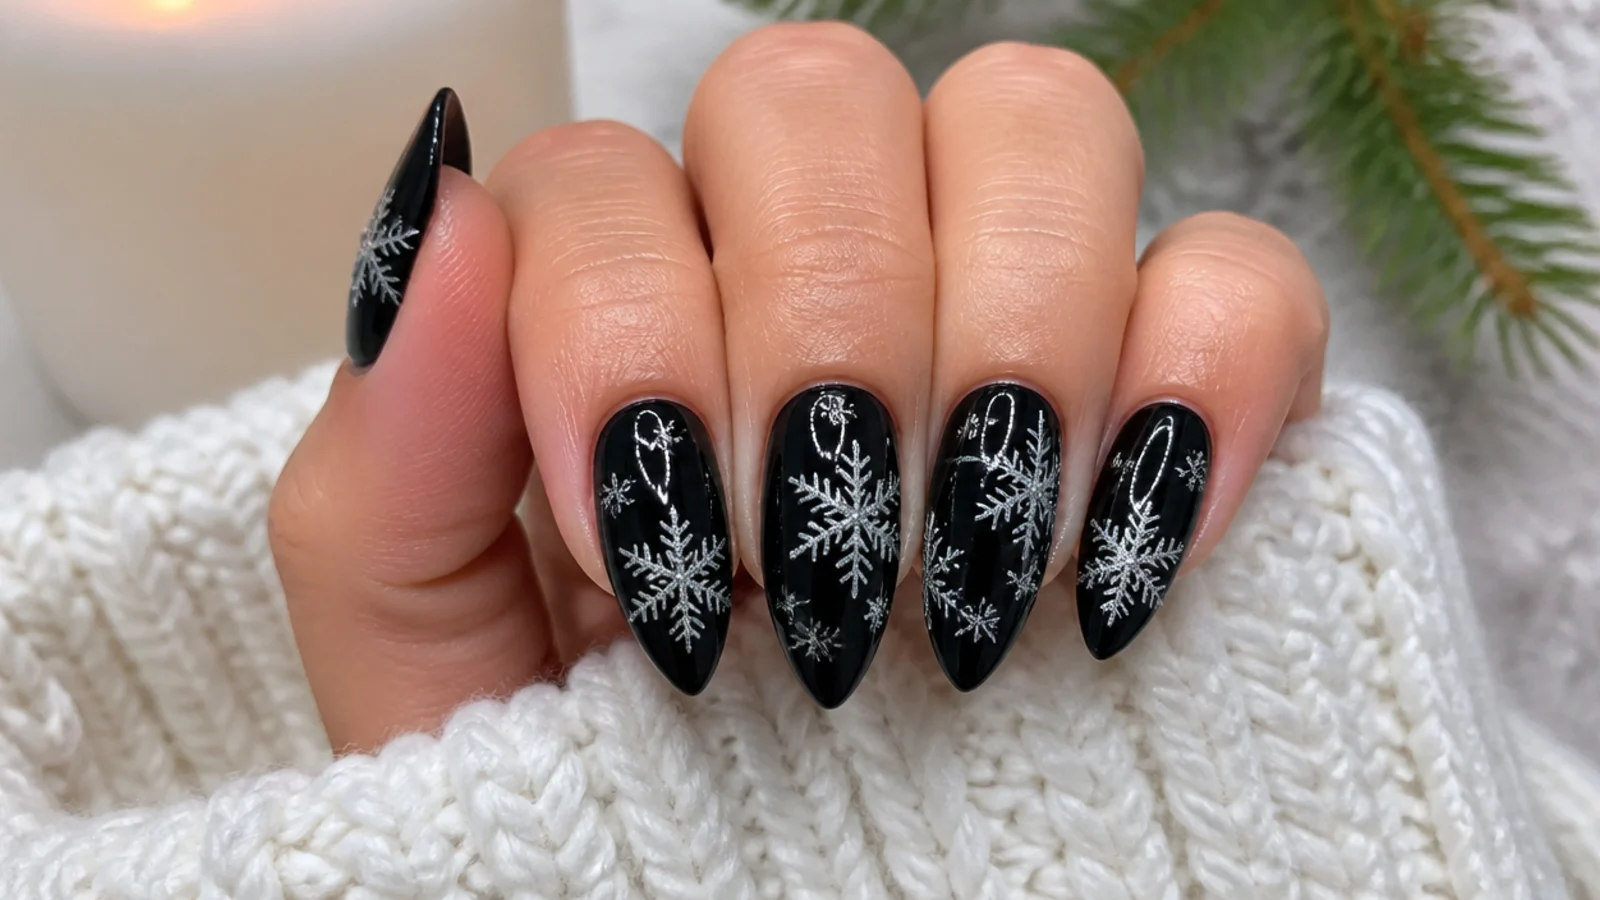
1. Classic White Snowflake on Black
The most-saved black snowflake look - crisp white six-arm snowflakes over a glossy jet-black base for maximum holiday contrast. Over two coats of black gel you draw each flake with a fine detail brush: a white plus sign first, then two diagonals across it to make six arms, then a dot at the end of every arm and a dot in the center. White is the highest-contrast choice, so the flake reads sharp and clean against the dark. Scattering one flake per nail at slightly different angles keeps it natural, not stamped. It works because white on black is the boldest winter pairing there is, festive without any pastel softness.
Who it suits: Anyone wanting bold, classic Christmas contrast.
Tip: Draw the plus sign first, then the diagonals - building on the cross keeps all six arms even.
2. Silver Chrome Snowflake
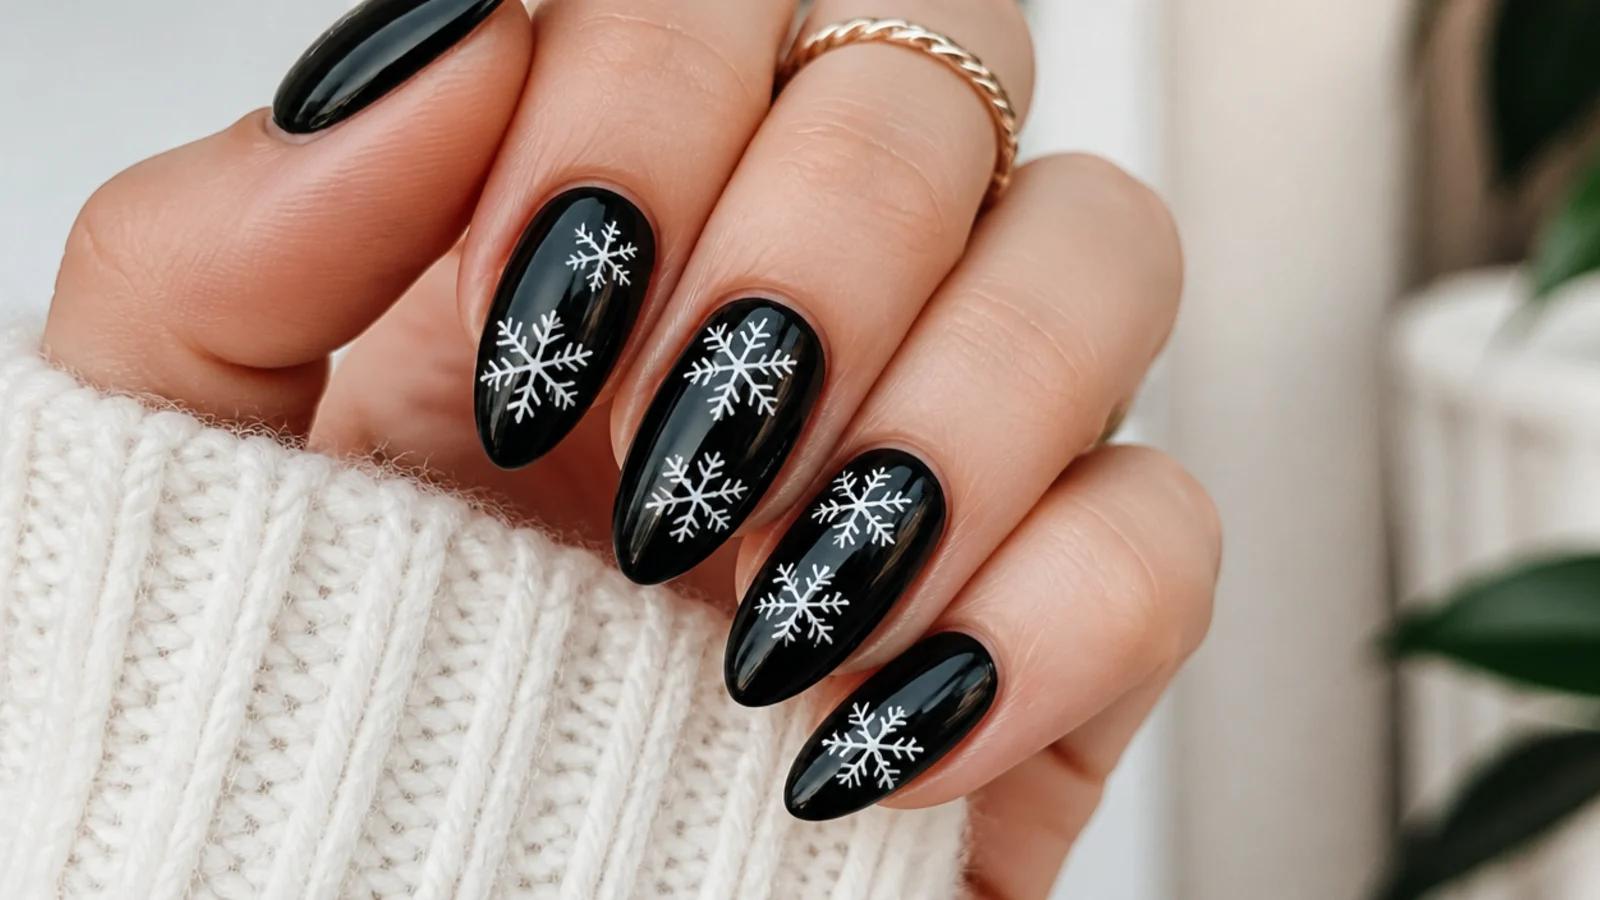
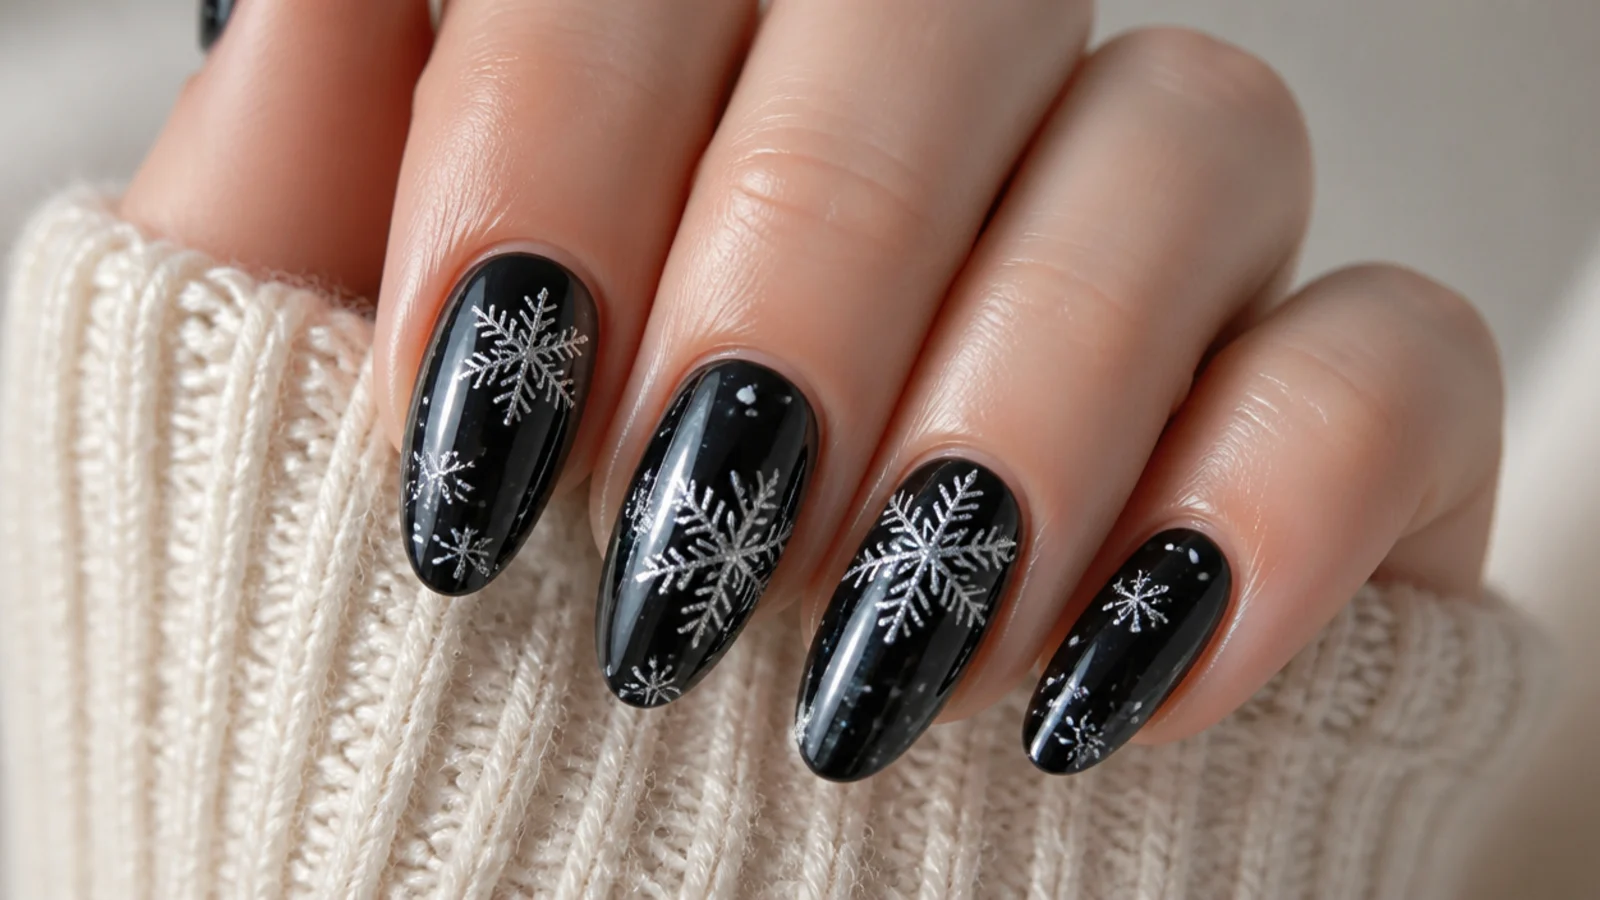
Frosty silver-chrome snowflakes over black for a colder, more metallic take than plain white. Over a black gel base you paint the snowflake outline in a silver chrome or mirror gel, then dot the arm ends so they catch the light like real frost. The chrome finish gives a reflective shimmer that white cannot, so the flakes look icy rather than flat. Keeping the black glossy under them makes the silver pop even more. It works because silver on black reads like moonlight on a frozen window, a luxe wintry finish that suits New Year's Eve and holiday parties more than a cozy at-home look.
Who it suits: Anyone wanting a frosty, metallic party set.
Tip: Apply chrome over a no-wipe top coat for the mirror shine, then seal again so it does not dull.
3. Matte Black with White Snowflake
A moody matte black base with crisp white snowflakes for a modern, understated winter set. Over black gel you finish with a matte top coat, then draw the white flakes on top - or reverse it, leaving the flake glossy over matte black for a subtle raised effect. The flat matte surface makes the white snowflakes look even sharper, since there is no shine competing with them. It reads edgier and less sparkly than chrome or glitter. It works because matte black feels current and grown-up, giving festive snowflake nails a cool, minimalist edge that suits anyone who finds glitter too much.
Who it suits: Anyone wanting a moody, modern matte finish.
Tip: Paint snowflakes before the matte top coat, or use glossy top coat only on the flake for contrast.
4. Black and Silver Glitter Snowflake
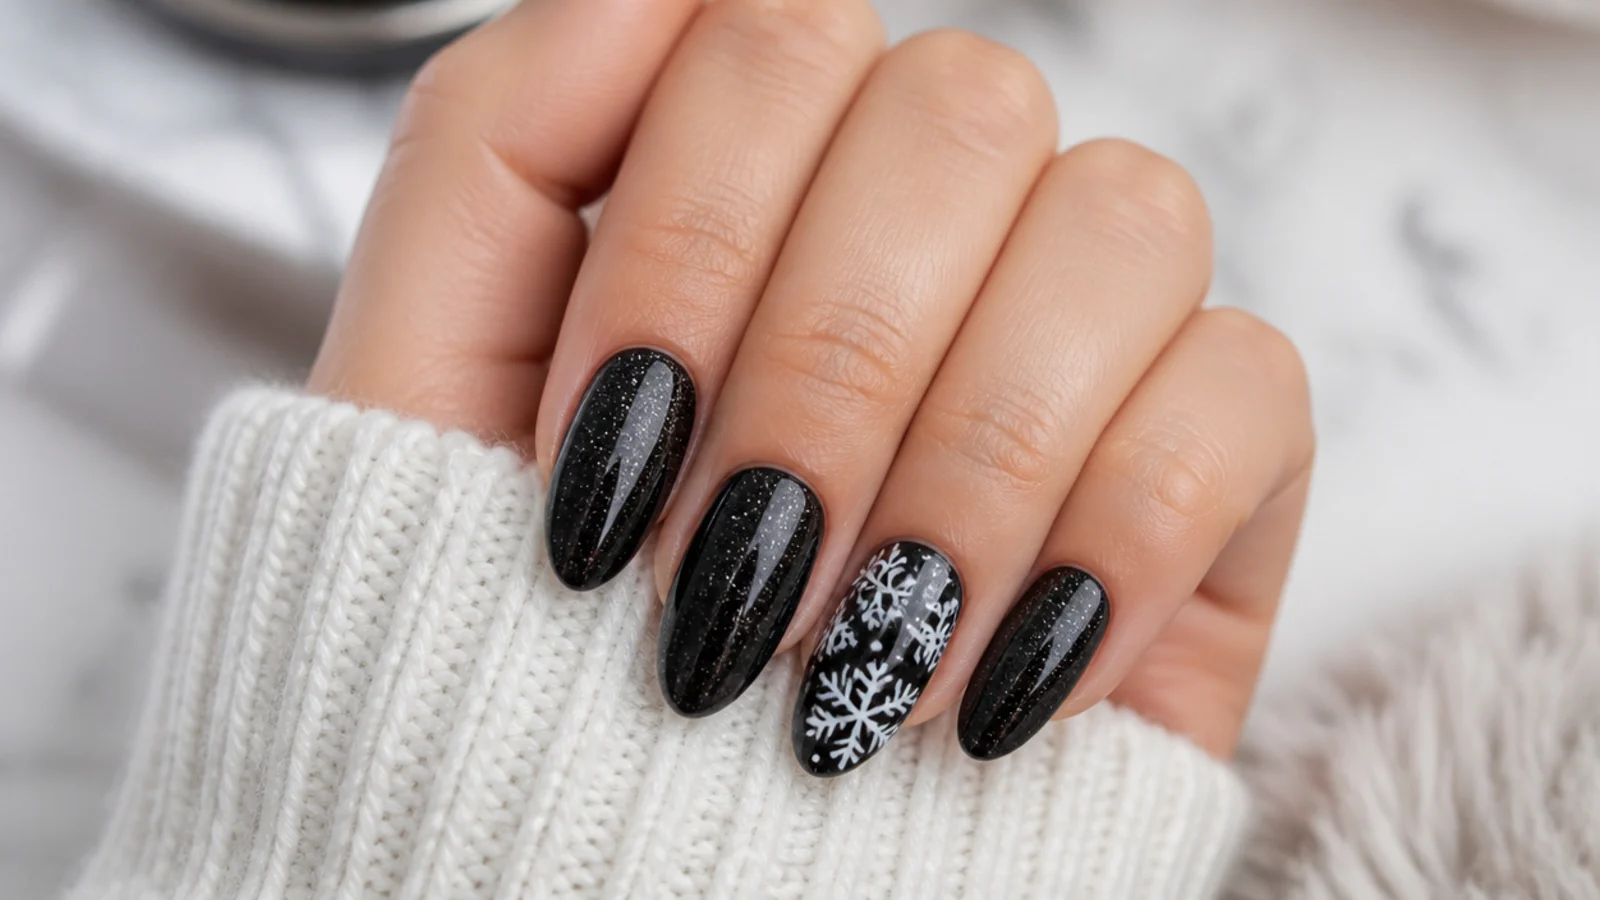
Black nails with a silver-glitter accent and white snowflakes for a sparkly, festive set. Over a black base you paint one or two nails in a fine silver glitter gel, keep the rest solid black, then add white snowflakes over the plain black nails. The glitter nails catch light like snow while the flakes stay crisp on the matte-dark ones. Balancing sparkle and solid keeps it wearable rather than overwhelming. It works because the mix of glittering silver and graphic white snowflakes captures both the shimmer and the shape of real snow, giving a party-ready set that suits Christmas and New Year's Eve.
Who it suits: Anyone wanting sparkle plus graphic snowflakes.
Tip: Keep glitter to one or two accent nails so the snowflakes still have plain black to pop against.
5. Single Accent Snowflake Nail
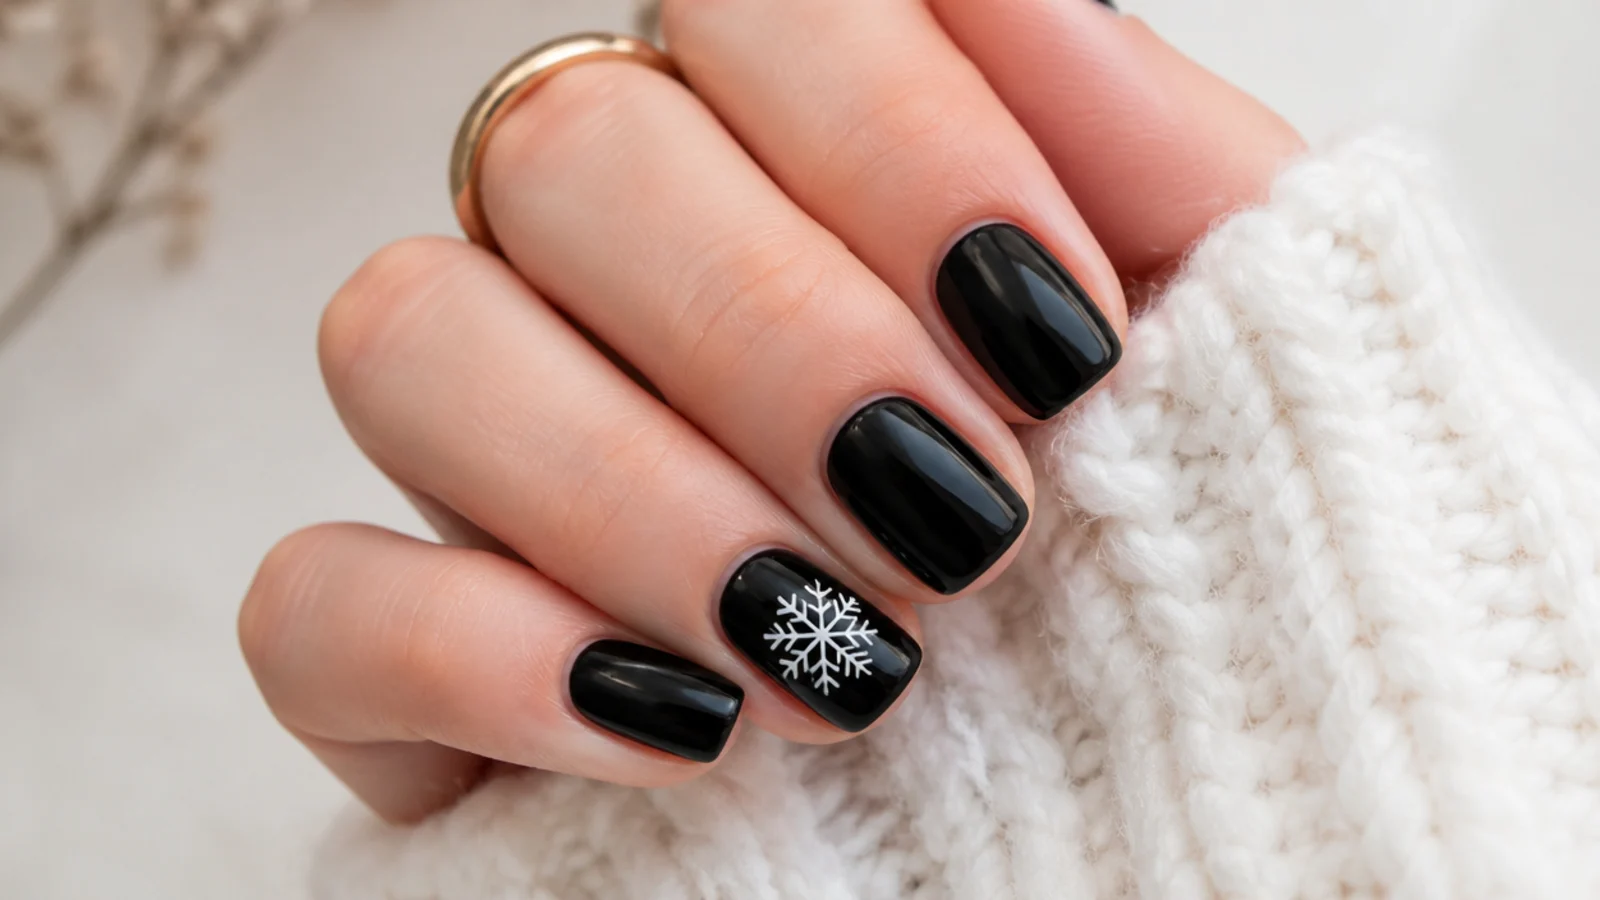
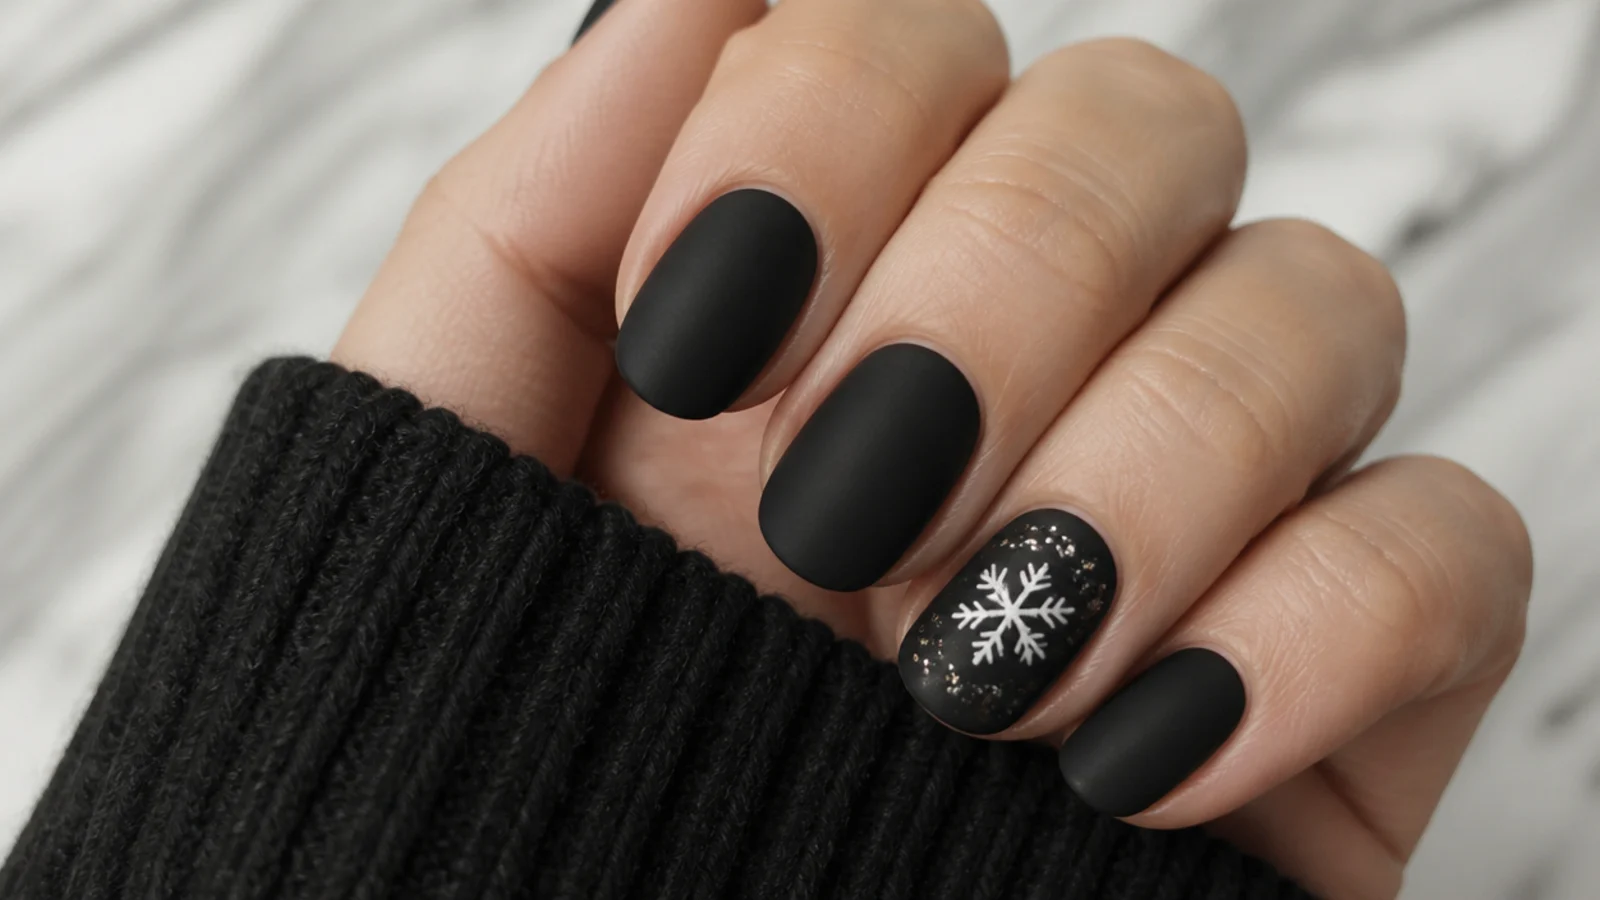
A clean short set in solid black with just one white snowflake on the ring finger - the easiest and most office-friendly way to wear the trend. Over black gel on all nails you leave four plain and, on one, draw a single white snowflake with a dotting tool: plus sign, two diagonals, dotted arms. The short length keeps it neat while the one flake adds a wintry touch. Because only one nail carries the art, it is quick, low-cost and easy to freehand. It works because the single snowflake looks intentional and modern on short nails, suiting anyone new to the technique or wanting subtle seasonal art.
Who it suits: Anyone wanting a subtle, work-safe accent.
Tip: Put the snowflake on the ring finger so the single accent reads balanced across the hand.
6. Black French with Snowflake Tips
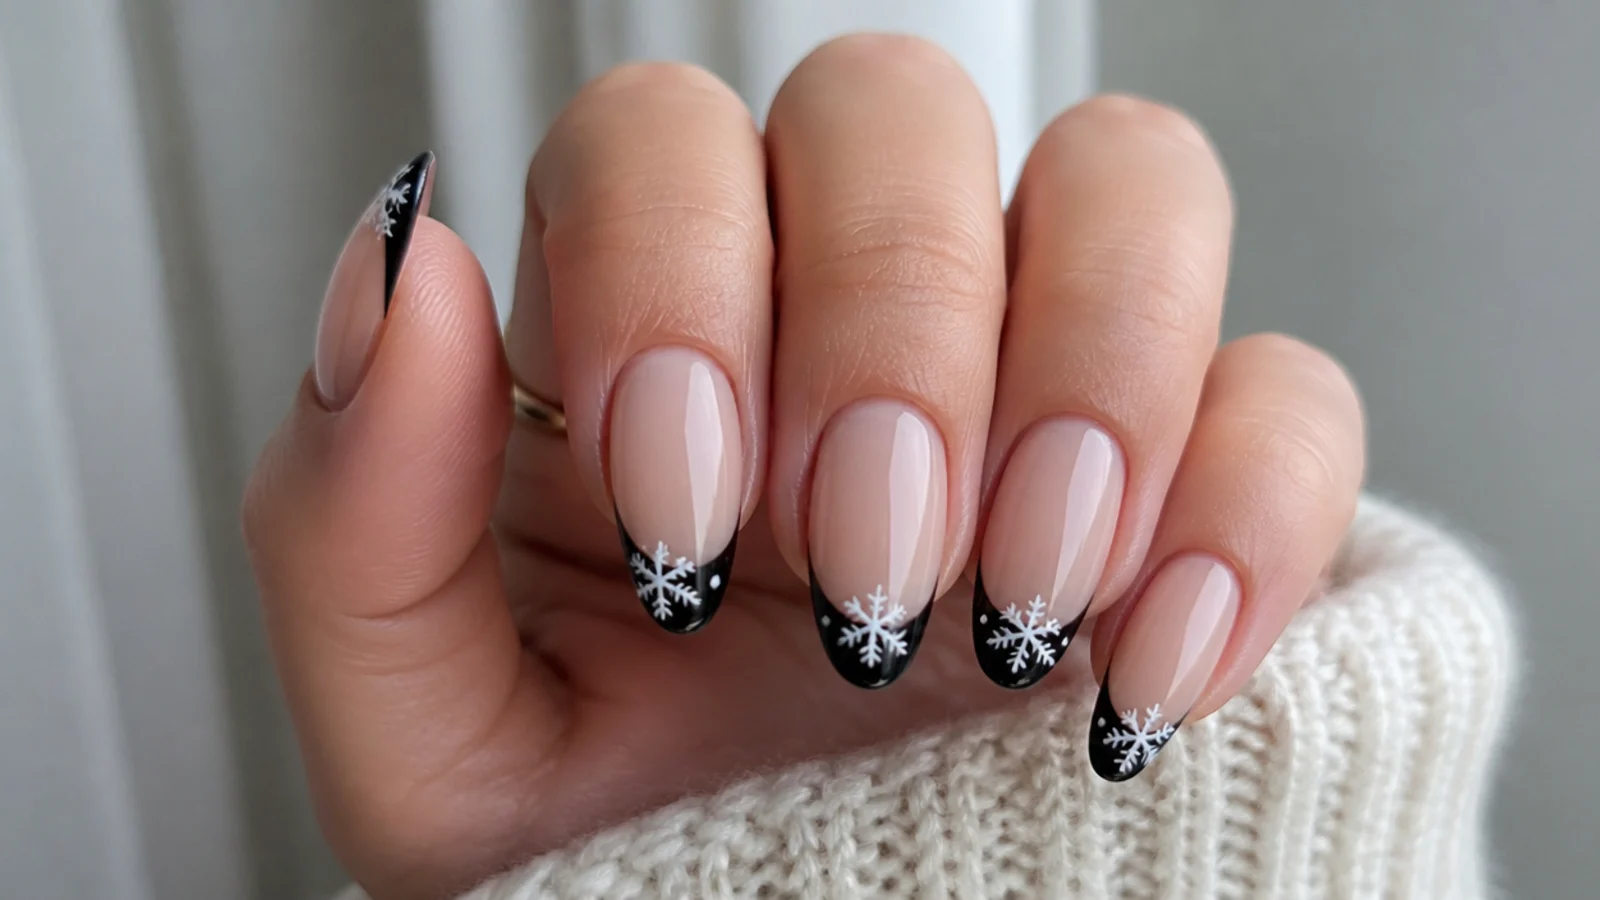
A wintry twist on French tips - black tips over a nude or milky base with a tiny white snowflake sitting on each dark tip. Over a sheer base you paint a clean black tip, then place one small white snowflake near the smile line with a fine brush. The nude keeps the set soft and work-appropriate while the black tip and flake add the seasonal edge. Keeping the snowflakes small stops the tip looking crowded. It works because it blends a timeless French shape with holiday detail, giving a set that is festive but subtle enough for the office or a nude-loving minimalist.
Who it suits: Anyone wanting subtle, French-style winter nails.
Tip: Keep the snowflake small and centered on the tip so the French smile line stays clean.
7. Black, Red and White Snowflake
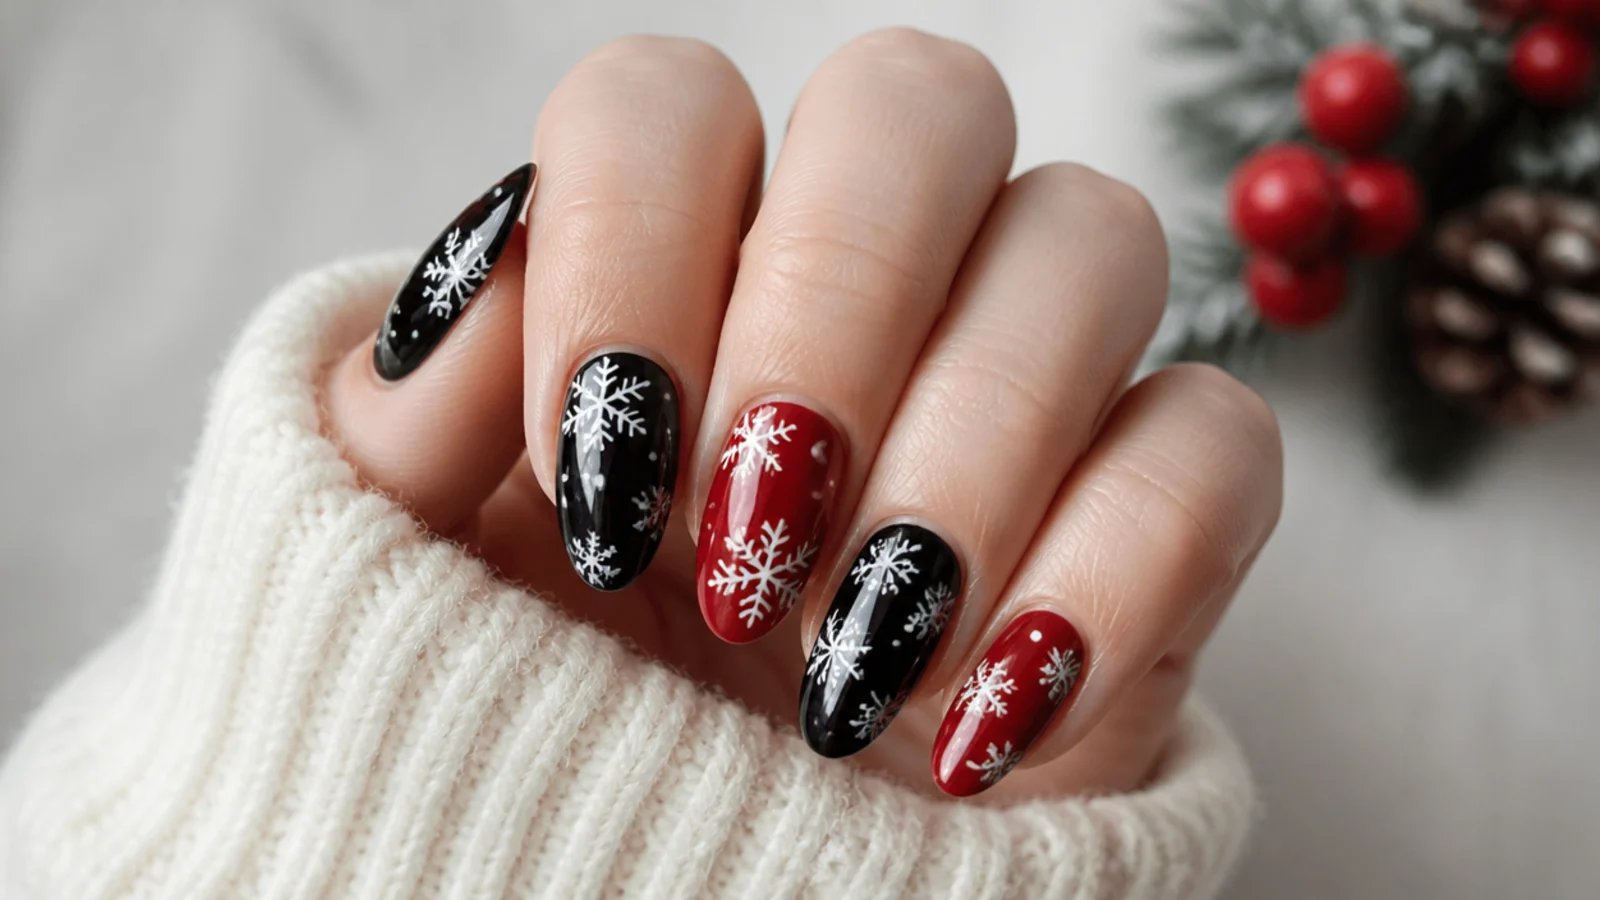
A festive mix of black and red nails with white snowflakes for a bold Christmas set. Over the black base on some nails and a true red on others, you add crisp white snowflakes across both, so the flakes tie the two colors together. The red warms up the black and pushes the look firmly into holiday territory rather than plain winter. Alternating the two base colors keeps it playful. It works because black, red and white is a classic Christmas palette, and the snowflakes give it a wintry, hand-painted charm that suits the season and holiday gatherings.
Who it suits: Anyone wanting a festive red-and-black Christmas set.
Tip: Paint white snowflakes over both the black and red nails so the design feels like one set.
8. Black and Icy Blue Snowflake
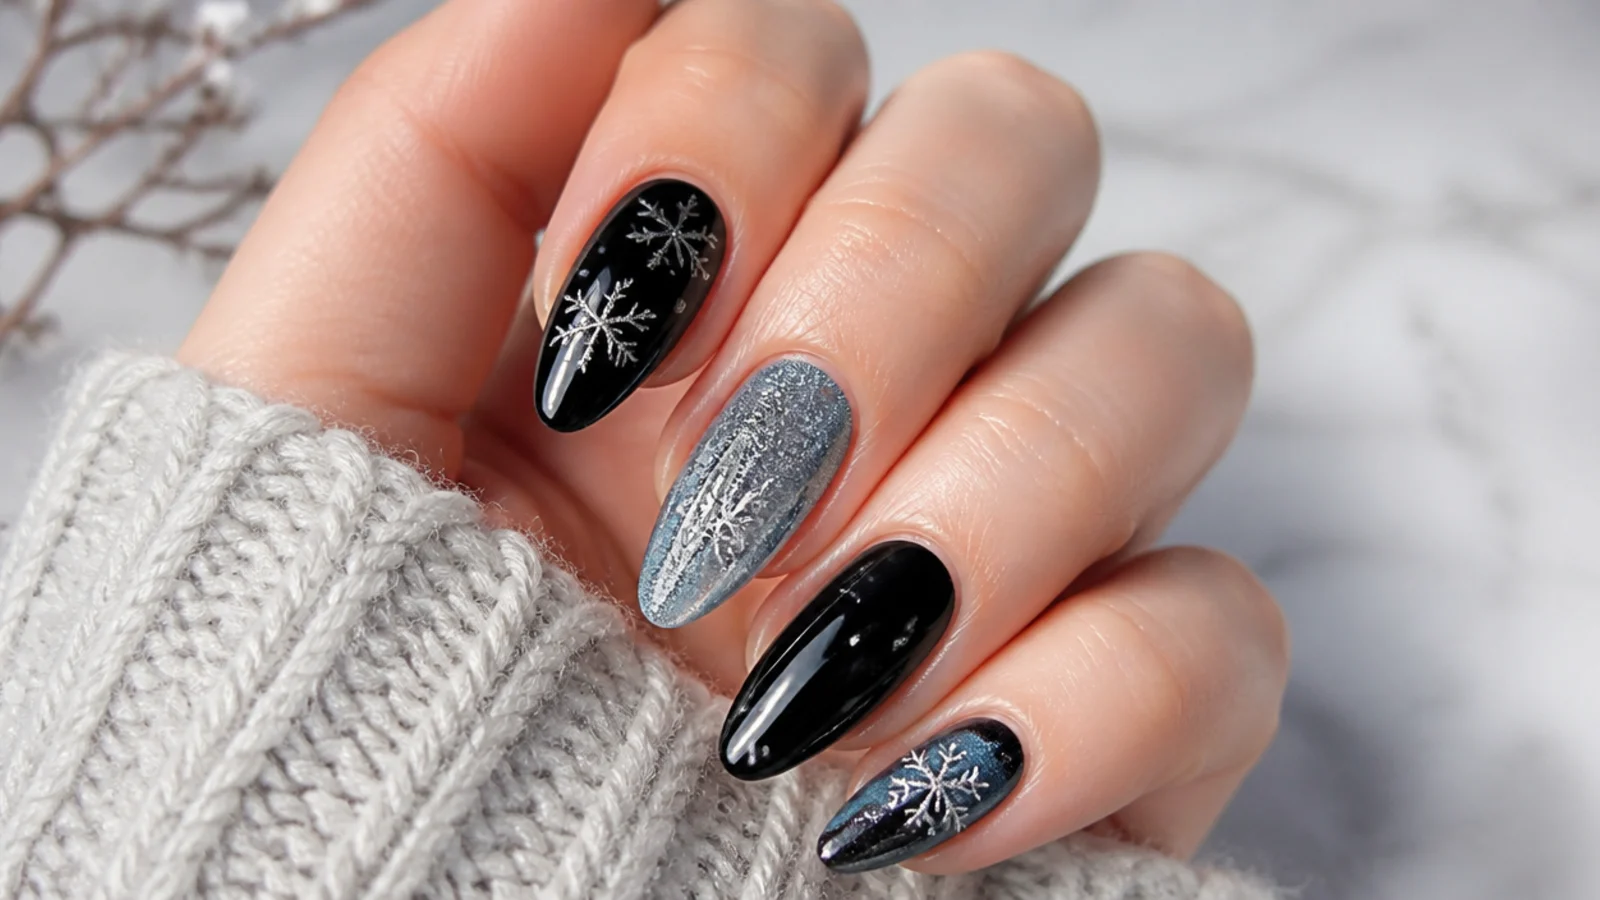
Black paired with icy pale-blue accents and silver snowflakes for a colder, frostier feel. Over a black base on most nails you paint one or two in a soft icy blue, then add silver or white snowflakes across both. The blue brings in the classic wintry tone while the black keeps it bold rather than sweet. Silver flakes tie the two together with a frosted shine. It works because the icy blue reads instantly like winter while the black grounds it, giving a set that feels cold and elegant at once, suiting anyone who wants wintry blue without a fully pastel manicure.
Who it suits: Anyone wanting bold black with a wintry blue touch.
Tip: Use silver snowflakes so they read on both the black and the pale blue nails.
9. Black and Gold Snowflake
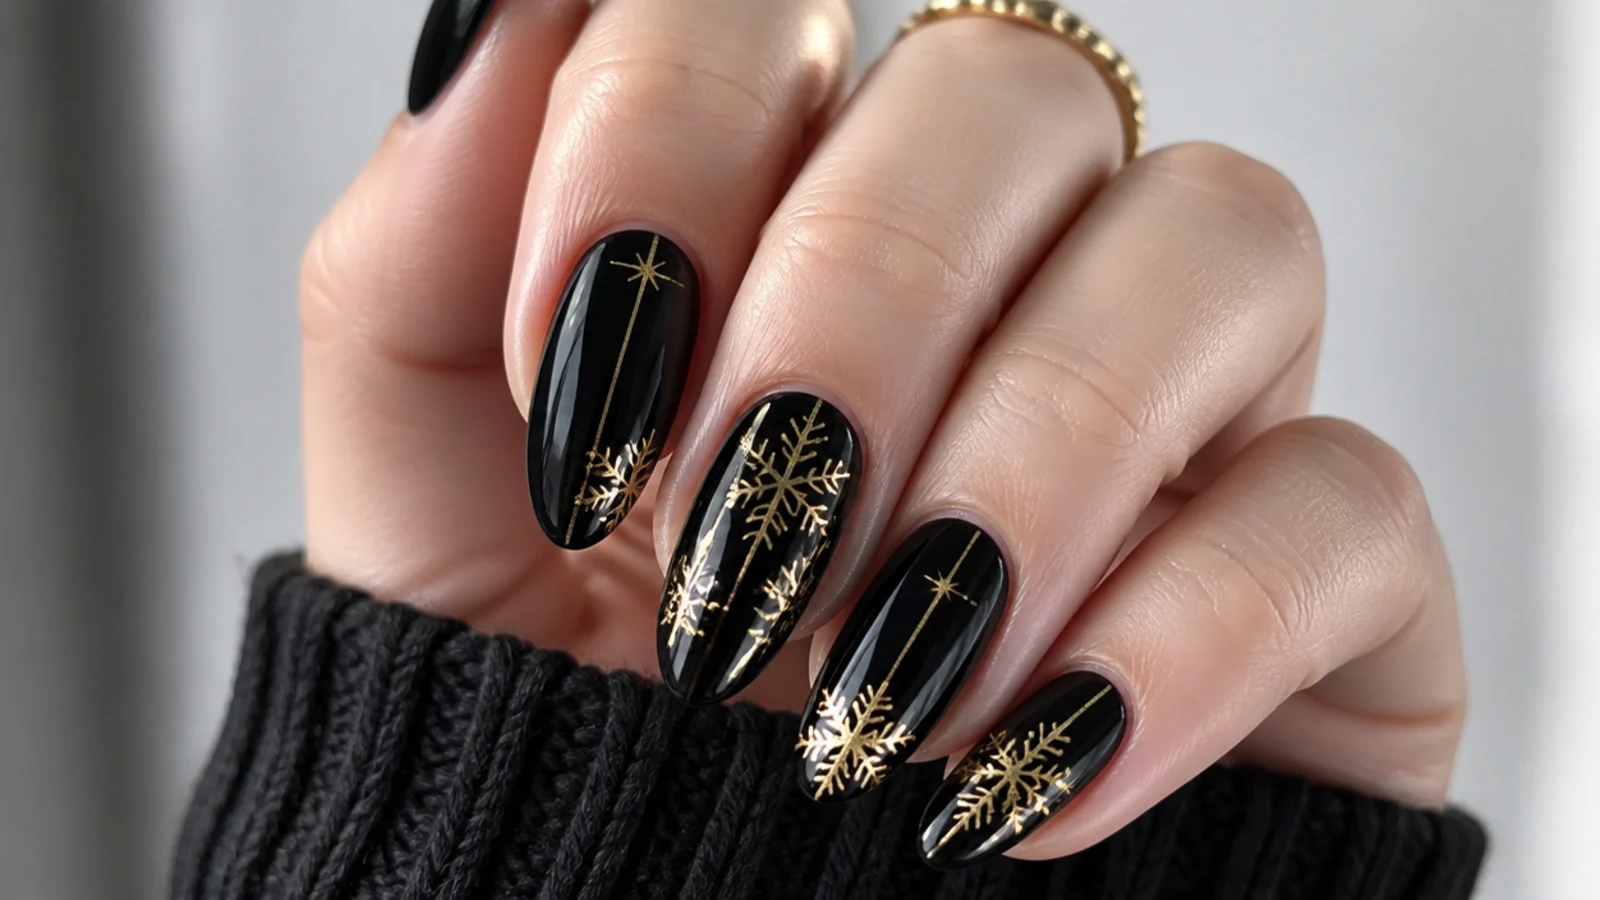
Glossy black nails with fine gold snowflakes for a warm, luxe holiday finish instead of the usual white or silver. Over a black gel base you draw the snowflake outlines in a gold chrome or metallic gel, then dot the arm ends so they glint. Gold reads richer and warmer than silver, giving a more upscale, festive feel. A thin gold line at the cuticle on one nail can echo the flakes. It works because gold on black is a classic luxe pairing, and the snowflake shape keeps it seasonal, making a dressy set that suits New Year's Eve and holiday parties.
Who it suits: Anyone wanting a warm, luxe holiday set.
Tip: Use a gold metallic or chrome gel over top coat so the flakes stay bright and do not sink in.
10. Matte Black with Glossy Snowflake
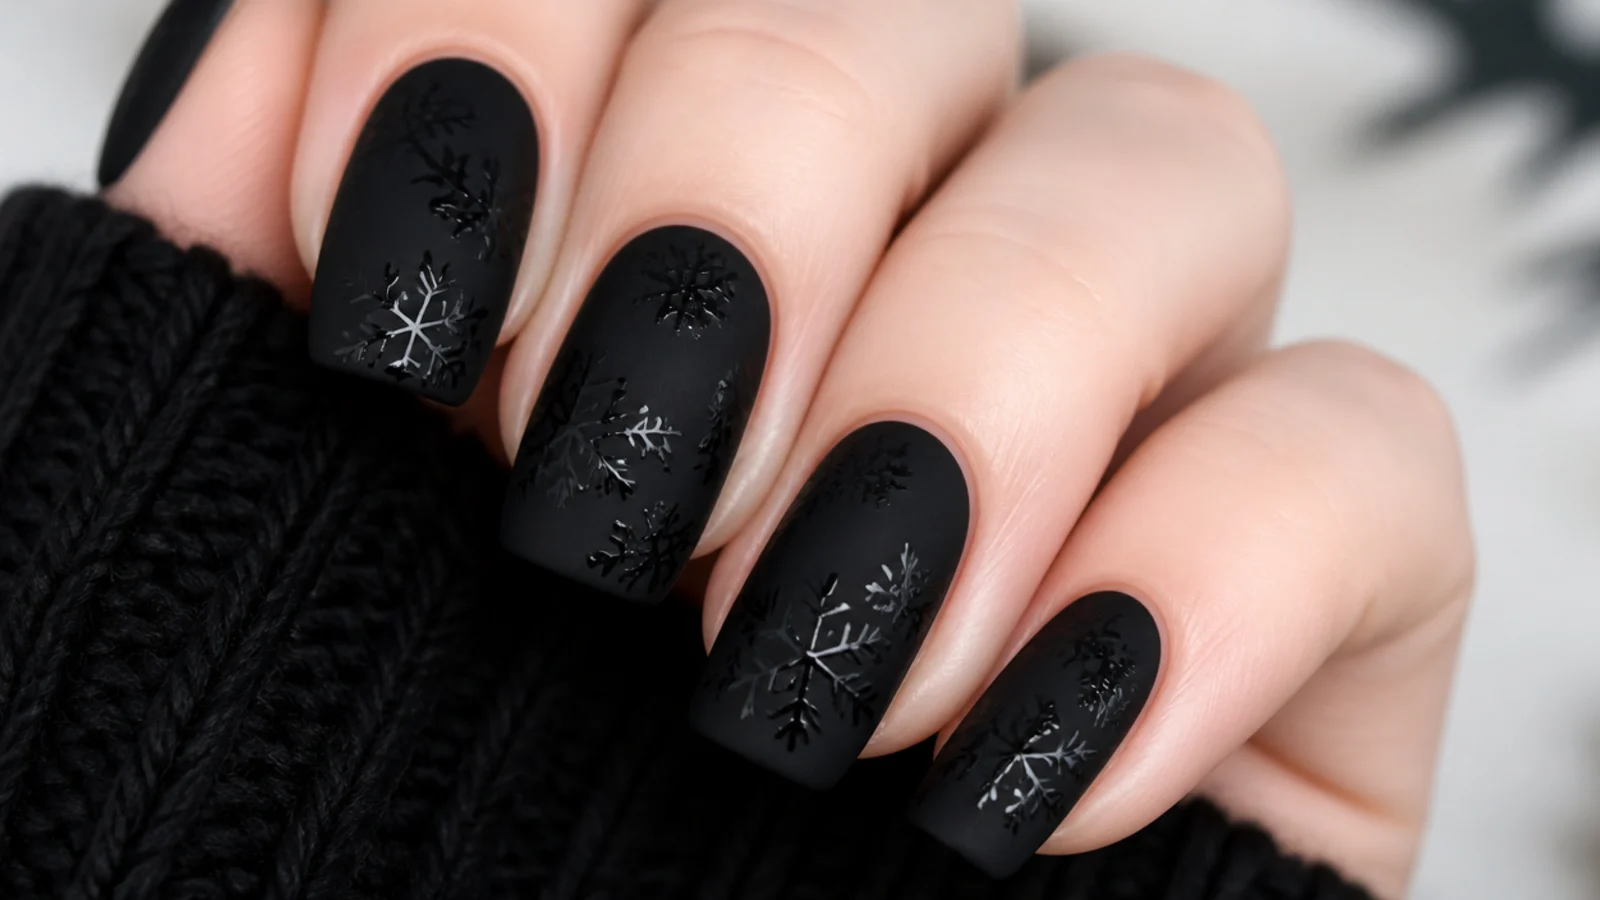
An all-black set where the snowflakes are made of glossy top coat over a matte black base - tonal and subtle, no color at all. Over black gel you apply a matte top coat, then paint the snowflake shapes in a glossy no-wipe gel top coat on top. The flakes only show when light hits the shine against the flat matte, giving a stealthy, sophisticated effect. It is all one color, so it reads modern and understated. It works because the matte-versus-gloss contrast is quietly striking, giving a grown-up, monochrome winter set that suits anyone who wants snowflakes without white or sparkle.
Who it suits: Anyone wanting a tonal, all-black snowflake set.
Tip: Do the matte coat first, then paint flakes in glossy top coat so only the shine shows the shape.
11. Black Holographic Snowflake
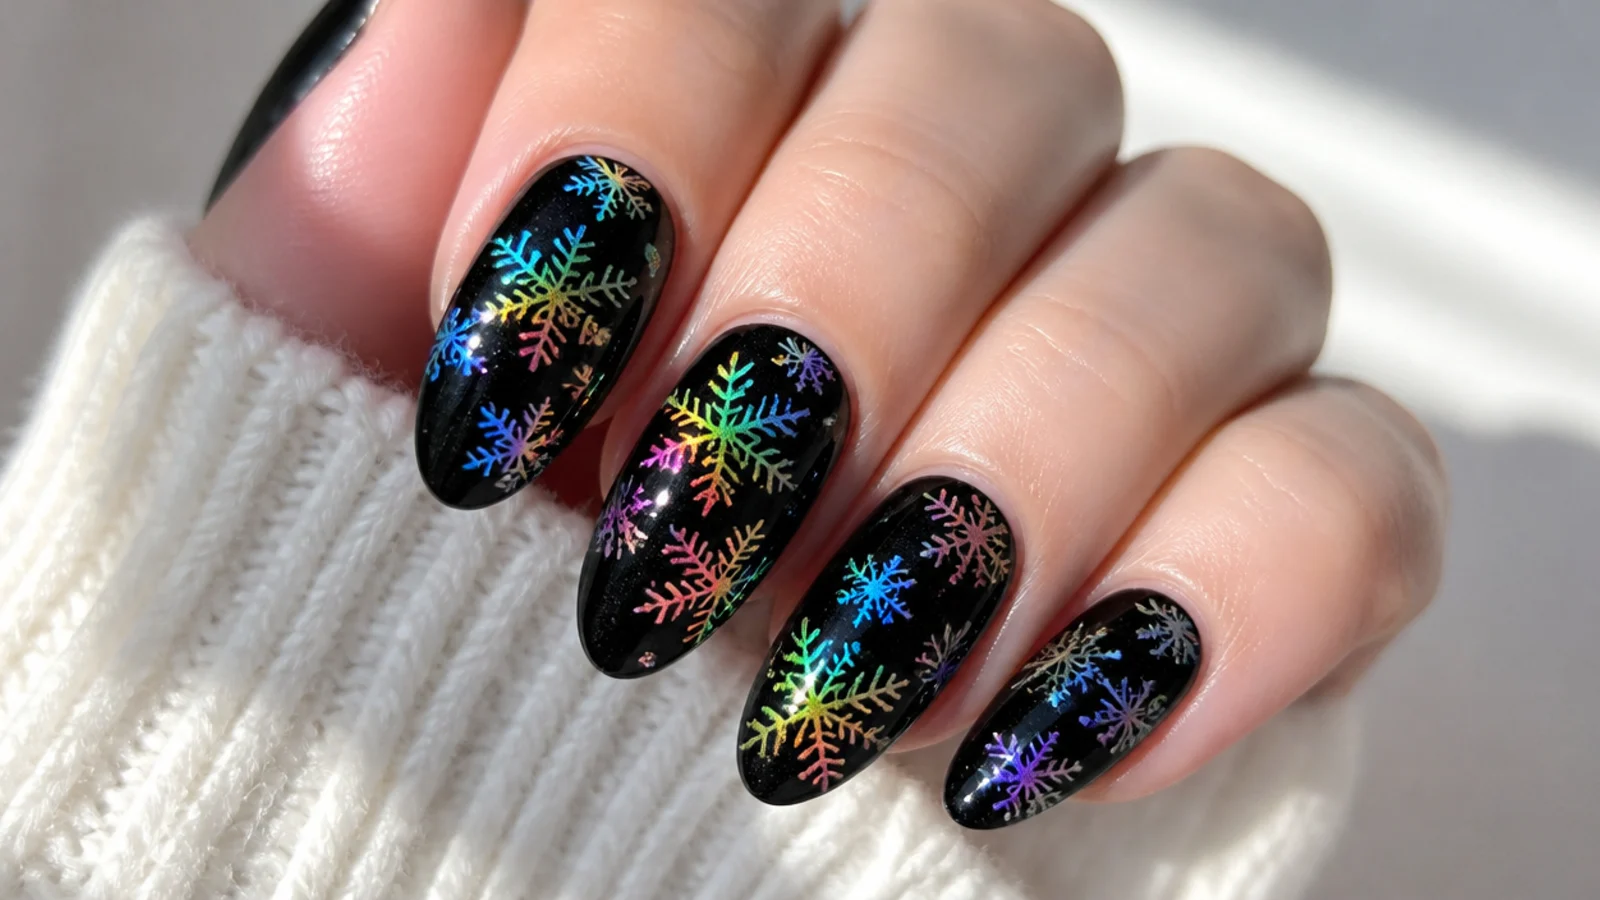
Black nails with holographic snowflakes that flash rainbow color as your hand moves. Over a black base you draw the flakes in a holographic or iridescent gel, or press on tiny holo snowflake decals, then seal. Against the dark base the holo shift stands out even more, throwing pink, blue and green sparks like light on ice crystals. It is flashier than plain white but still snowflake-shaped and seasonal. It works because the color shift mimics the prism effect of real frost and snow, giving a fun, eye-catching set that suits parties, New Year's Eve and anyone who loves a bit of magic in their nails.
Who it suits: Anyone wanting eye-catching, color-shifting flakes.
Tip: Seal holographic gel or decals under a top coat so the flakes stay smooth and do not lift.
12. Black Snowflake with Rhinestones
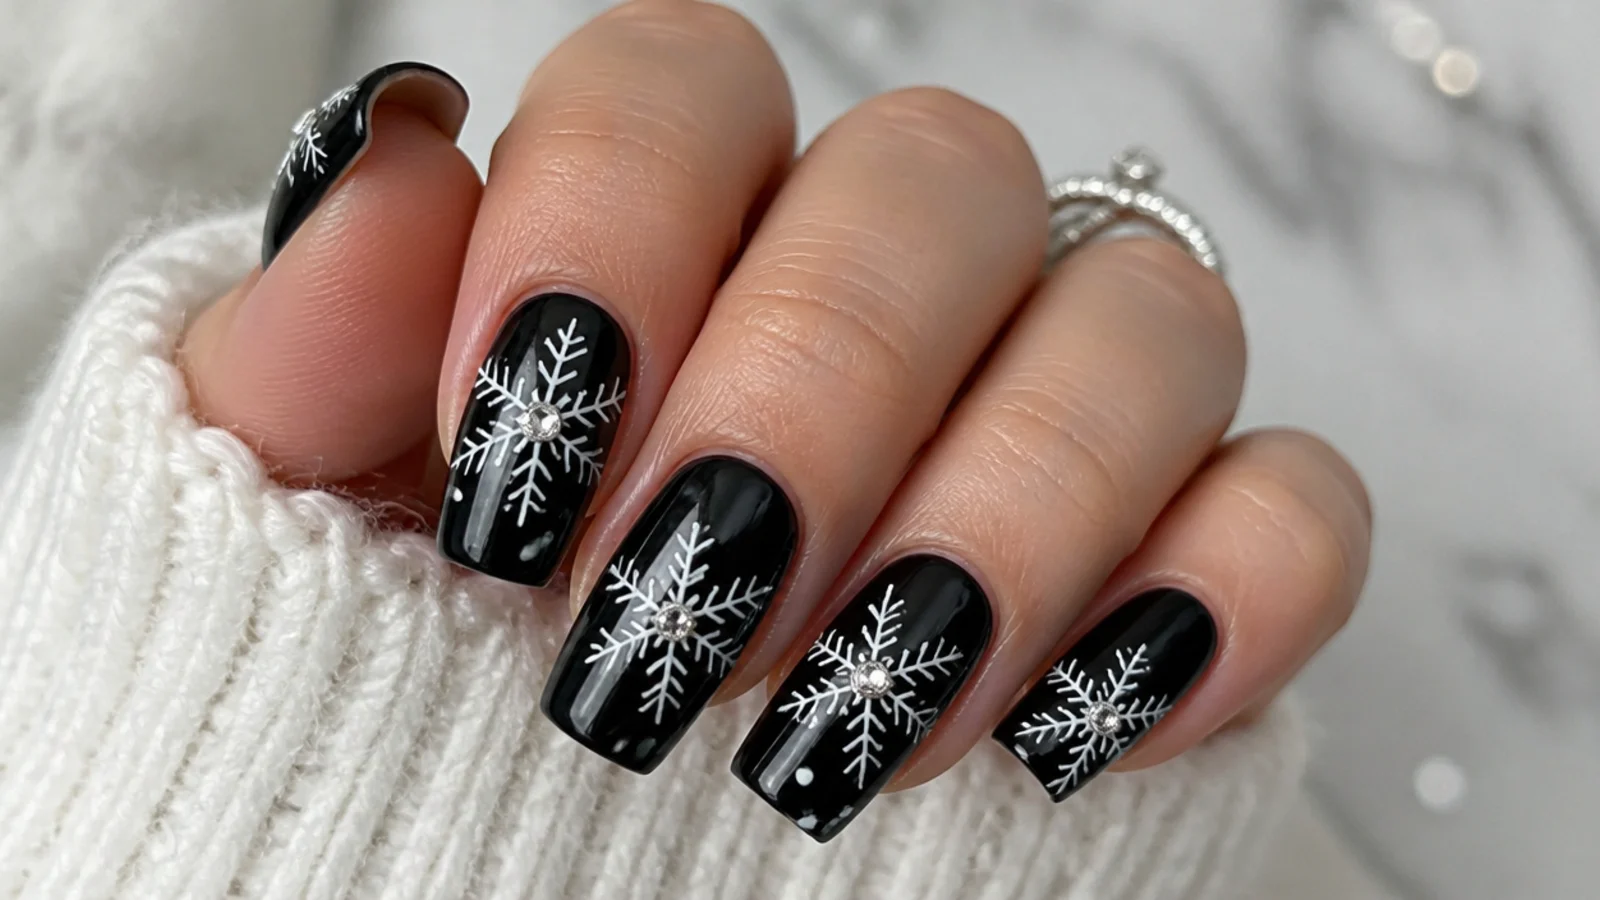
White snowflakes on black with a tiny clear crystal set in the center of each for a bit of dimensional sparkle. Over a black base you draw the white snowflake, then place a small clear or aurora rhinestone in the middle with gel glue and seal it under top coat. The crystal catches light like an ice bead at the heart of the flake, lifting a flat design into something dressier. Keeping the stones small stops them snagging. It works because the added sparkle at the center makes the snowflakes feel jeweled and festive, giving a party-ready set that suits Christmas, New Year's Eve and special occasions.
Who it suits: Anyone wanting a jeweled, dressed-up snowflake.
Tip: Set each rhinestone in a dot of gel and cap the edges with top coat so it stays put for weeks.
13. Bold Snowflakes on Long Coffin
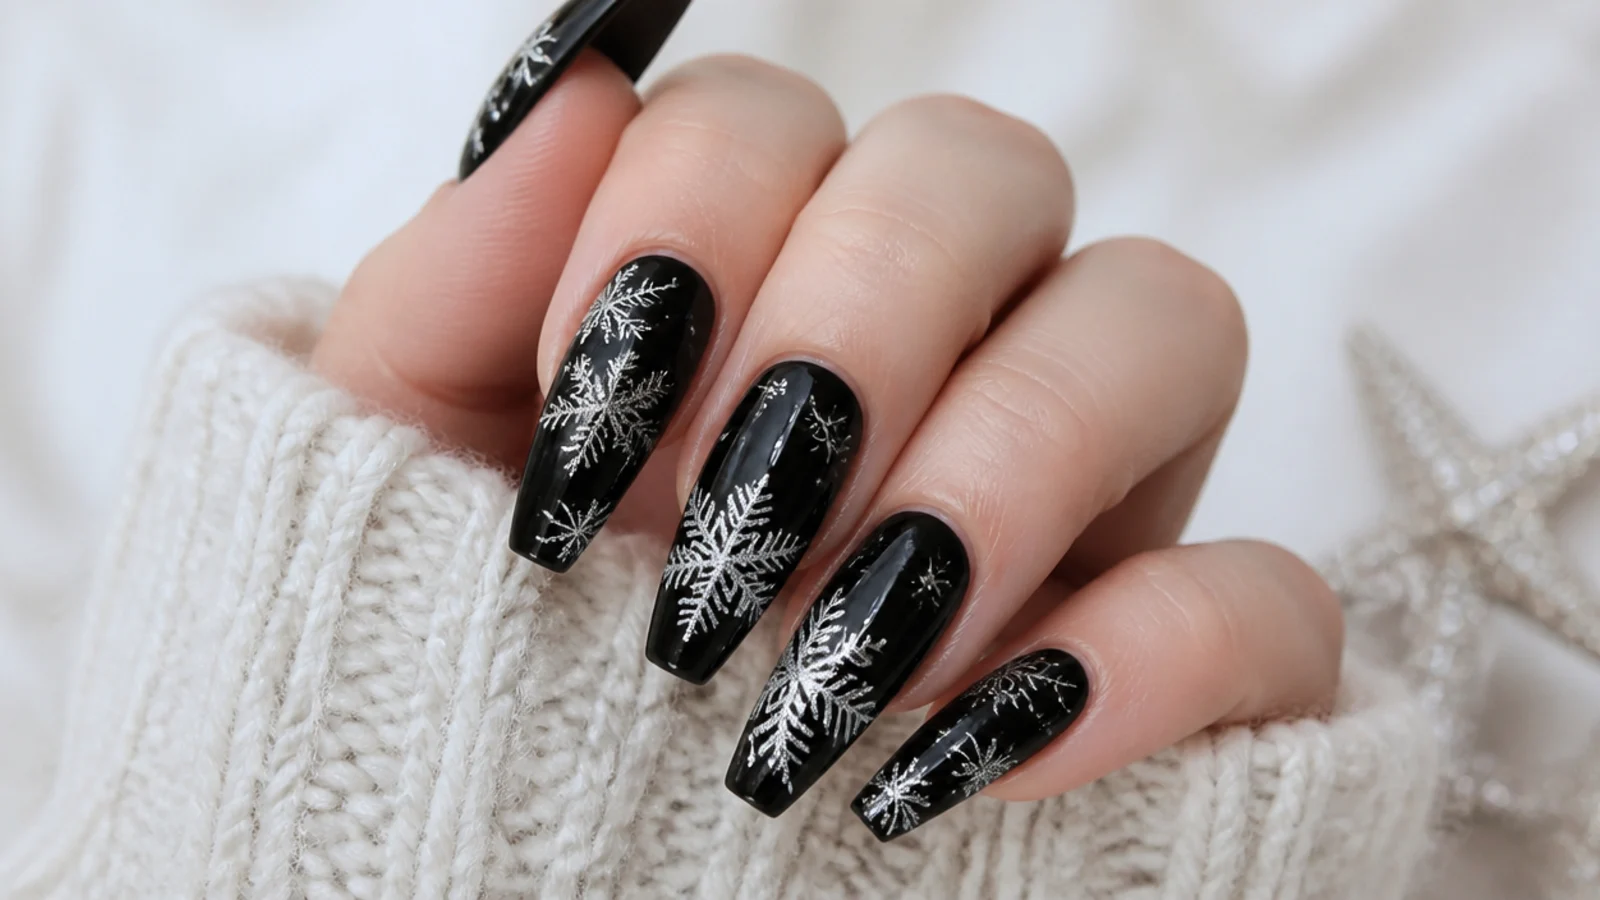
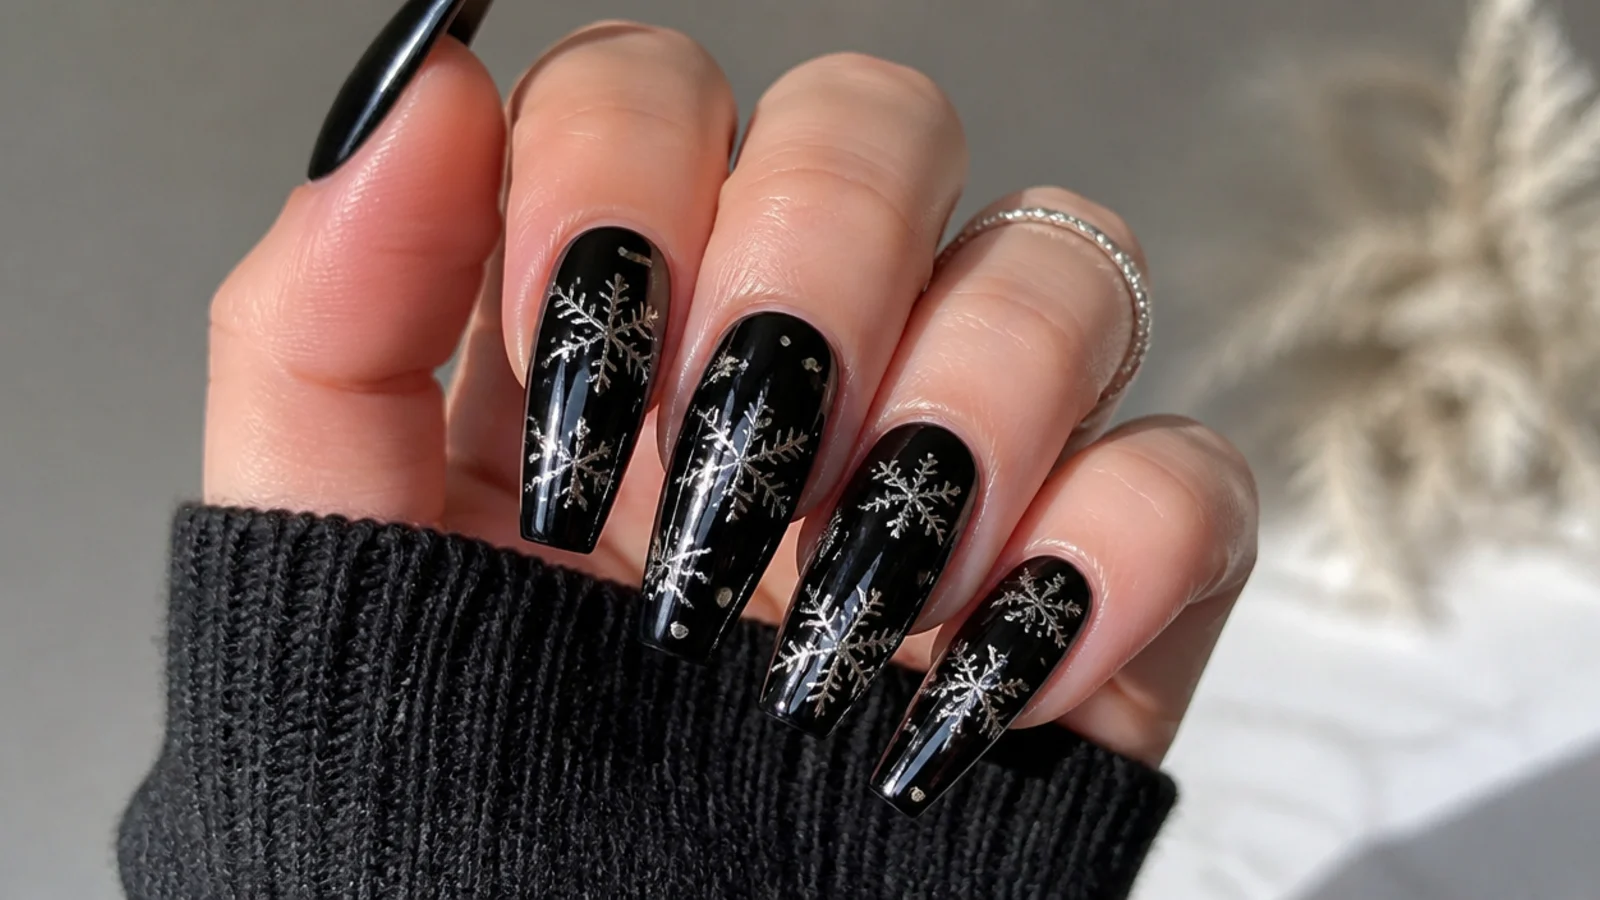
Long black coffin nails with big, detailed snowflakes that use the extra length as a canvas. Over a black base you paint one large, intricate white-and-silver snowflake per nail, adding extra branching lines and dots between the six arms since there is room. The long coffin shape suits statement art, so the flakes can be more elaborate than on short nails. Mixing white outlines with silver detail adds depth. It works because the long surface lets the snowflake become the whole design rather than a small accent, giving a dramatic, glam winter set that suits anyone who loves long nails and bold seasonal art.
Who it suits: Anyone with long coffin nails wanting statement art.
Tip: Add extra branch lines between the six arms to fill the longer nail without looking sparse.
14. Black Glitter Ombre Snowflake
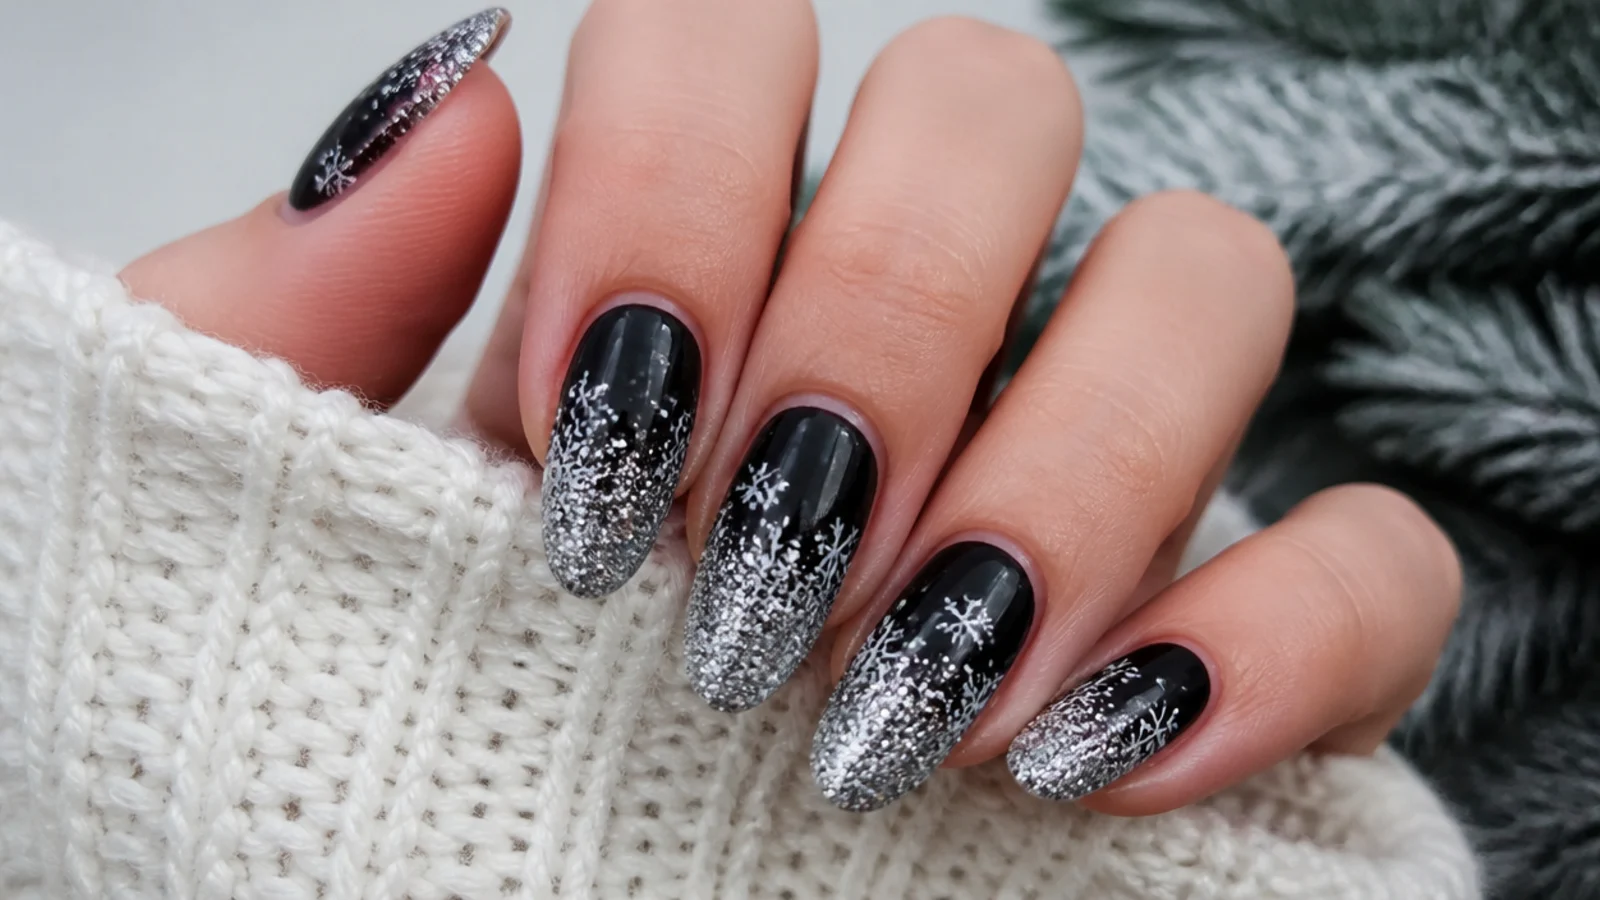
Black nails fading into silver glitter at the tips, with white snowflakes on top for a snowy ombre effect. Over a black base you sponge silver glitter gel from the tip down, blending it into the black so it looks like frost settling, then add white snowflakes over the design. The glitter gradient mimics snow catching on the ends of the nails. Keeping the fade soft stops a hard line. It works because the ombre adds movement and shine while the snowflakes keep it clearly wintry, giving a glam, sparkly set that suits Christmas and New Year's Eve without being flat black.
Who it suits: Anyone wanting a sparkly, gradient winter set.
Tip: Sponge the glitter in thin layers from the tip so the fade into black stays smooth, not blotchy.
15. Minimalist Tiny Snowflake
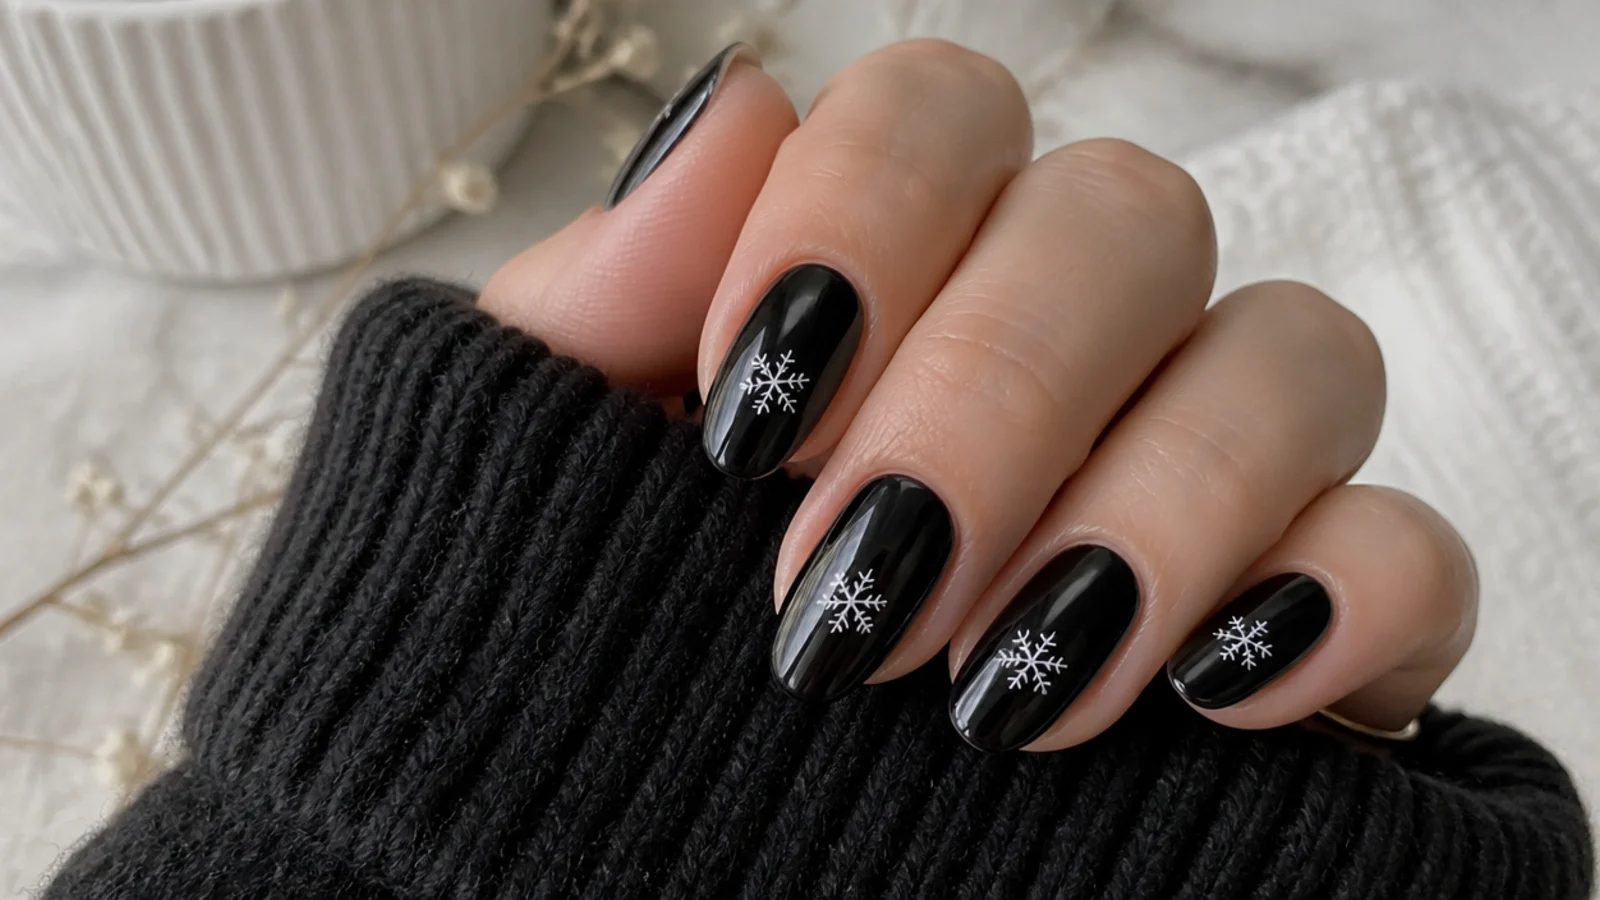
Glossy black nails with one very small, delicate white snowflake on each for a pared-back, elegant winter set. Over a black base you draw a tiny fine-line snowflake with the thinnest detail brush, keeping it small and simple - just a plus, two diagonals and small dotted ends. The restraint makes it look chic rather than crafty, and the small scale suits short nails and quiet taste. It works because a single small flake per nail reads modern and intentional, giving a minimalist take on black snowflake nails that suits the office, everyday wear and anyone who wants winter nails kept subtle and clean.
Who it suits: Anyone wanting delicate, minimalist winter nails.
Tip: Use the finest brush and keep the flake tiny - thin lines read elegant, thick ones read cartoonish.
How to Paint a Snowflake on Your Nails (Step by Step)
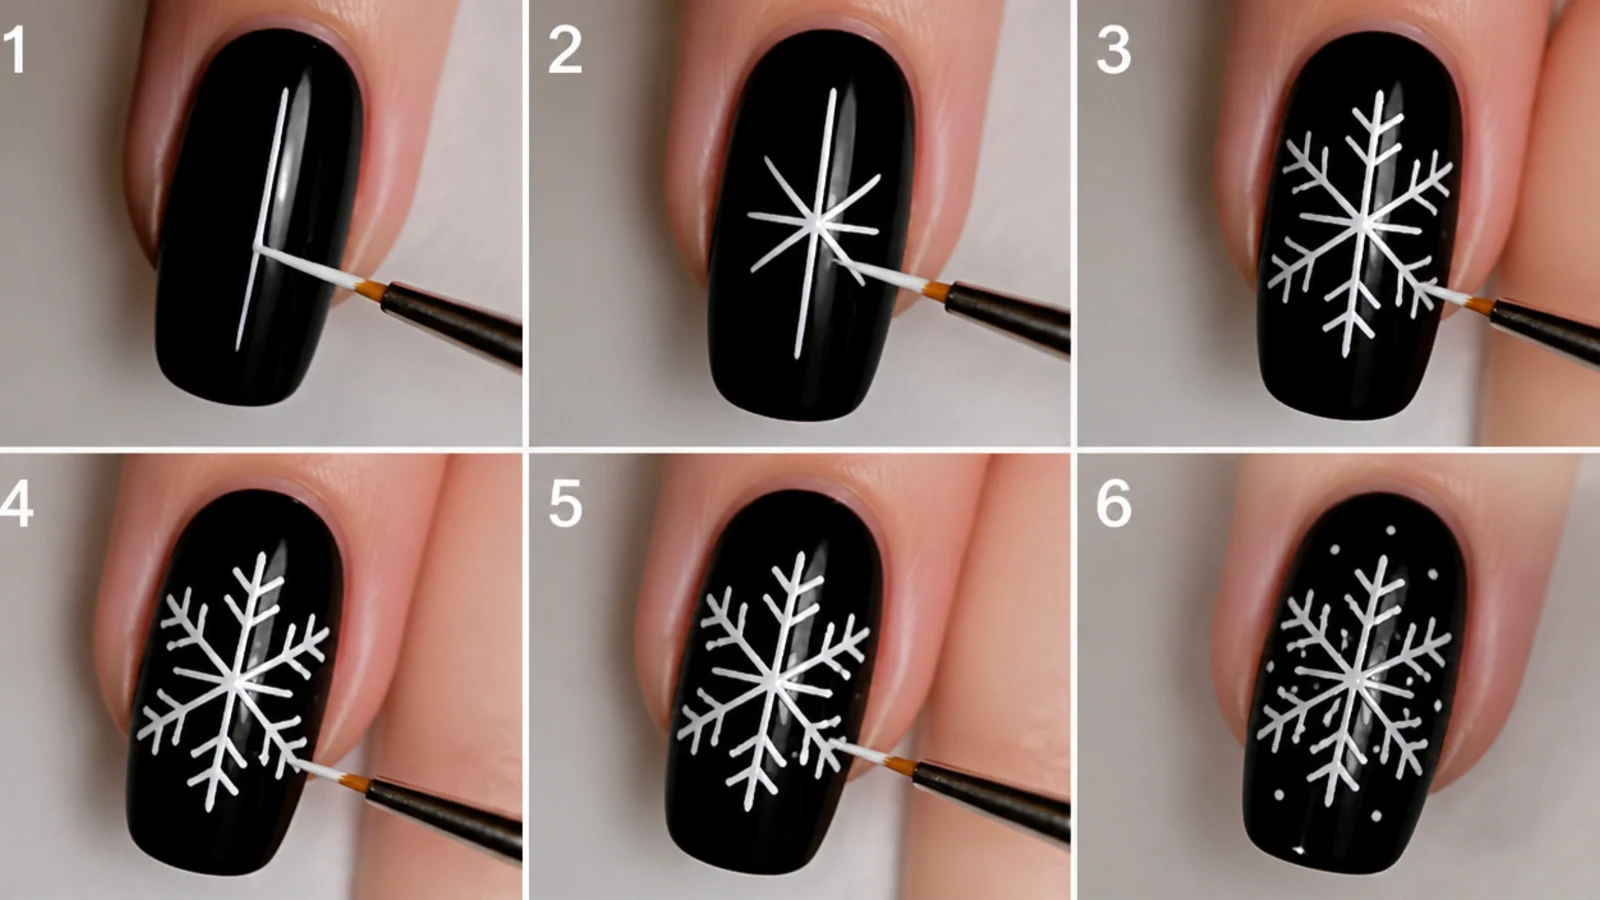
Painting a snowflake is simpler than it looks because it is built on a cross. Start with a dry, cured black base. Load a fine detail brush or dotting tool with white or silver gel and draw a straight vertical line down the middle of the nail, then a horizontal line across it to make a plus sign - that is four of the six arms. Add two diagonal lines through the center to complete the six-arm shape. Now dot the end of each arm, and add a small V or a short branch line partway along each arm for detail. Finish with a dot in the center. Keep the lines thin and let each flake sit at a slightly different angle so the set looks natural rather than stamped. Cure, then seal with top coat. If you want fewer flakes, one well-drawn snowflake on an accent nail always looks more polished than several rushed ones.
Snowflake Nails Without a Dotting Tool
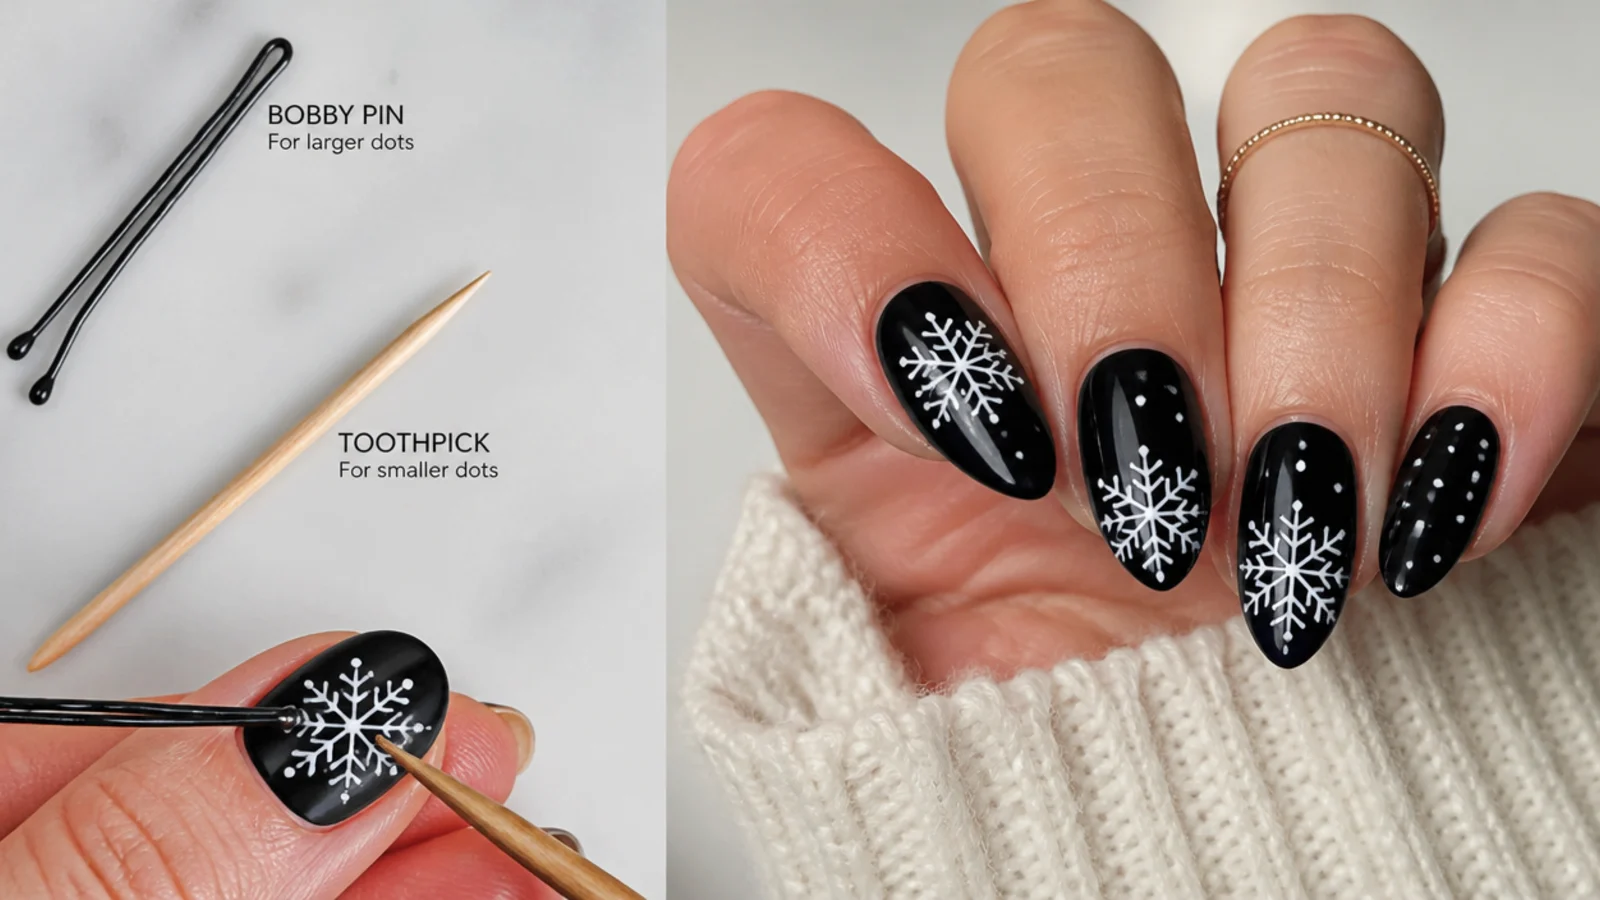
You do not need a professional dotting tool to make snowflake nails - a few things in your bathroom drawer work just as well. For the dotted arm ends, the rounded head of a bobby pin, the tip of a toothpick, or the end of a Q-tip all make clean little dots when pressed into wet polish. For the fine lines of the snowflake, a toothpick or the tip of a thin liner brush draws the plus sign and diagonals. Dip your tool in white or silver polish, dot or drag, and wipe it clean between colors. A bobby pin is the easiest stand-in because the two ends give you two dot sizes. Work on one nail at a time so the polish stays wet enough to shape. Cost: nothing beyond polish you already own, which makes this a fully DIY design with no special kit.
Best Colors and Occasions for Snowflake Nails
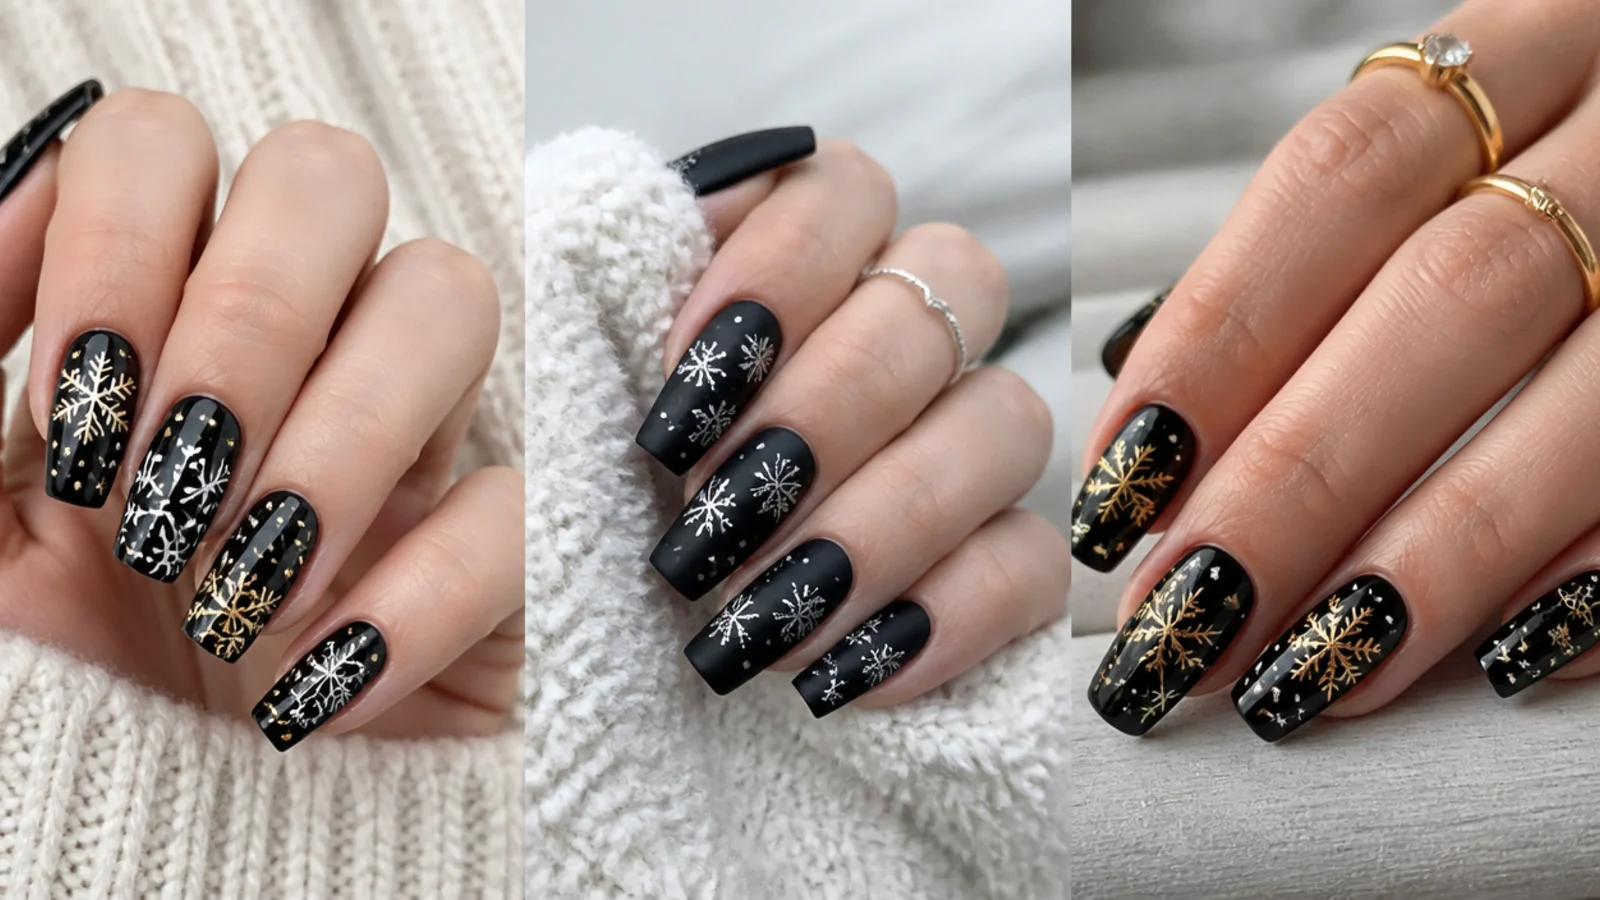
The base color you choose sets the whole mood of a snowflake set. On this board the black base is the bold, moody option, and what you pair with it changes the occasion. White snowflakes on black give the crispest, most classic Christmas contrast. Silver or chrome flakes read frostier and more metallic, ideal for New Year's Eve and parties. Gold flakes warm it up for a dressier, luxe holiday look. Beyond black, icy blue plus silver is the most wintry combination, red plus white is the most festive, and nude plus white is the most subtle and work-appropriate. Timing matters too: winter and snowflake nails ramp up in early November, peak from late November through December, and fade in early January, so book or DIY them anytime from late fall through the holidays for the most seasonal payoff.
Snowflake Nails for Short Nails
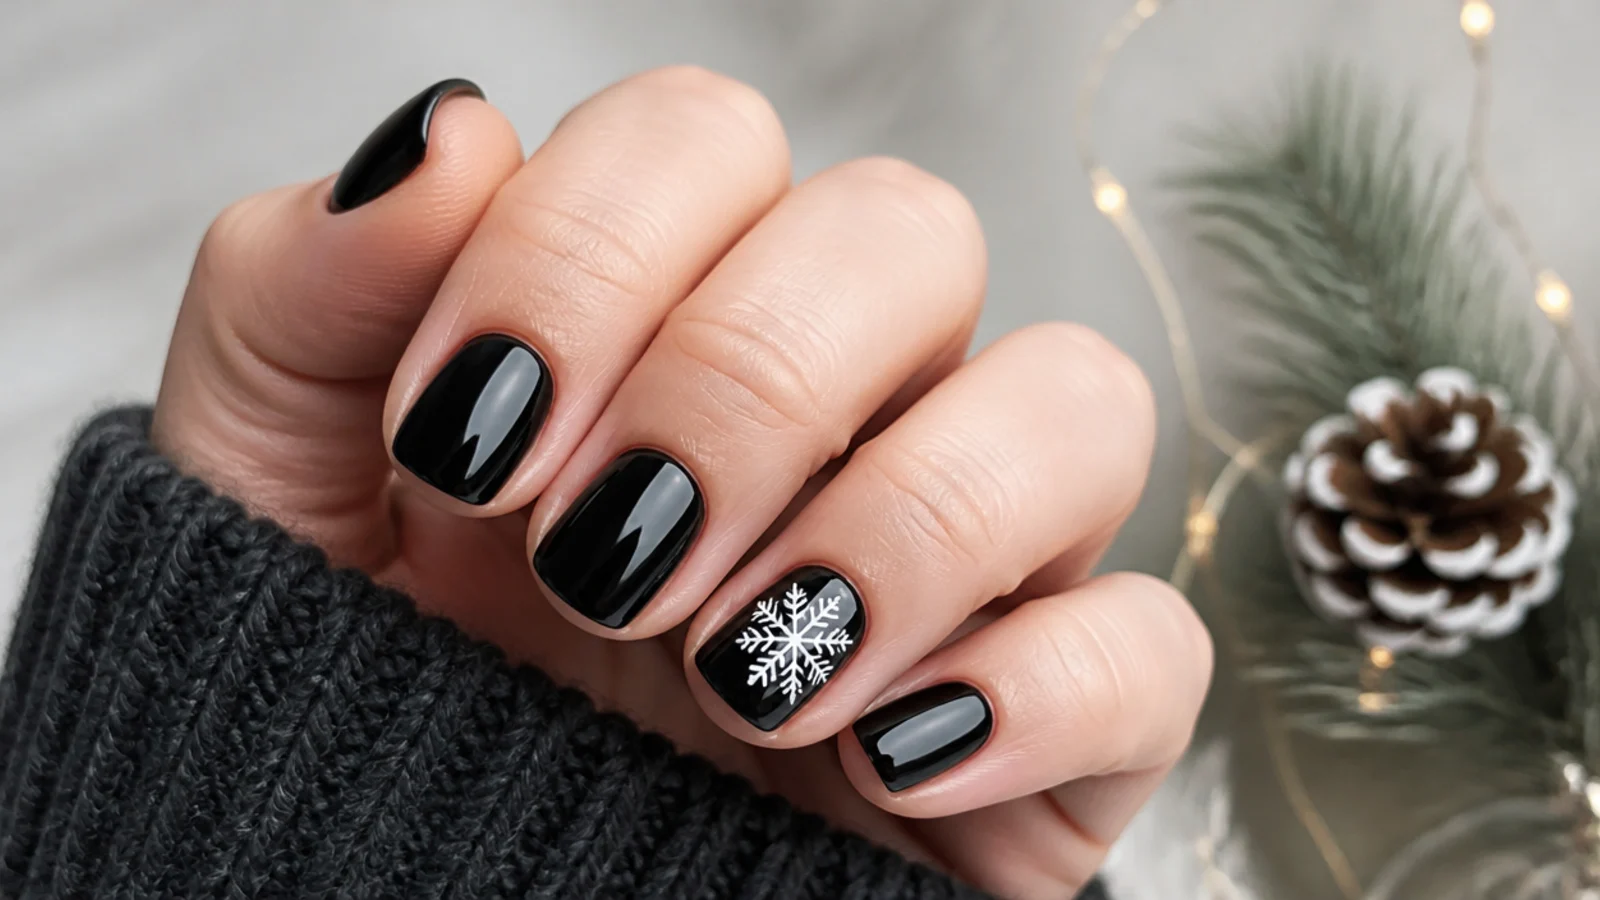
Short nails handle snowflake art beautifully as long as you scale it down. The trick is restraint: instead of crowding a full snowflake onto every short nail, keep most nails solid black and put one clean accent snowflake on a single finger, usually the ring finger. A tiny, fine-line flake reads elegant on a short nail, while a large detailed one can look cramped. If you want more than one, spread small minimalist flakes across two or three nails rather than filling each. A single accent also keeps the design quick, low-cost and easy to freehand with a dotting tool or bobby pin. Short nails plus a matte or glossy black base and one crisp white snowflake is the most wearable, office-friendly version of this trend, and it is the easiest place to start if you are new to painting snowflakes.
Snowflake Nails vs Christmas Nails
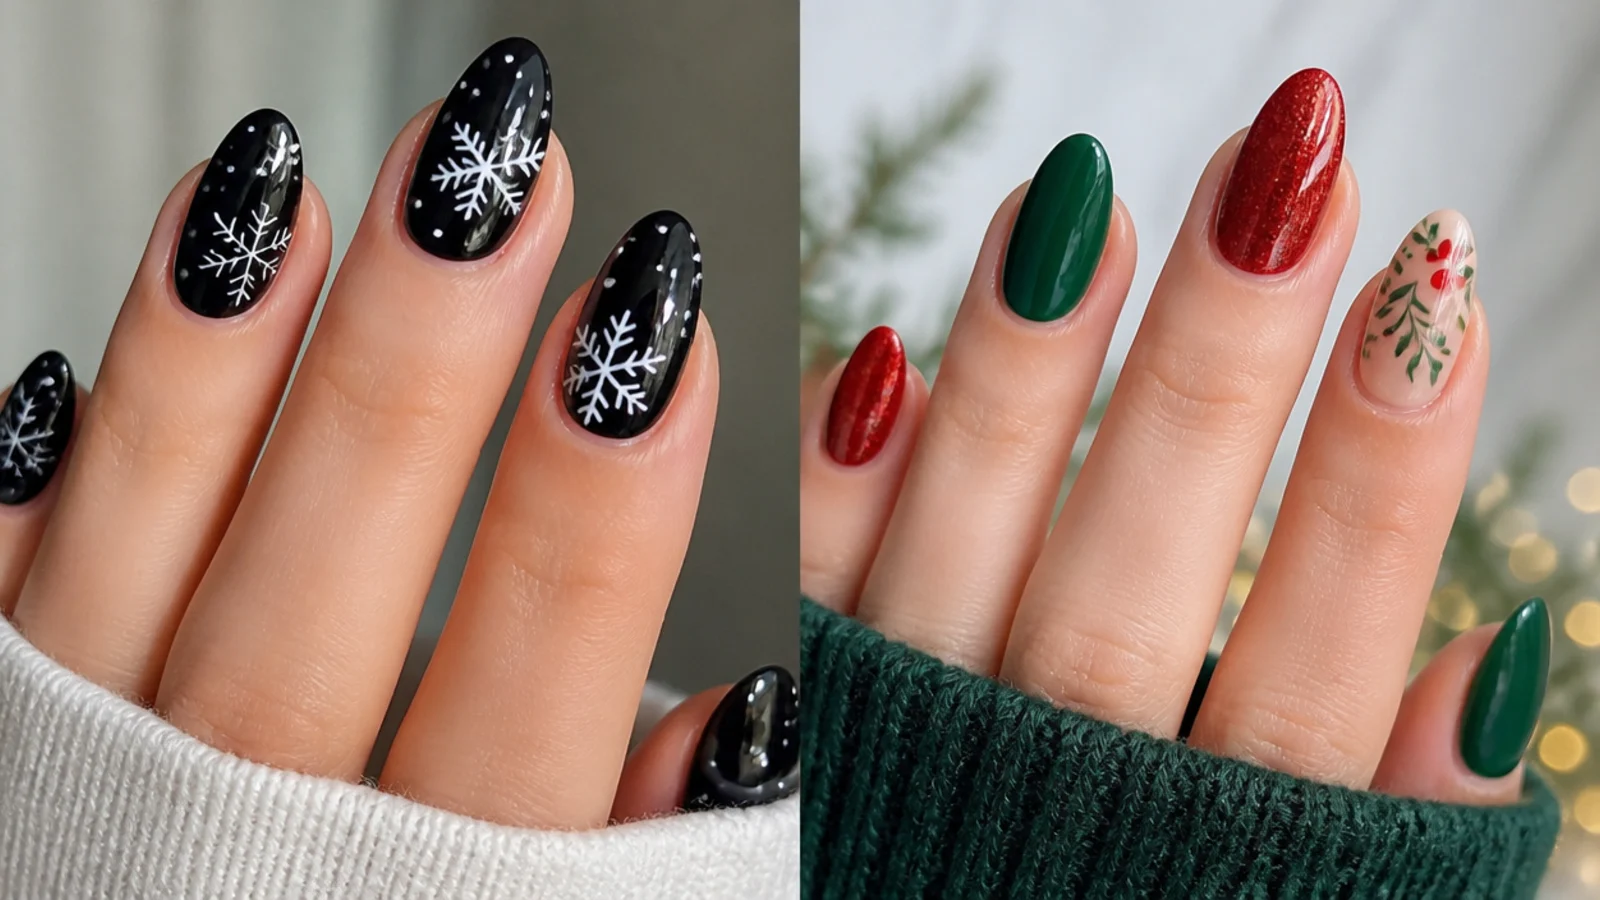
Snowflake nails and Christmas nails overlap but are not the same thing. Christmas nails cover the whole holiday palette and motifs - red and green, Santa, candy canes, trees, plaid, ornaments - and lean festive and warm. Snowflake nails are specifically wintry: they focus on the snowflake motif and cooler, icy tones, and they work all winter long, not just at Christmas. That makes snowflakes the more versatile choice, since white or silver flakes on black still look right in January after the tree comes down, when red-and-green Christmas nails start to feel out of season. You can absolutely bridge the two - black, red and white snowflakes read as both festive and wintry. Choose Christmas nails when you want peak-holiday color, and snowflake nails when you want a look that carries through the whole cold season.
How Long They Last and What They Cost
Because snowflake nails are usually done in gel, a set lasts about two to three weeks, and up to four with good prep, daily cuticle oil, and capping the free edge to protect the design. Regular non-gel polish only holds for about five to seven days before chipping, so gel is worth it for detailed art you want to keep. On cost: a standard gel manicure runs roughly thirty to fifty-five dollars, and hand-painted nail art adds about five dollars per accent nail, so a full black snowflake set is often around forty to sixty dollars at a salon. A single accent snowflake keeps it cheaper. Doing it yourself costs far less over time, since one bottle each of black, white and silver gel plus a lamp covers many manicures. To make any set last, wear gloves for chores and never peel the gel off.
Frequently Asked Questions
How do you paint a snowflake on your nails?
Draw a plus sign on a dry base with white or silver on a fine brush, then add two diagonal lines through the center to make six arms. Dot the end of each arm, add a small branch or V partway along, and a dot in the middle. Keep lines thin, then cure and top coat.
Can you do snowflake nails without a dotting tool?
Yes. A bobby pin, toothpick or the tip of a Q-tip all make the dotted arm ends, and a toothpick or thin liner brush draws the fine lines. A bobby pin is easiest because its two ends give you two dot sizes. Dip in polish, dot or drag, and wipe clean between uses.
Do you use white or silver for snowflakes?
Both work on black - white gives the crispest, most classic Christmas contrast, while silver or chrome reads frostier and more metallic for a party feel. White pops sharper against black; silver adds shine and light. Many sets use both, white outlines with silver detail, for extra depth.
What colors suit black snowflake nails?
White snowflakes give the boldest contrast, silver and chrome read frosty, and gold adds a warm, luxe holiday feel. Pairing black with icy blue, red or nude accents shifts the mood from wintry to festive to subtle. Whatever you choose, black keeps the set moody and high-contrast.
Can you do snowflake nails on short nails?
Yes, and short nails suit them well. Keep most nails solid black and put one small accent snowflake on a single finger, usually the ring finger, rather than crowding every nail. A tiny fine-line flake reads elegant on short nails and is the most office-friendly, wearable version of the look.
Are snowflake nails hard to do?
Not really - they are built on a simple cross. Draw a plus sign, add two diagonals for six arms, then dot the ends. The hardest part is keeping lines thin and steady. Start with one accent snowflake before doing all ten, and use a dotting tool or bobby pin for even dots.
How long do black snowflake nails last?
As a gel set they last about two to three weeks, and up to four with good prep, daily cuticle oil, and capping the free edge. Regular non-gel polish only lasts about five to seven days before chipping, so gel is the better choice for detailed snowflake art you want to keep through the holidays.
How much do black snowflake nails cost?
At a salon, a gel manicure runs about thirty to fifty-five dollars, plus roughly five dollars per accent nail for hand-painted art, so a full black snowflake set is often around forty to sixty dollars. A single accent snowflake keeps it cheaper, and doing it yourself costs far less over many manicures.
When should you get winter nails done?
Winter and snowflake nails ramp up in early November, peak from late November through December, and fade in early January. Book or DIY them anytime from late fall through the holidays for the most seasonal payoff. Snowflake designs still look right in January, unlike red-and-green Christmas nails.
What is the difference between snowflake nails and Christmas nails?
Christmas nails cover the whole holiday palette - red and green, Santa, trees, plaid - and lean festive. Snowflake nails focus on the snowflake motif and cooler, icy tones, so they work all winter, not just at Christmas. Snowflakes are more versatile and still look right in January.
Which snowflake nails look are you saving?
Black snowflake nails are proof that winter nail art does not have to be pale or pastel - a deep black base makes every white or silver snowflake read crisp and bold. Keep the flakes simple, a plus sign with two diagonals and dotted arms, and you can freehand them with a dotting tool or even a bobby pin. For short nails or the office, put one snowflake on an accent finger and leave the rest solid black. Whether you want a matte moody set or a sparkly silver-chrome one, save the designs you love and take the exact photos to your nail tech so the contrast comes out just how you picture it.