1. Prep and Shape Your Nails
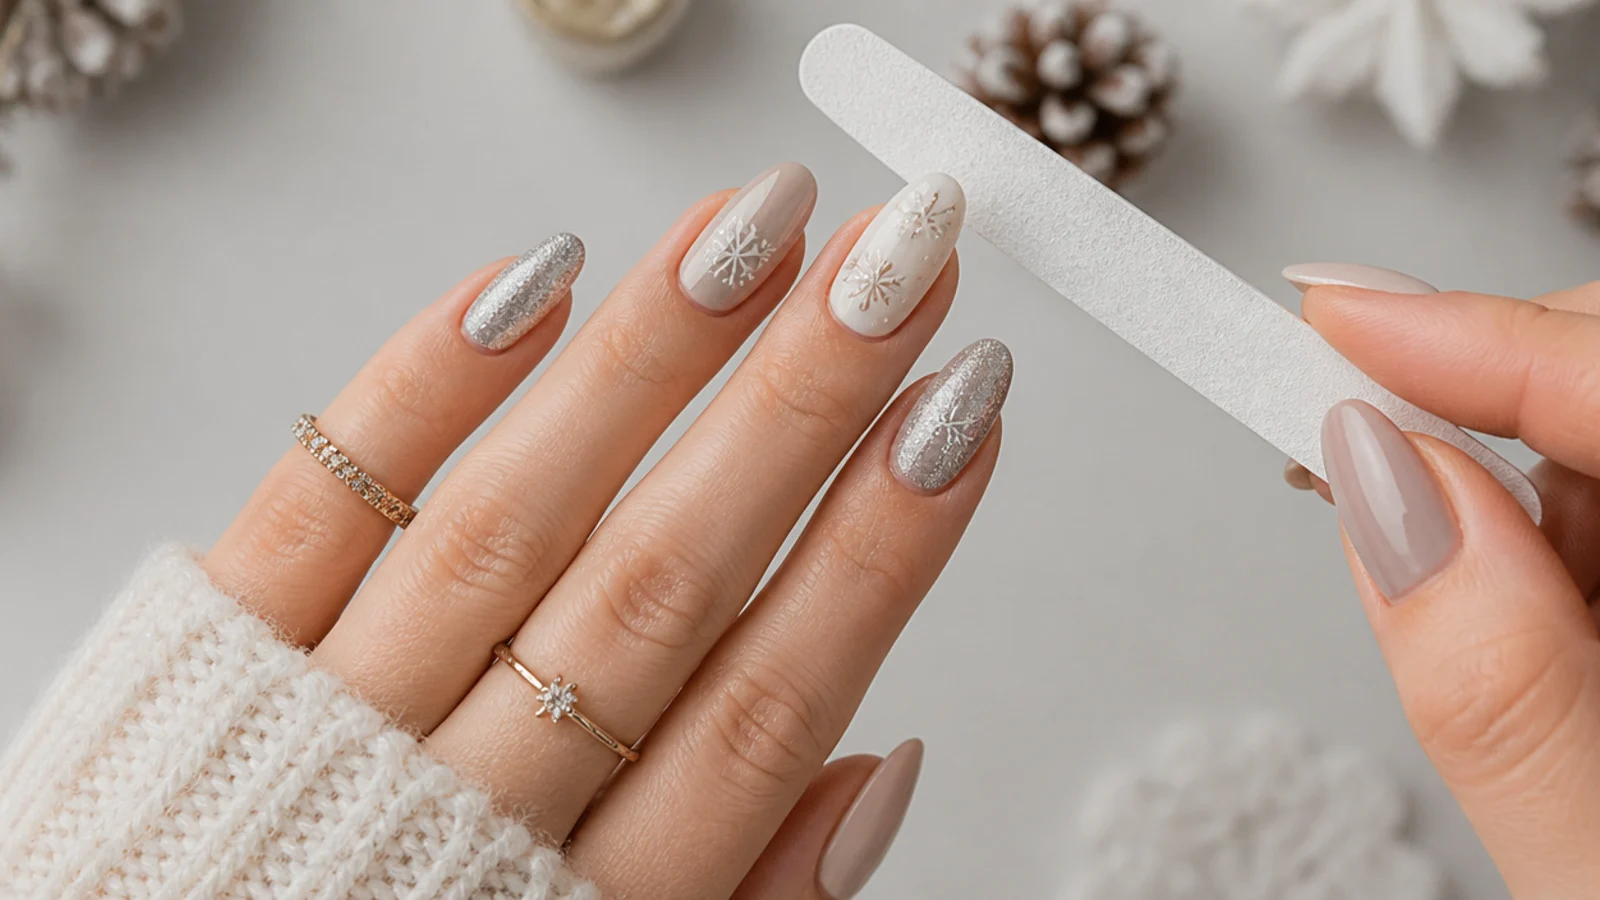
Start with clean, dry nails. Push back the cuticles, lightly buff the surface to a matte finish so polish or gel grips, shape the free edge into a squoval or almond, and wipe with a lint-free wipe and alcohol so no oils remain. Good prep is what keeps a set from lifting or chipping early, and a smooth surface gives your snowflake a clean canvas to sit on.
Common mistake: Leaving oils or cuticle on the nail causes lifting and early chips - always cleanse before you start.
Pro tip: Buff only lightly; over-buffing thins and weakens the natural nail.
2. Paint Your Base Color and Cure or Dry
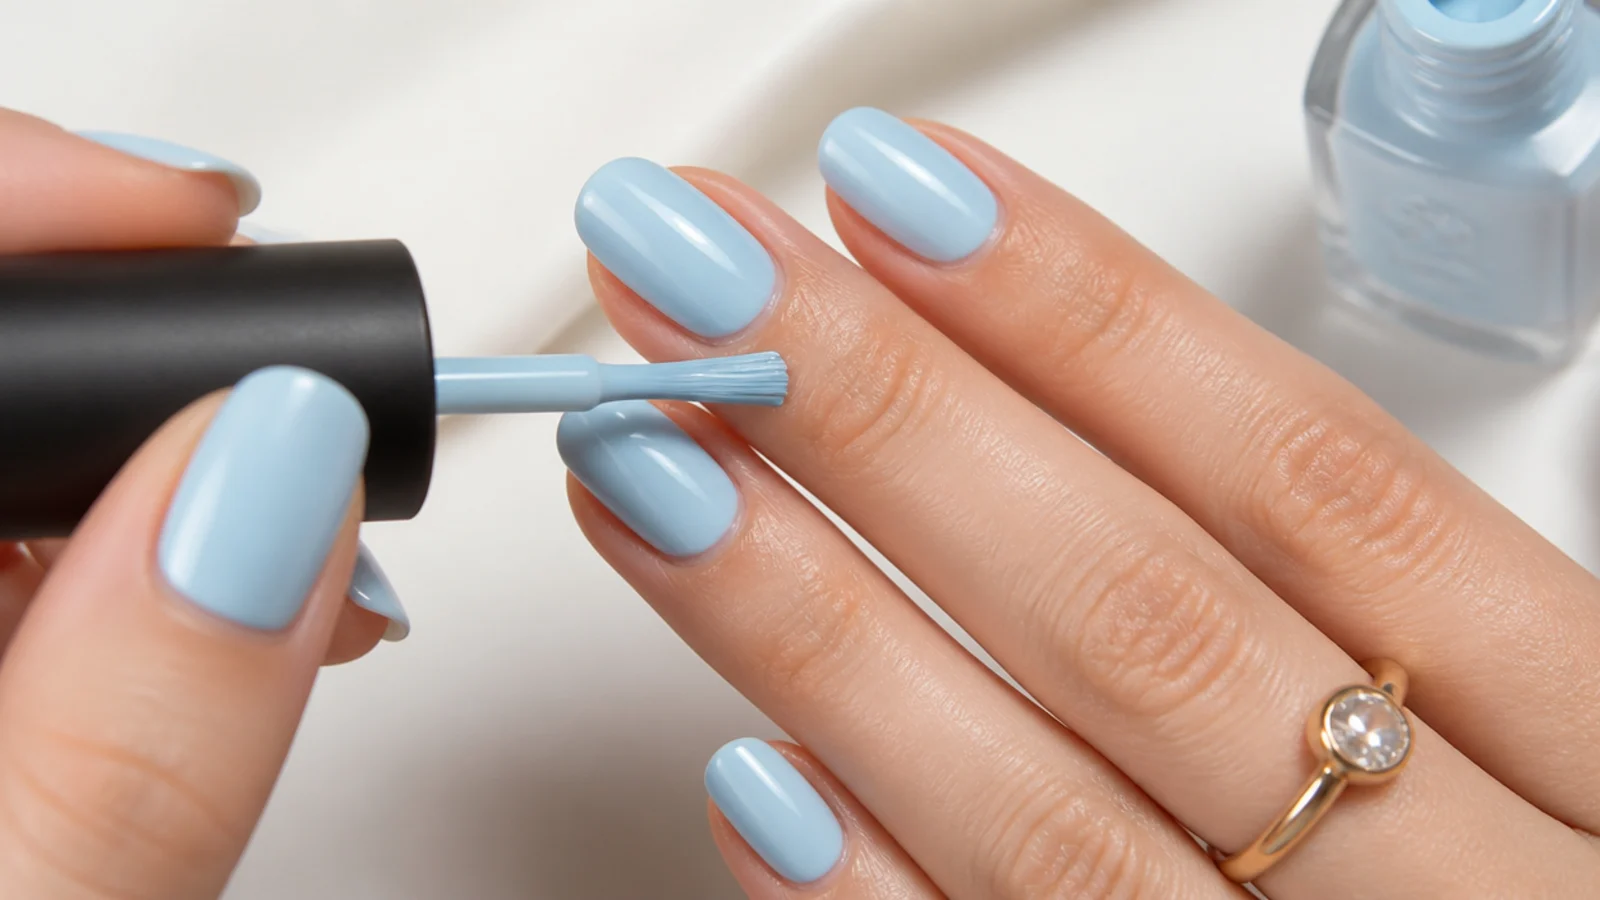
Apply a base coat, then two thin coats of your background color - icy blue, navy, deep red, black or a milky nude all set off a white snowflake. If you are using gel, cure each coat about 30 to 60 seconds under LED or roughly 2 minutes under UV; if you are using regular polish, let each coat dry fully. Build color in thin layers so it stays smooth and fully opaque before you add any art.
Common mistake: Painting the snowflake onto a wet or streaky base smears the whole design - let the base set completely first.
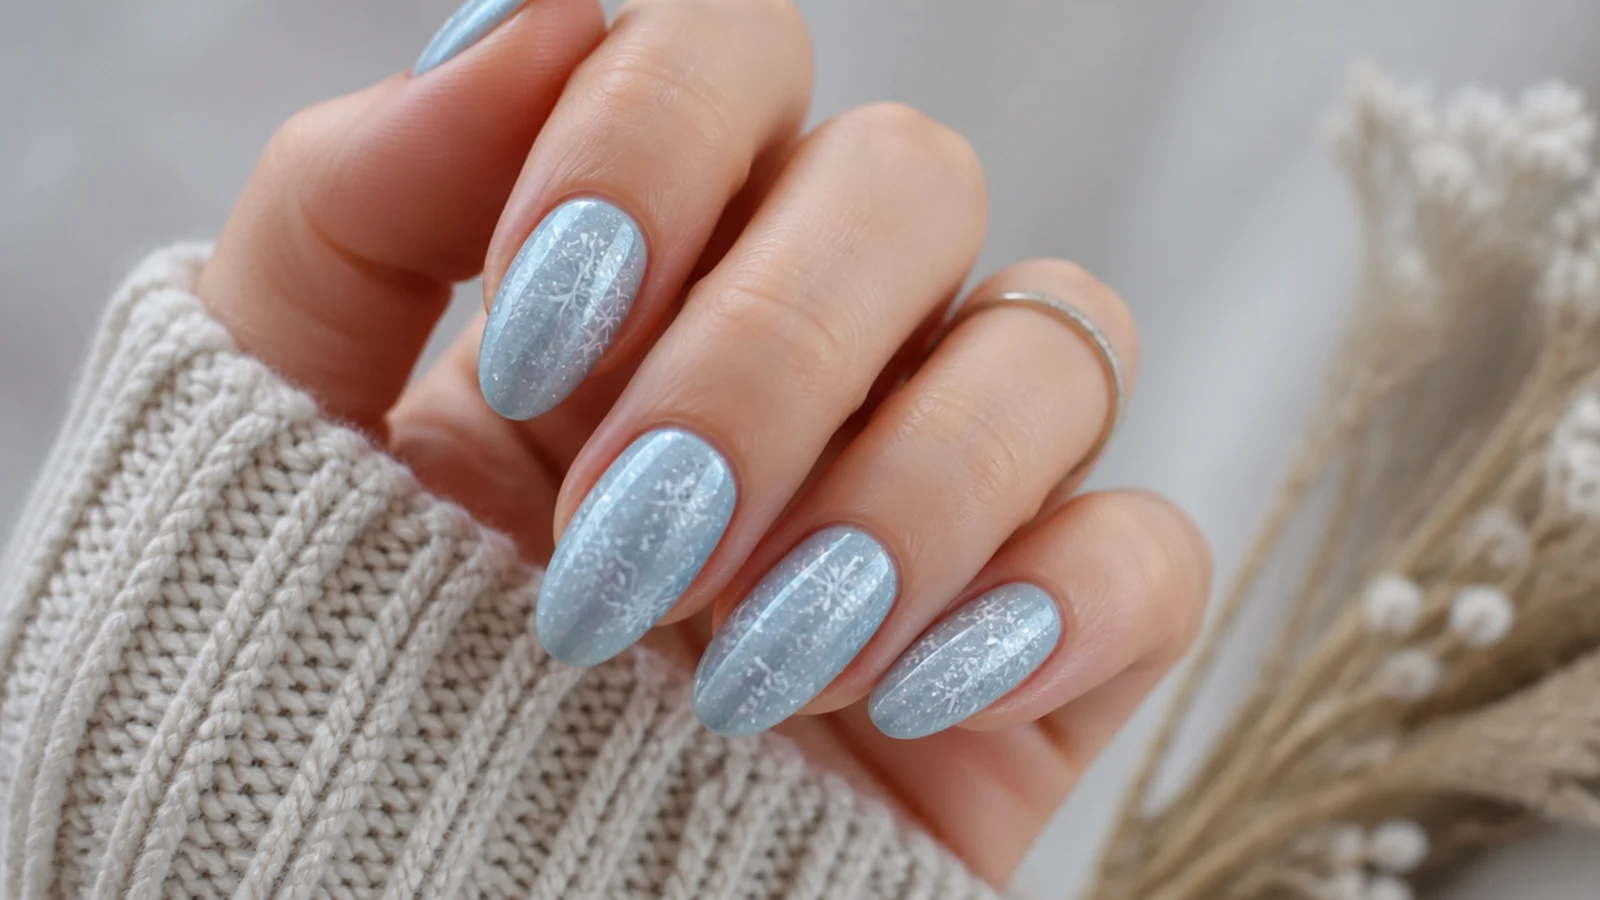
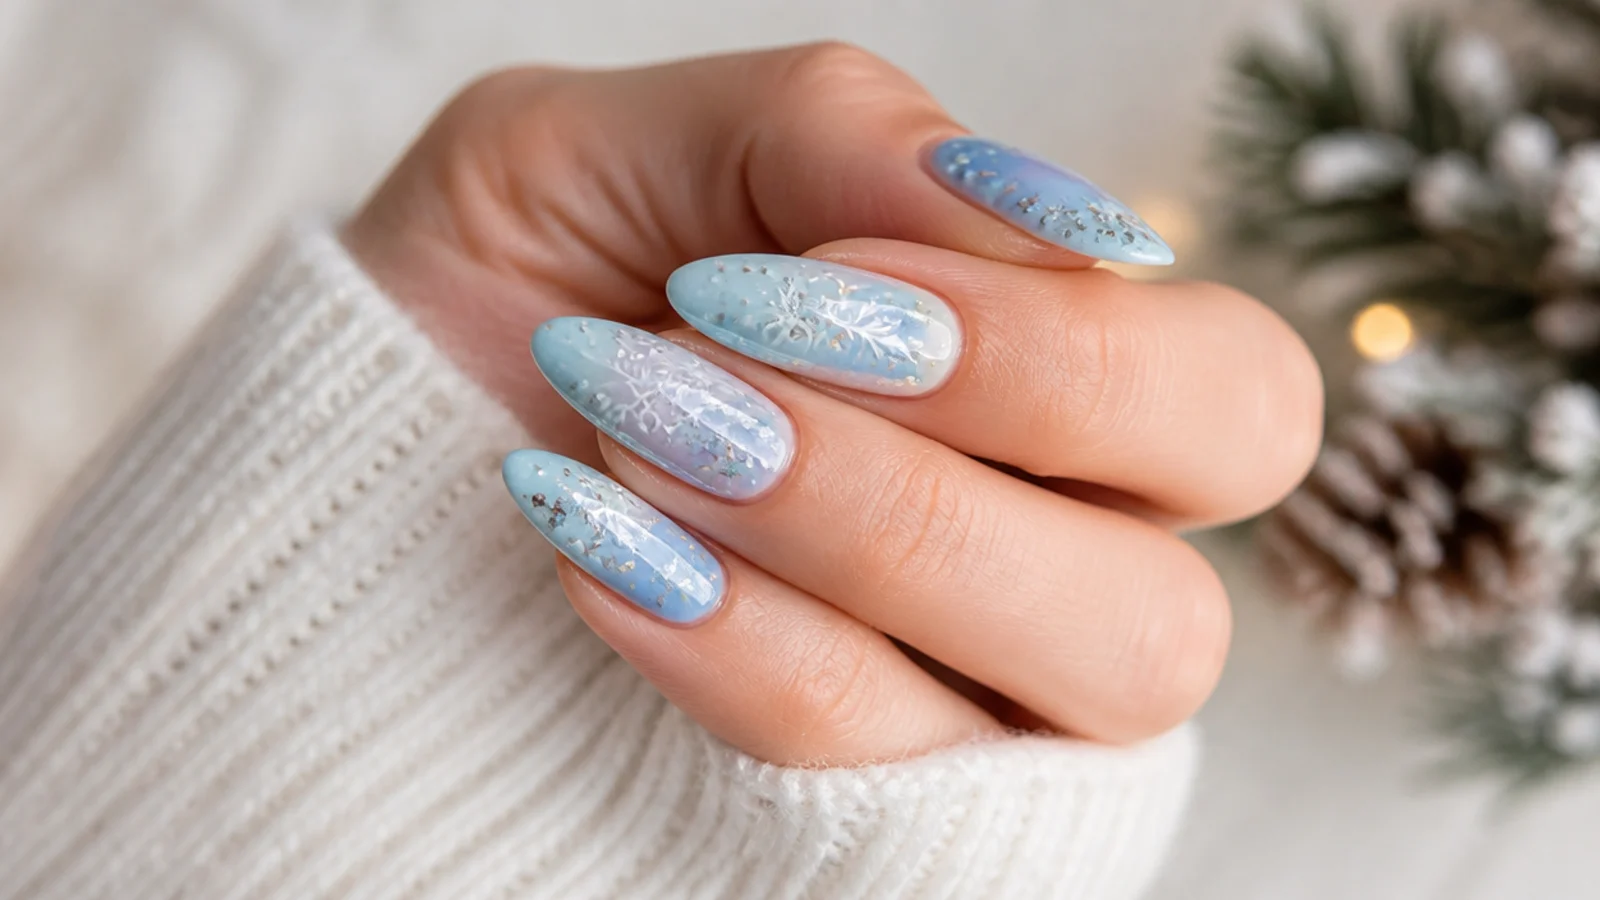
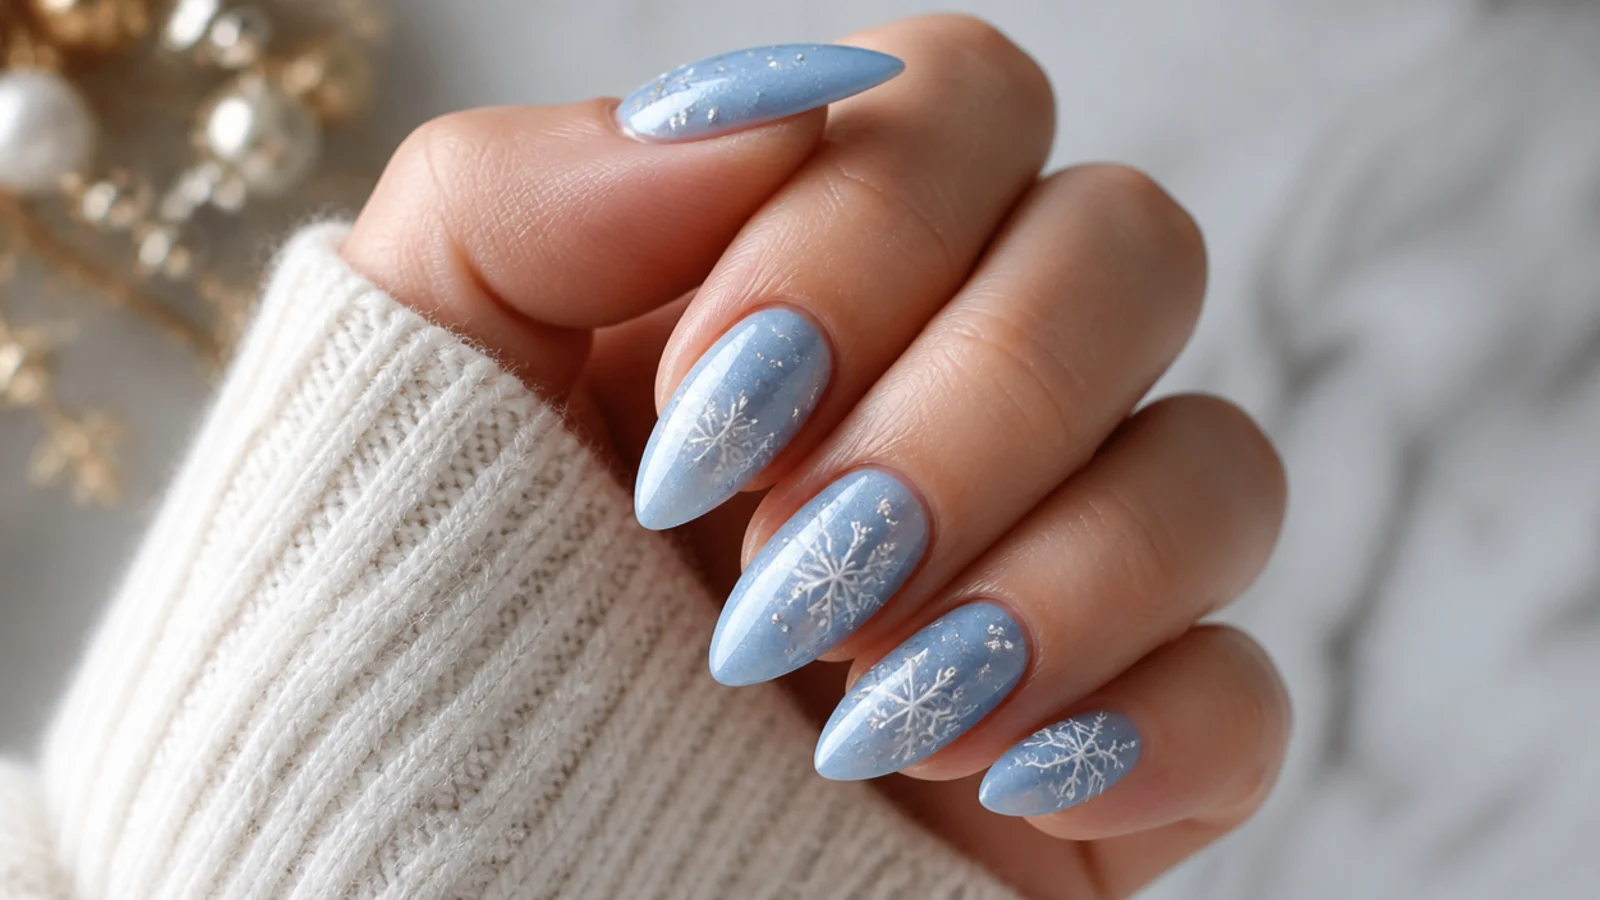
Pro tip: Icy blue plus silver reads the most wintry, while nude plus white stays subtle enough for work.
3. Choose Your Tool and Thin Your Paint
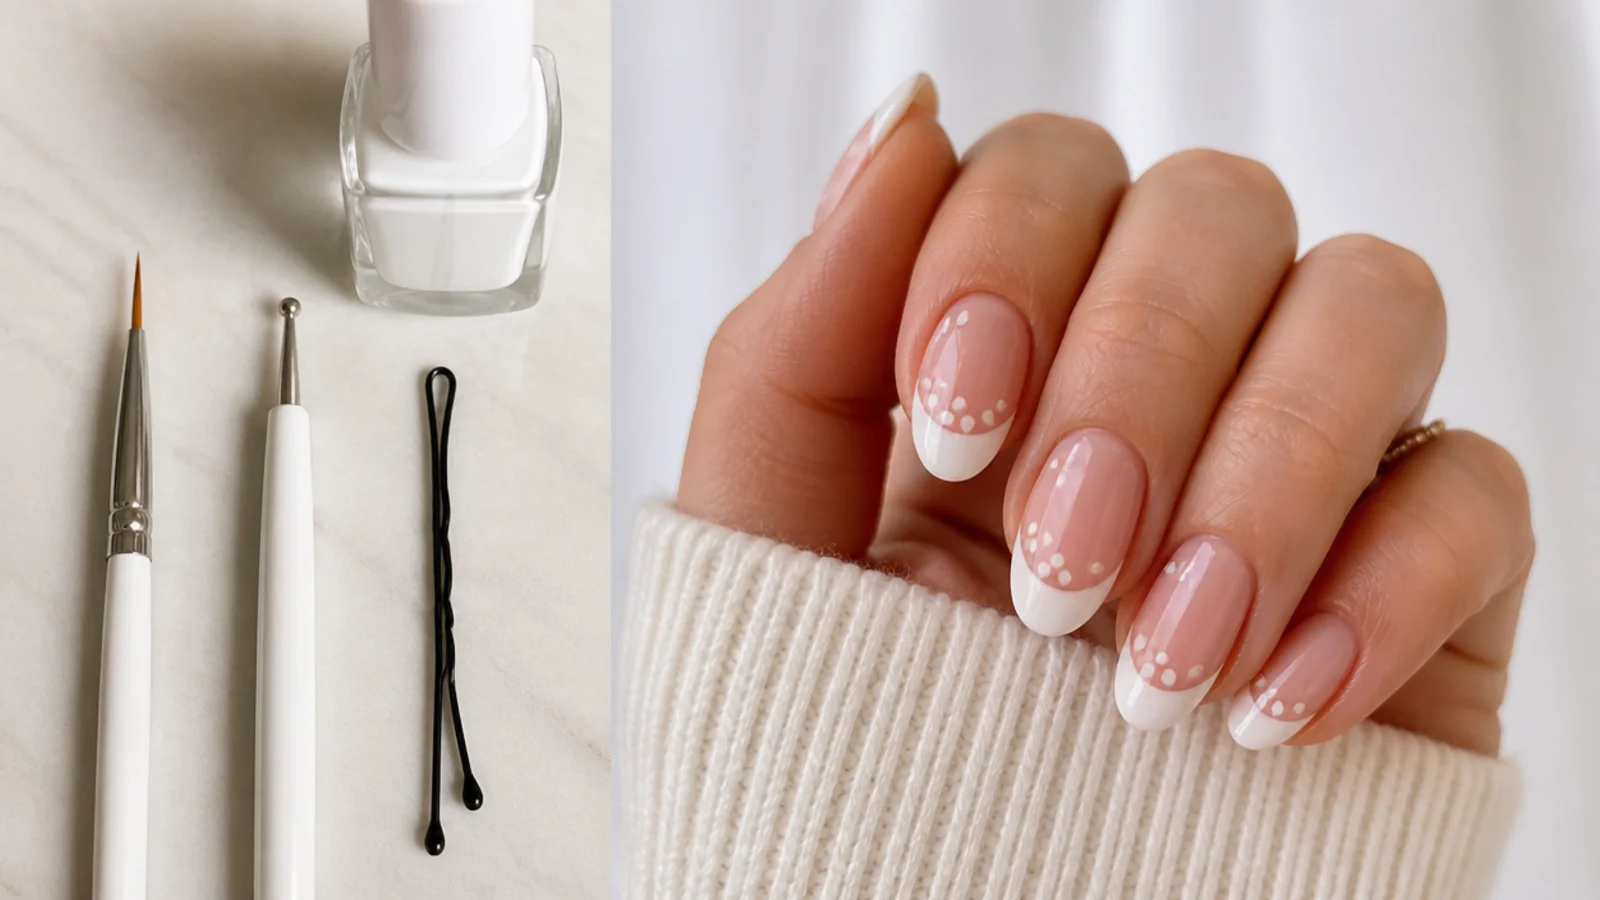
Snowflakes need fine lines, so pick your tool: a thin detail or liner brush and a dotting tool are ideal, but a bobby pin, toothpick or the wooden end of a Q-tip all work with no dotting tool at all. Load a little white or silver polish or gel paint onto the tool. If your paint is thick, thin it slightly so the arms stay crisp instead of blobby, and wipe excess off before you touch the nail.
Common mistake: Overloading the brush floods thick, blobby lines - less paint on the tool gives finer, cleaner arms.
Pro tip: The rounded head of a bobby pin makes perfectly even dots for the tips and center.
4. Draw the Center Plus Sign
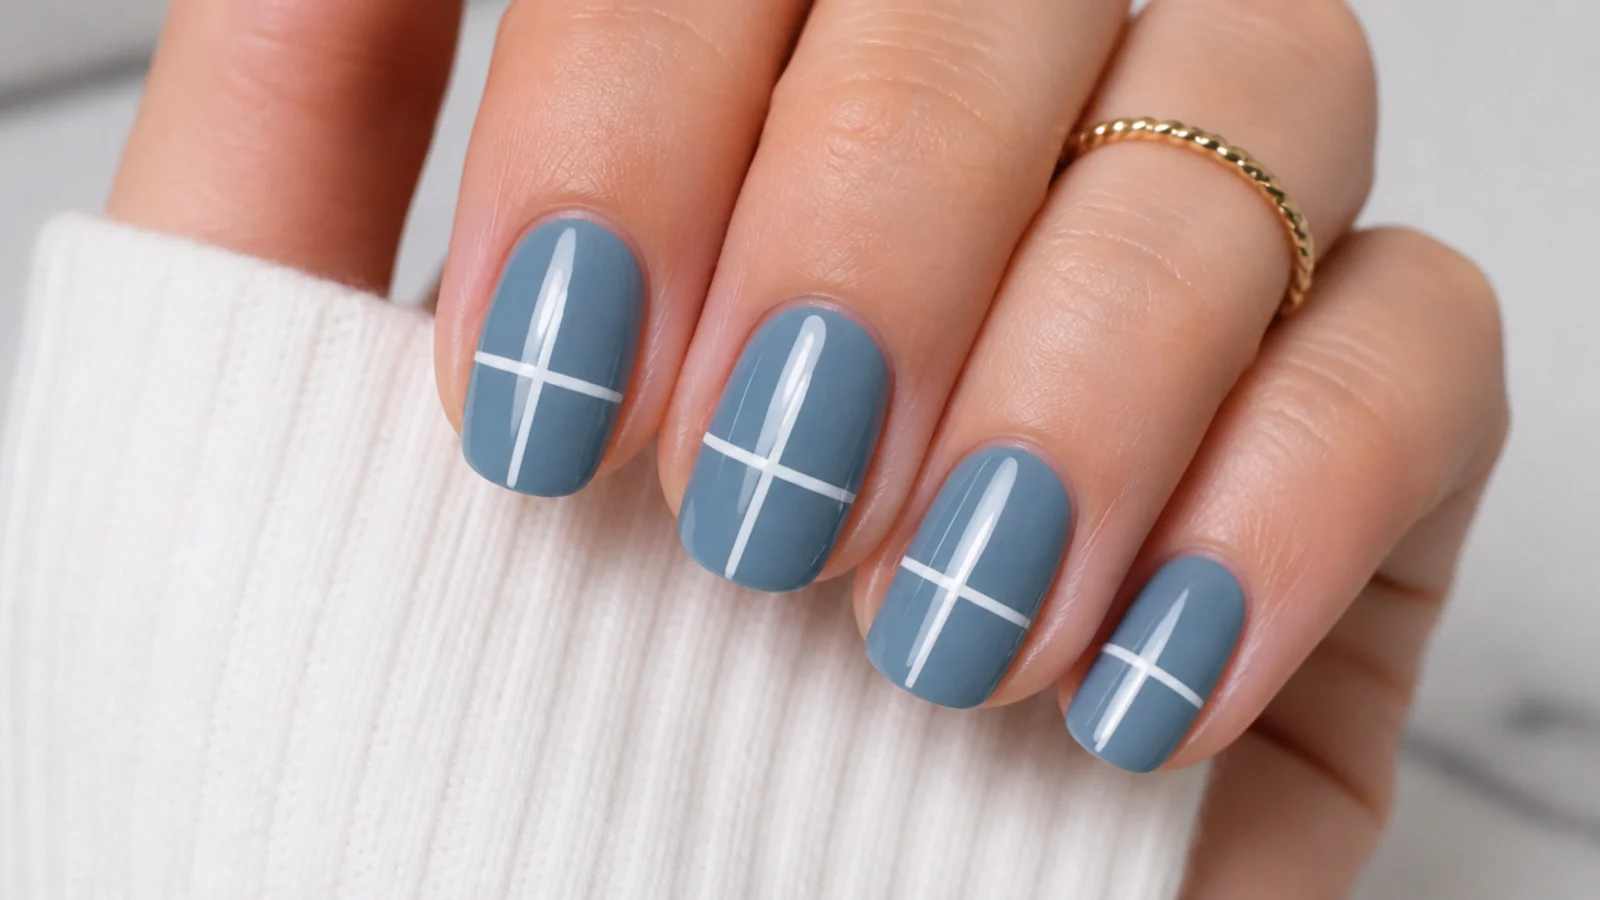
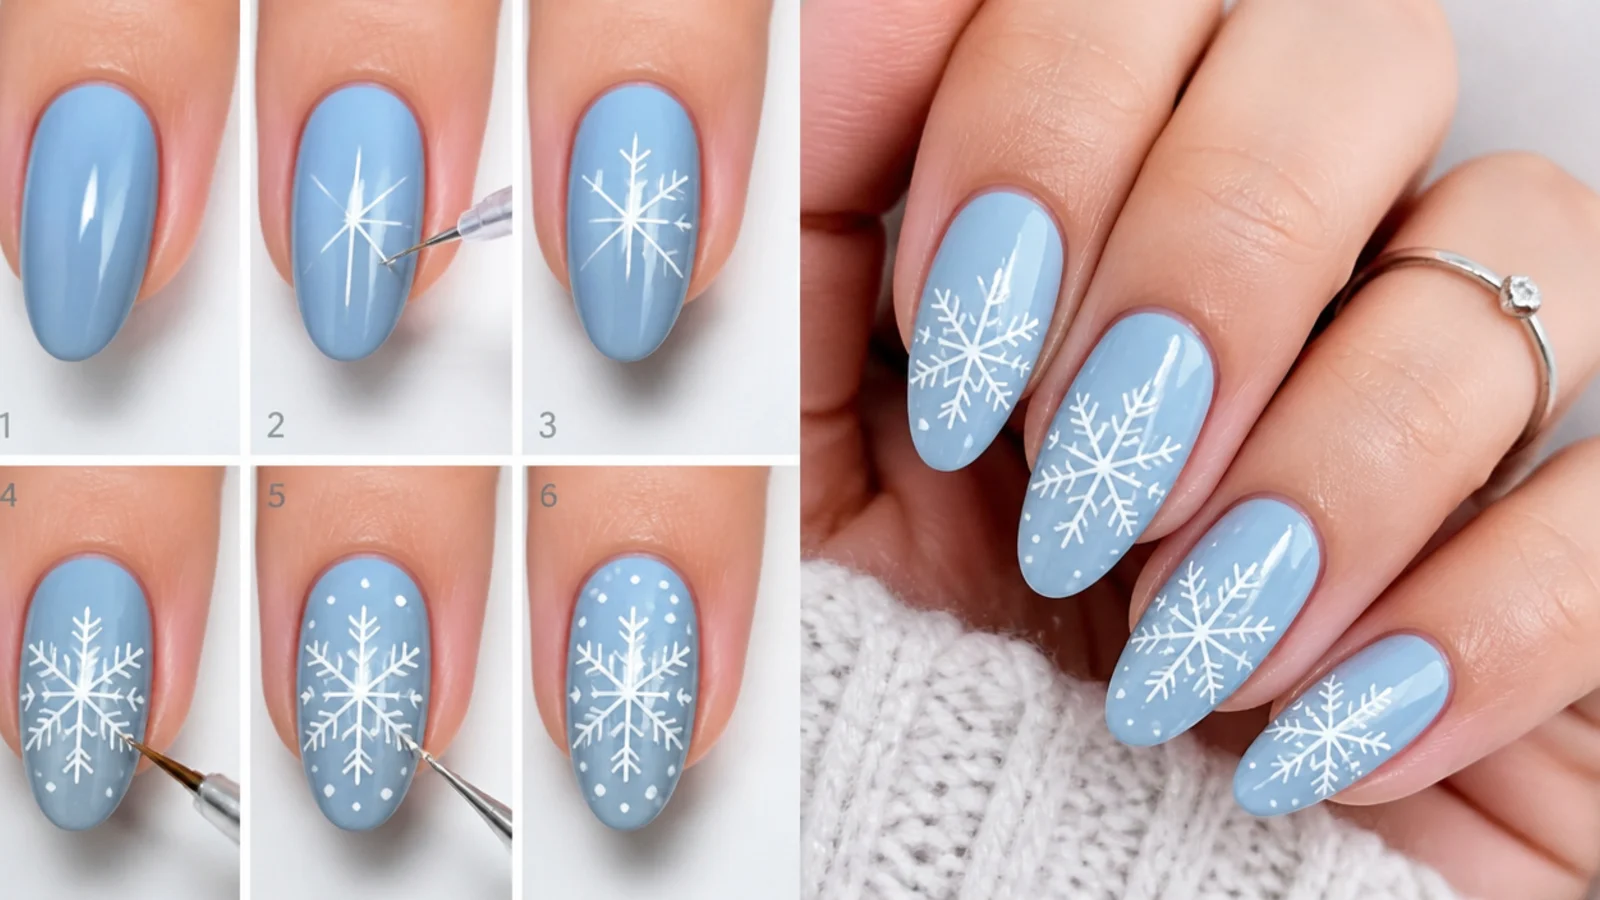
Every snowflake starts as a plus sign. Draw one thin vertical line down the center of the nail, then one thin horizontal line across it so they cross in the middle. Keep both lines the same length and centered, because this cross sets the size and symmetry of the whole flake. Work on one nail at a time so the paint stays workable while you build the arms.
Common mistake: Off-center or uneven arms throw off the symmetry - measure by eye and match the four line lengths.
Pro tip: Start the lines from the center outward so each arm meets cleanly in the middle.
5. Add the Two Diagonal Arms
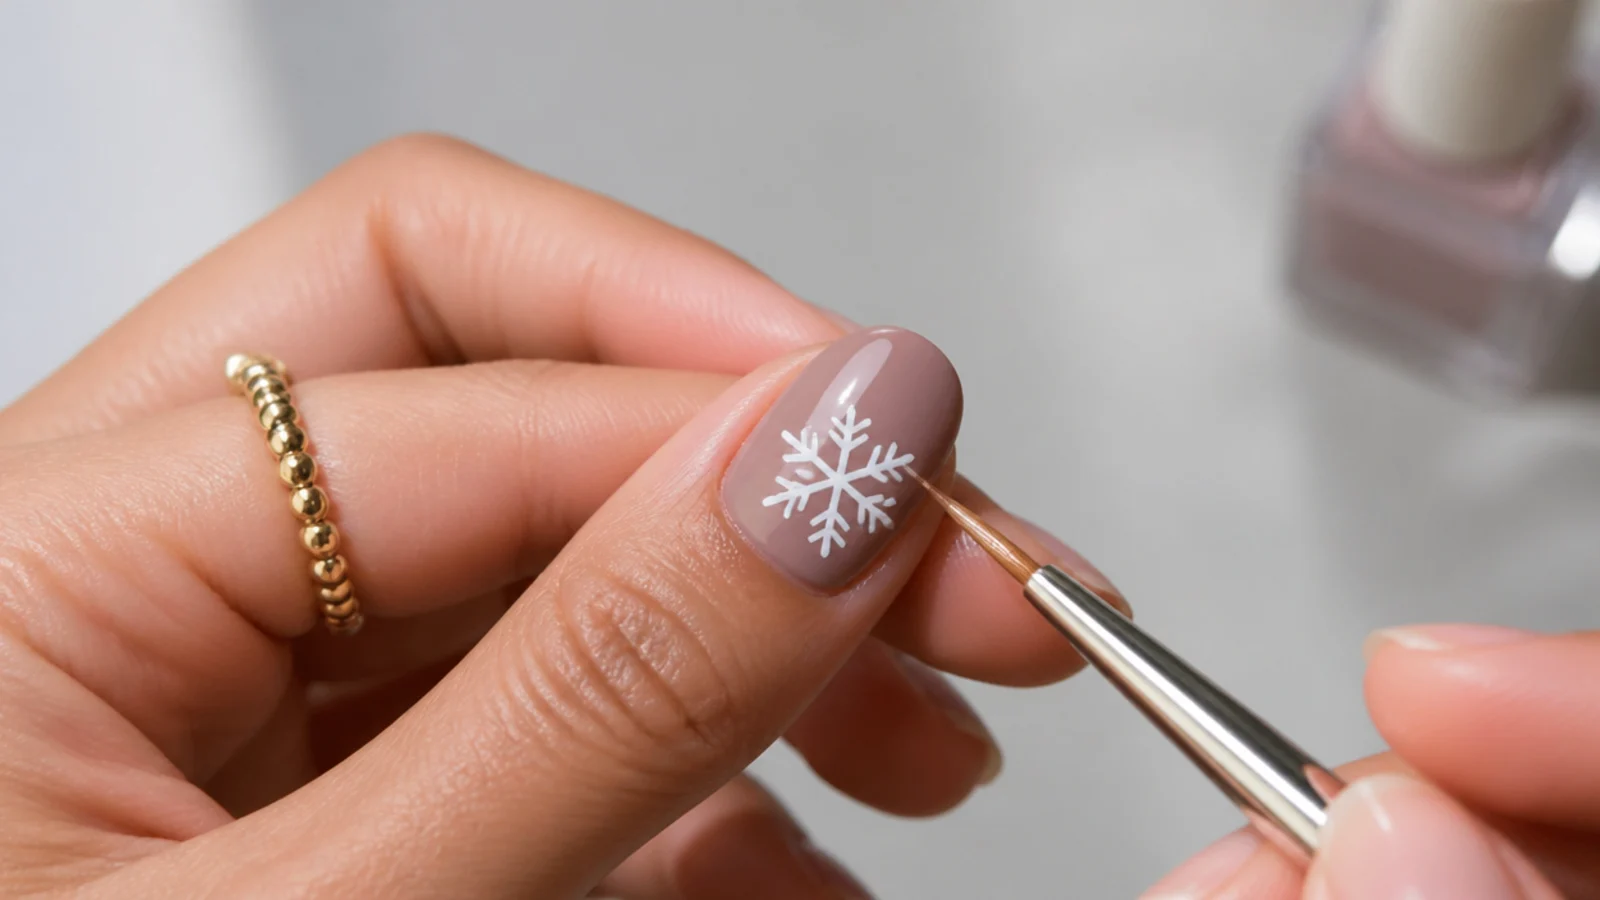
Now cross the plus sign with two diagonal lines through the same center point, so you end up with six evenly spaced arms like spokes on a wheel. Keep each diagonal the same length as the plus arms. Six arms is what makes a snowflake read as a snowflake rather than a star or a plus, so space them as evenly as you can around the center.
Common mistake: Crowding the diagonals to one side makes it look like an asterisk - aim for even gaps between all six arms.
Pro tip: Picture the nail as a clock and place arms toward 12, 2, 4, 6, 8 and 10 for even spacing.
6. Add Tiny Branches to Each Arm
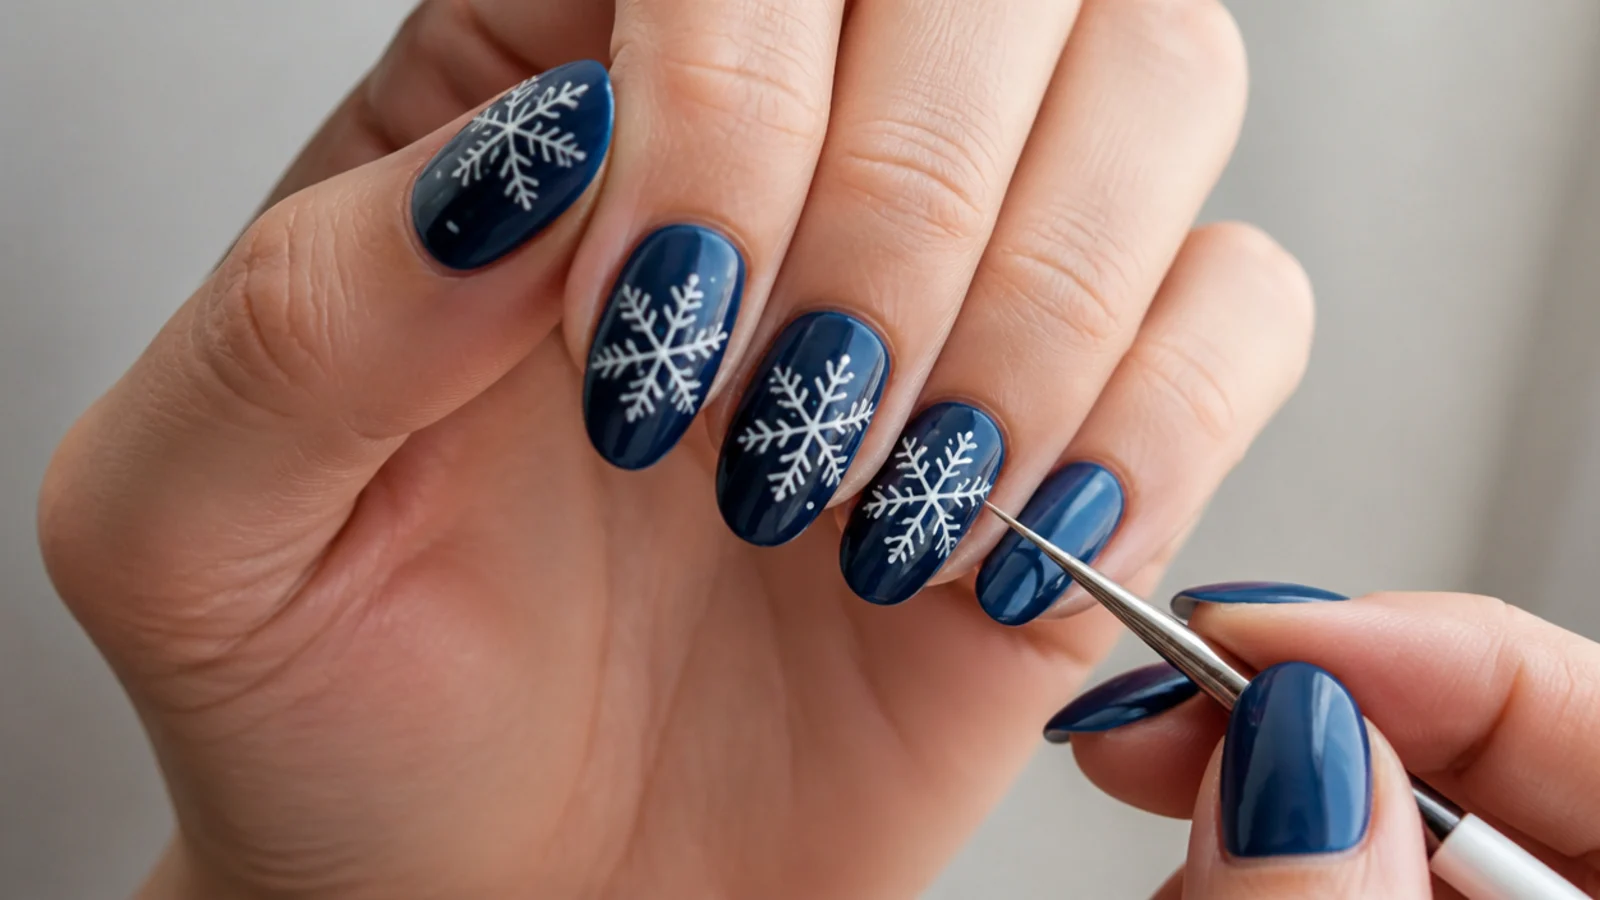
Give each of the six arms two tiny branches near its tip - short strokes that angle outward in a little V or arrow shape, like a real snowflake crystal. Keep them small and matched from arm to arm. These branches add the detail that turns a simple six-spoke shape into a convincing snowflake, so add them lightly with just the tip of your tool.
Common mistake: Long, heavy branches overwhelm the arms and muddy the shape - keep them short and delicate.
Pro tip: You can skip branches entirely for a cleaner, more minimal snowflake on short nails.
7. Dot the Tips and Center
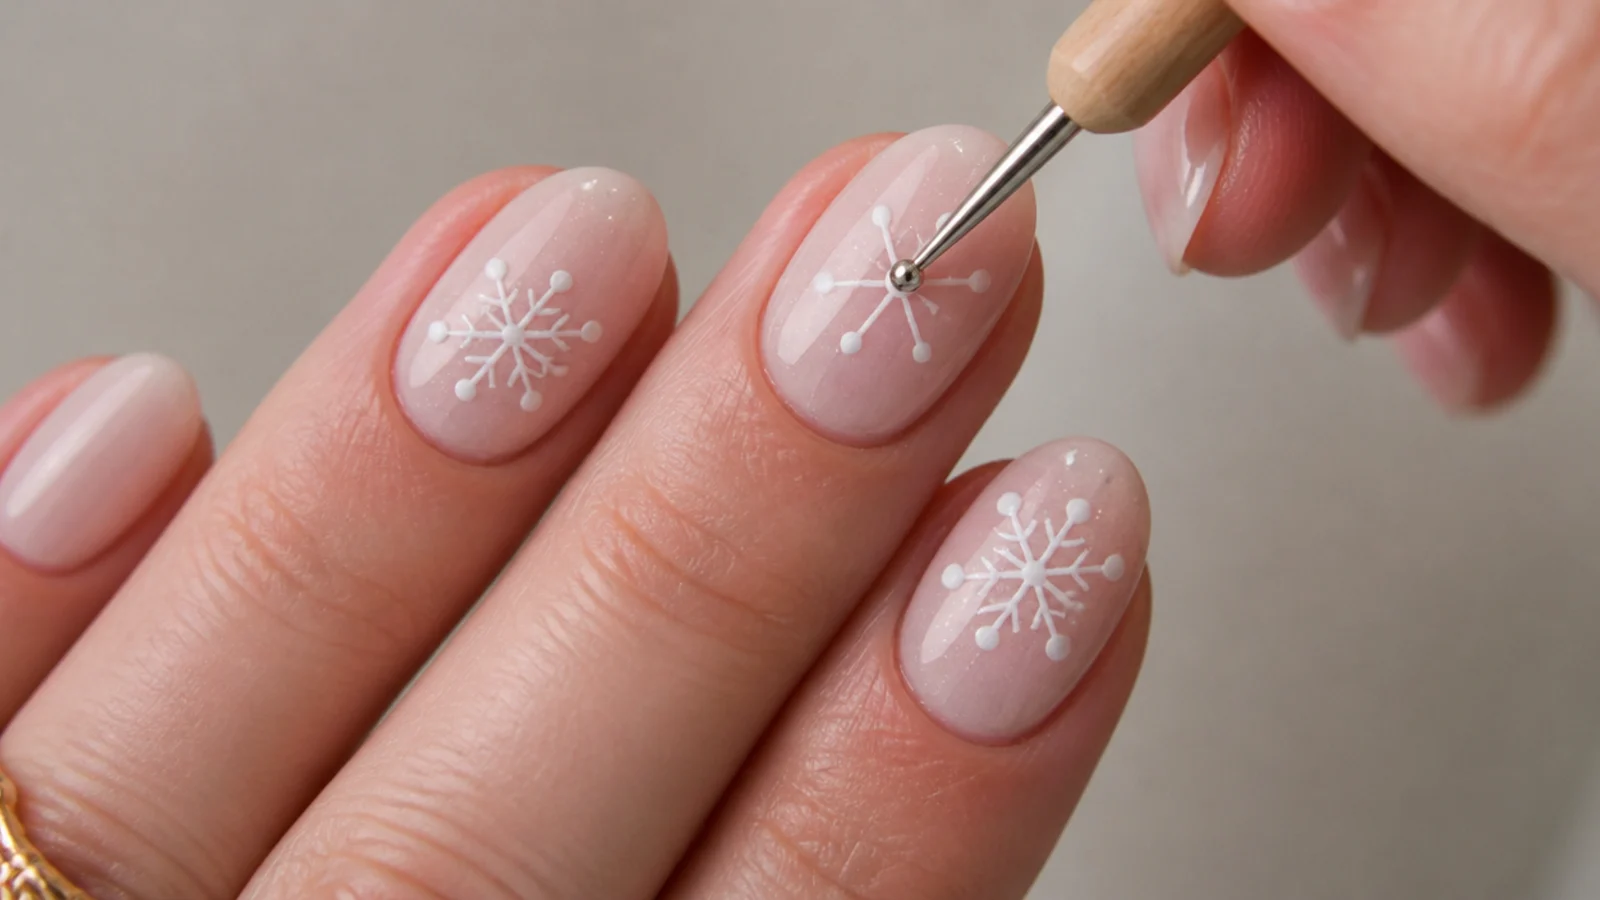
Finish the shape by placing a small dot at the end of each of the six arms and one dot in the center where the lines cross. A dotting tool, bobby-pin head or toothpick tip makes even dots. These dots cap the arms and balance the flake, and you can scatter a few tiny extra dots in the empty spaces around the snowflake to look like falling snow. Let the paint dry or cure before sealing.
Common mistake: Uneven or oversized tip dots unbalance the flake - use the same tool and pressure for every dot.
Pro tip: A tiny dot of silver or iridescent glitter in the center adds a frosted, icy sparkle.
8. Seal With Top Coat and Oil
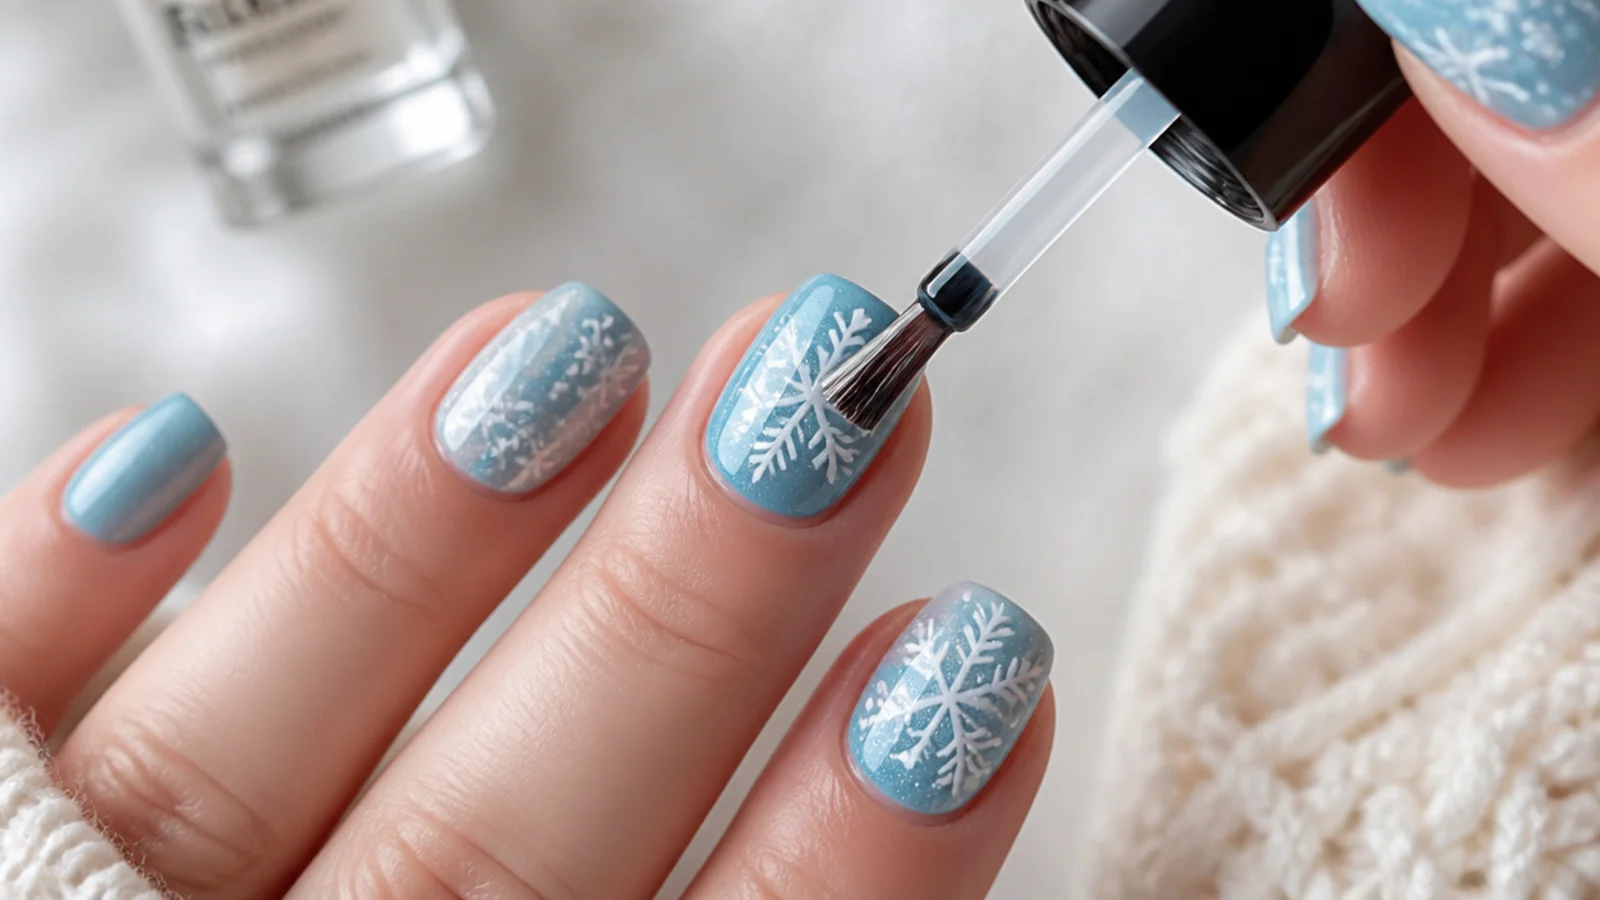
Once the snowflake is fully dry or cured, brush a top coat over the whole nail and cap the free edge by running it along the tip. If using gel, cure a no-wipe top coat about 30 to 60 seconds under LED. Capping the edge is what keeps the design from chipping early. Wipe any sticky residue if needed, then massage cuticle oil around each nail to finish and protect the skin.
Common mistake: Brushing top coat too hard over fresh paint drags and smears the snowflake - float it on with a light hand.
Pro tip: Daily cuticle oil keeps a gel set flexible and stretches it closer to the full three weeks.
How to Paint a Snowflake on Your Nails (Step by Step)
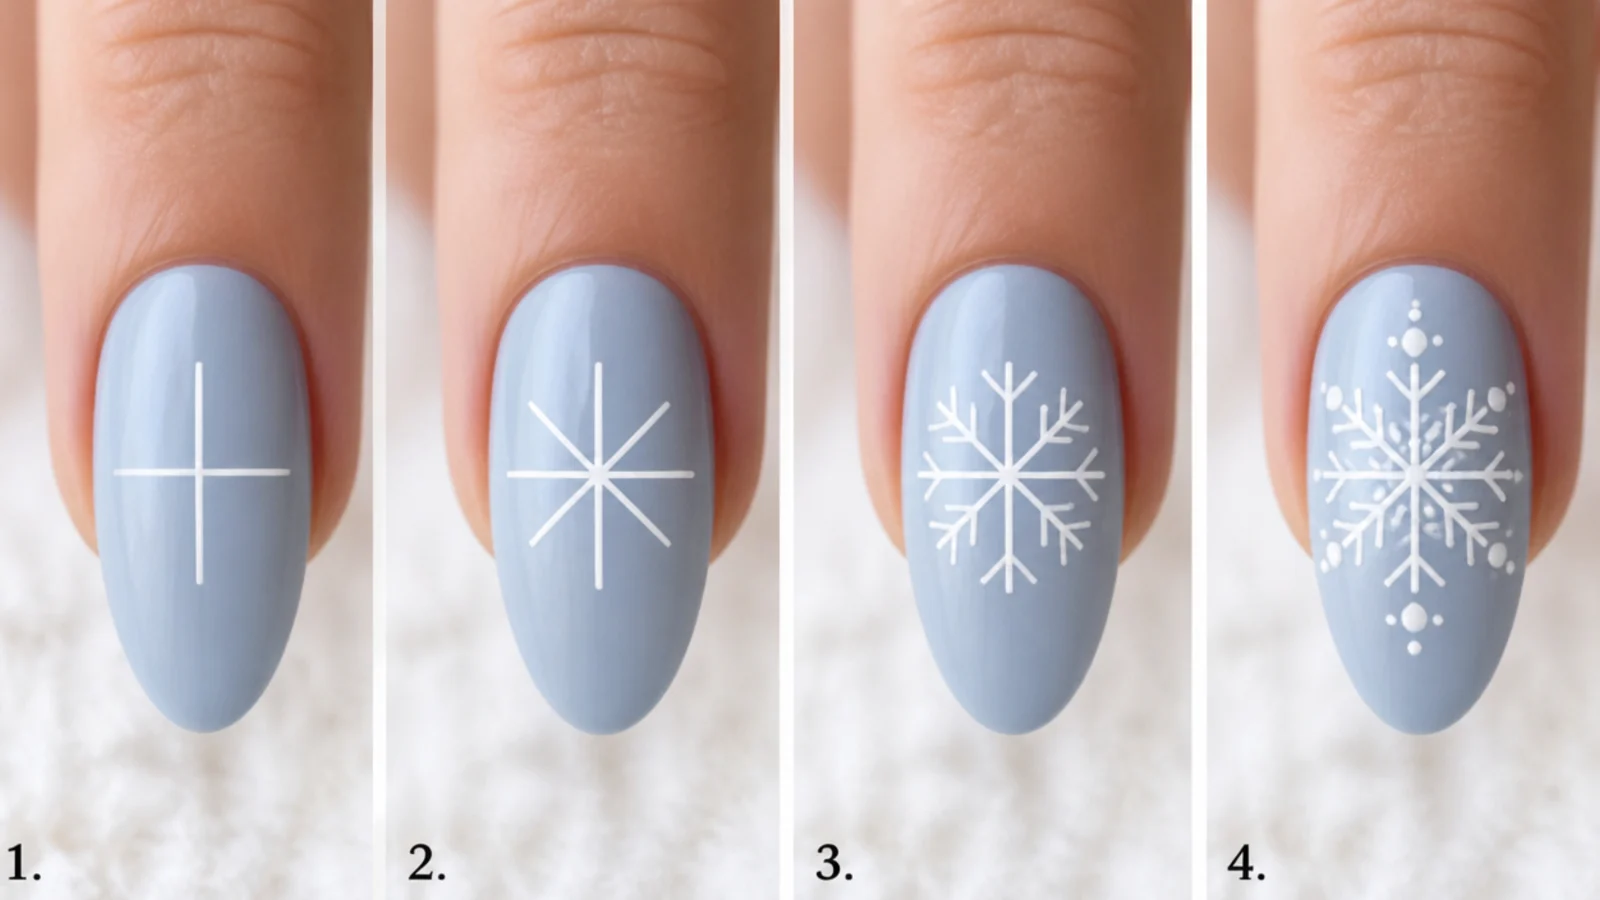
The whole snowflake comes down to stacking simple shapes in order. Paint your base color and let it set, then draw a thin plus sign in white or silver down and across the center of the nail. Cross that plus with two diagonal lines through the same center so you have six evenly spaced arms. Add two tiny outward branches near the tip of each arm for that crystal look, then cap every arm end and the center with a small dot. Scatter a few extra dots around it like falling snow if you want, and seal it all under a top coat. Keep your paint slightly thinned and your tool lightly loaded so the lines stay fine, and work one nail at a time before the polish skins over. Start each arm from the center outward so they meet cleanly. That is the entire technique - a plus, two diagonals, branches and dots.
Snowflake Nails Without a Dotting Tool
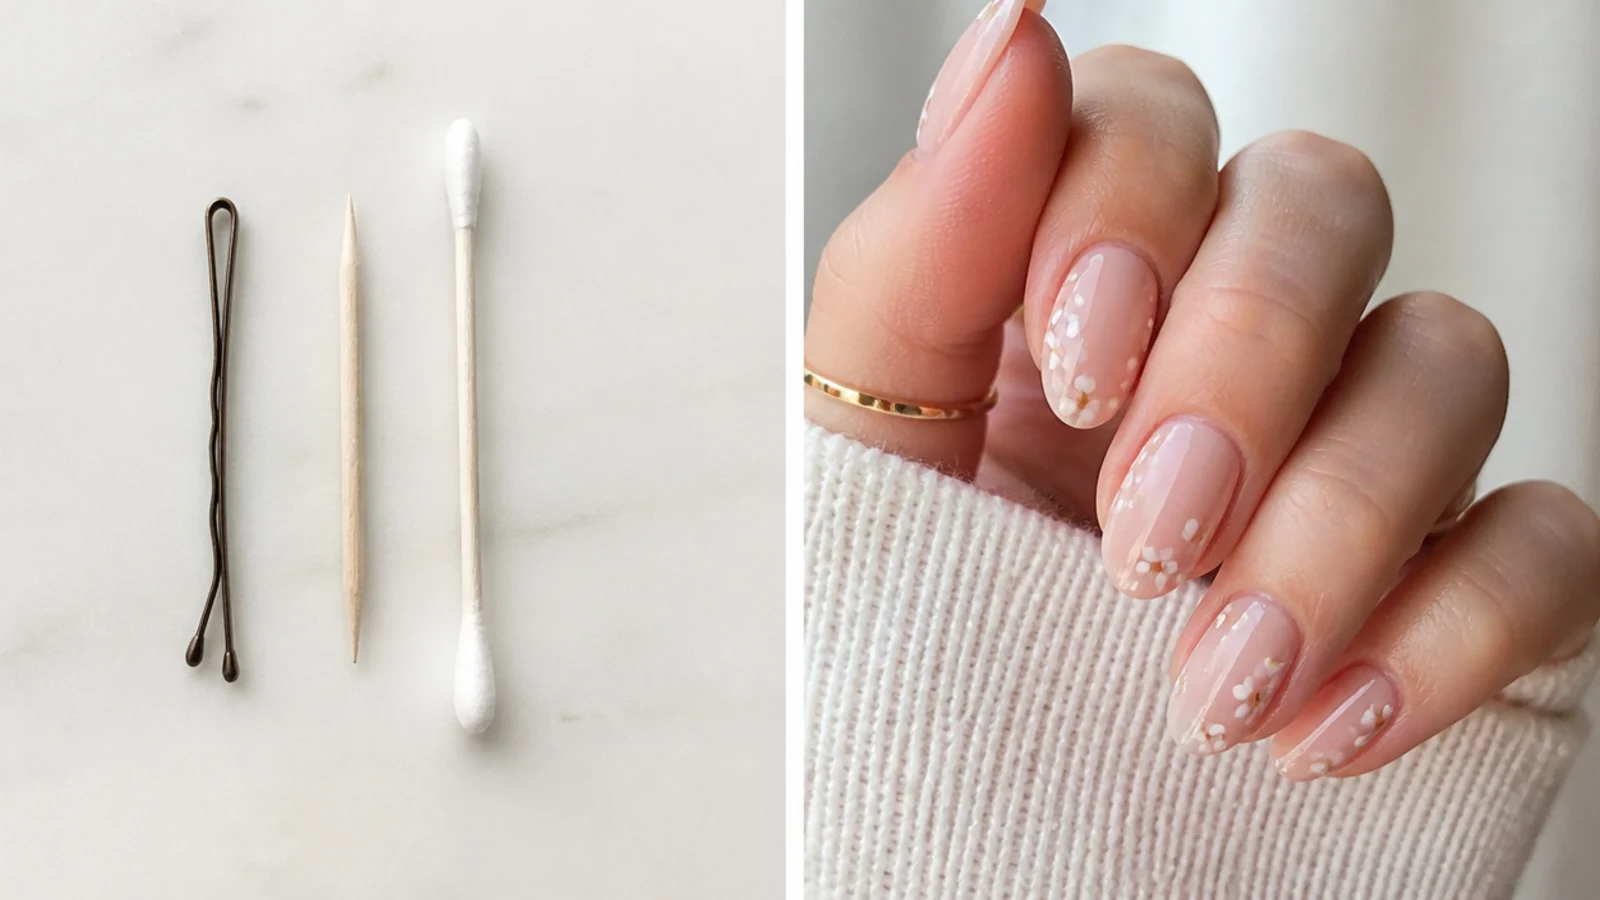
You do not need a dotting tool or fancy brushes to paint snowflakes - common household items do the job. A bobby pin is the best substitute: its rounded head makes even dots for the arm tips and center, and the straight leg draws fine lines for the arms. A toothpick or a wooden cocktail stick gives you thin lines and tiny dots, and the wooden end of a cotton swab or Q-tip makes larger dots or can be used to dab and soften. For the arms themselves, the tip of a toothpick or a bobby pin leg draws lines nearly as fine as a liner brush. The trick with any improvised tool is the same as with a real one: use a little paint, wipe off the excess, and redip often so the lines stay crisp. Beginners often get cleaner dots from a bobby pin than from a brush, so do not feel you are missing out.
Best Colors and Occasions for Snowflake Nails
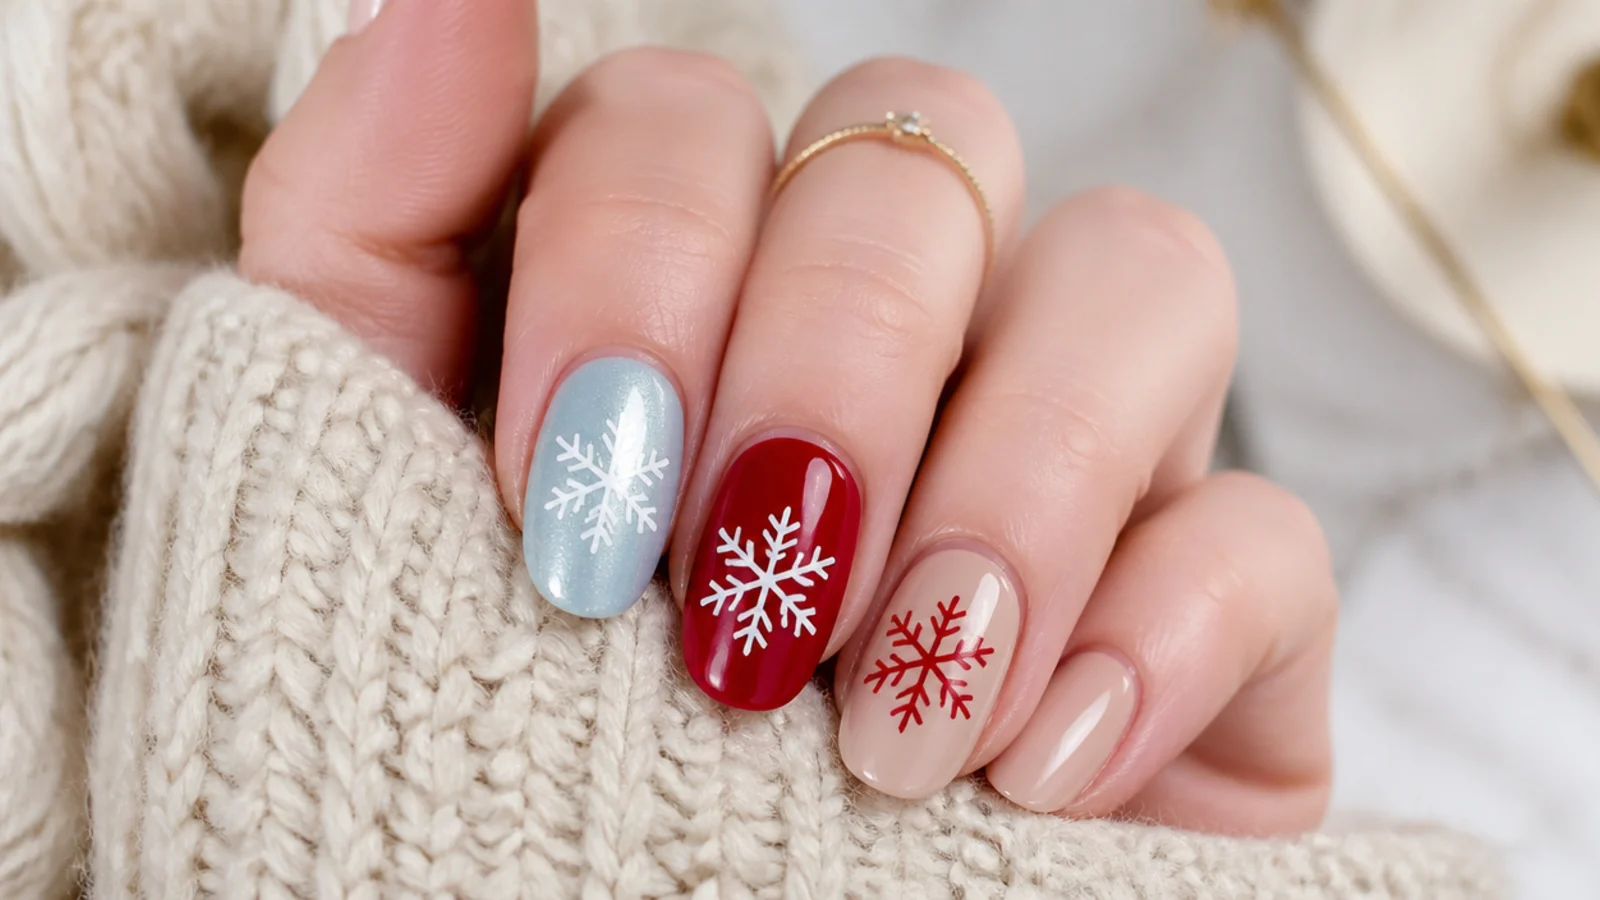
The base and snowflake color set the whole mood. Icy blue with a silver snowflake reads the most wintry and frosted, and it is the classic combination if you want the design to look cold and snowy. Red with a white snowflake feels festive and Christmassy, perfect for holiday parties and photos. Nude or a milky pale base with a fine white snowflake is the subtle, understated option that stays office-appropriate and works for work or a low-key look. Navy and black bases make white or silver snowflakes pop with high contrast for evening and New Year looks. As a rule, white snowflakes suit almost every base, while silver leans icier and glitzier. Match the base to the occasion: icy blue for wintry everyday, red for Christmas, nude for work, and dark bases with silver for parties and New Year's Eve.
Snowflake Nails for Short Nails
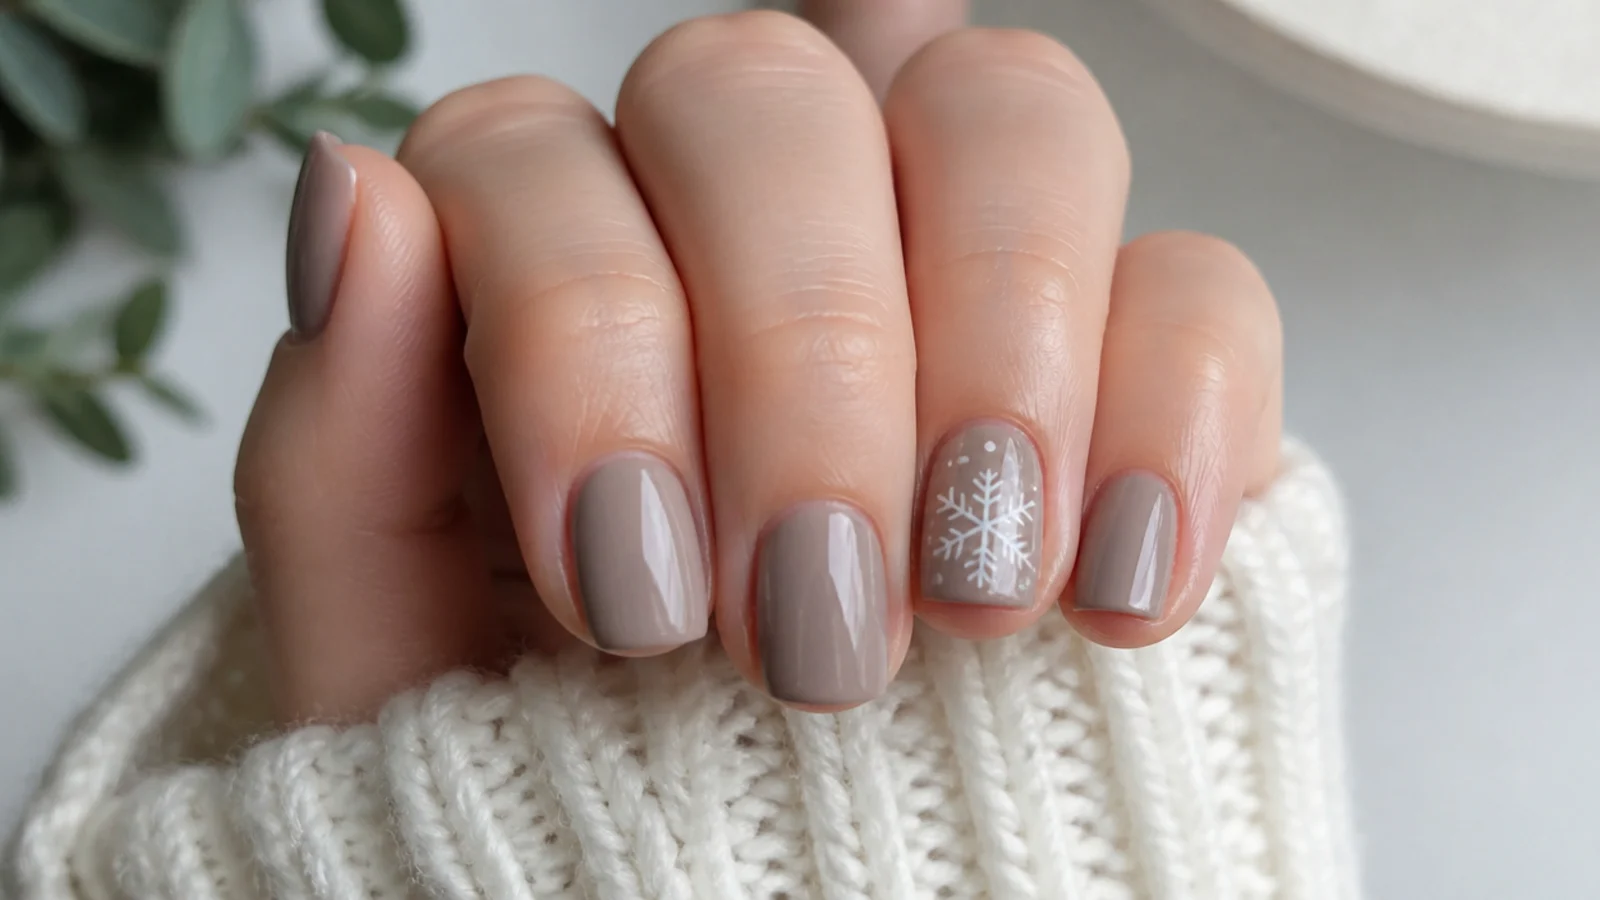
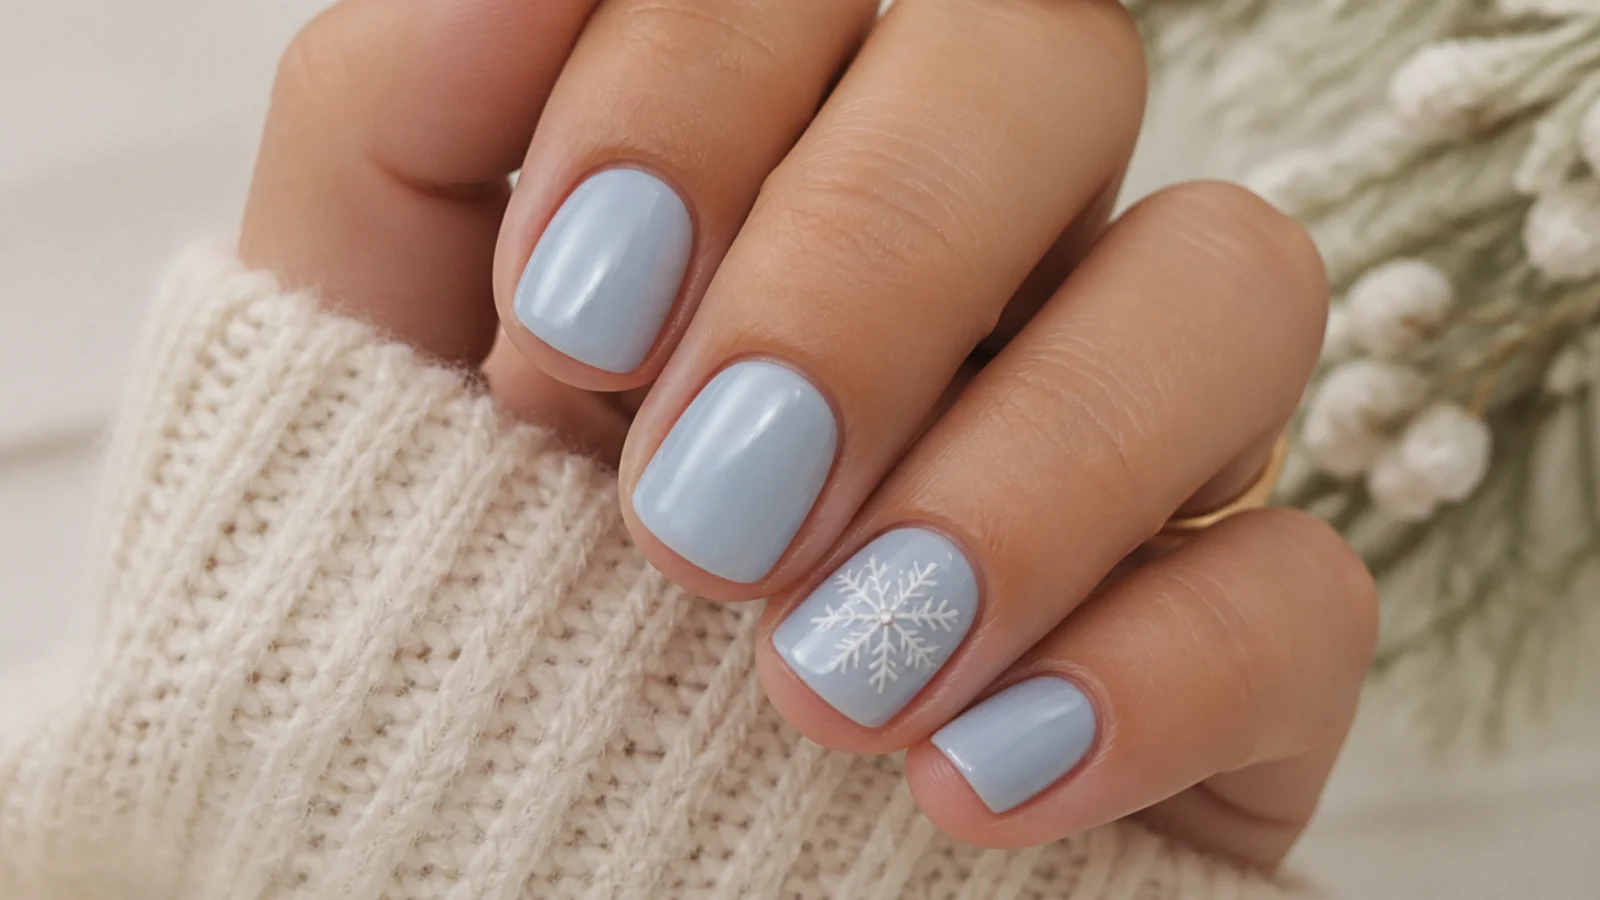
Short nails suit snowflake art beautifully as long as you scale it down. The best approach is a single accent snowflake on one nail - usually the ring finger - with the rest painted a solid winter base like icy blue, red or nude. One well-placed flake reads as intentional and elegant, while trying to cram a full detailed snowflake onto every short nail can look crowded. On the accent nail, keep the snowflake small and centered, and consider skipping the tiny branches for a cleaner minimal flake that fits the space. A scatter of tiny dots across the other nails, like falling snow, ties the set together without needing room for full designs. Almond or squoval shapes elongate short nails and give the flake a touch more canvas. Short nails also chip less at the tip, so your accent snowflake tends to last well.
Snowflake vs Christmas Nails
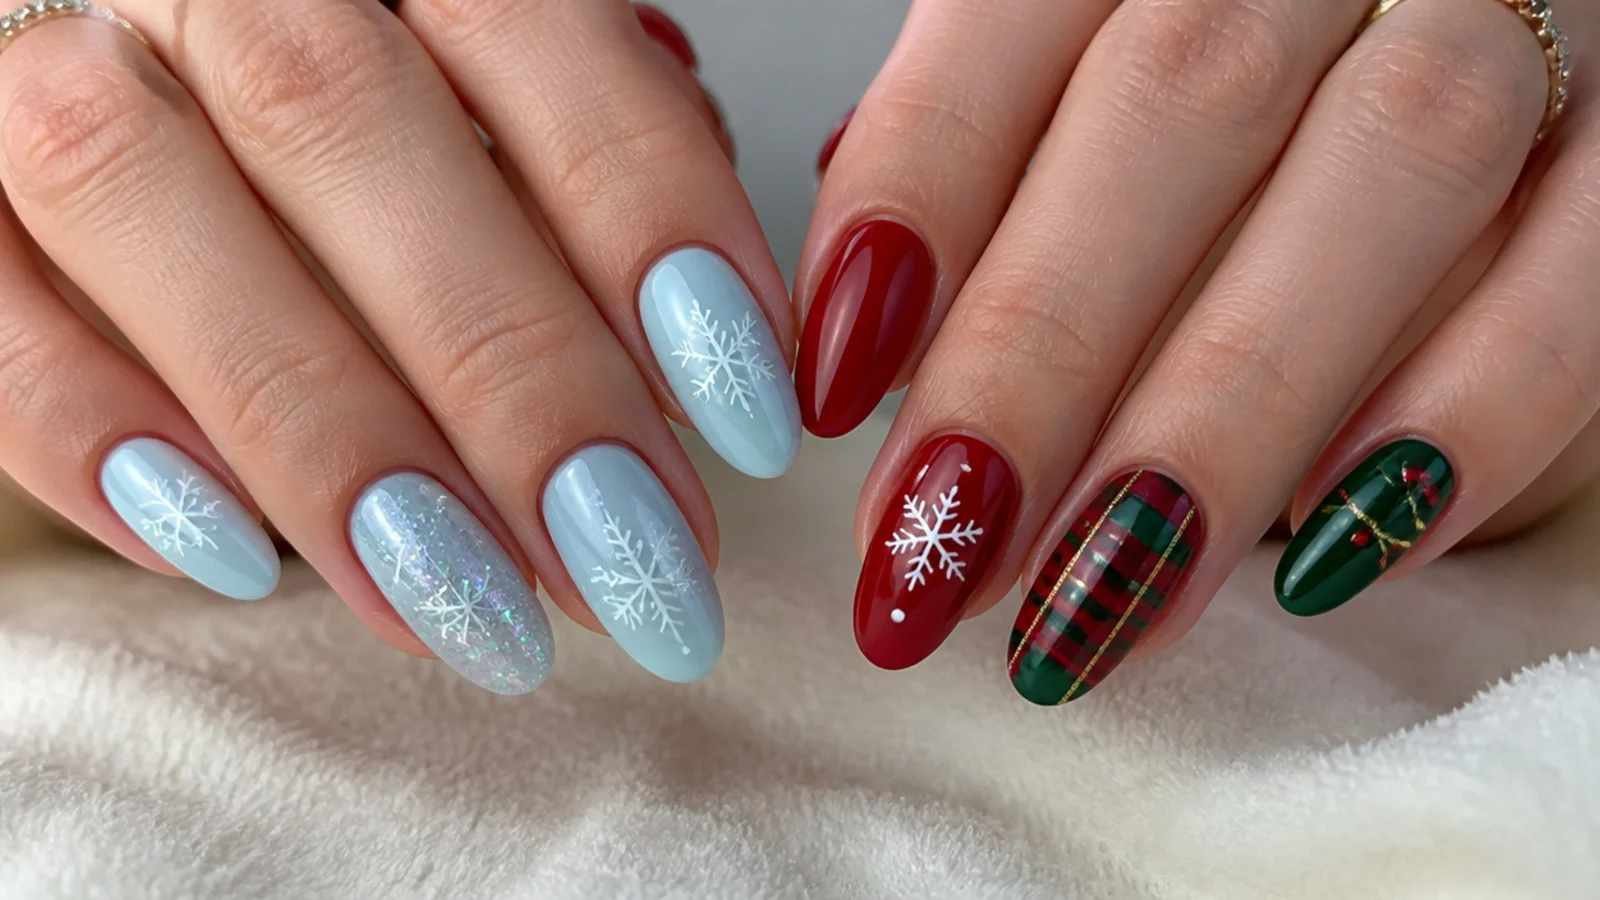
Snowflake nails and Christmas nails overlap but are not the same thing. Snowflake nails are a winter design centered on the snowflake motif, usually in white or silver over icy blue, navy, black or nude bases, and they read as cold and seasonal well beyond December - people wear them all winter, from November into January. Christmas nails are holiday-specific and lean into festive symbols and colors: red and green, gold, Santa, trees, candy canes, plaid and, yes, sometimes snowflakes. Think of snowflakes as one motif that can sit inside a Christmas set or stand alone as a general winter look. If you want something you can wear through the whole cold season, choose an icy blue or nude snowflake; if you want it tied to the holiday, put a white snowflake over a festive red base. The snowflake is the most versatile winter motif because it never looks tied to one single day.
How Long They Last and What They Cost

How long snowflake nails last depends on the base. In gel, a set holds about two to three weeks, and up to four with solid prep, a capped free edge and daily cuticle oil, while regular polish art chips in roughly 5 to 7 days. Cost at a salon runs about $30 to $55 for a gel manicure, with nail-art add-ons around $5 per accent snowflake nail, so a full winter set often lands near $35 to $55. Doing it at home with polish or a small gel kit is a modest one-time cost that pays back fast. To make it last, cap the free edge under top coat, wear gloves for chores, apply cuticle oil daily, and avoid using your nails as tools. When it is time to remove gel, file the shine, soak cotton in 100% acetone, wrap in foil 10 to 15 minutes, and gently push it off - never peel or pry, which takes layers of natural nail with it.
Frequently Asked Questions
How do you paint a snowflake on your nails?
Paint and dry your base color, then draw a thin plus sign in white or silver down and across the center. Cross it with two diagonal lines through the same point to make six even arms. Add two tiny branches near each arm tip, then dot every arm end and the center. Scatter a few extra dots like snow if you like, and seal with a top coat.
Can you do snowflakes without a dotting tool?
Yes. A bobby pin works best - the rounded head makes even dots and the leg draws fine arms. A toothpick or wooden cocktail stick gives thin lines and small dots, and the wooden end of a Q-tip makes larger dots. Use a little paint, wipe off the excess, and redip often, and your improvised tool works nearly as well as a real dotting tool.
Do you use white or silver for snowflakes?
Both work, and it depends on the mood. White snowflakes suit almost every base and give a clean, classic look, while silver leans icier and glitzier and reads more frosted, especially over icy blue, navy or black. Many people combine them - a white snowflake with a silver dot in the center or silver glitter tips for extra winter sparkle.
What colors suit snowflake nails?
Icy blue with silver is the most wintry, red with white is festive and Christmassy, and nude or milky bases with a fine white snowflake stay subtle and work-appropriate. Navy and black bases make white or silver flakes pop for evening and New Year looks. Match the base to the occasion: icy blue for everyday winter, red for the holidays, nude for the office.
Can you do snowflake nails on short nails?
Yes, and they look great scaled down. The best method is a single accent snowflake on one nail, usually the ring finger, with the rest a solid winter base. Keep the flake small and centered and skip the tiny branches for a cleaner minimal shape. A scatter of dots like falling snow across the other nails ties the set together without crowding the small surface.
Are snowflake nails hard to do?
No - they are one of the more beginner-friendly winter designs. A snowflake is just a plus sign crossed by two diagonals, with tiny branches and dots on the ends, so it is built from simple shapes rather than freehand skill. Keep your paint thinned and your tool lightly loaded, start with one accent flake, and the symmetry gets easier with every nail you paint.
How long do snowflake nails last?
In gel, a snowflake set lasts about two to three weeks, and up to four with good prep, a capped free edge and daily cuticle oil. Regular non-gel polish art chips faster, in about 5 to 7 days. To get the most wear, cap the free edge under top coat, wear gloves for chores, oil your cuticles daily, and avoid using your nails as tools.
When should you get winter nails done?
Winter and snowflake nails ramp up in early November, peak from late November through December around the holidays, and fade in early January. If you want them for a specific event like a Christmas party or New Year's Eve, book or paint them a few days before so they are fresh. In gel they last two to three weeks, so timing a set to cover the holiday stretch works well.
Gel application and removal, lamps, and 100% acetone should be used as directed. Curing gel improperly or force-removing it can damage your natural nails. For best results and nail health, see a licensed nail technician, and stop if you have any irritation or reaction.
Which snowflake nails look are you saving?
A beginner snowflake comes down to three moves: draw a plus sign, cross it with two diagonals, and dot the ends. Keep your white or silver paint slightly thinned so the lines stay fine, work one nail at a time before the polish skins over, and start with a single accent snowflake if your nails are short. Seal everything under a top coat so the design does not chip, and finish with cuticle oil. Your first snowflake may look a little uneven - that is normal, and the symmetry gets easier every nail. Build the set in gel for two to three weeks of wear, never peel or pry it off, and see a nail tech if you notice any irritation. Save this guide and paint a few practice flakes before your holiday set.