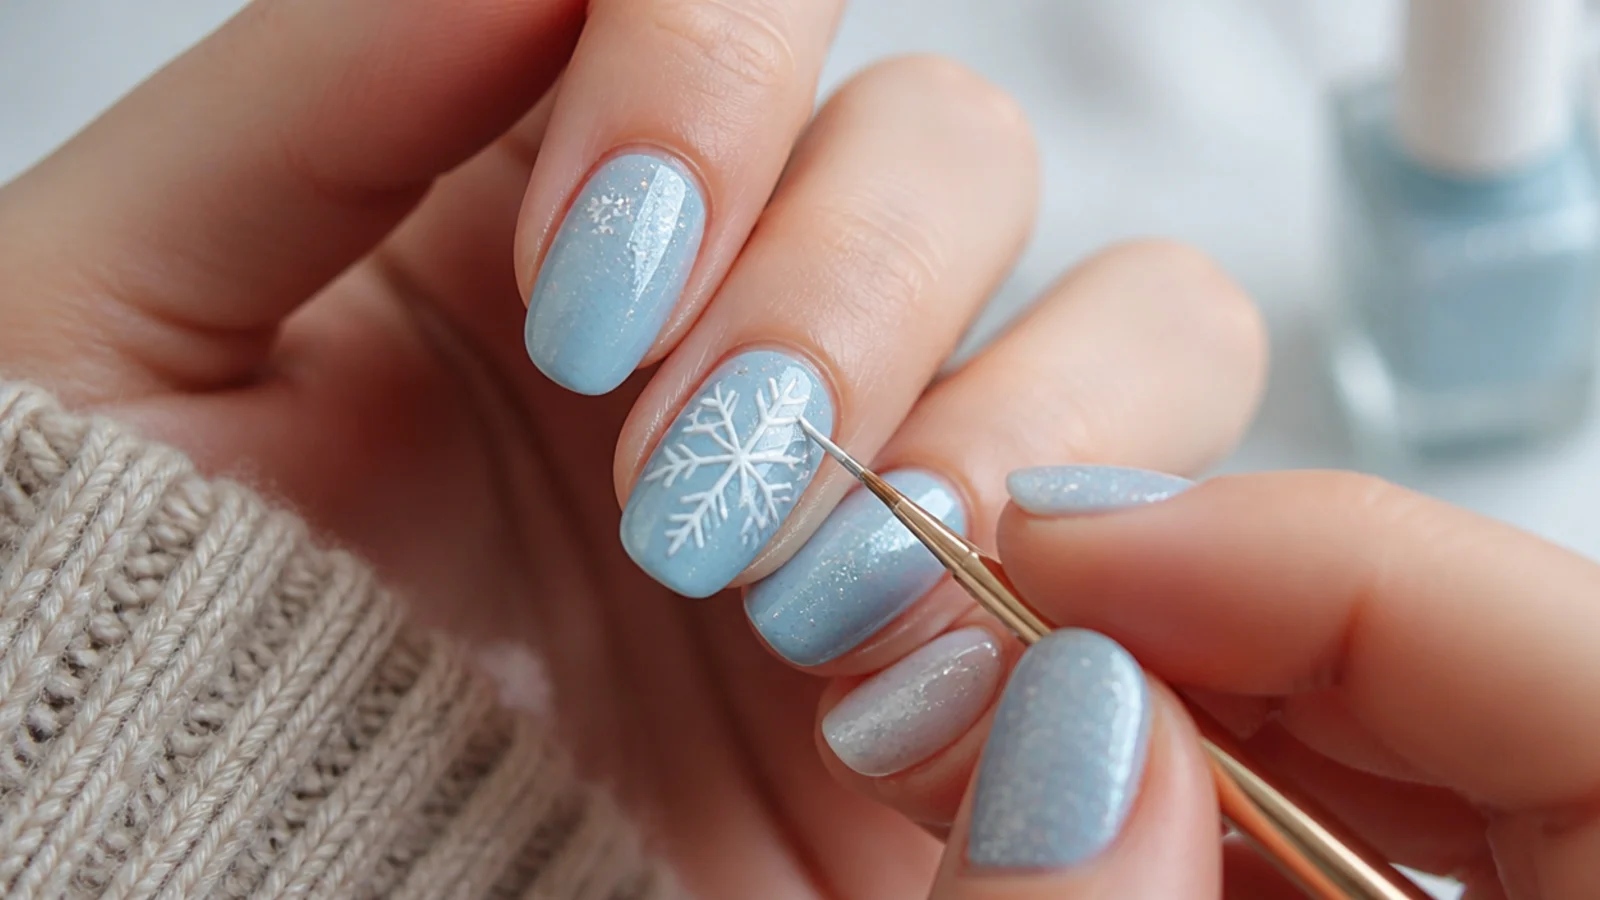
1. Prep and Shape Your Nails

Start with clean, dry nails. Push back the cuticles, lightly buff the surface to a matte finish so polish grips, shape the free edge, and wipe with a lint-free wipe and alcohol so no oils remain. Good prep is what keeps a set from lifting or chipping early, and a smooth surface makes thin snowflake lines far easier to draw.
Common mistake: Leaving oils or cuticle on the nail causes lifting and early chips - always cleanse before you start.
Pro tip: Buff only lightly; over-buffing thins and weakens the natural nail.
2. Apply Base Coat and Cure
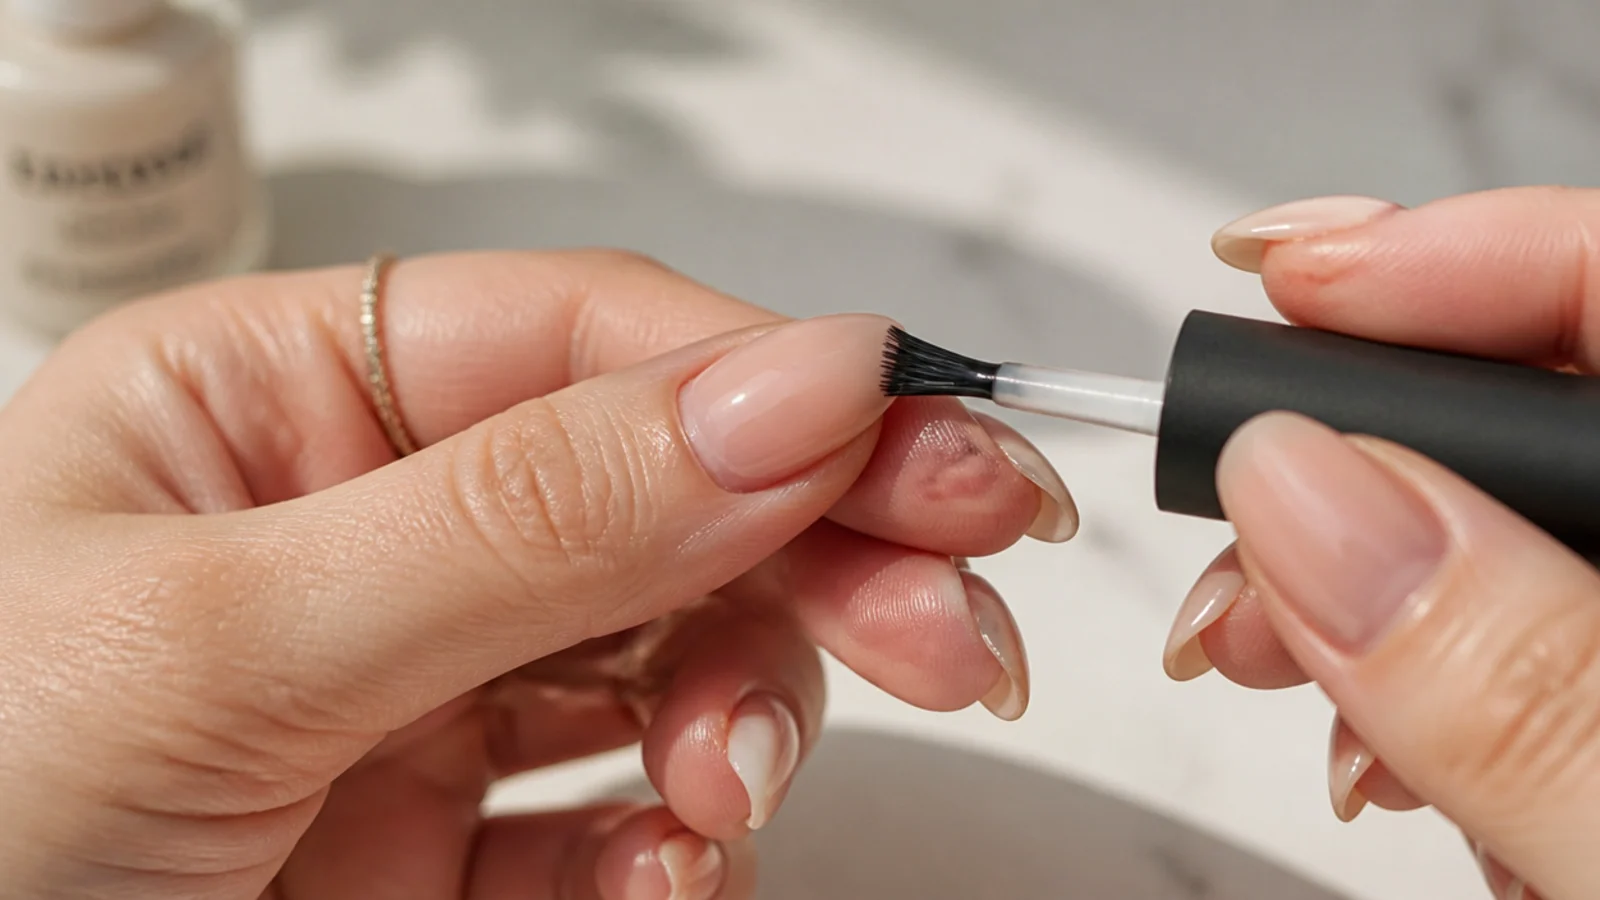
Brush on a thin, even gel base coat and cap the free edge by running the brush along the tip. Cure under your lamp as directed, typically about 30 to 60 seconds under LED or roughly 2 minutes under UV. The base coat protects your natural nail and gives the color underneath something to hold onto, which is what stops early lifting.
Common mistake: Skipping the base coat or applying it thick leads to lifting and a weak foundation for the color.
Pro tip: A quality base coat is the single best product for preventing damage and lifting.
3. Paint Your Winter Base Color
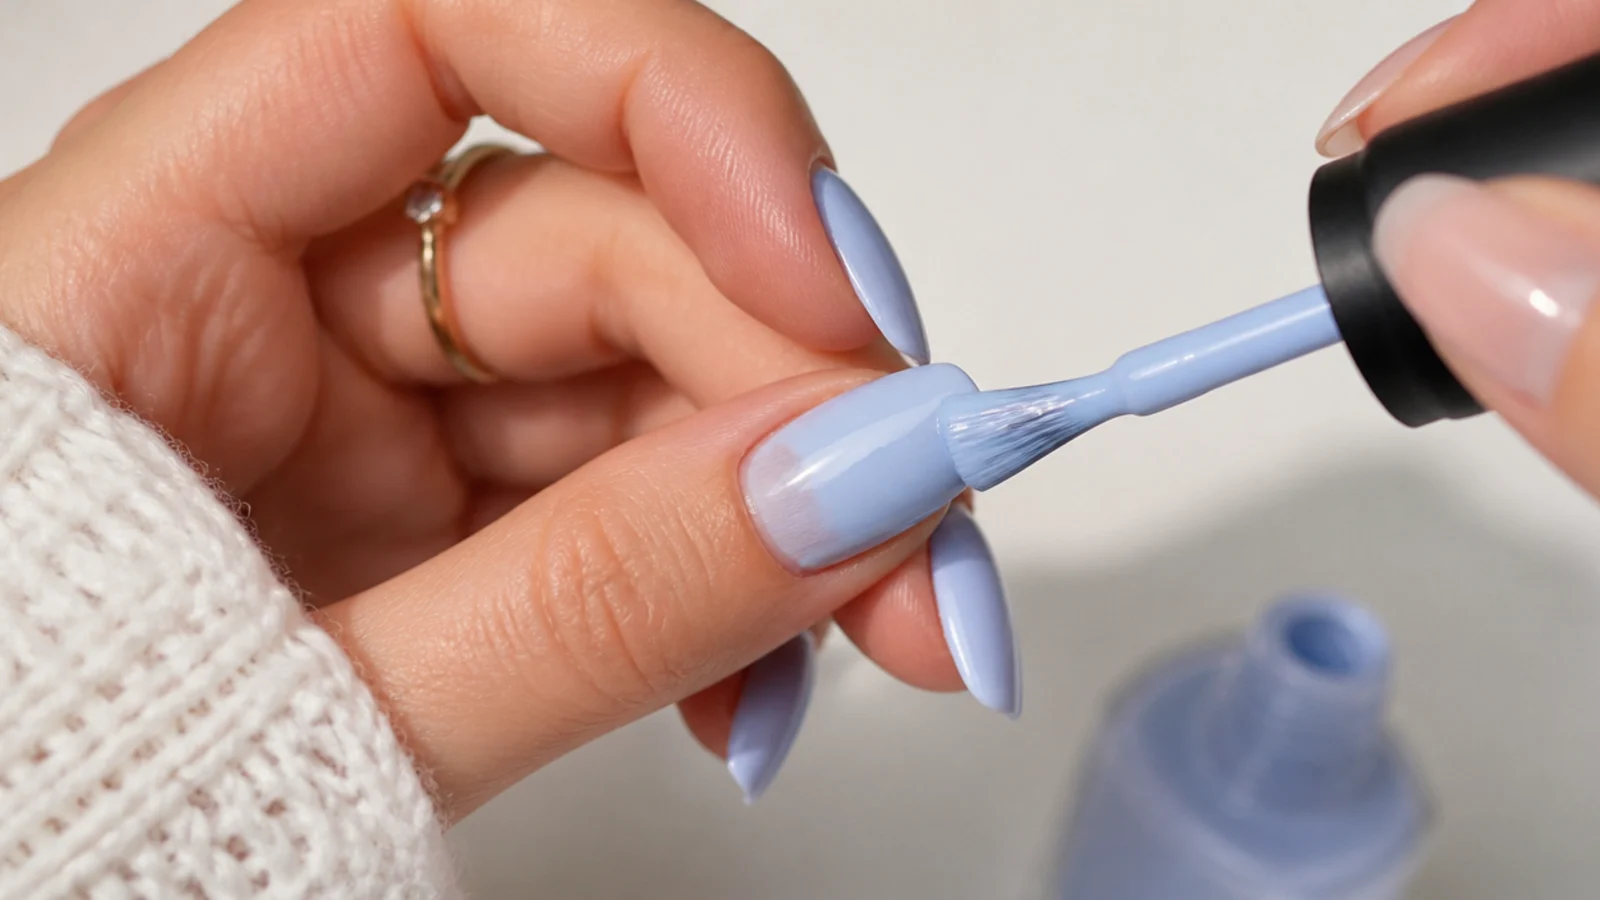
Paint one or two thin coats of your cold base color over the whole nail, curing each for about 30 to 60 seconds under LED. Icy blue and silver read the most wintry, navy and deep red feel festive, black makes white pop hardest, and a milky nude keeps it subtle for work. Let the base be fully opaque and smooth before you draw, since snowflakes need a clean canvas.
Common mistake: Thick, streaky color coats look patchy and make thin white lines skip - always build with thin layers.
Pro tip: Choose your snowflake color to contrast the base: white or silver over blue, navy, red or black.
4. Plan Your Snowflake Placement
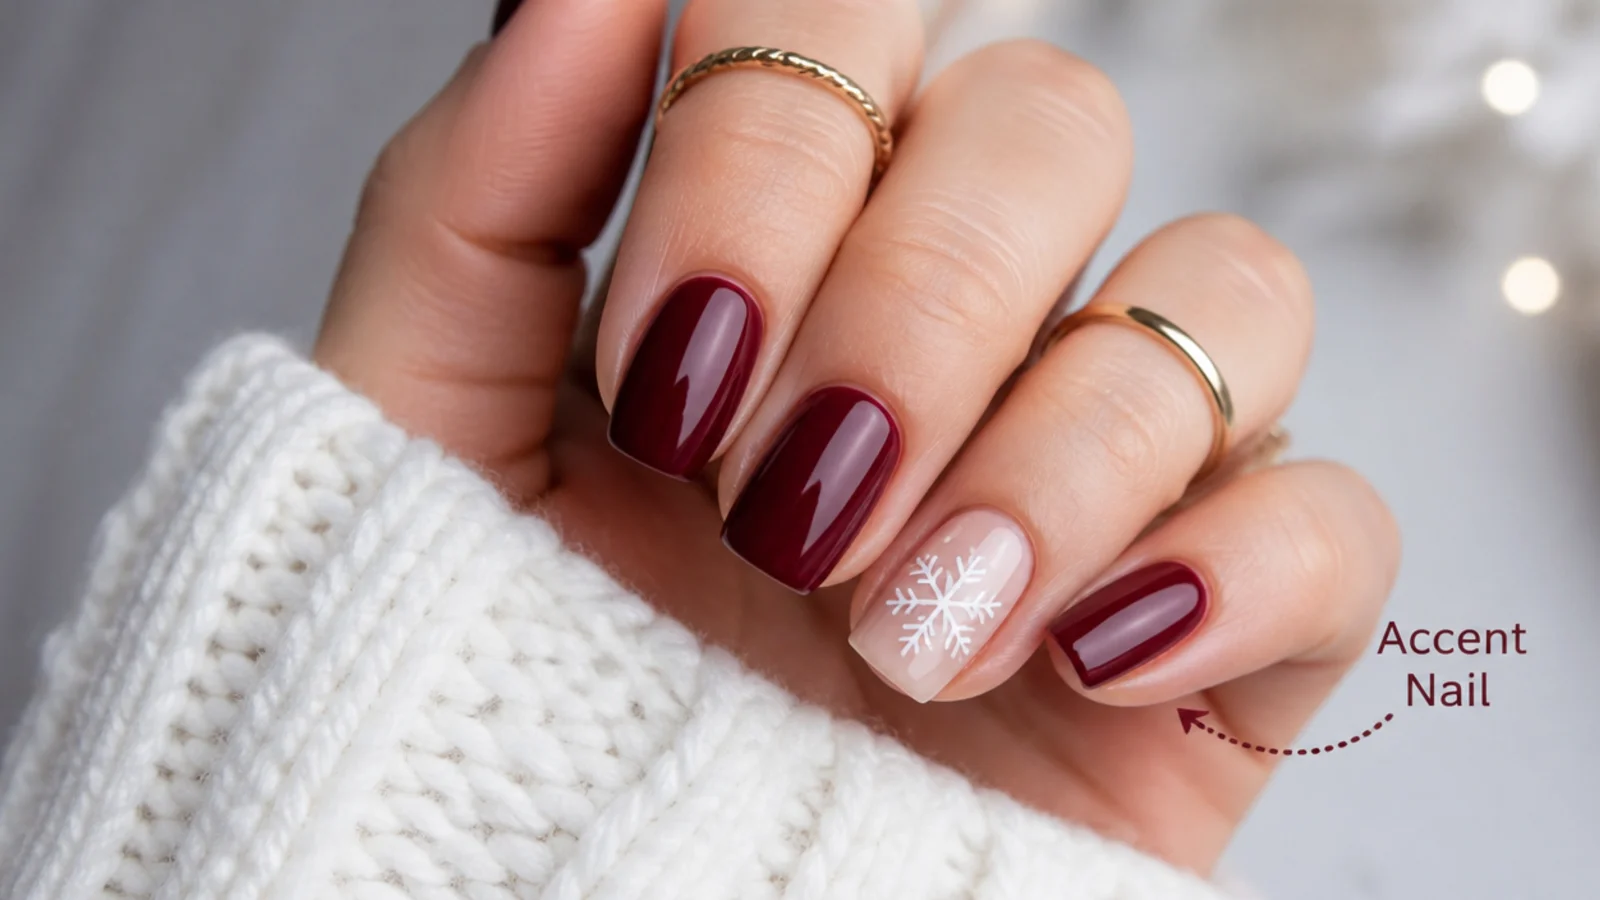
Decide where the snowflakes go before you touch a brush. A single snowflake centered on one accent nail is the cleanest look and the easiest to keep neat, especially on short nails. For a fuller set, place one large flake per nail or scatter a few small ones with dots between them. Picturing the layout first stops you crowding the arms or running out of room near the cuticle.
Common mistake: Starting a snowflake too high or off-center leaves no space for the arms and looks lopsided.
Pro tip: On short nails, do one accent snowflake nail and keep the rest solid - it reads intentional, not empty.
5. Draw the Snowflake Cross
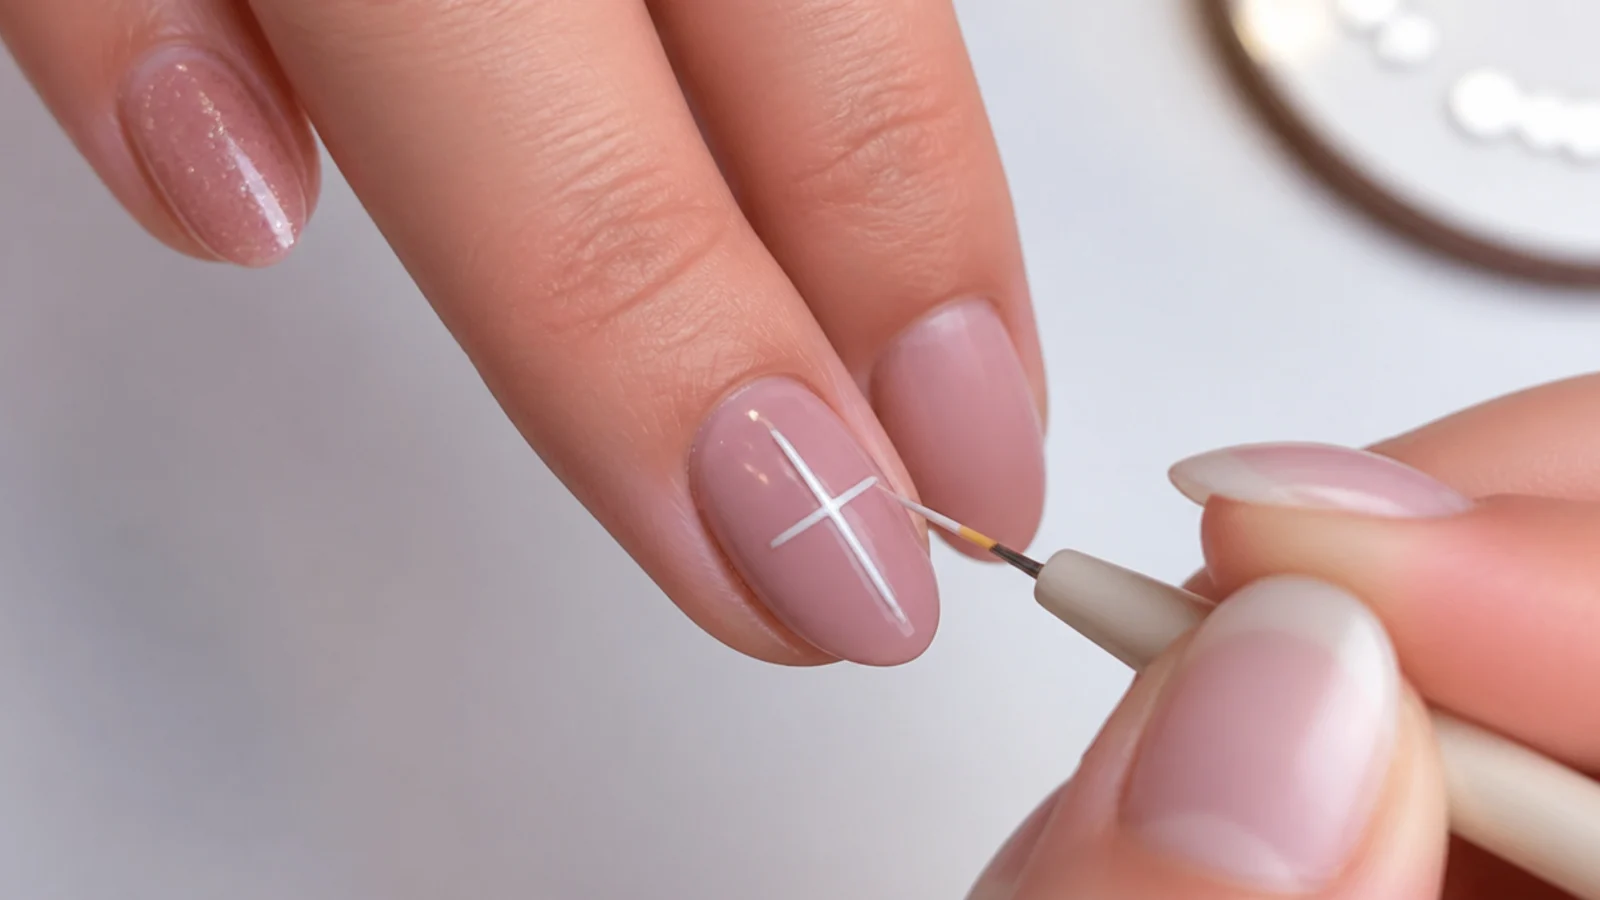
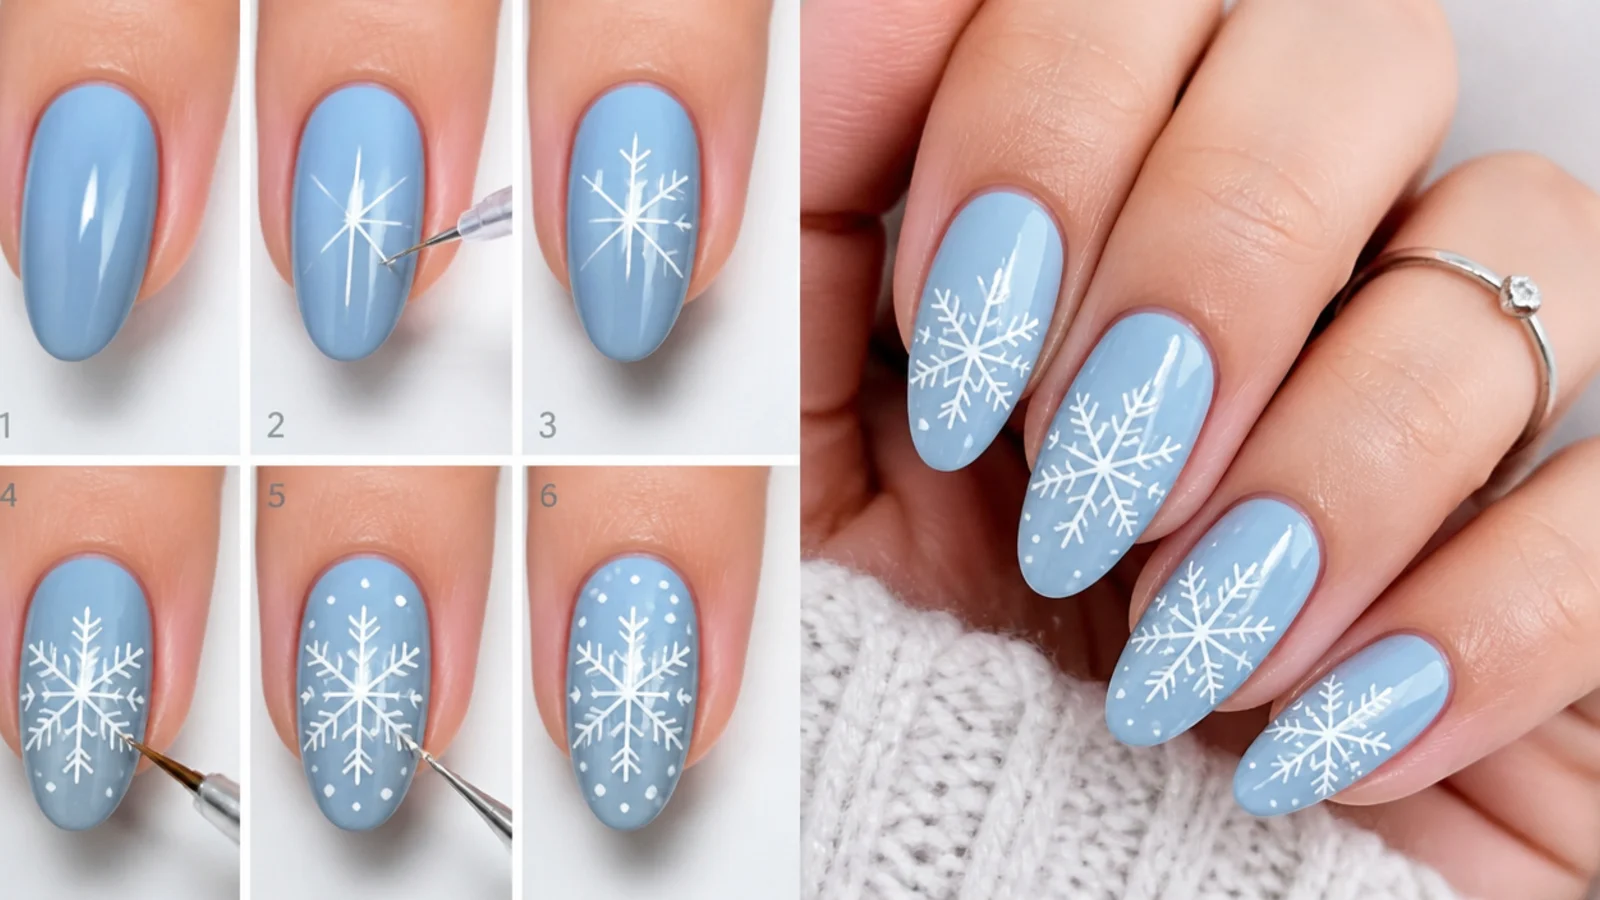
Load a fine liner brush or dotting tool with white or silver polish and draw a thin vertical line down the center of the nail, then a matching horizontal line across it to form a plus sign. Keep both strokes thin and even - this cross is the skeleton every arm builds on, so straight, centered lines here make the whole flake look symmetrical. Wipe excess polish off the tip first so the line does not go thick.
Common mistake: A thick or wobbly cross throws the whole snowflake off - thin, steady lines are the foundation.
Pro tip: Steady your painting hand on the table and pull each line in one smooth stroke rather than dabbing.
6. Add the Two Diagonal Arms
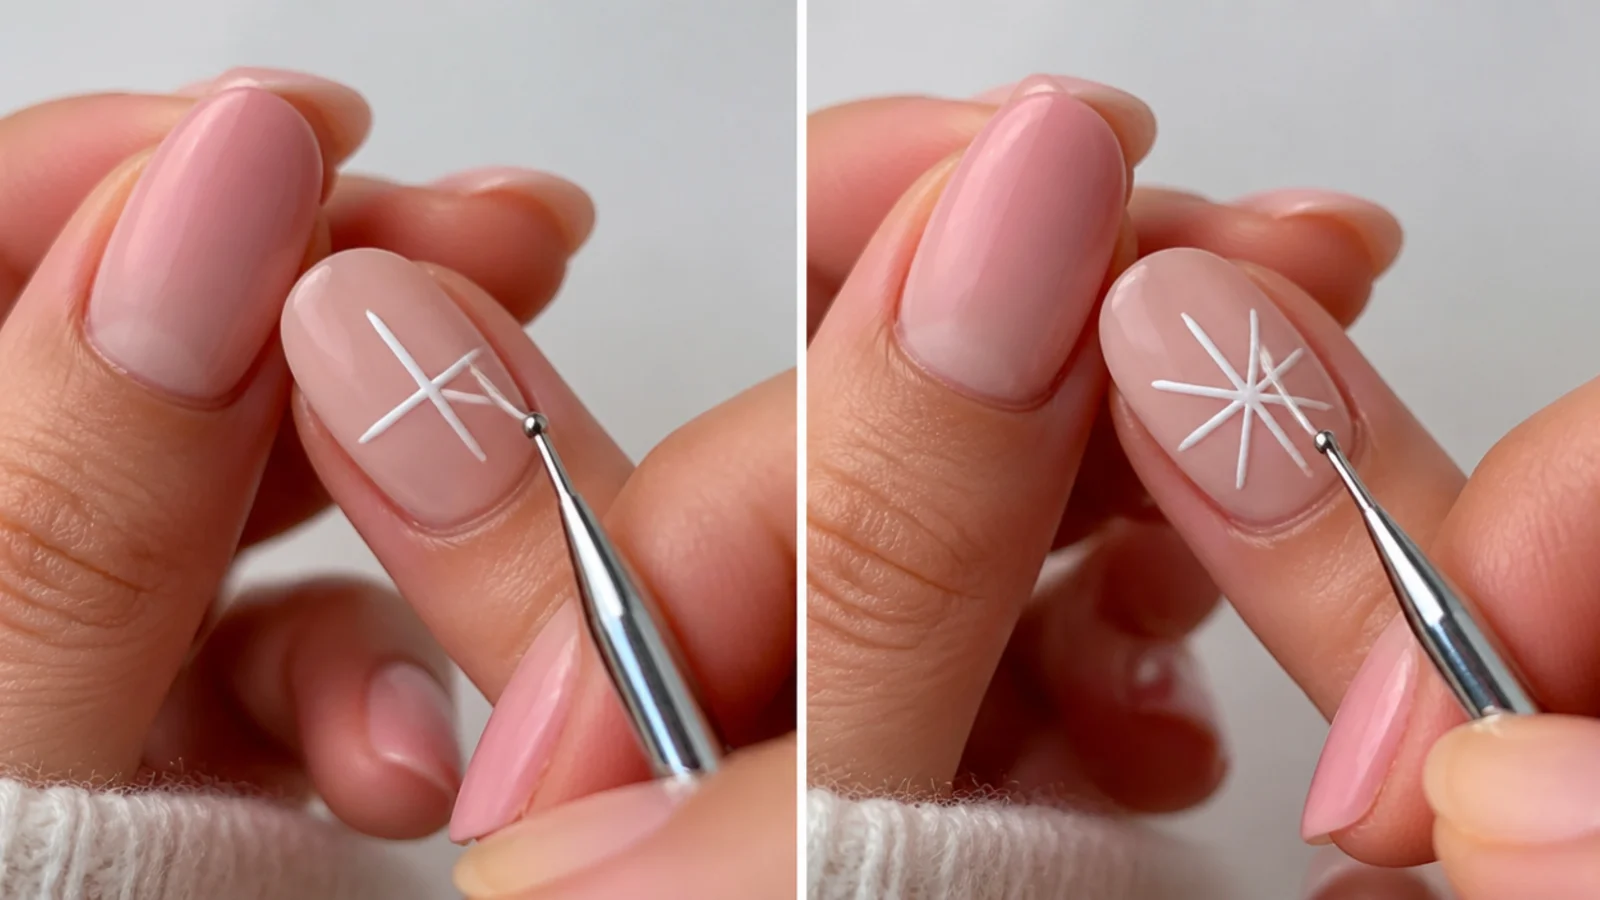
Draw two diagonal lines through the center of the cross, crossing at the same middle point, so you end up with six evenly spaced arms like an asterisk. Aim to split the gaps evenly between the vertical and horizontal lines. This six-arm shape is what makes it read as a real snowflake rather than a plus or a star, so take your time keeping the angles balanced around the center.
Common mistake: Uneven or too-few arms make it look like a star or a plus instead of a snowflake - aim for six even arms.
Pro tip: Think of a clock and place arms toward 12, 2, 4, 6, 8 and 10 for even spacing.
7. Dot the Arm Ends and Center
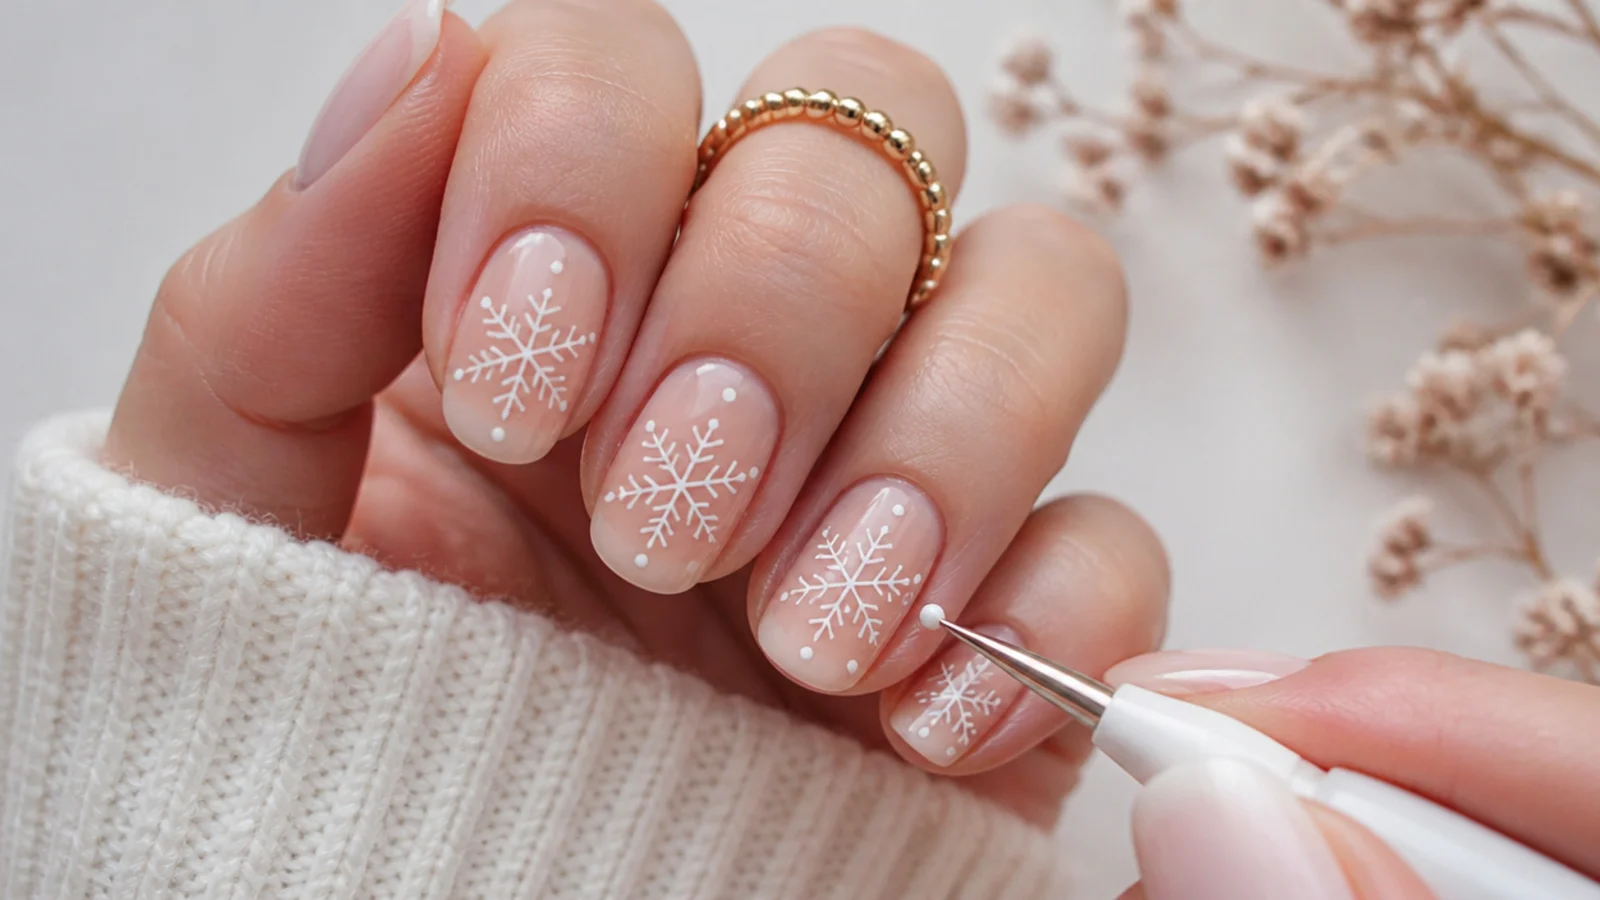
Using a dotting tool or the tip of your brush, place a small dot at the end of each of the six arms, a dot in the center, and optional tiny dots partway along each arm for extra detail. These dots are what give a snowflake its lacy, crystalline feel. Keep them small and consistent in size so the flake looks delicate rather than heavy or blobby around the edges.
Common mistake: Oversized or uneven dots make the snowflake look clumsy - keep every dot small and matched.
Pro tip: No dotting tool? A toothpick, the head of a bobby pin, or a Q-tip tip all place clean dots.
8. Add Optional Sparkle and Accents
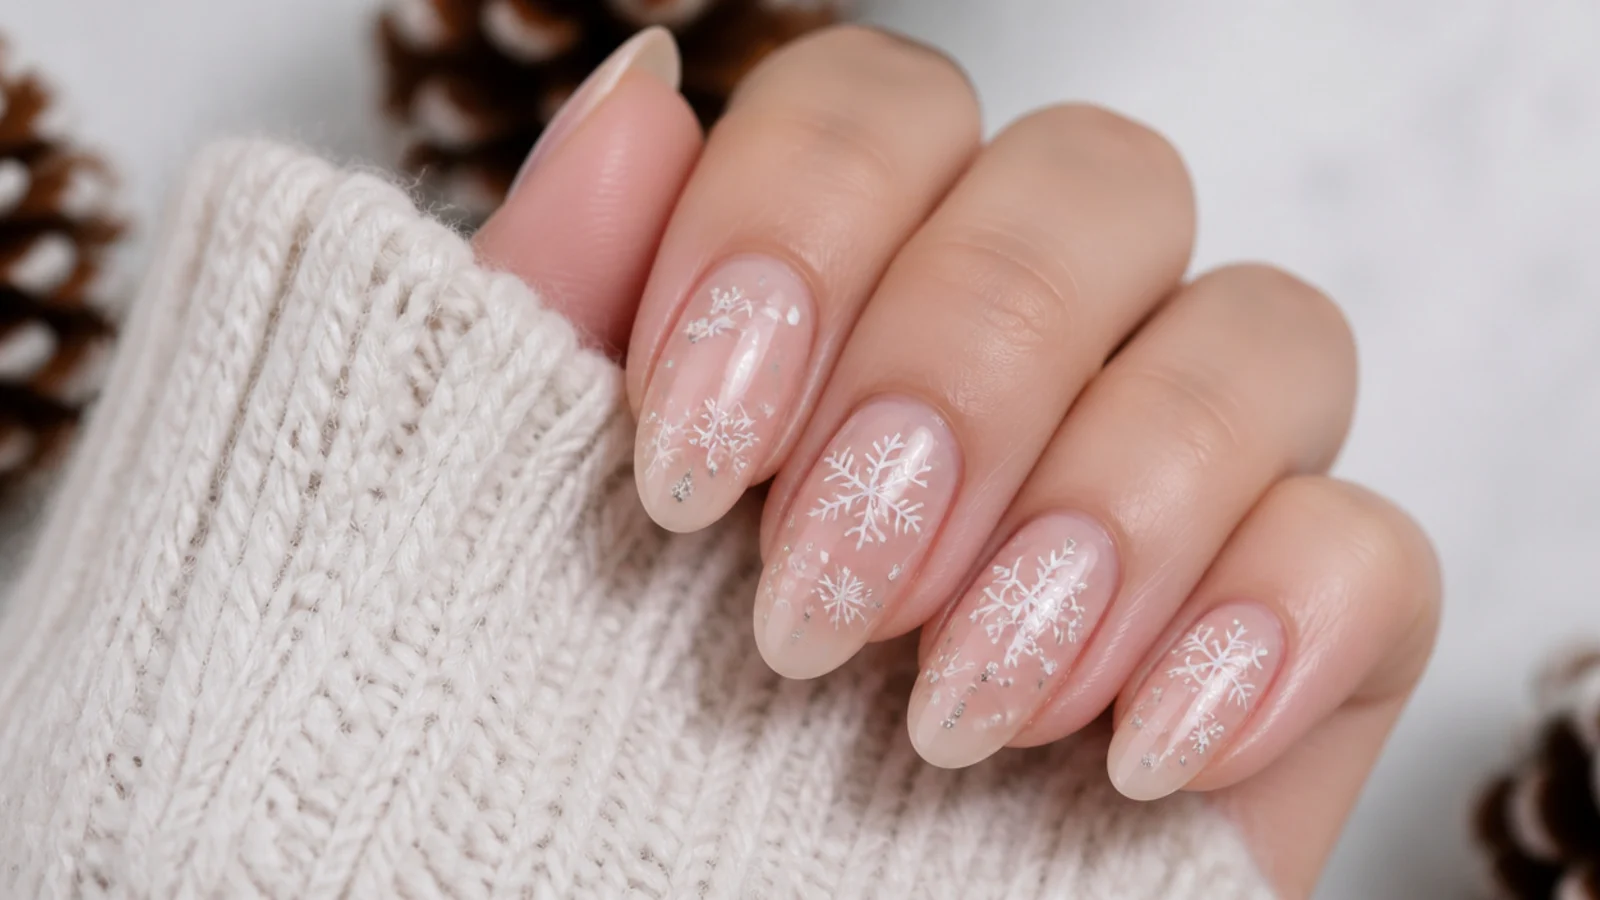
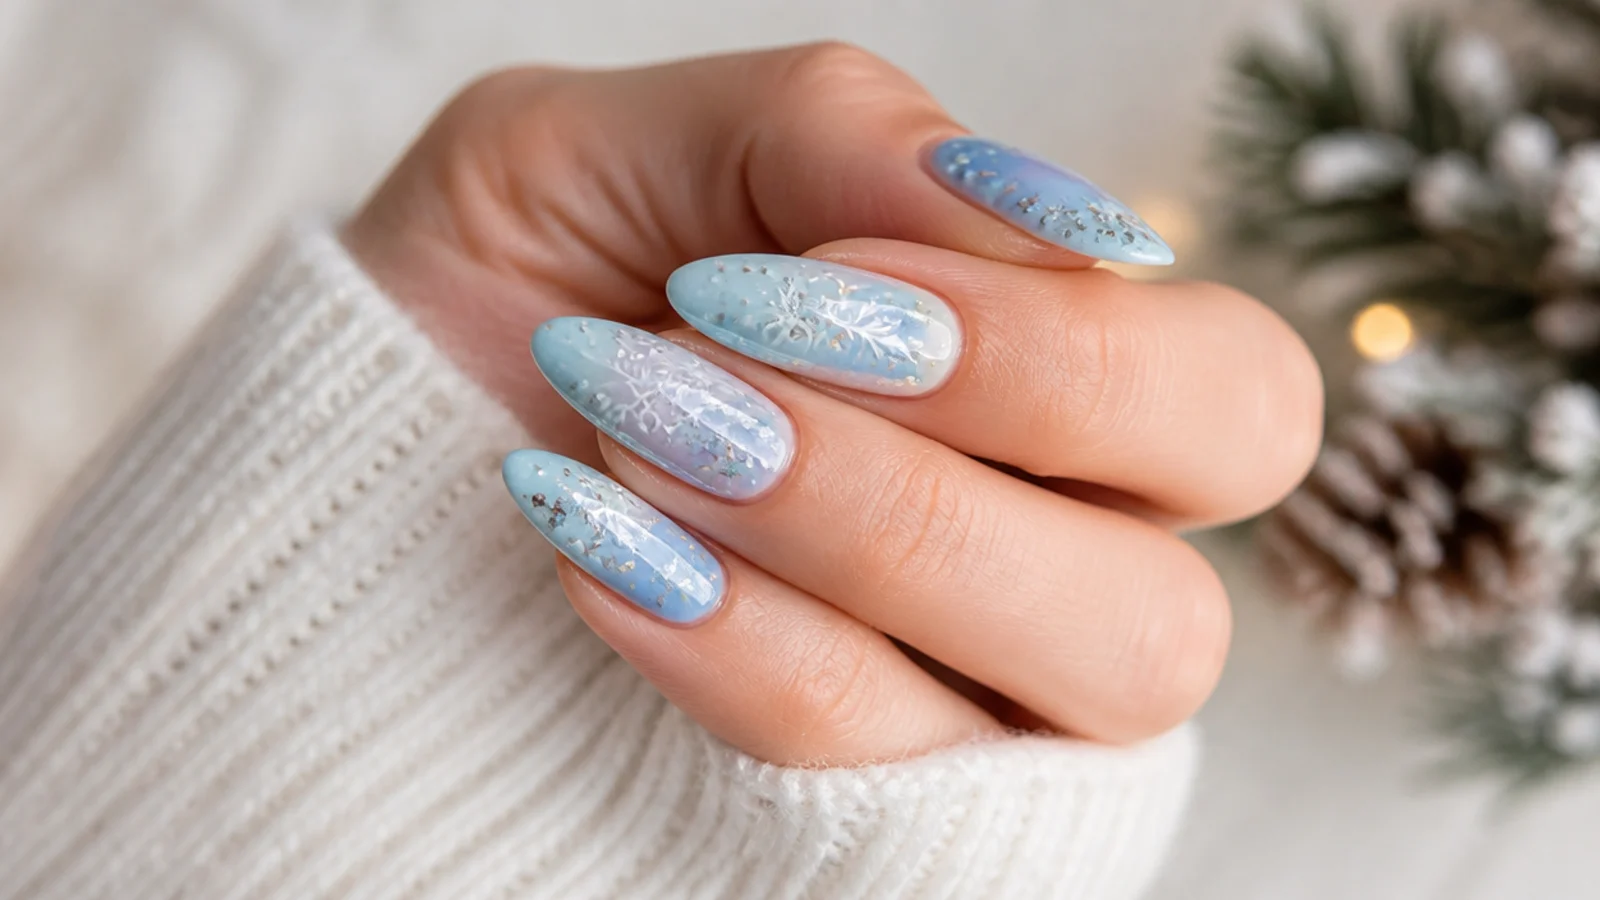
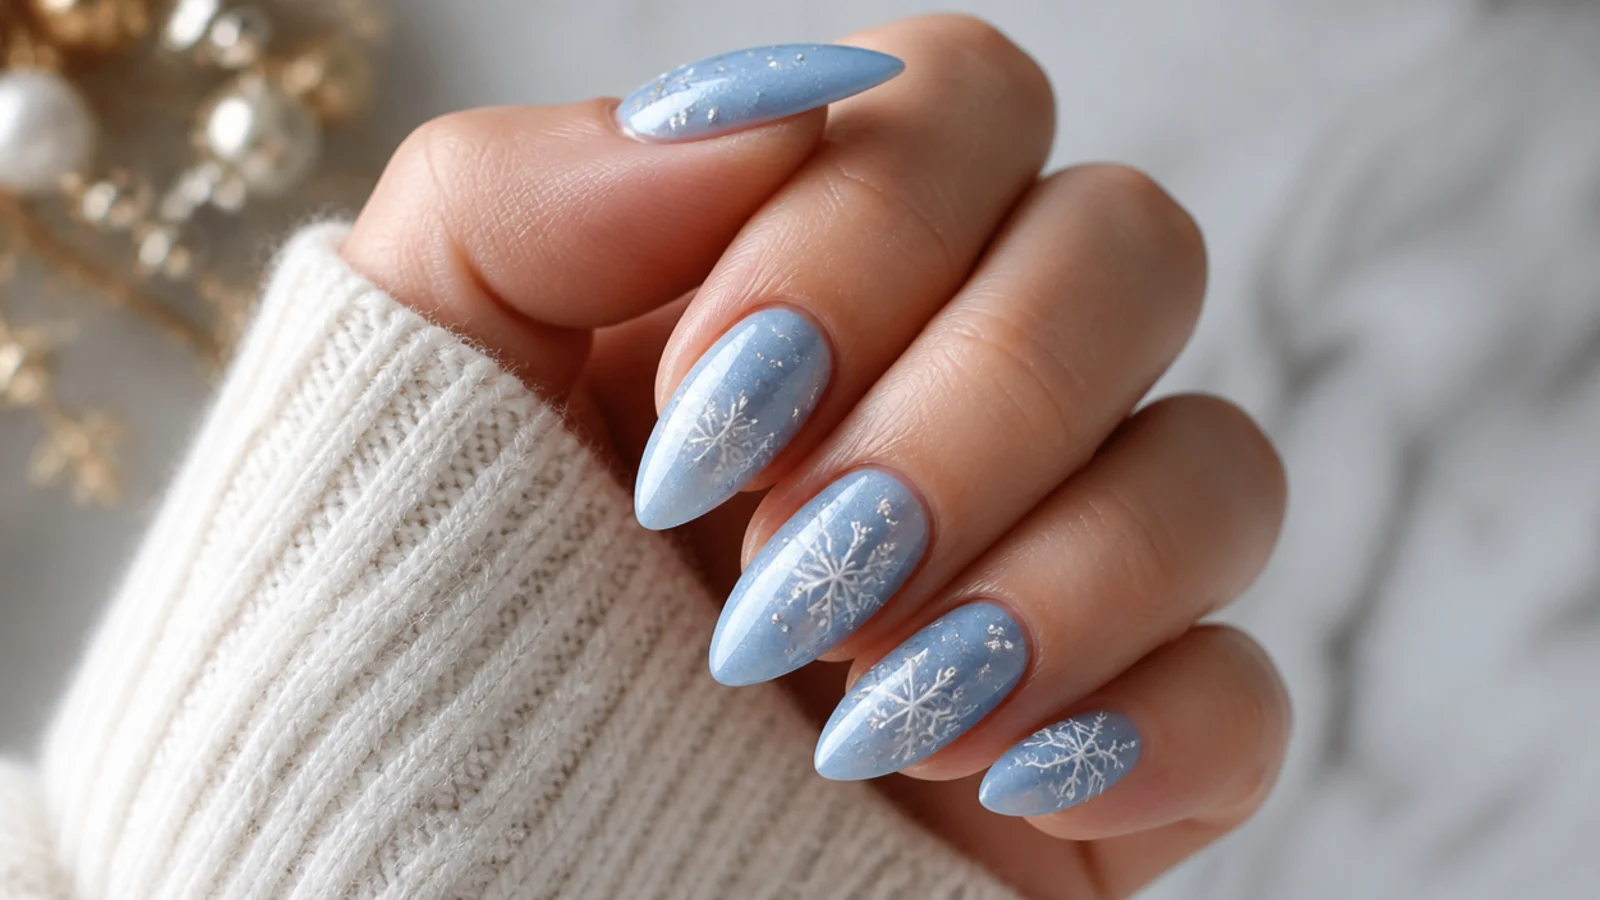
For extra winter magic, scatter a few tiny dots or fine silver glitter around the snowflakes to look like falling snow, or add a small rhinestone at the center of an accent flake. Keep accents sparse so the snowflake stays the star. This step is optional - a clean white flake on an icy base is beautiful on its own - but a little sparkle pushes it toward festive Christmas territory.
Common mistake: Piling on glitter and rhinestones buries the snowflake - a few scattered accents beat a crowded nail.
Pro tip: Place any rhinestone into a fresh dot of gel and cure it fully so it stays put for weeks.
9. Seal With Top Coat, Cure and Oil
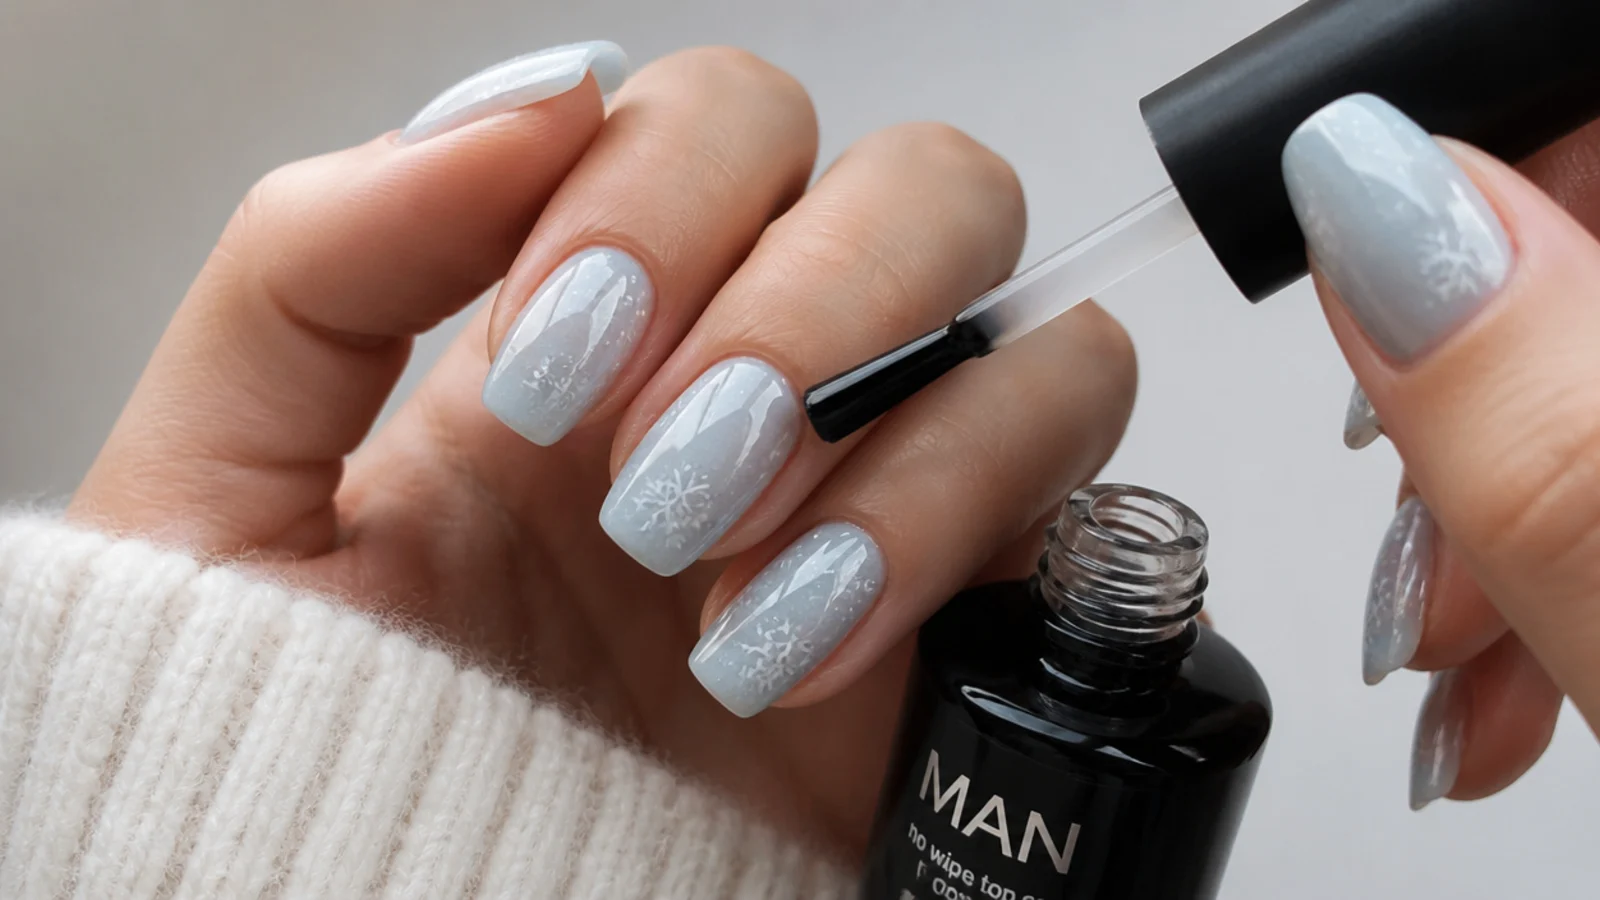
Once the design has set enough not to smudge, brush a no-wipe gel top coat over the whole nail and cap the free edge by running it along the tip, then cure for about 30 to 60 seconds under LED. Capping the edge is what keeps the snowflakes from chipping early. Wipe off any sticky residue if needed, then massage cuticle oil around each nail to finish and protect the skin.
Common mistake: Forgetting to cap the free edge lets the design chip and peel back within days.
Pro tip: Daily cuticle oil keeps the set flexible and stretches it closer to the full three weeks.
Supplies You Need for Snowflake Nails
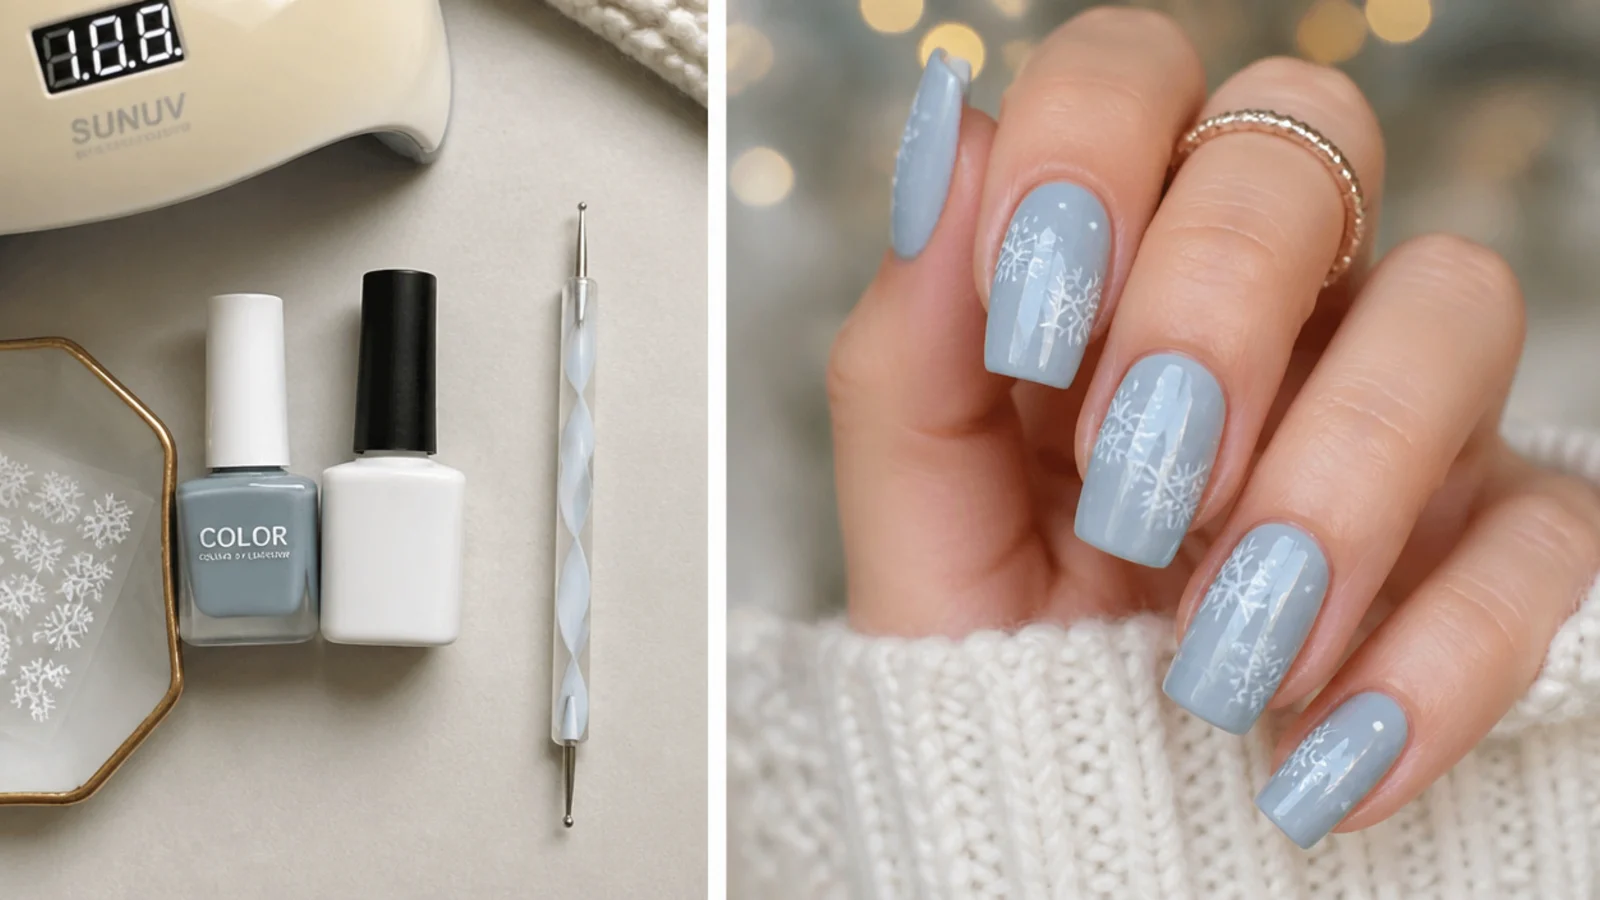
Snowflake nails use standard gel-manicure supplies plus one fine tool for the art. You will need a gel base coat, a cold base color - icy blue, navy, deep red, black or milky nude - a white or silver polish for the flakes, and a no-wipe gel top coat. For curing you need an LED or UV lamp. For the snowflake itself, a fine liner brush or a dotting tool gives you thin lines and even dots, but you do not have to buy either: a toothpick, a bobby pin or a Q-tip tip all draw clean dots in a pinch. Round out the kit with cuticle oil for finishing and 100% acetone with cotton and foil for removal. Optional extras like fine silver glitter or small rhinestones add falling-snow sparkle. A small starter kit runs a modest one-time cost and pays back fast against salon prices.
Snowflake Nails Without a Dotting Tool
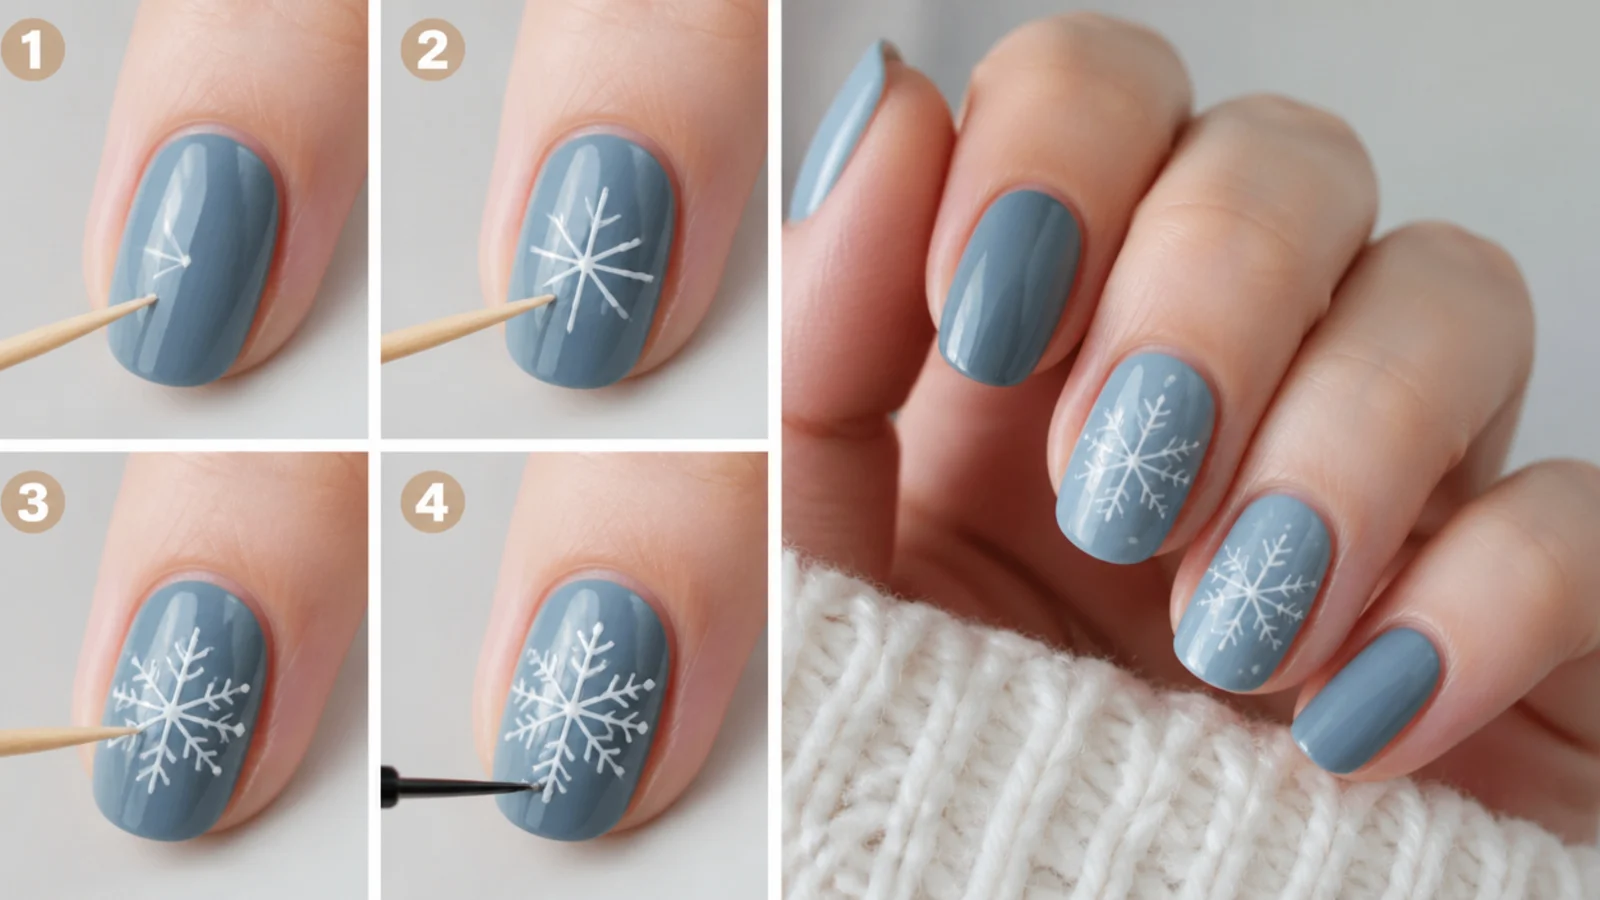
You do not need special gear to draw a snowflake. The lines come from any fine point - the tip of a thin liner brush, a toothpick, or even a cocktail stick dipped in white polish. For the dots on each arm, the rounded head of a bobby pin makes a perfect small circle, and a toothpick tip makes an even tinier one, so you can vary dot sizes with two household objects. A Q-tip works for softer, larger dots. Just dip the tool, wipe off the excess, and dab or drag. The technique is identical to using a store-bought dotting tool: draw the cross, add two diagonals for six arms, then dot the ends and center. If lines come out thick, your tool is holding too much polish - wipe it back and reload often. Household tools are actually easier for beginners because you control exactly how much polish reaches the nail.
Best Colors and Occasions for Snowflake Nails
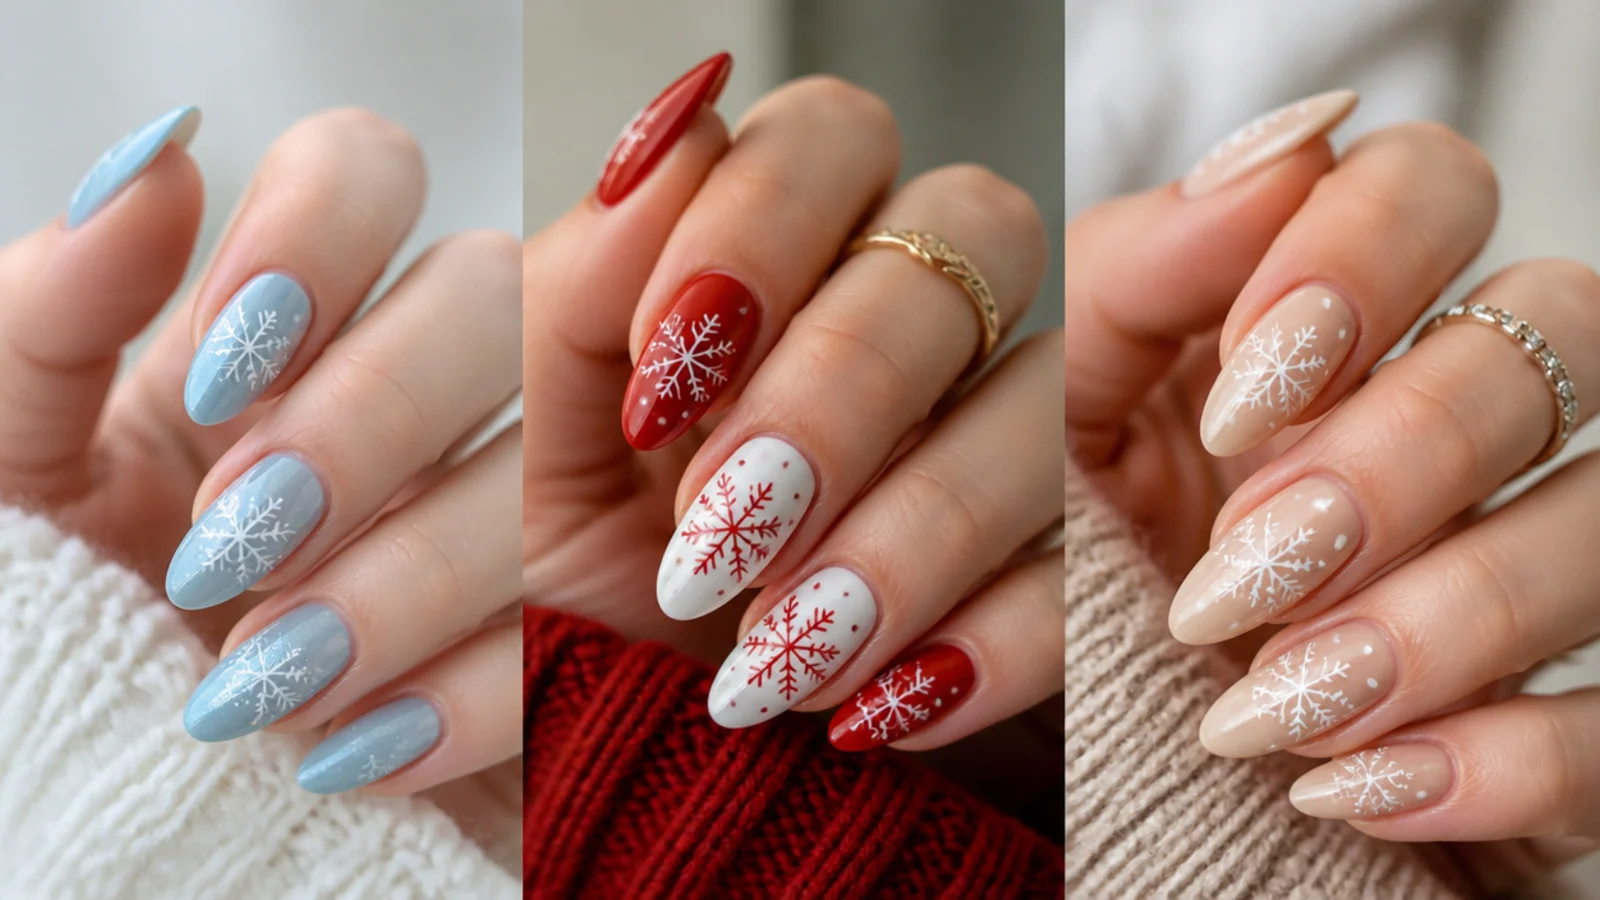
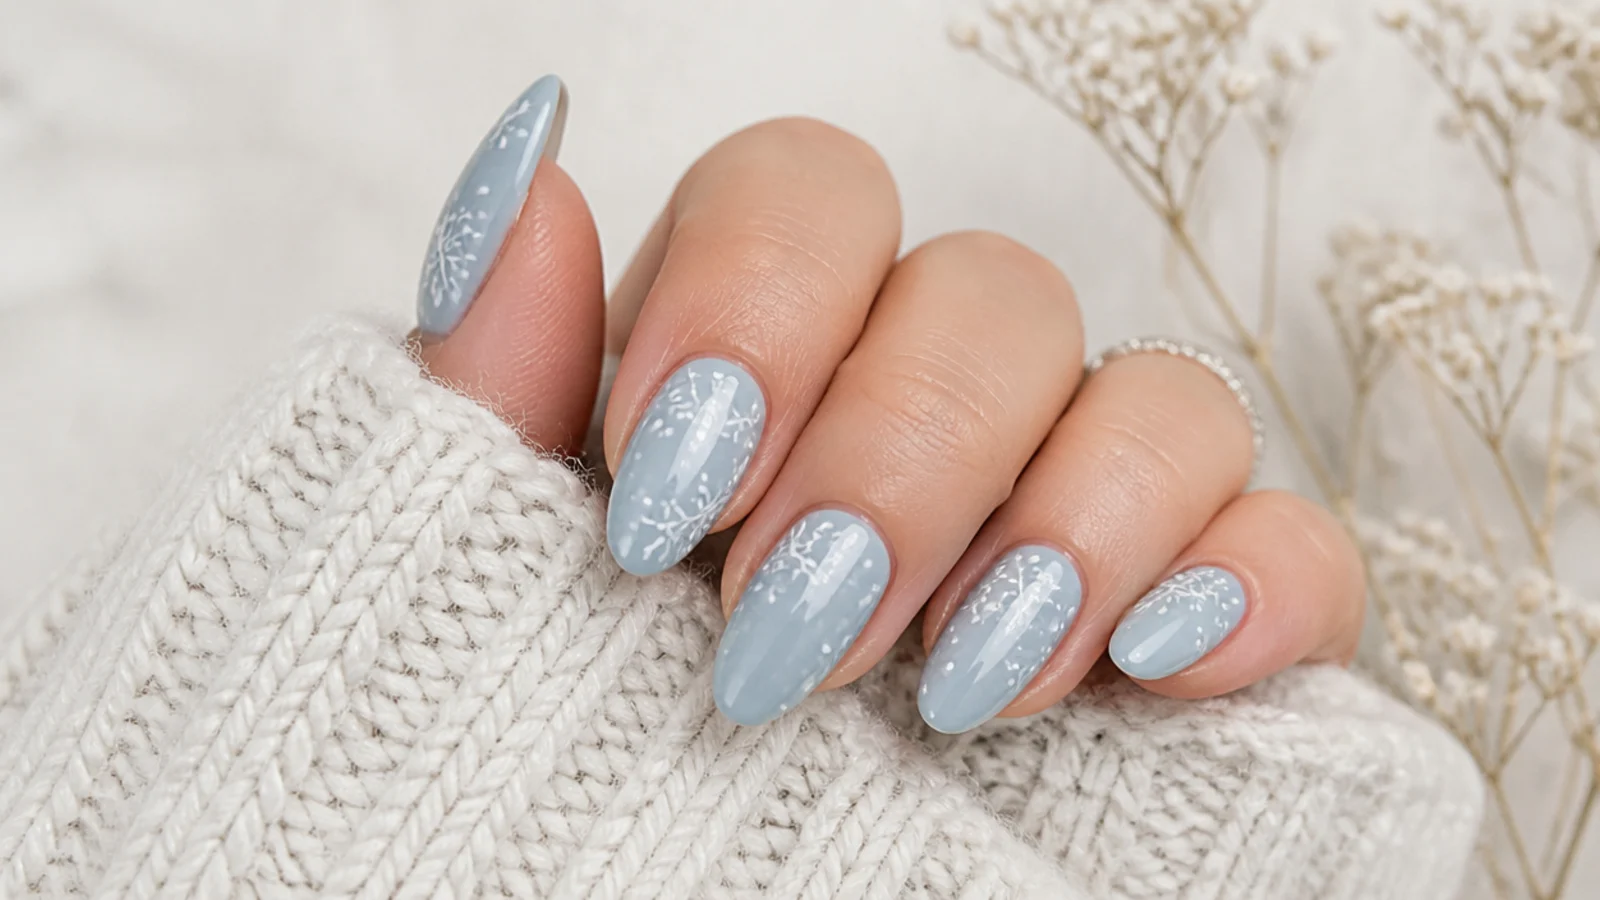
The base color sets the mood. Icy blue with silver or white snowflakes is the most classic wintry combo and reads cold and frosty. Red with white flakes feels festive and Christmassy, perfect for holiday parties and photos. Navy or black backgrounds make white snowflakes pop the hardest for a dramatic, high-contrast look. For something subtle you can wear to work or with any outfit, put white snowflakes over a milky or nude base - soft enough for the office, still clearly seasonal. Silver flakes on any dark base add a metallic, jewelry-like shimmer. Match the finish to the event: matte top coat over the base leans cozy and modern, while a glossy top coat feels more festive and catches the light. If you only want one look that covers everything from a work week to New Year's Eve, milky nude with a single white accent flake is the safest bet.
Snowflake Nails for Short Nails
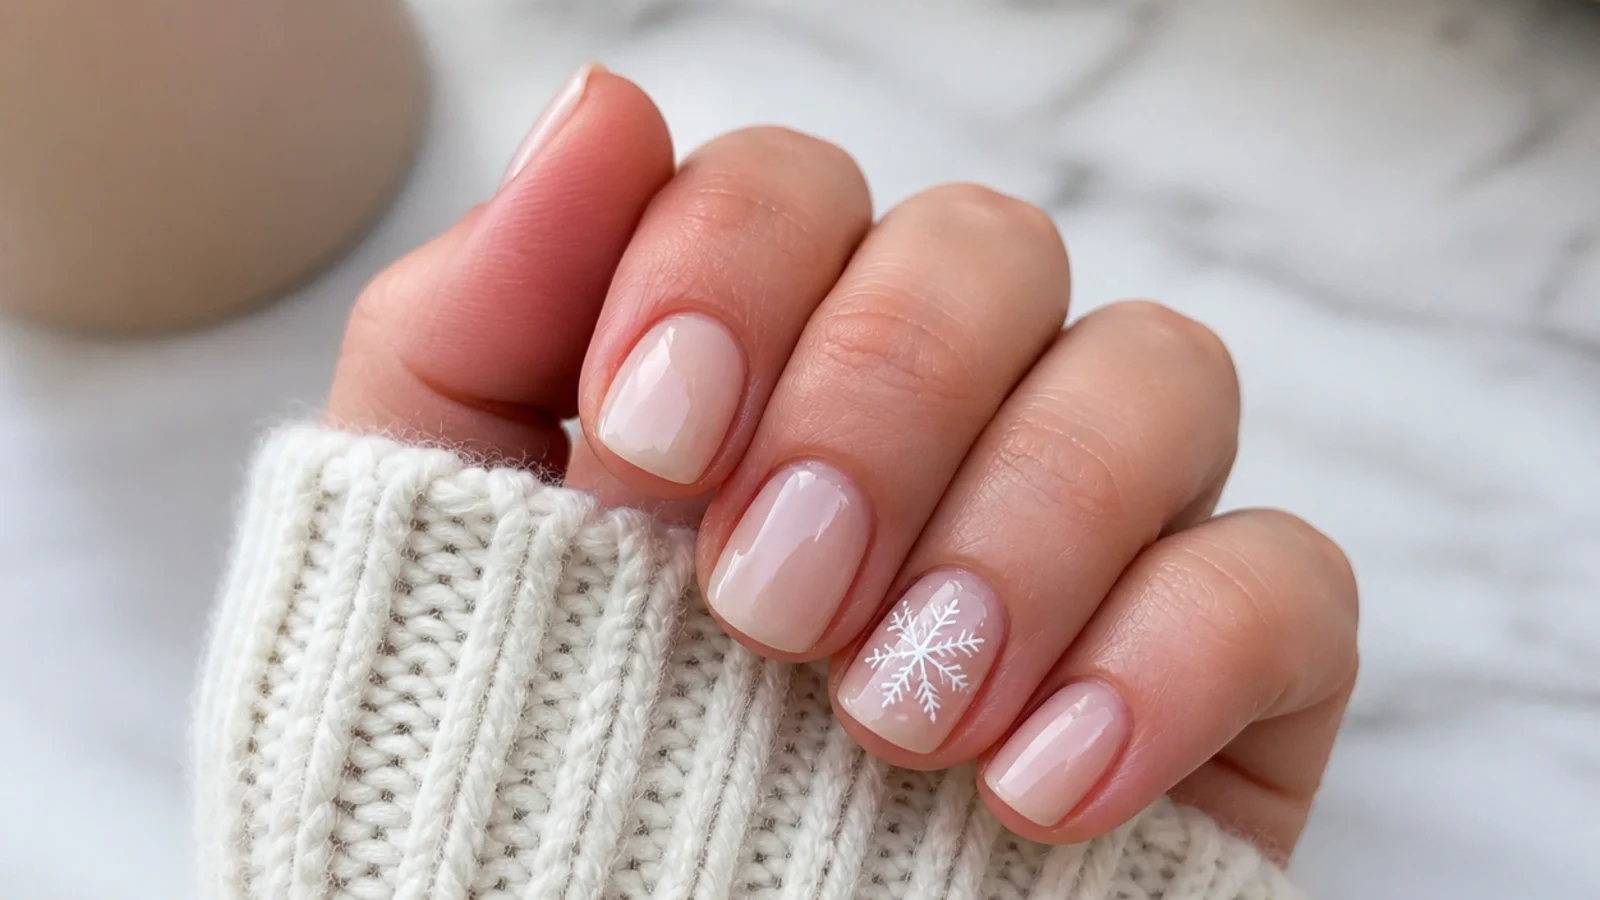
Short nails suit snowflakes beautifully - you just scale the design down. The cleanest approach is one accent snowflake nail: paint every nail in your base color, then draw a single snowflake on one nail, usually the ring finger. This keeps the look intentional and uncluttered when there is not much surface to work with. If you want more than one flake, keep them small and simple, a five or six arm shape without the extra mid-arm dots that can crowd a tiny nail. Avoid packing multiple large snowflakes onto one short nail; it reads busy and the arms run into the cuticle. A single centered flake plus a few scattered dots for falling snow on the other nails gives a full winter effect without overwhelming the space. Squoval or round shapes give you the most flat area to draw on for short nails.
Snowflake Nails vs Christmas Nails
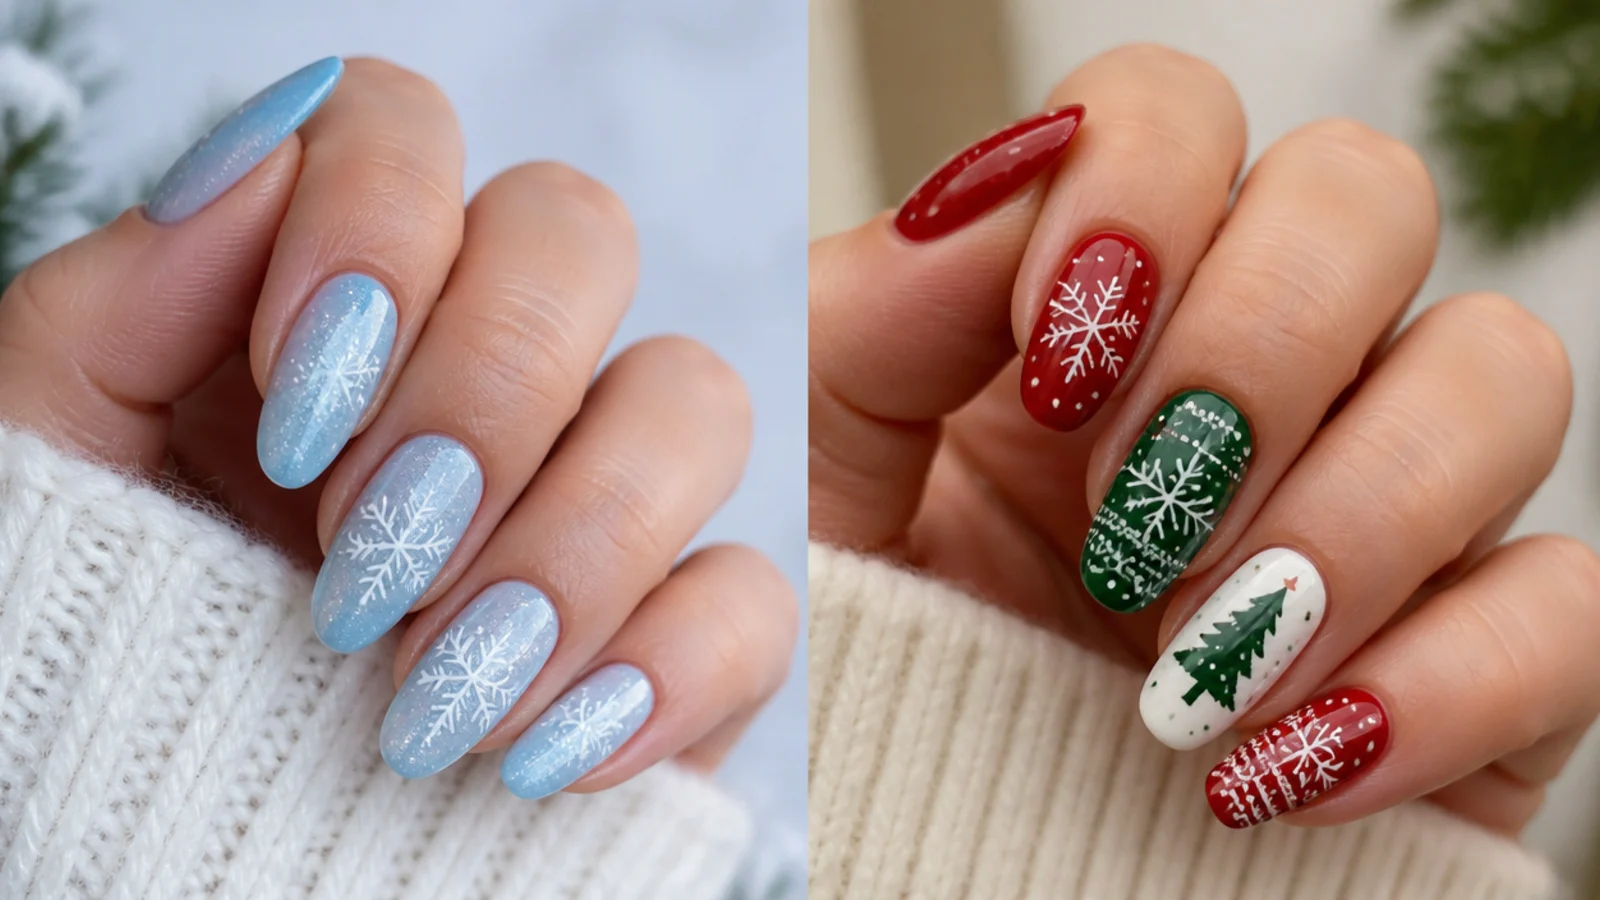
Snowflake nails and Christmas nails overlap but are not the same. Christmas nails is the broad category - anything holiday themed, including red and green, candy canes, Santa, plaid, gold accents and festive glitter. Snowflake nails are one motif within winter nails and stay wintry rather than strictly Christmassy, which is why icy blue and silver snowflakes work all the way through January, well after the holiday. That makes snowflakes the more versatile choice: put them over red for a Christmas party, then the same flake over icy blue or milky nude carries you through the rest of winter. If you want a set that is festive in December but does not look out of place in January, snowflakes beat a Santa or a candy cane. Think of snowflakes as the winter-long look and full Christmas designs as the December-only one.
Common Snowflake Nail Mistakes to Avoid
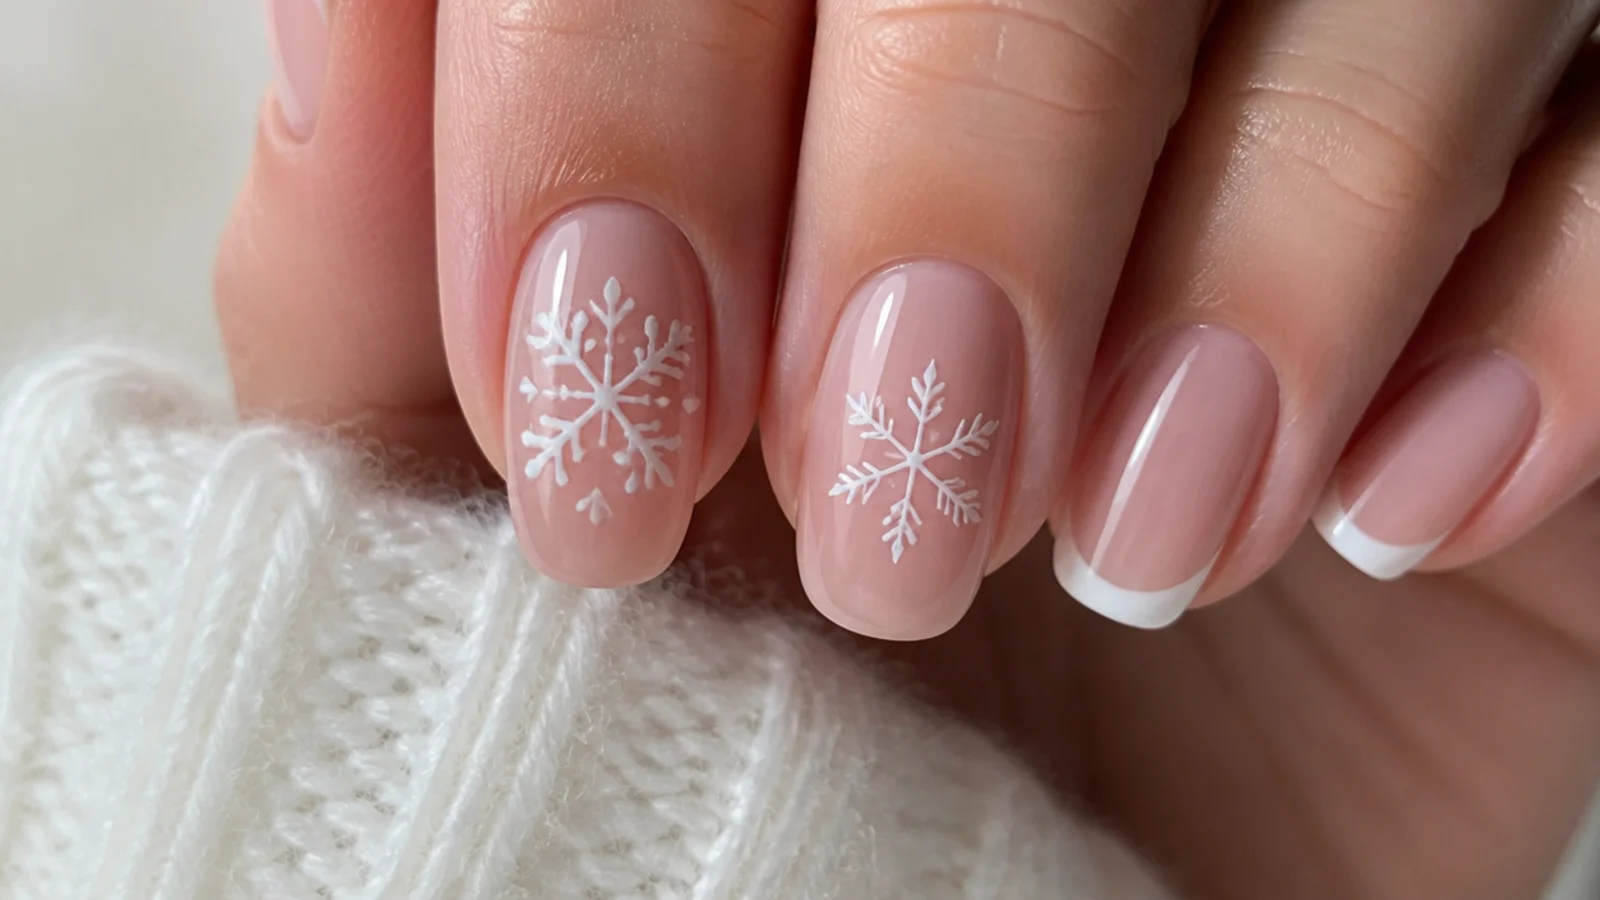
Most snowflake problems trace back to a few fixable errors. The biggest is thick lines - a heavy cross and arms look clumsy, so wipe excess polish off your tool and draw thin. The second is uneven arms; aiming for six evenly spaced arms keeps it from looking like a star or a plus, so picture a clock and space them out. Oversized or mismatched dots also cheapen a flake, so keep every dot small and consistent. Starting the snowflake off-center or too high near the cuticle leaves no room for the arms and looks lopsided, so plan placement first. Piling on glitter and rhinestones buries the design - a few scattered accents beat a crowded nail. Finally, drawing on wet or thick base color makes white lines skip and drag, so let each base coat cure fully. If a flake goes wrong, wipe it with a little alcohol on a brush before you top coat and redraw.
How Long Snowflake Nails Last and What They Cost
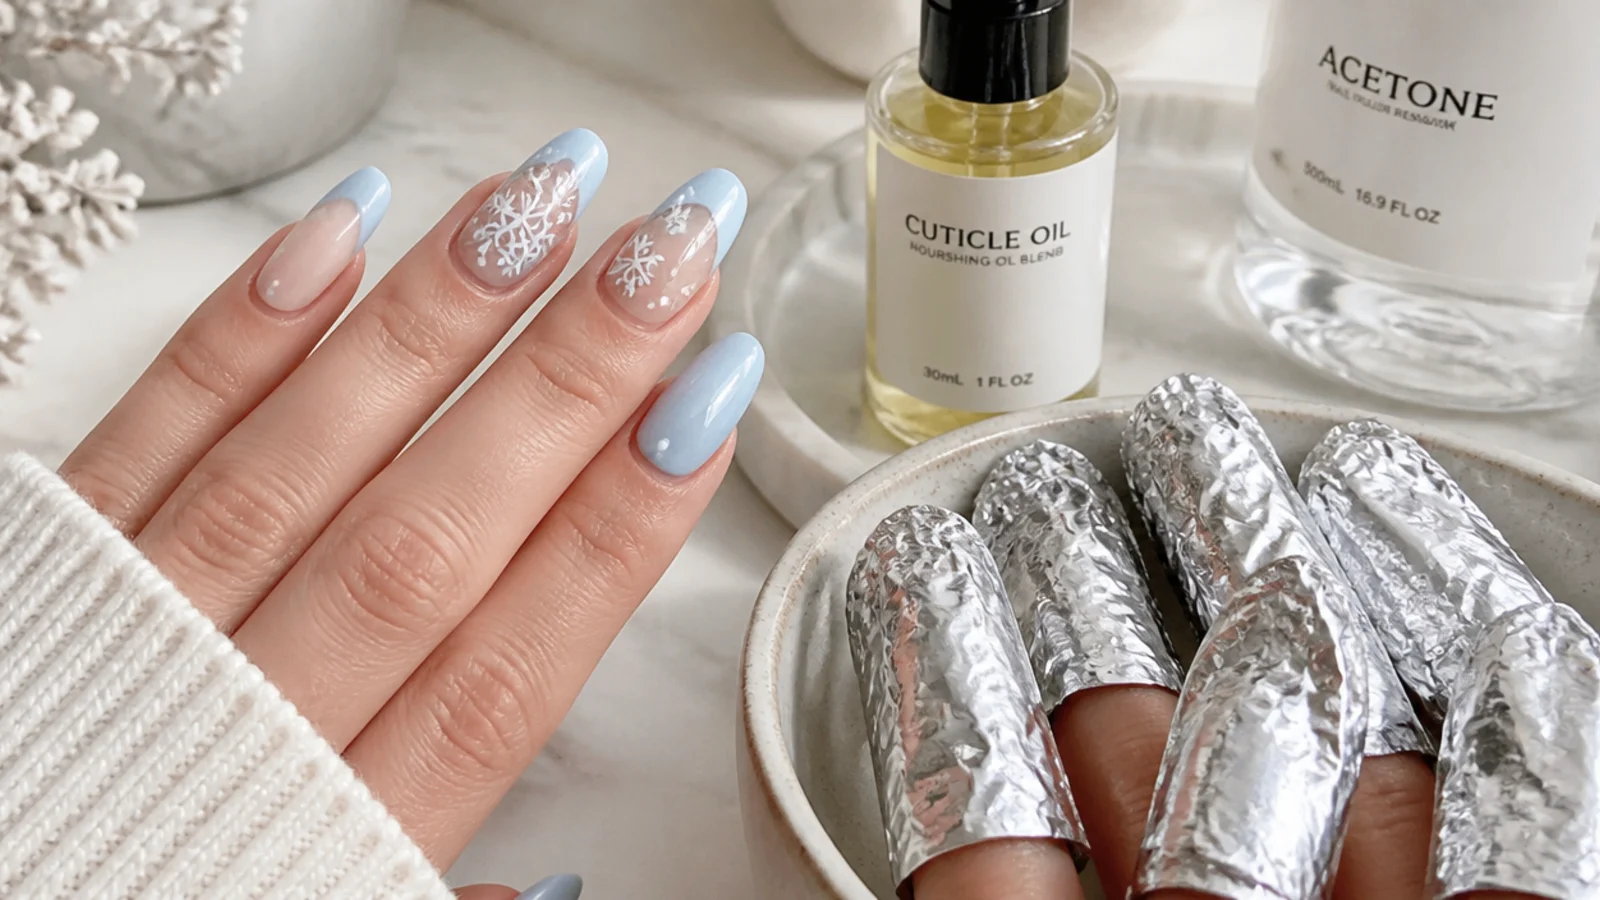
Done in gel, a snowflake set lasts about two to three weeks, and up to four with solid prep, capped edges and daily cuticle oil - far longer than regular polish, which chips in about 5 to 7 days. At a salon, a gel manicure with snowflake art usually runs about $30 to $55, with design add-ons around $5 per accent nail. Doing it at home with your own polish and a small lamp is a modest one-time cost that pays back after a set or two. To make it last, apply cuticle oil daily, wear gloves for chores, and avoid using your nails as tools. When it is time to remove it, do a proper soak-off: lightly file the shiny top coat, soak cotton in 100% acetone, press it to each nail, wrap in foil for 10 to 15 minutes, then gently push the softened gel off. Never peel or pry it, and see a nail tech if you notice lifting or irritation. Book or plan winter sets from early November, when the look peaks through December and fades in early January.
Frequently Asked Questions
How do you paint a snowflake on your nails?
Over a cured base color, use a fine liner brush or dotting tool loaded with white or silver polish. Draw a thin vertical line and a horizontal line to make a plus sign, then add two diagonals through the center for six even arms. Dot the end of each arm and the center, add optional mid-arm dots, then seal with top coat.
Can you do snowflakes without a dotting tool?
Yes. A toothpick, the rounded head of a bobby pin, a cocktail stick or a Q-tip tip all work. Use the fine point to draw the cross and diagonal arms, then use the bobby pin head or toothpick tip for the dots. Wipe off excess polish so lines stay thin. Household tools give beginners more control than a store-bought dotting tool.
Do you use white or silver for snowflakes?
Both work; it depends on the look. White gives a crisp, classic snowflake and pops hardest over blue, navy, red or black bases. Silver adds a metallic, jewelry-like shimmer and reads more glam, especially on dark bases. For a subtle office look, white over a milky nude is softest. Many sets use white for the flake and silver glitter for accent sparkle.
What colors suit snowflake nails?
Cold bases work best. Icy blue with silver or white is the most wintry, red with white flakes is festive and Christmassy, and navy or black makes white snowflakes pop for high contrast. Milky nude or soft gray keeps it subtle and work-appropriate. Silver flakes suit any dark base. Pick your flake color to contrast the base so the design stays crisp.
Can you do snowflake nails on short nails?
Yes, and they look great. The cleanest approach is one accent snowflake nail with the rest solid in your base color. Keep any flakes small and simple, skipping the extra mid-arm dots that crowd a tiny nail. Scatter a few dots for falling snow on the other nails to fill the look. Squoval or round shapes give the most flat area to draw on.
Are snowflake nails hard to do?
Not as hard as they look. A snowflake is just a repeated shape: a plus sign, two diagonals for six arms, and a dot on each arm. Once you can draw one, the rest follow. The main skill is keeping lines thin and arms even. Start with a single accent nail, use a fine tool, and wipe off excess polish so lines stay delicate.
How long do snowflake nails last?
Done in gel, a snowflake set lasts about two to three weeks, and up to four with good prep, a capped free edge and daily cuticle oil. That is far longer than regular non-gel polish, which chips in about 5 to 7 days. Wear gloves for chores and avoid using your nails as tools to get the most wear out of the set.
How much do snowflake nails cost?
At a salon, a gel manicure with snowflake art usually runs about $30 to $55, with design add-ons around $5 per accent nail, so a full set often lands near $40 to $60. Doing it yourself with your own base color, white polish and a small lamp is a modest one-time cost that pays back after a set or two.
When should you get winter or snowflake nails done?
The snowflake look ramps up in early November, peaks from late November through December for the holidays, and fades in early January. Because icy blue and silver flakes stay wintry rather than strictly Christmassy, they carry you well past the holiday into January. Book or plan your set anytime from early November through midwinter for the most seasonal payoff.
What is the difference between snowflake nails and Christmas nails?
Christmas nails is the broad holiday category - red and green, candy canes, plaid, gold and Santa motifs. Snowflake nails are one winter motif that stays wintry rather than strictly festive, so icy blue or silver flakes work through January, after the holiday. That makes snowflakes more versatile: festive over red in December, then wintry over blue or nude for the rest of the season.
Gel application and removal, lamps, and 100% acetone should be used as directed. Curing gel improperly or force-removing it can damage your natural nails. For best results and nail health, see a licensed nail technician, and stop if you have any irritation or reaction.
Which snowflake nails look are you saving?
Snowflake nails come down to one repeatable shape - a cross, two diagonals, and a dot on each arm - so once you nail the first one the rest follow. Keep the lines thin, work over a cold base like icy blue, navy or milky nude, and seal the free edge so a gel set makes the full two to three weeks. If your first flake looks heavy, that is normal; less polish and a finer tip fix it next time. Be gentle with your natural nails, never peel or pry gel off, and see a nail tech if you notice any irritation. Save this guide and add a snowflake to your winter rotation from November on.