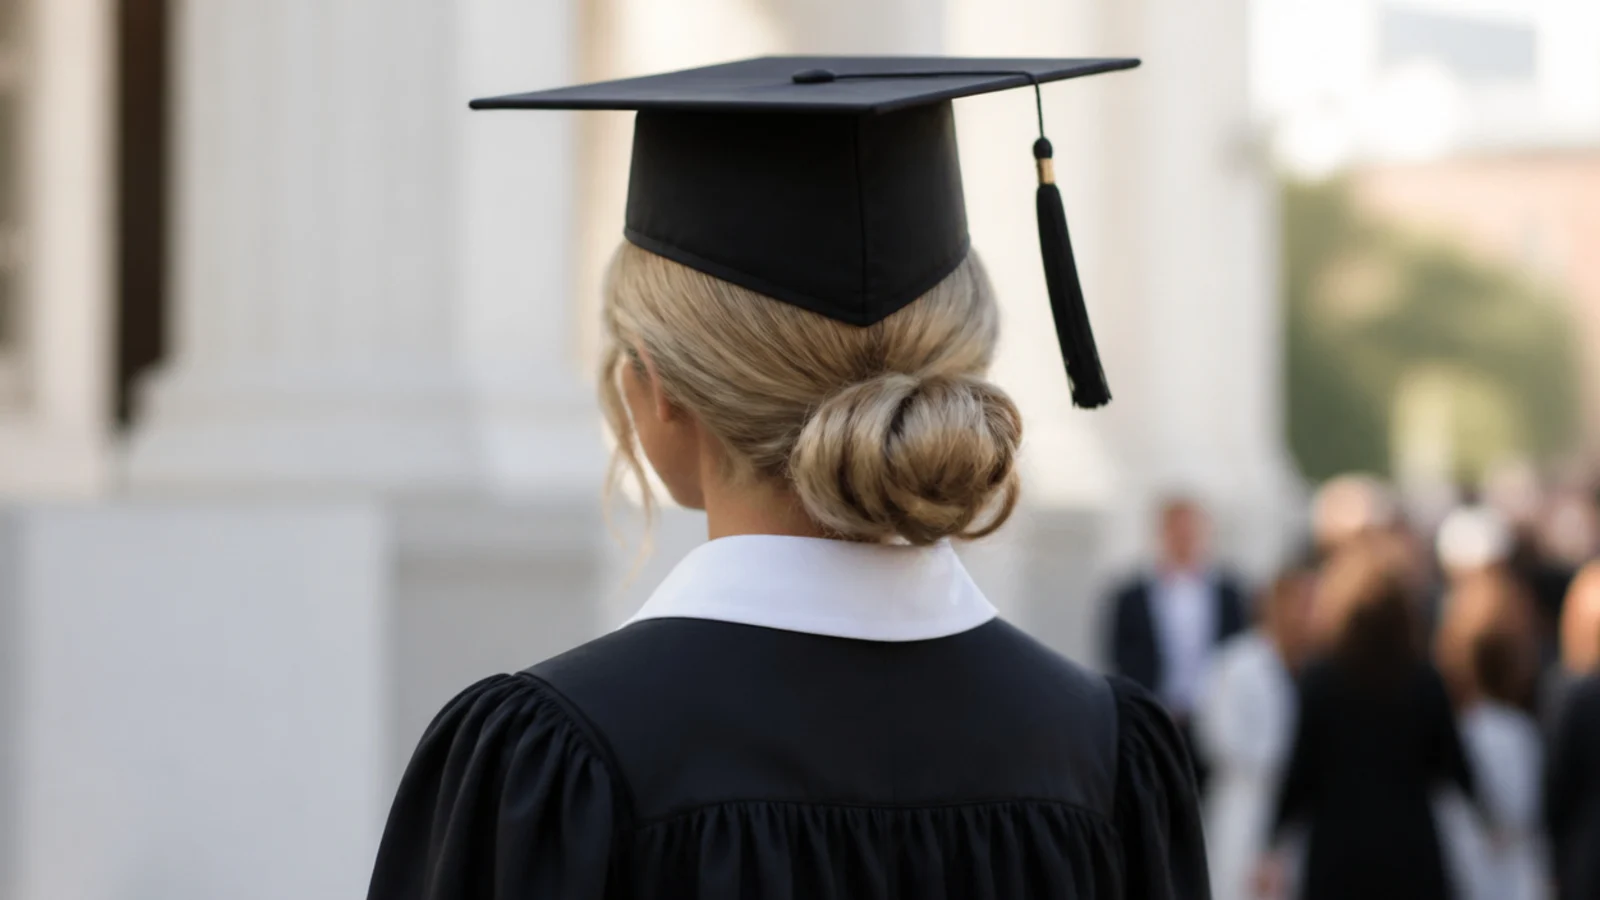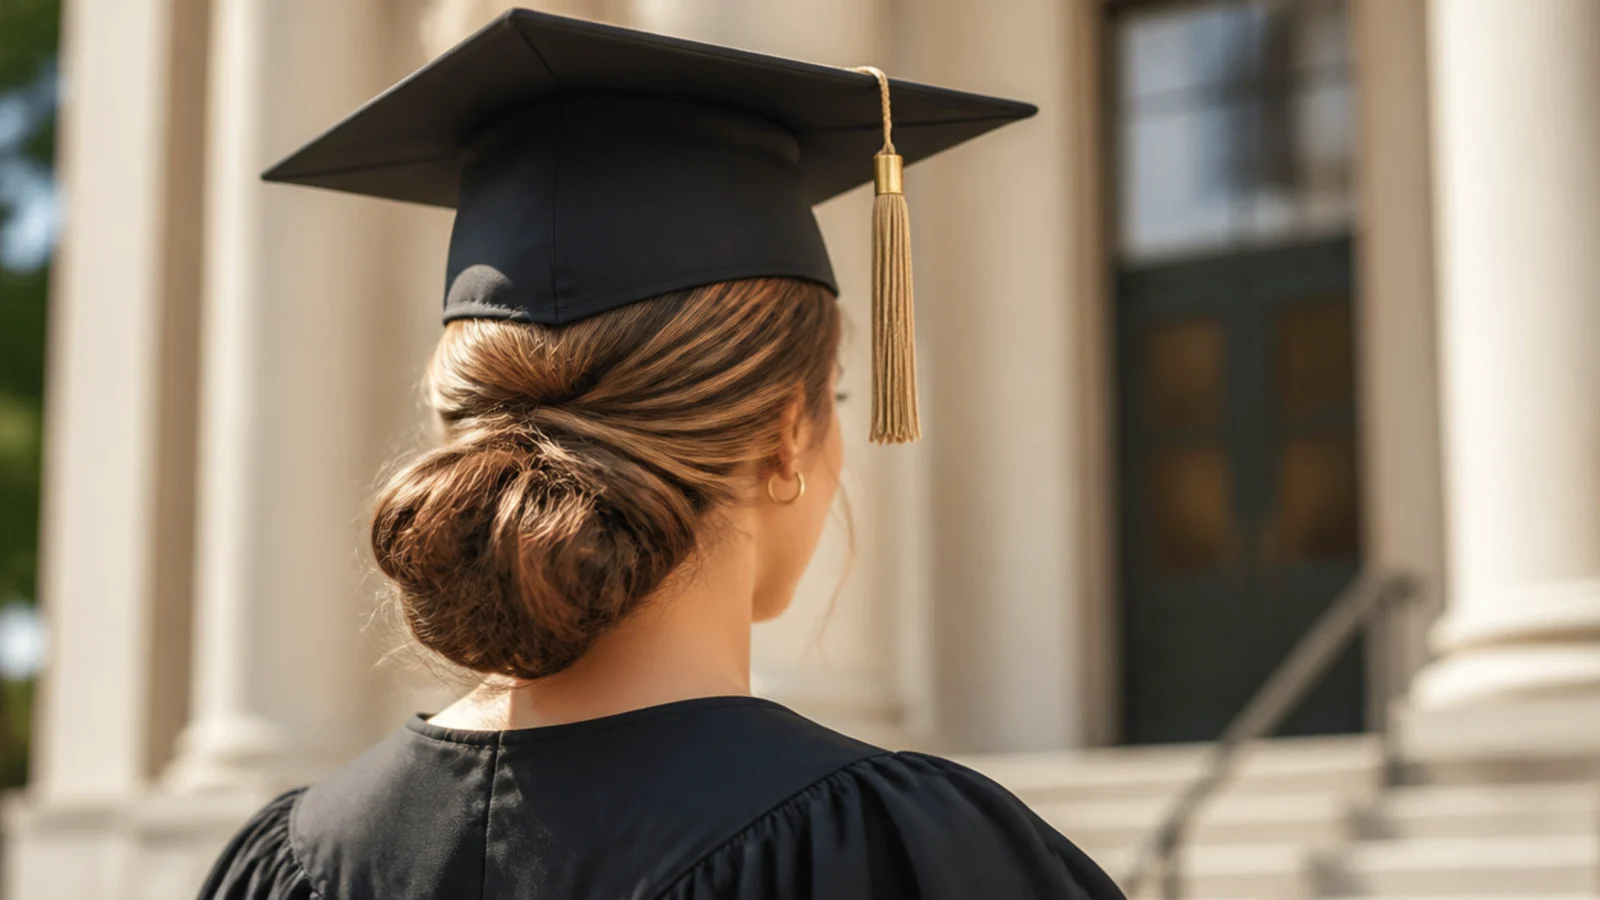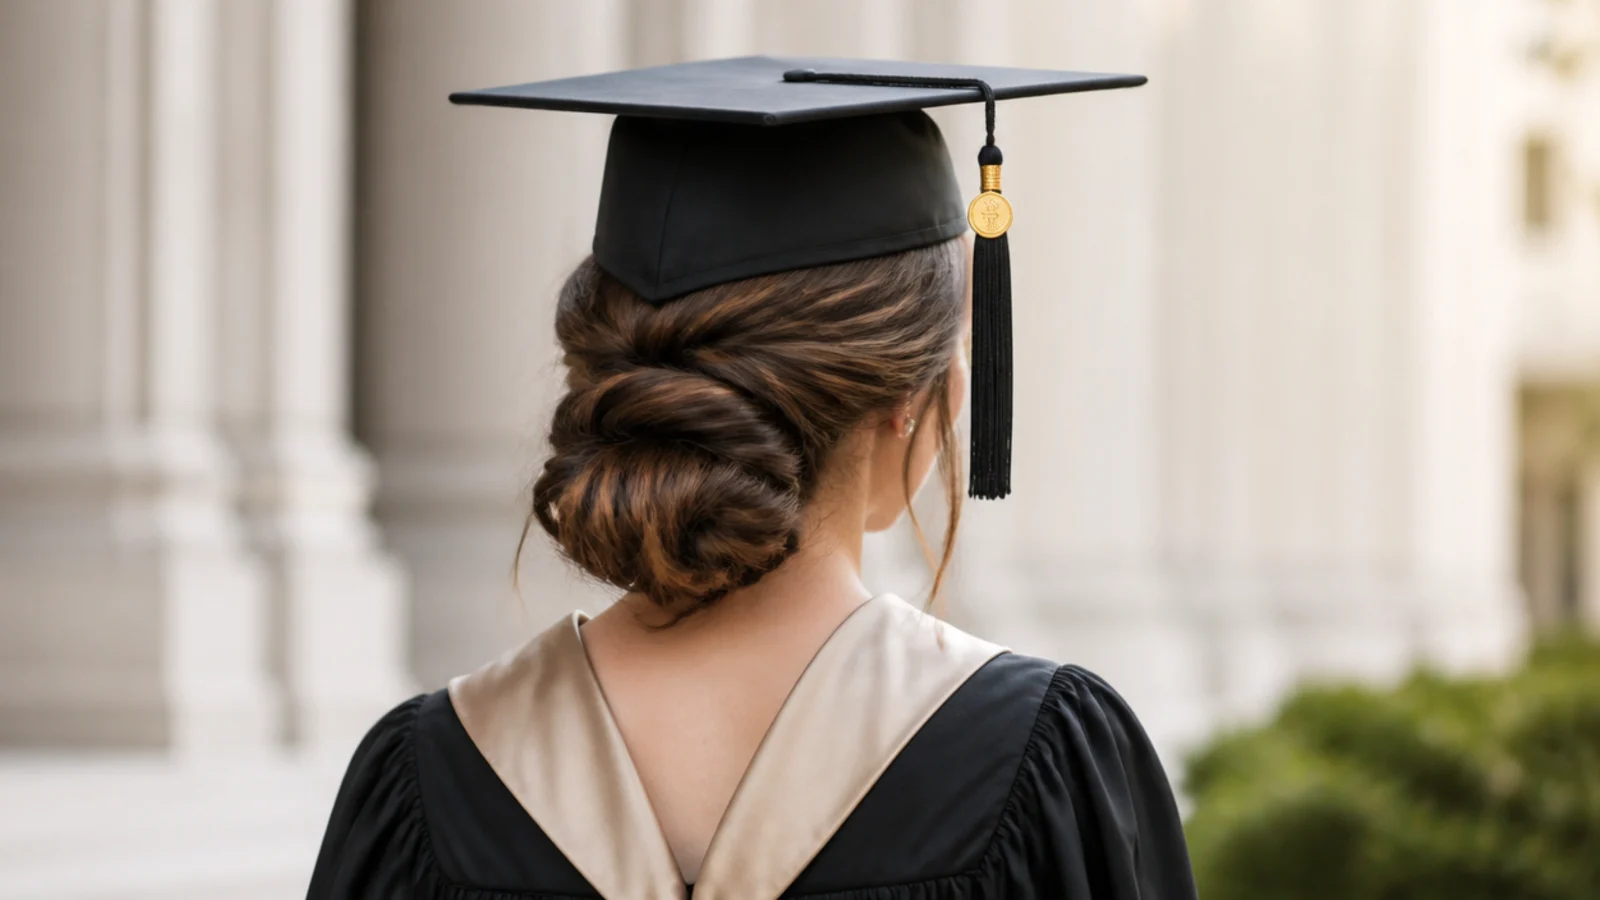
Quick Comparison
| Updo Under the Cap | Hair Down Under the Cap | |
|---|---|---|
| Cap fit | Excellent once the bun sits at or below the nape | Excellent, since nothing occupies the crown at all |
| Cap sliding risk | Low; pins grip a structured base easily | Moderate; smooth hair lets the board slide backward |
| 4-hour hold | Holds shape all ceremony with 8 to 12 pins | Flattens at the band line after about 90 minutes |
| Photo performance | Defined silhouette in every frame, no shadow loss | Moves and catches shadow, can vanish on a dark gown |
| Humidity and outdoor heat | Frizz stays contained inside the shape | Frizzes at the hairline where the band sits |
| Comfort in a gown | Hair off the neck, cooler for a long sit | Traps heat between the gown collar and the cap |
| Cap-off recovery | No dent to fix; the shape is already set | Needs a 60 second water mist and root lift |
| Time to style | 15 to 25 minutes for a low bun or chignon | 10 minutes flat-dried, 30 to 45 with curls |
| Best for | Outdoor, long or summer ceremonies and formal gowns | Indoor, air-conditioned ceremonies under two hours |
1. Find Your Cap Line Before You Touch a Styling Tool
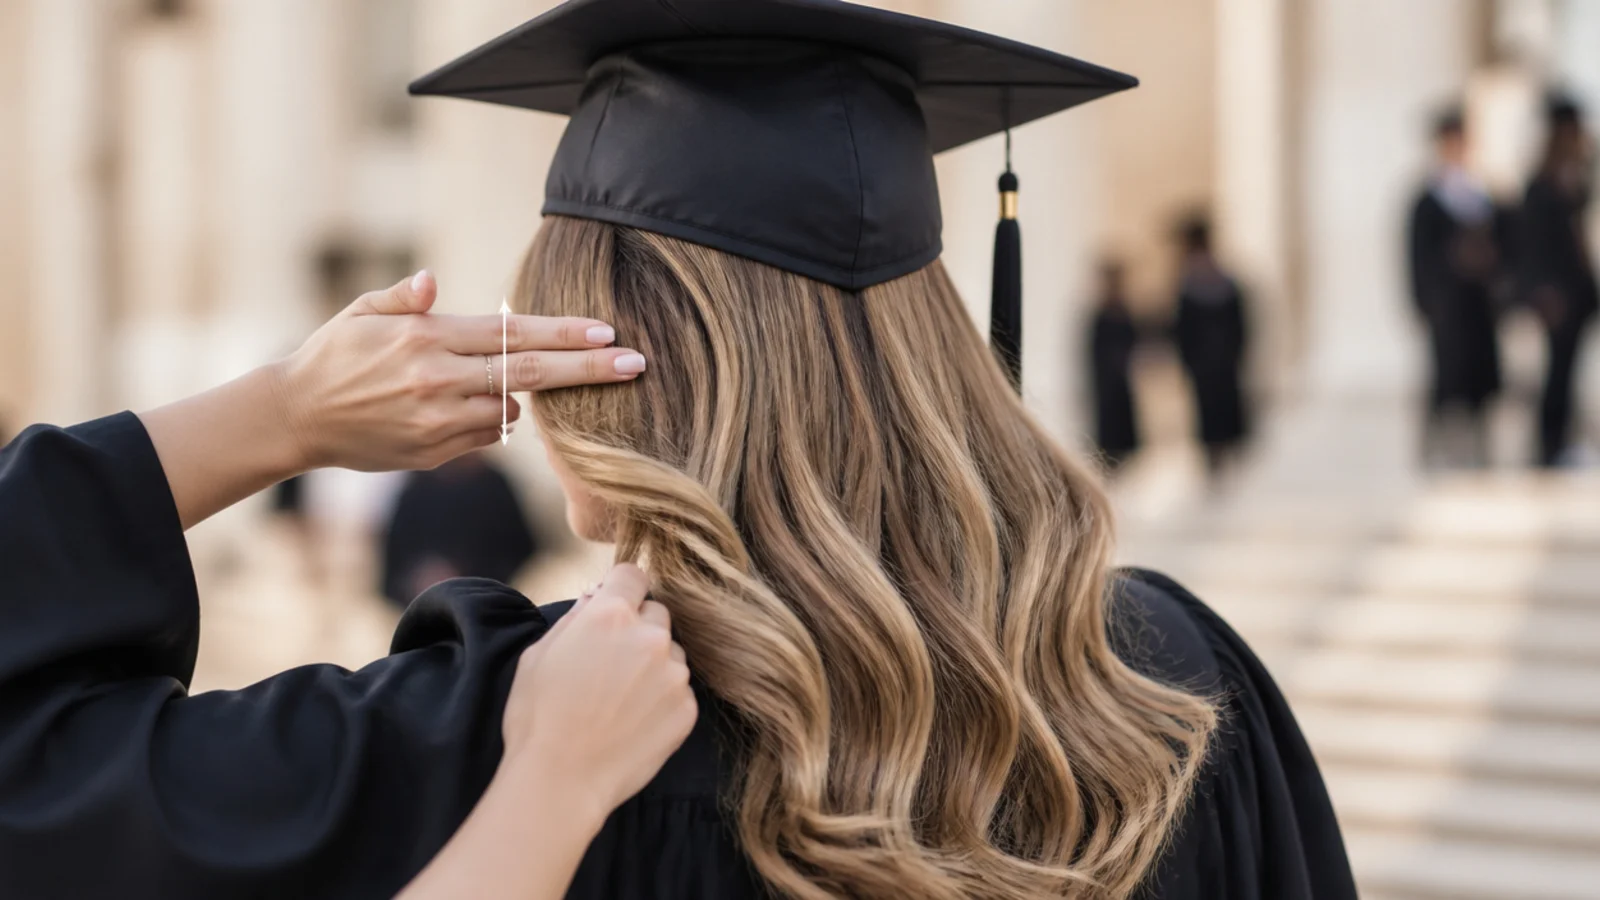
Put the cap on bare, dry hair first and settle it where it is meant to sit: flat on the crown, the front band about two fingers above your eyebrows, the four points level. Draw a mental line around your head where the band rests and mark it with a claw clip on each side. Everything above that line has to stay flat. Everything below it is where your volume, curls and bun go. Doing this before you style is the whole difference between a style that survives and one you rebuild in a parking lot.
Common mistake: Styling first and trying the cap on last, which is how people discover their crown volume five minutes before lineup.
Pro tip: Take a phone photo of yourself in the bare cap from the front and the side so you know the target the whole time.
2. Prep on Second-Day Hair With Grip, Not Slip
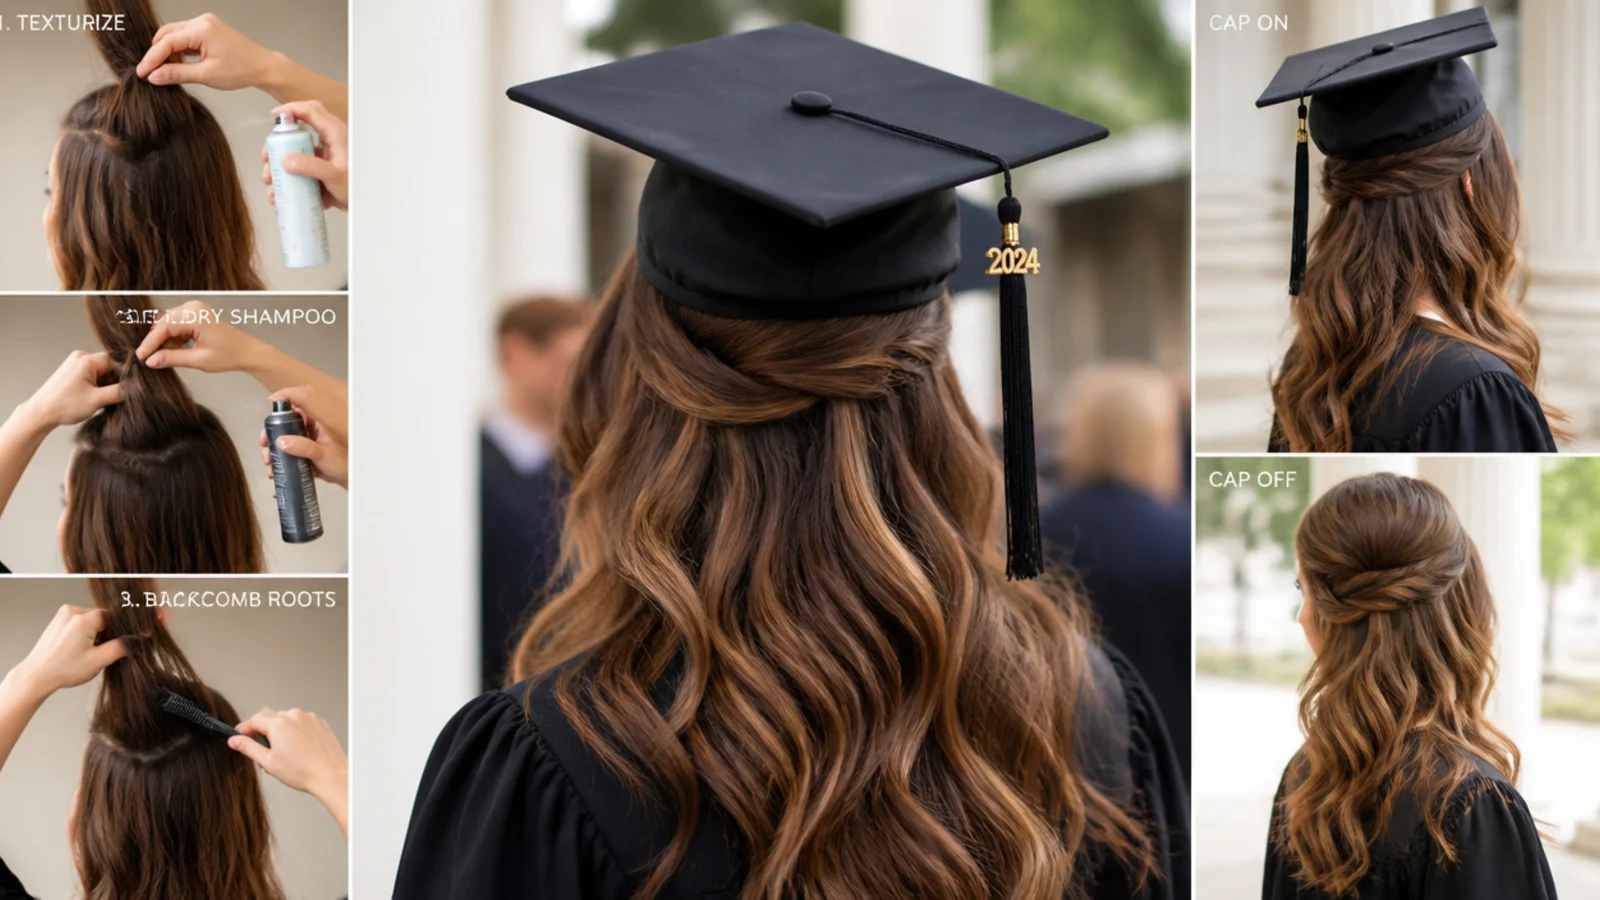
Freshly washed, silky hair is the worst possible surface for a cap, because the mortarboard slides backward and the pins slip out. Work on day-two hair, or fake it with a light mist of dry shampoo at the roots and texturizing spray through the mid-lengths. Skip conditioner at the crown if you washed that morning. You want a matte, slightly gritty texture at the roots so pins bite. Do not add oil or serum anywhere the cap touches. This one prep decision saves more graduation styles than any product you can buy on the way there.
Common mistake: Washing and blow-drying an hour before, leaving slippery hair that will not hold a single bobby pin.
Pro tip: If your hair is genuinely too clean, braid it damp for 30 minutes and take it out for instant grip.
3. Build the Style Below the Line, Never Across It
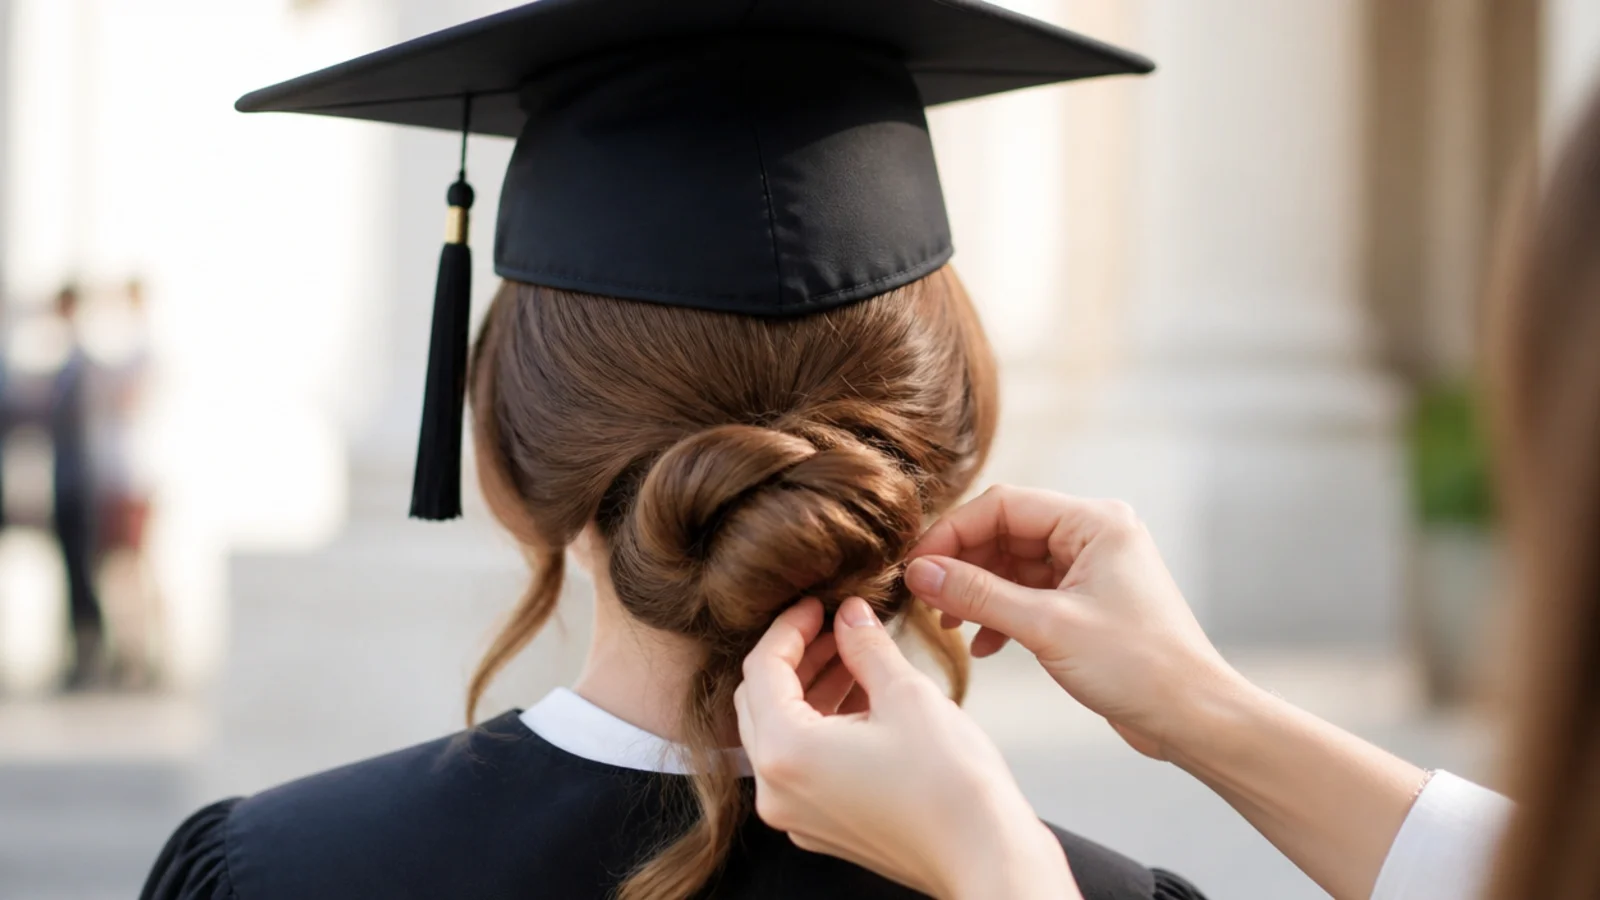
Now style, keeping every bump, twist, elastic and bun base underneath your marked line. A bun sits at the nape or just above it, never at the occipital bone where the back edge of the cap lands. A half-up gathers at the level of your ear tops or lower. Curls get pushed forward toward the shoulders rather than piled up. Smooth the crown with a boar bristle brush and a drop of cream as you go, because a flat crown is what lets the mortarboard sit level. Browse graduation hairstyles with cap if you want more shapes that respect this line.
Common mistake: Placing a half-up elastic at the crown, which creates exactly the lump that tips the cap forward.
Pro tip: Backcomb at the sides and the back of the head for volume, never at the top of the head.
4. Set With Flexible Hold, Not a Freeze Spray
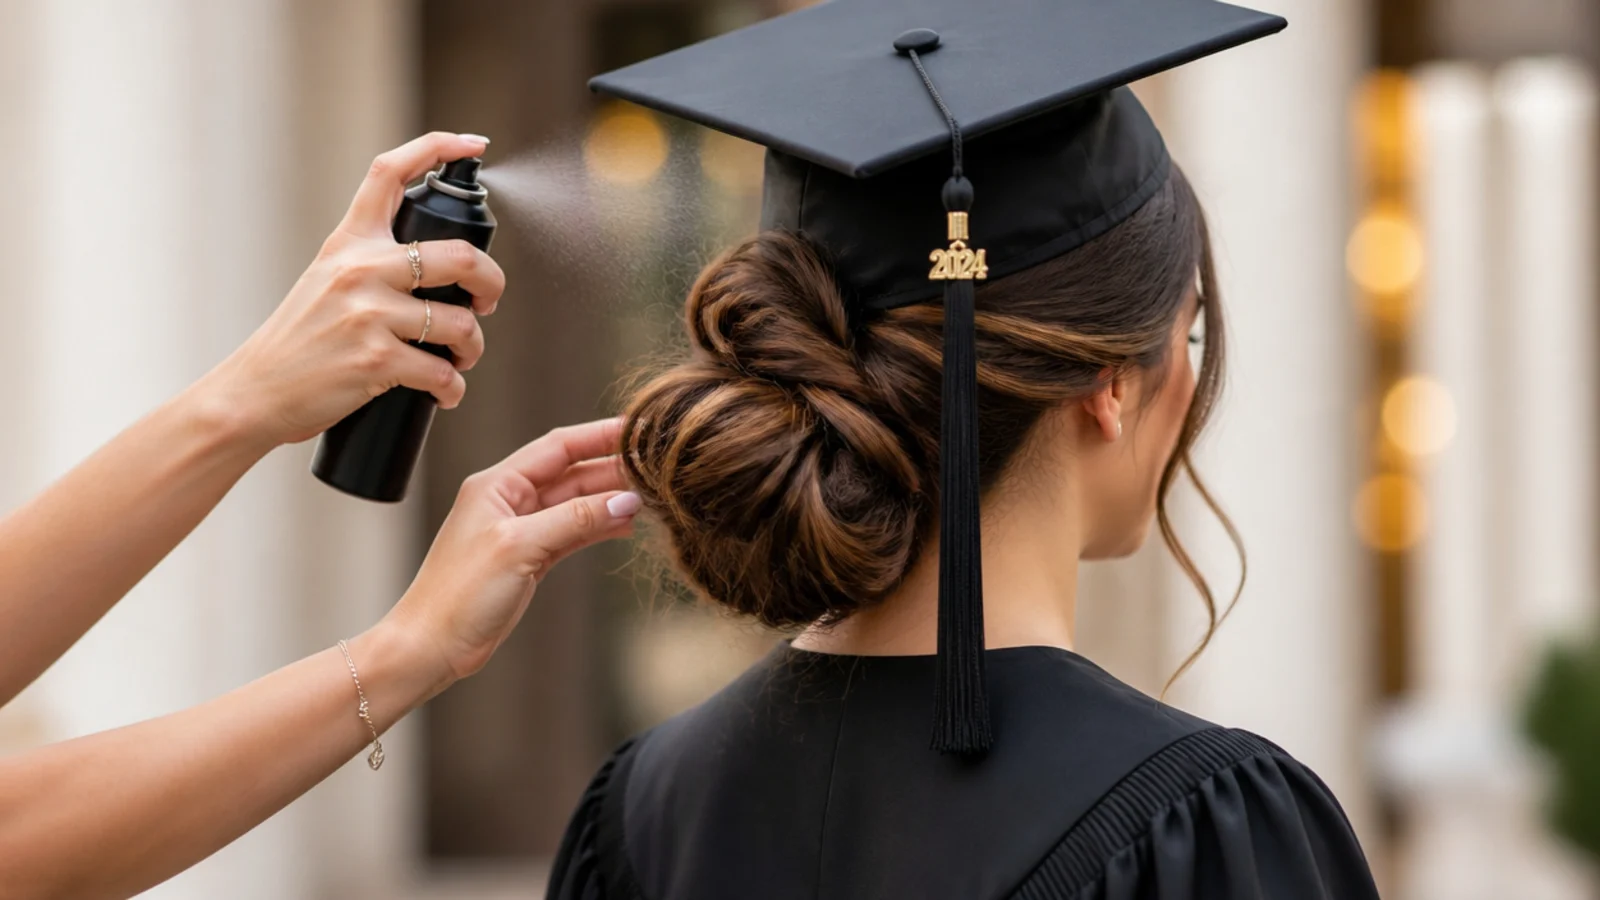
Mist a flexible or workable-hold hairspray from about ten inches away, in two light passes, and let it dry completely before the cap goes anywhere near your head. Flexible hold matters more here than in any other occasion styling, because a stiff freeze spray sets your hair in the exact shape the cap crushes it into, and it stays crushed after the cap comes off. Flexible hold lets the hair compress under the board and then spring back when you lift it. Two light passes always beat one heavy one, which goes crunchy and shows in photos.
Common mistake: Using a maximum-hold or freeze spray, then finding a permanent flat ring in your hair at the photo booth.
Pro tip: Let curls cool completely before spraying and before the cap goes on, or they drop within the hour.
5. Cross Two Bobby Pins in an X Under the Cap Band
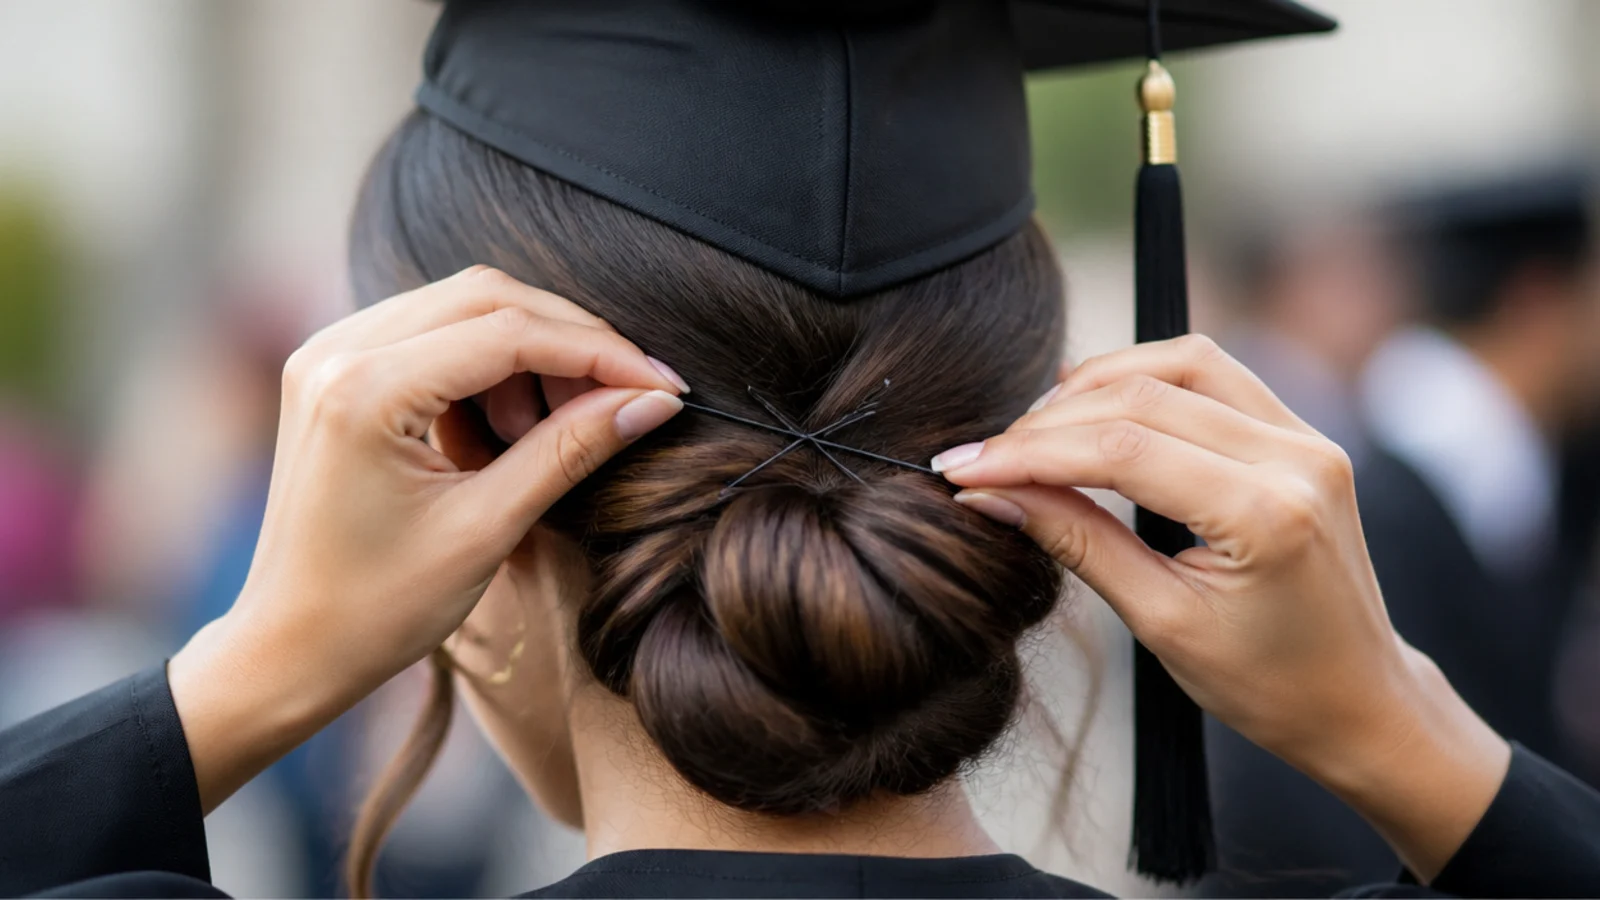
This is the anchor that stops the cap sliding backward all ceremony. Slide one bobby pin through the inner band of the cap and into your hair at an angle, then slide a second pin through the band crossing the first so the two form an X. The crossed pins grip in opposing directions and lock, where a single pin just pivots. Do this at both sides above the ears, and add a third X at the back if the cap is loose or it is windy. Open the pins with your fingers, not your teeth, and push wavy side down against the scalp.
Common mistake: Pinning straight through the fabric with parallel pins, which slide out within twenty minutes of walking.
Pro tip: Match pin color to your hair and hide each X just under the band edge so nothing shows in photos.
6. Do a Full Dress Rehearsal With the Real Cap
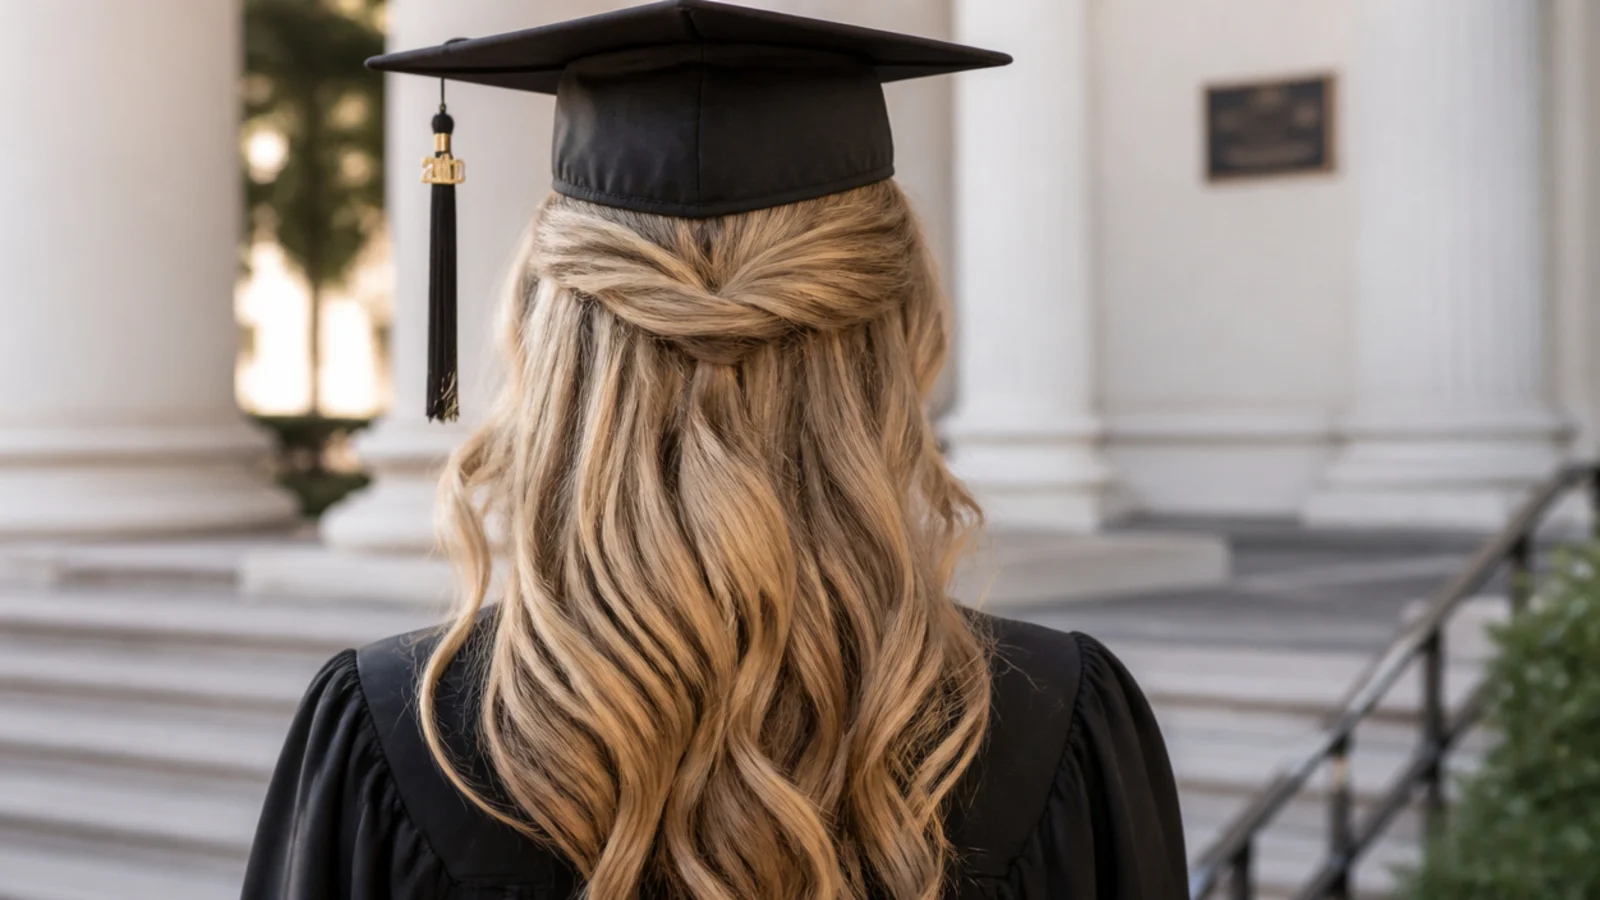
With the cap pinned, walk around the house for five minutes, look down at your phone, turn your head fast, and hug someone. Anything that shifts will shift on stage. Check the tassel is hanging free at your right side and not caught in your hair, check the cap front is still two fingers above your brows, and check the back of the cap is not being pushed up by your bun. Fix problems now with one extra pin rather than at lineup. If a bun is genuinely in the way, drop it half an inch lower rather than flattening it.
Common mistake: Testing the style in a mirror while standing still, which hides every movement failure.
Pro tip: Take the cap off and put it back on twice, so you know the style survives cap-off photos and the cap-on walk.
7. Pack a 60 Second Repair Kit and Fix the Dent After
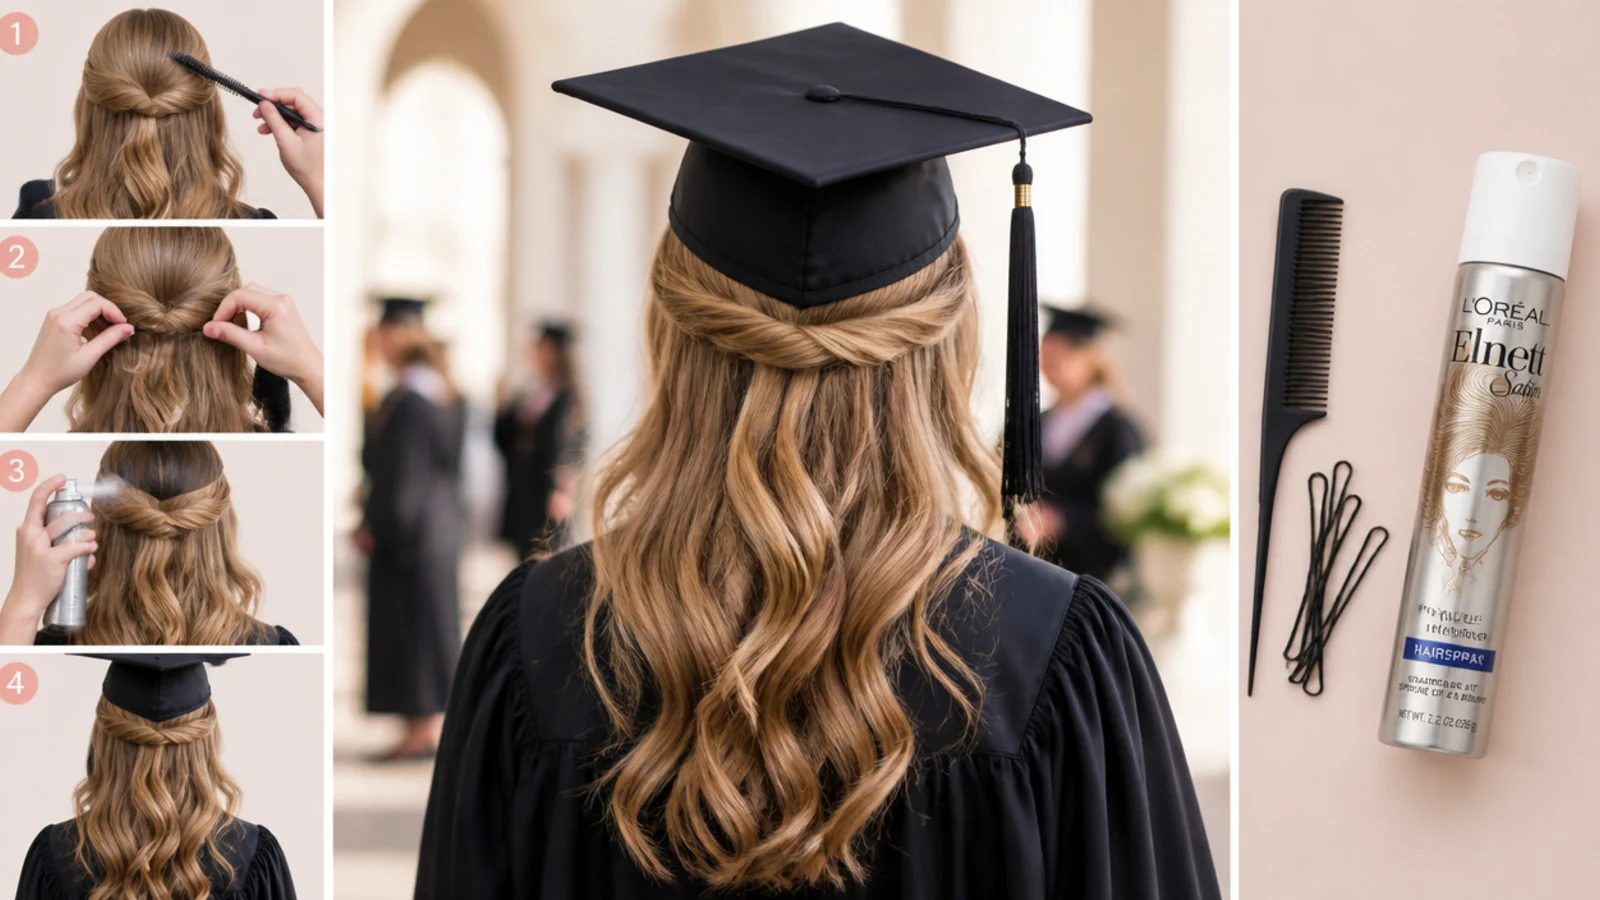
In a clutch: six bobby pins, two clear elastics, a travel flexible-hold spray, a small pick or wide-tooth comb, and a mini water mister. The second the cap comes off for photos, flip your head forward, mist water only along the dent line, and lift the roots with the pick using short upward flicks rather than combing through. Shake, flip back, and mist a light pass of spray. It takes under a minute and it is the difference between the cap-off photo and the cap-on one looking like the same hairstyle.
Common mistake: Brushing the whole head after cap removal, which pulls the style apart instead of lifting the dent.
Pro tip: Curly and coily textures should use the pick at the roots only, never through the length, to keep curl clumps intact.
Where the Cap Line Falls and Why Volume Goes Below It
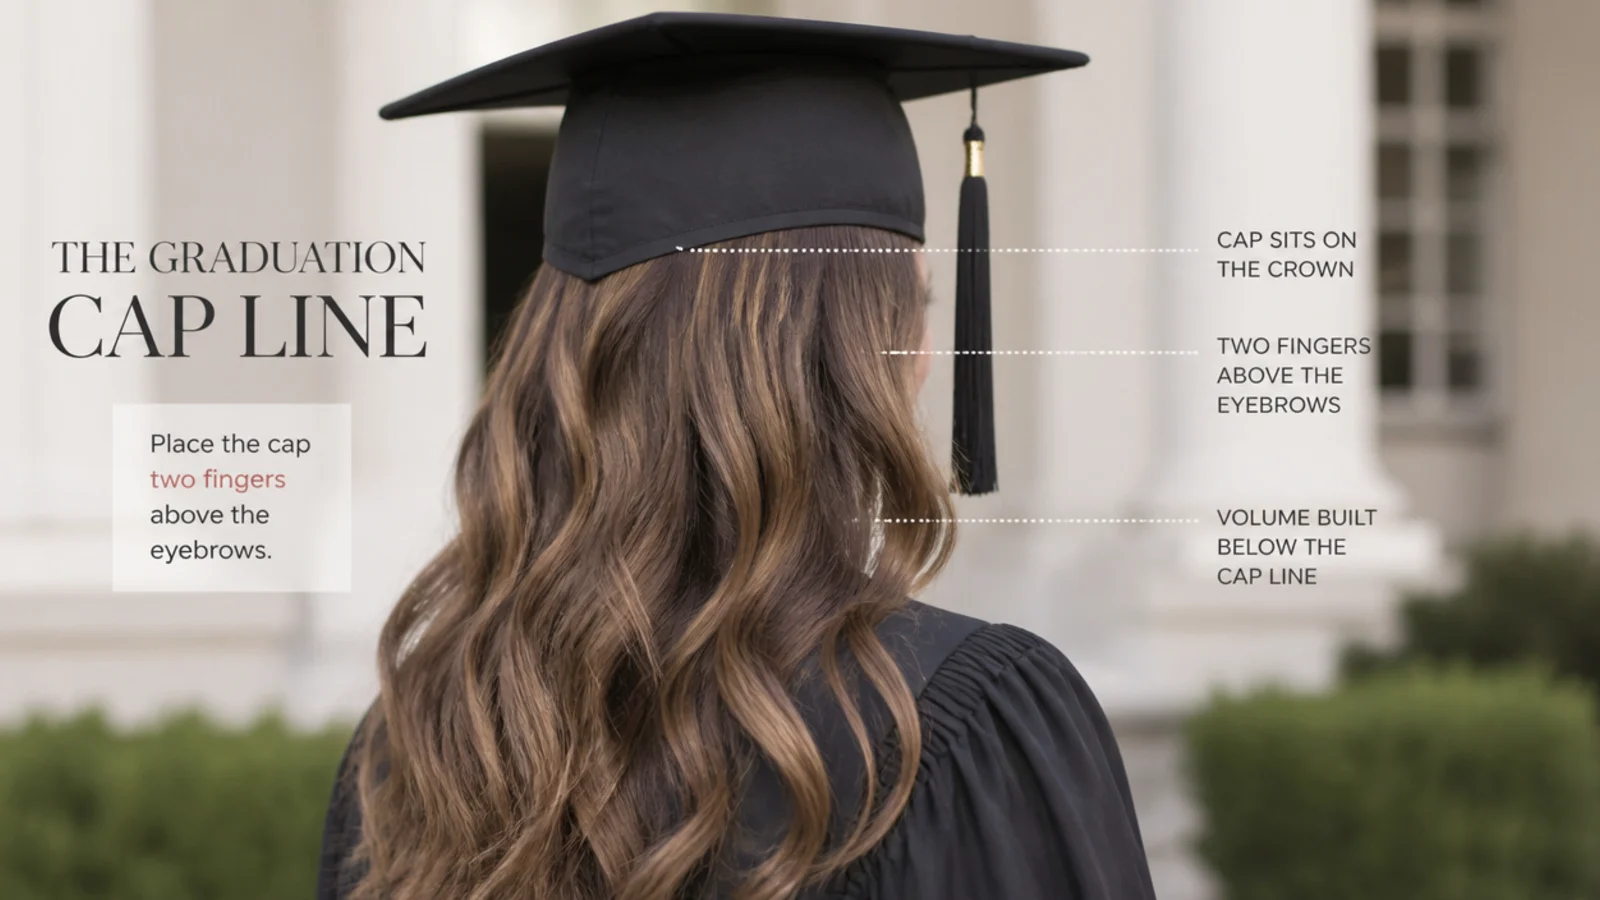
The mortarboard is a rigid flat square attached to a fabric skull cap, and it is designed to sit level on the crown with the front band about two fingers above your eyebrows and the four corners pointing to your shoulders and front and back. That geometry gives you a hard boundary. Anything occupying the crown, from a topknot to a high ponytail base to a crown-level half-up elastic, forces the board to sit higher at the front, which tips the whole square backward and drops the tassel out of position. It also means the cap cannot grip, so it slides all ceremony. Below that line you have the sides, the back of the head and the nape, and those are exactly the areas the camera sees when you are photographed from the front or in profile on stage. So build there. Backcomb at the sides, curl toward the shoulders, place buns at the nape, and keep the top two inches of your head as smooth and quiet as you can. Every style in graduation hairstyles with cap follows the same rule.
What Works by Hair Length: Short, Medium and Long
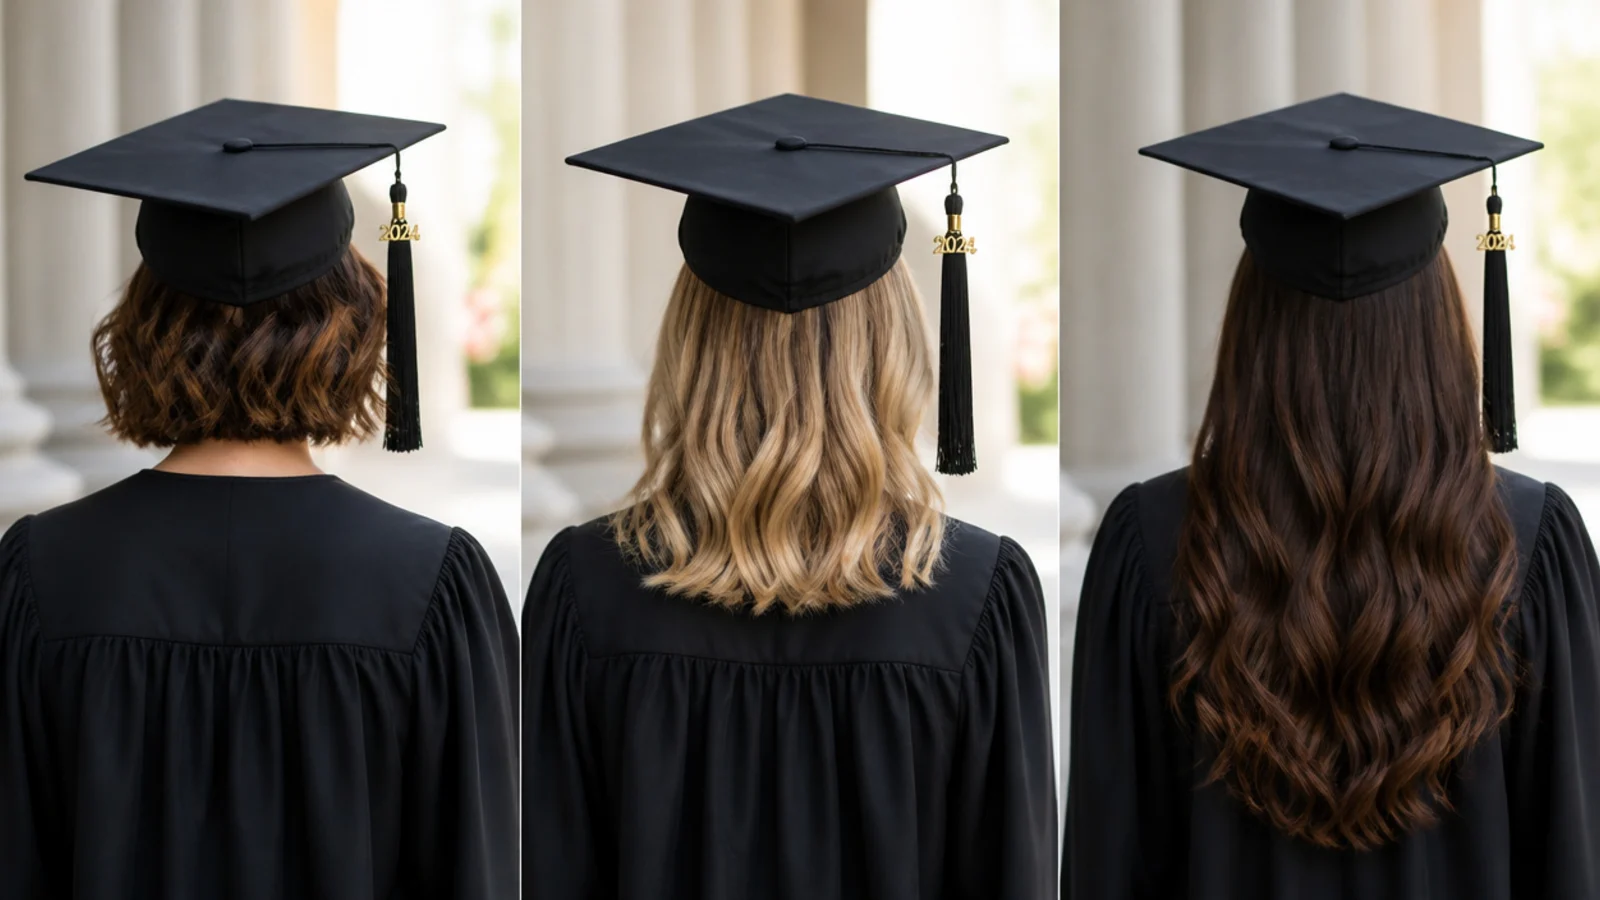
Short hair under a cap has the opposite problem to long hair: instead of managing bulk, you are stopping the cap from swallowing the style entirely. Pixies and bobs want asymmetry and forward-facing texture, one side pinned back, curls falling toward the jaw, and a little wax at the ends so something reads below the band. Medium hair between the collarbone and the shoulder blades is the easiest length here, because half-ups, low ponies and small nape buns all land naturally below the line without any planning. Long hair needs weight management more than anything: a heavy bun placed too high drags the cap backward over three hours, and thick lengths worn fully down get pressed into a visible band mark. Split very long or very thick hair into two low knots, or wear it down but pinned at one side. Start with graduation hairstyles for short hair or graduation hairstyles for long hair for length-specific shapes.
Updo or Down for Graduation Photos?
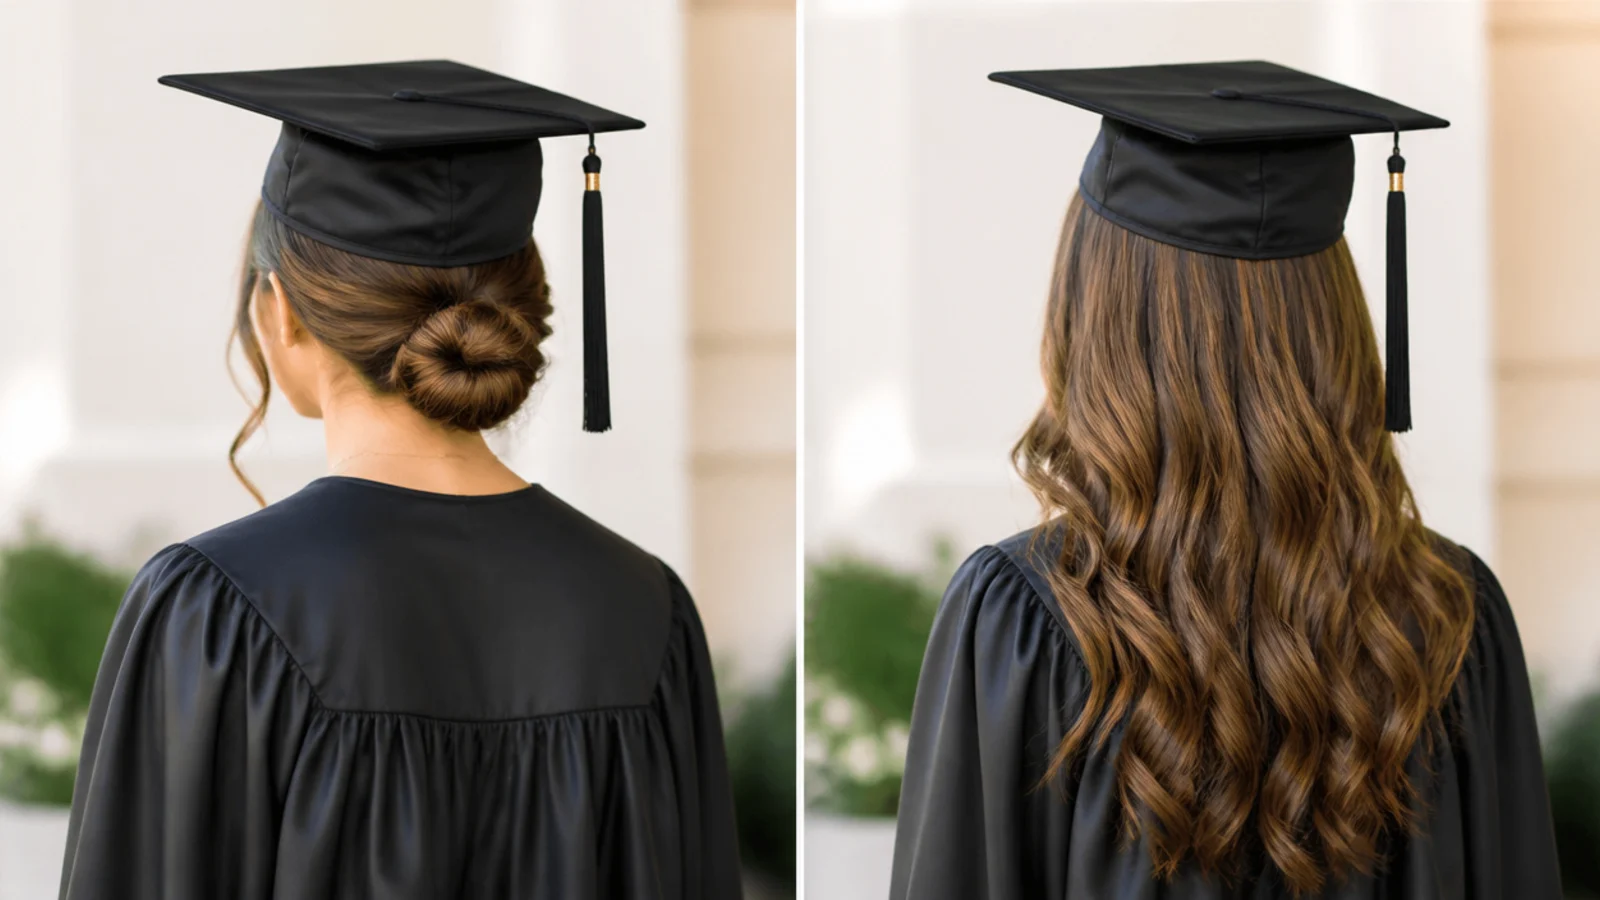
Structured hair photographs better than loose hair on a stage, and the reason is lighting rather than taste. Auditorium and outdoor light comes from above, so down hair catches shadow, moves between frames and disappears against a dark gown or a dark backdrop. An updo holds a defined silhouette in every shot, and it keeps the cap band area tidy so the mortarboard reads level. The exception is long hair with real wave definition worn over one shoulder, which holds shape against the gown and photographs as well as any updo. Comfort is the other half of the decision: hair down means four hours of heat trapped between a polyester gown and a cap, and outdoors in humidity it frizzes at the hairline where the band sits. If your ceremony is outdoors, long, or in July, pick the updo. If it is indoors, air conditioned and under two hours, down or half-up is genuinely fine. See more angles in graduation hairstyles.
All-Day Hold: Pins, Spray and Surviving a Four-Hour Ceremony
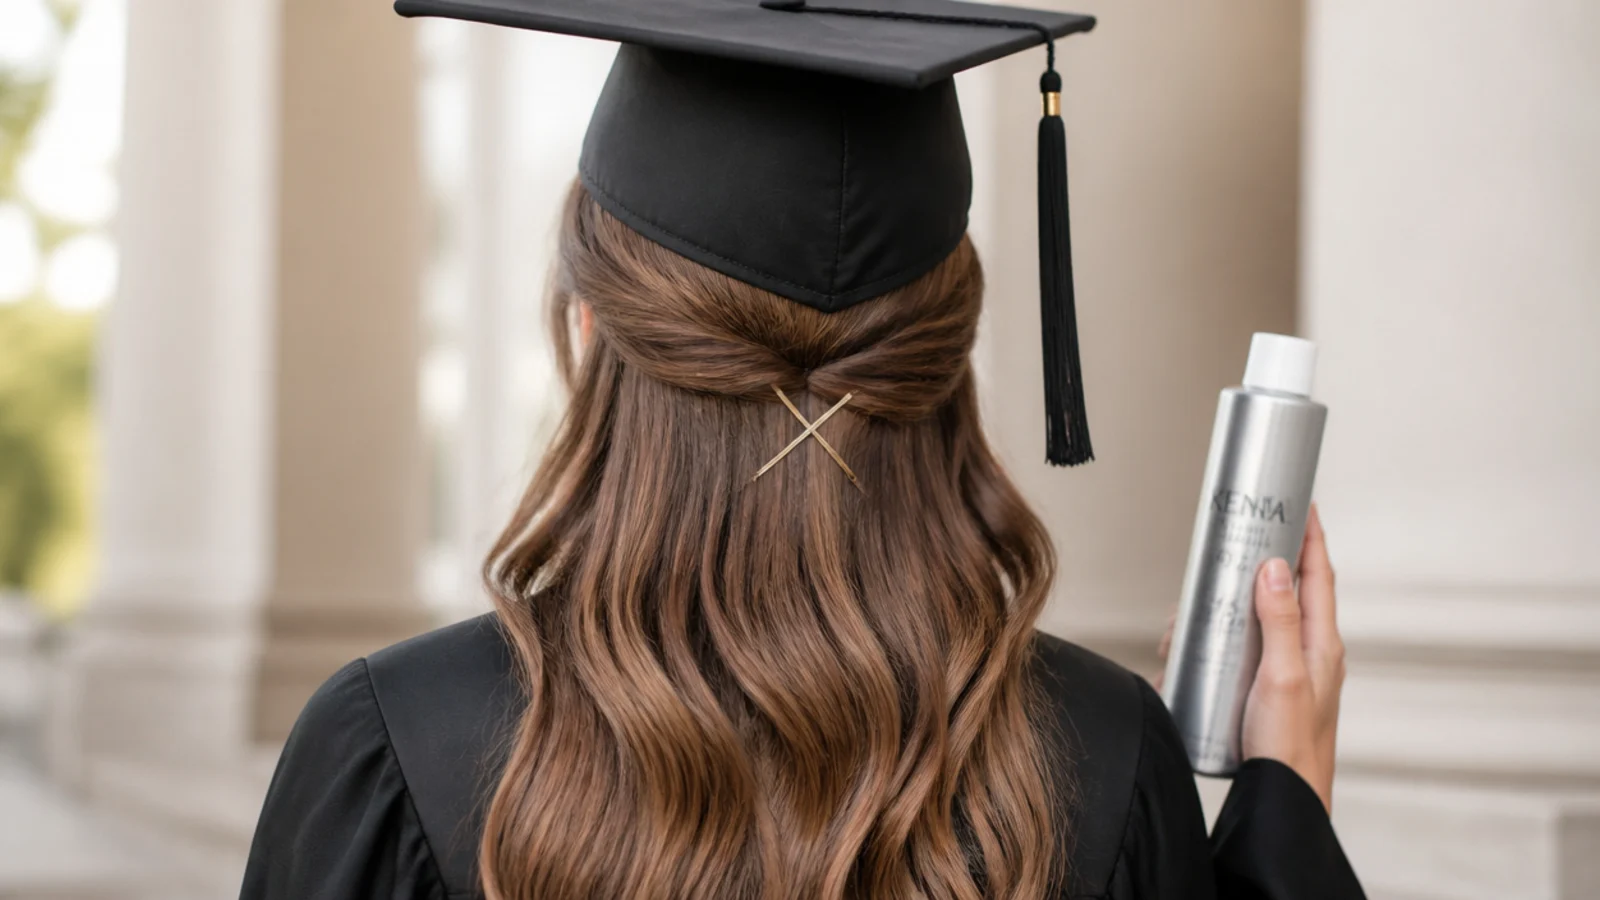
Hold is a pinning problem before it is a product problem. Bobby pins go in wavy side down against the scalp, opened with your fingers, and they should always cross another pin rather than run parallel to it, because two pins in an X grip in opposing directions and lock. Use that X twice, once above each ear, through the inner band of the cap and into the hair, and add a third at the back for wind. Count how many pins you used so you can rebuild the style in a bathroom if something gives. On product, reach for flexible or workable hold rather than a freeze spray, because the cap will compress your hair for hours and stiff hold sets that compression permanently, while flexible hold lets it spring back. Two light passes from ten inches, fully dried before the cap goes on. Skip oils and serums anywhere the band touches, since slip is what makes caps slide. Bring six spare pins, two clear elastics and a travel spray in a clutch.
Cap-On to Cap-Off: Fixing the Dent Before Photos
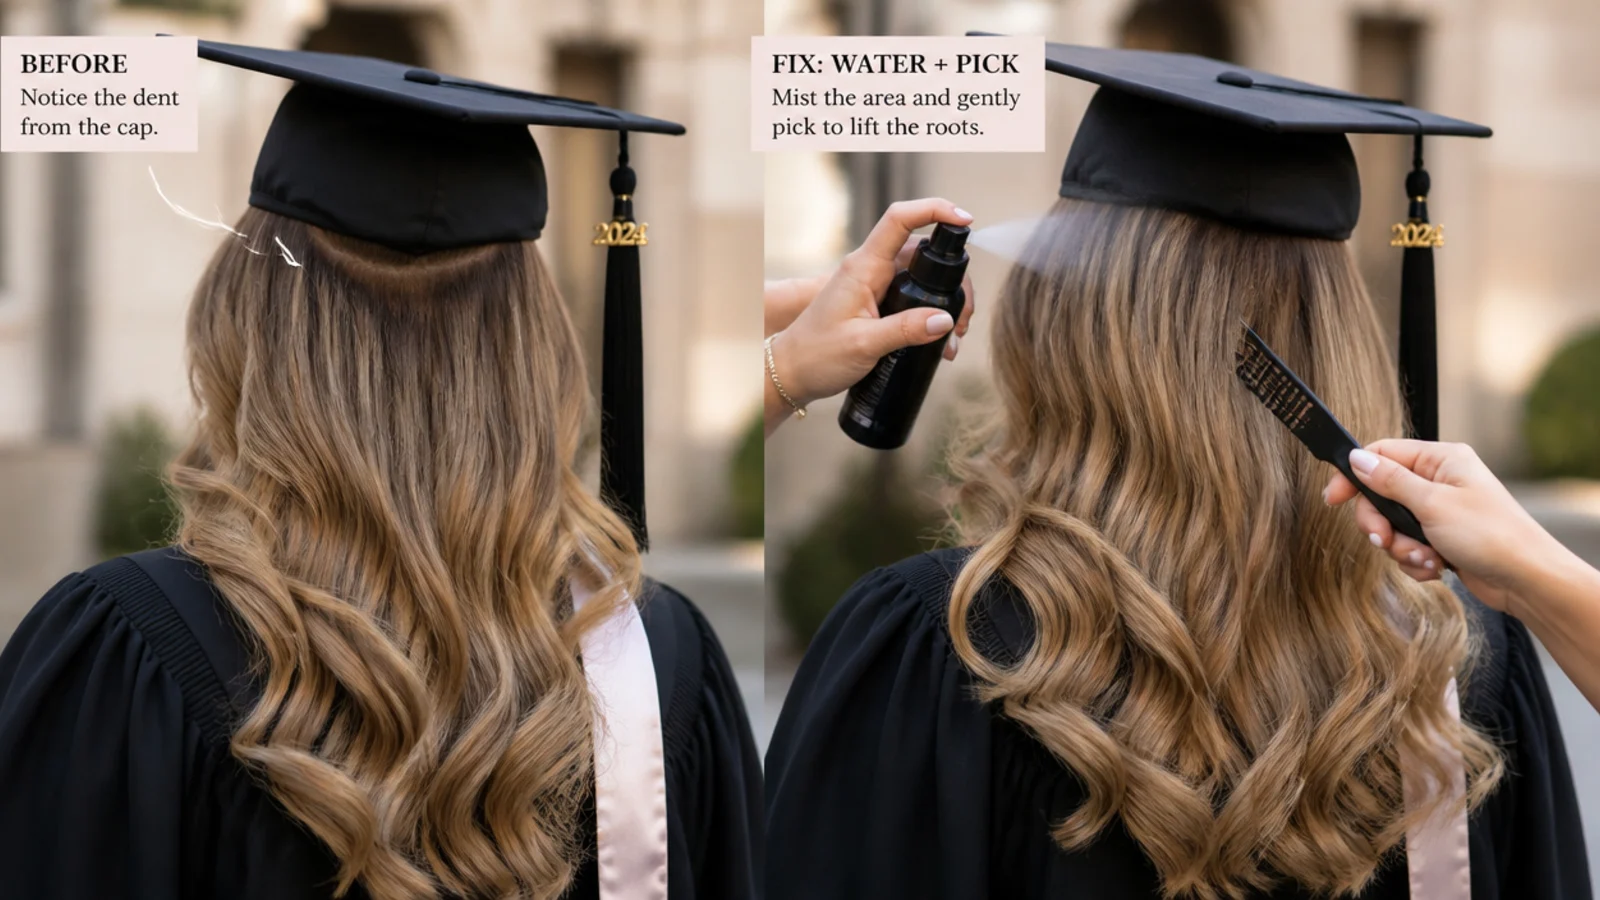
Nobody plans for the moment the cap comes off, which is a mistake, because that is when most graduation photos are actually taken. Caps leave a horizontal dent along the band line and a flattened crown, and the fix takes under a minute if you have the right two items. Flip your head forward, mist plain water only along the dent, then lift the roots with a pick or the tail of a comb using short upward flicks. Do not comb through the length, which pulls the style apart. Shake, flip back, and mist one light pass of flexible hold. Curly and coily textures should pick at the roots only and never disturb curl clumps. If you have a heat tool at home and the reception is later, a 30 second blast on the cool setting at the roots resets the crown completely. Styles that were already flat by design, like the slicked bun or the sleek low ponytail, need no fix at all.
Timing the Morning Of: A Realistic Schedule
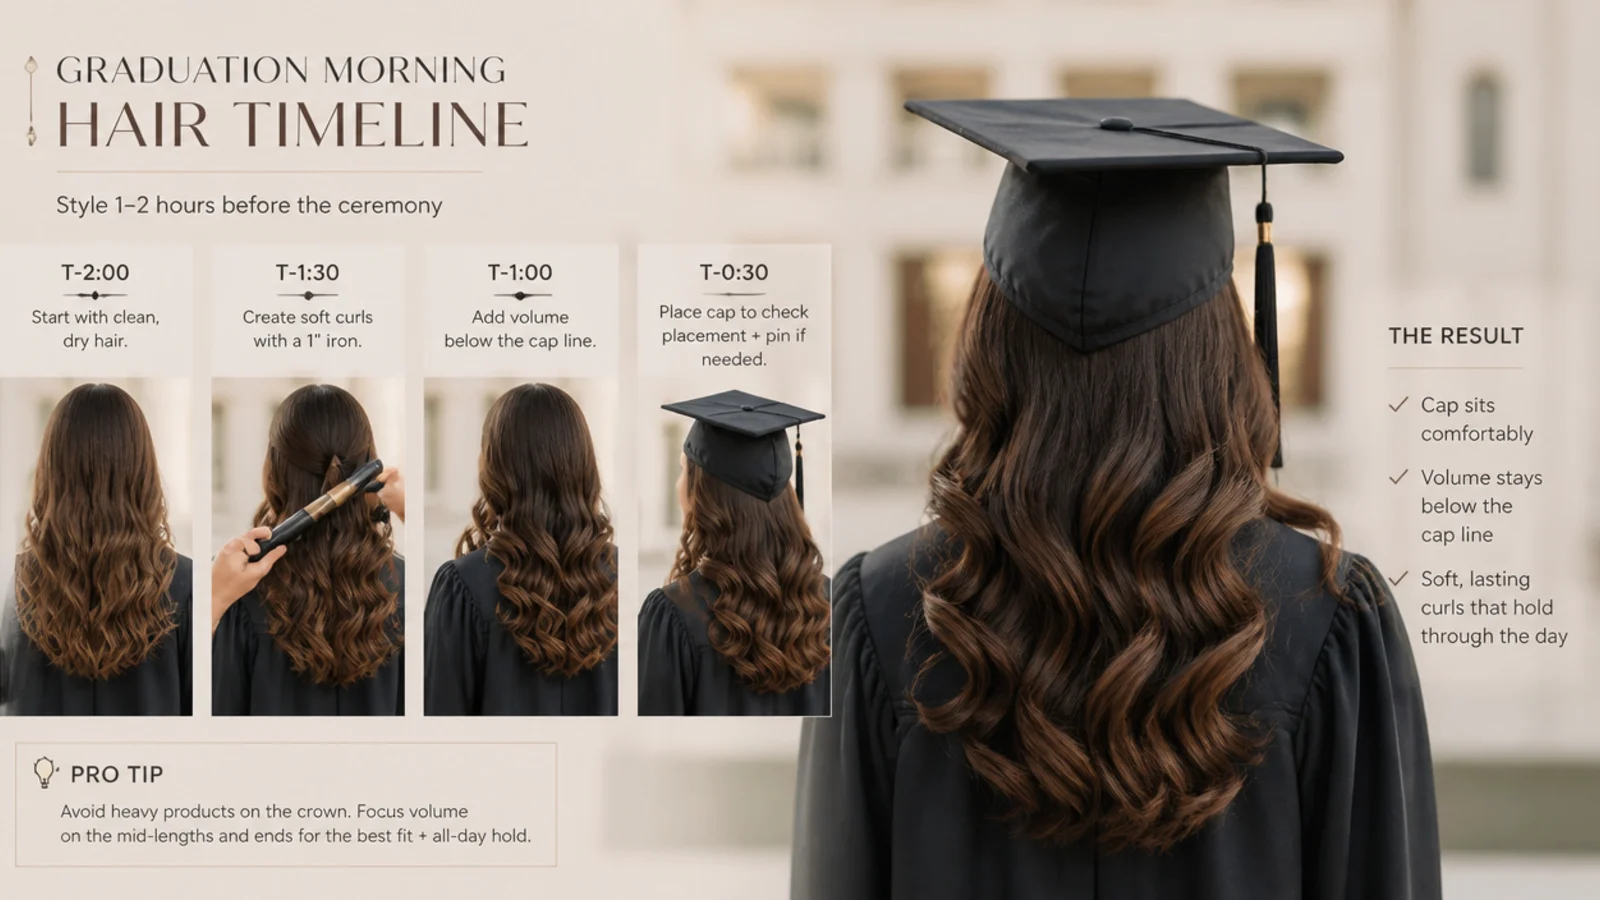
Style one to two hours before you leave, and no earlier. Any sooner and the style has already relaxed before the cap goes on; any later and you are pinning in a car. The single exception is a braided style, which you can genuinely build the night before and sleep in, and which will look better for the extra settling time. Wash the night before rather than the morning of, because day-two texture grips pins and freshly washed hair does not. Work backward from your call time: 15 minutes to dress and find the gown, 10 minutes for the cap pinning and rehearsal walk, and then your style time on top, which is 10 minutes for a sleek pony, 20 for a low bun, and 45 to 60 for curls that need a full cool-down. Add 15 minutes of buffer, because every graduation morning loses time somewhere. Fast options live in graduation hairstyles.
Frequently Asked Questions
What kind of hairstyles actually work under a graduation cap?
Anything that keeps the crown flat and puts its volume below the cap band. Low buns, low chignons, half-ups gathered at ear-top level, flat crown braids, side-swept waves and sleek low ponytails all work. High topknots, high ponytails and crown-level half-ups do not, because they lift the front of the cap and tip the whole board backward.
How do you wear a graduation cap with long hair?
Keep the weight low and split it if it is heavy. A single large bun placed too high drags the cap backward over a long ceremony, so either sit the bun at the nape or use two smaller low knots side by side. If you are wearing it down, sweep it over one shoulder and pin at the opposite side so nothing catches under the back band.
How do you keep a graduation cap from sliding back?
Cross two bobby pins in an X through the inner band of the cap and into your hair above each ear, and add a third X at the back if it is windy. The crossed pins grip in opposing directions and lock, where parallel pins pivot and slide out. Work on day-two hair for grip and skip oils or serums anywhere the band touches.
Should I wear my hair up or down for graduation?
Up if your ceremony is outdoors, longer than two hours, or in summer heat, because an updo holds shape, keeps hair off your neck and photographs with a clean silhouette. Down or half-up is fine indoors in air conditioning for a shorter ceremony. Long defined waves worn over one shoulder are the down style that photographs closest to an updo.
How do I fix the dent my graduation cap leaves in my hair?
Flip your head forward, mist plain water along the dent line only, then lift the roots with a pick or comb tail using short upward flicks rather than combing through the length. Shake it out, flip back and mist one light pass of flexible-hold spray. It takes under a minute. A cool-setting dryer blast at the roots resets it fully if you are at home.
How far in advance should I do my hair on graduation day?
One to two hours before you leave. Earlier than that and the style has already relaxed before the cap goes on, later and you end up pinning in a car. Braided styles are the exception and can be done the night before and slept in. Wash the night before rather than that morning, because day-two texture grips bobby pins far better.
Can you wear curly hair under a graduation cap?
Yes, and you should not flatten it. Define your curls, dry them fully, then redistribute the volume forward and to the sides so the crown section is the calmest part of your head. The cap sits on that calm section. Carry a pick and fluff at the roots only after the cap comes off, which restores most of the volume in about 30 seconds.
What hairspray should I use under a graduation cap?
A flexible or workable-hold spray, not a maximum-hold or freeze formula. The cap compresses your hair for hours, and stiff hold sets that compression permanently so the flat ring stays after the cap comes off. Flexible hold lets the hair squash and spring back. Use two light passes from about ten inches and let it dry fully before capping.
Do I need to practice with the cap on before graduation day?
Yes, and it is the single most useful ten minutes you will spend. Pin the cap on the finished style, walk around, look down at your phone, turn your head quickly and hug someone. Anything that shifts at home will shift on stage. Check the tassel hangs free at your right and that your bun is not pushing the back of the cap upward.
How many bobby pins do I need for a graduation hairstyle?
Budget 8 to 12 for the hairstyle itself and 4 to 6 more for anchoring the cap, then carry six spares in a clutch. A low bun needs a circle of six to eight pins around the coil, a rolled chignon needs 10 to 12, and each cap anchor point uses two crossed pins. Match the pin color to your hair so nothing shows in photos.
Which graduation hairstyles look are you saving?
If you remember one thing, make it the line: two fingers above the eyebrows, flat crown, volume below. Every style on this page obeys that and every style that fails on graduation day breaks it. Do a full practice run with the actual cap the day before, count your pins so you can rebuild in a bathroom if you need to, and set everything with flexible hold rather than a stiff freeze so your hair bounces back for the cap-off photos. Style 1 to 2 hours before you leave, carry six spare bobby pins and a small pick, and stop touching it after that. For more options by length, see graduation hairstyles for long hair and graduation hairstyles for short hair, or browse the whole graduation hairstyles hub.