Quick Comparison
| Updo Under the Cap | Hair Down Under the Cap | |
|---|---|---|
| Cap stability over four hours | High; a low bun gives the band a flat, dry surface to grip | Medium; smooth hair lets the cap slide back over time |
| Risk of cap dent | Very low; nothing at the crown to crush | High; the band presses a visible crease into the crown |
| Pin count needed | 6 to 10 pins for the style, plus 2 crossed pins for the cap | 2 crossed pins per side, purely to anchor the cap |
| Best in humidity | Better; pinned hair cannot expand or frizz outward | Worse; outdoor spring ceremonies swell loose lengths |
| Photo performance with the cap on | Strong; the silhouette stays crisp against a dark gown | Mixed; dark hair can disappear into a black gown |
| Photo performance after the cap comes off | Excellent; the shape is unchanged | Needs a fix; expect a 5-minute reset with water and fingers |
| Styling time the morning of | 12 to 30 minutes depending on the updo | 10 to 25 minutes, most of it curling |
| Comfort in a hot gown | Better; the neck stays clear | Warmer; length sits on the neck under polyester |
| Best hair lengths | Shoulder-length through waist-length | Pixie through long, but shines at bob and shoulder length |
1. Low Chignon at the Nape, Two Inches Below the Cap Band
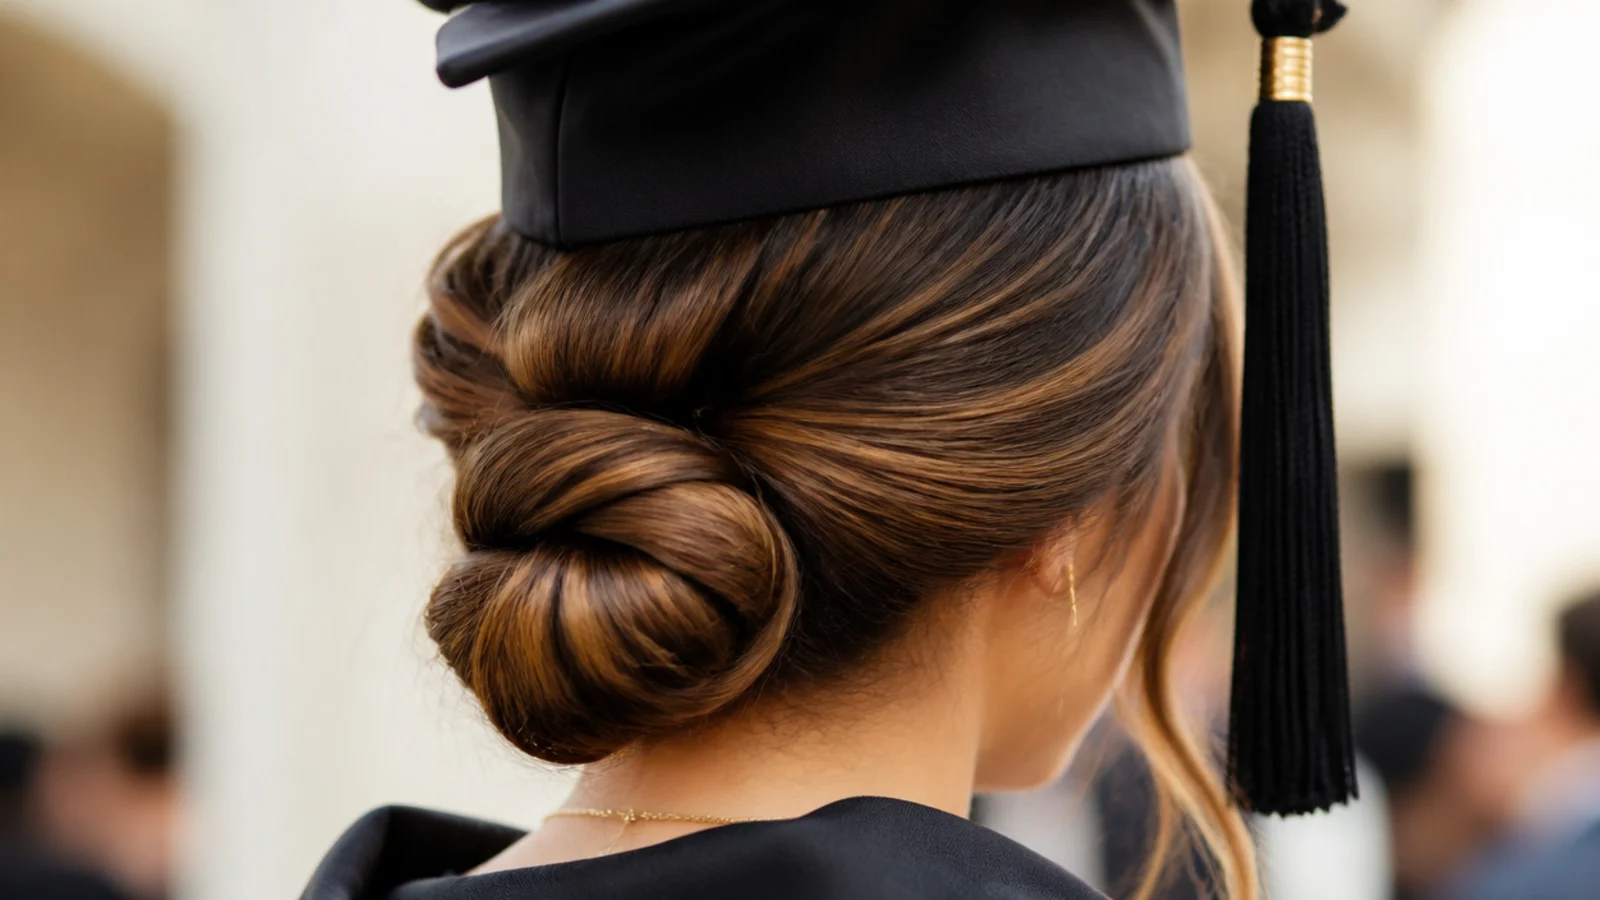
The single most cap-compatible style there is. Gather hair at the nape, twist the length into a rope, coil it flat against the head and pin the coil at four points around the outside with U-pins rather than bobby pins. The bun should sit at or below the occipital bone, roughly two inches under where the cap band falls, so the mortarboard never touches it. Leave the crown slightly loose instead of scraped tight, because a flat scraped crown reads severe in photos. Takes about 15 minutes on shoulder-length or longer hair. See more in the graduation updo guide.
Who it suits: Shoulder-length to waist-length hair, any texture, formal ceremonies.
Tip: Pin the coil toward the scalp at a downward angle so the weight cannot drag the cap backward.
2. Half-Up Half-Down With the Top Section Pinned Flat
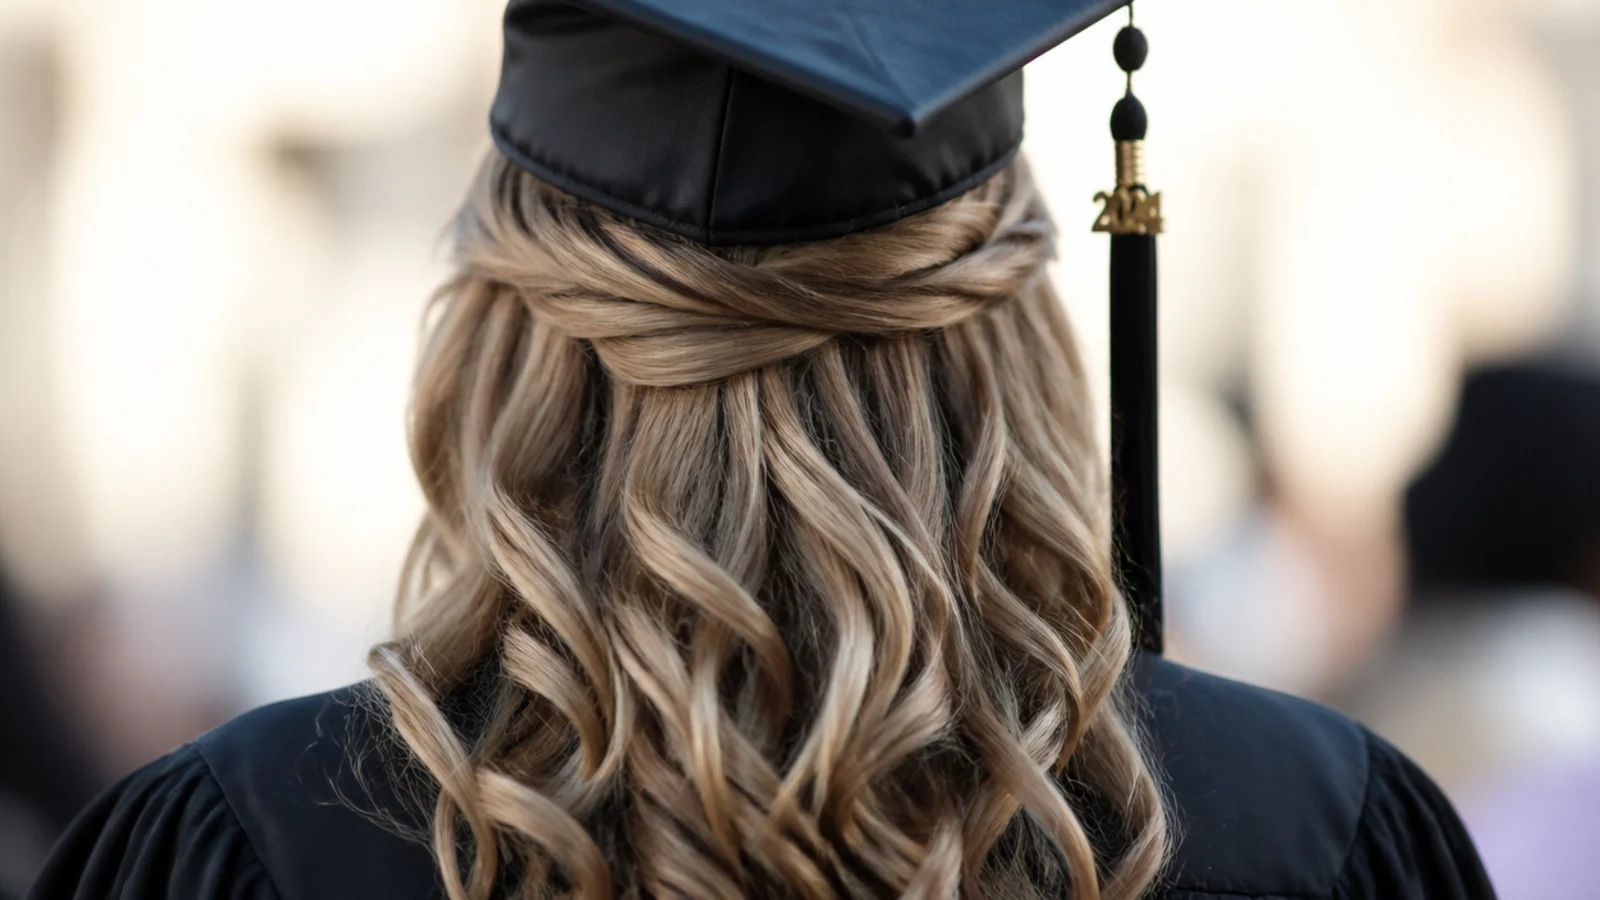
Take the section from temple to temple, twist it back, and pin it flat against the head just below the crown instead of gathering it into a puff. That flat pinning is the whole trick: a bouffant half-up fights the cap band, while a flat one disappears under it and lets the cap sit level. The curled length below does all the visual work in photos. Use two crossed bobby pins at the join and one on each side. Ten minutes plus curling time, and it is the easiest style to fix mid-day if the pins slip.
Who it suits: Anyone who wants length visible in photos but hair off the face.
Tip: Set the cap over the pinned join, not in front of it, so the band hides the hardware.
3. Side-Swept Waves Over the Left Shoulder
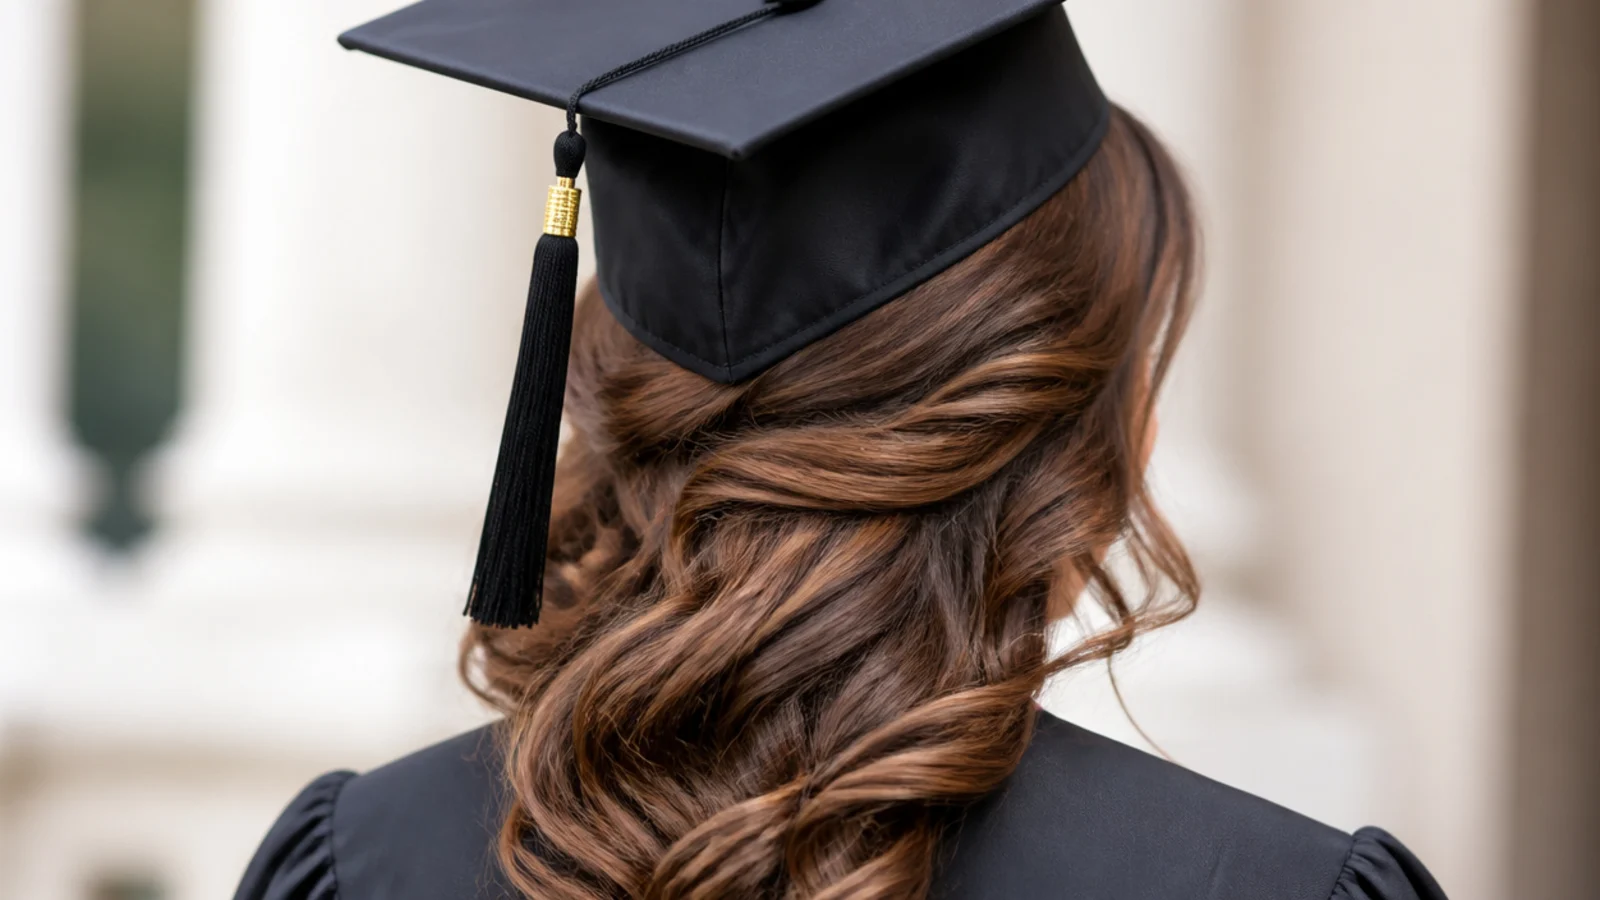
Deep side part, all the length brought forward over one shoulder, waves curled with a 1.25-inch iron and brushed out soft. The cap sits on a smooth crown while the entire style lives at chest level, which is why it survives four hours untouched. Pin the back section behind the opposite ear with two hidden bobby pins so the hair does not creep back over the shoulder every time you turn your head. Roughly 25 minutes including curling. It also photographs well head-on, since the cap and the waves occupy different halves of the frame.
Who it suits: Long and medium-long hair, off-shoulder or wide-neckline dresses.
Tip: Let curls cool completely for 10 minutes before the cap goes on or they will drop flat.
4. Sleek Low Ponytail at the Occipital Bone
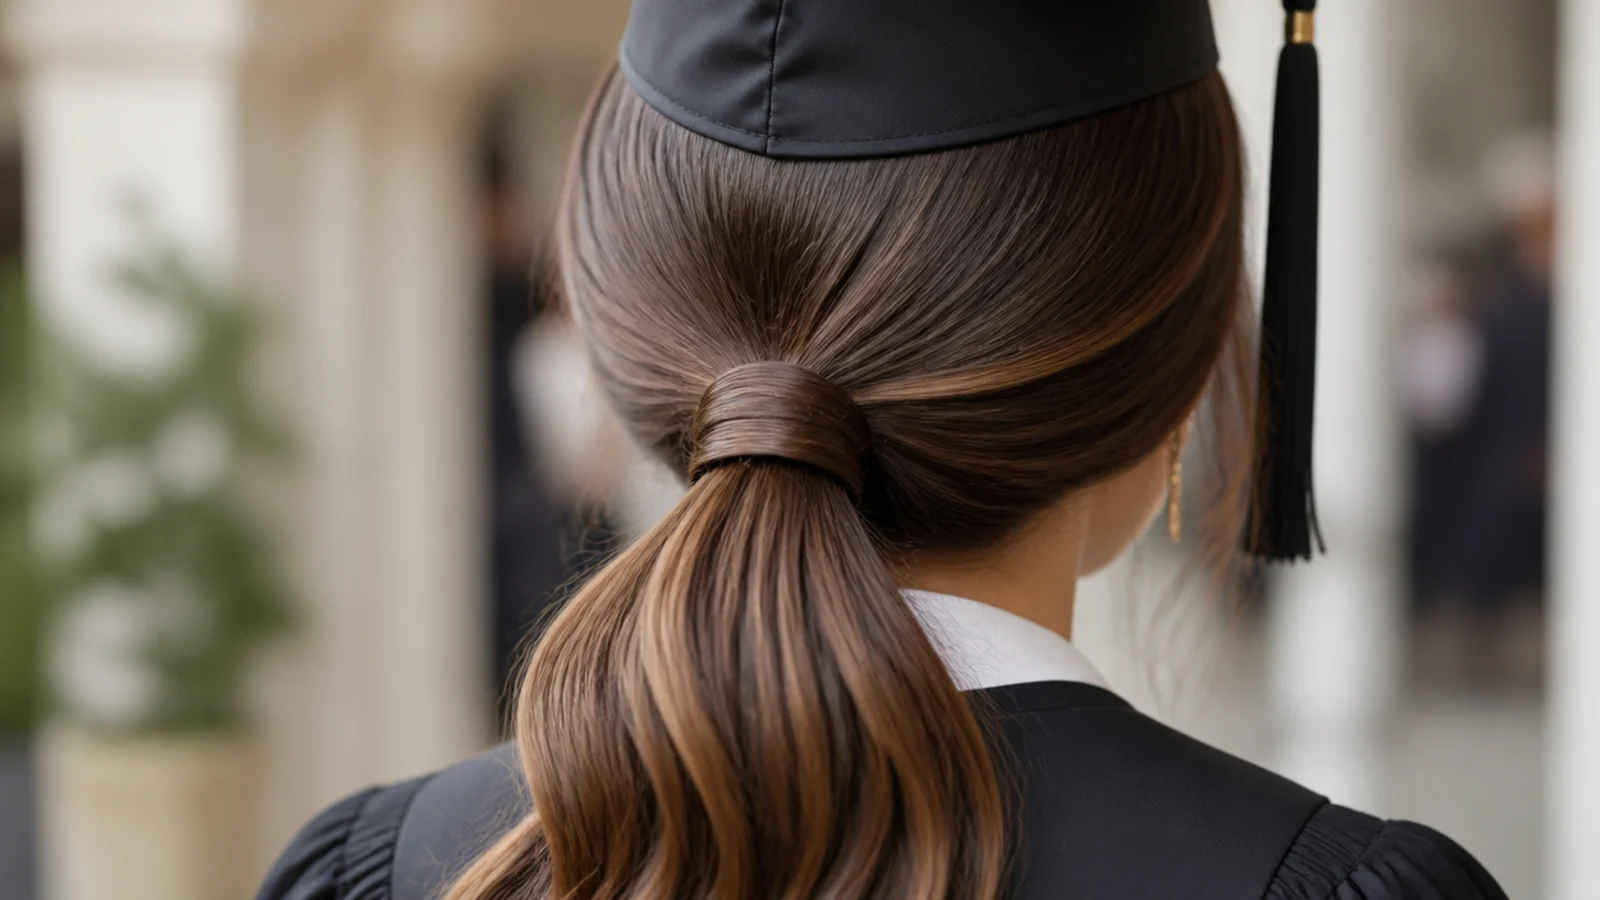
Smoothed back with a lightweight cream, tied at the bony ridge at the back of the skull, then wrapped with a half-inch section of hair to hide the elastic. Placement is everything: an inch higher and the elastic sits under the cap band, creating a lump that tilts the mortarboard forward. Use alcohol-free gel on damp hair rather than a heavy freeze spray, since gel that dries hard flakes visibly against a black gown. Fifteen minutes. This is the most reliable option for very thick hair, which gets heavy fast in a bun. More placements in ponytail styles.
Who it suits: Thick or long hair, outdoor ceremonies, anyone who wants zero fuss.
Tip: Smooth the crown with a boar bristle brush, not a comb, so you do not create static under the cap.
5. Dutch Crown Braid That Sits Below the Cap Line
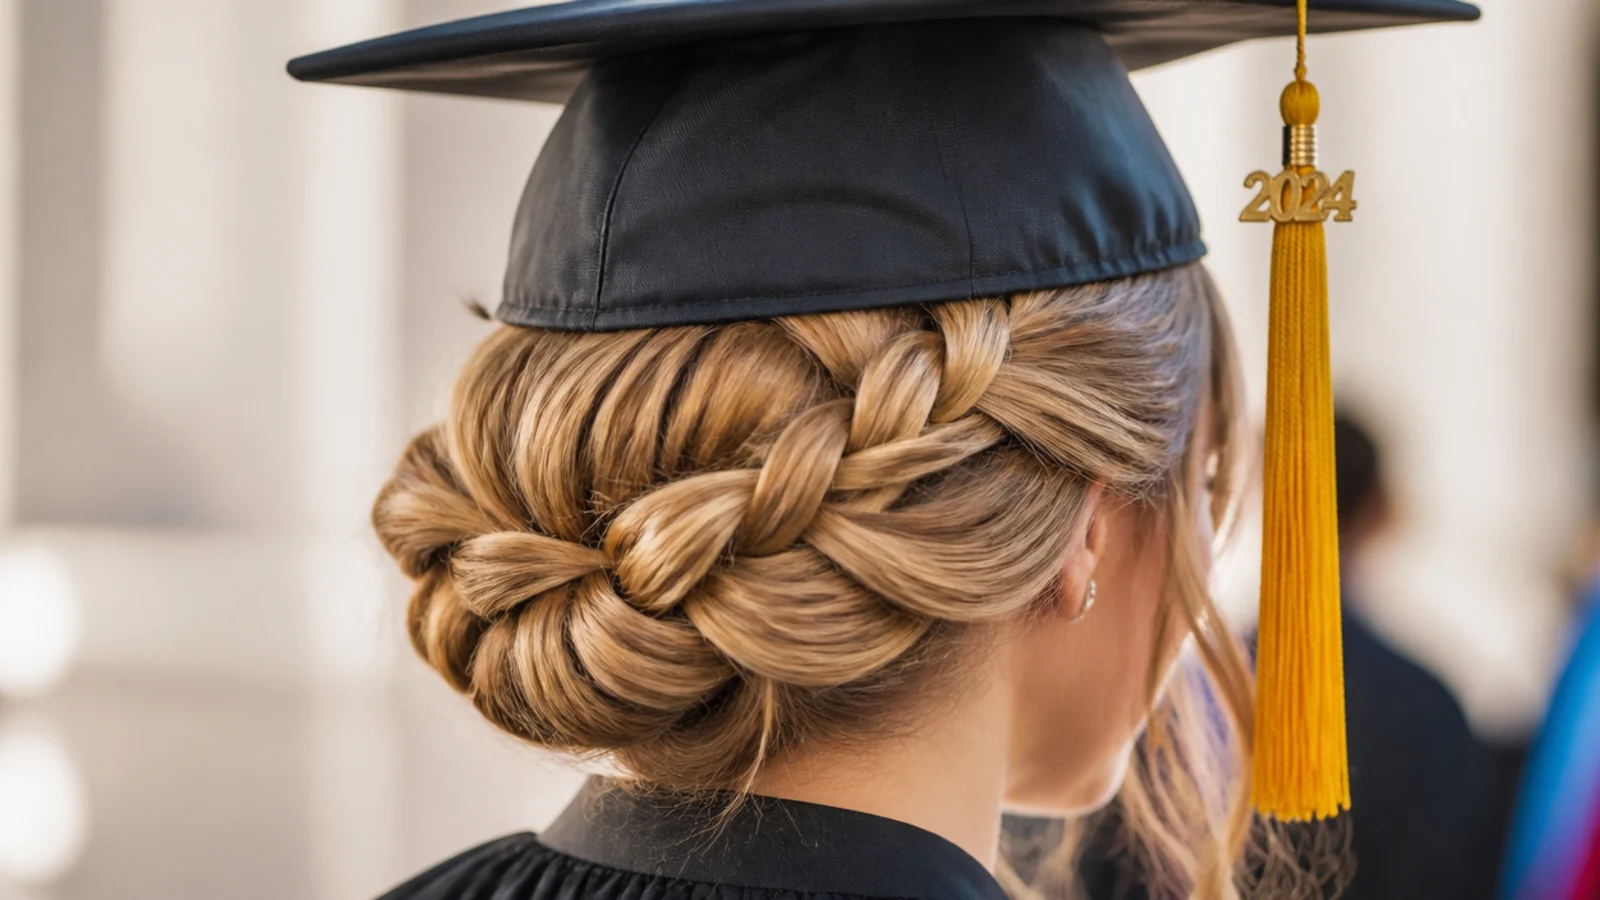
A Dutch braid worked from one ear around the back and pinned above the opposite ear, kept deliberately low so the braid rides behind the cap band rather than under it. Standard crown braids fail here because they sit exactly where the mortarboard front edge lands. Drop yours a full inch and the conflict disappears. Braids also hold better than any other style over four hours and look identical after the cap comes off, with zero dent risk. About 20 minutes with practice, longer if you are braiding blind from behind.
Who it suits: Medium to long hair, outdoor ceremonies, humidity.
Tip: Pancake the braid outward at the sides only, so the volume lands where the cap does not.
6. Low Twisted Bun for Fine Hair Under a Cap
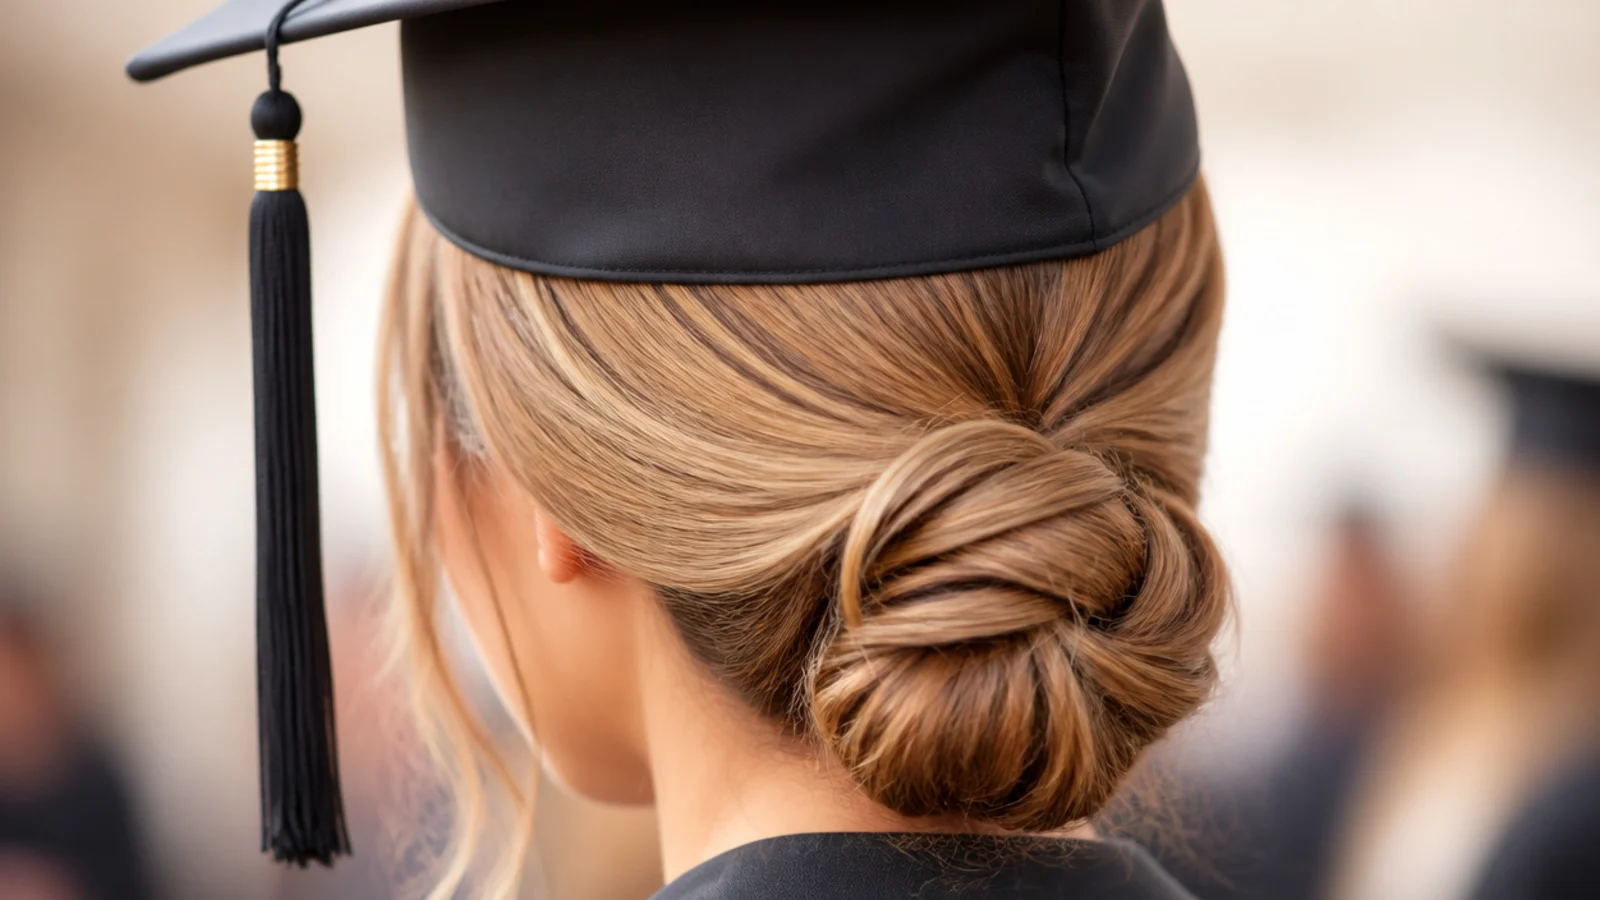
Fine hair collapses under a cap faster than any other type, so build the bun bigger than it needs to be. Mist dry texture spray through the mid-lengths, backcomb lightly at the nape only, twist into a loose low bun and pin with six bobby pins crossed in pairs. Fine hair does not have the weight to hold a single pin, and pairs crossed into an X grip roughly twice as well. Leave two face-framing pieces out. Twelve minutes. Fine hair also recovers fastest from cap dent, which is the trade-off working in your favor. See also how to style short fine hair.
Who it suits: Fine, thin or slippery hair that will not hold a standard bun.
Tip: Spray the pins with hairspray and let them tack for 5 seconds before sliding them in.
7. Two Dutch Braids Ending in a Low Bun
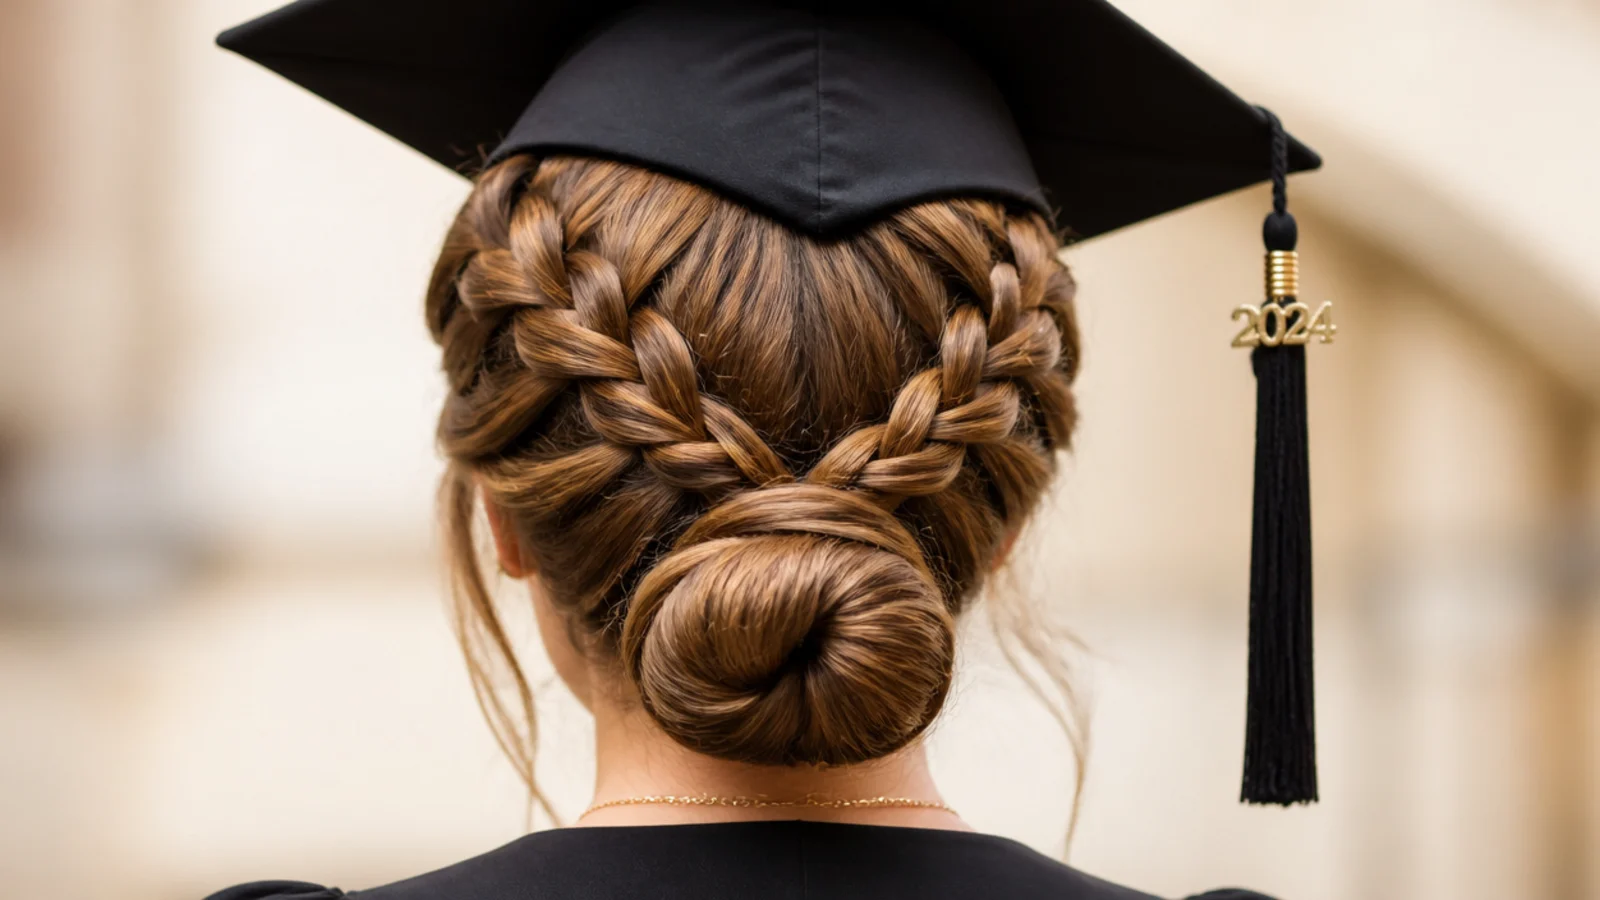
Two Dutch braids run from the front hairline straight back, then meet and fold into one low bun at the nape. Because Dutch braids sit raised on the surface, keep them tight and flat for the first three inches, which is the stretch the cap band crosses. After that you can pancake them freely. This is one of the few styles that reads as an intentional hairstyle from every angle including directly overhead in stadium photos. Around 25 minutes on yourself. Pairs well with the techniques in easy braided hairstyles.
Who it suits: Medium to long hair, athletic ceremonies, anyone who wants zero touch-ups.
Tip: Keep the first three inches of each braid flat, then pancake once the cap is off for photos.
8. Loose S-Wave Blowout for Shoulder-Length Hair
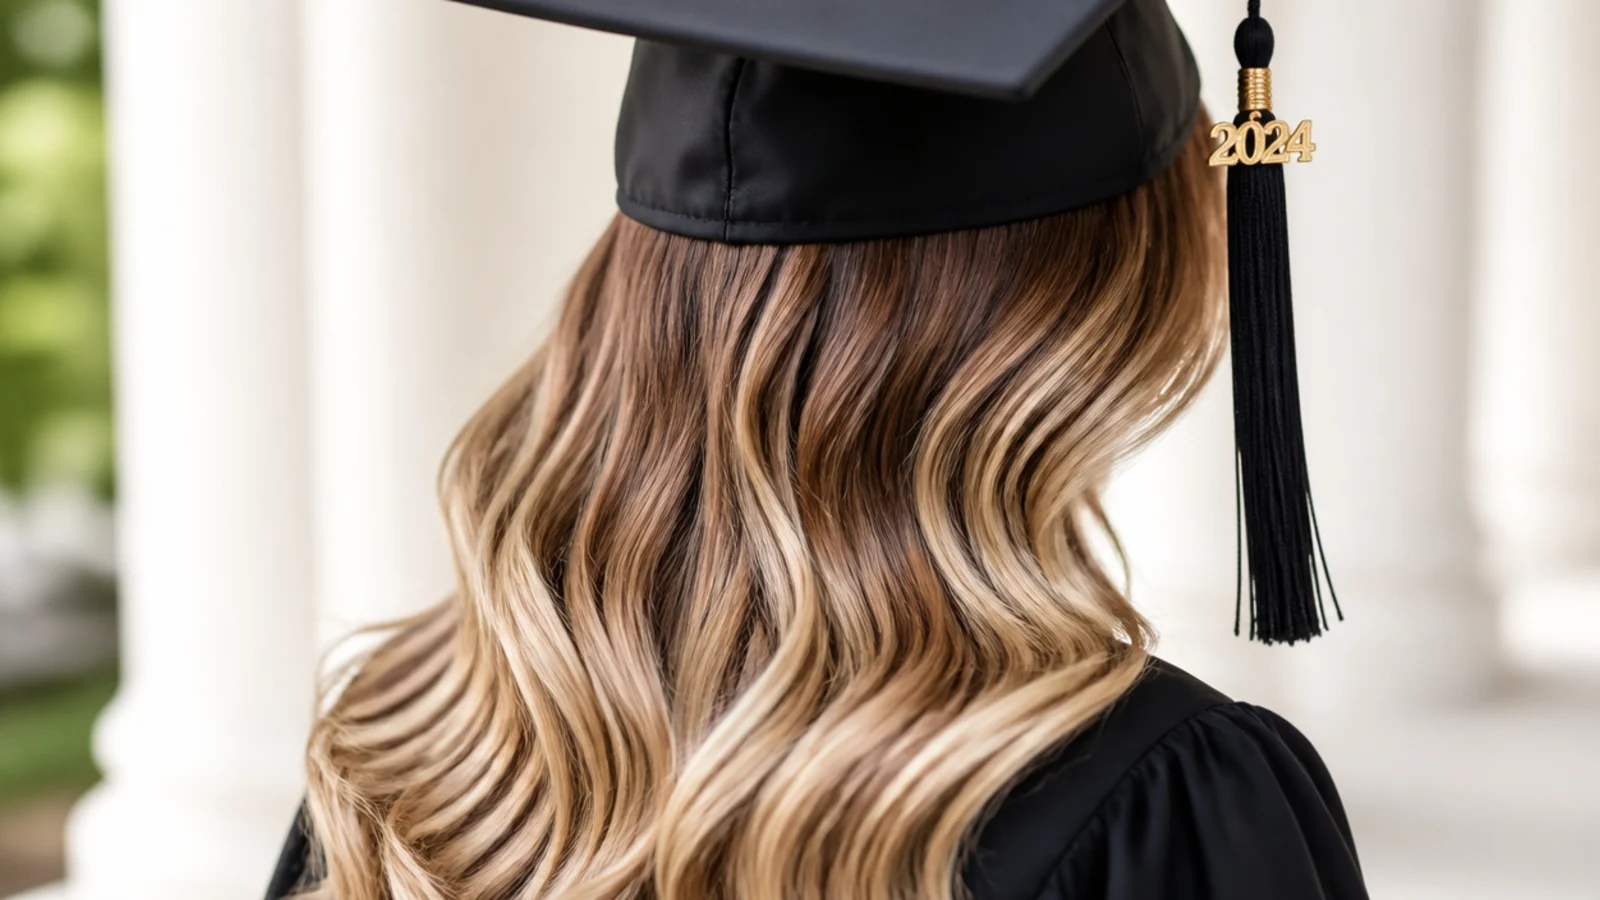
Wide bends set with a 1.5-inch iron, starting at ear level rather than at the root, so all the movement happens below the cap band. Root-level waves are the mistake here; the cap flattens them within twenty minutes and you are left with a crimped-looking crown. Starting the bend low means the cap simply sits on a smooth section and the waves stay untouched. Mist flexible-hold spray from mid-length down only. Twenty minutes. This is the best down style for anyone whose hair falls between chin and collarbone.
Who it suits: Shoulder-length hair, indoor ceremonies, low-humidity days.
Tip: Skip product at the roots entirely, since anything there will look greasy after four hours under felt.
9. Textured Bob With Volume at the Jaw, Not the Crown
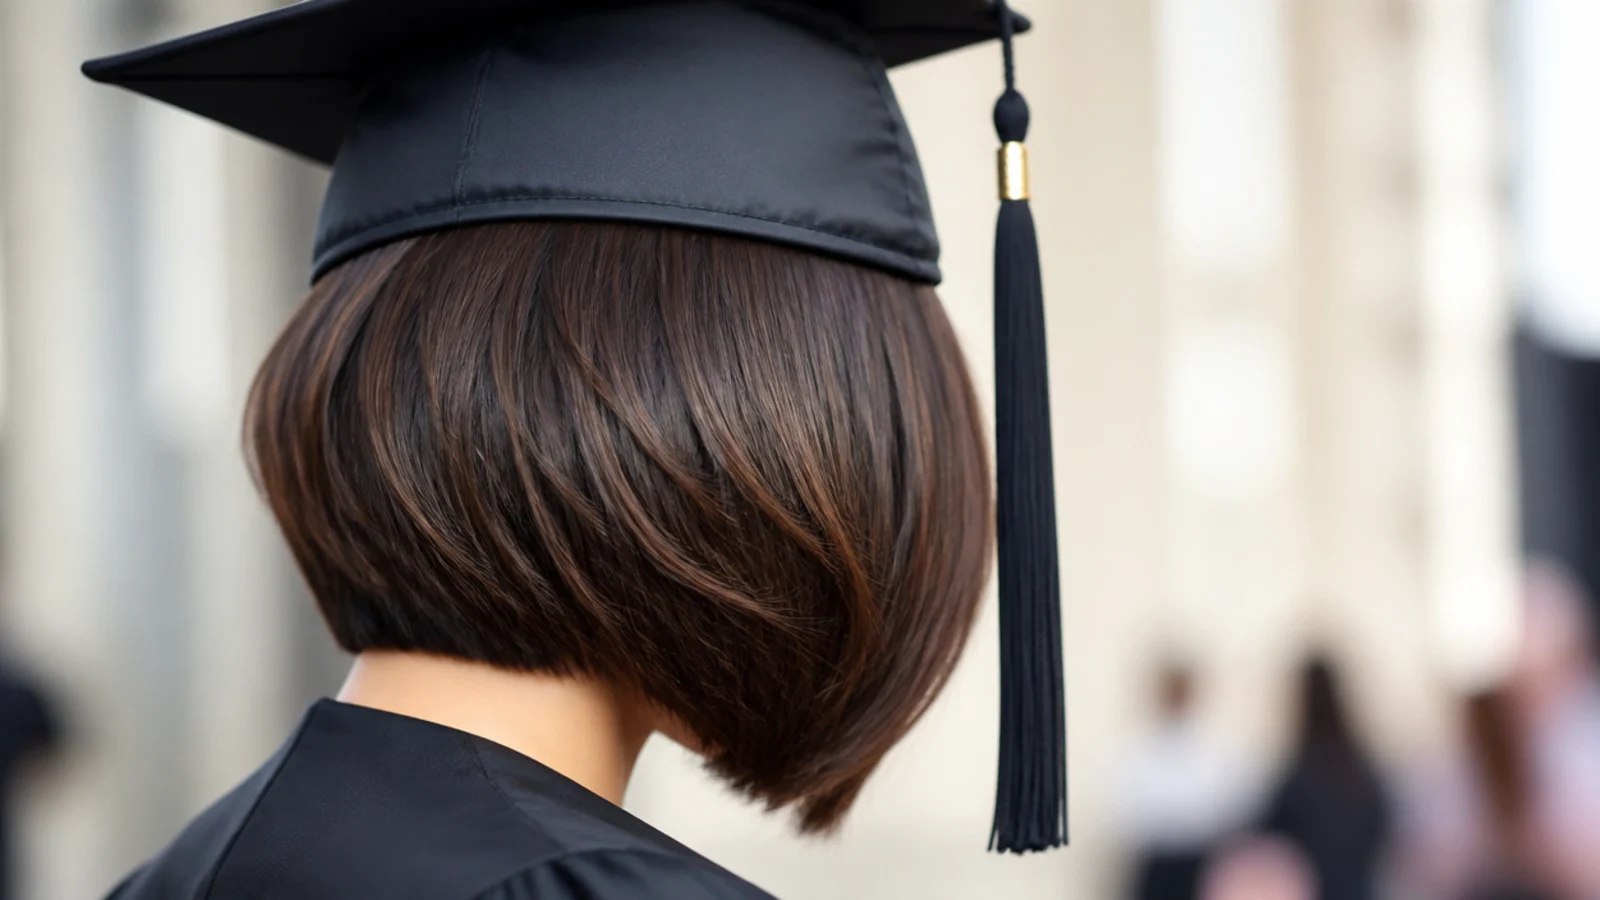
On a chin-length bob the cap covers nearly the entire top of your head, so every bit of styling should push outward at the jaw. Rough-dry with your head upright, not flipped, then bend the ends outward with a flat iron and finish with texture spray at the ends only. Volume aimed forward and out gives the cap a wide base and reads far better in photos than a lifted crown you cannot see. Ten minutes. For cut-specific detail, see bob haircuts.
Who it suits: Chin to jaw-length bobs and lobs of any texture.
Tip: Tuck one side behind the ear so the cap band has a clean edge to sit against.
10. Pixie With the Cap Anchored on Two Crossed Pins
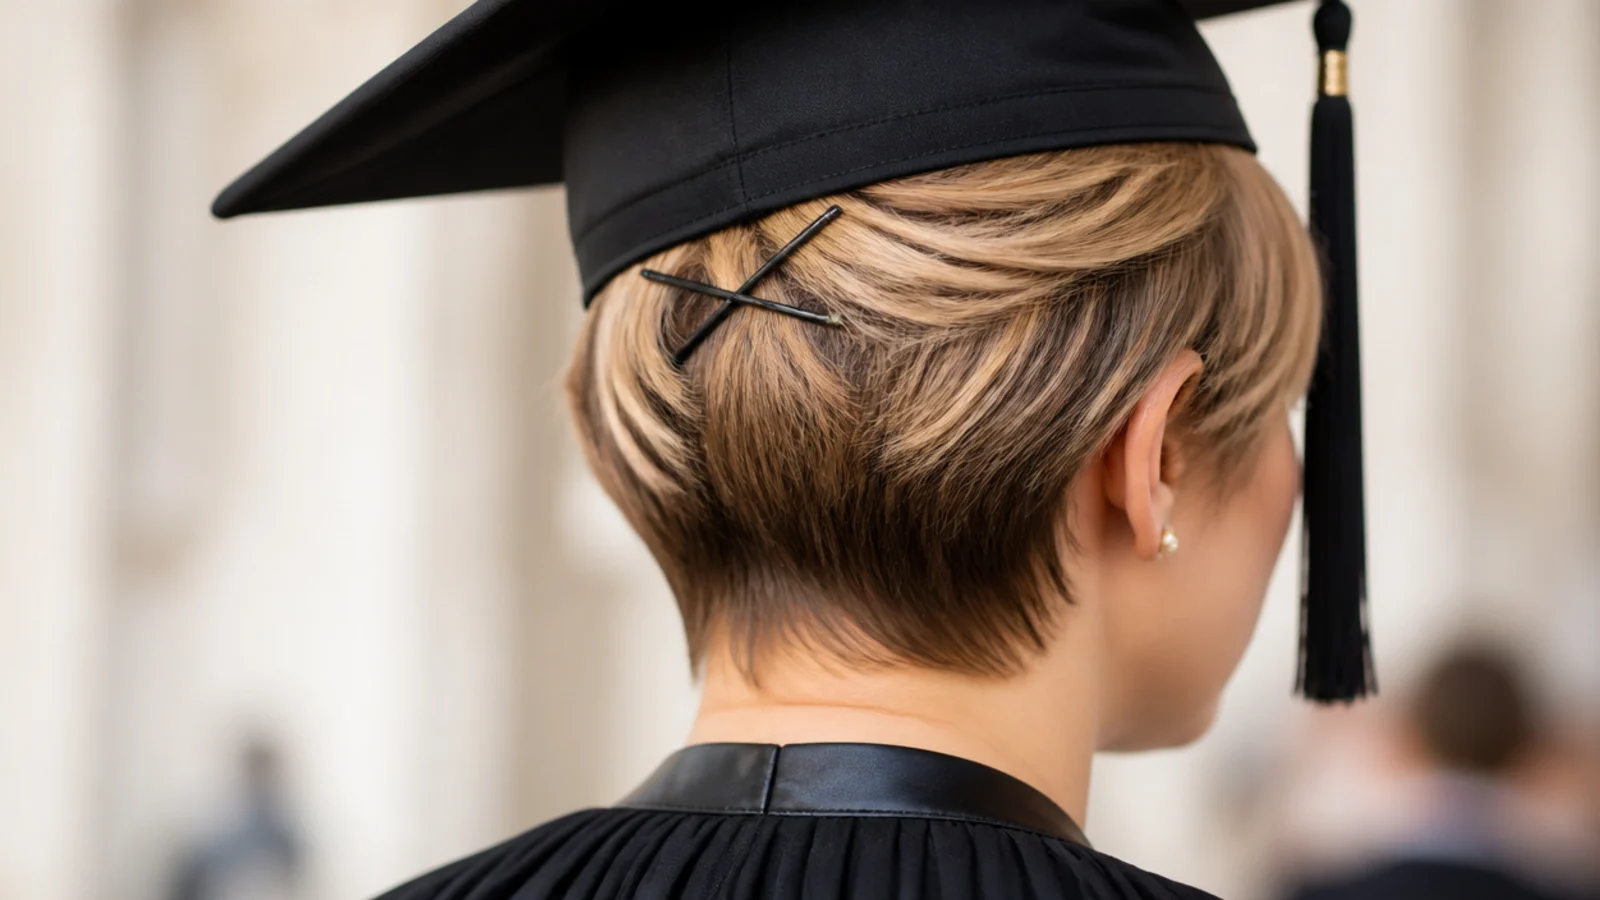
The real pixie problem is not styling, it is anchoring: there is nothing for the cap to grip, so it slides. Fix it by sliding two bobby pins into the hair just behind each temple, crossing them into an X, then hooking the cap band under the crossed pins on both sides. Style the pixie itself forward and to one side with a matte paste so the front piece shows below the band. Five minutes. This is also the fastest cap-off recovery on the list, since a pixie needs one pass of fingers and paste.
Who it suits: Pixies, crops and very short hair of any texture.
Tip: Use pins that match your hair color, since the band leaves them partly visible at the temples.
11. Flat Twists Into a Low Bun for 4C Hair
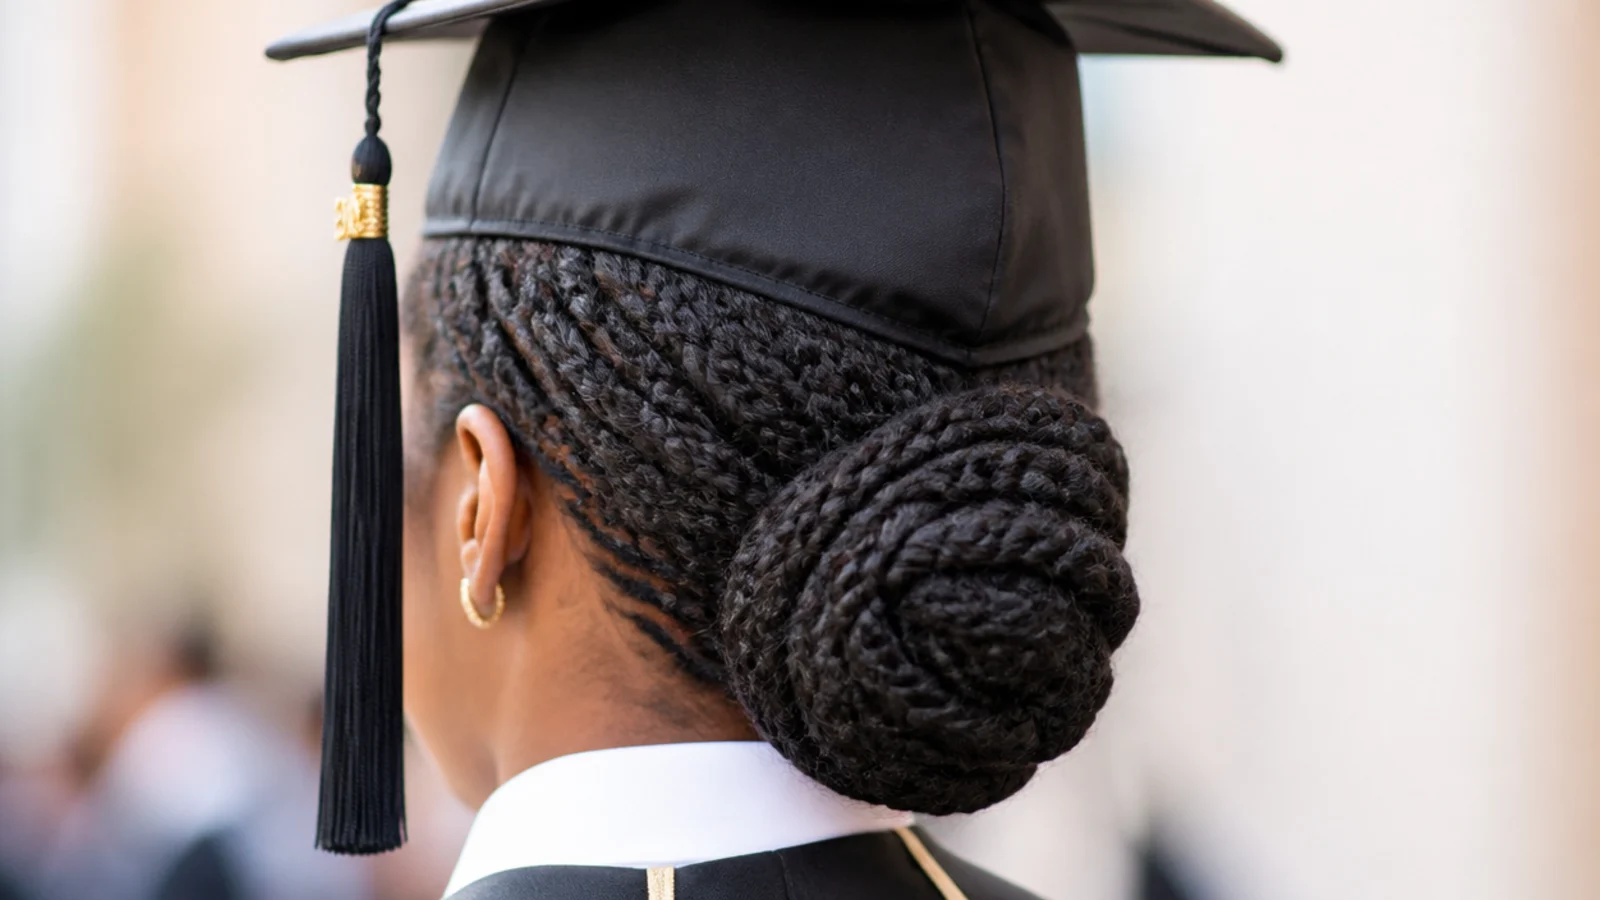
Two or three flat twists laid along the scalp from the front hairline to the nape, gathered into a low bun or puff at the back. Flat twists solve the cap problem better than any loose natural style because they sit close to the scalp exactly where the band crosses, so nothing gets compressed and nothing needs reviving afterward. Install them the morning of rather than days ahead, since a fresh tight install is uncomfortable under a cap for four hours. About 35 minutes. More options in protective styles for fine 4C hair.
Who it suits: Type 4 natural hair, locs and anyone wanting a style that needs no revival.
Tip: Leave the bun at the nape rather than high, so the cap does not push the twists forward.
12. Low Fishtail Braid Over One Shoulder
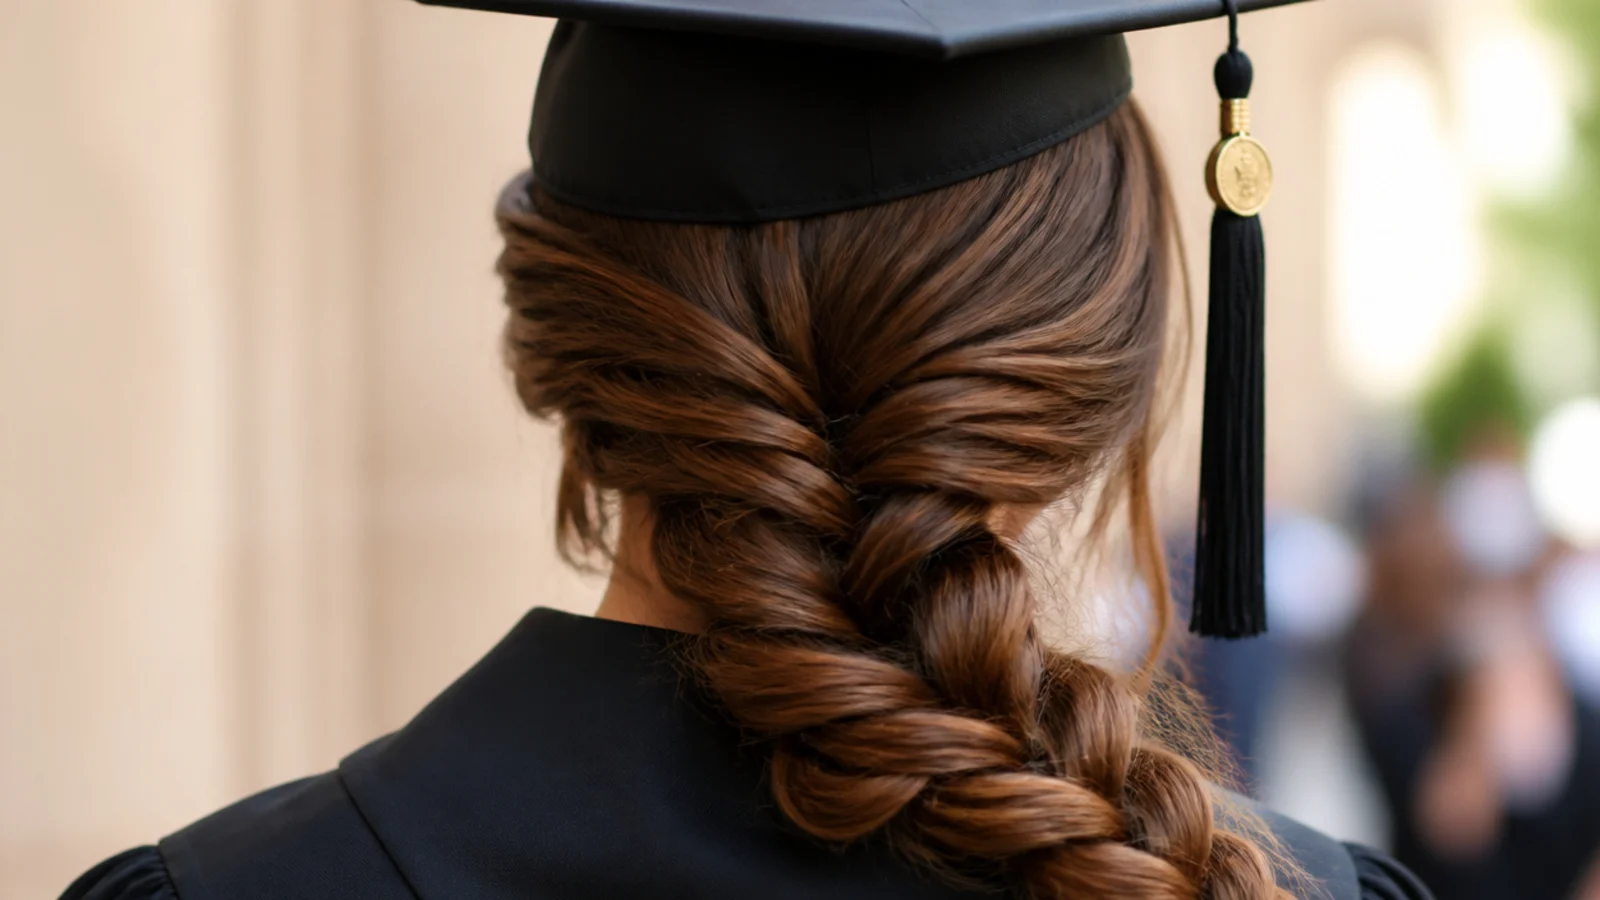
Hair gathered low at the nape, fishtailed loosely and brought forward over one shoulder. Bringing it forward matters more than the braid itself: a long heavy braid hanging down the back pulls on the crown and slowly drags the mortarboard backward, which is the most common cap failure with very long hair. Over the shoulder, the weight sits on your collarbone instead. Loosen the braid gently with your fingertips before the cap goes on. About 20 minutes. Related long-hair setups live in graduation hairstyles for long hair.
Who it suits: Very long or very thick hair, spring and outdoor ceremonies.
Tip: Finish with a clear elastic and one drop of oil on the ends so the braid photographs smooth.
13. French Twist Rolled Below the Cap Band
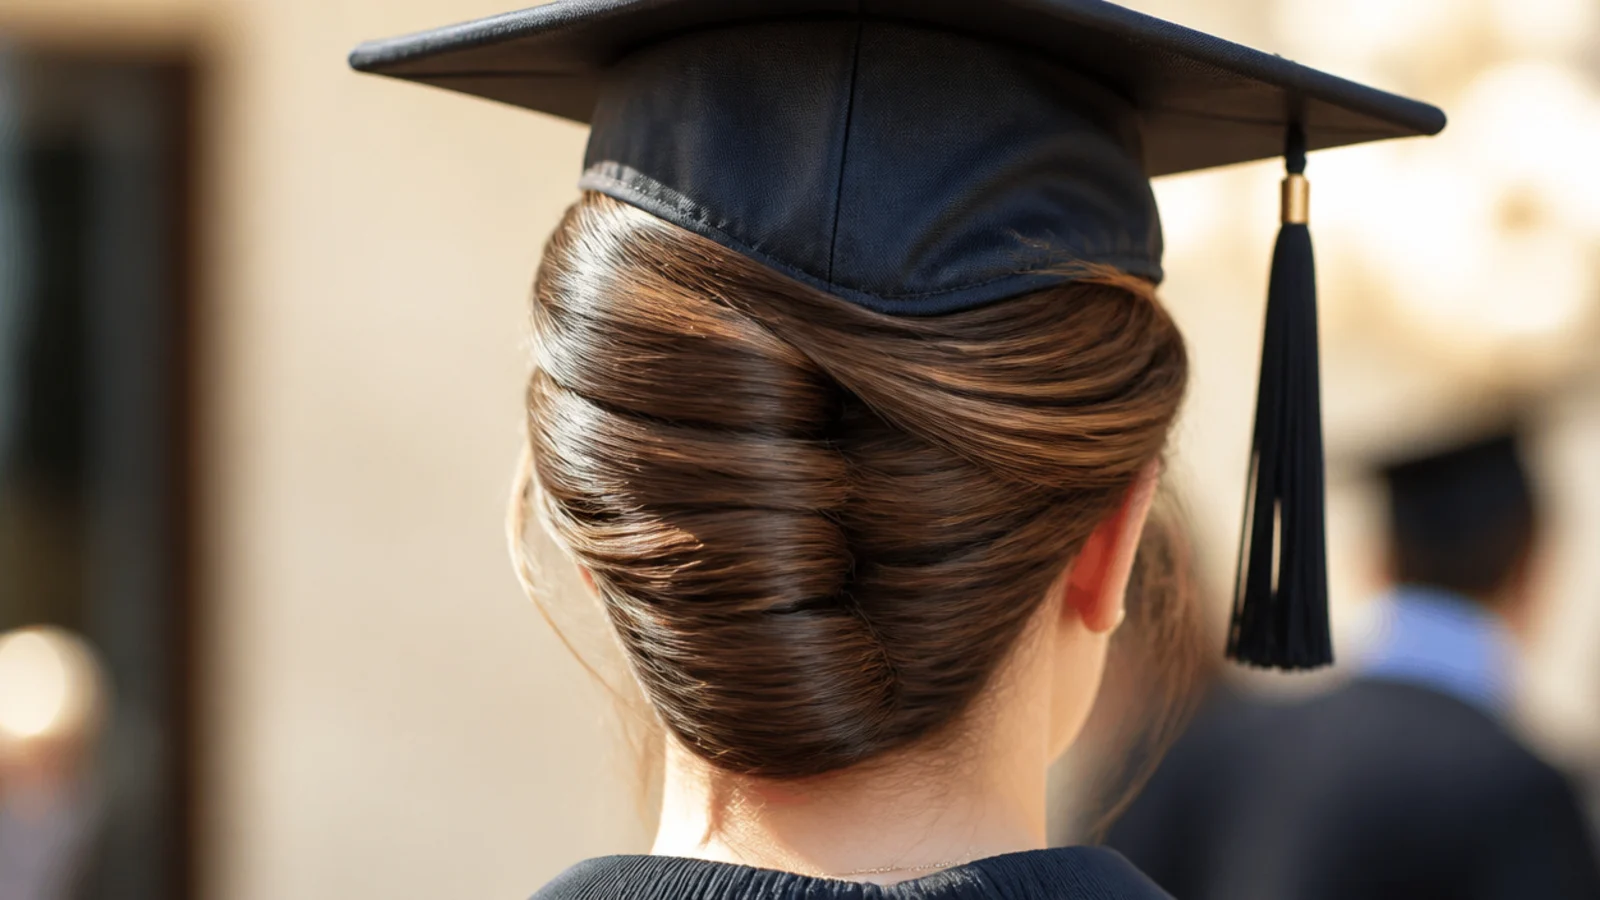
Sweep everything to one side, twist the whole section upward and roll it inward against the head, then pin down the seam with U-pins. Stop the roll about an inch below where the band lands. Stopped there, it is the flattest formal updo you can build, which is exactly why it works under a mortarboard. Roll it any higher and the top of the twist becomes a ridge that lifts the cap. About 25 to 30 minutes on yourself. It is the most formal option here and the one most worth practicing twice.
Who it suits: Shoulder-length to long hair, hooding ceremonies and formal dress codes.
Tip: Pin along the seam vertically, not horizontally, so the roll cannot unravel over four hours.
14. Half-Up Bubble Ponytail Below the Cap
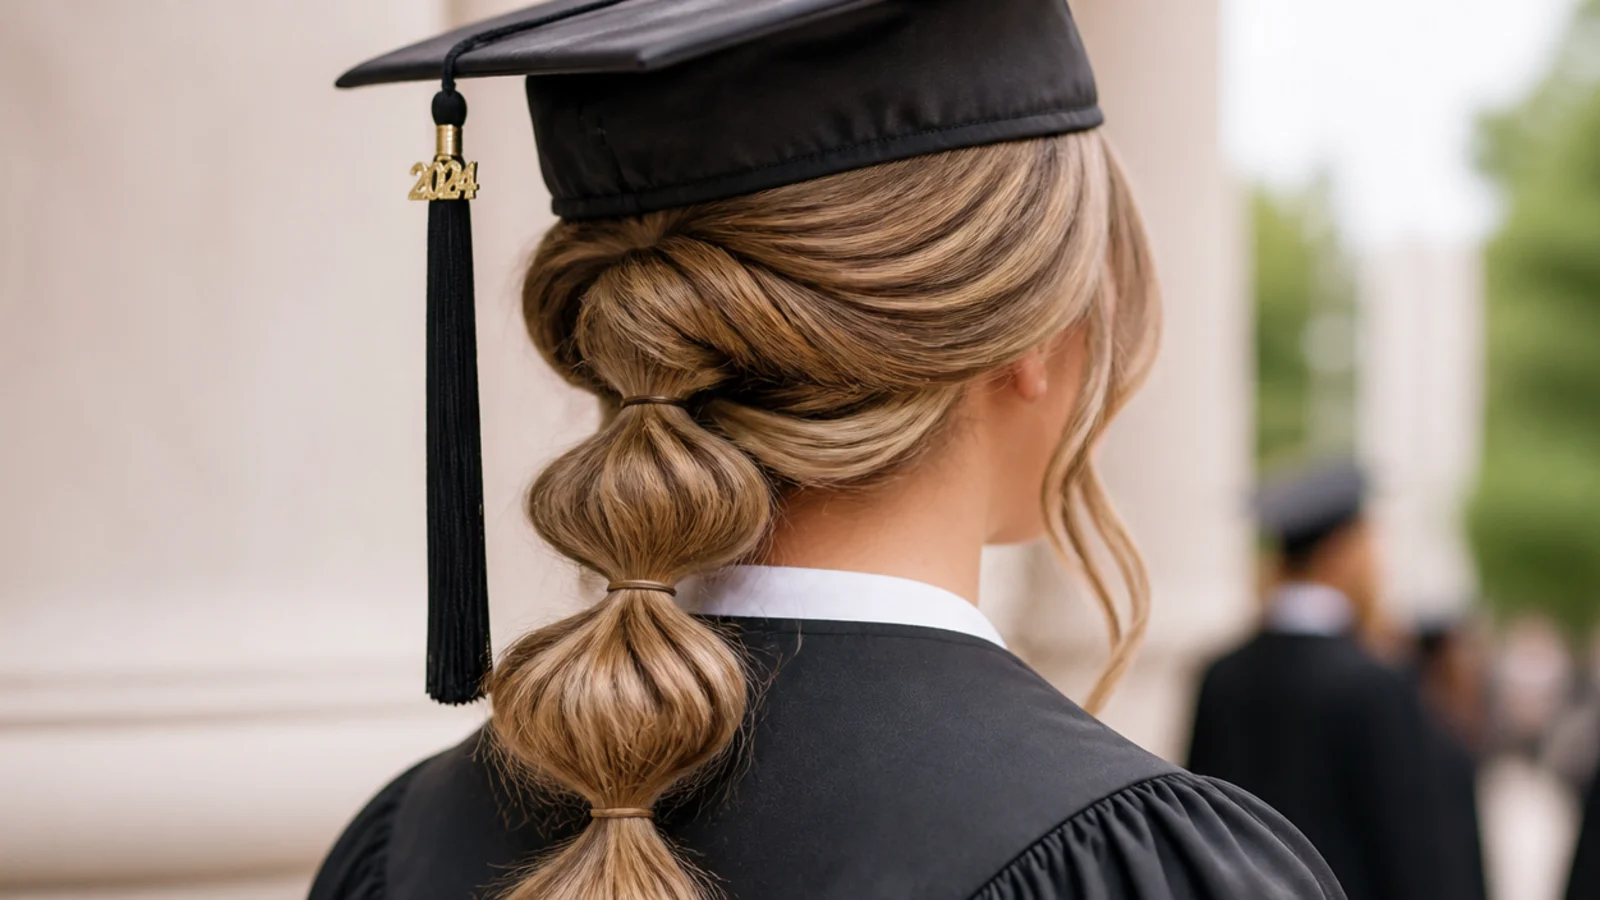
A half-up section tied low at the back of the head, then segmented into three or four bubbles with clear elastics spaced two inches apart. Every element sits below the cap, and the bubbles give photos a rhythm that a plain half-up does not have. The first elastic must sit at or below the occipital bone, not at the crown, or the cap will tilt. Pull each bubble gently outward after the cap is on, since the band flattens the top one. Fifteen minutes and no heat required.
Who it suits: Medium to long hair, high school graduations, heat-free days.
Tip: Space the elastics evenly by eye in a mirror; uneven bubbles are the giveaway in photos.
15. Curly Wash-and-Go Pinned Back at the Temples
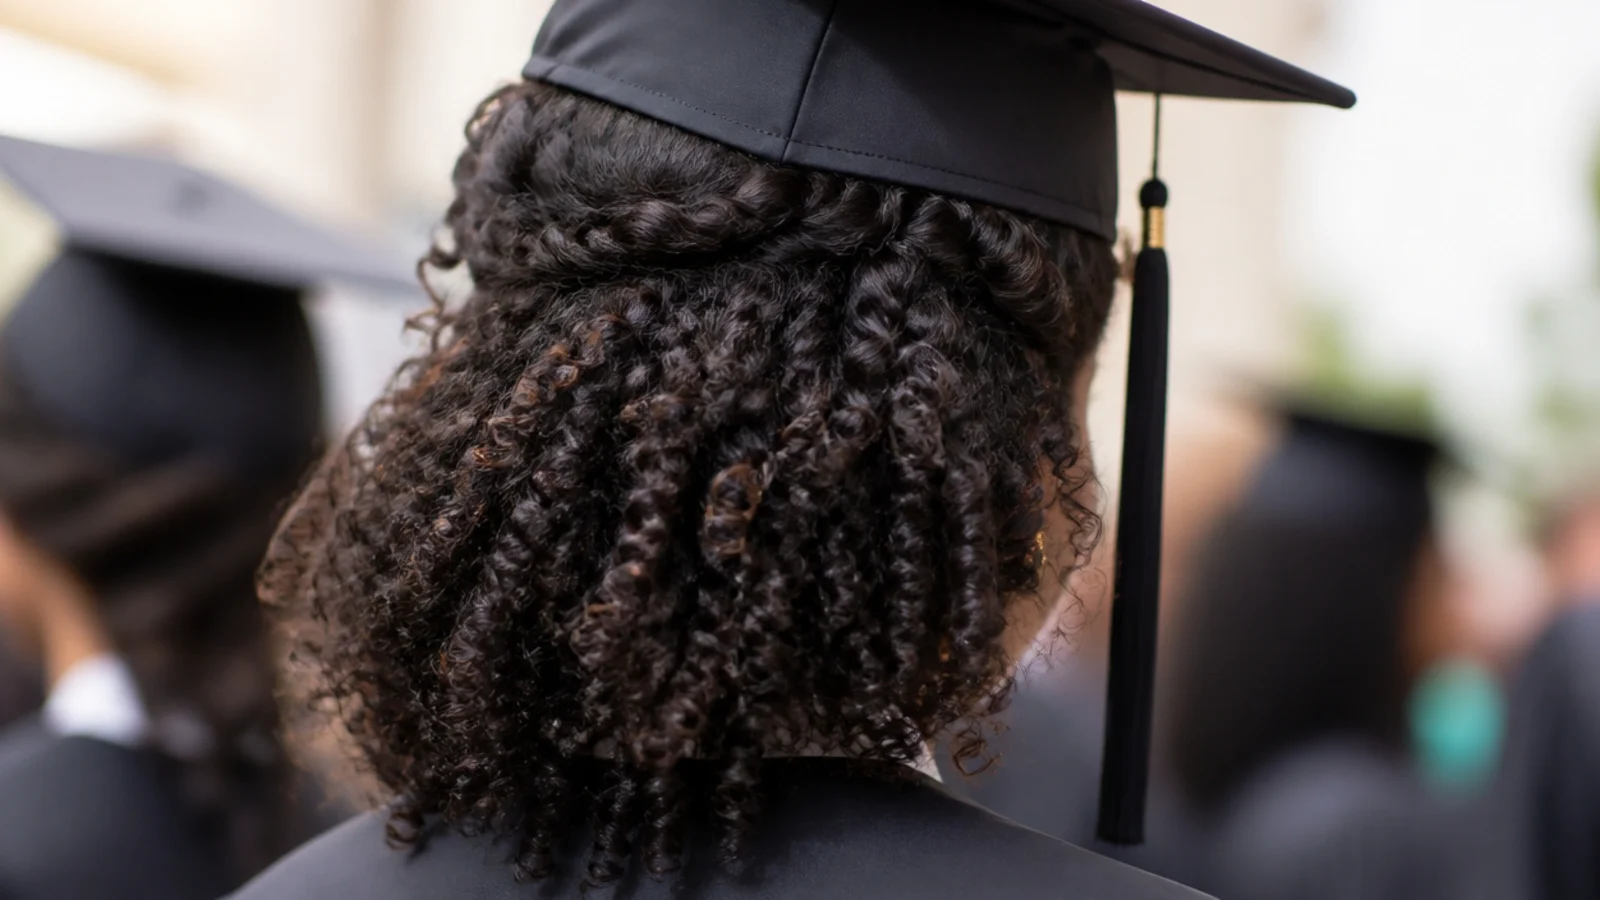
Curls worn loose with just the temple sections pinned back, so the cap has flat anchor points at both sides while the volume stays out at the ears and below. Clip the roots at the crown while drying anyway, since that is the section the cap will compress. Type 3 curls flatten and recover; type 4 coils compress more and need a pick, so carry one. Do not touch the crown once the cap is on. About 20 minutes on second-day hair. See also graduation hairstyles for curly hair.
Who it suits: Type 2C through 4A curls worn down.
Tip: Carry a small pick and fluff from underneath, never from the top, when the cap comes off.
Where the Graduation Cap Actually Sits on Your Head
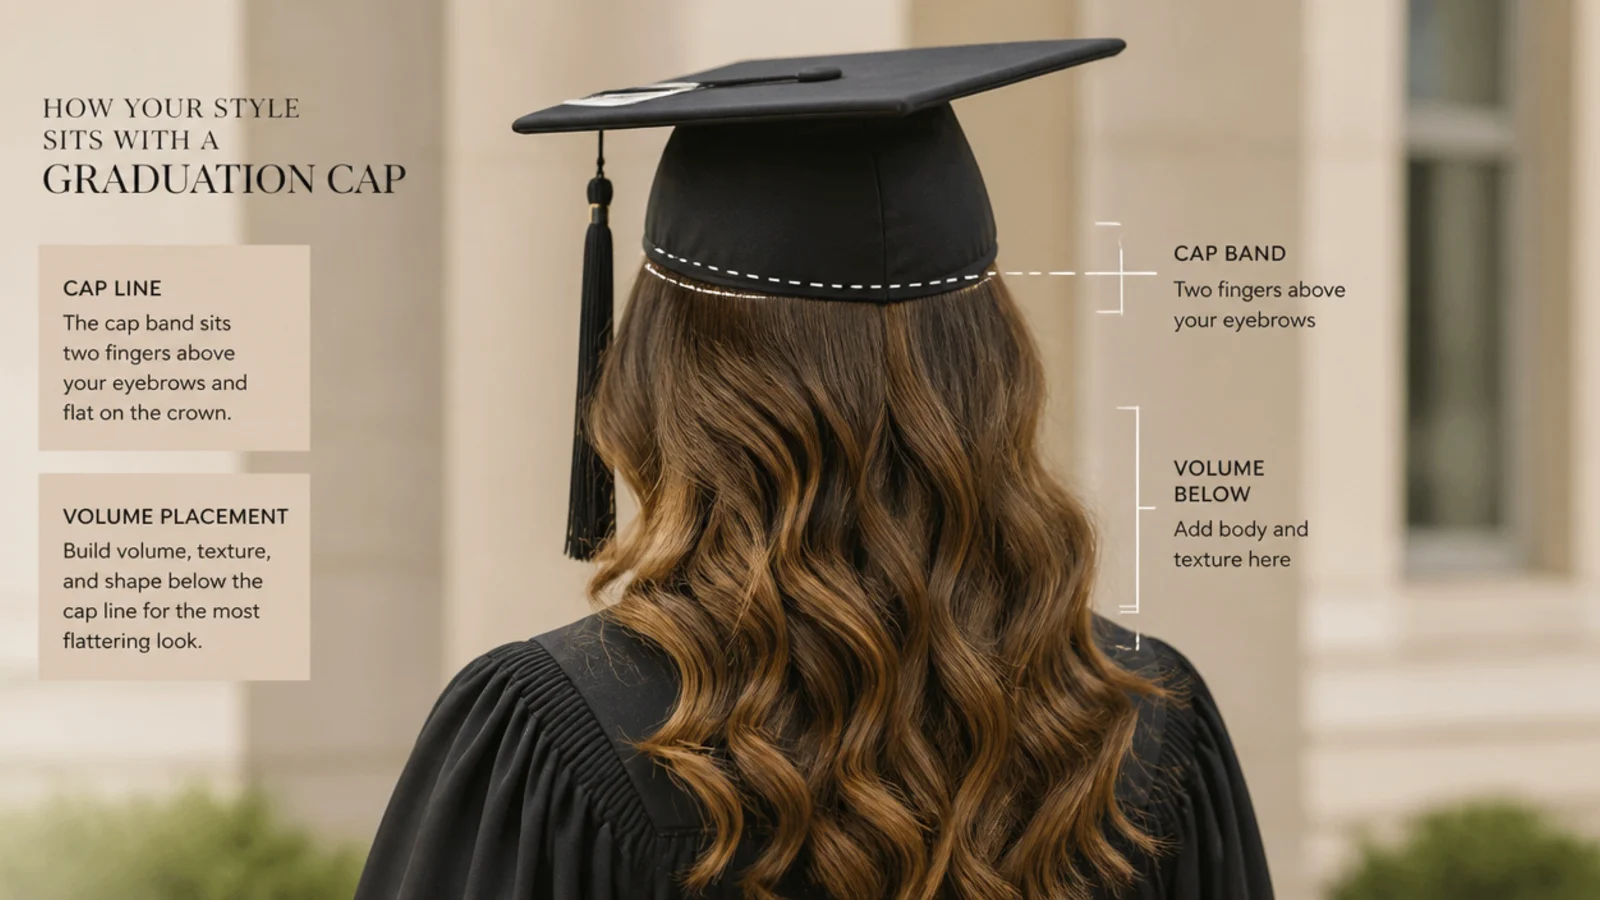
A mortarboard is not a hat that perches, it is a flat board on a fitted band, and the band is designed to sit level with the floor. In practice that means the front edge lands about two fingers above your eyebrows and the band wraps the head at roughly the same height all the way around. Put your cap on now, before you decide anything else, and mark that line in the mirror with your fingers. Everything above it is dead space for four hours. Everything below it is where your hairstyle has to live. This is why high topknots, crown-height ponytails and bouffant half-ups all fail: they occupy the exact volume the band needs, so the cap rides up at the front, tips backward, and starts sliding. It also explains why so many graduation photos show a cap sitting at an odd angle. It was not badly made, it was fighting a hairstyle. Build below the line and the cap sits flat with no effort at all.
Graduation Hairstyles With a Cap by Hair Length
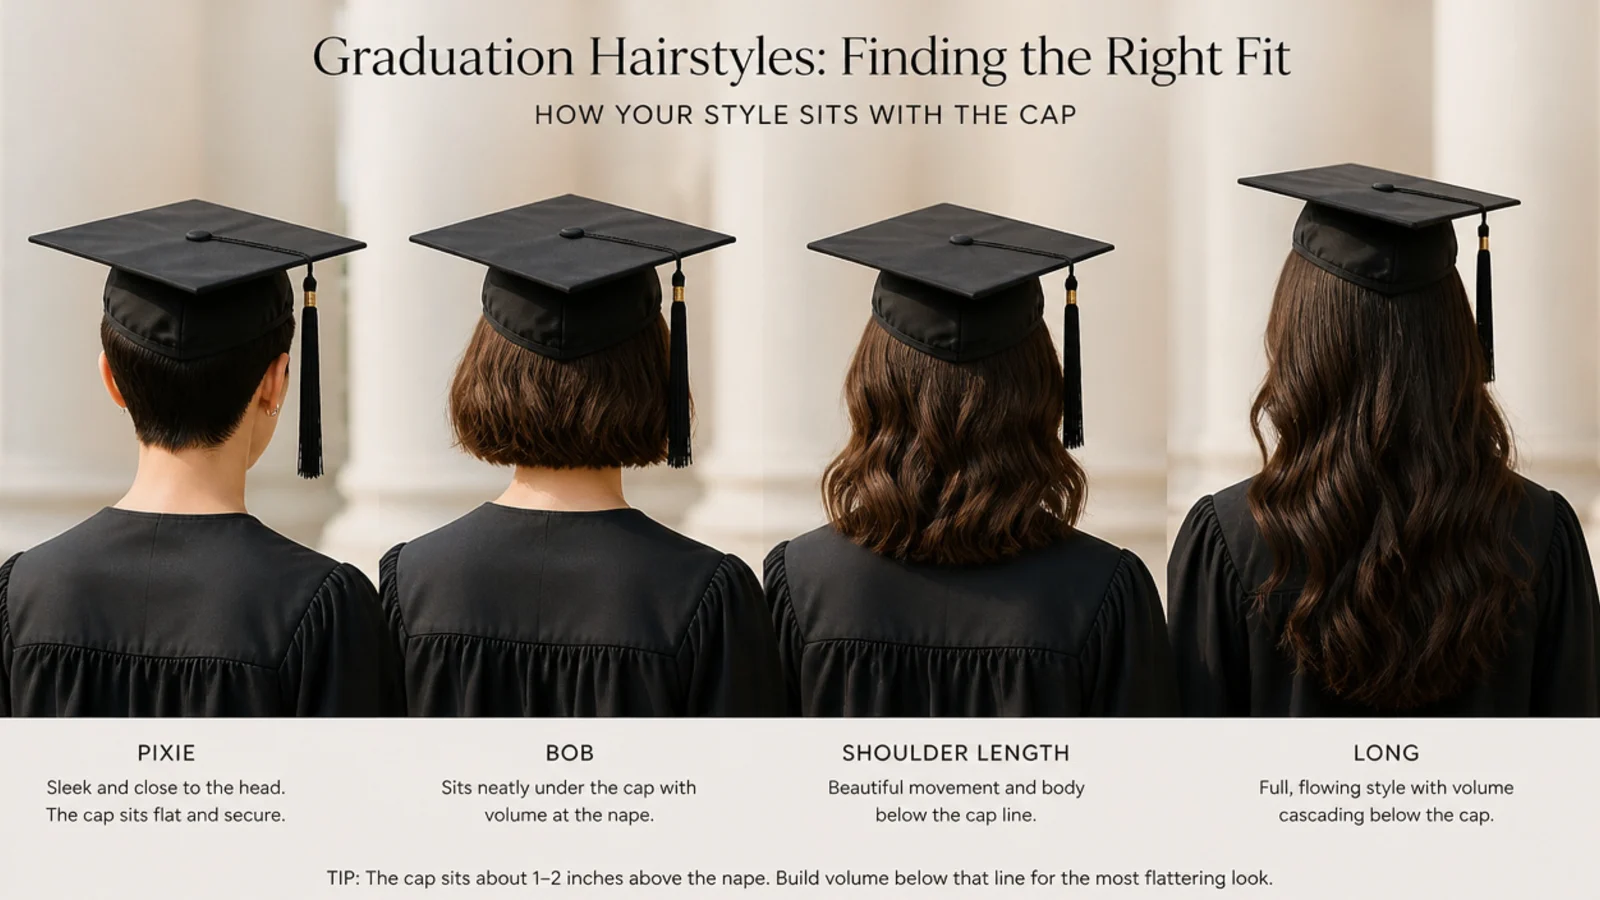
Length changes the problem completely. On a pixie or crop the cap covers almost everything, so the work is anchoring rather than styling: two bobby pins crossed behind each temple give the band something to hook under, and a matte paste keeps the front piece visible. On a chin-length bob the cap hides the crown entirely, so push volume outward at the jaw and bend the ends out rather than lifting the roots. At shoulder length you have the widest choice on this list, since half-up styles, low buns and S-waves all work without any weight problem. Long and very thick hair introduces the one issue nobody warns you about: mass. A heavy braid or bun hanging at the back slowly drags the mortarboard backward across a long ceremony. Bring the weight forward over a shoulder, or pin the bun upward toward the scalp rather than letting it hang. Length-specific breakdowns live in graduation hairstyles for long hair and graduation hairstyles for short hair.
Should You Wear an Updo or Your Hair Down for Graduation Photos?
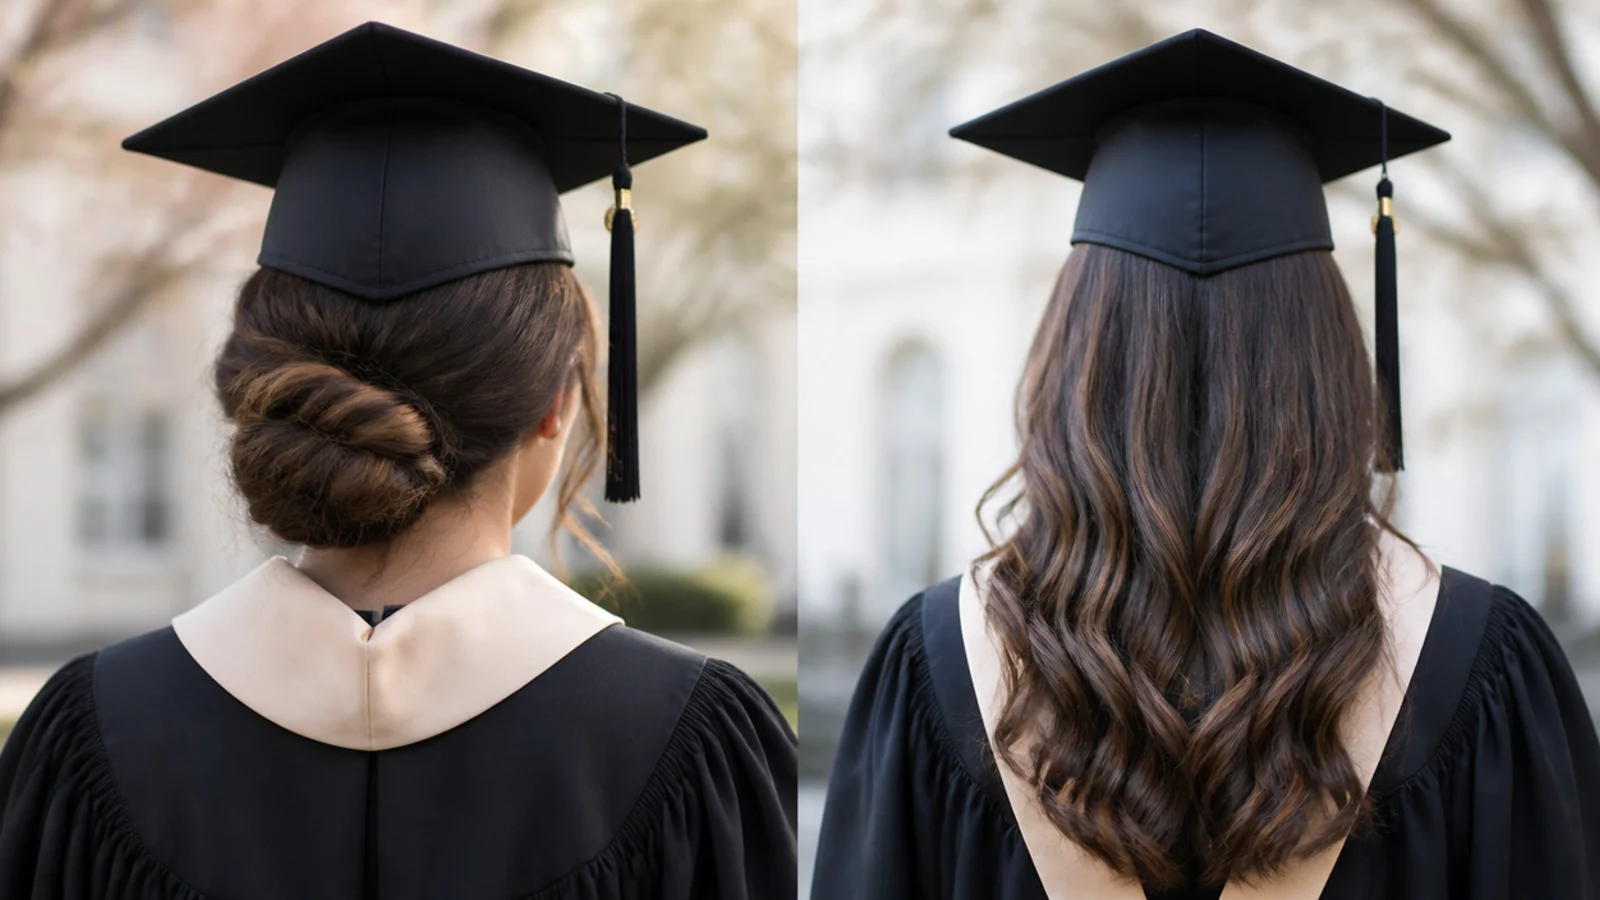
The honest answer is that updos win with the cap on and down styles win with the cap off, so pick based on which photos matter more to you. A low bun keeps a crisp outline against a black gown in every stadium shot, holds its shape for four hours, and needs nothing done to it when the cap comes off. Hair worn down is warmer under a polyester gown, can vanish into a dark background in wide shots, and always arrives at the photo session with a crease across the crown. The compromise most people actually want is half-up: the pinned top section gives the cap a stable base, and the lengths below stay visible and movable. If your ceremony is outdoors in May or June, weight the decision toward pinned styles, since humidity works against loose hair for hours before you ever reach the photos. The full side-by-side comparison sits in the table above, and there is more on staying power in cute hairstyles that last all day.
How to Make Graduation Hair Hold for Four Hours Under a Cap
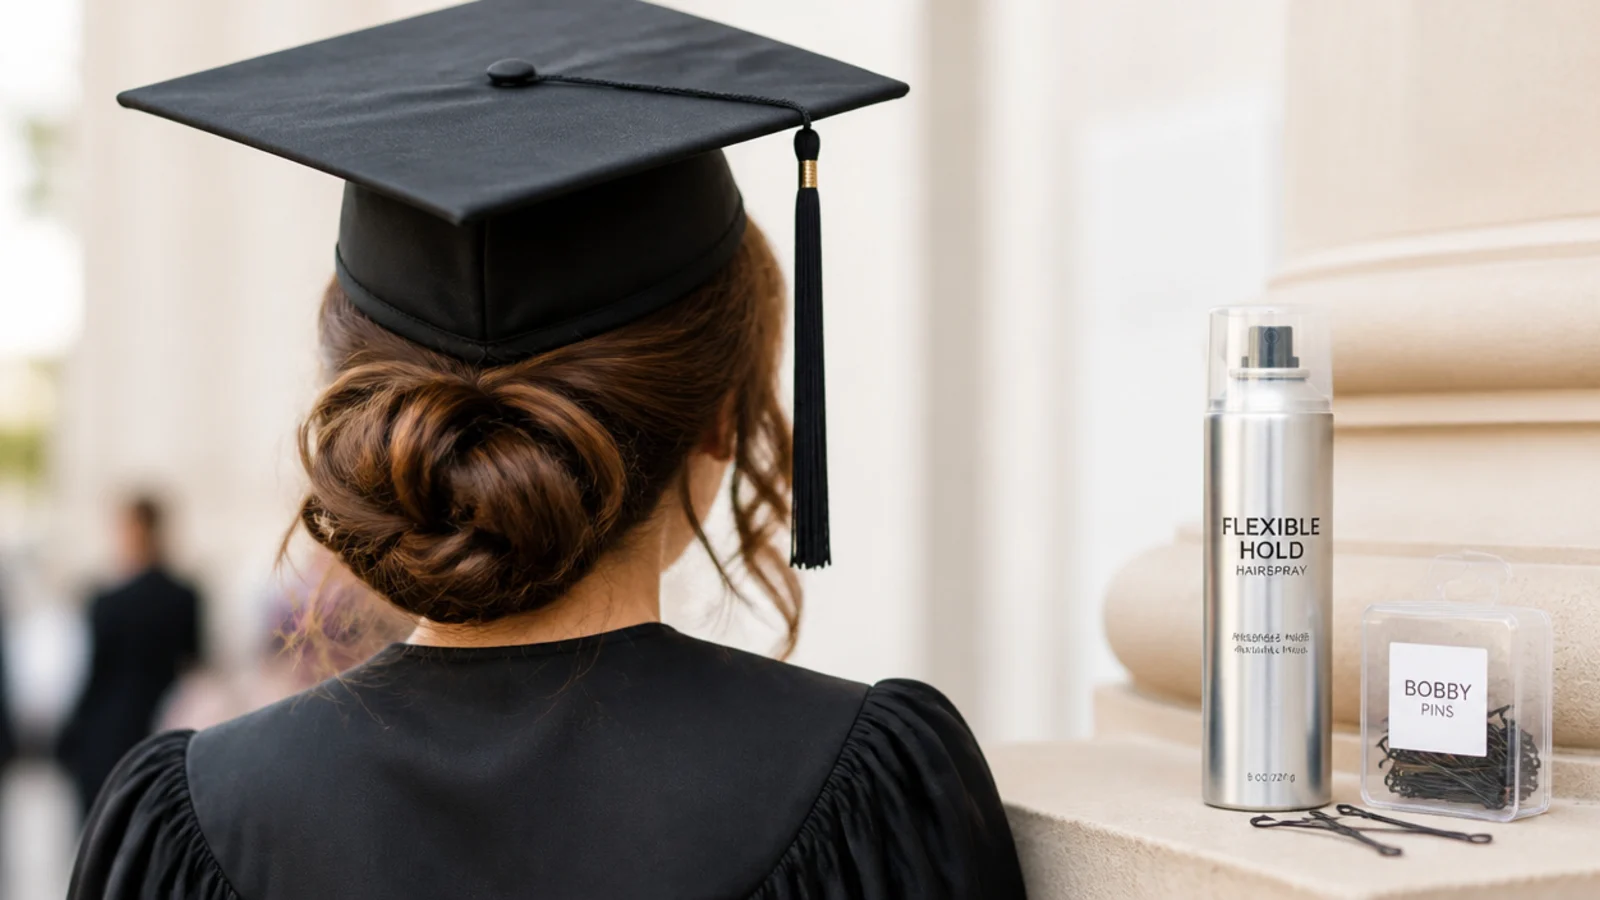
Reach for a flexible-hold hairspray rather than a freeze or extra-strong formula. Stiff spray does hold, but it sets hair into whatever shape the cap presses it into, so when the cap comes off the crease stays and the hair cannot recover. Flexible hold lets the hair spring back. Spray in light passes from about ten inches away, focusing on the sides and back and skipping the crown entirely, since product there will look greasy after hours under felt. For pinning, cross bobby pins in pairs to form an X rather than sliding them in parallel, and slide them in with the wavy side against the scalp for grip. Six to ten pins is a realistic count for most updos. Curls need to cool completely before the cap goes on, which takes about ten minutes, otherwise warm curls set flat. Put six spare pins, a travel spray and a small pick in your bag. Tool choices are covered in heatless curl tools compared, and the pinning logic for long styles is expanded in long hair updos that last.
Cap-On to Cap-Off: Fixing the Dent Before Photos
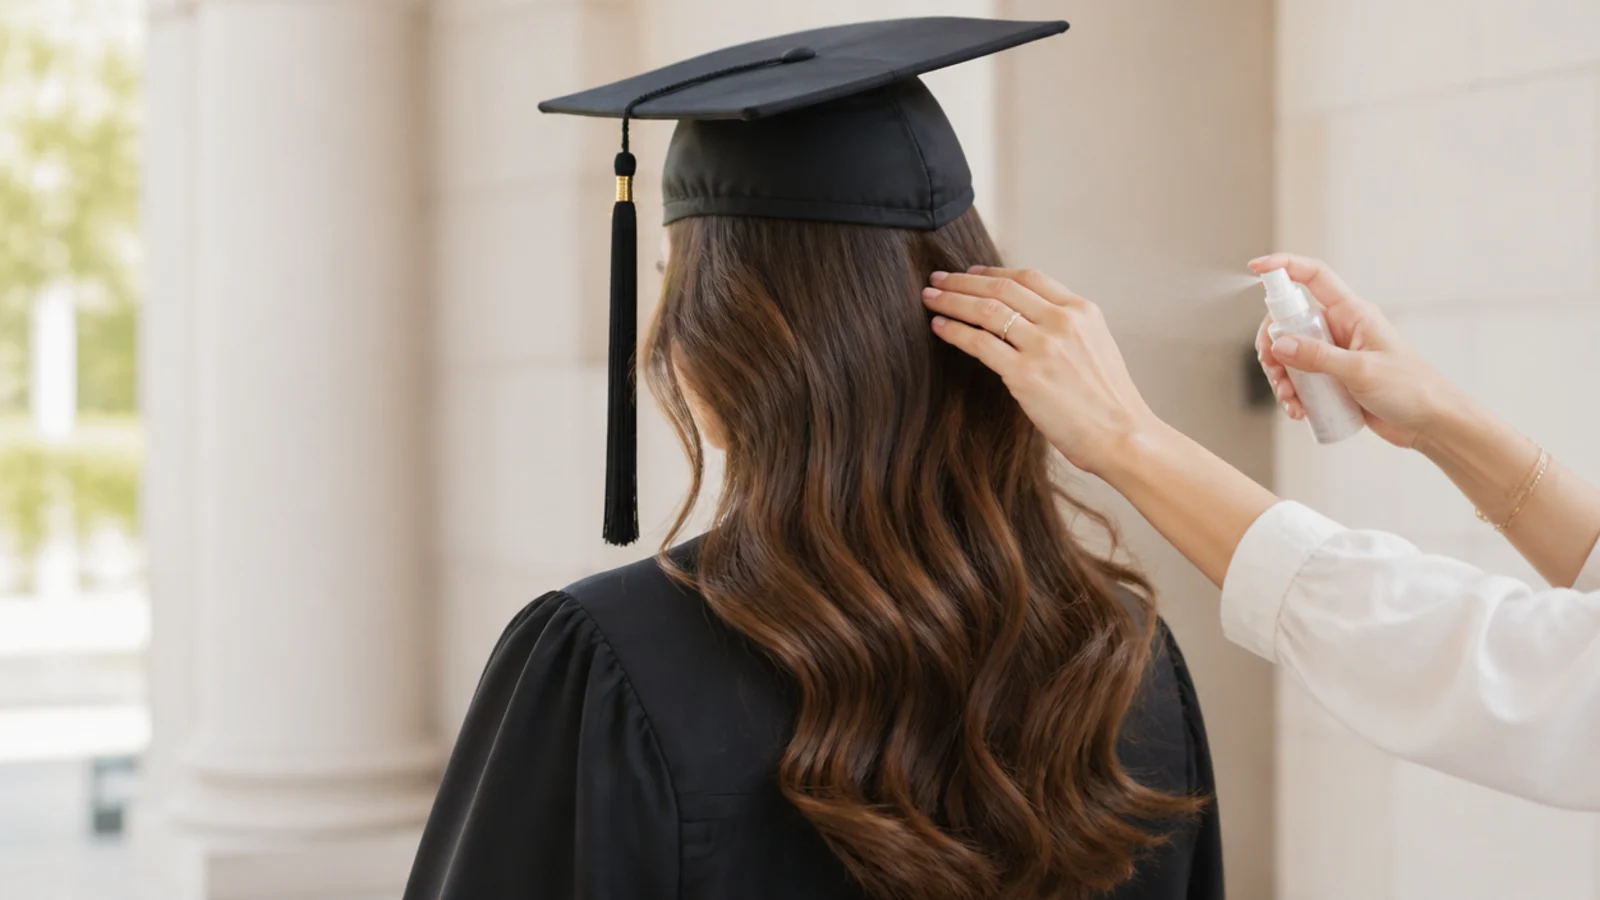
Almost everyone takes the cap off within minutes of walking, which makes cap-off recovery part of the hairstyle rather than an afterthought. If you wore hair down, expect a horizontal crease across the crown where the band sat. Mist plain water on the crease only, flip your head forward, finger-comb from the roots, then flip back up and let it air dry for two or three minutes while you find your family. Do not brush it, since brushing a dent redistributes the flatness across the whole crown instead of lifting it. Curls get fluffed with a pick from underneath, never from the top, which is the difference between restored volume and frizz. Pinned styles need almost nothing: push two pins back into place, pancake a braid outward, pull a couple of face-framing pieces loose, and you are photo-ready. This is the strongest practical argument for a low bun or braid if you know a long photo session is coming.
Timing the Morning Of: When to Style Before the Ceremony
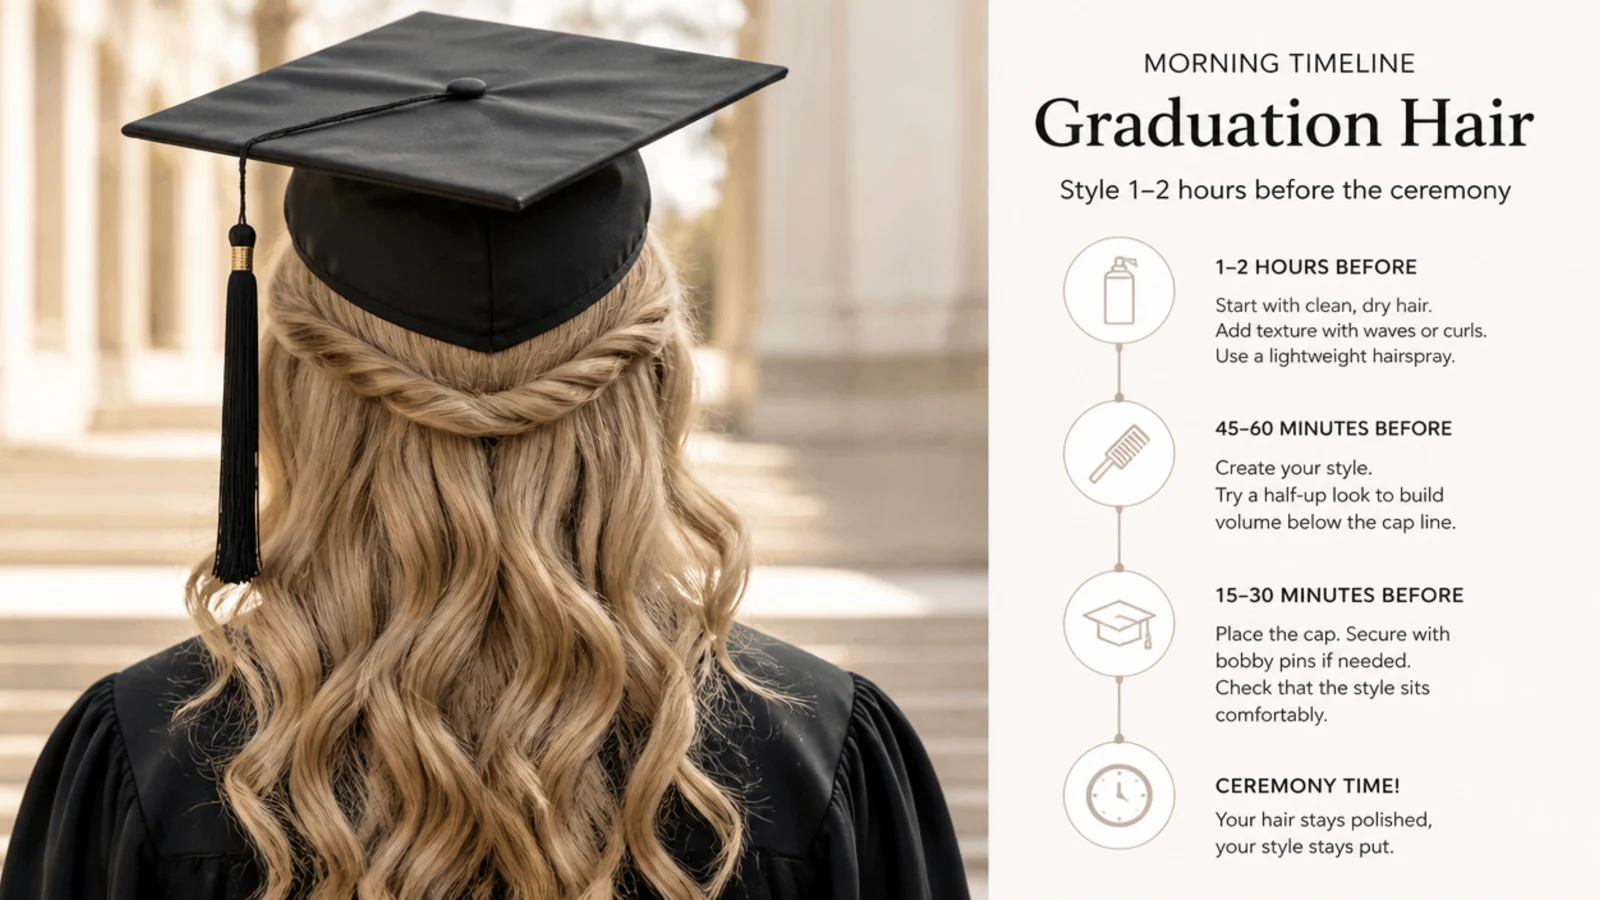
Style one to two hours before you need to be in your seat, not the night before. Overnight leaves you with flattened curls, a slept-on crown and no time to fix either. The single exception is braided styles, which genuinely do hold overnight and often look better on second-day hair. Wash the day before rather than the morning of, since freshly washed hair is slippery and pins slide out of it; day-two hair grips pins far better and holds a bun without any product. Work backward from your call time and allow ten minutes at the end to sit with the cap on, walk around, and turn your head, which is how you find out if the cap is going to slide. Do a full practice run with the actual cap three days out so you still have time to switch styles. If you are still deciding between silhouettes, the full set is in graduation hairstyles. For a genuinely fast morning, see the 5-minute everyday hairstyle and easy graduation hairstyles.
Frequently Asked Questions
What kind of hairstyles actually work under a graduation cap?
Anything that sits below the cap band works: low buns, chignons, low ponytails, half-up styles pinned flat, low braids and side-swept waves. The band sits about two fingers above the eyebrows and wraps the head level, so the test is simple. If the style occupies height at the crown, the cap will fight it. If the style lives at or below the occipital bone, the cap sits flat and stays put.
How do you wear a graduation cap with long hair?
Bring the weight forward. Long hair gathered heavily at the back slowly drags the mortarboard backward over a long ceremony, which is the most common cap failure. Wear the length over one shoulder as waves or a fishtail braid, or pin a low bun upward toward the scalp so it does not hang. Then anchor the cap with two bobby pins crossed in an X under the band on each side.
How do you pin a graduation cap to your hair so it does not fall off?
Slide two bobby pins into the hair just behind each temple and cross them into an X, leaving a small loop of pin exposed. Set the cap on level, then hook the inside edge of the band under the crossed pins on both sides. Two pins per side is enough for most hair. Use pins that match your hair color, since the band leaves part of each pin visible.
Can you wear a high ponytail or topknot under a graduation cap?
No, and this is the one firm rule on the whole board. A topknot or crown-height ponytail sits exactly where the band needs to sit, so the cap tips backward off the head or perches at an angle for every photo. If you love the look, drop the same style to the nape. A sleek low ponytail at the occipital bone gives you the same clean feel with none of the problems.
Will a graduation cap ruin my curls?
It will flatten the crown, not ruin the style. Type 2 and type 3 curls compress under the band and spring back within a few minutes of the cap coming off. Type 4 coils compress more and need a pick, worked from underneath rather than from the top. Clip the roots while drying, skip product at the crown, and do not touch the top of your head while the cap is on.
How do you fix graduation cap hair dent before photos?
Mist plain water directly onto the crease, flip your head forward, finger-comb from the roots and let it air dry for two or three minutes upright. Do not brush, because brushing spreads the flatness across the whole crown instead of lifting it. Flexible-hold hairspray rather than a freeze formula is what makes this recovery possible in the first place.
Should I do my graduation hair the night before?
Only if it is braided. Braids hold overnight and often look better on day-two hair. Everything else, especially curls and buns, should be styled one to two hours before the ceremony so you have time to fix anything that goes wrong. Wash your hair the day before rather than the morning of, since clean hair is slippery and pins slide straight out of it.
What hairspray should I use for graduation hair under a cap?
Use a flexible or medium-hold hairspray, not an extra-strong freeze formula. Stiff spray locks hair into the shape the cap presses it into, so the crease is permanent for the day. Flexible hold lets hair recover once the cap comes off. Spray in light passes from about ten inches away, and skip the crown entirely so it does not look greasy after four hours.
How long before graduation should I do a practice run with my cap?
Three days out is ideal. Put on the actual cap with your actual hairstyle, then walk around, turn your head and look down as you would receiving a diploma. Most cap slides show up within a minute of moving. Three days gives you time to switch to a lower bun, add pins, or change the style entirely without doing it in a panic on the morning.
Which graduation hairstyles look are you saving?
If you take one thing from these 15 graduation hairstyles with your cap, make it the two-finger rule: find where the front band lands, then build everything below it. Do a full practice run with the actual cap at least three days out, because a style that looks perfect in the mirror can still push the mortarboard back an inch. Style one to two hours before the ceremony, use flexible-hold spray rather than a stiff freeze formula, and put six bobby pins and a travel-size spray in your bag for the walk to photos. Browse the rest of the graduation hairstyles hub or start with easy graduation hairstyles if you are styling yourself at 6am.