Quick Comparison
| Short Hair Worn Down (Bob or Pixie Loose) | Short Hair Pinned Back (Half-Up, Faux Bob or Nape Knot) | |
|---|---|---|
| Cap compatibility | Good, as long as no volume sits above the cap line | Excellent; the pinned section sits below the band by design |
| Pins needed | 2, purely to anchor the cap in an X under the band | 4 to 8, including the 2 anchoring the cap |
| Time to style | 5 to 18 minutes | 8 to 20 minutes |
| Four-hour hold | Moderate; waves soften and the crown flattens | High; nothing moves once it is pinned |
| Photo performance with cap on | Reads soft, needs side volume to avoid a flat silhouette | Reads polished, gives a clean jawline and neck |
| Photo performance with cap off | Needs a 60-second fluff and a water mist to recover | Needs nothing; the shape was never under the cap |
| Humidity resistance | Low on wavy hair, higher on a slicked or pressed style | High; pinned hair cannot expand outward |
| Minimum length | Works at 2 inches on a pixie | Needs about 7 inches to gather, or a claw clip |
| Best for | Indoor ceremonies, pixies, anyone short on time | Outdoor ceremonies, lobs, long programs with a reception after |
1. Sleek Side-Parted Pixie Under the Cap
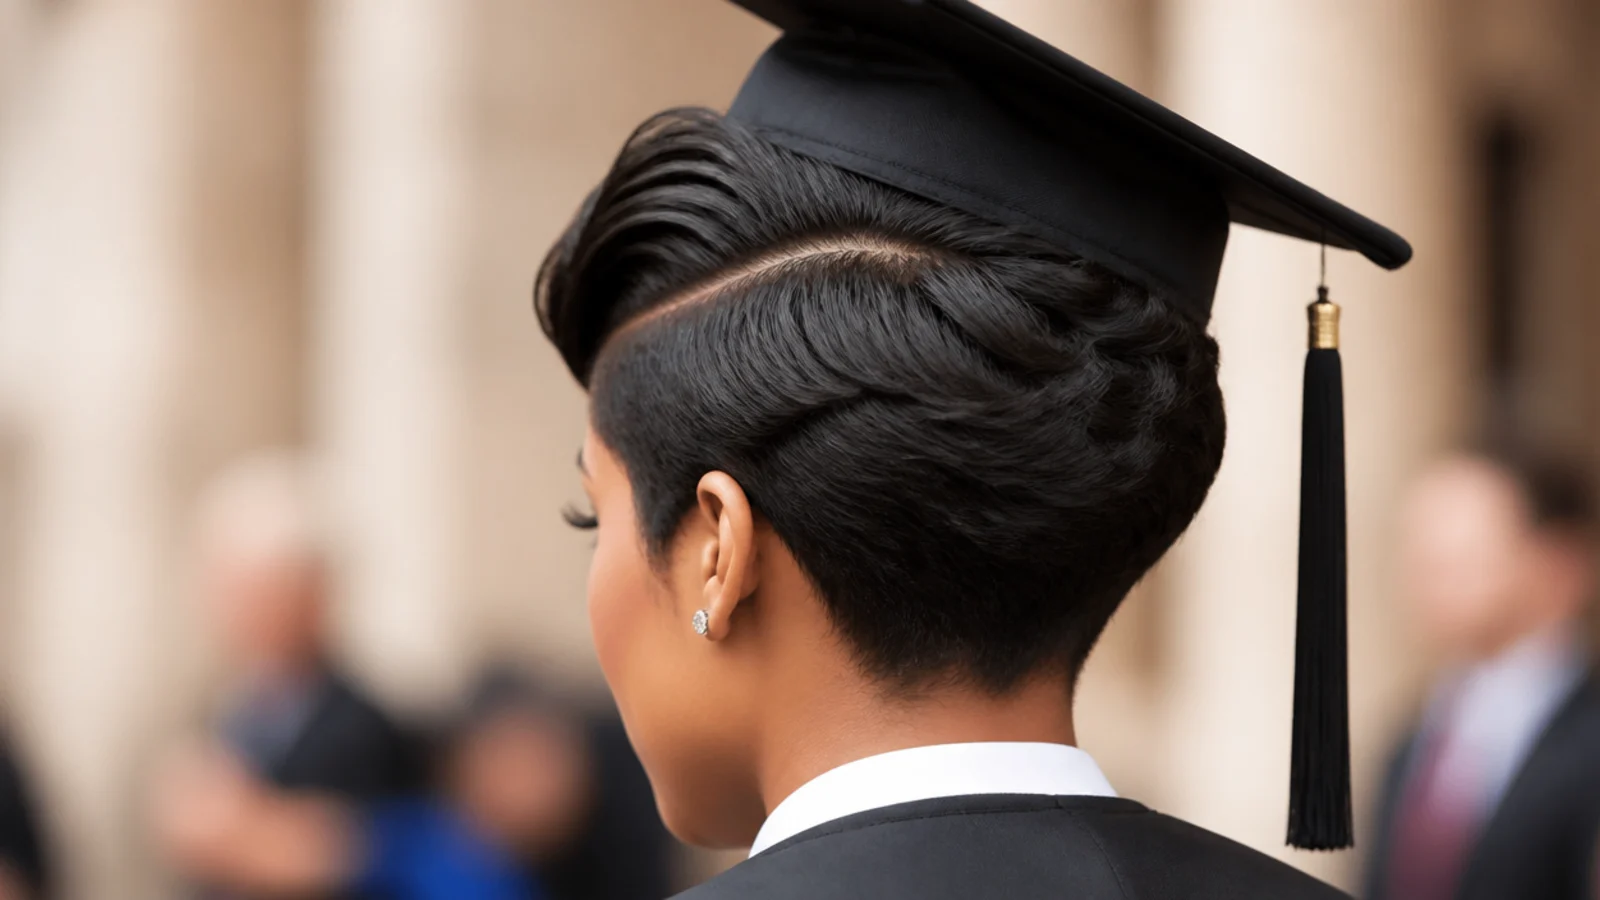
A deep side part set about an inch off center, with the longer side swept across the forehead and smoothed flat with a pea-sized amount of light pomade. Because the mortarboard covers the crown anyway, a sleek top is not a loss here, it is the whole design. The part line reads clearly in photos and gives the flat cap a diagonal to play against. Takes about 6 minutes with a fine-tooth comb and a blow dryer on cool. Once the cap comes off, the part is still crisp, which is more than most crown styles manage.
Who it suits: Pixies from 2 to 4 inches, fine hair, oval and heart face shapes. Fine-hair tactics in how to style short fine hair.
Tip: Comb the part while the hair is damp, then set it with cool air so it holds under the cap band.
2. Textured Piecey Pixie with Matte Paste
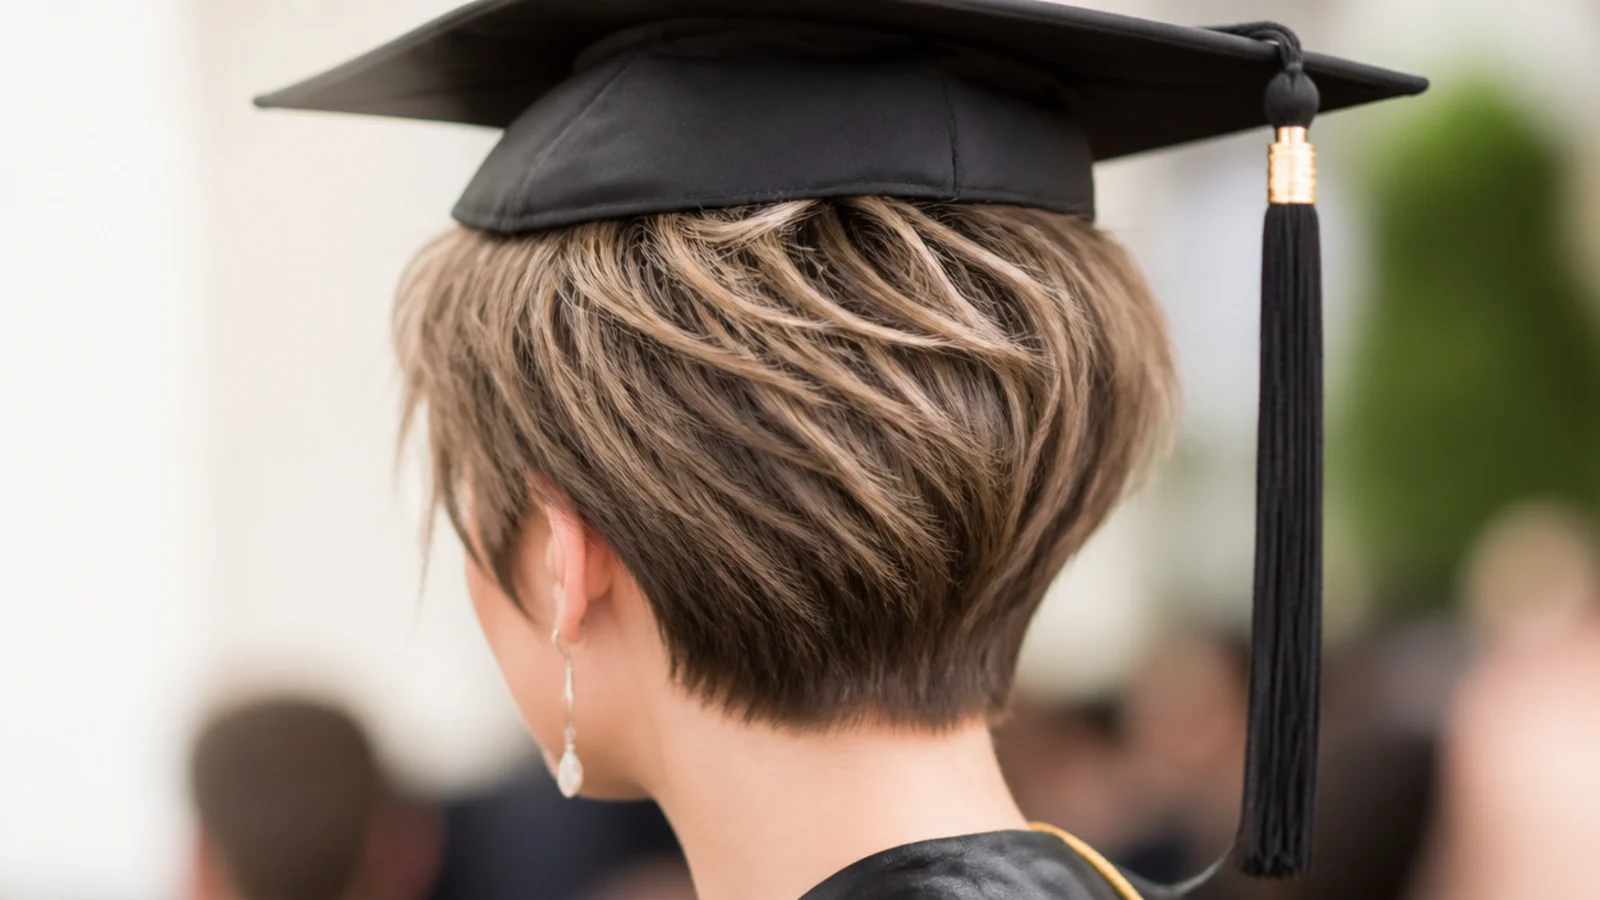
Work a fingertip of matte clay or paste through dry hair, then pinch out individual pieces at the fringe and the sides so the cut reads sharp rather than soft. Matte paste is the right product category here because it holds without shine, and shine is the one thing that photographs badly under a black cap in direct sun. Keep the pieces angled forward and outward, never up, so nothing fights the cap band. Five minutes, no heat, no pins beyond the two holding the cap. It survives cap removal better than any curled style.
Who it suits: Choppy or layered pixies, straight and wavy hair, anyone who hates fussing.
Tip: Rub the paste between your palms for 10 seconds first so it never lands in a visible clump.
3. Deep Side-Swept Waves on a Bob
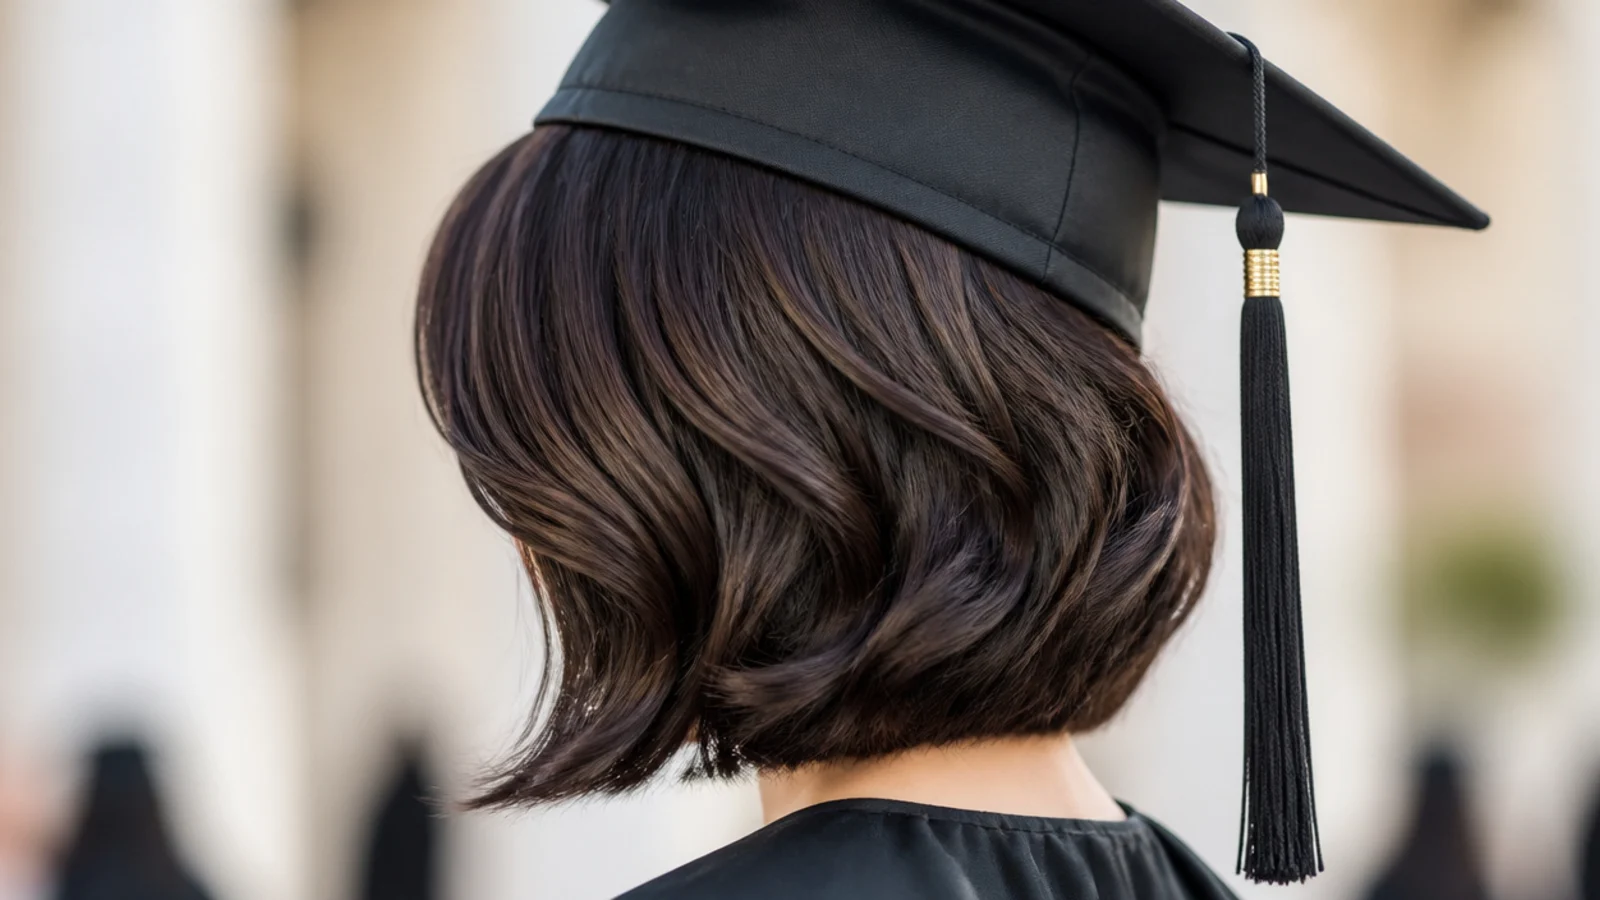
S-waves pressed into a chin-length bob with a one-inch curling iron, all bent in the same direction and swept hard to one side. This is the single most cap-friendly down style for short hair, because the wave pattern starts at ear level and the crown stays flat by design. Let the curls cool completely in your hand before you release them, then brush them out with a paddle brush for a soft finish. About 15 minutes. Under the cap the waves compress slightly at the top and fall right back out once it is lifted.
Who it suits: Bobs from 8 to 10 inches, straight to 2B hair, round and square face shapes.
Tip: Set your iron to 300 to 330 degrees on fine hair so the wave holds four hours without frying.
4. Blunt Chin-Length Bob, Flat-Ironed Glassy
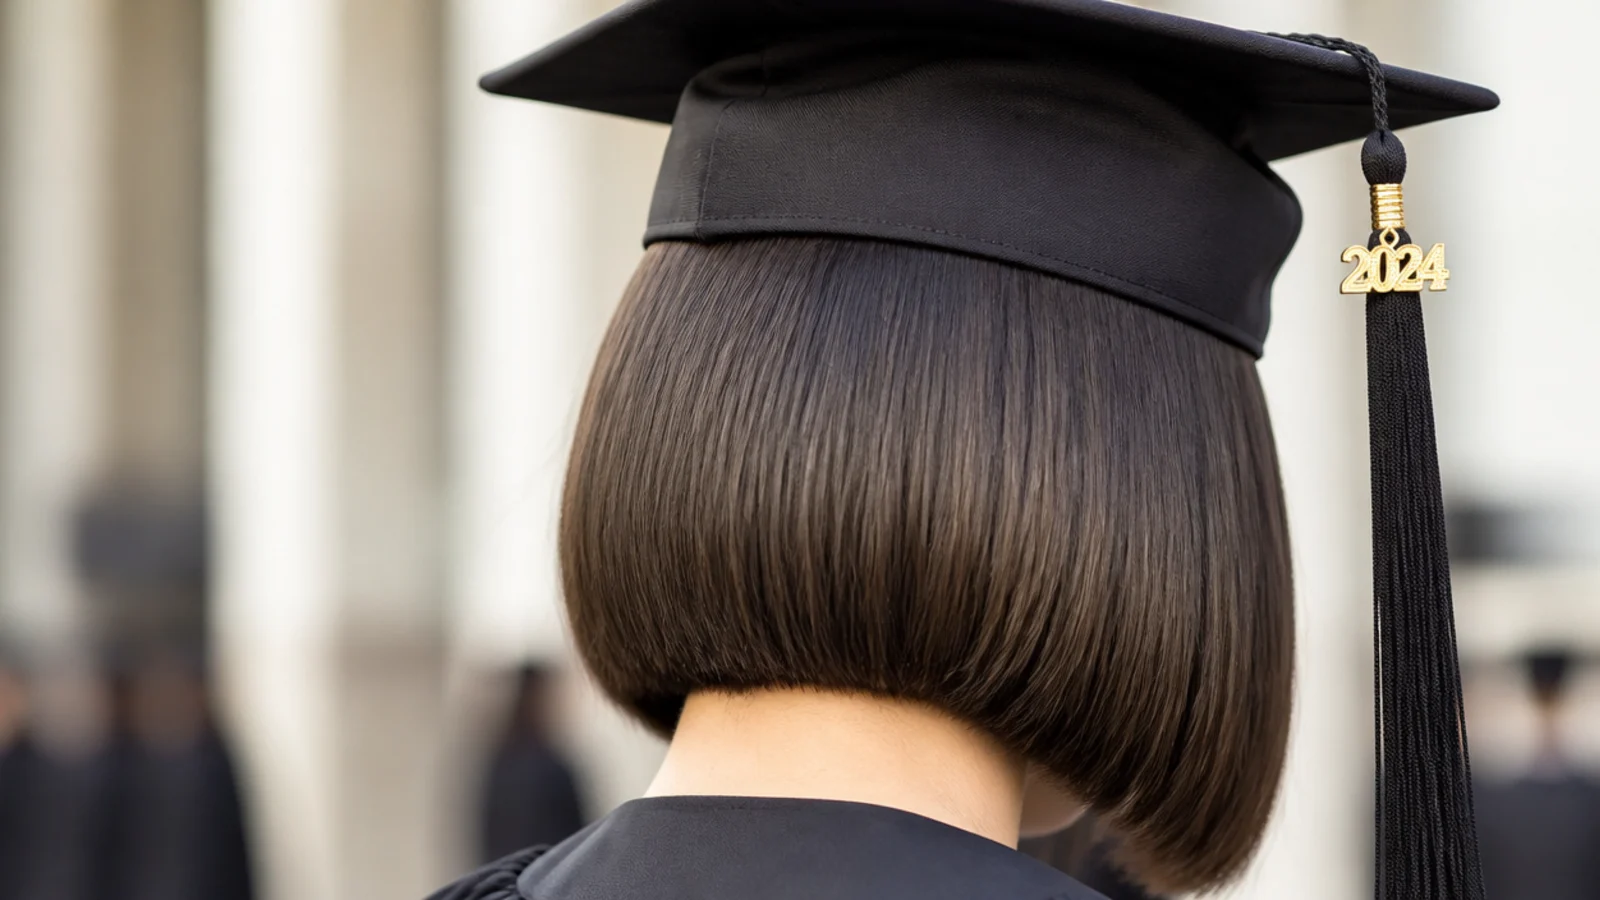
Dead-straight, blunt, and finished with two drops of lightweight hair oil on the mid-lengths only. The appeal for graduation is that a blunt line at the jaw gives the photograph a second strong horizontal to echo the flat edge of the mortarboard, which is why this cut looks deliberate in cap photos instead of accidental. Flat-iron in half-inch sections at 350 degrees, one pass each. Roughly 18 minutes. The risk is a visible crown dent, so keep the iron away from the top two inches and mist flexible hairspray there instead.
Who it suits: Blunt bobs, thick straight hair, anyone wanting a minimalist look. More cuts in bob haircuts.
Tip: Never oil the roots; oil at the crown plus cap pressure equals a flat greasy dent by photo time.
5. Half-Up Mini Bun on a Chin-Length Bob
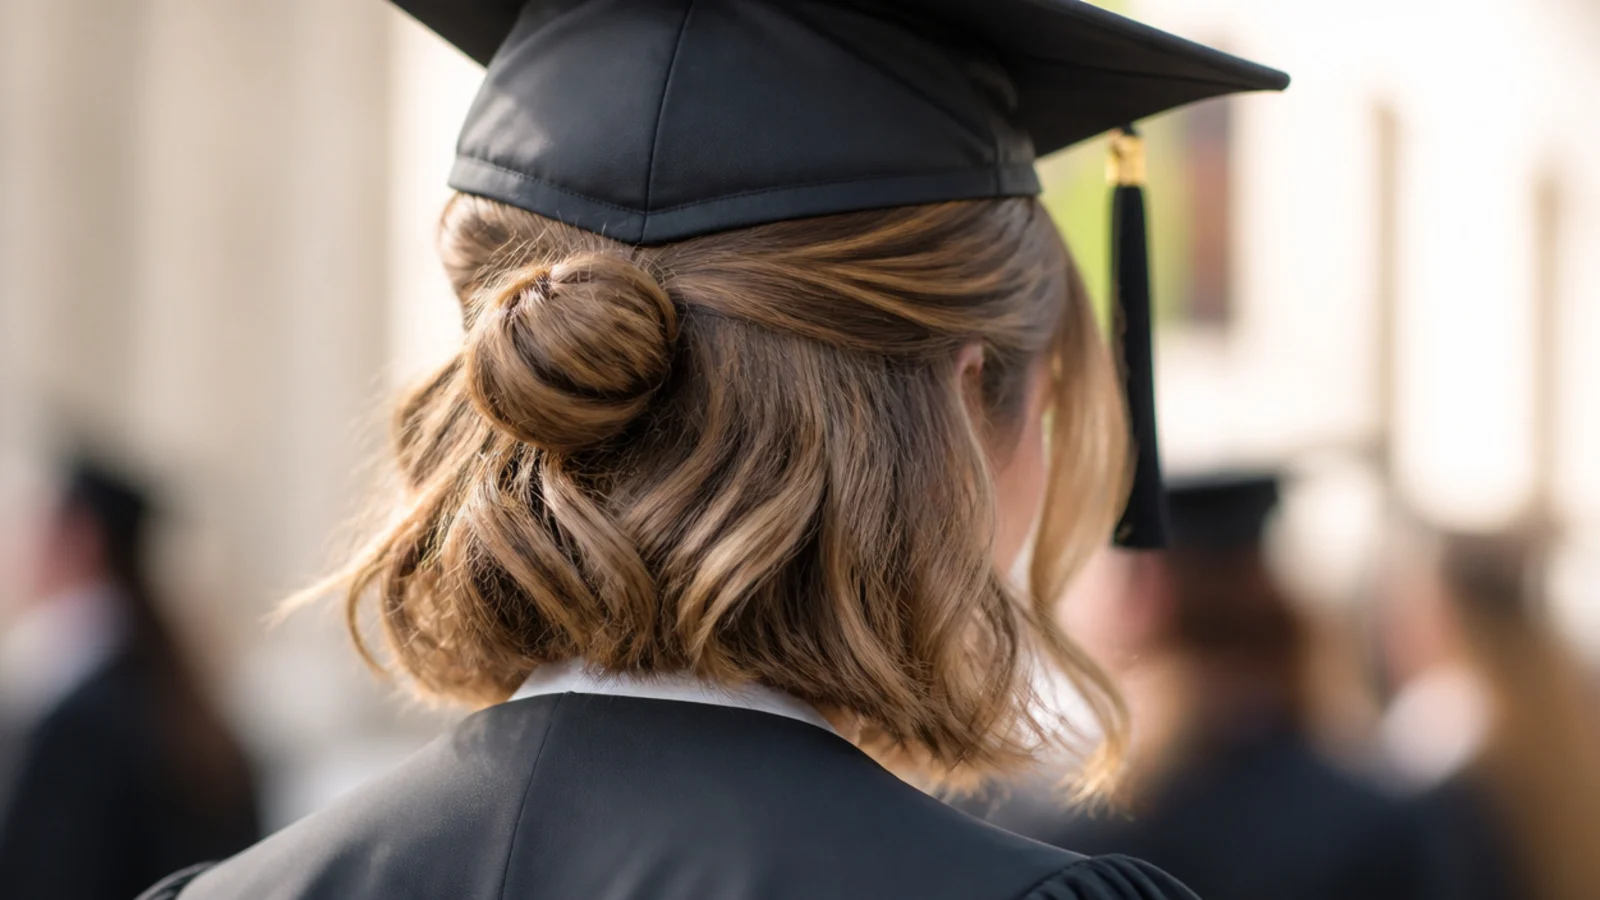
Take the top section from temple to temple, twist it once, and coil it into a mini bun sitting low at the occipital bone, not at the crown. Two small elastics and two bobby pins hold it. The placement is the whole trick: anything above the widest point of the back of your head will collide with the cap. Left down, the rest of the bob still swings at the jaw. Eight minutes. If your bob is too short to gather, use a claw clip the size of a matchbox instead of an elastic.
Who it suits: Bobs and lobs from 7 inches up, fine hair that needs the crown lifted slightly.
Tip: Place the bun where the cap's back edge will sit, then it props the board up instead of pushing it off.
6. Low Nape Knot for a Shoulder-Skimming Lob
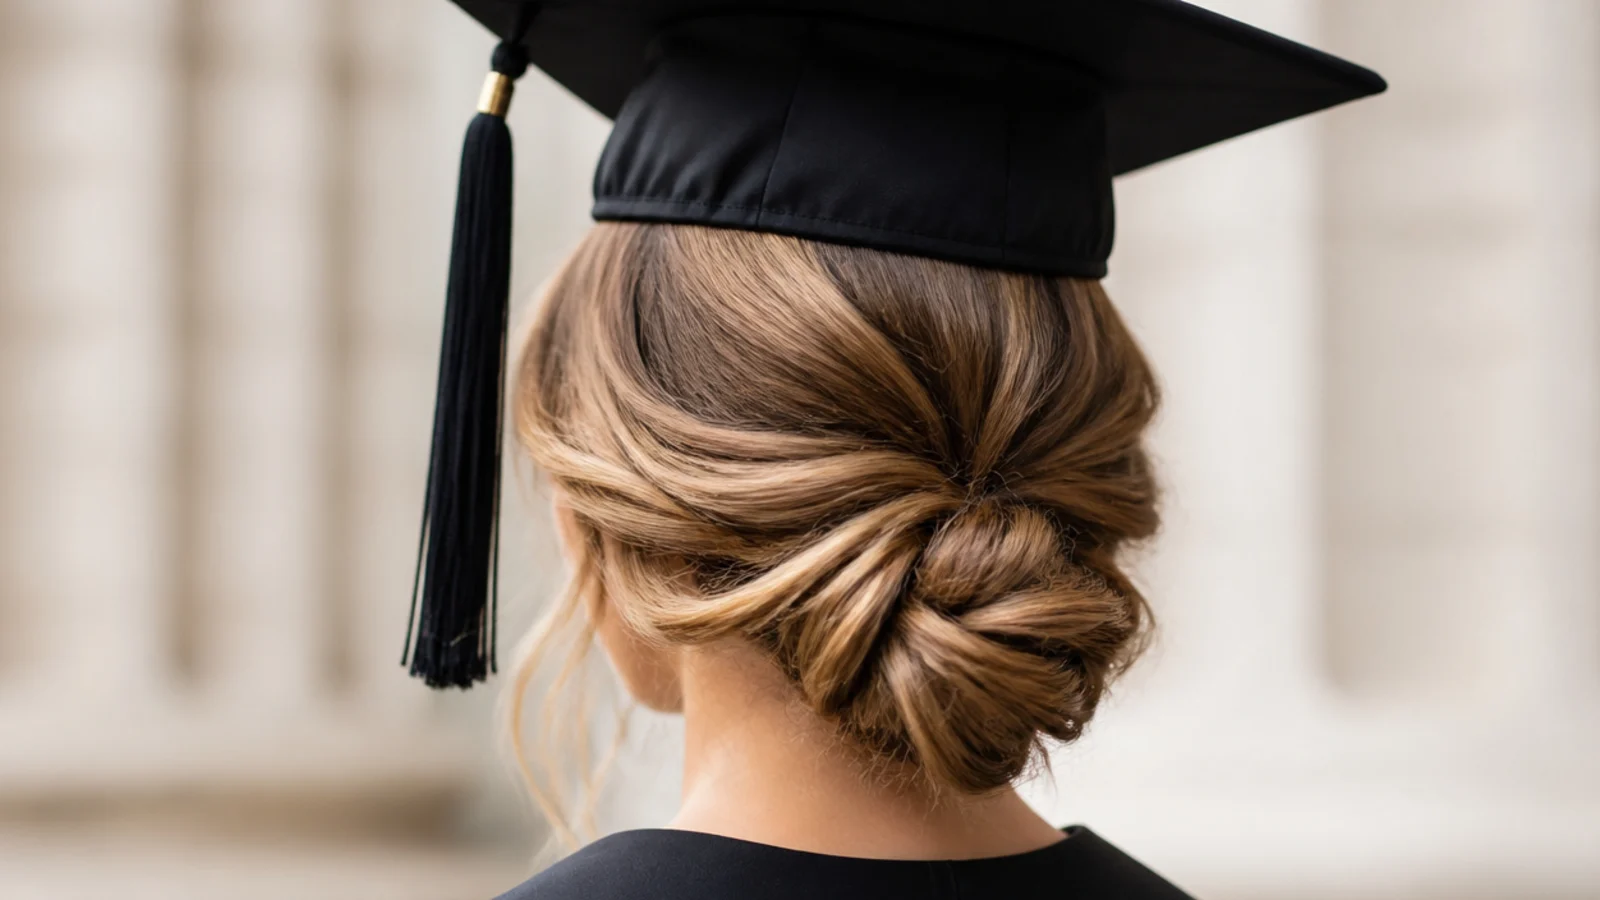
Gather everything at the nape, twist it upward once, and pin the tail under itself into a small flat knot with three U-pins. On a lob this reads as a proper updo without the length an updo usually demands. It sits four inches below the cap line, so the board lands on smooth hair with zero interference, and the gown collar hides any escaping ends. Ten minutes. It is also the most heat-free option here, which matters for an outdoor May ceremony. See more in graduation updo.
Who it suits: Lobs of 9 to 12 inches, thick or coarse hair, humid outdoor ceremonies.
Tip: Use U-pins rather than bobby pins; they grip a short knot without needing length to slide through.
7. Twisted Side Pin-Back on a Pixie
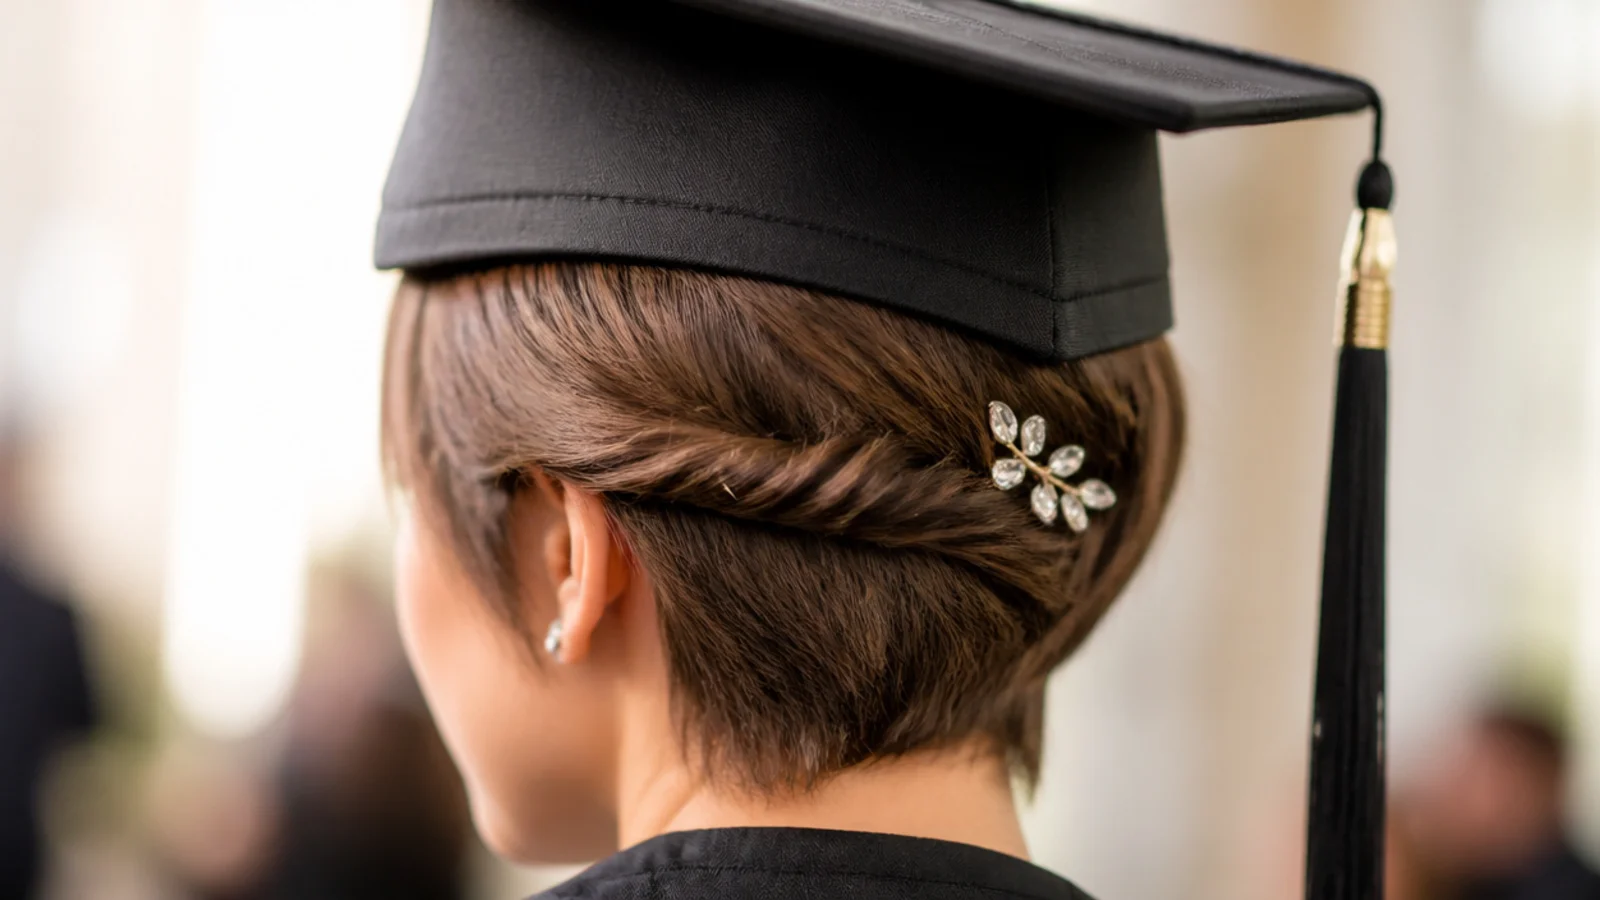
Twist the longer front section back from the temple on one side and secure it flat against the head with two bobby pins crossed in an X, then repeat one inch behind it. It clears the face for the diploma handshake photo and adds a visible detail in the exact zone the cap does not cover, which is the whole problem with pixie styling. Four minutes and no heat at all. Because the pins already sit under the cap band area, they double as extra grip for the mortarboard.
Who it suits: Grown-out pixies with 3 inches or more at the front, all textures.
Tip: Match the bobby pins to your hair color at the back and use a pearl pin at the front for the photo.
8. Faux Bob: Lob Tucked and Pinned at the Jaw
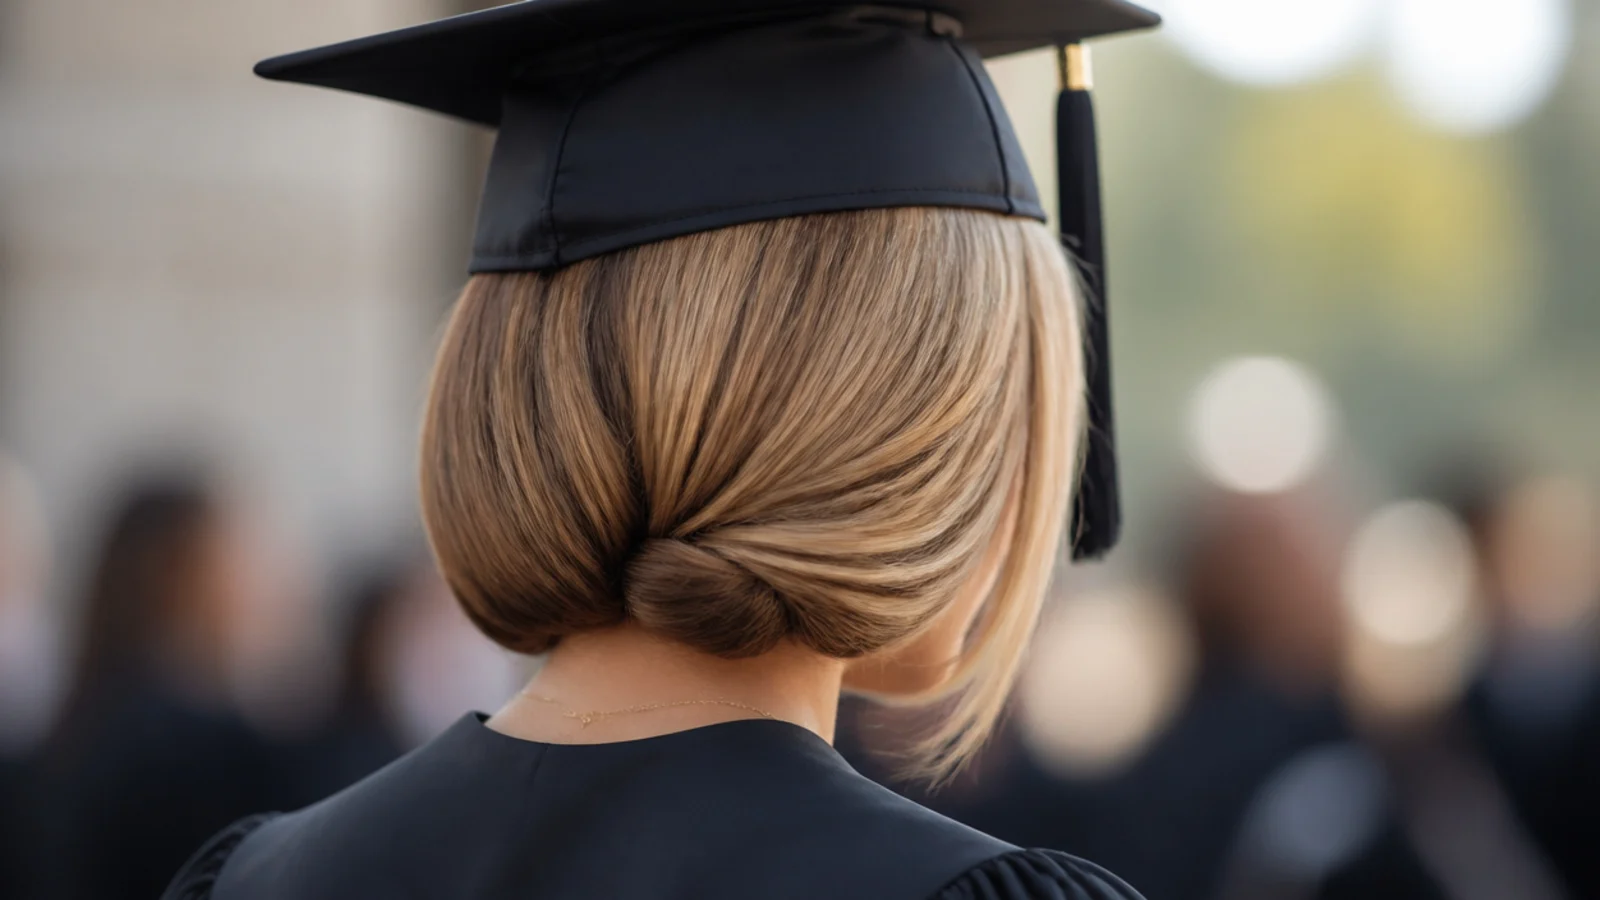
Roll the ends of a lob under toward the nape and pin the roll in place with four to six bobby pins hidden inside the fold, creating the silhouette of a chin-length bob. It keeps the length off the gown collar, where hanging ends read messy in photos, and it concentrates the shape at the jaw, which is right under the cap line. Twelve minutes. Best on hair that is one day past a wash, since freshly washed hair slips out of the roll.
Who it suits: Lobs and collarbone-length hair that wants a shorter shape for one day only.
Tip: Pin the roll vertically into itself, never horizontally, or the fold will collapse by the second hour.
9. Short Hair Halo Braid Below the Cap Line
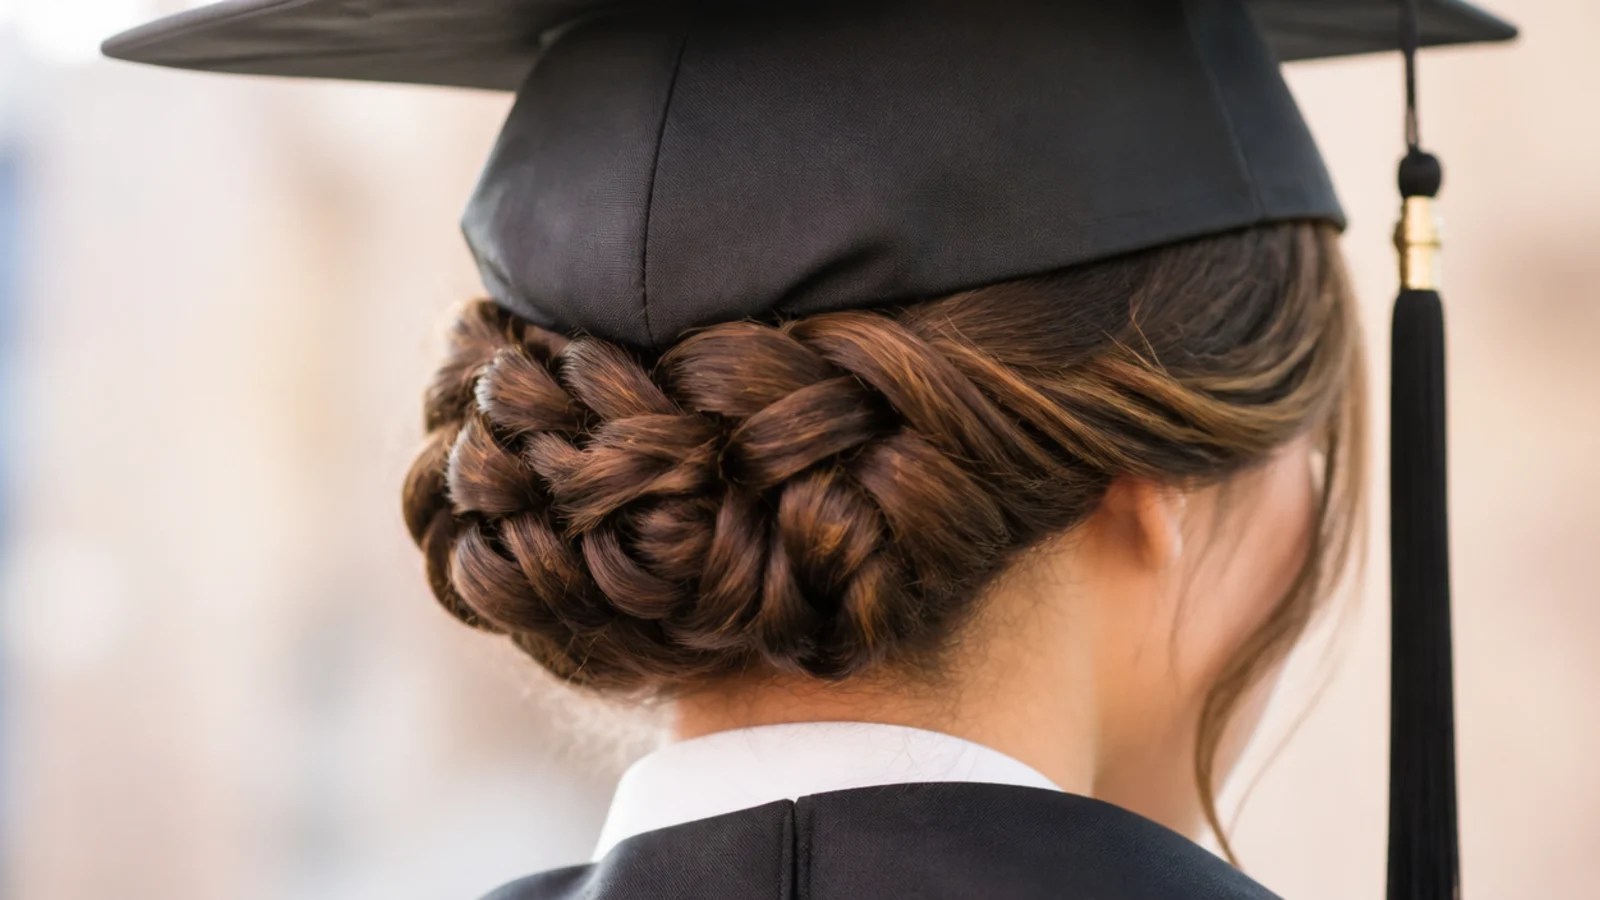
A single braid taken from behind one ear, around the back of the head, and pinned behind the other ear, sitting low rather than on the crown. Standard crown braids fail at graduation because they land exactly where the mortarboard's front edge does. Dropping the braid two inches removes that conflict entirely and leaves a clean, decorated back of the head for the walking-away shots. Fifteen minutes and it holds all day. Practice it once during the week before. More options in easy braided hairstyles.
Who it suits: Bobs and lobs from 8 inches, straight to 3A hair, anyone wanting detail without height.
Tip: Backcomb lightly before braiding; short sections slip out of a braid unless there is grip.
10. Two Dutch Braids on a Bob, Ending at the Nape
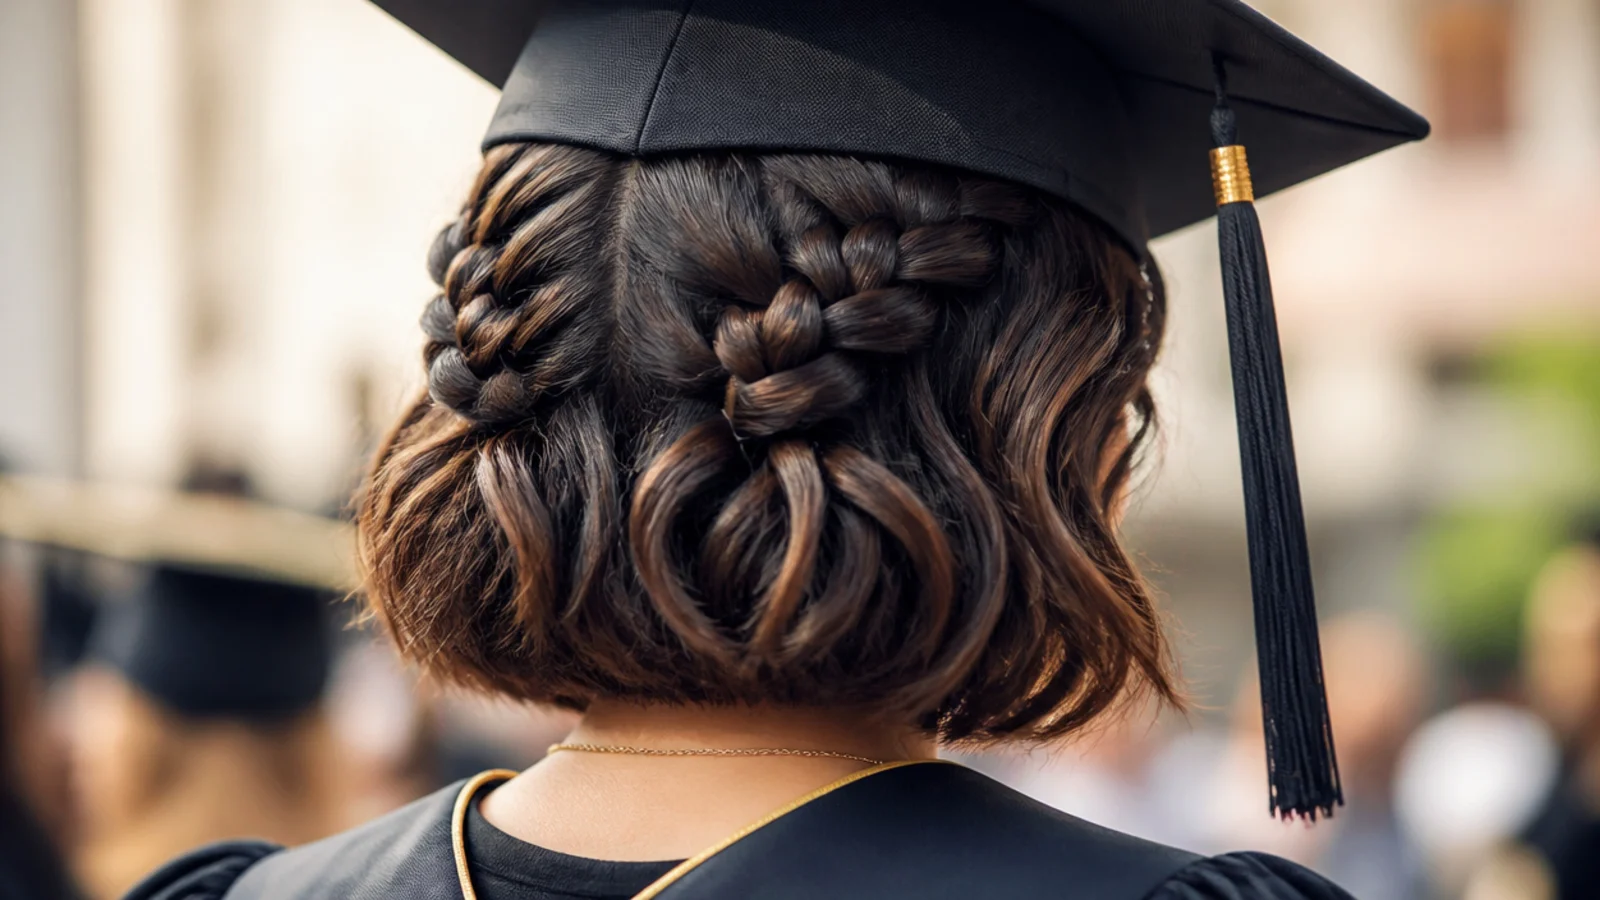
Part down the middle and Dutch braid each side from the hairline back, stopping at the nape and pinning the short tails under. Dutch braids sit raised on the surface, so keep them tight against the scalp for the first three inches where the cap will press. The advantage over a ponytail is total security: nothing shifts in four hours, and nothing needs re-doing. Twenty minutes if you braid well, longer if you are learning. This is the most humidity-proof style on the list.
Who it suits: Bobs of 7 inches or more, thick or textured hair, outdoor ceremonies in June.
Tip: Braid on second-day hair with a little texture spray so the short pieces do not slide free.
11. Slicked-Back Wet-Look Pixie
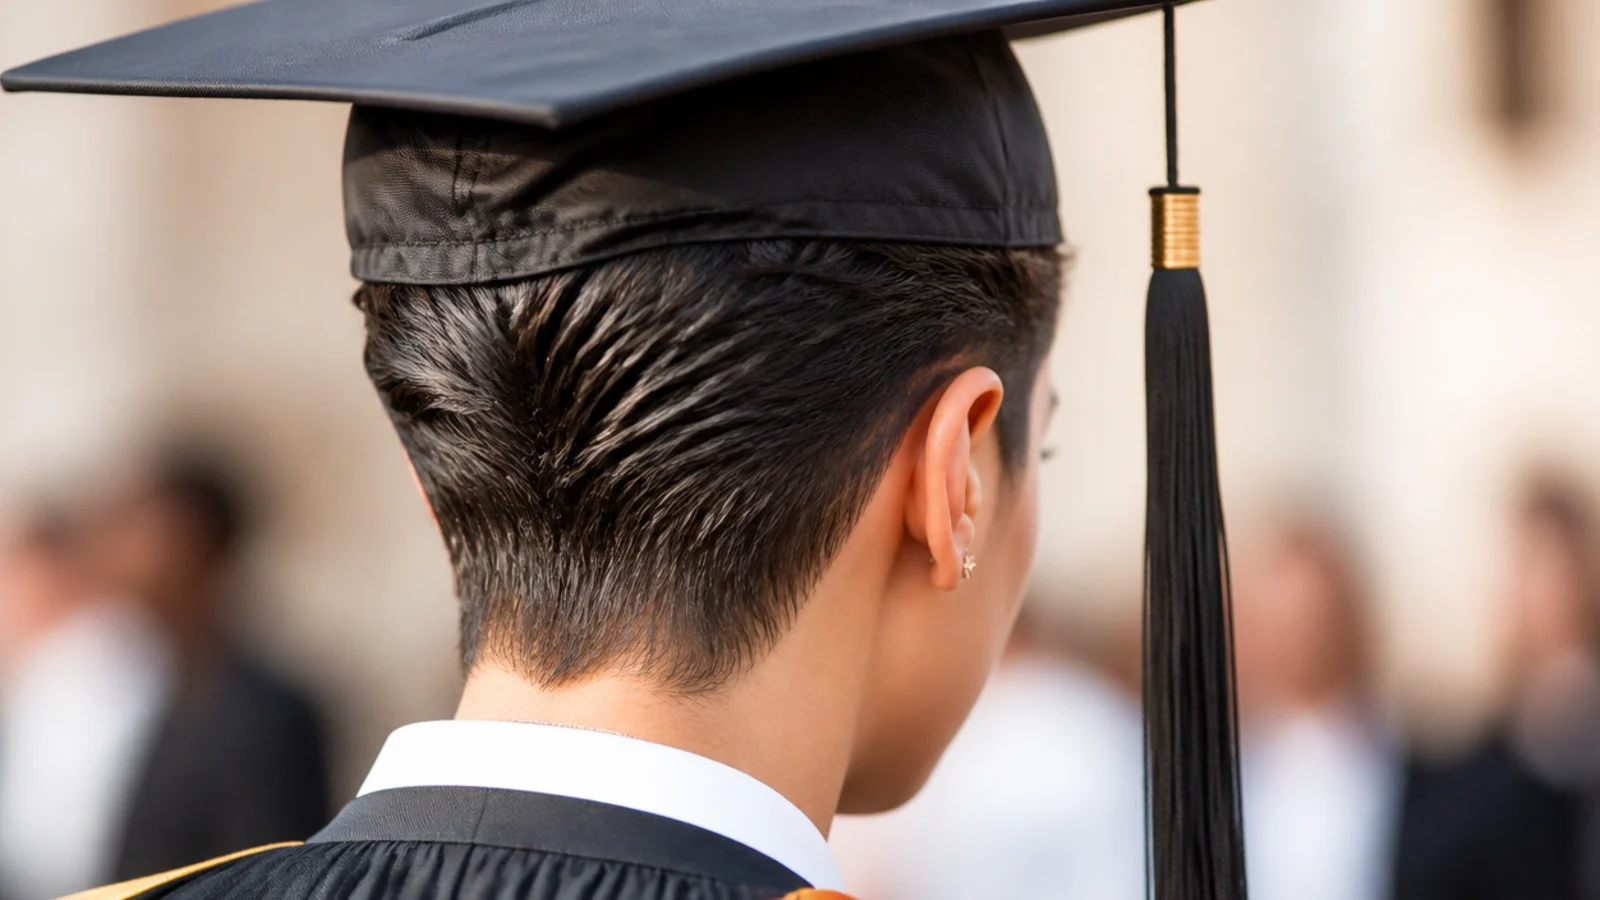
Alcohol-free gel raked straight back from the hairline over damp hair, built in two thin passes rather than one heavy one. This is the one style where cap flattening is genuinely irrelevant, because the hair is already flat on purpose, so it removes the biggest short-hair worry outright. It reads editorial in photos and pairs well with statement earrings since the ears are fully exposed. Seven minutes. The trade-off is humidity: gel can revert or flake at a hot outdoor ceremony, so test yours.
Who it suits: Pixies and very short crops, straight to 3B hair, strong bone structure.
Tip: Start with a dime of gel and add more; too much on short hair looks wet rather than sleek.
12. Side-Swept Curtain Bangs with a Bob
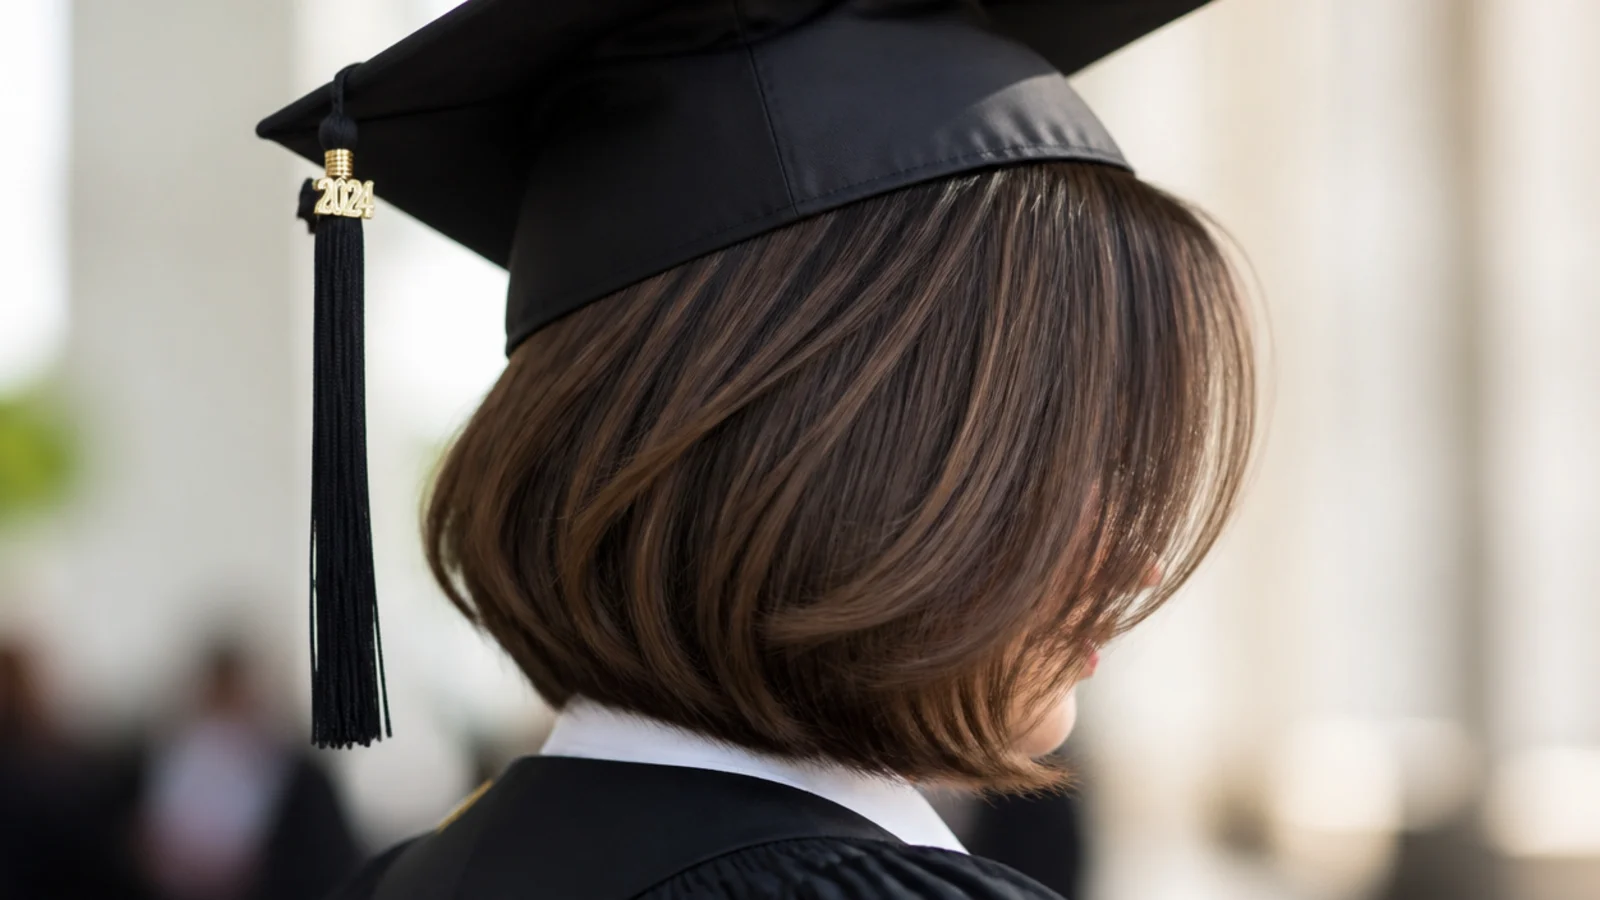
Curtain bangs split off center and blown outward with a round brush so they sweep away from the eyes and land at the cheekbone. Bangs are the single best short-hair asset for cap photos, because they fill the gap between the eyebrows and the cap band, which is otherwise a large flat expanse of forehead. Ten minutes with a two-inch round brush. Keep them light and moving, not helmet-set, so they recover when the cap pushes them down at the temples.
Who it suits: Bobs and pixies with existing bangs, round and long face shapes.
Tip: Blow the bangs dry first, before the rest of the hair, while they are still damp enough to shape.
13. Finger Waves on a Short Bob
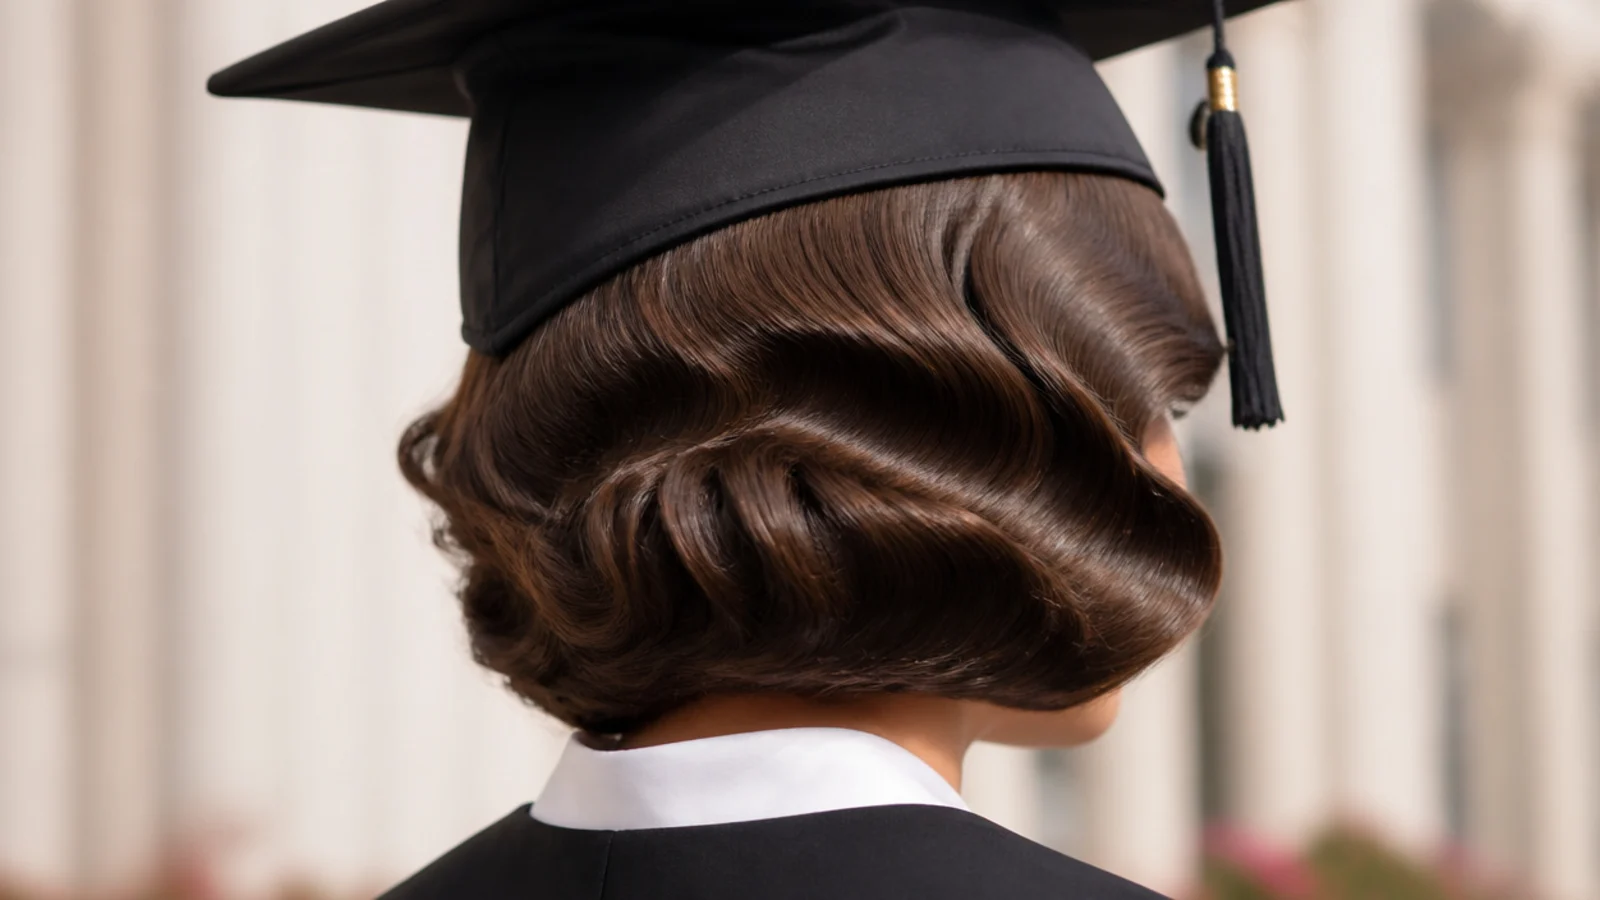
Vintage S-shaped ridges molded into damp hair with setting lotion, a fine comb and duckbill clips, then dried and lightly brushed. It is the most formal option here and it suits a hooding ceremony or a graduate school photo far better than beachy texture does. The waves sit at the sides and hug the head, so the cap goes on without disturbing a thing. Budget 30 to 40 minutes plus drying time, and set it the morning of, never overnight, unless you sleep in a silk scarf.
Who it suits: Bobs of 6 to 9 inches, fine to medium straight hair, formal or vintage-leaning taste. Heat-free alternatives in heatless curl tools compared.
Tip: Do not brush the set until it is bone dry; brushing damp waves erases the ridges completely.
14. Curly Pixie Wash-and-Go with Defined Coils
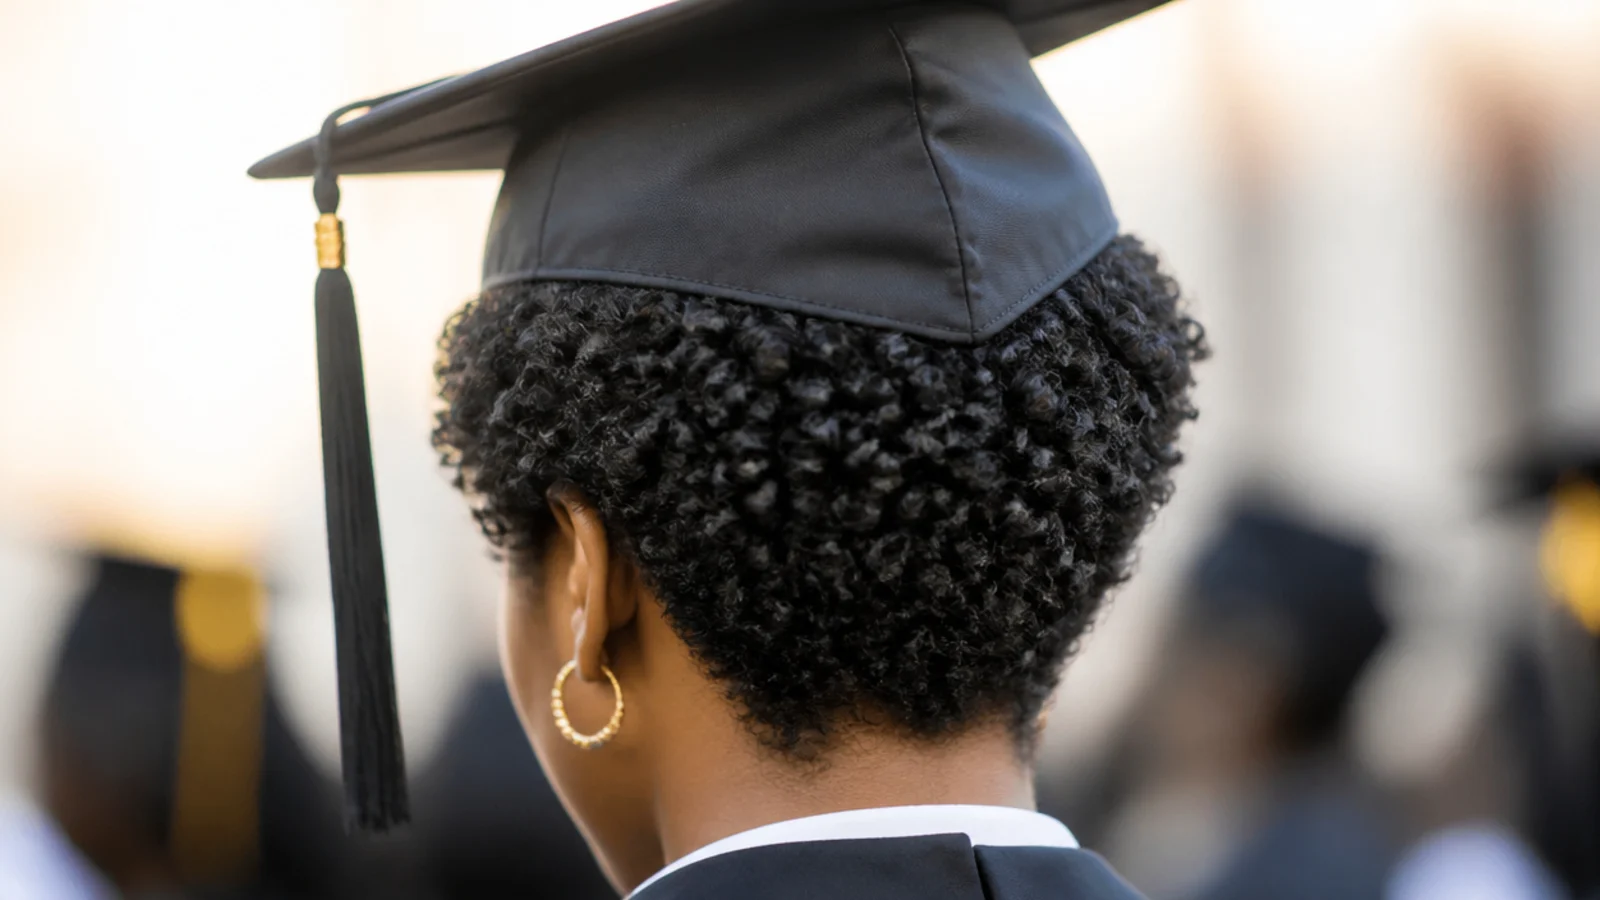
Curl cream raked through soaking wet hair, then a light gel scrunched in and diffused on low heat until the cast sets, then scrunched out. On a curly pixie the cap flattens the crown coils and leaves the sides untouched, so concentrate your definition work at the sides and hairline where it will still show. Twenty-five minutes including diffusing. Pack a wide-tooth pick in a clutch to lift the crown before photos. See more in graduation hairstyles for curly hair.
Who it suits: 3A to 4A pixies and tapered cuts, anyone avoiding heat entirely.
Tip: Let the gel cast dry fully before the cap goes on; scrunching a wet cast under a cap flattens it.
15. Flat Twists at the Front on a Tapered Cut
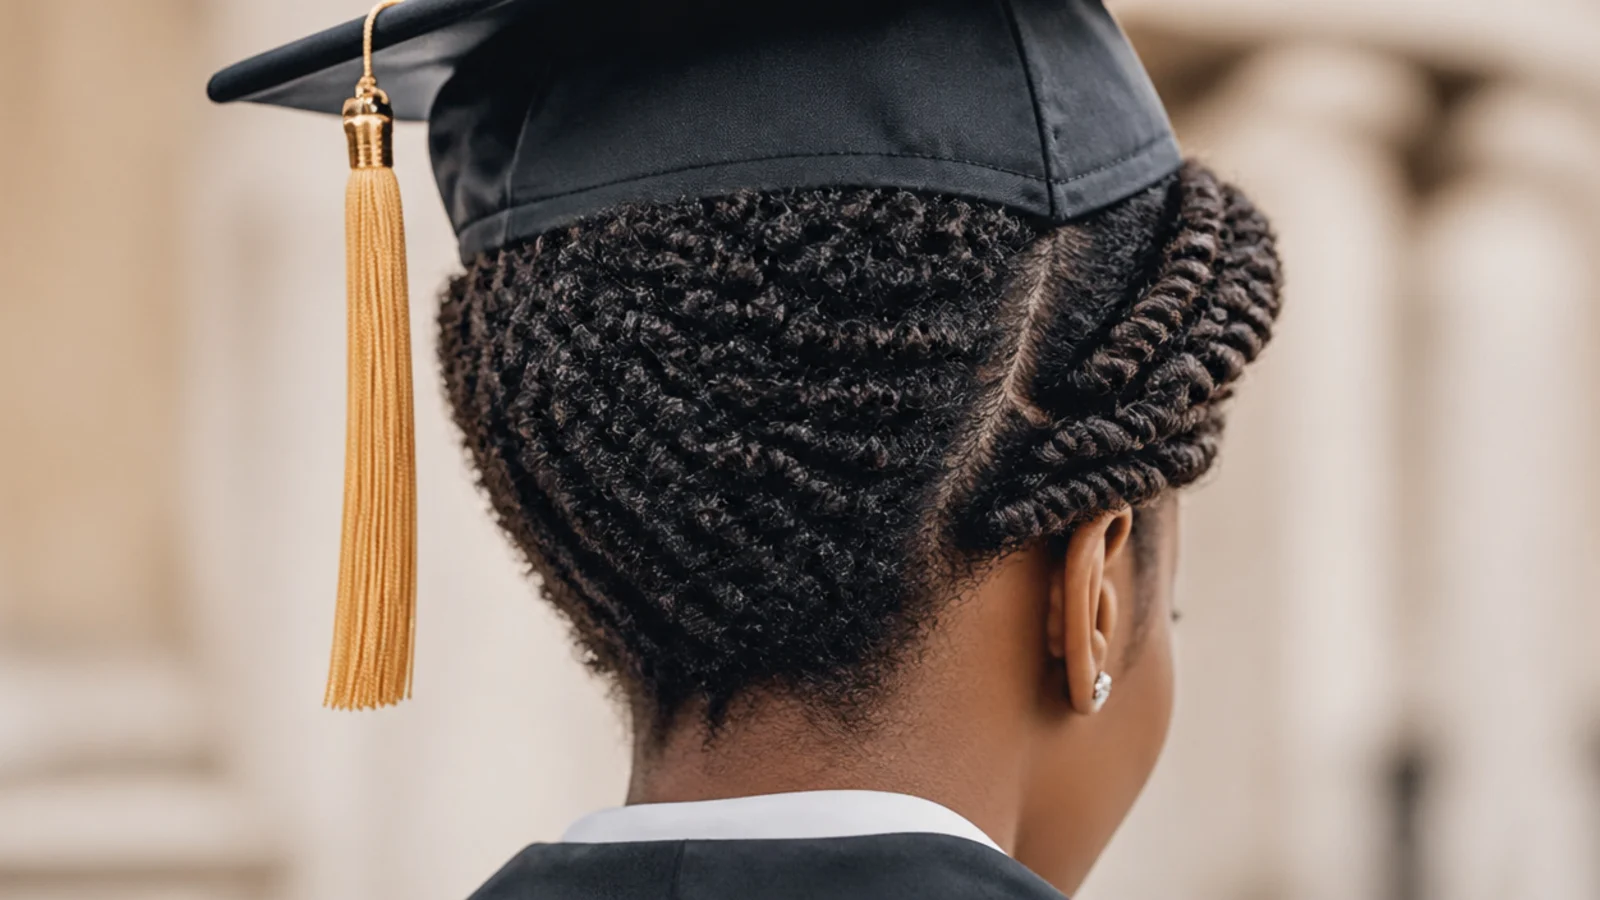
Two or three flat twists taken from the front hairline straight back, ending where the crown begins, with the rest of the tapered cut left in its natural pattern. The twists control the section that will be crushed anyway and give the finished look structure exactly where the cap band crosses. Fifteen minutes on damp, moisturized hair. This is the no-purchase alternative to a wig or fresh install, which is what most of the internet will try to sell you for graduation.
Who it suits: 4A to 4C tapered cuts and TWAs, natural hair with no extensions. Related: protective styles for fine 4C hair.
Tip: Twist on hair damp with leave-in, not dry, or the twists will unravel before the ceremony starts.
16. Bantu Knot-Out on Short Natural Hair
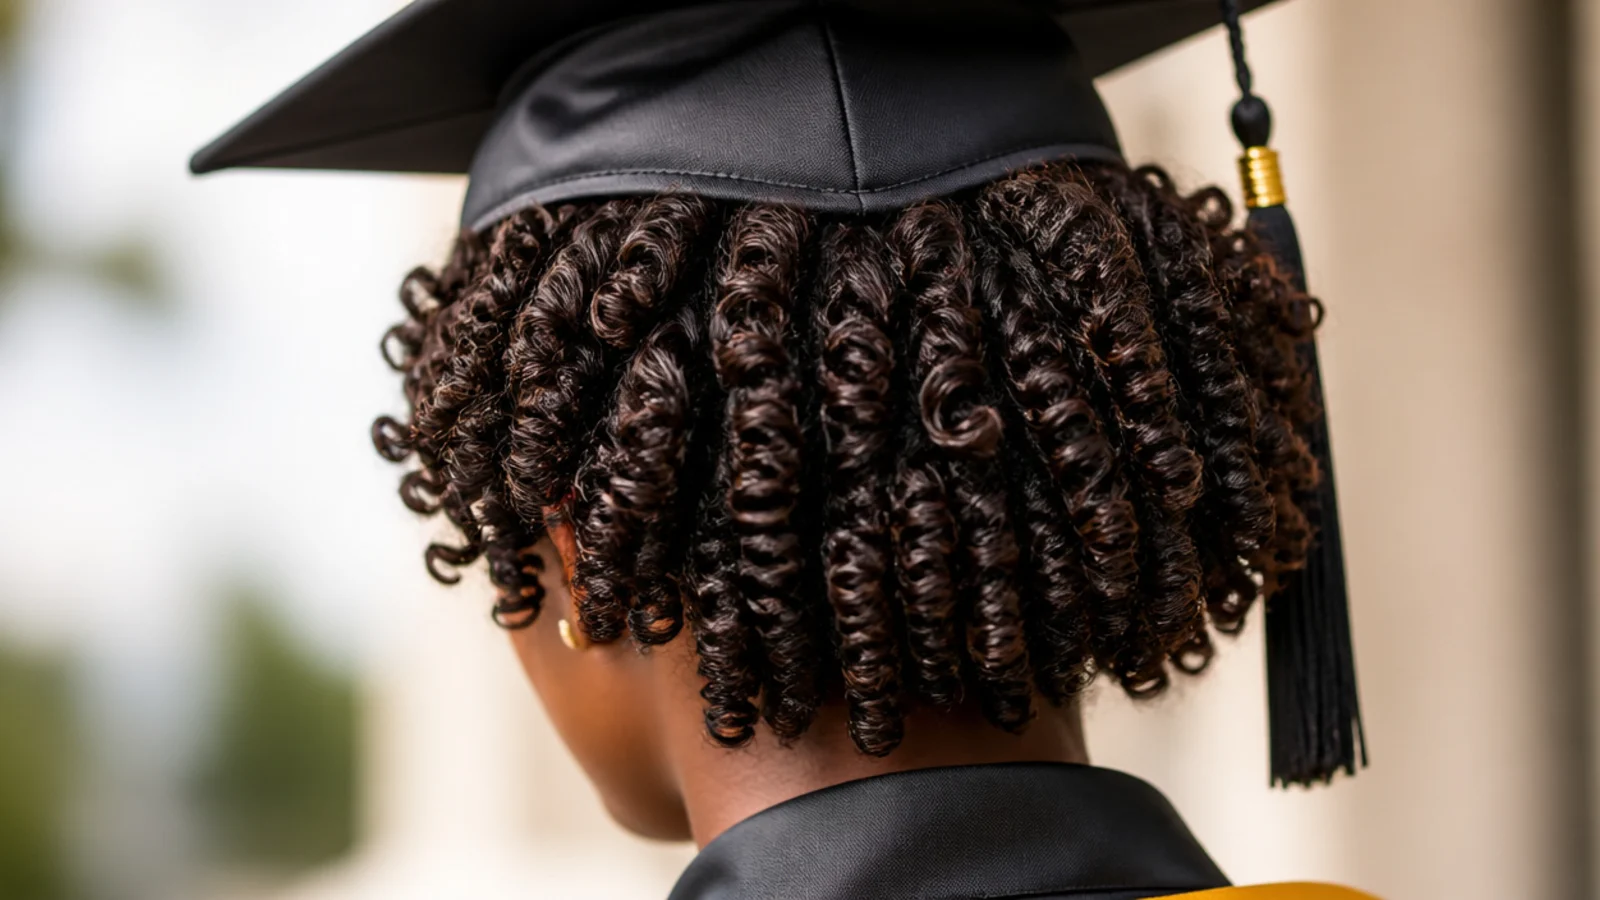
Eight to ten small Bantu knots set on damp, creamed hair the night before, unraveled in the morning into springy defined spirals. This is the one style on the list that genuinely should be prepped overnight, because the set needs drying time and the takedown itself is only five minutes. Fluff the spirals at the sides and back rather than the top. Under the cap the crown compresses and the sides carry the shape, which is exactly the volume placement you want anyway.
Who it suits: 4A to 4C hair from 3 to 6 inches, anyone who wants definition without heat.
Tip: Unravel with oiled fingers about 90 minutes before you leave so the parts have time to soften.
17. Pearl Barrette Pin-Back on a Lob
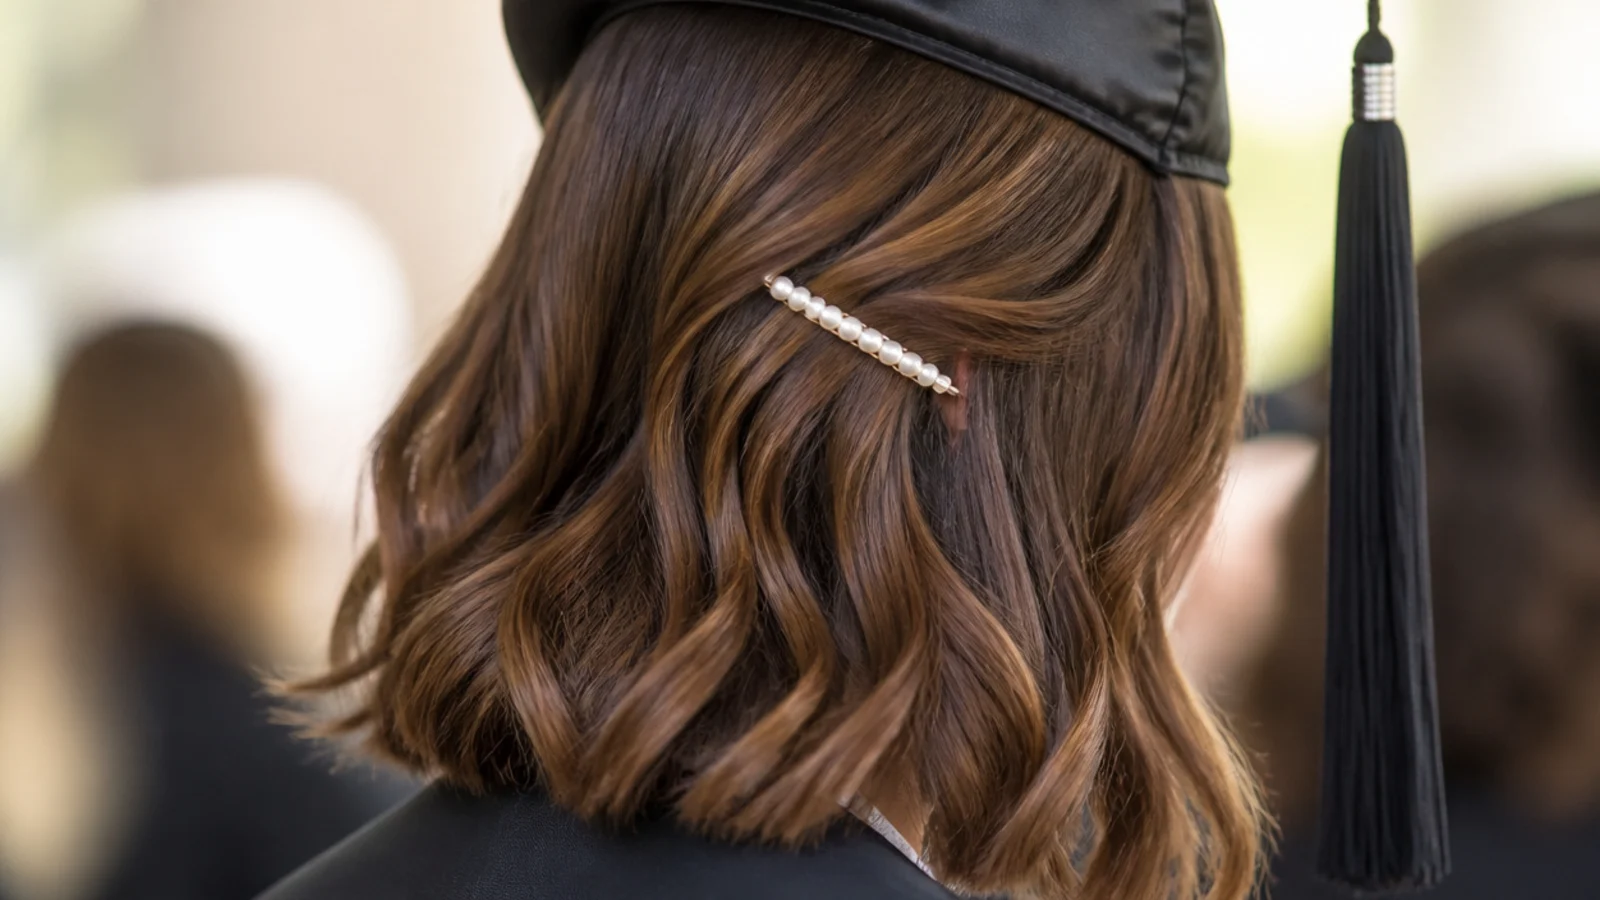
One side swept behind the ear and clipped with a two-inch pearl or rhinestone barrette placed just above the ear, below where the cap band lands. Accessories are the cheapest way to make short hair look styled, and the placement rule is simple: anything above the cap line will be hidden or knocked loose. A barrette in the 8 to 20 dollar band photographs as well as anything pricier. Two minutes. It also stops hair falling forward while you shake hands on stage.
Who it suits: Bobs and lobs of any texture, anyone who ran out of time.
Tip: Clip into a half-inch twist rather than flat hair, so the barrette has something solid to bite.
18. Low Side Ponytail on a Lob
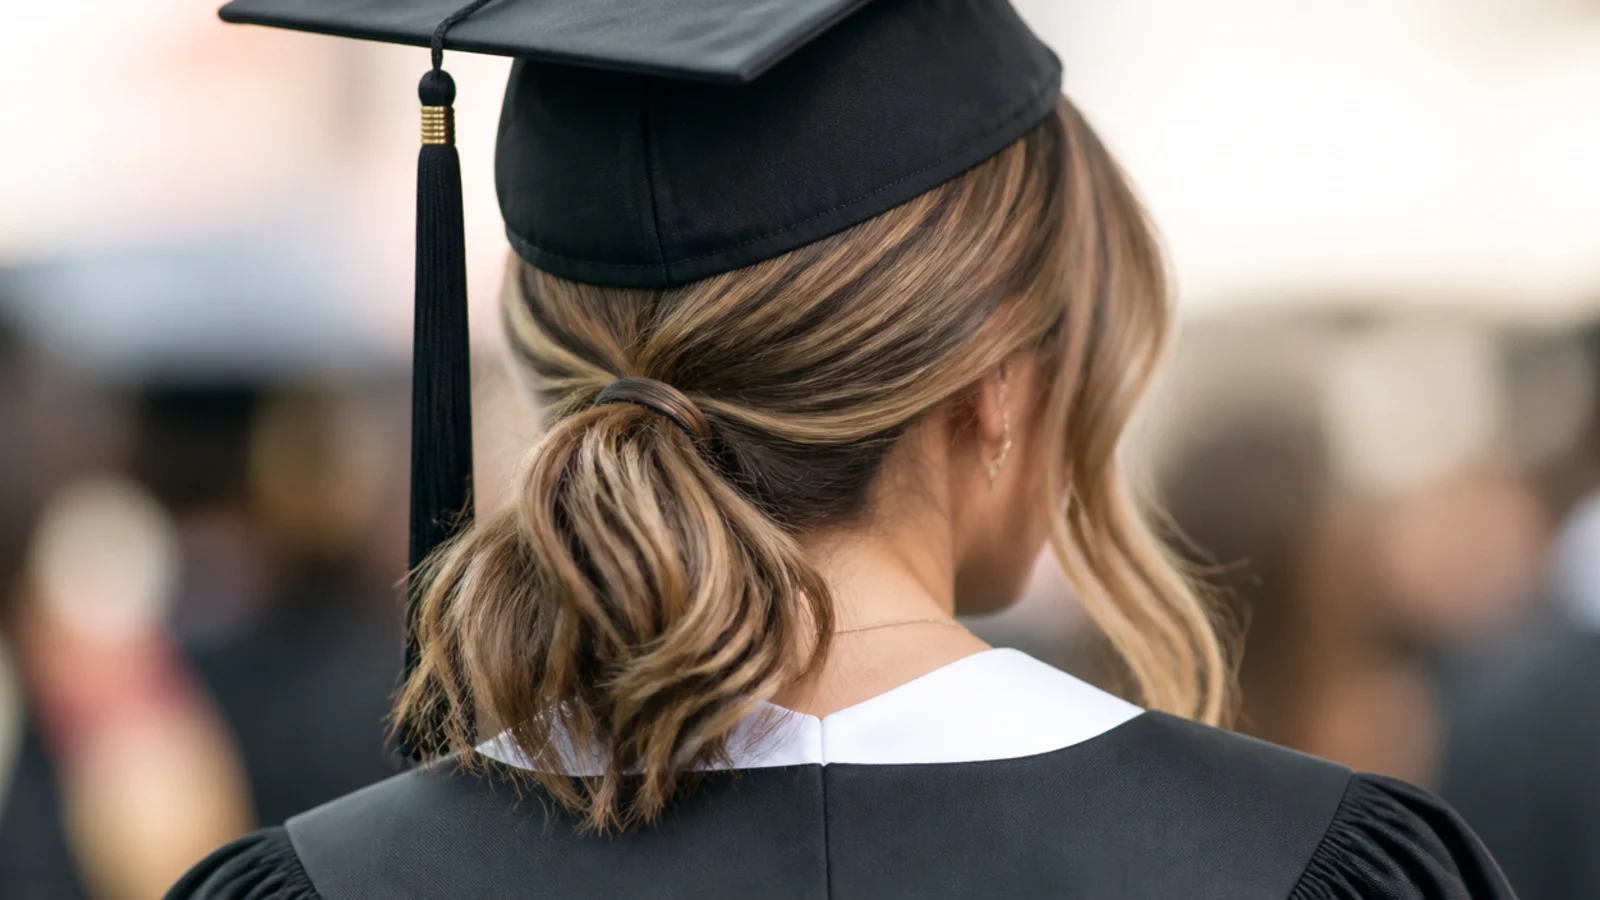
Everything gathered low and slightly to one side, sitting behind and below the ear, secured with a small elastic wrapped with a strand of hair. Placed this low it never argues with the cap, and it pulls the visual weight to one shoulder, which is more flattering in a straight-on stage photograph than a center-back tail. Six minutes. On a lob you will lose a few short face-framing pieces, and that is fine; leave them out deliberately. More at ponytail styles.
Who it suits: Lobs of 10 inches or more, straight to wavy hair, warm outdoor ceremonies.
Tip: Angle the tail forward over the shoulder so the gown collar does not swallow it in photos.
19. Undercut Pixie with a Deep Sweep
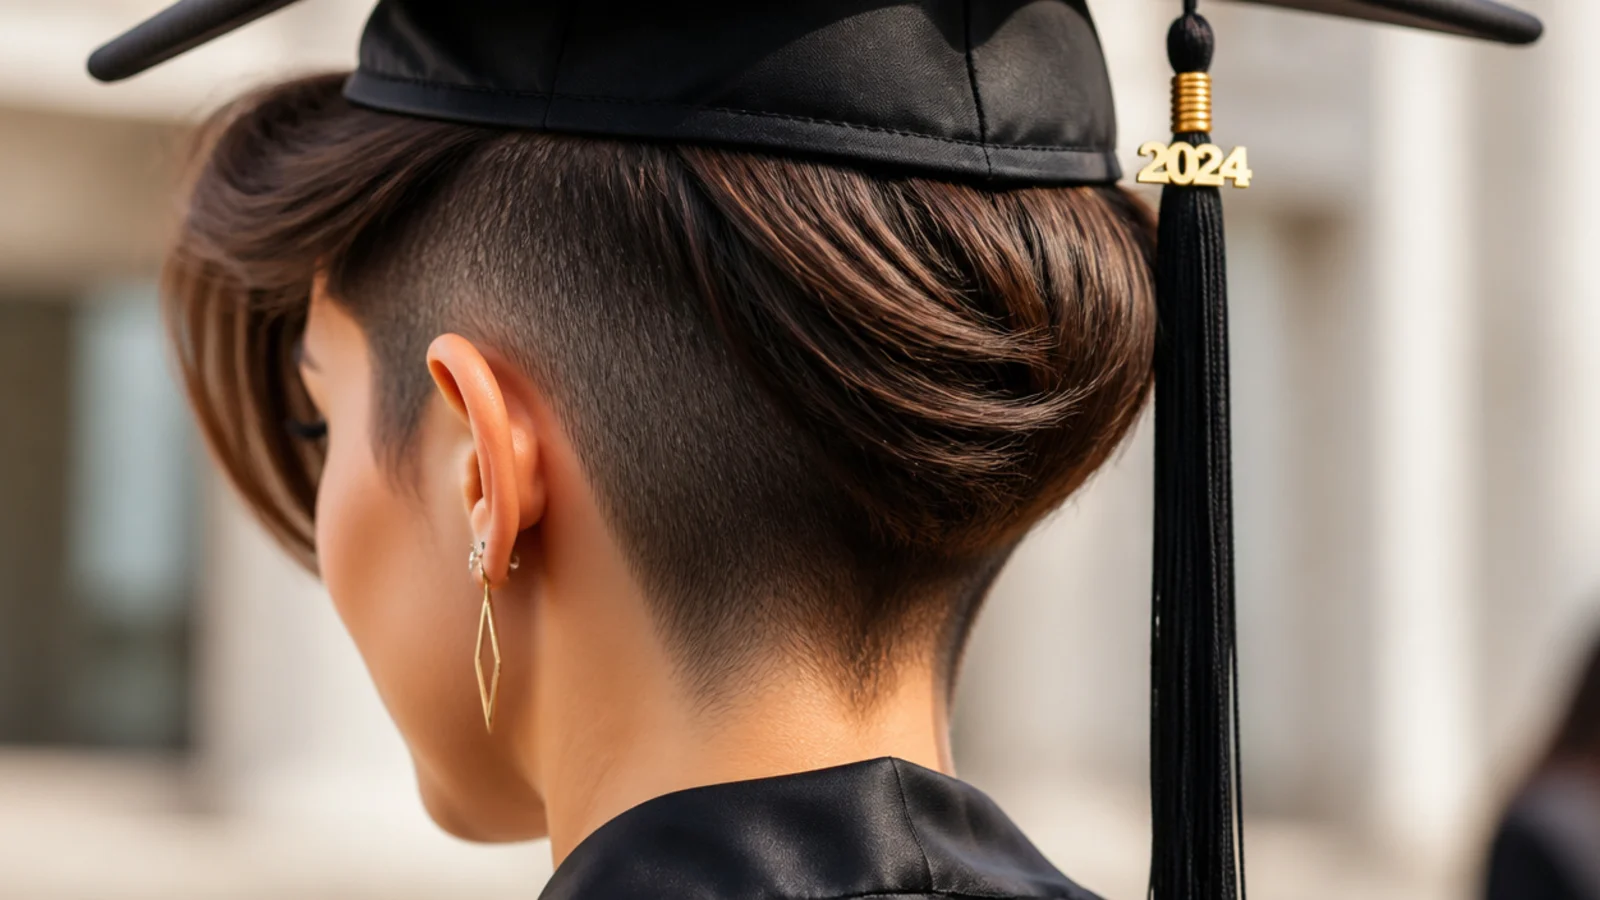
The long top section swept hard across and over the shaved or tapered side, held with a light spray rather than a stiff one. An undercut is the easiest short cut to wear with a mortarboard, because the shaved side has no volume to lose and the swept section lies flat under the band by design. Five minutes. It also makes the best cap-off reveal on this list, since flipping the sweep back up takes one hand and two seconds.
Who it suits: Undercut and shaved-side pixies, straight to 3B hair, bold personal style.
Tip: Spray the sweep from underneath so it lifts at the root instead of gluing flat to the scalp.
20. Silk-Pressed Bob with Bumped Ends
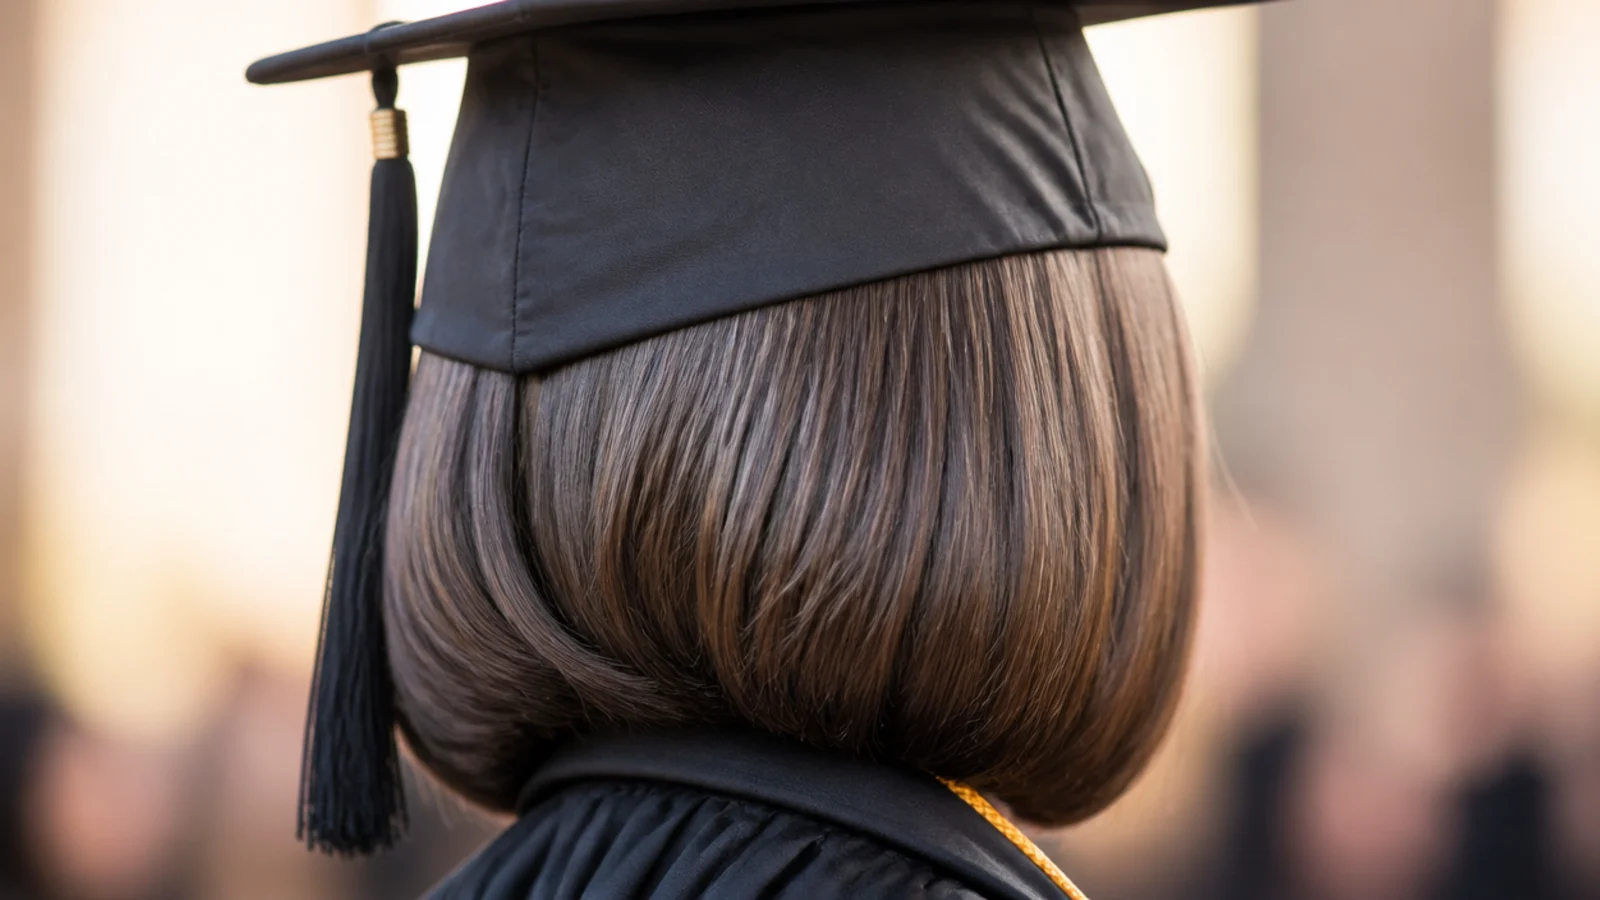
A blow-dry and flat-iron press finished with the ends turned under in a soft bump using the iron or a round brush. The bumped ends give a short bob movement at the jaw without adding a millimeter at the crown, which is precisely the shape trade a mortarboard demands. About 40 minutes at home or 60 to 90 in a salon. Book a press for the day before, not the morning of, and wrap it overnight so you are not rushing. Humidity is the enemy here.
Who it suits: Relaxed or natural hair pressed straight, bobs from 6 to 10 inches.
Tip: Carry a silk scarf and tie the press down the moment the ceremony ends, before you go outdoors.
Where the Graduation Cap Sits on Short Hair, and Why Volume Goes Below It
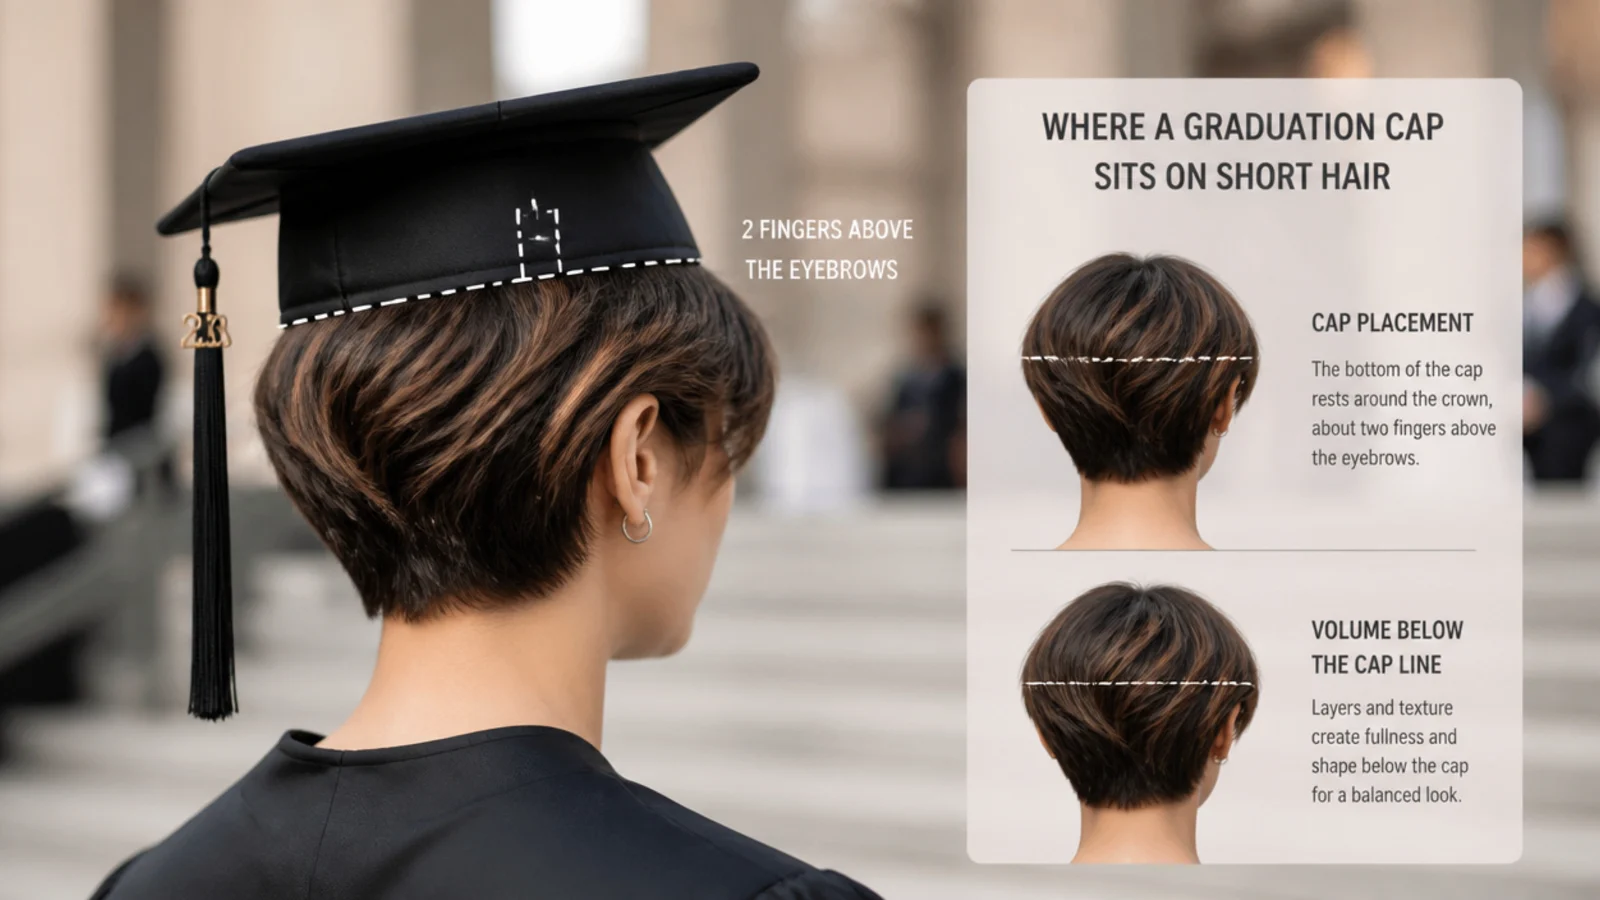
A mortarboard is meant to sit flat and level on the crown, with the front band about two fingers above your eyebrows. It is not a hat you tilt back. That single fact decides every styling choice on short hair, because it means the entire top of your head from the hairline to the crown is going to be covered and compressed for the length of the ceremony. On long hair you can hide the flattening under the length that hangs below. On a pixie or a chin-length bob there is no length to hide it with, so the answer is to stop putting volume there at all. Build fullness at the sides, at the temples and around the back of the head, all below that band line. Volume at the sides and back is also what photographs best once the cap is on, because it stops your silhouette reading as a flat black square balanced on a narrow head. Treat the crown as deliberately sleek and everything gets easier.
How to Anchor a Mortarboard on a Pixie or Bob When There Is Nothing to Pin
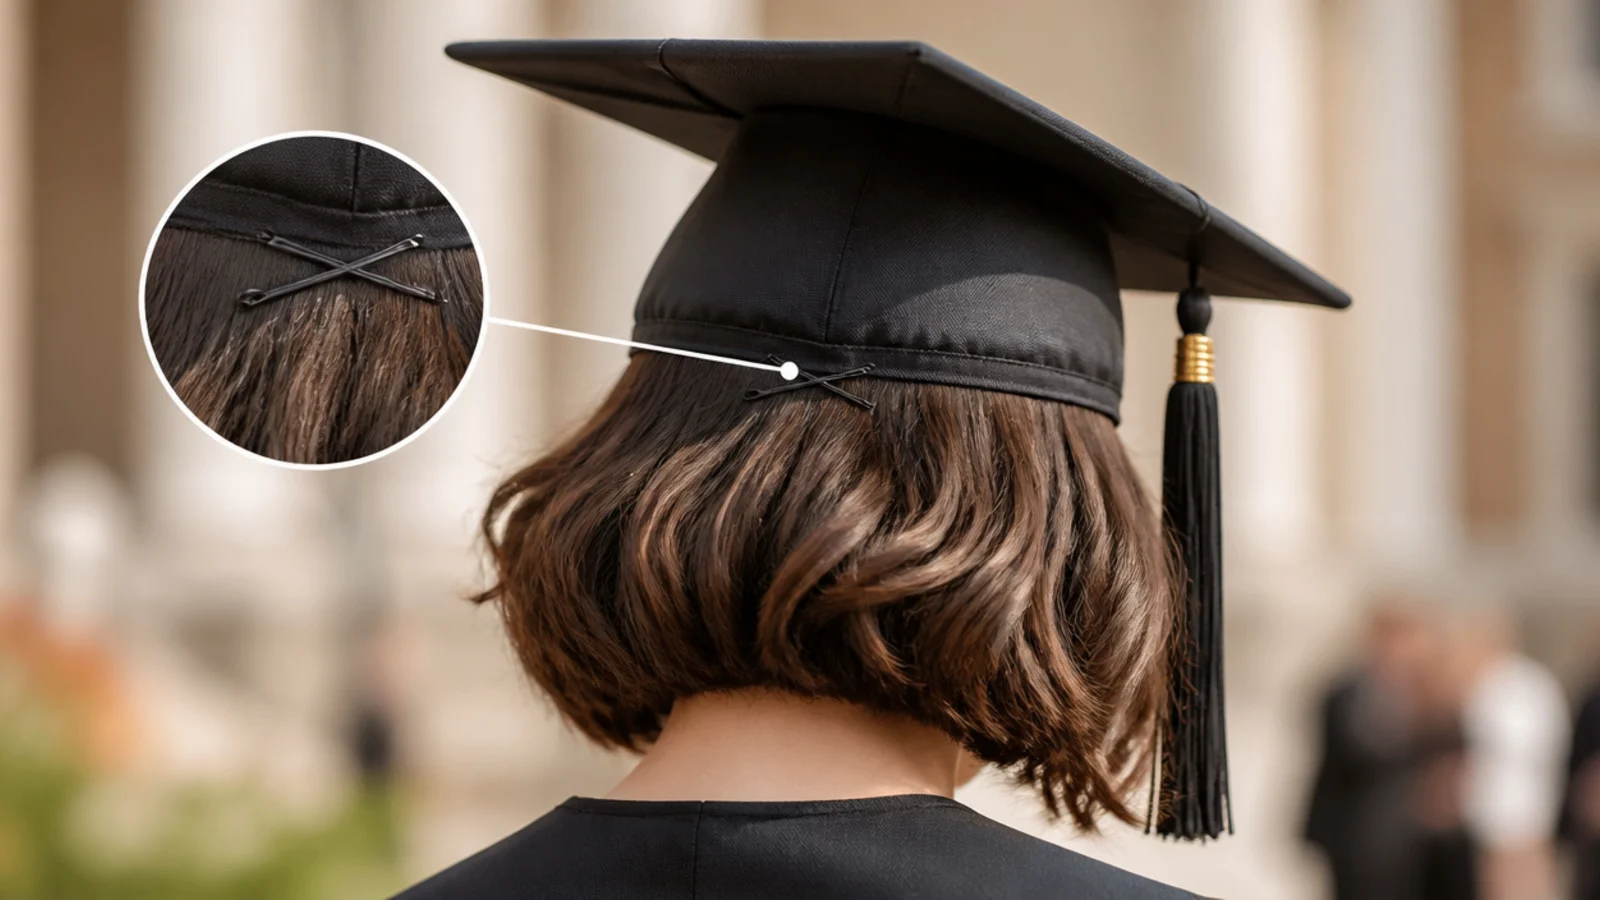
This is the problem nobody writes about, and it is the reason short-haired graduates spend the whole ceremony holding their cap. The fix is the crossed pin. Slide one bobby pin up through the inside edge of the cap band, catch a small section of hair, and push it back through. Then slide a second pin across the first at roughly a 45-degree angle, so the two form an X. That X grips hair that is far too short for a single pin to hold. Use two pins on each side, four total, for a pixie under 3 inches or a windy outdoor ceremony. Wavy-edged pins hold better than smooth ones, and a light mist of flexible hairspray on the section before pinning adds real grip. On a bob you can also pin into the twisted section of a half-up, which gives the pin something solid to bite. Full detail lives in graduation hairstyles with cap.
Updo vs Down for Graduation Photos When Your Hair Is Short
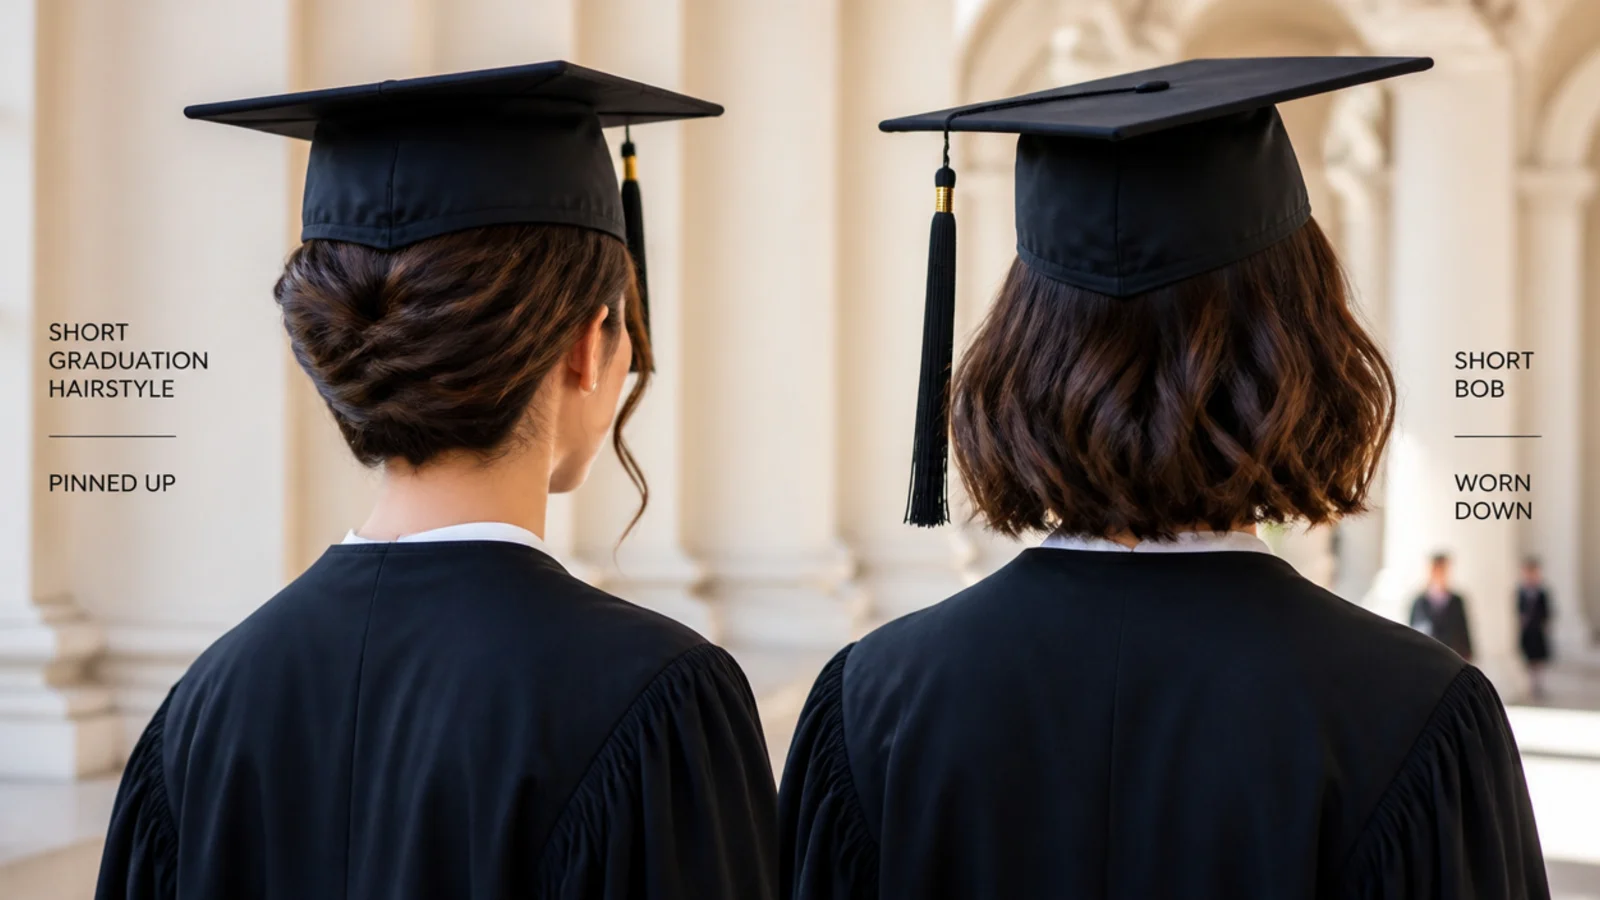
On long hair this is a genuine debate. On short hair the calculus is different, because a pixie already reads as an updo and a bob already sits above the shoulder. What actually changes is whether you pin the sides back or leave them loose. Pinned-back styles photograph more cleanly with the cap on: the jawline and neck are exposed, the silhouette has structure, and nothing shifts between the processional and the diploma shot. Loose styles look softer and recover faster after the cap comes off, but they need side volume or the whole head reads flat under a black board. If your ceremony is outdoors in May or June heat, pin it. If your ceremony is indoors and under two hours, leave it down and enjoy the movement. If you are still deciding on a cut or a texture strategy first, start with hairstyle for your hair type, then browse the full graduation hairstyles guide. The comparison table above breaks the trade-off down row by row, and graduation hairstyles for long hair covers the same question at the other end of the length scale.
All-Day Hold: Making a Short Style Survive a Four-Hour Ceremony
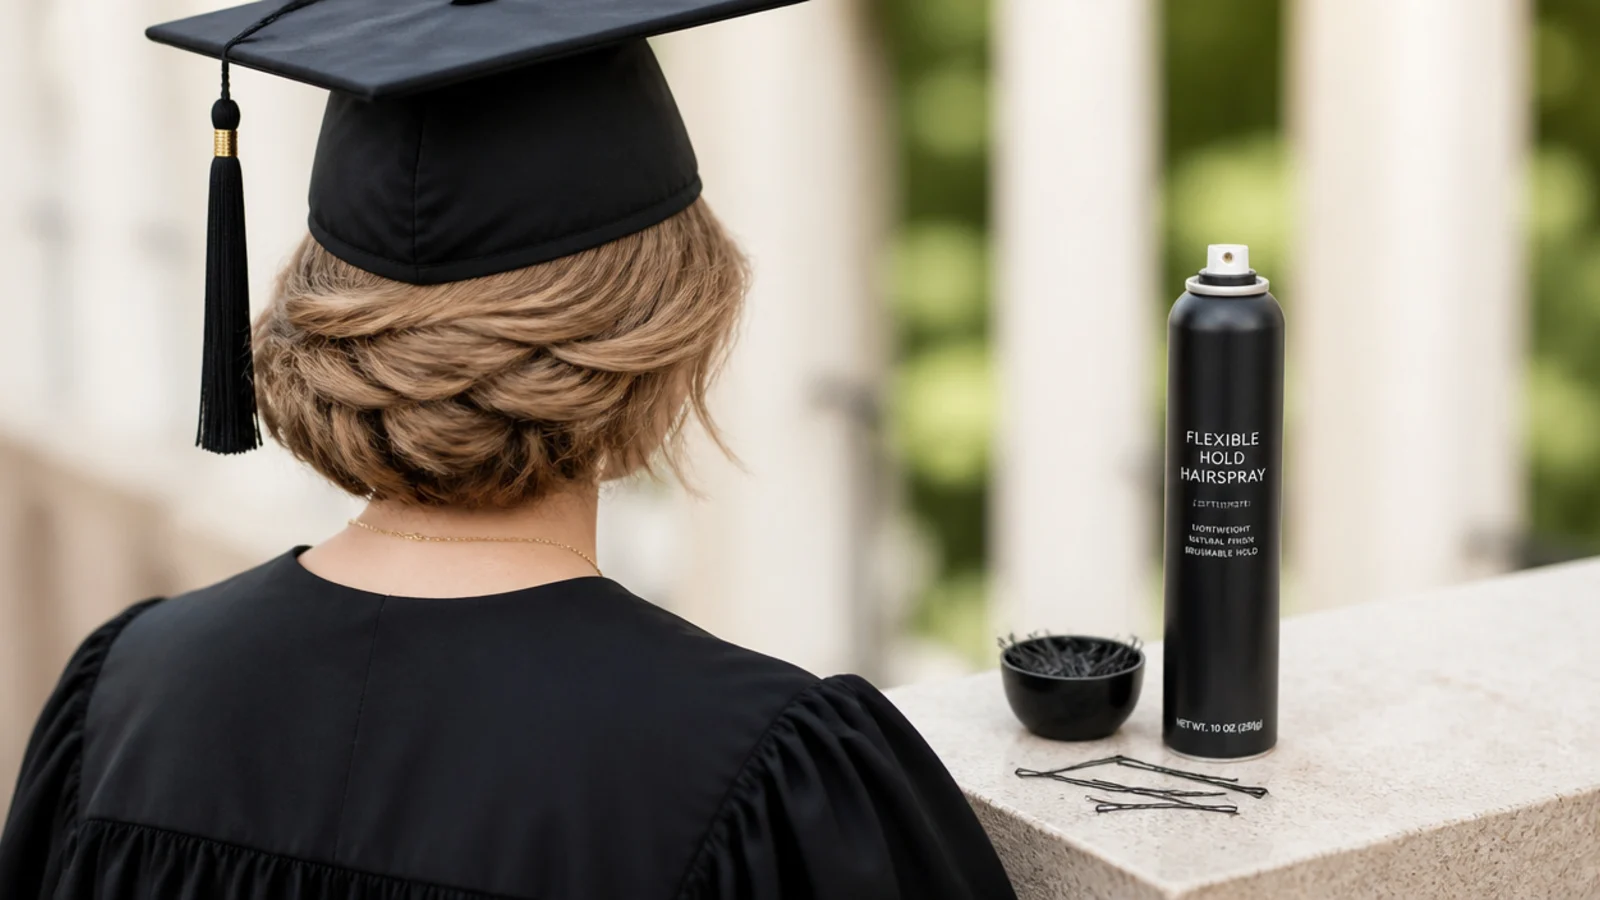
Four hours is longer than most short styles are built for, which is why product choice decides this. Reach for flexible-hold hairspray, not a stiff freeze spray. The distinction matters more on short hair than on any other length, because stiff spray sets the crown in whatever shape the cap pressed it into and it stays there. Flexible hold keeps movement in the hair so it springs back the moment the pressure is gone. Spray from about ten inches away in two light passes rather than one heavy one. For texture that will not quit, a light dusting of dry texture spray at the roots at the sides gives grip that outlasts any curl. Let curls cool completely in your hand before releasing them, and let a gel cast dry fully, before the cap ever goes on. Skip serums and oils anywhere near the crown. And do a full practice run with the actual cap the week before, because that is when you find out your style pushes the board off the back of your head. More hold tactics in cute hairstyles that last all day.
Cap-On to Cap-Off: Fixing the Dent in 60 Seconds
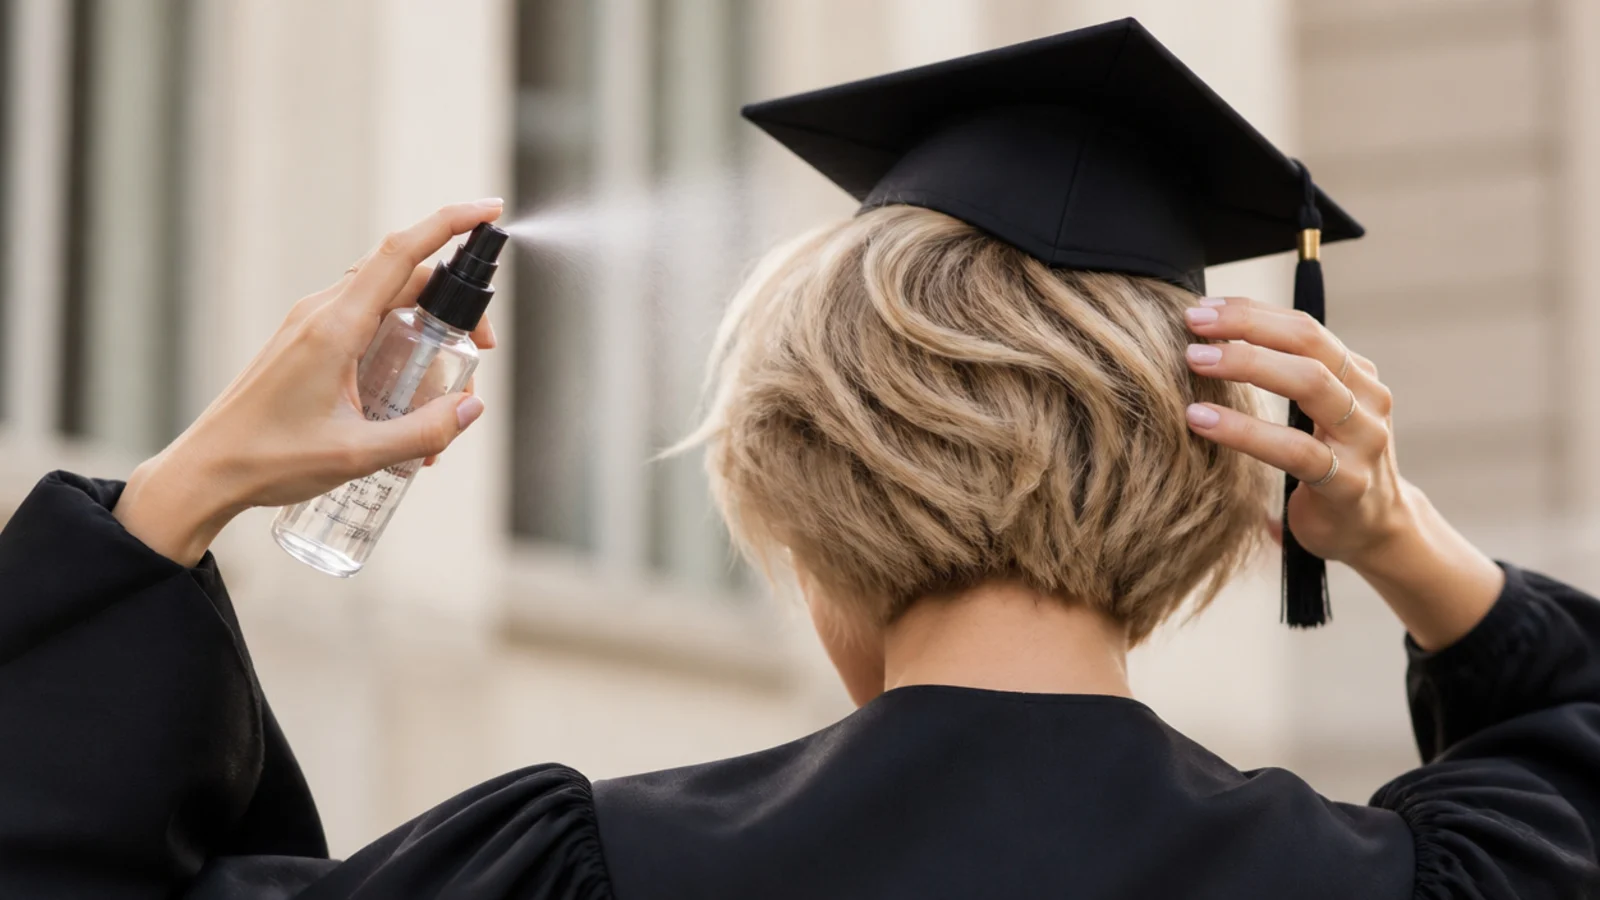
Most graduates take the cap off within minutes of walking off the stage, and every photo after that shows the crown. Short hair dents faster than long hair and also recovers faster, which is the good news. Keep three things in a clutch: a travel mist bottle of water, a wide-tooth pick or comb, and four spare bobby pins. Spritz the dented section lightly, never soak it, then flip your head forward and shake the roots with your fingertips for about 20 seconds. Come back up, comb the part back in, and hit the roots with a short burst of flexible spray. On curly and coily hair, skip the water and go straight in with the pick at the root, lifting rather than combing through, so you do not disturb the curl pattern. Sixty seconds total. The styles that need this least are the slicked pixie, the nape knot and the undercut sweep, because none of them relied on crown height in the first place.
Timing the Morning Of: A Short-Hair Graduation Schedule
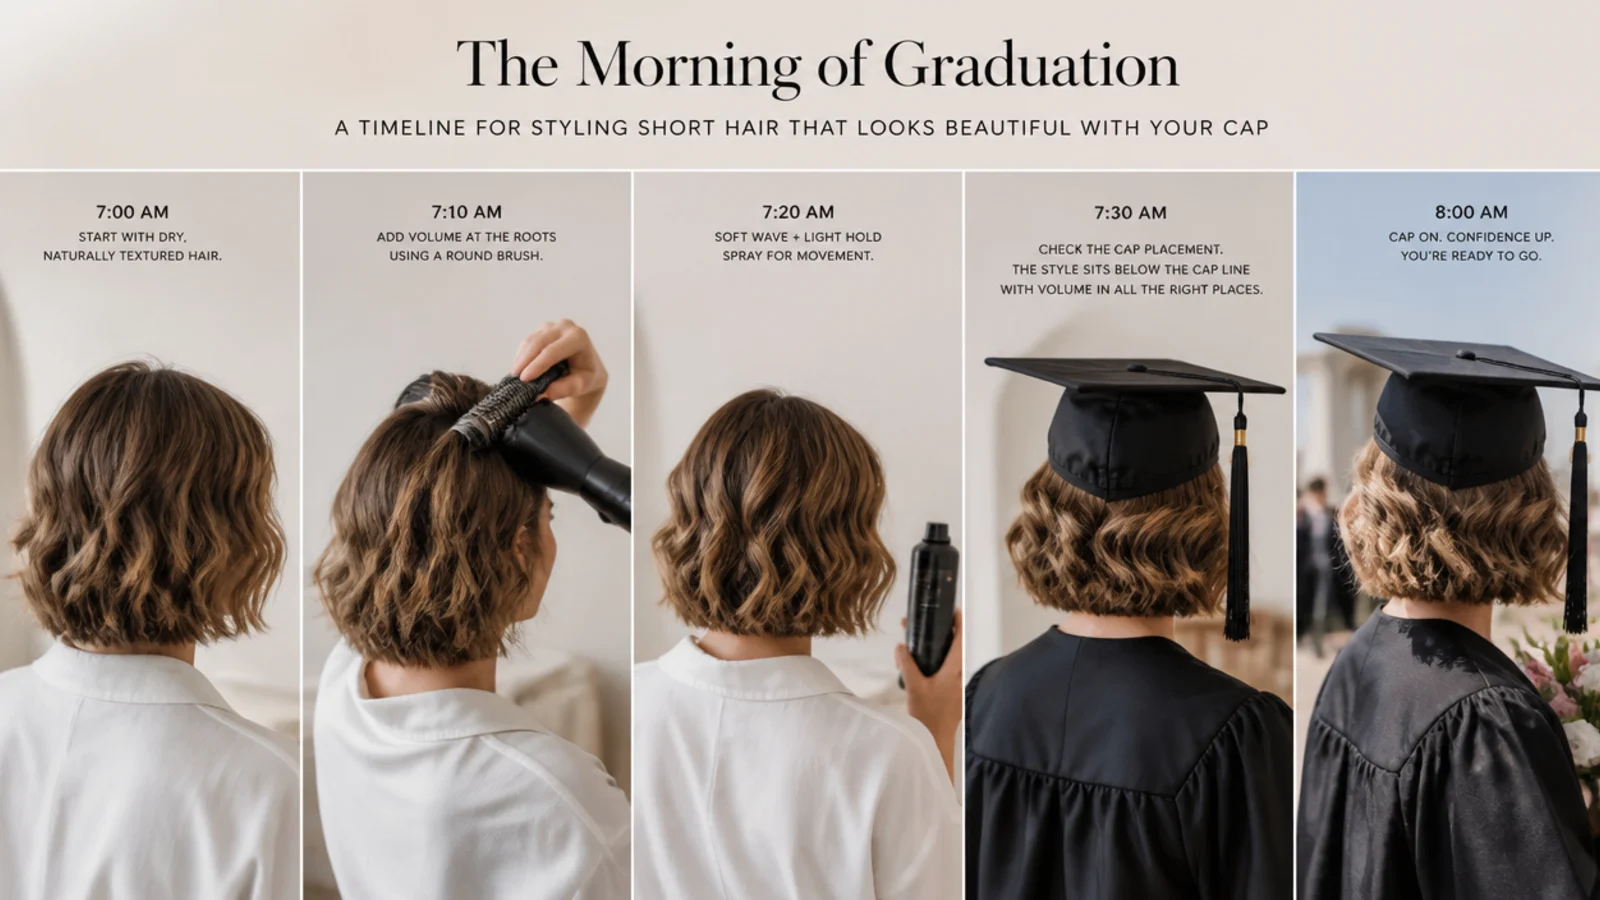
Style one to two hours before the ceremony, not the night before. Short hair holds a set for a few hours and then starts to separate, so a style built at 10pm will be limp by a 10am processional. The only exception is a braided or knotted set, like the Bantu knot-out, which genuinely needs overnight drying time. A workable schedule looks like this: wash the night before so the hair has grip rather than slip; 90 minutes out, style; 60 minutes out, spray and leave it alone; 30 minutes out, do the cap fitting and pin the X; 15 minutes out, pack the clutch with pins, mist and pick. Getting dressed after styling matters too, since pulling a gown over a finished head is how side volume dies. Put the gown on first, then do the final spray. For a faster version of all of this, see easy graduation hairstyles and 5-minute everyday hairstyles.
Frequently Asked Questions
What is the best hairstyle for short hair for graduation?
A deep side-parted pixie or a side-swept bob is the safest choice, because both keep the crown flat where the cap lands and put the visual interest at the sides. If you want something more structured, a half-up mini bun placed at the occipital bone works on any bob from about seven inches, and it holds for four hours without touching up.
How do you wear a graduation cap with short hair?
Sit the cap flat on the crown with the front band about two fingers above your eyebrows, never tilted back. Anchor it by sliding a bobby pin up through the inside of the band, catching a small section of hair, and crossing a second pin over it in an X. Use two pins per side on a pixie.
How do you keep a graduation cap on a pixie cut?
Crossed bobby pins are the only reliable method on very short hair. Mist the section with flexible-hold hairspray first so the pins have grip, then use four pins total, two on each side of the band, angled against each other. Wavy-edged pins hold better than smooth ones. Test the whole setup a week before.
Should I wear my hair up or down for graduation if it is short?
Pin it back if the ceremony is outdoors, longer than two hours, or humid; a pinned style holds its shape and photographs with a cleaner jawline. Wear it down if the ceremony is indoors and short, and add side volume so your silhouette does not read flat beneath the black board. Both work at bob length.
How do you fix the dent a graduation cap leaves in short hair?
Spritz the flattened crown lightly with water, flip your head forward, and shake the roots with your fingertips for about 20 seconds. Stand up, comb the part back in, and finish with a short burst of flexible-hold hairspray. On curly or coily hair, skip the water and lift at the root with a wide-tooth pick instead.
Can you do an updo with short hair for graduation?
Yes, from about seven inches. A low nape knot, a faux bob rolled and pinned at the jaw, or a half-up mini bun all read as updos on a bob or lob. Below seven inches, use flat twists or a twisted side pin-back instead, which give the same polished effect without needing length to gather.
How far in advance should I style short hair for graduation?
One to two hours before the ceremony. Short hair holds a fresh set for a few hours and then separates, so styling the night before leaves you limp by the processional. The exception is a set that needs drying time, such as Bantu knots or braids, which should go in the night before and come down in the morning.
What hairstyles should you avoid under a graduation cap?
Skip high topknots, high ponytails and crown braids. All three sit exactly where the mortarboard needs to rest, so the cap ends up perched, tilted, or sliding backward all afternoon. Anything with height above the band line causes the same problem. Keep every gathered or braided element at or below the occipital bone.
Does a graduation cap ruin curls on short curly hair?
It flattens the crown coils but leaves the sides intact, which is why definition work should focus on the sides and hairline. Let any gel cast dry completely before the cap goes on, then carry a wide-tooth pick and lift at the root once the cap is off. Avoid combing through, which breaks up the pattern.
Which graduation hairstyles look are you saving?
If you take one thing from these 20 graduation hairstyles for short hair, make it the volume rule: the mortarboard flattens the crown no matter what you do, so put your height at the sides and the nape and let the top stay sleek on purpose. Two crossed bobby pins under the front band will hold the cap on a pixie all afternoon, and a spray bottle plus 30 seconds of finger-fluffing brings a bob back to life once the cap is off. Start styling 90 minutes before you leave, do a full practice run with the actual cap the week before, and pack pins, a mini spray and a comb. For more options, browse easy graduation hairstyles or the full graduation hairstyles hub.