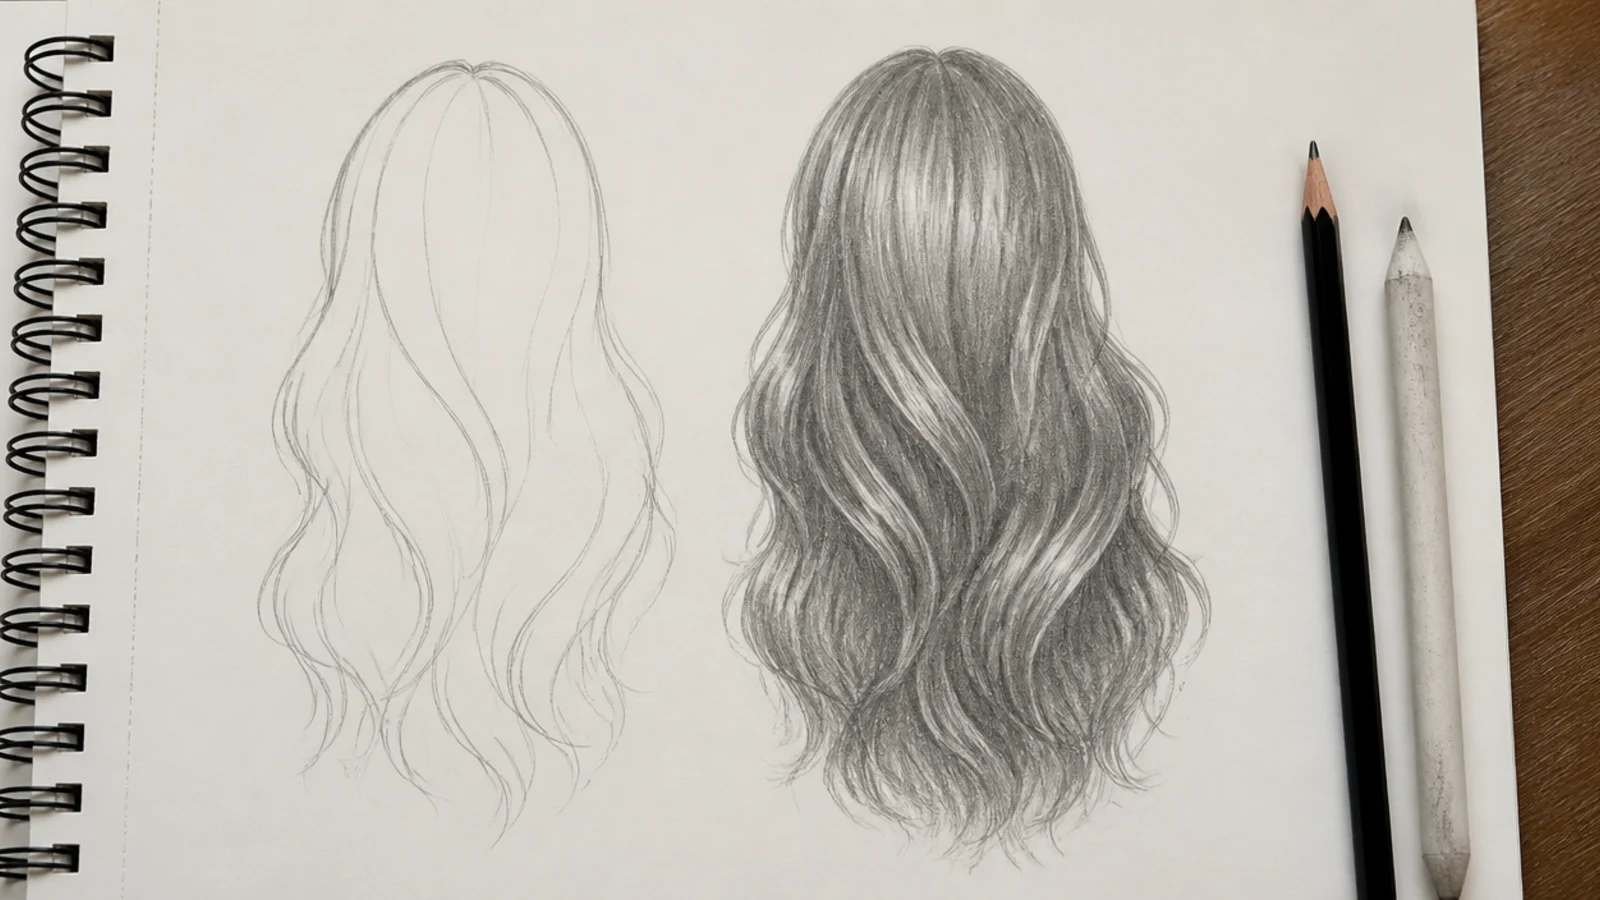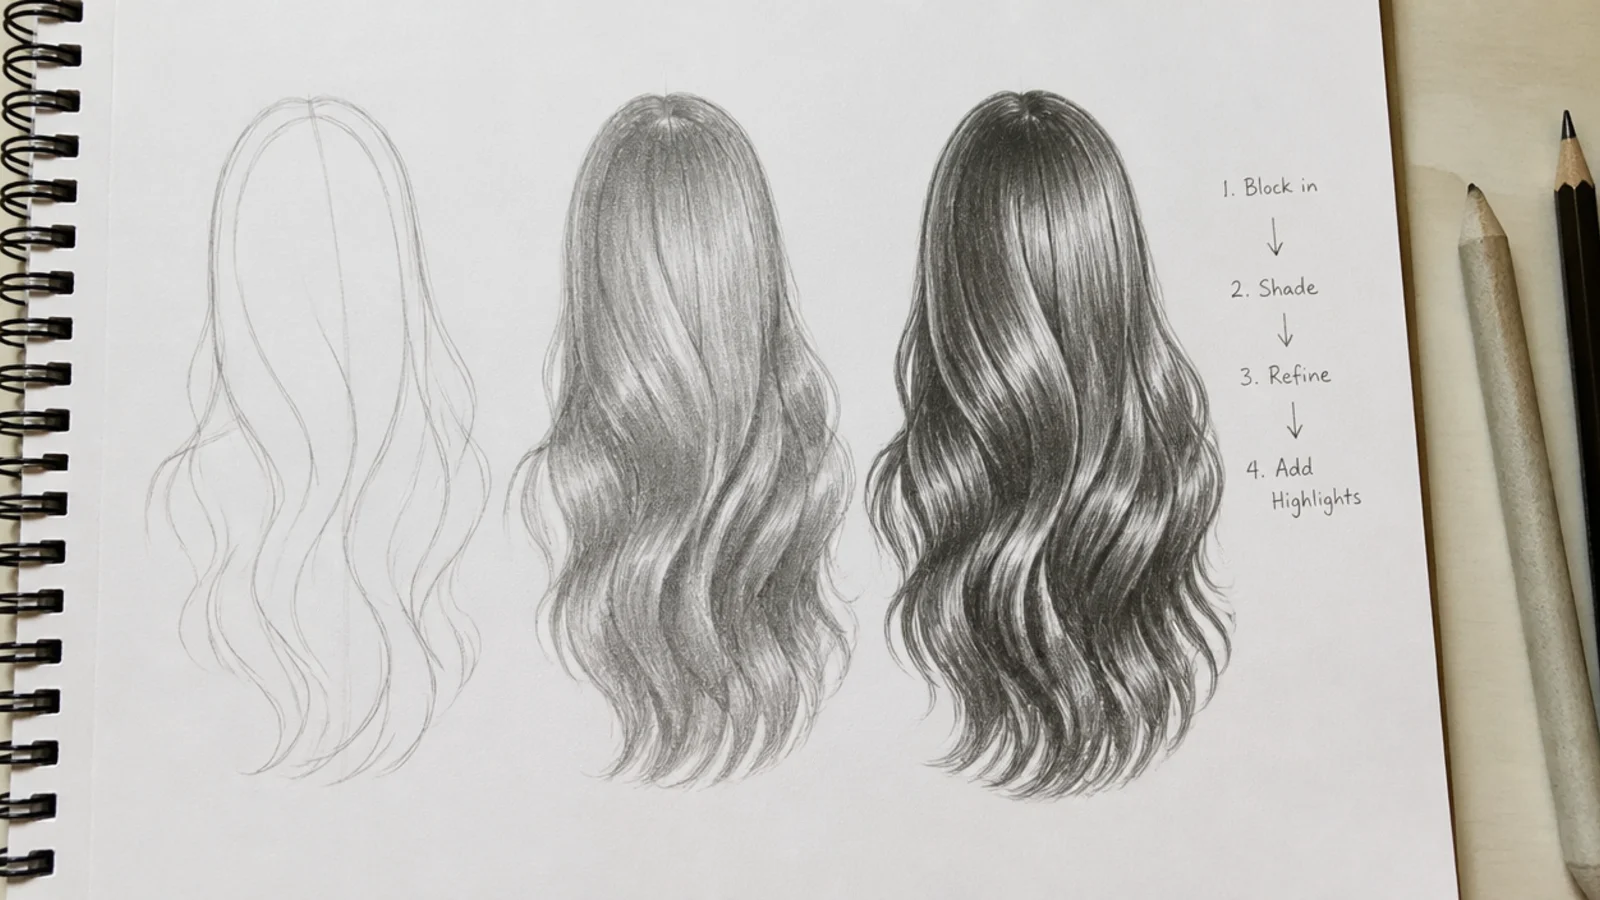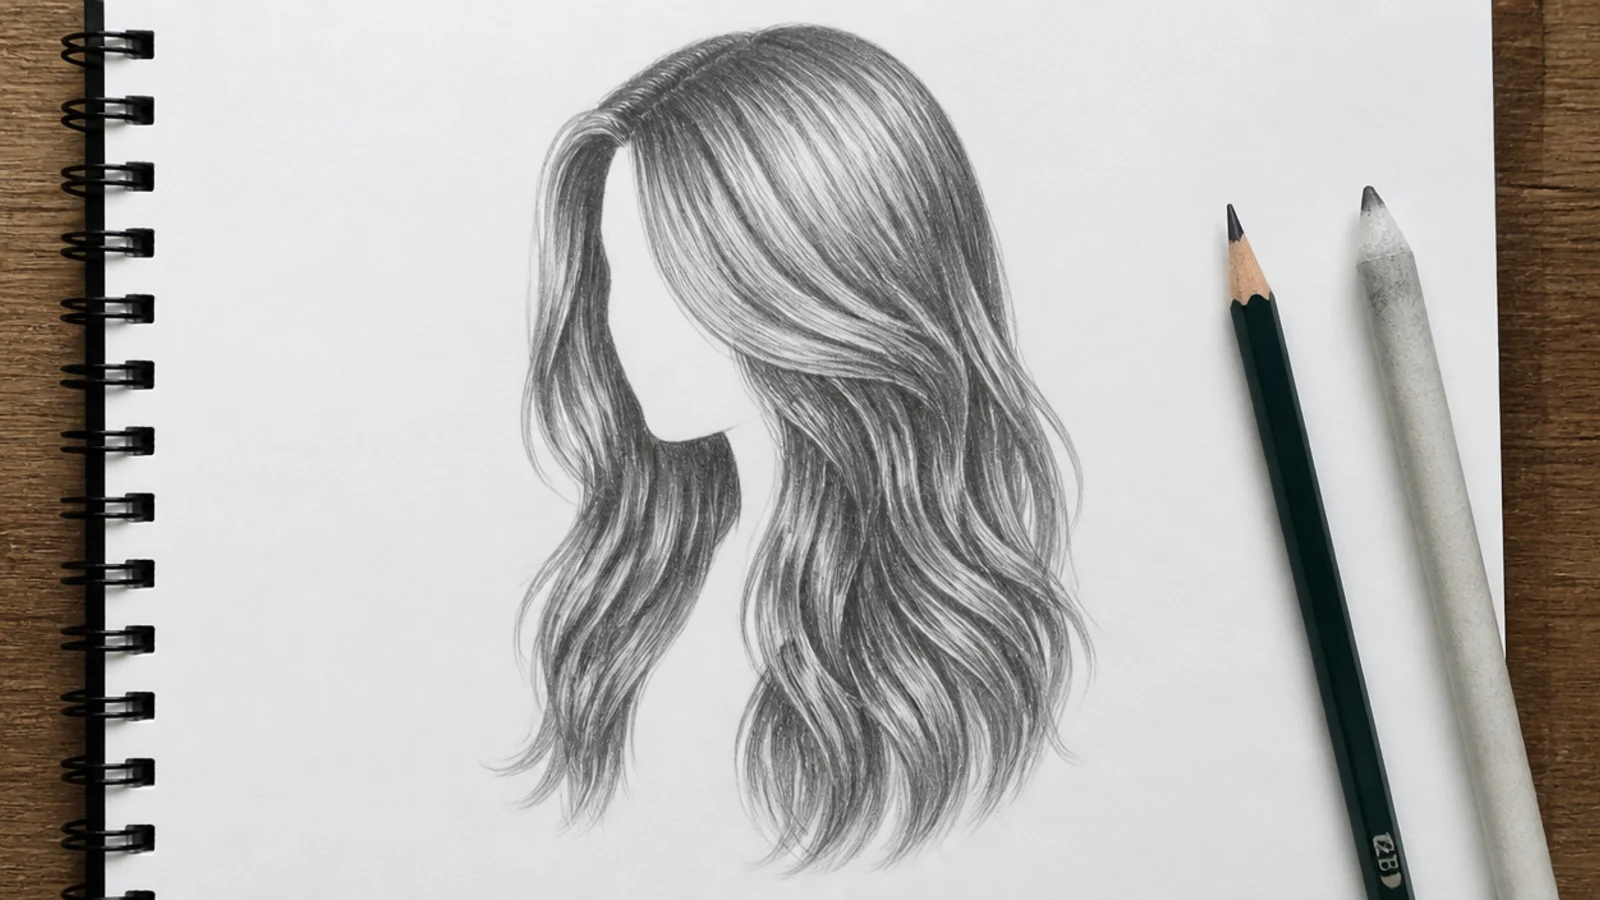
Quick Comparison
| Silhouette-First Method | Strand-by-Strand Method | |
|---|---|---|
| First mark on the page | One light 2H outline of the whole hair mass, no interior detail at all | Individual hairs drawn from the hairline outward, straight into detail |
| Where volume comes from | The outer shape, set wider than the skull, holds volume before any shading | Hoped for later; usually never arrives, so the hair hugs the skull flat |
| Flow direction | Fanned out from the crown, spacing varied, no two lines parallel | Drifts into parallel vertical lines that read as a curtain or a wig |
| Order of values | Mid tone, then 4B shadow, then 6B core, highlights left as bare paper | Random dark strands early, so mid tones have nowhere left to go |
| Highlights | Planned as a band before shading starts, or lifted with a kneaded eraser | Erased in at the end, often muddy because graphite is already worked in |
| Time to a usable sketch | 12 to 30 minutes, most of it spent on value not line | Often an hour or more, with much of it erased and redrawn |
| Most common failure | Silhouette drawn too close to the skull, which is a quick fix | Helmet effect, spaghetti strands and a flat gray mass with no light |
| Works for curly and coily hair | Yes; the mass is blocked first, then ribbons or texture go on top | Poorly; outlining every coil individually produces springs, not hair |
| Best for beginners | Yes, and it stays the professional working order at every skill level | No; it is the single most common reason beginner hair sketches fail |
1. Long Straight Center Part Hair, Front View
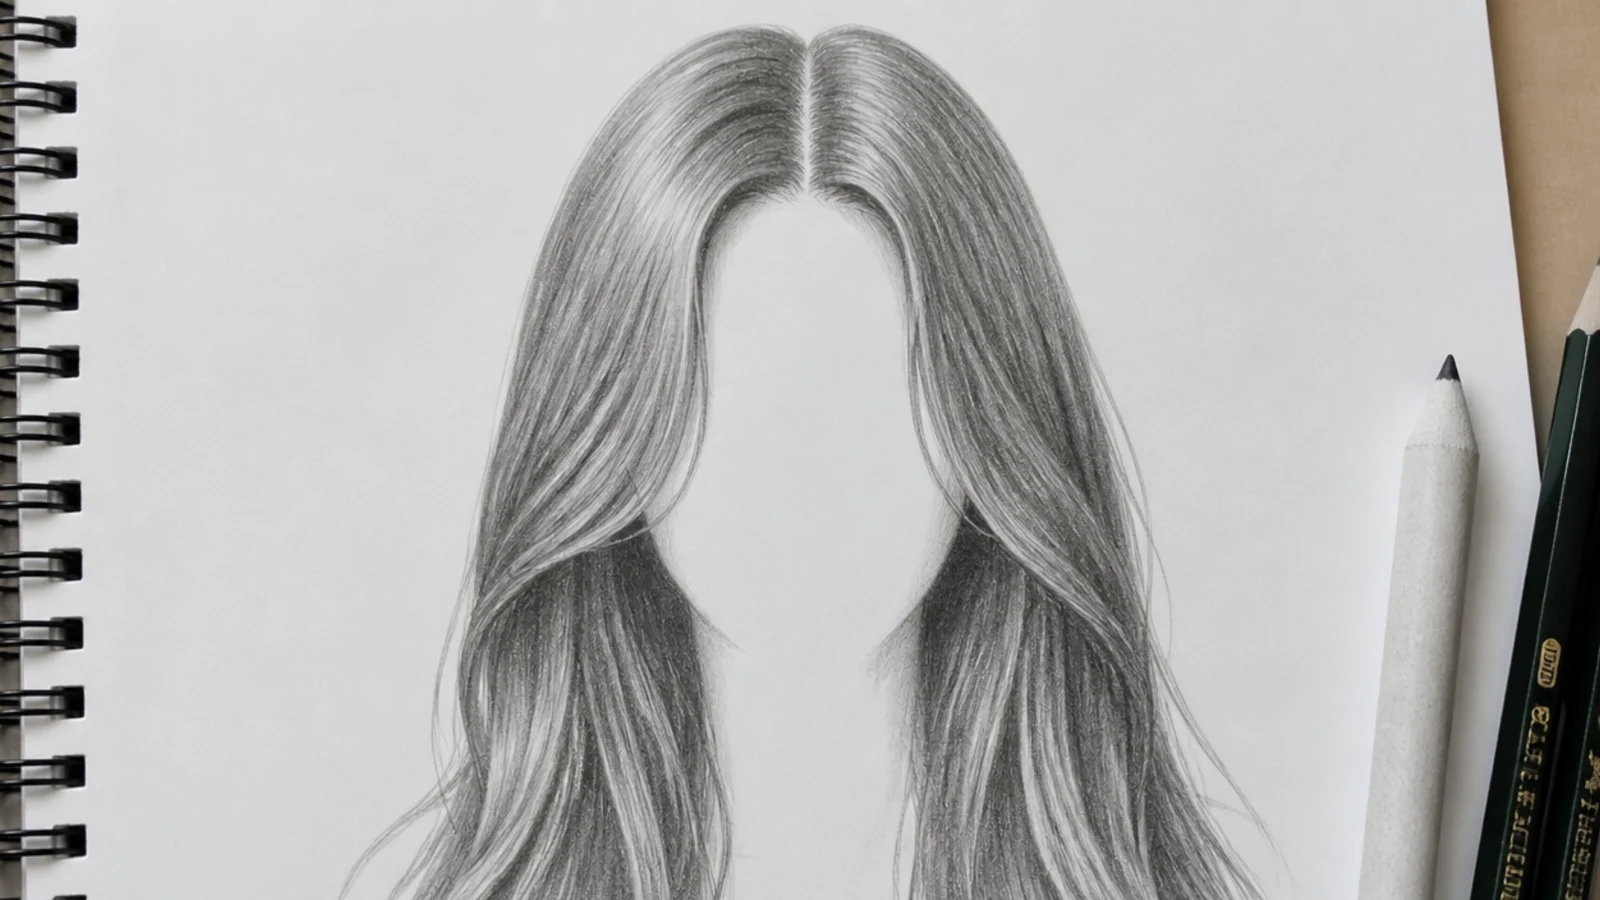
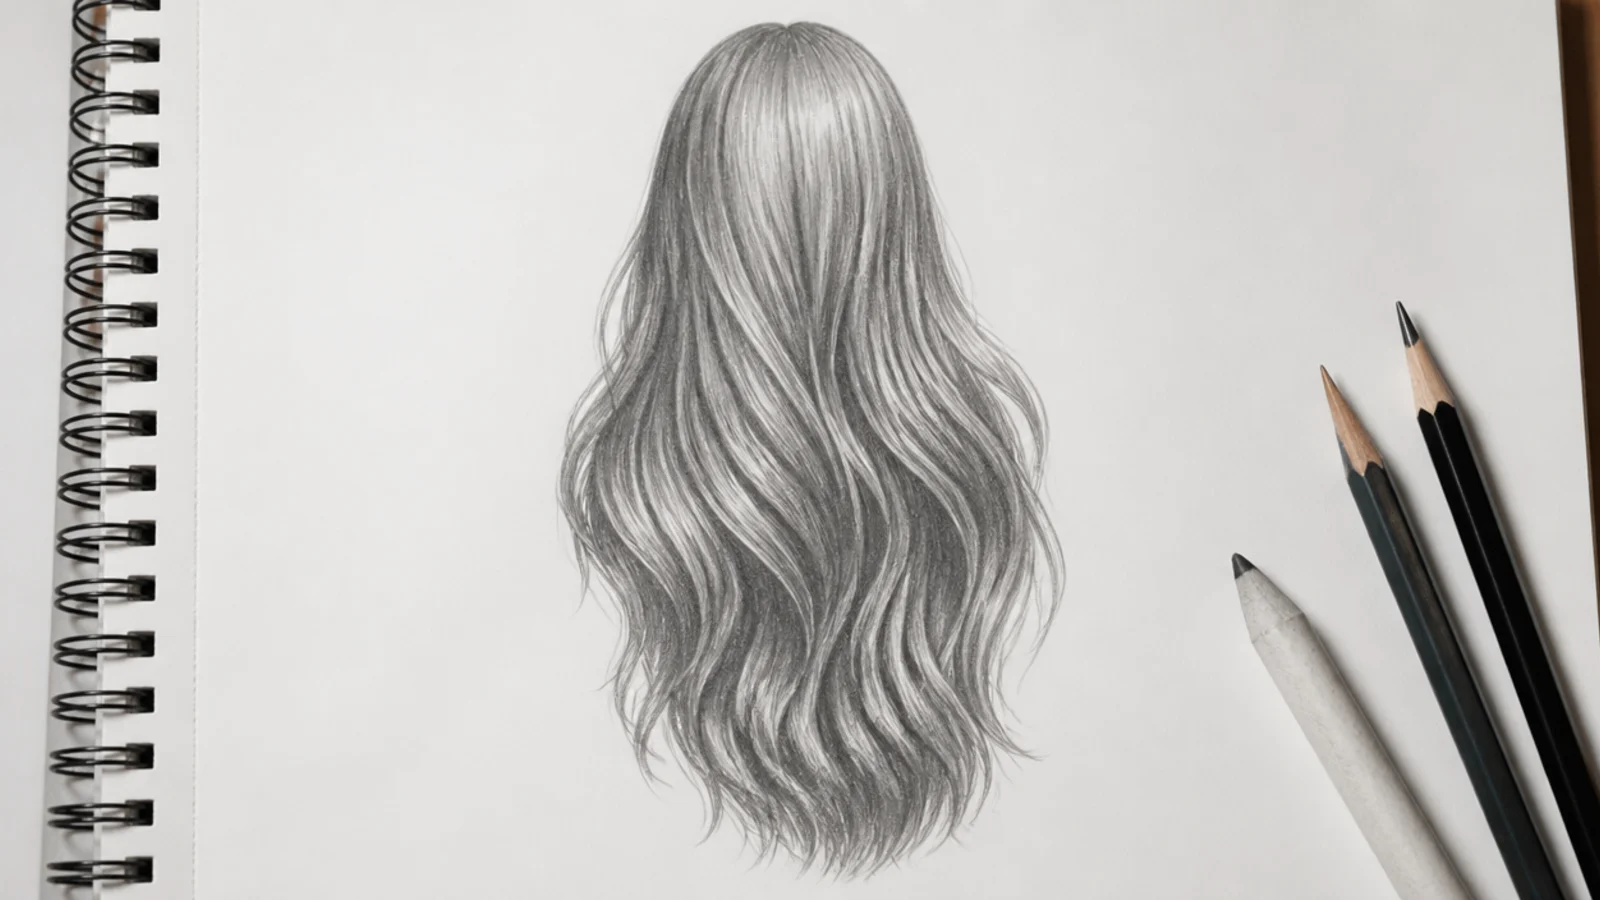
The best first sketch on this list. Block a bell shaped silhouette that starts narrow at the crown, widens past the jaw and ends around 4 inches below the shoulder. Mark the center part as a short 2H line, then run every flow line outward from that point in a slight curve rather than straight down. Shade a 2B band on each side of the head where the hair wraps away from the light, and leave a bare paper highlight ring about an inch below the crown. Finish with short flicks at the ends so it does not read as a helmet. More starter styles at this level live in the main hair sketch list.
Who it suits: Complete beginners and anyone whose hair sketches look like a flat curtain.
Tip: Never let two flow lines run exactly parallel; vary the spacing so the eye reads volume.
2. Loose Beach Waves Falling Past the Shoulders
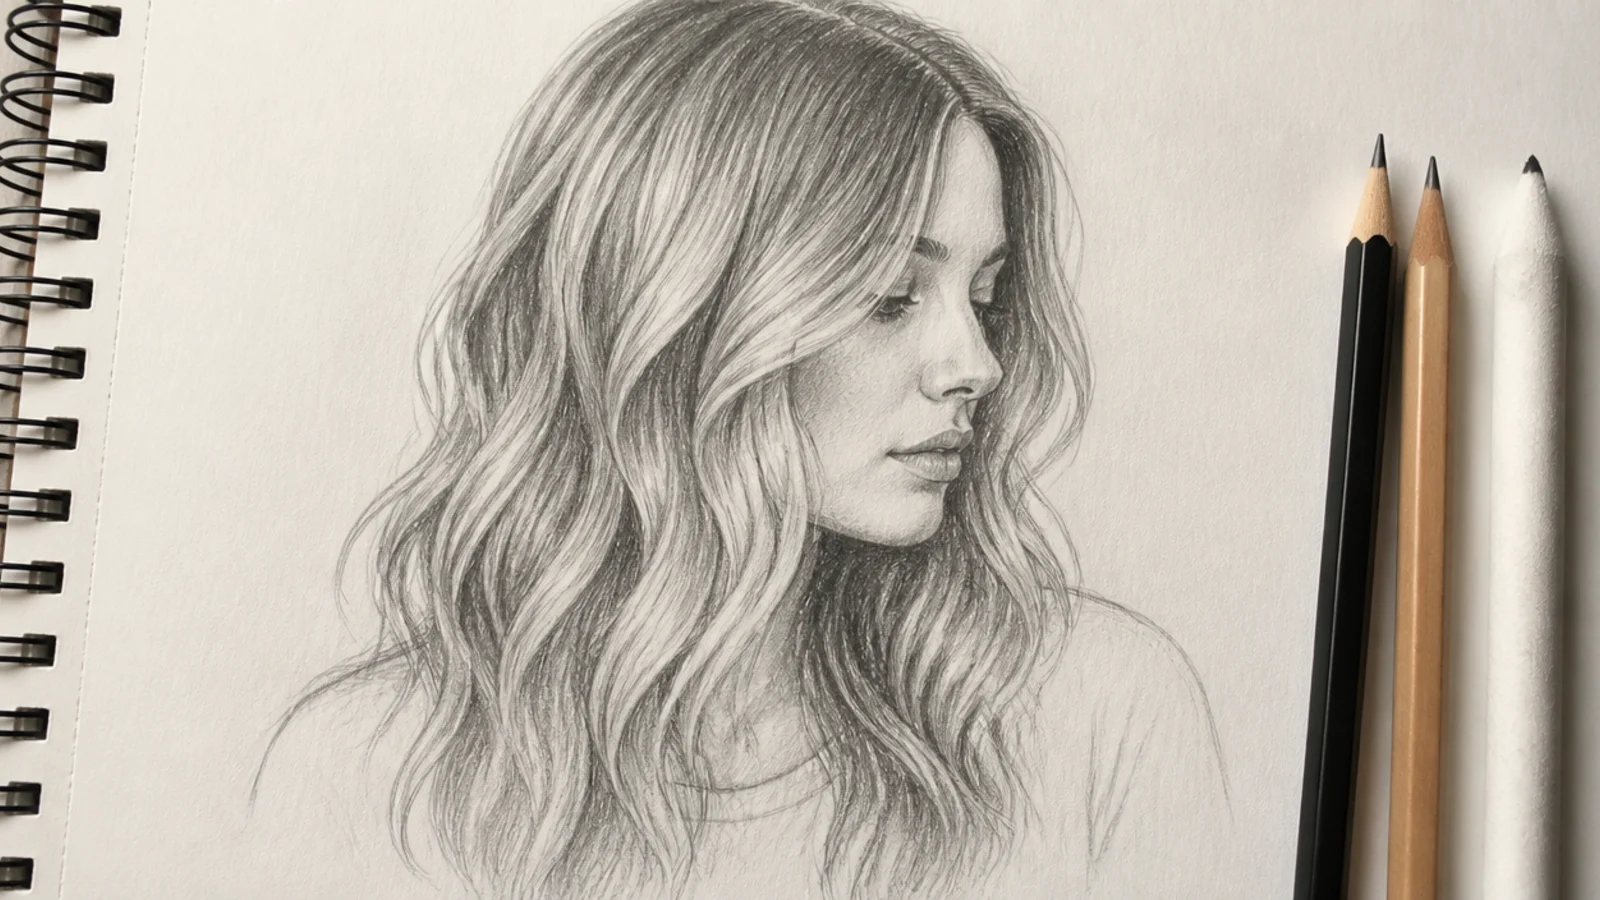
Waves are straight hair with an S drawn through it. Lay in the same bell silhouette, then draw three or four long S curves from crown to tip as your master flow lines, offsetting each one so the peaks never line up in a row. Every place the S turns away from you gets a 4B shadow, every place it turns toward the light stays paper white. Keep the wave amplitude small near the crown and wider by the ends, because real waves loosen as they fall. Around 15 minutes once the silhouette is confident.
Who it suits: Anyone who can draw straight hair and wants the next step up.
Tip: Shade the shadow first and the highlight last so the wave rhythm stays readable.
3. Spiral Curls Drawn as Ribbons, Three-Quarter View
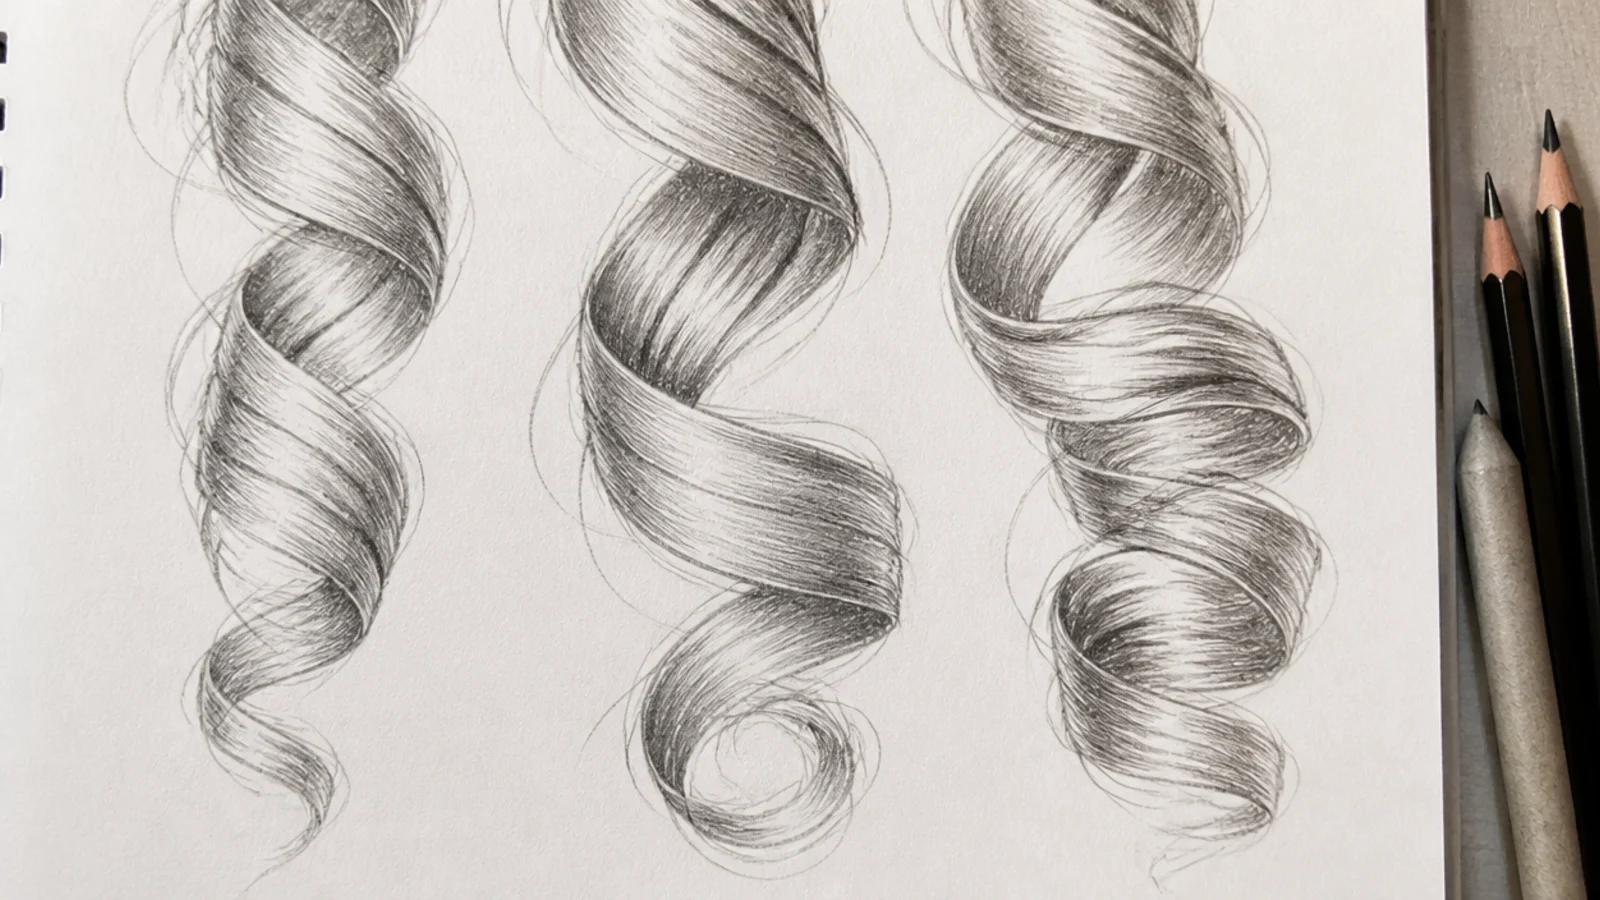
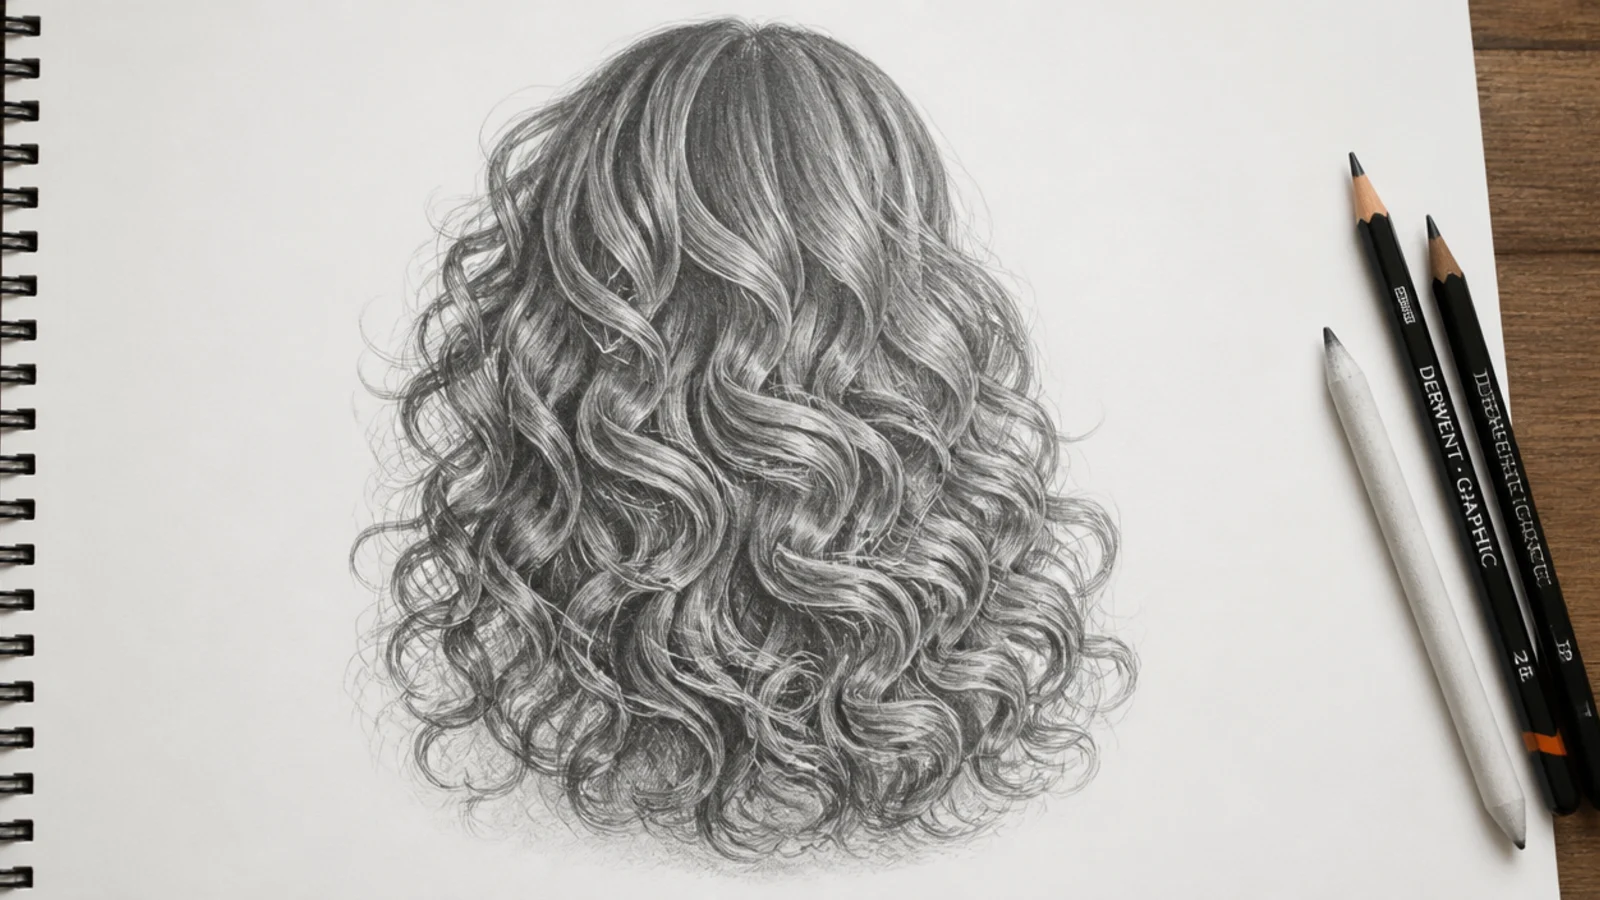
The single technique that fixes curly hair: draw each curl as a ribbon twisting in space, not as an outlined coil. Sketch a loose spiral guideline, then give it width so it turns from wide face to narrow edge and back. Light hits the outer face of the twist, so shadow always sits on the opposite side of the same ribbon, usually 4B against bare paper. Vary curl size across the head, since identical curls read as springs. Work in clumps of three to five ribbons, then darken the gaps between clumps with 6B, the same method used throughout curly hair sketch practice.
Who it suits: Intermediate sketchers ready to stop outlining every curl.
Tip: Darken the space between curls more than the curls themselves; the gaps create the volume.
4. 4C Coils Shaded as One Soft Mass
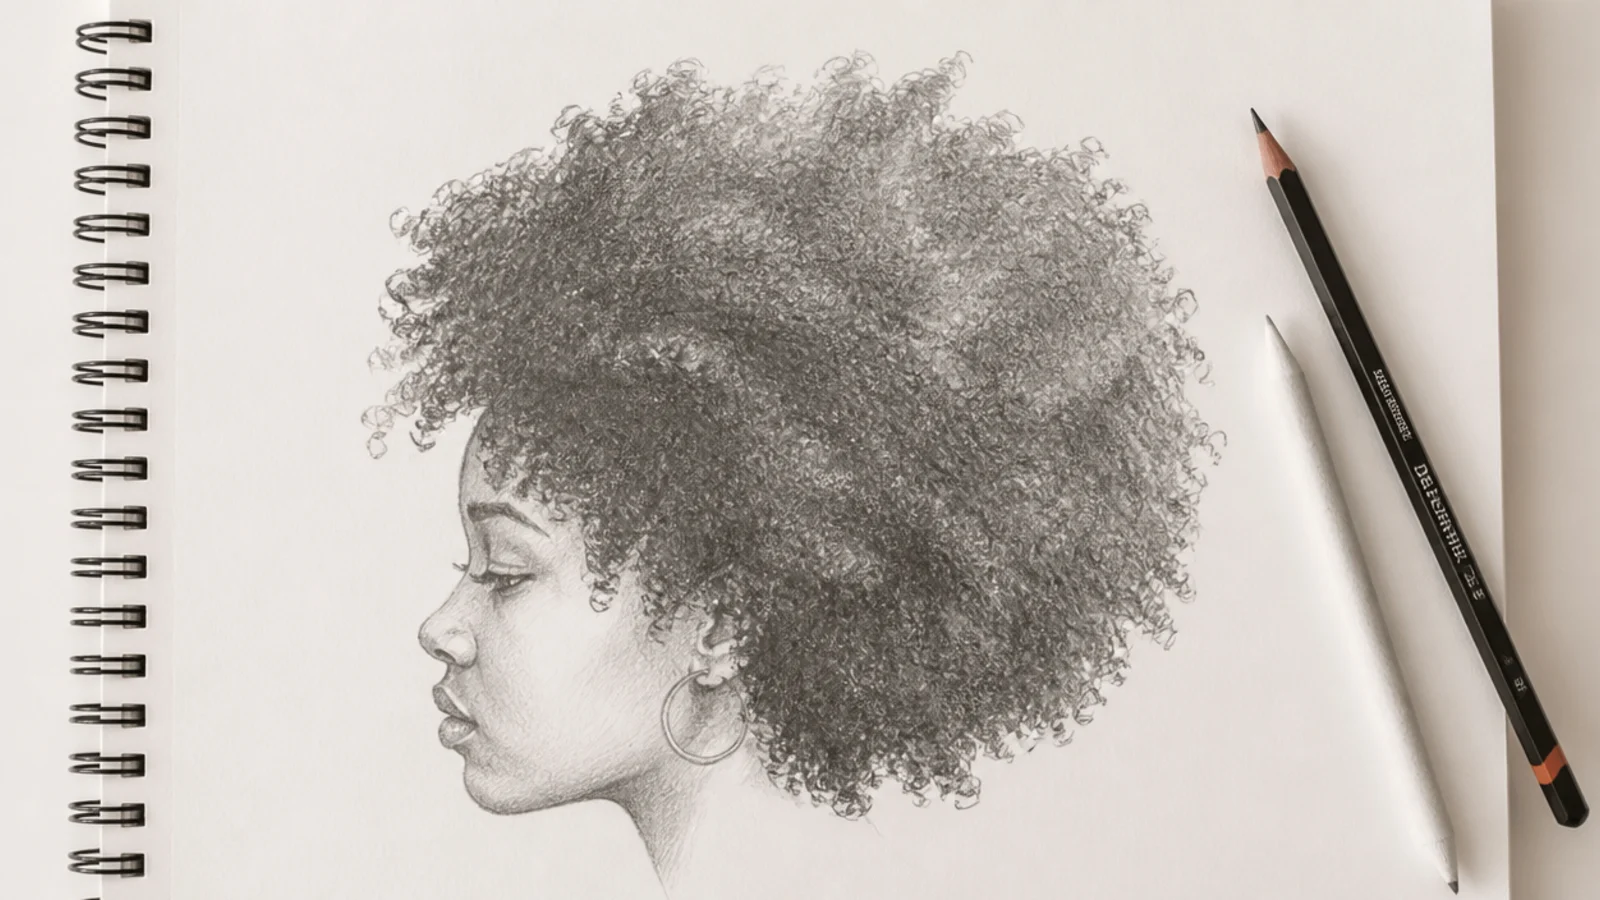
Tight coils are the most skipped texture in hair drawing tutorials and the easiest to overwork. Do not draw coils. Block a rounded silhouette with a deliberately soft, broken edge, then shade the whole mass in 4B with a blending stump so it reads as one velvety volume. Add a broad 6B core at the lower back of the mass and lift a wide diffused highlight band across the upper curve with a kneaded eraser. Only at the very end, suggest maybe a dozen small spiral marks near the highlight, never across the whole head.
Who it suits: Character artists drawing natural and textured hair.
Tip: Keep the outer edge fuzzy; a hard clean outline instantly turns coily hair into a hat.
5. High Messy Bun with Loose Face-Framing Pieces
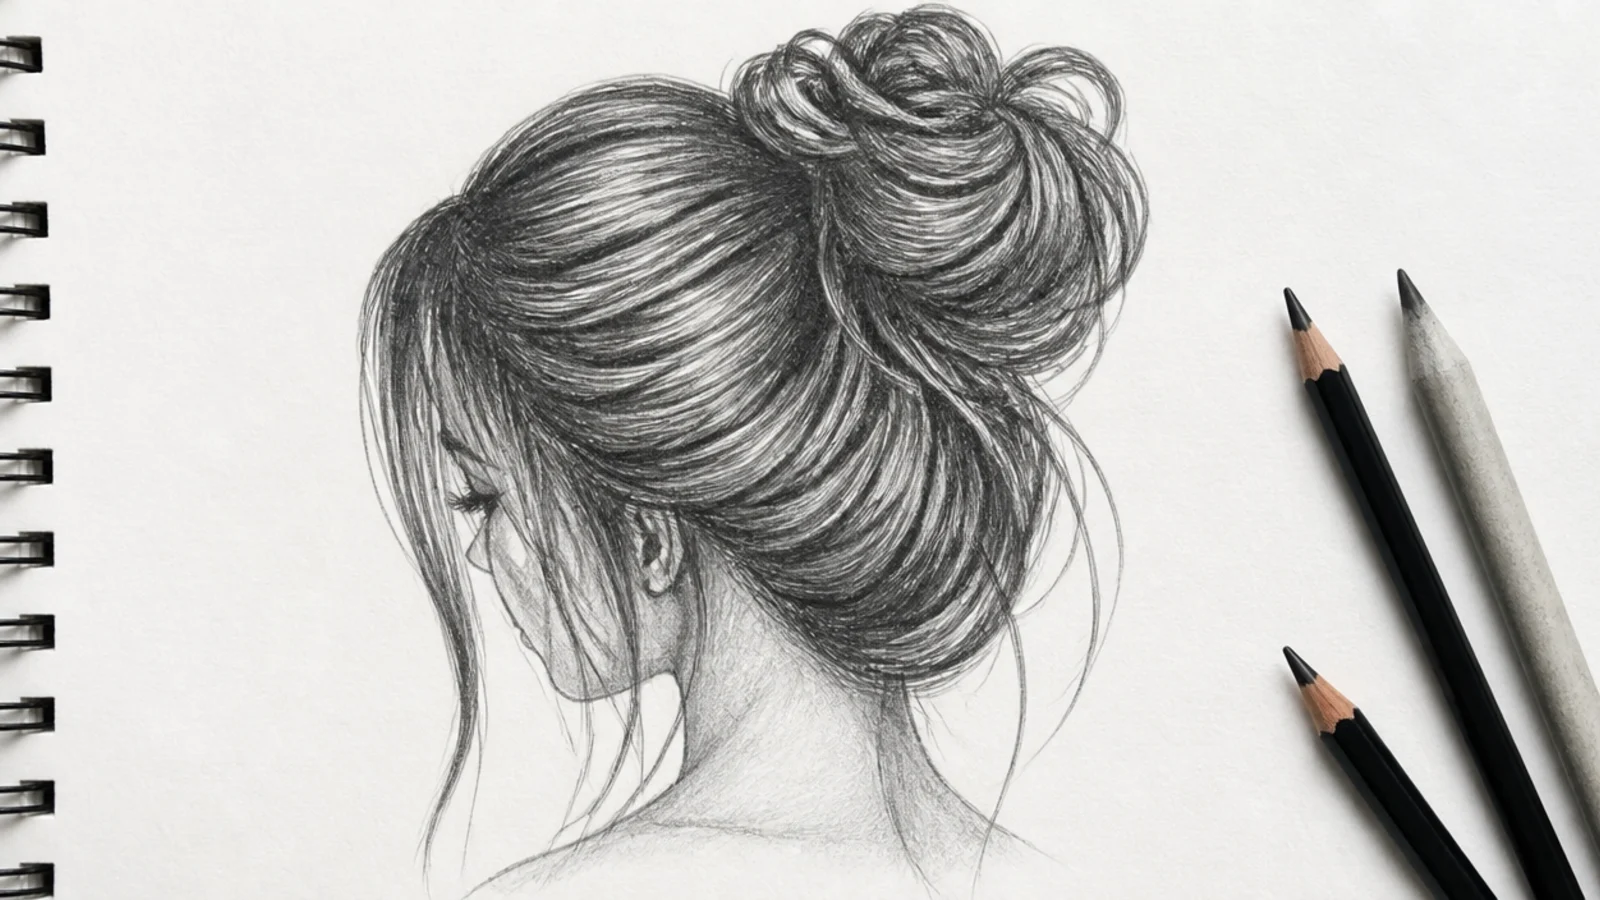
Three shapes stacked: the swept mass on the skull, the gather point, and the bun itself. Draw the bun as a slightly squashed oval sitting above and behind the crown, not balanced on top of it. Every flow line on the skull converges on the gather point like a funnel, which is what sells the tension. Shade 4B directly under the bun where it casts onto the head, then pull two or three loose strands down beside the temples with a tapered stroke. Real reference helps here: see a messy ponytail for how gathered hair actually bunches.
Who it suits: Sketchbook practice on tension, gather points and cast shadow.
Tip: Escaped strands should curve away from the gather point, never hang straight down.
6. Sleek Low Bun with a Visible Part Line
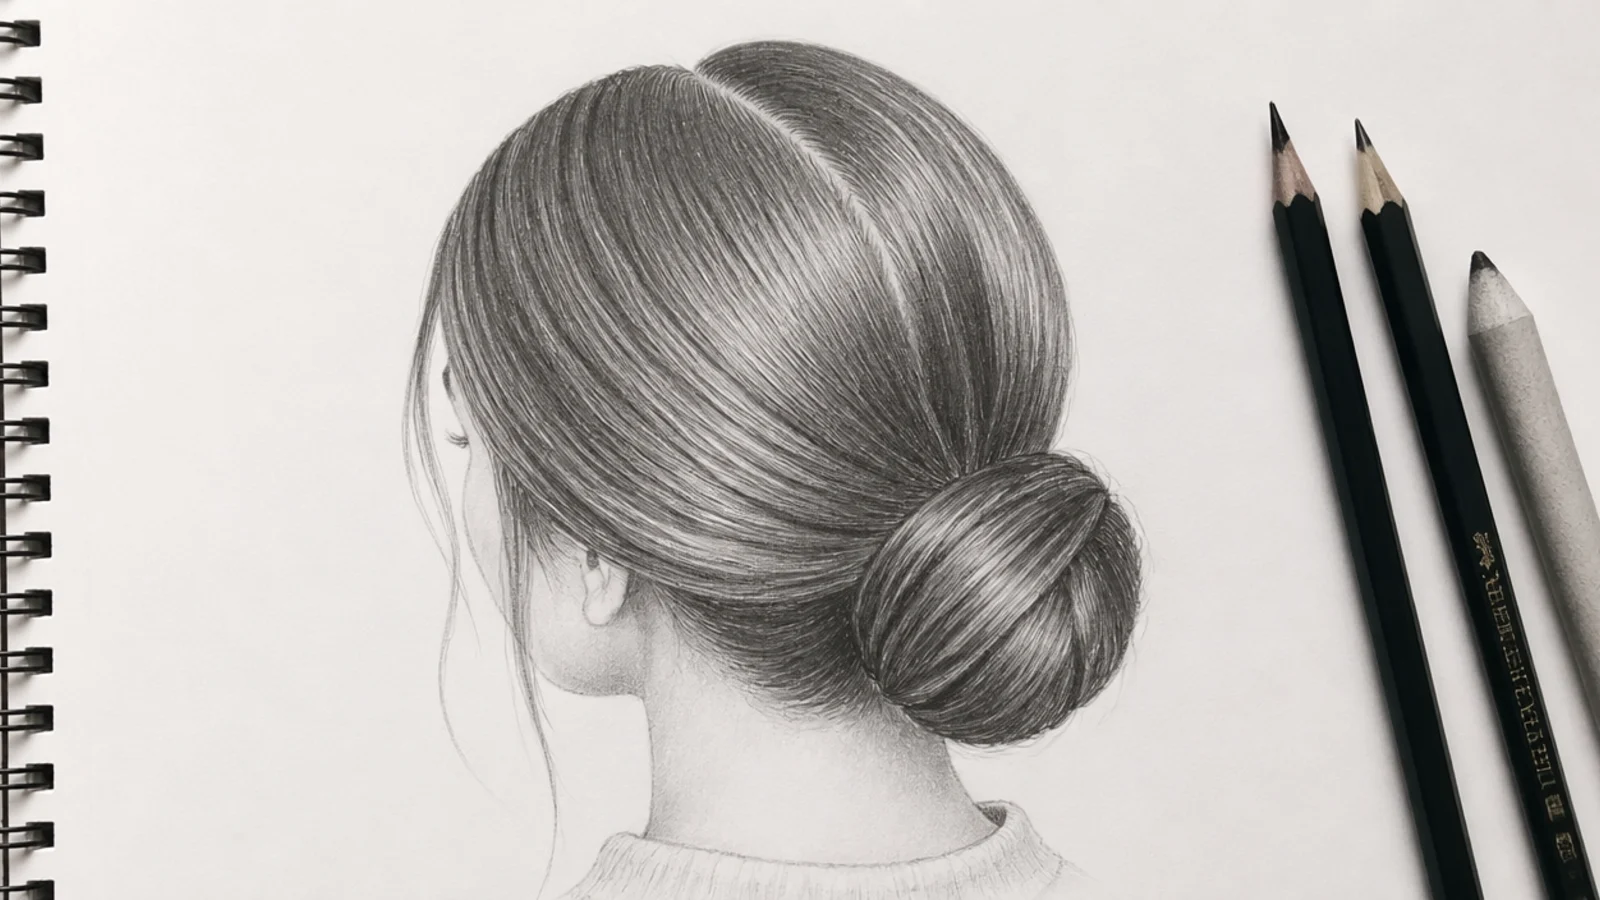
The opposite discipline to the messy bun: here the hair hugs the skull, so the drawing is almost pure value. Keep the silhouette barely wider than the head outline. The part line is a fine 6B stroke with a soft 2H fade either side, and the flow lines are long, smooth and unbroken from part to nape. Shade a smooth gradient with a blending stump, then lift one long narrow highlight band that follows the curve of the skull. The bun is a low oval at the nape with a 6B shadow tucked under it.
Who it suits: Anyone learning to shade hair that follows the shape of the head.
Tip: Sleek hair needs a very narrow highlight; a wide one makes it look wet instead of smooth.
7. Long Side Braid Over the Shoulder
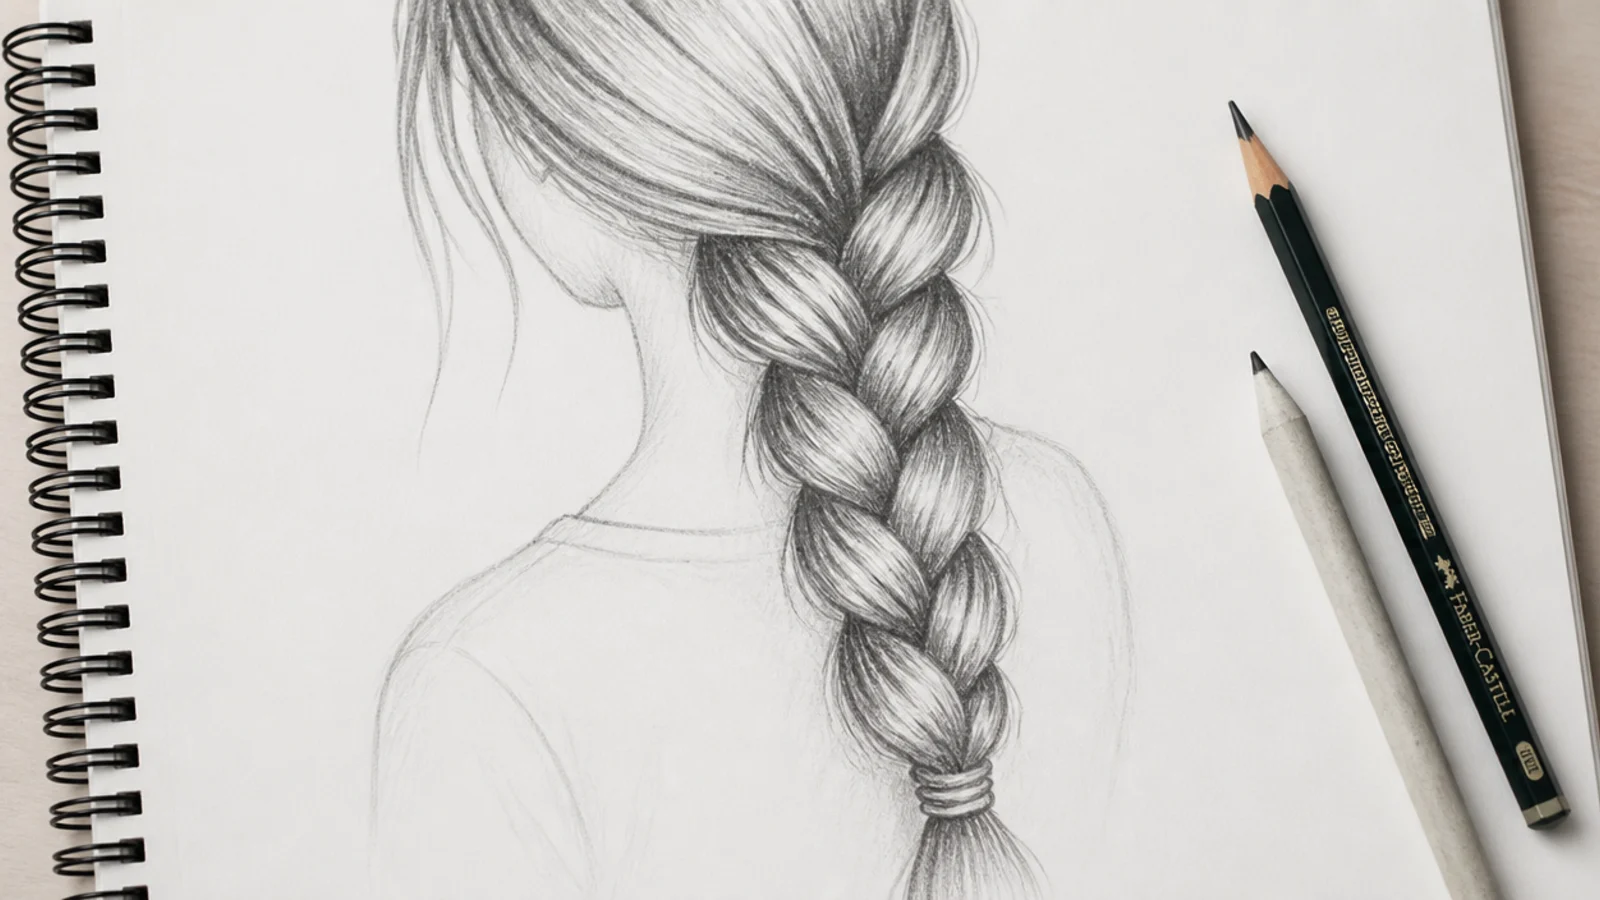
The friendliest braid to draw first. Draw a single tapering guideline from the ear over the shoulder to the hip, then stack alternating wedge shapes along it, left over right over left, each one slightly overlapping the one below. The braid narrows as it descends, so shrink each wedge by a hair. Shade a 4B shadow along the lower edge of every wedge where the strand tucks under the next one, and keep the upper curve of each wedge bare paper. Finish with a small burst of loose ends. For real braid structure, study mermaid braids.
Who it suits: First-time braid drawers; roughly 20 minutes.
Tip: The shadow under each overlap is what makes it a braid; without it you have a rope.
8. Dutch Crown Braid, Top-Down Angle
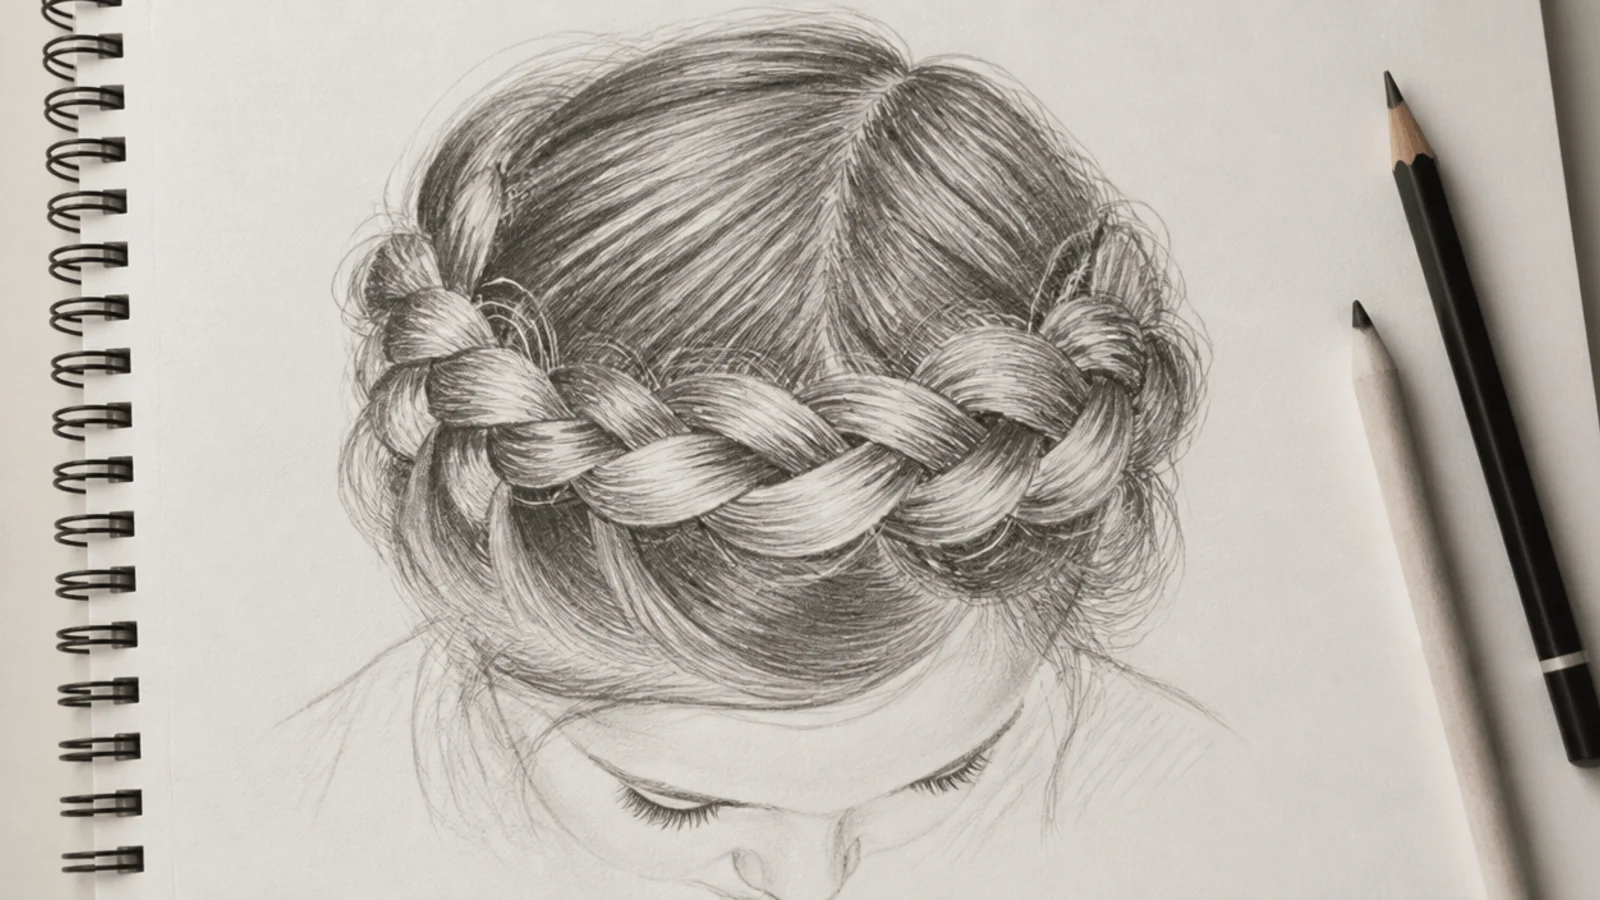
A crown braid is the best exercise on this list for perspective and overlapping lines, because the braid wraps around a curved skull and gets compressed as it turns away from you. Draw the head as an egg from above, then a band circling it. The wedges are widest at the front where they face you and squeeze narrow at the sides. Shade 6B under the braid where it meets the scalp so it lifts off the head, and keep the shading inside the braid lighter at the front, darker as it recedes.
Who it suits: Intermediate artists working on perspective and overlap.
Tip: Compress the wedge spacing as the braid turns away; even spacing kills the roundness.
9. Space Buns with Wavy Loose Ends
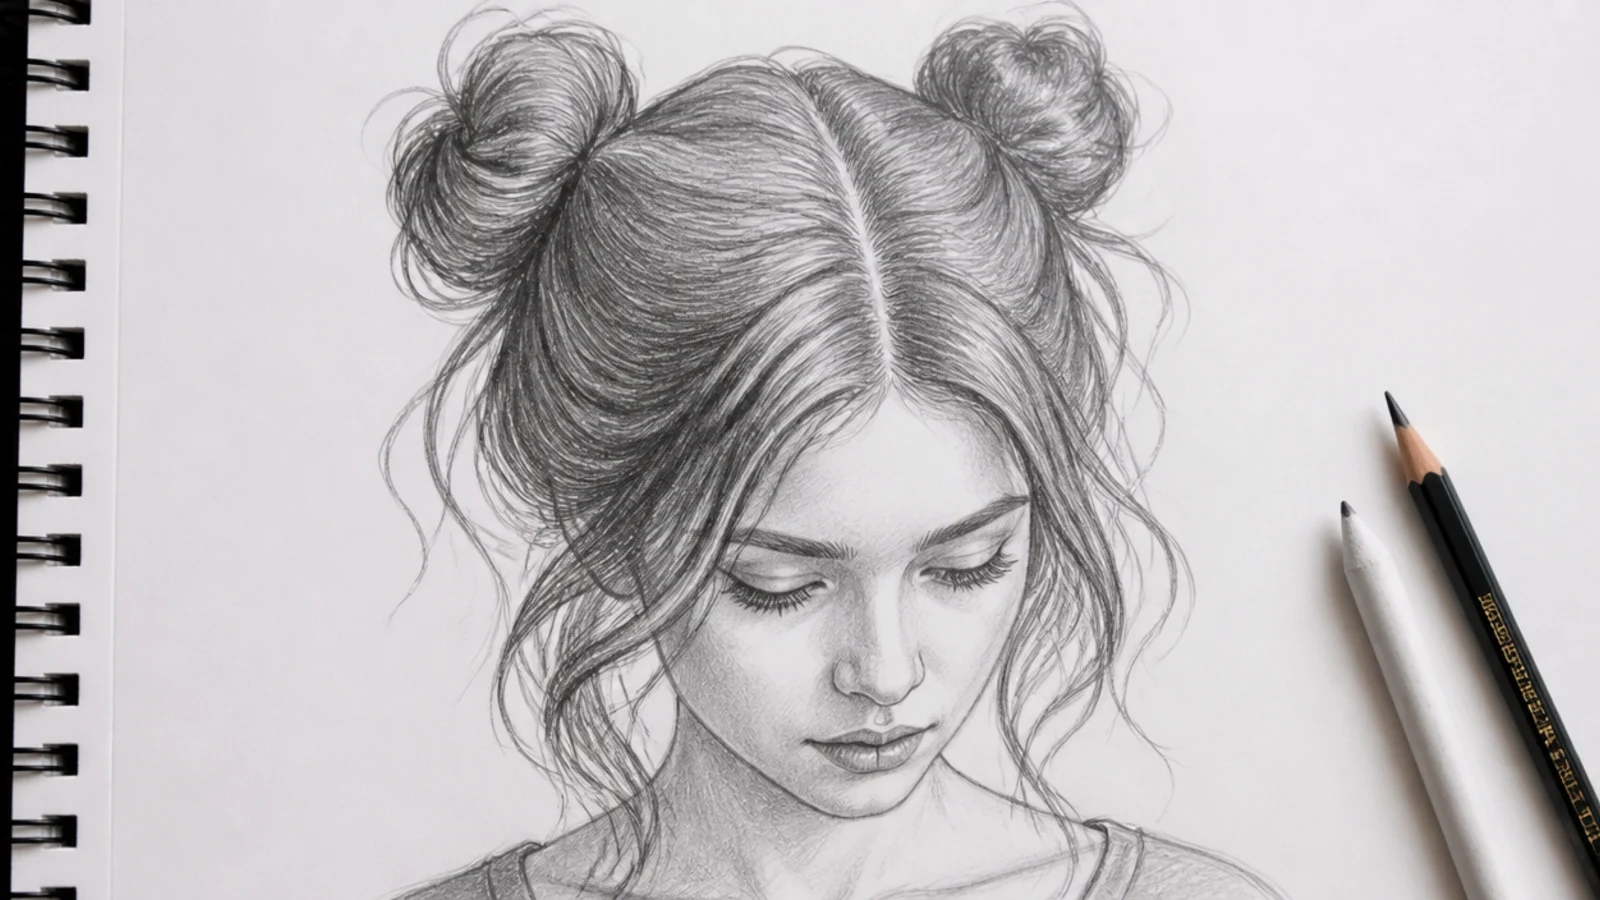
Two gather points instead of one, which doubles the flow-line practice. Place the buns symmetrically about an inch off the center part and slightly forward of the crown, since buns set too far back read as ears. Each side of the part funnels into its own bun, so the flow lines mirror each other. Draw each bun as a loose spiral of two or three wrapped ribbons rather than a solid ball. Let a few wavy ends escape from the base of each bun, tapering to a point, and shade 4B where each bun sits against the head.
Who it suits: Character design, chibi styles and younger characters.
Tip: Make the two buns slightly different sizes; perfect symmetry looks stiff on paper.
10. Curtain Bangs Over a Round Face
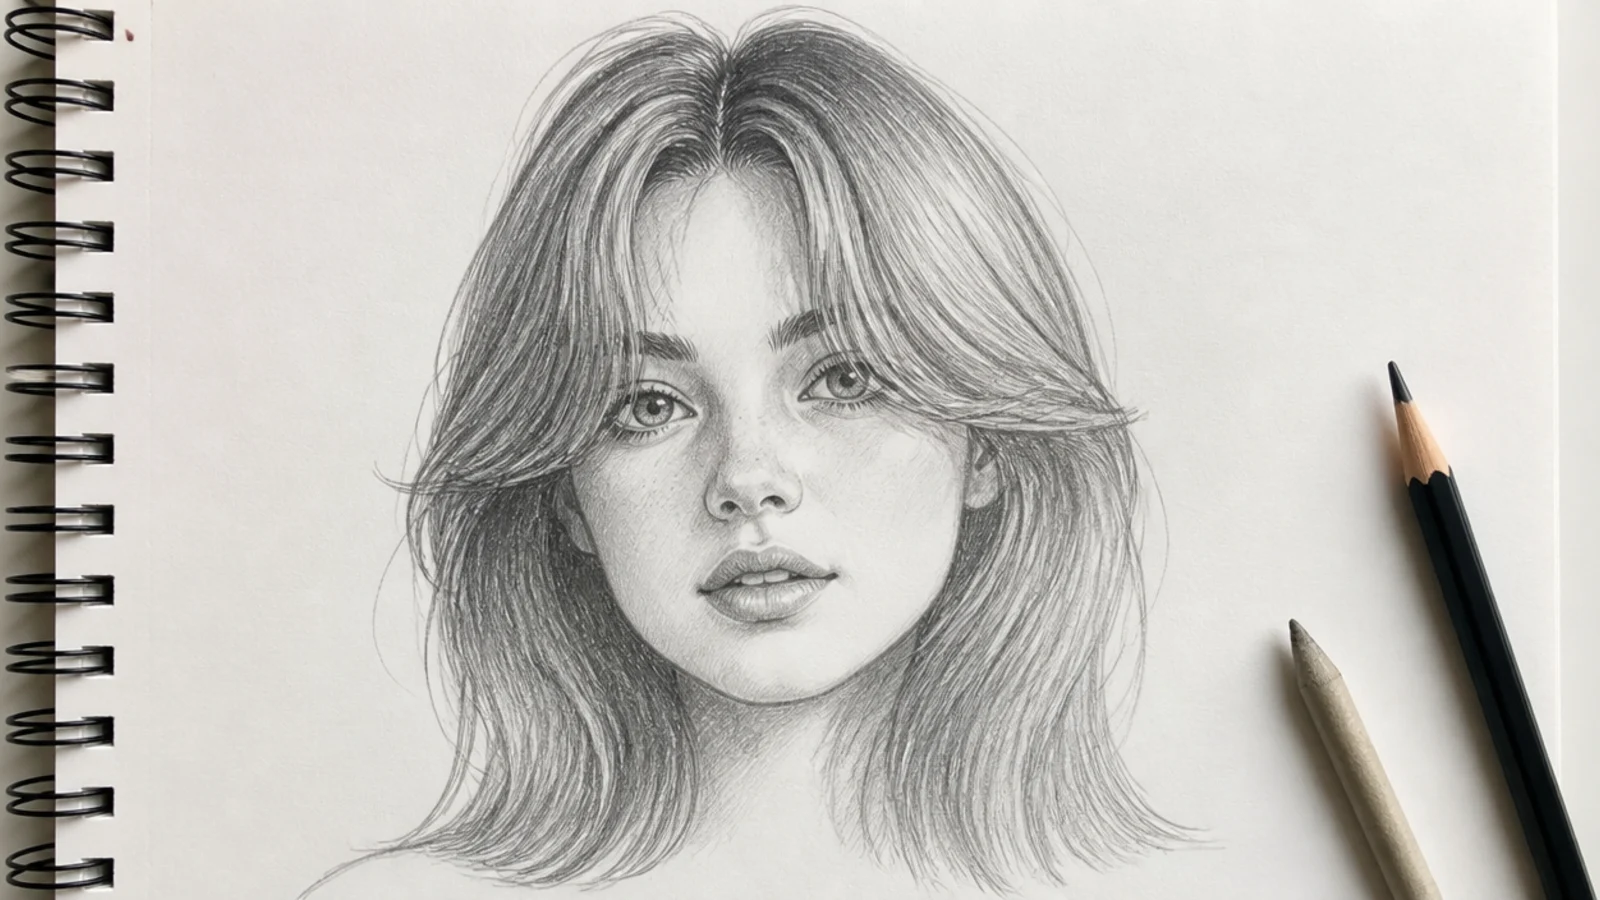
Bangs are where beginners flatten a drawing, because they draw the fringe as a straight line across the forehead. Curtain bangs split from a center part and sweep outward in two soft C shapes, shortest at the inner edge around the eyebrow and longest at the cheekbone. Draw the inner edge of the fringe as a second line under the outer edge so the underside of the hair shows. Keep the forehead partly visible, which is what makes them flattering on a round face. See the real cut in short curtain bangs.
Who it suits: Portrait sketchers who struggle with the hairline.
Tip: Draw the fringe in three tapered groups per side, never as one solid block.
11. Short Blunt Bob with a Straight Fringe, Side View
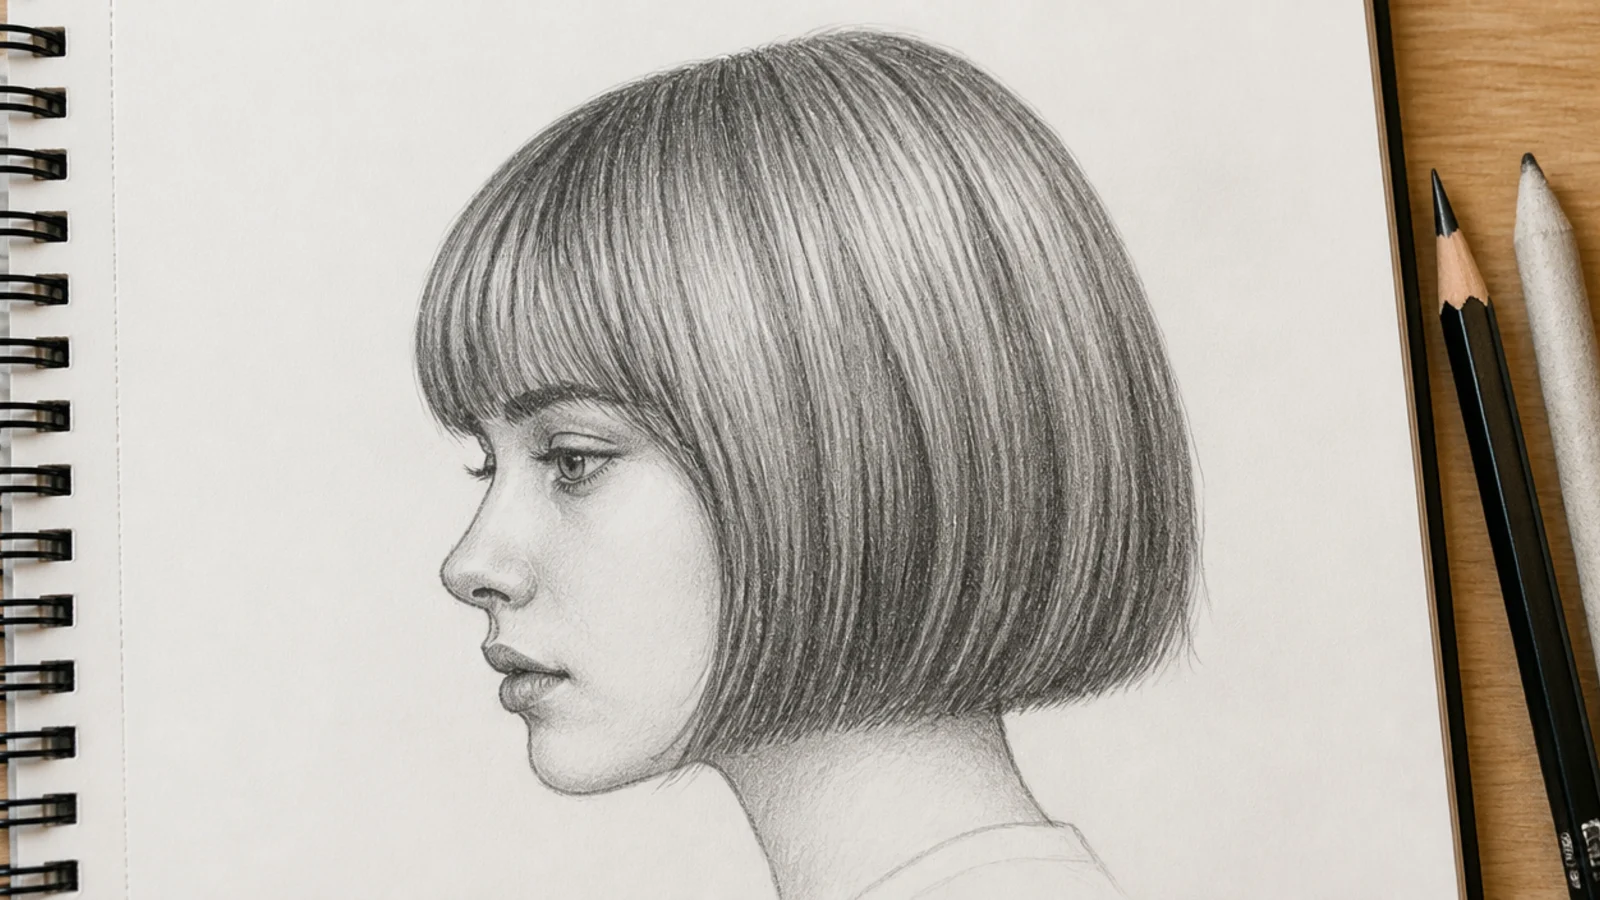
Short hair is unforgiving because the skull shape shows through every value. Draw the head in profile, then add hair as a shell sitting roughly a quarter inch off the skull, with the most volume at the back of the crown. A blunt bob ends in a hard, almost straight line at the jaw, so the silhouette edge stays crisp while the interior stays soft. Shade the darkest 6B core where the hair tucks behind the ear and under the jawline, and keep a bright bare-paper band across the top curve of the skull. The step order is walked through in the hair sketch tutorial.
Who it suits: Anyone practicing short hair and skull structure.
Tip: Leave a visible gap between skull and hair edge, or the bob looks painted onto the head.
12. High Ponytail Caught Mid-Turn
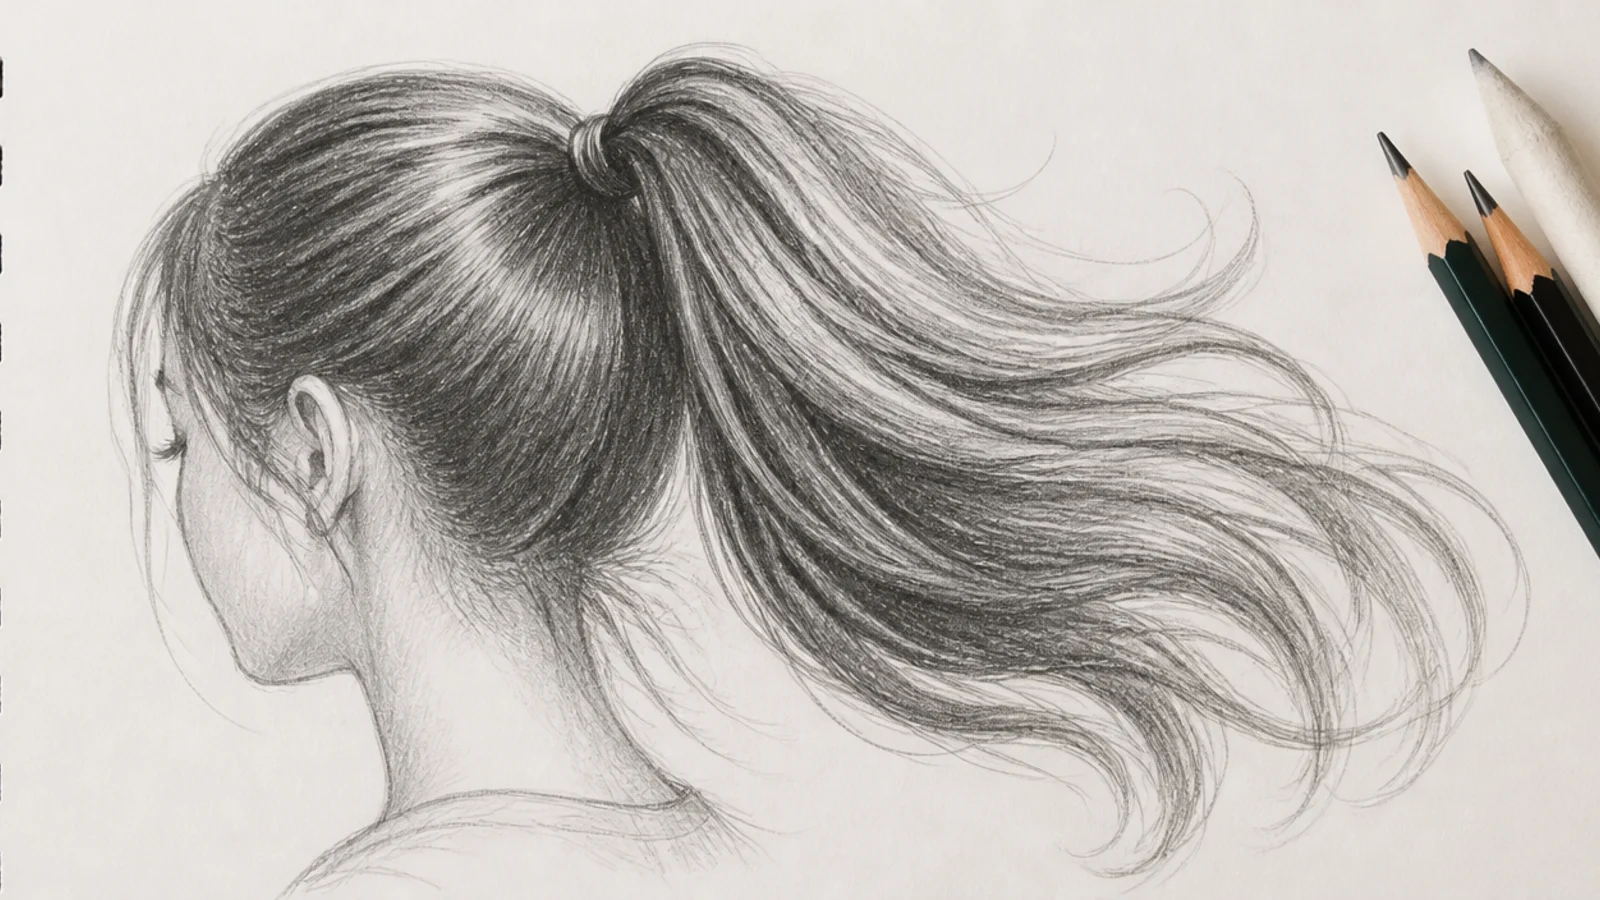
Motion is the biggest untouched subject in hair drawing, and a ponytail is the easiest way in. Set the gather point high on the back of the crown, then draw one long sweeping arc as the master flow line, with the tail trailing behind the direction of the turn. Every strand group inside the tail follows that arc but fans slightly wider toward the ends. Do not draw the tail as a solid shape; split it into three overlapping ribbons with 4B shadows between them so air shows through, then flick the ends outward.
Who it suits: Character artists drawing action, dance or sports poses.
Tip: Hair lags behind the head, so aim the tail where the head was, not where it is.
13. Wind-Blown Long Hair Against a Dark Background
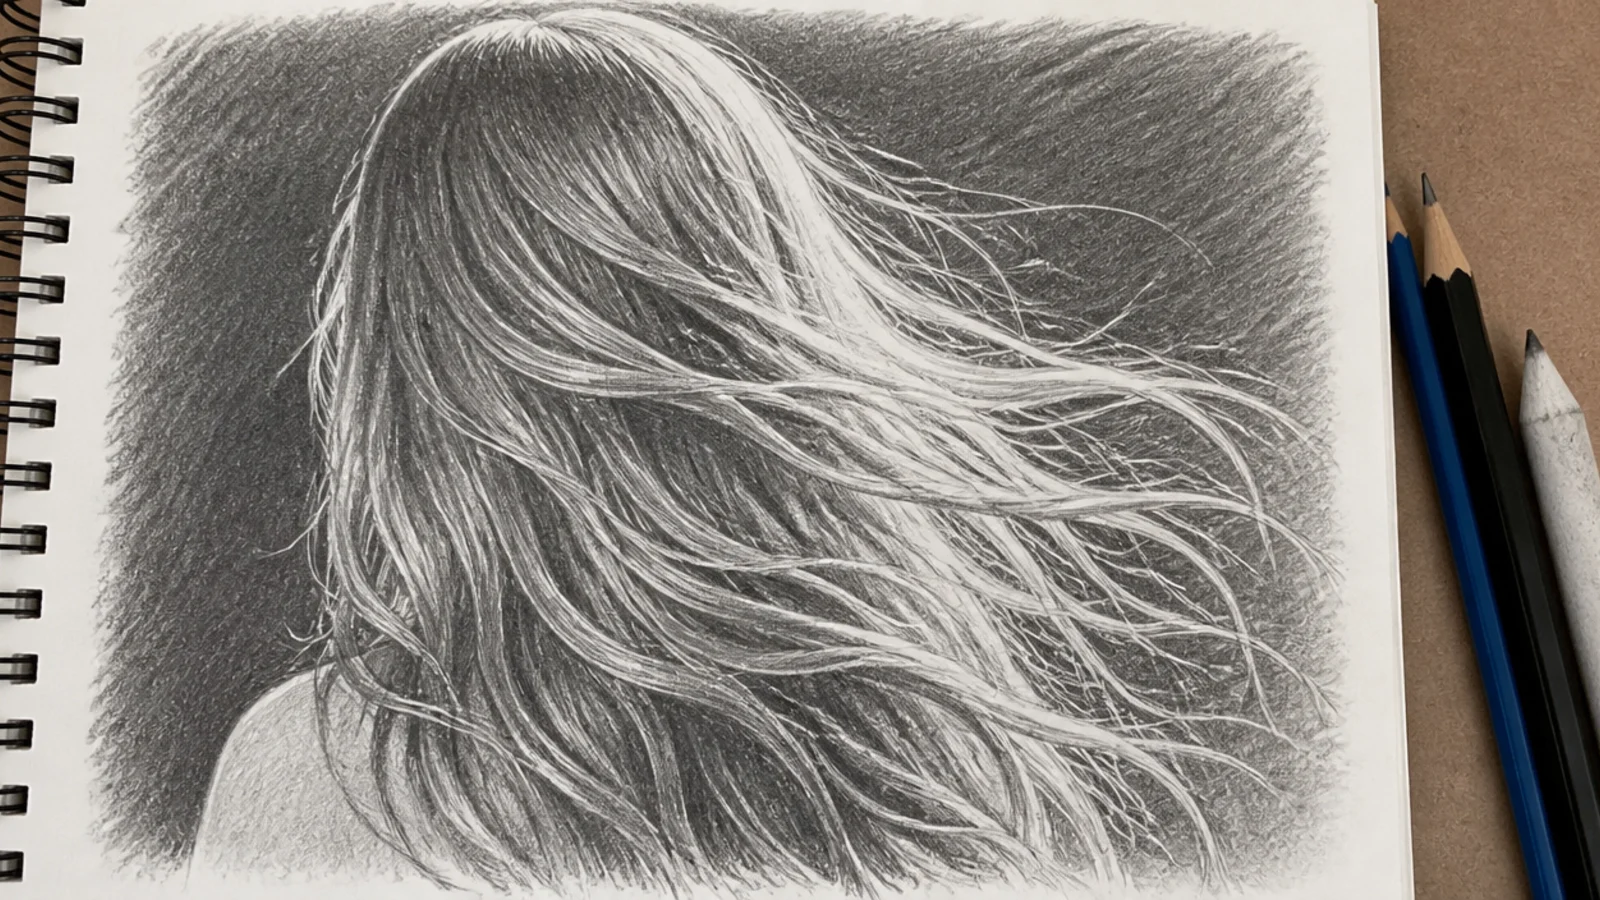
A value inversion exercise. Fill the background with a flat 6B tone, then let the hair read as light shapes lifted out of it with a kneaded eraser, which is exactly how backlit hair behaves. Draw the mass in long crossing S curves that all lean the same way, with a few strands breaking loose and crossing the others. Because the background is dark, the flyaway strands become bright hairline marks rather than dark ones. Keep the roots darker than the ends so the head still reads as solid. Backlighting is the hardest lesson on the hair sketch board.
Who it suits: Sketchers who already shade confidently and want drama.
Tip: Lift the flyaways with a sharpened kneaded eraser point, not a plastic eraser edge.
14. Waist-Length Locs Drawn Rope by Rope
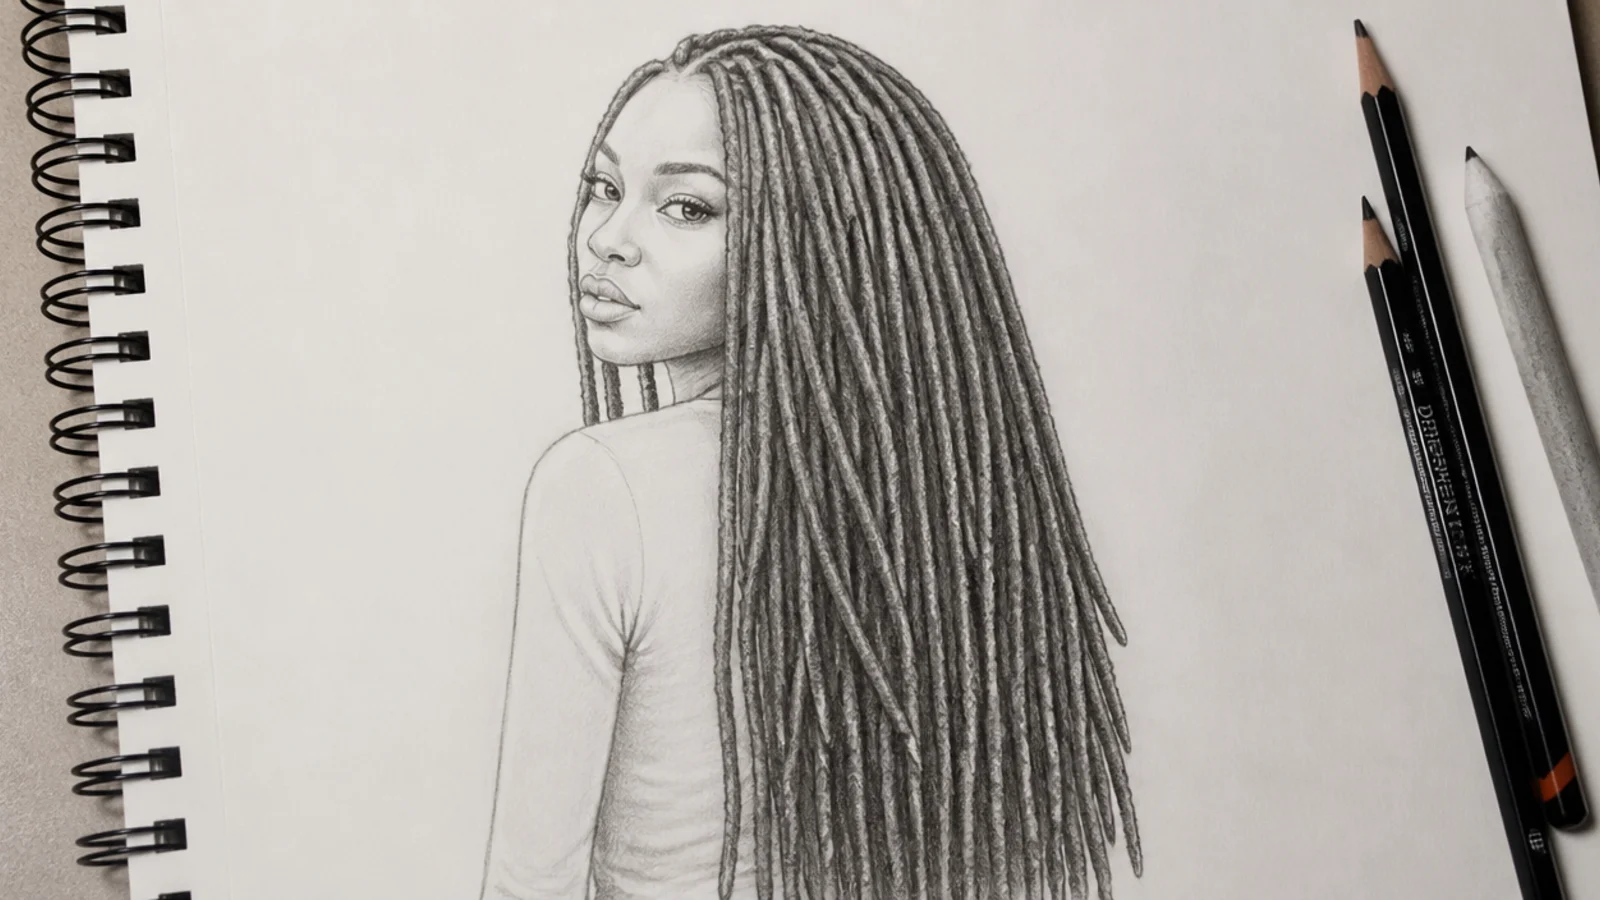
Locs are cylinders, so shade them like cylinders. Draw 12 to 18 ropes of uneven width falling from a visible scalp parting grid, each one with a slightly different length and a small variation in how it hangs. Every rope gets a light side, a mid tone and a 4B shadow edge, and the gaps between them go 6B so the ropes separate. Add texture with short diagonal marks across each rope rather than along it, which is what gives locs their banded surface. Vary the front row so they overlap the ones behind. Textured hair shading carries over from curly hair sketch work.
Who it suits: Character artists drawing textured and natural Black hair.
Tip: Draw the scalp parting grid first; locs without visible parts look like drawn spaghetti.
15. Flower Crown Half-Up with Loose Curls
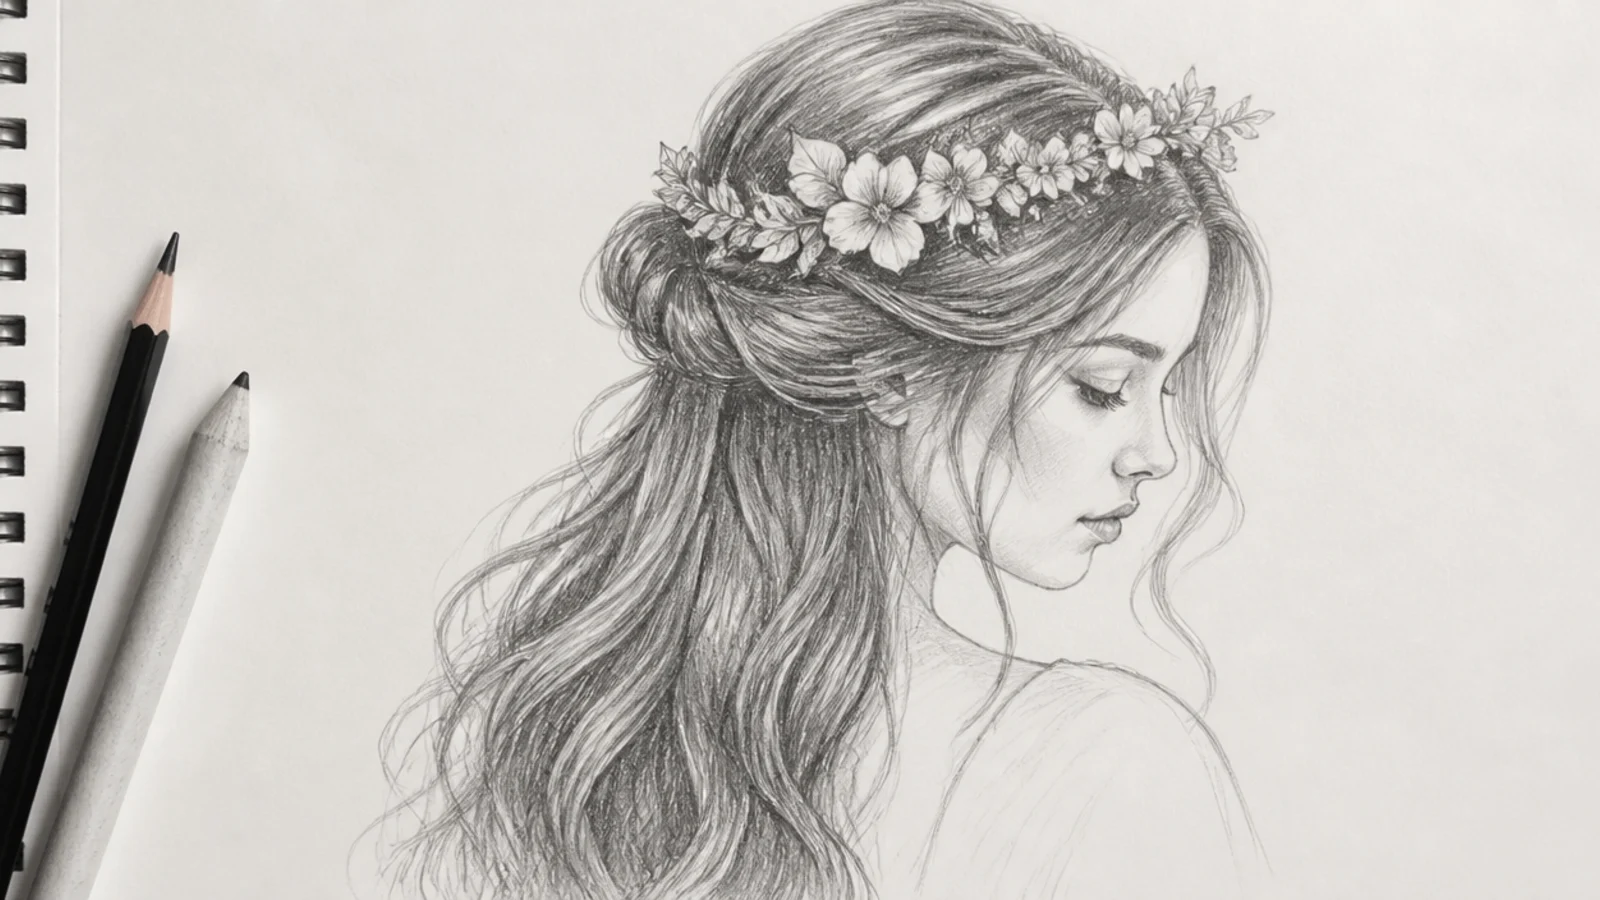
The most saved girl hair sketch concept on Pinterest, and it works because two textures meet. The upper half is gathered smooth and pinned at the back of the crown, while the lower half falls in loose ribbon curls. Draw the flowers as simple five-petal shapes overlapping the hairline, and shade a 4B cast shadow beneath each bloom so it sits on the hair instead of floating. Keep the flowers lighter in value than the hair around them, or they disappear. Around 30 minutes with the curls.
Who it suits: Bridal, fantasy and portrait illustration practice.
Tip: Overlap two or three petals across the hair edge so the crown wraps rather than sticks on.
How to Start a Girl Hair Sketch: Shape Before Strands
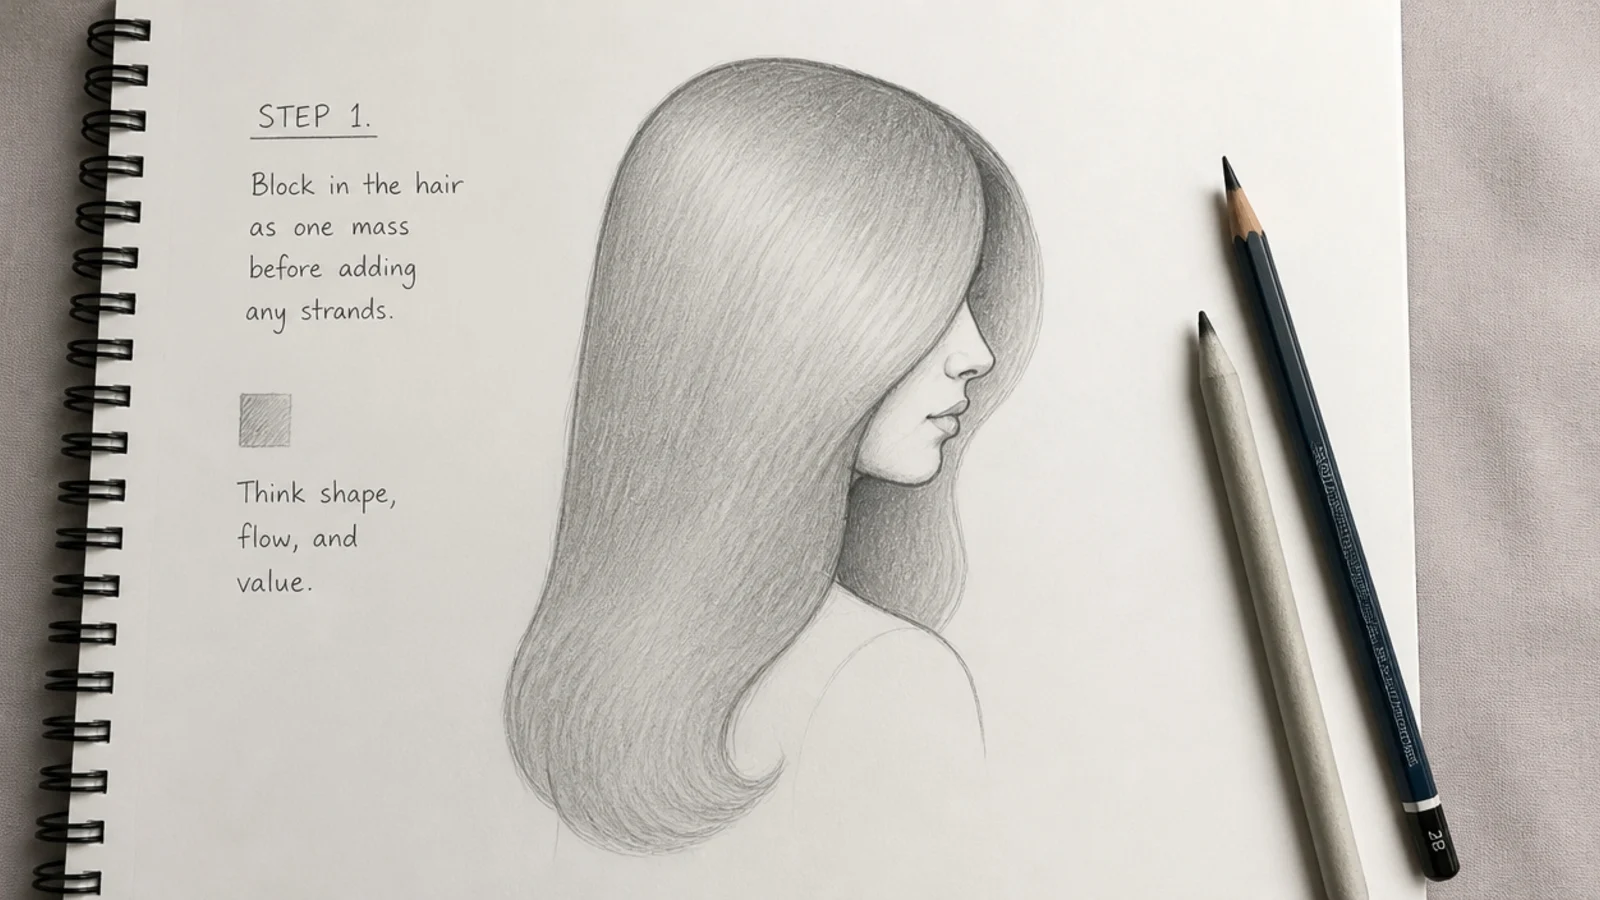
Draw the head first, all of it, including the top of the skull that the hair will cover. Beginners flatten the cranium and then have no room left for volume. With the head in place, block the hair as a single silhouette in 2H, set noticeably wider than the skull, because hair has thickness and lifts off the scalp by a quarter inch or more depending on texture. Mark two things inside that shape: the crown, which is the swirl point the hair radiates from, and the part line if there is one. Now draw five or six flow lines fanning outward from the crown to the ends of the silhouette. These are not strands. They are the map every later mark obeys. Keep the hairline irregular rather than a clean curve, and vary the spacing of the flow lines so no two run parallel. Only when the silhouette, crown and flow map are all settled should any texture go down. Drawing individual strands too early is the number one beginner mistake on this whole board, and it is the reason most attempts end up as a flat gray helmet. The same sequence opens every project in our hair sketch tutorial.
Shading Hair for Volume and Depth: 2H Guides to 6B Cores
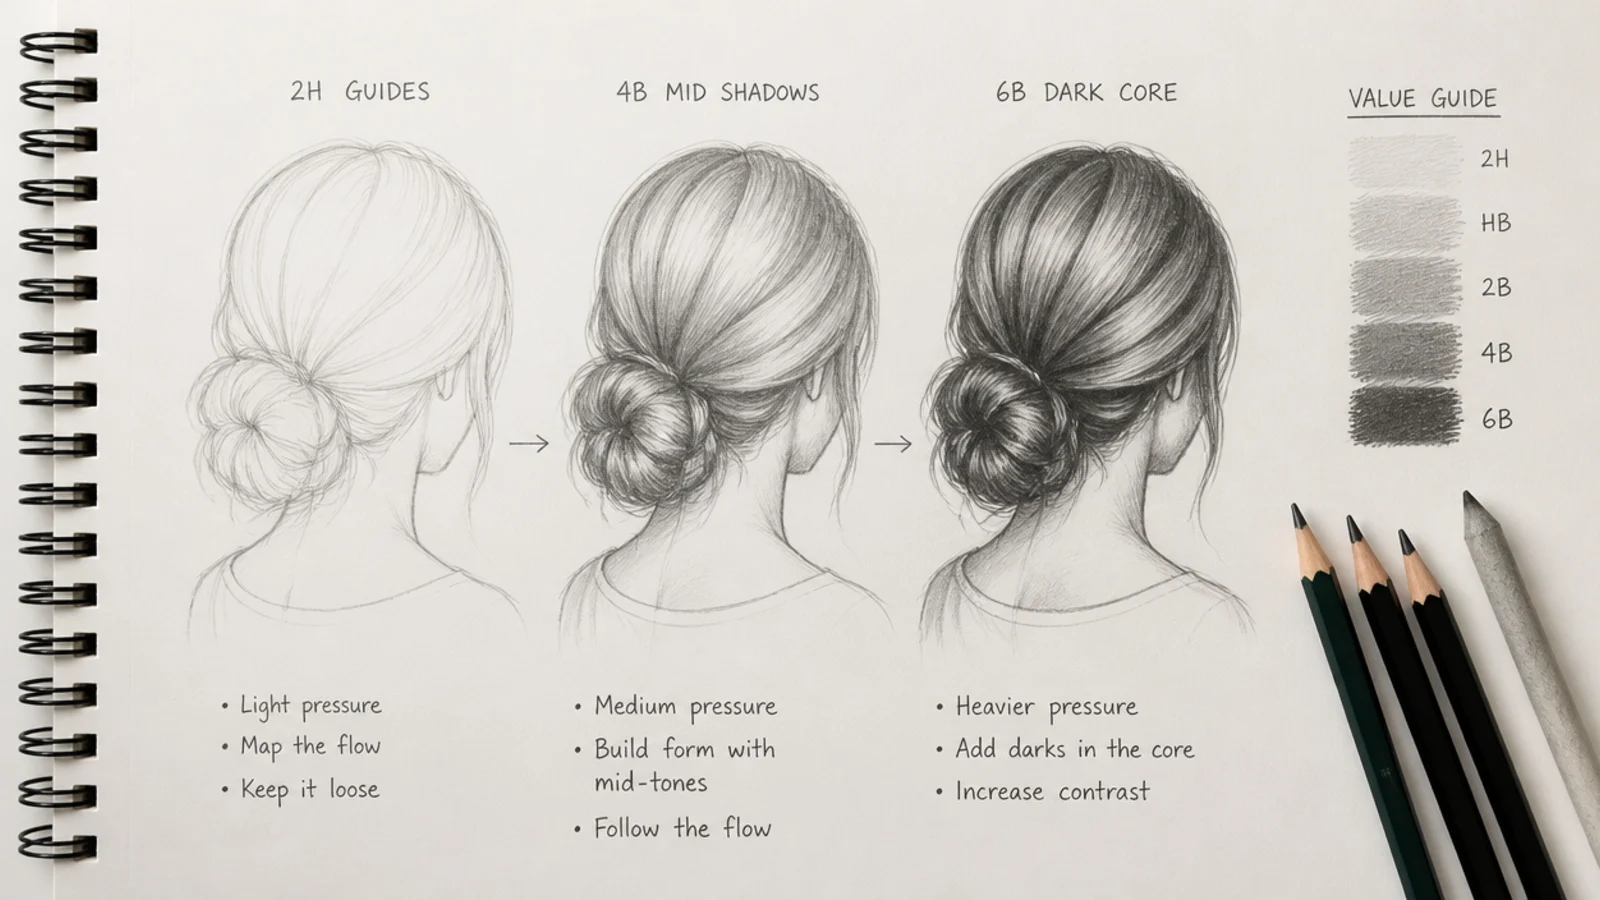
Hair reads as three dimensional only when it carries a full value range, and most flat sketches are flat because they live entirely in the middle. Assign the grades before you start. 2H handles the guides and the lightest planes. 2B and 4B carry the mid shadows, which is where most of the drawing actually happens. 6B is reserved for the darkest cores: the roots at the parting, the gaps between strand groups, the underside of a bun, and wherever hair tucks behind the ear or the jaw. Work light to dark and always stroke in the direction the hair travels. Highlights are the part people get wrong. Do not draw them. Leave the paper white where the light band falls, usually a soft band an inch or so below the crown where the head curves toward the light, or lift the band back out with a kneaded eraser pressed and rolled rather than rubbed. One highlight band per light source is enough. If the sketch still looks flat, the fix is almost never more strands; it is a darker core and a cleaner highlight.
Drawing Straight, Wavy, Curly and Coily Hair Differently
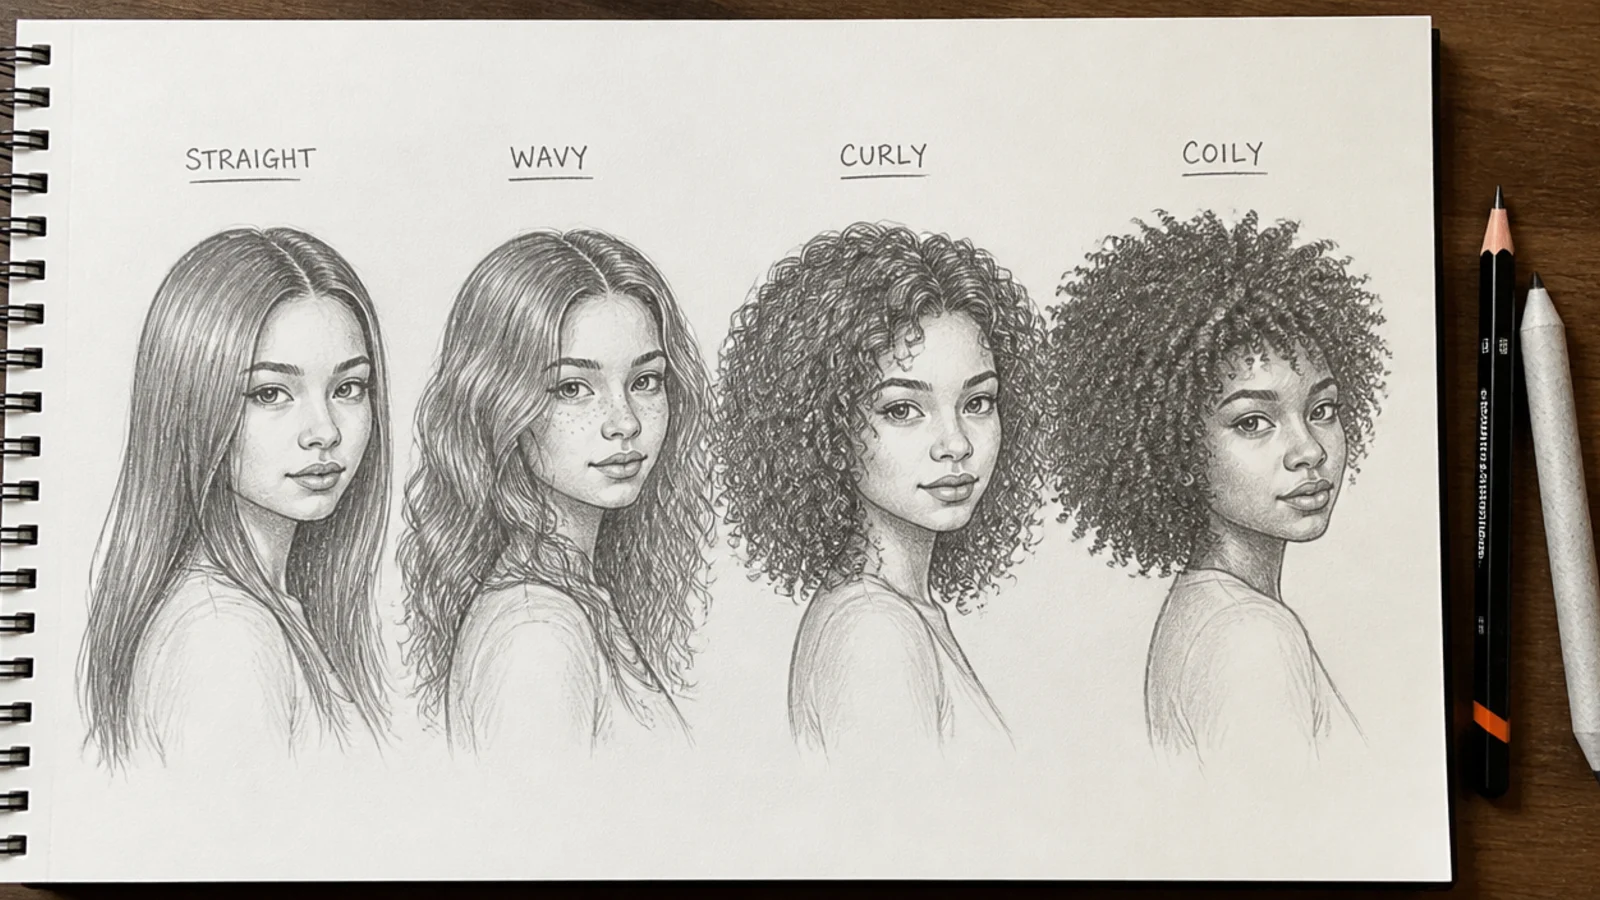
Four textures, four different approaches, one shared starting point. Straight hair is long unbroken flow lines with a single wide highlight band and shadow at the sides where the mass turns away. Wavy hair is the same, with S curves running the length and shadow placed on each turn that faces away from the light; offset the S peaks so they never queue up in a row. Curly hair is the one that needs a mental switch: draw each curl as a ribbon twisting through space, with light on one face and shadow on the other face of the same ribbon, and darken the gaps between clumps more than the curls themselves. Coily and 4C hair is the texture everyone skips, and it is handled by mass rather than line. Shade the whole shape as one soft velvety volume with a stump, keep the outer edge broken and fuzzy, and add only a scattering of small spirals near the highlight. Curl work has its own deep dive in curly hair sketch ideas.
Common Mistakes That Make a Girl Hair Sketch Look Flat
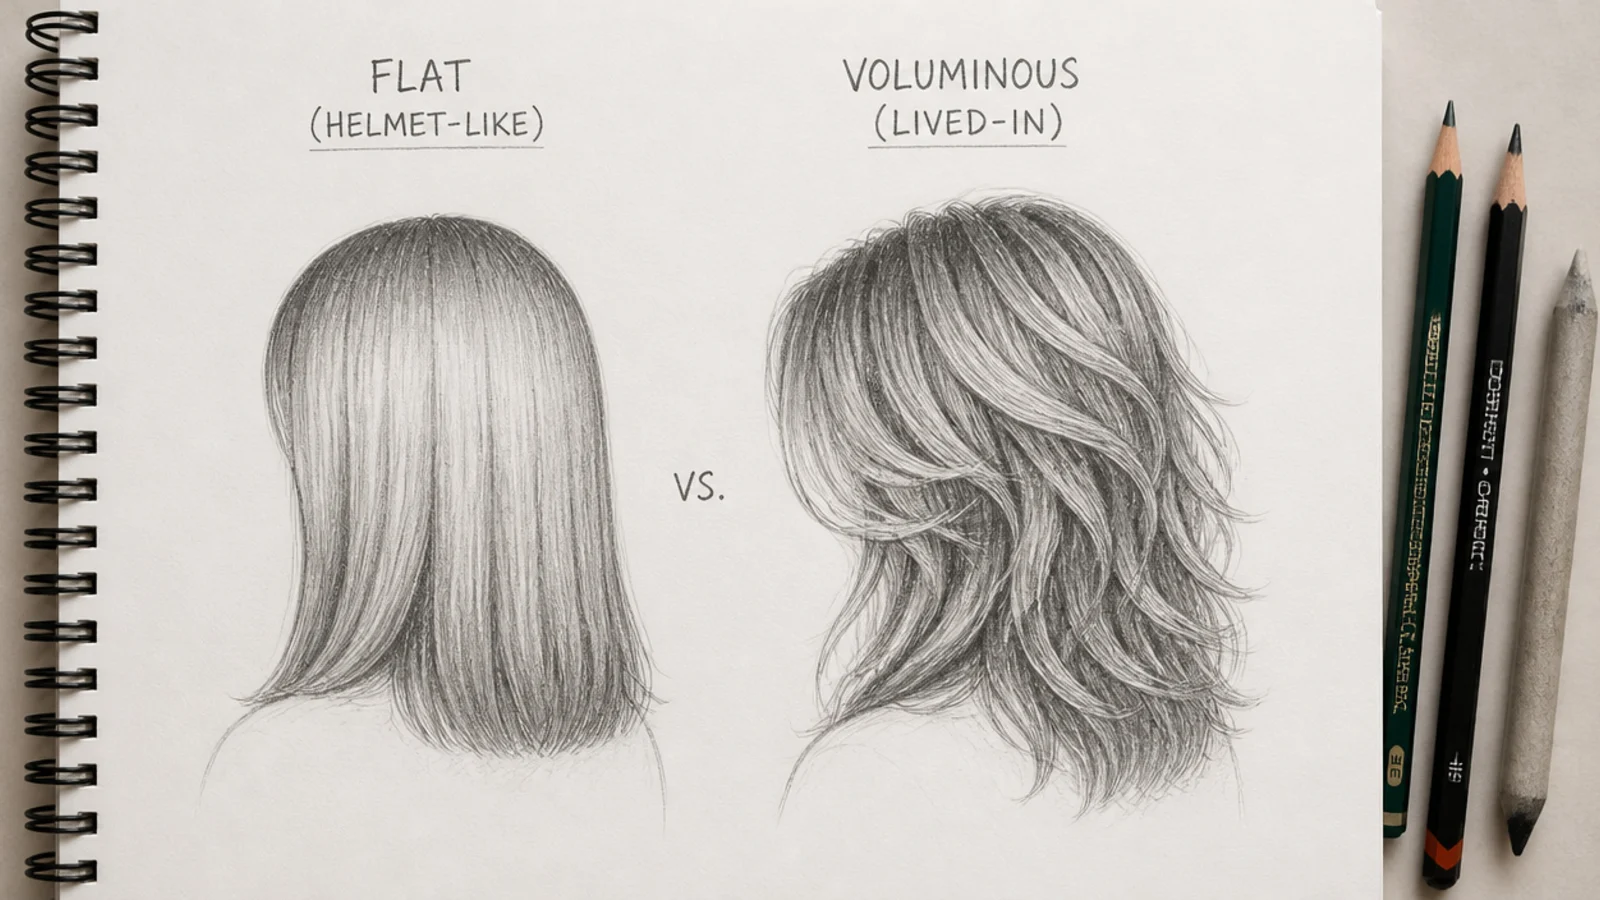
Five failures cover almost every disappointing hair drawing. First, strands before shape: the fix is to erase back to the silhouette and start again with flow lines. Second, parallel lines, which read as a wig because real hair grows in sections from the crown and fans as it falls; vary spacing and let groups cross. Third, the helmet, caused by a hard continuous outline and blunt ends; break the outline in places and finish with short flicks at the tips so the edge feels like hair. Fourth, no dark core, which leaves everything in a gray middle; push a 6B into the roots, the gaps and the undersides. Fifth, hair glued to the skull, where the silhouette sits directly on the head outline; move it out a quarter inch for straight hair and up to an inch or more for curly and coily textures. Two smaller ones worth naming: shading across the hair direction instead of along it, and blending everything until no strand edges survive. Blending is for the mid tones only. Work through the corrections one at a time against the ideas on the hair sketch board.
Pencils, Paper and Blending Tools for Hair Sketching
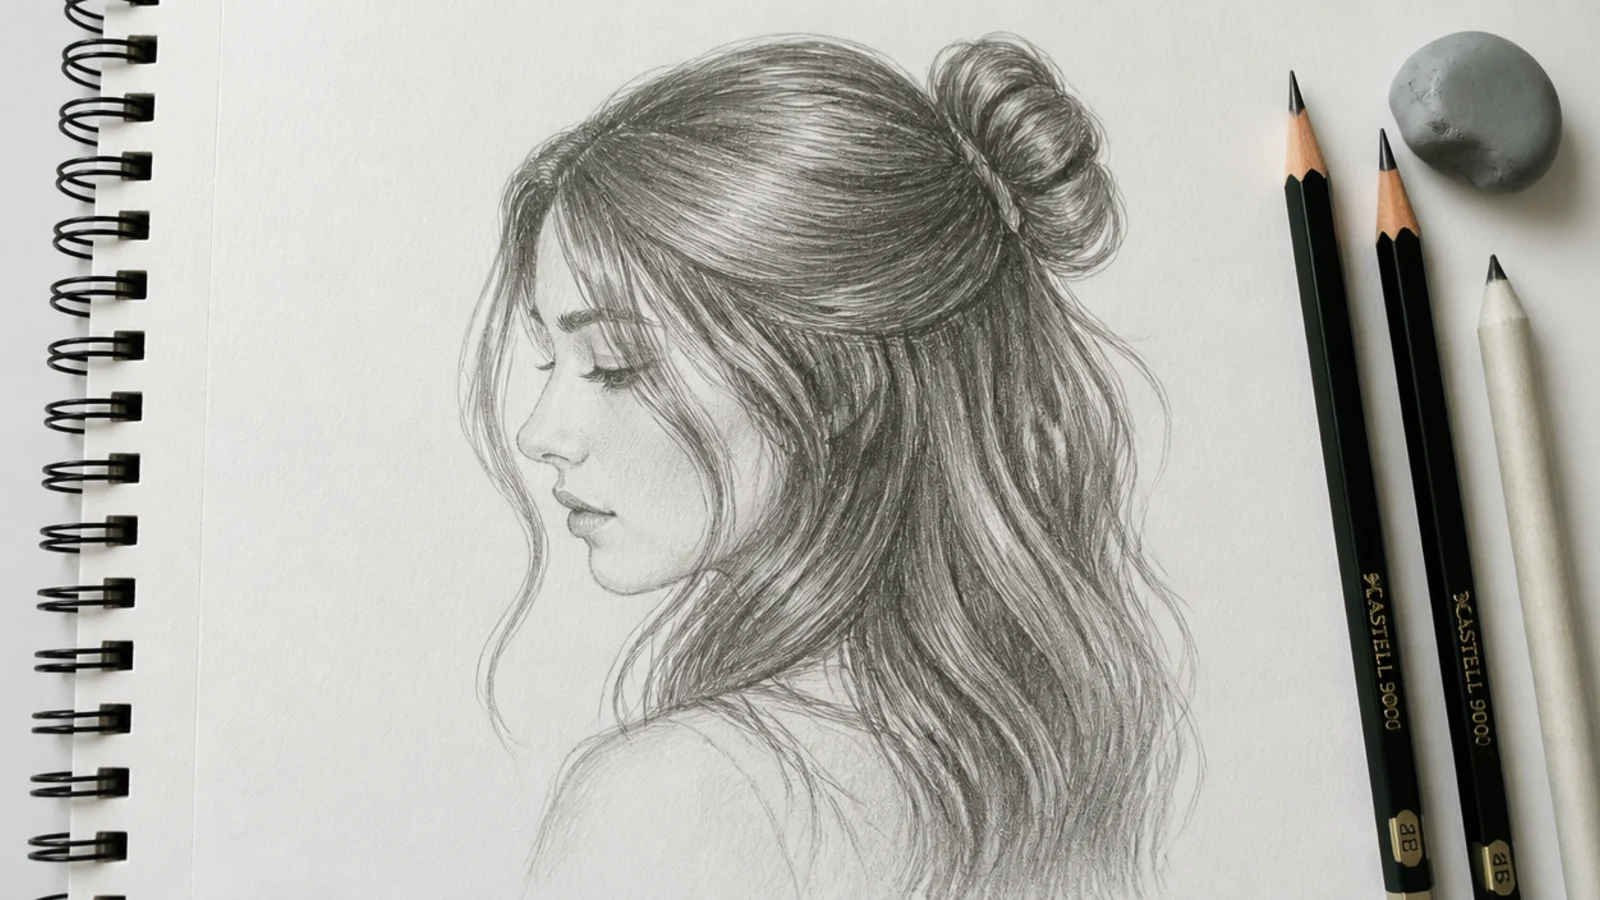
A five-pencil set covers everything on this page: 2H, HB, 2B, 4B and 6B. Match the grade to the hair, not just to the stage. Light blonde or gray hair lives mostly between 2H and 2B with only a touch of 4B in the deepest gaps, while black hair and dark locs need 6B doing real work across large areas. Red and auburn hair sits in the middle with strong mid tones and sharp highlight separation. Smooth cartridge paper around 100 to 120gsm suits detailed strand work; heavier textured paper fights fine lines but is friendlier for soft coily masses. The kneaded eraser is not optional, because it lifts graphite rather than scrubbing it, which is how highlight bands and flyaway strands get made. A blending stump smooths mid tones; use it sparingly, since over-blending is what turns hair into smoke. Keep one pencil sharpened to a long point for tapered strand strokes and one blunt for broad value work. Full material notes sit in the main hair sketch guide.
Using References Without Copying Them
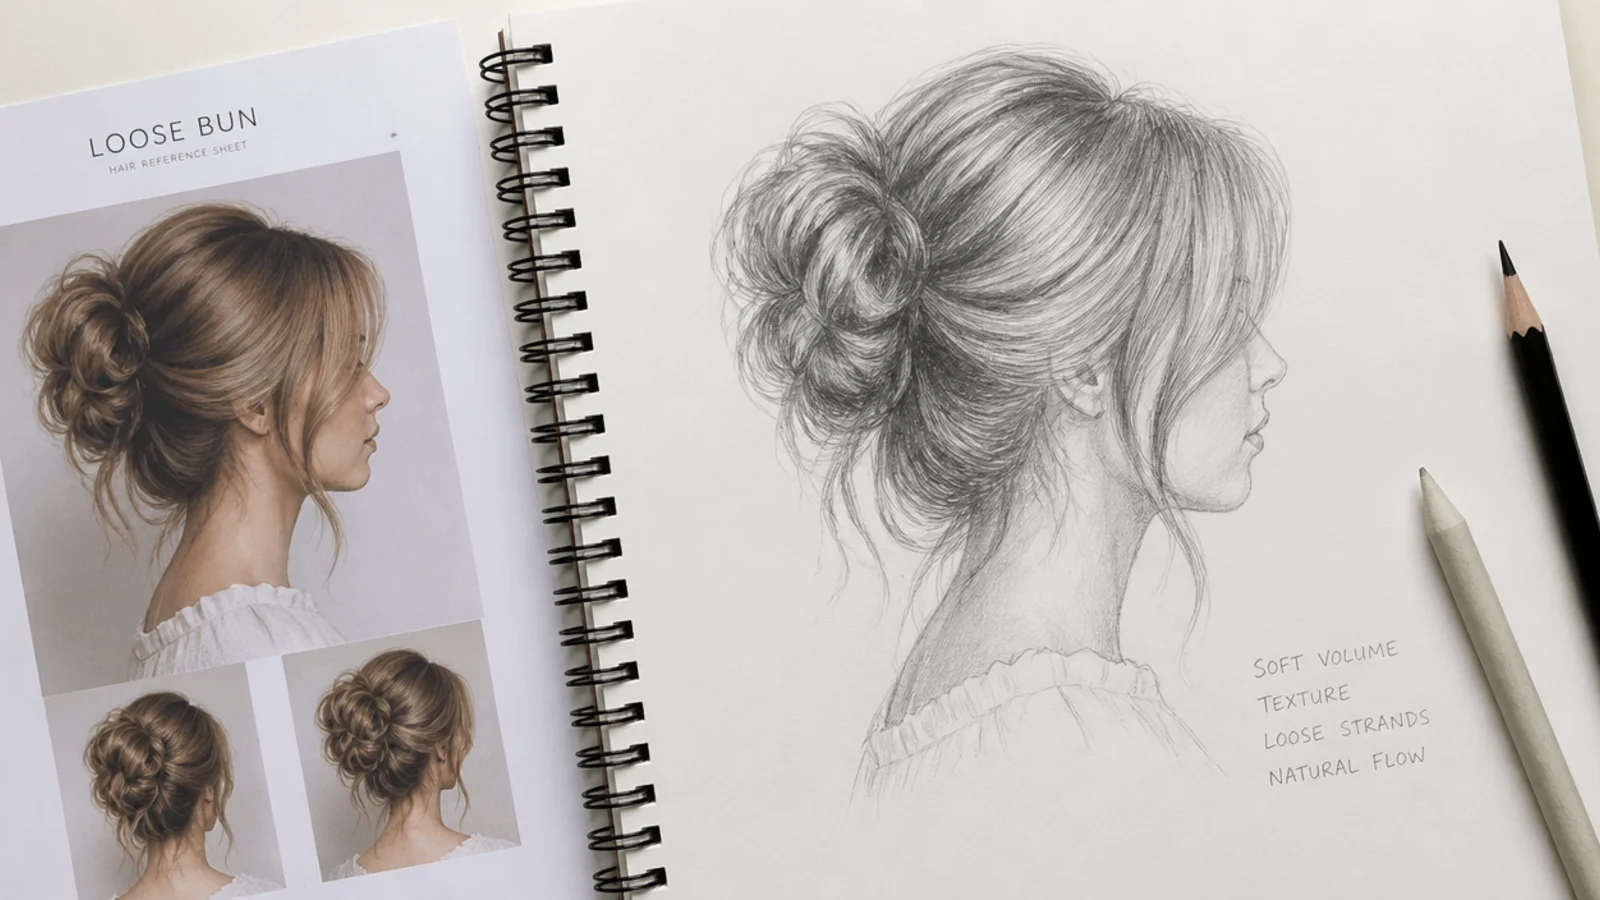
References are how you learn hair, but copying a photo line for line teaches almost nothing. Use a reference for three things only: the silhouette shape, the direction the hair flows, and where the light band falls. Squint at the image until the detail disappears and only the big value shapes remain, then draw those shapes from memory before you look again. Collect multiple angles of the same style, since front, side, back and three-quarter views of one hairstyle teach you the form rather than a picture of it. Photographs of real hairstyles work perfectly well as structural reference; a messy ponytail shows exactly how gathered hair bunches at the tie, and mermaid braids show how a braid loosens as it descends. On rights, drawing from a photo you did not take is fine for practice and study, but if you intend to sell or publish the artwork, work from your own photos, from free reference libraries that grant commercial use, or from several sources combined so the result is genuinely yours.
Frequently Asked Questions
How do you draw a girl's hair easily?
Draw the whole head first, then block the hair as one silhouette set wider than the skull. Mark the crown and the part, fan five or six flow lines out from the crown, and only then add value. Shade mid tones, push 6B into the roots and gaps, and leave the highlight band as bare paper. Strands come last, in groups.
Should I draw the head before adding the hair?
Yes, always, including the top of the skull the hair will hide. Beginners flatten the cranium, so the hair has no room to sit on and ends up glued to the head. Draw the full head lightly in 2H, then build the hair silhouette a quarter inch or more outside that line depending on the hair texture.
How do I make hair look more realistic in my drawings?
Widen the value range and follow the flow. Realistic hair needs a genuine 6B core in the roots and gaps, a large mid tone area in 2B to 4B, and a clean untouched highlight band. Stroke along the hair direction, draw groups rather than single hairs, and break the outer edge with short flicks at the ends.
How do I avoid making hair look flat in my sketches?
Flatness comes from three things: a silhouette drawn too close to the skull, flow lines that run parallel, and everything sitting in the same gray middle value. Move the silhouette outward for volume at the crown, vary line spacing so no two run parallel, and darken the gaps between strand groups far more than the strands.
How do you draw a braid step by step?
Draw one tapering guideline for the braid path, then stack alternating wedge shapes along it, left over right over left, each slightly overlapping the one below and slightly smaller as the braid descends. Shade a 4B shadow under the lower edge of every wedge where it tucks under the next, keep the upper curves light, and finish with loose ends.
How do you draw a messy bun?
Build three shapes: the swept hair on the skull, the gather point, and the bun. Funnel every flow line into the gather point so the tension reads, then draw the bun as a squashed oval sitting above and behind the crown. Shade 4B under the bun for cast shadow and pull two or three loose strands down near the temples.
What pencils do you use for drawing hair?
2H for guides and light planes, HB for line work, 2B and 4B for mid shadows, and 6B for the darkest cores. Match grade to hair color too: blonde and gray hair sits between 2H and 2B, black hair and locs need 6B across large areas. Add a kneaded eraser for highlights and a blending stump for mid tones.
How long does a girl hair sketch take?
A simple straight or wavy style takes around 12 to 20 minutes once the silhouette-first habit is set. Braids and updos run 20 to 30 minutes because of the overlapping shapes, and curls, locs or a backlit wind study can take 30 to 45 minutes since almost all the time goes into value rather than line.
Is it OK to use photo references for drawing hair?
For practice and study, yes, and it is the fastest way to learn hair. Use the photo for silhouette, flow direction and light placement rather than copying it line for line. If you plan to sell or publish the artwork, work from your own photos, from libraries that grant commercial use, or combine several sources so the result is your own.
Which hair sketch look are you saving?
If you draw only one thing from this list, draw the silhouette. Every one of these 15 pretty girl hair sketch ideas is built on the same three moves: a light 2H outline of the whole hair mass, a set of flow lines fanning out from the crown, then value laid in from mid tone to 6B core with the highlights left as bare paper. Strands come last and they come in groups. Work through the easy ones first, ideas 1 through 6, then push into the coils, braids and motion studies once your shading holds up. Keep going with curly hair sketch ideas, follow a full hair sketch tutorial, or browse the rest of the hair sketch board.