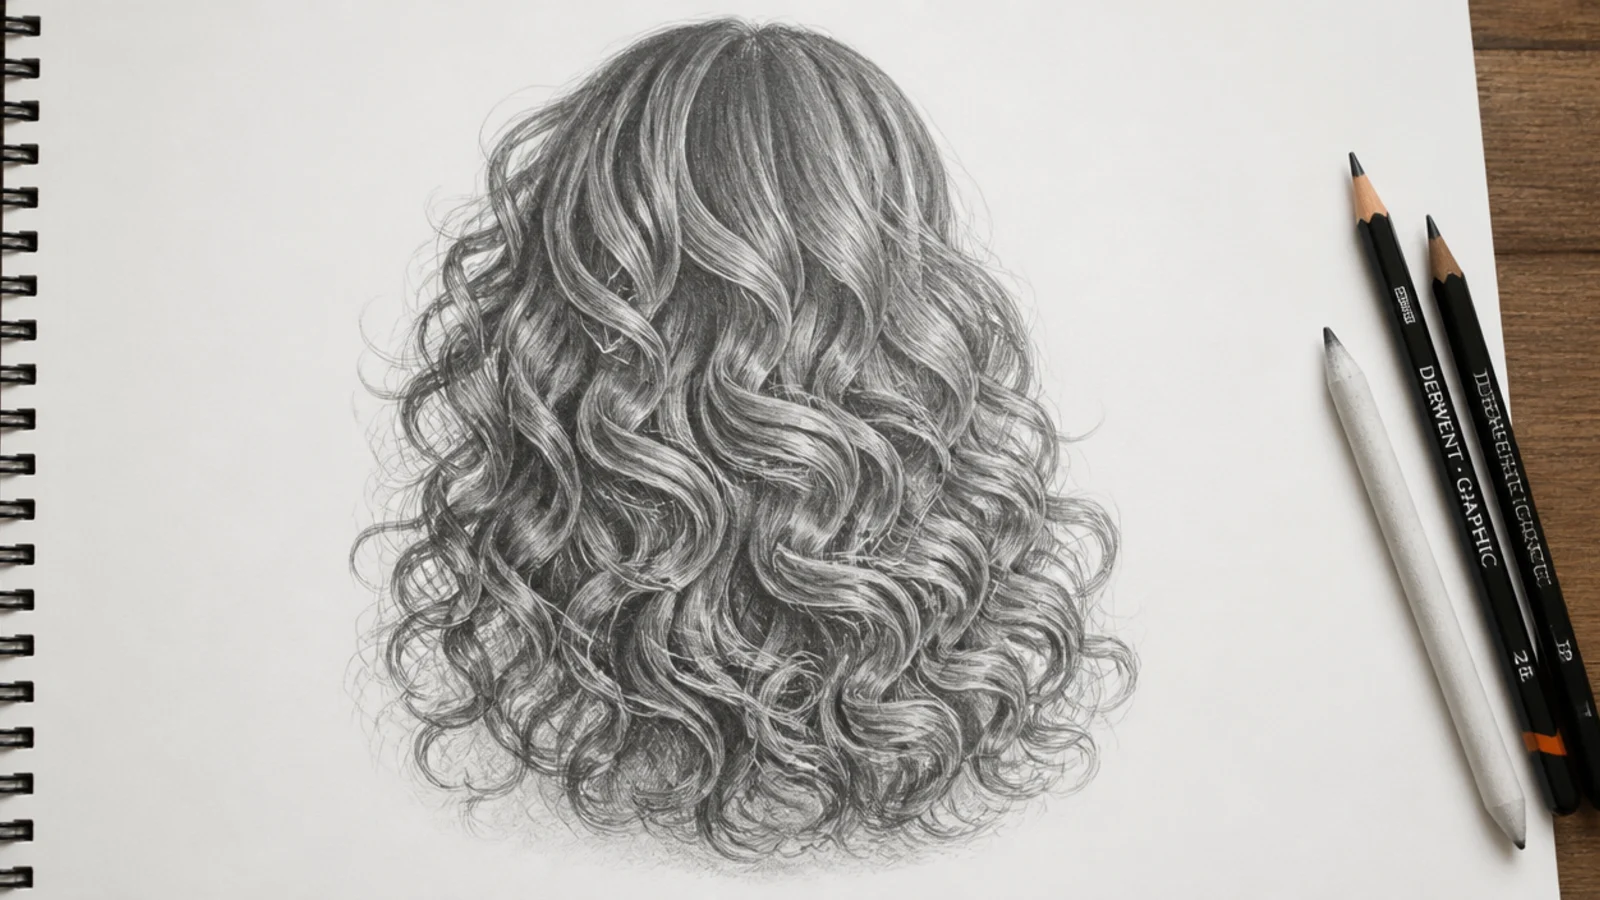
Quick Comparison
| Loose Curls (2A to 3A) | Tight Coils (3C to 4C) | |
|---|---|---|
| Zig-zag guideline size | Peaks 18 to 25mm apart | Peaks 4 to 8mm apart, or stippled texture instead |
| Silhouette distance from skull | 10 to 20mm; follows the head shape closely | 30 to 50mm; a rounded cloud clearly proud of the skull |
| Main drawing unit | The individual ribbon or S-bend | The clump, described as value and texture |
| Pencil doing most of the work | 2B for mid tones, 2H for guides | 4B throughout with 6B recesses |
| Average value | Light to mid; plenty of bare paper survives | Mid to dark; bare paper only on the top plane |
| Highlight behavior | Broad soft bands running along each curl | Small broken glints, or almost none on 4C |
| How many curls to fully describe | 15 to 25 across the whole drawing | 6 to 10, all on the lit silhouette edge |
| Stroke type | Long flowing curved strokes | Short circular or angular clustered marks |
| Most common failure | Waves drawn as parallel identical lines | Hard outlined perimeter that reads as a helmet |
1. Loose 2A Beach Waves Sketch, Shoulder Length
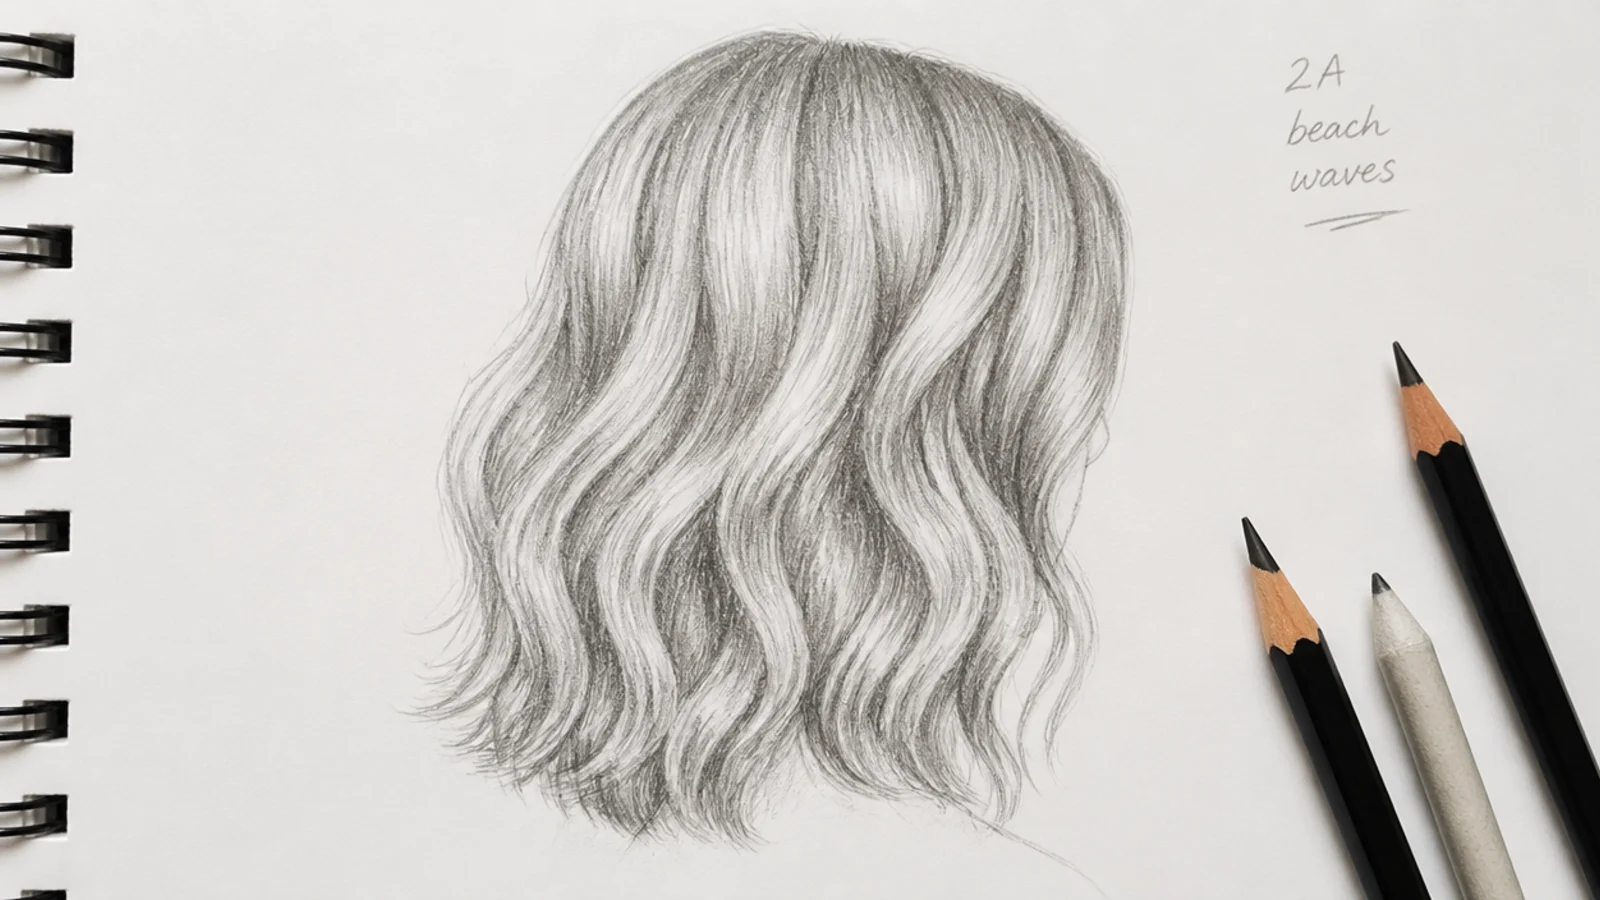
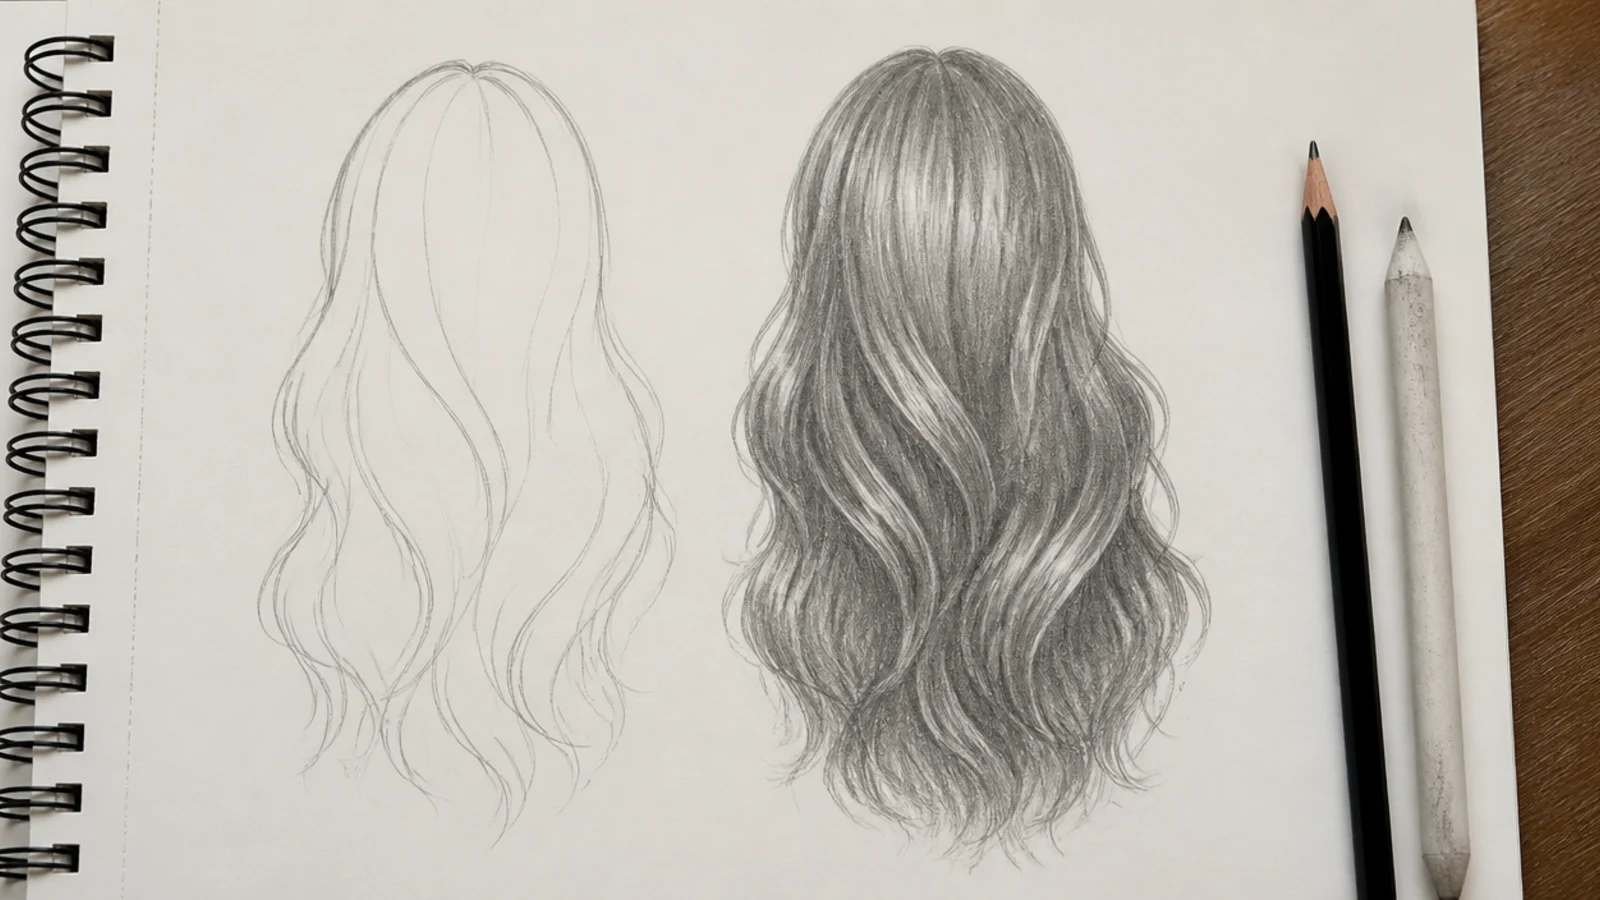
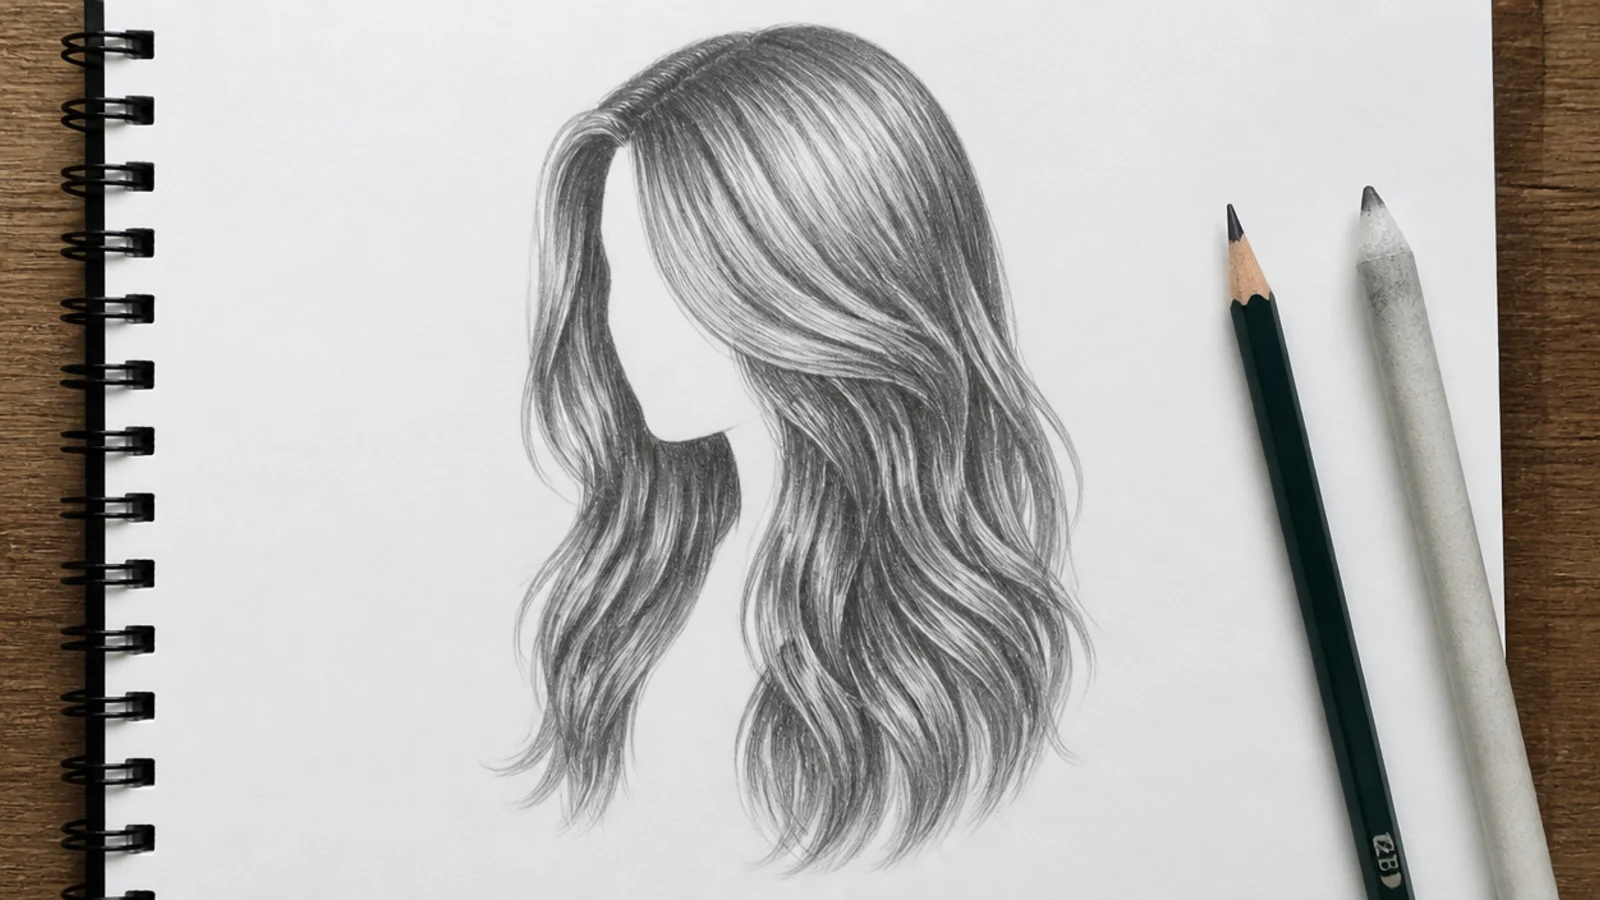
The gentlest entry point into curly hair. 2A is barely a curl, a wide open S that repeats maybe three times between the crown and the shoulder. Draw a shoulder-length silhouette about one and a half head-widths across, then lay 2H zig-zag guidelines with peaks around 25mm apart. Every wave should be shallower at the roots and deeper toward the ends, because gravity stretches the top of the strand. Shade with 2B along the inside of each curve and leave clean paper on the outward face. Fewer, larger shapes read as beachy; too many small ones tip it into 2C.
Who it suits: First-time curl drawers and anyone whose waves keep looking like corrugated metal.
Tip: Never let two waves peak at the same height across the head; stagger them by about 10mm.
2. 2B Wavy Lob Sketch with a Defined S-Bend
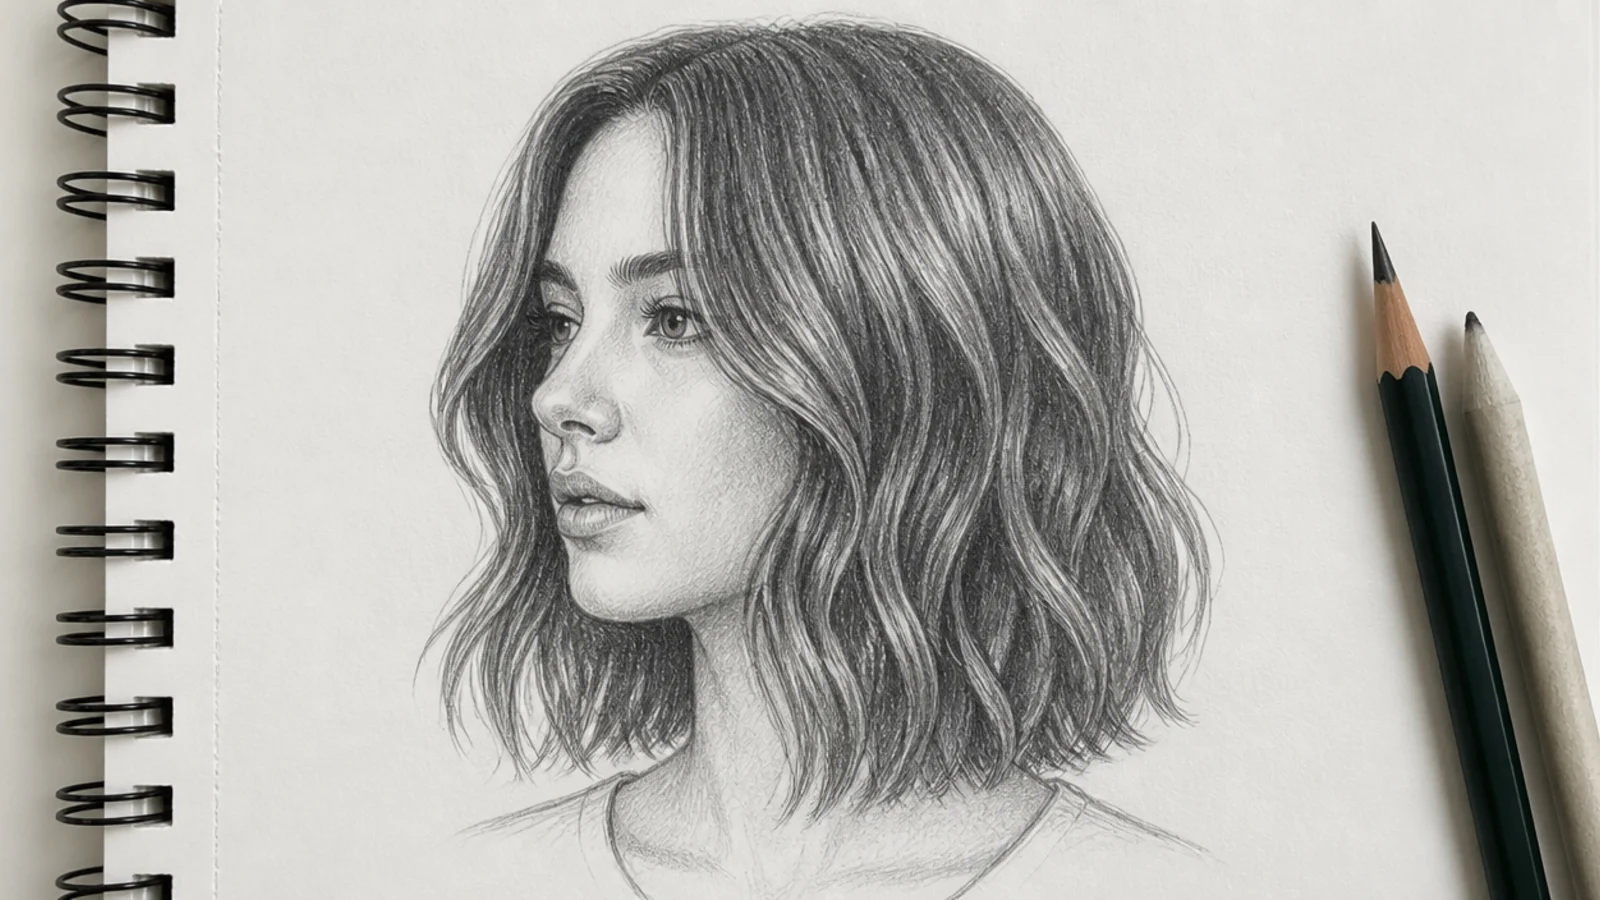
A collarbone-length lob where the waves start around eye level rather than at the roots, which is the defining 2B trait. Block the mass as a soft bell, wider at the jaw than at the crown, then run three or four flow lines from the part down through the bell. Zig-zag guides sit at roughly 18mm peak to peak. The trick that sells 2B is the flat top: keep the first inch and a half from the scalp nearly straight, then let the S-bend begin abruptly. Shade the underside of every bend with 4B and lift a soft highlight band across the crown with a kneaded eraser.
Who it suits: Sketchbook portraits and anyone drawing a modern shoulder-length cut.
Tip: Draw the part line first; every wave direction on the head derives from it.
3. 2C Deep S-Wave Curly Hair Sketch, Long
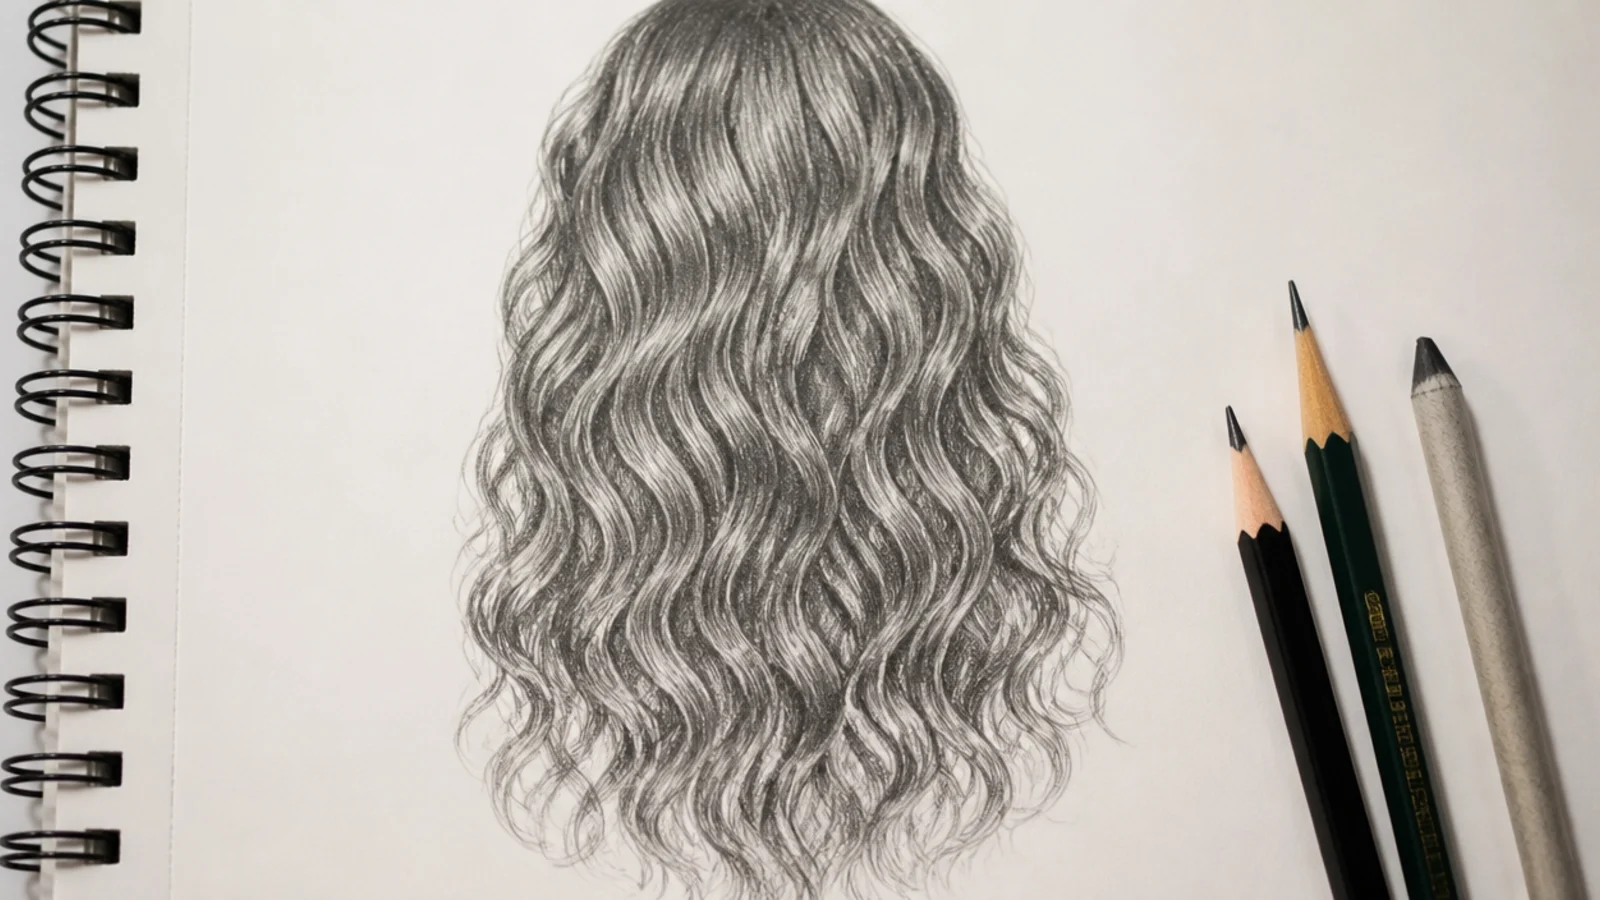
2C is where waves start behaving like curls: deep S-bends that begin at the root and pack tighter as they fall. At mid-back length you have room for six or seven full bends per strand group, with guide peaks about 12mm apart. Group the hair into four or five masses instead of trying to describe every strand, and let each mass overlap the one behind it so the drawing gains depth. Use 2H to place the bends, 4B for the shadow tunnels between masses, and 6B only where a mass tucks behind another. The dark spaces do more work here than the lines do.
Who it suits: Long hair studies and anyone practicing overlap and depth.
Tip: Shade the gaps between masses before you outline anything; the curls appear on their own.
4. 3A Loose Spiral Curls Sketch, Mid-Back Length
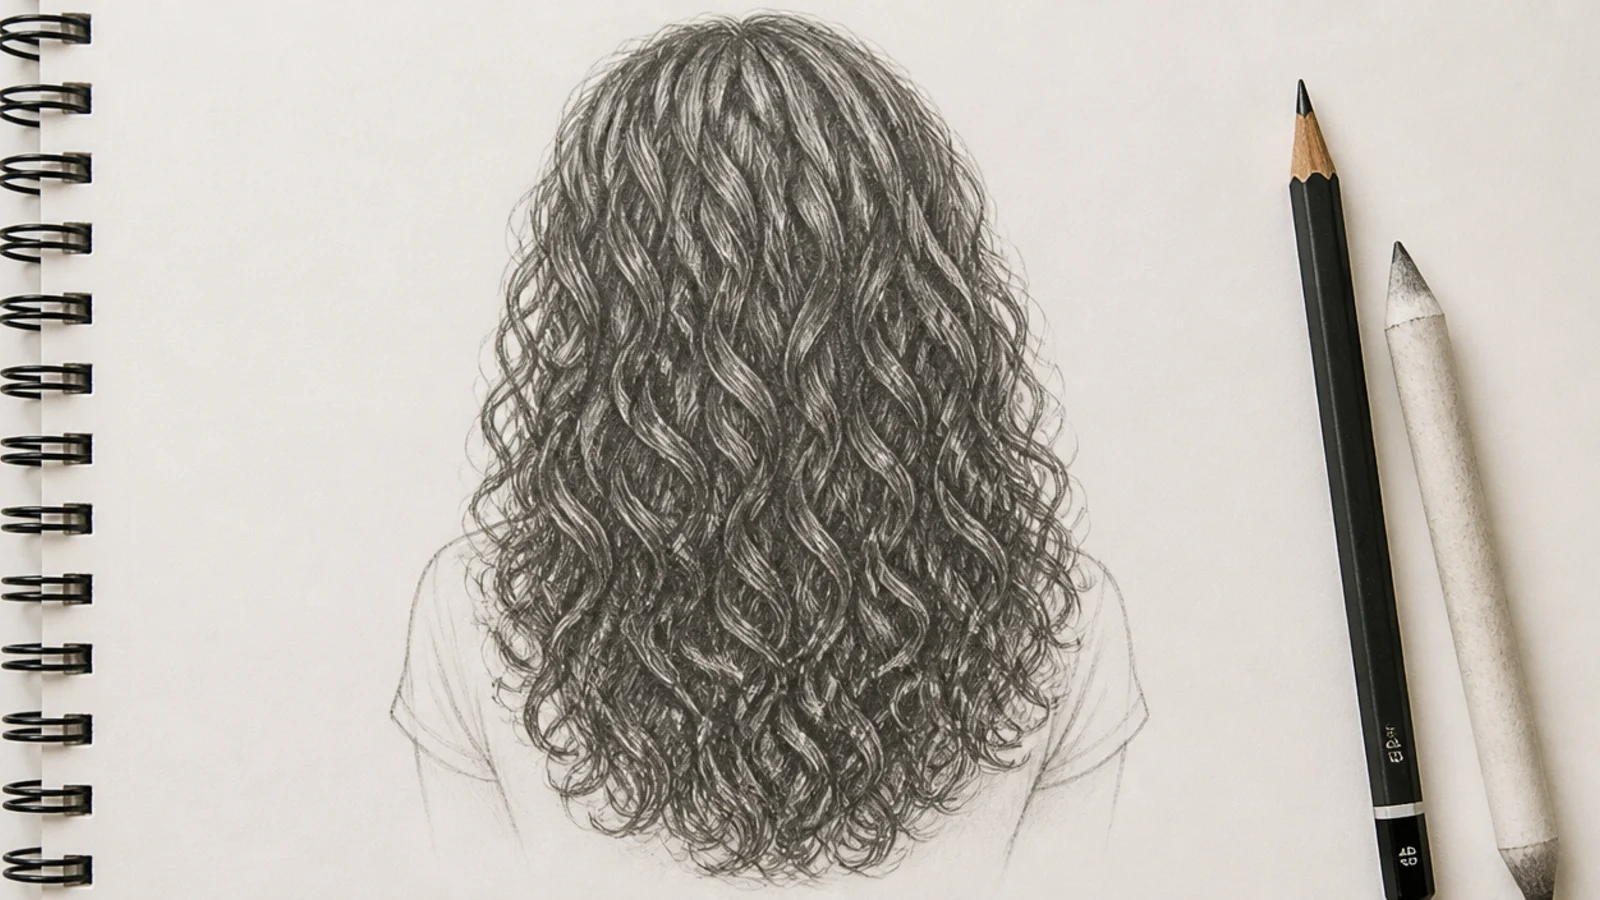
3A curls form loose spirals roughly the width of a sidewalk chalk stick, and they are the friendliest pattern for learning ribbon logic. Each curl wraps an invisible cylinder, so as it turns you see the outer face, then the edge, then the inner face. Draw the outer face wide with a 2B mid tone, pinch it to a hairline at the turn, then open the inner face and fill it with 4B because it faces away from the light. Repeat down the strand and the spiral appears without you ever outlining a coil. Keep spirals loose and slightly irregular; identical spirals read as a wig.
Who it suits: Anyone whose curls come out looking like flat outlined circles.
Tip: Vary the cylinder width by about 20 percent between neighboring curls.
5. 3B Springy Ringlet Curls Sketch, Shoulder Length
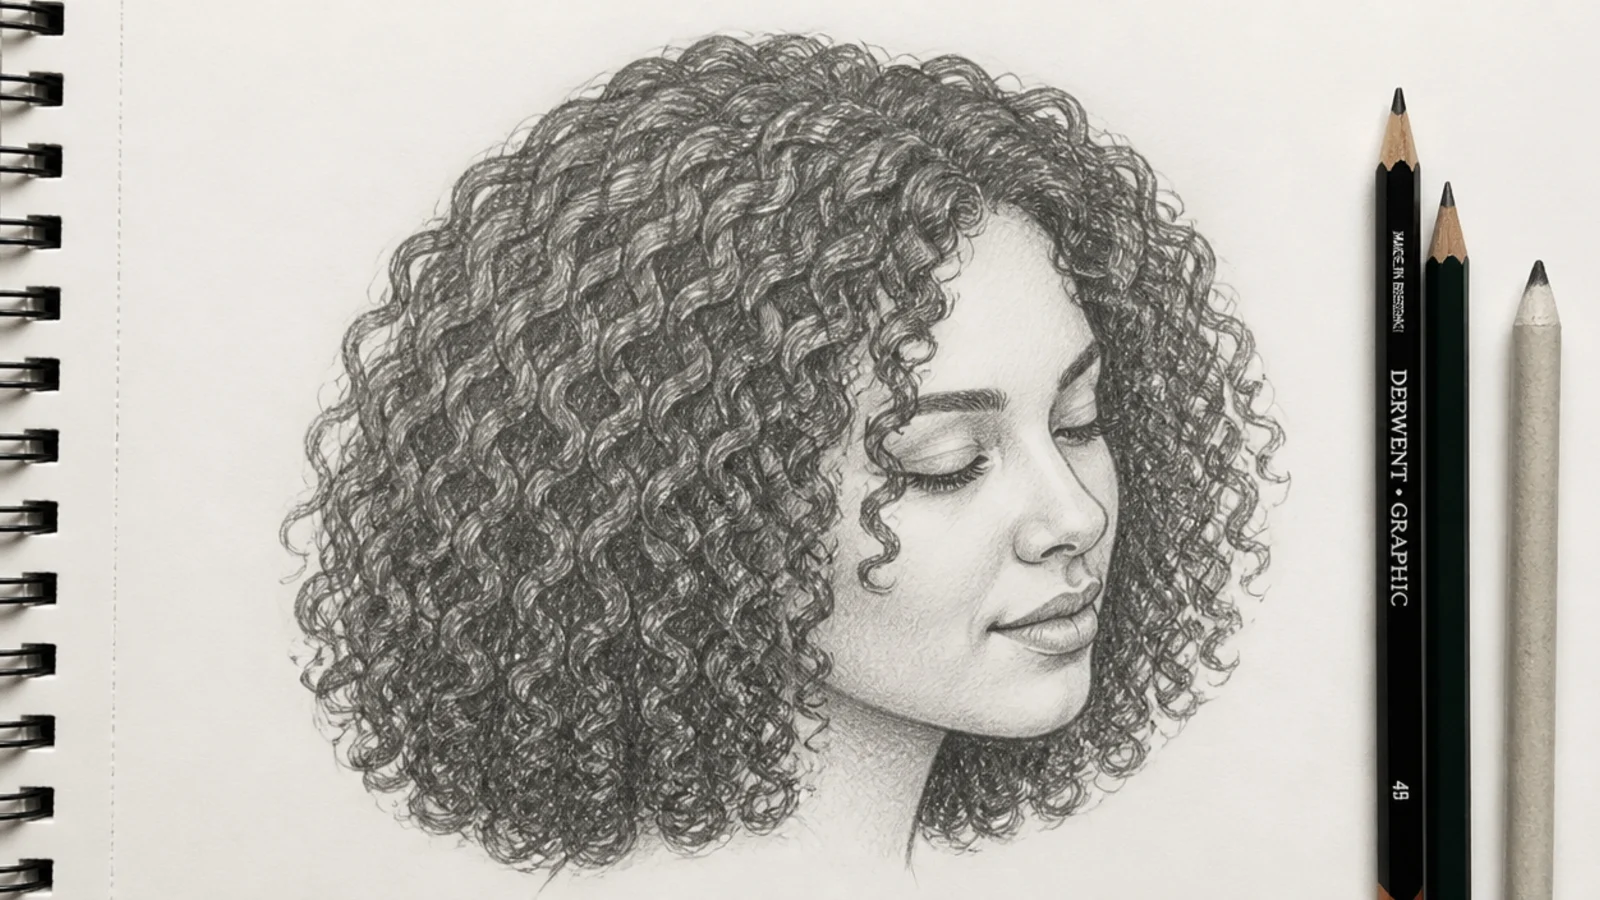
3B ringlets are about the circumference of a permanent marker, springy and well defined, and the silhouette they build is a triangle: narrow at the crown, widest at the jaw and shoulder. Block that triangle before anything else. Zig-zag guides drop to around 8mm. Because the curls are tighter, you see more of the shadowed inner face than the lit outer face, so your overall value should sit darker than a wavy sketch, roughly a 4B average with 6B cores. Add three or four fully described ringlets at the front edge of the silhouette and let everything behind them stay as value only.
Who it suits: Portrait work where the curls need to read from across the room.
Tip: Describe only the curls on the silhouette edge; suggest the rest with tone.
6. 3C Tight Corkscrew Curls Sketch with Volume at the Crown
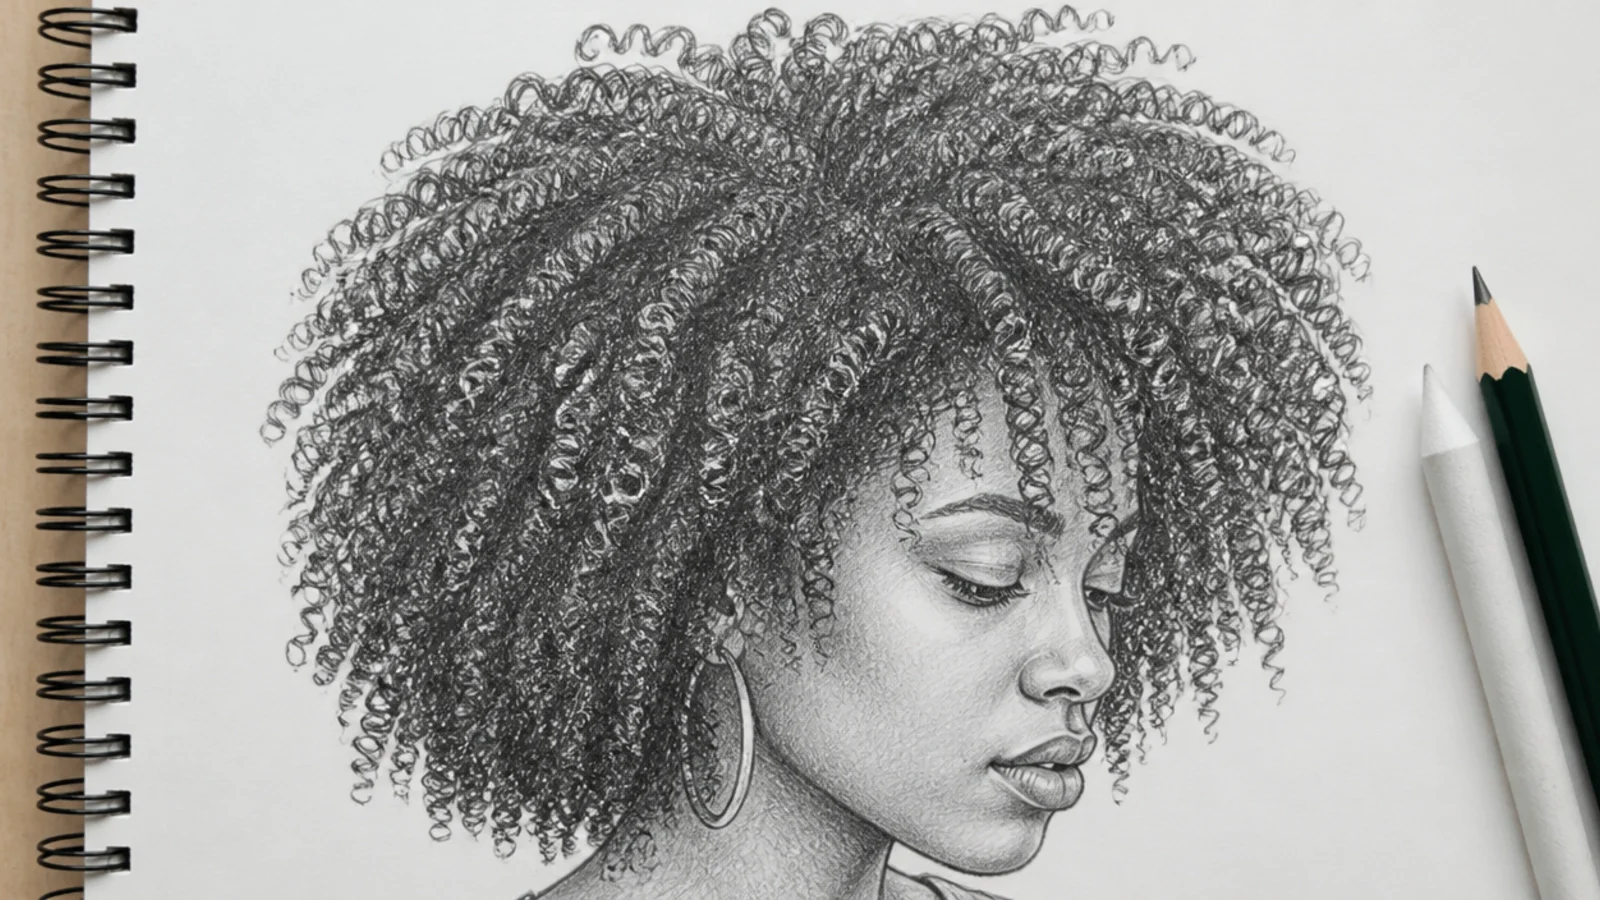
3C packs pencil-width corkscrews densely enough that individual curls start merging into texture. The silhouette is a full rounded cloud sitting roughly 30mm proud of the skull all the way around, and beginners consistently draw it too close to the head. Establish that gap first with a light 2H outline. Then work value only: 4B across the whole mass, 6B in the recesses between curl clumps, and lifted highlights along the top plane where light lands. Describe maybe eight corkscrews total, all on the lit edge, and let the rest be texture. Any more and the drawing turns to noise.
Who it suits: Studies of dense curl patterns and character design.
Tip: Draw the gap between skull and hair before you draw a single curl.
7. 4A Coily Afro Sketch, Round Silhouette from the Front
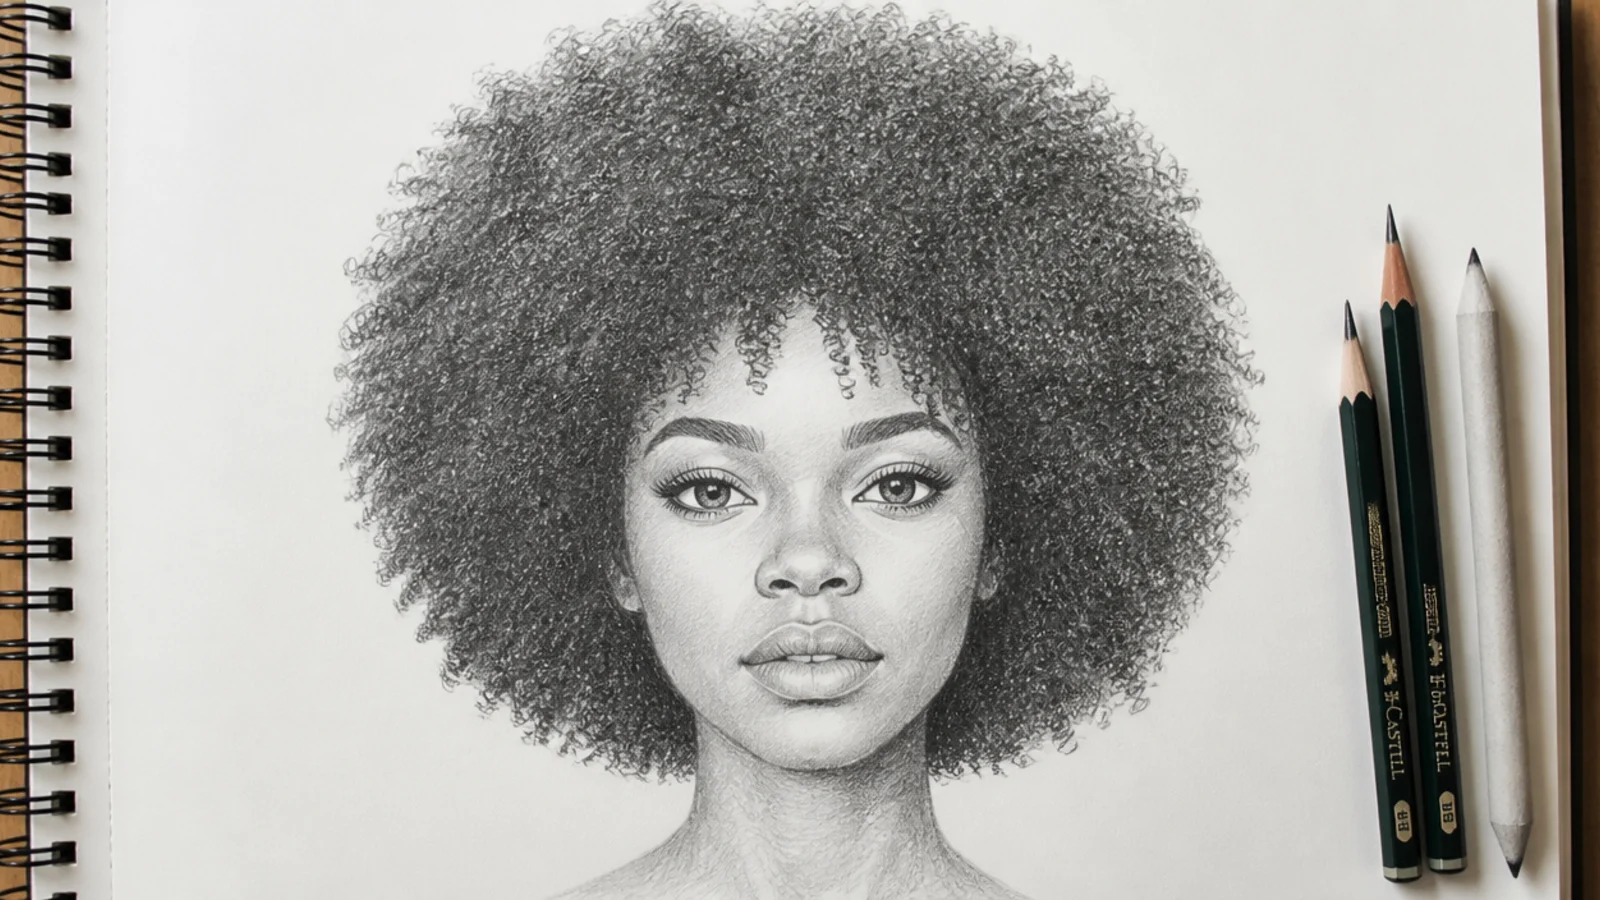
4A coils are tight springs about the width of a crochet needle, and drawn from the front they build an almost perfect circle around the head. The whole drawing lives or dies on the edge: a hard outlined circle looks like a helmet, so break the perimeter with short 2B flicks that sit just outside the mass, irregular in length between 2mm and 6mm. Inside, work small overlapping circular strokes with 4B rather than lines, then push 6B into the shadow just above the ears and under the overhang. Leave a soft lifted band across the upper left if your light is up and left.
Who it suits: Character artists and anyone drawing textured hair for the first time.
Tip: Never close the silhouette with a continuous line; the edge should be all texture.
8. 4B Zig-Zag Coil Sketch with Cotton Texture
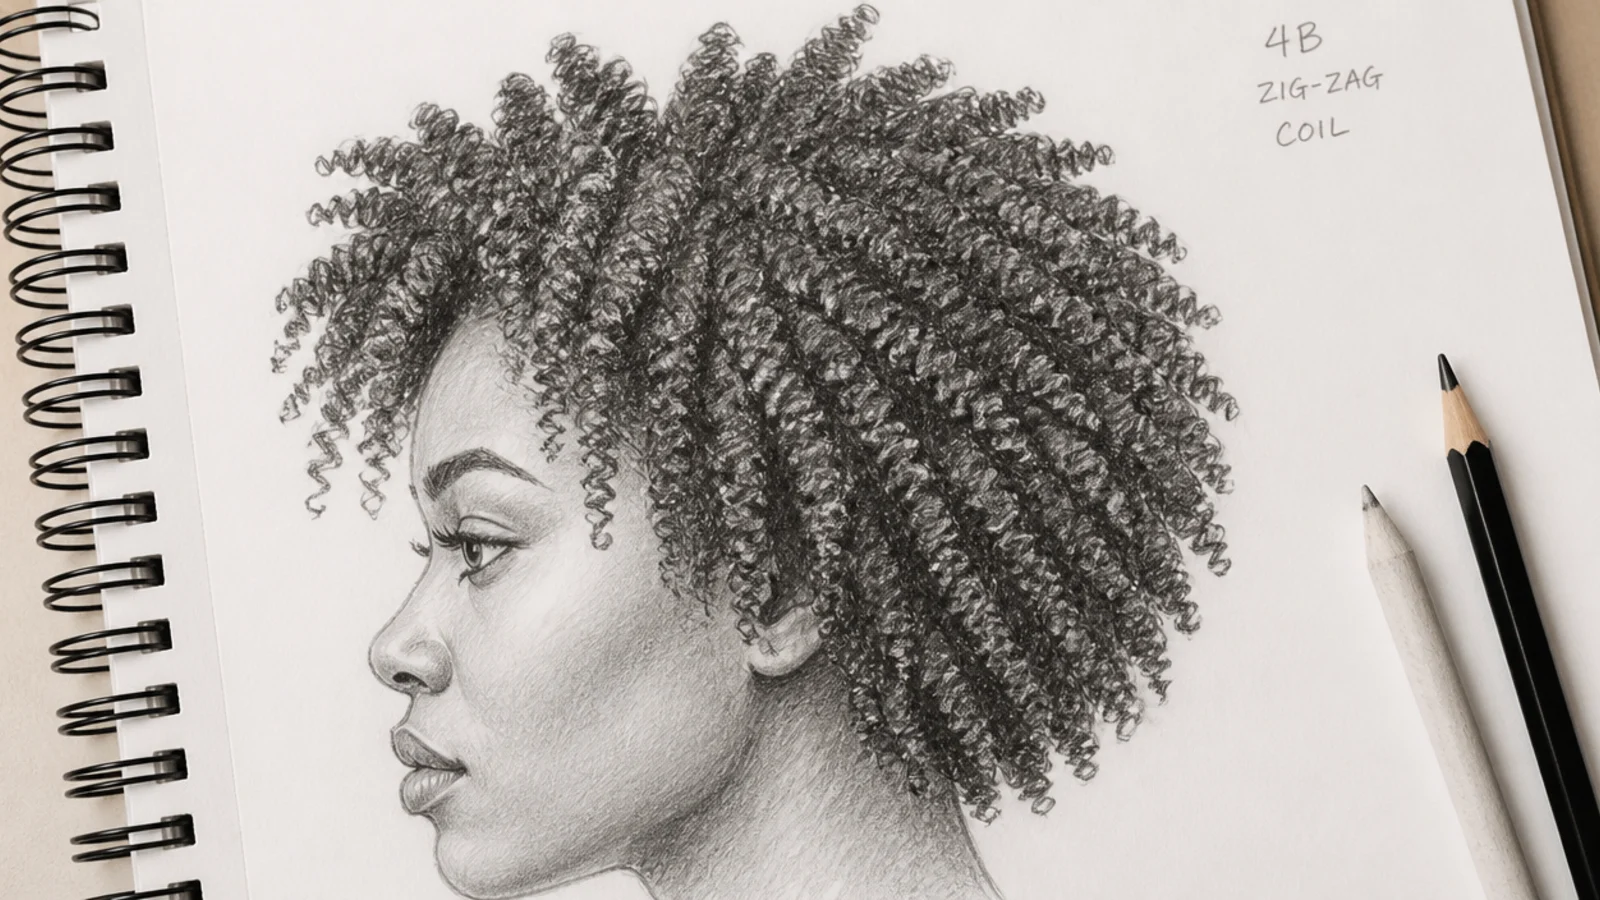
4B bends in sharp angles rather than curving, so the strand looks like a Z repeated at tiny scale, and the mass reads as cotton rather than spiral. Forget round strokes entirely. Use short angular 4B marks laid in clusters that all tilt in slightly different directions, building density instead of line. The silhouette can be shaped, an oval, a heart, a tapered square, because 4B holds a cut. Keep contrast lower inside the mass than you would for 3B, since less light escapes the tight structure, then pop a single crisp highlight on the top plane so the head still reads as round.
Who it suits: Anyone practicing textures that no strand-by-strand method can handle.
Tip: Rotate your wrist between clusters so no two patches share a stroke angle.
9. 4C Sponge-Coil Sketch on a Tapered Fade
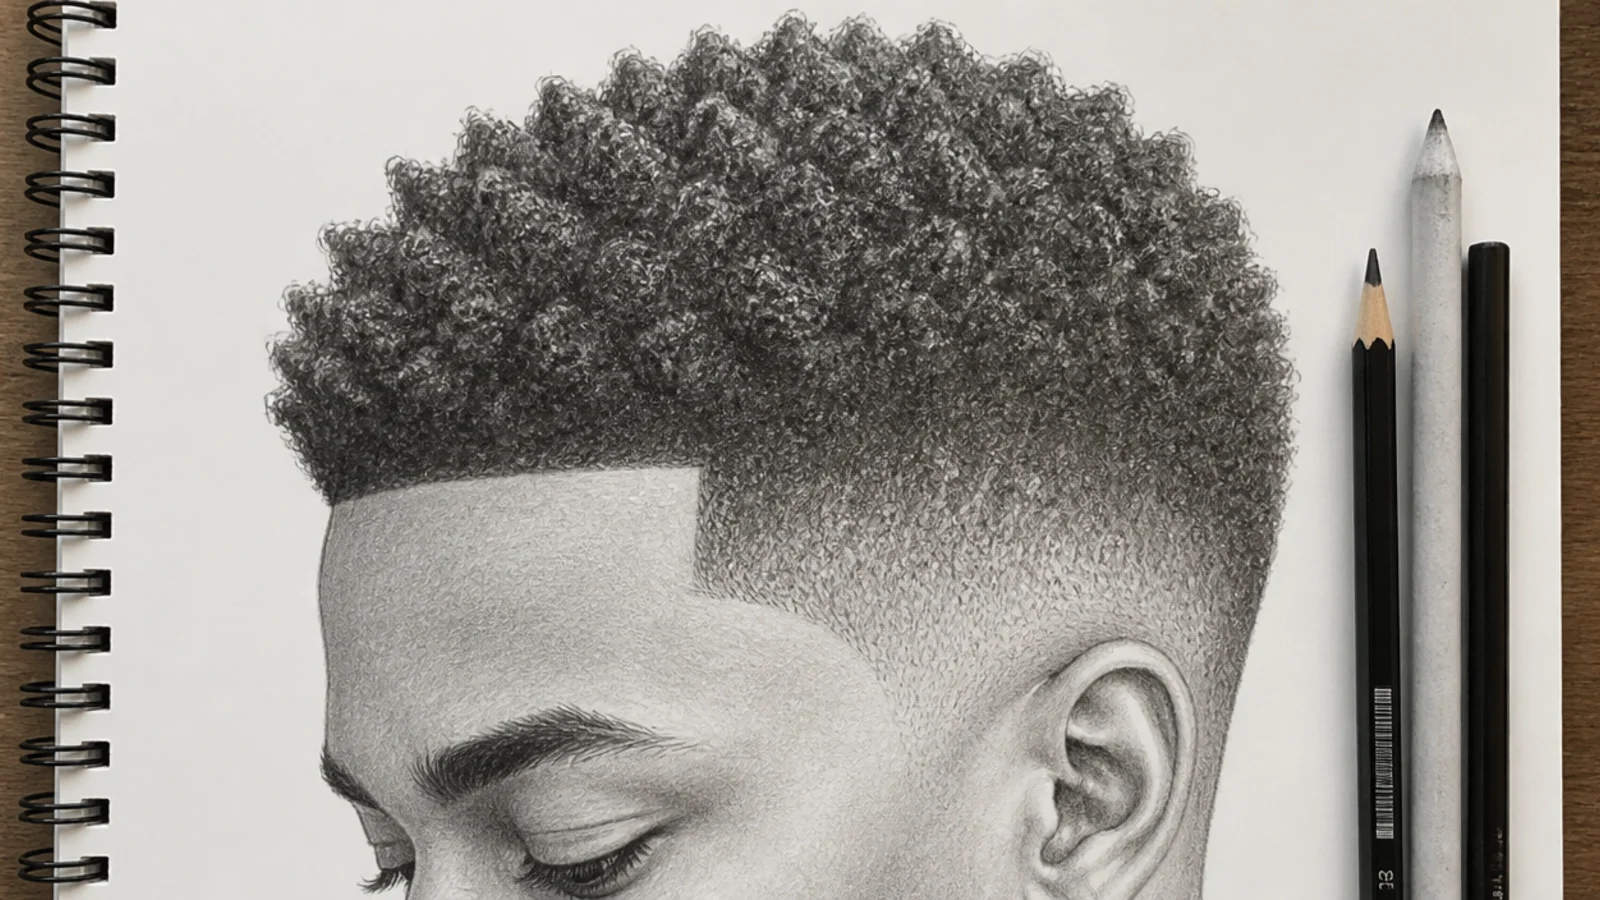
The most skipped texture in drawing tutorials and the one worth learning. 4C coils are tighter than a pencil lead and barely reflect a highlight, so the mass reads as an even deep value with a defined shape. Draw the tapered fade as a value gradient: 6B at the top plane, 4B through the mid, 2B fading to bare paper at the temple where the fade goes to skin. The hairline is the star. Give it a crisp edge along the forehead and temples with a sharp 2B point, since a lined-up hairline is the detail every competitor ignores. Texture comes from stippled circular pressure, not from strokes.
Who it suits: Portrait and character artists drawing textured Black hair.
Tip: Draw the hairline edge sharp and the outer silhouette soft; that contrast is the whole look.
10. Curly Half-Up Bun Sketch, Three-Quarter View
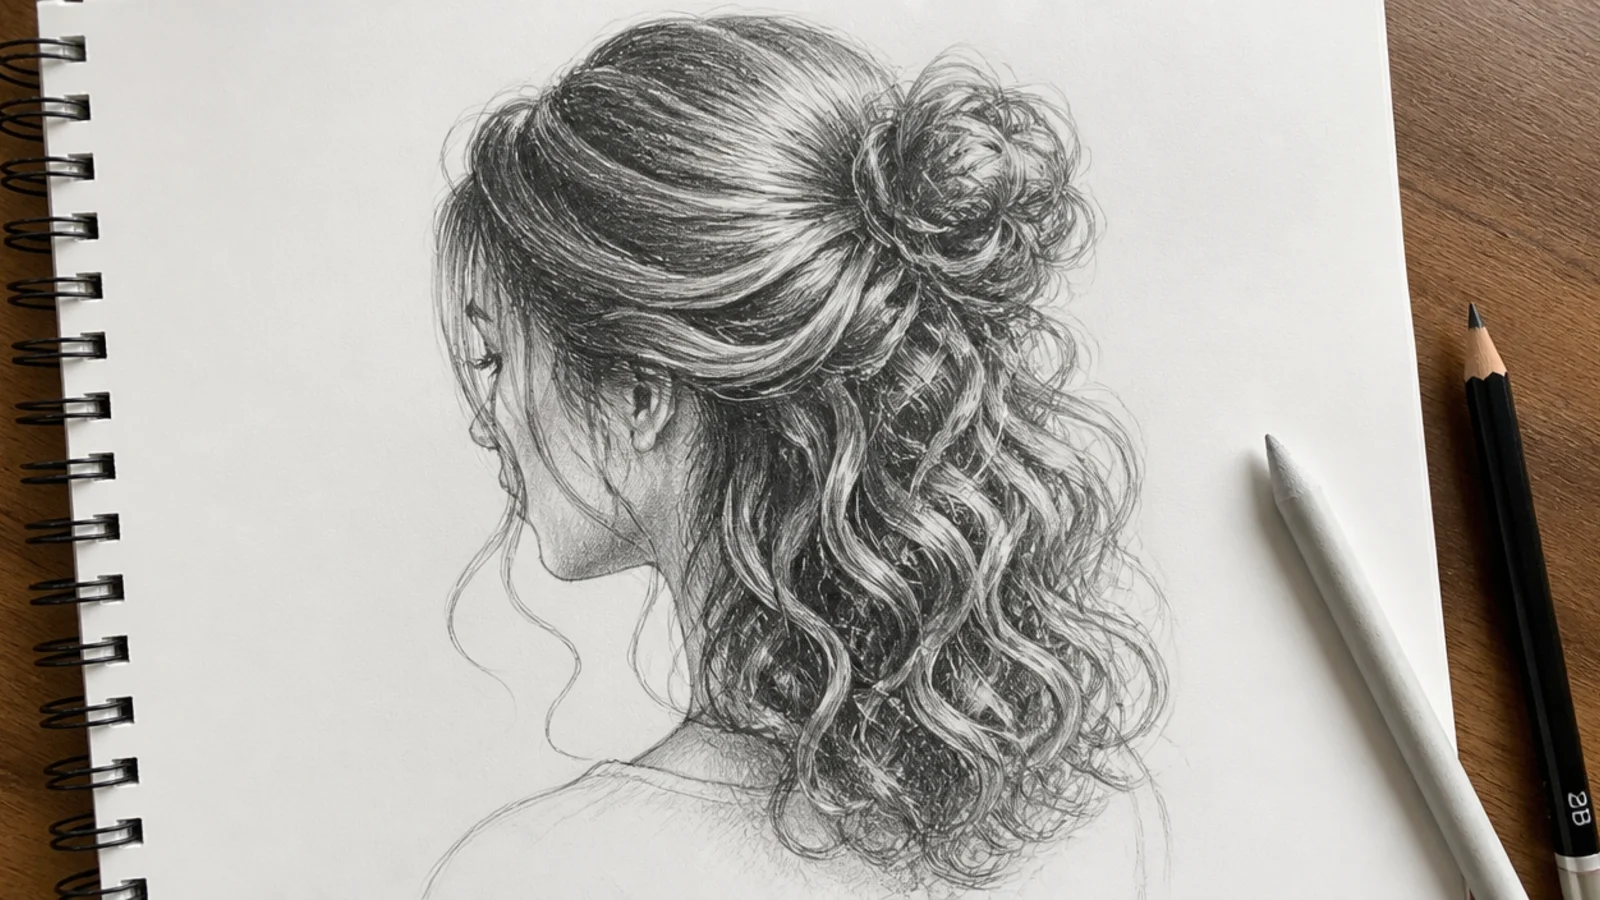
Two masses in one drawing, which is why it teaches so much. The gathered top section pulls every curl into stretched tension lines that converge on the elastic, while the loose bottom section falls back into full 3B spirals. Draw the convergence point first, mark it about 40mm above and behind the ear in three-quarter view, then radiate 2H guide lines toward it from the hairline. The bun itself is a sphere of compressed curls: 6B in the crevices, almost no white. The contrast between stretched top and springy bottom is what makes the pose read as styled rather than random.
Who it suits: Sketchbook portrait practice and drawing hair with tension.
Tip: Stretched curls near the elastic should be about half as tall as free ones; do not draw them the same.
11. Curly High Ponytail Sketch, Back View
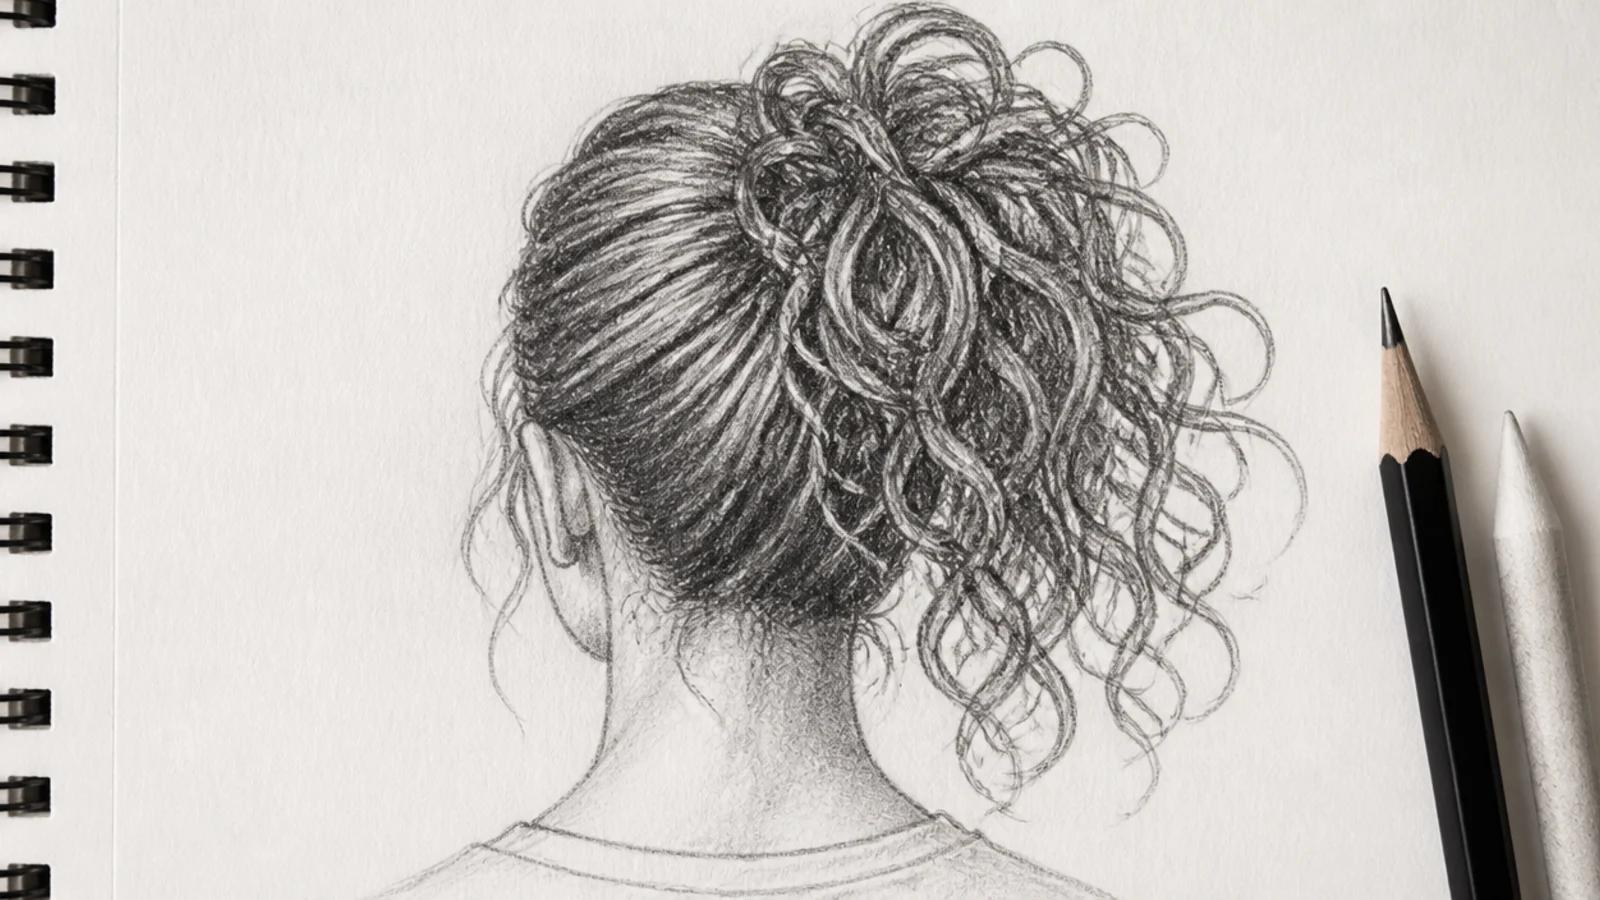
Back views are the biggest untouched sub-niche in hair drawing, and a high curly ponytail is the clearest one to start with. From behind you see the full radial pattern: every strand travels from its follicle to a single point at the crown, so the tension lines fan like a starburst. Lay those in 2H first and shade the valleys between them with 4B. Above the elastic, the curls explode outward in every direction, so the ponytail silhouette should be wider than it is long. Add a dark 6B pool right under the elastic where the mass casts shadow onto the nape.
Who it suits: Reference sheet building and anyone who only ever draws front views.
Tip: Curve the tension lines around the skull; drawing them straight flattens the head.
12. Wind-Blown Curly Hair Sketch in Motion
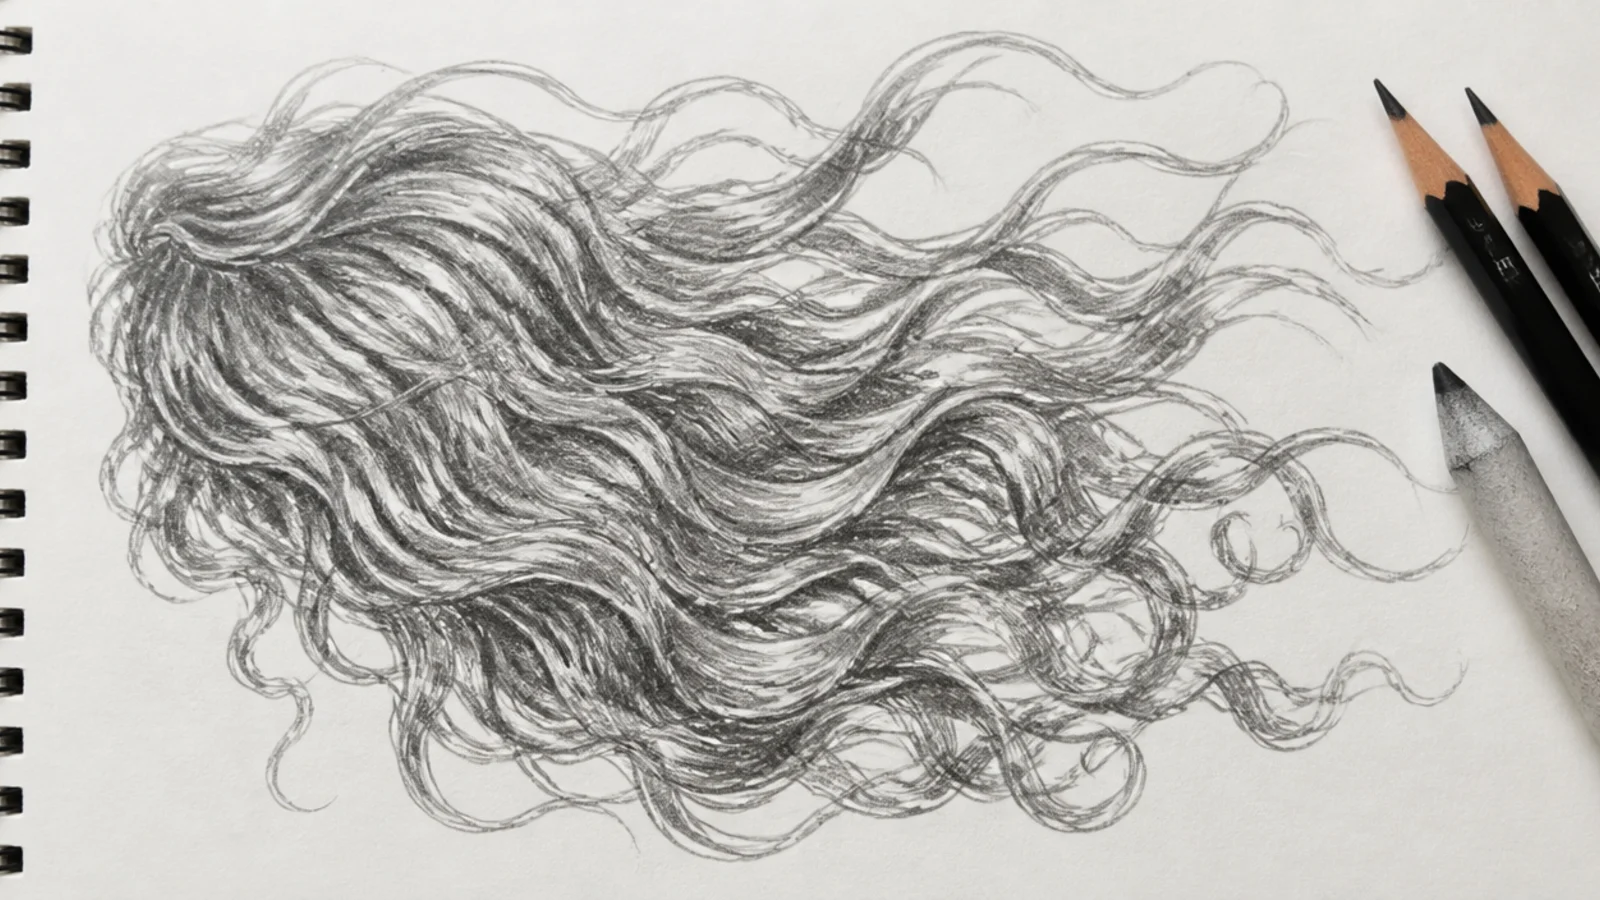
Wind stretches curls, and that single fact is what most motion drawings miss. A curl caught in a gust opens by around a third, so a 3B ringlet temporarily behaves like a 2C wave on the leading edge while the roots stay tight. Draw one dominant arc across the whole mass to set the wind direction, then hang the curls off it, tightest near the scalp and most stretched at the flying ends. Keep the trailing edge broken and airy: a few isolated strand groups separated from the mass sell the movement far better than a solid outline does. Shade with 2B so the mass stays light and lifted.
Who it suits: Illustration and cover art where the pose needs energy.
Tip: Leave real paper gaps inside the flying mass; solid hair never looks like it is moving.
13. Wet-Look Curly Hair Sketch with Clumped Ends
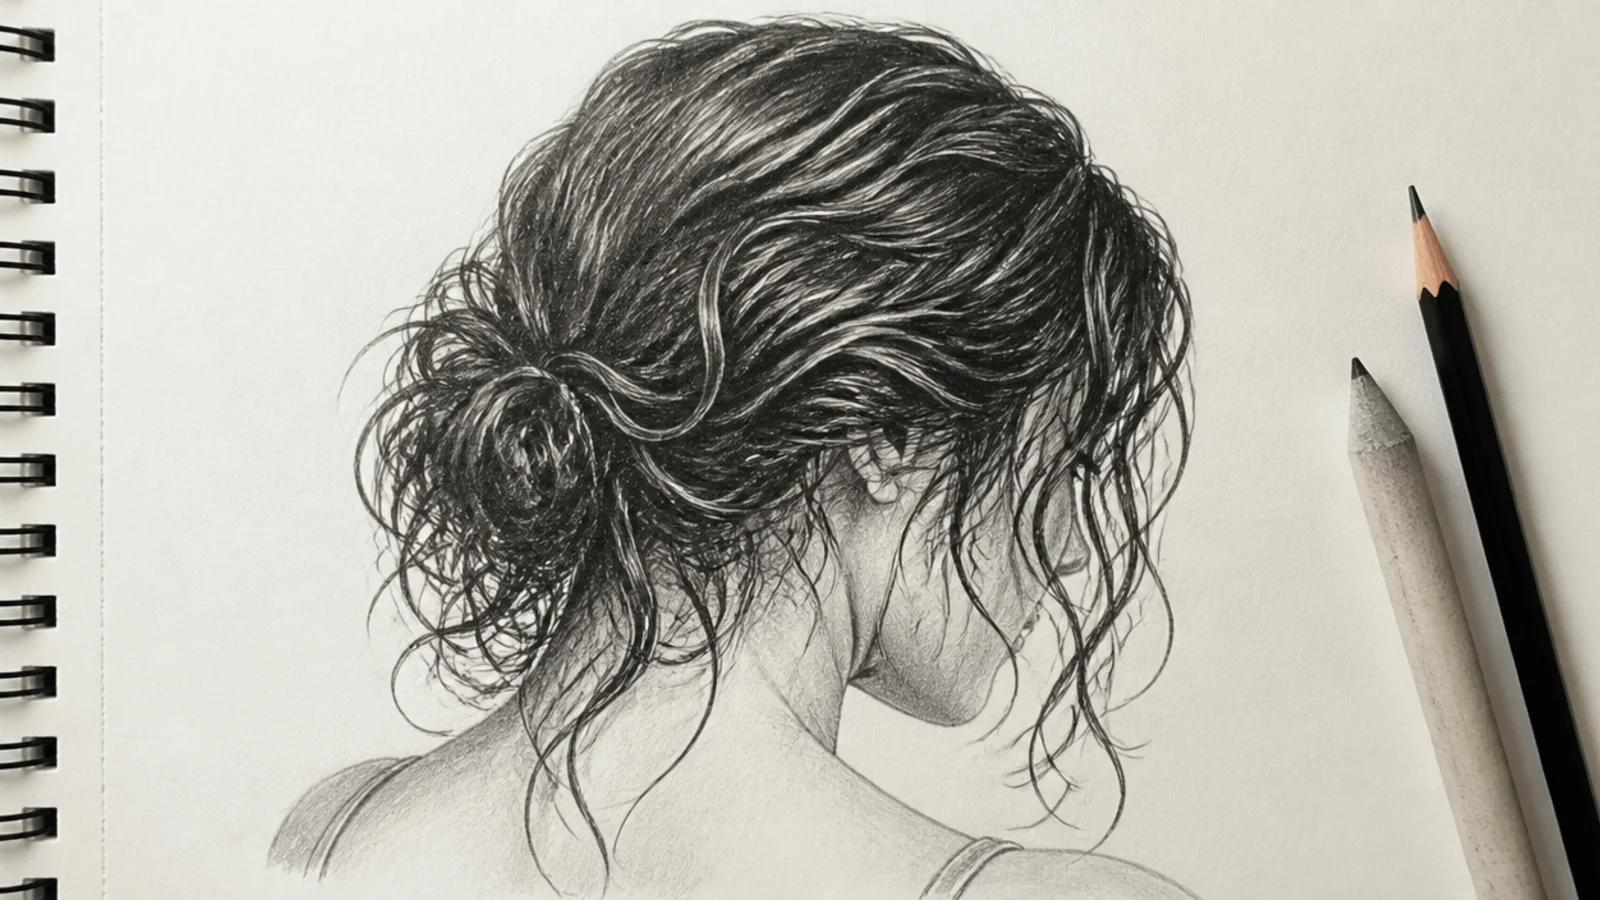
Wet curls do two things: they clump into fewer, fatter groups, and they gain a much harder highlight. So reduce your curl count by about half compared with the dry version, and taper every clump to a point at the tip where water gathers. Value range goes extreme. Lay 6B across most of the mass, then cut sharp white highlights back with a sharpened kneaded eraser edge, narrow and crisp rather than soft and broad. Those highlights should sit in a broken band following the curve of each clump. The gap between darkest dark and paper white is what makes it look wet.
Who it suits: High-contrast studies and anyone practicing highlight lifting.
Tip: Highlights on wet hair are narrow and hard edged; soft blended ones read as dry and shiny instead.
14. Curly Bob Sketch on a Heart-Shaped Face
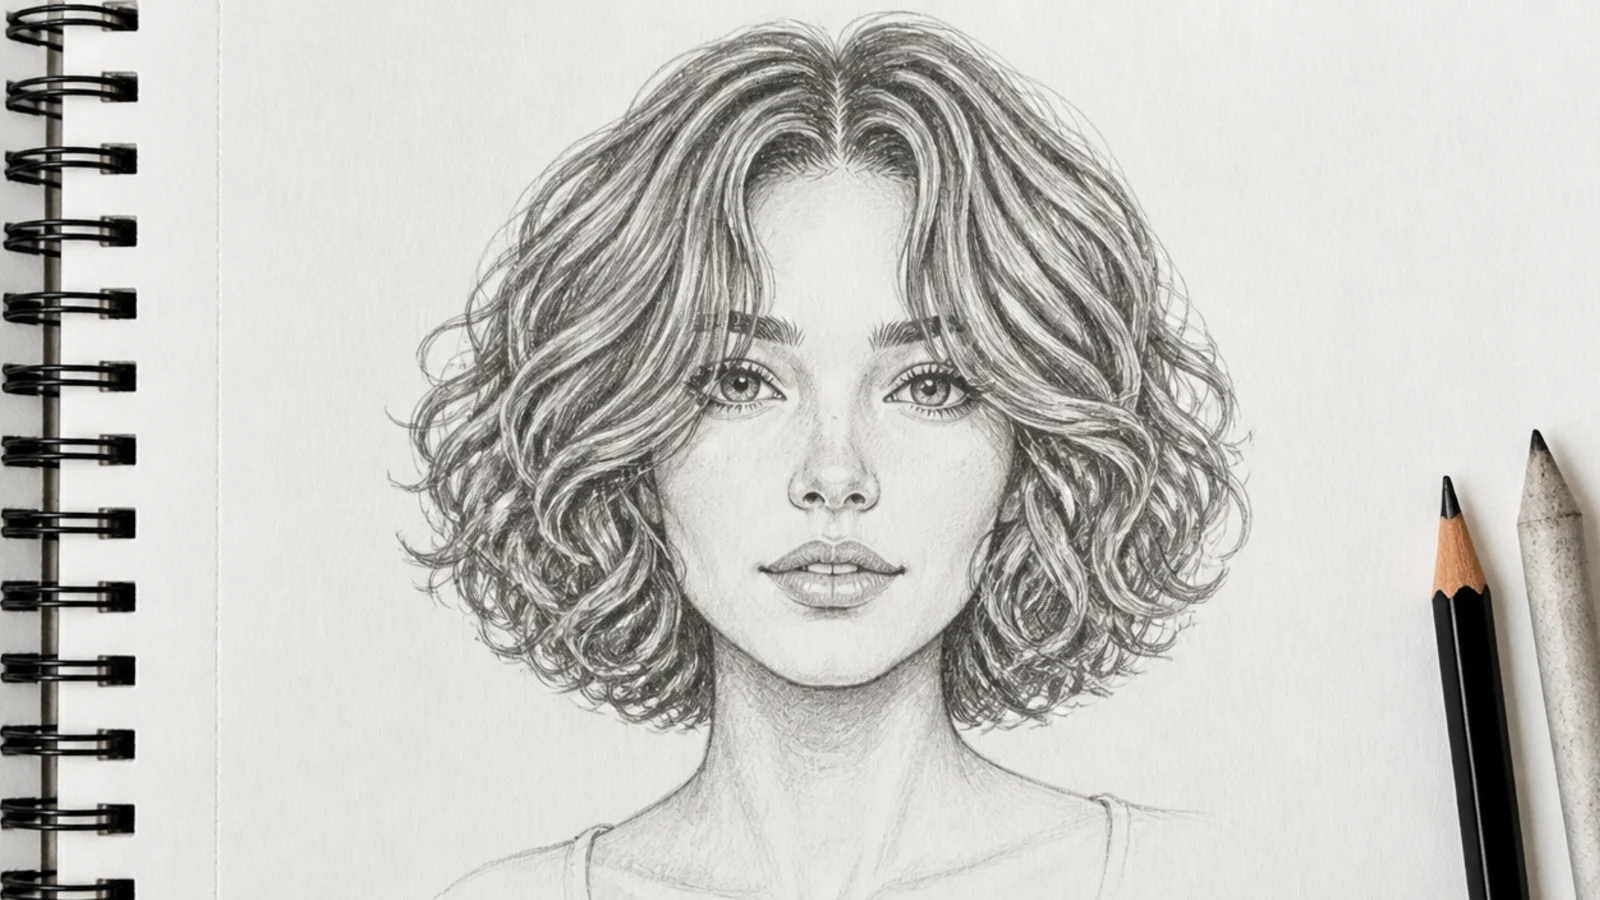
A jaw-length curly bob is the best study for how hair shape interacts with face shape. A heart-shaped face is wide at the temples and narrow at the chin, so the drawing works when the curl volume sits low, level with the jaw, balancing the narrow chin instead of adding width up top. Keep the crown relatively flat, about 12mm off the skull, and let the mass swell to 45mm at the jaw. 3A to 3B spirals suit this length. Shade the underside of the bob heavily with 4B so it appears to lift away from the neck rather than sit on it.
Who it suits: Portrait artists learning to match a cut to a face shape.
Tip: Volume at the temples on a heart face makes the chin look pointier; keep the width low.
15. Curly Hair Sketch with Curtain Bangs
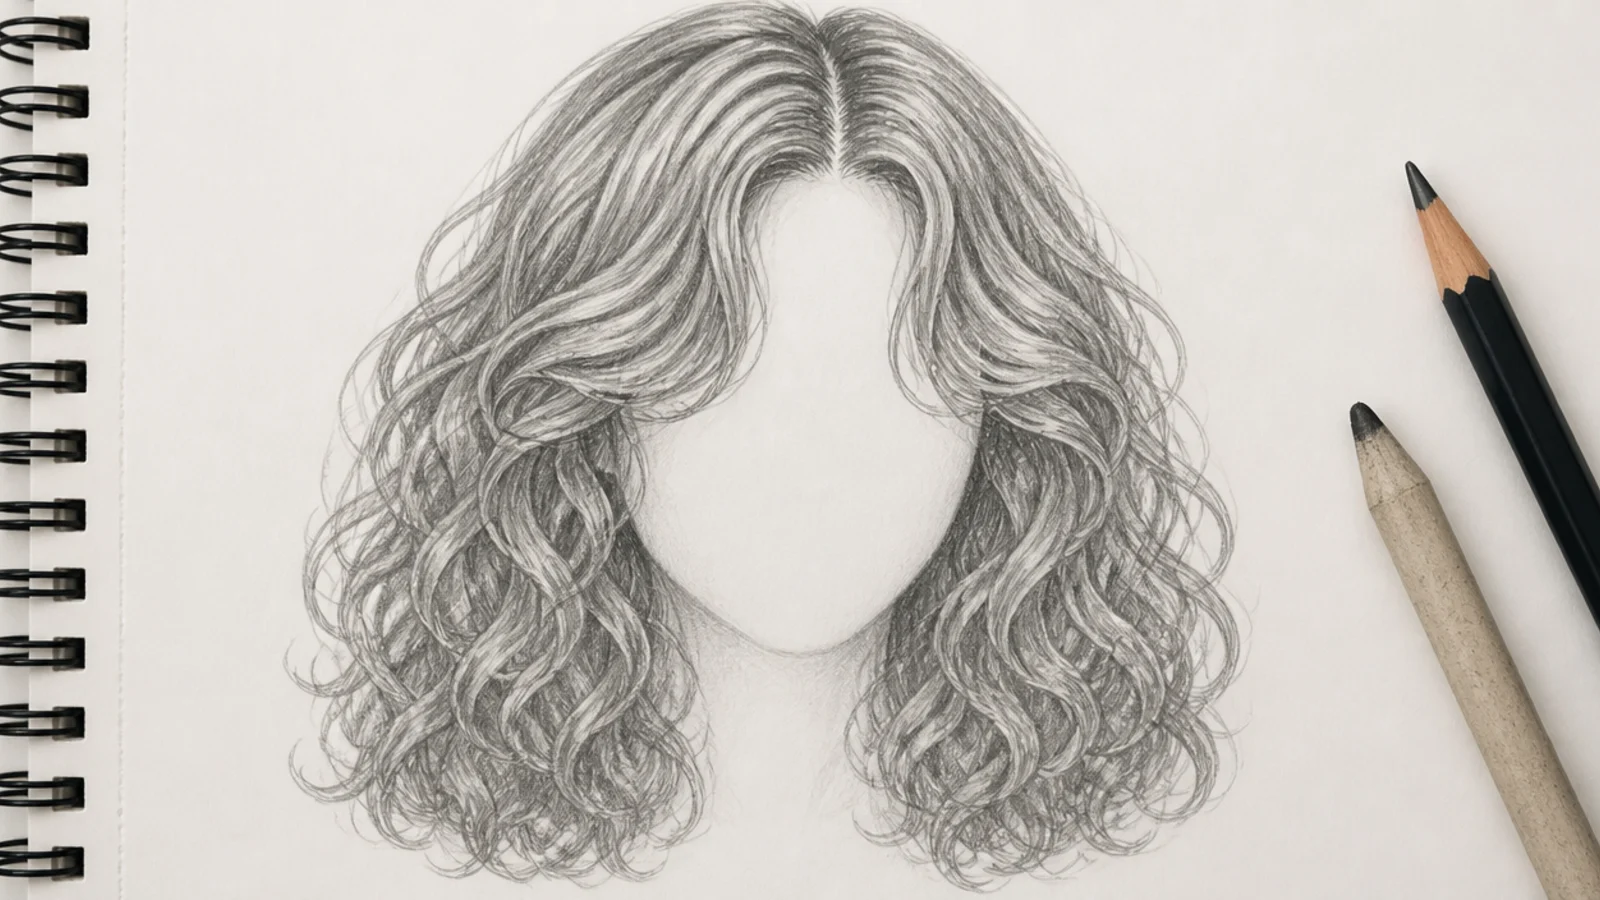
Curtain bangs on curly hair split at the center and sweep outward, and the drawing challenge is the transition where the bang curls meet the side mass. Start the part at the center of the forehead, then run each side out and down so the shortest curls land around the eyebrow and the longest reach the cheekbone. Because bangs are cut shorter, they curl tighter and spring higher than the length behind them, so draw them with guides about 30 percent smaller. Shade a soft 2B shadow on the forehead directly beneath the bang so it sits forward of the face rather than glued to it.
Who it suits: Anyone drawing modern haircuts and face framing.
Tip: The cast shadow on the forehead is what separates bangs from the skull; never skip it.
16. Male Curly Top Sketch with a Faded Hairline
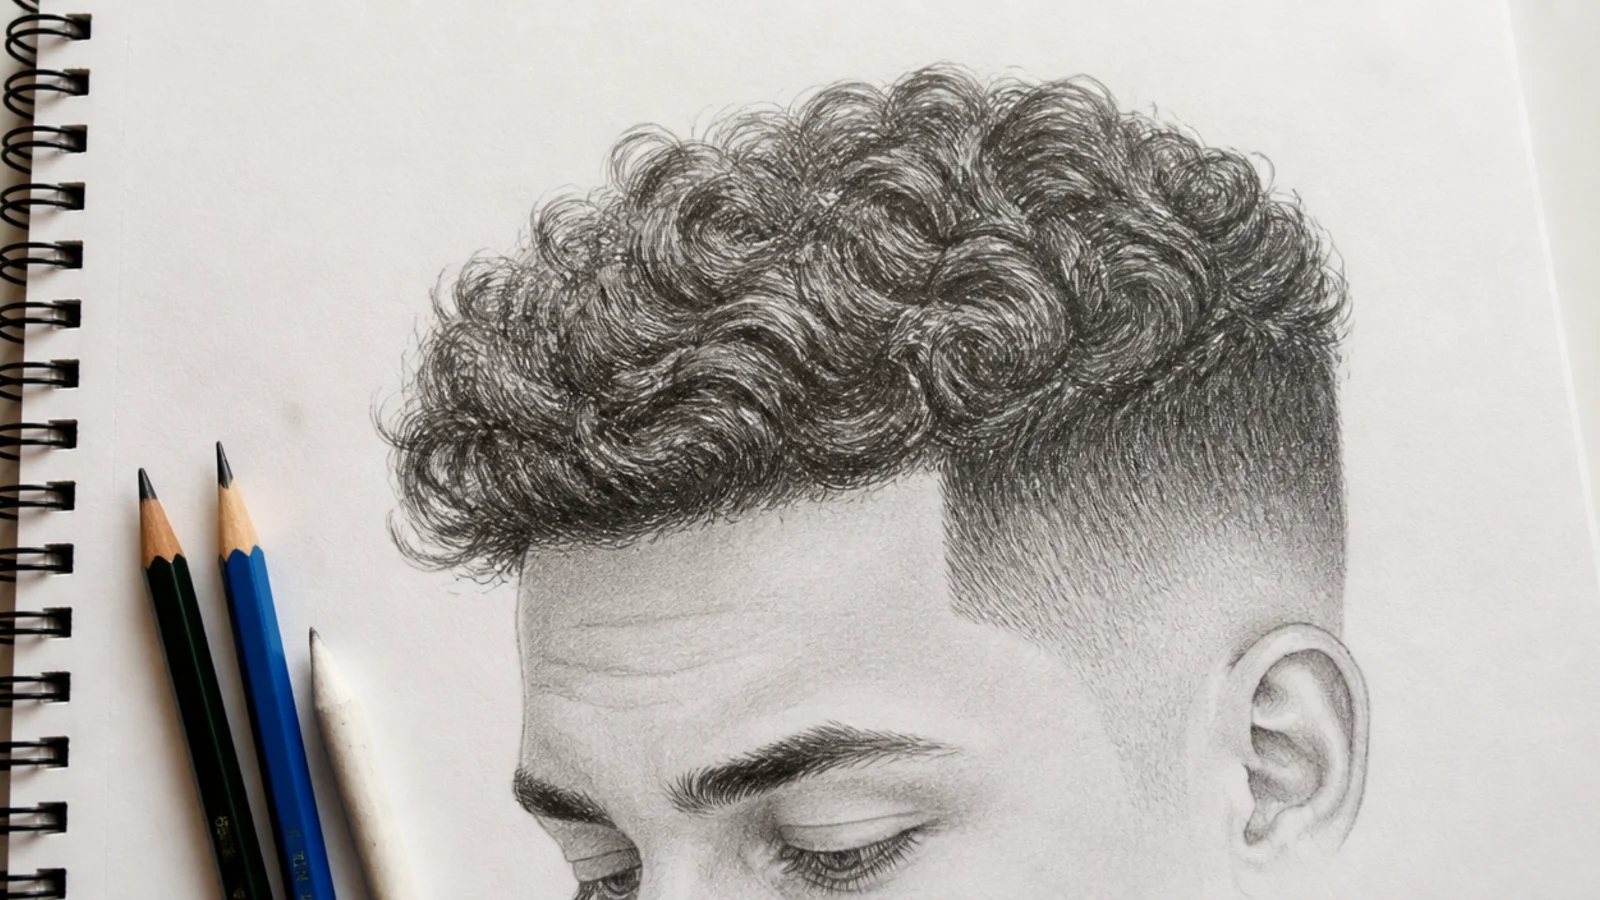
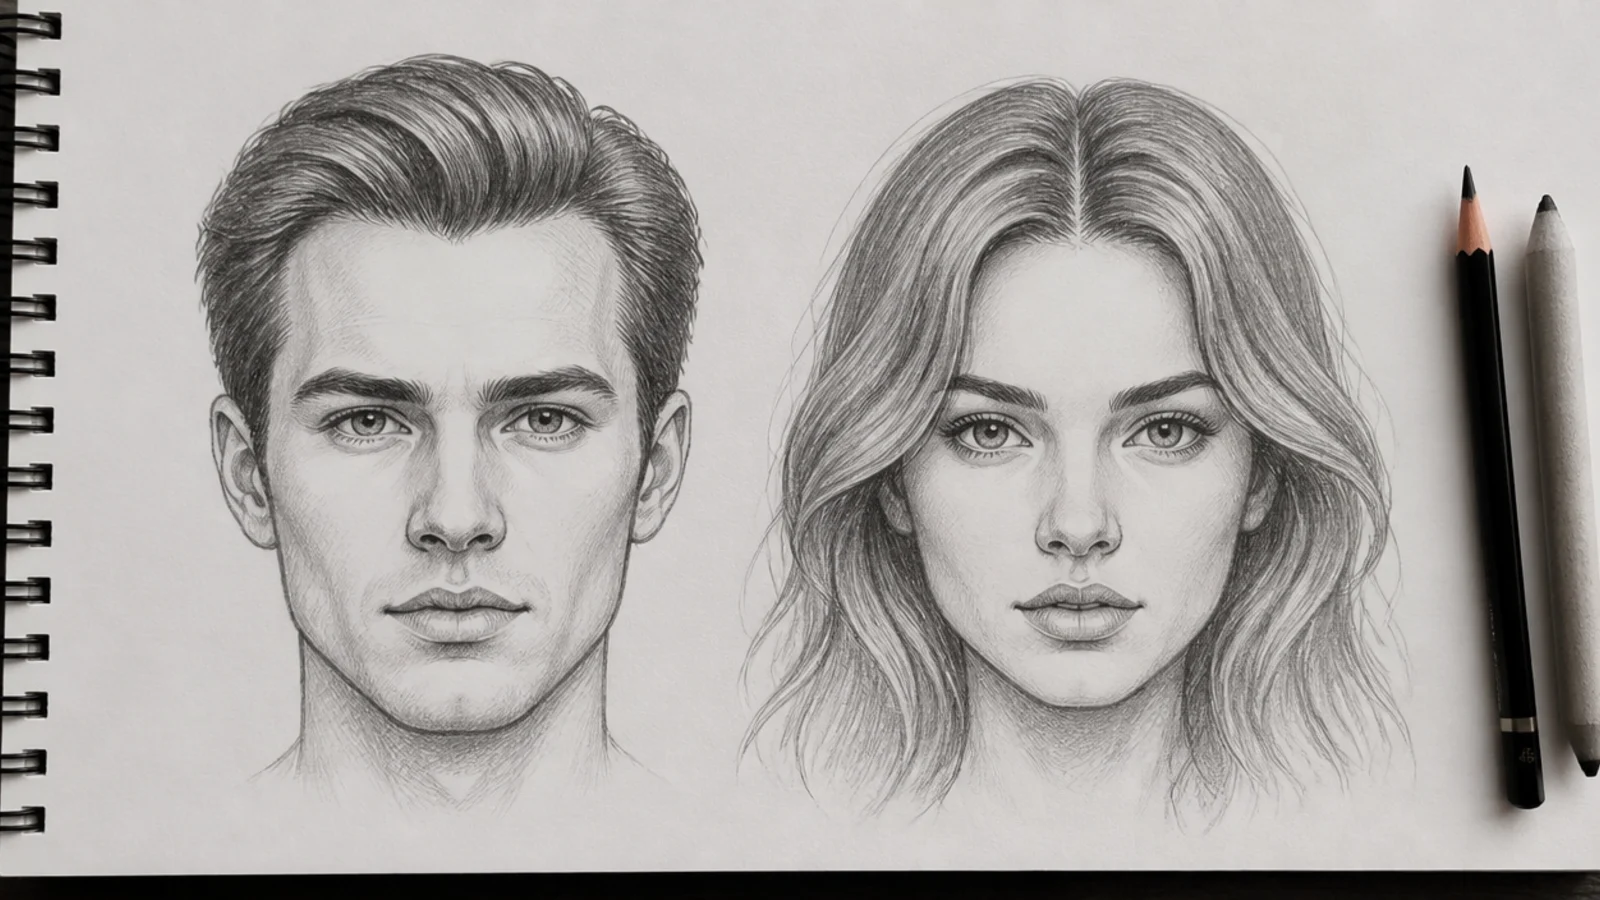
Short curls on top, faded tight at the sides, and a hairline that sits higher and squarer than a female one. That hairline shape is what makes the drawing read as male, more than the length does: mark the temples receding slightly into an open M rather than a rounded curve. The curly top is a compact mass around 40mm deep sitting on a fade that goes from 4B at the top of the taper to bare paper at the ear. Keep the curls on top irregular in size, and let the silhouette break upward with a few flicks so it does not look like a molded cap. More angles in male hair sketch.
Who it suits: Character artists and anyone drawing men's hair for the first time.
Tip: Set the hairline about a finger's width higher than you would for a female portrait.
17. Curly Hair Sketch on a Dark Background, Light Curls Out
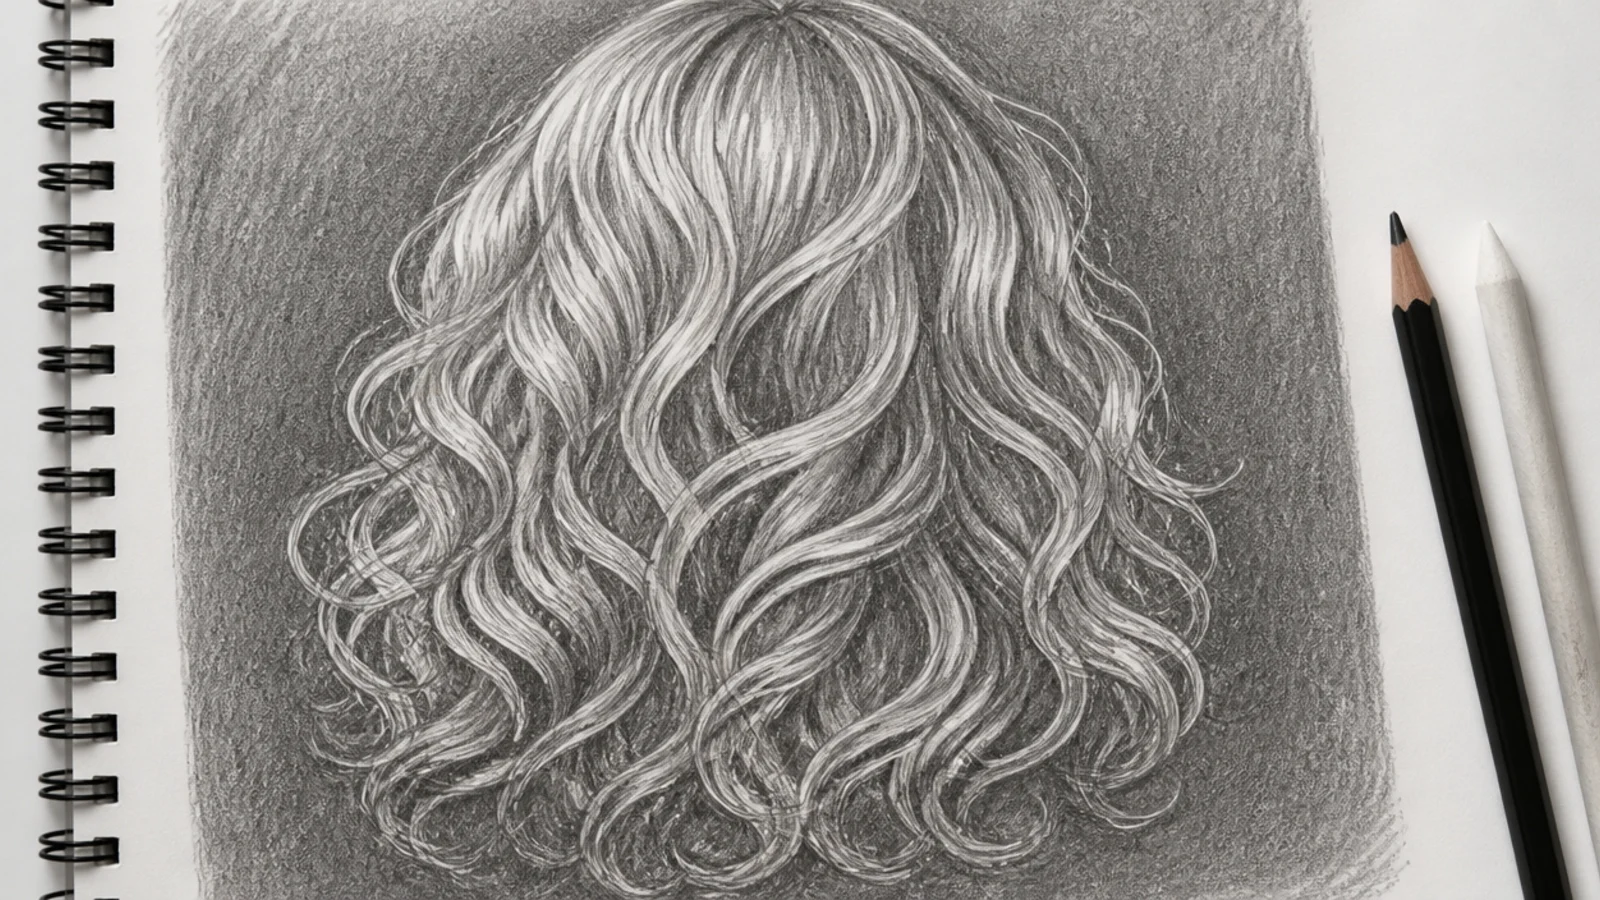
Reverse the whole process. Lay a flat 6B tone across the paper with a blending stump until the sheet is an even dark gray, then pull the curls out with a kneaded eraser shaped to a point. You are drawing light instead of shadow, which forces you to think in masses rather than lines, and it fixes the outlining habit faster than any other exercise. Work the biggest lit shapes first, then refine edges by pushing 6B back in with a sharp pencil. The stray flyaway hairs at the silhouette come out last, lifted as single hairline strokes against the dark.
Who it suits: Anyone stuck outlining every curl instead of seeing value.
Tip: Knead the eraser into a chisel edge; a blob lifts mush, an edge lifts a curl.
18. Blonde Curly Hair Sketch, High-Key Value Range
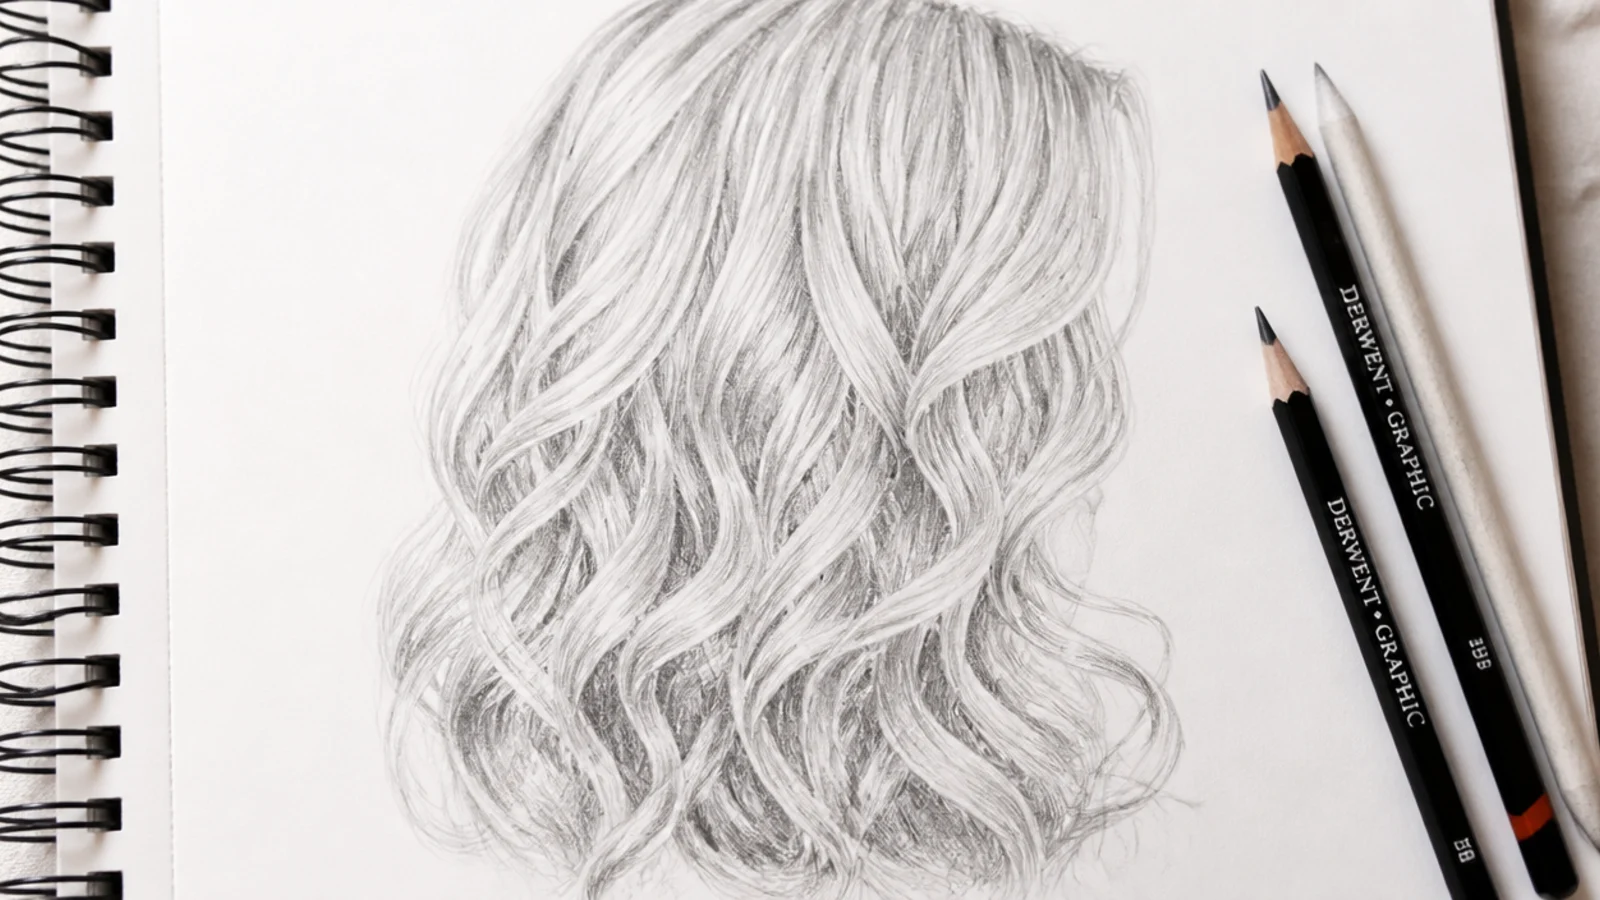
Almost every tutorial teaches dark hair, so blonde catches people out: the value range compresses and inverts, sitting between bare paper and about 2B, with 4B used only in the deepest core shadows near the nape. If you shade blonde curls at the same weight as brown, they read brunette. Keep at least 40 percent of the mass as untouched paper, use 2H for the pale mid tones the way you would use 4B on dark hair, and rely on edge quality rather than darkness to describe each curl. The silhouette does most of the storytelling because the interior has so little contrast.
Who it suits: Anyone whose blonde hair drawings keep coming out gray.
Tip: Cap your darkest value at 2B except for three or four small core shadows.
19. Silver Gray Curly Hair Sketch for an Older Portrait
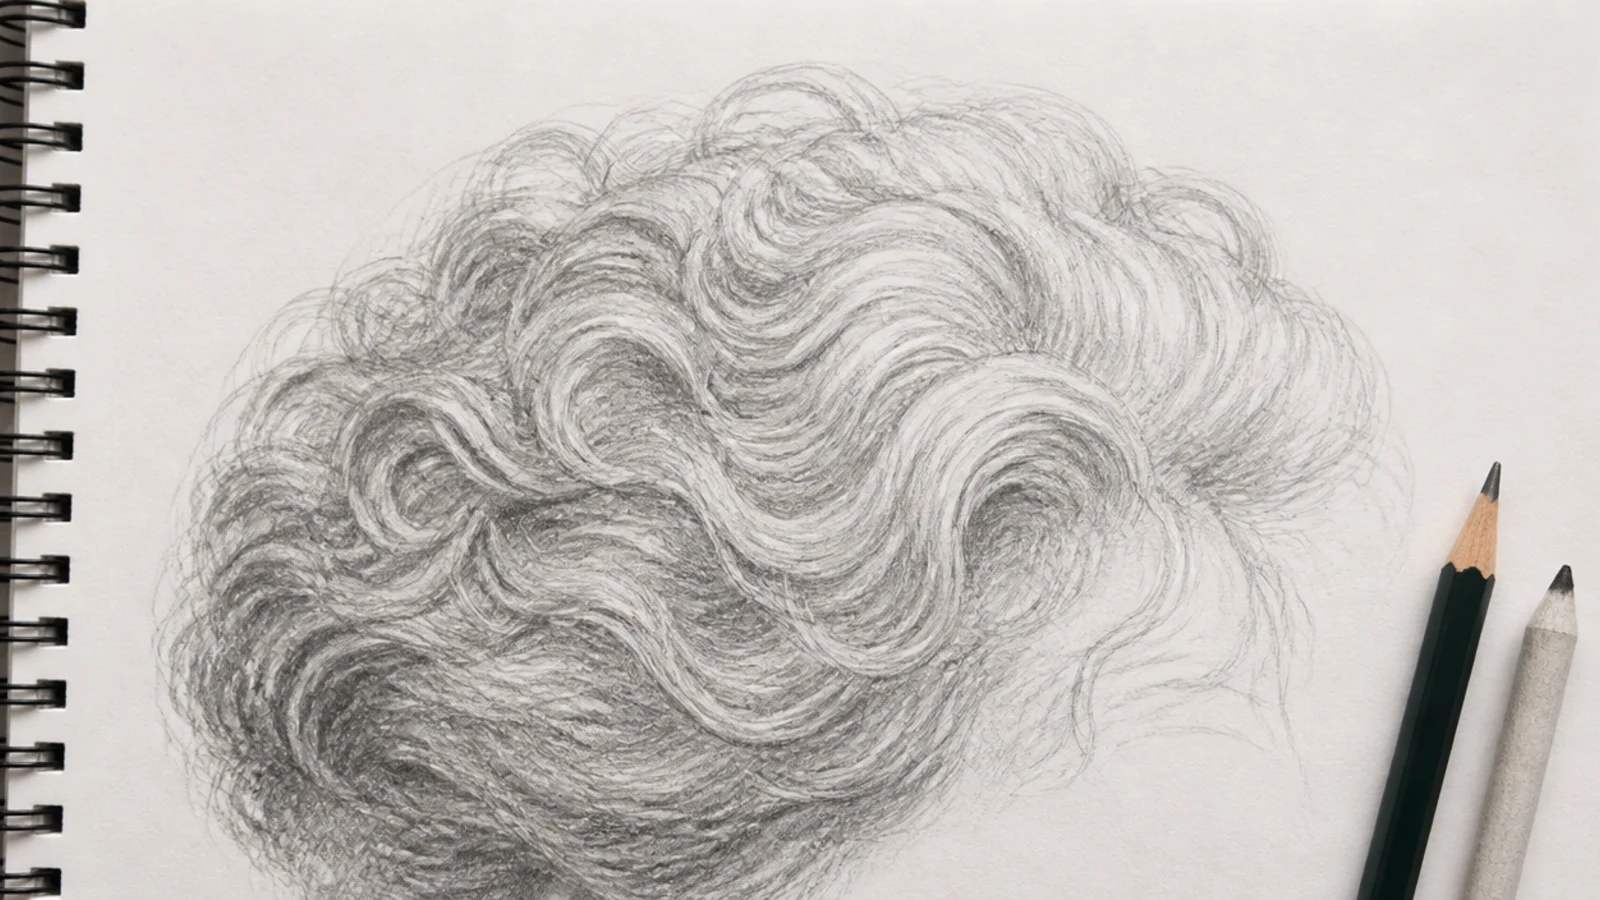
Gray curls behave differently from young hair: individual strands are coarser and more wiry, so a few of them genuinely do stand out from the mass, which is the one case where drawing single hairs is correct. Keep the overall mass light, mostly HB with 2B shadows, then add ten to fifteen individual wiry strands that break the silhouette in slightly wrong directions. Curl pattern loosens with age too, so pull the spirals about 20 percent wider than you would for the same person at thirty. A soft 4B cast shadow on the neck keeps the light mass from floating off the head.
Who it suits: Portrait artists drawing older subjects with real character.
Tip: Draw the rogue strands with a hard 2H point so they stay thin and wiry, never soft.
20. Single-Line Monoline Curly Hair Sketch
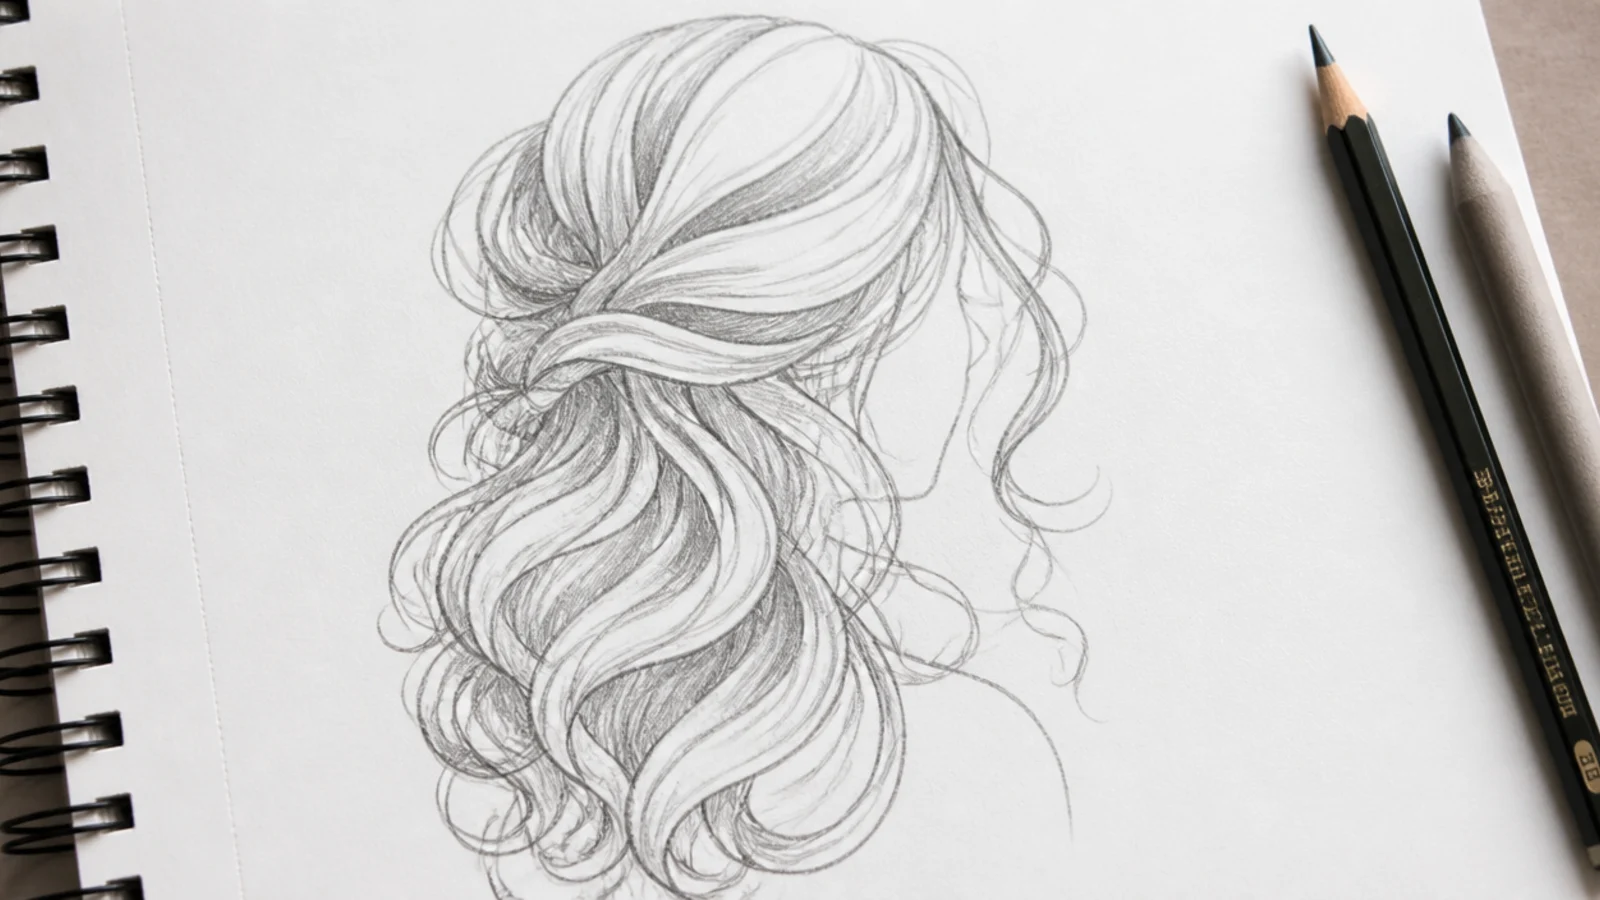
One continuous line, even weight, no shading, no lift. It is the fastest curly sketch you can make and the most demanding, because with value stripped out the curl rhythm has to carry the whole drawing. Plan the route before you touch the paper: enter at the part, spiral down one side, loop across the shoulder, come back up the other side and exit at the temple. Keep every loop a slightly different size, and let a few loops overlap the face outline so the hair reads as sitting in front. Fineliner or a 0.5 mechanical pencil at 2B works best. Great as a warm-up before a full drawing.
Who it suits: Minimalist illustration, tattoo flash and quick sketchbook pages.
Tip: Do it in five seconds, not fifty; hesitation shows as wobble in a monoline.
How to Start a Curly Hair Sketch: Silhouette Before Strands
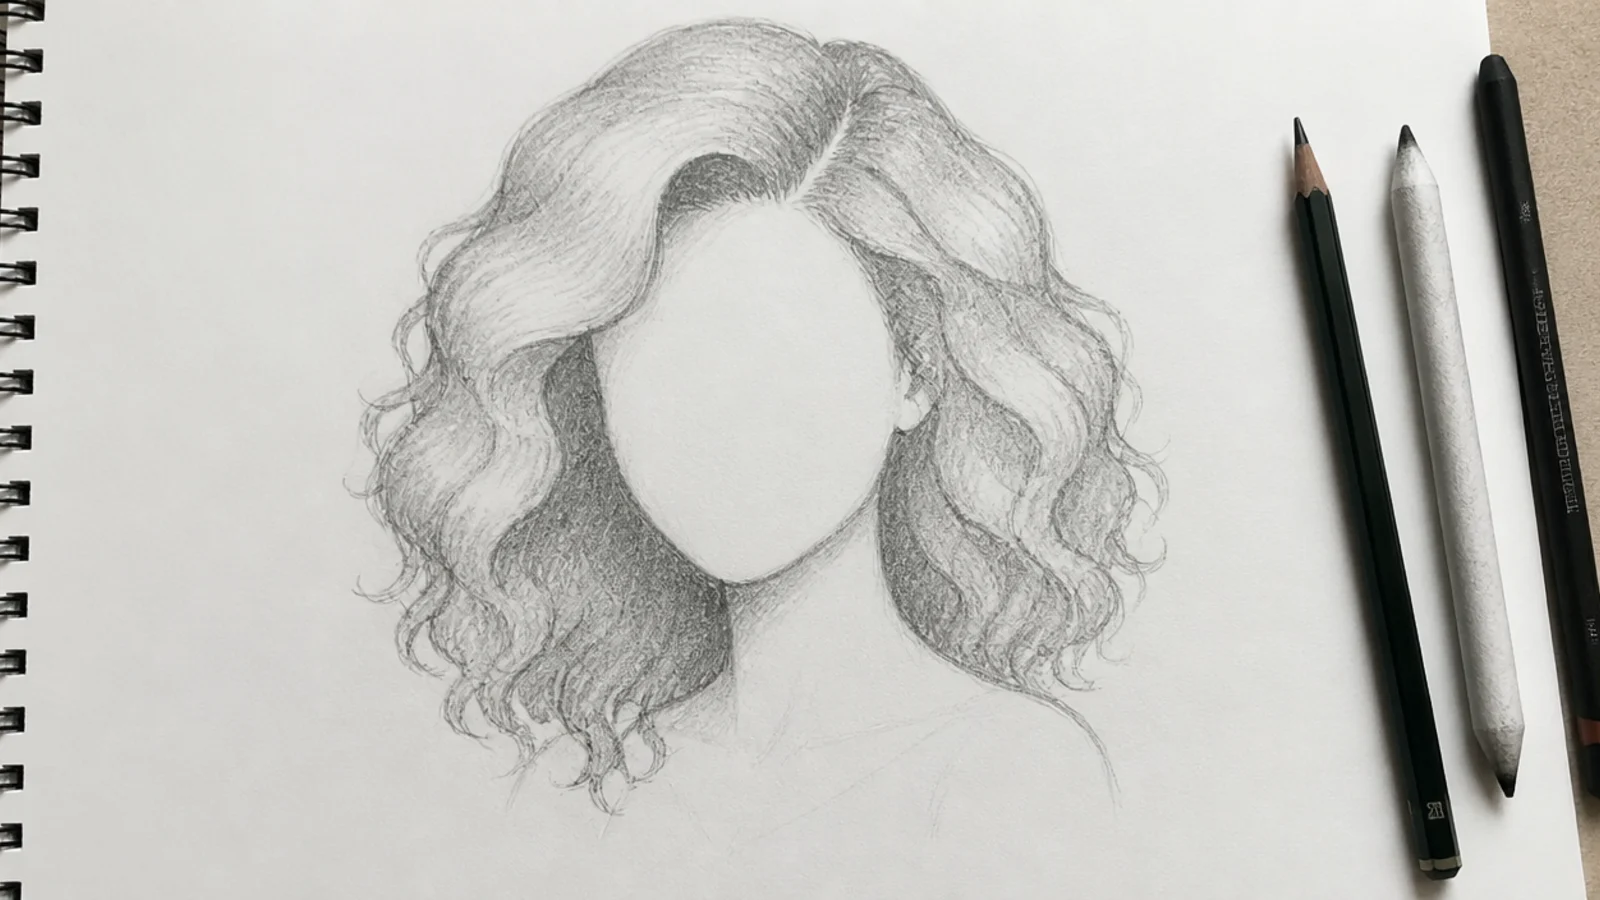
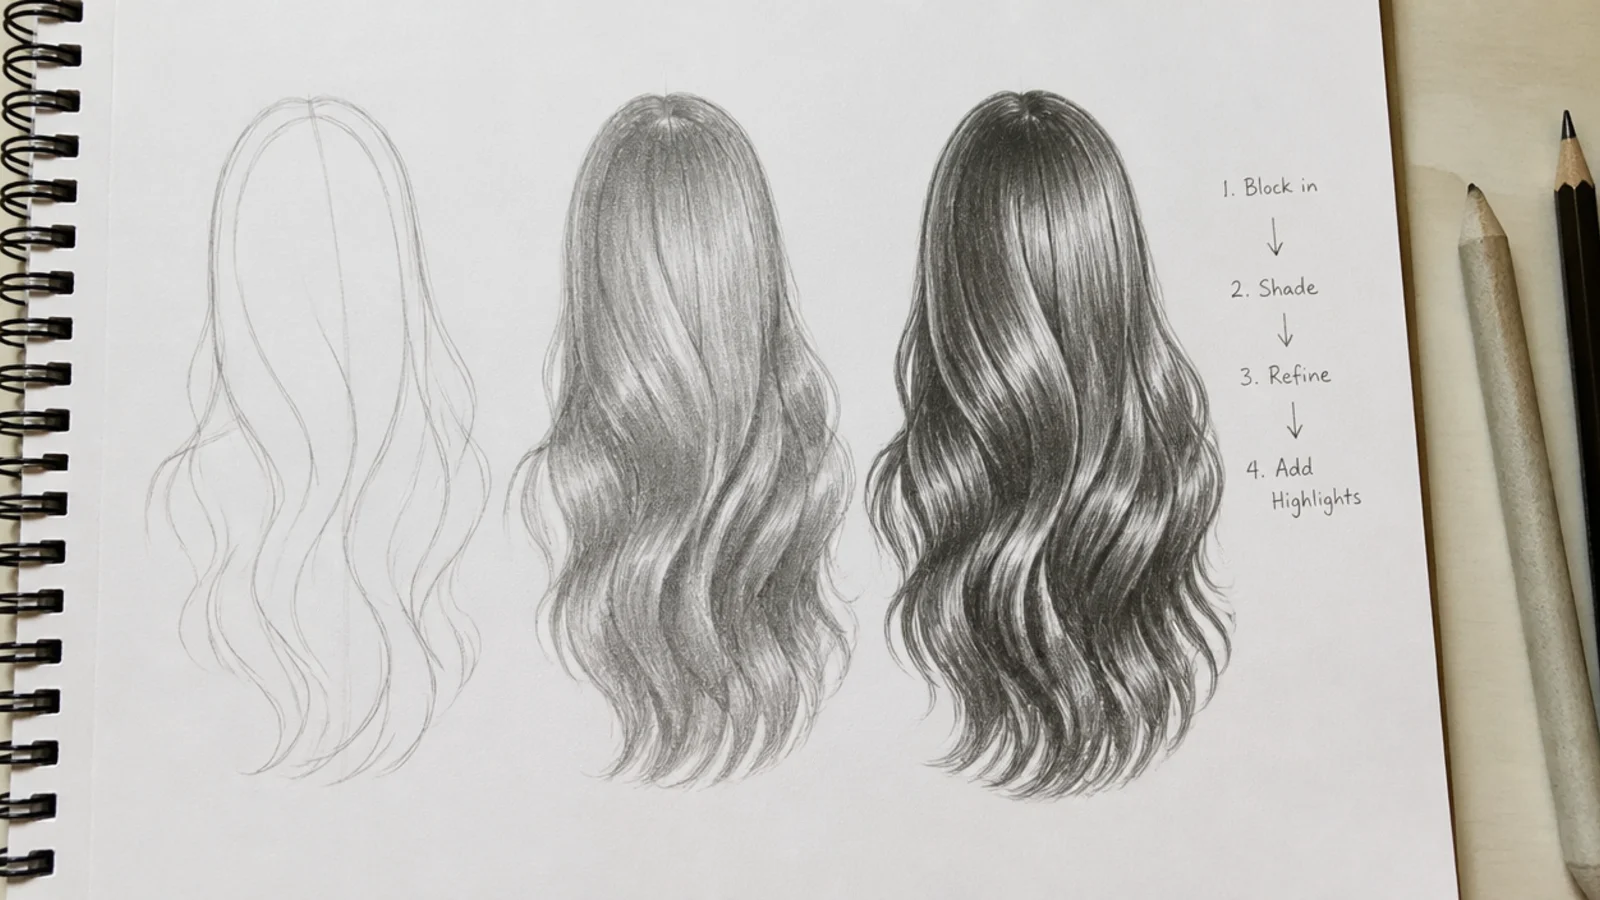
Drawing individual strands too early is the number one beginner mistake, and with curly hair it is fatal, because curls have more volume than any other texture and volume is a shape decision, not a line decision. Start with the skull, then draw the hair mass as one closed silhouette floating around it, deliberately leaving a gap between scalp and outline. For loose 2A to 3A curls that gap runs about 10 to 20mm at sketch scale; for 3C to 4C it runs 30 to 50mm. Beginners almost always draw it too tight, which is why their curly hair ends up looking like a swim cap with squiggles on it. Once the mass is blocked, mark the crown, since hair grows in sections radiating out from it, and every flow line in the drawing has to obey that origin. Draw three to five flow lines from the crown through the mass to the ends. Only then does a single curl get drawn. The full step order is in the hair sketch tutorial.
The Zig-Zag Guideline Method, Sized by Curl Pattern
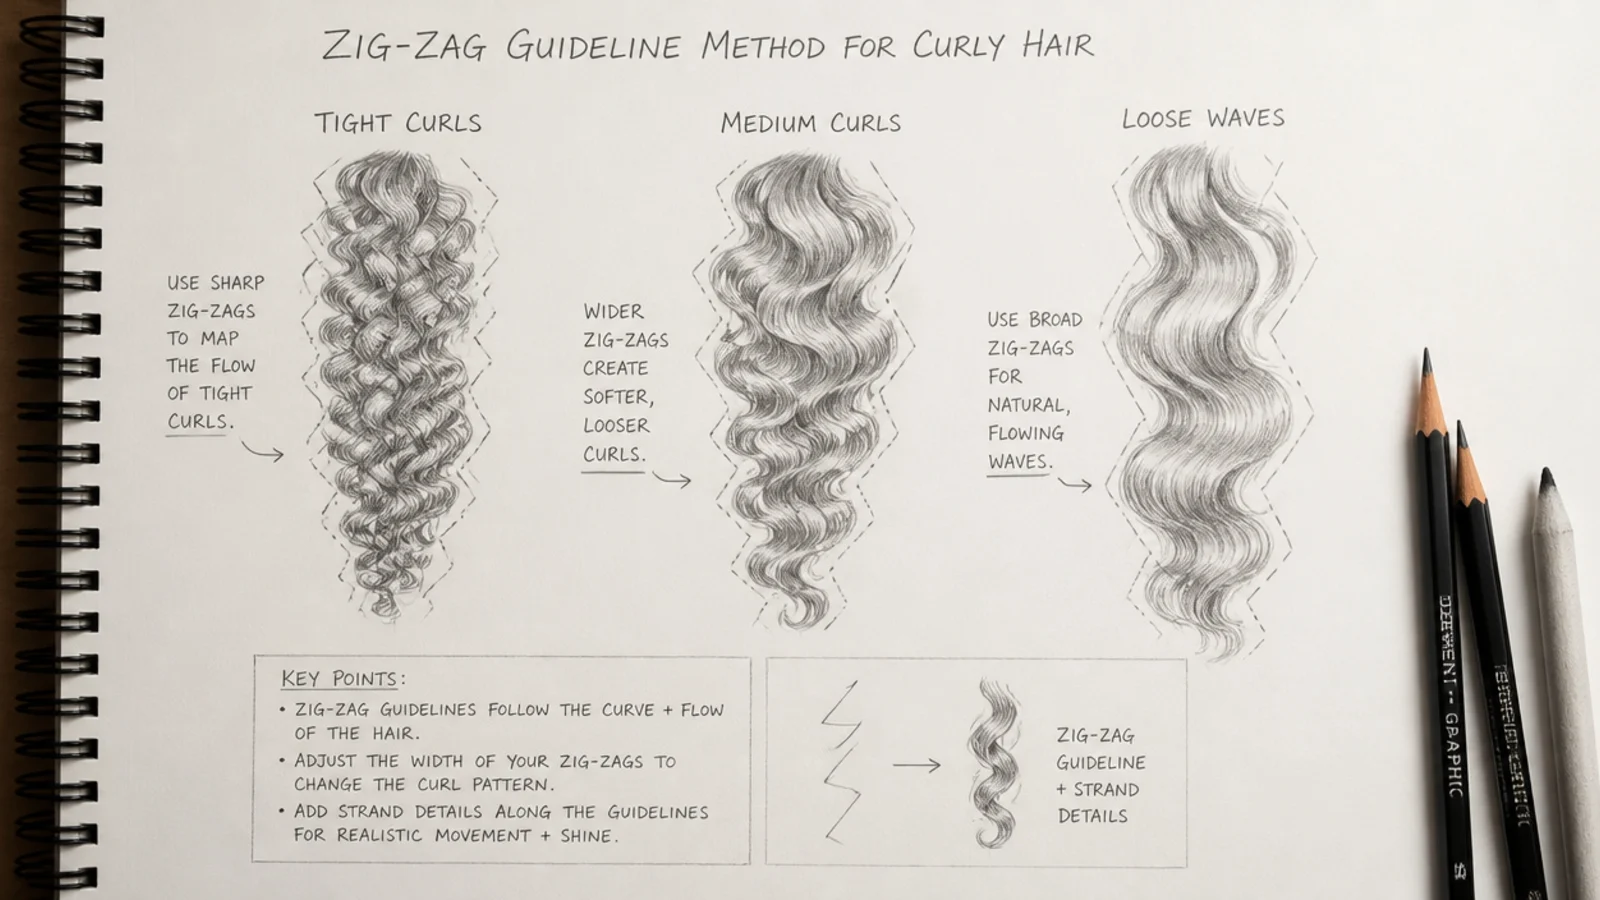
The most useful curly hair technique that no one scales properly: draw a light 2H zig-zag down the path of a strand group, then wrap the actual curl around it. The bigger the zig-zag, the bigger and easier the curl. What competitors leave out is that the zig-zag size is the curl pattern. Peaks 25mm apart give you 2A beach waves; 18mm gives 2B; 12mm gives 2C; 8mm gives 3B ringlets; 4mm gives 3C. Below that, at 4A and tighter, stop using zig-zags entirely and switch to clustered circular marks, because a coil that tight is texture rather than line. Two rules keep it from looking mechanical. Stagger the peaks between neighboring strand groups by roughly half a wavelength so the waves never line up in rows, and let the zig-zag compress toward the ends where the strand carries less weight. Erase the guides once the curls are in, or lay them so lightly they vanish under shading. This works identically on paper and on a tablet layer set to 20 percent opacity.
Shading Curly Hair for Volume: Ribbon Logic and Dark Spaces
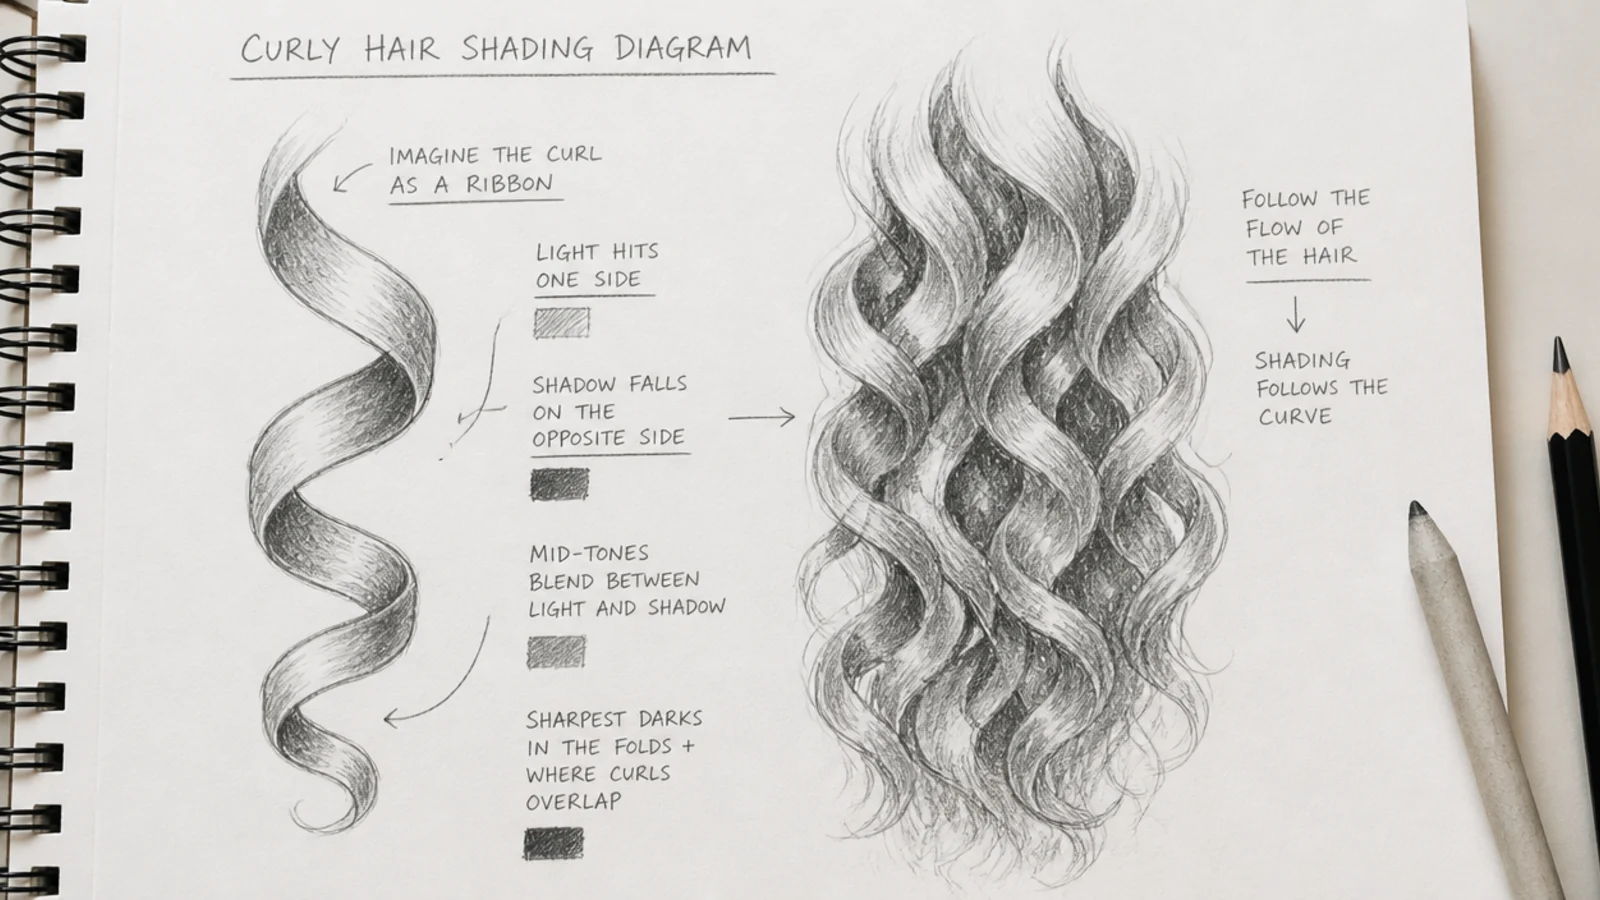
Draw a curl as a ribbon, an S or a spiral with light on one side and shadow on the other, and never as an outlined coil. A ribbon twisting around an invisible cylinder shows you its outer face, then narrows to an edge at the turn, then opens onto its inner face, which faces away from the light and goes dark. That alternation, light face, pinch, dark face, pinch, is the entire illusion of a curl. The second half of the job is the dark spaces: the tunnels between curl clumps where almost no light reaches. Push 6B into those, and the clumps in front separate themselves without any outline at all. Work light to dark, keep every stroke traveling in the direction the hair grows, and identify your light source before the first mid tone goes down. Leave paper white for the highlight band across the crown, or lift it back with a kneaded eraser if you shaded over it. Shading order applies to any texture, straight included, as covered in the hair sketch hub.
Pencils, Paper and Blending Tools for Curly Hair Sketches
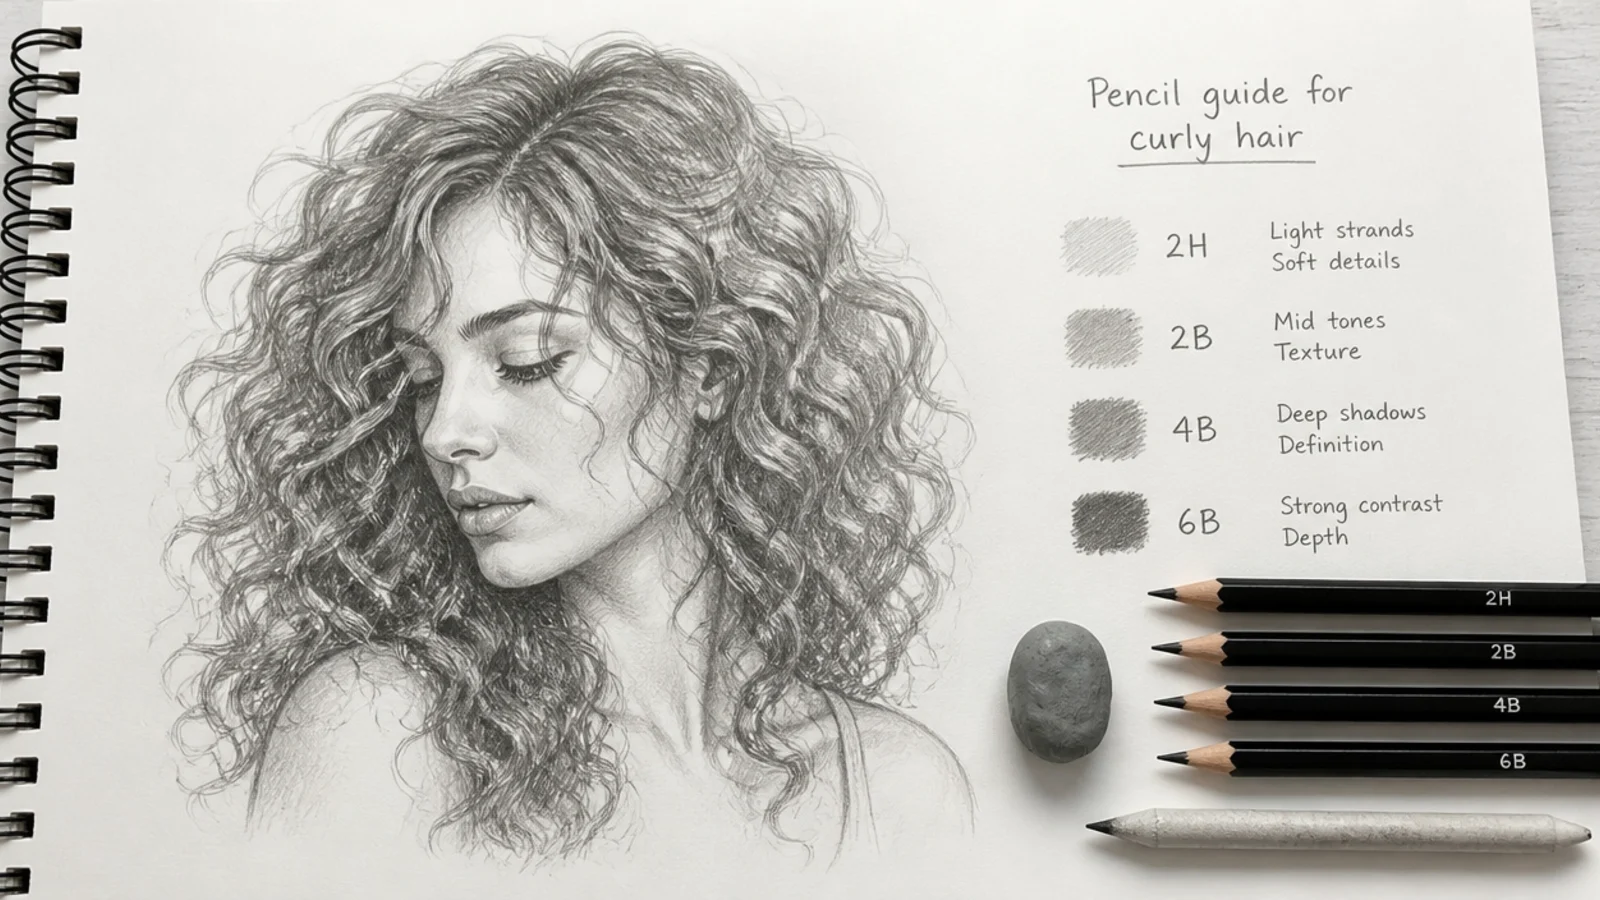
Four pencils cover everything. 2H lays guidelines and the initial silhouette light enough to erase. 2B handles mid shadows and the bulk of a light-haired drawing. 4B builds the main shadow structure on brown and black hair. 6B goes only into the darkest cores, the tunnels between clumps and the shadow under the overhang. Map grade to hair color, not just to hair type: blonde curls top out around 2B, brown sits at 4B, and 4C black hair lives at 6B across most of the mass. A kneaded eraser shaped to a chisel edge lifts highlights and is the only eraser that pulls a clean curl out of a dark field. A blending stump is useful for laying flat background tone but should be kept away from the curls themselves, since over-blending kills the crisp value breaks that make curls read. Smooth Bristol suits tight coils and heavy graphite; lightly toothed drawing paper around 160gsm suits loose waves. On a tablet, a hard round brush with pressure-linked opacity matches 2B closely.
Common Curly Hair Sketch Mistakes and How to Fix Them
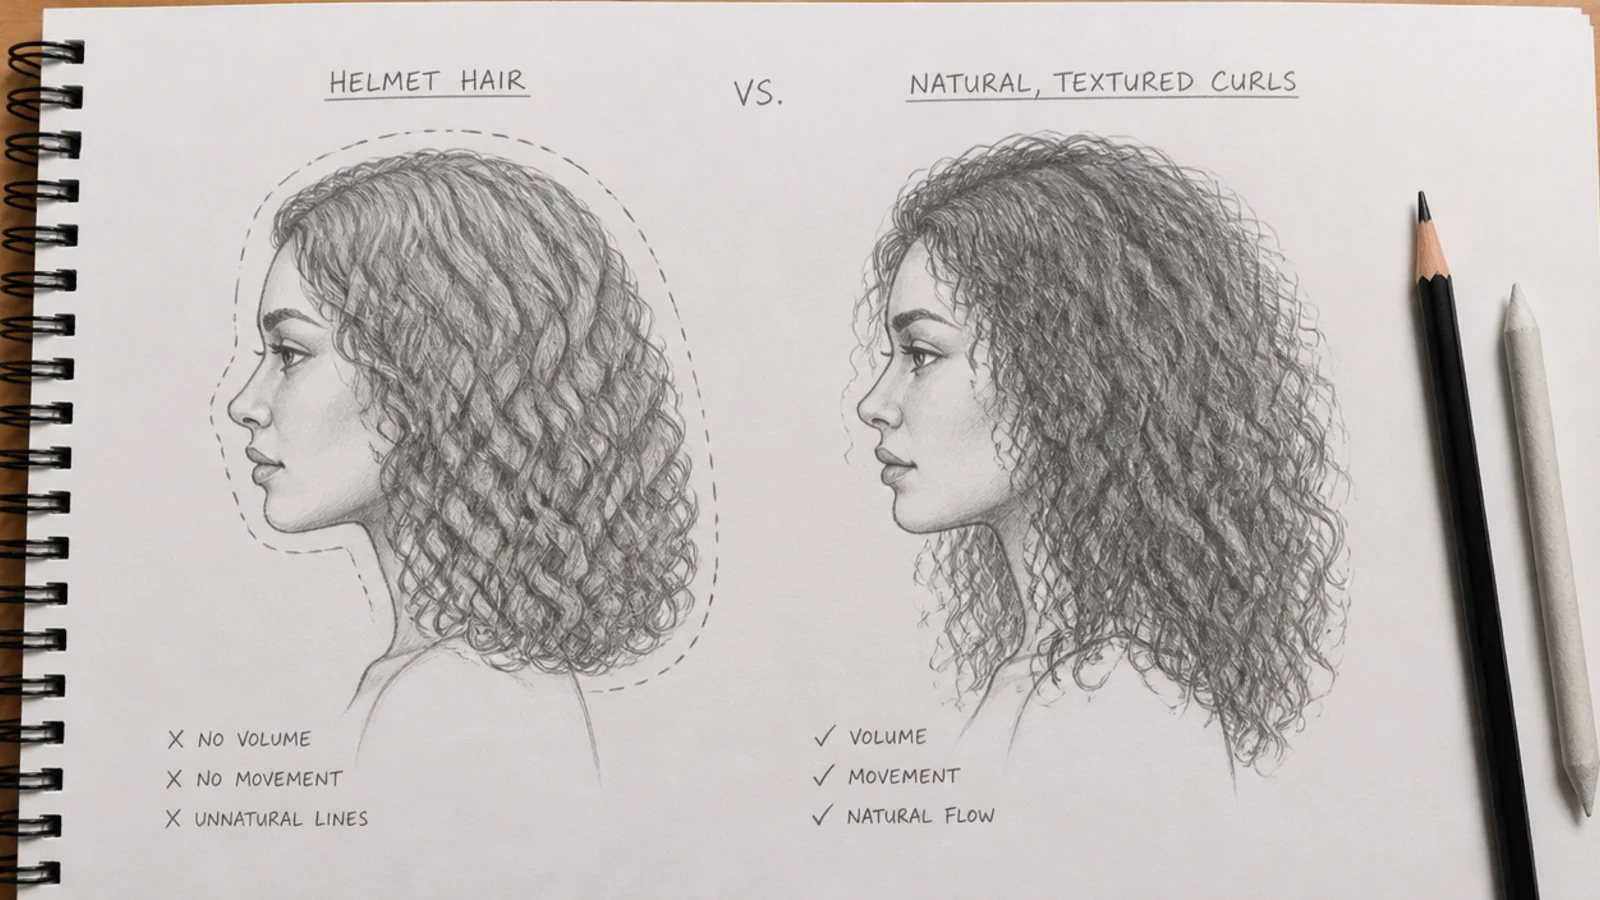
Five failures cover almost every disappointing curly drawing. Helmet hair means you drew a hard continuous outline around the mass; fix it by breaking the perimeter with short irregular flicks at the ends, between 2mm and 6mm long, so the edge becomes texture. Spring hair means you outlined coils instead of shading ribbons; go back and darken the inner face of every curl. Flat hair means the silhouette sits too close to the skull; redraw the outline further out before touching anything else. Corduroy hair means your waves run as parallel identical lines; stagger the peaks and vary the wavelength by 20 percent. Gray mush means you blended the whole mass; lift the highlight band back with a kneaded eraser and push 6B into the tunnels to restore contrast. The one diagnostic question worth asking at any stage is whether you can tell where the light is coming from. If you cannot, the problem is value, not curls, and adding more spirals will make it worse.
Using References Without Copying Them
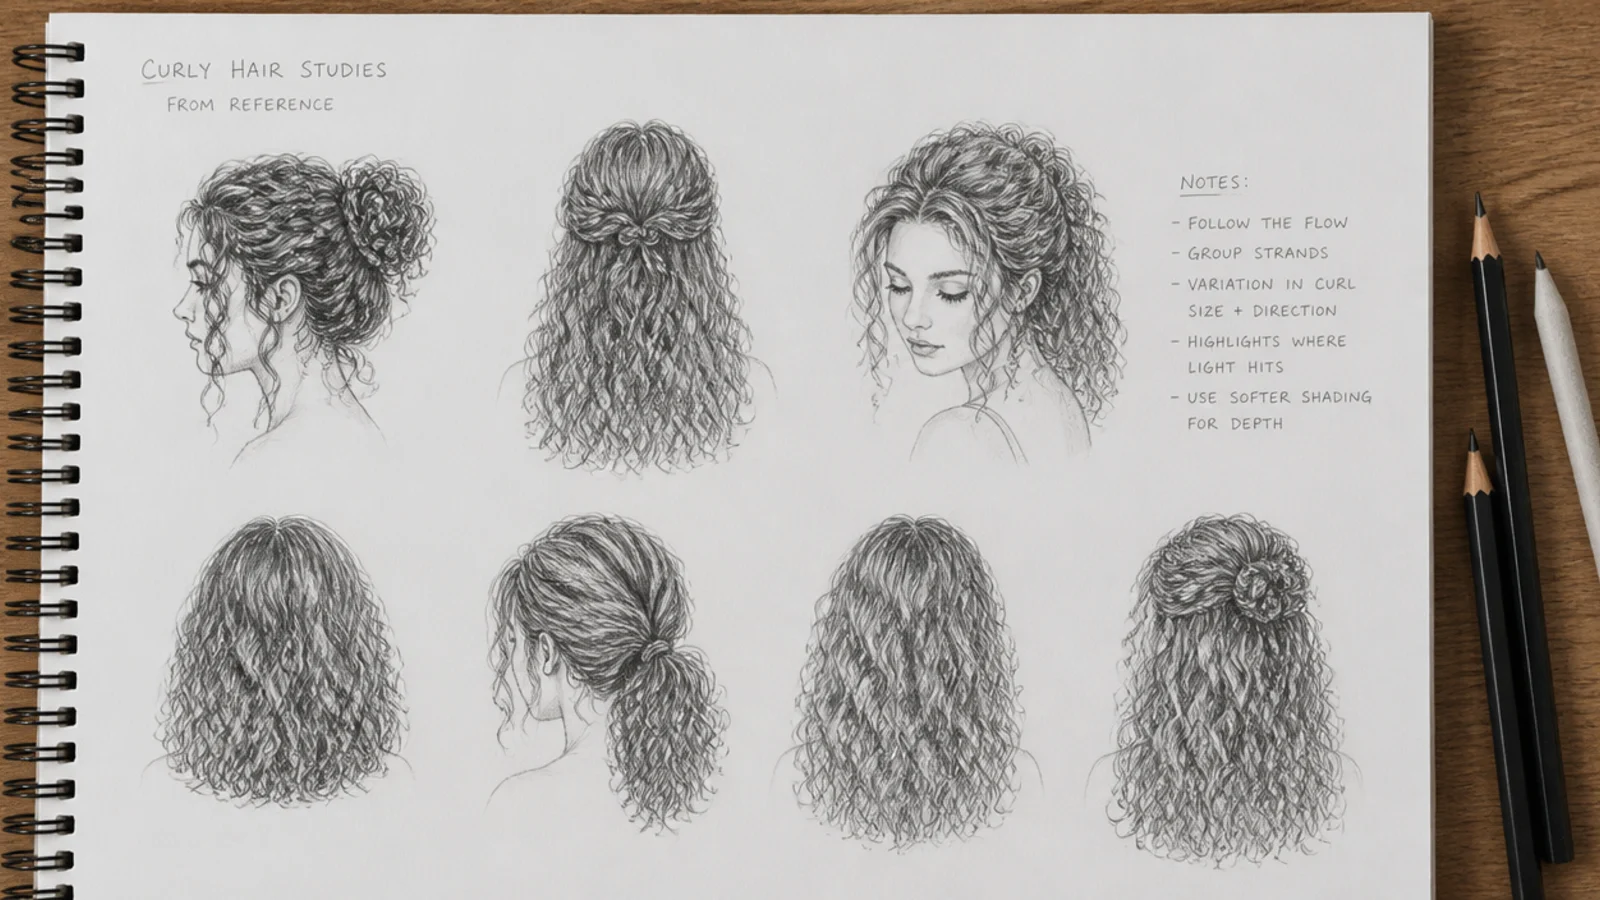
References are how you learn curl patterns quickly, but tracing a photo teaches your hand nothing. A better method: look at the reference, name the curl pattern out loud, note where the light is coming from, then turn the photo away and draw the silhouette from memory. Check it, correct it, and only then look back for curl detail. Studying real curl types helps too, and haircare photo galleries are useful references for how curls actually clump and frizz, such as the curl patterns shown in frizzy curly hair or the styled volume in curly jellyfish haircut. Build a reference sheet habit: draw the same hairstyle from the front, the side, the back and three-quarter, on one page. That is what turns a copied drawing into knowledge you can pose from later. Also practice small, at a head height of about 20mm, because at that scale you physically cannot draw strands and are forced to solve the drawing with silhouette and value alone. Apply the same method to length in long hair sketch.
Frequently Asked Questions
How do you draw curly hair step by step?
Draw the skull, then block the hair as one silhouette floating 10 to 50mm off the scalp depending on curl tightness. Mark the crown and run three to five flow lines from it. Lay light 2H zig-zag guidelines sized to the curl pattern. Shade the dark tunnels between clumps with 4B, then describe individual curls as ribbons with light and shadow on opposite faces. Add stray flicks last.
How do you make curls look natural and not like springs?
Springs happen when you outline coils instead of shading them. A curl is a ribbon wrapping an invisible cylinder, so you see a lit outer face, a pinch at the turn, then a shadowed inner face. Shade that alternation and the spiral appears without an outline. Also vary curl size by about 20 percent between neighbors, since identical repeated coils are what read as mechanical.
How do you shade curly hair?
Work light to dark with strokes following the growth direction. Lay 2B mid tones across the mass, push 4B into the shadowed inner faces, and reserve 6B for the tunnels between clumps and the shadow under the overhang. Leave paper white for the highlight band near the crown, or lift it back with a kneaded eraser. Contrast between clumps, not outlines, is what creates depth.
What pencils do you need for a curly hair sketch?
Four grades cover it. 2H for guidelines and the initial silhouette, 2B for mid shadows, 4B for the main shadow structure, and 6B for the darkest cores. Match the grade to hair color as well: blonde curls should top out around 2B, brown hair sits at 4B, and dense black 4C hair lives at 6B. Add a kneaded eraser for lifting highlights.
How do you draw 4C or coily hair?
Stop using line entirely. 4C coils are tighter than a pencil lead, so the mass reads as an even deep value with a defined shape rather than as visible curls. Build texture with clustered circular pressure marks at 4B and 6B, keep the outer silhouette soft and broken, and draw the hairline crisp and sharp. The contrast between a sharp hairline and a soft outer edge is what sells it.
Why does my curly hair drawing look like a helmet?
Because the silhouette is a hard continuous outline. Real curly hair has no clean perimeter. Break the edge with short irregular flicks, between 2mm and 6mm long, at different angles, so the boundary becomes texture instead of a line. Also check the gap between the skull and the hair mass, since drawing the outline too close to the head is the other half of the helmet problem.
Should you draw the head before adding the hair?
Yes, always. Hair sits on a skull and follows its curvature, so without the head underneath the mass has nothing to wrap. Draw the full cranium lightly, including the part that will be covered, then float the hair silhouette around it. Beginners who skip this flatten the top of the skull and lose the volume room that curly hair needs most.
What is the easiest curl type to draw for beginners?
Loose 2A beach waves. The zig-zag guideline is wide, around 25mm between peaks, so there are only three or four large shapes to manage between crown and shoulder, and the value range is gentle. Once wide waves feel comfortable, tighten the guideline in stages through 2C and 3A. Tight 3C and 4C coils are the hardest because they demand texture and value rather than line work.
How long does a curly hair sketch take?
A single-line monoline curly sketch takes under a minute. A loose 2A wave study with light shading runs about 20 to 30 minutes. A fully rendered 3B or 4C portrait with tunnel shadows, lifted highlights and stray strands typically takes 90 minutes to three hours, most of it spent on value rather than on drawing individual curls.
Which hair sketch look are you saving?
If you only take one habit from these 20 curly hair sketch ideas, make it the order of operations: silhouette, then flow lines from the crown, then value blocks, then curls as ribbons, then a handful of stray flicks at the ends. Every failure mode in curly hair, the helmet look, the spring look, the flat gray look, comes from skipping straight to spirals. Pick three ideas from different curl patterns, a 2A wave, a 3B ringlet and a 4C coil, and draw the same head three times so you can feel how the guideline scale changes. Then work through the hair sketch tutorial for the step sequence, and browse the rest of the hair sketch hub when you want a new subject.