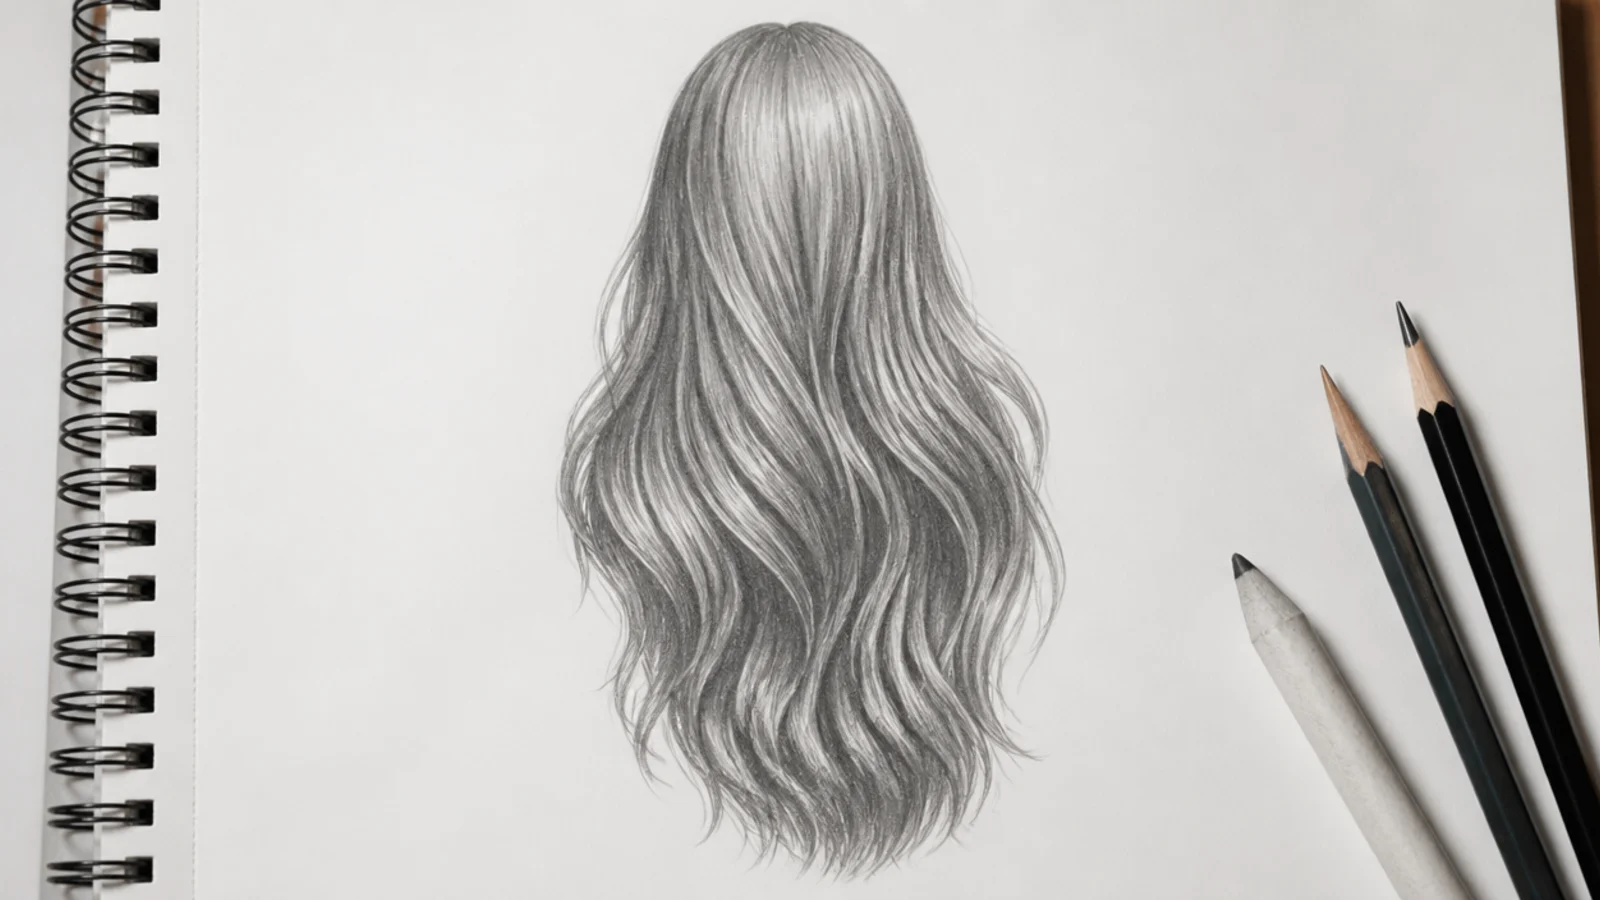
Quick Comparison
| Flow, Guides and Pencils by Long Hair Type | The Mistake That Ruins It | |
|---|---|---|
| Long straight, waist length | Straight 2H guides fanning from the crown; HB groups; 4B under the mass | Parallel vertical lines all the same length, which reads as spaghetti |
| Long wavy, 2A to 2C | One lazy S every 3 inches; 4B inside each curve, paper white outside | Random wave sizes, which reads as frizz instead of a wave pattern |
| Long curly, 3A to 3B | Ribbon curls, light and shadow on opposite sides; 6B in the deepest turns | Outlined coils drawn as springs with no light and dark side |
| Long spiral, 3C | Tighter ribbons packed near the scalp, opening toward the ends | Drawing every spiral, when ten carved ribbons carry the whole mass |
| Long coily, 4C stretched | No outline at all; HB zigzag texture, 6B compressed core, soft perimeter | A hard silhouette edge, which turns the hair into a helmet |
| Long braided | Alternating overlapping wedges on a center line; 4B where each tucks under | Weaving individual strands before the wedge structure exists |
| Wet long hair | Eight heavy clumps; 6B darks against blank paper highlights, pointed ends | Soft blended highlights, which make it look greasy rather than wet |
| Wind-blown long hair | One committed direction; lead group, mass, trailing tail; gaps of white paper | Strands blowing in several directions at once, which cancels the motion |
| Blonde or silver long hair | 2H and HB do the work; tone the background so light hair reads on white paper | Reaching for 4B and 6B, which turns blonde hair muddy brown |
1. Long Straight Hair, Front View, Center Part
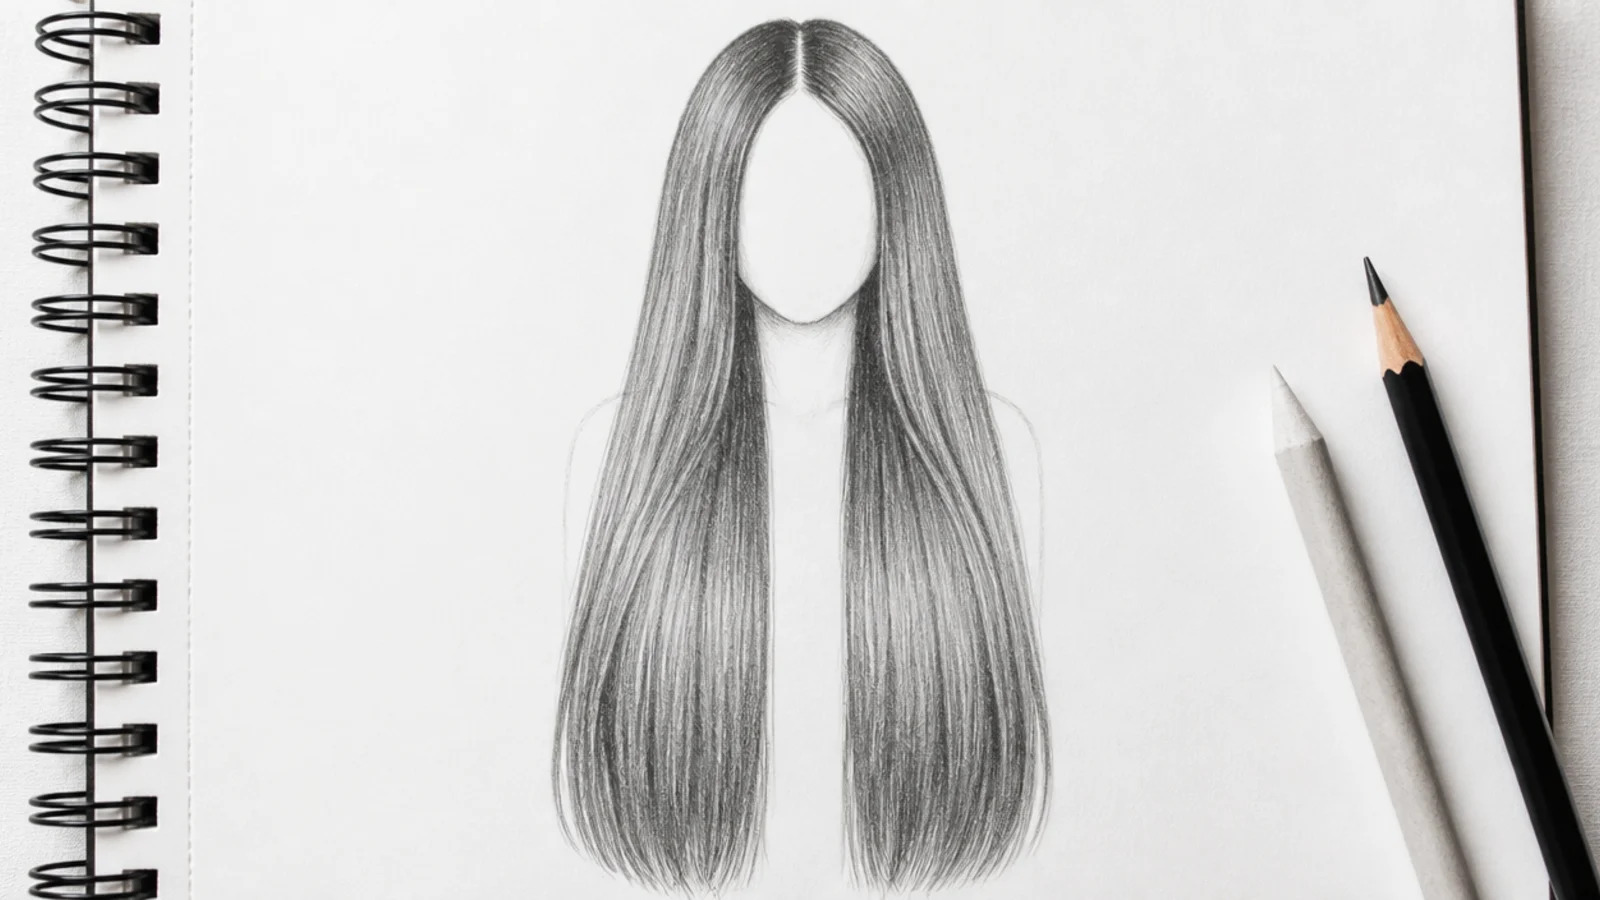
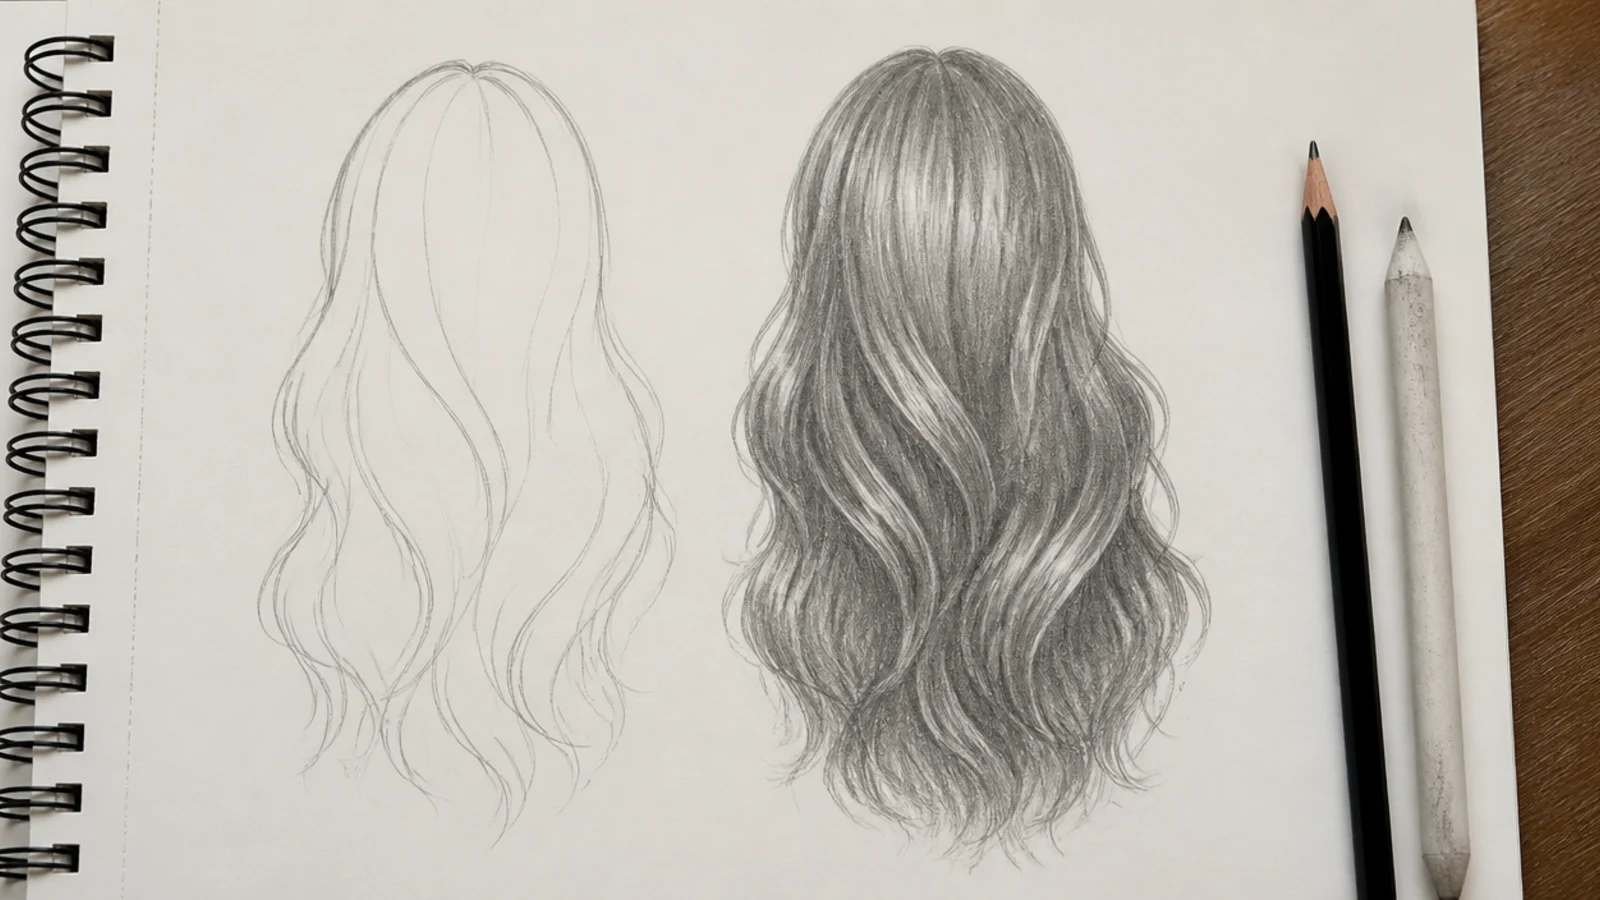
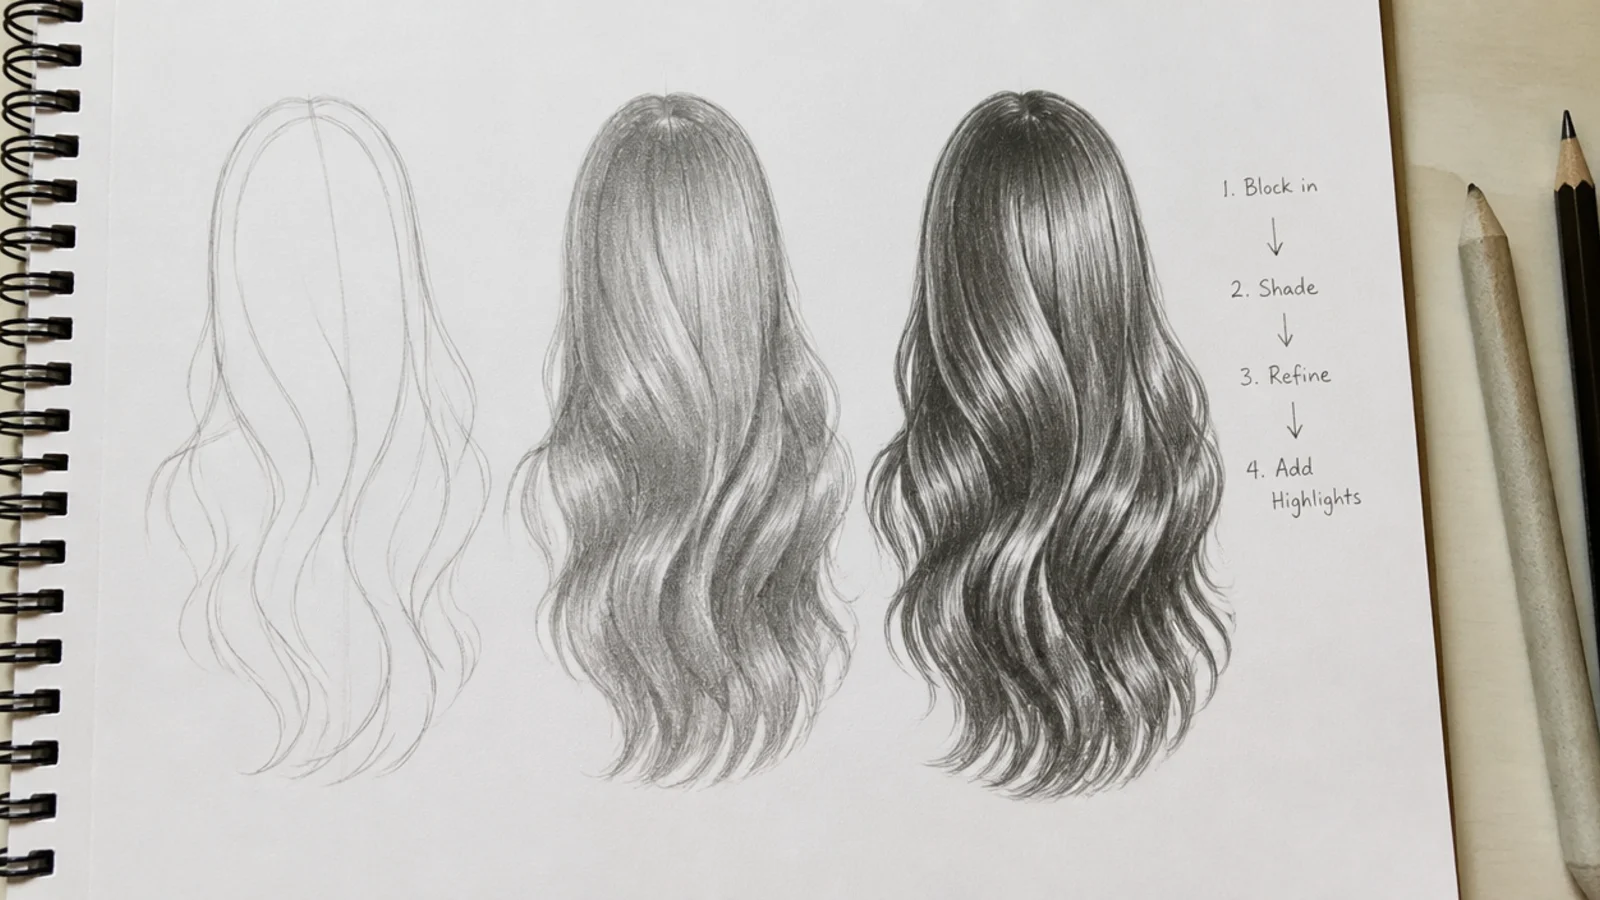
The control test for everything that follows. Draw the skull, set the hairline about a third down the forehead, then block the whole mass as one shape that sits roughly 8mm outside the skull line at the crown and widens gently to the waist. Mark the center part, then run six 2H guides from the part outward and down, never straight down. Fill between them with grouped HB strokes of uneven length. About 20 minutes. This is the same silhouette-first order taught in the hair sketch beginner set.
Who it suits: Anyone whose long hair drawings come out as a flat curtain.
Tip: Break the bottom edge with short flicks at three different depths so the ends do not read as one cut line.
2. Long Wavy Hair Over One Shoulder
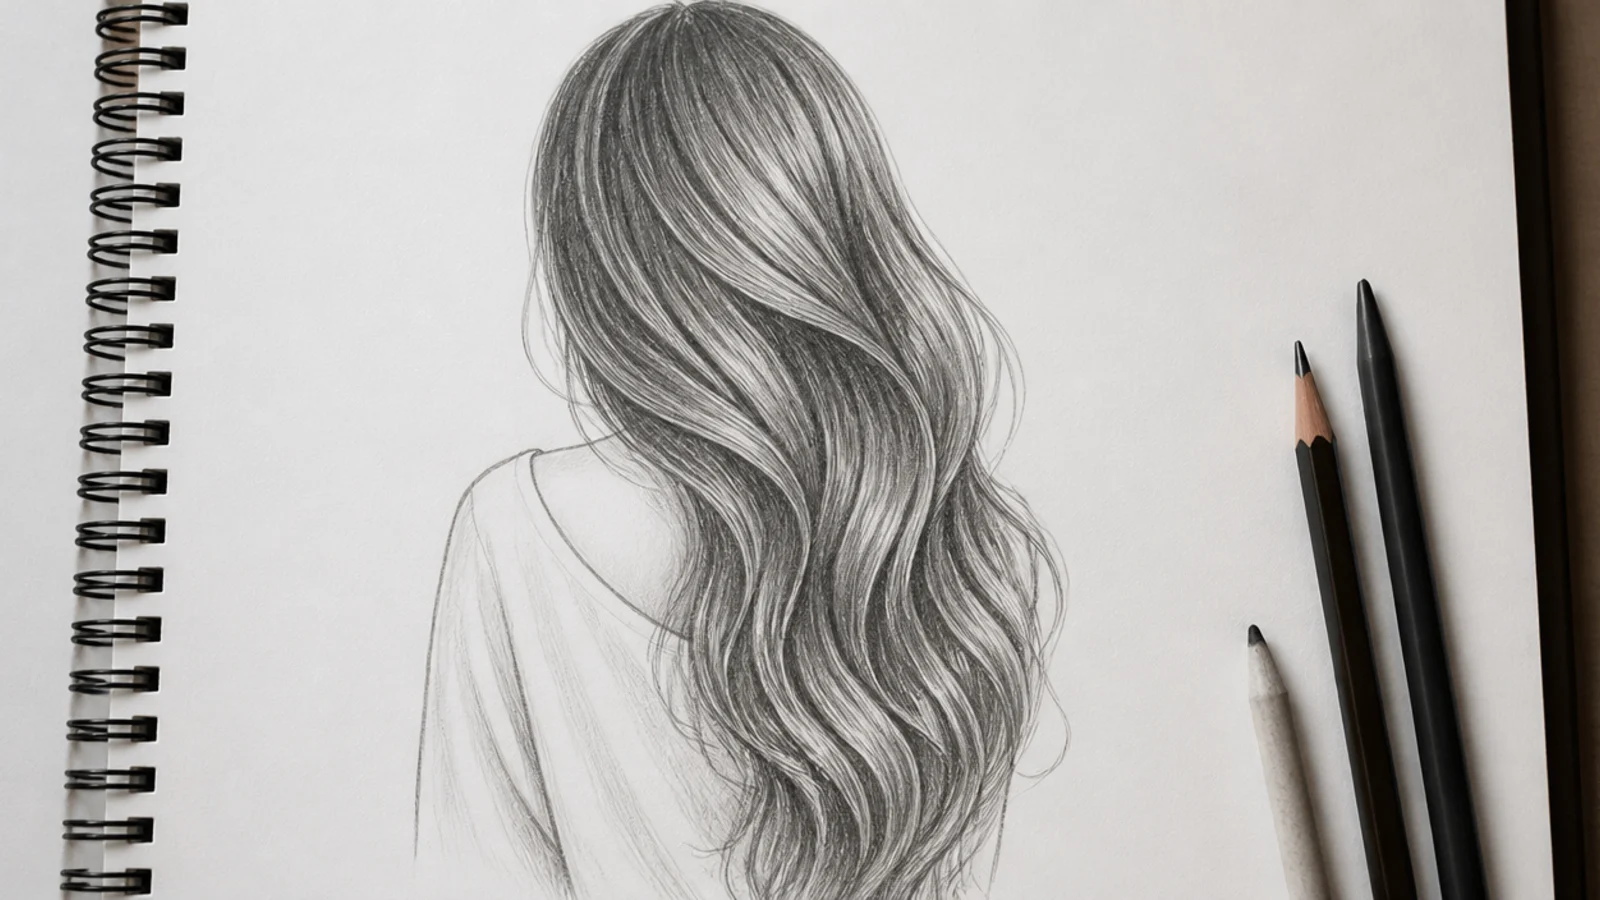
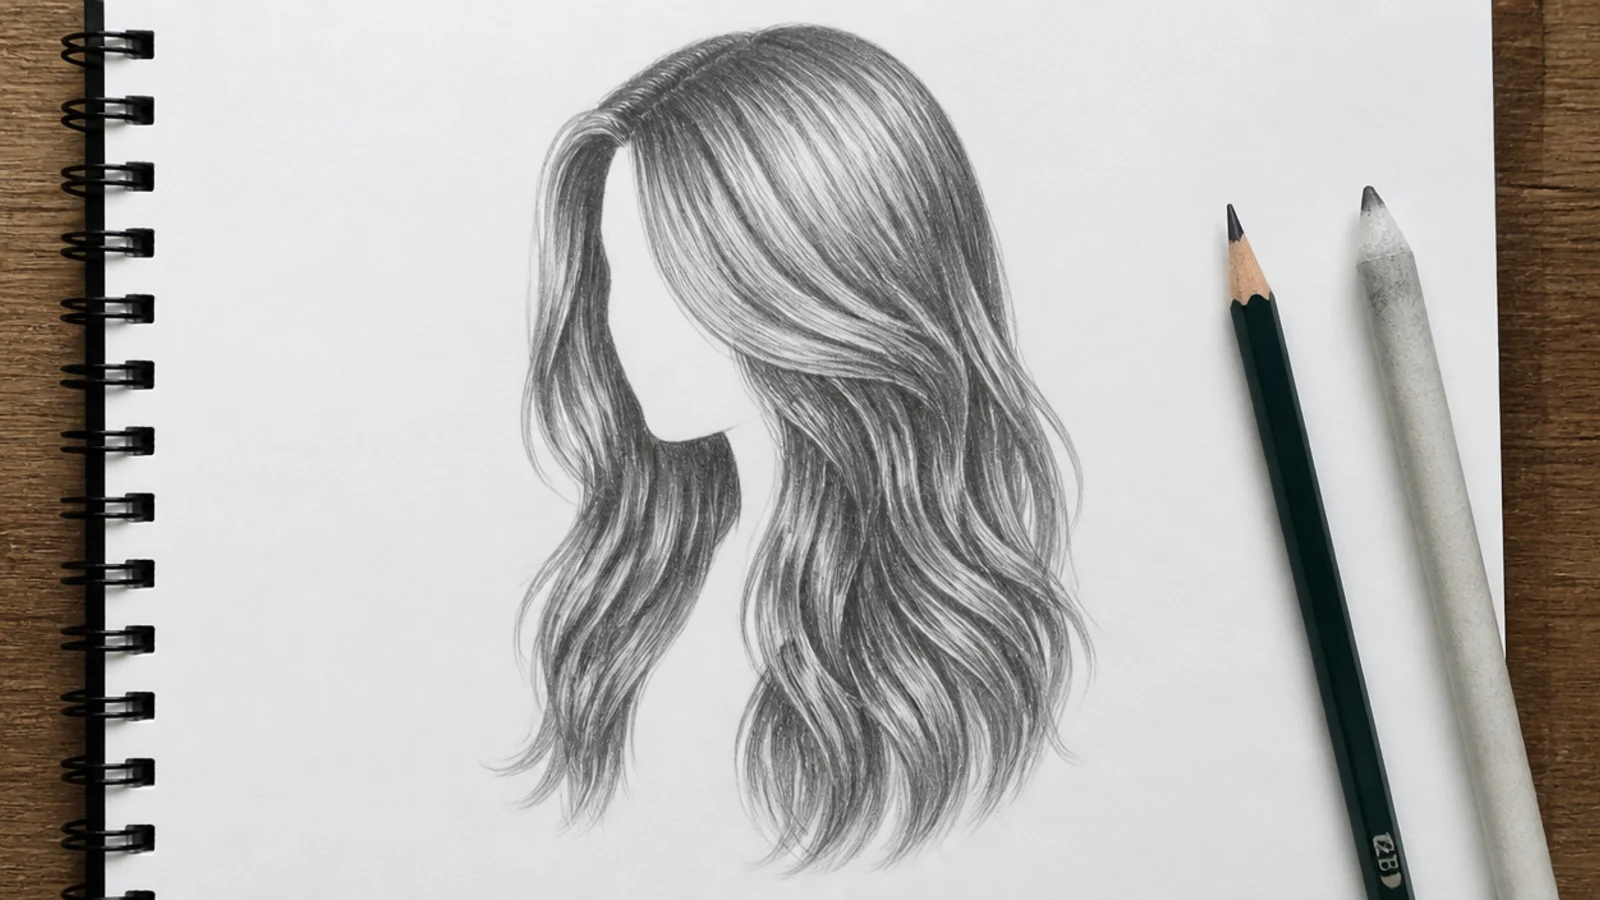
Sweeping the whole length forward over one shoulder gives you an asymmetric silhouette, which reads as designed rather than default. Draw the straight version first in 2H, then push each guide into a lazy S that widens toward the ends. Keep every S on the same rhythm, roughly one full curve every 3 inches of hair, or the waves read as frizz. Shade the inside of each curve with 4B and leave the outside as bare paper.
Who it suits: Artists ready to move past straight hair without committing to curls.
Tip: The shoulder should push the mass outward slightly where the hair rests on it, not pass through it.
3. Wind-Blown Long Hair, Side View
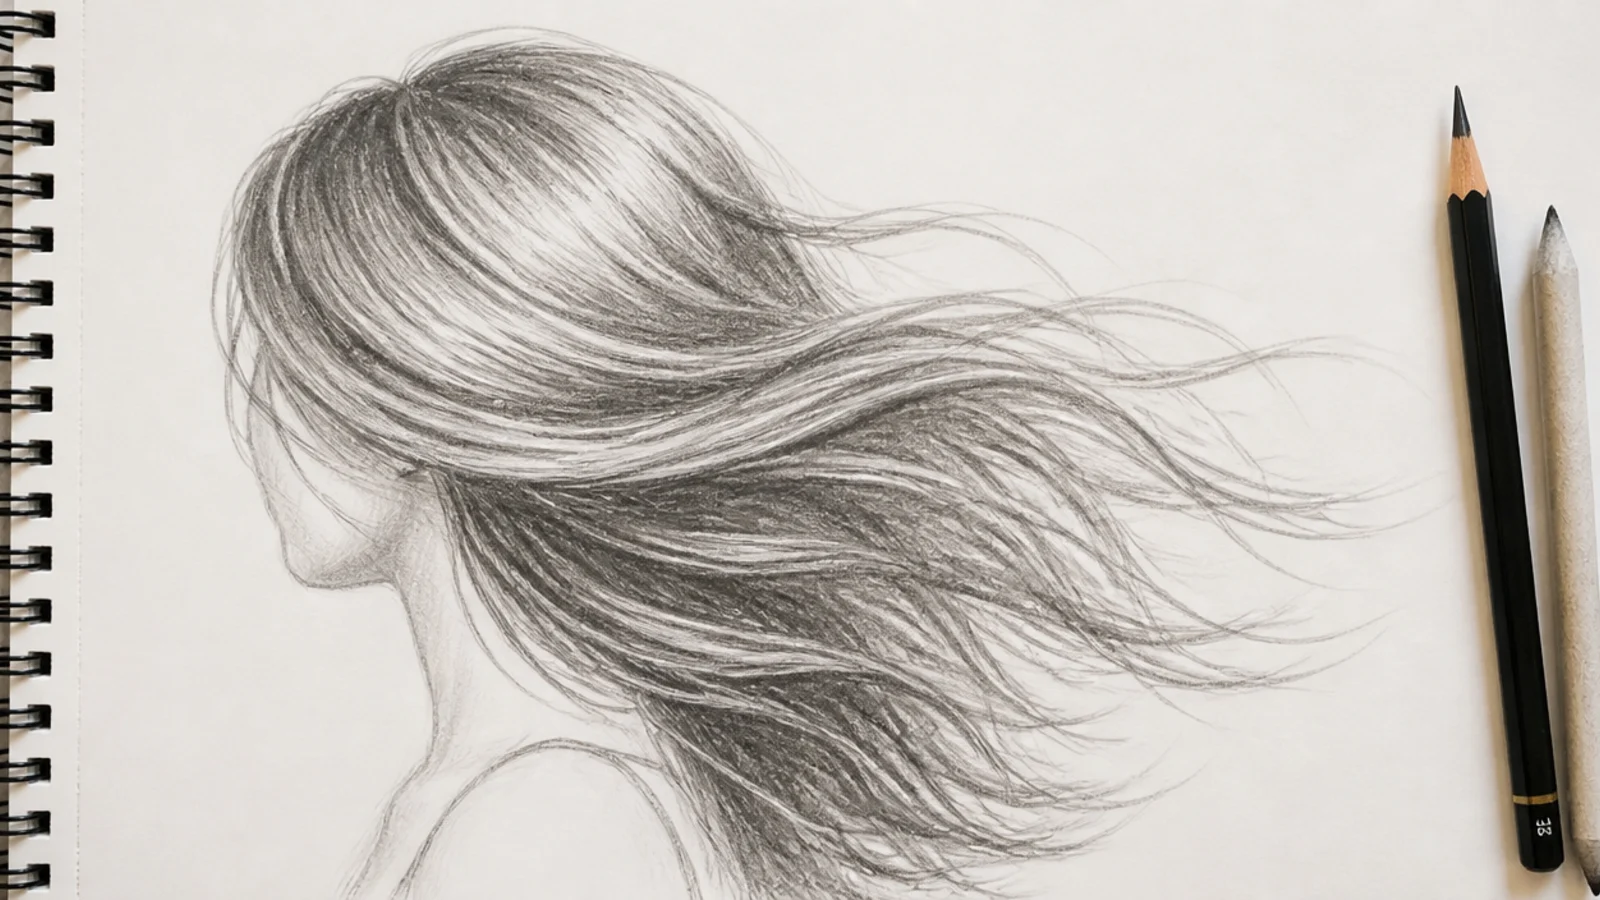
Wind is the single most searched long hair scenario and the easiest to get wrong. Pick one wind direction and commit: every group leaves the head on the same side and every tip points the same way. Draw three big groups first, a lead group, a mass, and a trailing tail, each thinning as it travels. The mass stays anchored at the crown while the ends open up like a fan. Leave visible gaps of white paper between groups so air reads through the hair. The step order is broken down in the hair sketch tutorial.
Who it suits: Character artists and anyone drawing action or outdoor scenes.
Tip: Hair lags behind the head in a turn, so the roots move before the tips do; keep the tips a beat behind.
4. Long Hair Back View, Down to the Waist
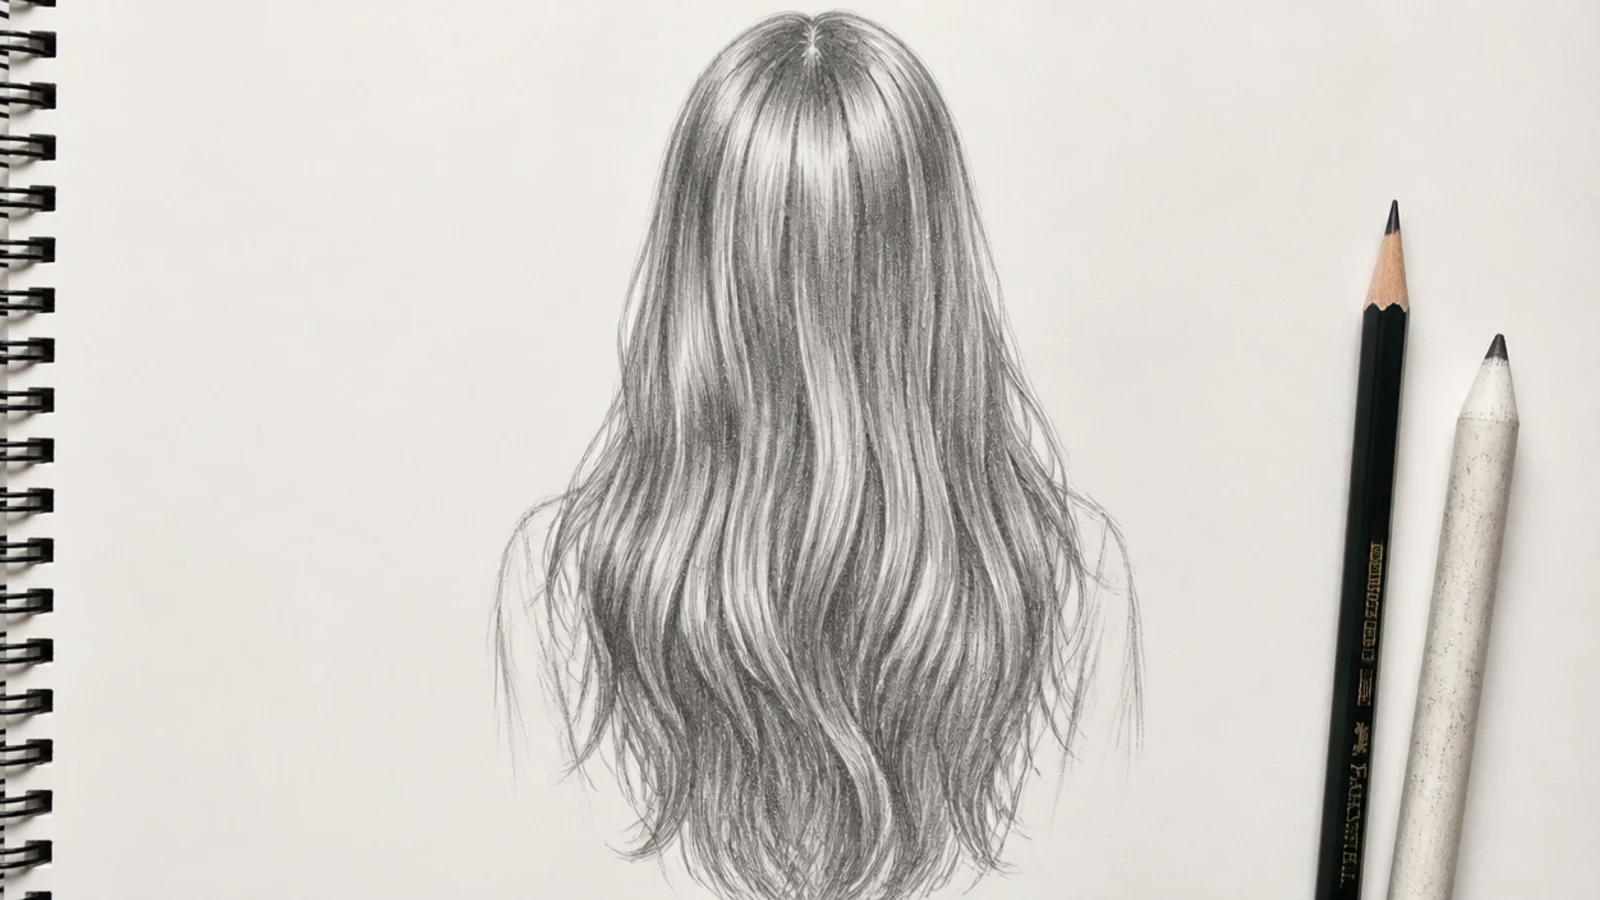
The most useful and most neglected long hair study there is. From behind you can see the crown swirl, which is the origin point every other view only implies. Start with a small spiral at the crown, then fan 2H guides out of it in every direction like water off the top of a dome. The mass narrows slightly at the nape, then widens across the shoulder blades. Darken with 4B just under the occipital curve where the hair leaves the skull.
Who it suits: Anyone building a reference sheet or drawing figures from behind.
Tip: The crown swirl is off center on most heads, usually a little to one side; a perfectly centered swirl reads fake.
5. Long Curly 3B Spirals, Three-Quarter View
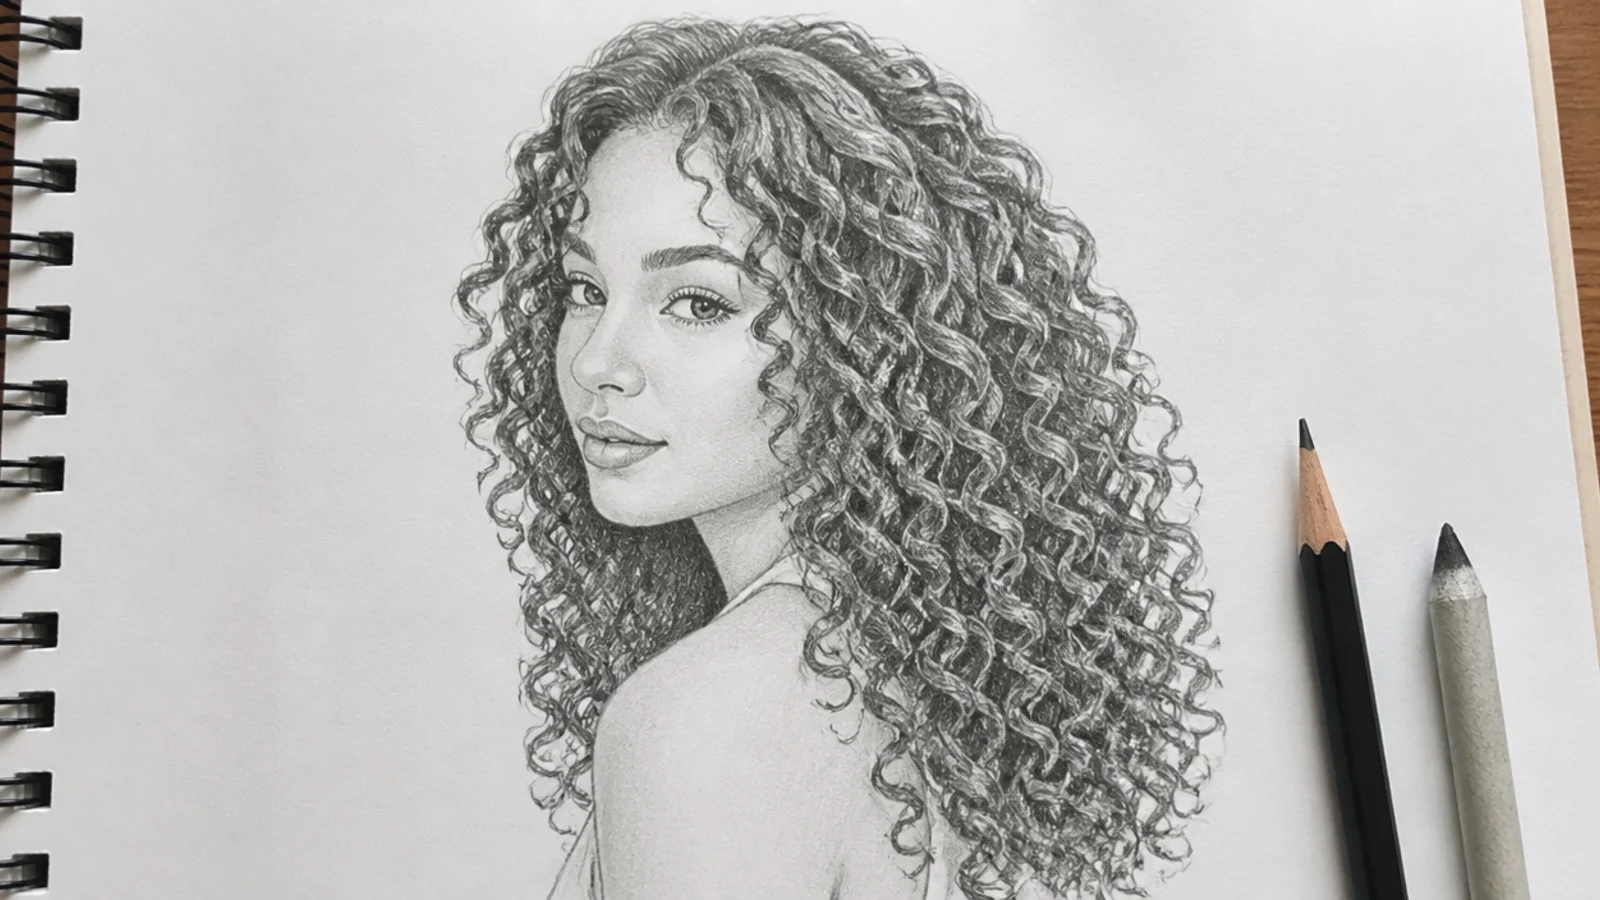
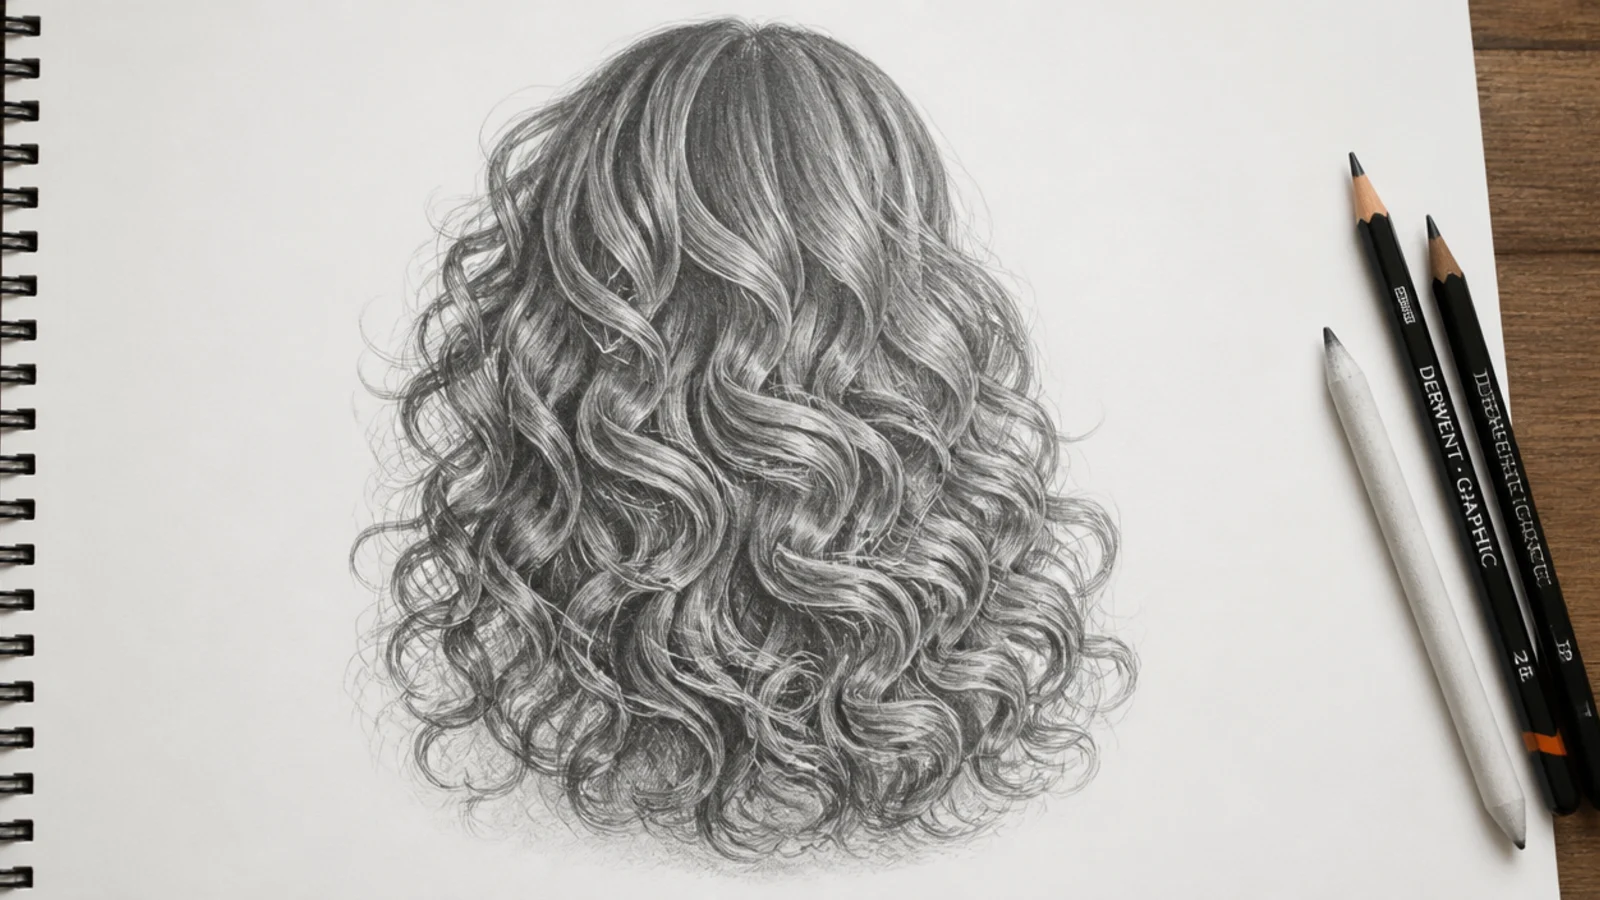
Do not outline coils. Draw each curl as a ribbon twisting in space: a band that turns from wide face to narrow edge and back. Light hits the outside of the turn, shadow sits on the opposite side, which is what makes a spiral look round instead of like a drawn spring. Block the whole curly mass first as one cloud shape, roughly 2 inches wider than the head on each side, then carve maybe fifteen ribbons into it, leaving the rest as texture.
Who it suits: Portrait artists drawing defined curl patterns at length.
Tip: Draw fewer curls than you think; ten well-turned ribbons beat sixty outlined coils. More in the curly hair sketch guide.
6. Long Coily 4C Hair, Stretched to Mid-Back
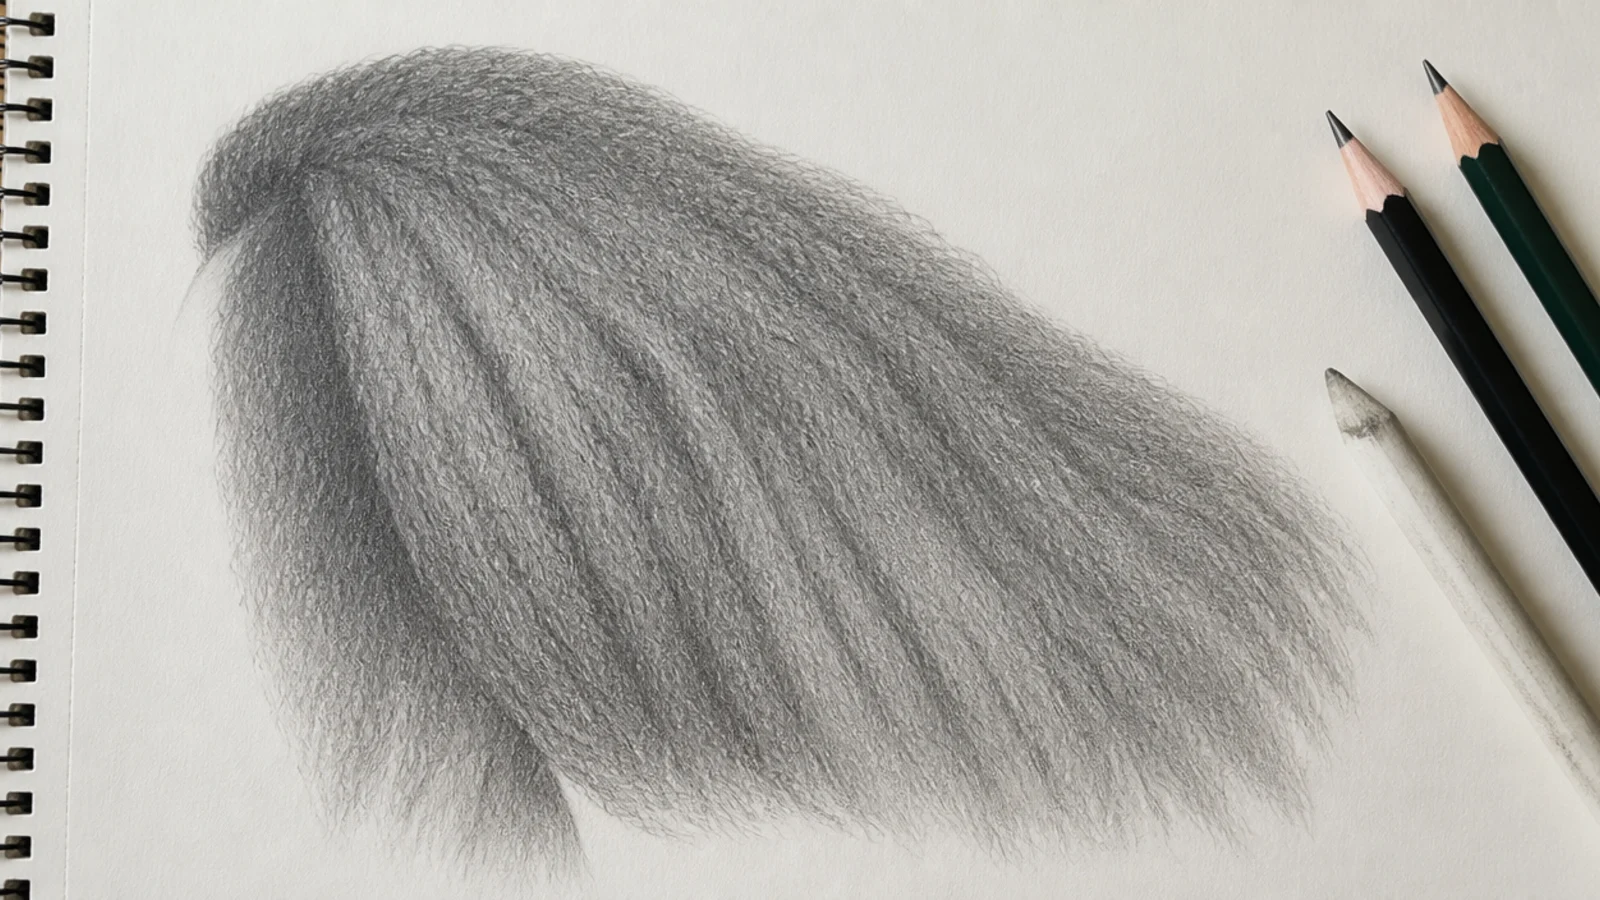
The texture almost every drawing guide skips. Coily hair has no hard silhouette edge, so resist drawing an outline at all. Build the shape from the inside out with small tight zigzag marks in HB, letting the edge dissolve into paper over about 5mm. Value is the whole job here: 6B in the compressed core near the scalp, 4B through the body, almost nothing at the perimeter where light passes through. Stretched length still fans from the crown but travels in wider sections, the same principle used across the hair sketch ideas set.
Who it suits: Character artists drawing textured and natural hair honestly.
Tip: Hard outlines are what make drawn 4C hair look like a helmet; keep the edge soft everywhere except where it crosses a dark background.
7. Wet Long Hair Clinging to the Shoulders
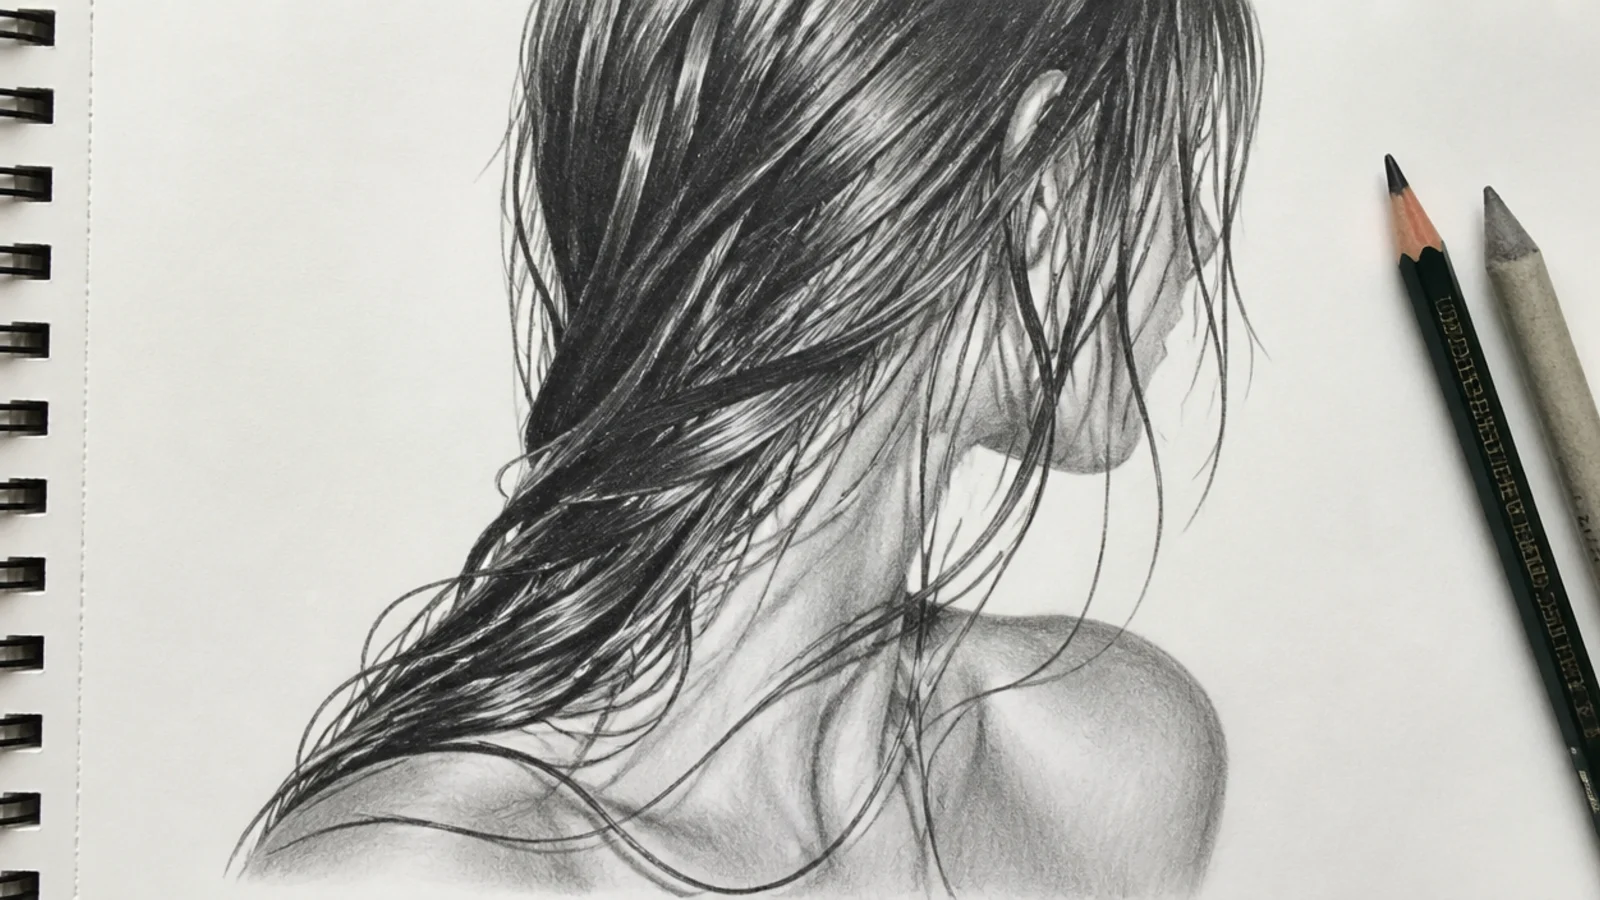
Wet hair is a different material. It clumps into fewer, heavier, sharper-edged sections, sits closer to the skull, and carries a much wider value range: near-black 6B in the clumps against blank white paper for the specular highlights, with almost nothing in between. Draw perhaps eight thick strands instead of forty thin ones. Ends come to points because water pulls them together. The silhouette hugs the head and shoulders rather than floating.
Who it suits: Artists studying value range and material differences.
Tip: Keep highlights small and hard-edged; soft blended highlights make wet hair look merely greasy.
8. Long Hair in a High Ponytail, Mid-Turn
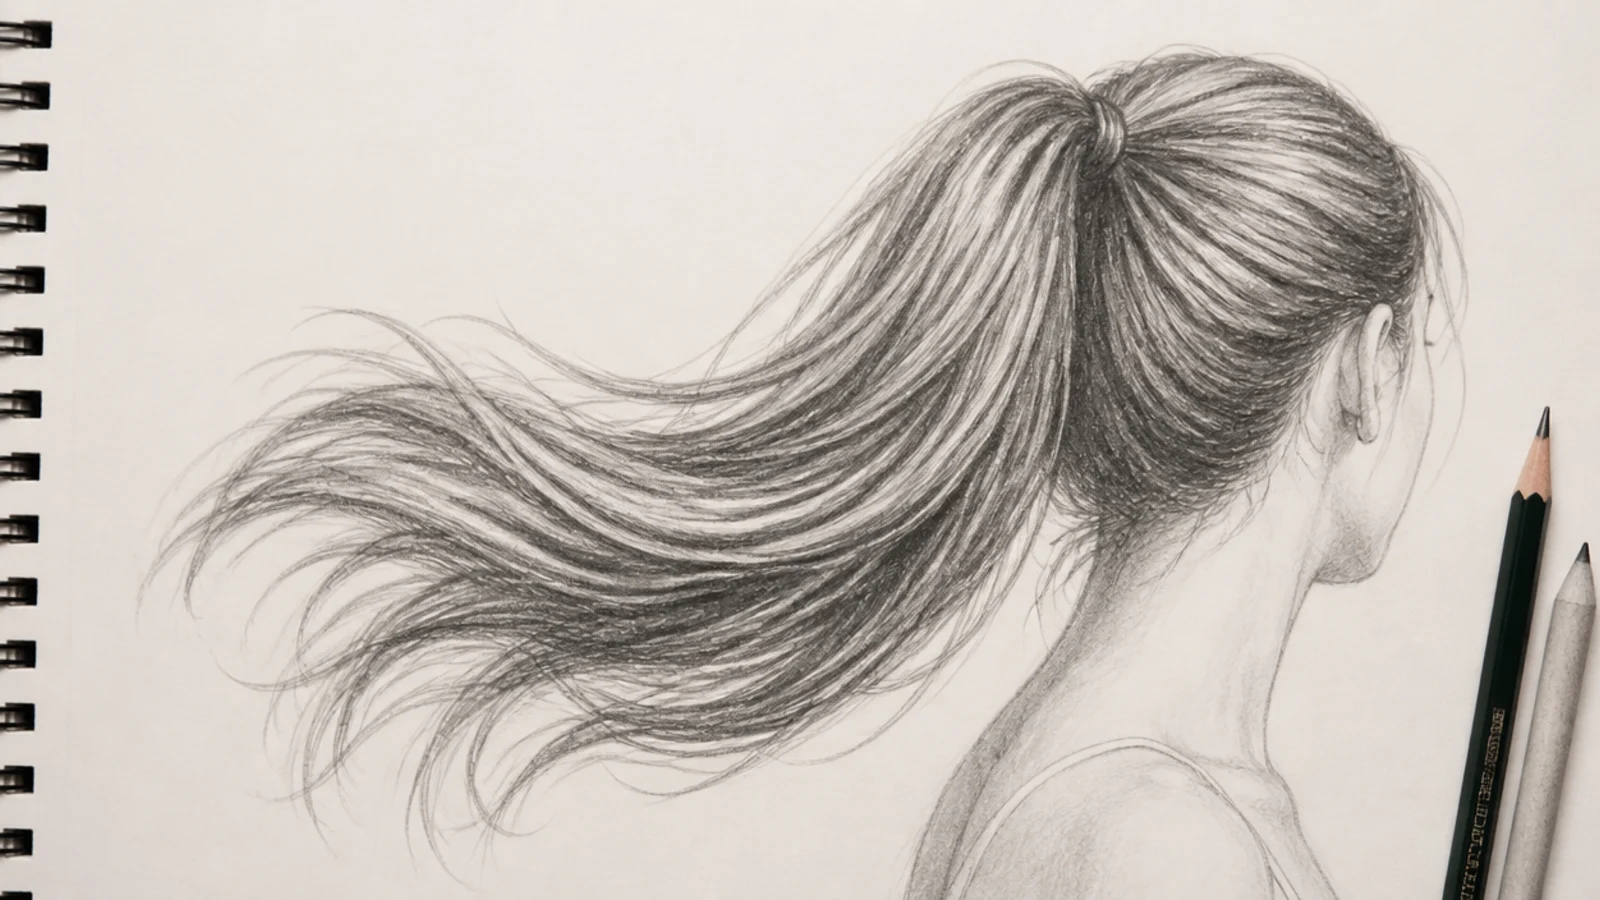
A ponytail gives you two problems in one drawing: the gathered pull toward the tie, and the free swing after it. All the flow lines from the crown, temples and nape converge on one point, so draw that convergence in 2H first as a funnel. Past the tie the tail behaves like unrestrained long hair and lags behind the turn. Put your darkest 6B right at the tie where the hair compresses, then let value drop off toward the tips.
Who it suits: Character artists drawing movement and everyday hairstyles.
Tip: Leave a few loose hairs escaping near the ears; a perfectly gathered ponytail reads as plastic. Real-life reference: messy ponytail on long hair.
9. Long Braided Hair, Loose Three-Strand Plait
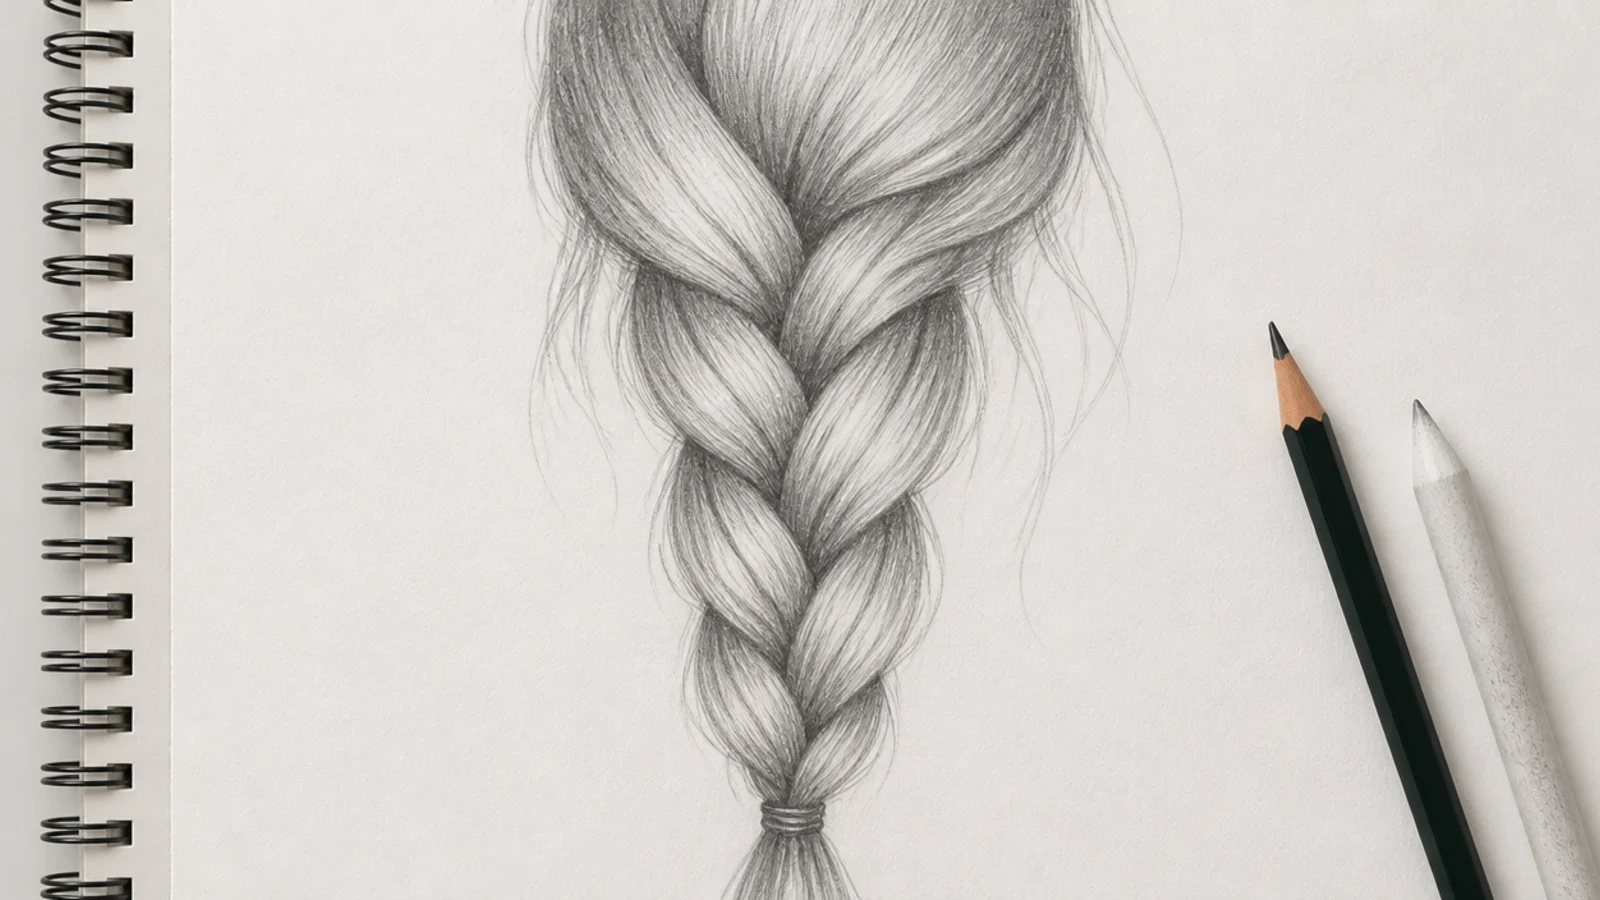
Stop thinking of a braid as woven strands and think of it as a stack of overlapping wedges alternating left and right. Draw a center line down the length, then place teardrop wedges alternating either side, each slightly overlapping the one below. Shadow goes where each wedge tucks under the next, in 4B, and the widest part of each wedge stays lightest. The braid narrows as it descends and finishes in a loose tuft.
Who it suits: Anyone who has abandoned a braid drawing halfway down.
Tip: Draw the wedges before any strand texture; texture on a wrong structure cannot be rescued. For reference on the real style see long mermaid braids.
10. Half-Up Half-Down Long Hair with Face-Framing Pieces
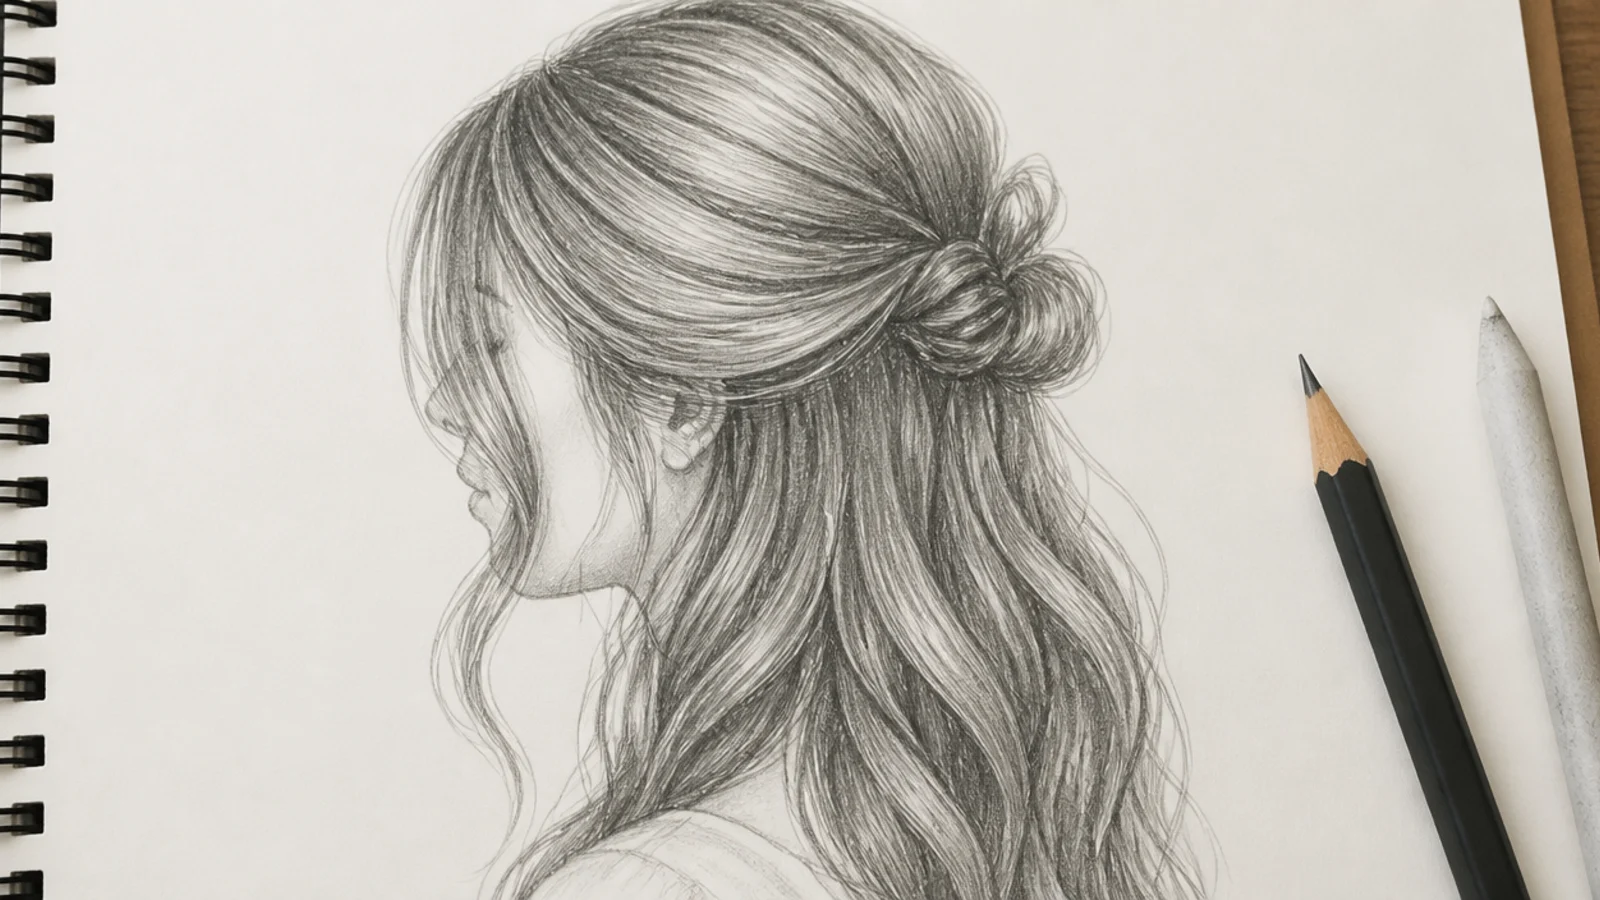
Two hair masses on one head, and they must read as one system. The upper section pulls back and up into a small gathered knot, which lifts the silhouette at the crown by about 1 inch. The lower section falls free. The join between them is where beginners fail: draw the sweep of the top section arriving at the tie, then let the bottom mass emerge from under it rather than beside it. Two thin face-framing pieces break the front outline. For photo reference on the real style, see graduation hairstyles for long hair.
Who it suits: Portrait artists drawing modern everyday hairstyles.
Tip: Give the two face-framing pieces different lengths, one at the jaw and one at the collarbone, so they do not read as symmetrical antennae.
11. Long Hair with Blunt Bangs, Front View
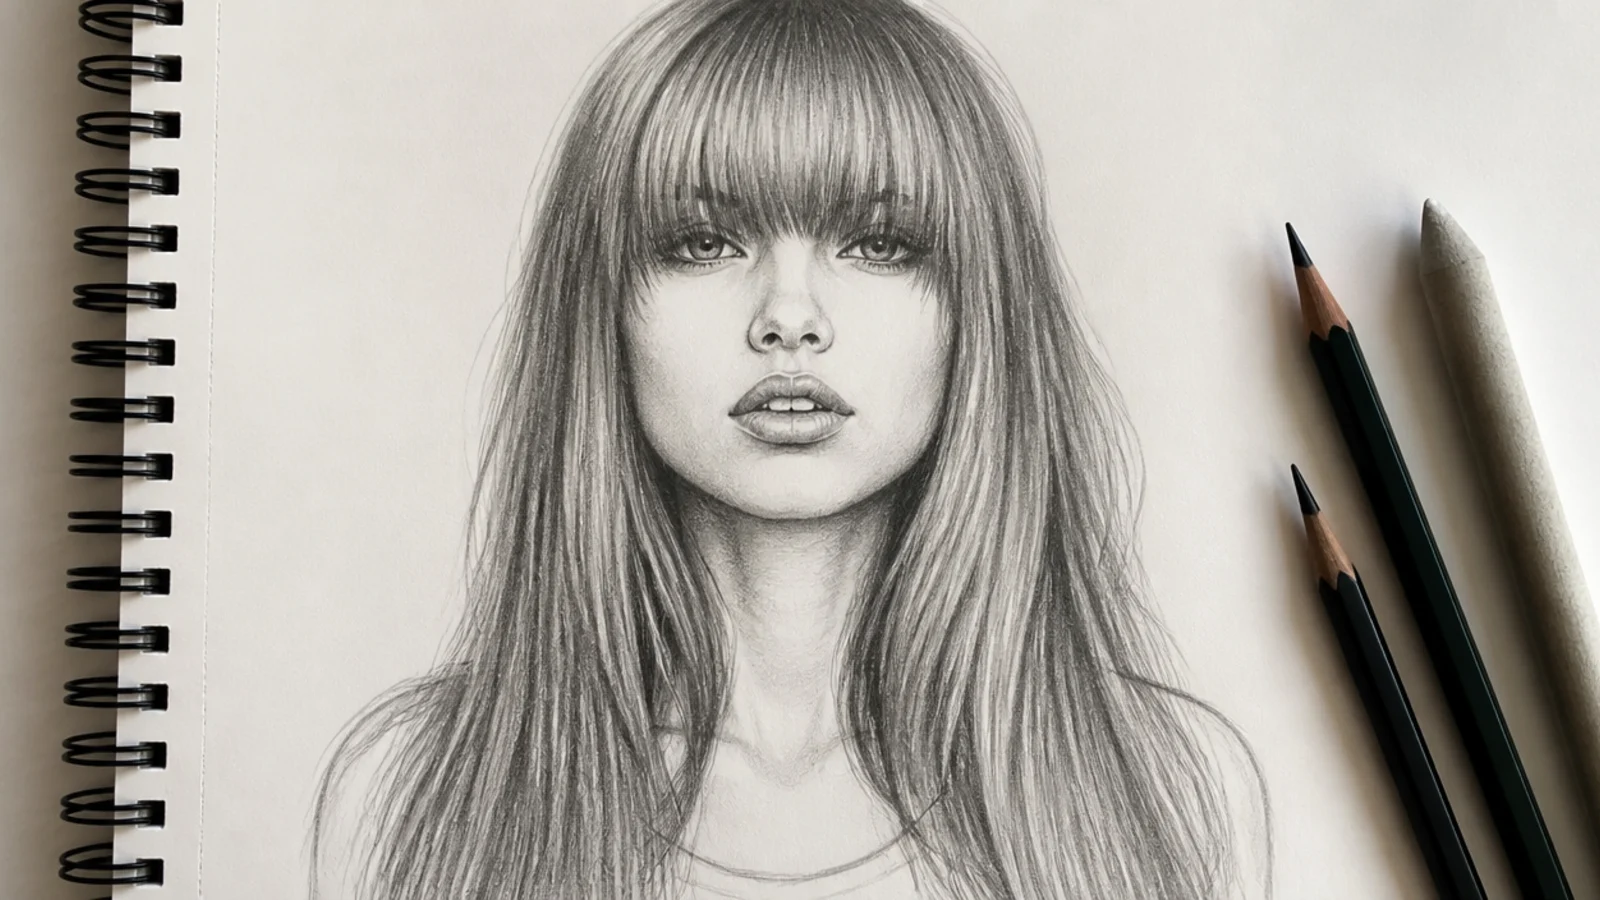
Bangs change the whole face structure, so place them before you finish the eyes. A blunt fringe sits on a horizontal line just above or at the eyebrows and gets cast shadow underneath it, which is the detail beginners miss: a soft 4B band across the forehead below the fringe edge. The fringe is a separate short mass with its own flow, running forward off the front hairline, while the length behind it continues down normally.
Who it suits: Artists drawing faces where the fringe has to sit believably on the forehead.
Tip: A perfectly straight fringe edge looks pasted on; break it with two or three strands hanging a few millimeters lower.
12. Long Hair with Curtain Bangs, Three-Quarter View
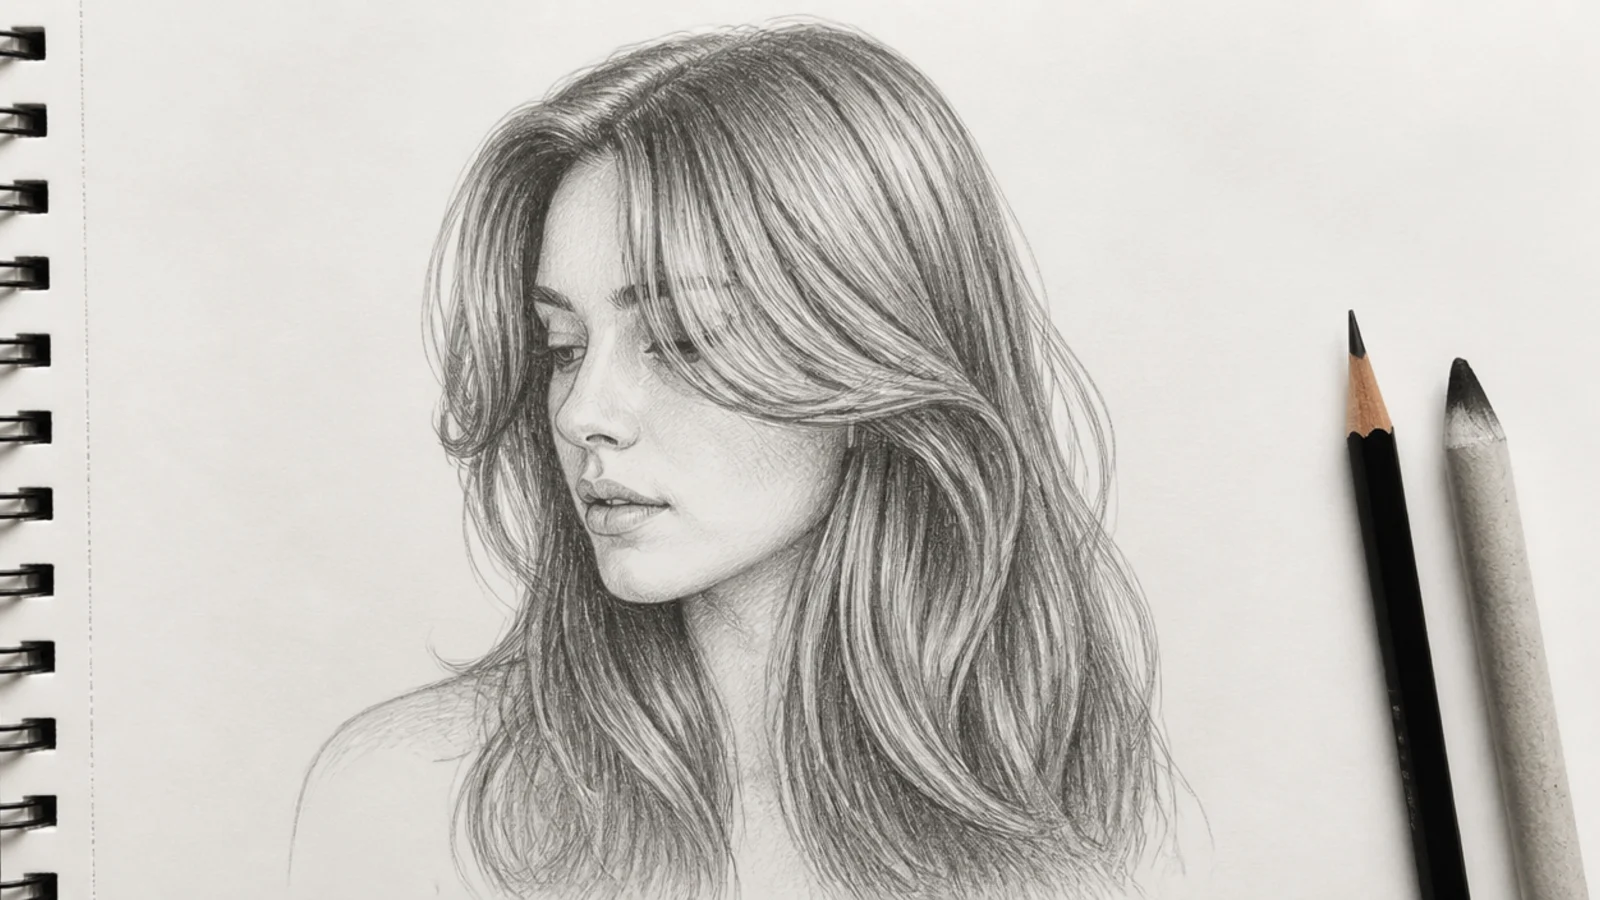
Curtain bangs are two soft triangles opening from a center part, shortest at the inner edge near the eyebrow and longest at the outer edge near the cheekbone. In three-quarter view the far side compresses and the near side opens out, which is the whole reason to practice this at an angle. Draw the part first, then two sweeping 2H arcs, then fill each with grouped strokes that taper. The rest of the length falls behind the ears.
Who it suits: Anyone drawing contemporary portraits or fashion figures.
Tip: Curtain bangs must merge into the length, not stop dead; feather the outer ends into the mass behind. See the real cut in short curtain bangs.
13. Long Hair Tucked Behind One Ear
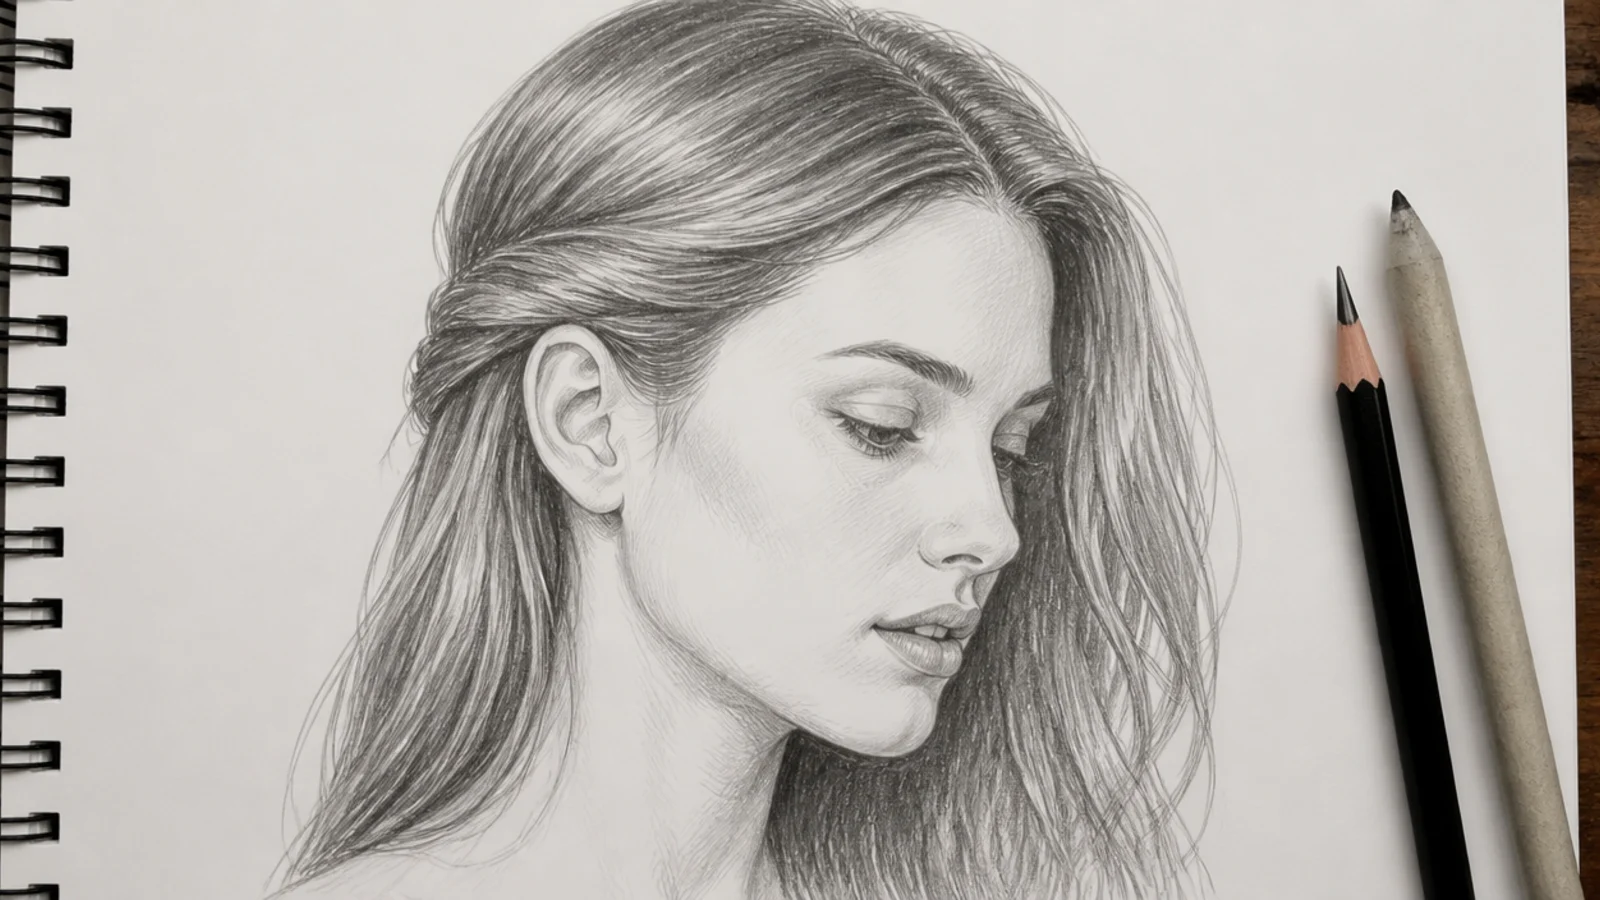
A tiny scenario that teaches overlap better than anything else on the list. On the tucked side, hair sweeps back from the temple, disappears behind the ear, and reappears below it, which forces you to draw the same mass passing behind an object. Darken with 4B immediately behind the ear where hair compresses. The untucked side falls forward across the cheek, so the two sides of the face have completely different framing.
Who it suits: Portrait artists learning overlap and depth in hair.
Tip: Leave one or two short hairs escaping in front of the ear or the tuck reads like a wig cap.
14. Long Hair Against a Dark Background, Backlit
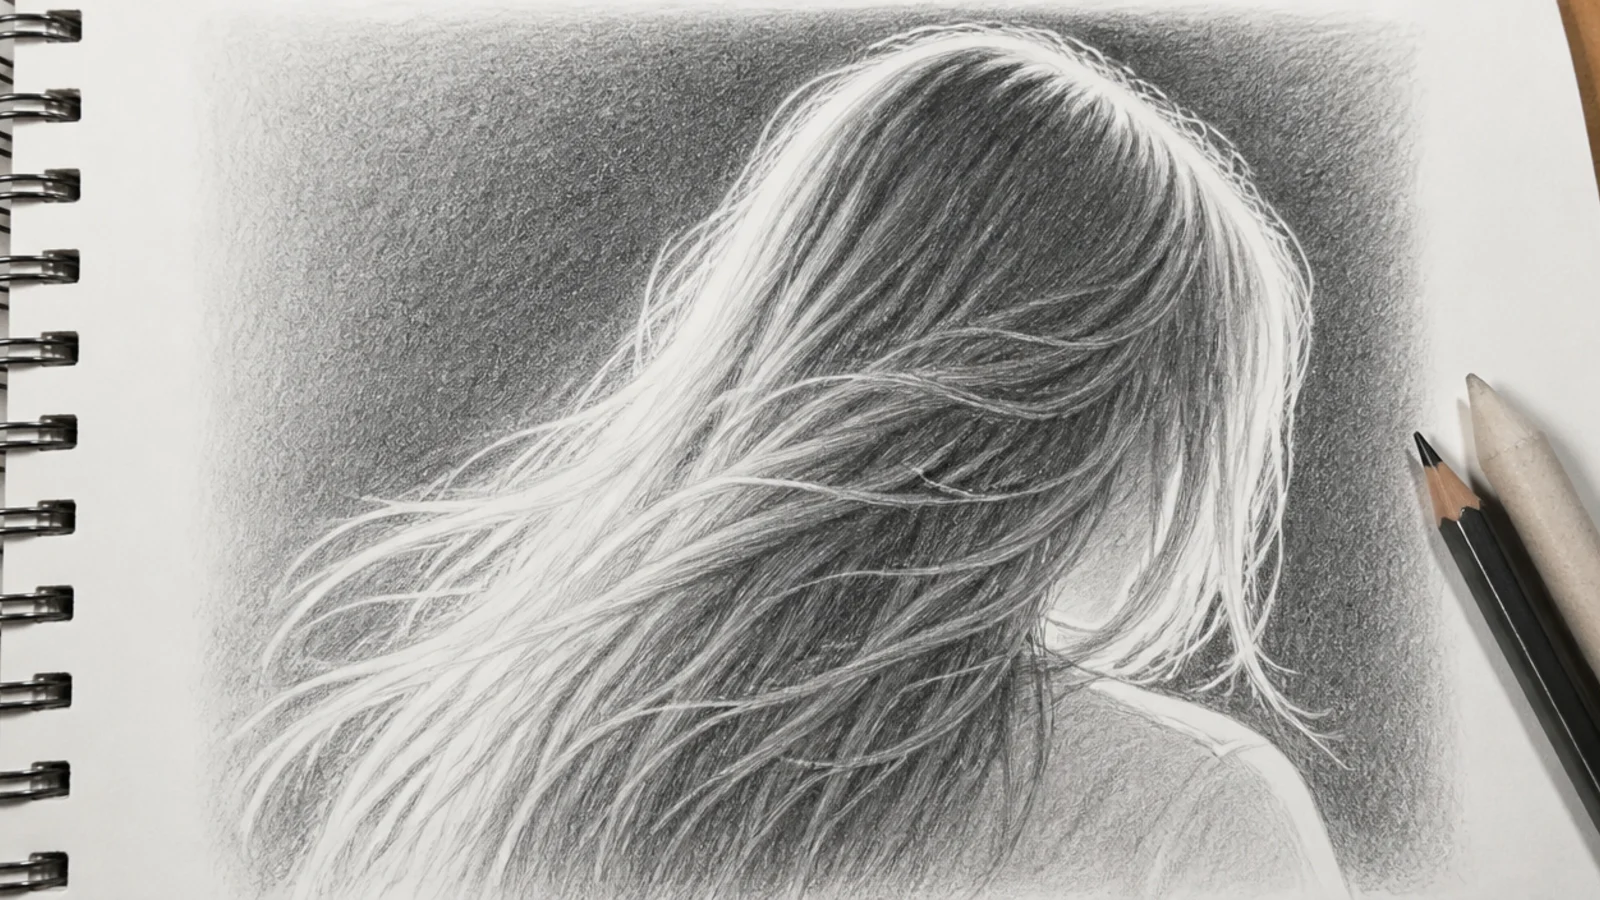
Value inversion practice. When the light sits behind the head, the hair mass goes dark and a thin bright rim traces the entire silhouette, brightest where the hair is thinnest. Fill the background with even 4B, keep the mass at 6B, and lift the rim back out with a sharpened kneaded eraser point, following every bump of the outline. Stray hairs at the perimeter glow, so draw them as light marks lifted out of dark, not dark marks added.
Who it suits: Intermediate artists ready to work light out of dark.
Tip: The rim should vary in thickness; a rim of even width reads as a traced outline rather than light.
15. Long Blonde Hair, Inverted Value Range
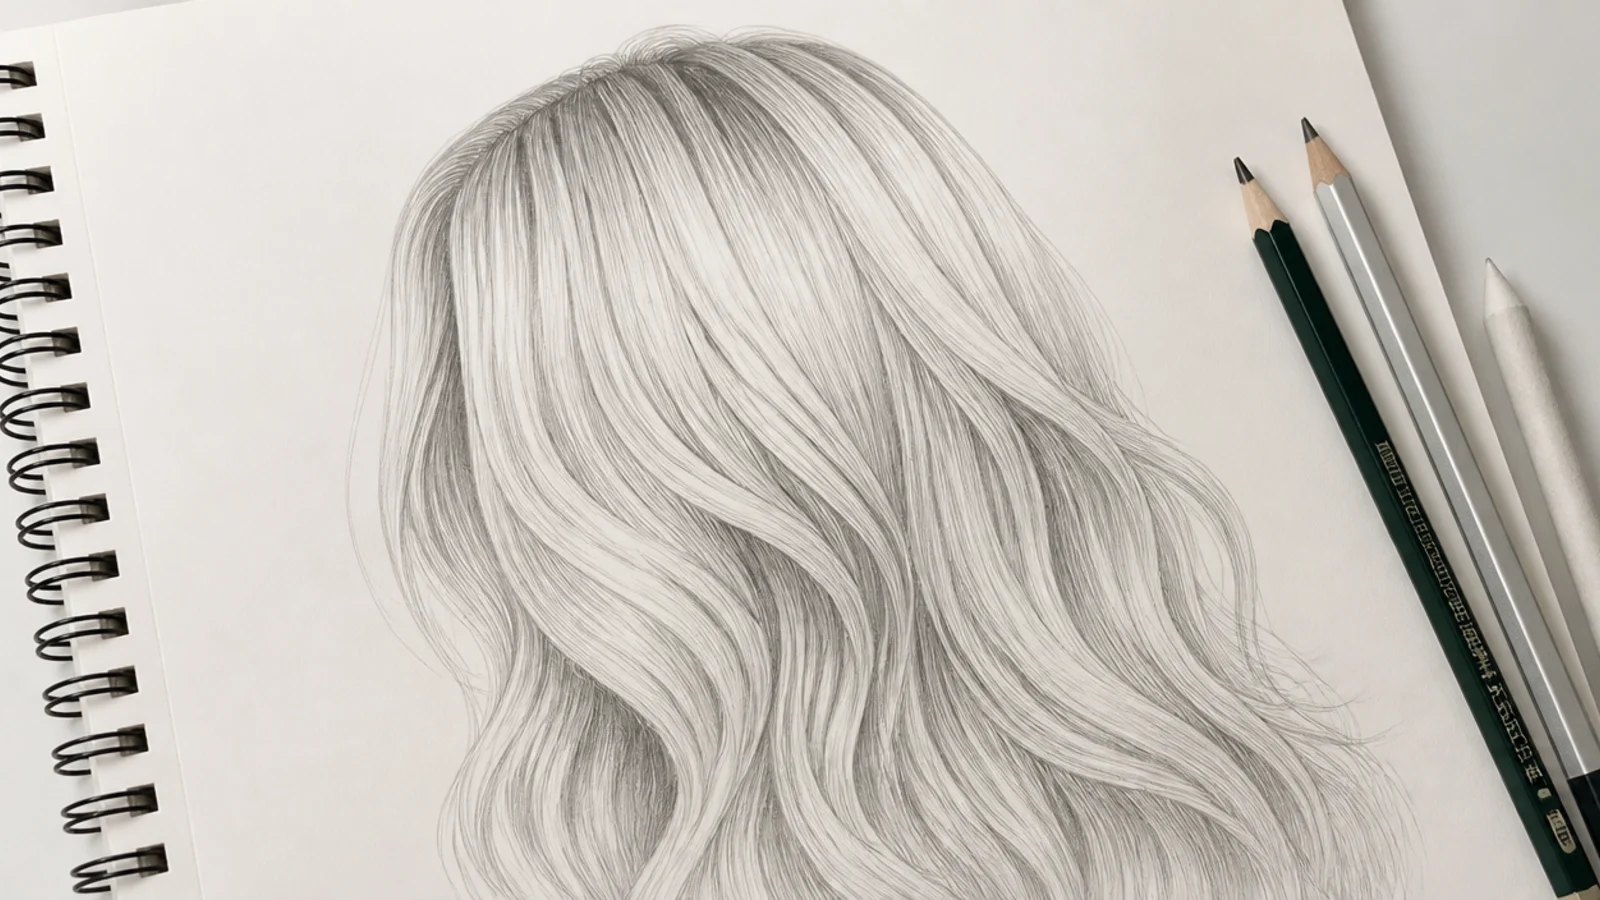
Every tutorial teaches dark hair, which is why drawn blondes look dirty. Blonde hair lives in the top half of the value range: 2H and HB do almost all the work, HB is your mid tone, and 2B is as dark as you go except in one or two deep overlaps. The shape still needs a dark accent somewhere, usually under the mass at the nape, or the whole drawing floats. Keep the shine band wide and soft rather than a hard white stripe, the opposite of the dark-hair approach in the hair sketch beginner set.
Who it suits: Anyone whose blonde hair drawings come out looking brown.
Tip: Resist the blending stump here; over-blending turns light hair into gray fog with no strand direction.
16. Long Gray and Silver Hair, White on White
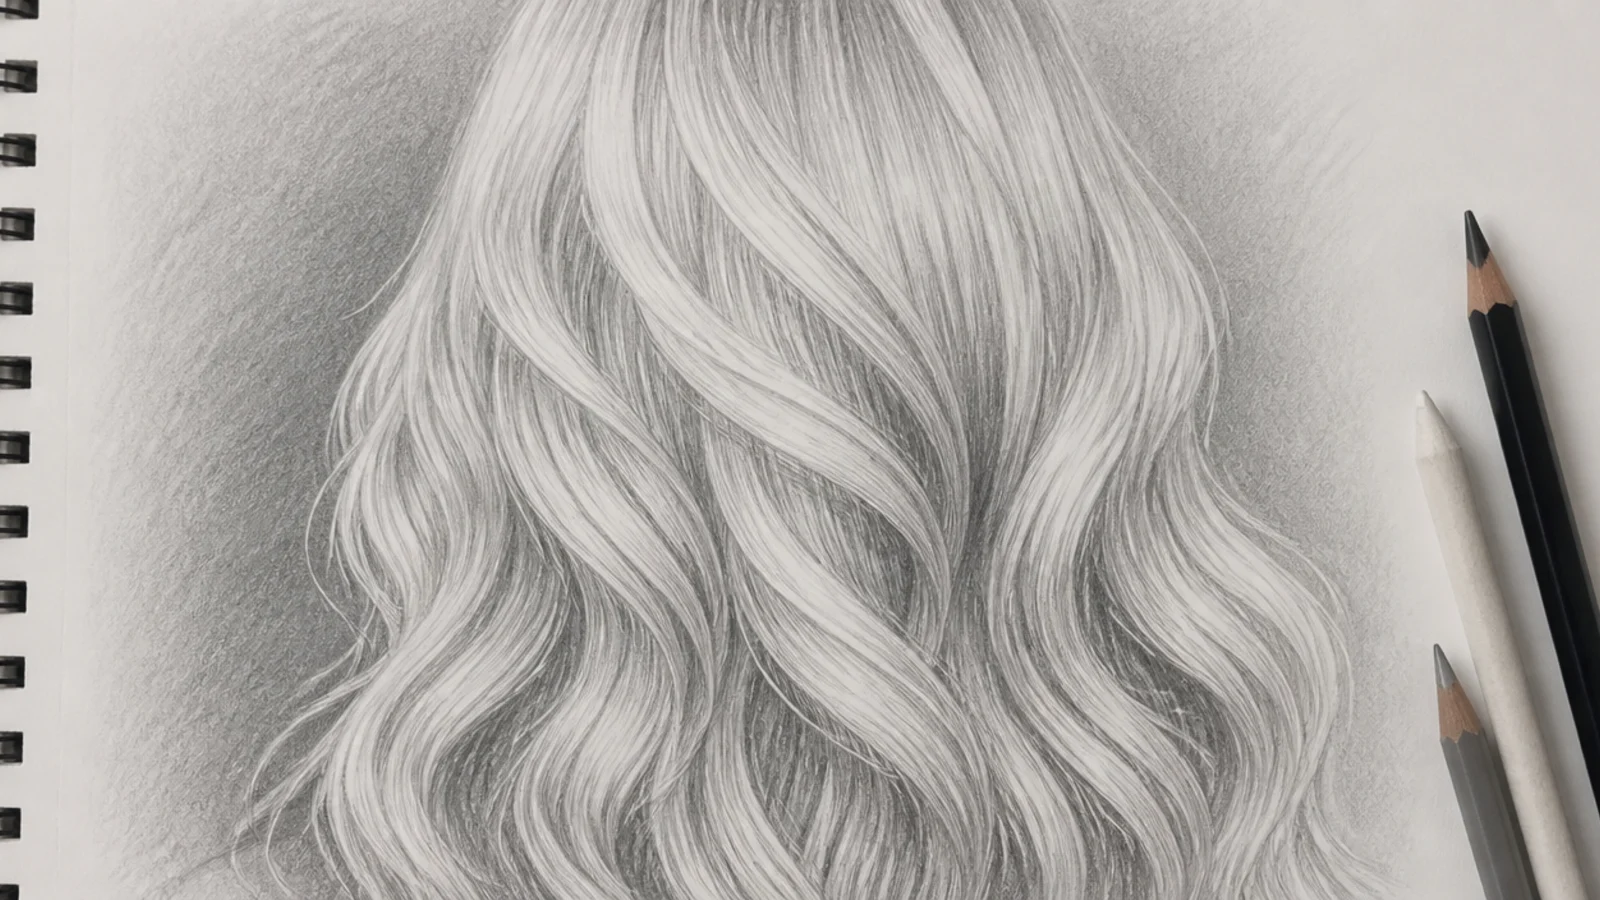
The hardest value problem in the whole list, and the one nobody covers. White or silver hair is lighter than your paper in places and can only be described by what surrounds it, so lightly tone the background in 2H first, then keep the hair itself nearly untouched paper with cool thin HB separations between sections. Silver reads through contrast of edges, not through fill. One 4B accent deep in the mass gives the eye a floor.
Who it suits: Artists drawing older characters, or white-haired character designs.
Tip: Draw the separations between strand groups rather than the strands themselves; the gaps carry all the information.
17. Long Layered Hair, Waist Length with Face-Framing Layers
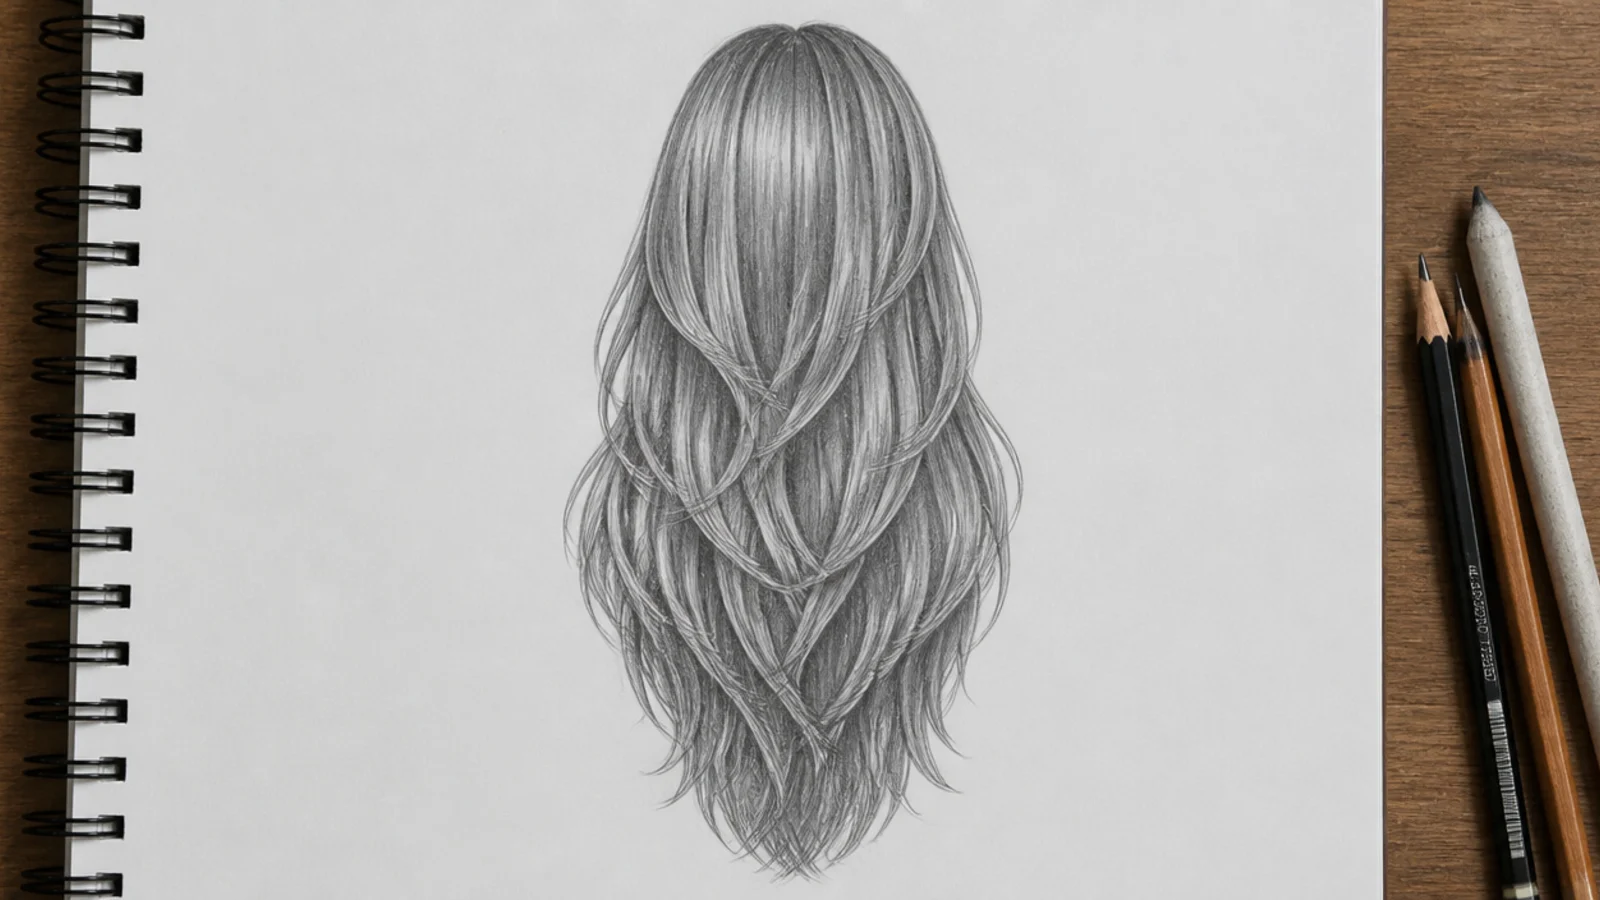
Layers give long hair its stepped silhouette, and drawing them is a matter of showing three or four different end depths within one mass. Block the full waist-length shape first, then indicate a layer edge at the chin, another at the collarbone, another mid-chest. Each layer edge gets a soft 4B shadow underneath where it lifts off the layer below. This shadow is the only thing that separates a layered cut from a blunt one on paper.
Who it suits: Fashion illustrators and anyone drawing modern long haircuts.
Tip: Do not outline layer edges; imply them with shadow and a few flicked ends. Real-cut reference: mid length vs long haircut.
18. Long Hair Lying Flat, Overhead View on a Pillow
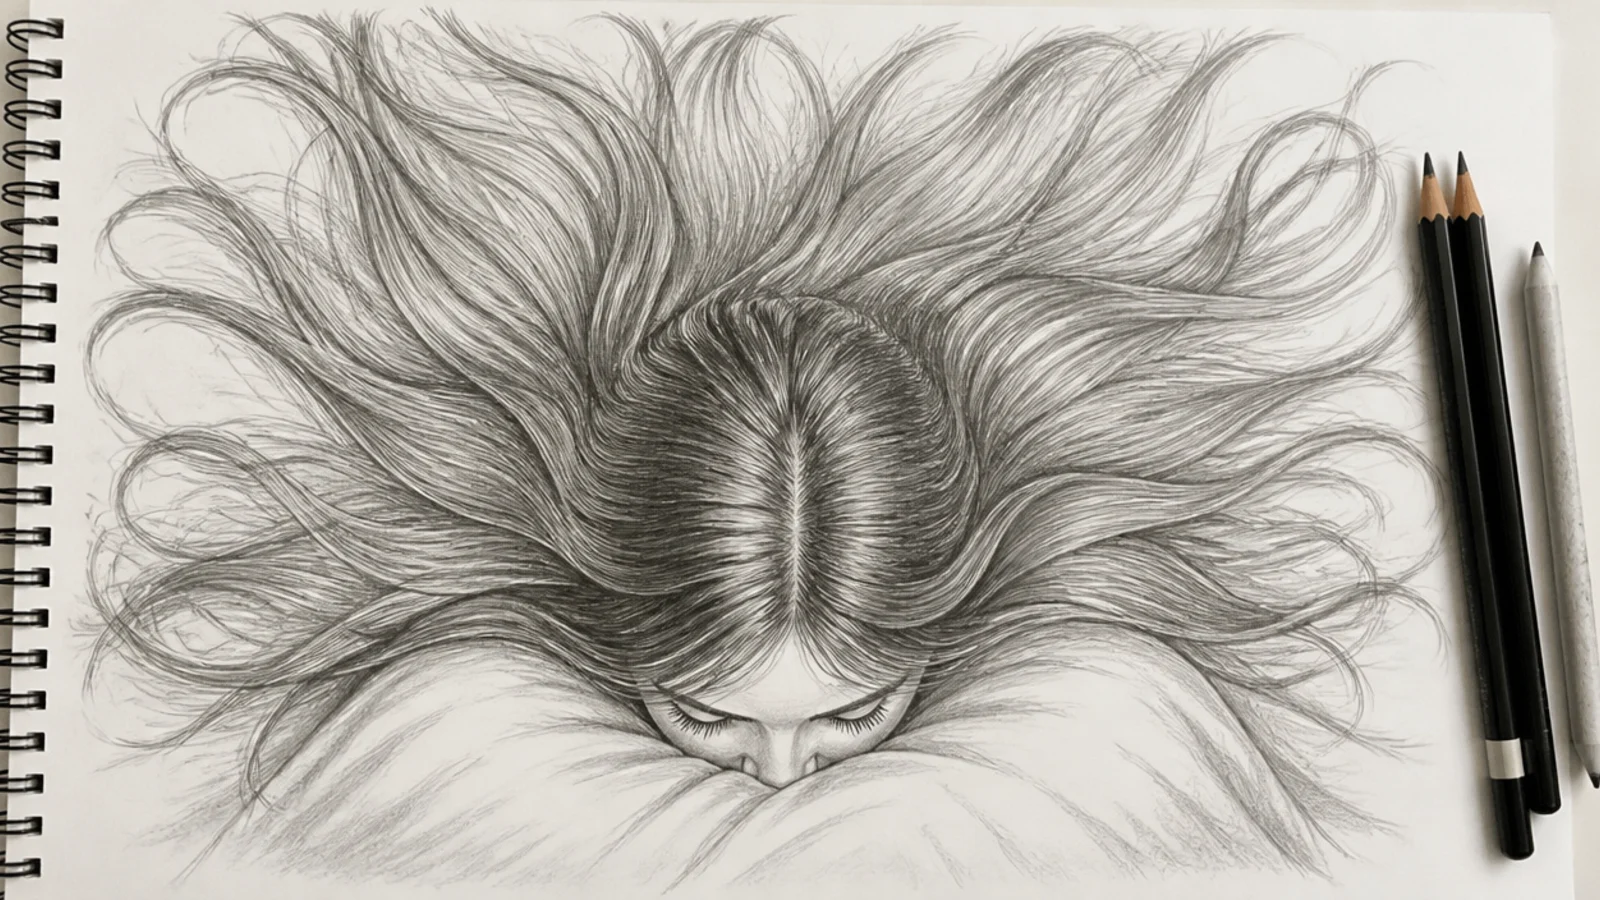
Gravity stops being your organizing rule and radiation takes over. Seen from above, hair spreads out from the crown in every direction, so the flow reads as a starburst rather than a fall. Draw the head small in the center, then sweep long 2H arcs outward, letting some groups cross over others. Shadow sits under each group where it lies on the group below, in 4B. Ends spread and separate because nothing pulls them together.
Who it suits: Illustrators drawing lying-down poses and dramatic compositions.
Tip: Vary how far each section travels; hair spread to an even radius looks like a drawn sun symbol.
19. Long Hair Underwater, Floating Ribbons
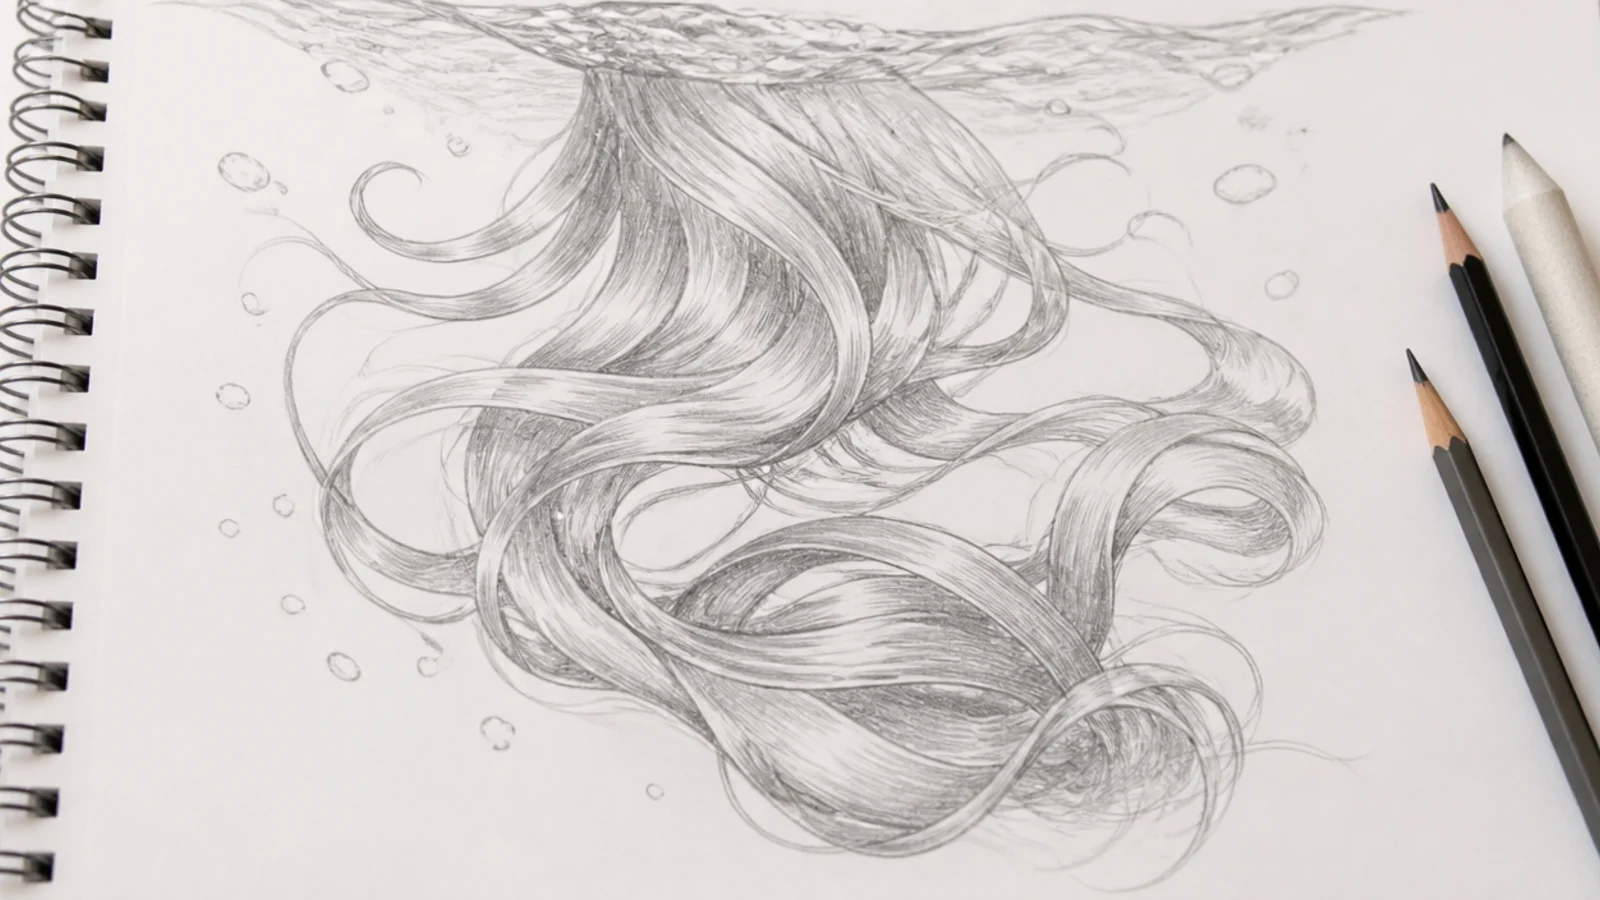
Underwater hair moves slower and wider than wind-blown hair, so the curves are lazier, the groups fatter, and nothing points sharply. Treat each section as a wide ribbon that turns face to edge as it drifts, exactly like a curl but stretched over 6 or more inches. There is no single direction; groups can drift against each other. Keep every edge soft with a blending stump and let strands fade rather than end. Real braid reference for the same mood: mermaid braids.
Who it suits: Fantasy and concept artists drawing mermaids or dream scenes.
Tip: Undercut the drama by leaving two or three groups nearly still; total motion everywhere flattens the effect.
20. Long Male Character Hair, Tied Half Back
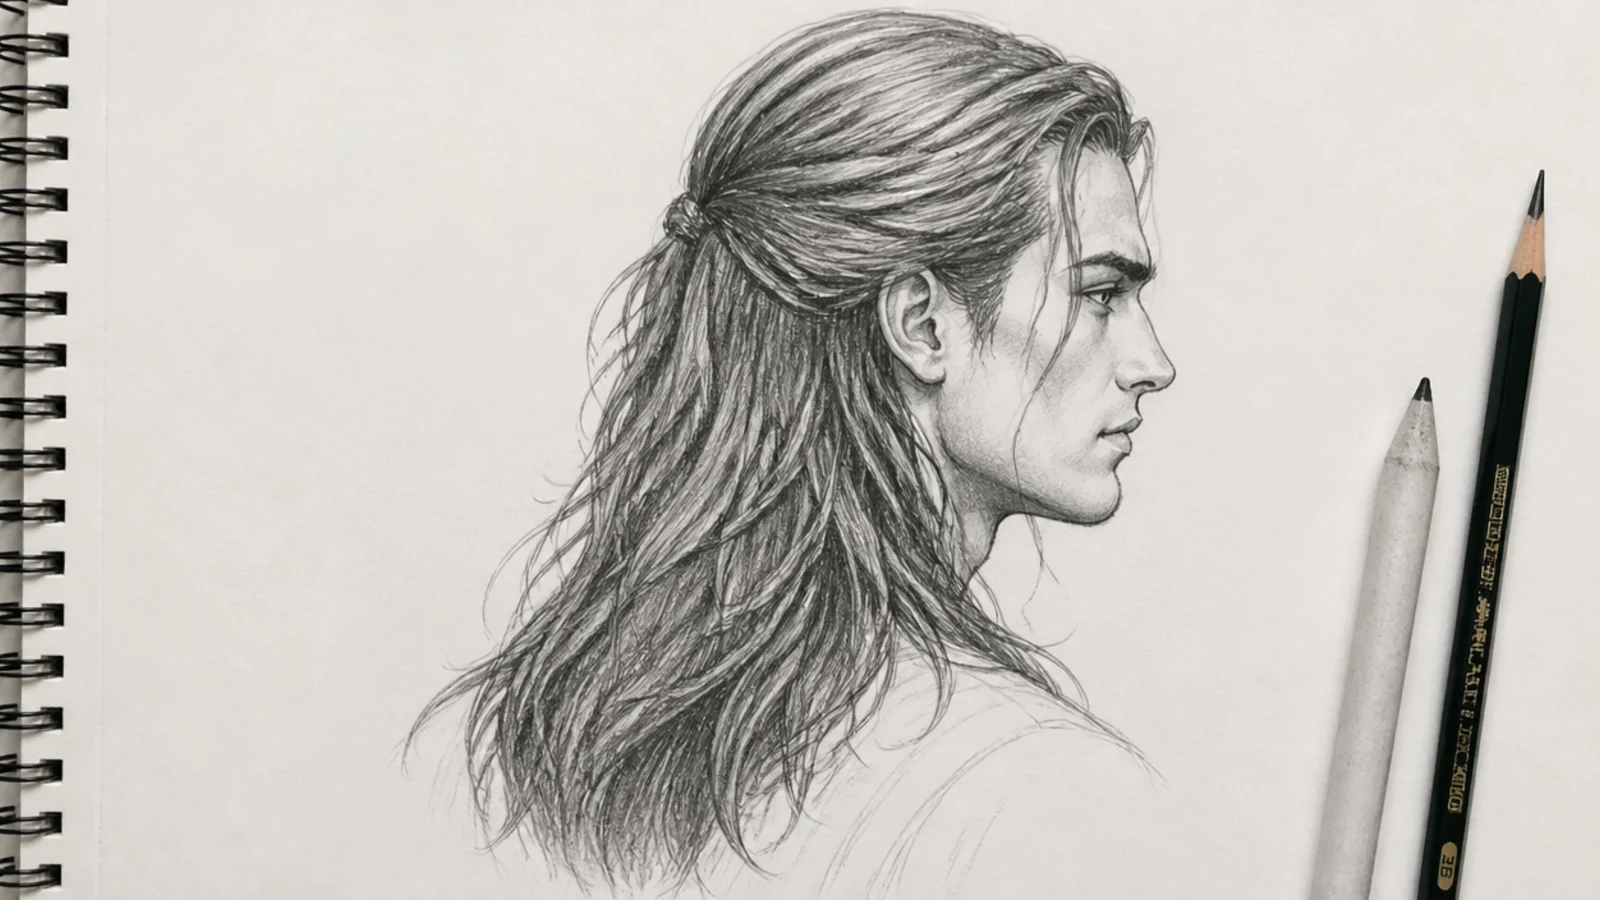
Long hair on a male character changes at the hairline more than at the length. Set the hairline higher and squarer, with a slight M shape at the temples, then let the mass fall to the shoulder blades. Half of it pulls back into a low tie at the nape, which keeps the face open. Keep the silhouette closer to the skull than you would on a female character and give the ends blunter, heavier flicks. Roughly 25 minutes.
Who it suits: Character designers drawing long-haired male figures.
Tip: The temple recession is the whole read; a rounded low hairline with long hair looks female regardless of the face. See the male hair sketch guide for hairline shapes.
How to Start a Long Hair Sketch: Shape Before Strands
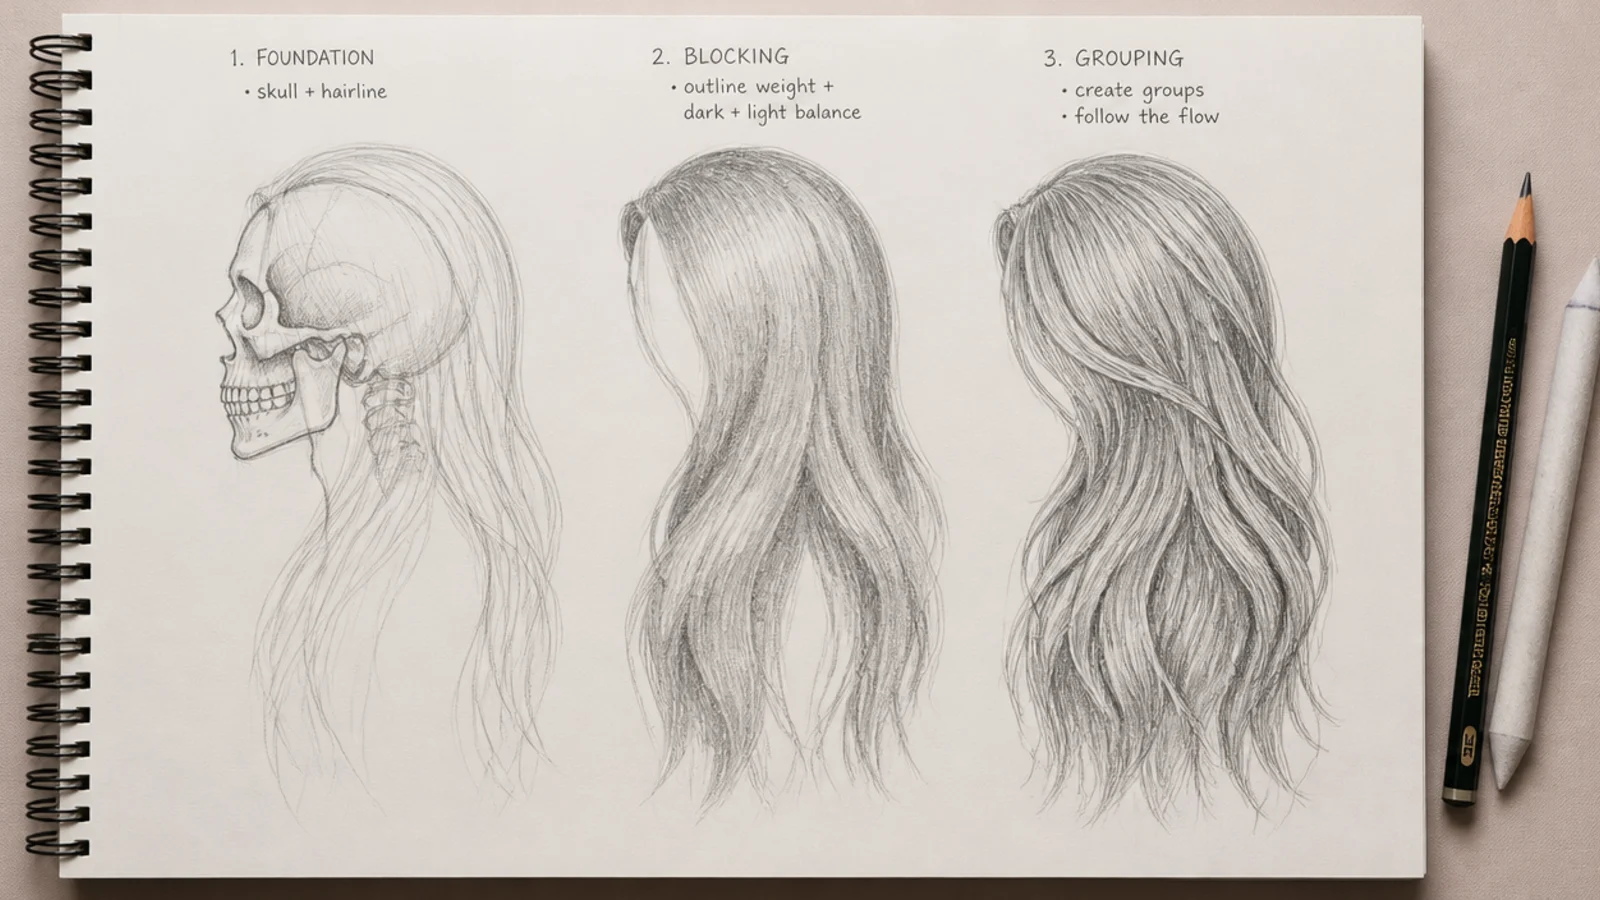
The number one beginner mistake is drawing individual strands too early, and long hair magnifies it, because a wrong silhouette gets twenty inches of runway to look wrong on. Start with the skull, since the hair mass sits on top of it and needs somewhere to sit. Set the hairline roughly a third of the way down the forehead and keep it irregular, never a clean curve. Then block the entire length, crown to ends, as one closed shape in 2H, sitting about 8mm outside the skull line at the crown to allow for volume. Ask two questions of that shape before going further: does it have a widest point, and does it have an interesting outline. Long hair that is the same width from ear to hip reads as a curtain. Only once the silhouette works do you divide it into four or five major sections, and only then do you add grouped strokes inside those sections. Strands are the last five percent of the drawing, not the first. The hair sketch tutorial walks the same order step by step.
Following the Flow: Why Long Hair Fans From the Crown
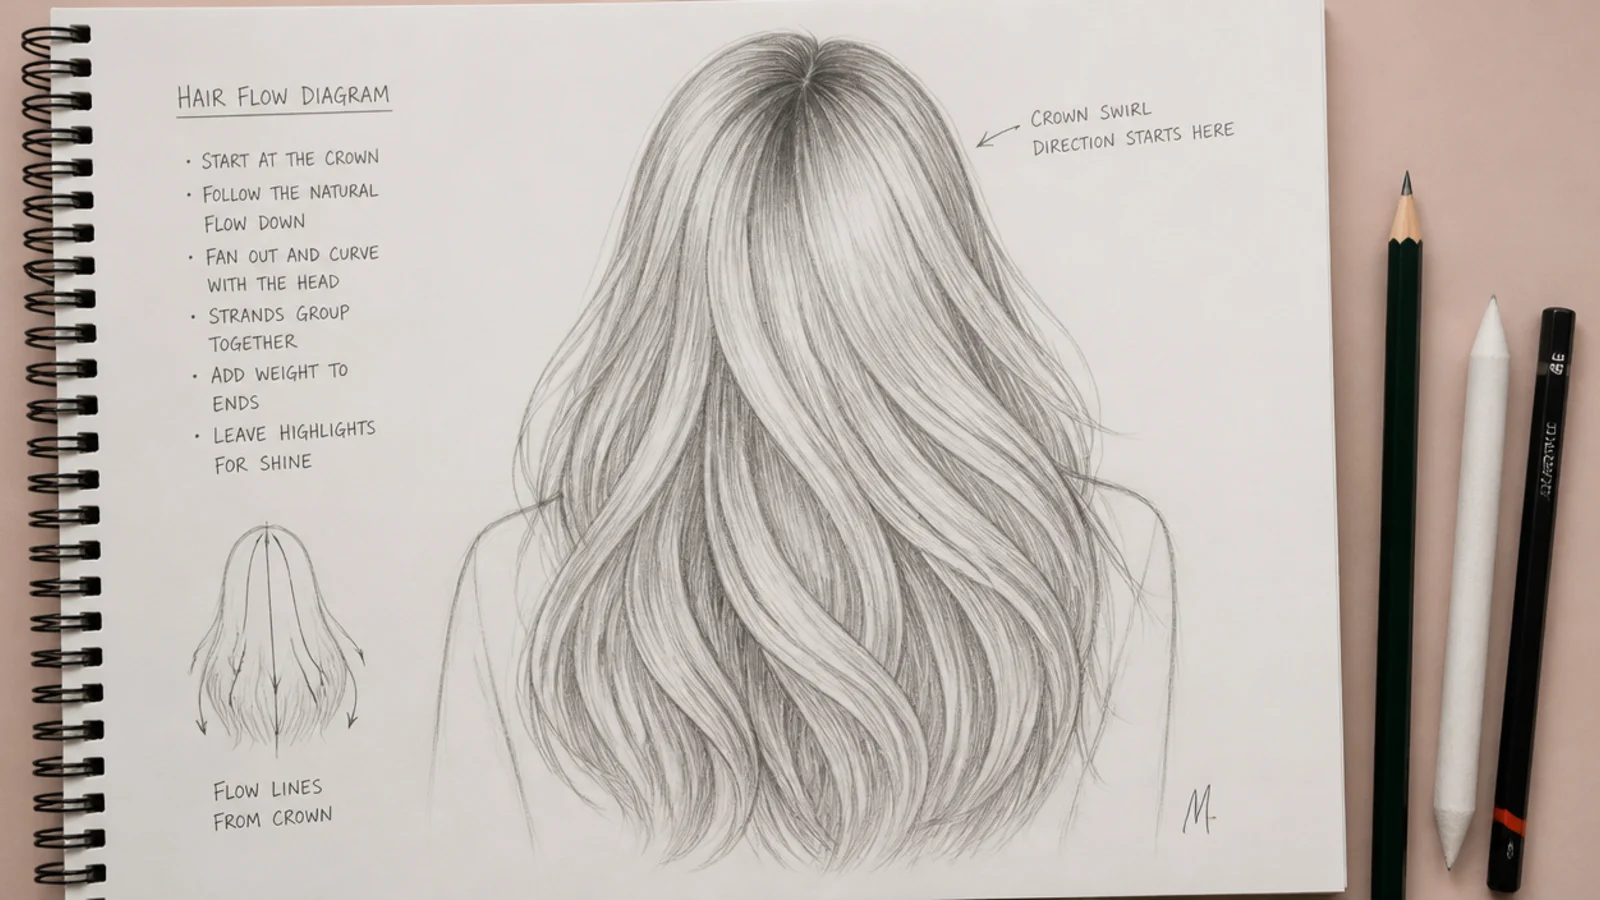
Hair grows in sections out of the crown, which means every line in a long hair sketch should trace back to that one point. This is the rule that separates drawn hair from drawn rain. Find the crown first, slightly off center on most heads, and treat it as the origin of a fan. Sections leave it in different directions, curve over the skull, and only start behaving like falling hair once they clear the head. That gives you a natural change of direction partway down, which is exactly what parallel lines lack. As sections travel they split, cross and overlap, and those crossings are where you place your darkest values, because that is where light cannot reach. Vary line length deliberately: a group that runs the full length next to a group that stops at the collarbone creates depth for free. On a back view the fan is visible directly, which is why idea four is worth repeating several times. Density is just the number of lines you place, so add more lines in the shadowed sections and fewer in the lit ones rather than pressing harder everywhere.
Shading Long Hair for Volume and Depth
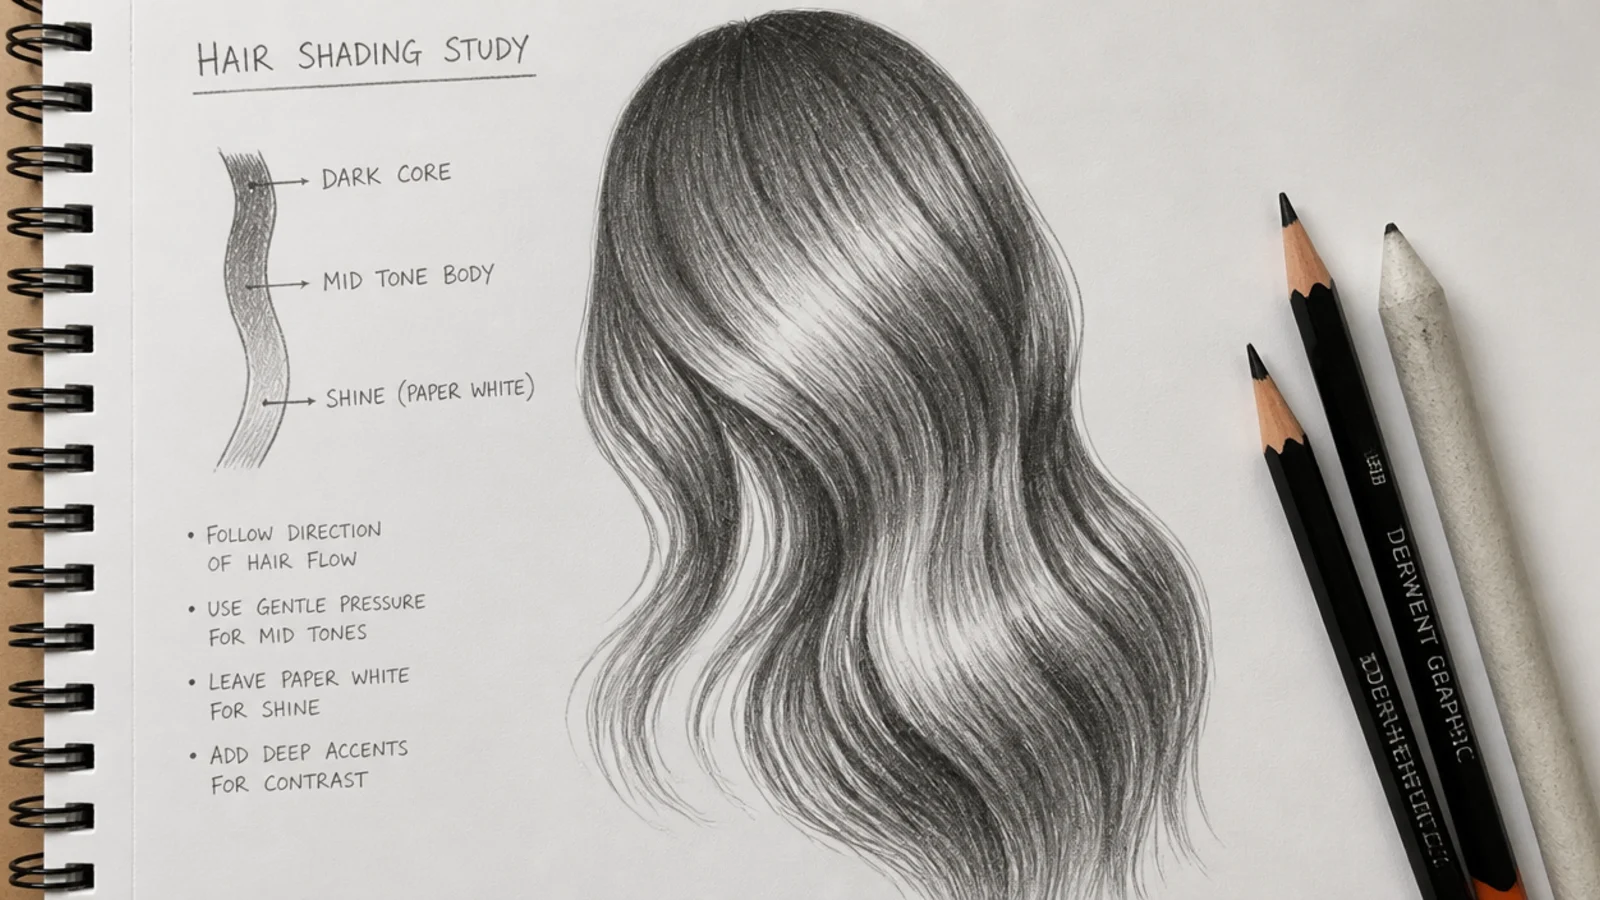
Long hair is a cylinder, roughly, and cylinders have four value zones: a dark core where the mass turns away from the light, a mid tone body, a shine band, and a reflected light near the far edge. Decide where the light is before a single mark of shading goes down. Then work light to dark: 2H for the erasable guides, HB and 2B for the first pass, 4B for mid shadows, and 6B only in the darkest cores where sections overlap and at the nape underneath the mass. That last one matters more than anything else on long hair, because a drawing with no dark underneath floats off the shoulders. For highlights, leave the paper white in the shine band or lift the band back out with a kneaded eraser pressed and rolled, following the curve of the hair rather than crossing it. On waist length hair the shine band usually appears twice, once near the crown and once lower where the mass turns again. Keep every stroke running along the hair direction, never across it, and add stray individual hairs last as a finishing pass.
Straight vs Wavy vs Curly vs Coily Long Hair
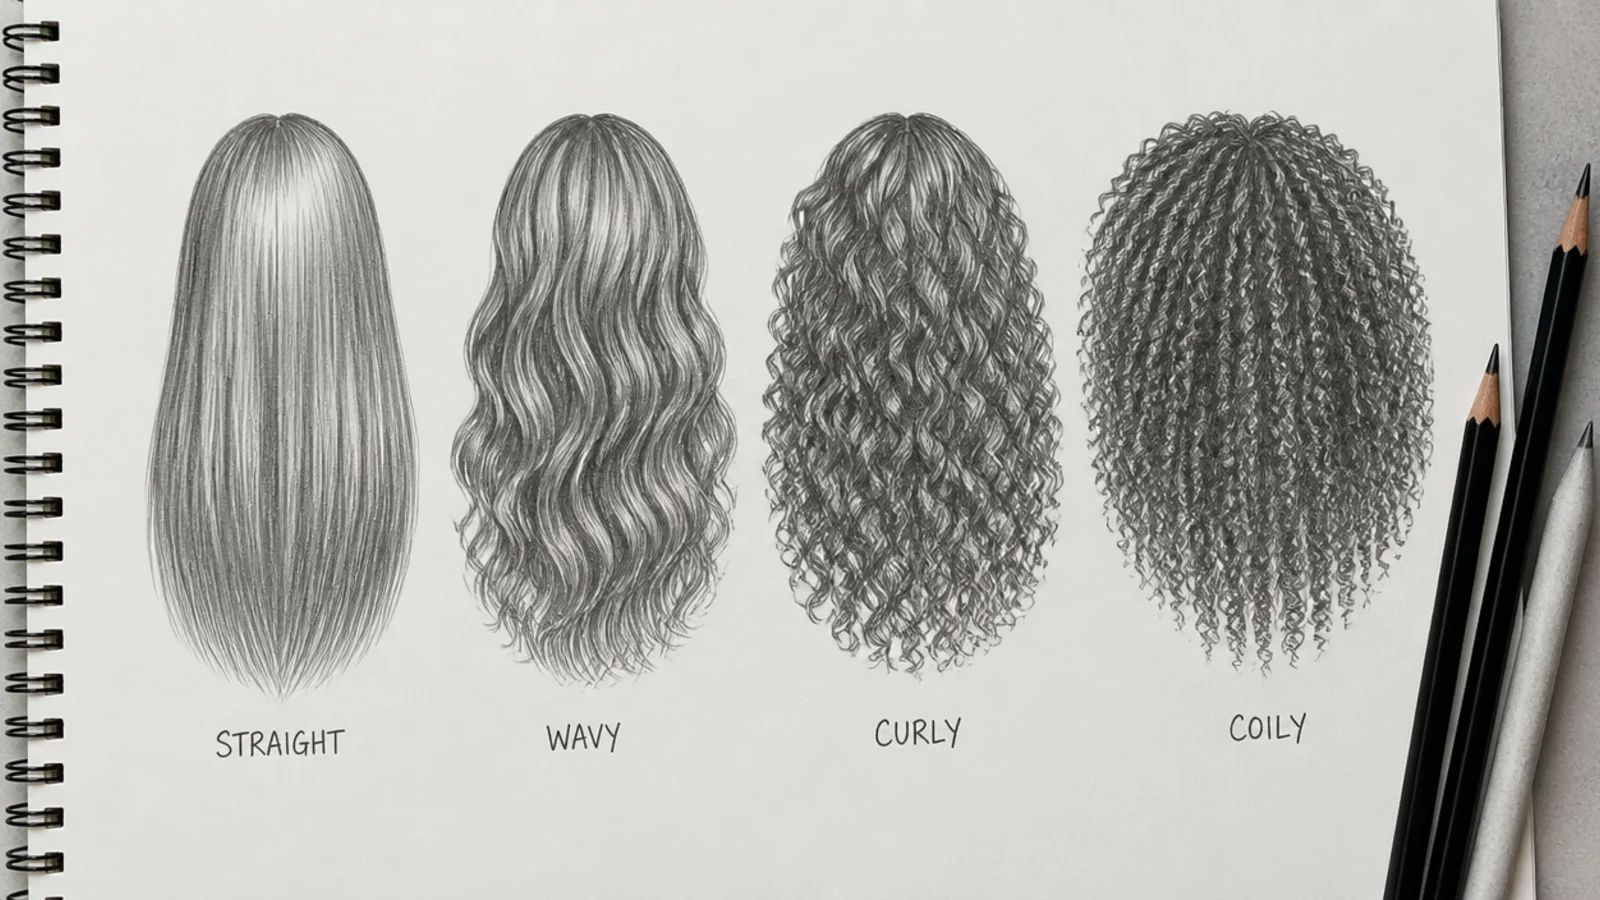
The four textures need four different first moves. Straight long hair is about line quality and restraint: long tapered strokes, varied length, and one clean shine band. Wavy hair is straight hair with an S pushed into it, so draw the straight version first and then bend it, keeping one wave rhythm throughout, about one full S every 3 inches. Curly hair is drawn as ribbons: a band twisting through space with light on one side of the turn and shadow on the opposite side, which is what makes it read as round instead of as a drawn spring. Never outline a coil. Coily 4C hair is the one almost every guide skips, and it inverts the usual approach entirely: no hard outline, small zigzag texture built from the inside out, a soft perimeter that dissolves into paper over about 5mm, and value doing all the structural work. At long stretched lengths coily hair still fans from the crown, just in wider, heavier sections. There are twenty more texture-specific starting points in the hair sketch ideas collection.
Common Mistakes in Long Hair Drawings and How to Fix Them
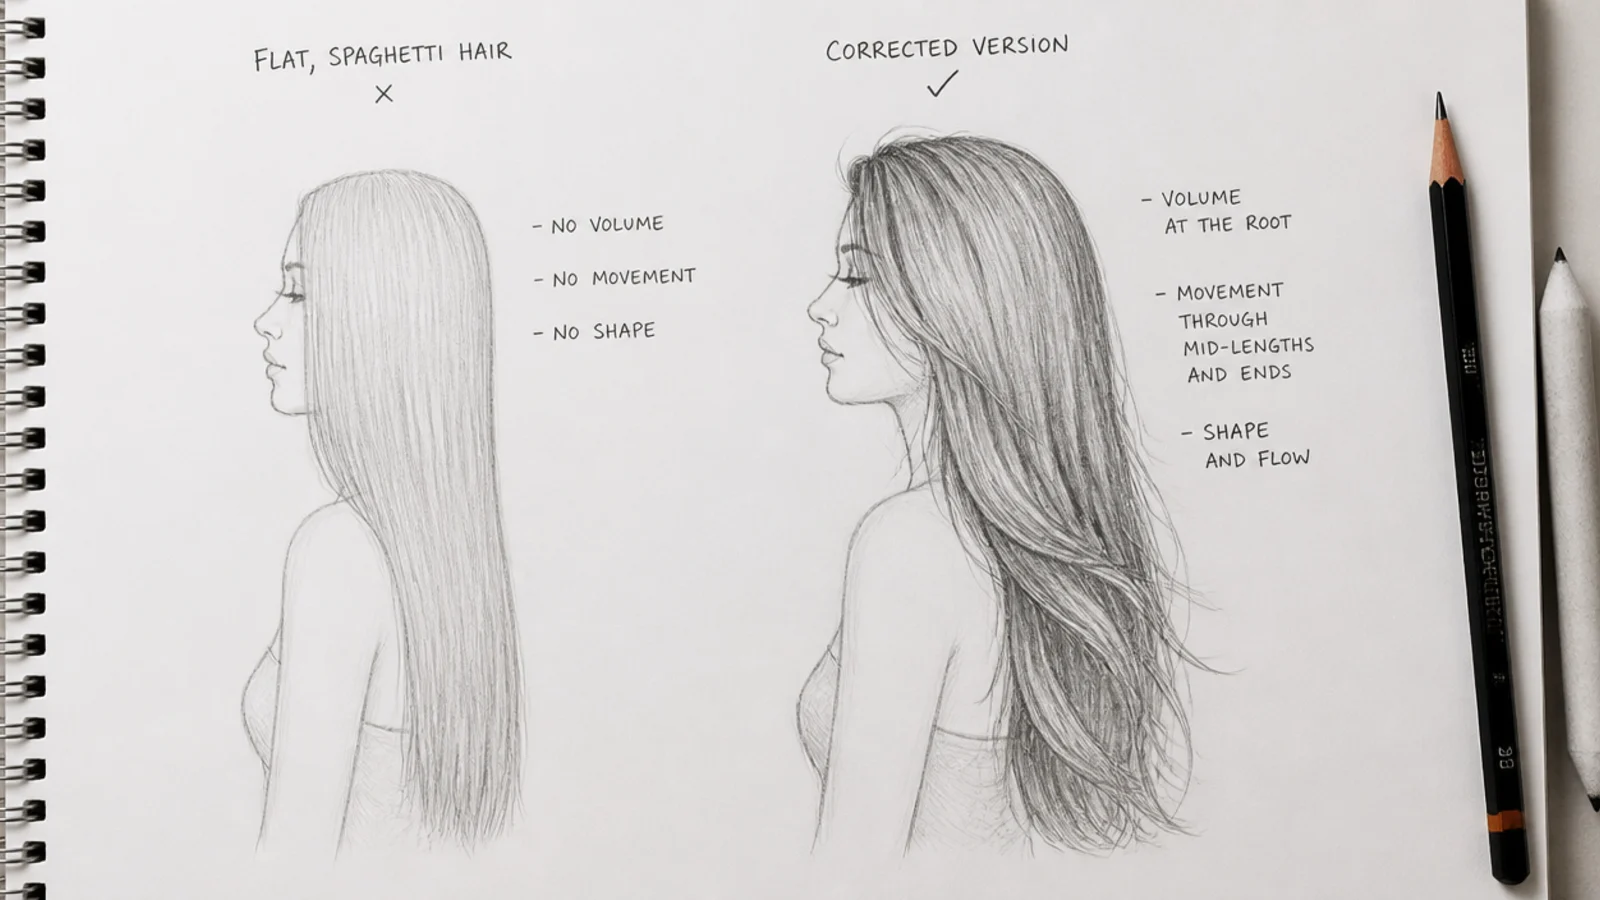
Five failures account for nearly every disappointing long hair sketch. First, spaghetti: parallel lines of equal length running straight down. The fix is the crown fan plus varied line length. Second, the helmet: a hard continuous outline around the whole mass. The fix is short flicks at the ends and breaking the outline in three or four places so hair escapes it. Third, flatness: an even mid tone everywhere with no dark core and no white paper left. The fix is committing to one light direction and putting 6B underneath the mass. Fourth, the pasted-on look, where hair sits beside the head rather than growing out of it. The fix is drawing the skull first and letting the hairline stay irregular. Fifth, over-detailing: every strand drawn, which reads as fur. The fix is mass, then sections, then strands, with strands limited to edges and the few places catching light. Shorter styles forgive more, which is why the boy hair sketch set is a good warm up. If a sketch is going wrong, stop adding and check the silhouette; it is almost always the silhouette.
Pencils, Paper, Blending Tools and Using References
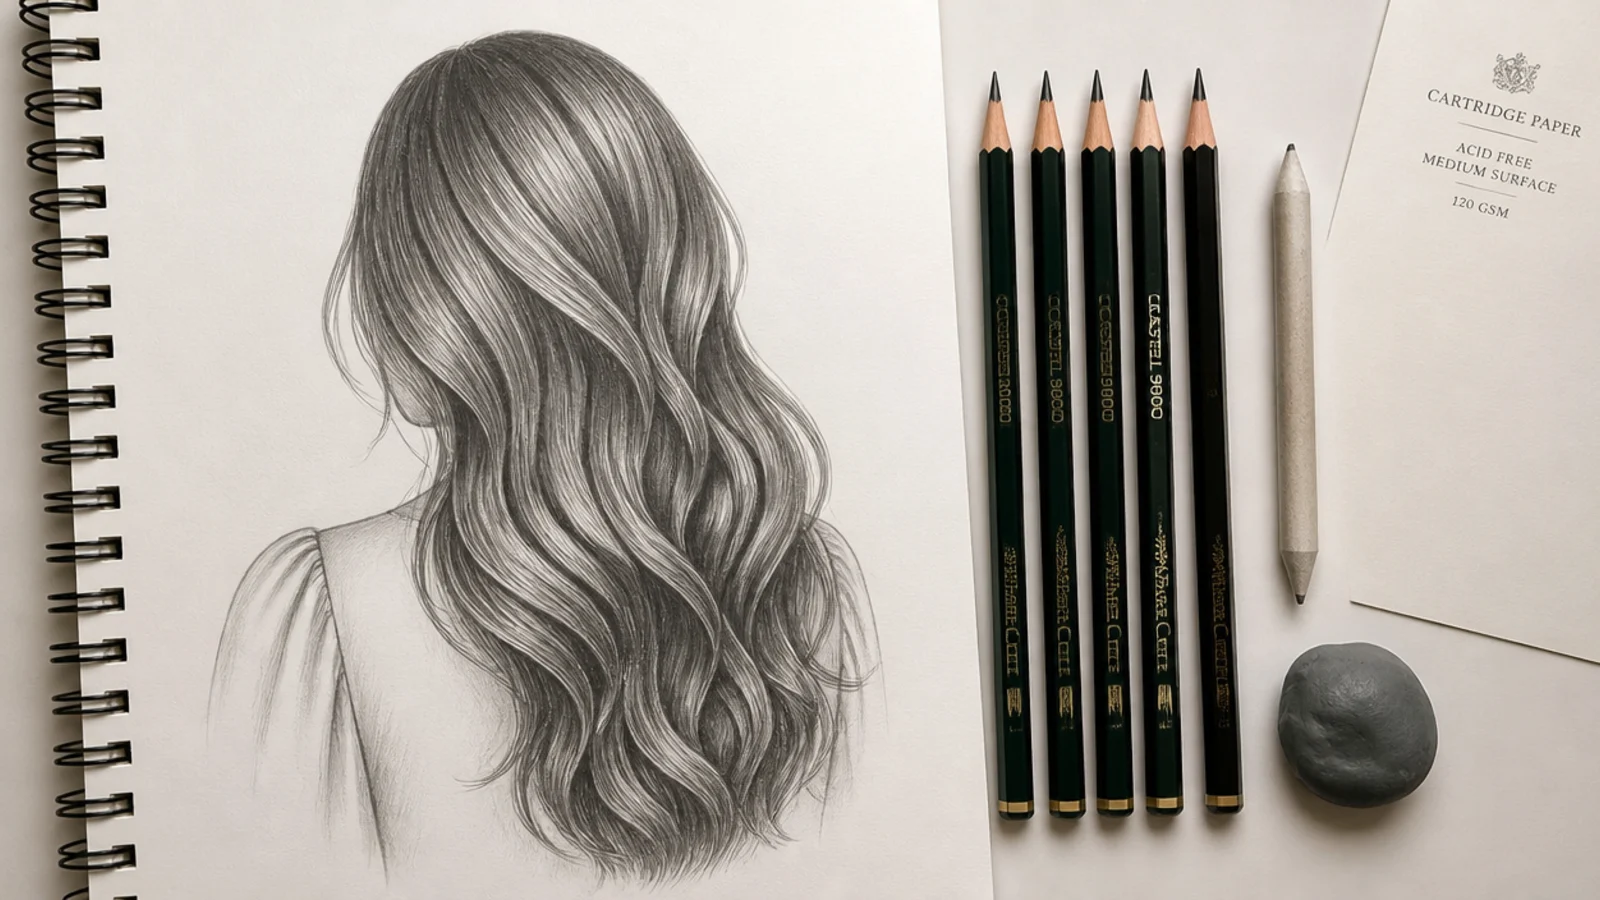
A long hair sketch needs five grades and nothing exotic: 2H for guides light enough to erase cleanly, HB for the first strand groups, 2B and 4B for mid shadows, and 6B for the darkest cores. Smooth 90 to 120gsm cartridge paper takes long unbroken strokes without the tooth fighting you, which matters far more on waist length hair than on a bob. A kneaded eraser is the actual highlight tool, since it lifts graphite instead of scrubbing it. Use a blending stump sparingly and only along the hair direction; a few passes suggest softness, twenty passes make gray fog. For references, work from three or four photos of the same hairstyle at different angles rather than copying one image, and study the flow before you study the detail. Trace the section directions with your finger first. Photo references are fine for learning, but check licensing before selling work derived from someone else's photograph. Browse the whole hair sketch board for angle-by-angle reference sets.
Frequently Asked Questions
How do you draw long flowing hair?
Block the entire length as one silhouette first, then find the flow. Every section fans out of the crown, curves over the skull, and only falls once it clears the head, which gives you a natural change of direction that parallel lines never have. Draw four or five major sections, let them cross and overlap, shade the overlaps darkest, and add individual strands last.
Why does my long hair drawing look flat or like spaghetti?
Almost always two causes. The lines run parallel and are all the same length, and there is no dark value underneath the mass. Fix the first by fanning every line from the crown and varying how far each group travels. Fix the second by putting 6B at the nape and in the overlaps, then leaving bare paper for the shine band.
What pencil is best for shading long hair?
Use a range, not one pencil. 2H draws guides light enough to erase, HB builds the first strand groups, 2B and 4B carry the mid shadows, and 6B goes only in the darkest cores where sections overlap. Blonde and silver hair invert this: 2H and HB do most of the work and 4B appears once or twice as an anchor.
How do you draw hair blowing in the wind?
Pick one wind direction and commit to it completely. Draw three groups, a lead group, the main mass and a trailing tail, all leaving the head on the same side and thinning as they travel. Leave gaps of white paper between groups so air reads through. Hair lags behind the head in a turn, so keep the tips a beat behind the roots.
How do you draw long curly hair without it looking like springs?
Draw curls as ribbons, not outlines. A ribbon turns from wide face to narrow edge as it spirals, so light lands on the outside of the turn and shadow sits on the opposite side. Block the whole curly mass as one cloud first, then carve maybe ten to fifteen ribbons into it and leave the rest as texture rather than defining every coil.
Should I draw the head before adding long hair?
Yes, always. Hair is a form sitting on top of a skull, and without the skull underneath it there is nowhere for the volume to sit and no hairline to grow from. Draw the head, mark an irregular hairline about a third down the forehead, then block the hair roughly 8mm outside the skull line at the crown so the mass has believable thickness.
How long does a long hair sketch take?
A straight front view runs about 20 minutes once you know the order. Wind-blown, wet and backlit studies run 30 to 40 minutes because the value work is heavier, and a full layered back view can take an hour. Volume of attempts teaches hair faster than polish, so favor several 20 minute studies over one long piece.
How do you draw the back view of long hair?
Start with the crown swirl, which is visible only from behind and sits slightly off center on most heads. Fan 2H guides out of it in every direction like water off a dome. The mass narrows at the nape then widens across the shoulder blades. Darken with 4B just under the occipital curve where the hair leaves the skull.
How do you use hair references without copying them?
Work from three or four photos of the same hairstyle at different angles instead of one image, and study flow before detail. Trace the section directions with your finger, note where the crown sits and where the darkest overlaps land, then draw from those observations. Check licensing before selling work derived directly from someone else's photograph.
Do you draw straight and coily long hair the same way?
No, they invert each other. Straight hair is defined by its outline and long tapered strokes, while coily 4C hair has no hard silhouette edge at all and is built from the inside out with small zigzag marks and a perimeter that dissolves into the paper. Straight hair leans on line quality; coily hair leans almost entirely on value.
Which hair sketch look are you saving?
Long hair rewards patience with the silhouette and punishes nothing else so heavily. If you take three habits from these 20 ideas, take these: block the full length as one shape before any strand, fan every line from the crown so the flow reads as growth rather than falling rain, and keep your darkest 6B value in the overlaps underneath rather than smeared across the surface. Work the list roughly in order, give each sketch 20 to 30 minutes instead of two hours, and repeat the back view and the wind-blown study more than once, since those two carry the most transferable skill. When you want a single texture in more depth, the curly hair sketch guide goes further, and the full hair sketch board has the step by step tutorials.