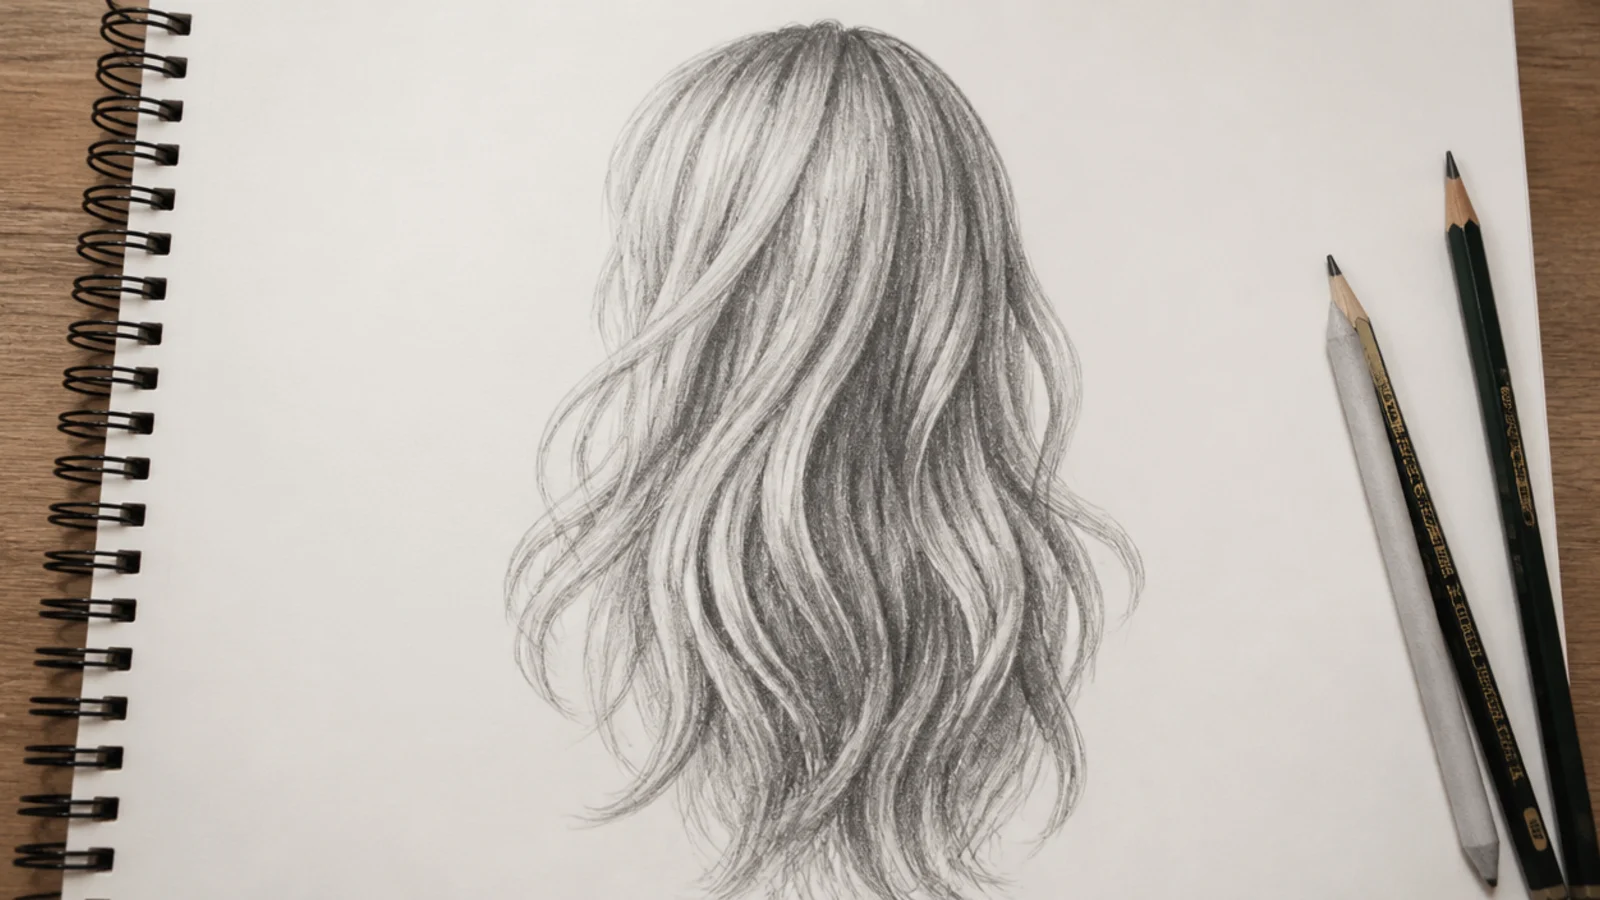
Quick Comparison
| Sketching Hair in Graphite on Paper | Sketching Hair Digitally on a Tablet | |
|---|---|---|
| Starting kit and cost | 2H to 6B pencils, kneaded eraser, paper, under 25 dollars | Tablet and stylus, roughly 100 to 400 dollars, plus software |
| How you get highlights | Protect white paper, then lift with a kneaded eraser | Erase freely or paint white on a layer above |
| Fixing a bad silhouette | Erase and redraw, and the paper tooth degrades | Transform the layer or undo, with no damage |
| Value control | Pressure and pencil grade, roughly 5 usable steps | Opacity sliders give continuous control |
| Texture and strand work | Grain of the paper adds natural break-up for free | Needs textured brushes or it looks plastic |
| Speed on a finished piece | 45 to 90 minutes for a full shaded head | 30 to 60 minutes once brushes are set up |
| Skill it builds fastest | Value judgment, because mistakes are expensive | Composition and iteration, because undo is free |
| Biggest failure mode | Over-blending into gray smoke | Over-relying on smudge and blur tools |
| Best for | Learning fundamentals and sketchbook practice | Character work, revisions and color exploration |
1. Draw the Skull and Hairline Before Any Hair
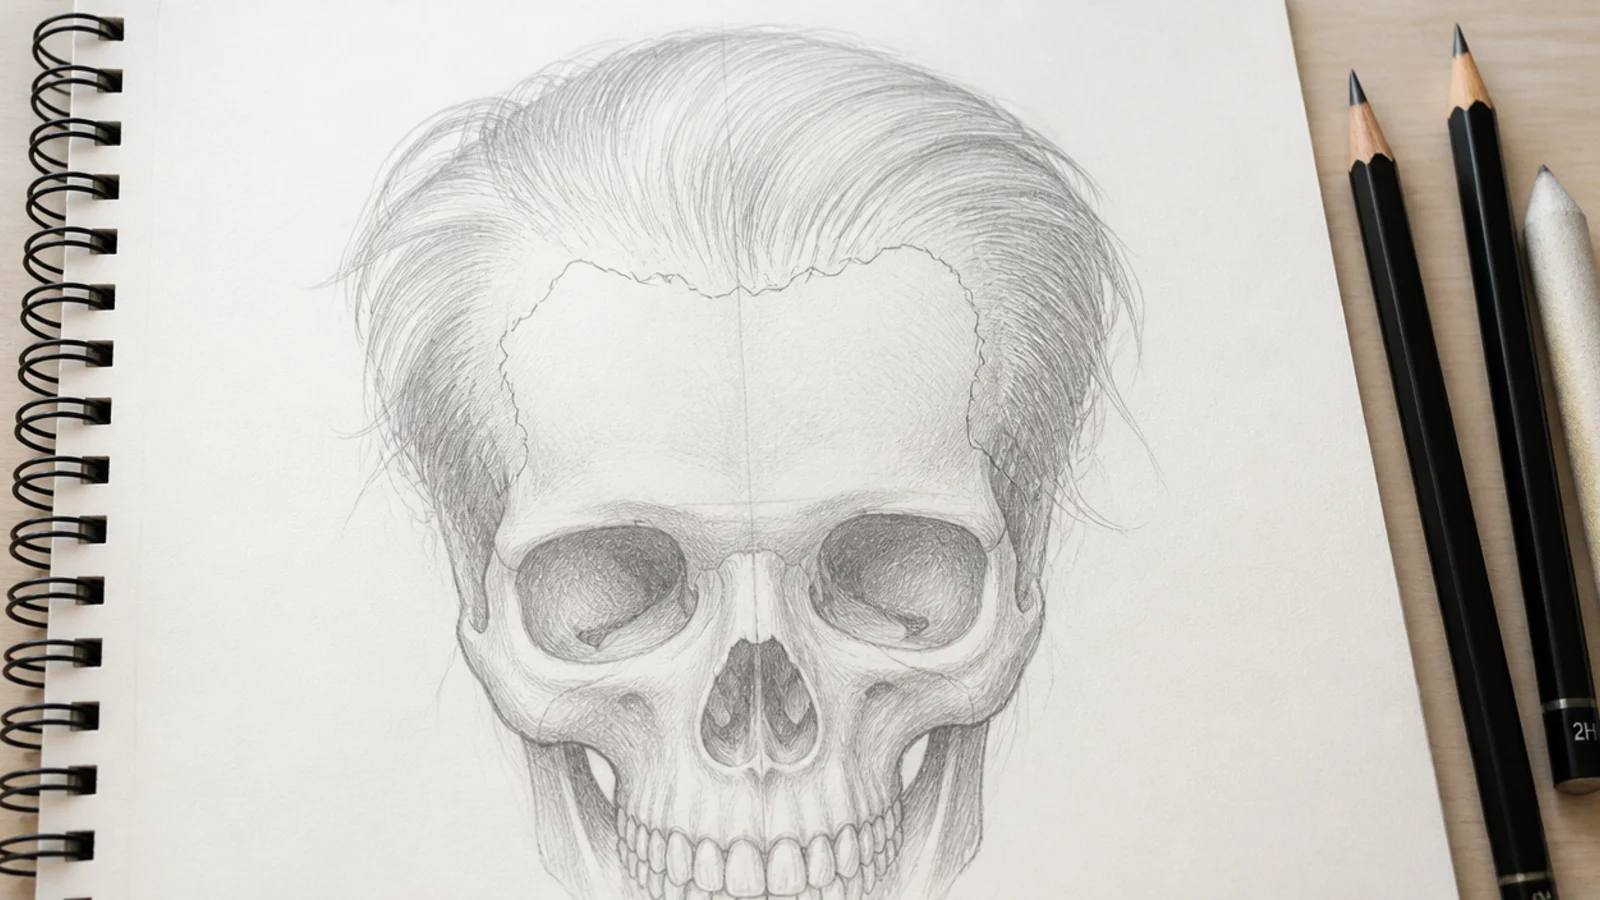
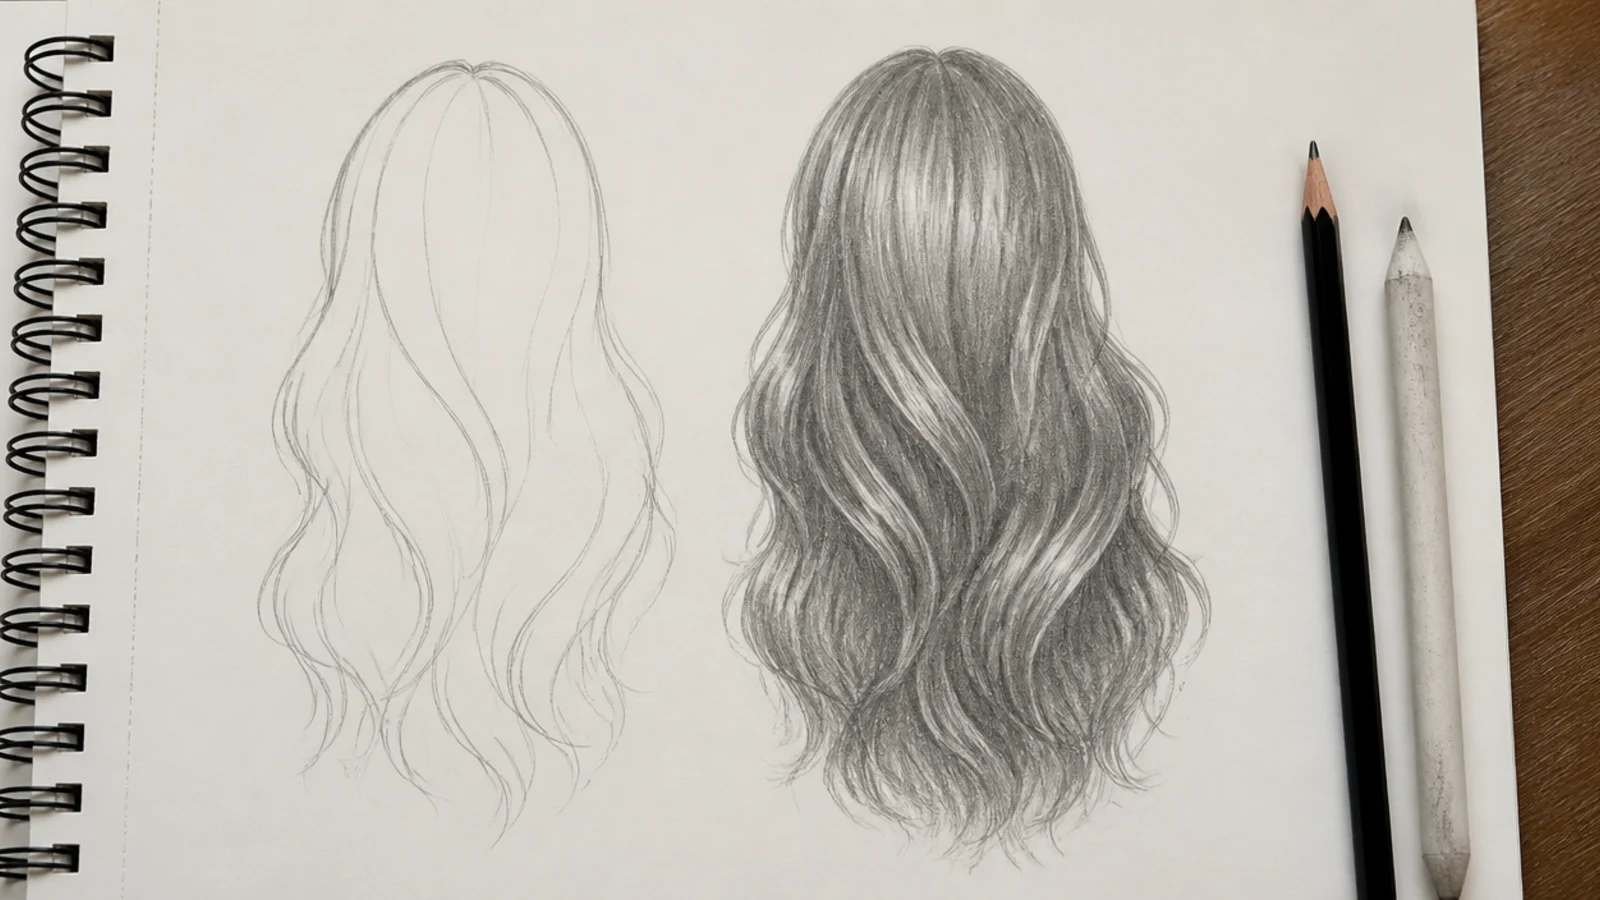
Sketch the head as a ball with a jaw attached, using a 2H pencil at pressure so light you can barely see it. Mark the top of the cranium, then draw the hairline about a third of the way down the forehead as a soft irregular line with small breaks, never a hard clean arc. Hair sits on top of that skull with real thickness, so leave 3 to 6mm of clearance above the crown depending on the volume you want. Everything you draw from here is a shell around this form, which is why the head has to exist first, as the block-ins in the hair sketch hub all show.
Common mistake: Flattening the top of the skull, which leaves no room for volume and makes the hair look painted on.
Pro tip: Draw the hairline in tiny broken ticks rather than one stroke so it never reads as a wig edge.
2. Block the Full Hair Silhouette as One Solid Shape
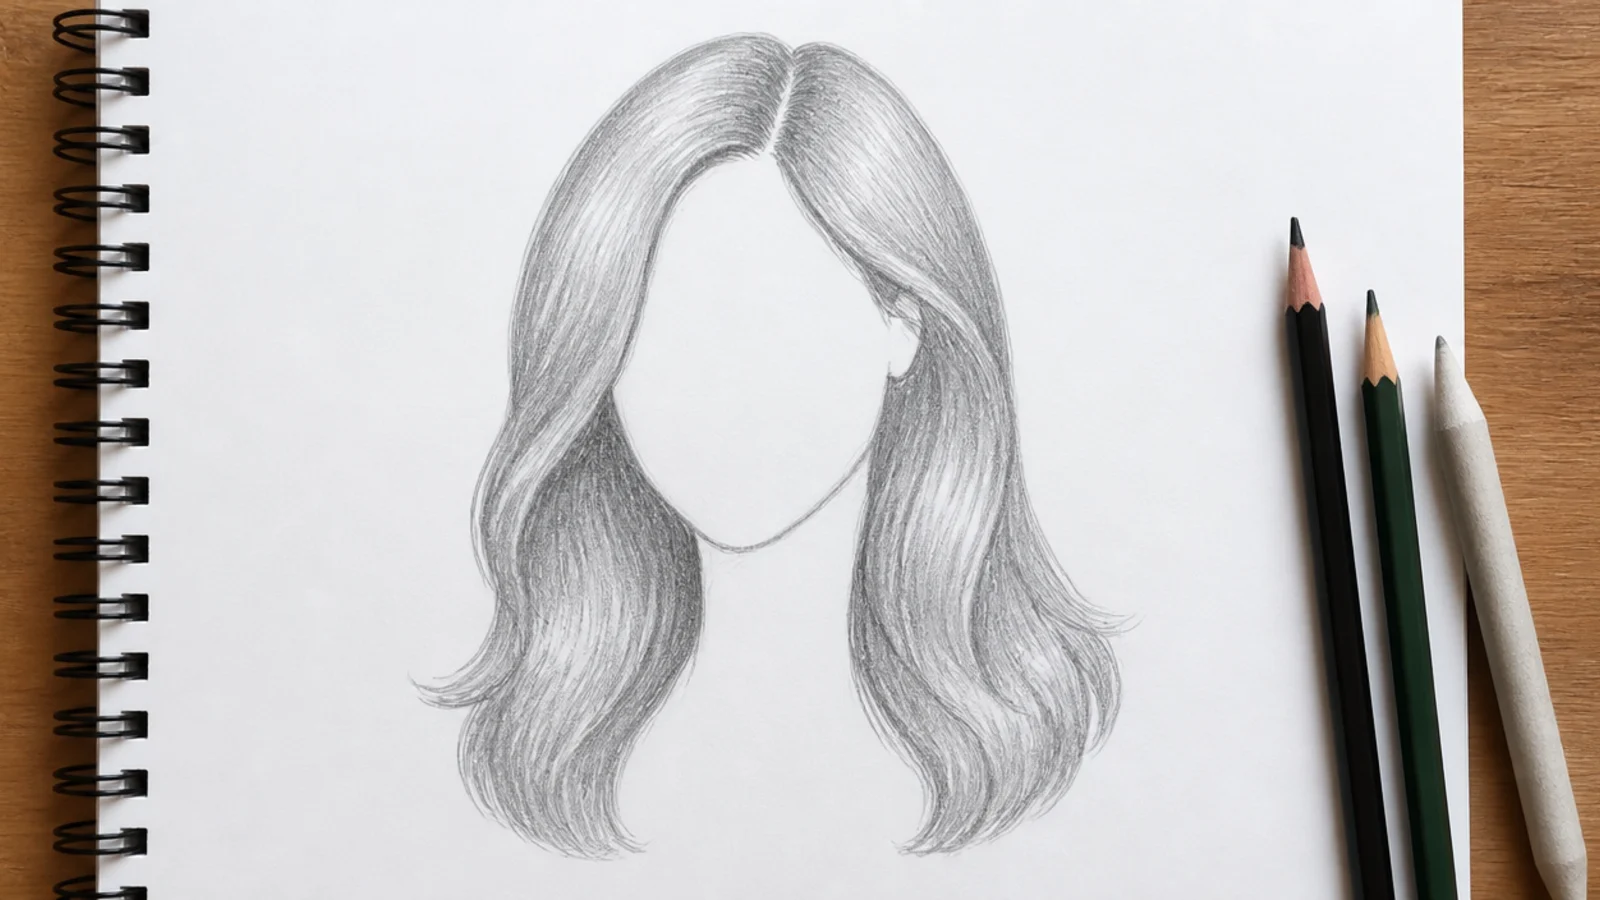
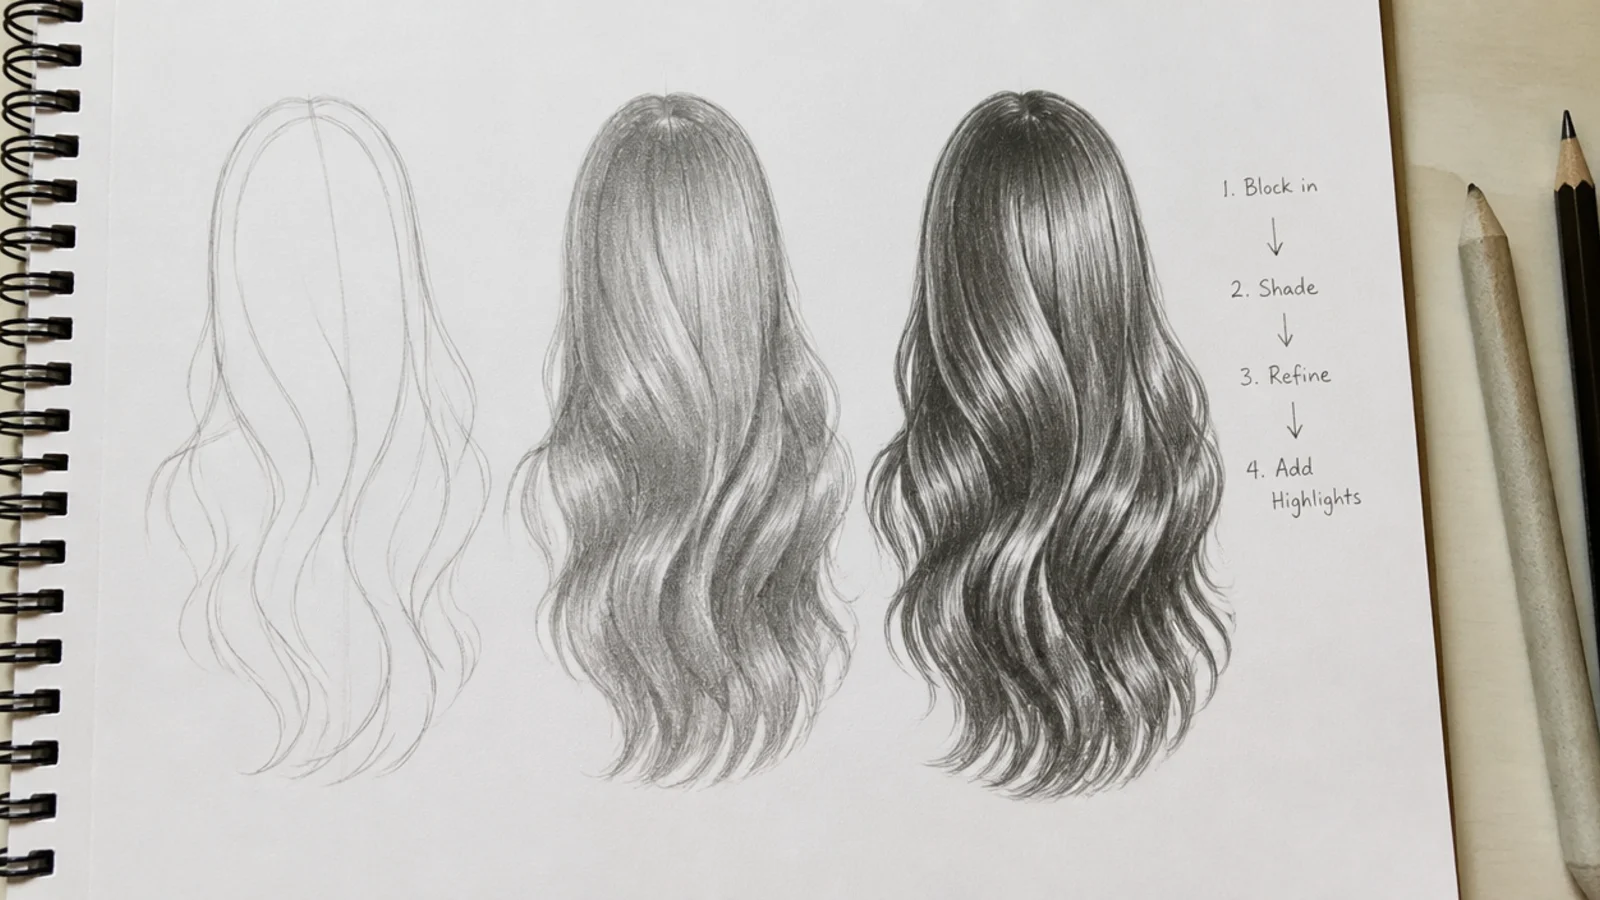
Outline the entire hair mass as a single closed shape, including where it falls past the shoulders. Judge it as a silhouette: turn the paper upside down or squint until the drawing goes gray, and the shape alone should read as a bob, a ponytail or long layers with no interior detail at all. Keep the outer contour slightly uneven, because a perfectly smooth outline is what makes drawn hair look like a helmet. This single step is the biggest difference between beginner and pro hair, and it costs about two minutes.
Common mistake: Drawing individual strands here is the number one beginner error and it locks in a flat shape.
Pro tip: Photograph your block-in and shrink it on your phone; if it still reads at thumbnail size, the silhouette works.
3. Find the Crown and Fan Your Flow Lines Out From It
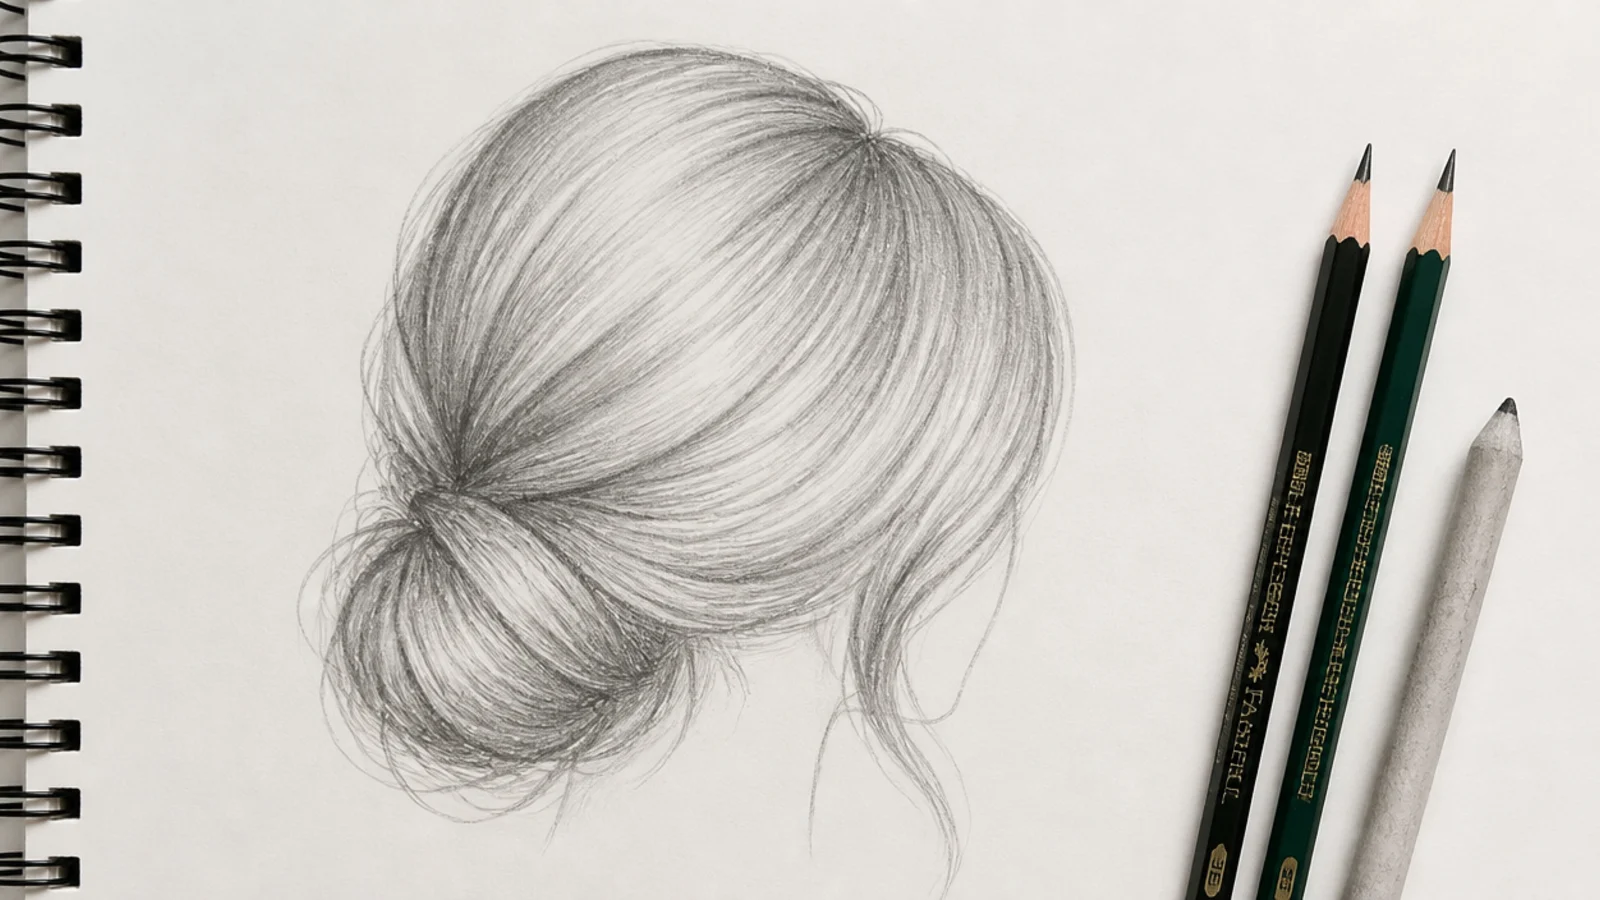
Put a small x where the crown or growth spiral sits, usually up and back from the center of the skull, then draw five to eight long sweeping guide lines fanning out from it to the ends of the hair. Hair grows in sections from that point, so every strand you draw later has to obey one of these lines. Vary the spacing deliberately: lines that run parallel and evenly spaced are what makes hair read as a wig or a wall of noodles. Add the part line now too if the style has one.
Common mistake: Parallel evenly spaced flow lines, which produce that curtain-of-spaghetti look no shading can fix.
Pro tip: Draw each flow line in one continuous arm movement from the shoulder, not short wrist strokes.
4. Break the Mass Into Five or Six Strand Groups
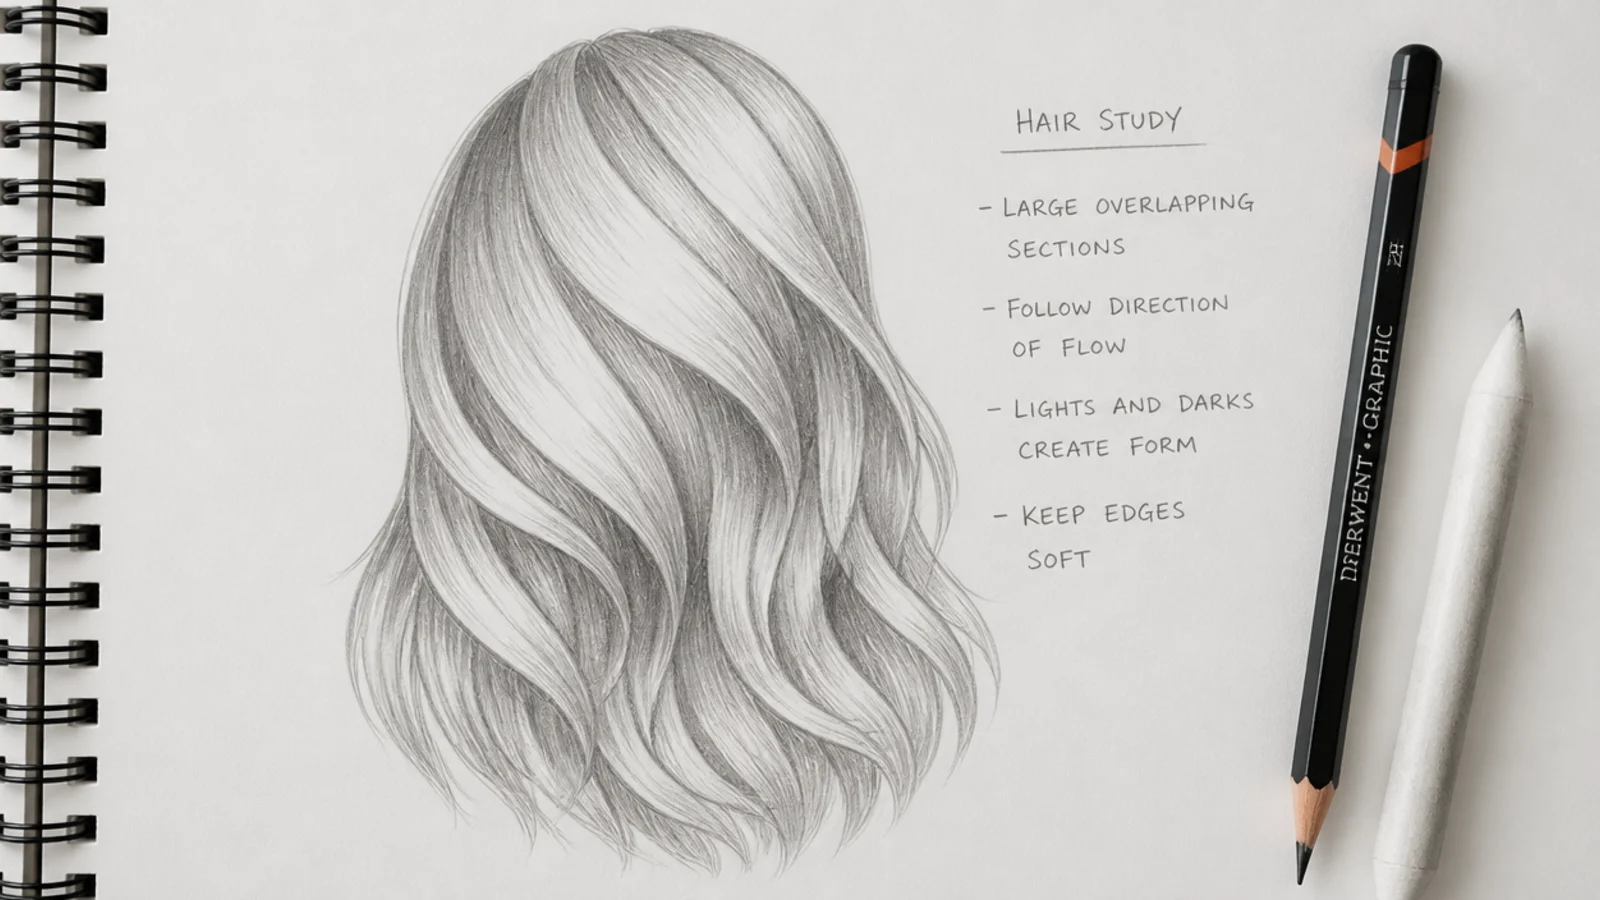
Divide the silhouette into a handful of large overlapping locks that follow your flow lines. Think ribbons or flattened cylinders, each with a top plane catching light and a side plane turning away. Let them overlap and cross so some groups pass in front of others, because that overlap is what creates depth before you shade anything. Five or six groups is plenty for a portrait; twenty is chaos. Give each group a different width so the eye finds a rhythm rather than a repeat pattern, the same grouping logic used throughout the hair sketch tutorial progressions.
Common mistake: Making every group the same width and length, which flattens the whole mass back into wallpaper.
Pro tip: Number the groups front to back in the margin so you shade the ones behind darker later.
5. Set the Light Source and Mark the Bands of Light
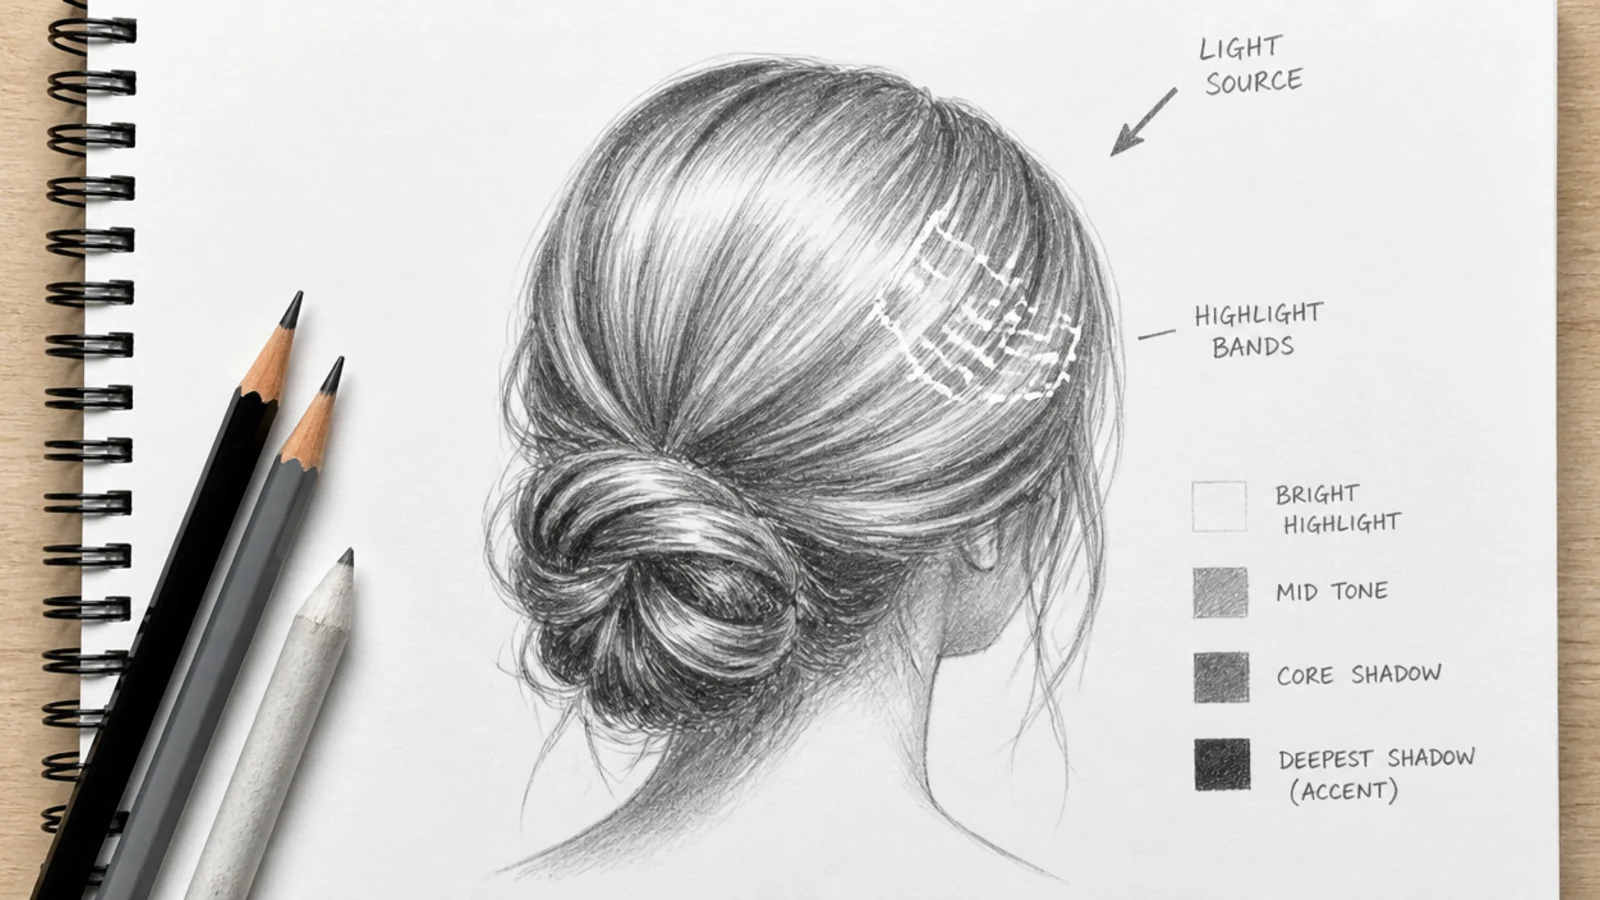
Decide where the light comes from before a single shadow goes down and draw a small arrow in the corner of the page as a reminder. Hair does not highlight in scattered dots; it catches a broad band of light that wraps around the curve of the head, usually across the upper crown and again where a lock turns. Outline those bands lightly with 2H so you know which paper to protect. Everything outside a band is fair game for graphite, and everything inside it stays white until the very end.
Common mistake: Shading first and hunting for highlights afterward, which means erasing into gray instead of clean white.
Pro tip: One main band plus one weaker secondary band beats five equal shine strips every time.
6. Lay a Flat 2B Mid Tone Over Everything But the Light Bands
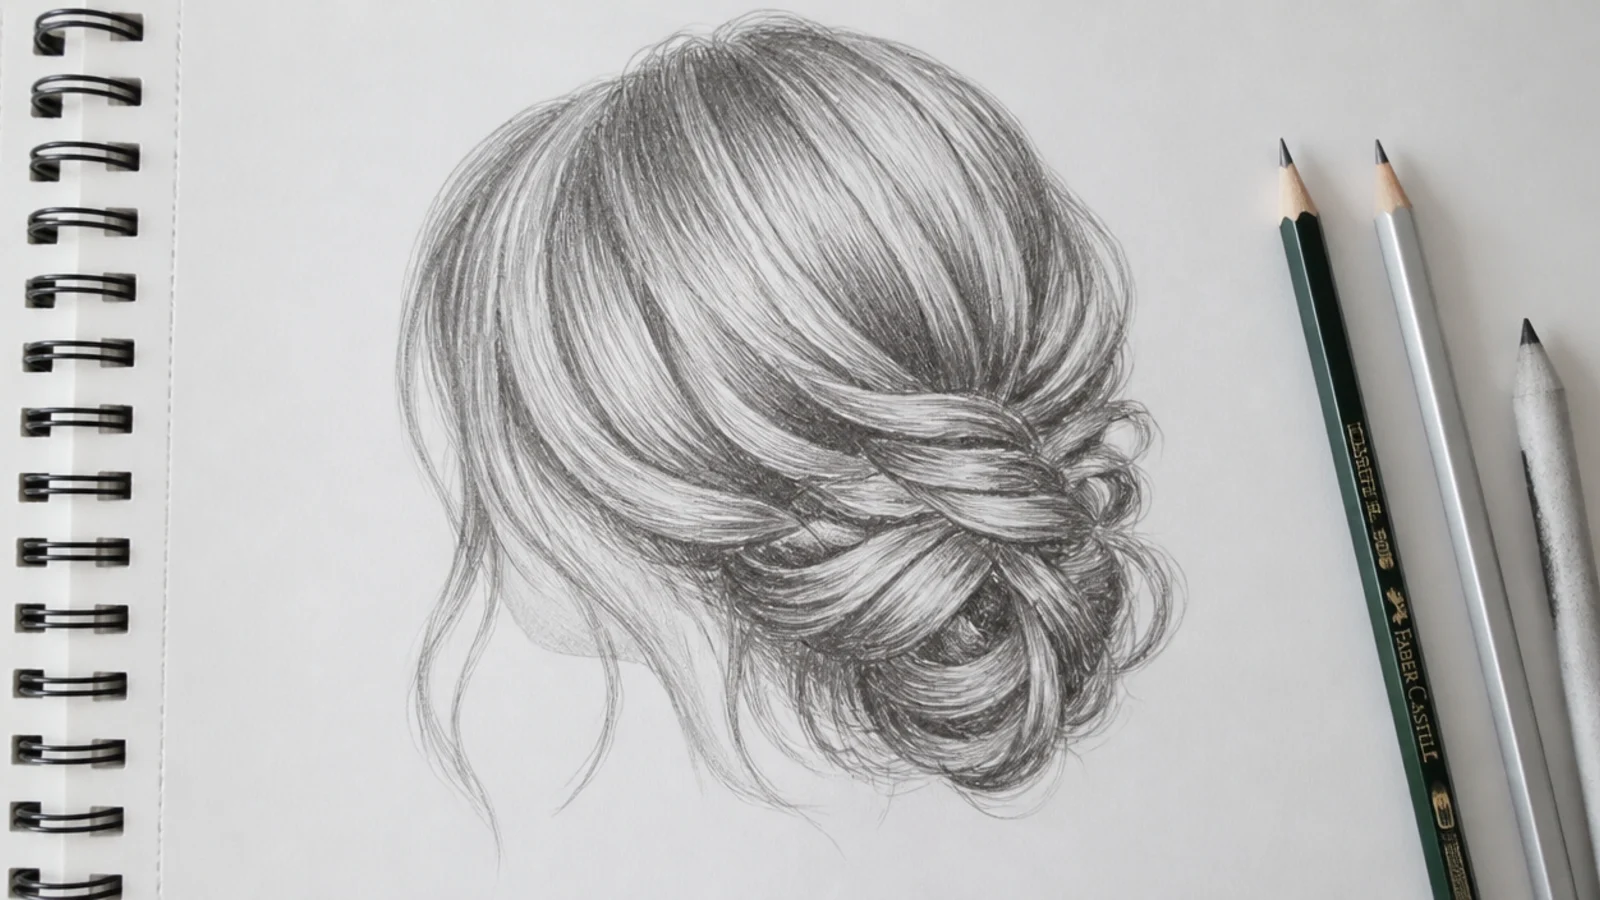
Take a 2B and cover the whole hair mass in one even mid gray, stroking along the flow lines and stopping at the edges of your light bands. Keep the pressure light and build in two passes rather than pressing hard once. This kills the white of the paper everywhere it does not belong and instantly gives you something to judge against, which is why the drawing suddenly looks better at this stage. Do not chase texture yet, and do not blend; you are only setting the middle value of your three-value plan.
Common mistake: Pressing hard for speed, which burnishes the tooth of the paper so darker layers cannot bite later.
Pro tip: Hold the pencil at a low angle with the side of the lead for smooth coverage without stroke marks.
7. Push the Dark Spaces With 4B and 6B
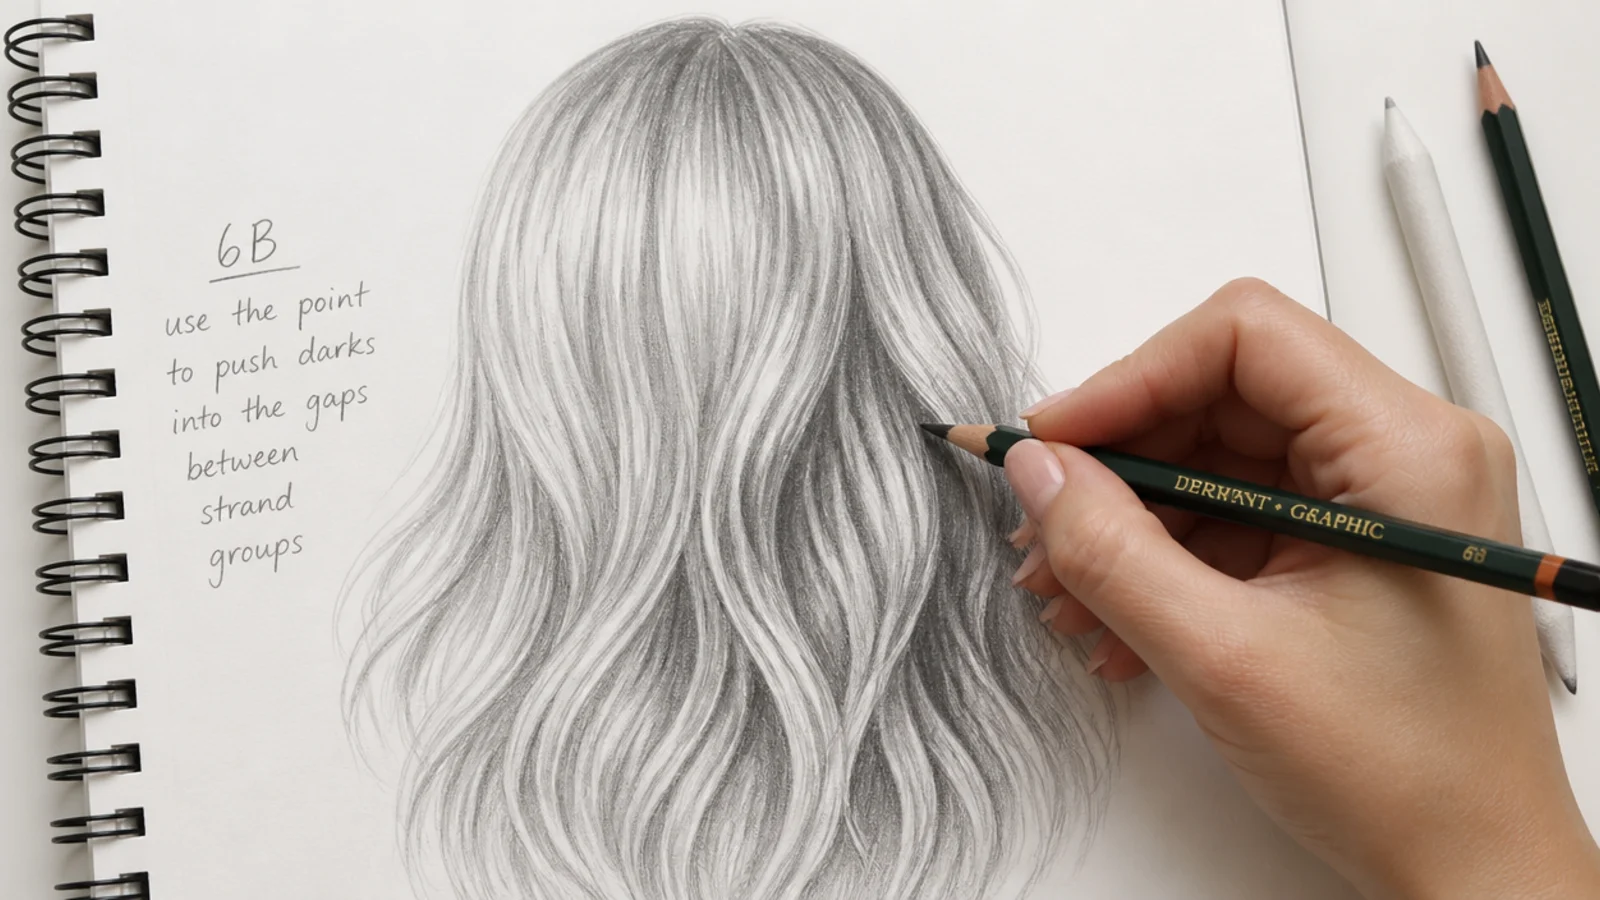
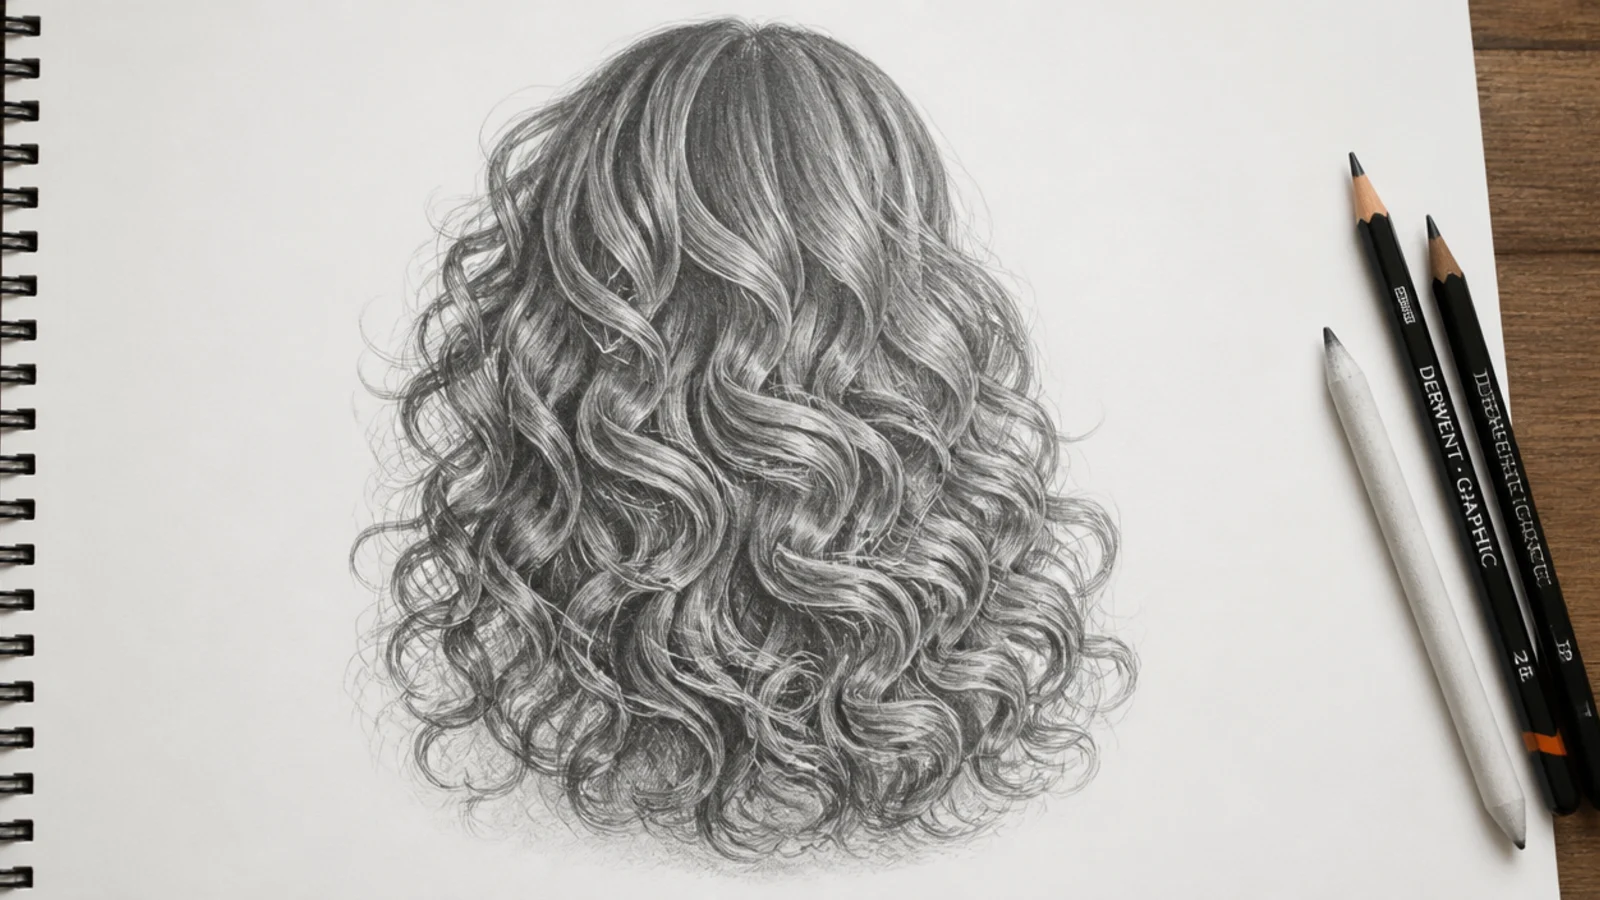
Find the dark spaces: under the light bands, where one group tucks behind another, at the roots near the part, and inside the shadow the hair casts on the forehead and neck. Build these with 4B first, then drop the darkest cores in with 6B until they are nearly black. Realistic hair needs a genuinely dark value somewhere or the whole drawing sits in a muddy mid range. Keep the darks in narrow wedge shapes that follow the flow rather than broad even patches, so they separate the groups instead of merging them, which matters most on the tight texture in curly hair sketch.
Common mistake: Distributing shadow evenly across the mass, which is the exact reason drawn hair looks flat.
Pro tip: Squint at the drawing every few minutes; if the darks vanish when you squint, they are not dark enough.
8. Lift the Highlights and Flick In the Loose Strands Last
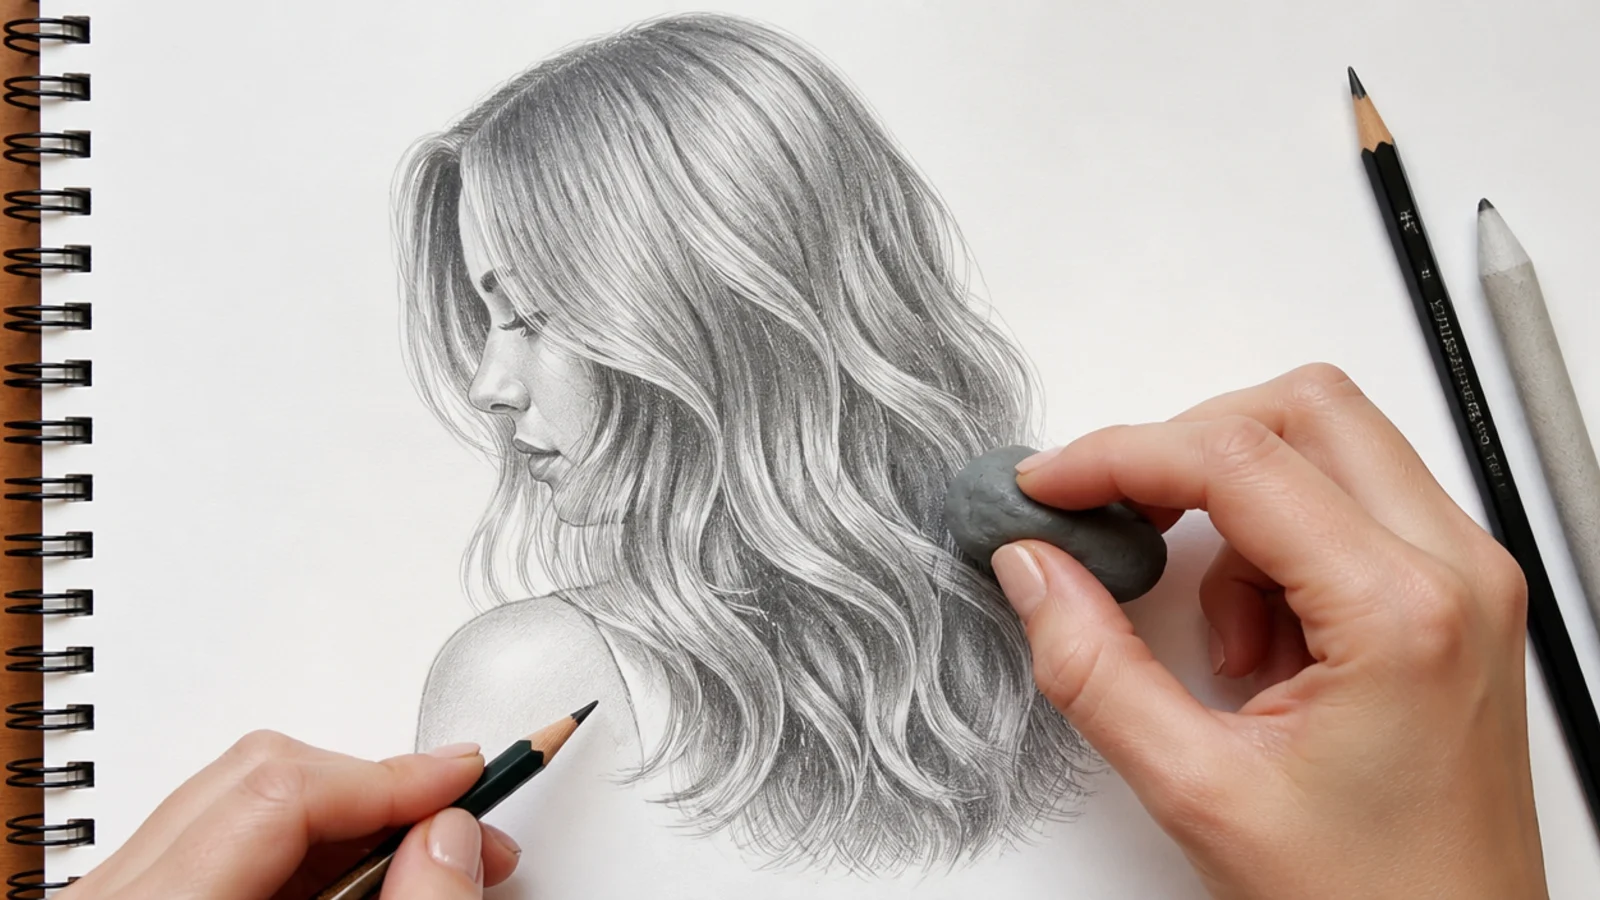
Shape a kneaded eraser into a chisel edge and lift thin bright strands out of the light bands, pulling along the flow direction. Sharpen a 2B and add fine strands only at three places: crossing a light band, at the silhouette edge, and at the ends. Finish the ends with short tapering flicks that break the outline, so the mass stops looking like a helmet. Ten to fifteen well-placed loose hairs sell the whole sketch; a hundred turns it back into noise. Sign it and stop.
Common mistake: Outlining strands over the entire surface at the end, which flattens all the value work underneath.
Pro tip: Taper every strand by lifting the pencil off the paper mid-stroke so no line ends in a blunt stub.
How to Start a Hair Sketch: Shape Before Strands
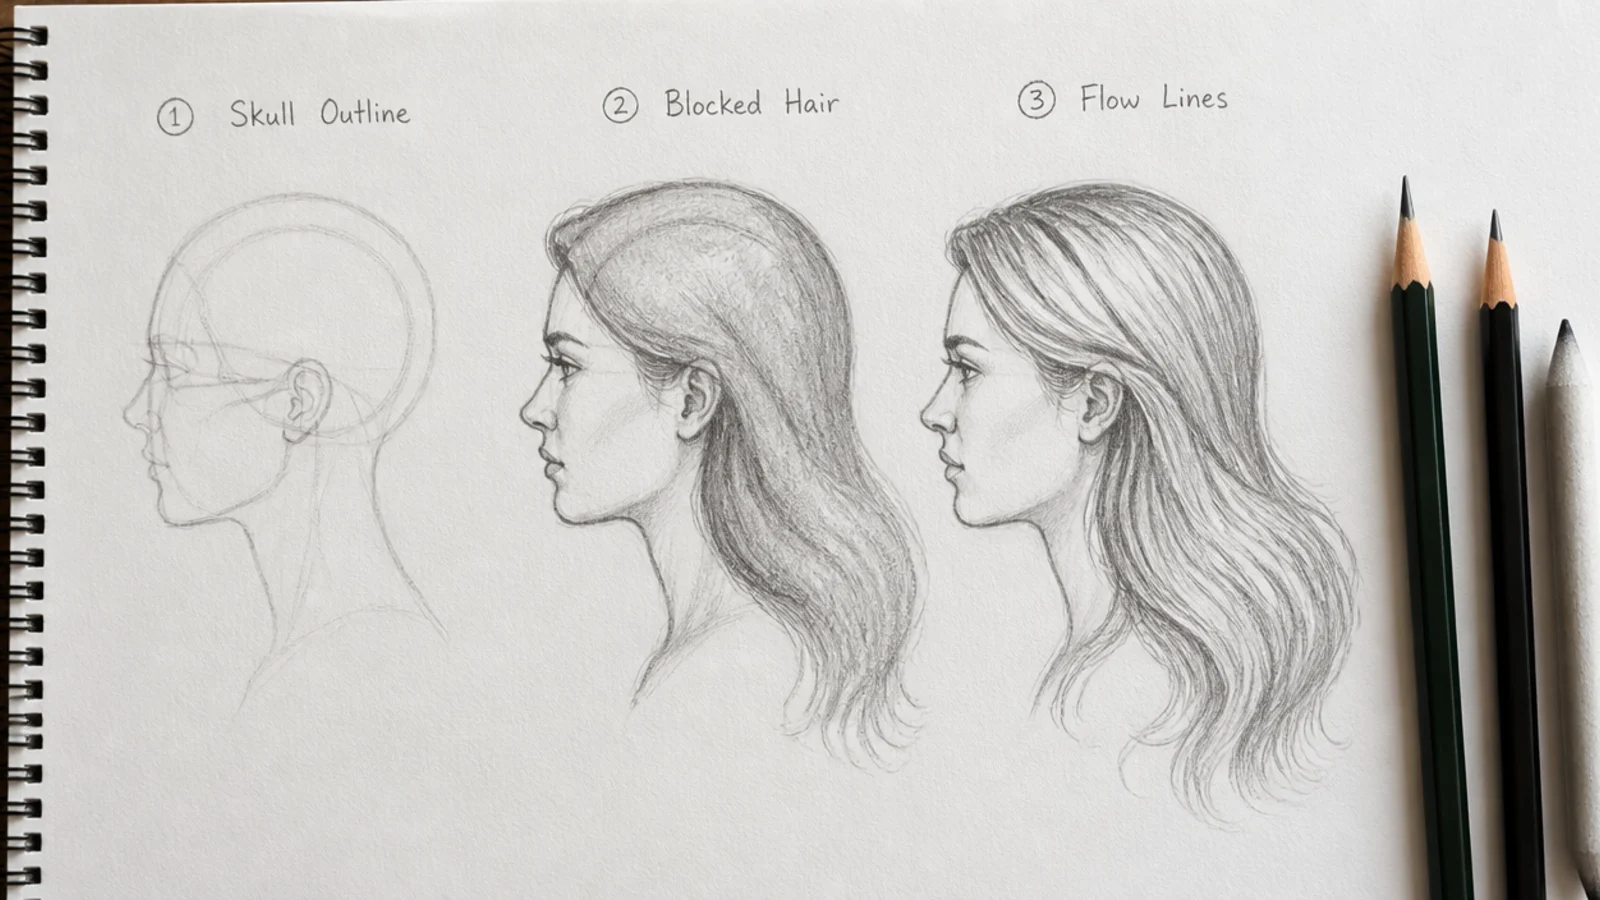
The opening two minutes decide the drawing. Sketch the skull and jaw in 2H, mark an irregular hairline about a third down the forehead, then block the entire hair mass as one closed silhouette with a 3 to 6mm gap above the cranium. Judge it squinted or upside down, because a silhouette that fails at thumbnail size cannot be rescued by detail. Only once the shape reads do you mark the crown and fan five to eight flow lines out from it, then divide the mass into five or six overlapping strand groups. Drawing individual strands before this point is the number one beginner mistake and it is the reason most first attempts look flat and pasted on. Nothing in this stage should be dark enough to survive into the finished piece; it is scaffolding, and the later graphite layers should swallow it. If you want more block-in examples to copy, the studies collected in hair sketch are all built in this order, and the hair sketch hub groups them by texture.
Shading Hair for Volume and Depth
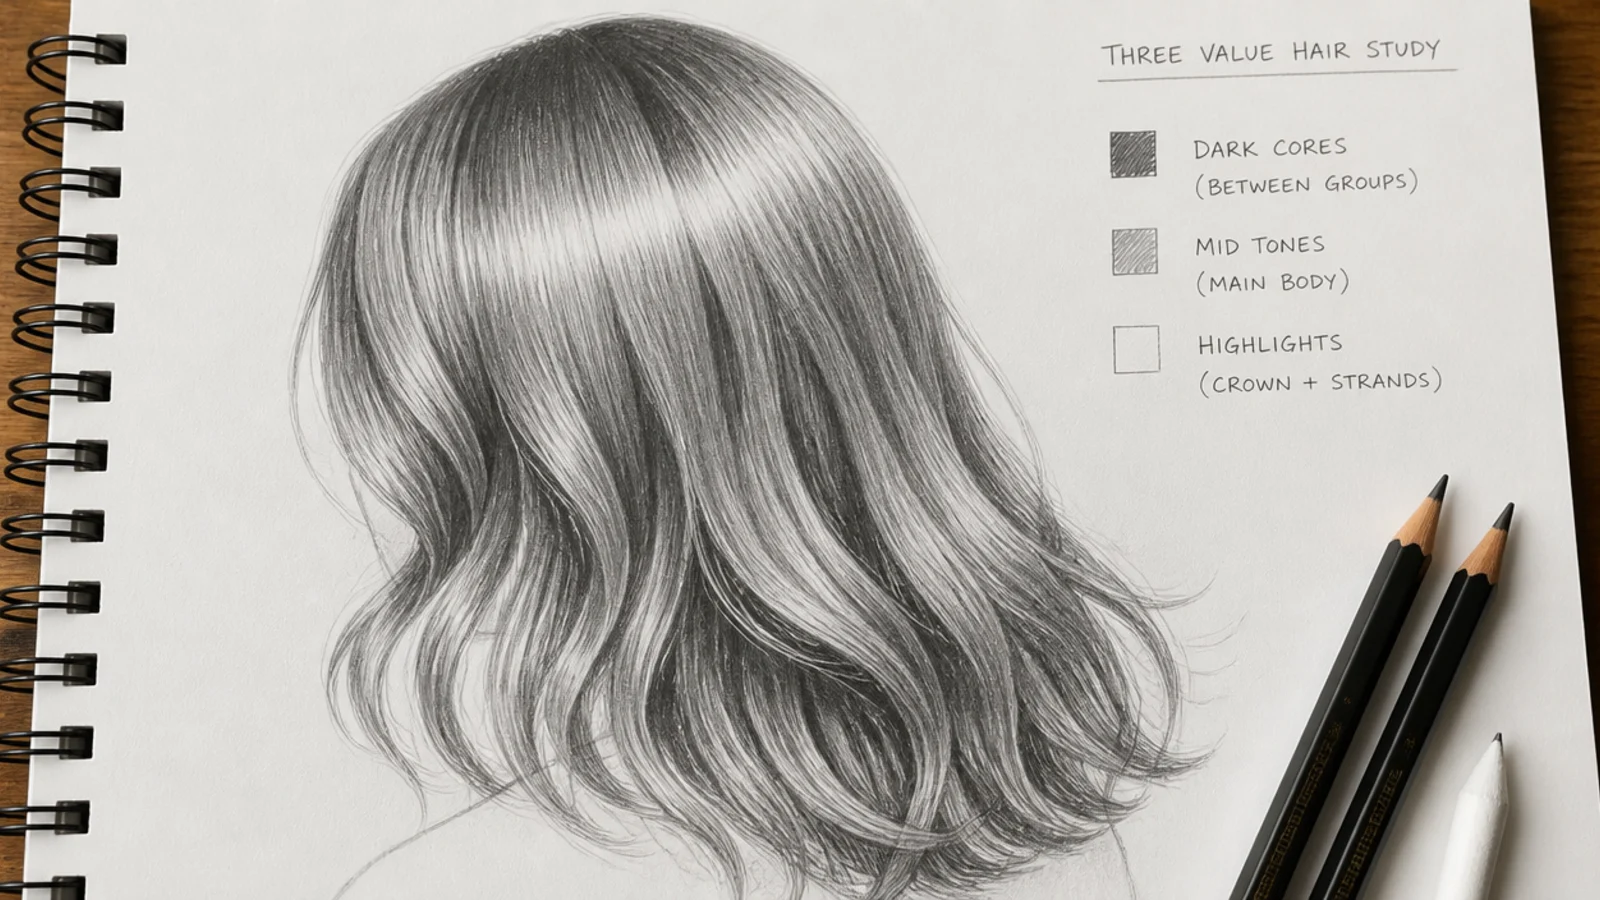
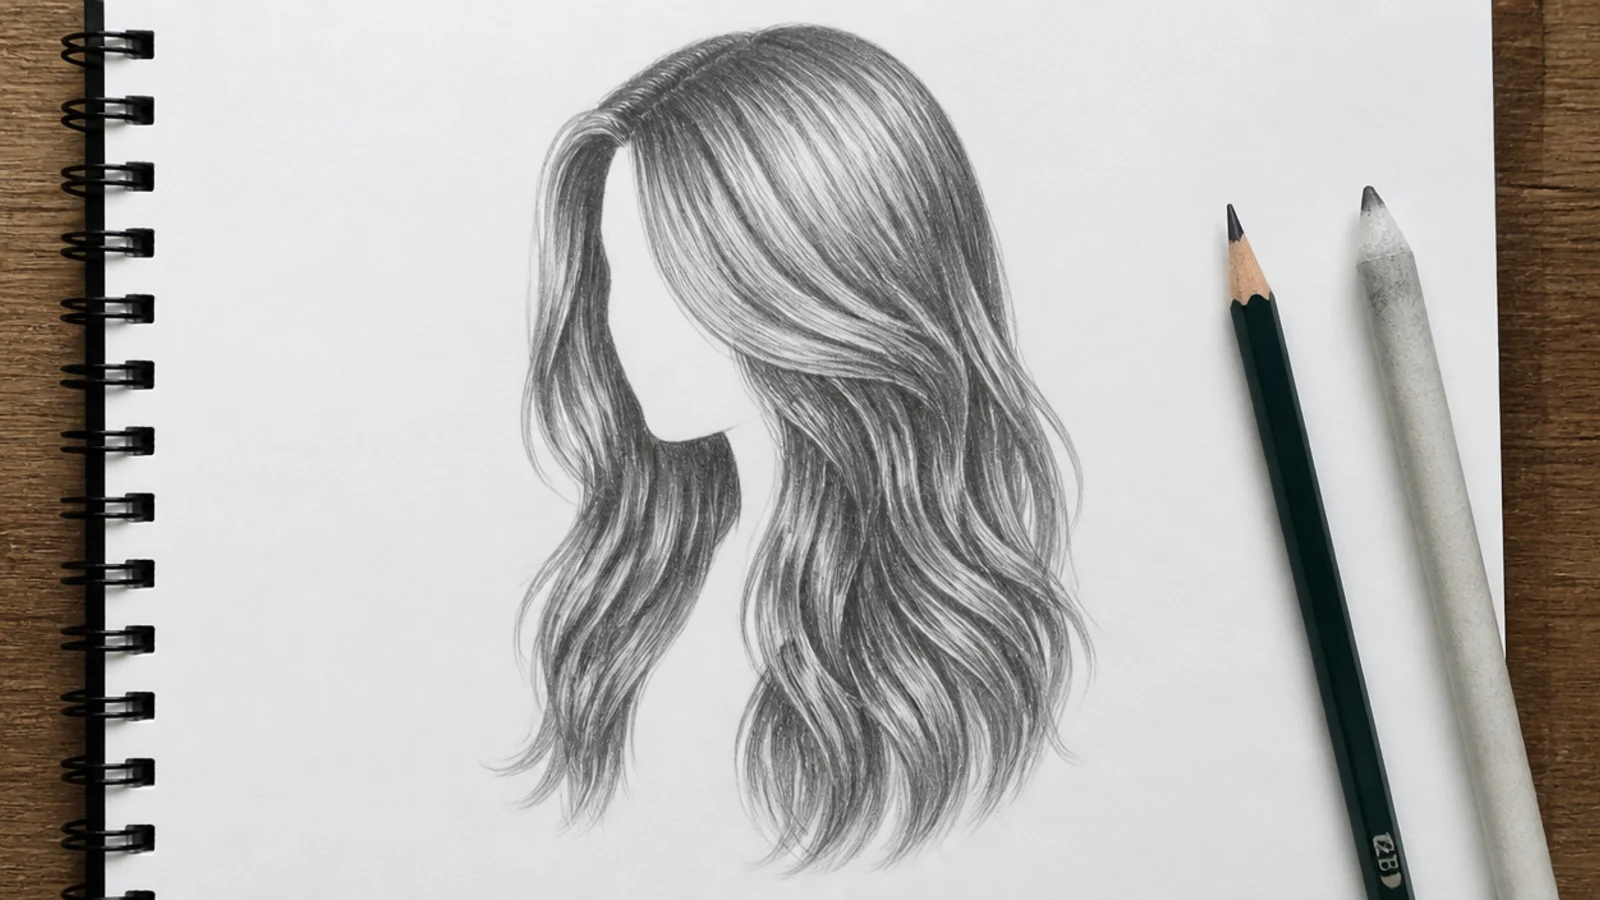
Shading runs in one direction only: light to dark, never the reverse. Commit to a light source, map the broad bands of light across the crown and the turn of each lock, then lay a flat 2B mid tone over everything else with the side of the lead. Now hunt the dark spaces, which is where depth actually lives: under the light bands, where one group tucks behind another, at the roots by the part, and in the shadow the mass casts on the forehead and neck. Build those with 4B and drop the very darkest cores in with 6B until they read nearly black at a squint. Keep every dark shaped as a narrow directional wedge following the flow, because a shaped dark separates two forms while an even smear merges them. Blonde and gray hair invert the whole plan and top out around 2B, while black hair sits mostly in 6B with the light bands defended fiercely. Strands come last, and only as a finishing pass, as shown in the hair sketch tutorial sequences.
Drawing Straight vs Wavy vs Curly vs Coily Hair
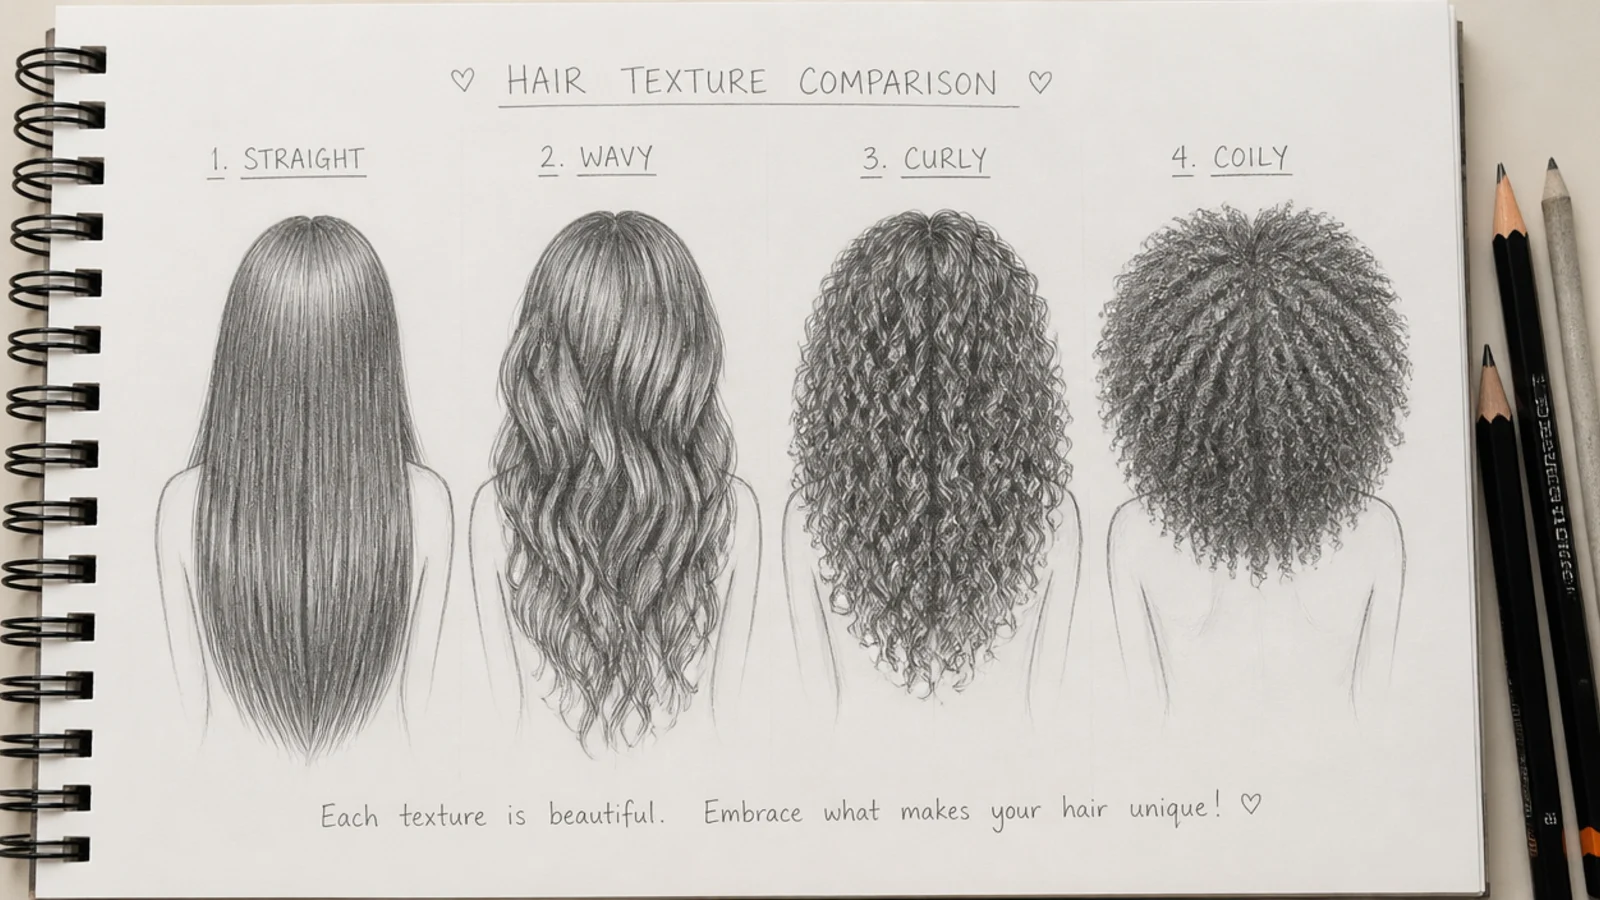
The twenty steps do not change across textures; only the flow line does. Straight hair runs on long unbroken arm strokes with a tight hard-edged highlight and a gentle S as it passes the shoulder. Wavy hair hangs on a lazy S spine, brightening where it turns toward the light and darkening where it turns away, with the wave phase offset between neighboring locks. Curly hair is a ribbon twisting through space, so light and shadow sit on opposite faces at every turn and the coil is never outlined; make the zig-zag guideline bigger for bigger, easier curls, which is the whole method behind curly hair sketch. Coily 4C texture is too fine to draw strand by strand, so build it as a soft-edged value mass with small circular scribbles, a broken fuzzy outline and a broad diffuse crown band, while keeping the hairline itself crisp. Braids get overlapping wedges down a center line with a hard triangular shadow where each section tucks under. Practice all four on the same page and the differences stop being abstract.
Common Hair Sketch Mistakes and How to Fix Them
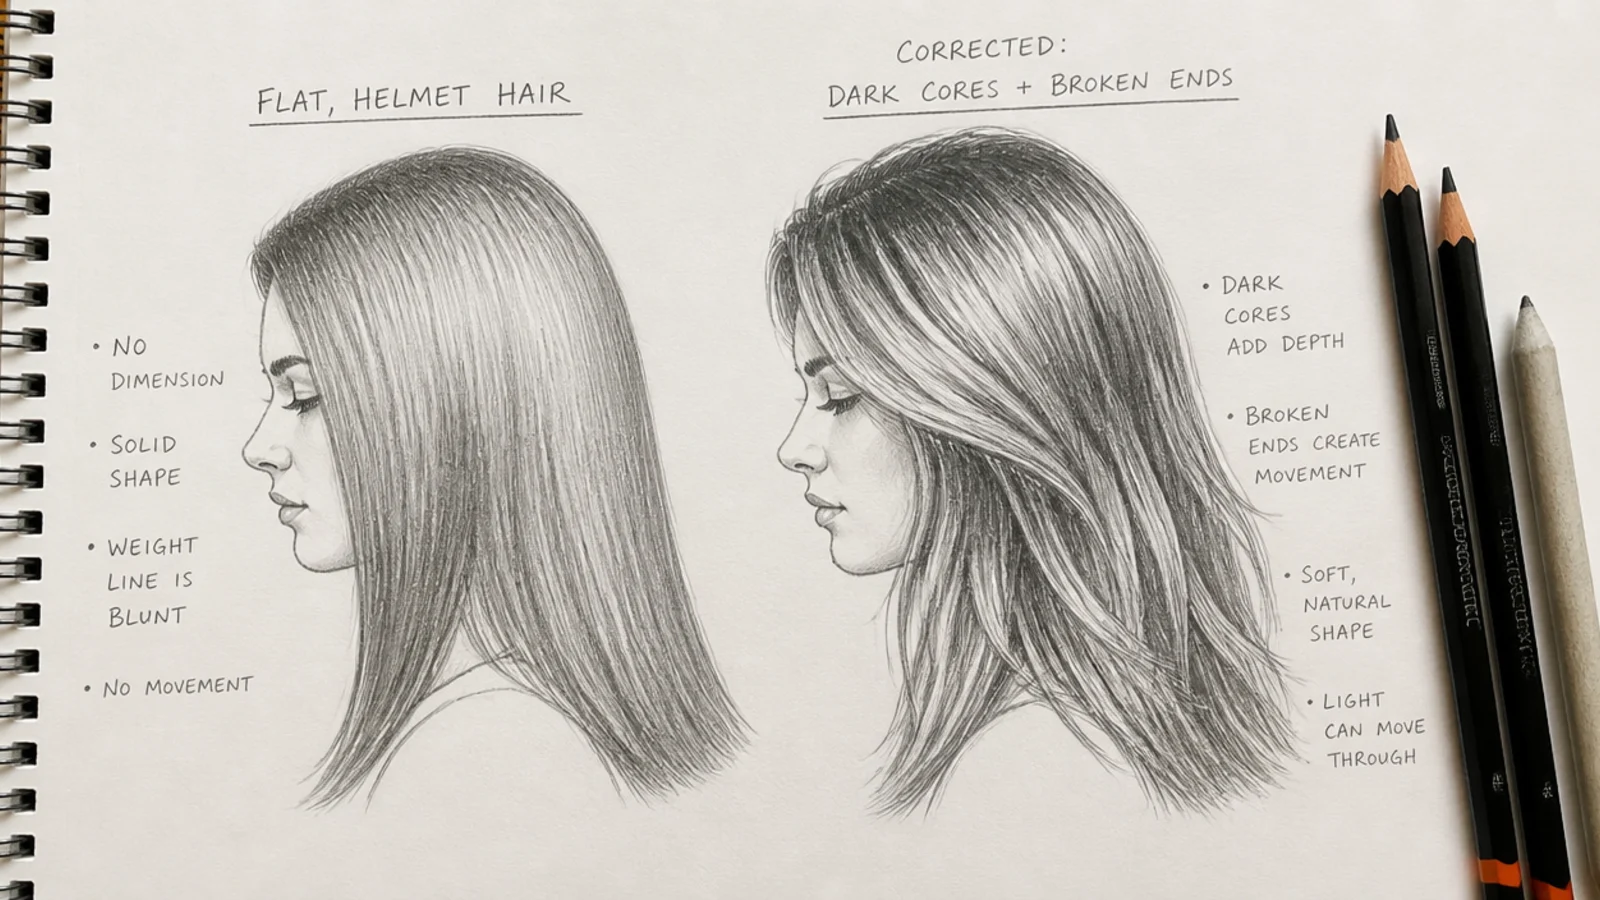
Six failures cover nearly everything. Flat hair means you never established three values, so squint and push the dark spaces with 6B rather than adding lines. Spaghetti hair means parallel evenly spaced strokes, so merge lines and vary the spacing. Helmet hair means the outer contour is too smooth and the ends are not broken, so flick the ends and take a kneaded eraser to the silhouette edge. Wig hair means the hairline is one clean arc, so break it into irregular ticks with baby hairs at the temples. Muddy hair means you blended everything into a uniform gray, so restate the darks and lift a few crisp highlights back out. Shrink-wrapped hair means you traced the skull with no thickness, which needs a redraw of the silhouette rather than a patch. The pattern to notice is that the visible symptom is almost always downstream of the real fault, so fix the earliest broken stage instead of the place your eye landed.
Pencils, Paper and Blending Tools That Actually Matter
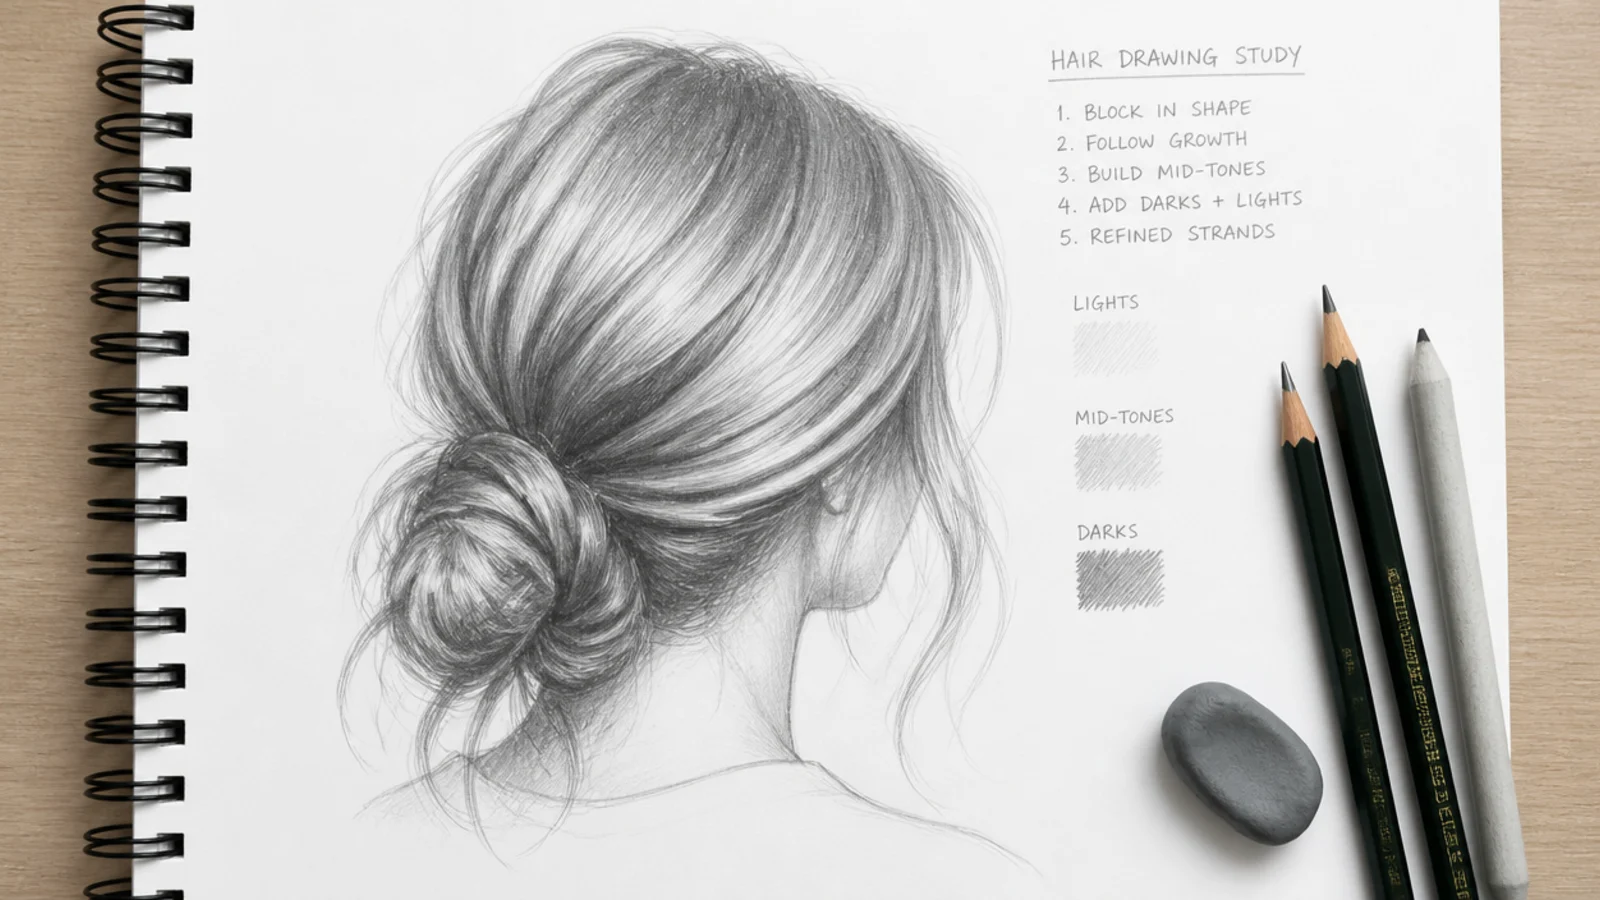
Five pencils cover everything: 2H for guides, HB and 2B for the mid tone, 4B for shadow between groups and 6B for the darkest cores. Paper matters more than most beginners expect. Smooth 90 to 100gsm cartridge or bristol takes fine strand work cleanly, while heavily toothed paper fights thin lines and speckles them. Toned gray or tan paper is worth trying, because it lets you work in both directions with graphite for darks and white charcoal for highlights. A kneaded eraser is non-negotiable, shaped to a chisel for lifting bright strands and dabbed for softening edges. A mechanical eraser pen or an electric eraser cuts hairline highlights nothing else can reach. Blending stumps are optional and easy to overuse; blend at most the deepest shadow zones, because blending the whole mass is exactly how hair turns to smoke. Skip fixative until the final pass, since it seals the tooth and blocks any further darks.
Using References Without Copying Them
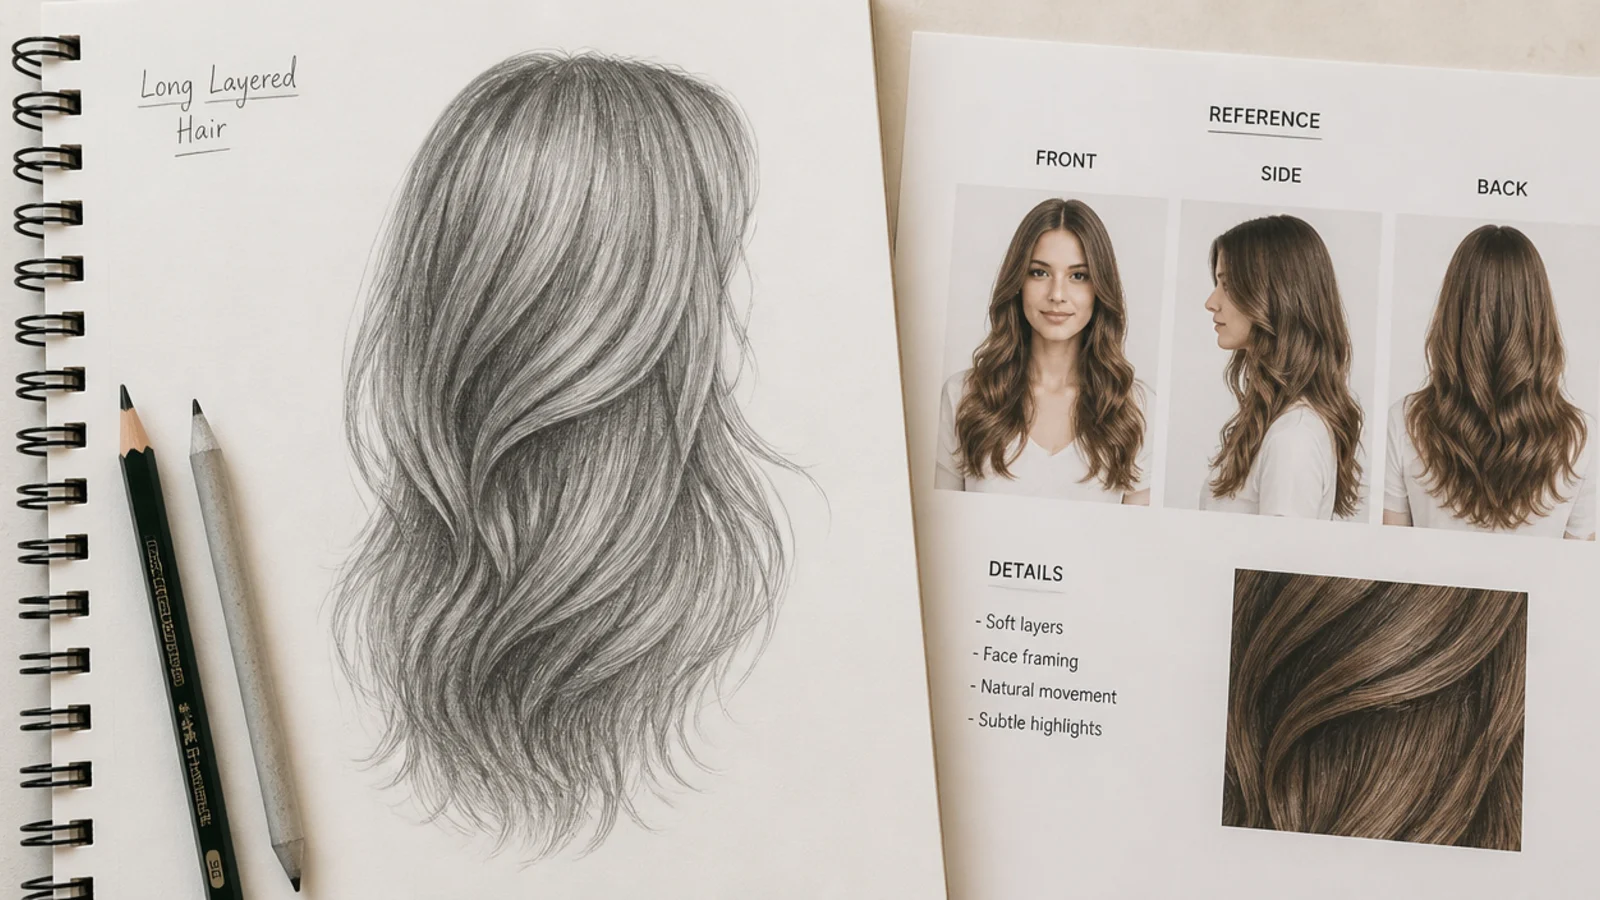
References are how you learn hair, but tracing teaches nothing. The useful method is to look at the reference and extract three things only: the silhouette, the flow direction from the crown, and where the dominant band of light sits. Close the reference and draw those three from memory, then reopen it to check. Multi-angle sheets are far more valuable than single photos, because seeing the same style from front, side, back and three-quarter is what teaches you the form rather than the outline. Real hairstyle photography works well as source material, so pull structural reference from styles you can see clearly from several angles, such as a messy ponytail for tension and gathering or short curtain bangs for how a fringe splits and falls. Watch usage rights before selling work drawn from someone else's photo, and credit artists when you post studies. Then run the same style again without any reference at all.
Frequently Asked Questions
How do you sketch hair step by step for beginners?
Draw the skull and an irregular hairline first, then block the whole hair mass as one silhouette with real thickness above the cranium. Mark the crown and fan flow lines out from it, divide the mass into five or six overlapping groups, set your light source, lay a flat 2B mid tone, push dark spaces with 4B and 6B, then flick in loose strands last.
What pencils do you use for drawing hair?
Use 2H for guide lines and flow lines, HB and 2B for the flat mid tone, 4B for the shadows between strand groups, and 6B only for the darkest cores and roots. Blonde and gray hair should top out around 2B so the whole mass stays light, while black hair needs 6B across most of its area with the light bands left as bare paper.
Why does my drawn hair look flat?
Almost always because there is no genuine dark in the drawing. Flat hair sits in a narrow mid-gray range with shadow spread evenly across the mass. Squint at your sketch: if nothing reads as nearly black, push the gaps between strand groups with 6B in narrow wedges that follow the flow, and protect a clear band of white paper for the highlight.
Should I draw the head before adding the hair?
Yes, always. Hair is a layer sitting on top of the skull with real thickness, so you need the cranium and jaw in place first, drawn lightly in 2H. Leave 3 to 6mm of clearance above the top of the skull at portrait scale, more for thick or curly texture. Skipping the head is why so many sketches look shrink-wrapped or bald underneath.
How do you shade hair realistically with a pencil?
Work light to dark in three passes. Map the bands of light and leave them as white paper, lay a flat 2B mid tone everywhere else with the side of the lead, then build the dark spaces with 4B and finish the cores with 6B. Stroke along the hair direction every time, avoid heavy blending, and add individual strands only at the very end.
How do you draw curly hair without it looking like springs?
Stop outlining the coil. Draw curls as ribbons twisting through space: sketch the spiral path lightly, wrap a band of width around it, then put light on the face turning toward the source and shadow on the face turning away, alternating at every turn. Vary the curl diameter across the head, since identical curls are what makes them read as drawn springs.
How do you draw coily or 4C hair?
Treat it as a value mass, not as strands. Block the silhouette with a deliberately broken, fuzzy outer edge, then build texture with small overlapping circular scribbles and stippling rather than lines. Keep the light as a broad diffuse band across the crown instead of a sharp stripe, and keep the hairline itself crisp, because that soft-edge and hard-edge contrast is what sells the texture.
How do you make hair look shiny in a drawing?
Shine comes from contrast and placement, not from white marks. Leave a broad band of untouched paper wrapping around the crown, drive the value immediately below it as dark as 6B allows, and let the band have a soft edge on one side and a harder edge on the other. Break the band with two or three dark strands crossing it so it reads as hair rather than a painted stripe.
How long does it take to sketch hair?
A quick silhouette study takes 10 to 15 minutes, and a fully shaded head of hair takes 45 to 90 minutes in graphite or 30 to 60 minutes digitally once your brushes are set. Beginners should spend far more time on short silhouette studies than on single long pieces, since silhouette judgment improves faster with twenty thumbnails than with one labored portrait.
Is it okay to use photo references for drawing hair?
Yes, and it is how most artists learn. The productive method is to extract only the silhouette, the flow direction from the crown, and the position of the main light band, then draw those from memory before checking back. Multi-angle reference sheets teach form far better than single photos. Check usage rights before selling work based on someone else's photograph.
Which hair sketch look are you saving?
Every one of these twenty steps protects the same idea: hair is a lit 3D mass, not a pile of lines. Block the silhouette, find the crown, follow the flow in sections, then build value from 2H guides through 4B mid tones down to 6B cores, and only then flick in the loose strands that sell it. When a sketch goes wrong, the fault is almost always upstream of where it looks wrong, so squint, check whether your darks and your silhouette are doing their job, and fix that instead of adding more lines. Fill a page with silhouette studies before your next portrait, then work through the hair sketch tutorial progressions or browse the whole hair sketch hub for your next practice subject.