Quick Comparison
| Styling the Short Top Layer (the Bell) | Styling the Long Lower Lengths | |
|---|---|---|
| Main tool | 1.5 inch round brush and a dryer nozzle | 1 inch flat iron, or fingers and gravity |
| Products that work | Root lift spray, smoothing cream, shine serum | Sea salt spray, dry texture spray, light oil on ends |
| Heat setting | 300 to 320 degrees, it gets styled daily | 350 degrees, thicker and styled less often |
| Time needed | About 4 minutes for five sections | 8 to 12 minutes to dry, 5 more to iron |
| Goal | Lift at the root, defined edge at the ends | Movement, weight and length kept visible |
| How often restyled | Every day, it flattens and gets oily first | Every second or third day |
| Heatless option | Air-dry with a light cream, or slick it wet-look | Overnight braids or foam rollers on damp hair |
| Biggest failure mode | Collapsing flat into a helmet by early afternoon | Ends going straggly and dragging the shape down |
| Hold spray | Flexible hold only, firm spray kills the lift | Light mist at the ends, or none at all |
1. Prep on Damp Hair and Split the Heat Protectant
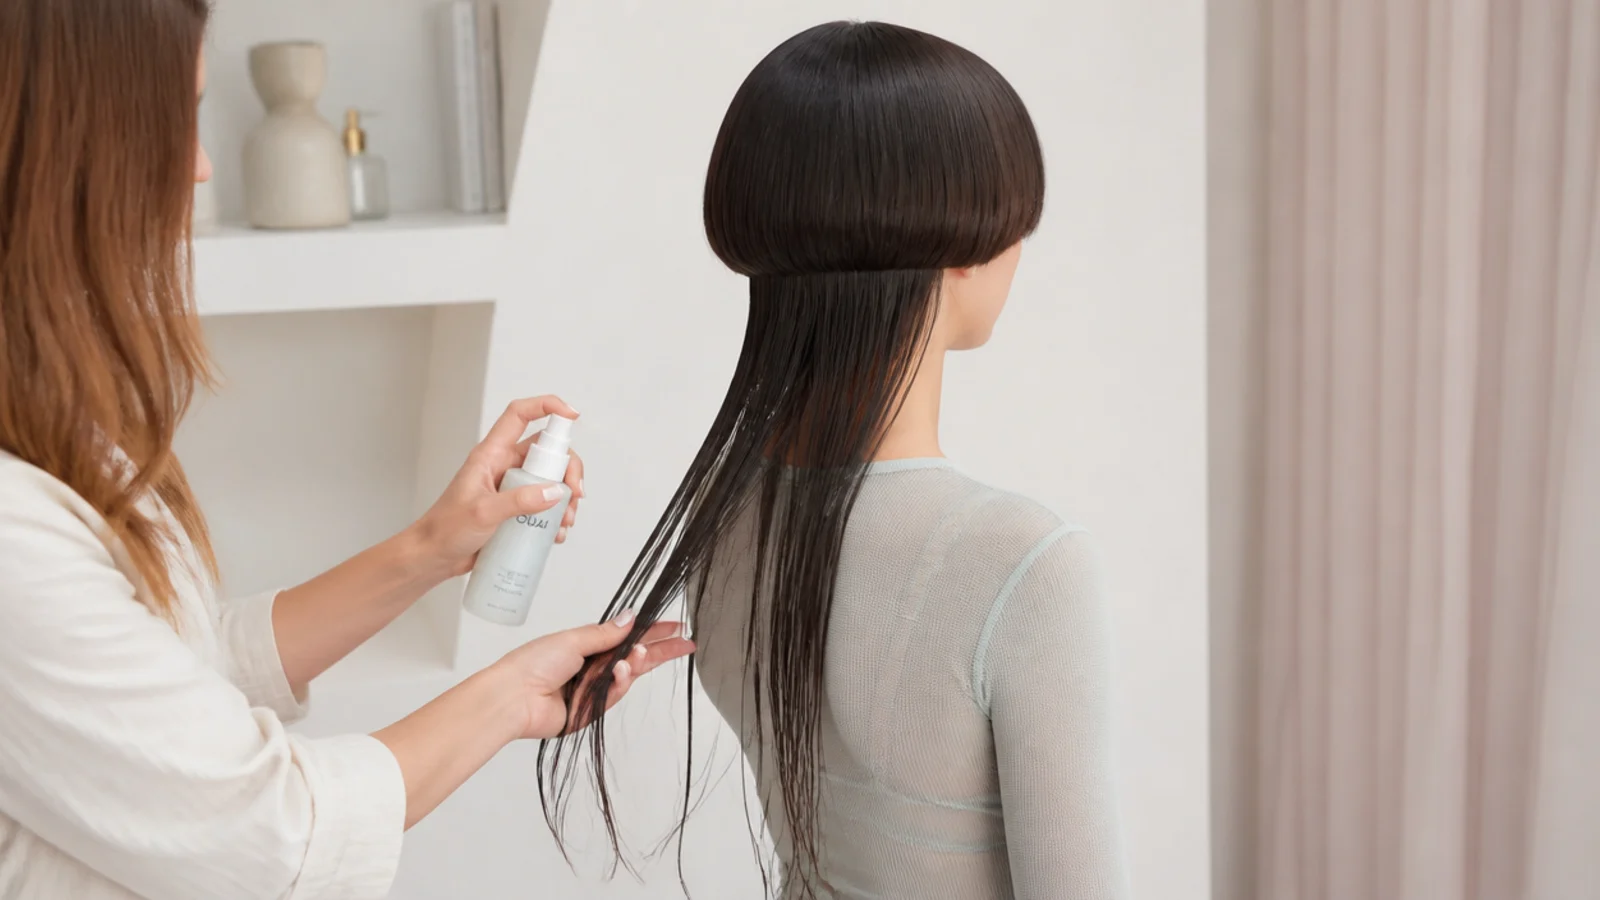
Towel-dry to about 70 percent damp. Spray a lightweight heat protectant through the long lengths first, four to six spritzes, then use just one or two on the short top layer. The bell is thinner, sits nearest the scalp and gets styled every single day, so it needs protection but drowns in product far faster than the lengths do. Comb each section through separately with a wide-tooth comb before any heat goes near it.
Common mistake: Spraying the whole head evenly, which leaves the short top layer weighed down and greasy-looking by noon.
Pro tip: Choose a spray protectant for the bell and a cream one for the lengths; creams flatten short layers.
2. Clip the Bell Away at the Disconnection Line
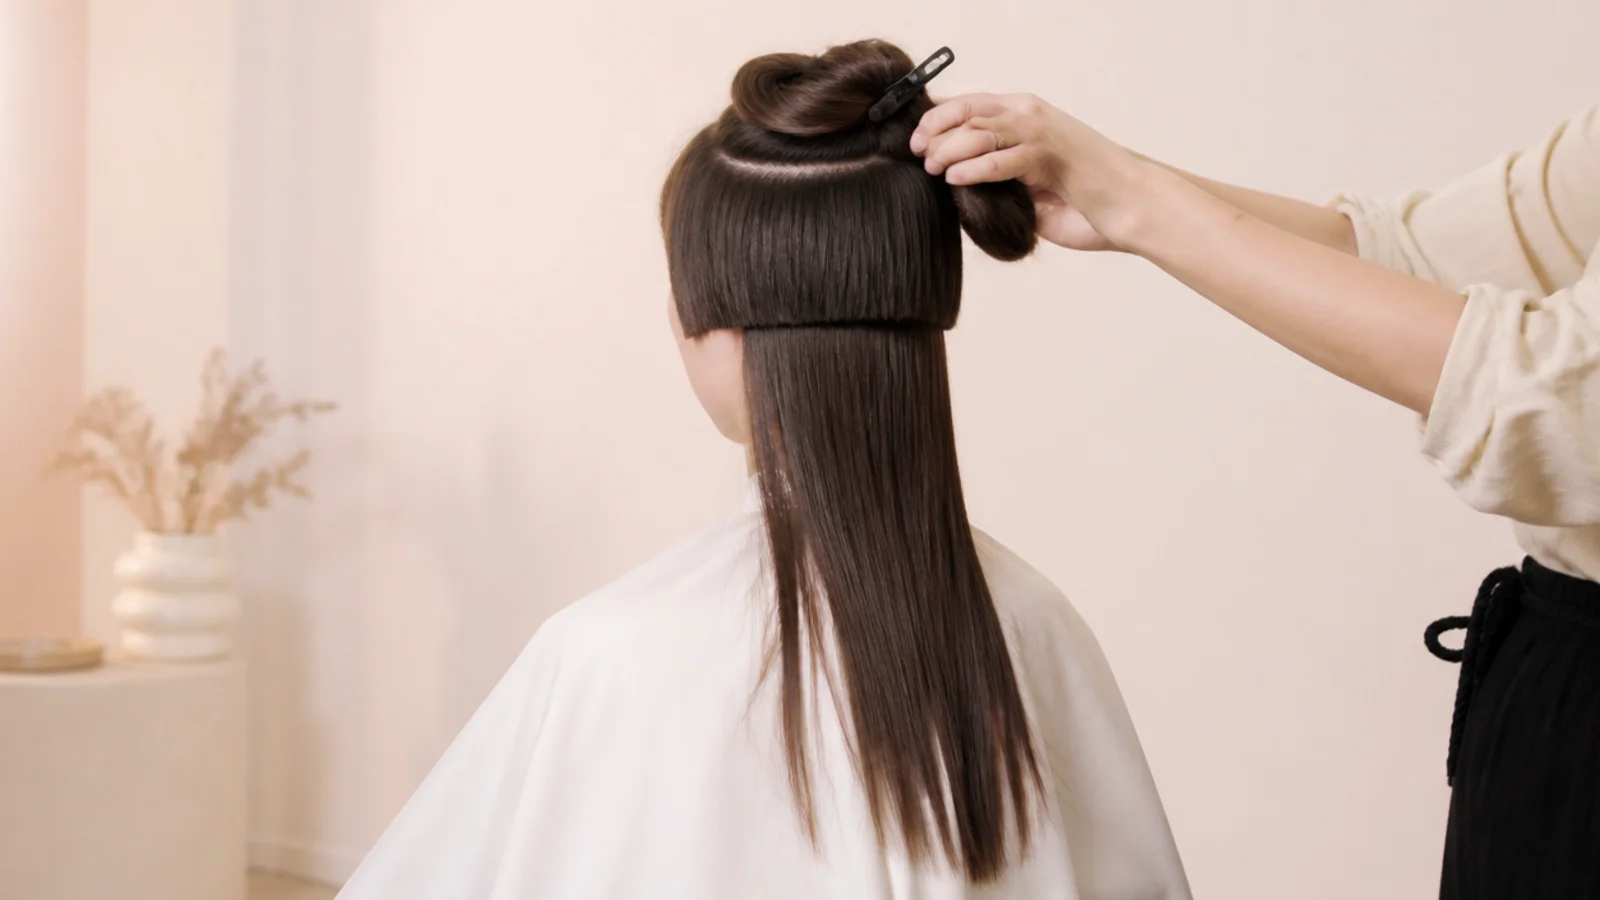
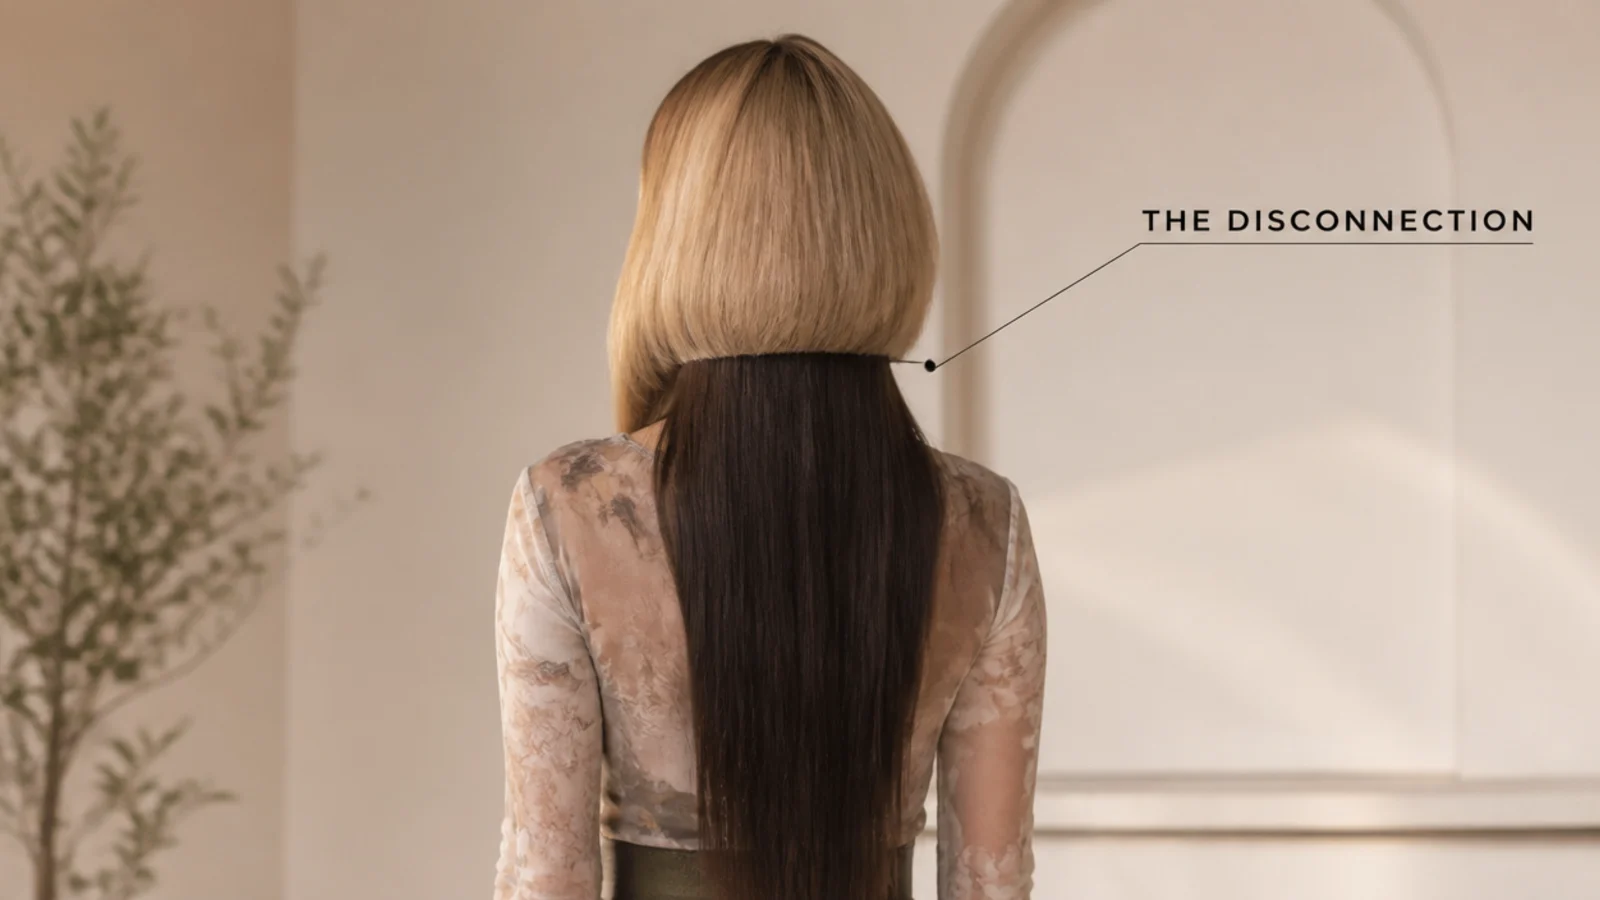
Find where the top layer ends and the long lengths begin, then lift the entire bell up and secure it with two duckbill clips, one at each side of the crown. You should be left with only the long lengths hanging. This 15-second step is what makes everything after it work, because from here you are simply blow-drying long hair, and then separately styling what amounts to a short bob.
Common mistake: Guessing the section line by eye and catching long pieces in the clipped bell, which then dry with a bend in the wrong place.
Pro tip: Part the section horizontally from ear to ear across the back so the line matches the cut.
3. Rough-Dry the Long Lengths First
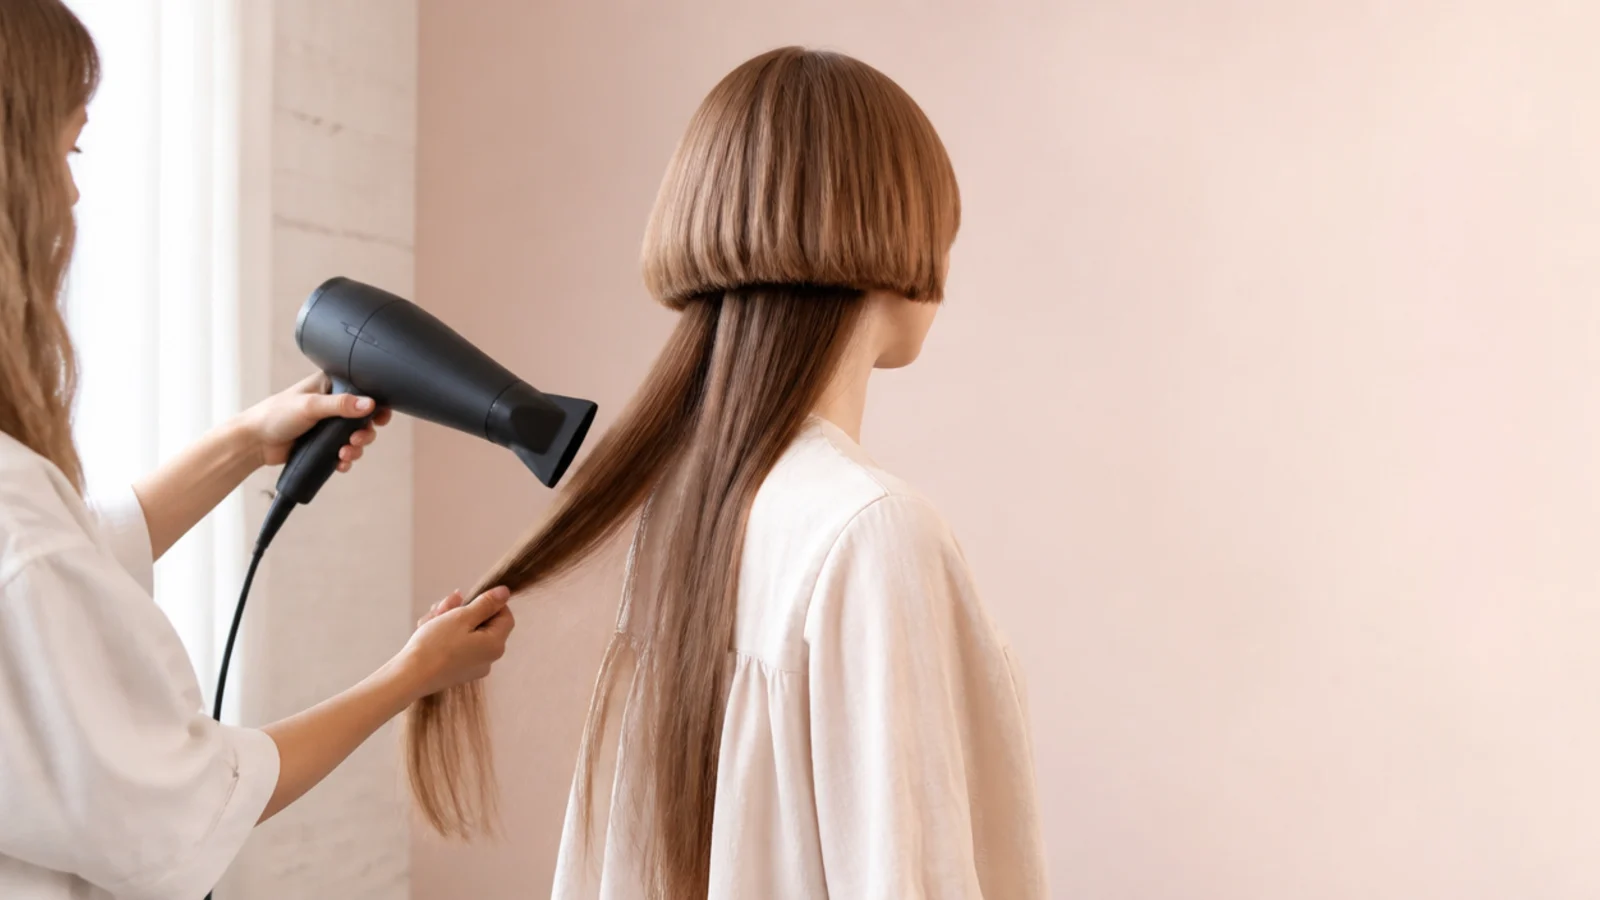
With the bell still clipped, blow-dry the lengths on medium heat and high speed, nozzle pointed downward, using only your fingers. Take them to about 90 percent dry. There is no need for a brush yet since the lengths carry their own weight and will straighten under gravity. This usually takes eight to twelve minutes at mid-back length and is the longest step in the routine.
Common mistake: Drying without the nozzle, which blasts air in every direction and roughs up the cuticle on both layers at once.
Pro tip: Point the nozzle down the hair shaft, never across it, to keep the lengths glossy.
4. Round-Brush the Bell and Set Its Direction
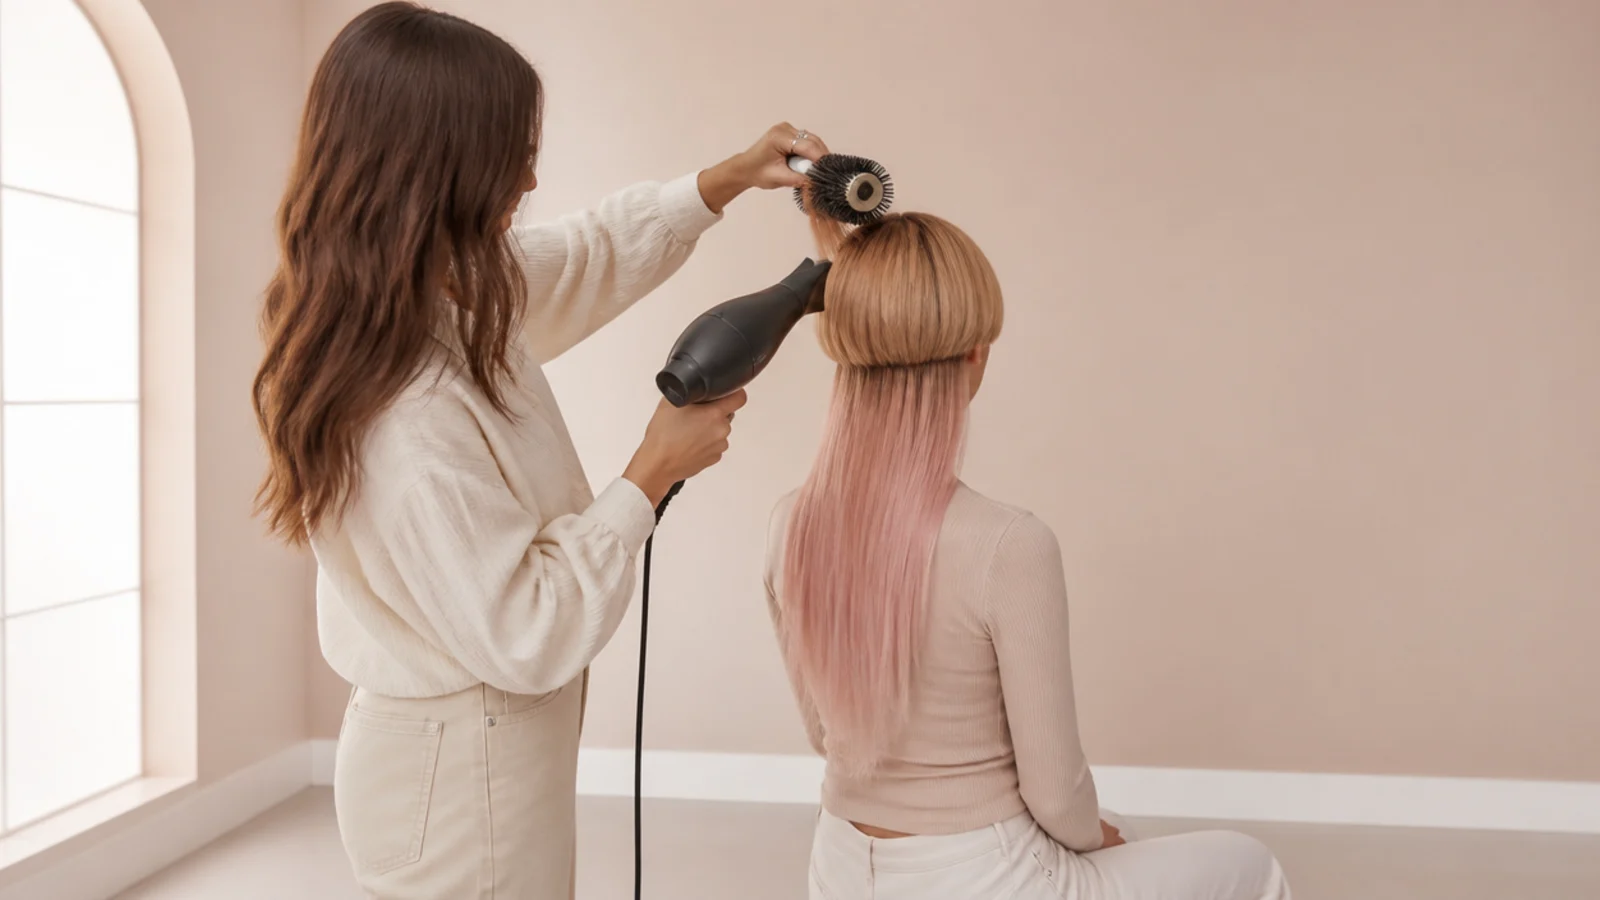
Drop the bell and work it in 2 inch sections over a 1.5 inch round brush, three sections at the front and two at the back. Over-direct each section straight up from the scalp, then roll the brush down through the ends and decide the direction there: rolled under for a blunt dome, rolled outward for a flick. Four minutes total. Finish each section with a five-second cool shot before you slide the brush out.
Common mistake: Brushing the bell down flat from the root, which removes every bit of lift and leaves a helmet shape.
Pro tip: A boar and nylon mixed-bristle round brush grips short layers better than an all-nylon one.
5. Shape the Ends of the Long Lengths
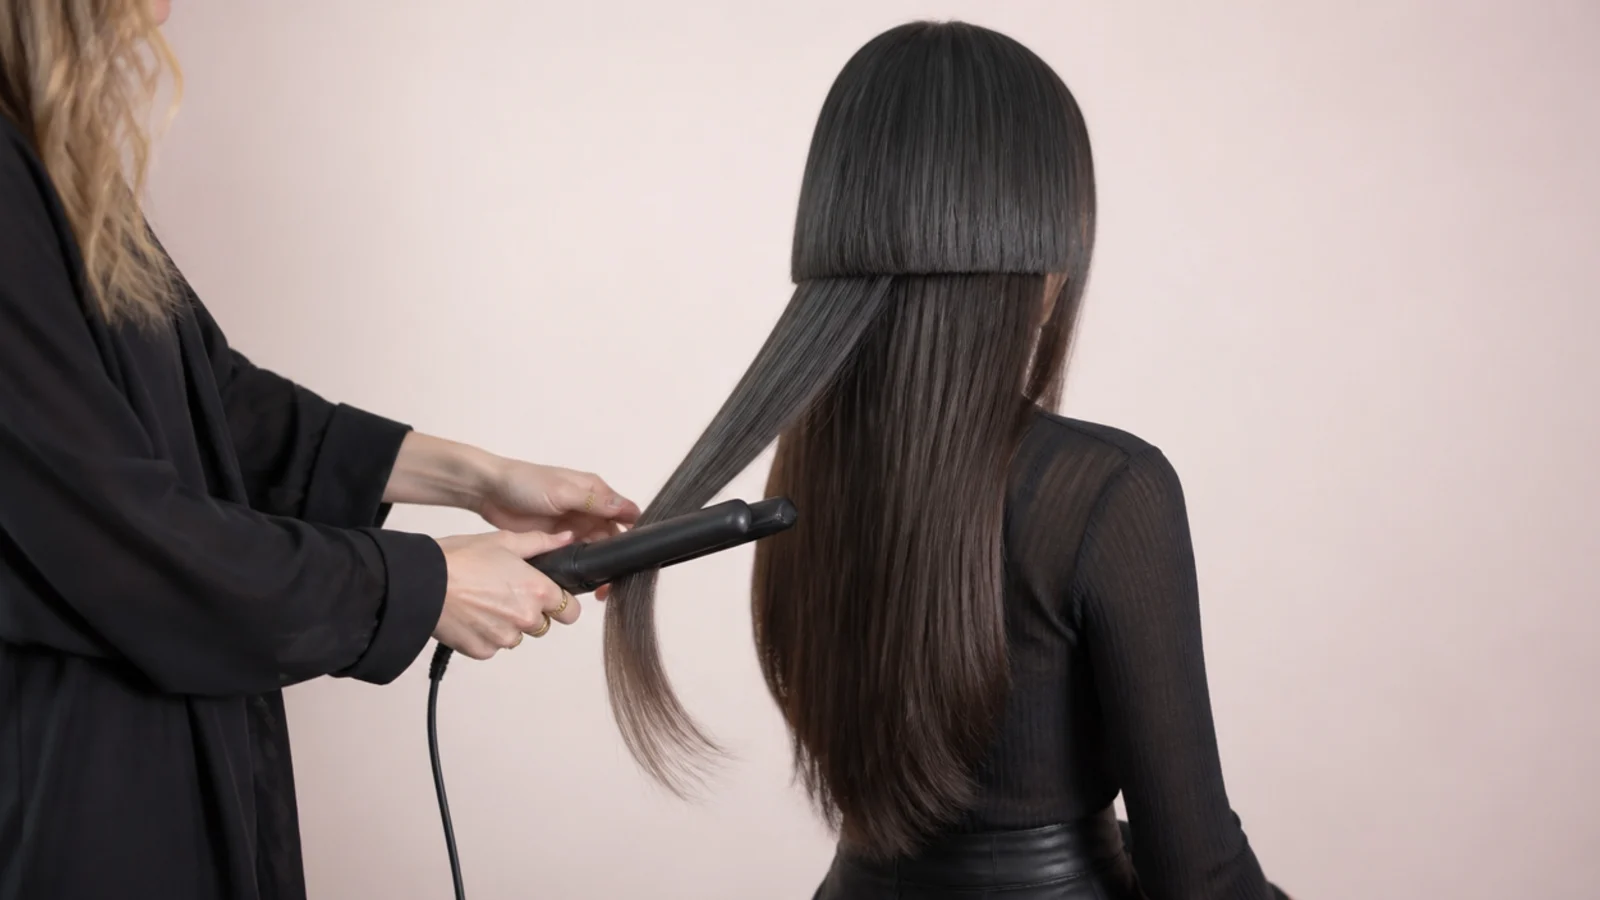
Now decide what the lengths do. For straight, run a 1 inch flat iron at 350 degrees through 2 inch sections in one pass. For waves, alternate the iron direction section by section and leave the final inch straight. For no heat at all, skip ahead and braid them damp instead. Whatever you choose, keep the tool below the disconnection line the entire time so the two layers stay visually distinct.
Common mistake: Carrying the iron up past the section line, which curls the bottom of the bell and merges the two layers.
Pro tip: One slow pass beats three fast ones; repeated passes at low heat damage more than a single hotter one.
6. Add Texture Below, Smoothness Above
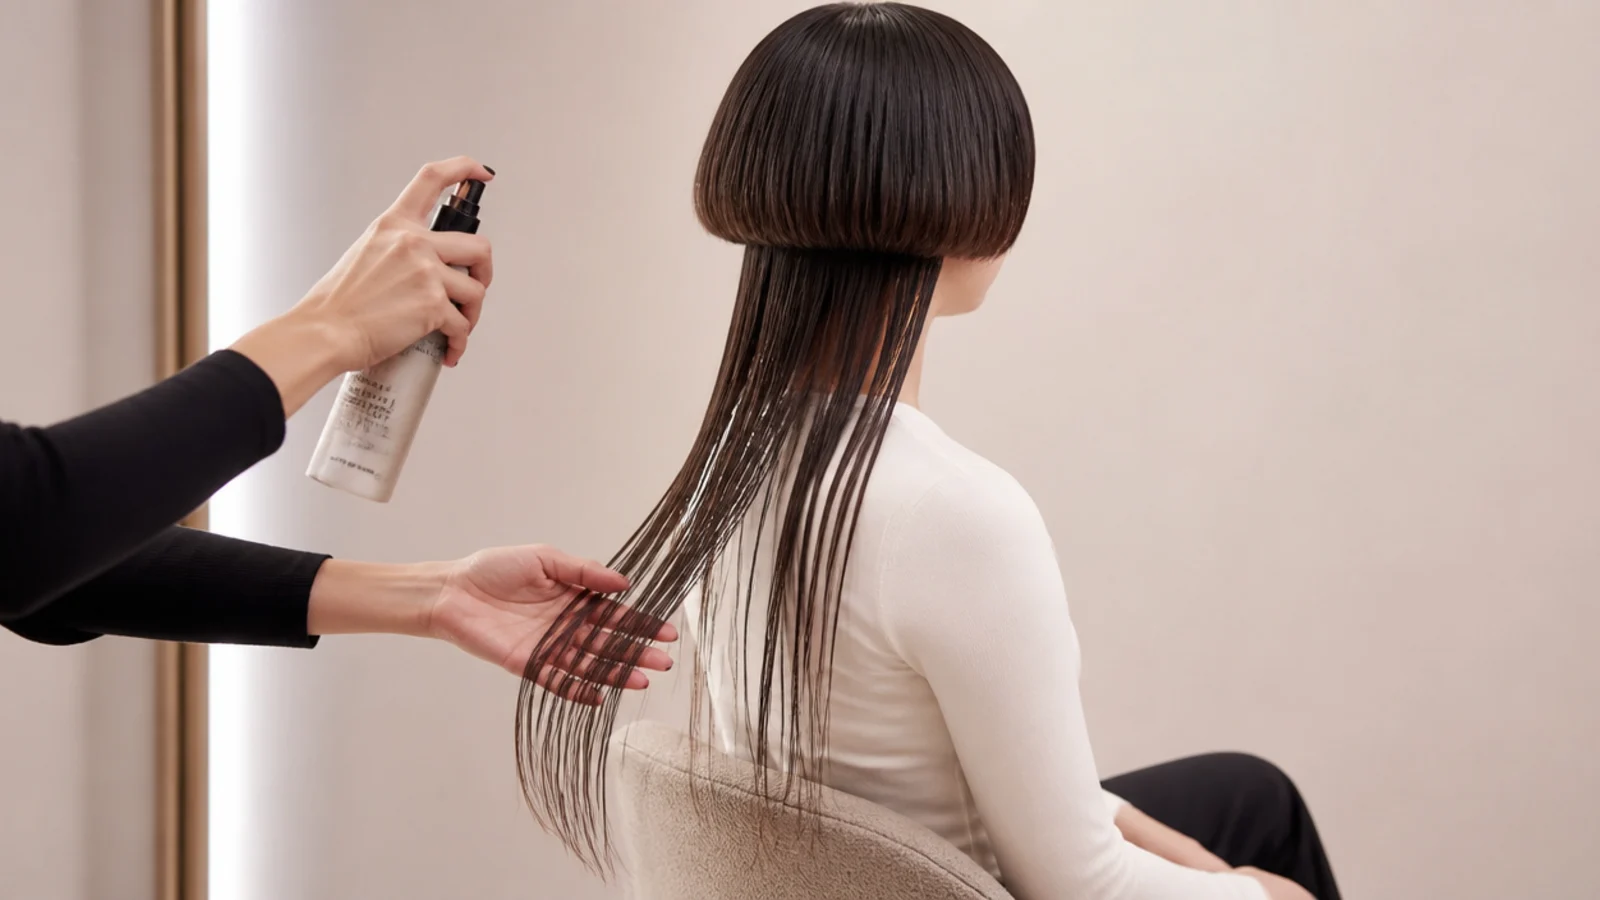
Mist sea salt or dry texture spray onto the long lengths only, two or three spritzes per side, then scrunch with your hands to break up the sections. Separately, warm a nickel-sized amount of smoothing cream or a single drop of shine serum between your palms and skim it over the surface of the bell. The contrast between a textured bottom and a polished top is what makes the cut read as styled rather than simply grown.
Common mistake: Using salt spray on the top layer, which makes the bell gritty and stops it holding any curve.
Pro tip: Emulsify serum fully in your palms first; applied straight it leaves a greasy stripe on short layers.
7. Set With Flexible Hold and Check the Back
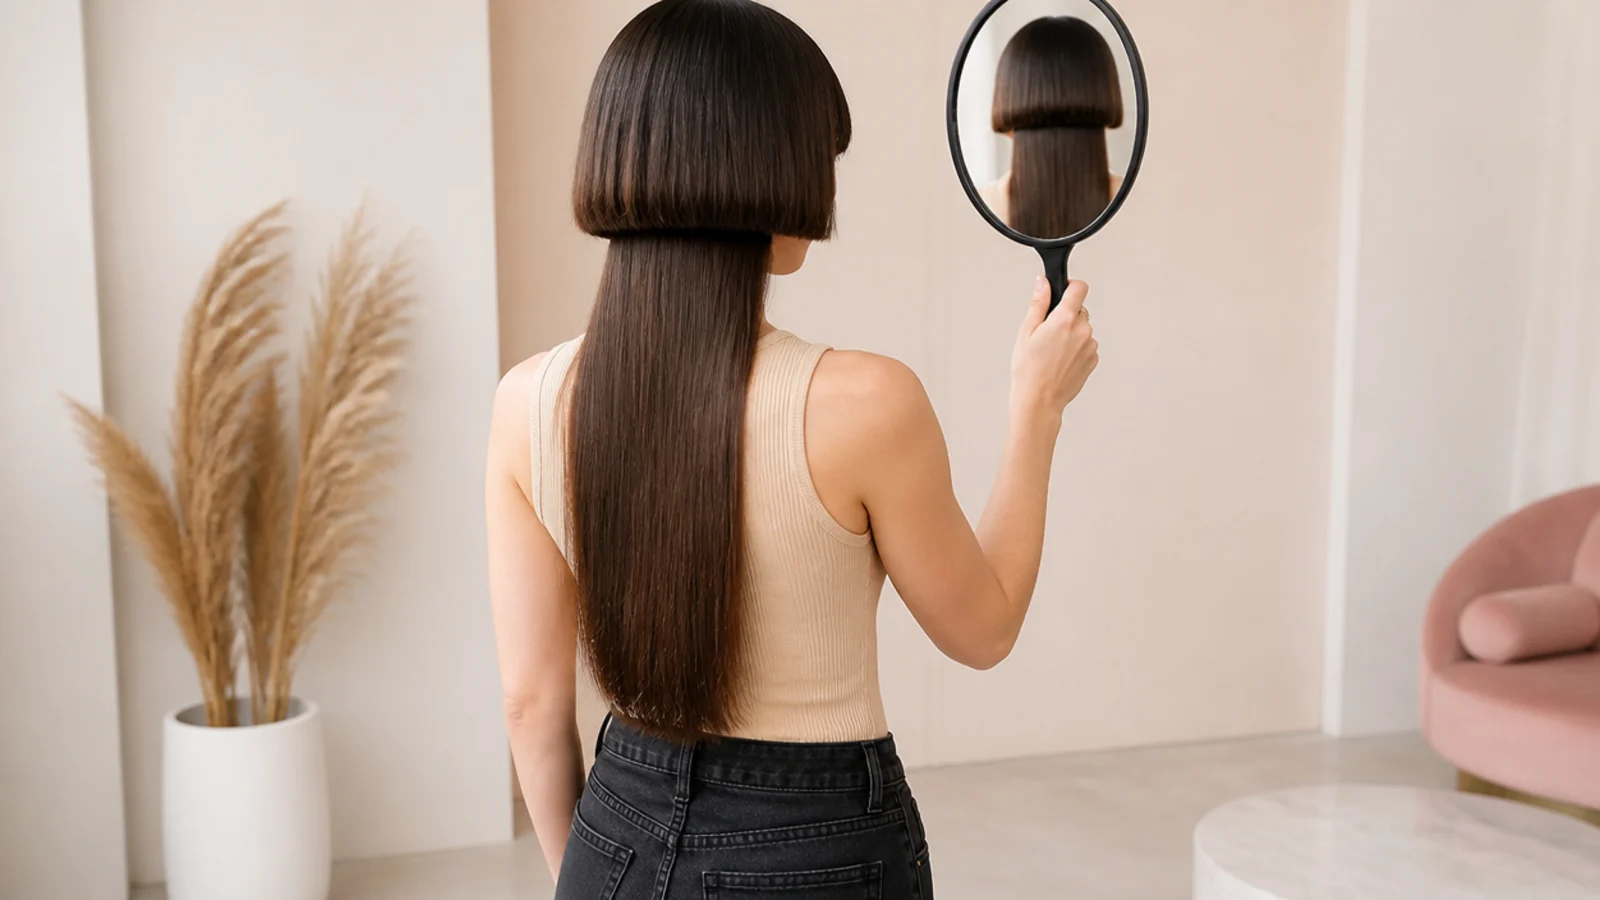
Mist a flexible hold spray from 12 inches away, one pass over the bell and one light pass at the ends of the lengths. Then take a handheld mirror and actually look at the back, because the disconnection line runs across the back of your head and that is the view everyone else gets. Adjust any section of the bell that has dried flat with a two-second blast of the dryer and your fingers.
Common mistake: Skipping the back check, the single most common reason people think the cut looks wrong when it is only the styling.
Pro tip: Keep a small mirror by the door; the bell settles about ten minutes after styling and often needs one tweak.
What a Jellyfish Haircut Is and Why the Two Layers Style Separately
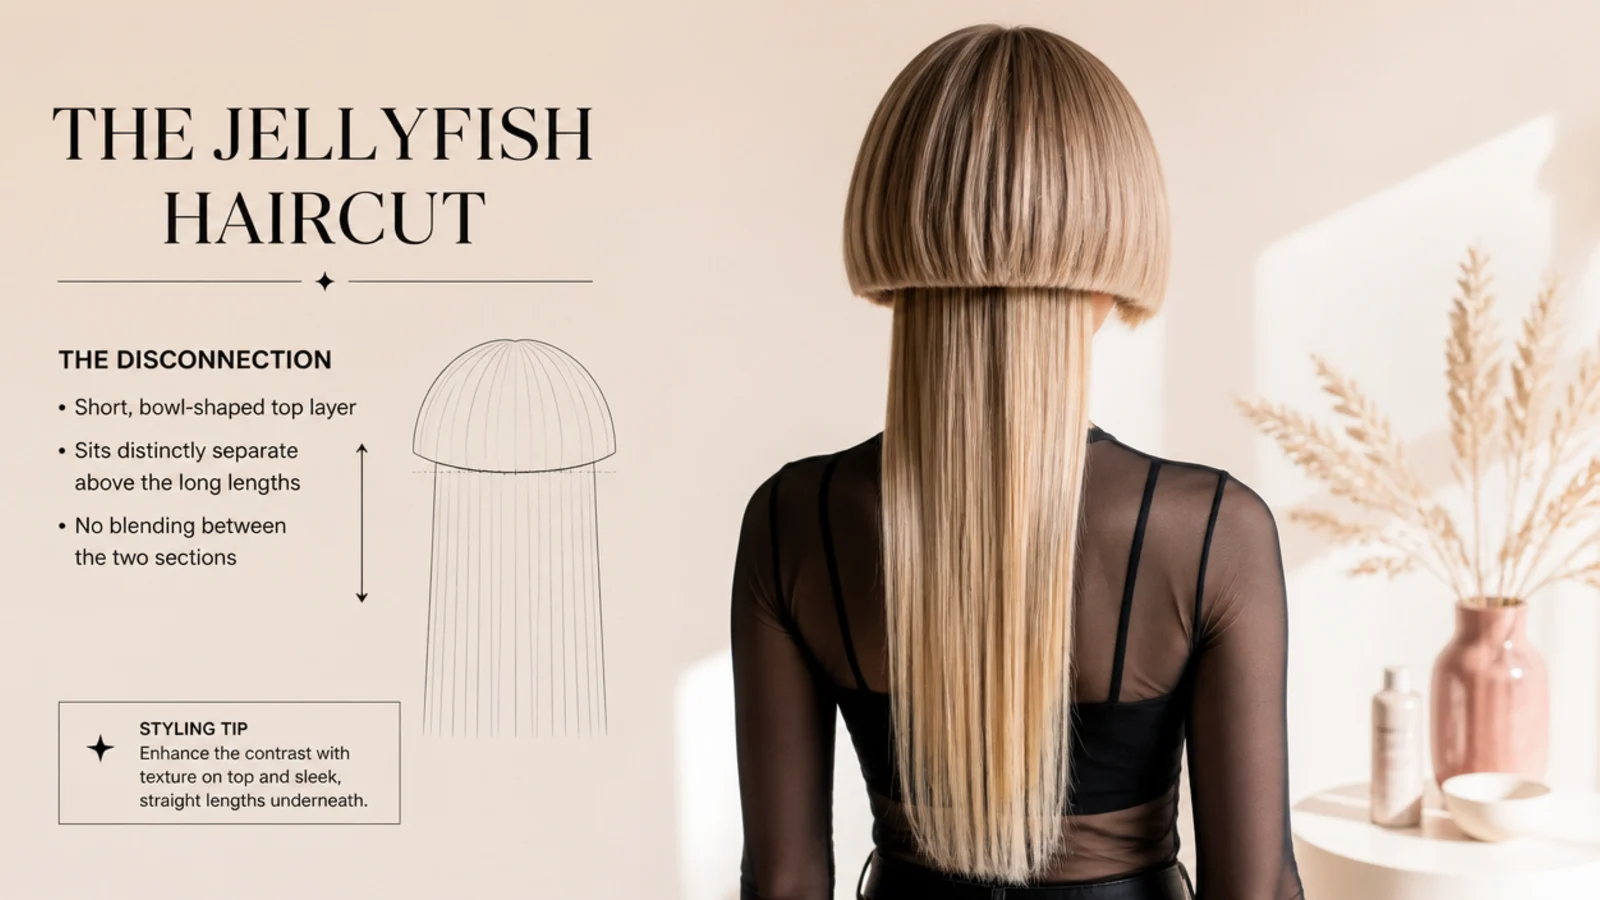
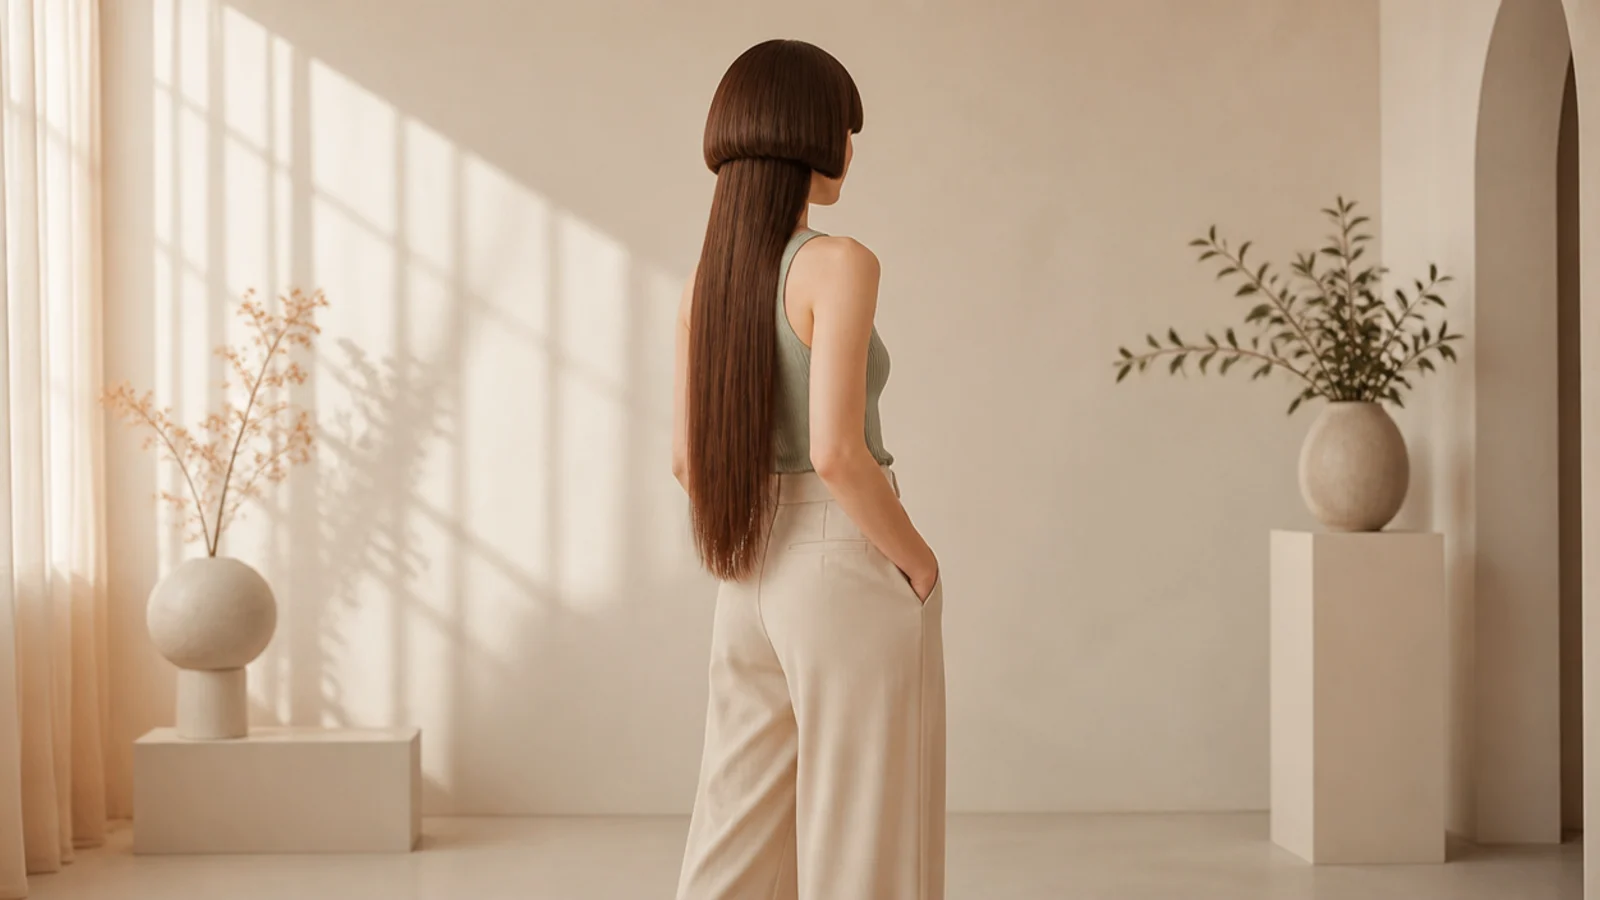
A jellyfish haircut is a disconnected, bowl-shaped upper layer cut to somewhere between the cheekbone and the jaw, sitting over lower lengths that were left long and essentially untouched. The name comes from the silhouette: a rounded bell on top, long trailing lengths beneath. The structural detail that matters for styling is the word disconnected. Unlike a shag or a wolf cut, the two layers are deliberately not blended into each other, so there is no graduated middle section carrying weight from one to the other. That is why styling them as one unit fails. The top layer is short, light and dries in about three minutes; the lengths are long, heavy and can take twenty. Dry them together and the bell is bone dry and frizzing while the ends are still damp. Split them at the disconnection line with a sectioning clip and every step afterward gets easier. The full anatomy of the cut is broken down in the jellyfish haircut guide.
Who the Jellyfish Haircut Suits: Face Shape and Hair Texture
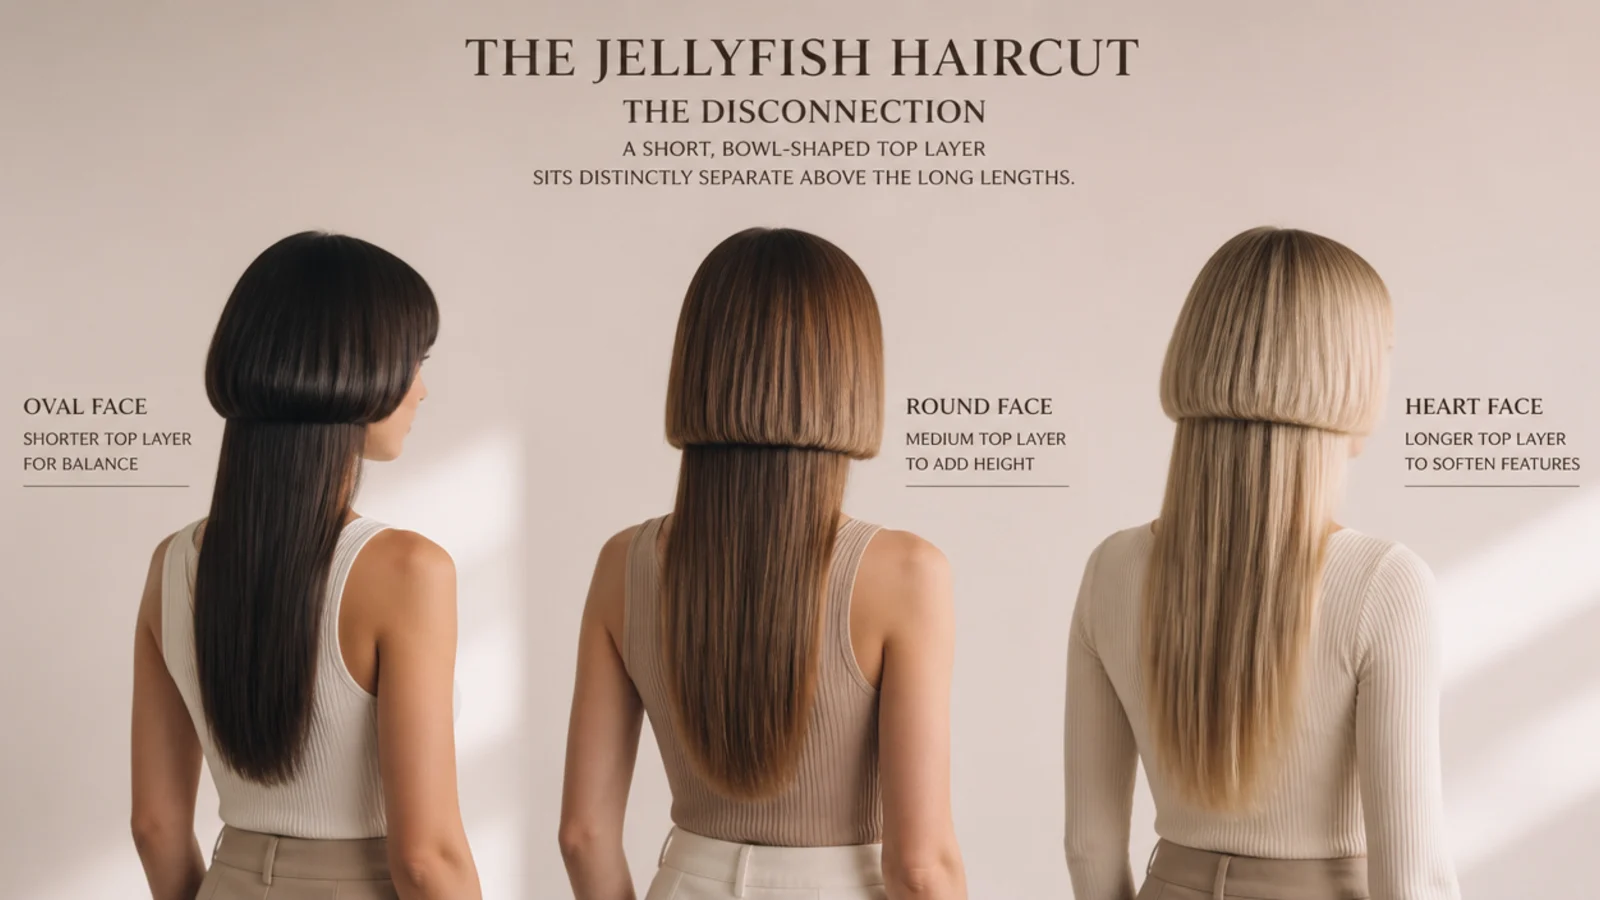
Straight and wavy hair show this cut most clearly, because the disconnection needs a visible edge to register and smooth hair gives you one. Tight curls blur it: the bell shrinks upward as it dries and the long lengths expand outward, so the line between them softens into a shape that reads closer to a rounded shag. That is not a reason to skip it, only a reason to cut it longer and dry, which is covered in curly jellyfish haircut. On face shape, oval and heart shapes take the bell at its most classic, right at the cheekbone. Round faces do better with the top layer at jaw length or lower and a center or deep side part, since a short round bell echoes the face shape and widens it. Square and diamond faces benefit from the curtain flick, which breaks the horizontal line at the jaw. Density matters too: fine hair needs root lift to keep the bell from collapsing, thick hair needs internal weight removed from the top layer or it turns into a mushroom. Wavy texture specifics live in wavy jellyfish haircut.
Jellyfish vs Wolf Cut vs Mullet vs Shag: What You Are Actually Styling
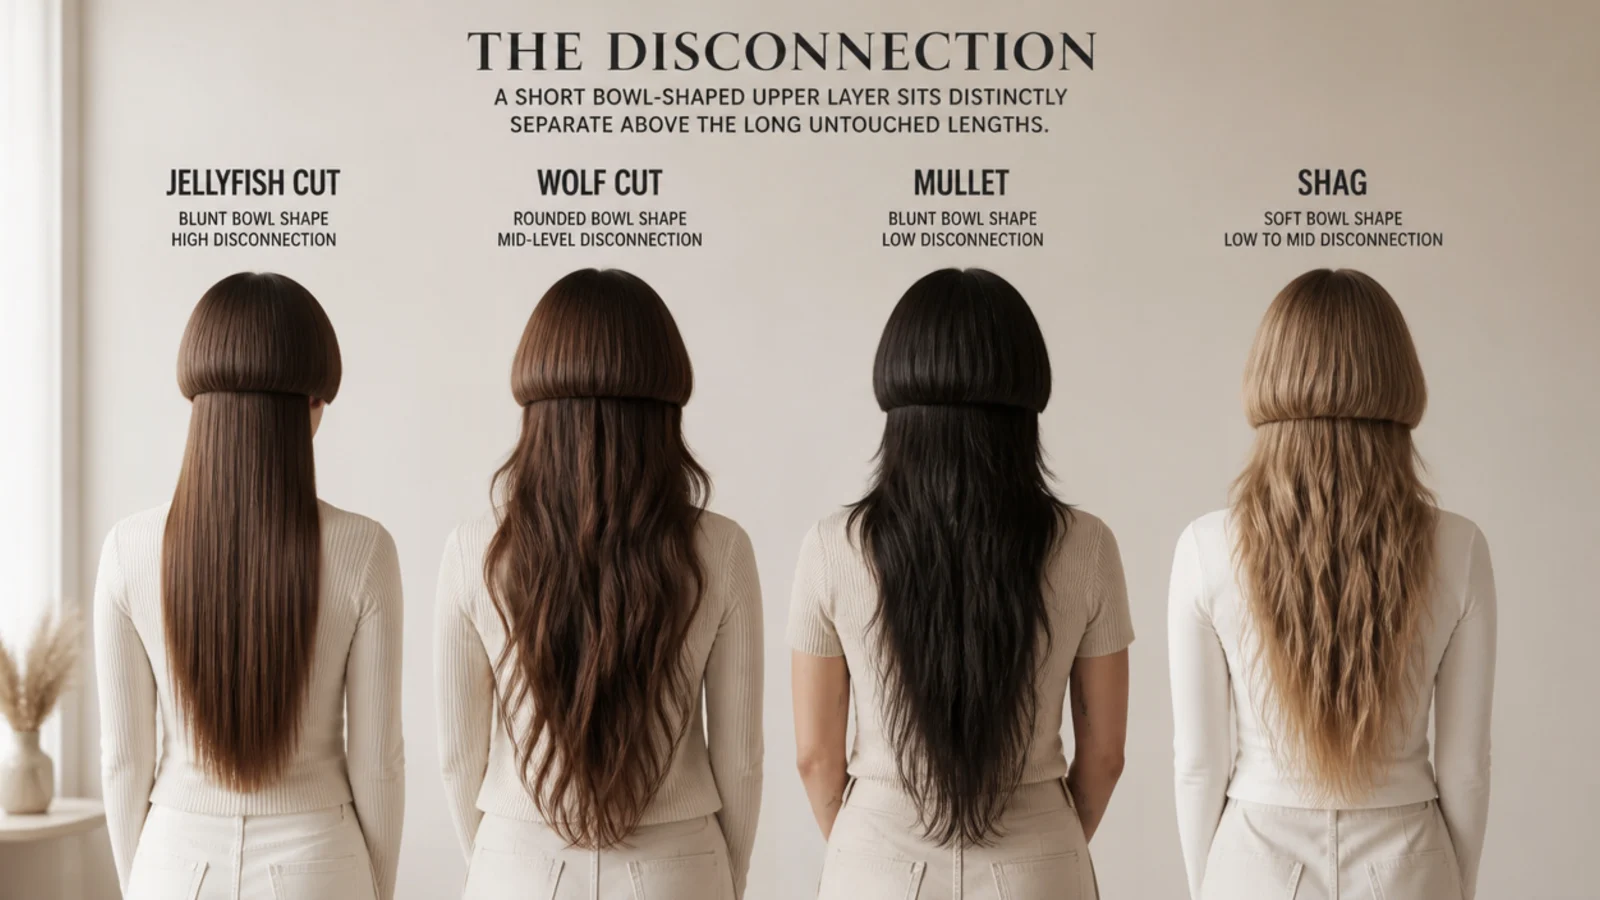
These four get lumped together and they style nothing alike. A wolf cut is choppy and blended all the way through, with no hard break anywhere, so you scrunch product through the whole head at once and you are done. A mullet is short at the front and sides with length only at the back, which is a front-to-back gradient rather than a top-over-bottom stack. A shag is layered throughout with soft graduation, built for texture spray and air-drying. The jellyfish is the only one of the four with a deliberate horizontal break: a complete upper layer, one length all the way around, sitting over untouched lengths with nothing bridging them. Practically, that means a jellyfish is the only one of the four that needs two separate styling routines, and it is the only one where a round brush is genuinely non-negotiable, because the bell has no surrounding weight to hold its shape. It is also the only one where blending is a mistake rather than a repair, so if a stylist offers to soften the line, that is a different haircut. If blended layers are what you actually want, a shaggy mid-length haircut is the closer match.
Styling the Short Top and the Long Bottom Without Blending Them
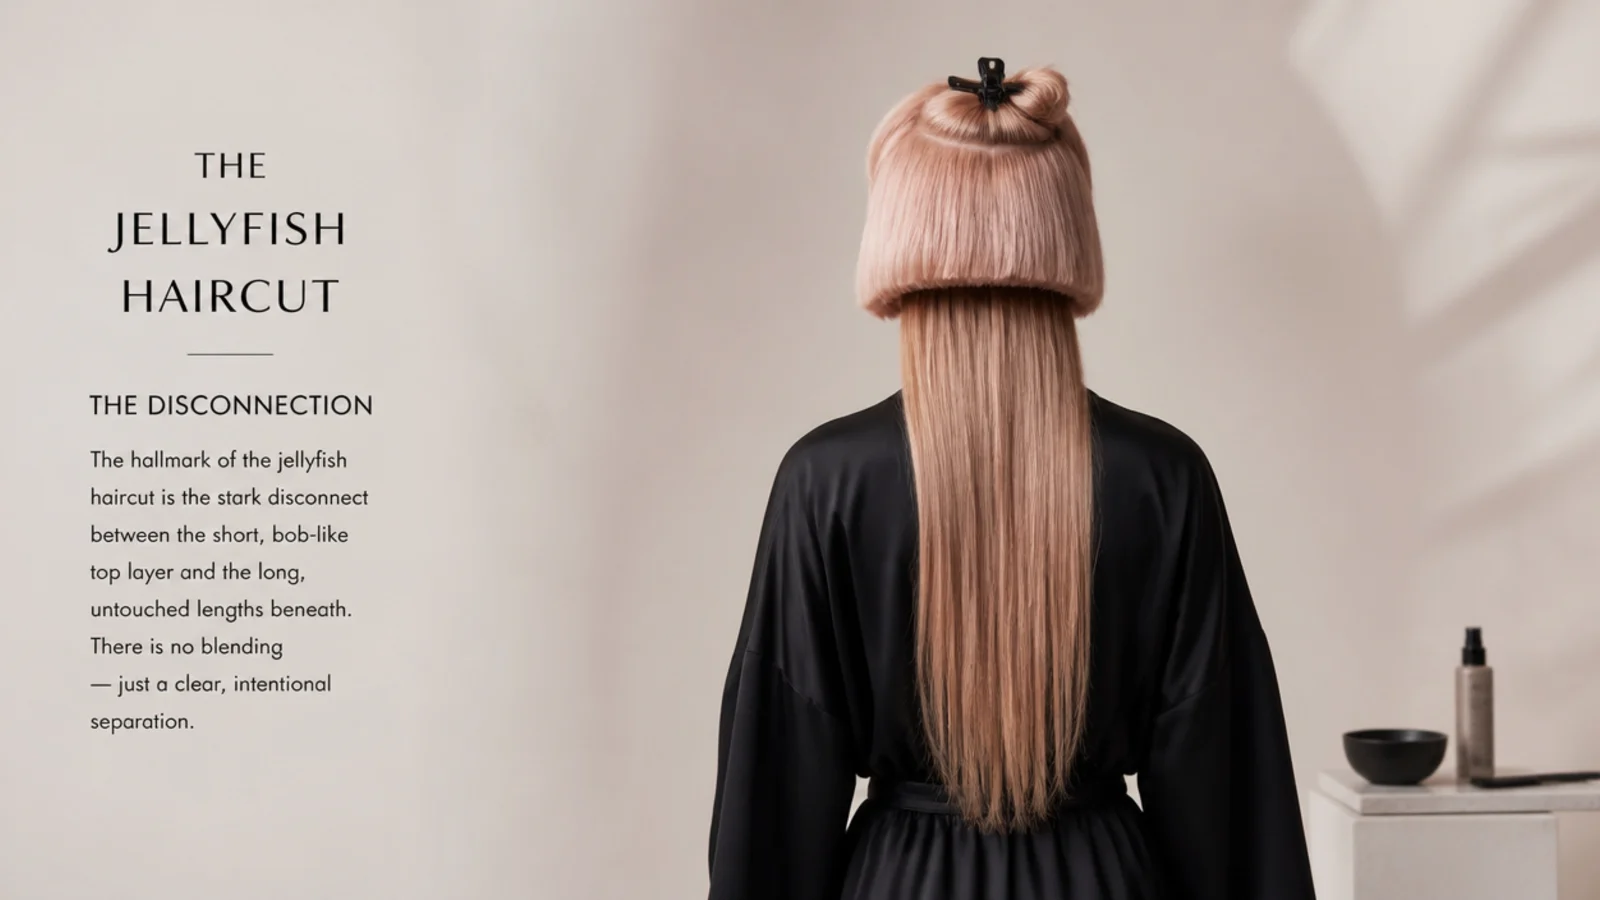
The working rule is that anything that adds texture goes on the lengths, and anything that adds smoothness and shape goes on the bell. Sea salt spray, texture spray and scrunching all live below the disconnection line. Cream, serum, root lift and the round brush all live above it. Cross those over and the layers start to resemble each other, which is exactly what the cut is designed to avoid. Product amounts are small: about a nickel of cream for the whole bell, and two to three spritzes of salt spray per side on the lengths. Hold matters as much as product. Firm-hold hairspray on the bell glues it to the head and kills the lift you spent four minutes building, so use a flexible or working spray held 12 inches away. On the lengths, a light mist at the ends only keeps flyaways down without stiffening the movement. If your top layer frizzes as it dries, treat it the way you would any short frizz-prone section, with a leave-in and a cool finish rather than more product, along the lines of a frizzy hair routine.
How to Style a Jellyfish Haircut While It Grows Out
A jellyfish does not grow out gracefully on its own, because the bell drops toward the lengths and the disconnection stops reading as intentional. Expect an awkward stretch of roughly two to three months when the top layer reaches an in-between length around the shoulder. Three styling fixes carry you through it. First, the deep side part, which converts the horizontal line into a diagonal sweep. Second, adding wave to the top layer instead of straightening it, since texture hides an edge that smoothness advertises. Third, a claw clip twist, which removes the length from the equation entirely. Cut-wise, the natural landing spot is a shag or a curtain-bang shape: your stylist point-cuts into the ends of the old bell so it merges into face-framing layers rather than sitting on top of them. Ask for that around month three rather than waiting for it to fix itself. If you decide to keep the cut short instead, see short jellyfish haircut.
How to Ask for a Jellyfish Haircut Without a Disaster

Use these words: a disconnected bowl-shaped upper layer, length left long underneath. Then give three numbers. Where the bell falls, in inches or against a landmark, cheekbone, chin or jaw. How long the lengths stay, collarbone, mid-back or waist. And how hard the disconnection should be, fully blunt or slightly softened at the front corners only. Bring two reference photos, one from the front and one from the back, because the back view is where most disappointment happens and almost nobody checks it in advance. Say explicitly that you do not want the layers blended. Do not say bowl cut, which many stylists hear as a single-length cut, and do not say wolf cut, which gets you blended choppy layers instead. Finally, ask how it will be dried at the end of the appointment and watch which brush they reach for, because that is your home routine demonstrated for free. Trim cadence runs about six to eight weeks on a blunt bell and ten to twelve on a textured one. Browse shapes first on the jellyfish haircut hub.
Frequently Asked Questions
How do you style a jellyfish haircut?
Style it as two separate sections. Clip the short top layer up, rough-dry and shape the long lengths first, then drop the bell and blow-dry it over a 1.5 inch round brush in about five sections. Texture products go on the lengths, smoothing products go on the top. Finish with a flexible hold spray and check the back in a handheld mirror.
How do you style a jellyfish haircut without heat?
Braid the long lengths into two loose braids on 80 percent dry hair before bed and let the short top layer air-dry loose. In the morning unravel the braids and shake them out with your fingers for soft waves. Foam rollers on the lengths work the same way. The bell needs only a pea of leave-in cream and a comb-through while damp.
Does a jellyfish haircut need styling every day?
The short top layer usually does, because it sits closest to the scalp, gets oily first and collapses flat overnight. That is a four-minute job with a round brush or a 20-second one with dry shampoo and your fingers. The long lengths hold their shape for two or three days, so most days you are only restyling the bell.
How do you style a short jellyfish haircut?
With a shorter under-length, the disconnection is subtler, so lean on direction rather than length contrast. Flick the bell outward with a flat iron and curve the lower lengths inward, or reverse it, so the two layers move in opposite directions. Skip the heavy texture spray, which blurs a short shape, and use a light dry wax on the ends instead.
Is a jellyfish haircut high maintenance?
It is medium maintenance to style and higher maintenance to keep cut. Daily styling is four to ten minutes for the top layer. The trims are the real commitment: a blunt bell needs reshaping every six to eight weeks, and a textured one every ten to twelve, because the whole look depends on that upper layer holding a clean line.
Can you put a jellyfish haircut in a ponytail?
You can put the long lengths in a ponytail, but the short top layer is too short to reach the elastic and will fall loose around your face. Rather than pinning it down, treat it as intentional face-framing. A low ponytail, a half-up bun or a claw clip twist all look better than any attempt at a fully gathered updo.
Is the jellyfish haircut a mullet?
No. A mullet is short at the front and sides with length only at the back, a front-to-back shape. A jellyfish is a complete bowl-shaped upper layer at one length all the way around, sitting over long lengths underneath, a top-over-bottom shape. They read as different silhouettes from the side, which is where the confusion usually starts.
What products do you need for a jellyfish haircut?
Five things cover it: a spray heat protectant, a root lift spray for the top layer, a smoothing cream or shine serum for the bell, a sea salt or dry texture spray for the lengths, and a flexible hold hairspray. Add dry shampoo if your roots go oily quickly. Skip firm hold sprays and heavy oils, both flatten the top layer.
How often should you trim a jellyfish haircut?
Every six to eight weeks if the top layer is cut blunt, since a blunt line shows growth almost immediately. A textured or point-cut bell stretches to ten or twelve weeks because the softer edge disguises the drop. The long lengths underneath only need a dusting of the ends every three to four months.
Does a jellyfish haircut work on curly hair?
It works, but the shape reads differently. Curls shrink the bell upward and expand the lengths outward as they dry, so the disconnection softens rather than staying sharp. Ask for it cut dry and a little longer than you think to allow for shrinkage, and diffuse the top layer on low speed so the bell keeps its round shape instead of flattening.
Heat tools can damage hair. Always use a heat protectant, keep irons at or below 300 to 350 degrees Fahrenheit on fine or color-treated hair, and stop if hair feels dry or snaps. For cutting, reshaping or correcting a disconnected layer, see a licensed stylist rather than cutting at home.
Which jellyfish haircut look are you saving?
If you take one thing from these 15 jellyfish haircut styling ideas, make it the two-section habit: clip the bell up, dry and shape the lengths first, then come back and give the top layer its own three minutes with a round brush. That single change is the difference between a shape that reads deliberate and one that reads like an accident. Keep heat at 300 to 350 degrees on the top layer since it gets styled most often, use flexible hold rather than firm, and let a claw clip or a half-up do the work on days you cannot be bothered. When you are ready for more inspiration, browse the jellyfish haircut hub or compare lengths in long jellyfish haircut.