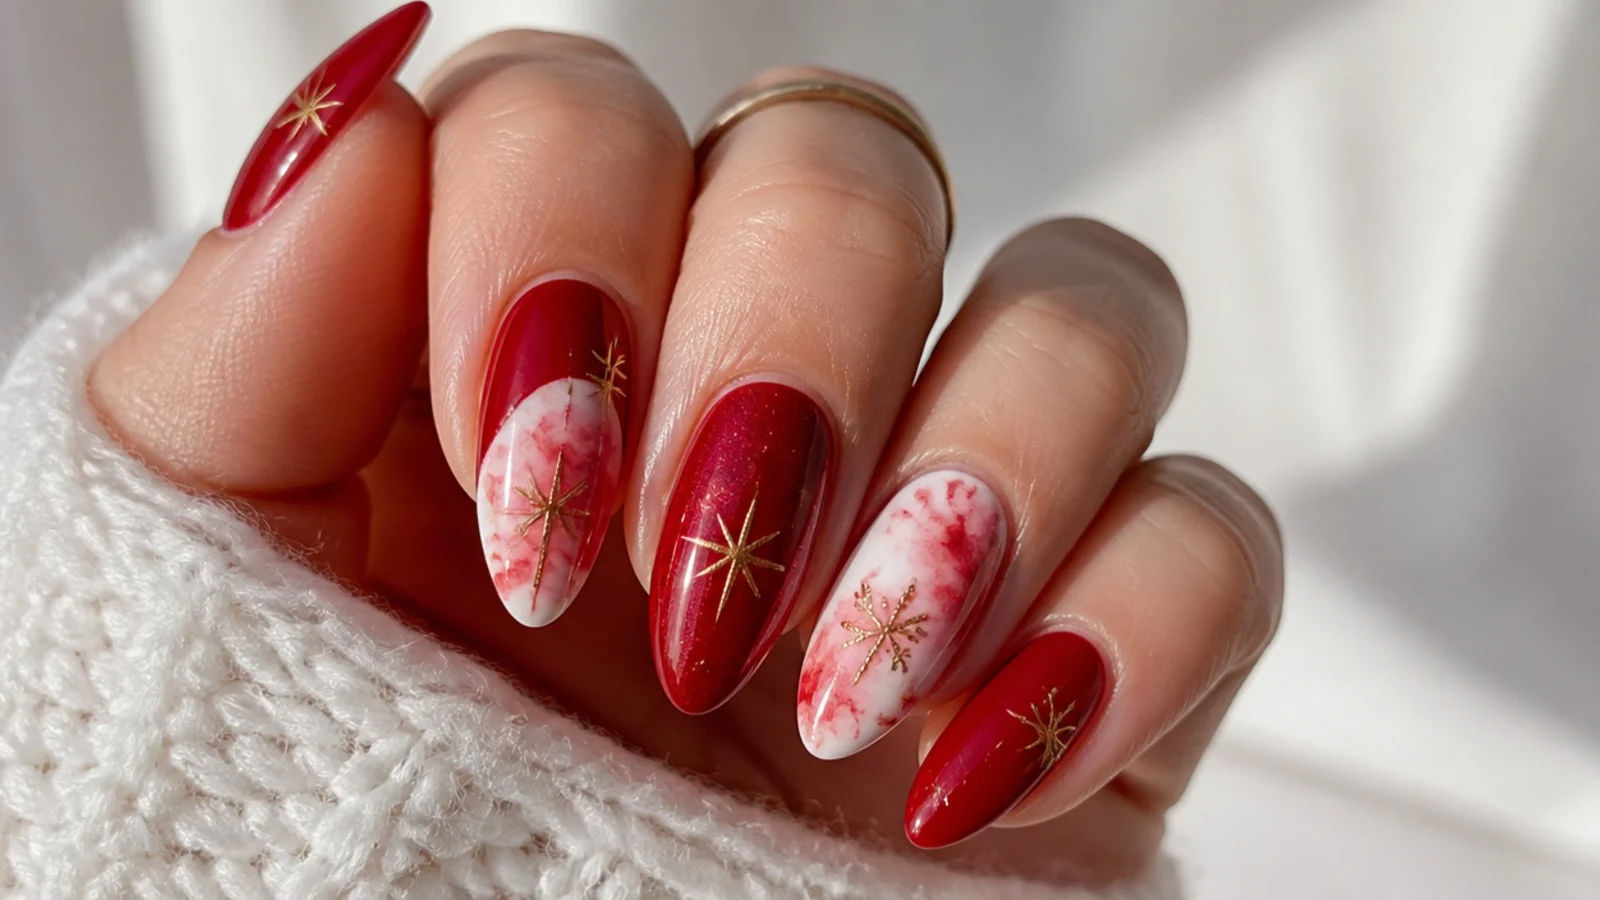
1. Watercolor Poinsettia Bloom
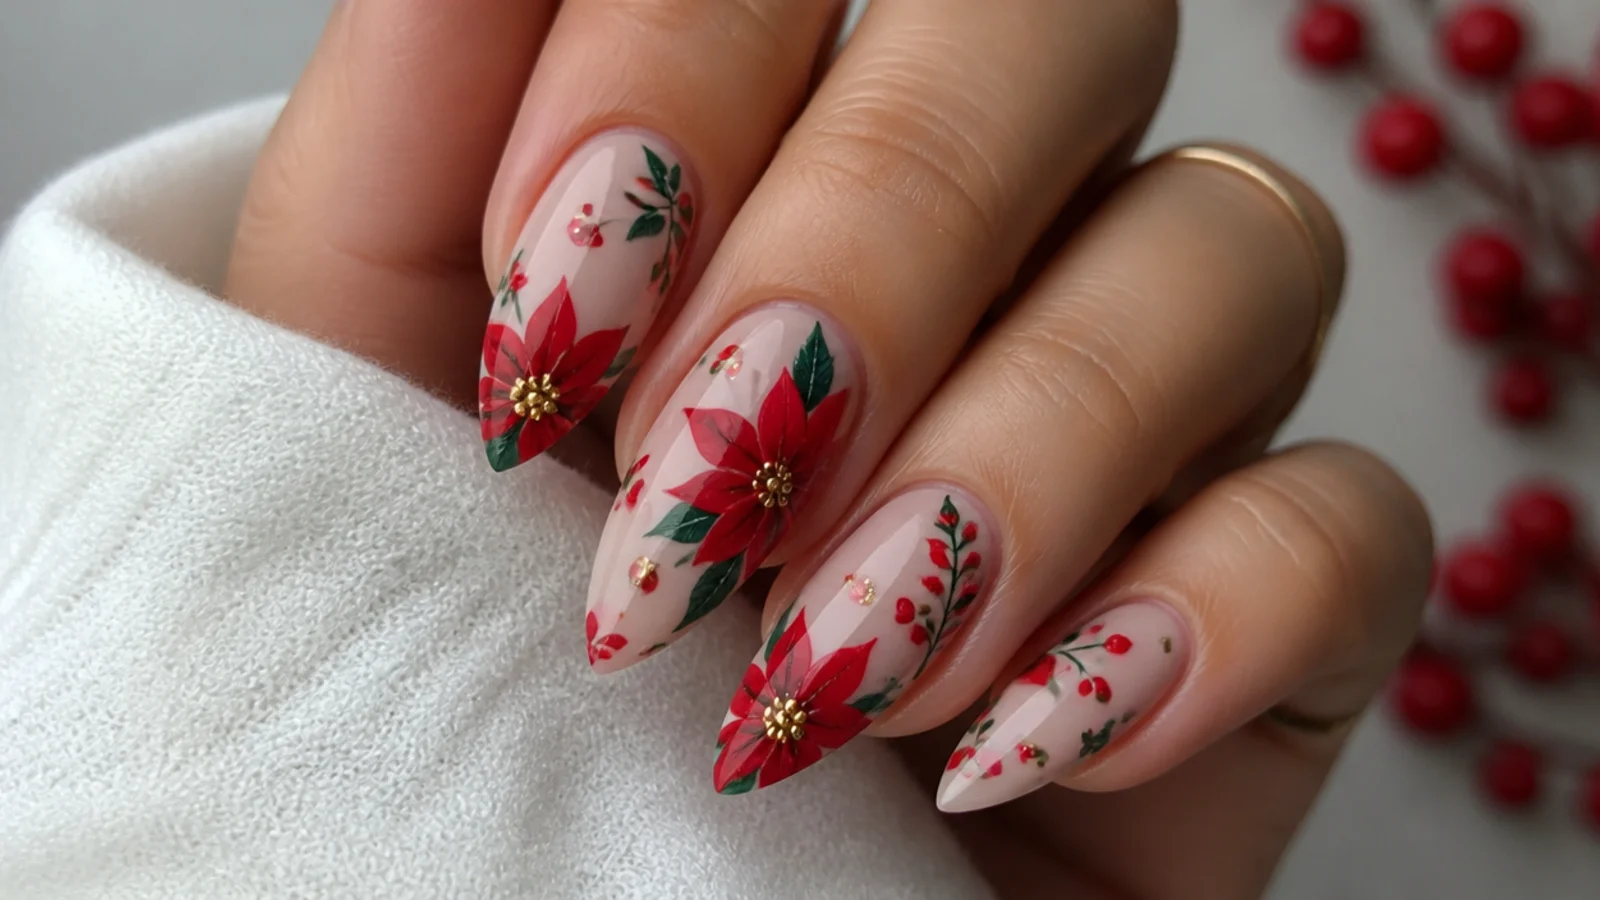
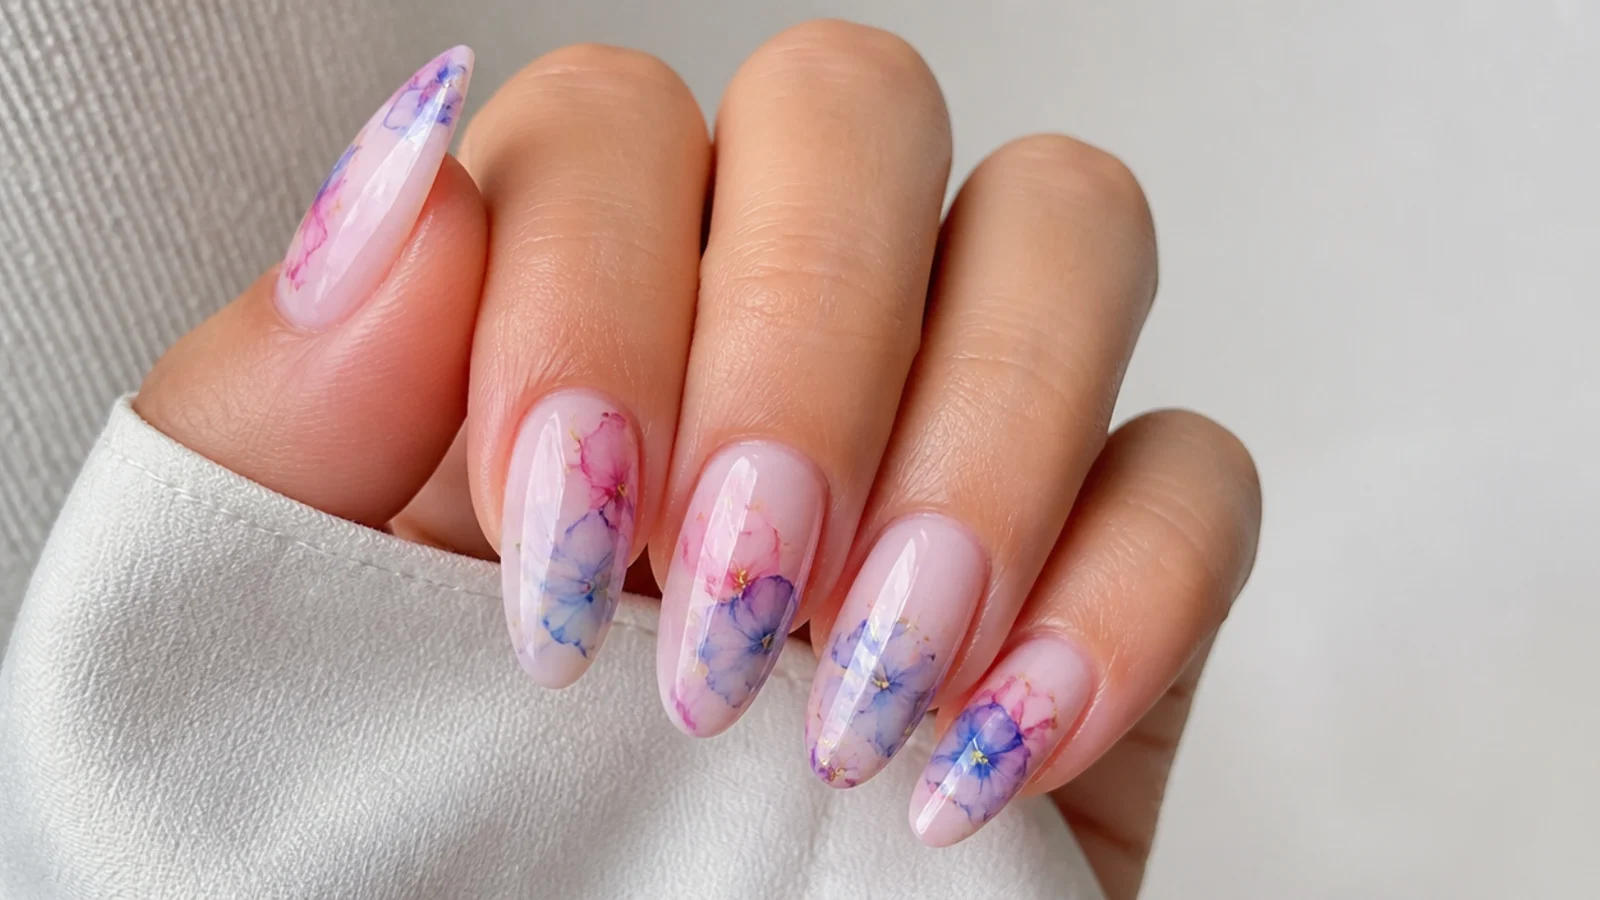
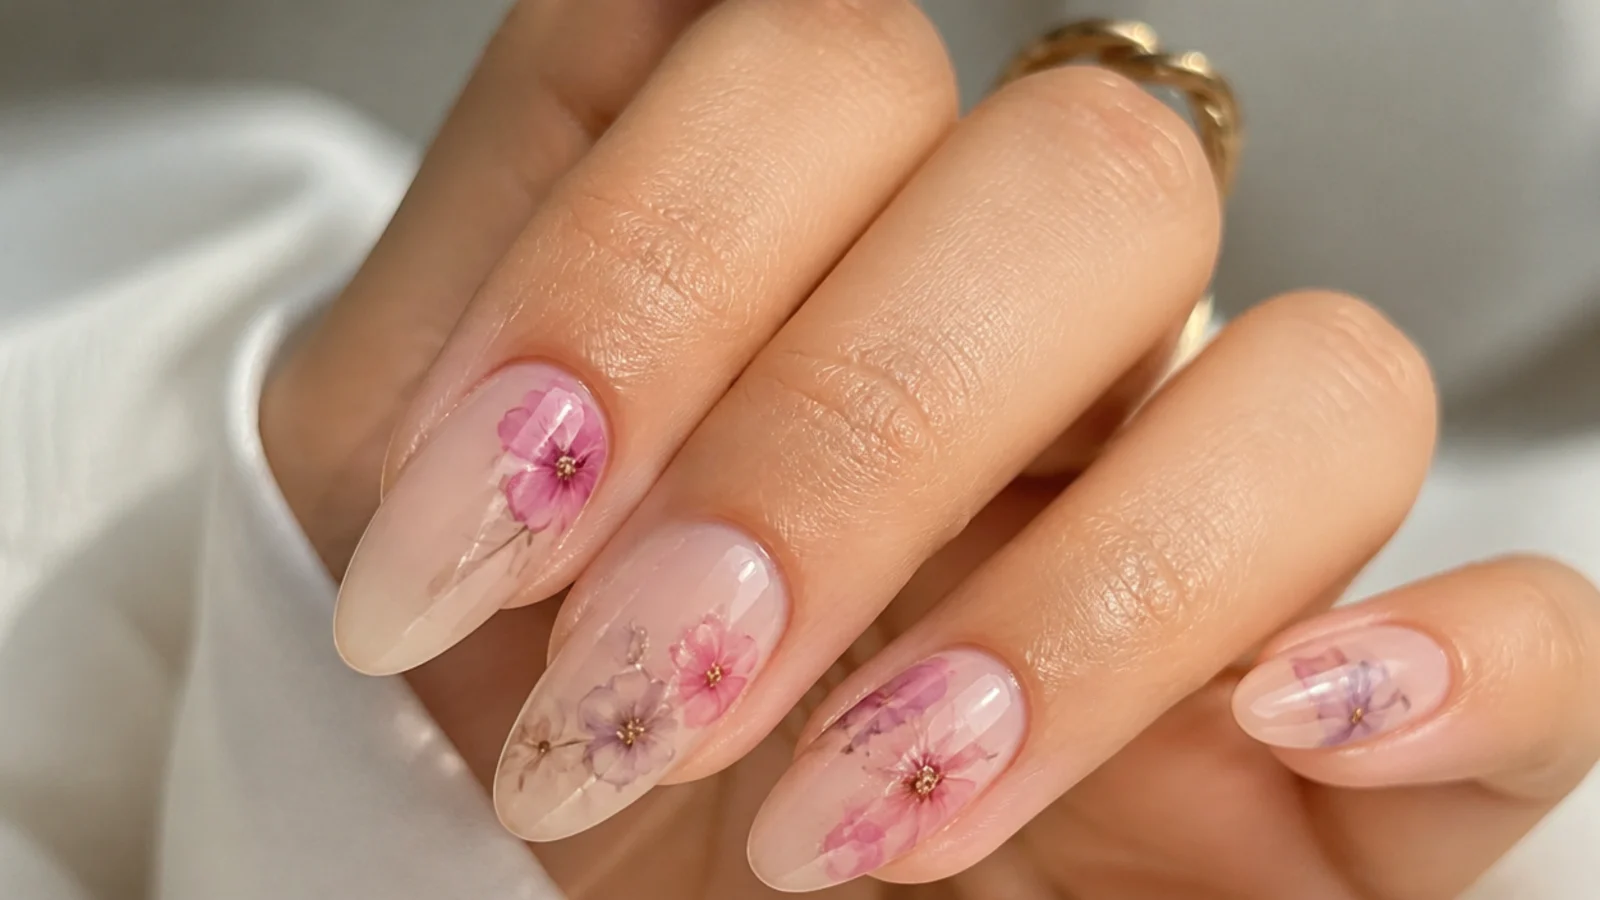
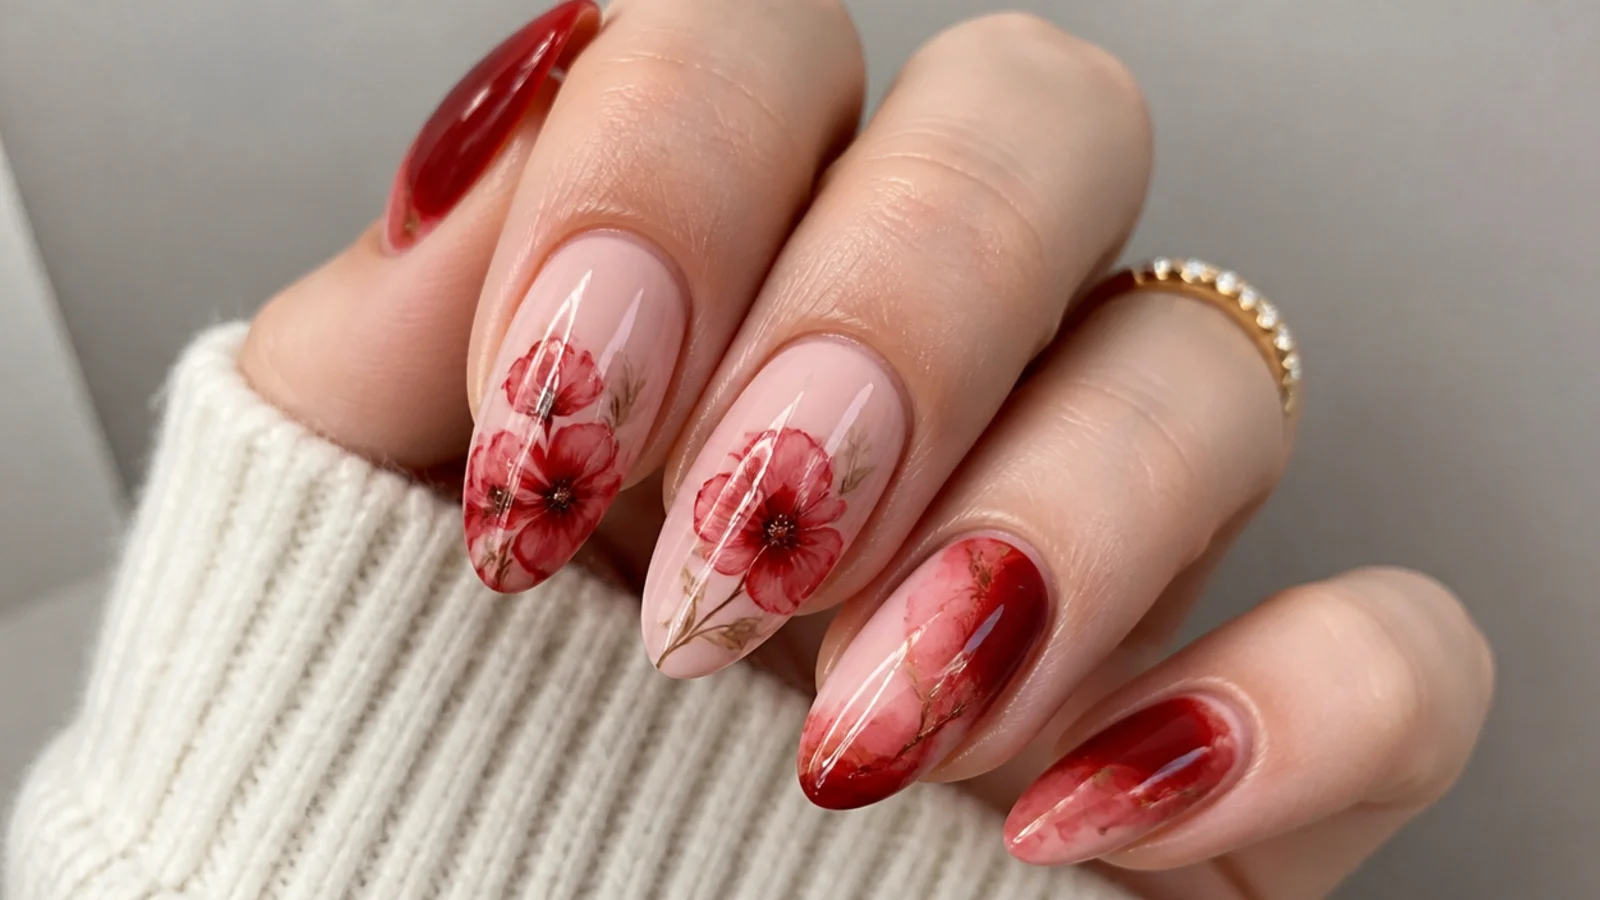
Over a milky-white cured base, a thin uncured blooming-gel layer lets drops of true red gel spread into soft poinsettia petals, with a dot of gold in each center added and cured last. Because the color diffuses on its own, the flower edges melt into the white background instead of reading as a hard outline, which is exactly the festive-but-soft effect a hand-painted poinsettia can never match. The petals stay translucent and layered. It suits medium almond or coffin nails and anyone wanting the signature holiday flower done softly. Use only a little red per petal and let it bloom for the full minute before curing.
Who it suits: Anyone wanting the classic holiday flower done soft.
Tip: Add the gold centers last and cure separately so they stay crisp.
2. Holly and Berry Bleed
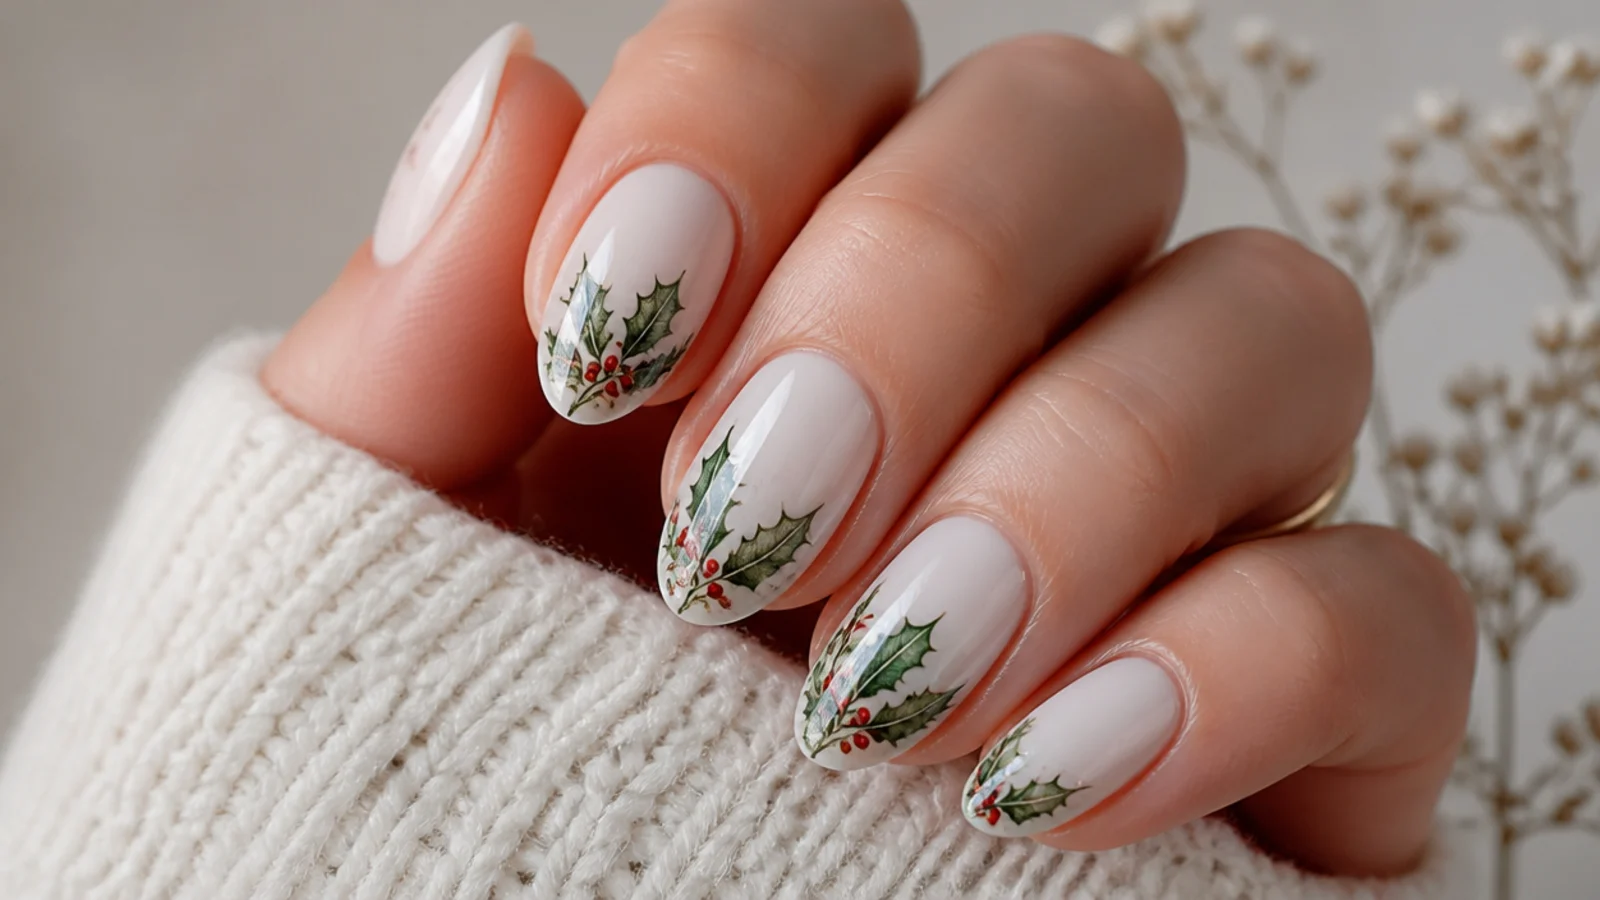
Deep evergreen gel drawn as two holly leaves bleeds gently into a white base through the uncured blooming gel, while tiny drops of red bloom into soft berry clusters beside them. The green diffuses at the leaf edges for a watercolor look, and the berries spread just enough to glow rather than sit as flat dots. It reads unmistakably Christmas while staying diffused and expensive. It suits short to medium nails and anyone who likes a botanical holiday motif. Draw the leaf veins with a thin liner brush into the wet gel, then cure once the bleed looks right.
Who it suits: Anyone wanting a botanical, evergreen holiday look.
Tip: Keep berries small - too much red floods the leaves and goes muddy.
3. Candy Cane Marble
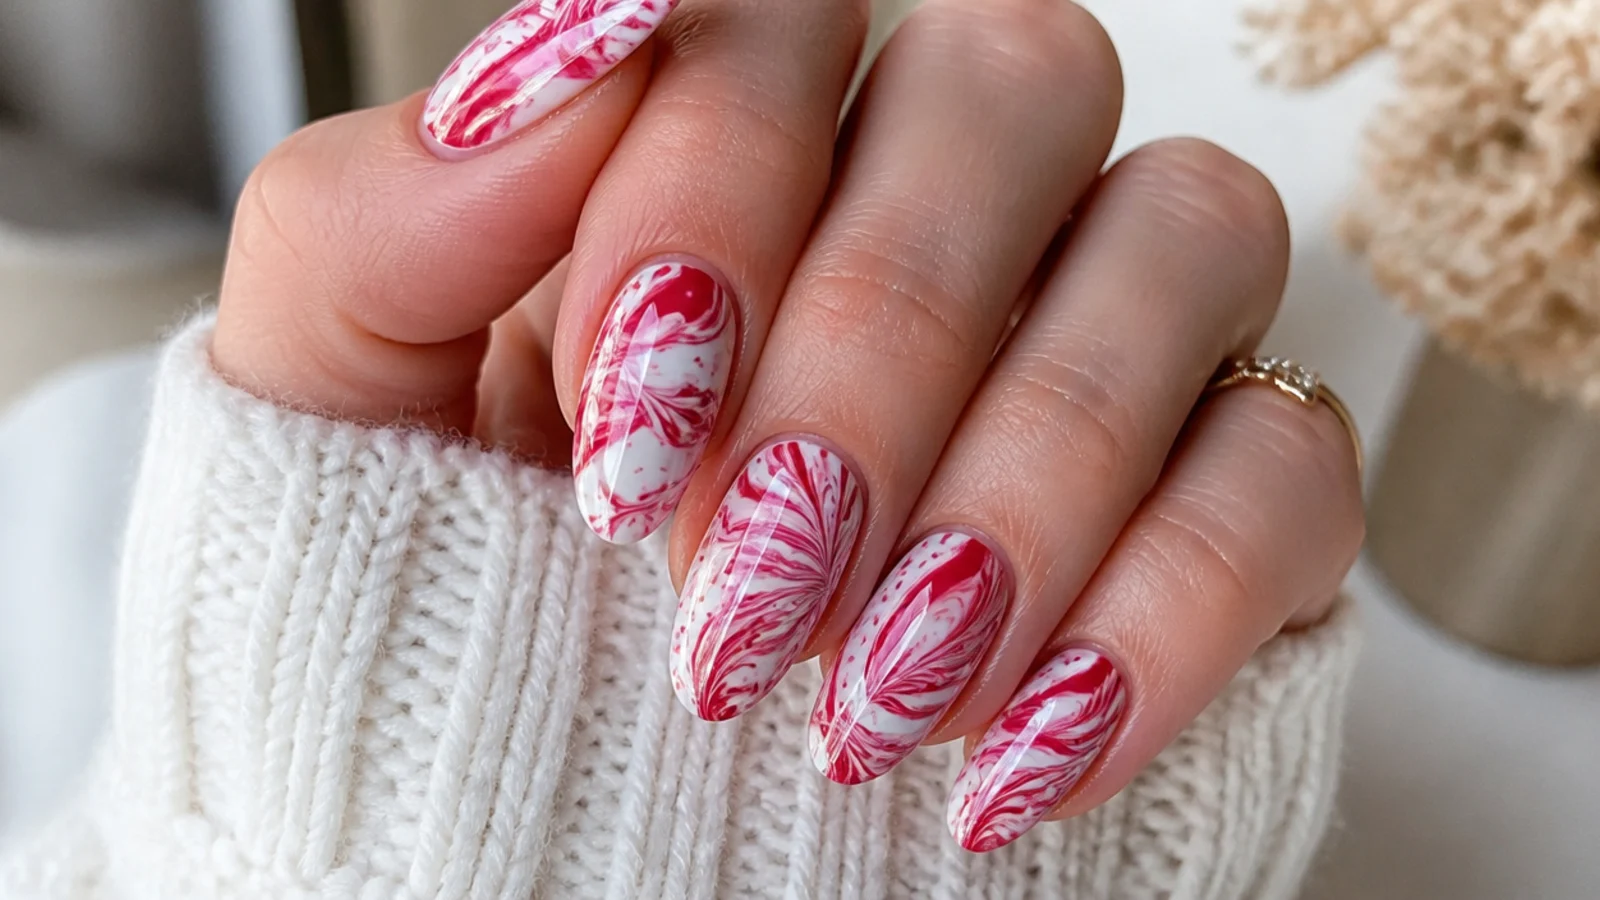
Diagonal stripes of red gel drawn across a white base bloom into each other through the uncured layer for a soft candy-cane marble rather than crisp peppermint stripes. Dragging a thin brush once through the wet gel pulls the red into feathered veins, so the stripes look like ink swirled in water. The white stays bright between them for that fresh peppermint contrast. It suits every shape, especially coffin and square, and anyone wanting a playful festive set. Work fast while the gel is wet, use one light drag, and cure at once so the marble does not over-spread into pink.
Who it suits: Anyone wanting a playful peppermint set.
Tip: One drag only - repeated dragging turns the red-white blend muddy pink.
4. Inky Evergreen Tie-Dye
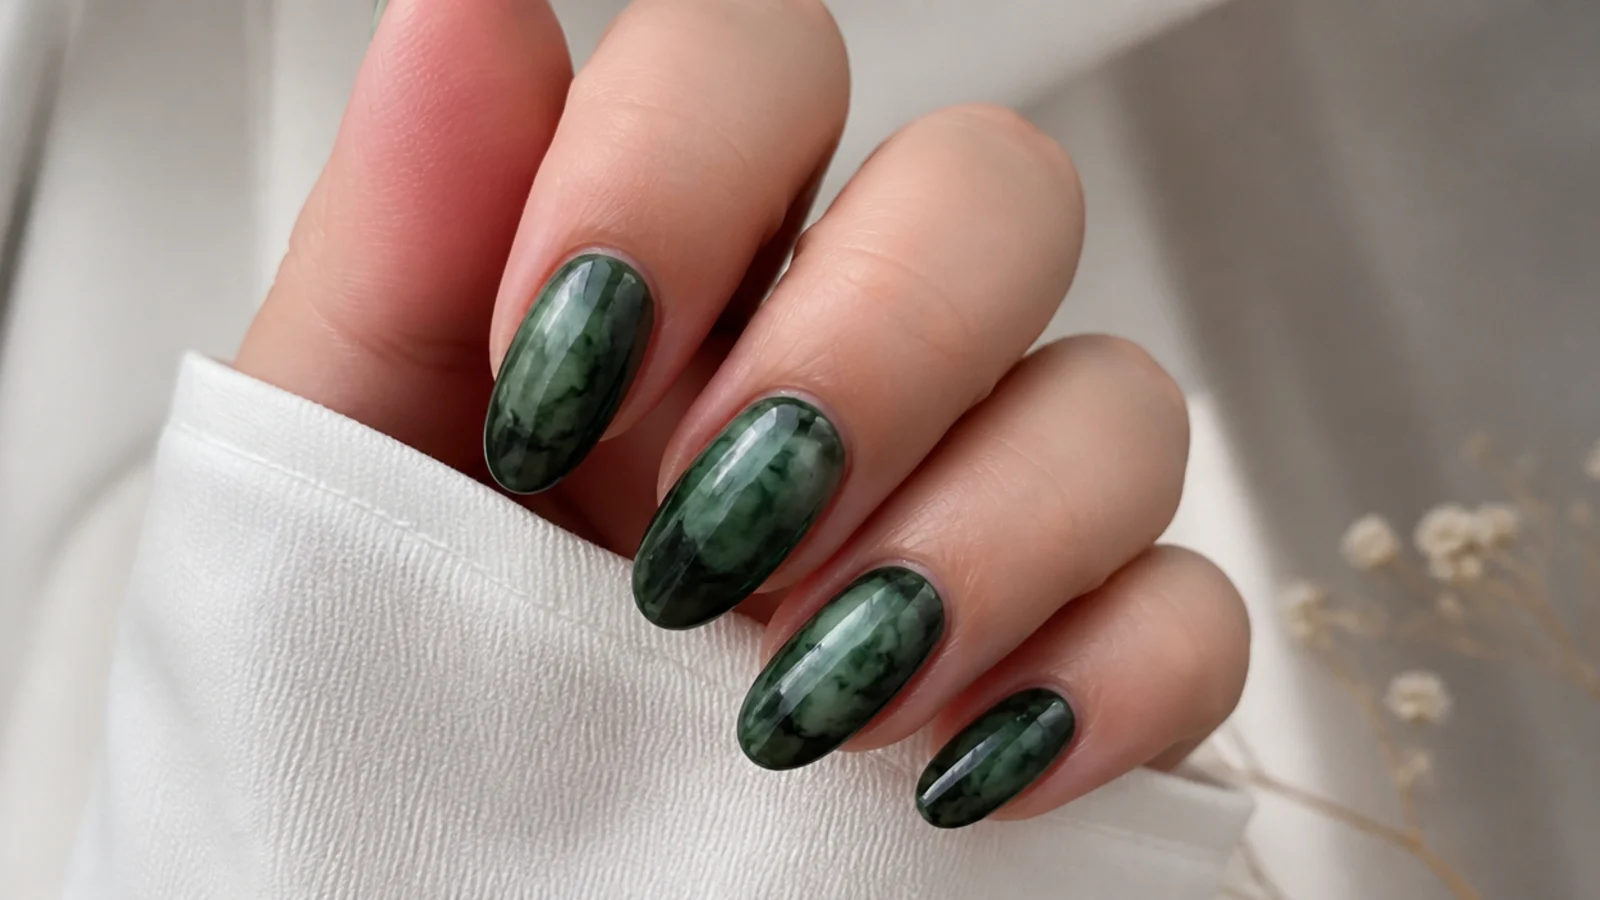
Drops of forest and pine green gel bloom into a pale sage base through the uncured blooming gel, spreading into an inky tie-dye that reads like a snowy pine forest. Because a thinner blooming-gel layer spreads more, the greens diffuse into soft clouds with darker cores, giving real depth without any brushwork. Building a second bloomed layer after curing the first deepens the shadows. It suits medium to long nails and anyone who wants moody, modern holiday color over bright red. Use a little color, cure the first layer, then add depth in a second pass.
Who it suits: Anyone wanting moody, modern evergreen tones.
Tip: Build depth in two cured layers rather than flooding color at once.
5. Frosted Snowflake
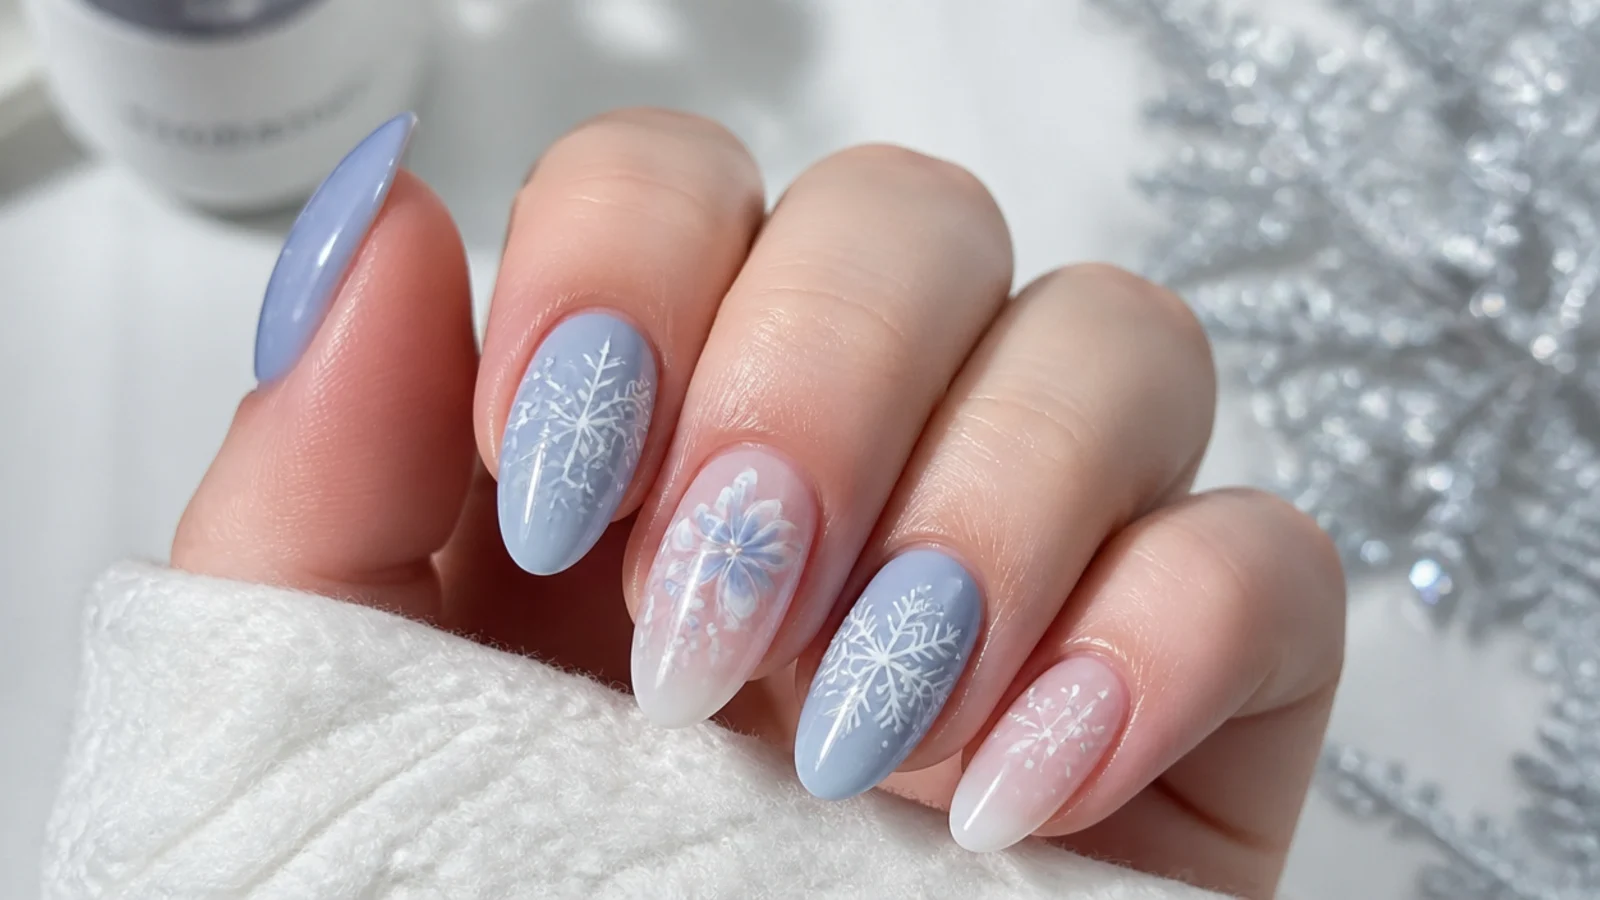
A pale icy-blue blooms softly across a white base, then a thin liner draws white gel snowflakes into the still-wet layer so their arms feather at the edges like frost on glass. The blue diffuses just enough to suggest a wintry haze behind each flake, and the soft-edged snowflakes look breathed onto the nail rather than stamped. It suits short and medium nails and anyone wanting a wintry, non-red holiday set. Keep the blue very light so the white snowflakes still read, and cure the moment the frost effect looks right.
Who it suits: Anyone wanting a cool, wintry holiday set.
Tip: Draw snowflakes into wet gel so the arms feather softly.
6. Gold Foil Christmas Marble
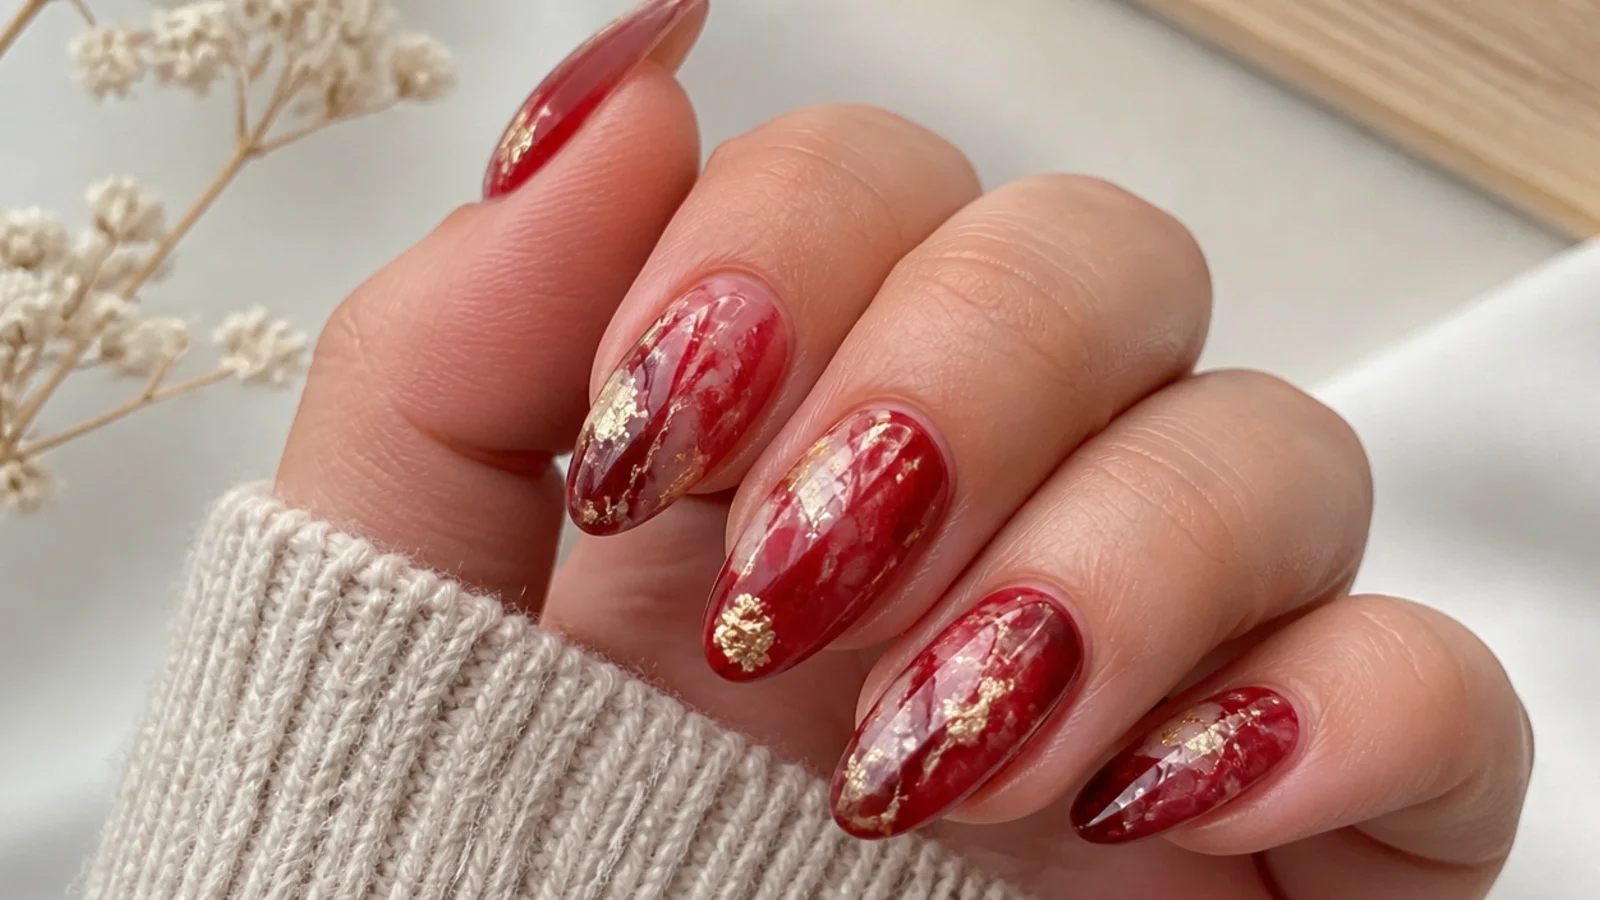
Deep cranberry-red gel blooms into a warm nude base for a rich marble, then flecks of gold foil are pressed on before the no-wipe top coat seals everything. The red diffuses into soft veins through the uncured blooming gel, and the irregular gold foil catches light against the watercolor background for a luxe, party-ready finish. Because the foil sits under top coat, nothing catches. It suits medium almond or coffin nails and anyone wanting festive glam. Bloom and cure the red marble first, then add foil and seal it under a generous no-wipe top coat.
Who it suits: Anyone wanting rich, party-ready glam.
Tip: Add foil after curing the marble, then seal so no edges lift.
7. White Christmas Cloud
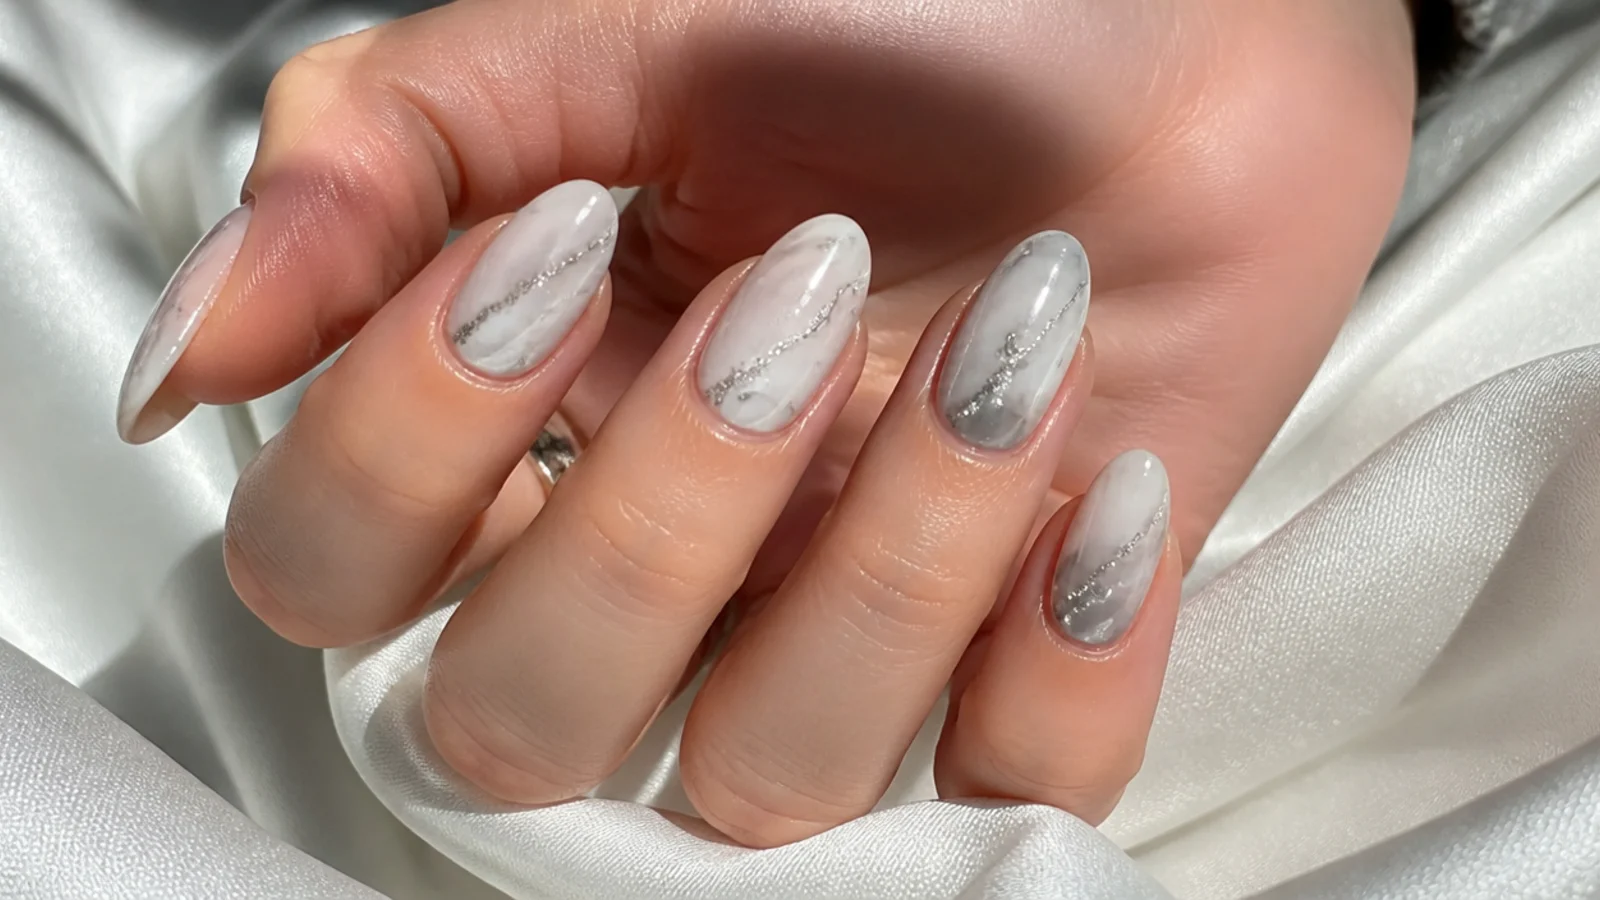
The softest set here - drops of pale gray and silver-shimmer gel bloom into a milky-white base for a snowy, cloudy diffusion with no defined motif at all. The colors spread into gentle overcast wisps through the uncured blooming gel, reading like a quiet snowfall rather than a graphic design. It is the understated, wear-anywhere version of a Christmas nail. It suits every shape and length and anyone who wants festive without red or green. Use tiny amounts of gray so it stays a soft cloud, and finish with a shimmer top coat for a light frosty glow.
Who it suits: Anyone wanting subtle, snowy holiday nails.
Tip: Use tiny amounts of gray so it stays a soft cloud, not a smudge.
8. Cranberry Wine Bloom
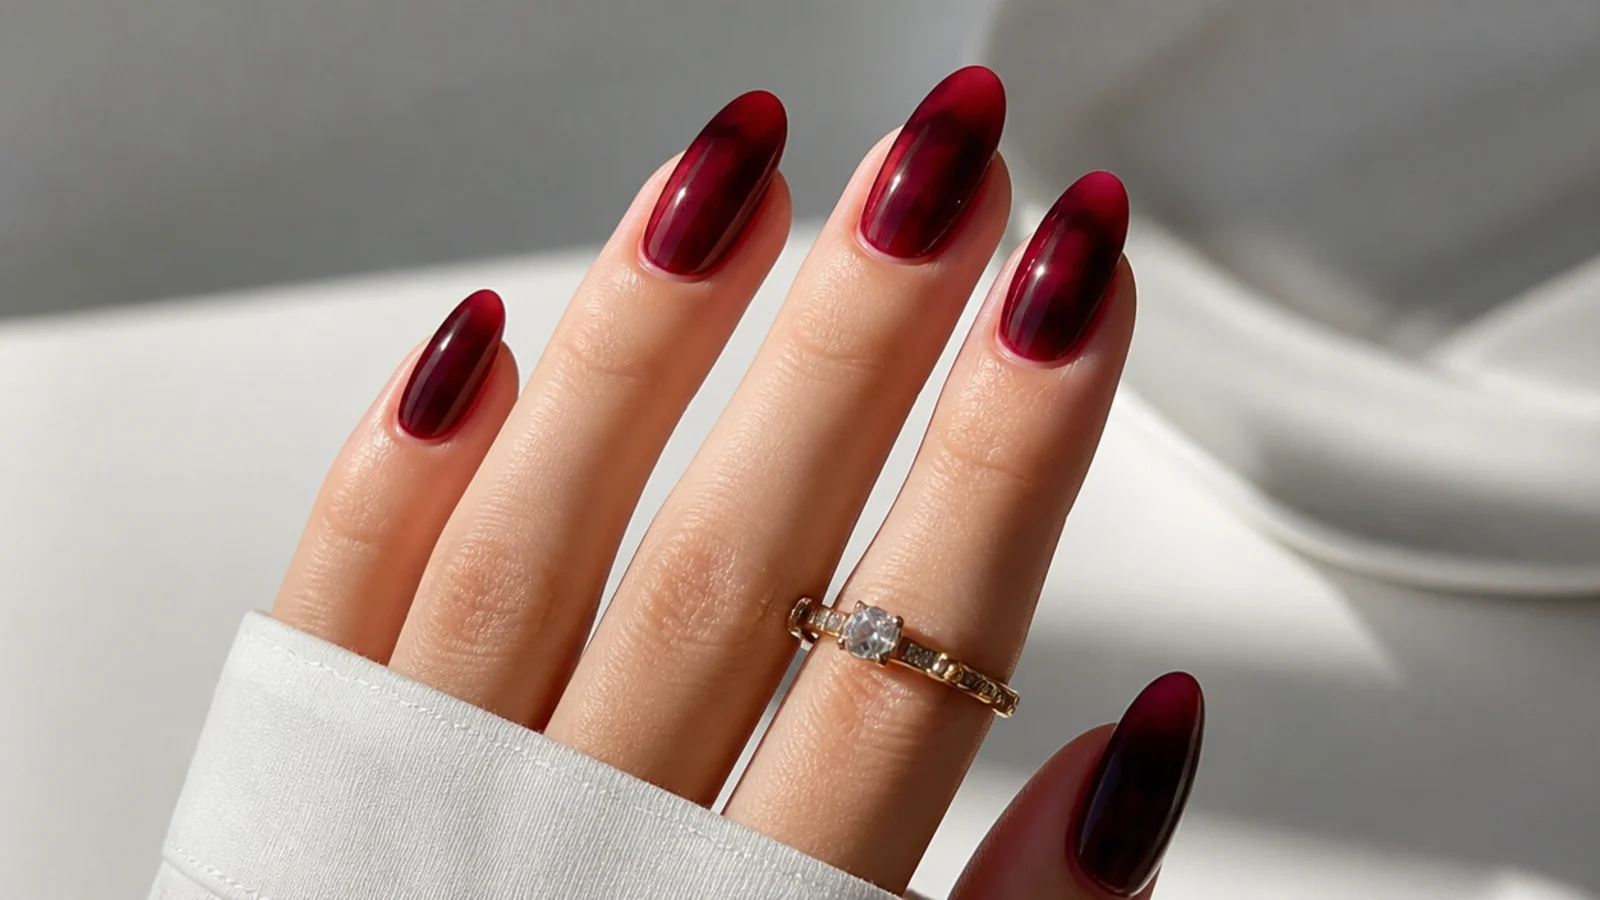
A single deep cranberry-wine gel dropped onto a sheer pink base blooms into a rich, moody watercolor with darker cores and lighter diffused edges. Leaving the blooming-gel layer thin lets the wine spread far, so each nail looks like ink dispersing in water, elegant and grown-up rather than bright and busy. It is the most sophisticated take on holiday red. It suits medium to long almond and coffin nails and anyone wanting festive color that still reads refined for parties. Drop the color in the center and let it bloom outward for a full minute before curing.
Who it suits: Anyone wanting a refined, grown-up holiday red.
Tip: Drop color in the center and let it spread outward on its own.
9. Emerald Watercolor Diffusion
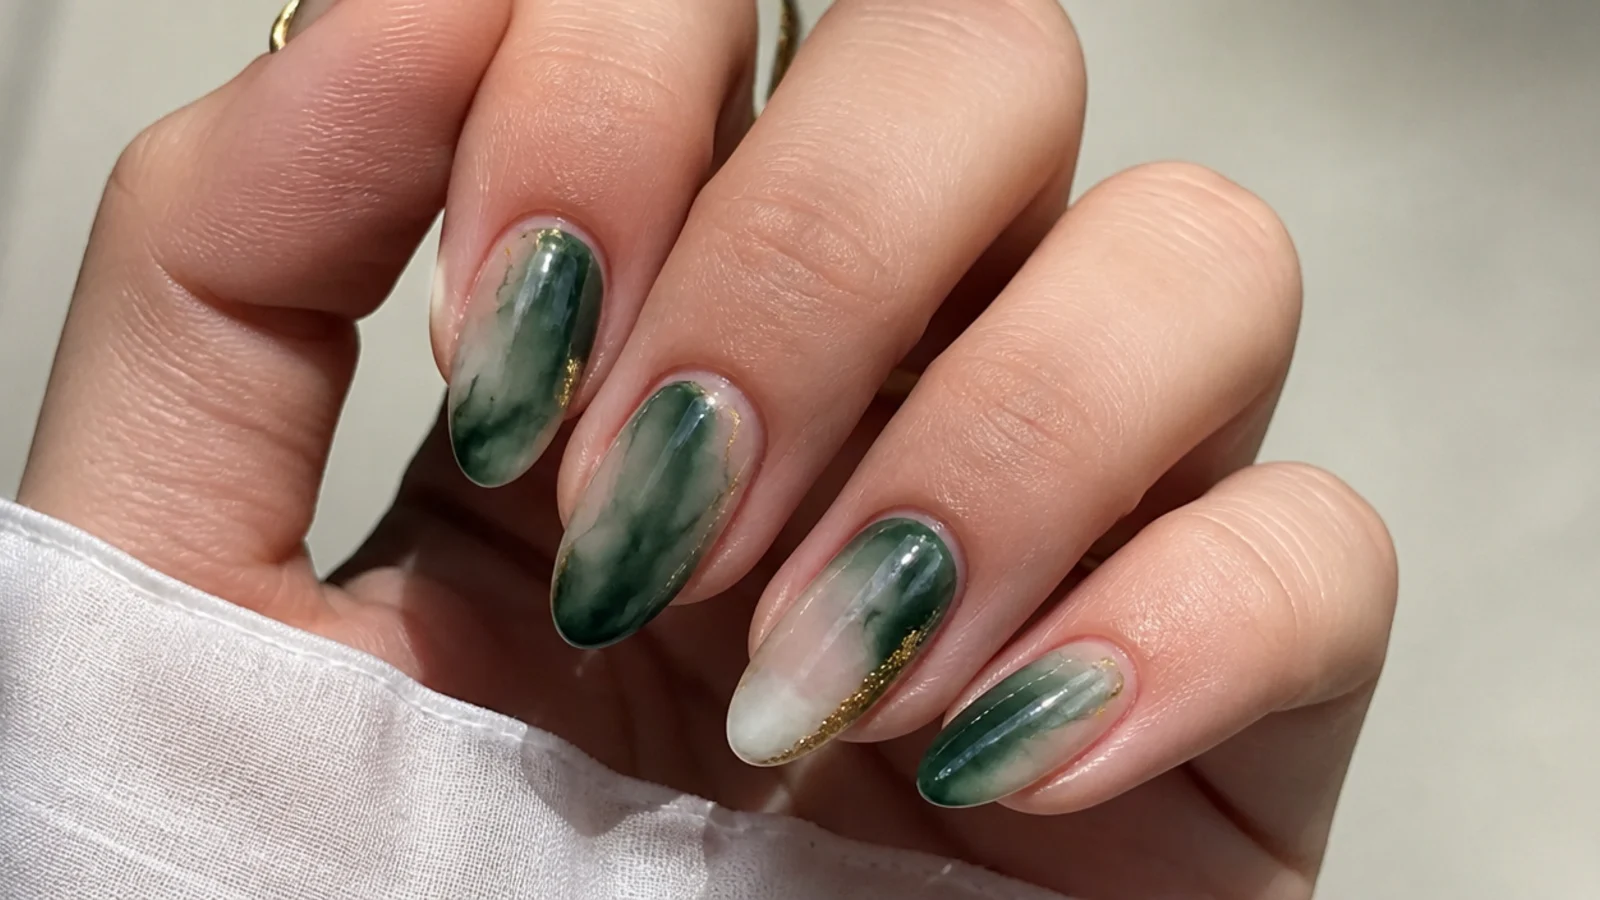
Bright emerald gel blooms into a white base for a jewel-toned watercolor that stays translucent and glowing rather than flat and opaque. The green diffuses into soft-edged pools through the uncured blooming gel, and a second cured layer deepens the richest spots for a gemstone effect. It is the elegant green counterpart to a classic holiday red set. It suits every shape, especially longer almond, and anyone drawn to jewel tones for the season. Keep the base white so the emerald reads bright, and build the deepest green in a second bloomed layer.
Who it suits: Anyone wanting a jewel-tone green set.
Tip: A white base keeps the emerald bright rather than muddy.
10. Gingerbread Spice Bloom
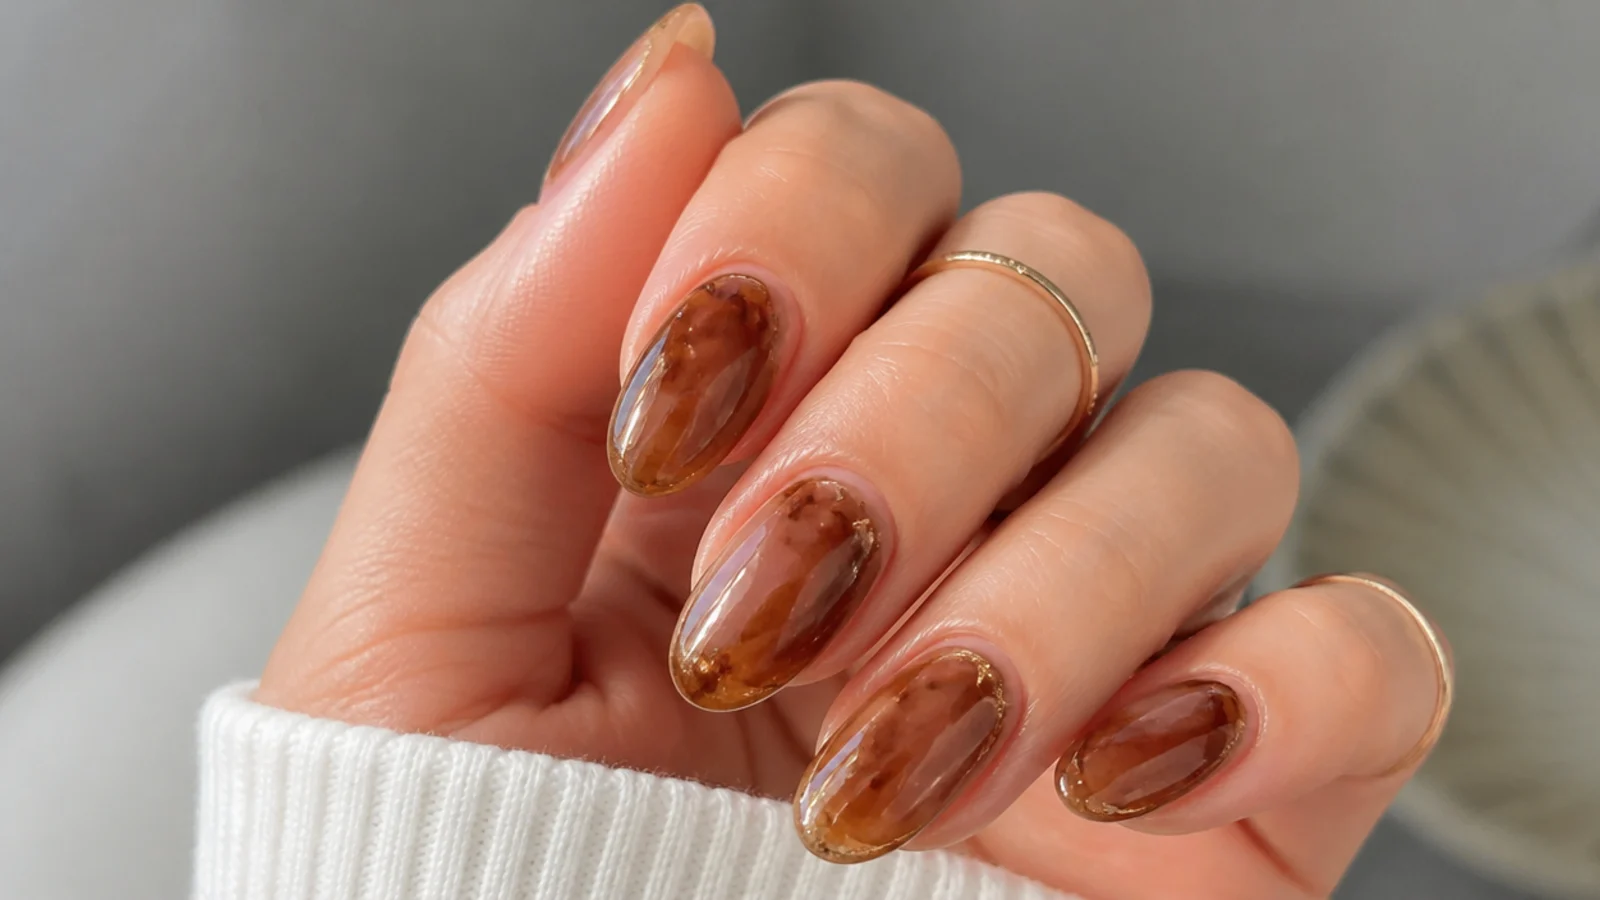
Warm brown and caramel gels bloom into a cream base for a cozy gingerbread watercolor, with tiny white dots added last to suggest icing. The browns diffuse into soft spiced clouds through the uncured blooming gel, giving a warm, unexpected holiday palette that flatters warm and deep skin tones especially well. It reads festive and comforting without any red at all. It suits short to medium nails and anyone wanting a cozy, non-traditional Christmas set. Add the white icing dots after curing the brown bloom so they stay crisp and bright.
Who it suits: Anyone wanting a cozy, warm-toned holiday set.
Tip: Add white icing dots after curing so they stay sharp.
11. Red and Green Color Block
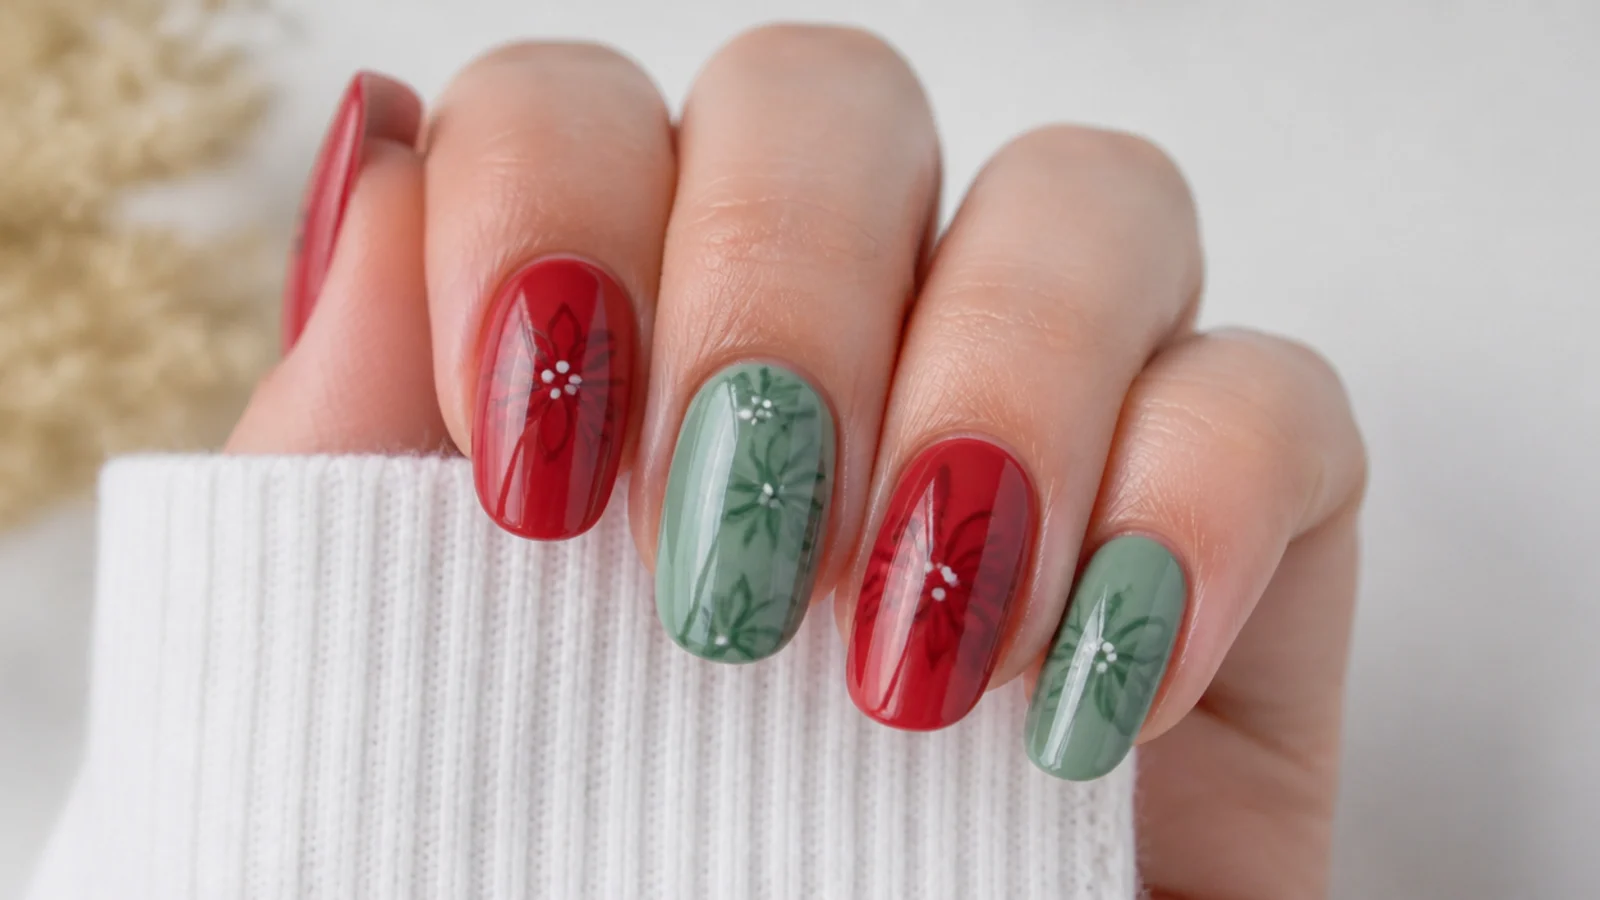
Alternating nails bloom in classic true red and evergreen over a white base, so the hand reads unmistakably Christmas while each nail stays a soft watercolor. Keeping one color per nail avoids the red-and-green muddiness that happens if they bloom together, and the white base keeps both bright. It is the easiest way to get the full holiday palette without a single motif to paint. It suits every shape and anyone who wants maximum festive color for minimal skill. Bloom each nail separately, and never let red and green touch in the same wet layer or they turn brown.
Who it suits: Anyone wanting the full festive palette simply.
Tip: Keep red and green on separate nails so they never muddy.
12. Champagne Shimmer Bloom
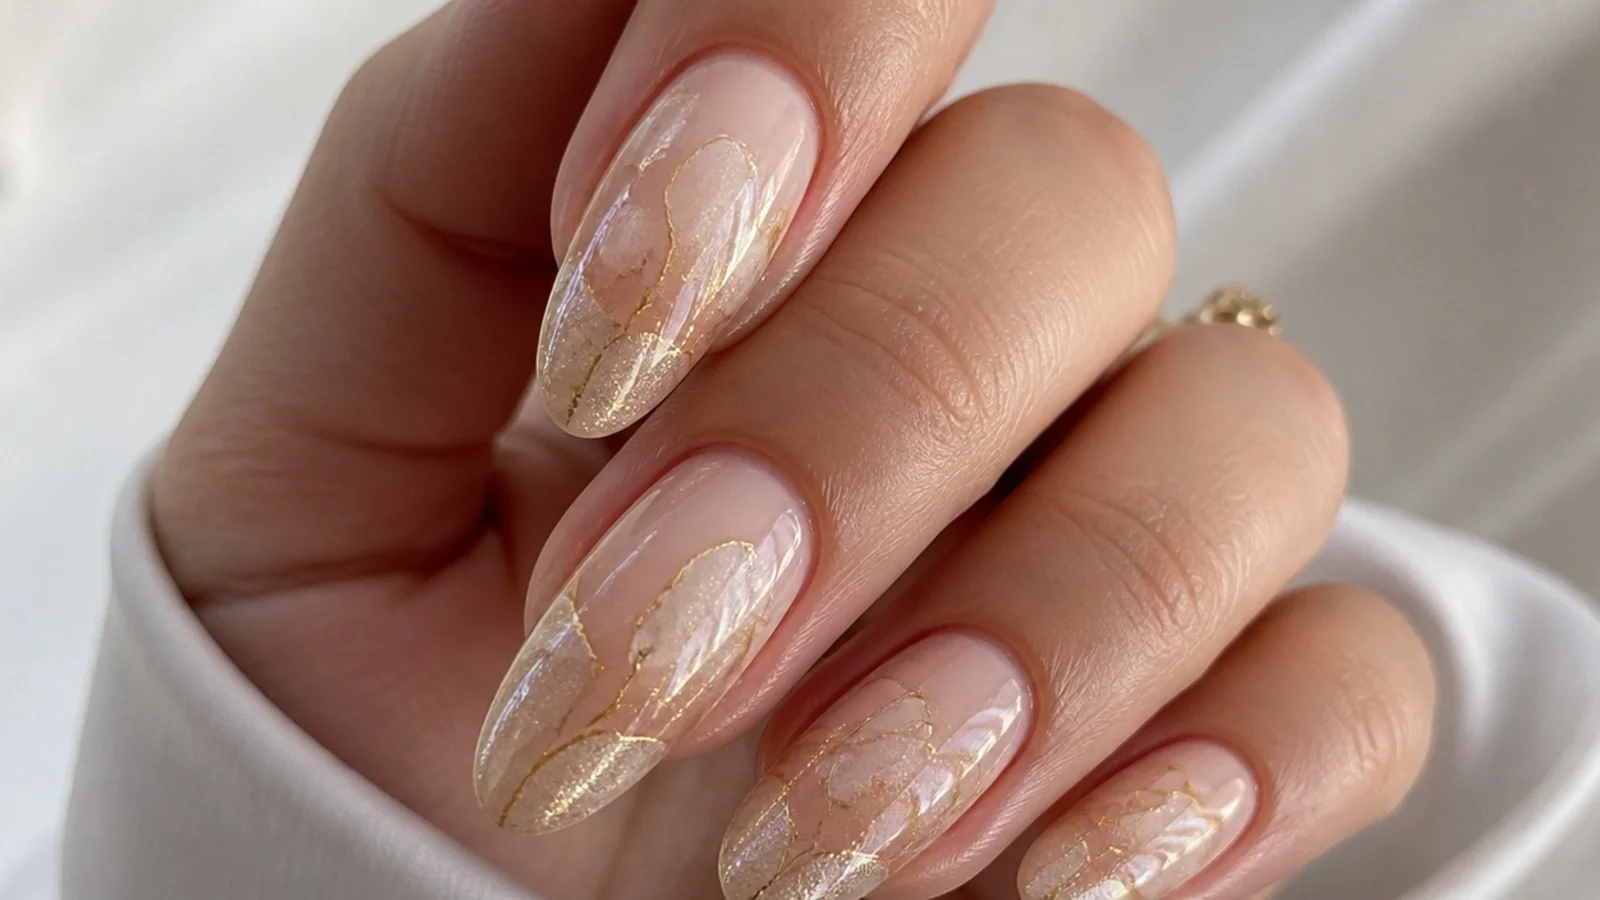
Sheer champagne and soft gold gels bloom into a nude base, then a shimmer no-wipe top coat lays a fine gold glow over the whole watercolor. The warm neutrals diffuse into gentle clouds through the uncured blooming gel, making this the New Year's-adjacent, elegant end of a holiday set - festive shine without red or green. It flatters every skin tone and reads dressy for parties. It suits medium almond and coffin nails and anyone wanting understated holiday sparkle. Bloom the neutral base, cure, then seal with a shimmer top coat for the gold glow.
Who it suits: Anyone wanting elegant holiday sparkle.
Tip: Add the shimmer through the top coat, not the bloom, for an even glow.
13. Navy Winter Night
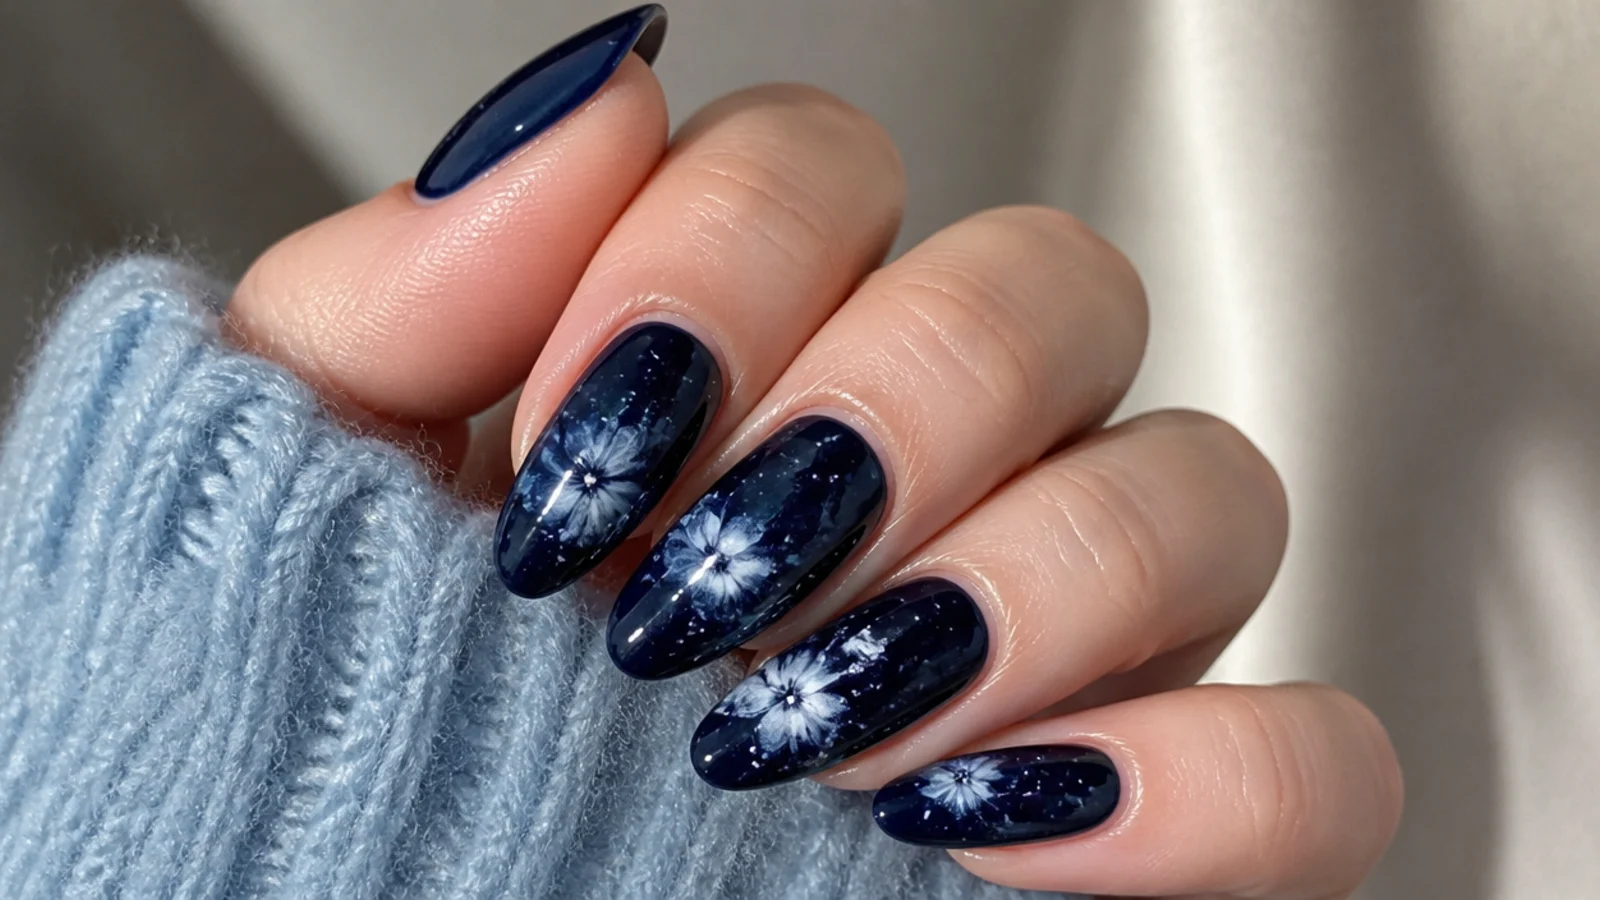
Deep navy gel blooms into a soft blue-gray base for a winter-night sky, then tiny white dots are scattered and cured on top as falling snow. The navy diffuses into a moody watercolor through the uncured blooming gel, its darker cores reading like a night sky behind the snow. It is a modern, non-red holiday direction that still feels wintry and festive. It suits medium to long nails and anyone wanting a dark, atmospheric set. Keep the snow dots fine and add them after curing the navy so they stay bright white against the deep background.
Who it suits: Anyone wanting a dark, atmospheric winter set.
Tip: Scatter fine white dots after curing so the snow stays bright.
14. Soft Pink Peppermint
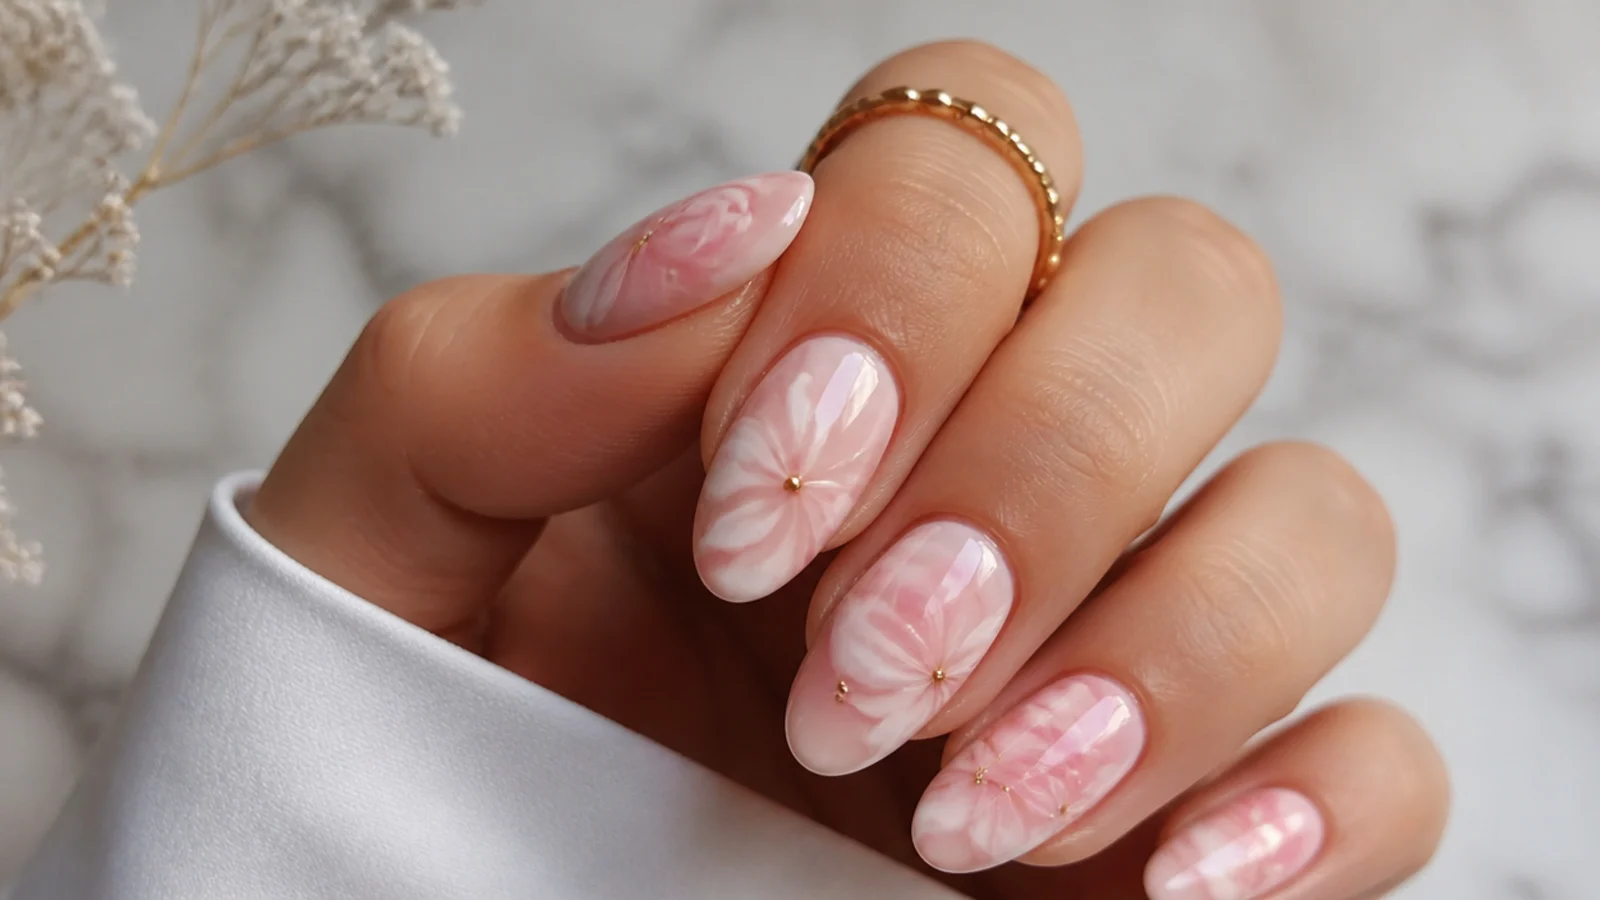
A gentler holiday take - dusty rose and soft pink gels bloom into a white base for a pastel peppermint swirl instead of bright red. The pinks diffuse into a soft candy marble through the uncured blooming gel, giving a sweet, wearable festive look for anyone who finds true red too bold. A single light drag through the wet gel adds the peppermint swirl. It suits short and medium nails and anyone wanting a soft, girly Christmas set. Use one light drag and cure fast so the pink stays a swirl rather than blending into a flat wash.
Who it suits: Anyone wanting a soft, pastel holiday look.
Tip: One light drag keeps the swirl - over-dragging flattens it to a wash.
15. Mistletoe Accent
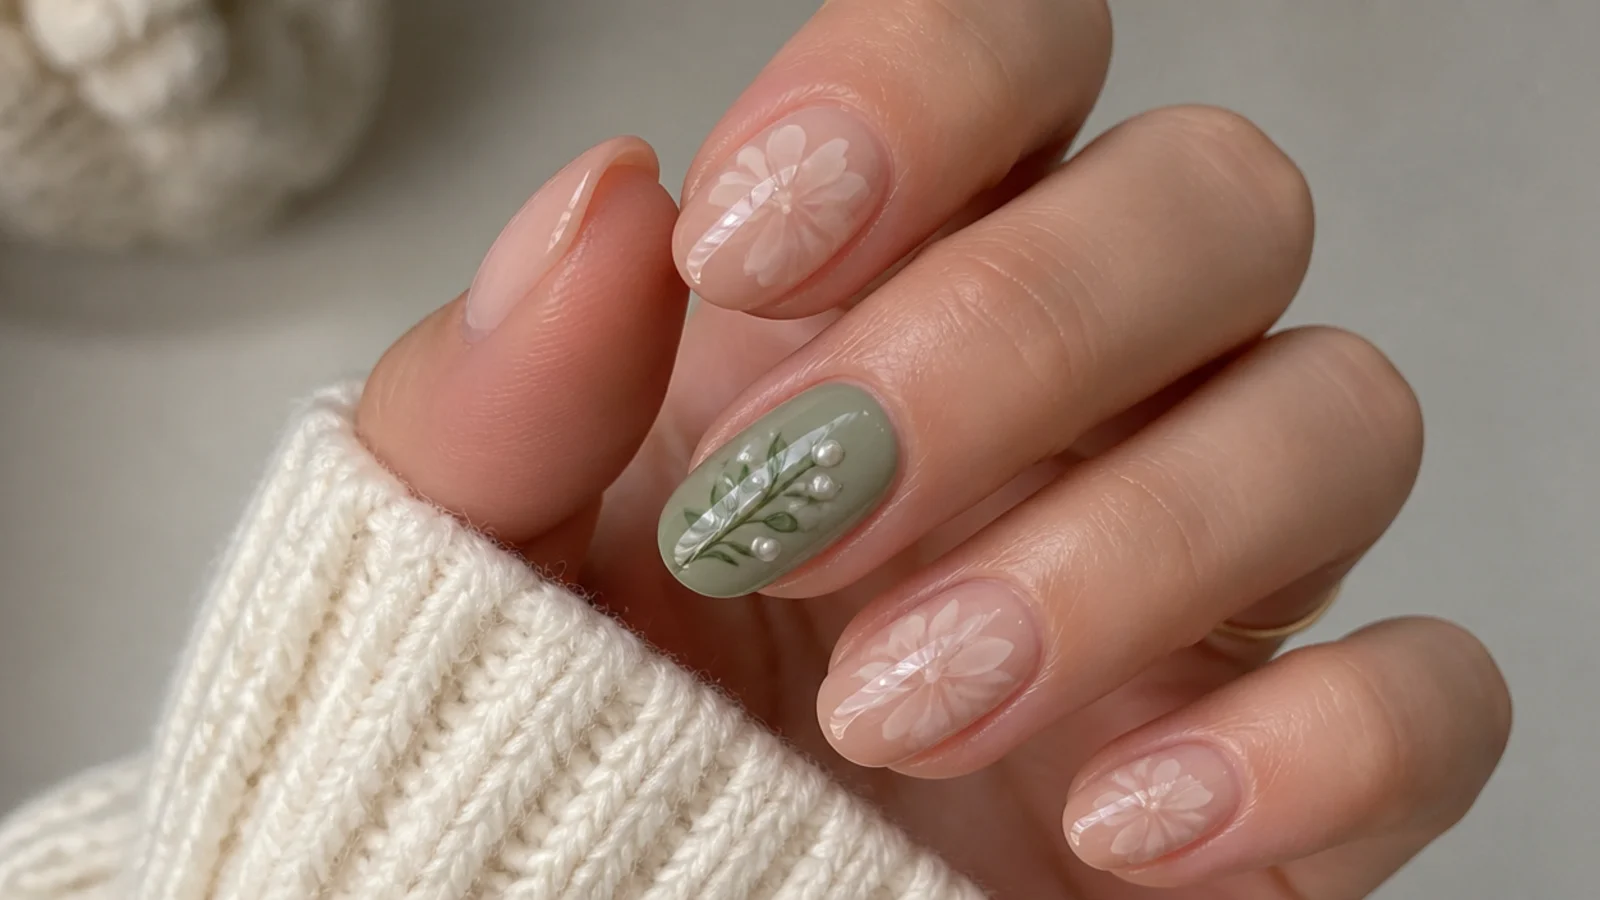
Four soft nude-bloomed nails carry the set while one accent nail features green mistletoe leaves and pale berry dots diffused into a white base. Concentrating the motif on a single nail keeps the look clean and modern, letting the watercolor mistletoe be a focal point rather than covering every finger. It is the minimalist way to signal the season. It suits every shape and anyone who wants festive detail without full holiday color. Bloom the nude nails first, then do the accent - keep the mistletoe green light so it diffuses softly rather than flooding.
Who it suits: Anyone wanting one subtle festive accent.
Tip: Concentrate the motif on one nail and keep the rest soft nude.
16. Burgundy Bloom French
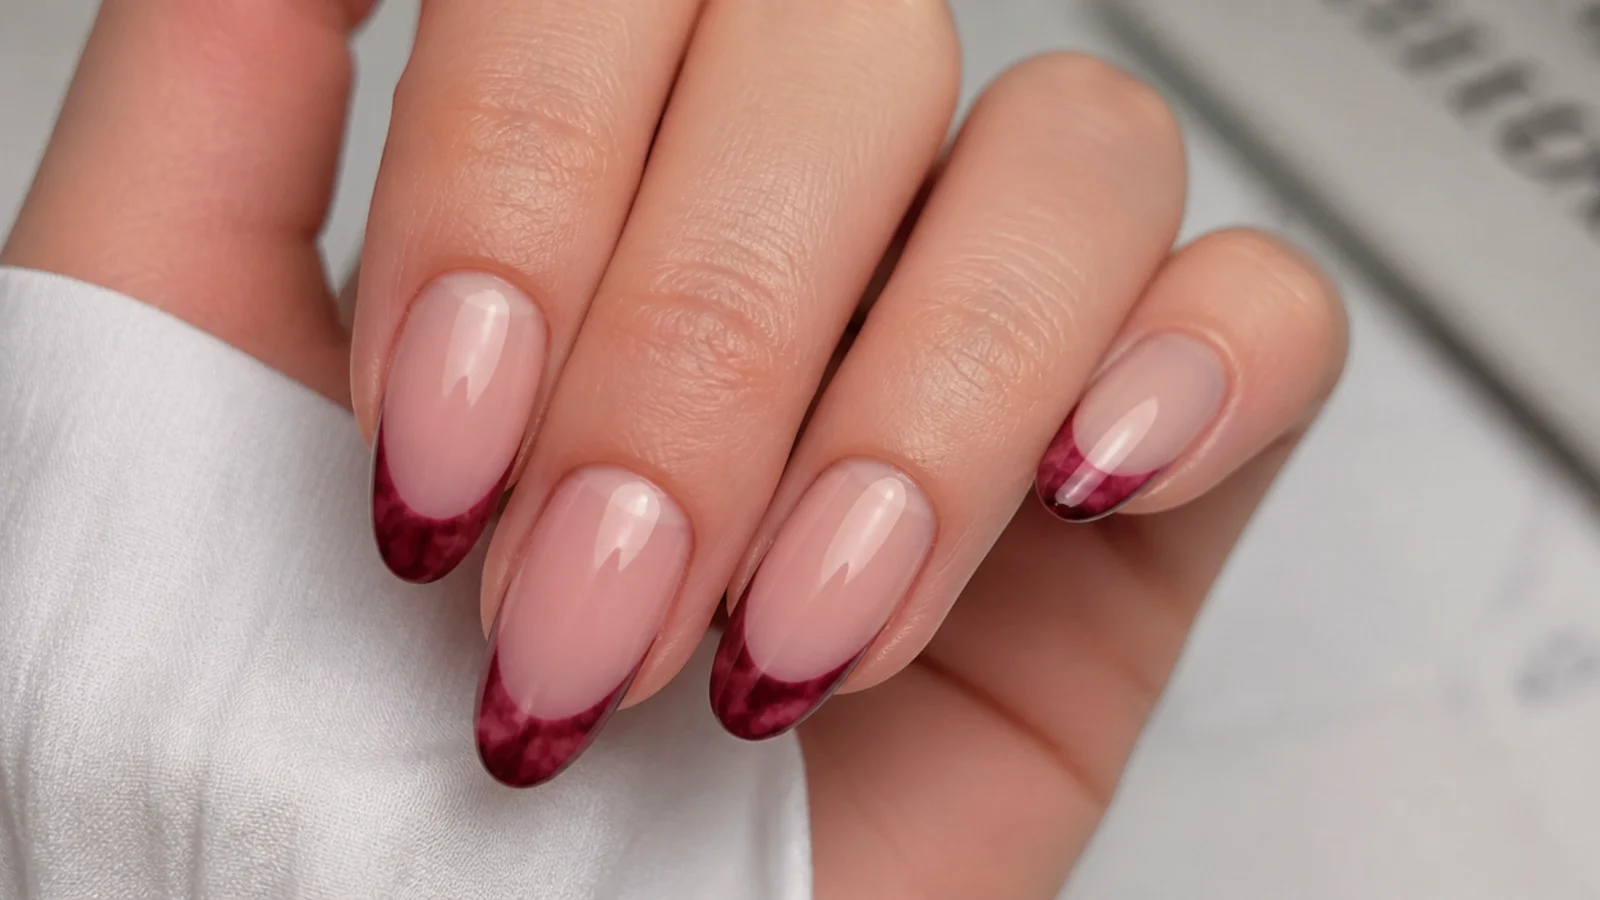
The tip half of each nail blooms in deep burgundy over a nude base for a soft watercolor French, finished with a thin gold line where the color meets the nude. The burgundy diffuses inward through the uncured blooming gel so the French tip has no hard edge, and the fine gold line adds structure and festive shine. It is an elevated, grown-up holiday French. It suits medium almond and coffin nails and anyone who wants a refined seasonal twist on a classic. Bloom only the tip, cure, then add the gold line last so it stays crisp over the soft fade.
Who it suits: Anyone wanting a refined holiday French.
Tip: Bloom just the tip, then add the gold line last for clean structure.
17. Soft Forest Plaid
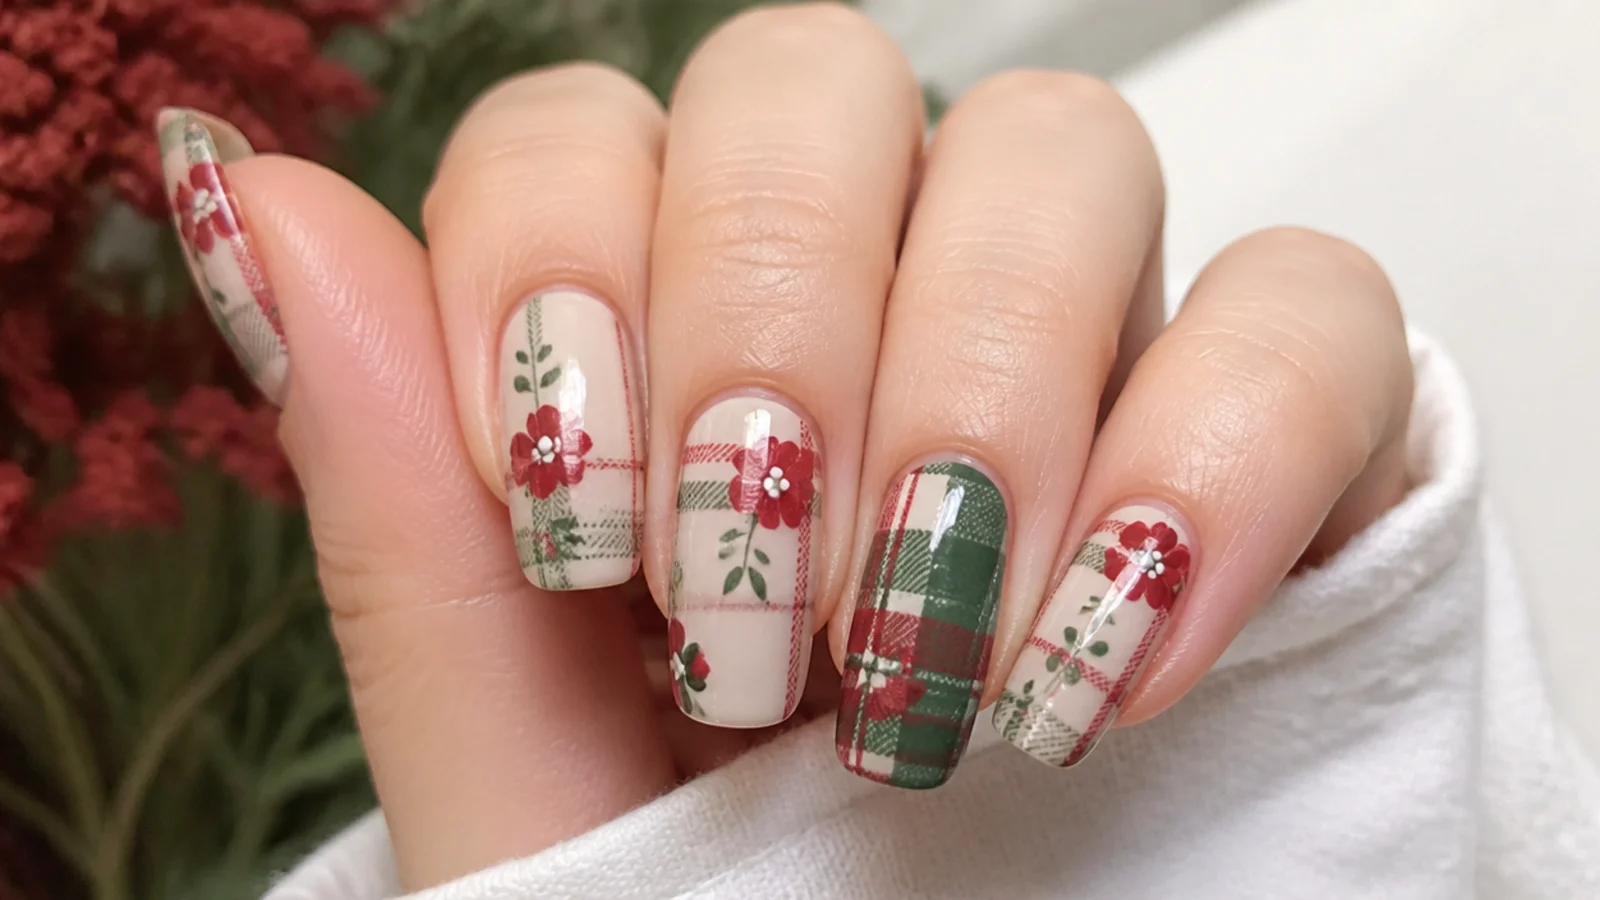
Thin green and red lines drawn across a cream base bloom slightly at their edges through the uncured blooming gel, softening a Christmas plaid into a watercolor tartan instead of crisp checks. Because the lines diffuse just a little, the plaid reads cozy and hand-painted rather than graphic, evoking a flannel throw. Keeping the lines sparse stops the red and green from blooming into brown. It suits short to medium nails and anyone wanting a homey, textured holiday set. Draw thin lines, let them bloom only slightly, and cure before red and green overlap and muddy.
Who it suits: Anyone wanting a cozy, textured tartan look.
Tip: Keep lines thin and cure fast so red and green never overlap.
18. Icy Blue Marble
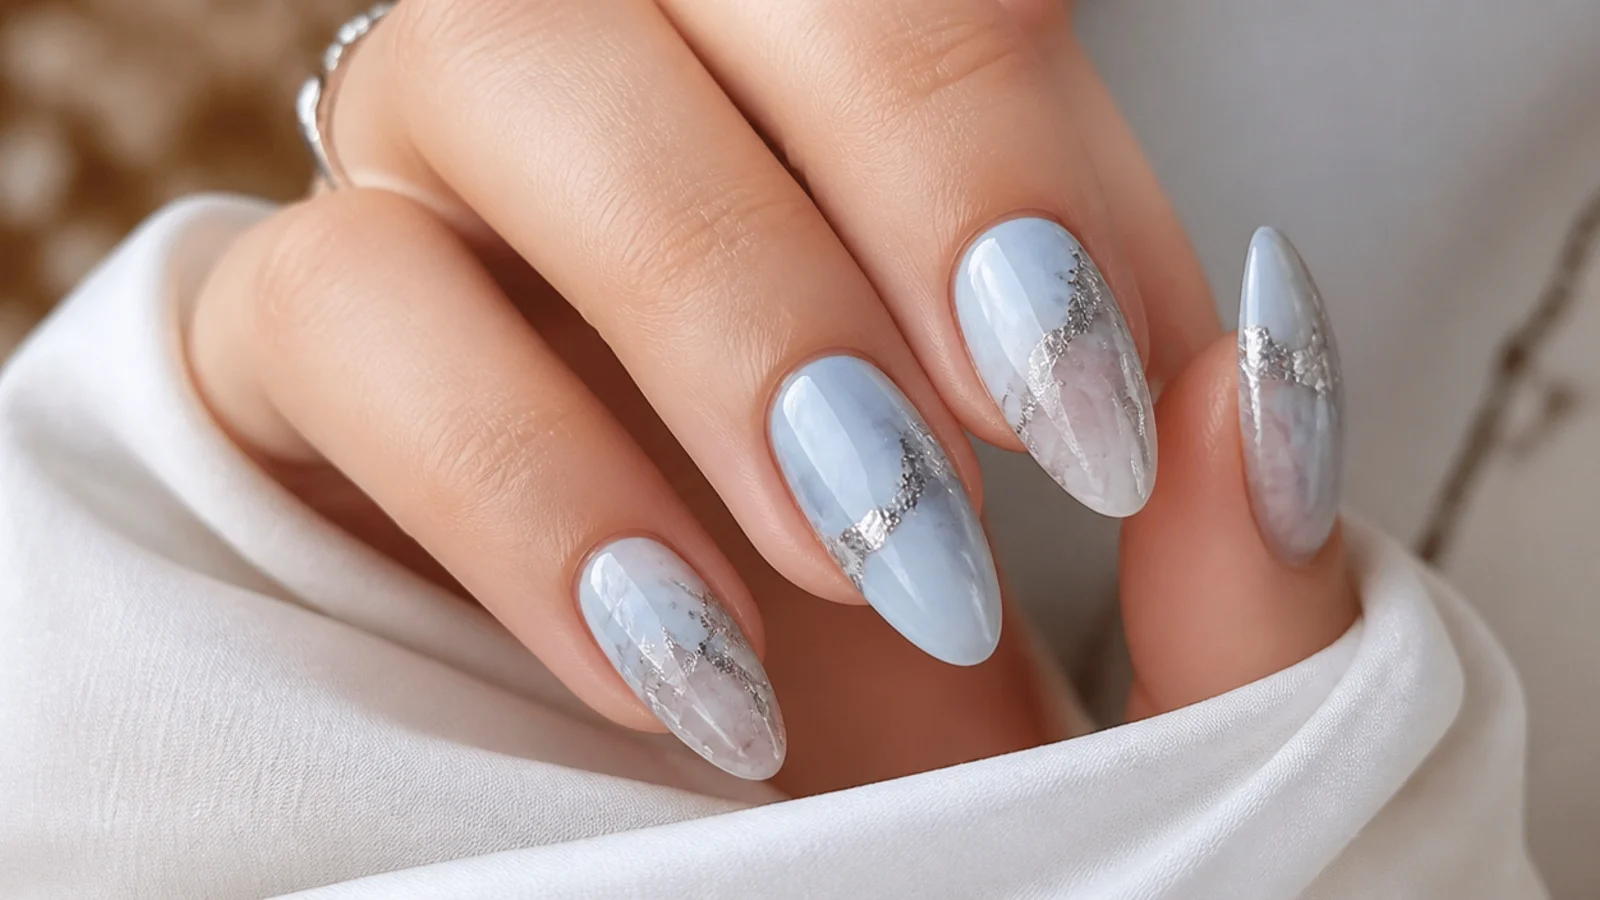
Pale ice-blue and soft gray gels bloom into a white base for a cool marble, with thin silver veins dragged through the wet layer like cracks in ice. The blues diffuse into a frosty watercolor through the uncured blooming gel, and a single drag pulls the silver into delicate frozen veins. It is a wintry, glacial alternative to warm holiday reds and greens. It suits every shape, especially longer almond, and anyone wanting an icy, elegant winter set. Drag the silver once through the wet gel for crisp veins, then cure before it spreads and softens.
Who it suits: Anyone wanting a cool, glacial winter set.
Tip: Drag silver veins once, then cure before they spread too far.
19. Red Bloom With Glitter Tips
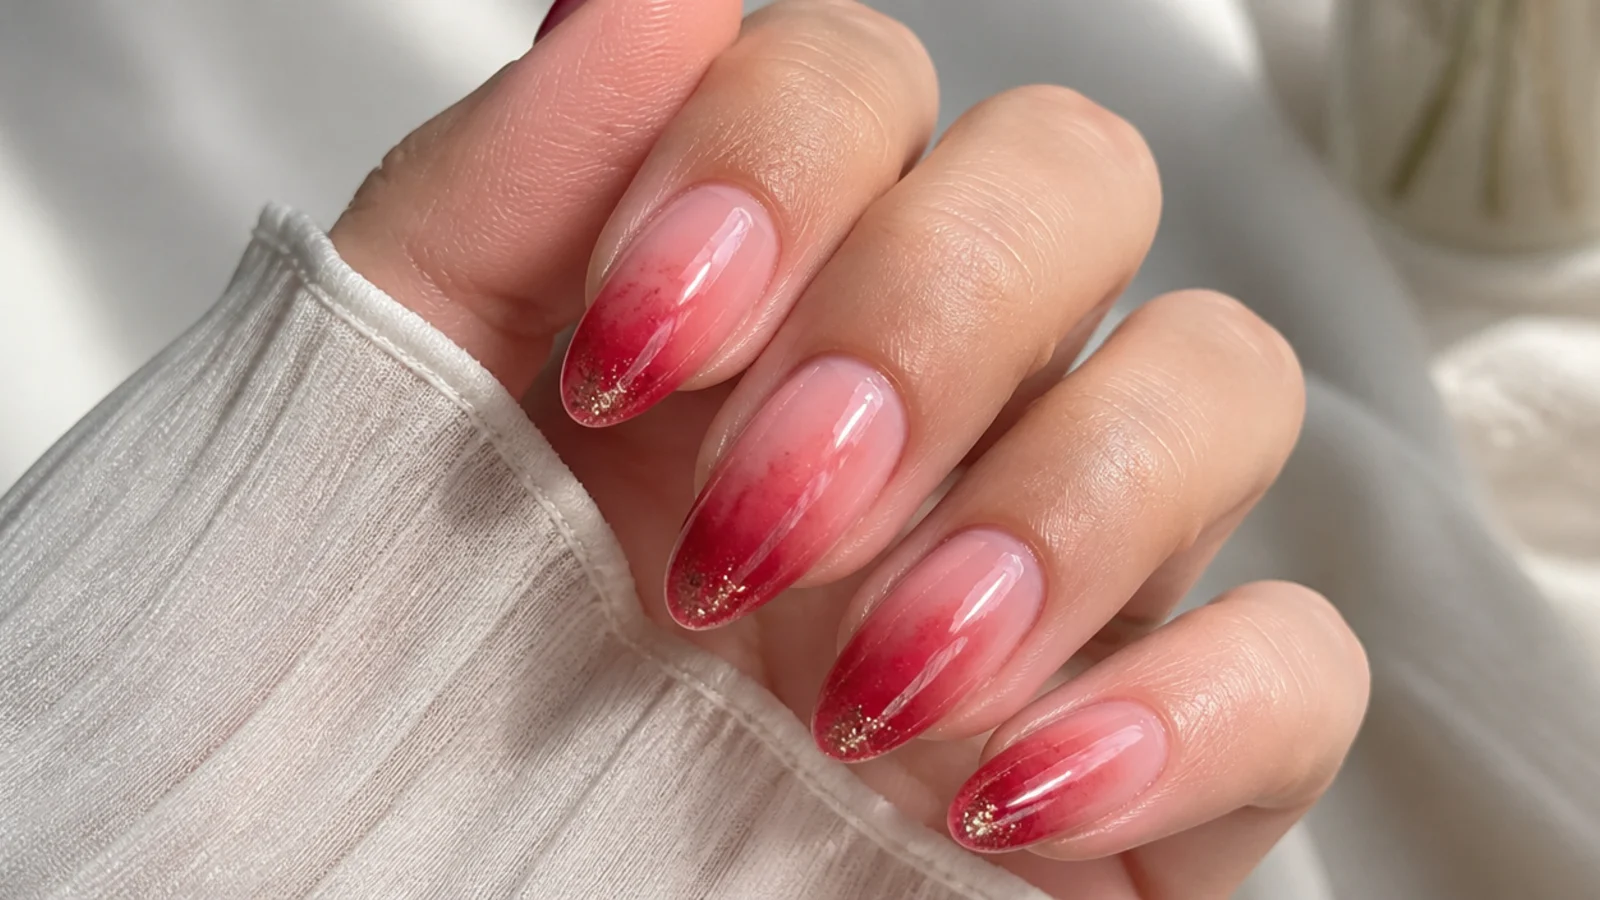
Classic true red blooms into a sheer pink base for a soft holiday watercolor, then fine red-gold glitter is packed only at the free edge and sealed under top coat. The red diffuses through the uncured blooming gel for that signature soft look, while the concentrated glitter tip adds festive sparkle without covering the whole nail. It balances soft and glam beautifully. It suits medium almond and coffin nails and anyone wanting party shine with a watercolor base. Bloom and cure the red first, then place glitter at the tip only and seal so nothing catches.
Who it suits: Anyone wanting soft red with a party tip.
Tip: Keep glitter at the free edge only so the bloom stays the star.
20. Full Holiday Mix Hand
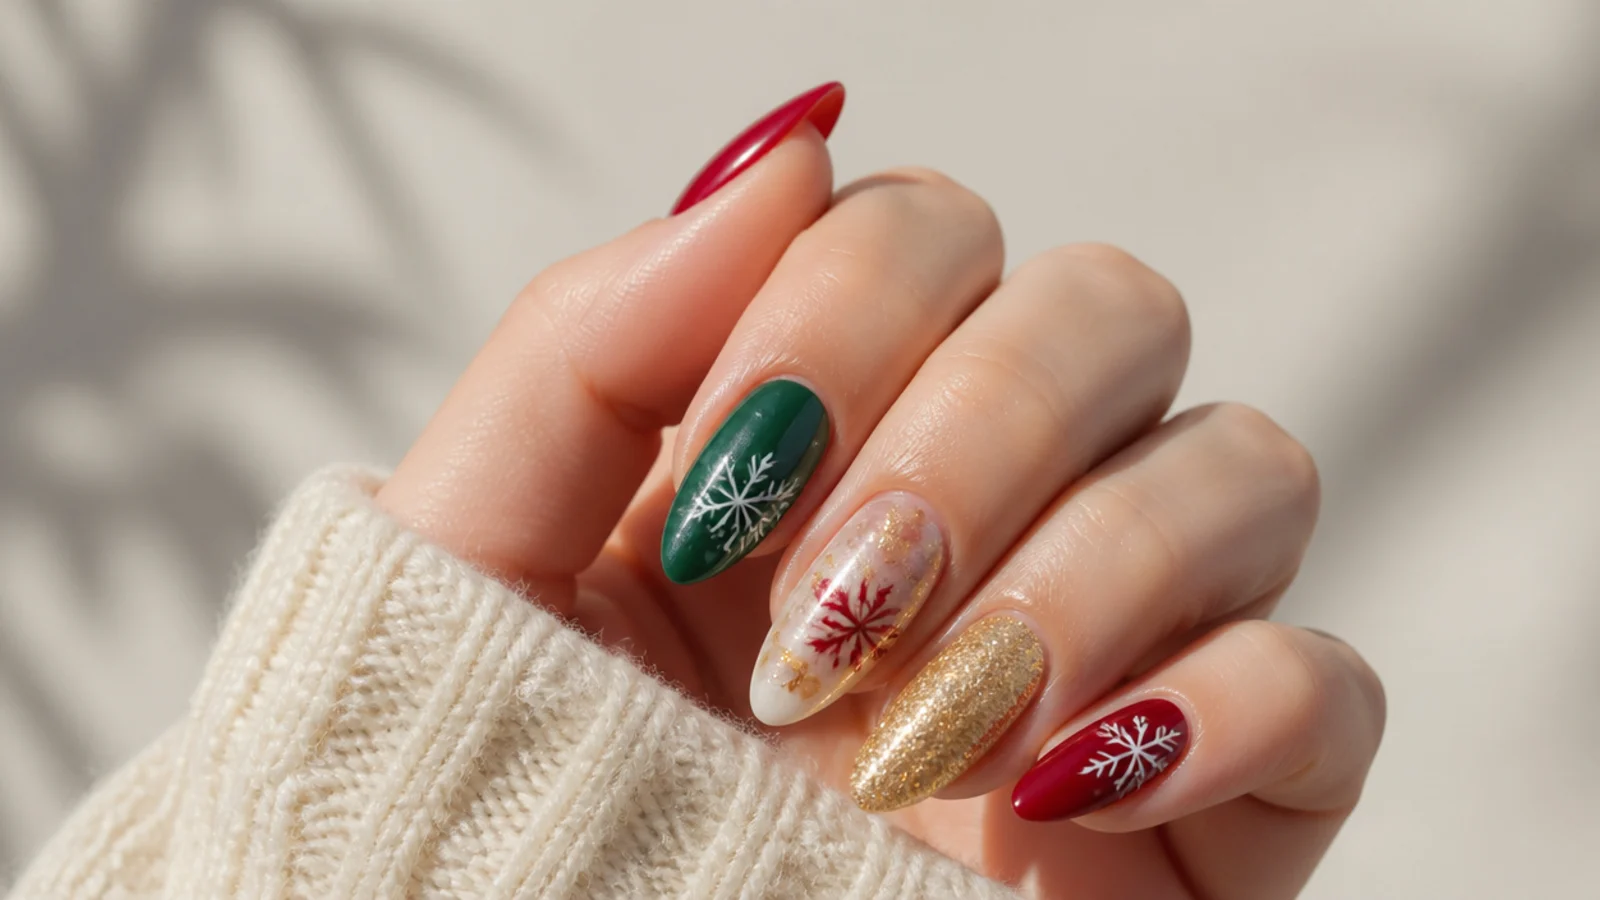
The show-stopper set - each nail a different bloom from the collection: a red poinsettia, evergreen tie-dye, a gold marble, a frosted snowflake and a soft white cloud, tied together by a shared white-to-nude base. Mixing motifs across one hand makes a maximal, festive statement while the consistent base and soft watercolor style keep it cohesive rather than chaotic. It is the set to save for the main event. It suits confident wearers and parties, on any shape. Bloom each nail separately, keep the base tone consistent across all five, and cure each before moving on.
Who it suits: Anyone wanting a maximal, statement holiday set.
Tip: Keep the base tone consistent so five different blooms still read as one set.
What Is Blooming Gel and How Does It Work?
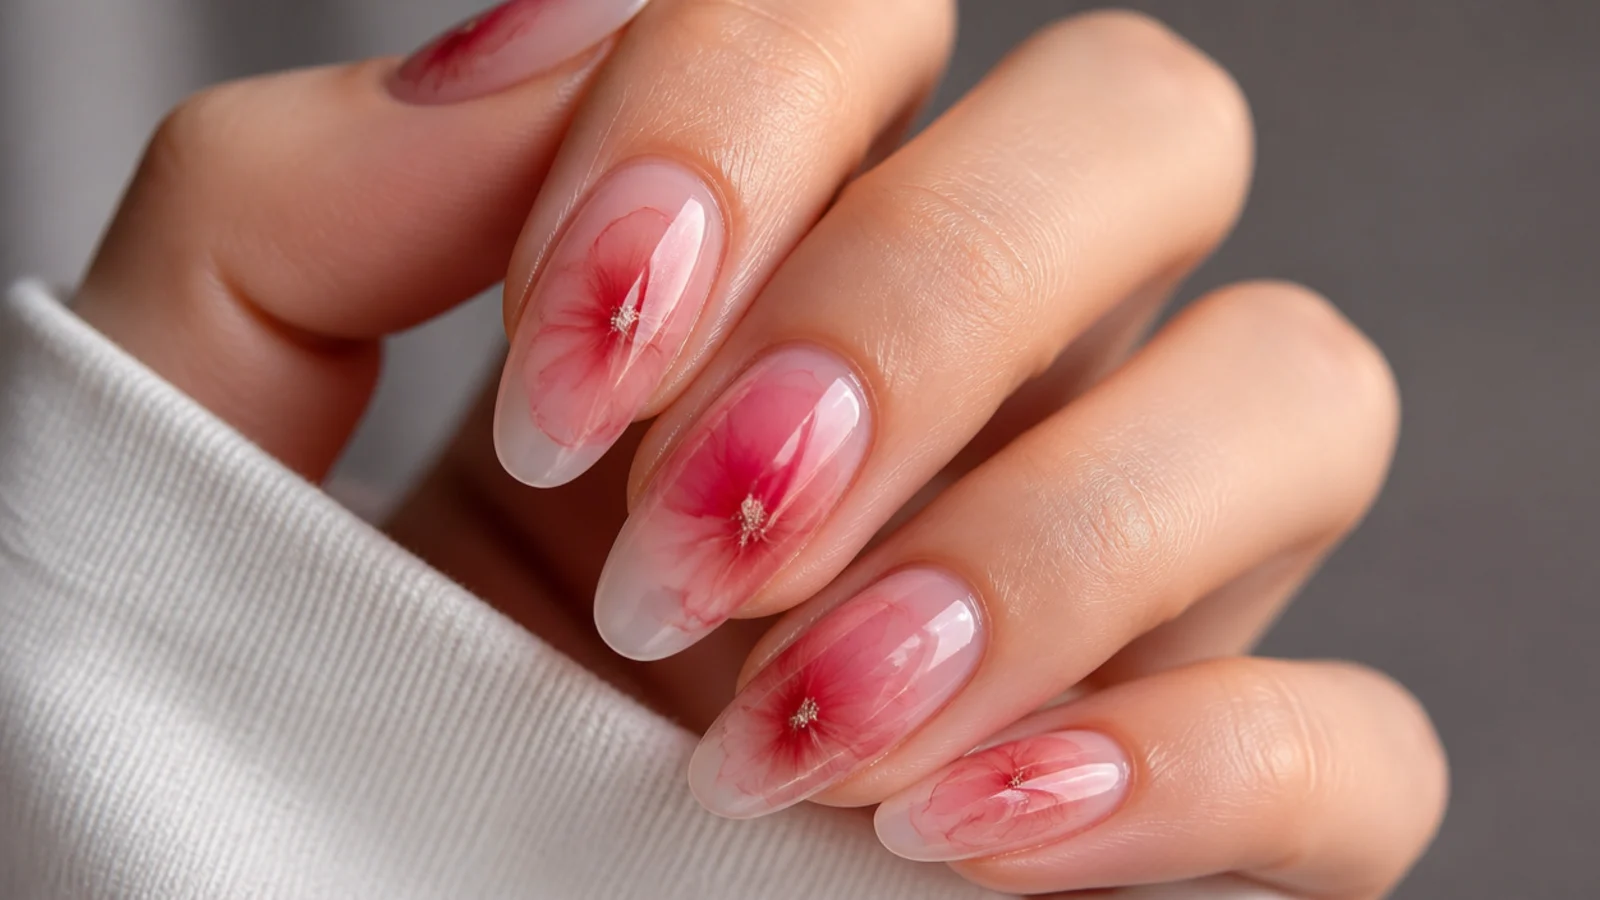
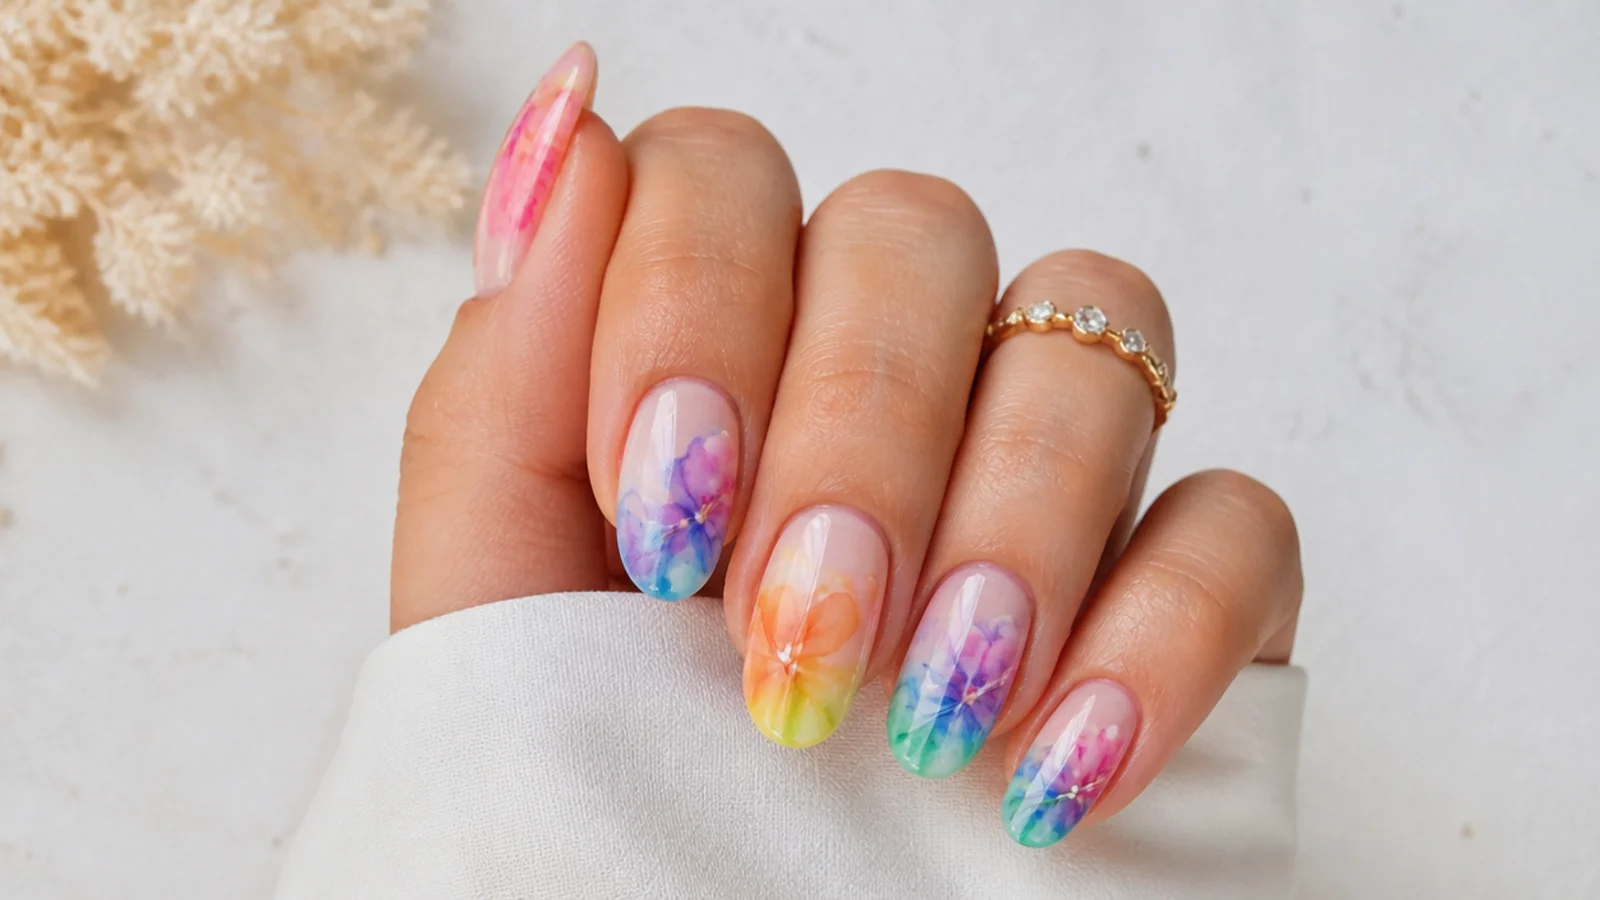
Blooming gel is a clear gel that makes gel color spread and diffuse into soft, watercolor patterns - flowers, marble and inky tie-dye. The trick is one rule: apply a thin layer of blooming gel over a cured color base and leave it uncured, then drop or draw gel color onto that wet layer. The color spreads and diffuses on its own within seconds to about a minute, and you cure under LED or UV to lock the pattern in place. Curing the blooming gel before you add color kills the effect completely, so timing is everything. Control comes from the layer: a thinner blooming-gel layer gives more spread, a thicker one gives less. The magic is that the diffusion does the artwork for you, which is why watercolor Christmas designs look soft and expensive without steady-handed painting.
How to Get the Blooming Gel Christmas Look at Home
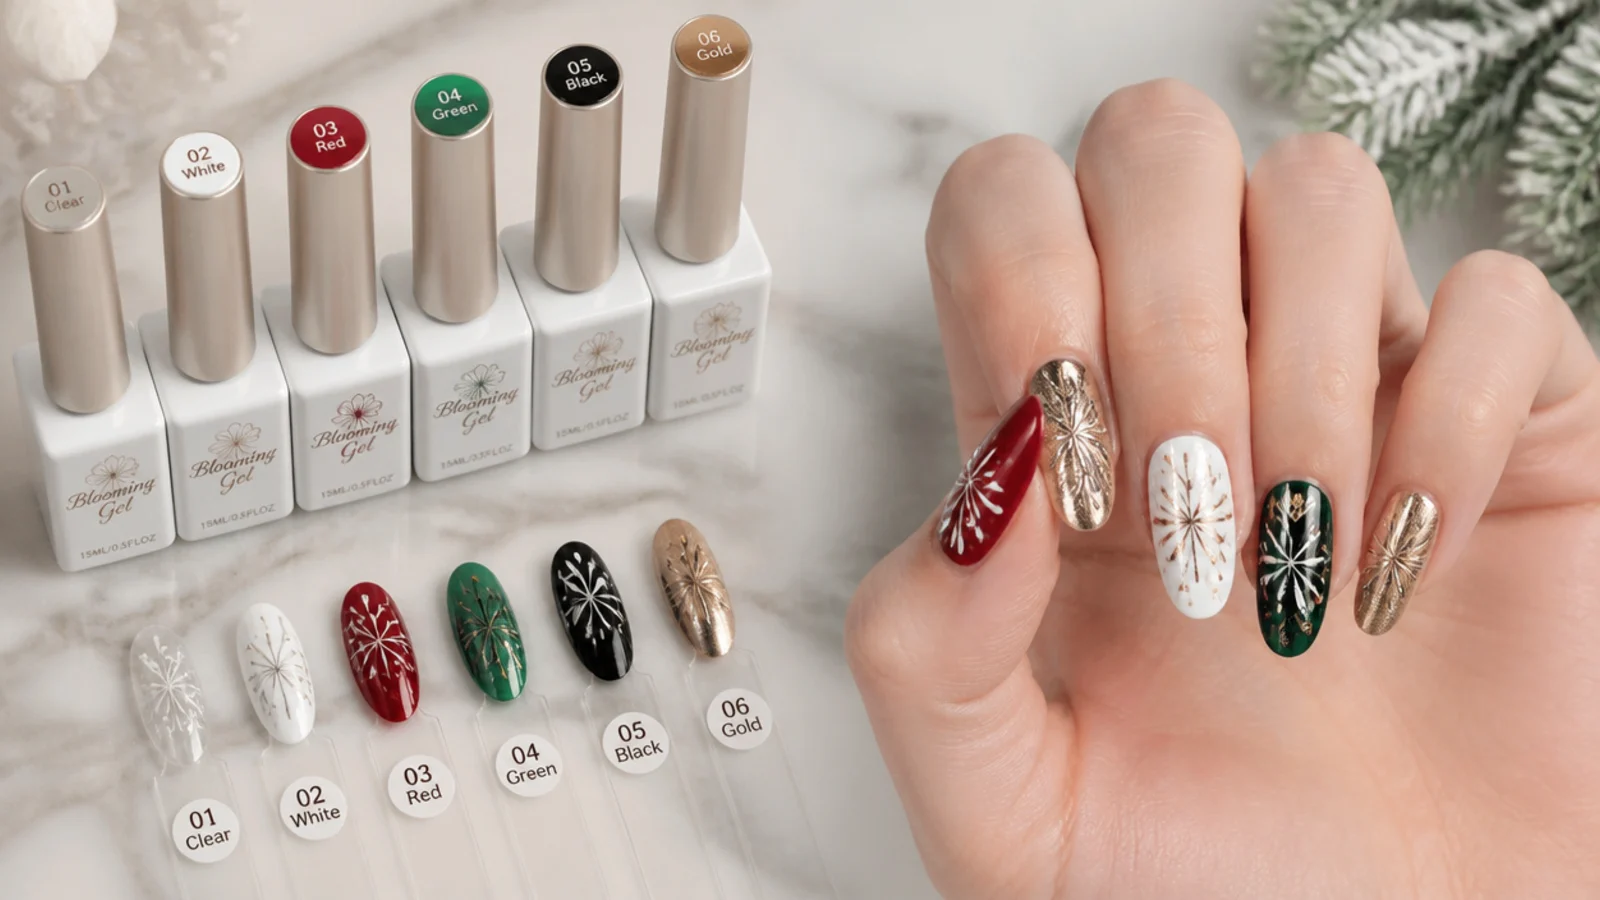
Start with prepped nails, a base coat, and one or two thin coats of your background gel color, curing each. Cure times are roughly 30 to 60 seconds per gel layer under LED, or about 2 minutes under UV. Brush on a thin, even layer of blooming gel and do not cure it. While it is wet, drop or draw your holiday colors - a little red for poinsettias, green for holly, or diagonal stripes for candy-cane marble - and watch them bloom. Shape the design with a thin liner brush if needed, then cure once it looks right. Build depth by curing and adding a second bloomed layer. Finish with a no-wipe gel top coat, capping the free edge, and cure. Swipe cuticle oil once it is sealed. Work one or two nails at a time so the gel stays wet.
Supplies You Need
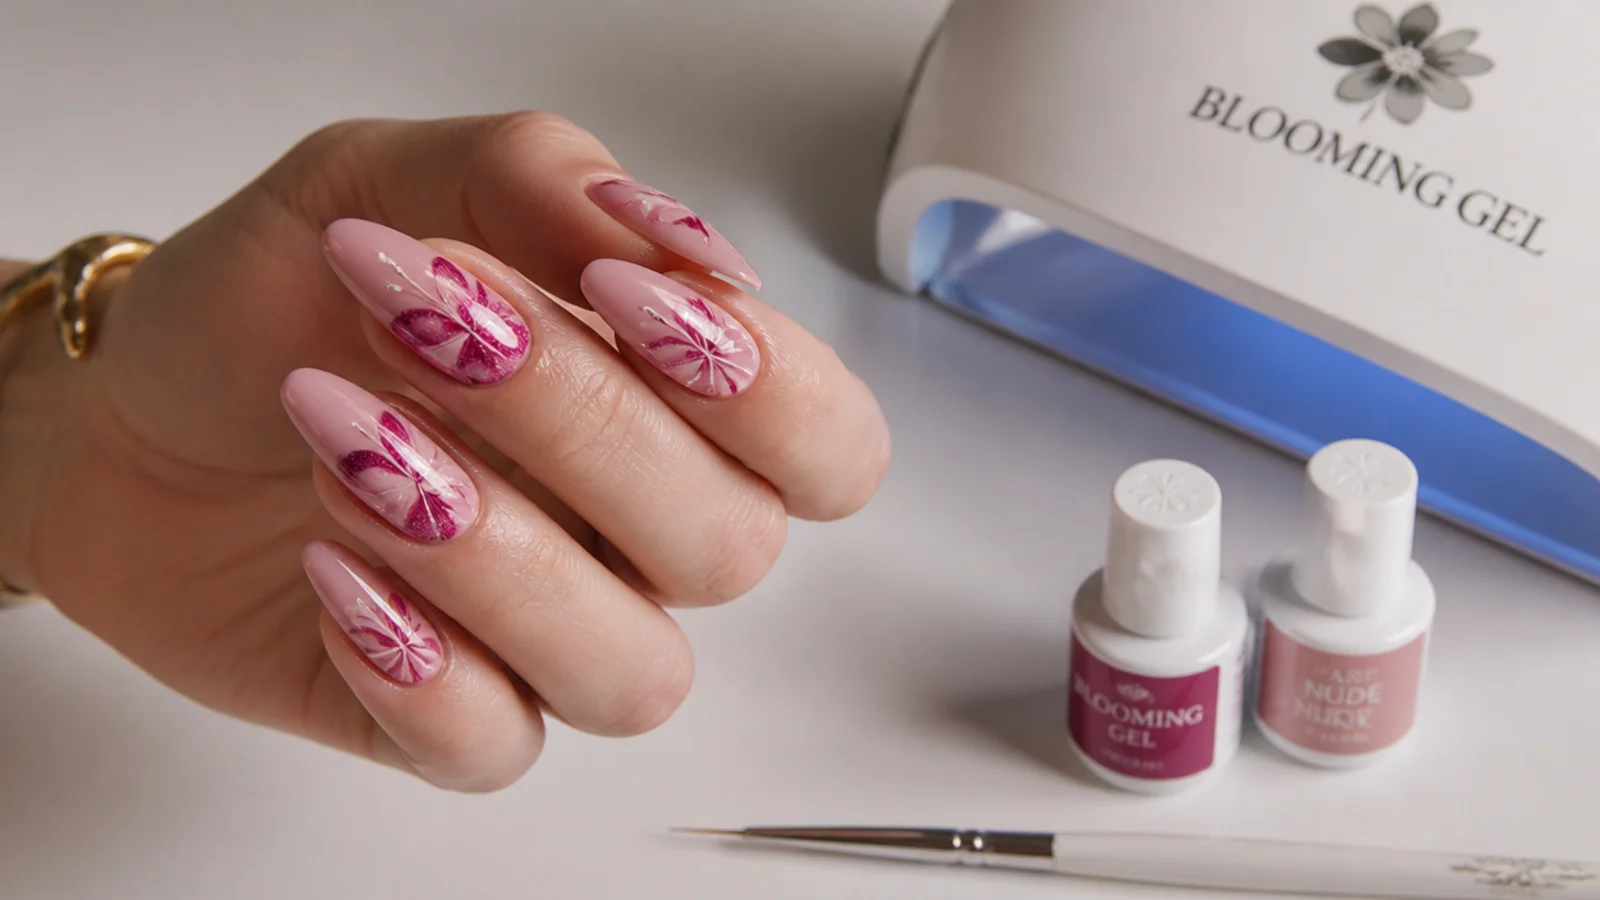
You do not need much to do blooming gel Christmas nails. The essentials are a base coat, gel color polish for your background and your festive colors, a bottle of blooming gel, a no-wipe gel top coat, and an LED or UV lamp to cure. For the art itself, a thin detail or liner brush lets you draw holly leaves, snowflakes and candy-cane stripes into the wet gel. Round it out with lint-free wipes, cuticle oil for finishing and daily care, and 100% acetone for removal. A DIY kit with the blooming gel, a few holiday colors and a lamp pays back fast against salon prices. Reds, greens, whites, gold and deep navy or burgundy cover almost every design in this collection, so a small festive color set goes a long way.
Common Blooming Gel Mistakes to Avoid
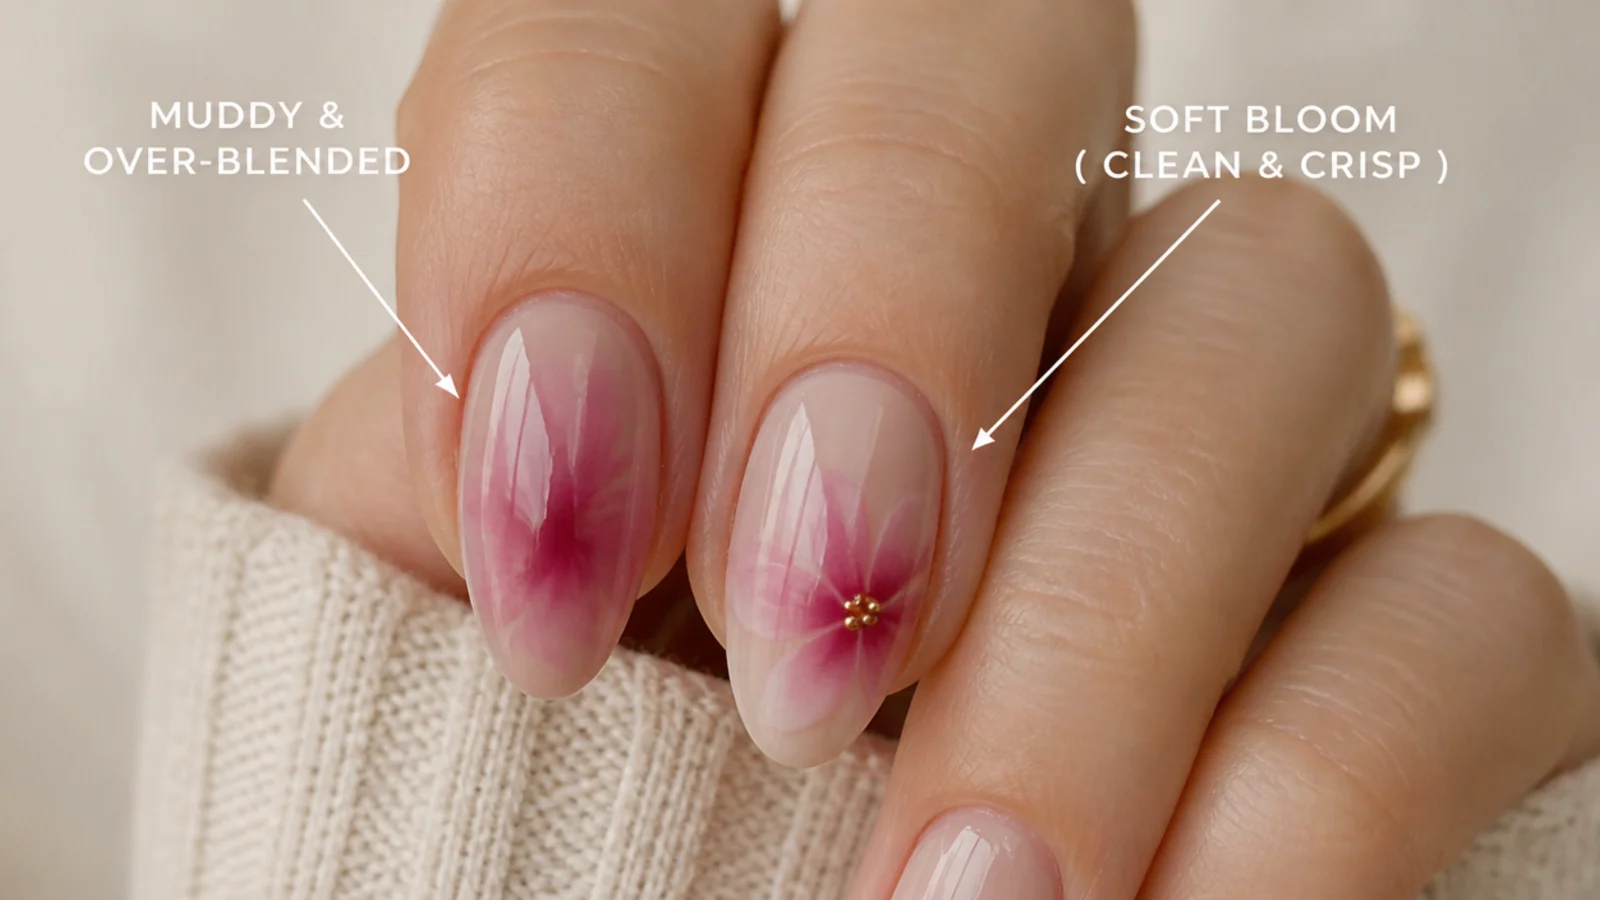
Most blooming gel fails come from a few repeat mistakes. Curing the blooming gel too early is the biggest - once it is cured, color sits on top instead of blooming, so always add color while the layer is still wet. Flooding too much color is next: a little blooms into a soft pattern, but too much just blurs into a muddy blob, and this is worst with red and green together, which turn brown. A blooming-gel layer that is too thick barely spreads at all, so keep it thin for holiday watercolors. Skipping base prep causes lifting and early chips, and not sealing or capping the free edge lets the design smear and chip within days. Use a little color, keep the layer thin, cap the edge, and cure each layer fully.
How Long Do Blooming Gel Christmas Nails Last?
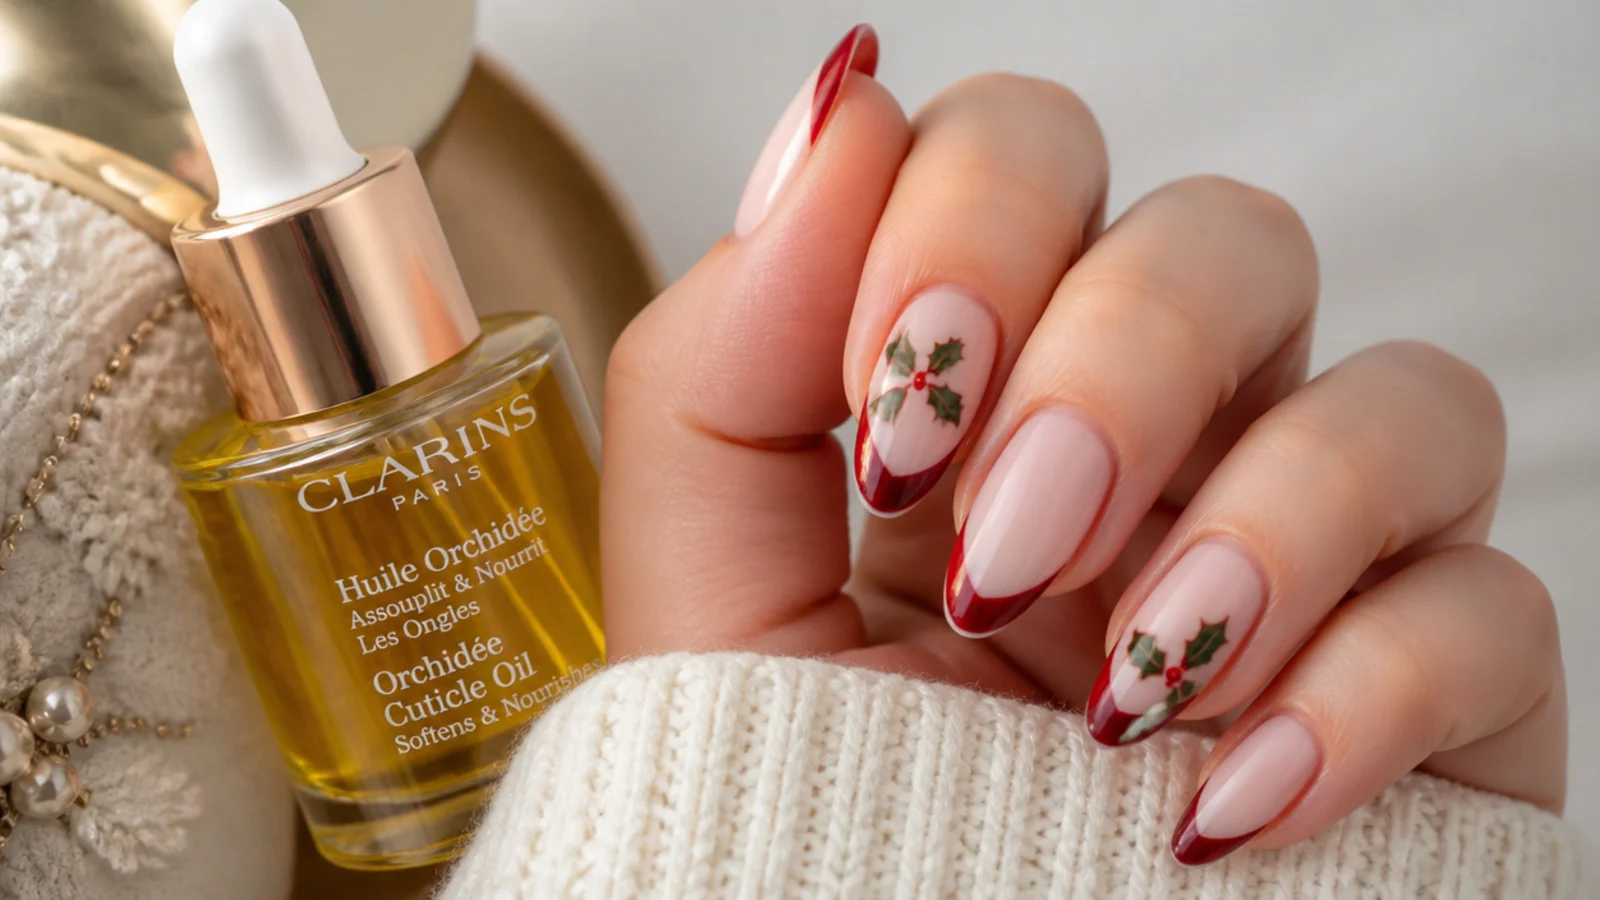
Because blooming gel is a gel technique, a set lasts about two to three weeks, and up to four with good prep, daily cuticle oil, and capping the free edge to seal the design. That easily covers the run-up to Christmas and the holiday parties after. It is a big upgrade on regular, non-gel polish art, which only holds for about 5 to 7 days before chipping. To get the most from a festive set, prep well before the design, seal everything under a no-wipe top coat, wear gloves for chores, and avoid using your nails as tools. When it is time to take them off, soak-off properly rather than picking, so your natural nails stay healthy for the next set. Book or plan a refill or redo every two to three weeks.
Cost - Salon vs DIY
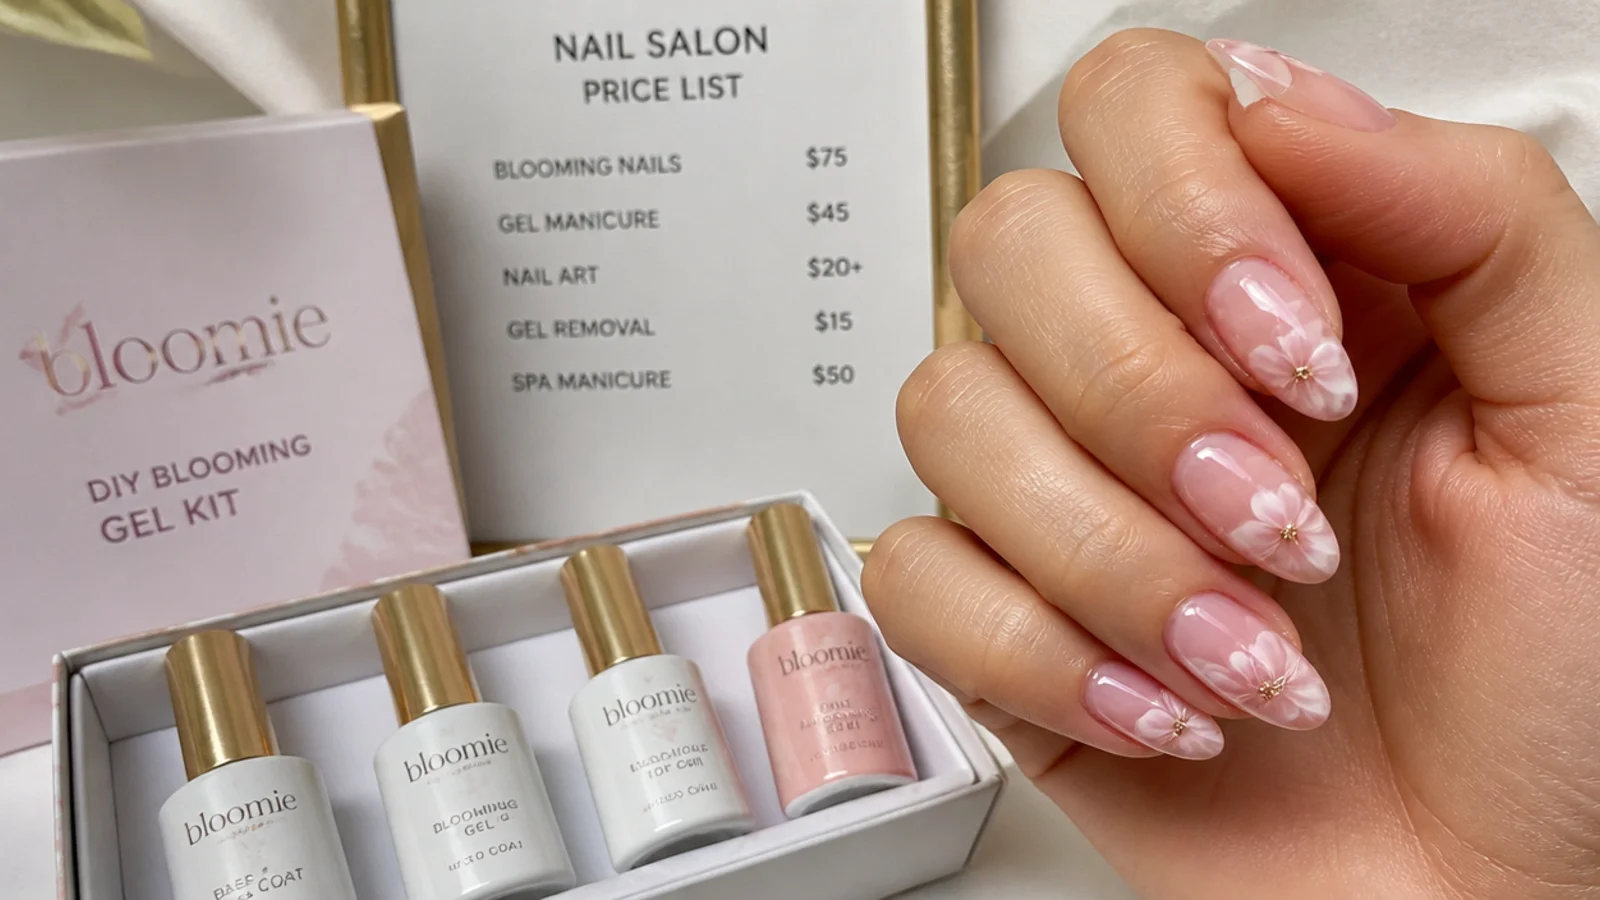
At a salon, a standard gel manicure runs about $30 to $55. Nail-art and design add-ons cost roughly $5 per accent nail, so a full blooming-gel Christmas set with a bloom on every nail often lands around $45 to $70 or more, depending on how detailed the holiday designs are and where you live. Doing it yourself changes the math fast. A DIY kit - blooming gel, a handful of festive gel colors, a no-wipe top coat and an LED lamp - has a one-time cost that pays back after just a set or two, since each design after that is essentially free. Blooming gel is intermediate but beginner-friendly with a little practice, and it is very DIY-able, which makes it one of the more cost-effective nail-art techniques to learn for the holidays and beyond.
Frequently Asked Questions
What is blooming gel and how does it work?
Blooming gel is a clear gel that makes gel color spread into soft watercolor patterns. You apply a thin layer over a cured color base, leave it uncured, then drop or draw gel color onto it. The color diffuses on its own within seconds, and you cure under LED or UV to lock the pattern in place.
Do you cure blooming gel before adding color?
No - that is the most common mistake. You apply a thin blooming-gel layer over your cured base and leave it uncured, then add color while it is still wet so it can bloom. Curing the blooming gel before adding color kills the effect and the color just sits on top instead of spreading.
How long does blooming gel take to bloom?
The color spreads and diffuses within seconds to about a minute after you drop or draw it onto the wet blooming-gel layer. Once the pattern looks right, you cure it immediately to lock it in - roughly 30 to 60 seconds under an LED lamp or about 2 minutes under UV per gel layer.
How long do blooming gel Christmas nails last?
Because it is a gel technique, a set lasts about two to three weeks, and up to four with good prep, daily cuticle oil and capping the free edge. That easily covers the holiday season. Regular, non-gel polish art by contrast only lasts about 5 to 7 days before chipping.
Why did my blooming gel go muddy or not bloom?
Muddy usually means too much color flooded the layer, or that red and green blended together into brown - use a little color and keep them on separate nails. No bloom at all means the blooming-gel layer was cured too early or applied too thick. Keep it thin, uncured, and add only a little color.
Is blooming gel good for beginners?
Yes, it is intermediate but beginner-friendly with a little practice, and very DIY-able. The diffusion does the artwork for you, so you do not need a steady painting hand. Start with simple one-color blooms or candy-cane marble, use a little color, and you will get soft, festive results quickly.
What is the difference between blooming gel and regular gel nail art?
Regular gel art is painted or placed with a brush and stays crisp where you put it. Blooming gel is left uncured so color spreads and diffuses on its own into soft, watercolor patterns you cannot get by hand. Both cure under a lamp and last two to three weeks, but only blooming gel gives that soft, bled look.
How much do blooming gel nails cost?
A salon gel manicure runs about $30 to $55, with design add-ons around $5 per accent nail, so a full blooming-gel Christmas set often lands near $45 to $70 or more. A DIY kit with blooming gel, festive colors, top coat and a lamp costs more upfront but pays back after a set or two.
How do you remove blooming gel nails?
Treat a festive set like any soak-off gel. Buff off the shiny top coat, then wrap each nail in 100% acetone-soaked cotton and foil for 10 to 15 minutes; heavily pigmented reds and greens may need a few extra minutes. Gently push the softened gel off with an orange stick, never peel, and follow with cuticle oil.
What colors work best for blooming gel Christmas nails?
Classic true red, deep burgundy and cranberry, evergreen and emerald, crisp white, gold and deep navy cover nearly every festive design. A white or nude base keeps bloomed colors bright rather than muddy. Keep red and green on separate nails so they do not bleed together into brown.
Which blooming gel nails look are you saving?
Blooming gel Christmas nails give you the soft, expensive watercolor look that plain holiday polish cannot, and the technique is far more forgiving than it appears - you drop the color, it blooms itself. Keep the blooming-gel layer thin for more spread, use a little color so it does not go muddy, and cure each layer for about 30 to 60 seconds under LED so the pattern stays crisp. Whether you want soft red poinsettias, inky evergreen or a full candy-cane marble, seal and cap the free edge and swipe cuticle oil daily so the set lasts through the season. Save the ones you love and recreate them or take the photos to your nail tech.