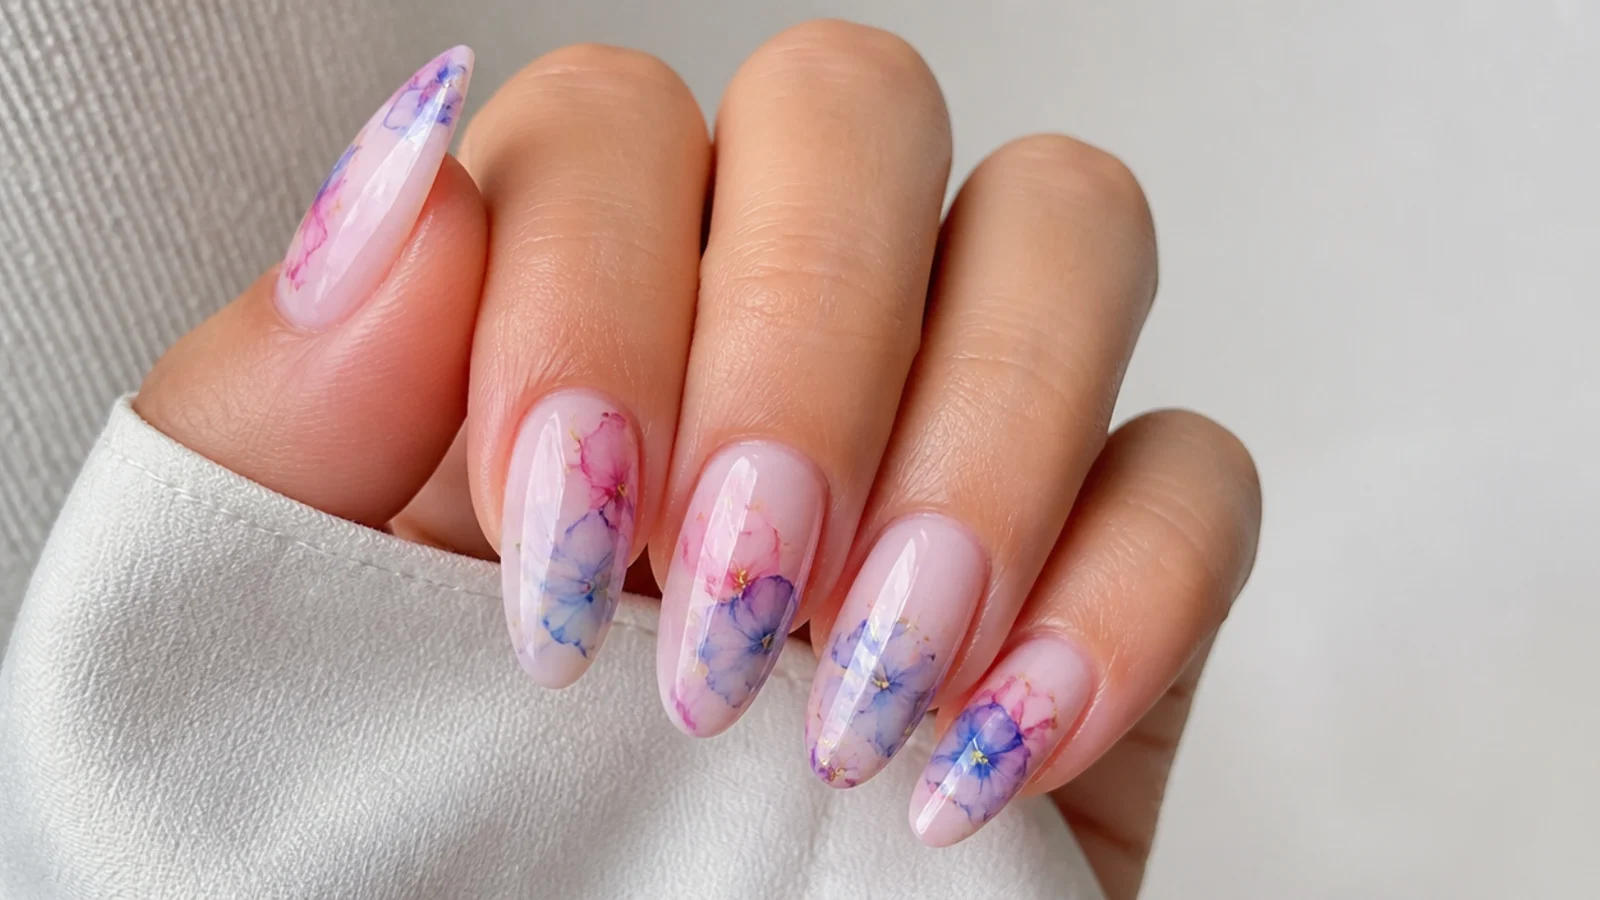
1. Watercolor Peony Bloom
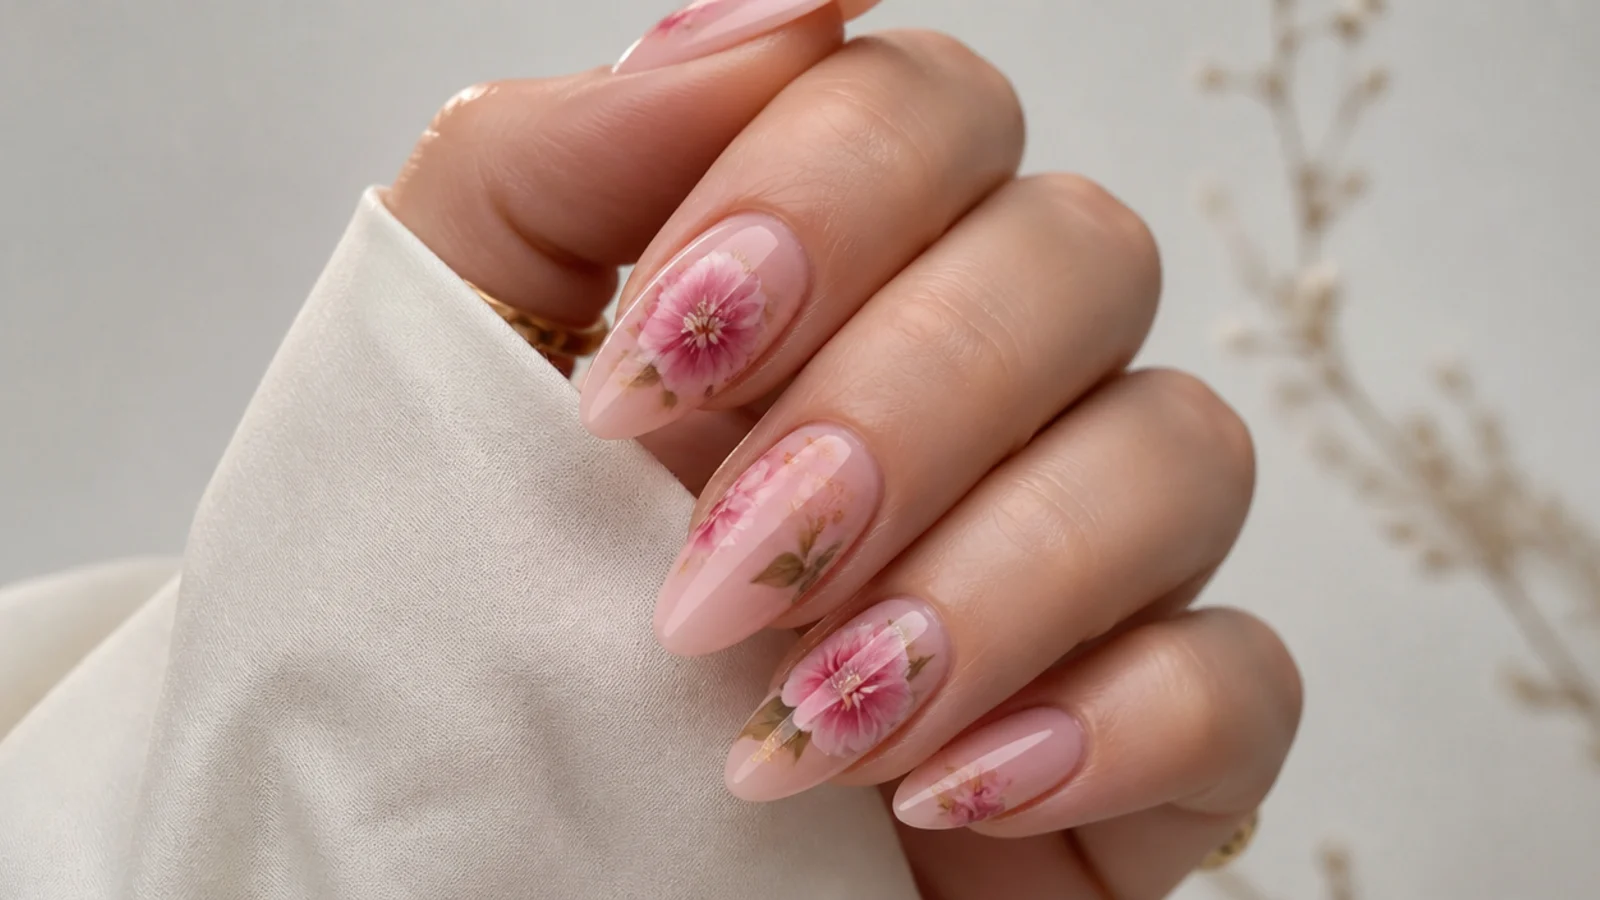
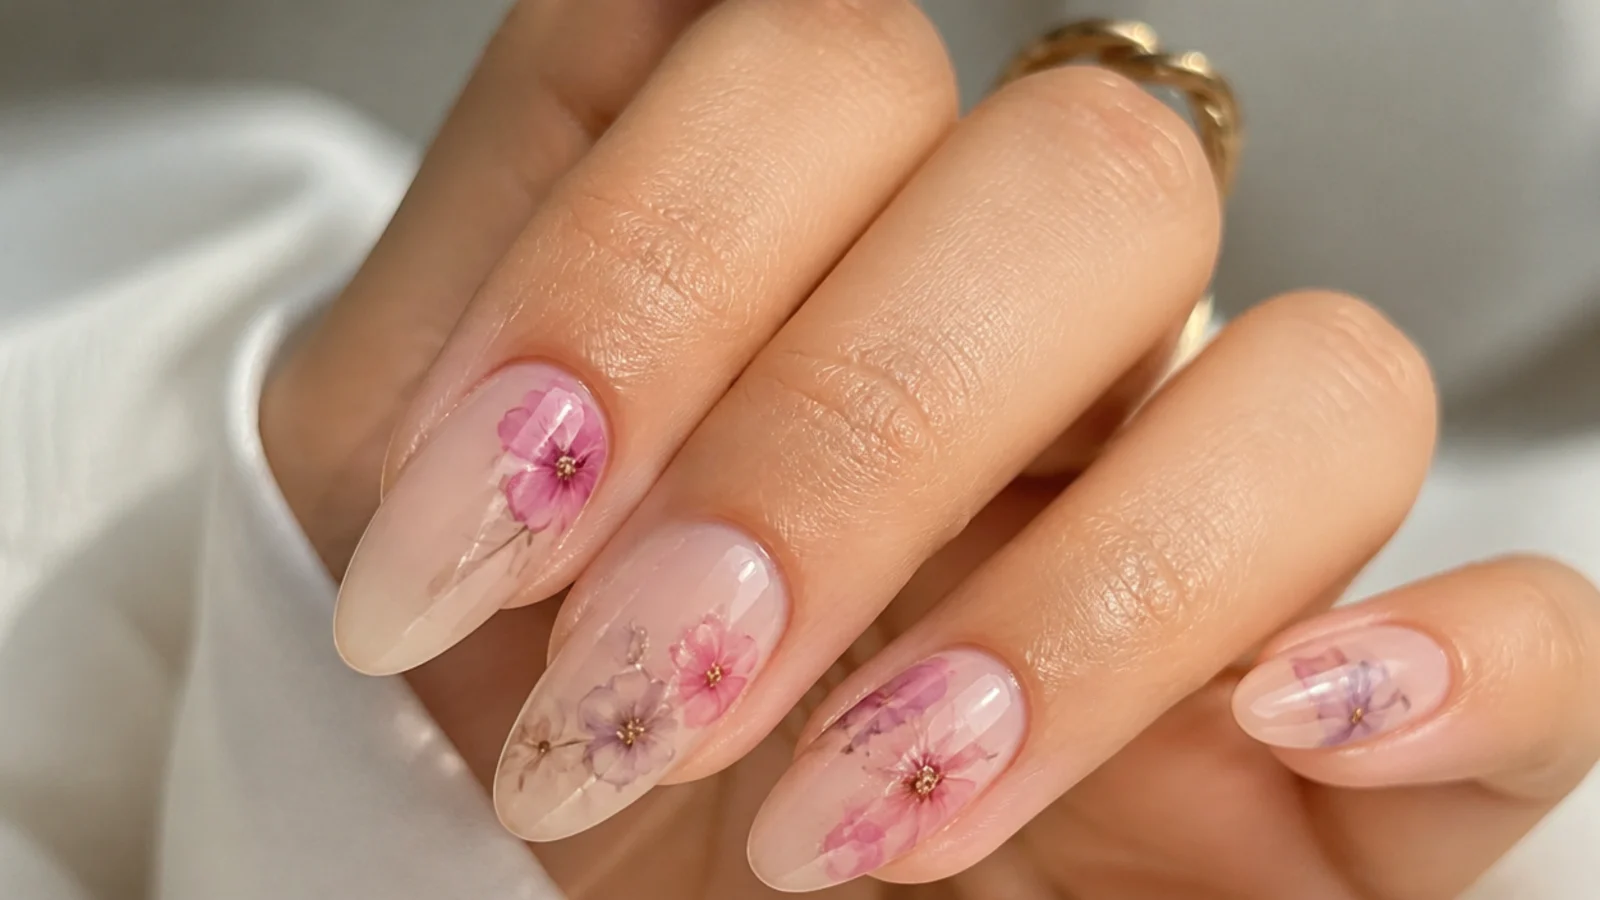
The most-saved blooming gel design - a soft blush and rose peony that looks hand-painted in watercolor. Over a milky nude base you brush a thin layer of blooming gel, leave it uncured, then drop a little rose gel in loose petal shapes and let it diffuse into feathery edges before curing. A fine liner brush pulls a few darker centers for depth. The gel does the blending, so the flower reads soft and painterly rather than sharp. It works because the diffusion mimics real watercolor pigment spreading on wet paper, giving that dreamy, expensive florist finish.
Who it suits: Anyone wanting a soft, romantic floral set.
Tip: Use only a dot or two of color per petal - too much floods and goes muddy.
2. Soft Pink Rose Bloom
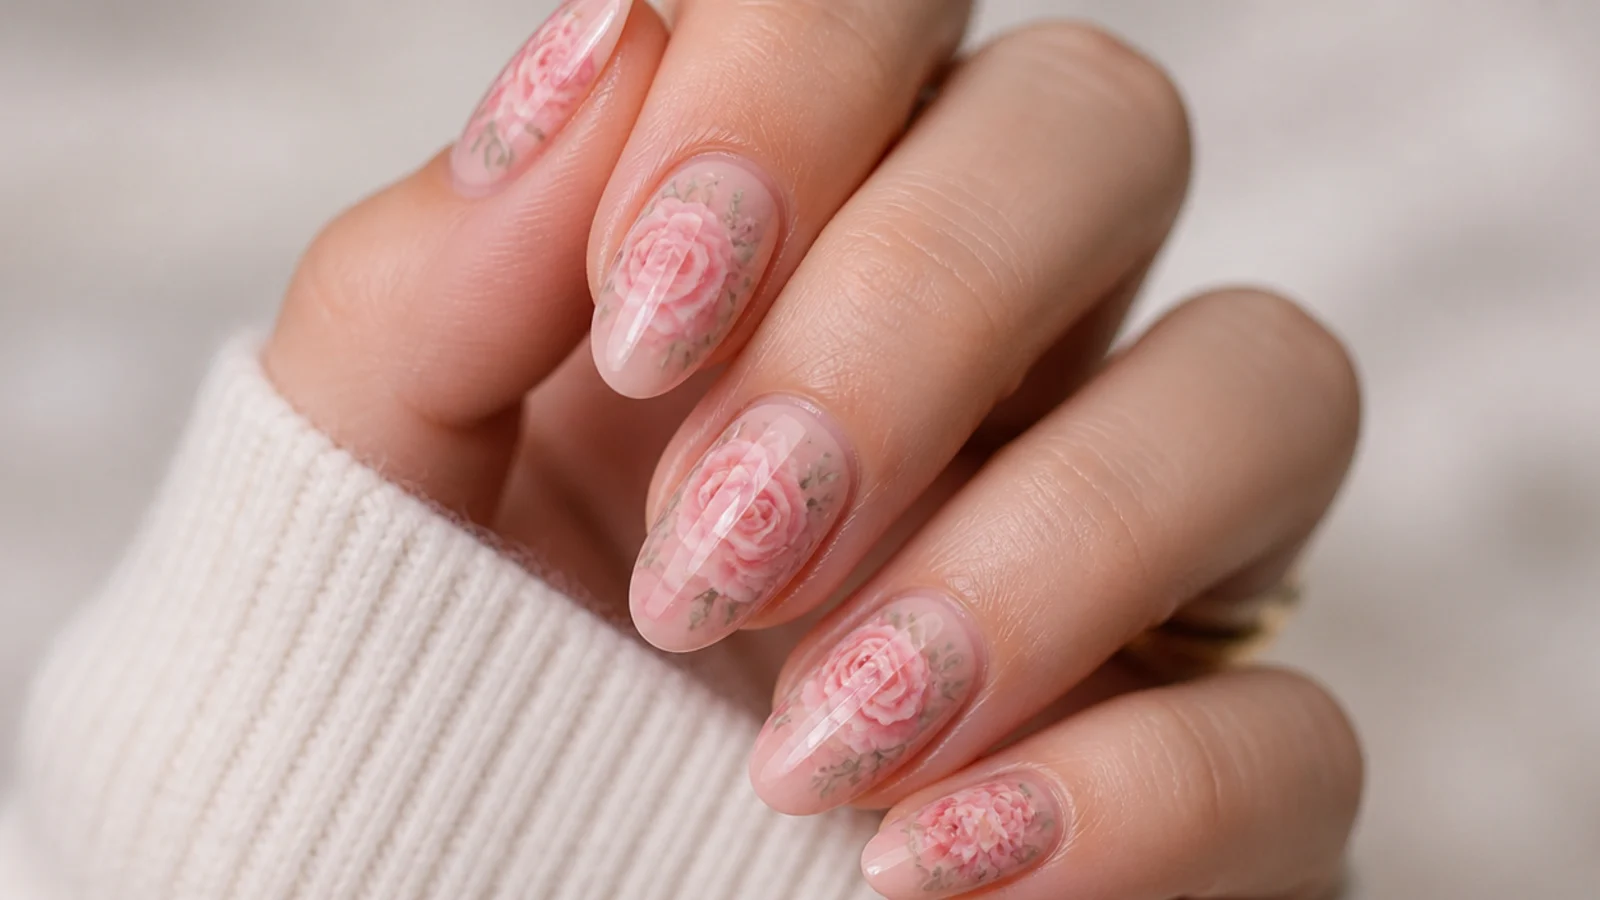
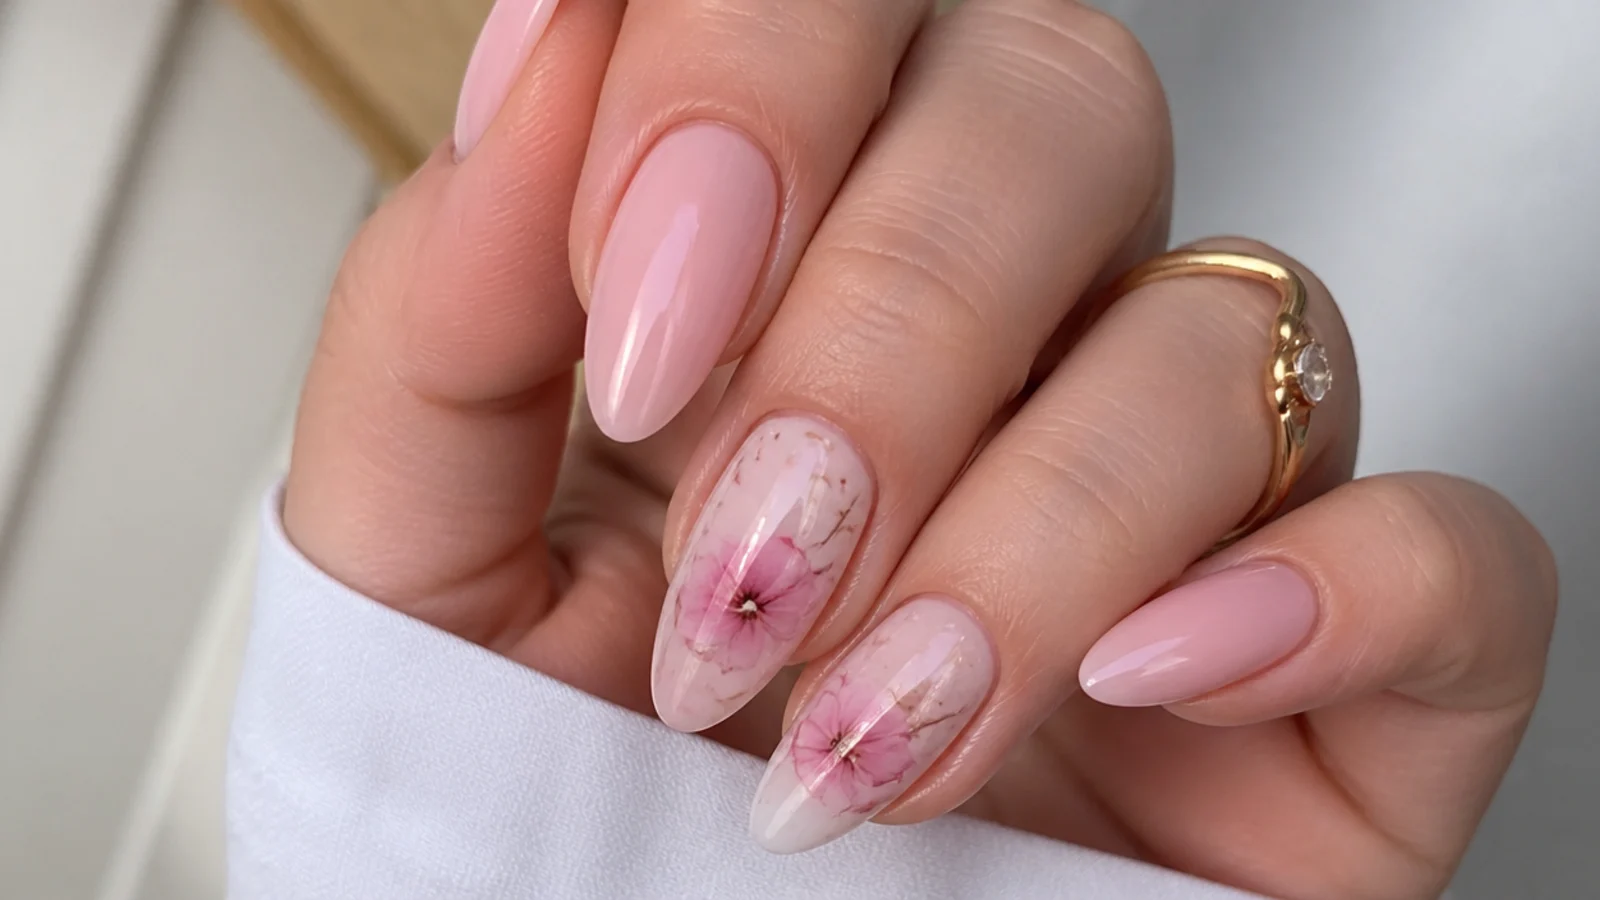
A single diffused rose in dusty pink with soft sage leaves, spread so the petals melt into each other. Over a sheer pink base you lay uncured blooming gel, then draw a loose spiral of rose gel and touch two green dots at the side; both bloom outward into soft, watercolor edges in under a minute before curing. Building the rose in two thin passes, curing between, deepens the center without muddying it. It works because the loose spiral reads as a full-blown garden rose once the gel softens every line, giving a pretty, feminine focal nail.
Who it suits: Anyone wanting one romantic accent flower.
Tip: Cure between the first and second bloom so the center stays richer than the edges.
3. Blue Forget-Me-Not Bloom
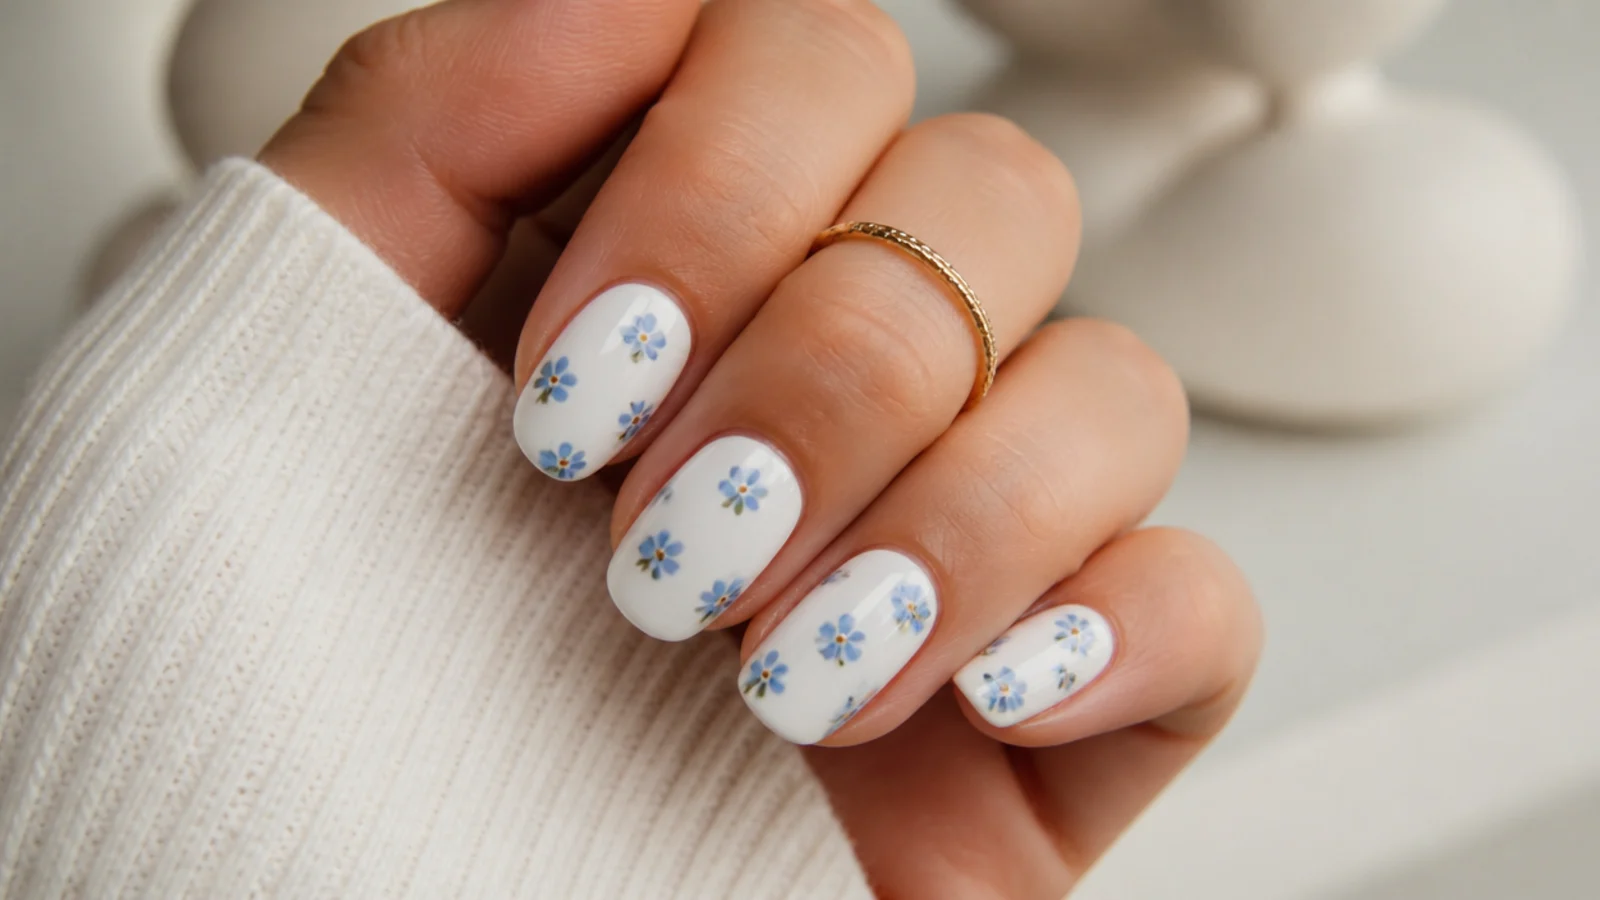
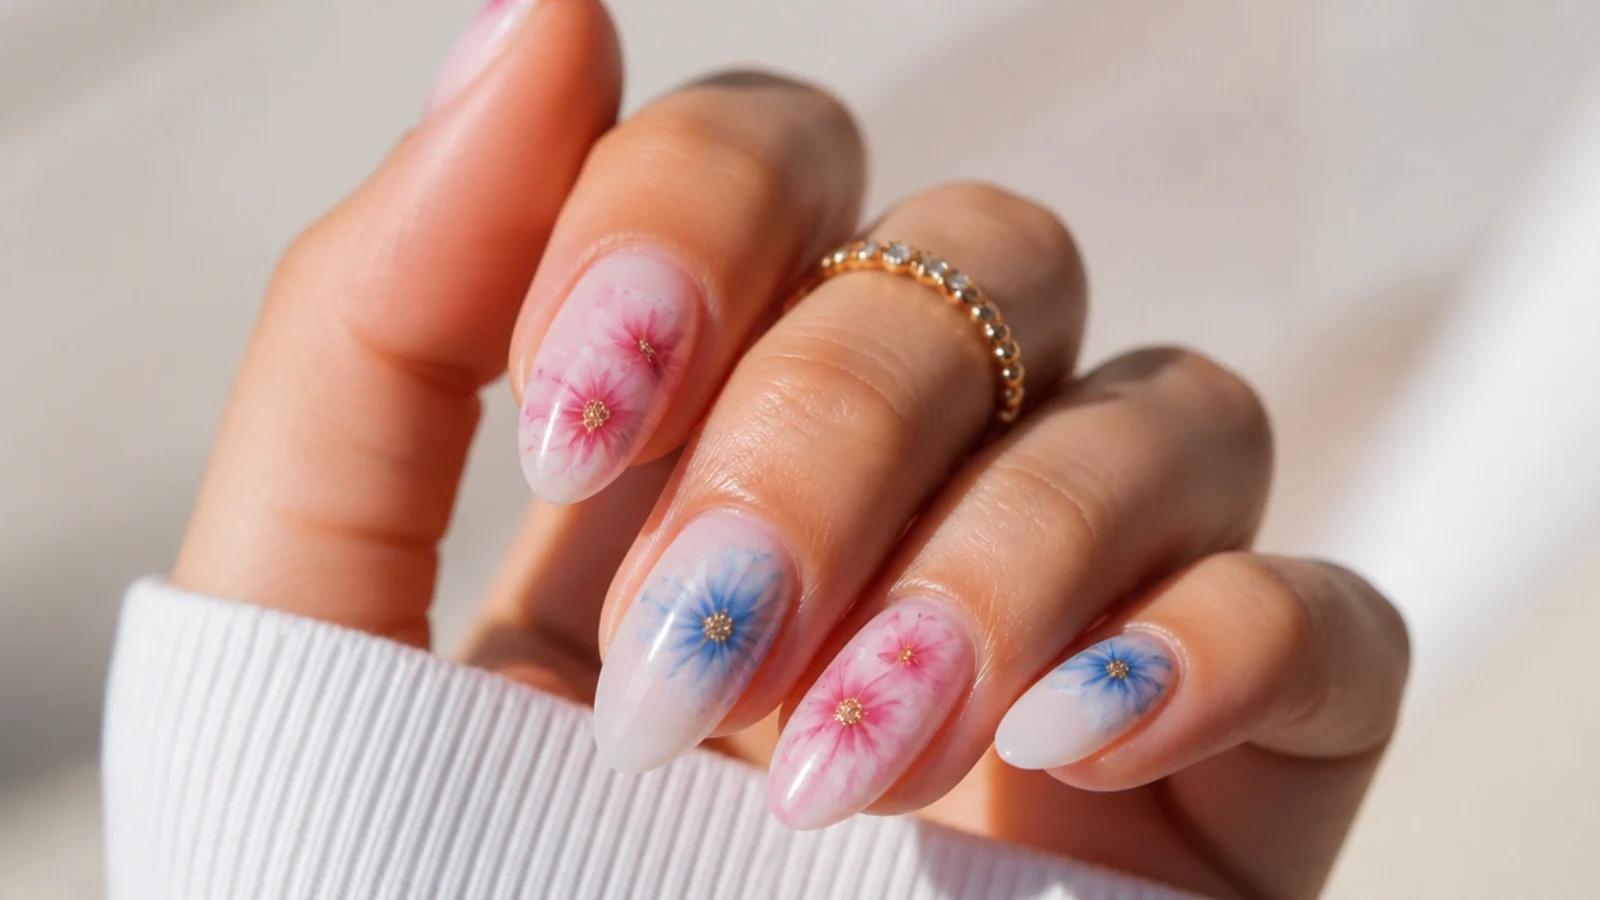
Tiny sky-blue forget-me-nots scattered over a soft white base, each flower a cluster of five diffused dots. Over the cured white you brush uncured blooming gel, then place small dots of cornflower-blue gel in little rings; they spread just enough to blur into soft five-petal blooms before you cure. A pinpoint of yellow in each center adds a lifelike touch. Keeping the layer thin gives a controlled, tidy spread rather than a full smudge. It works because the delicate scale and cool blue read fresh and springlike, perfect for a light, airy set.
Who it suits: Anyone wanting delicate, small-scale florals.
Tip: A thinner blooming gel layer keeps tiny flowers from over-spreading into blobs.
4. Lavender Wildflower Bloom
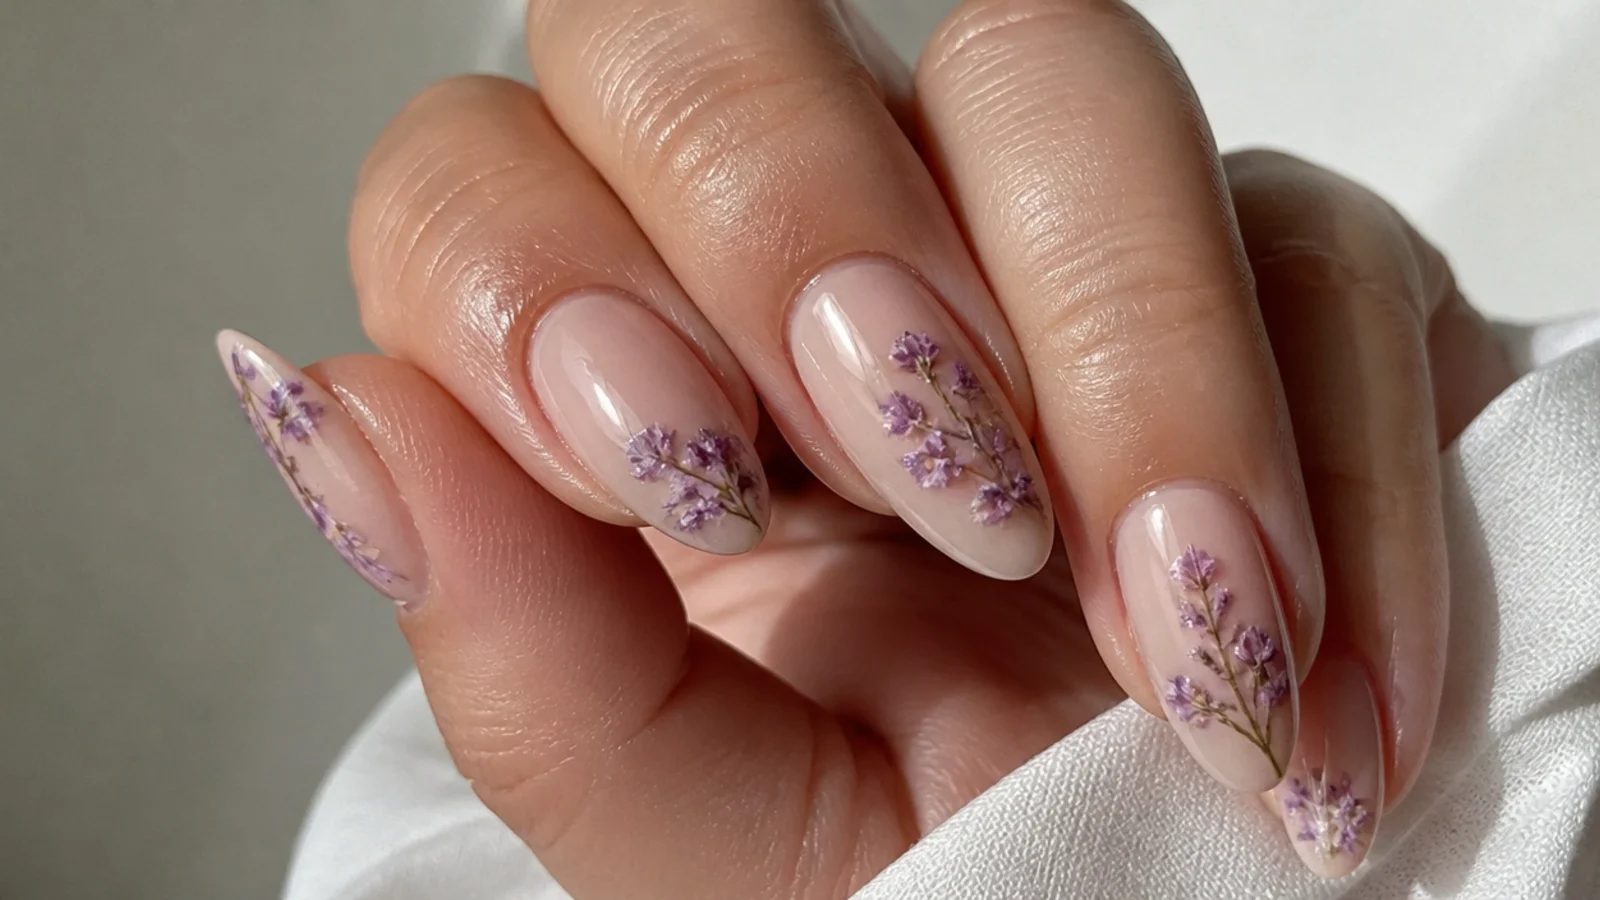
Loose lavender sprigs and purple wildflowers drifting up the nail like a pressed-flower print. Over a warm nude base you lay uncured blooming gel and dot soft lilac and deeper violet gel along a slight diagonal; the colors bloom into hazy little blossoms while a thin green line stays crisper as the stem. Because you cure the moment the spread looks right, you control how soft each flower gets. It works because the muted purples and airy spacing feel botanical and calm, giving a modern, understated take on floral nails.
Who it suits: Anyone wanting muted, botanical florals.
Tip: Draw stems last with a liner and cure fast so they stay defined against the bloom.
5. Cherry Blossom Bloom
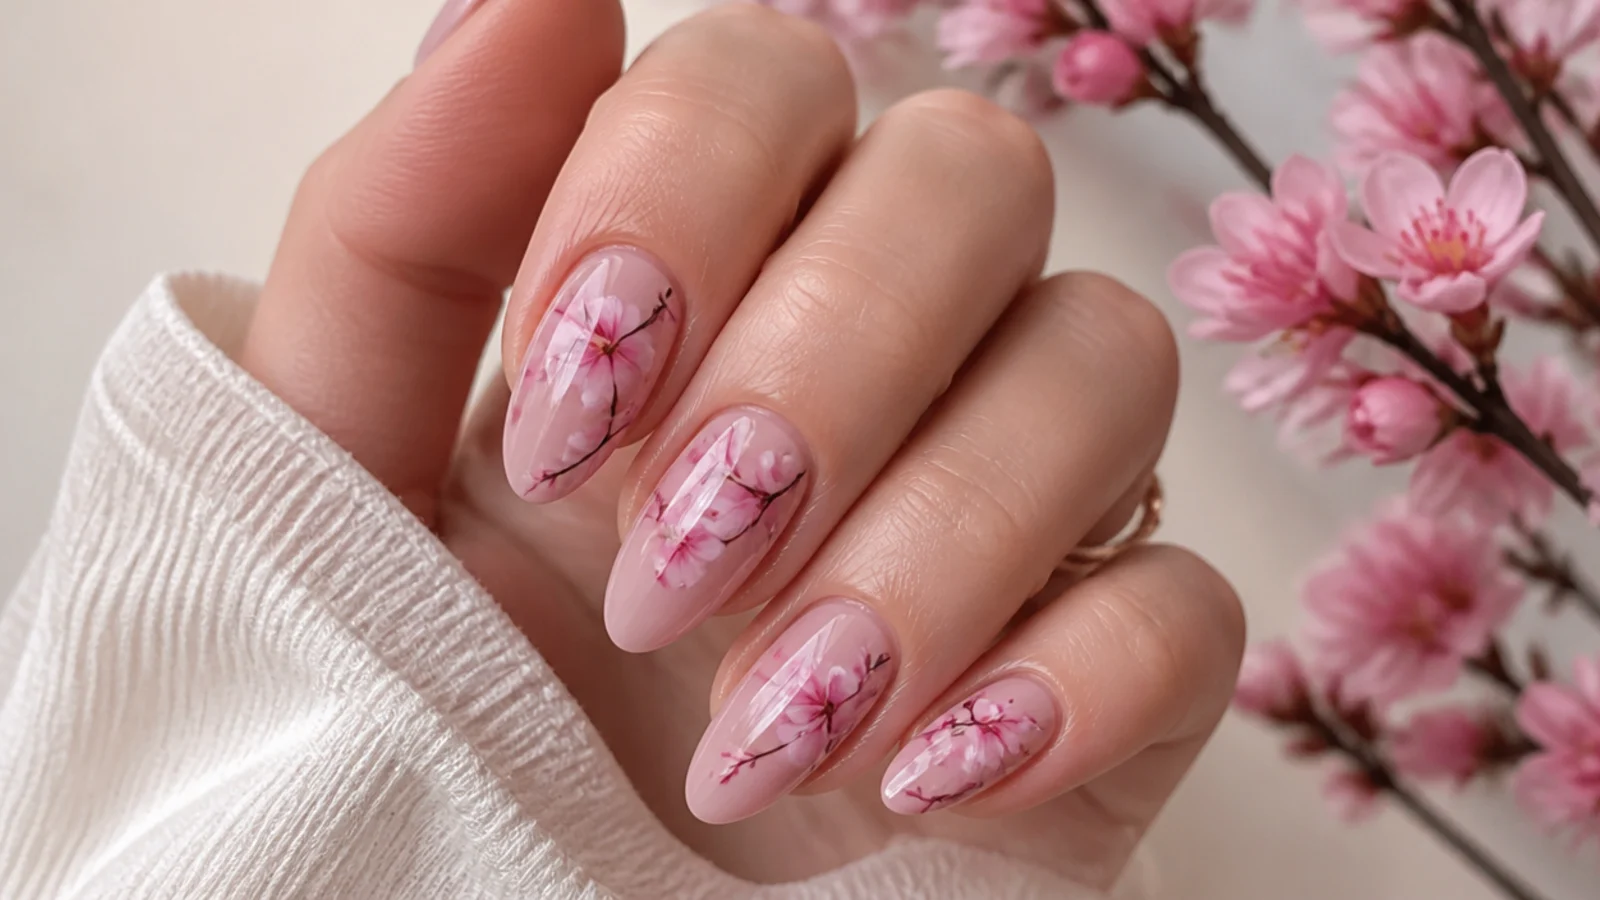
Pale pink cherry blossoms trailing along a fine brown branch across a milky base. Over the cured base you brush uncured blooming gel, paint a thin branch with a liner, then dot soft pink gel at intervals so each blossom diffuses into a rounded five-petal shape before curing. Tiny white and gold centers finish them. Letting the pink bloom while keeping the branch line sharp gives the print its structure. It works because the contrast of a crisp branch and soft, diffused petals captures real spring blossom, making a delicate, seasonal favorite.
Who it suits: Anyone wanting a spring, blossom-inspired set.
Tip: Paint the branch first and let it set slightly so the pink blooms around it, not over it.
6. Soft Pink Marble
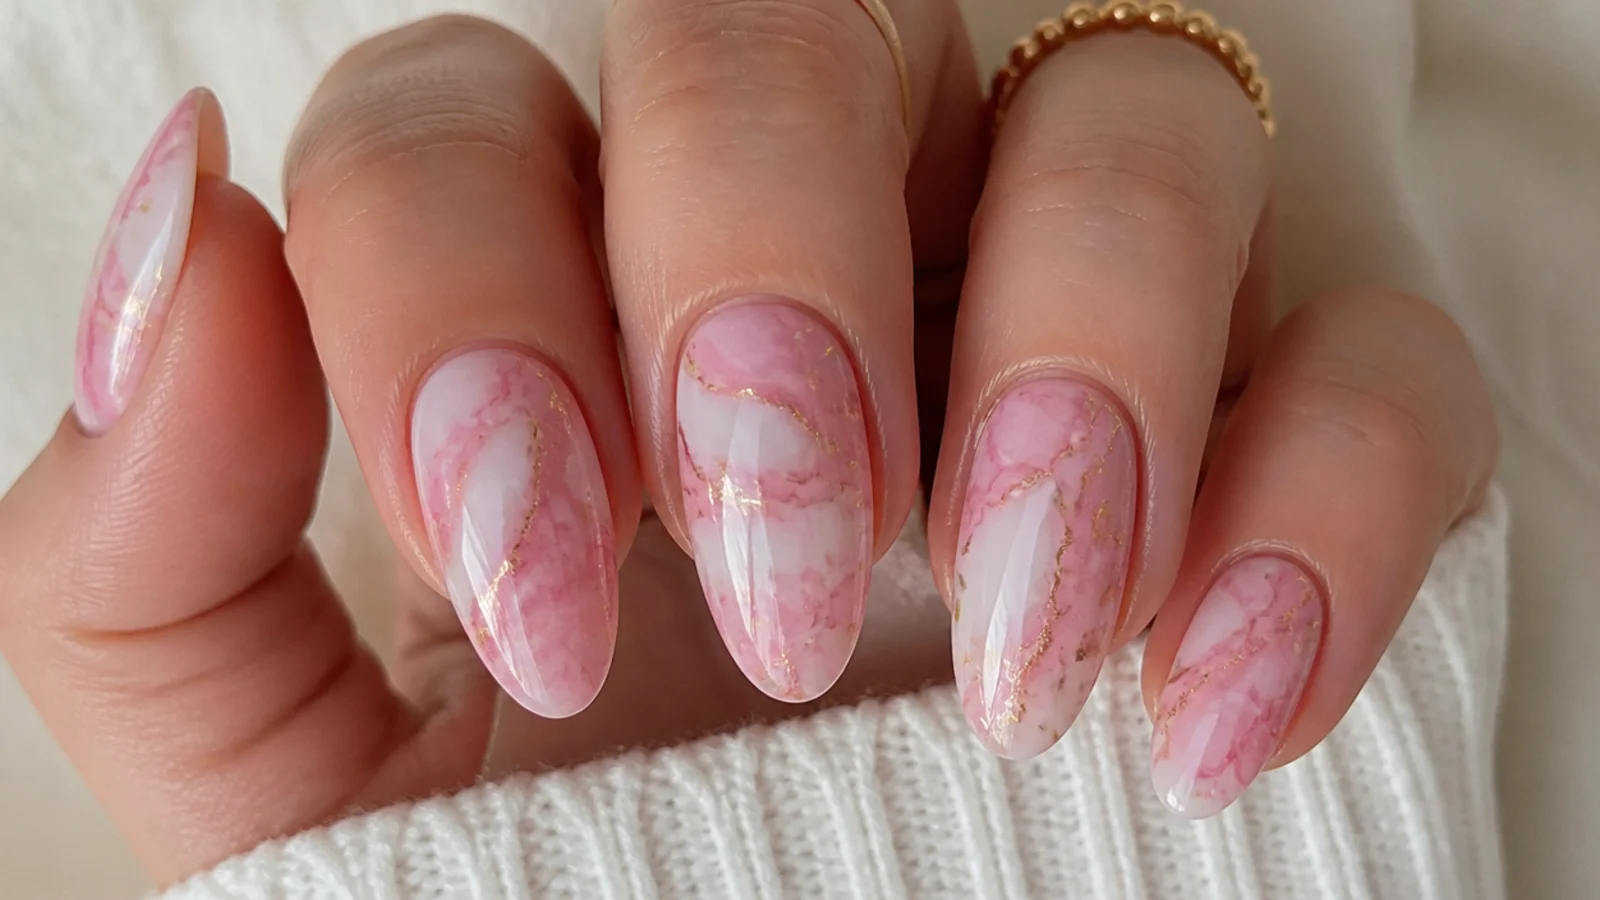
A hazy pink and white marble with soft, smoky veining and no hard lines. Over a white base you lay uncured blooming gel, then drag a little pink and a touch of gray gel in loose swirls with a liner; the colors bloom and blur into cloudy marble as the gel spreads before you cure. A second thin layer adds depth and a few finer veins. Keeping the color sparse stops it going muddy. It works because blooming gel naturally diffuses the veins into the soft, watery look real marble has, giving an elegant, expensive stone finish.
Who it suits: Anyone wanting a soft, elegant stone effect.
Tip: Drag veins in one direction and let them bloom - overworking turns marble to mud.
7. Gray Ink Marble
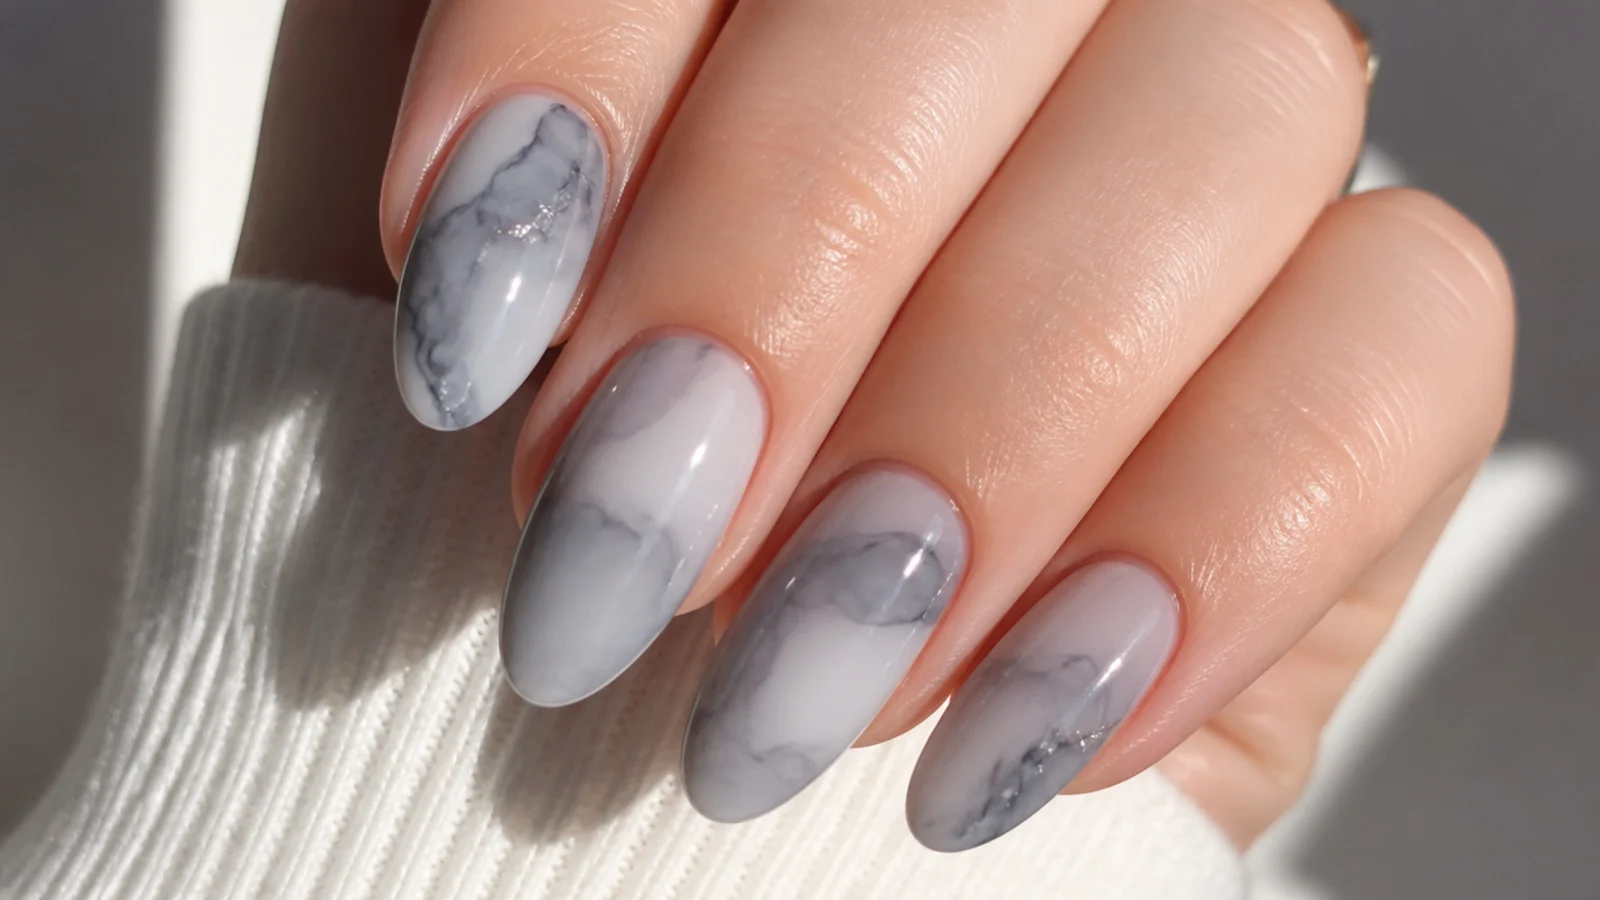
A cooler, smokier marble in gray and white that reads like ink dropped in water. Over a soft white base you brush uncured blooming gel and touch in wisps of gray gel, letting them diffuse into feathery smoke before curing; a few thin black veins pulled with a liner add contrast. Building in two light layers gives dimensional depth without heaviness. Because the gel softens every edge, the gray never looks like paint - it looks like it is floating in the nail. It works for a modern, moody neutral that pairs with everything and suits any season.
Who it suits: Anyone wanting a moody, modern neutral.
Tip: Add the darkest veins last on a fresh thin layer so they sit crisp over the haze.
8. Blush and Gold Marble
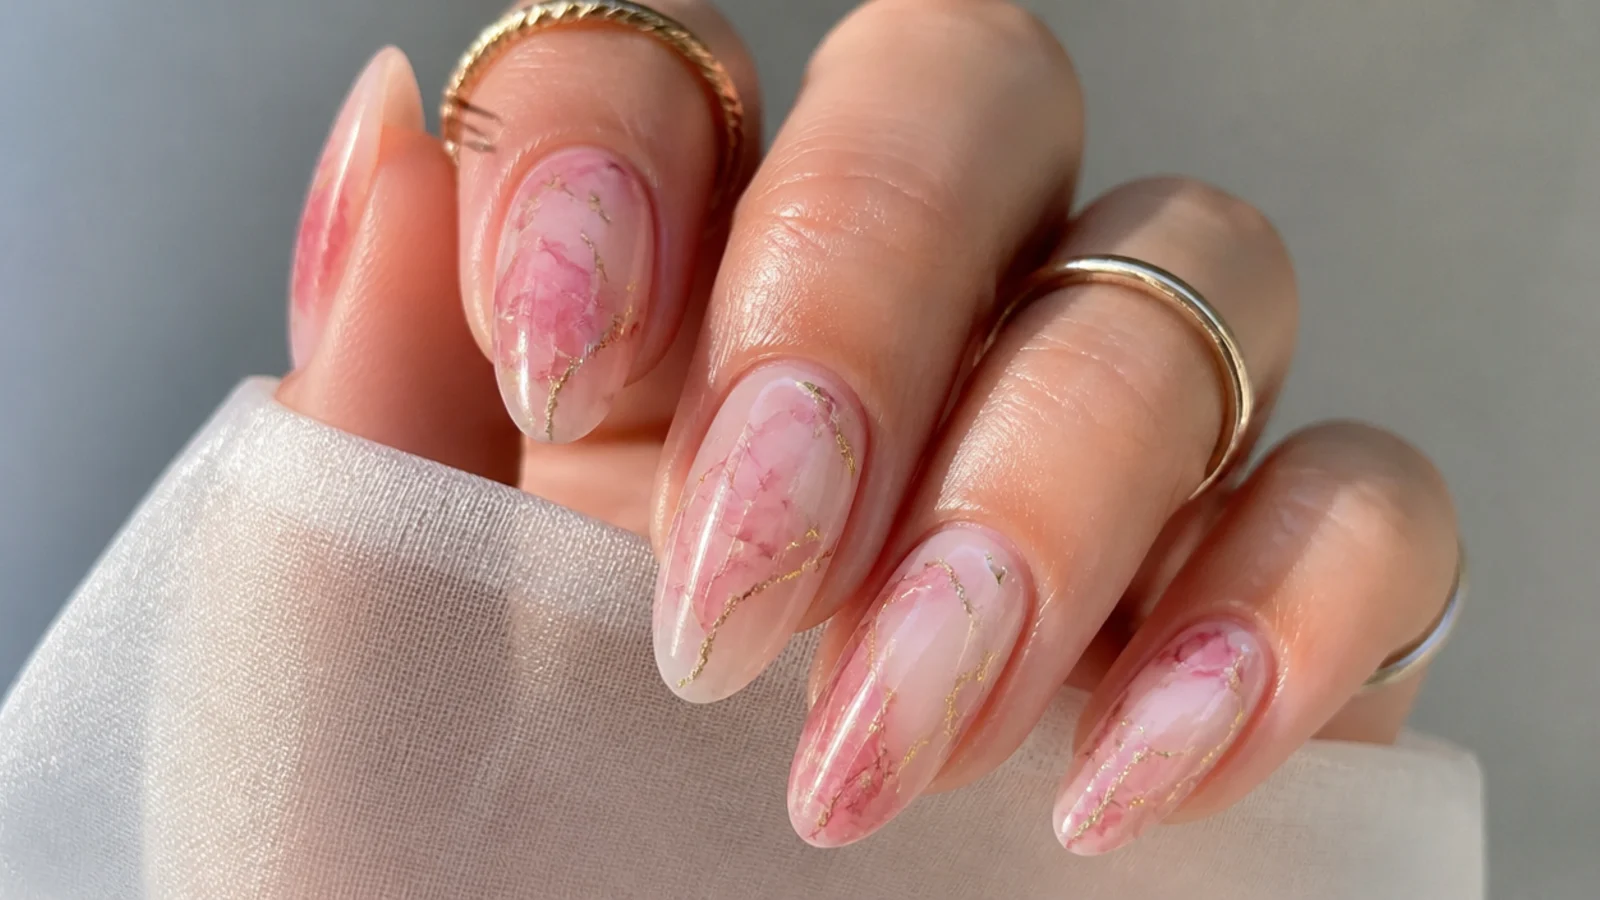
A soft blush marble threaded with fine gold-foil veins for a luxe, agate look. Over a nude base you lay uncured blooming gel and swirl in a little blush and cream gel, letting them bloom into cloudy stone before curing; once set, you press thin strips of gold leaf along the vein lines and seal under top coat. The diffusion gives the blush its soft, watery depth while the gold adds a crisp metallic edge. It works because the contrast of hazy marble and sharp gold reads high-end, making a pretty pick for weddings and events.
Who it suits: Anyone wanting a luxe, event-ready marble.
Tip: Add the gold after curing the bloom, then seal well so no foil edges lift.
9. Green Jade Marble
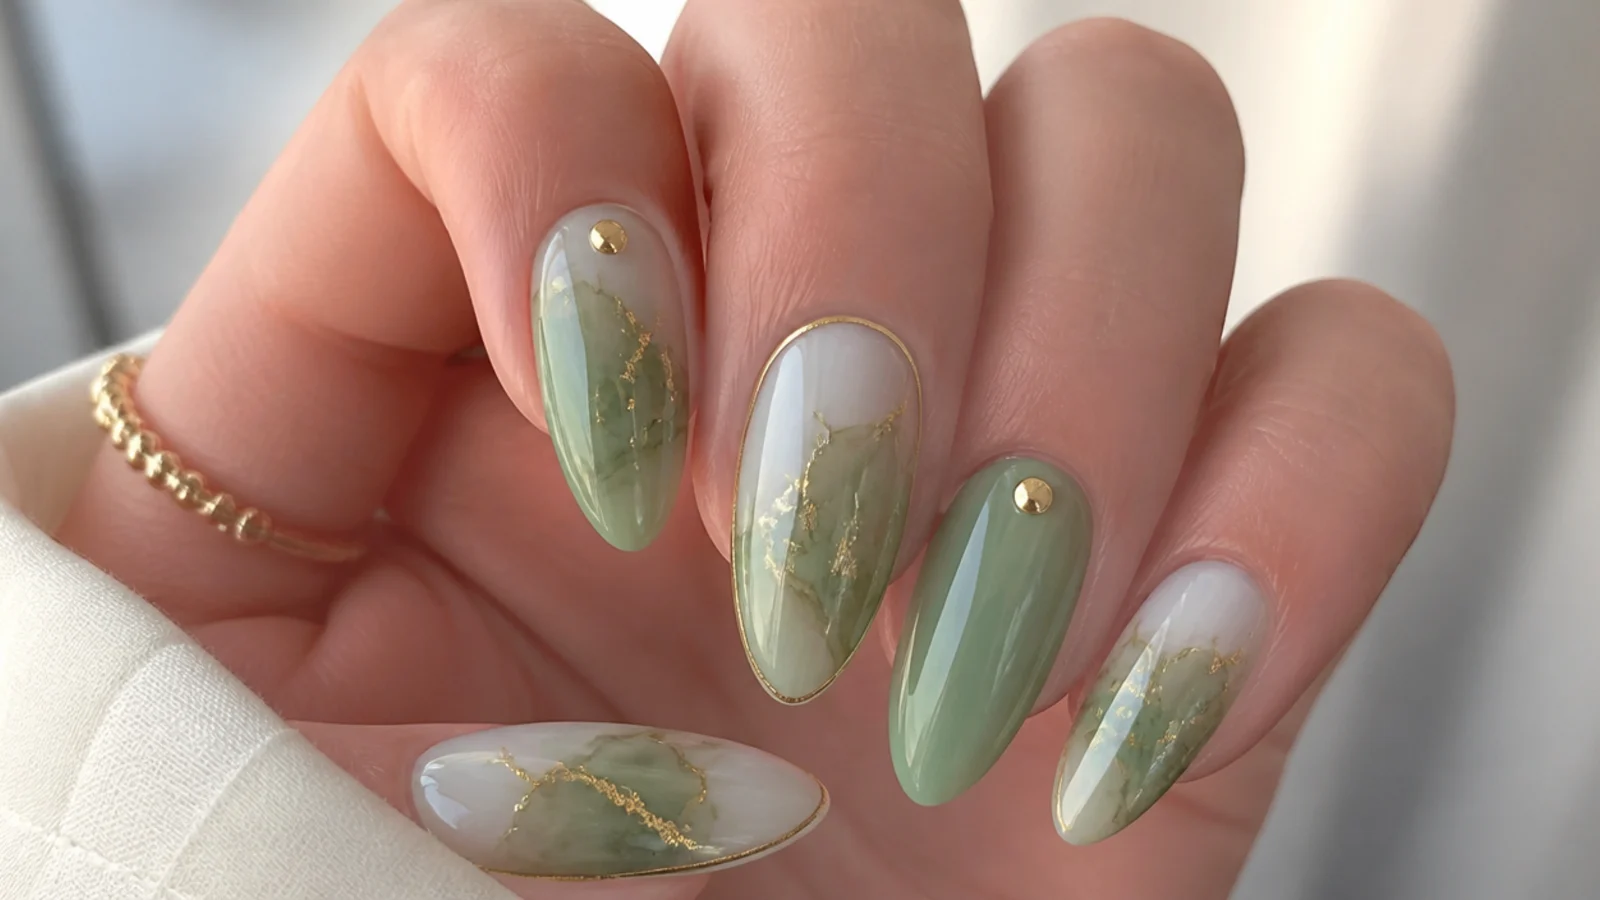
A jade-green marble with milky white swirls that looks like polished stone. Over a white base you brush uncured blooming gel and drop a little emerald and sage gel in loose curves; they bloom into soft green clouds with pale veins running through before you cure. A second thin pass deepens a few areas for that translucent jade depth. Keeping white space between the greens keeps it fresh, not solid. It works because the diffused greens mimic the layered, watery look of real jade, giving a rich yet soft finish that suits both summer and the holidays.
Who it suits: Anyone wanting a rich green stone effect.
Tip: Leave plenty of white showing so the jade reads translucent, not flat green.
10. Inky Blue Tie-Dye
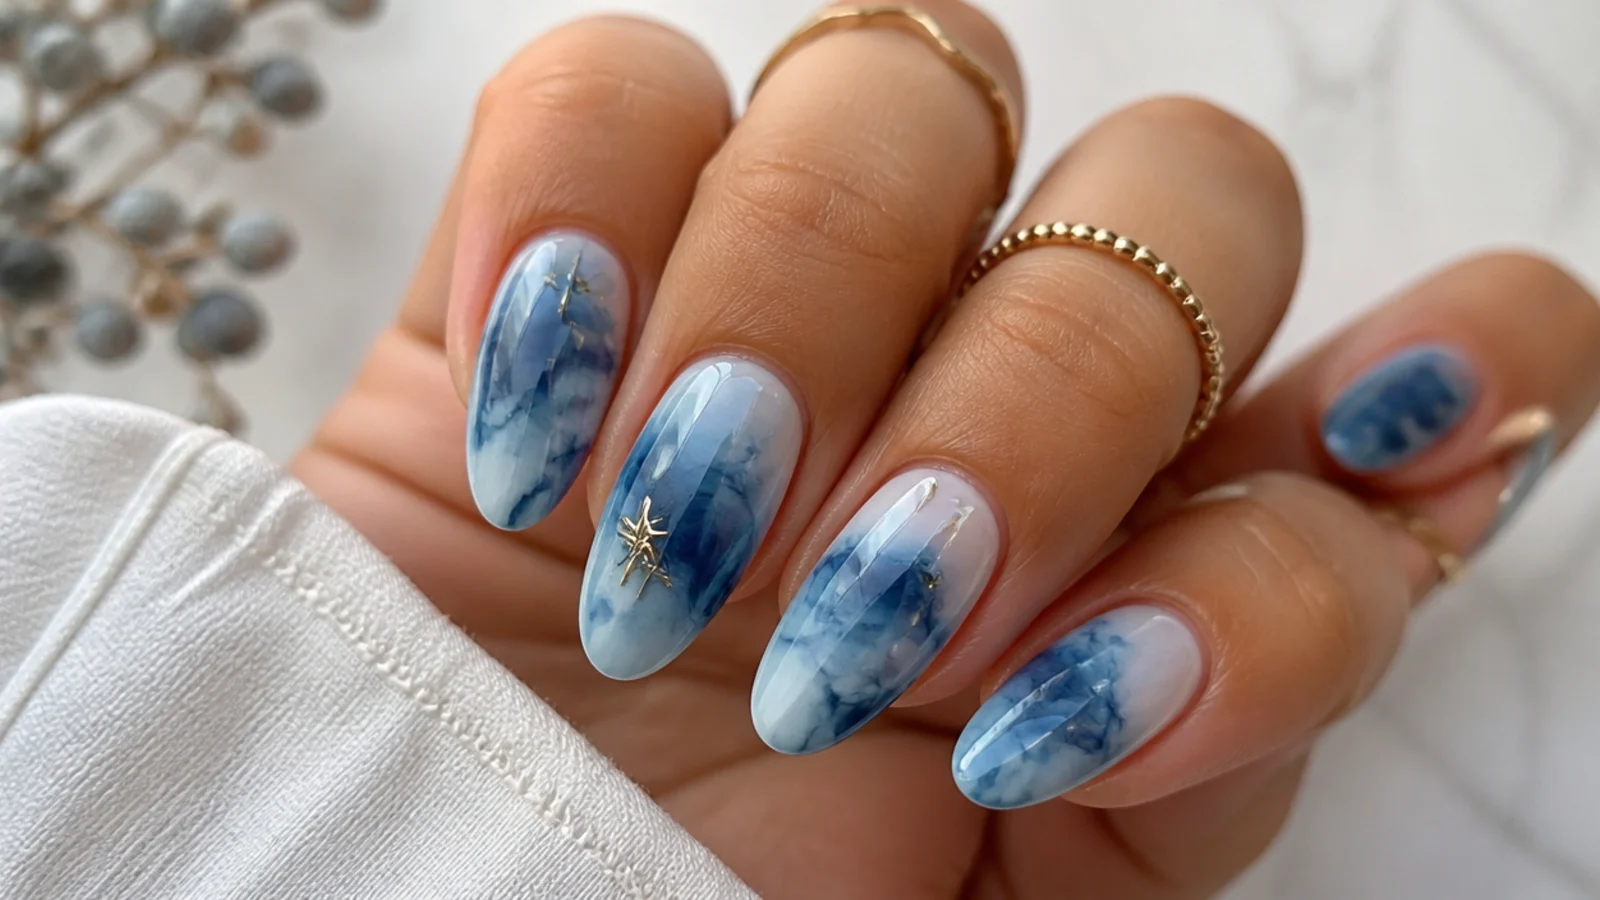
A bold blue tie-dye where navy and sky blue bleed into a white base like ink in water. Over the cured white you lay a thin layer of blooming gel, leave it uncured, and drop dots of cobalt and pale blue gel that spread and merge into swirling diffusion within about a minute before curing. Twisting a liner tip through the wet gel pulls tie-dye tendrils. Because the layer is thin, the color travels far for a full, watery spread. It works because the uncontrolled bloom is exactly what makes tie-dye look organic and cool, giving an artsy statement set.
Who it suits: Anyone wanting a bold, artsy statement.
Tip: Drop color and wait - the more you leave it uncured, the further it blooms.
11. Sunset Ombre Bloom
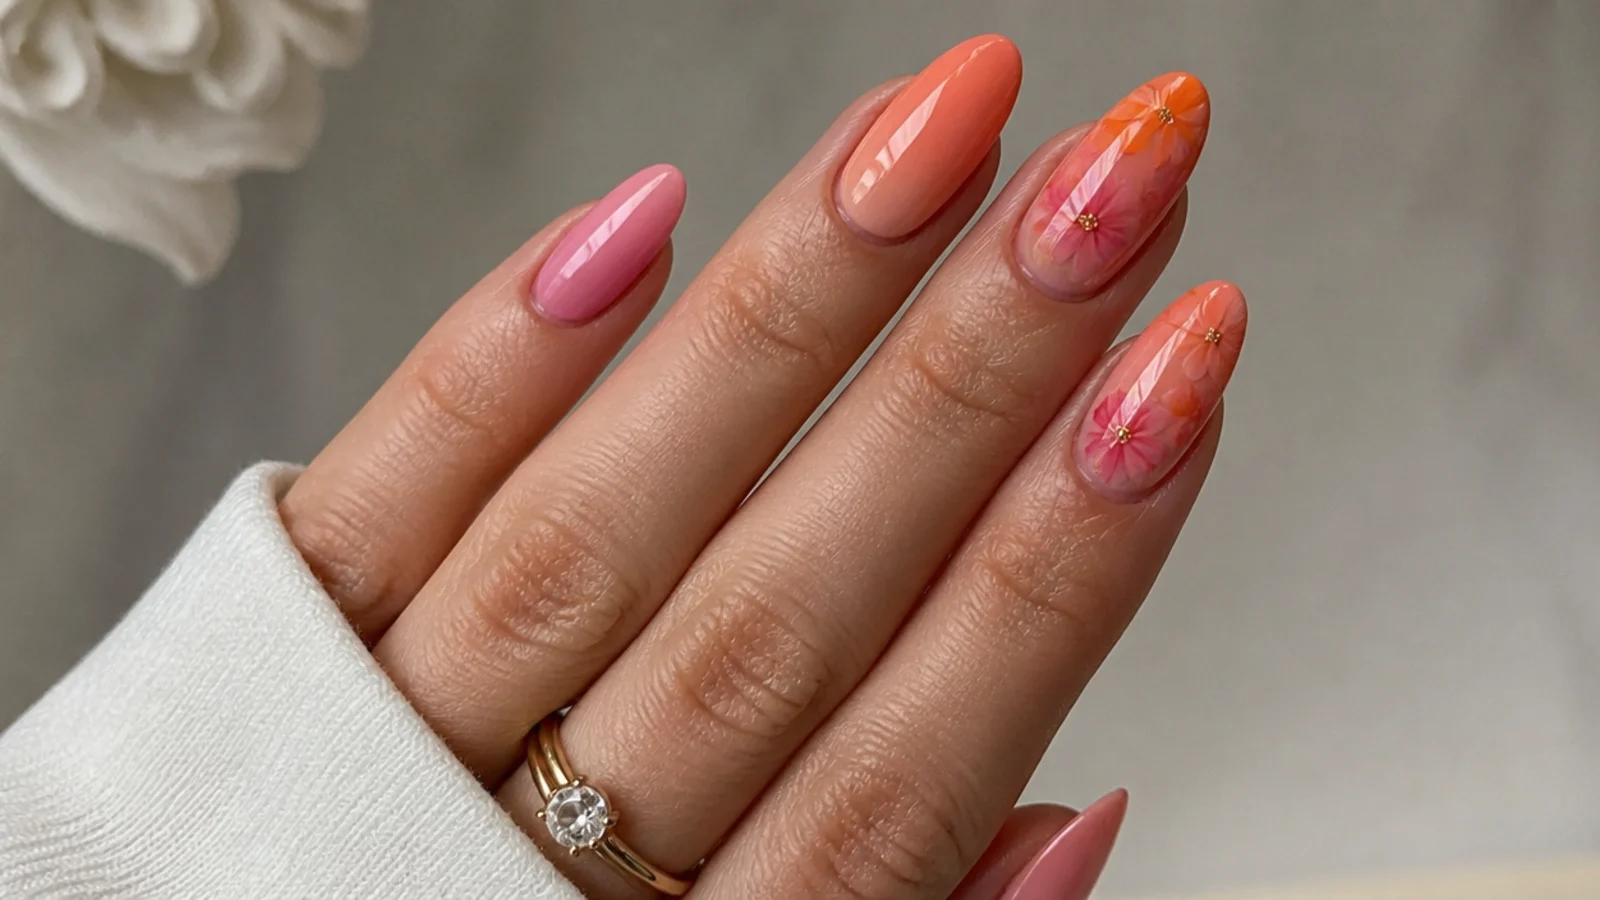
A warm sunset where coral, pink and soft orange bleed into one another across the nail. Over a cream base you brush uncured blooming gel and lay bands of coral, blush and tangerine gel side by side; they bloom into each other into a seamless, glowing gradient before you cure. A little white at the top keeps it airy like a hazy sky. Because the gel merges the bands for you, there is no hard line between the warm tones. It works because the diffused blend captures the melting colors of a real sunset, giving a happy, summery set.
Who it suits: Anyone wanting warm, summery color.
Tip: Place the warm tones touching so they bloom into each other with no gap or line.
12. Purple Ink Diffusion
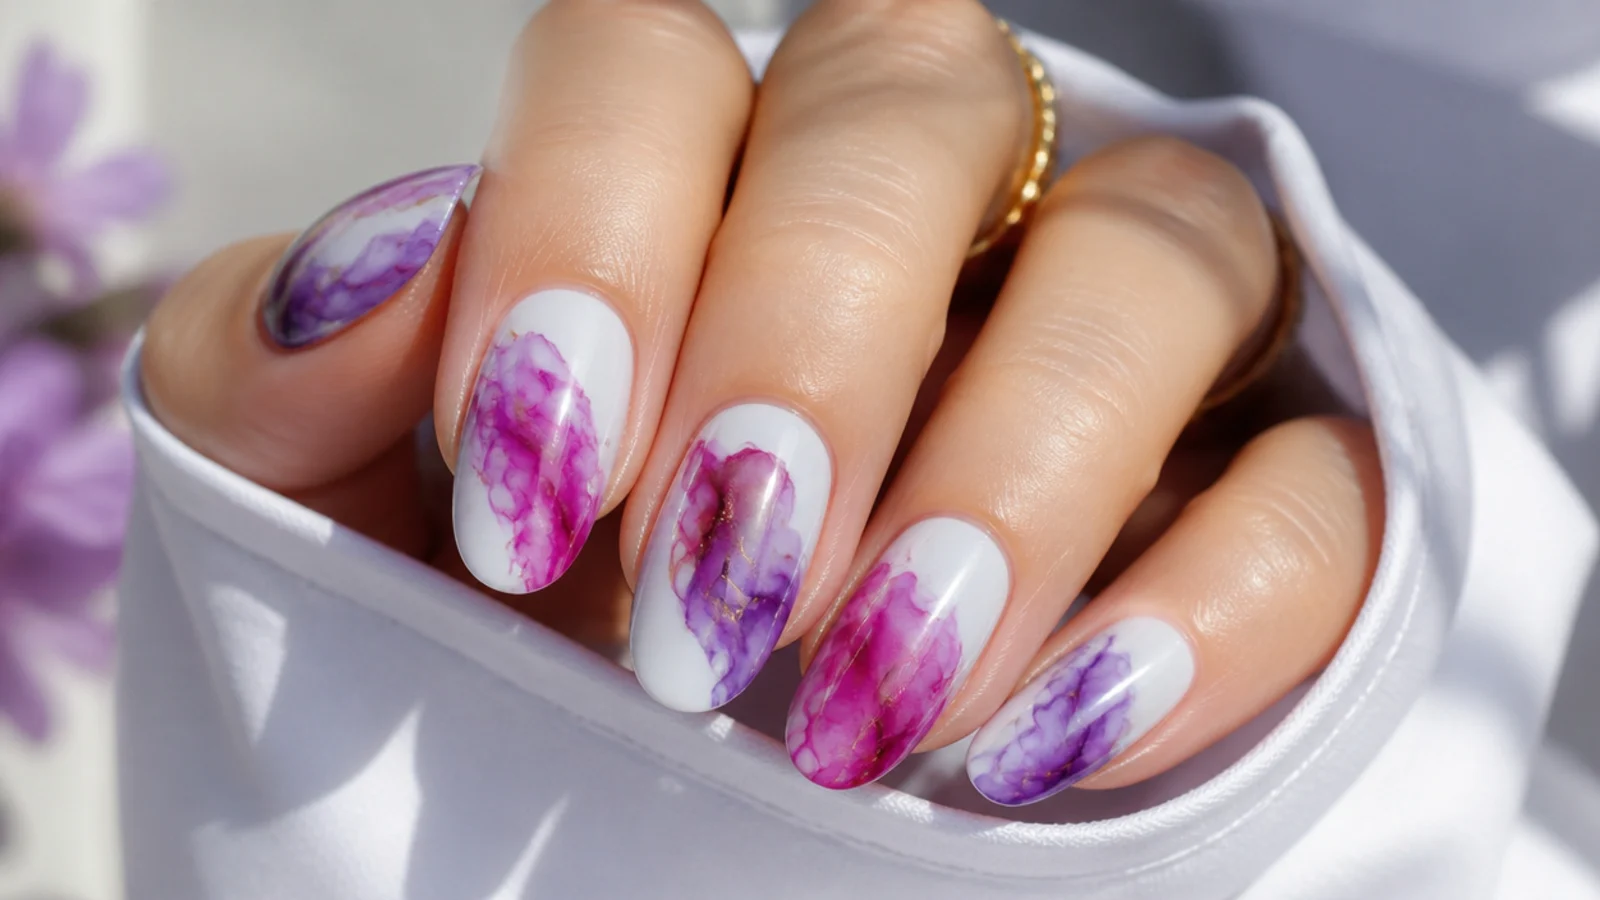
Deep purple and magenta ink blooming across a white base like dye in water. Over the cured white you lay uncured blooming gel and drop violet and pink-purple gel that spread into soft, veiny clouds within seconds before curing. Dragging a liner slowly through the wet gel stretches the ink into feathery streaks. Building a second sheer layer of a single purple adds depth without covering the diffusion. It works because the jewel-toned bloom reads rich and moody while staying soft-edged, giving a striking set that suits evenings, fall and anyone who loves darker color done in a watercolor way.
Who it suits: Anyone wanting rich, moody jewel tones.
Tip: Keep some white showing between the ink pools so the purples stay vivid, not muddy.
13. Rainbow Tie-Dye Bloom
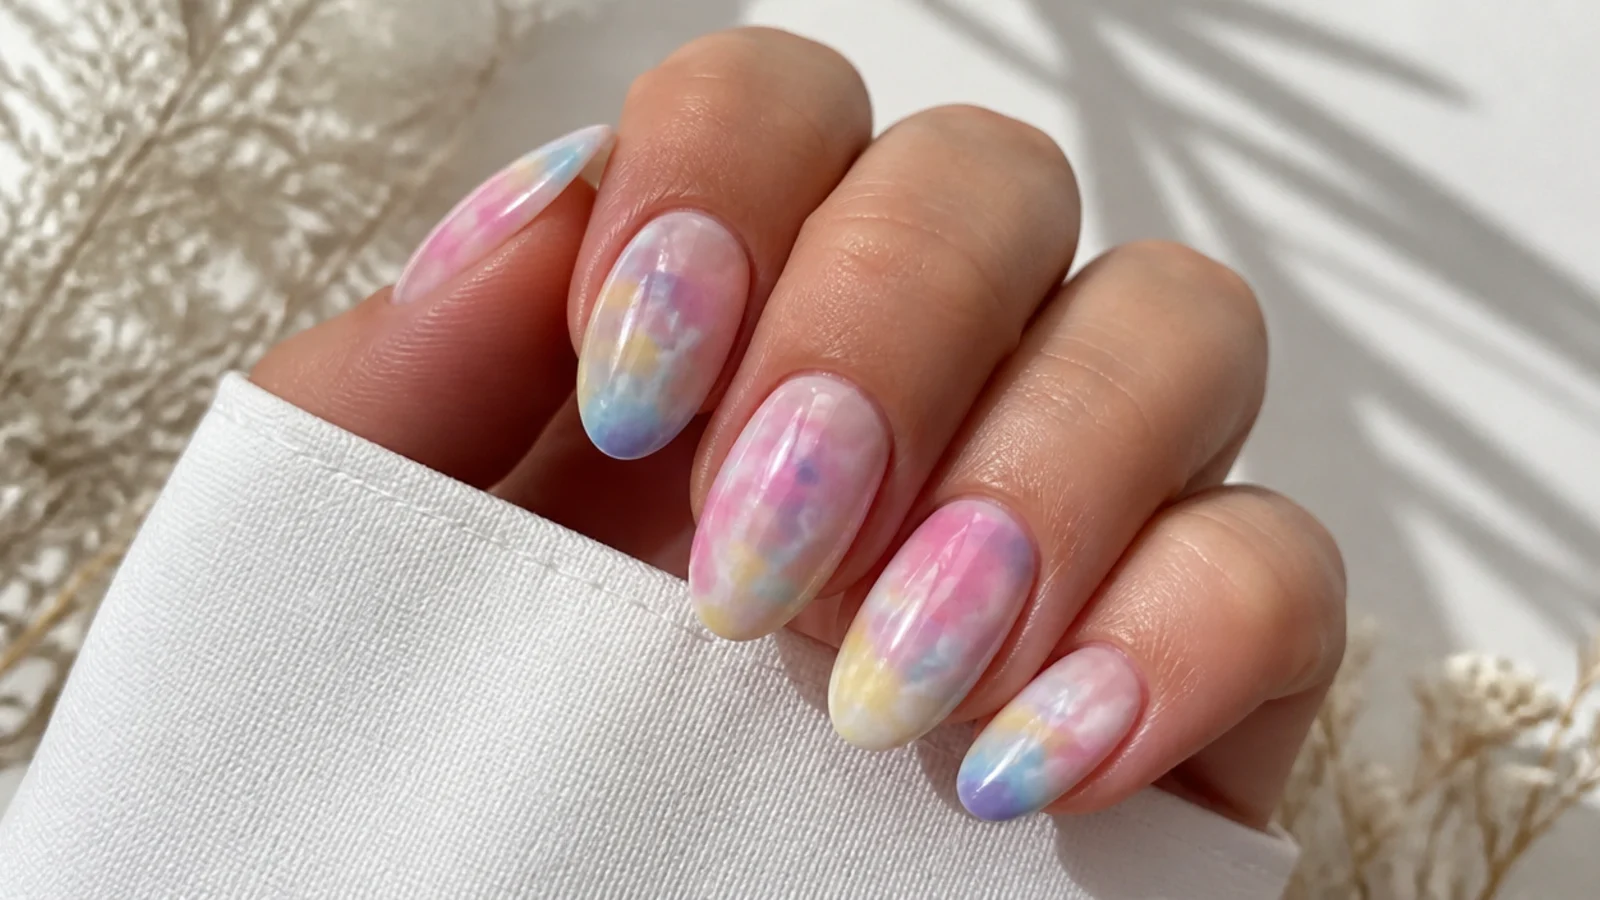
A soft pastel rainbow tie-dye with pink, peach, yellow, mint and lilac all blooming together. Over a white base you brush uncured blooming gel and dot each pastel gel in a loose arc; they diffuse and merge at the edges into a dreamy, multicolor haze before you cure. Keeping each dot small stops the colors turning gray where they meet. A thin top layer of clear blooming gel evens the finish. It works because the gentle diffusion keeps a busy rainbow soft and cohesive rather than clashing, giving a playful, cheerful set that suits spring and summer.
Who it suits: Anyone wanting playful, all-over color.
Tip: Use small dots with a little space between colors so they blend, not brown, at the seams.
14. Classic Red Bloom
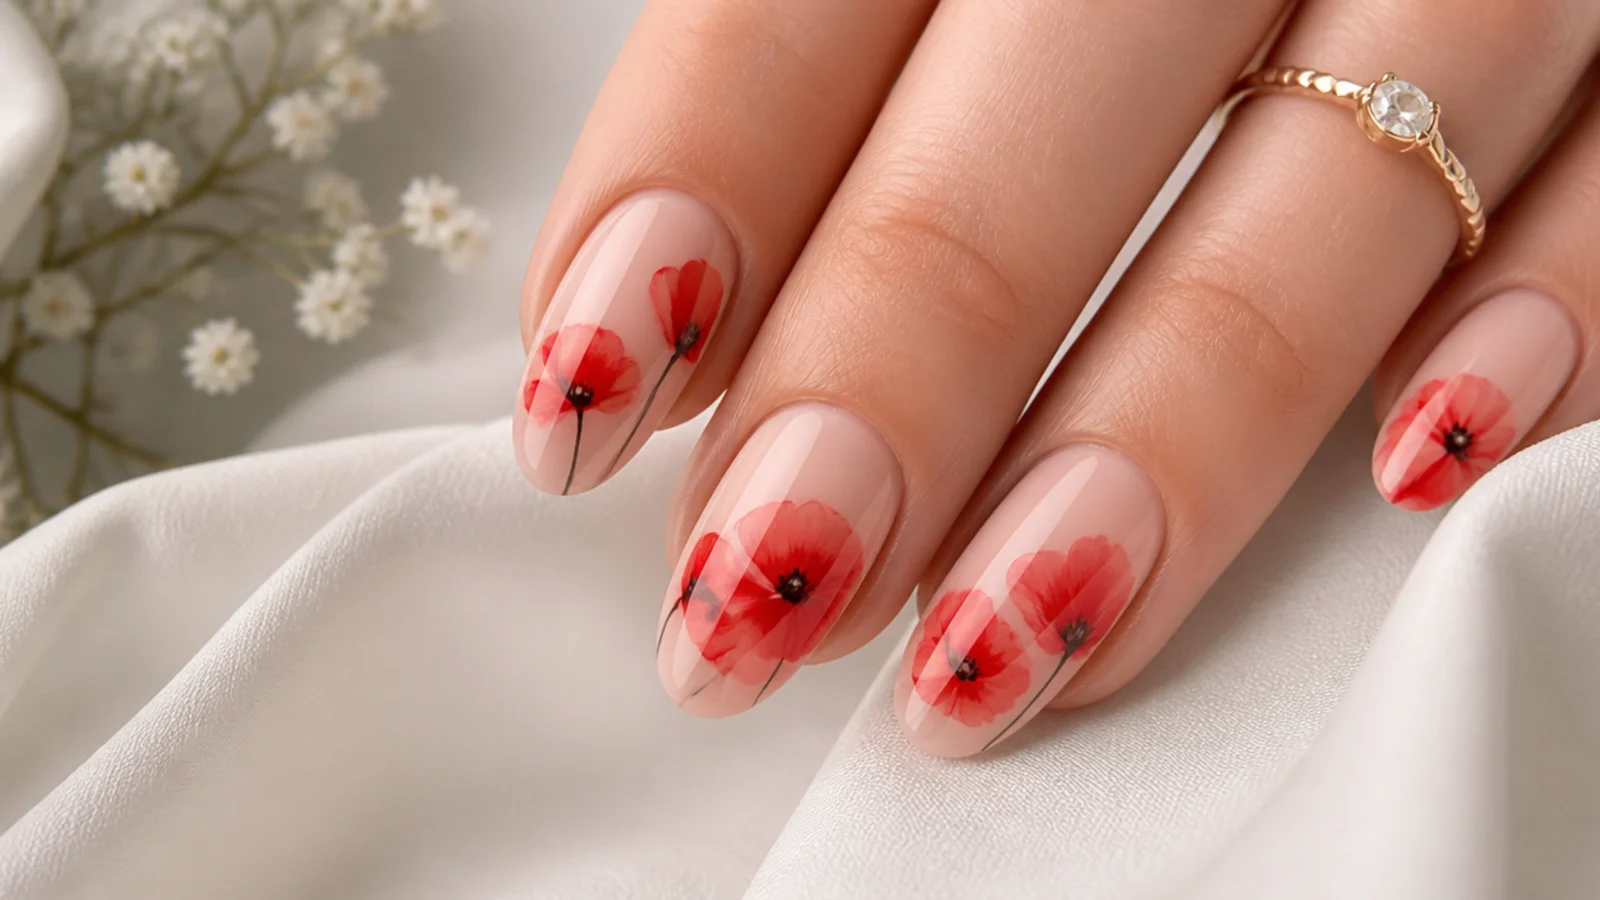
A single red poppy diffused over a nude base for a bold yet soft floral. Over the cured nude you lay uncured blooming gel and drop true red gel in loose petal shapes; they bloom into feathery, watery edges before curing, with a fine black liner adding a dark center once set. Because red is strong, using just a little keeps the bloom from flooding into a solid red blob. Building one clean second petal layer deepens the flower. It works because the soft red edges make a classic color feel artsy and modern, giving a striking accent that suits any season.
Who it suits: Anyone wanting a bold flower in a soft finish.
Tip: Red pigments are strong - start with less color than you think and let it spread.
15. Baby Blue Watercolor
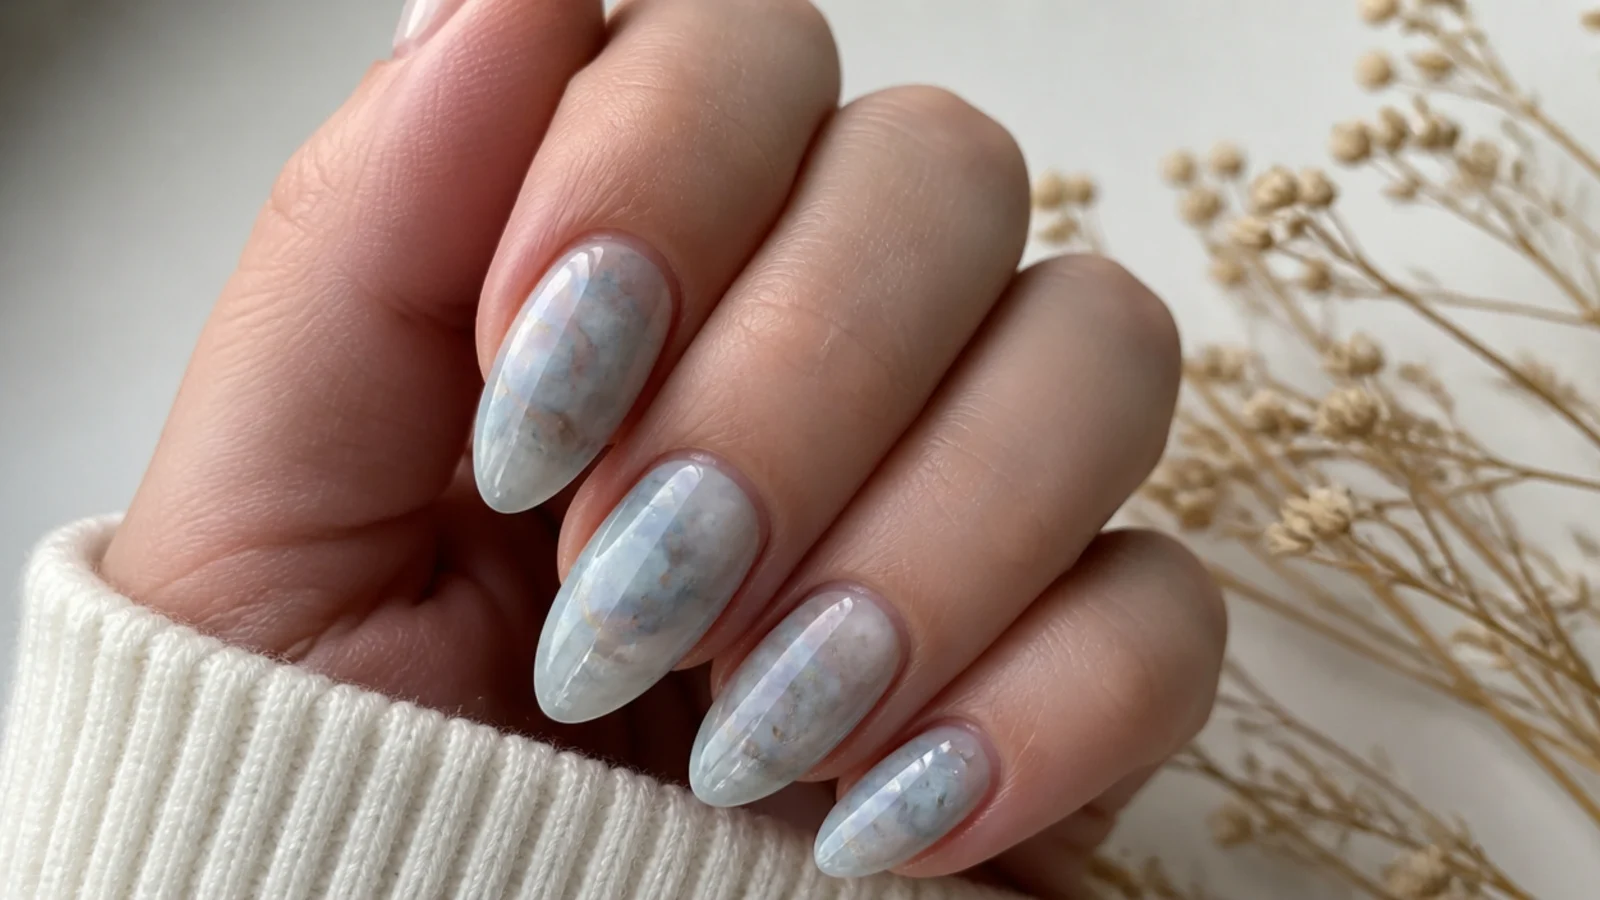
A soft baby-blue wash that looks like watercolor paint feathered across the nail. Over a sheer white base you brush uncured blooming gel and touch in a little sky-blue gel at the tips or corners; it blooms into a gentle, cloudy fade before you cure. Leaving parts of the nail nearly clear keeps it light and airy rather than solid color. A second whisper of blue in one spot adds subtle depth. It works because the diffused wash gives a calm, minimalist take on color that reads soft and expensive, suiting everyday wear and anyone new to nail art.
Who it suits: Anyone wanting a soft, minimalist color wash.
Tip: Leave clear areas unbloomed for an airy watercolor rather than a full color.
16. White Cloud Bloom
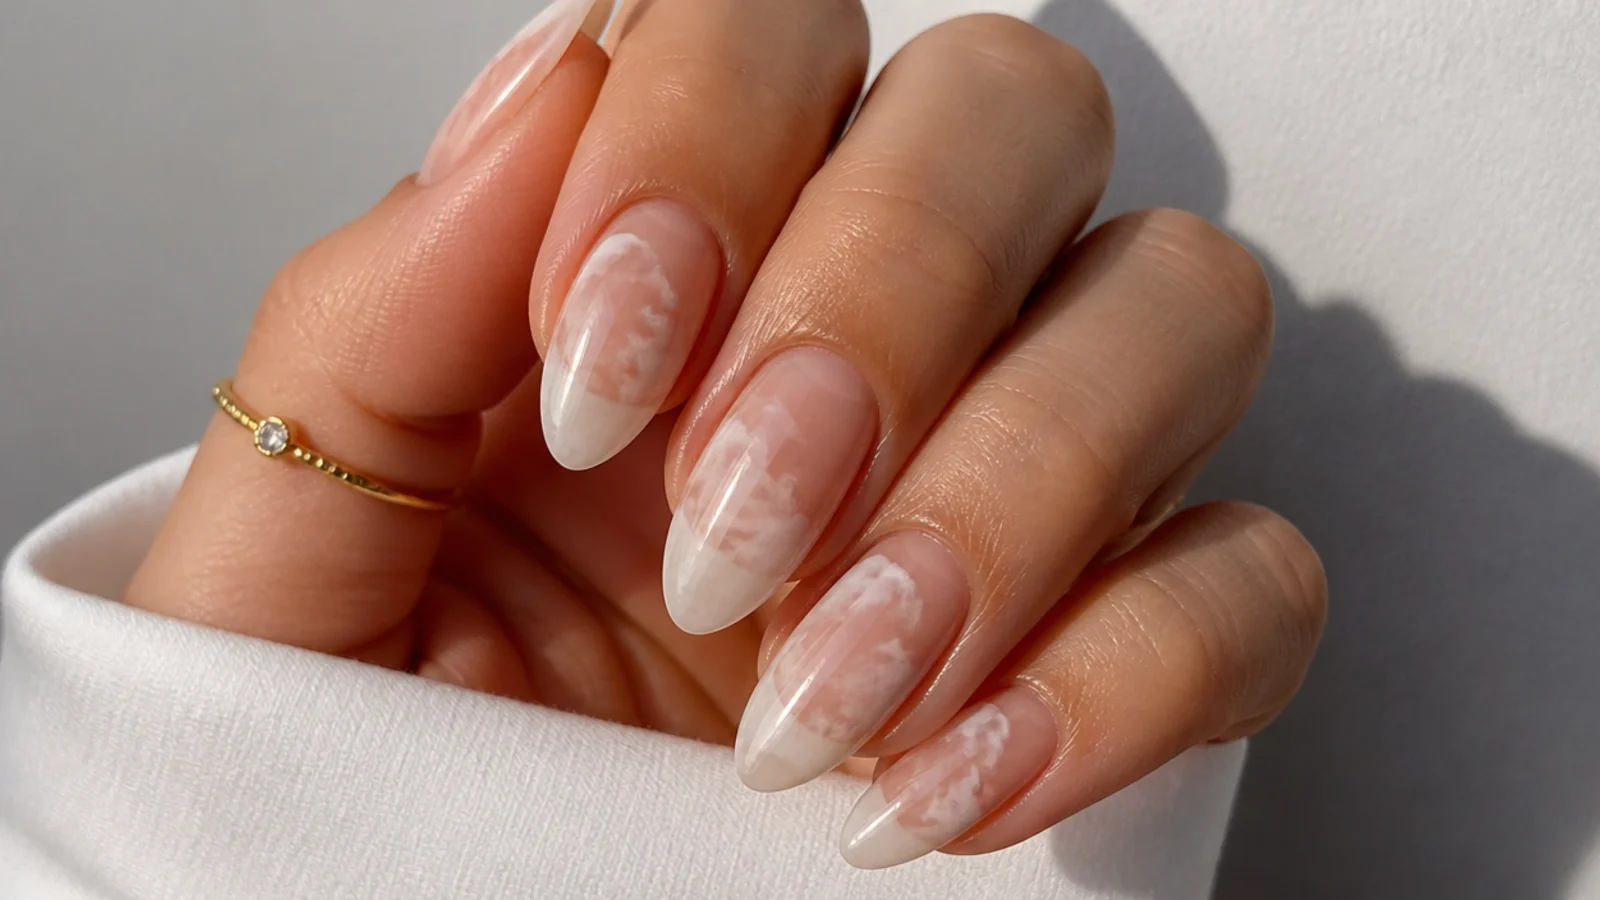
Soft white clouds diffused over a milky nude base for a subtle, dreamy finish. Over the cured nude you lay uncured blooming gel and dab a little white gel in loose, uneven shapes; it blooms into hazy, soft-edged clouds before curing, with the nude showing through for depth. Keeping the white sheer and the layer thin gives that gentle, sky-like haze rather than opaque paint. It works because the barely-there diffusion reads clean and modern, a quiet neutral that suits brides, minimalists and anyone wanting nail art so soft it looks almost like a natural cloud in the nail.
Who it suits: Anyone wanting a subtle, dreamy neutral.
Tip: Use a sheer white and a thin layer so the clouds stay soft, not chalky.
17. Black Ink Bloom
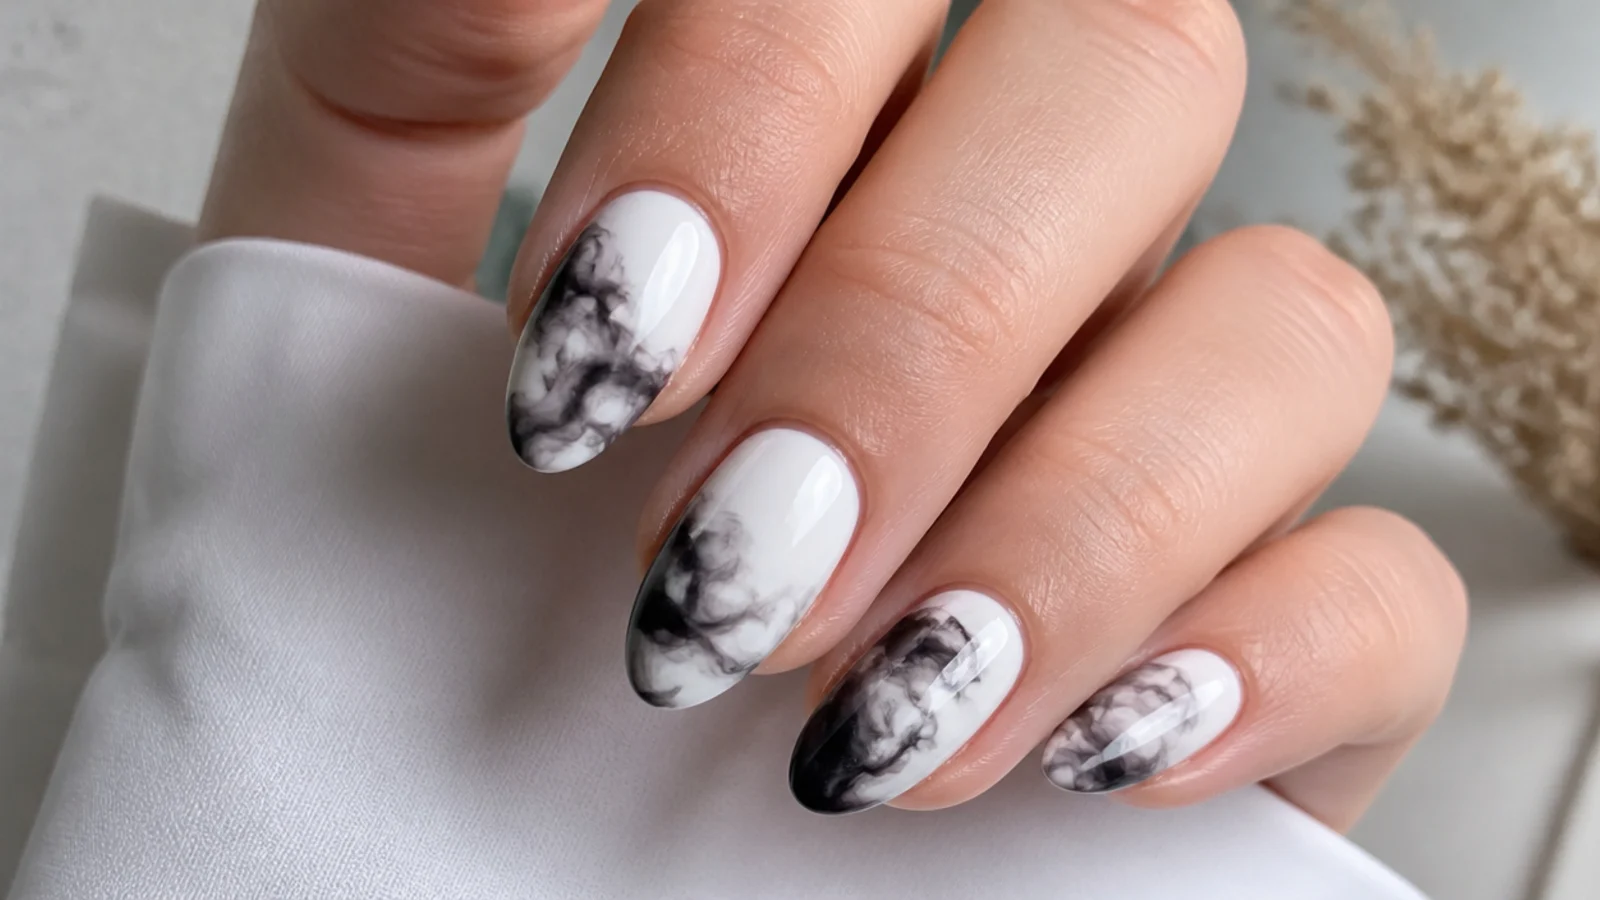
Dramatic black ink blooming across a white base like sumi brush painting. Over the cured white you brush uncured blooming gel and drop a little black gel that spreads into smoky, feathered clouds within seconds before you cure. Pulling a liner through the wet gel stretches the ink into elegant tendrils and splatter. Because black is the strongest pigment, a tiny amount blooms a long way, so restraint keeps white space in the design. It works because the high-contrast diffusion looks like real ink on paper, giving an edgy, artistic set that suits evenings, fall and anyone who loves a graphic look softened.
Who it suits: Anyone wanting edgy, high-contrast art.
Tip: The tiniest touch of black blooms far - add one dot, wait, then decide if you need more.
18. Emerald Green Bloom
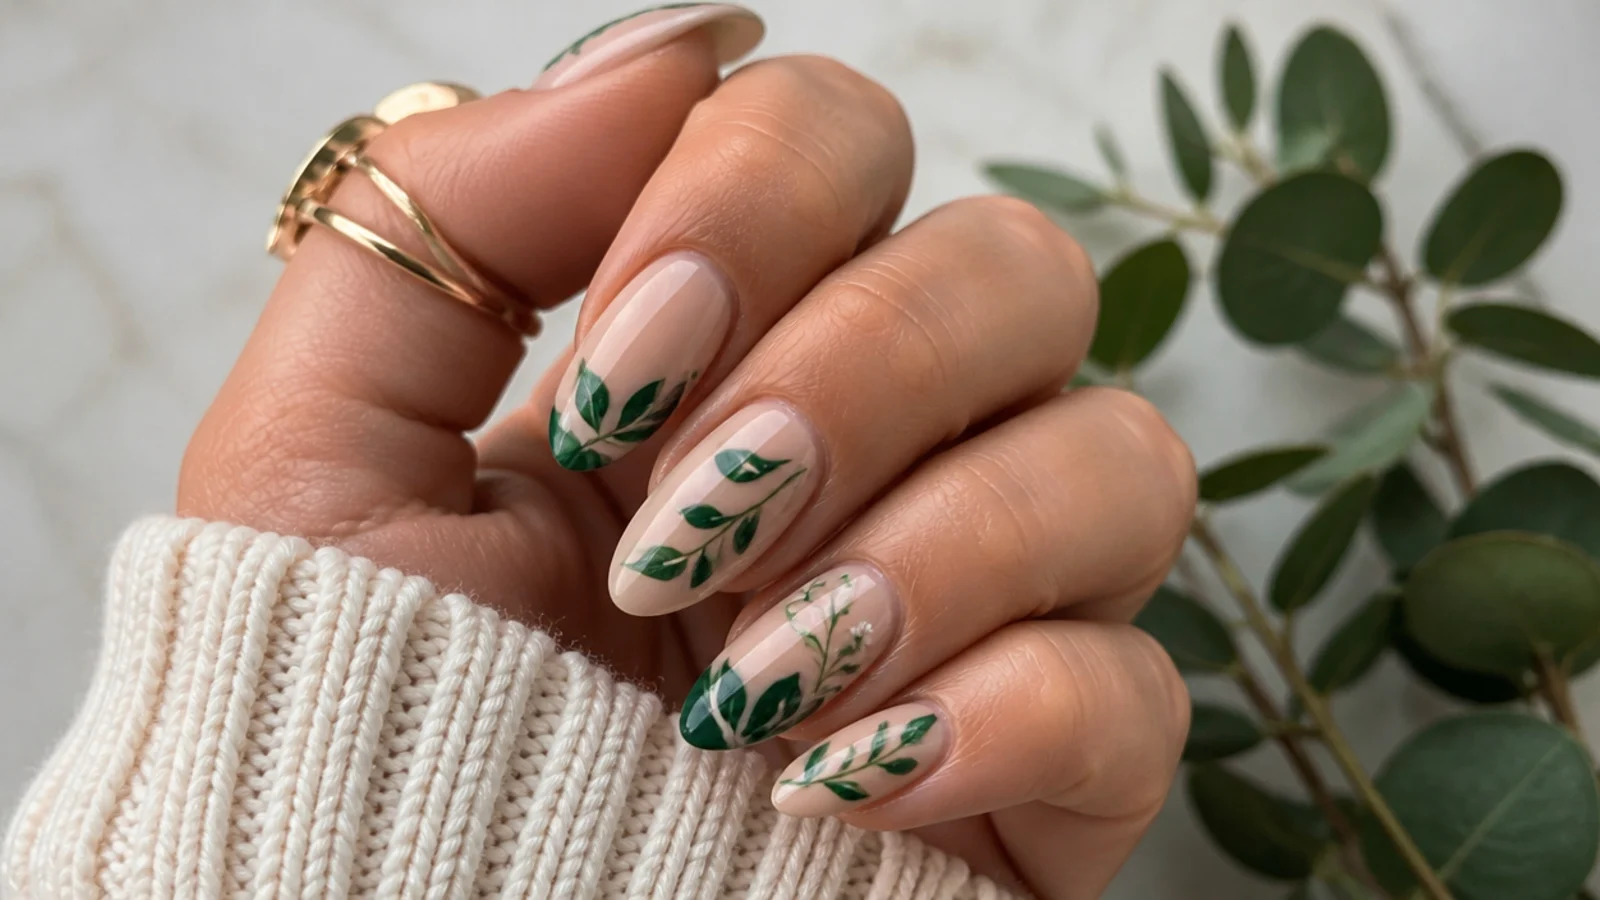
Emerald and sage foliage diffused over a warm nude base like a pressed-leaf print. Over the cured nude you lay uncured blooming gel and dot deep green and soft sage gel in leaf clusters; they bloom into soft, layered greenery before curing, with a fine liner adding a few stems and veins once set. Mixing a darker and a lighter green gives natural depth as they spread. It works because the diffused greens read like real watercolor botanicals rather than flat painted leaves, giving a fresh, organic set that suits summer, the holidays and anyone drawn to greenery over flowers.
Who it suits: Anyone wanting botanical greenery.
Tip: Combine two greens so the foliage blooms with natural light and dark depth.
19. Terracotta Brown Bloom
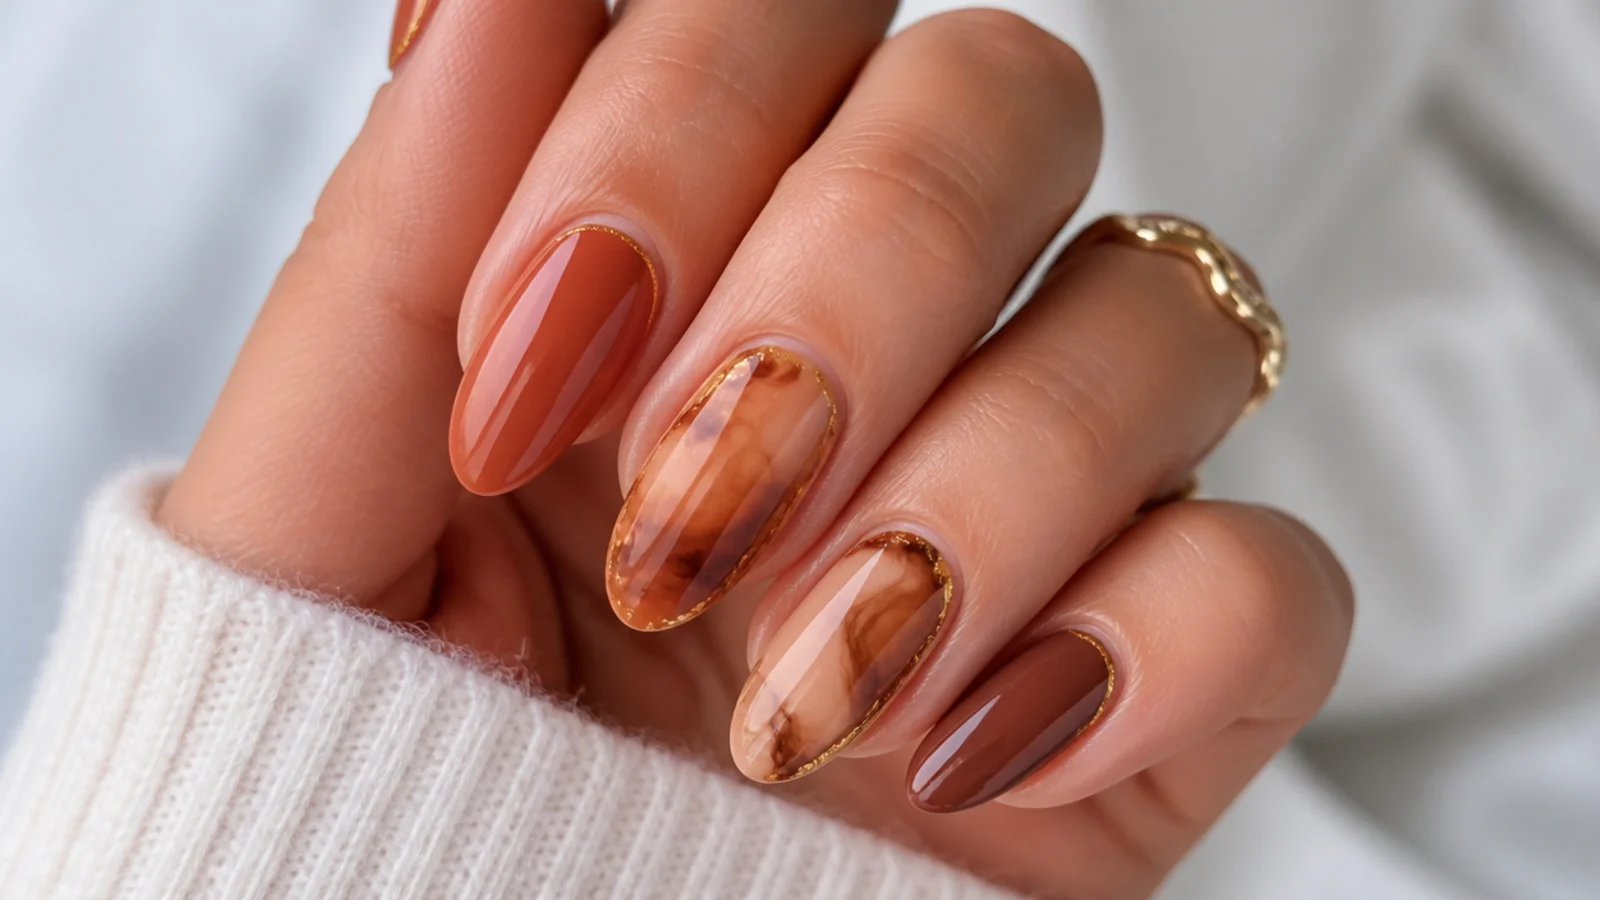
A warm terracotta and caramel marble that feels earthy and modern. Over a cream base you brush uncured blooming gel and swirl in rust, brown and a touch of cream gel; they bloom into soft, sandy clouds with subtle veining before you cure. A second thin layer deepens a few areas for that layered clay look. Keeping cream showing through stops the browns going flat. It works because the diffused warm neutrals read cozy and expensive at once, a soft stone effect that suits fall, autumn wardrobes and anyone wanting color that is warm but still understated.
Who it suits: Anyone wanting warm, earthy neutrals.
Tip: Let cream areas stay lighter so the terracotta looks like layered clay, not solid brown.
20. Colorful Confetti Bloom
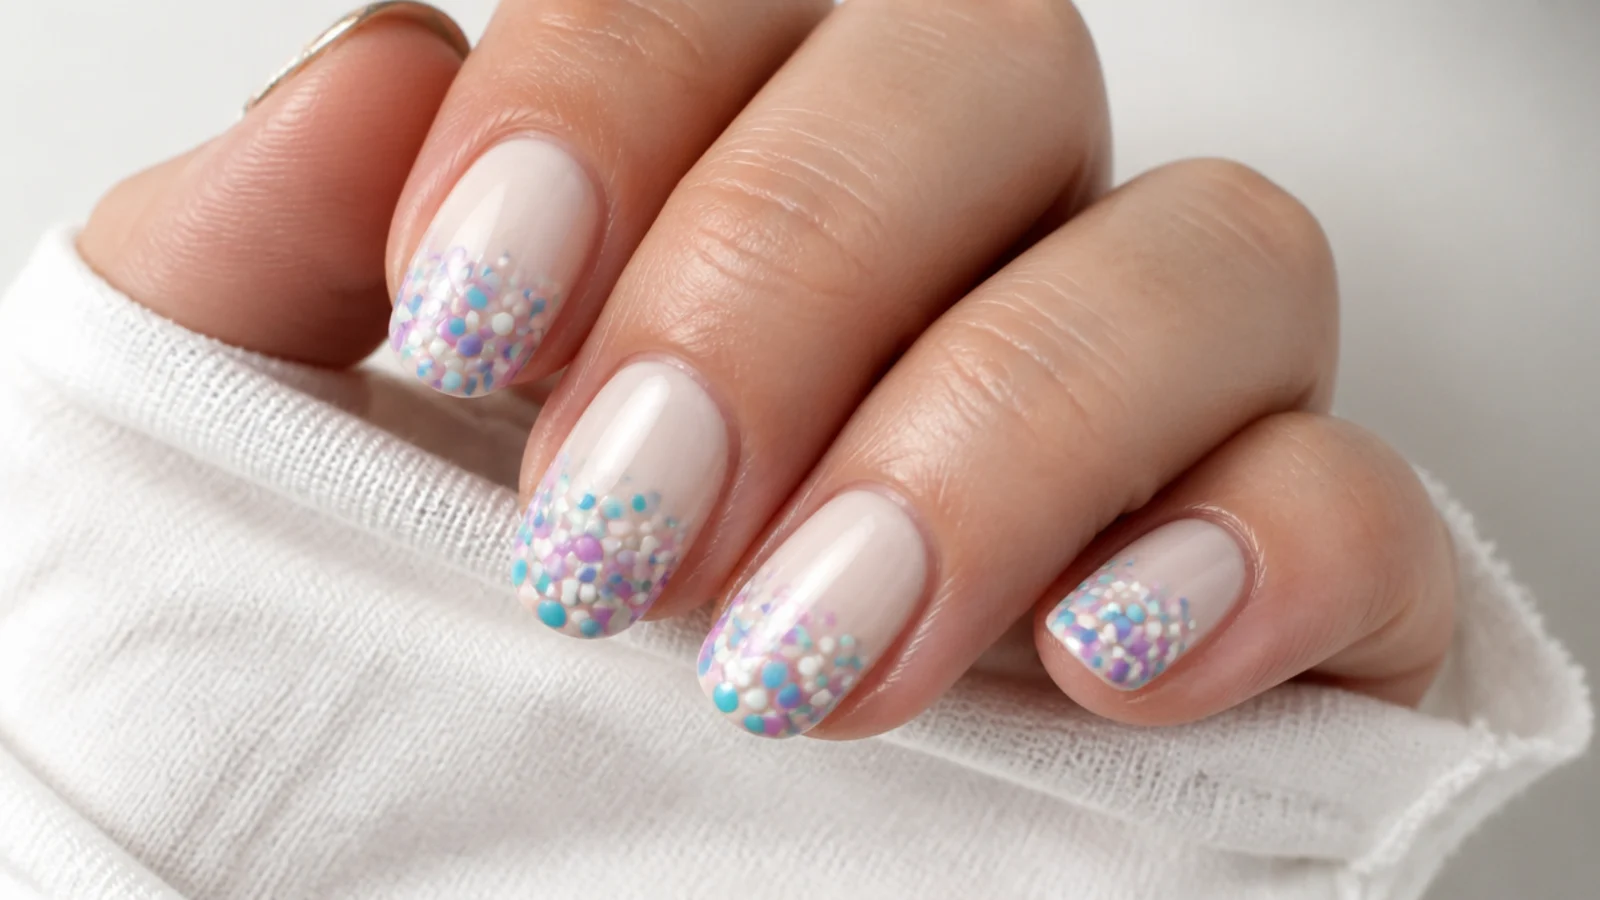
Scattered dots of every color blooming into soft confetti across a white base. Over the cured white you lay uncured blooming gel and drop small dots of pink, blue, yellow, green and purple gel spaced apart; each blooms into a soft, round halo before you cure. Keeping the dots small and separated lets each color stay bright with a diffused edge instead of blending into gray. It works because the playful, floating dots feel celebratory yet stay soft thanks to the bloom, giving a fun, party-ready set that suits birthdays, summer and anyone who wants cheerful color without a solid bright.
Who it suits: Anyone wanting fun, celebratory color.
Tip: Space the dots out - overlapping colors bloom into muddy brown at the edges.
21. Autumn Maple Bloom
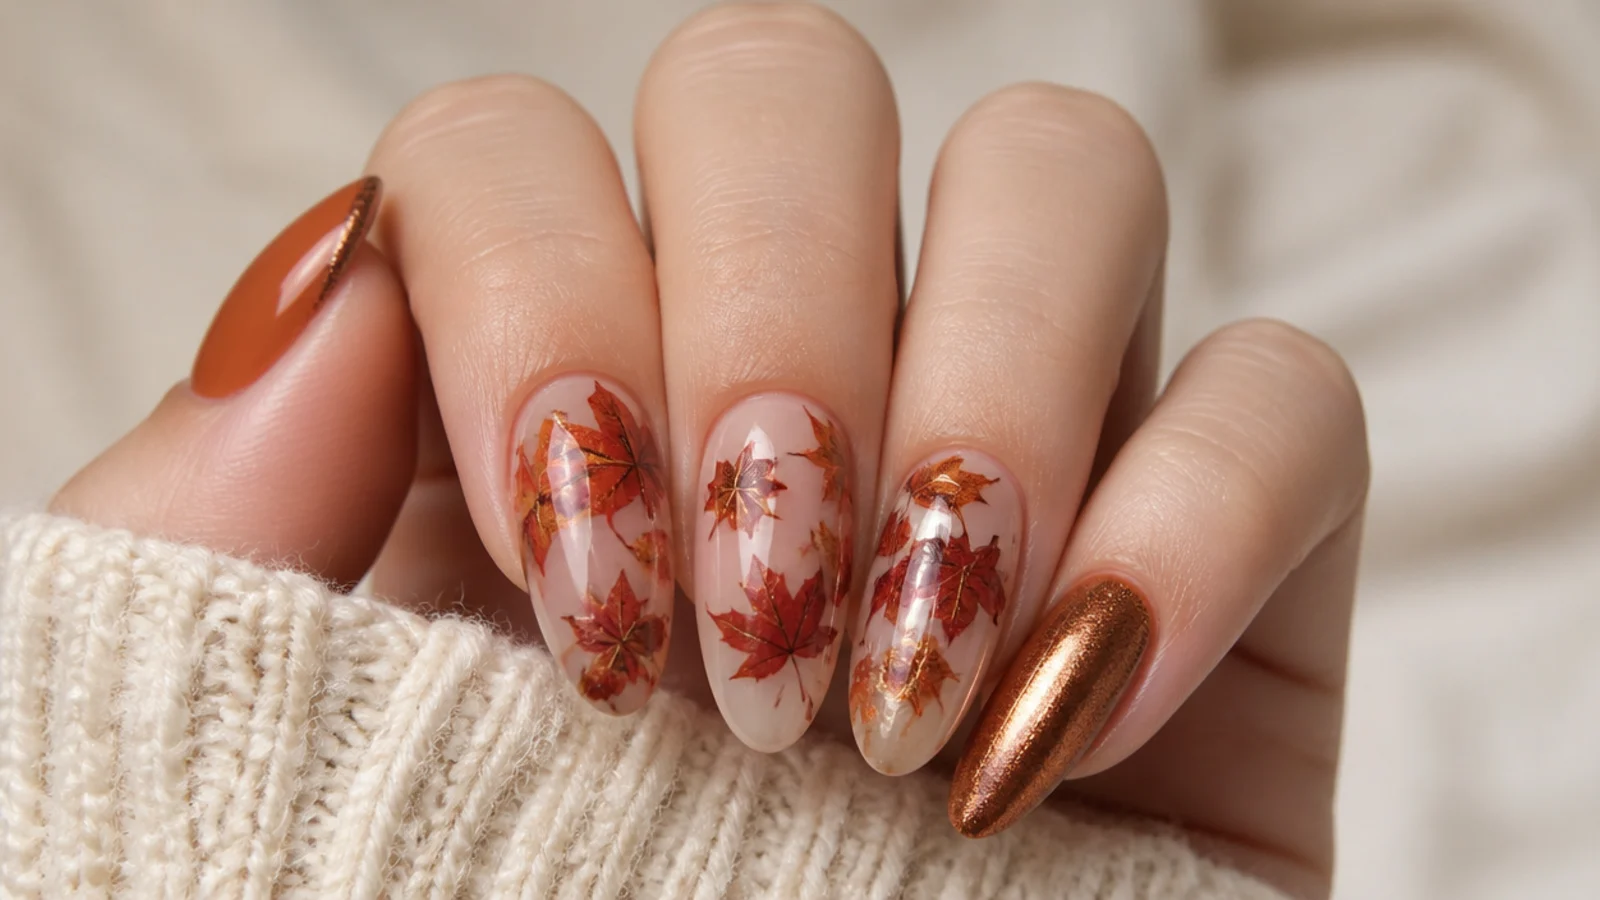
Diffused maple leaves in burnt orange, red and brown for a soft fall set. Over a cream base you brush uncured blooming gel and dot warm orange, rust and red gel in loose leaf shapes; they bloom into soft, layered foliage before you cure, with a fine brown liner adding stems and veins once set. Overlapping two warm tones gives each leaf that turning-color depth. It works because the diffused edges make autumn leaves look painted in watercolor rather than stamped, giving a cozy seasonal set that suits fall, Thanksgiving and anyone wanting warm color done softly.
Who it suits: Anyone wanting a cozy fall set.
Tip: Layer orange over red so the leaves bloom with that turning-color gradient.
22. Christmas Poinsettia Bloom
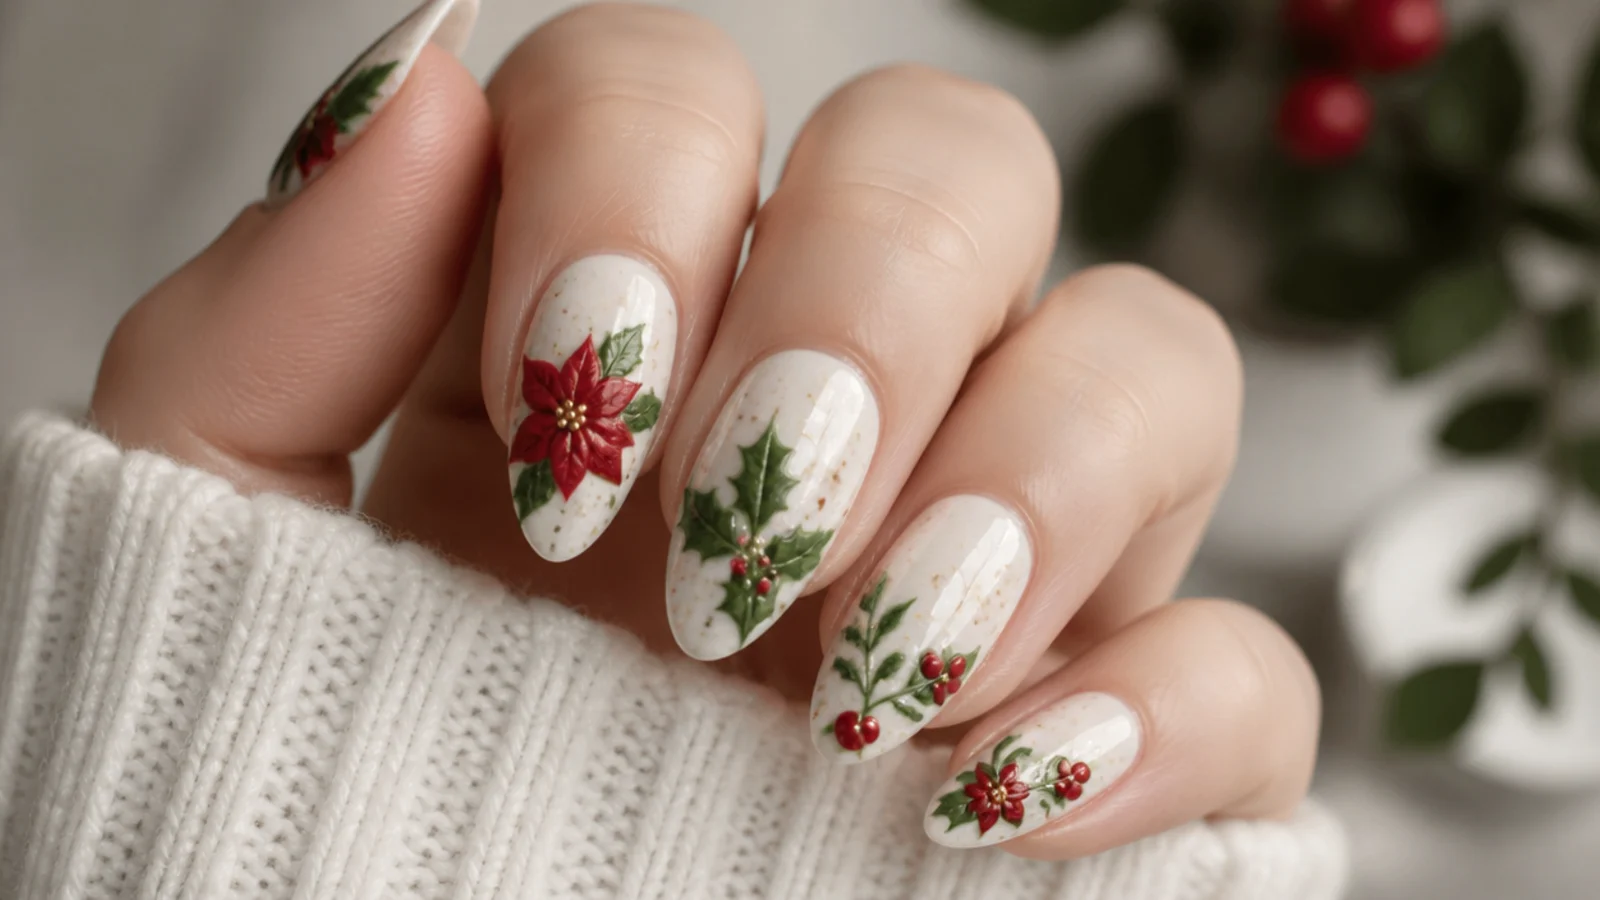
A red poinsettia with green holly diffused over a soft white base for the holidays. Over the cured white you lay uncured blooming gel and drop red gel in pointed petal shapes with green dots at the side; both bloom into soft, watery leaves before you cure, then gold dots or a few micro-beads finish the center once set. Using a little red keeps the bloom from flooding into a solid mass. It works because the soft-edged flower feels festive but elegant rather than cartoonish, giving a pretty Christmas set that suits the season and holiday parties.
Who it suits: Anyone wanting an elegant holiday set.
Tip: Add gold accents after curing the bloom so they sit crisp over the soft petals.
23. Spring Pastel Bloom
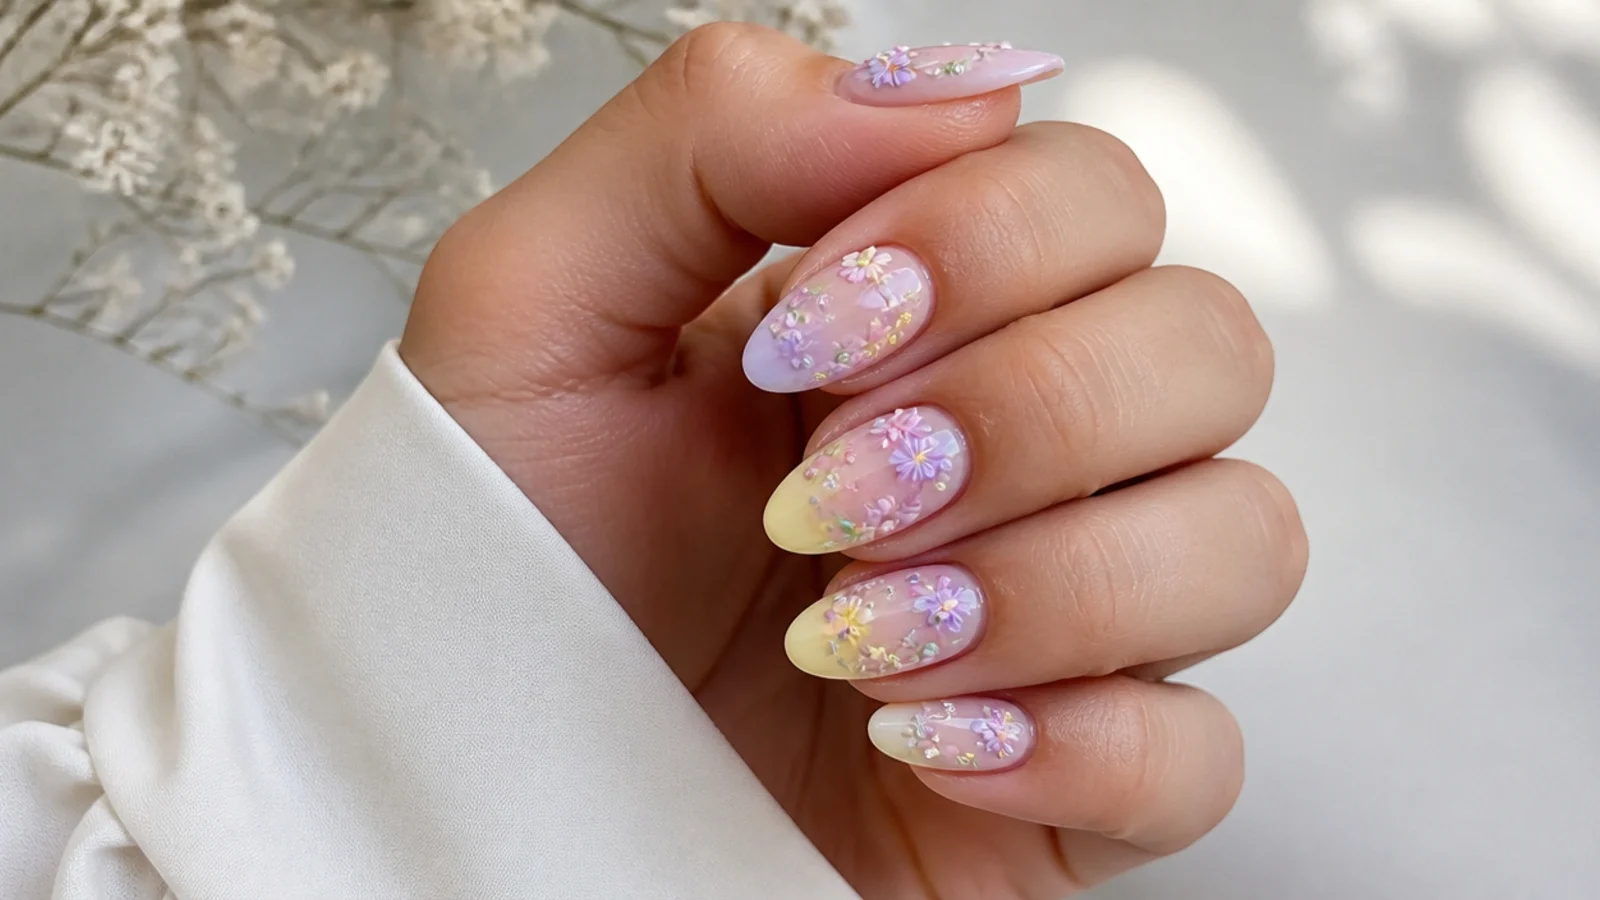
A soft mix of pastel flowers - pink, buttery yellow and lilac - blooming across a white base. Over the cured white you brush uncured blooming gel and dot each pastel gel in little five-petal clusters; they diffuse into soft blossoms before you cure, with tiny centers added once set. Keeping each flower small and spaced keeps the set airy and light. It works because the gentle pastel diffusion feels fresh and springlike without any one color dominating, giving a pretty, cheerful set that suits Easter, spring weddings and anyone who wants a soft floral mix rather than a single flower.
Who it suits: Anyone wanting an airy pastel floral mix.
Tip: Keep flowers small and spaced so the pastels stay distinct as they bloom.
24. Short Nude Bloom Accent
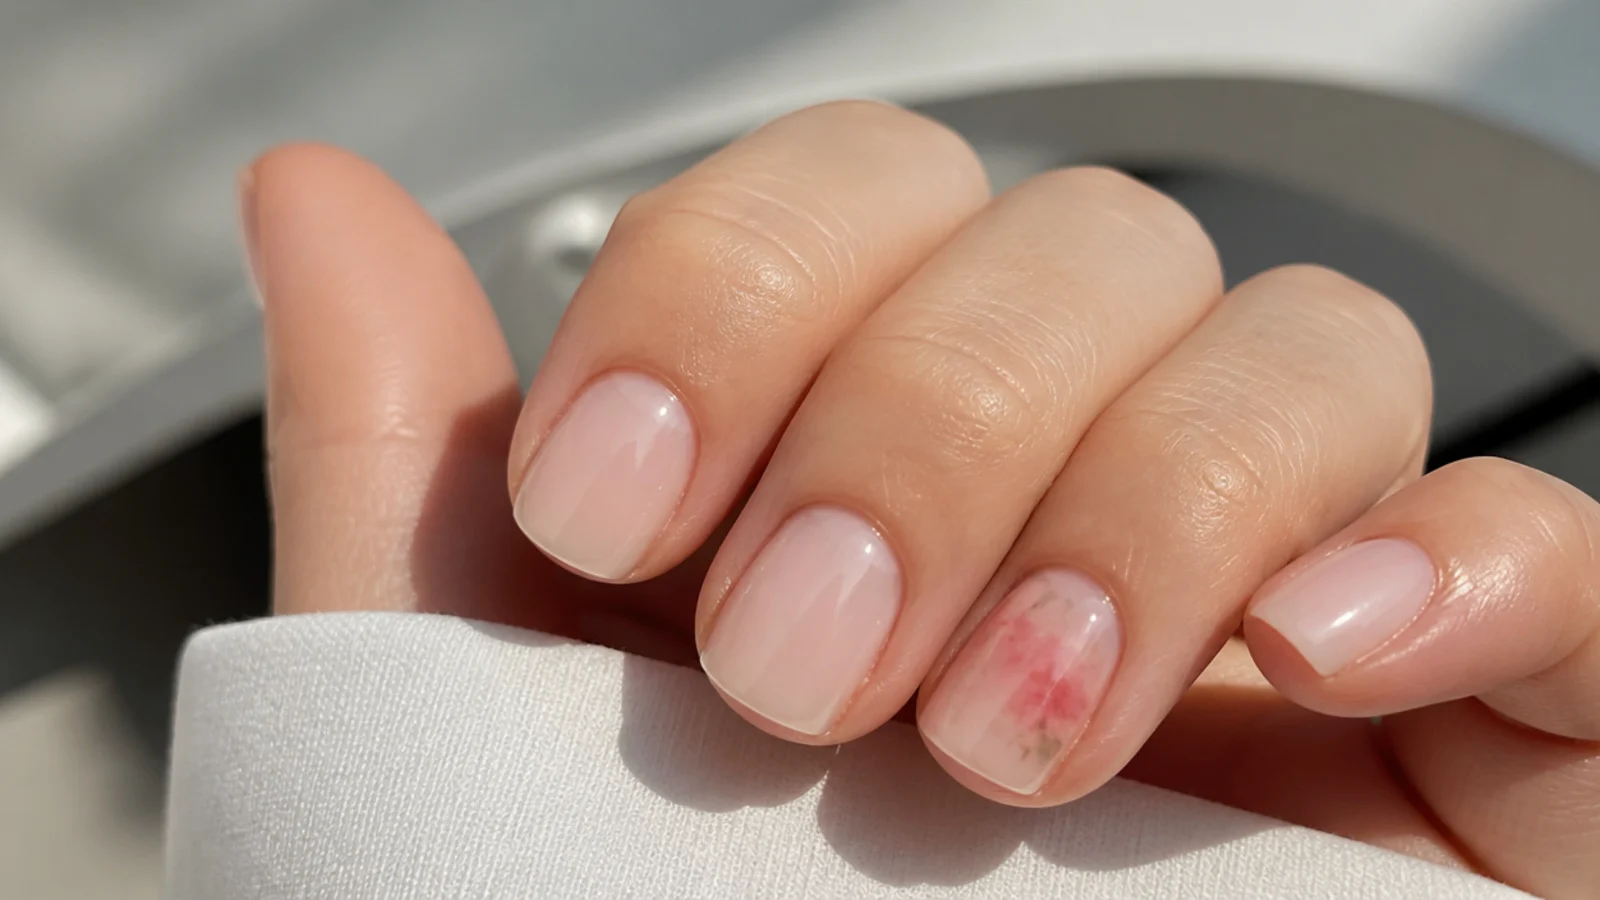
A practical short set in soft nude with a single diffused floral accent nail. Over a nude base on all nails, you leave four clean and, on one, brush uncured blooming gel and drop a small pink or blue bloom that spreads into a soft flower before curing. The short length keeps it neat and office-friendly while the one accent adds interest. Because only one nail carries the art, it is quick, low-cost and easy to live with. It works because the soft bloom looks intentional and modern on short nails, suiting anyone new to the technique or wanting subtle art.
Who it suits: Anyone wanting a subtle, low-key accent.
Tip: Put the bloom on the ring finger so the single accent reads balanced across the hand.
25. Summer Coral Bloom
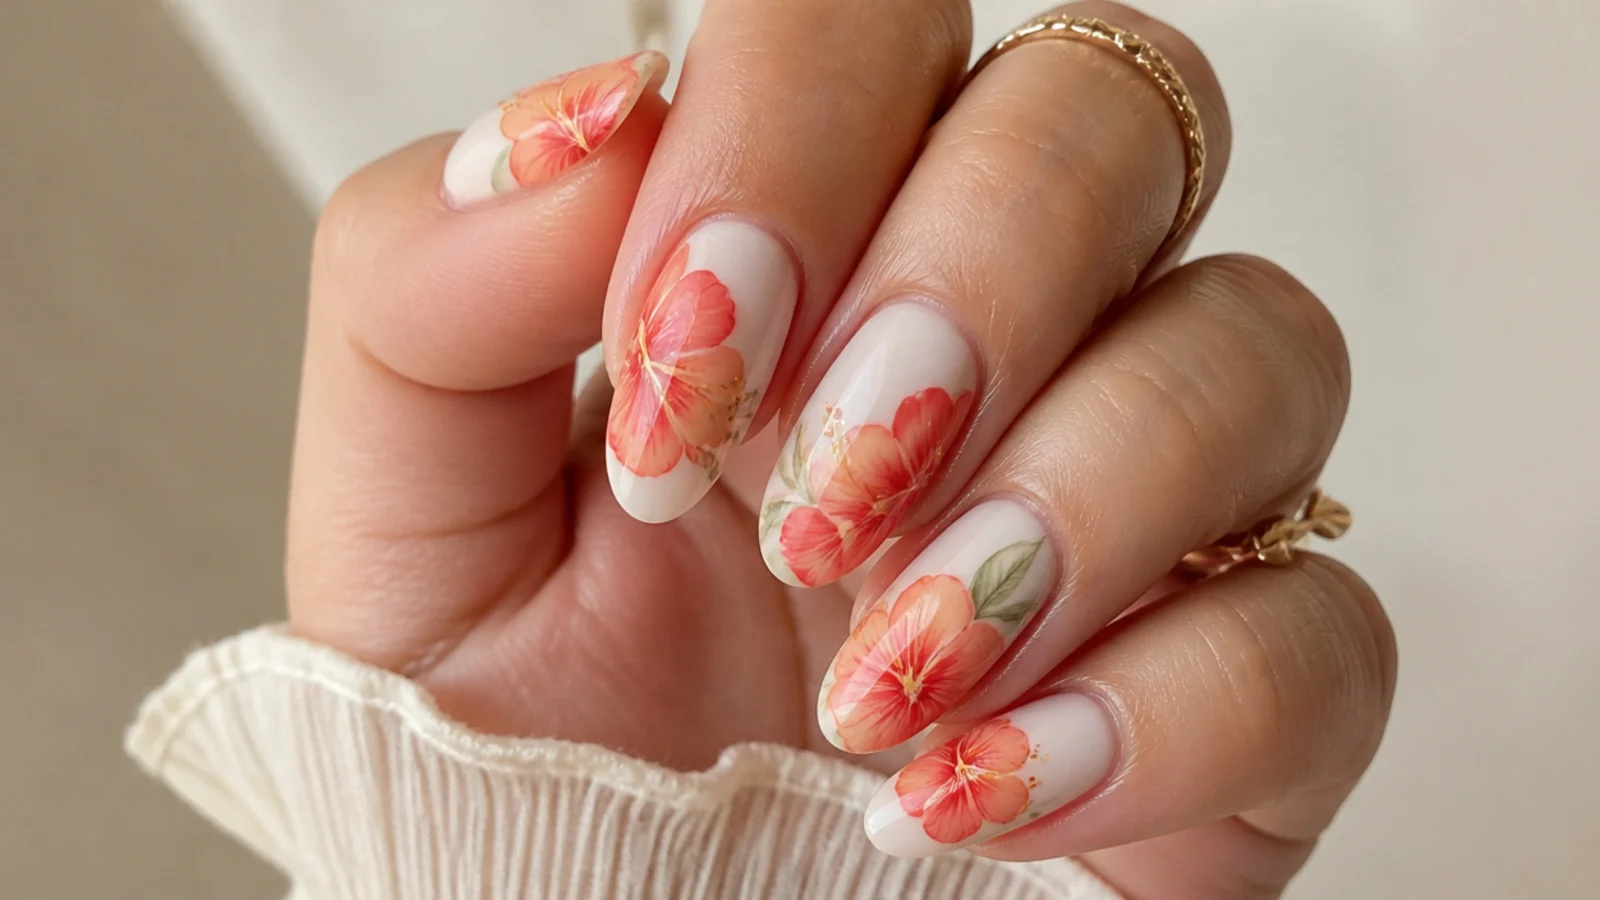
A bright coral hibiscus diffused over a cream base for a warm summer set. Over the cured cream you lay uncured blooming gel and drop coral and peach gel in loose petal shapes; they bloom into soft, tropical flowers before you cure, with a fine yellow liner adding the center stamen once set. Blending coral into peach gives the petals a sunlit gradient as they spread. It works because the diffused warm tones capture the soft edges of a real hibiscus, giving a vibrant yet painterly set that suits vacations, summer and anyone wanting bright color kept soft.
Who it suits: Anyone wanting a bright, tropical summer set.
Tip: Blend coral into peach on the petal so it blooms with a sunlit, two-tone glow.
What Is Blooming Gel and How Does It Work?
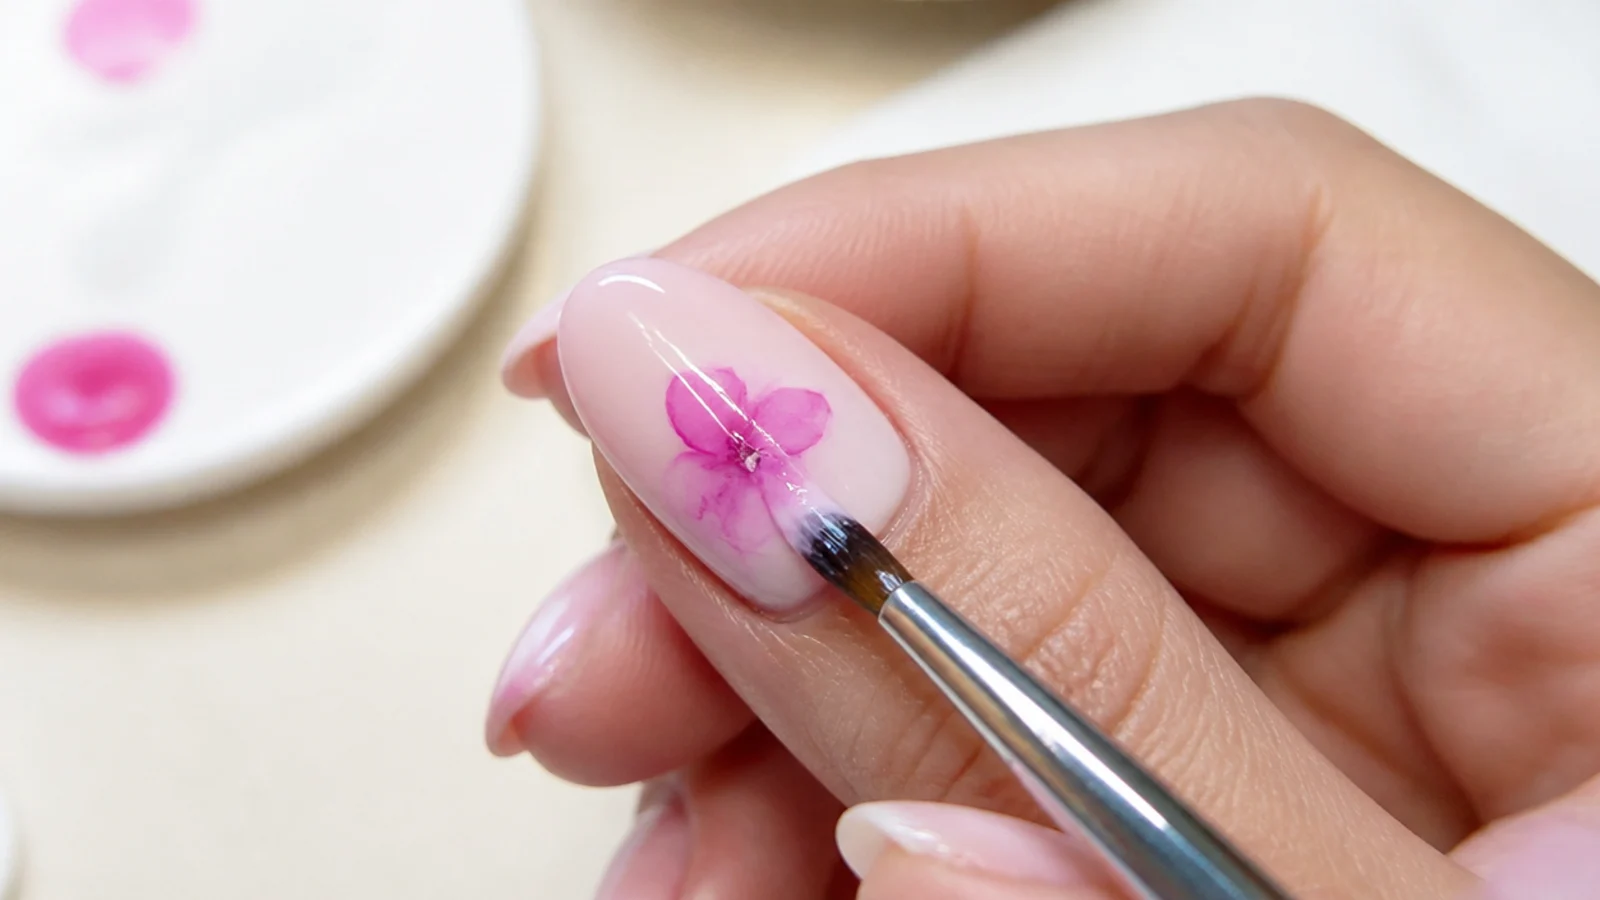
Blooming gel is a clear gel that makes gel polish spread and diffuse instead of staying where you paint it, which is what creates the soft, watercolor look. The method is simple: apply a thin layer of blooming gel over a cured color base and leave it uncured, then drop or draw gel color onto the wet gel. The color blooms - spreading and blurring into soft-edged flowers, marble or ink - within a few seconds up to about a minute. Once the pattern looks right, you cure it under an LED or UV lamp to lock it in, then seal with a no-wipe top coat. The single rule that matters most: never cure the blooming gel before you add color, because curing it first kills the effect and the color will simply sit on top. Thickness controls the spread too - a thinner blooming gel layer lets color travel further, while a thicker layer holds it back.
How to Get the Blooming Gel Look at Home
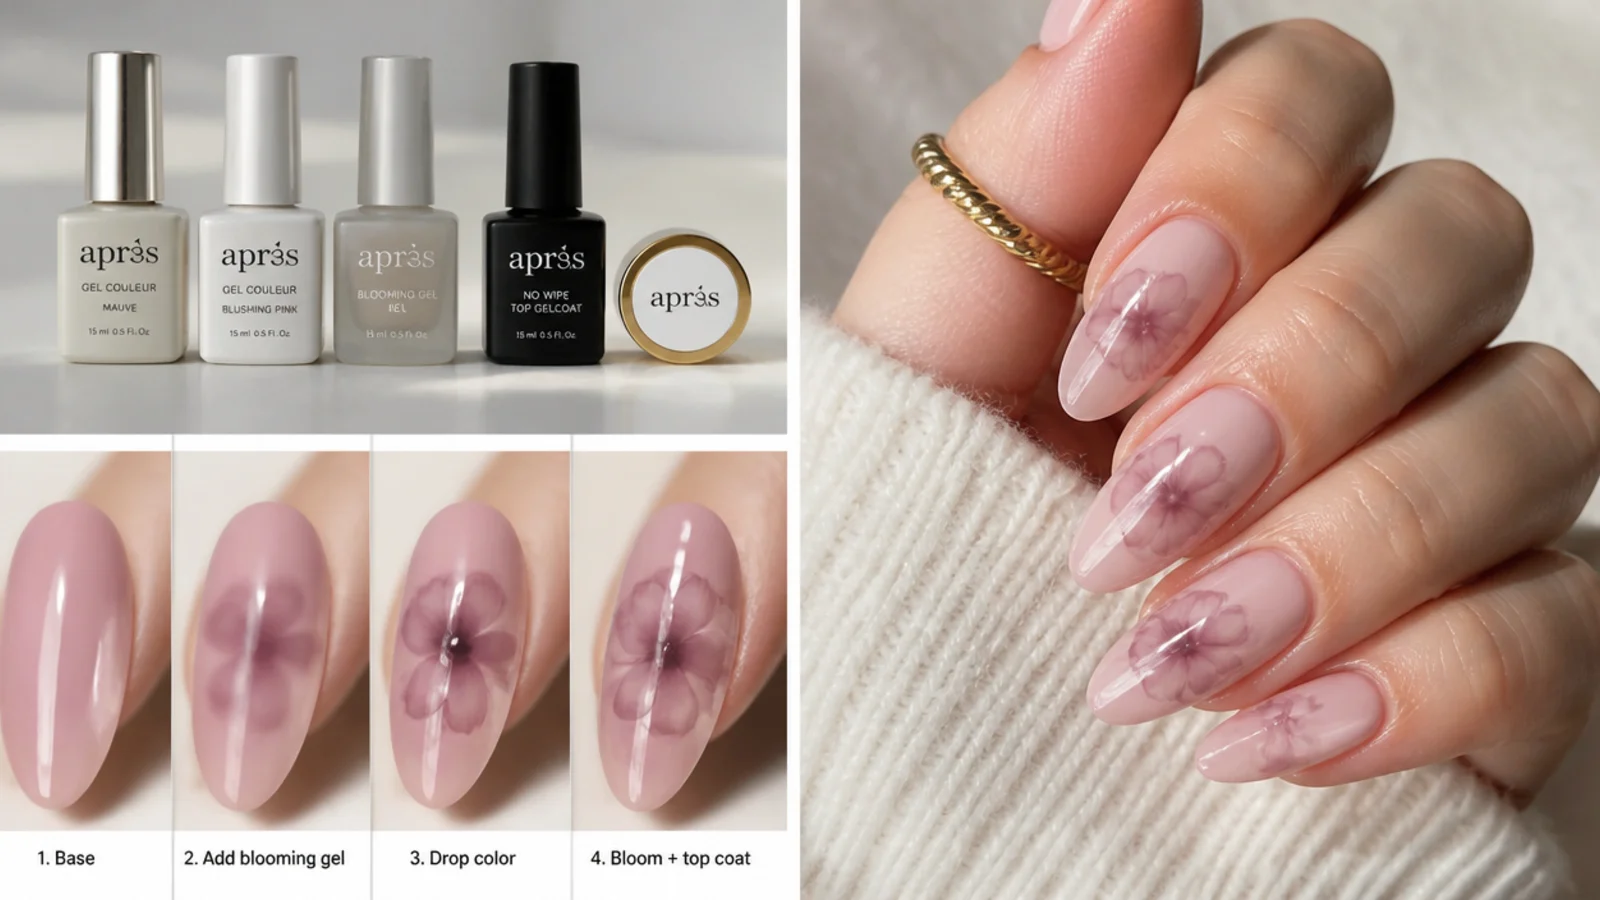
Start with clean, prepped nails, a base coat, and one or two thin coats of a cured gel color as your background. Brush on a thin, even layer of blooming gel and leave it uncured. Now work fast: drop small amounts of gel color onto the wet gel with a dotting tool or thin liner brush, and watch it spread. For flowers, place a few dots in a petal ring; for marble, drag loose veins; for tie-dye, drop and pull the color through. Let it bloom for a few seconds to a minute, shape it with your brush, then cure for about thirty to sixty seconds under LED. Build depth in a second thin layer, curing between each. Finish with a no-wipe top coat and cure, then apply cuticle oil. The trick is using less color than feels natural and letting the gel do the blending for you.
Supplies You Need
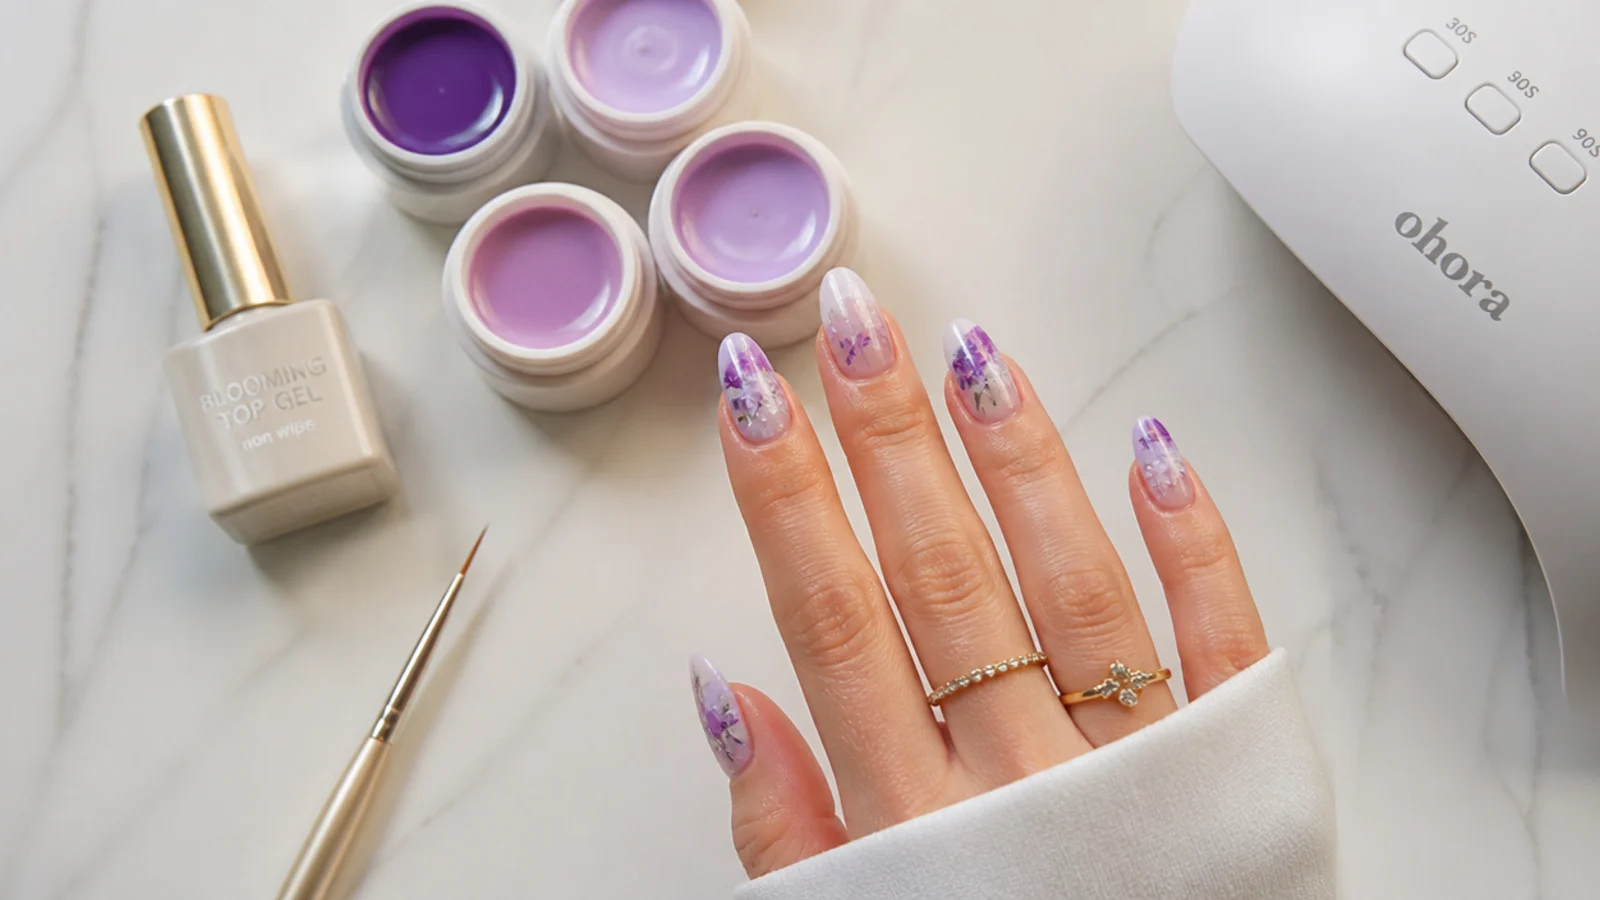
You do not need much to start, but a few items are essential. The core kit: a base coat, one or more gel color polishes for your background and design, a bottle of blooming gel, and a no-wipe gel top coat to seal. You will need an LED or UV lamp to cure - LED cures each gel layer in about thirty to sixty seconds, UV in about two minutes. A thin detail or liner brush and a dotting tool let you draw petals, veins and ink; lint-free wipes keep everything clean. Cuticle oil finishes and maintains the set, and 100% acetone is needed later for a safe soak-off removal. A DIY kit with the gel, a few colors and a lamp pays back fast compared to salon visits, since one bottle of blooming gel lasts many manicures.
Common Blooming Gel Mistakes to Avoid
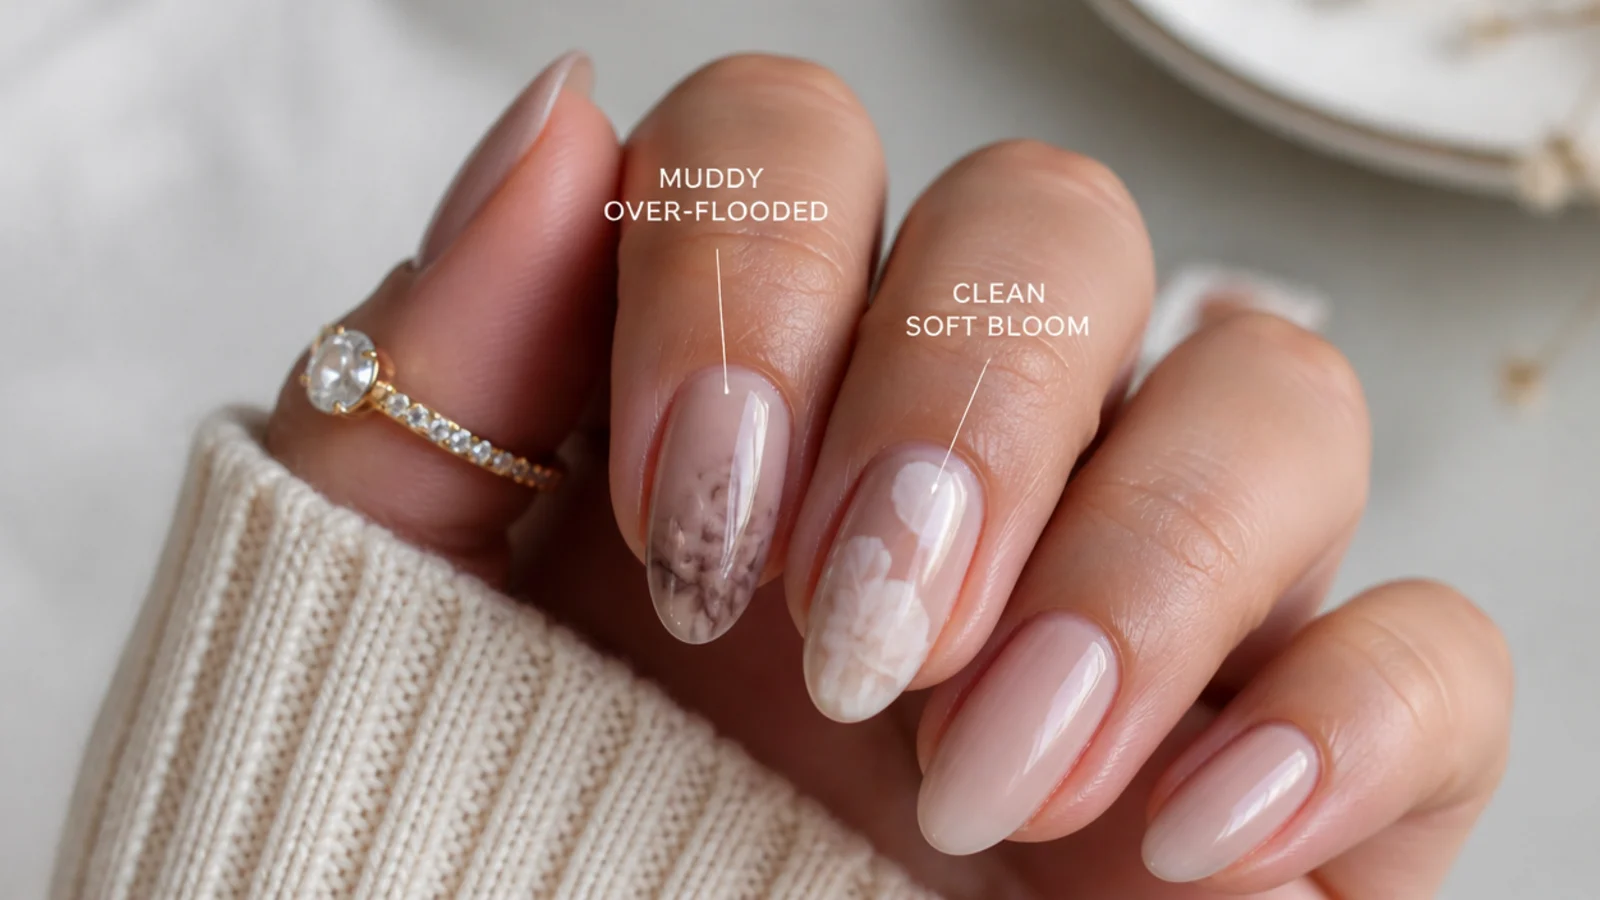
Most blooming gel fails come down to a handful of mistakes. The biggest is curing the blooming gel too early - if you cure it before adding color, the color has nothing wet to spread into and the bloom simply will not happen. The second is flooding too much color: a little blooms into a soft flower, but too much pools and turns muddy or gray, especially where colors overlap. A layer that is too thick holds the color back so nothing spreads, while a layer too thin can spread it uncontrollably - aim for thin but even. Skipping base prep causes lifting and early chips, and forgetting to cap the free edge with color and top coat lets the design smear and wear off fast. Build depth in thin layers, curing between each, rather than dumping color all at once, and always seal well.
How Long Do Blooming Gel Nails Last and What They Cost
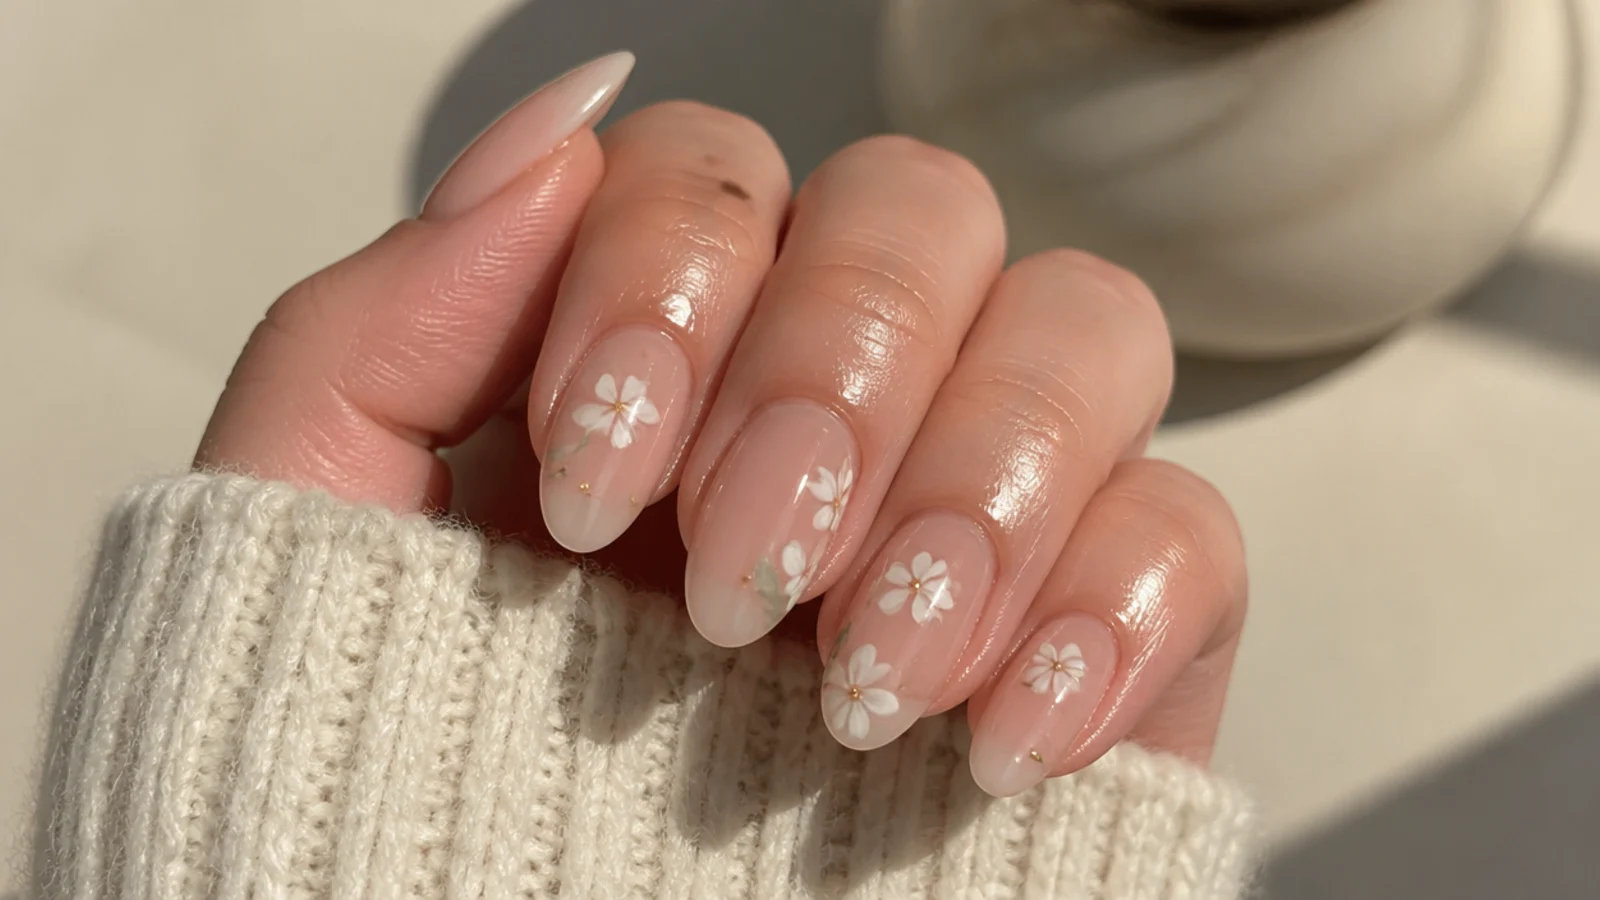
Because blooming gel is a gel technique, a set lasts about two to three weeks, and up to four with good prep, daily cuticle oil, and capping the free edge to protect the design. That is far longer than regular non-gel polish art, which only holds for about five to seven days before chipping. On cost: a standard gel manicure runs roughly thirty to fifty-five dollars, and nail-art add-ons average about five dollars per accent nail, so a full blooming-gel set is often around forty-five to seventy dollars or more at a salon. Doing it yourself changes the math - a DIY kit with blooming gel, a few colors and a lamp costs more upfront but pays back after a set or two, since one bottle of blooming gel covers many manicures. To make any set last, wear gloves for chores and never peel the gel off.
Blooming Gel vs Regular Gel Nail Art
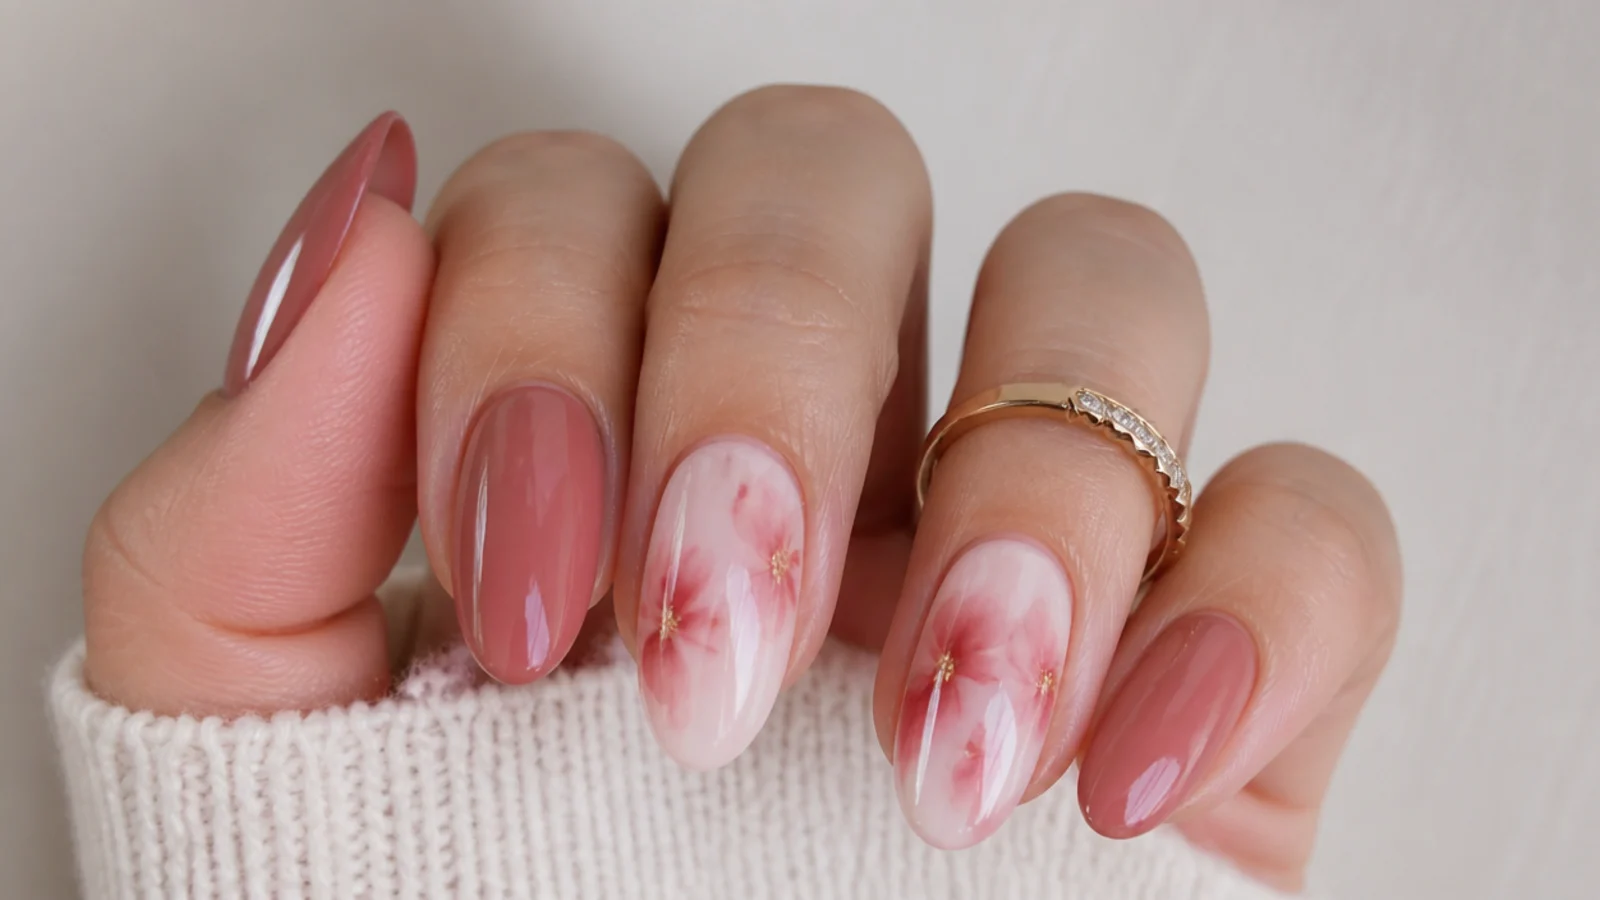
The difference is all in the edges. With regular gel nail art, you paint a design and the color stays exactly where your brush puts it, giving crisp, defined lines - great for graphic art but harder for soft, painterly looks. Blooming gel does the opposite: the clear gel makes the color spread and diffuse on its own, so you get soft, watercolor edges without the skill of hand-shading. That makes blooming gel far more beginner-friendly for florals, marble and tie-dye, since the gel blends for you. Both are cured under a lamp and both last about two to three weeks, so durability is the same. The choice comes down to look: reach for regular gel art when you want sharp detail and lines, and blooming gel when you want that soft, diffused, hand-painted watercolor effect.
Frequently Asked Questions
What is blooming gel and how does it work?
Blooming gel is a clear gel that makes gel color spread and diffuse instead of staying where you paint it. You apply a thin layer over a cured color base, leave it uncured, then drop color on and it blooms into soft watercolor patterns within a minute before you cure it under a lamp.
How long does blooming gel take to bloom?
The color starts spreading almost immediately and keeps diffusing for a few seconds up to about a minute. A thinner blooming gel layer lets it travel further and faster, while a thicker layer slows it down. Once the spread looks right, cure it under LED or UV to lock the pattern.
Do you cure blooming gel before adding color?
No - this is the most important rule. You must leave the blooming gel uncured and add color while it is still wet, so the color has something to spread into. Curing the blooming gel first kills the effect entirely, and the color will just sit on top with no bloom at all.
How long do blooming gel nails last?
Because it is a gel technique, a set lasts about two to three weeks, and up to four with good prep, daily cuticle oil, and capping the free edge. That is much longer than regular non-gel polish art, which only lasts about five to seven days before it starts to chip.
Do you need a UV or LED lamp for blooming gel?
Yes. Blooming gel and gel color both cure under a lamp, so you need an LED or UV light to set each layer and lock the design in. LED cures a gel layer in about thirty to sixty seconds, while UV takes around two minutes per layer. Without a lamp the gel stays wet.
Is blooming gel good for beginners?
Yes, it is one of the most beginner-friendly nail-art techniques because the gel does the blending for you - you do not need hand-shading skill to get soft, watercolor edges. It is intermediate but very DIY-friendly with a little practice. Start with simple single blooms before trying full marble or tie-dye.
Why did my blooming gel go muddy or not bloom?
Muddy color usually means you used too much - a little blooms softly, but too much pools and turns gray, especially where colors overlap. If nothing bloomed at all, you either cured the blooming gel too early or your layer was too thick. Use less color, keep the layer thin but even, and do not cure until after adding color.
How do you remove blooming gel nails?
Blooming gel soaks off just like standard soft gel. File the glossy surface so acetone can penetrate, saturate a cotton pad with 100% acetone, hold it against each nail with foil for ten to fifteen minutes, then slide the loosened gel away. Skip peeling or prying entirely, since that tears thin layers from the natural nail plate.
How much do blooming gel nails cost?
At a salon, a gel manicure runs about thirty to fifty-five dollars, plus roughly five dollars per accent nail for art, so a full blooming-gel set is often around forty-five to seventy dollars or more. A DIY kit with blooming gel, a few colors and a lamp costs more upfront but pays back quickly since one bottle lasts many manicures.
What colors work best for blooming gel?
Any gel color blooms, but softer, translucent shades give the prettiest watercolor spread, while strong pigments like red and black bloom far with just a touch. Cool tones like blue and purple make dreamy tie-dye and marble, and pastels are ideal for florals. Whatever the color, use a small amount and let the gel diffuse it.
Which blooming gel nails look are you saving?
Blooming gel is one of the most forgiving ways to get real nail art, because the gel does the blending for you - a little color, a thin layer of blooming gel left uncured, and the pattern spreads on its own. Keep the color light so it does not go muddy, build depth in layers curing between each, and seal the free edge so your watercolor set makes the full two to three weeks. Whether you want a soft single bloom or a bold inky tie-dye, save the designs you love and take the exact photos to your nail tech so the bloom comes out just how you picture it.