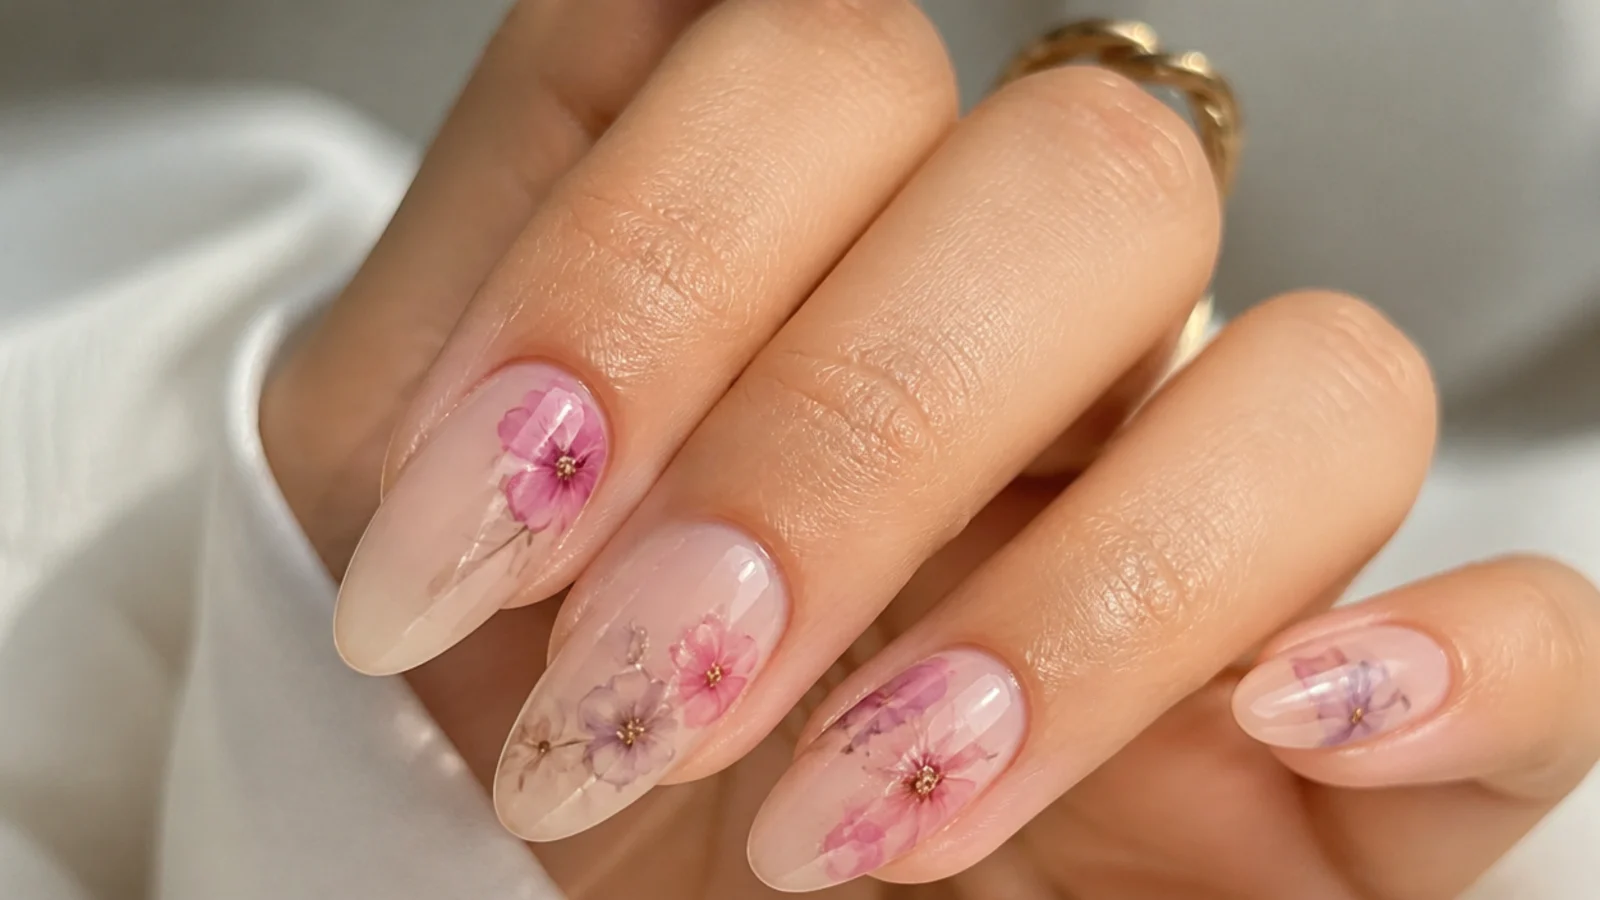
1. Watercolor Peony Bloom
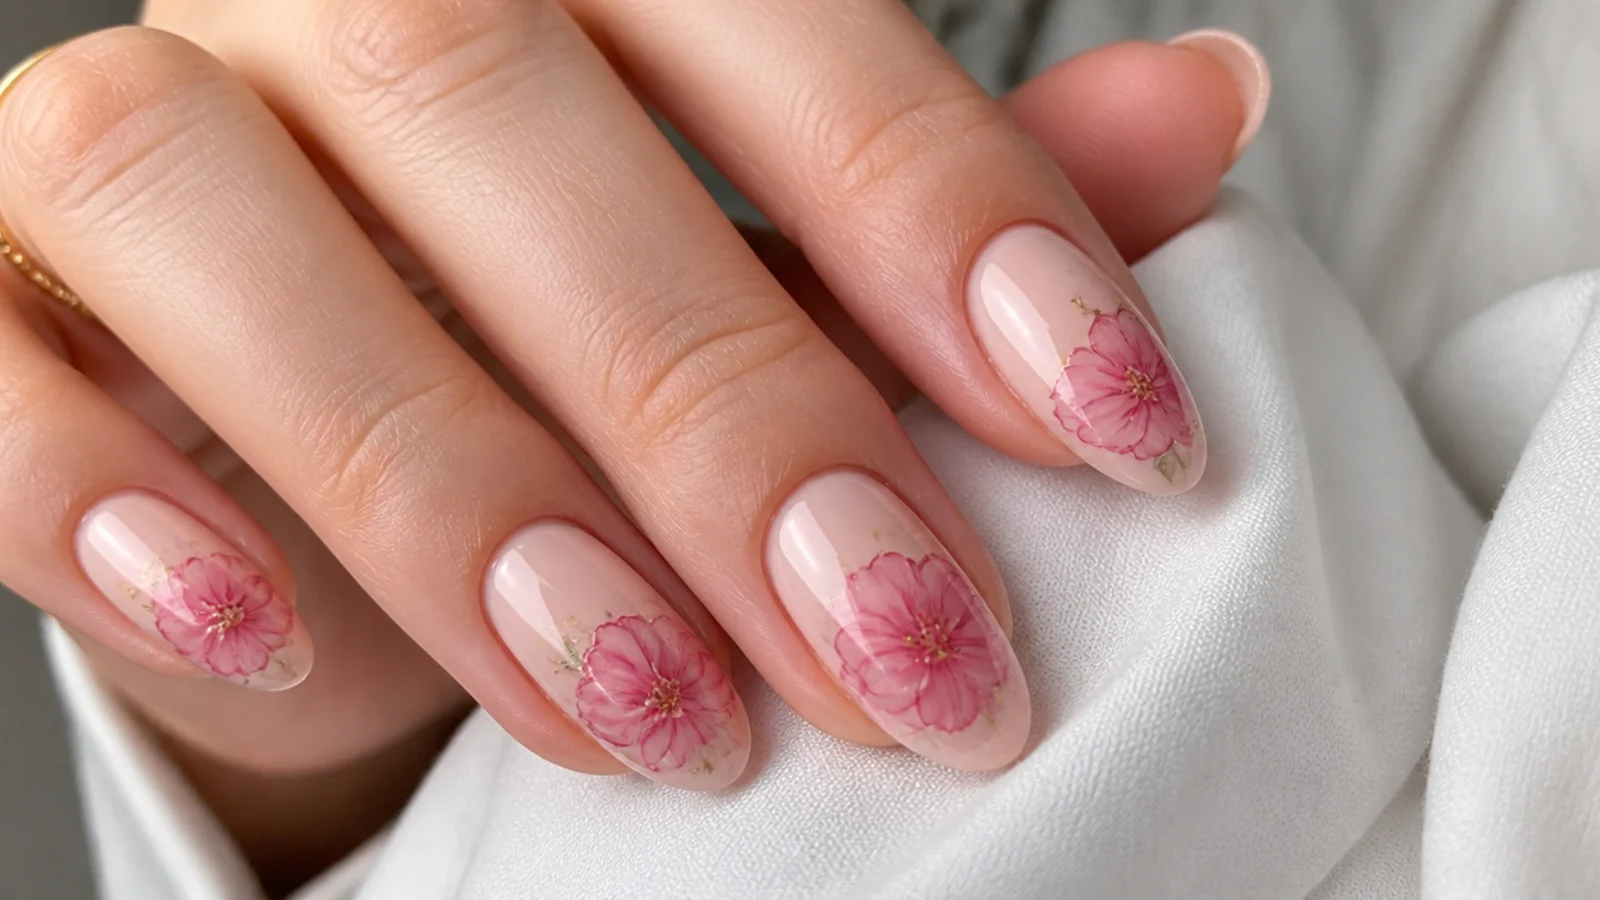
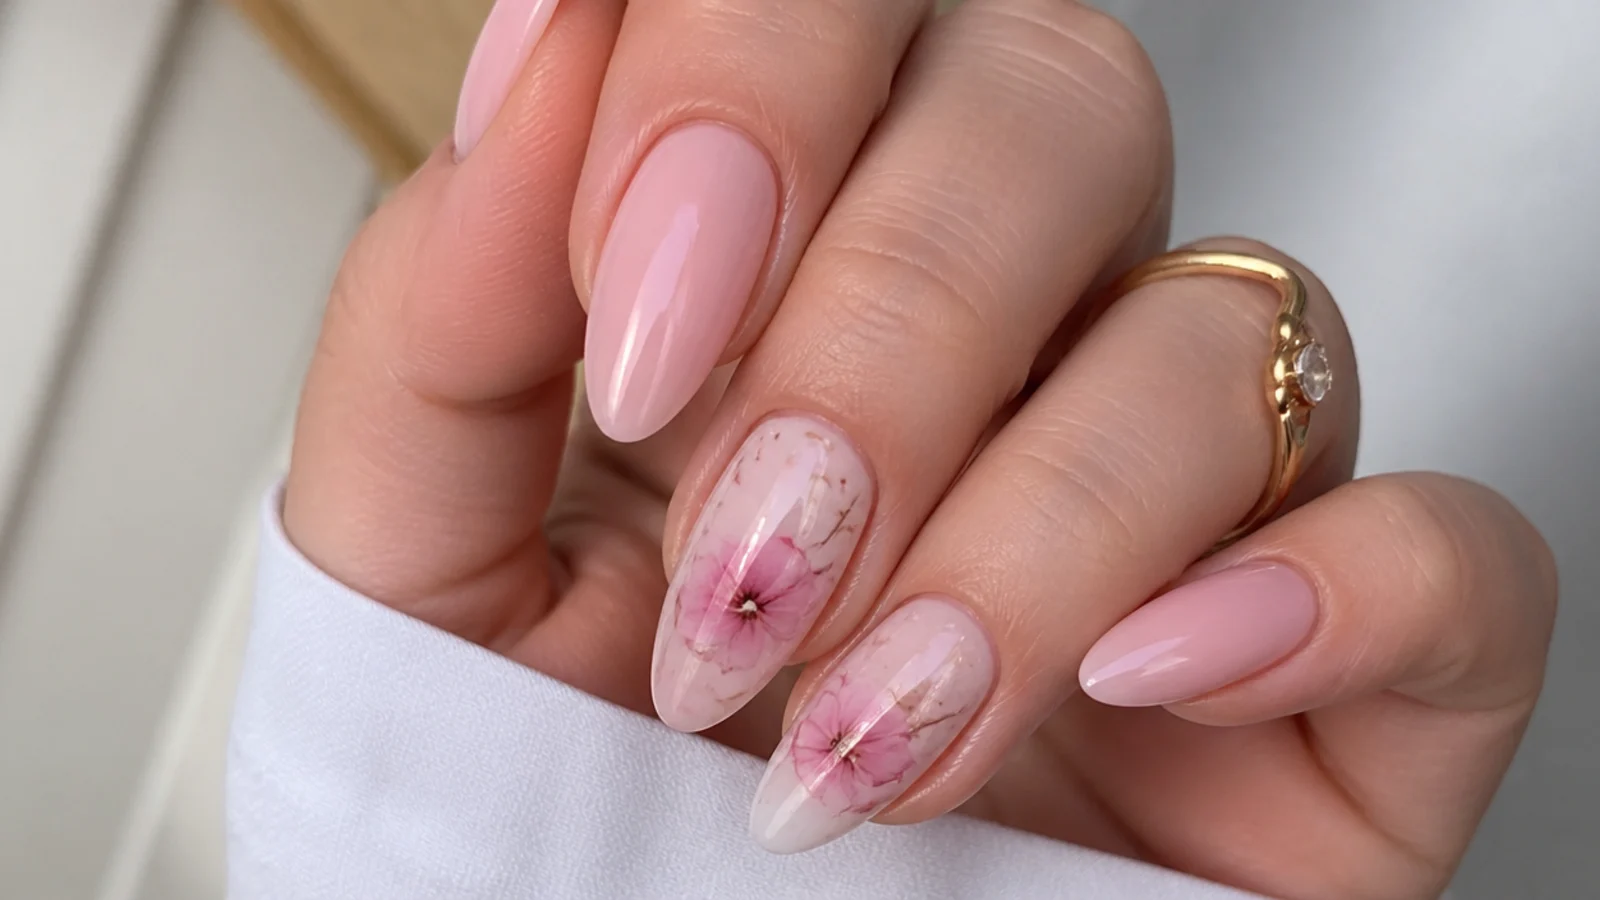
The most-saved bloom - a full blush-pink peony feathered onto a nude base with clear blooming gel. Brush a thin blooming gel layer over the cured nude, leave it uncured, then drop soft pink and a deeper rose into the center so the color diffuses outward into layered petals. A tiny dot of white in the middle keeps the bloom soft, not solid. It works because the wet gel pulls the pigment into watercolor edges no brush can match. Keep it to one or two accent nails with the rest a plain nude, then cure 30 to 60 seconds under LED to lock the petals.
Who it suits: Anyone wanting a soft, romantic accent flower.
Tip: Use a little color and let it spread - flooding the center turns the peony muddy.
2. Inky Blue Forget-Me-Nots
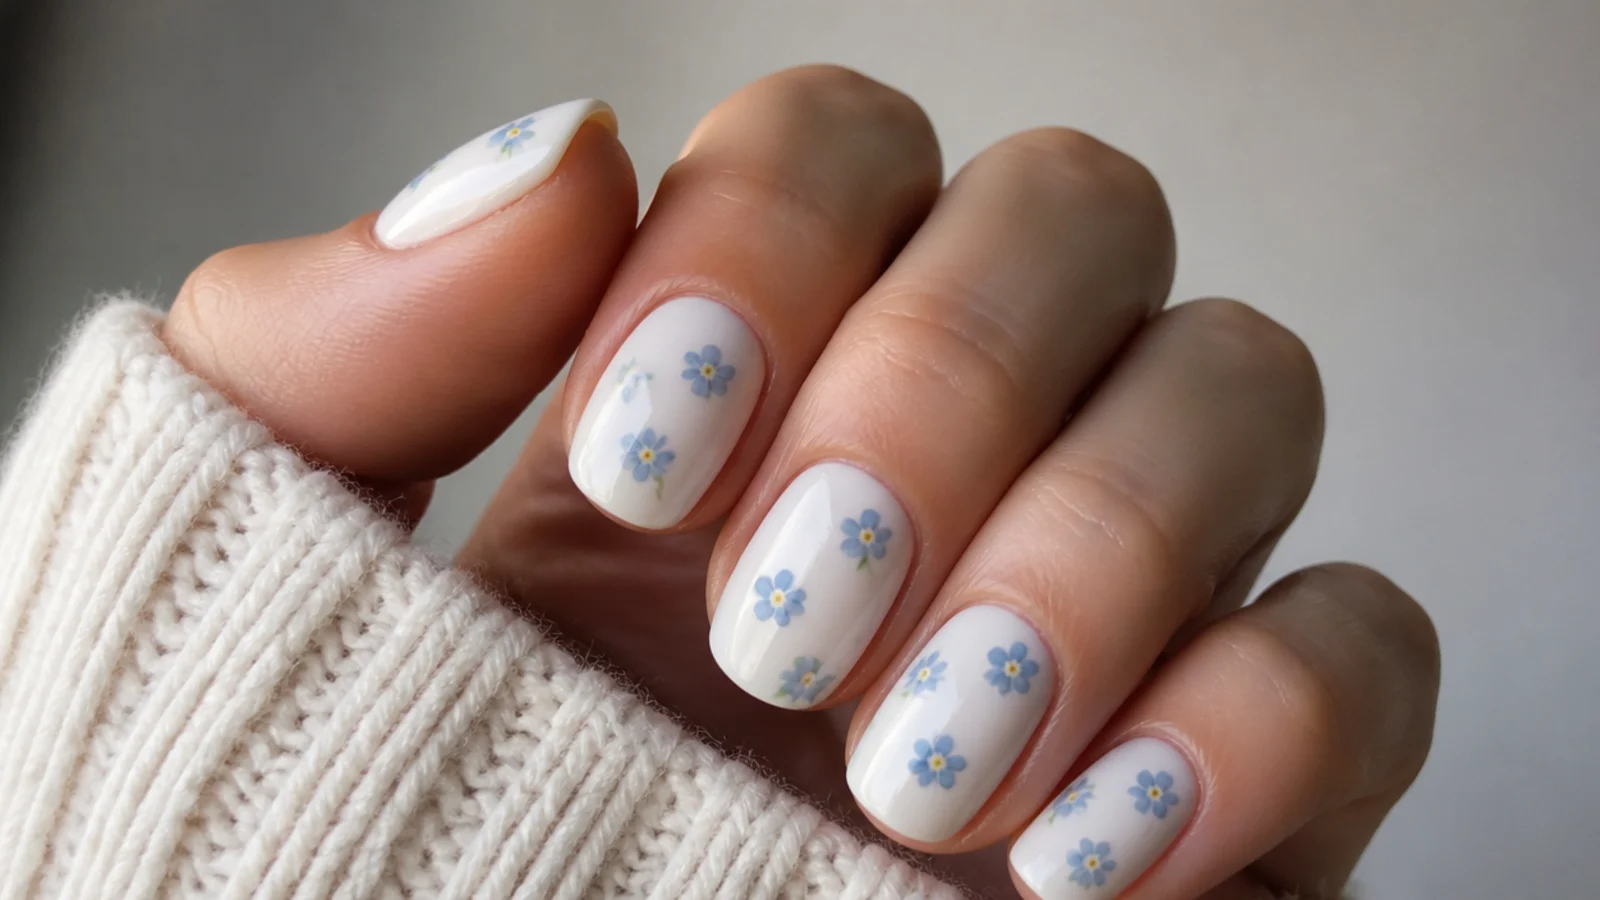
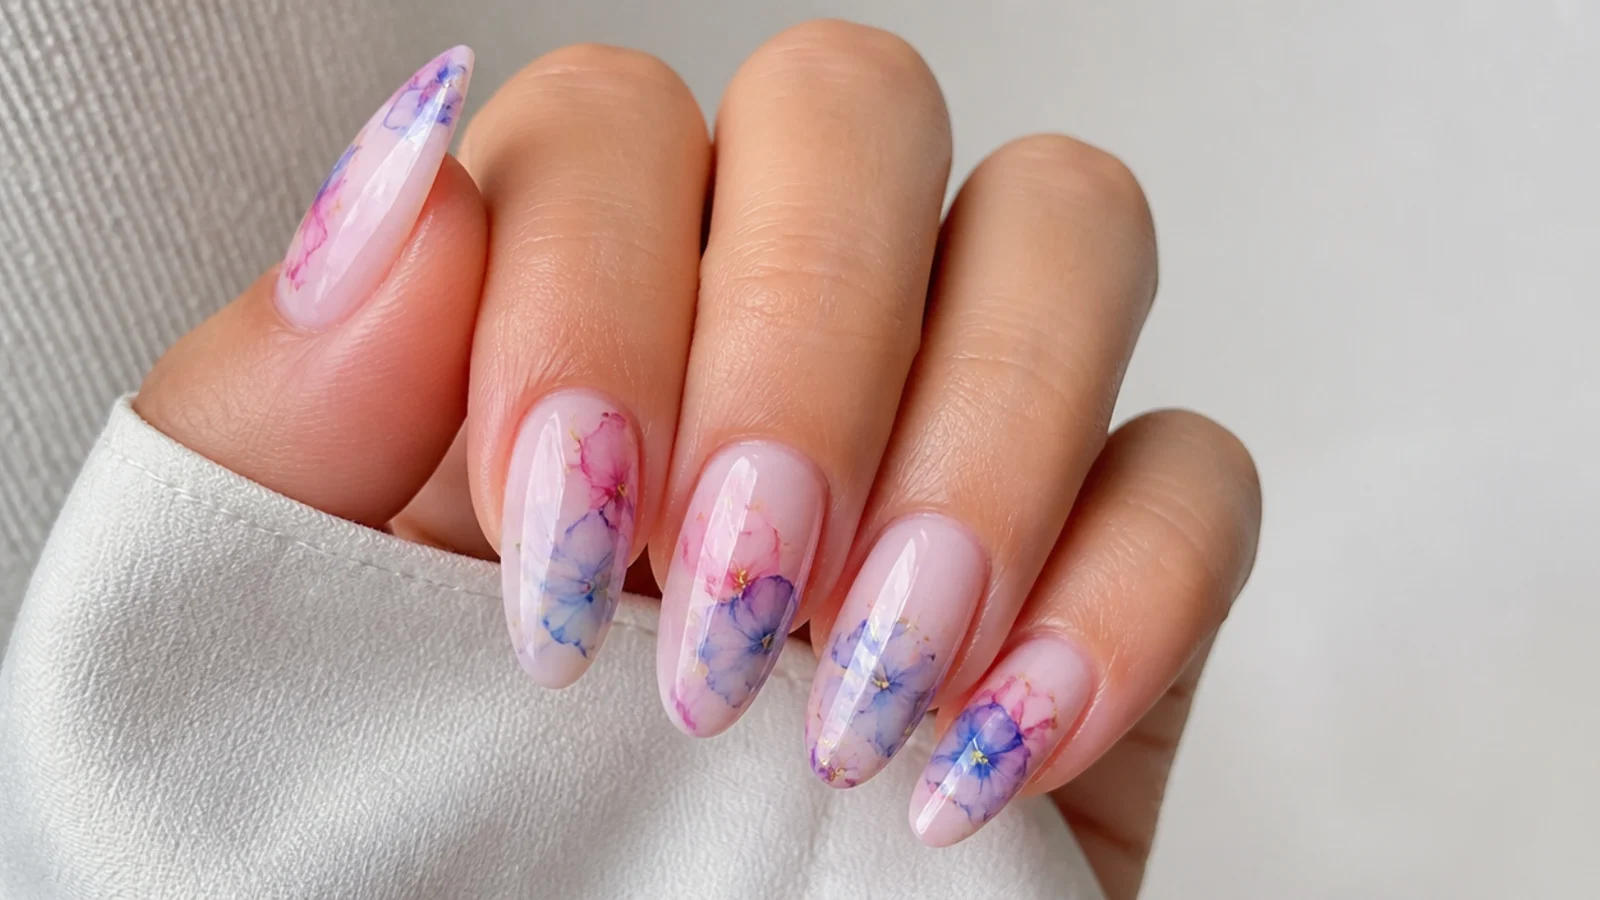
Tiny blue forget-me-nots scattered over a milky white base, each petal bled soft with blooming gel. Over the cured white, brush a thin uncured gel layer, then dot cornflower blue in little clusters of five so each dot blooms into a rounded petal. A yellow center dotted in after the first cure keeps the flowers crisp against the diffused blue. The effect is delicate and airy, like ink dropped on wet paper. It suits spring sets and pale-to-medium skin tones. Build the flowers in two layers, curing between, so the petals stay defined rather than blurring into one blue haze.
Who it suits: Anyone wanting dainty spring florals.
Tip: Cure between layers so a second flower does not smear the first.
3. Soft Pink Marble Rose
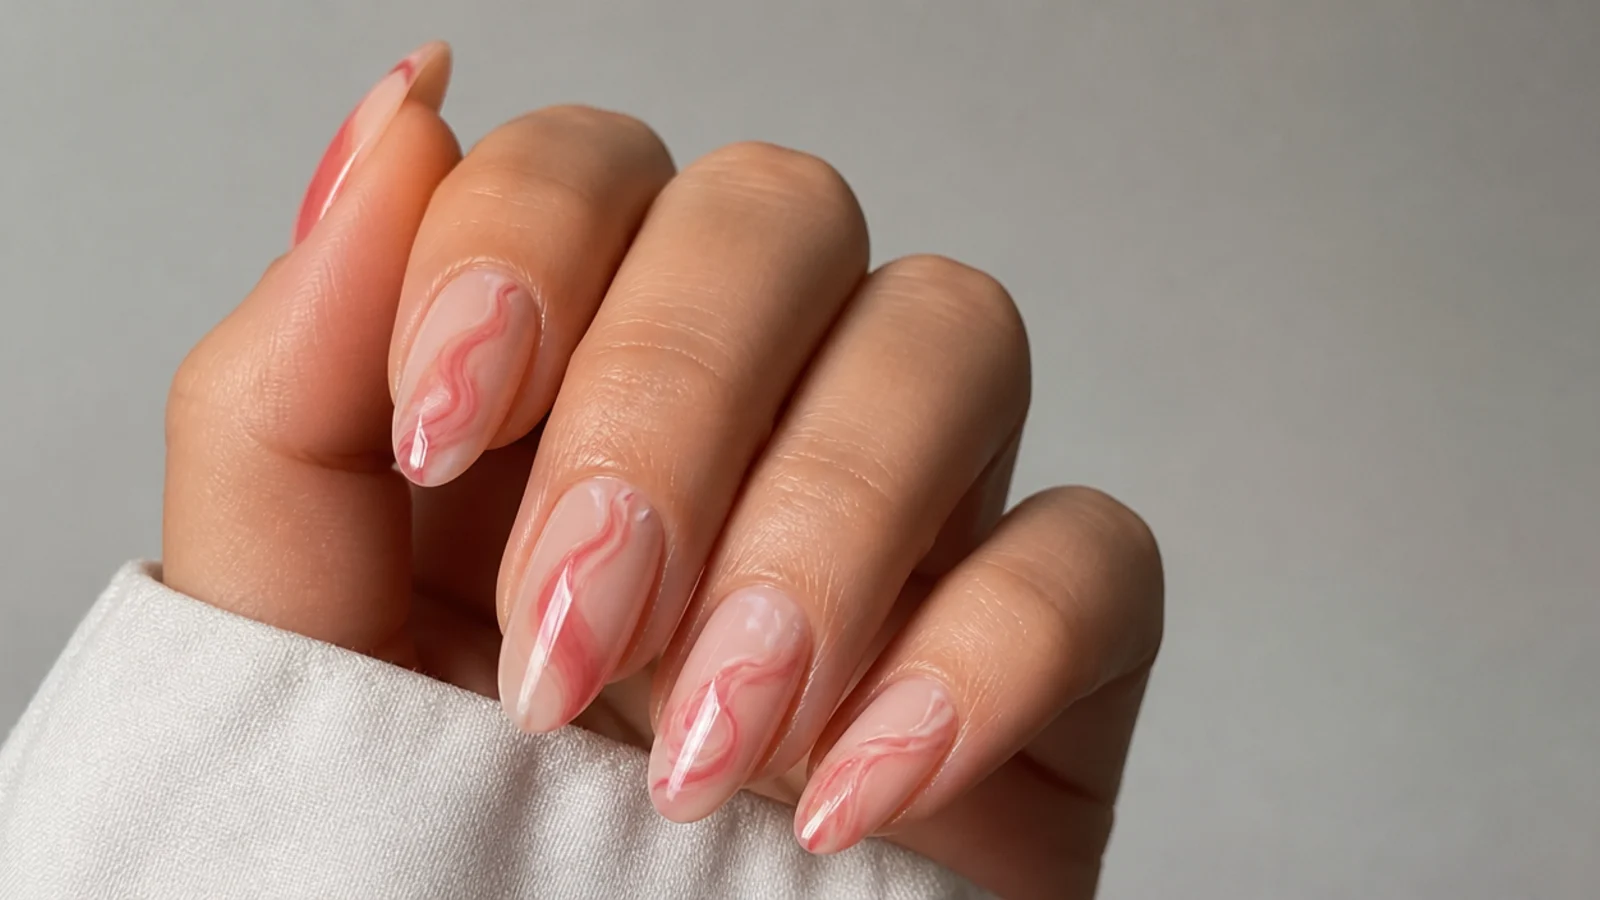
An abstract rose swirled from marbled pink tones over a nude base. Brush thin blooming gel, leave it uncured, then draw a loose spiral of soft pink and add a second rosier pink alongside so the two bleed into a swirled, petal-like marble. A thin liner brush pulled gently through the wet gel shapes the spiral before it sets. The diffused edges read as an impressionist rose rather than a defined outline, which is exactly the blooming gel look. It suits almond and coffin shapes where the swirl has room to open up. Cure 30 to 60 seconds once the swirl looks right, then seal.
Who it suits: Anyone wanting an abstract, painterly rose.
Tip: Drag a thin liner brush through the wet gel to guide the swirl before curing.
4. Bold Red Poppy
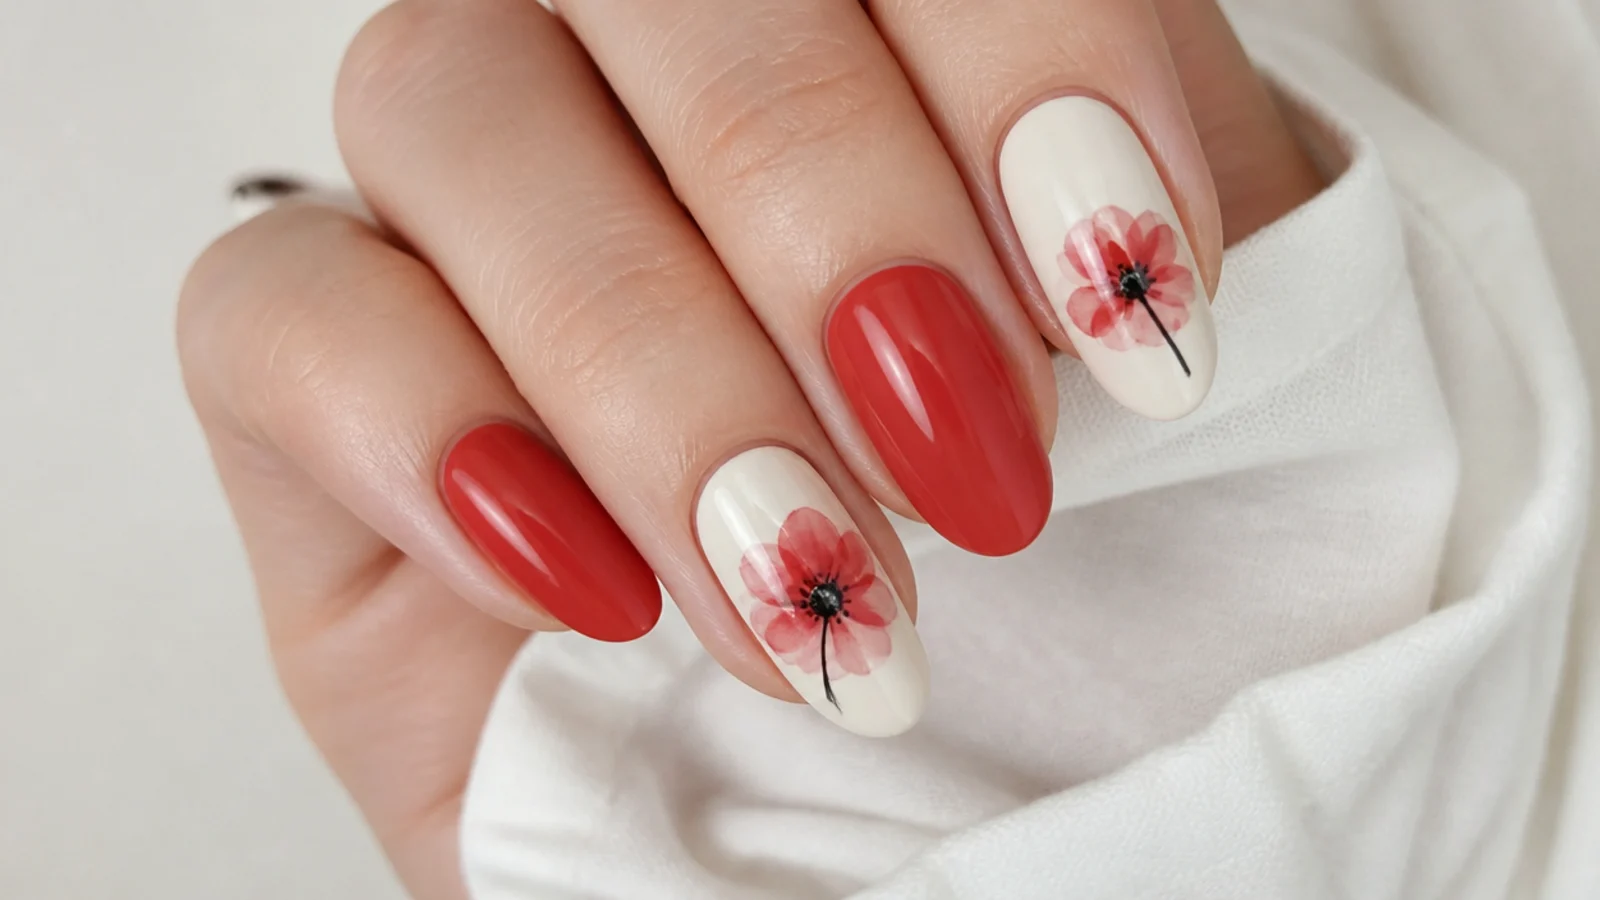
A single statement poppy in diffused red over a cream base. Brush a thin uncured blooming gel layer, drop bright red in four to five petal spots and let them bloom outward, then add a soft black center once the red has cured. The blooming gel softens the red edges so the poppy looks watercolor rather than cartoonish. Kept to one accent nail, it gives a bold pop against neutral companions. It suits confident, statement sets and flatters warm and deeper skin tones. Do not overload the red or the whole nail floods - a few small drops give the fullest, cleanest bloom.
Who it suits: Anyone wanting one bold statement flower.
Tip: Add the dark center only after the red petals have cured so it stays crisp.
5. Ditsy Floral Nude
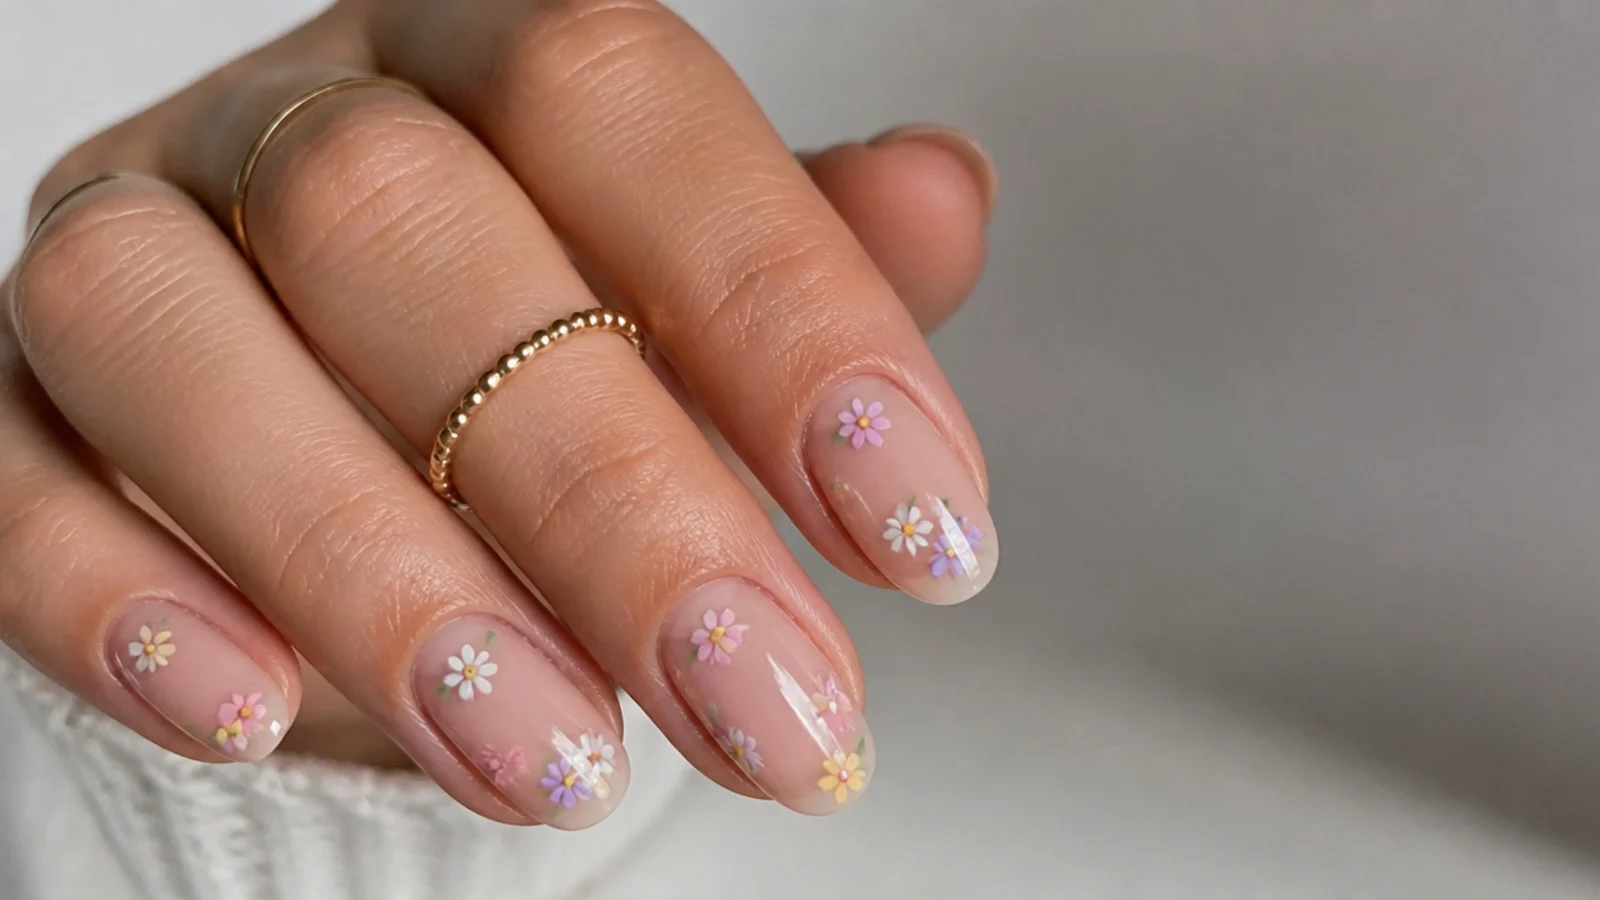
A scatter of tiny pastel flowers across a sheer nude base for an all-over ditsy print. Over the cured nude, brush thin blooming gel and dot small clusters of lilac, peach and soft blue, letting each little dot bloom into a soft petal. Green dotted between the flowers blooms into leaves. Because each flower is tiny, the diffusion keeps the print delicate rather than busy. It suits short and medium nails and reads sweet and vintage. Work a few flowers at a time so the gel stays wet, and cure once the whole nail is filled to keep the ditsy pattern soft.
Who it suits: Anyone wanting an all-over dainty floral print.
Tip: Space the clusters out - crowded dots bloom into each other and lose the pattern.
6. White Lace Blossom
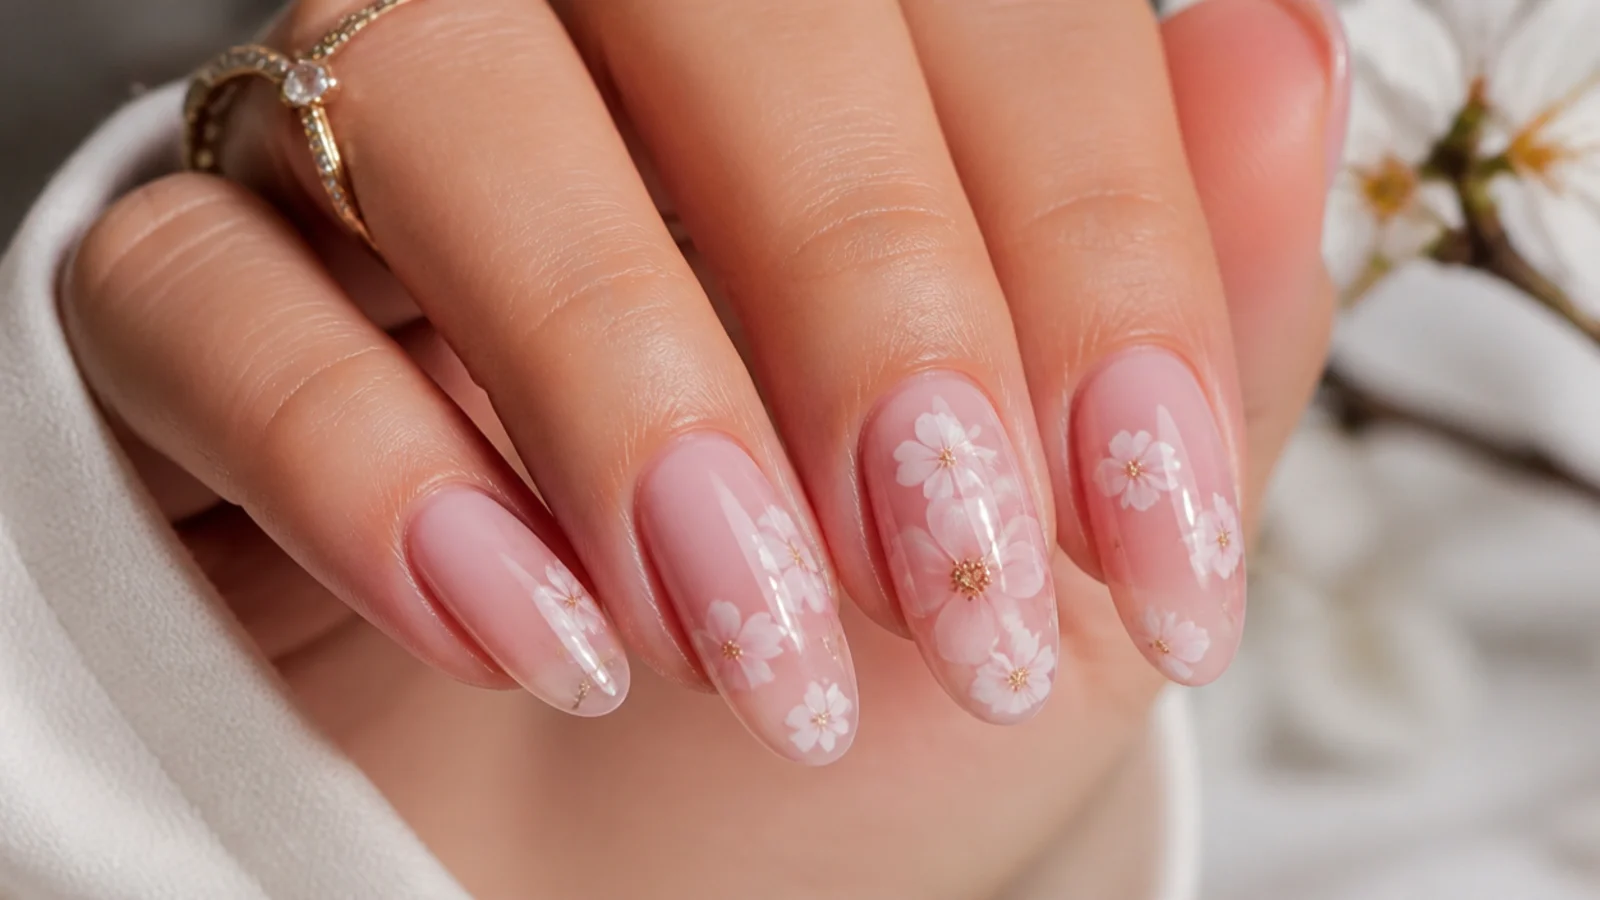
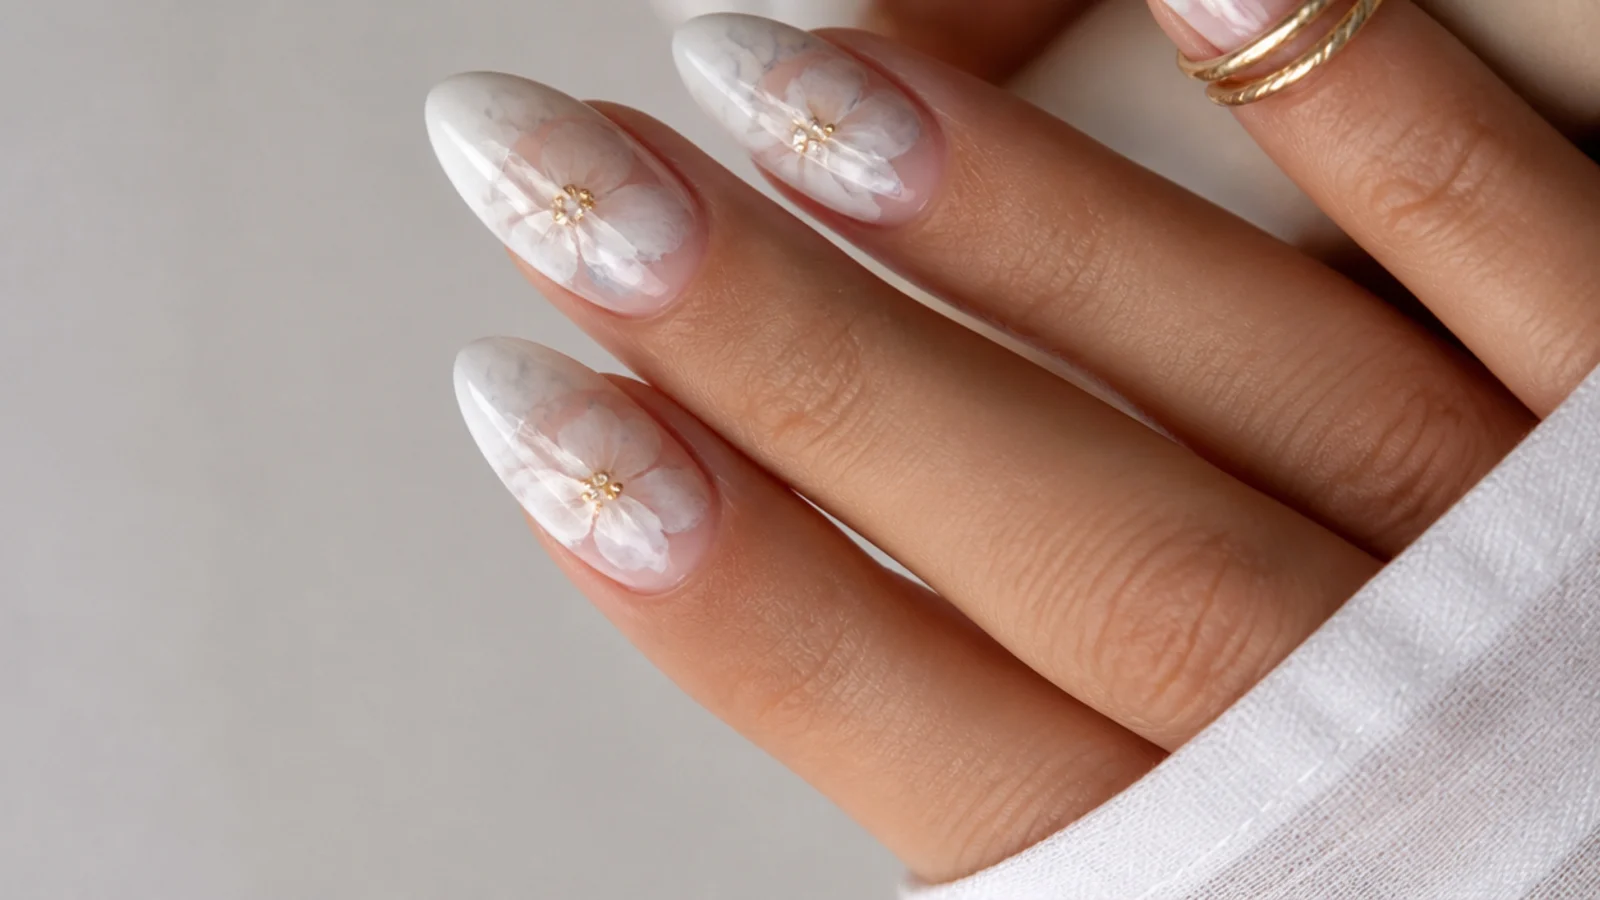
Soft white blossoms bloomed over a sheer pink base for a bridal, lace-like effect. Brush thin uncured blooming gel over the cured pink, then drop white in five-petal clusters so it diffuses into cloudy, translucent flowers. The white stays soft and milky rather than opaque, giving a delicate, veiled look. A tiny gold or pearl dot in each center adds a bridal touch after curing. It suits weddings, romantic occasions and pale-to-medium skin tones. Keep the white sheer by using a small amount - too much white blooms into a solid patch instead of translucent petals.
Who it suits: Brides and romantic, soft looks.
Tip: Go light on the white so the blossoms stay translucent, not solid.
7. Lavender Field
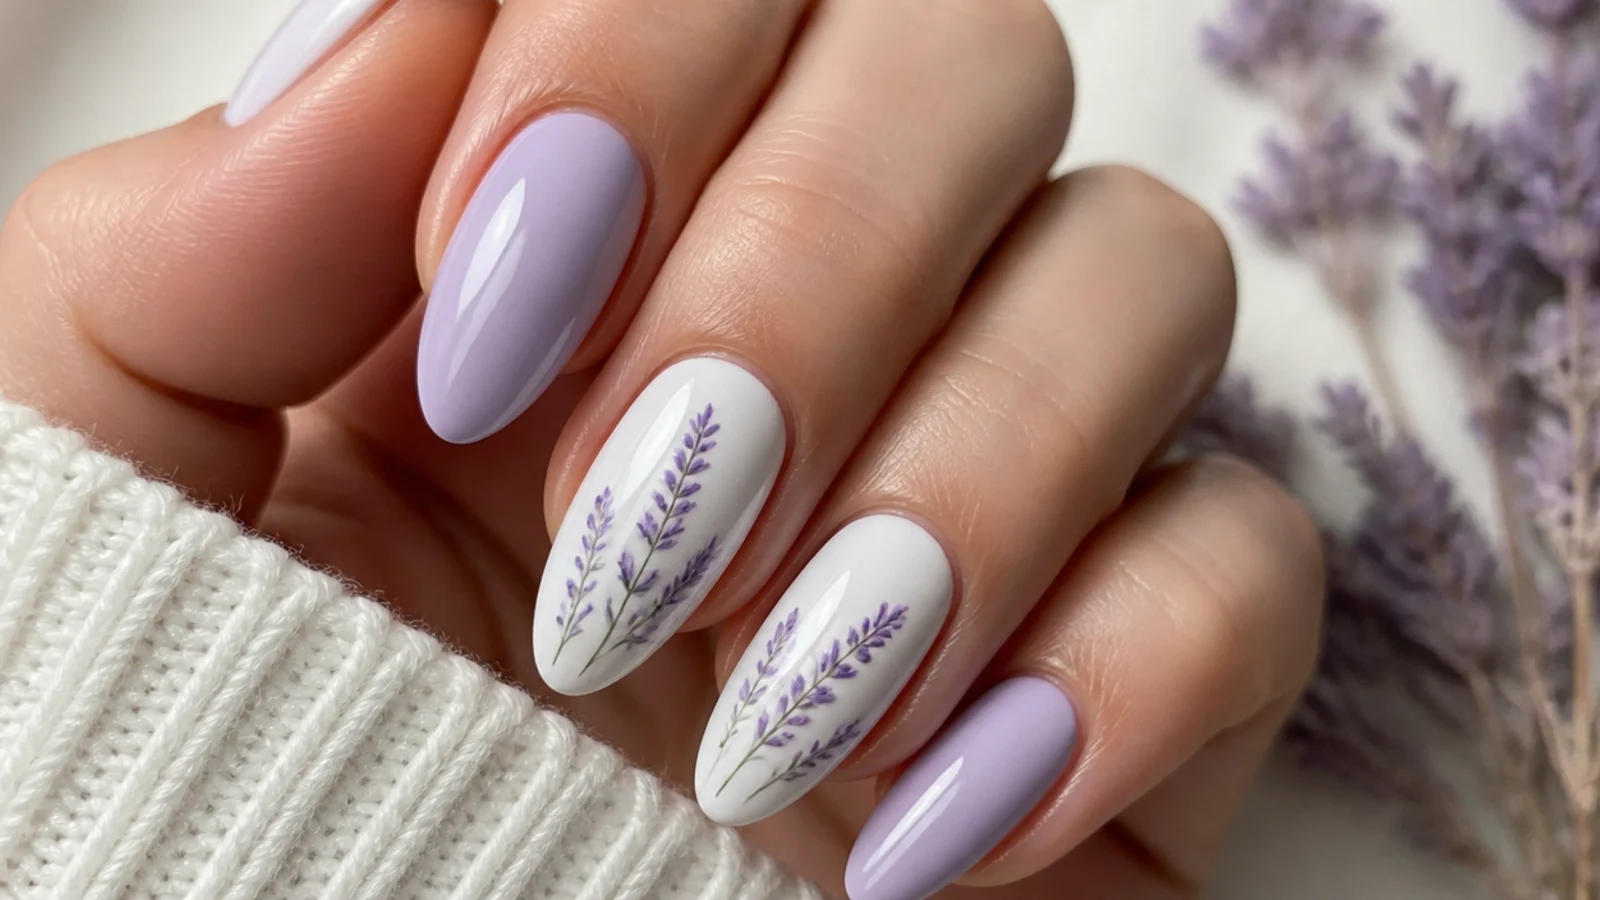
Sprigs of lavender rising from the cuticle up a soft white nail. Over the cured white, brush thin blooming gel and draw thin vertical green stems, then dot purple along each stem so the dots bloom into soft flower heads. The blooming gel feathers the purple into a hazy, sun-bleached field effect. Vertical placement elongates the nail, so it flatters shorter shapes. It reads calm and pretty, ideal for spring and summer. Draw the stems first and let them set slightly, then add the purple, so the two colors stay distinct rather than blooming into one muddy blur.
Who it suits: Anyone wanting a calm, elongating floral.
Tip: Set the green stems first, then bloom the purple so the colors stay separate.
8. Golden Sunflower Pop
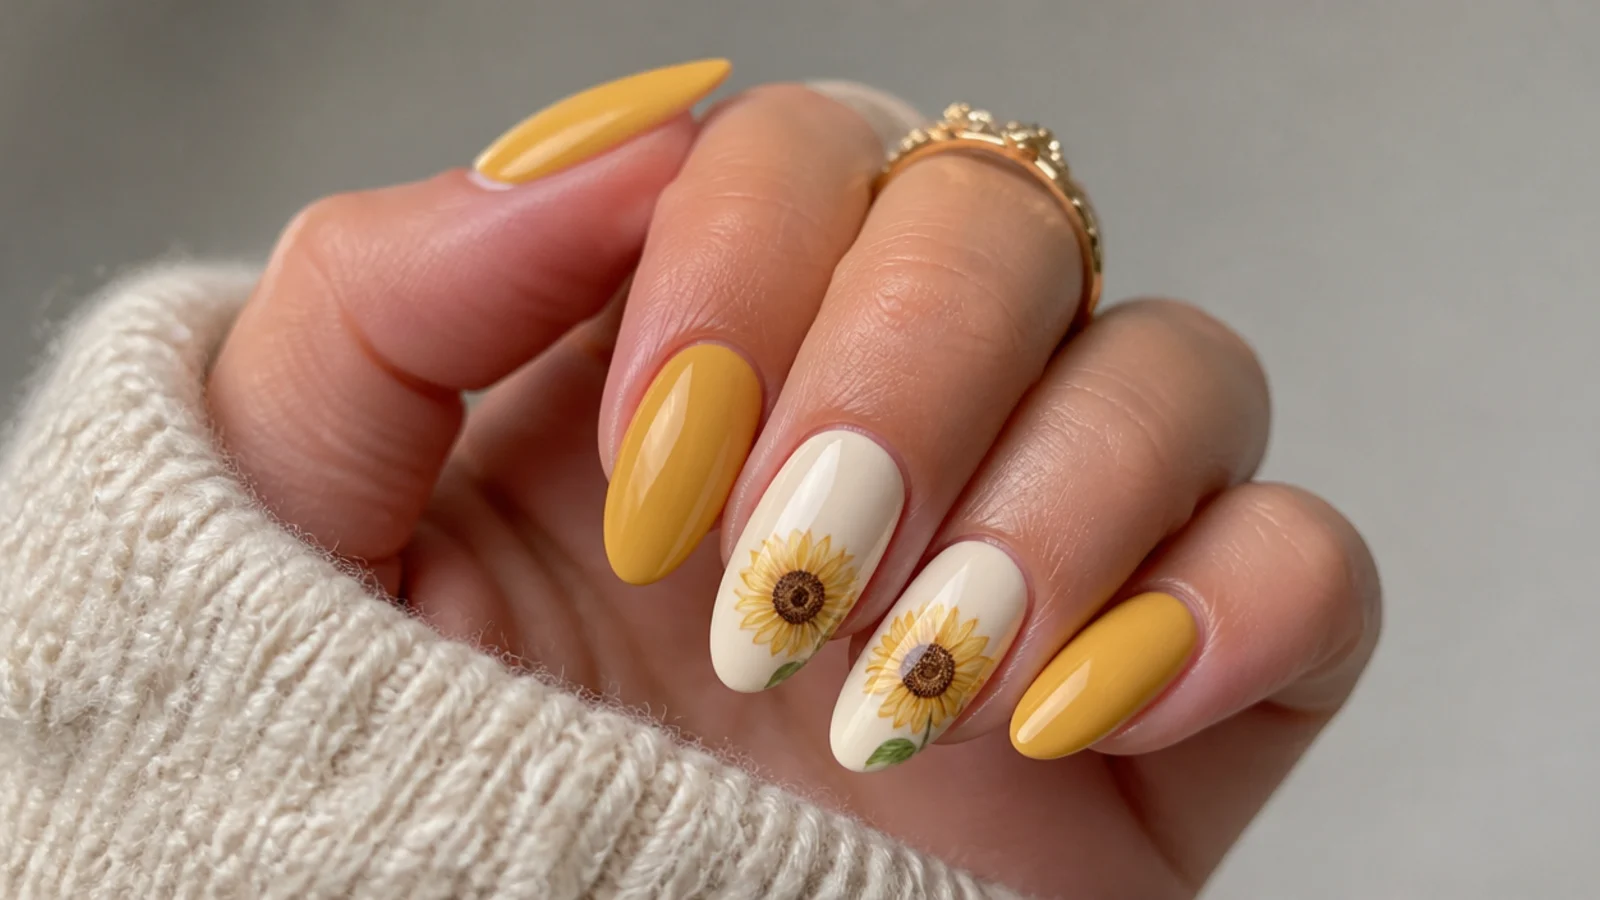
A cheerful sunflower in diffused golden yellow over a cream base. Brush thin uncured blooming gel, then drop warm yellow in a ring of petal points so each blooms outward, and fill the center with brown after the first cure. The blooming gel softens the yellow edges so the flower glows rather than sits flat. Kept to one or two accent nails, it gives a bright summer pop against neutral companions. It suits warm skin tones and sunny, casual sets. Build the petals in two thin layers, curing between, to keep the yellow vivid instead of washing out into the cream.
Who it suits: Anyone wanting a bright, cheerful summer flower.
Tip: Layer the yellow twice, curing between, so it stays vivid over cream.
9. Blue Tie-Dye Bloom
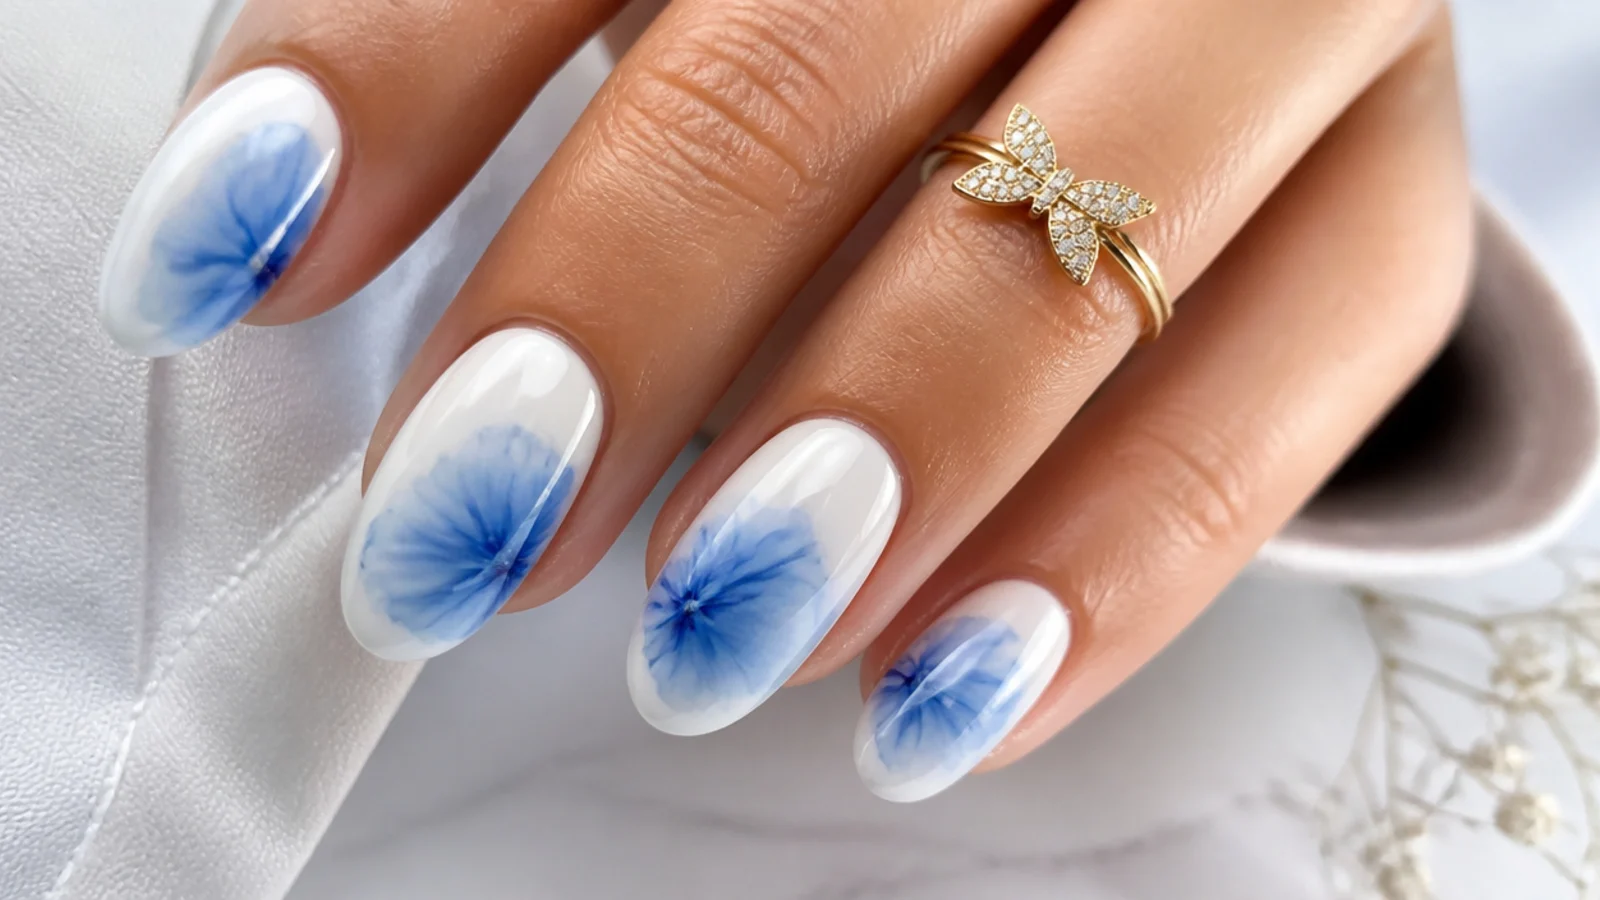
An abstract, all-over tie-dye bloom in blues over a white base - florals that read as diffused color rather than defined petals. Brush thin blooming gel, leave it uncured, and drop sky blue, deeper cobalt and a touch of teal in loose spots so they feather and merge into a soft, marbled sky. A few white gaps left uncolored keep it airy. The result is dreamy and modern, like watercolor clouds with a floral softness. It suits every shape and cool-to-neutral skin tones. Keep the drops small and spaced so the blues blend gently instead of flooding into one dark mass.
Who it suits: Anyone wanting abstract, modern florals.
Tip: Leave a few uncolored gaps so the tie-dye stays airy, not solid.
10. Cherry Blossom Branch
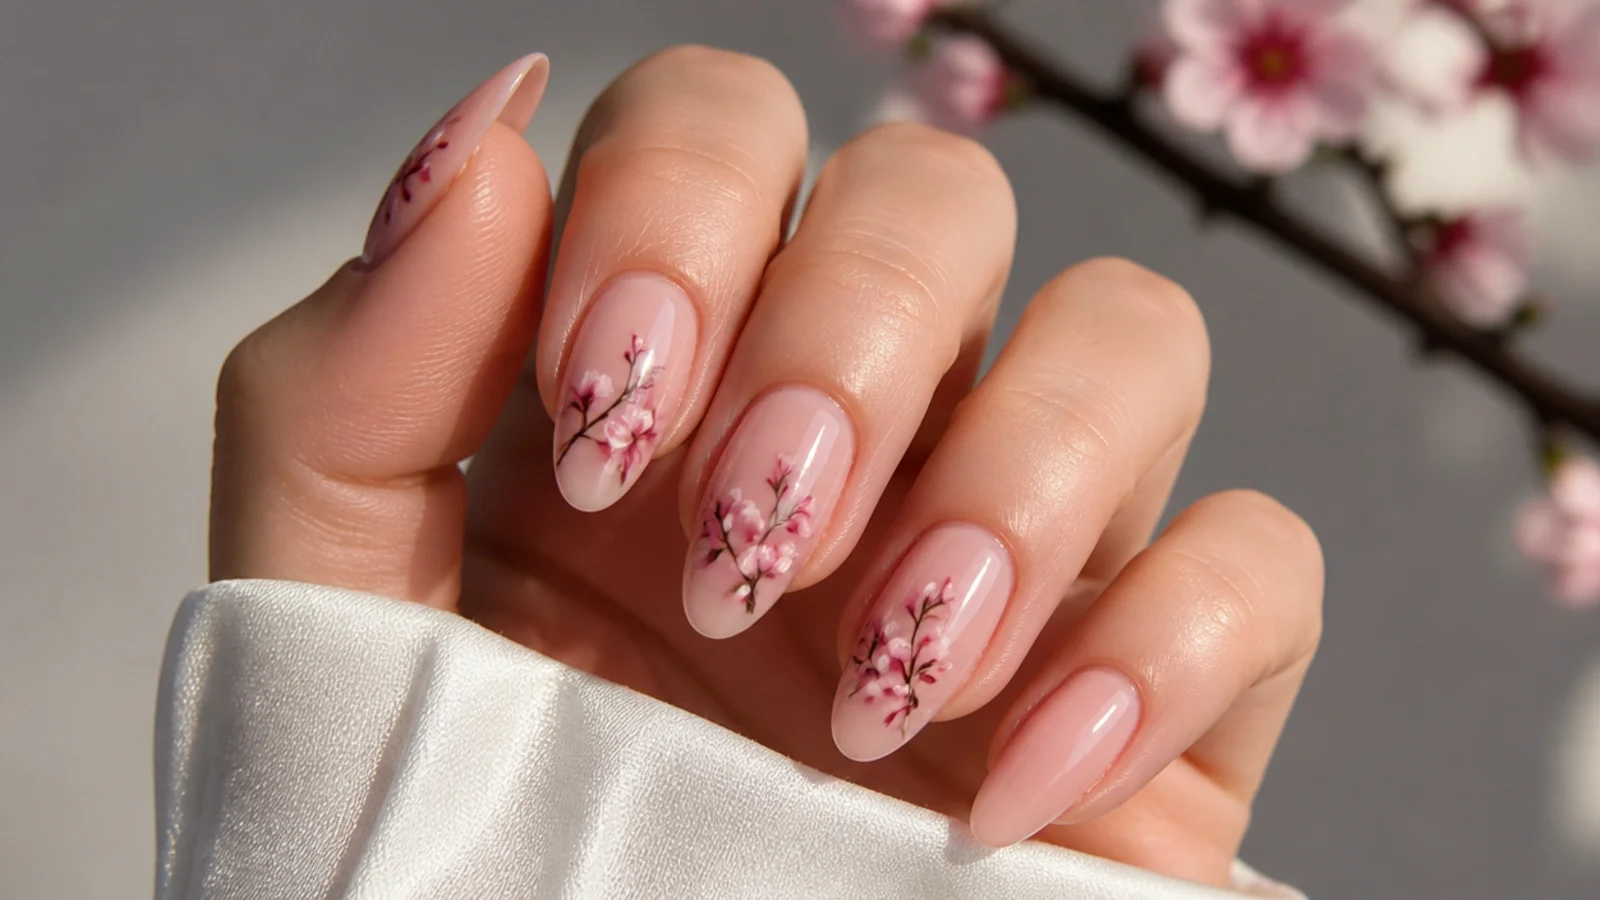
Delicate cherry blossoms along a fine branch over a nude base. Draw a thin brown branch, cure it, then brush blooming gel and dot soft pink blossoms along the branch so each blooms into a five-petal flower. A deeper pink dotted in the centers after curing adds depth. The blooming gel keeps the petals soft and diffused, like blossoms in a breeze. It suits spring sets, almond shapes and every skin tone. Add the branch and cure it first so it stays a crisp line, then bloom the pink separately - blooming both at once muddies the branch into the flowers.
Who it suits: Anyone wanting a delicate spring branch design.
Tip: Cure the branch before adding blossoms so the line stays crisp.
11. Pastel Hydrangea Cluster
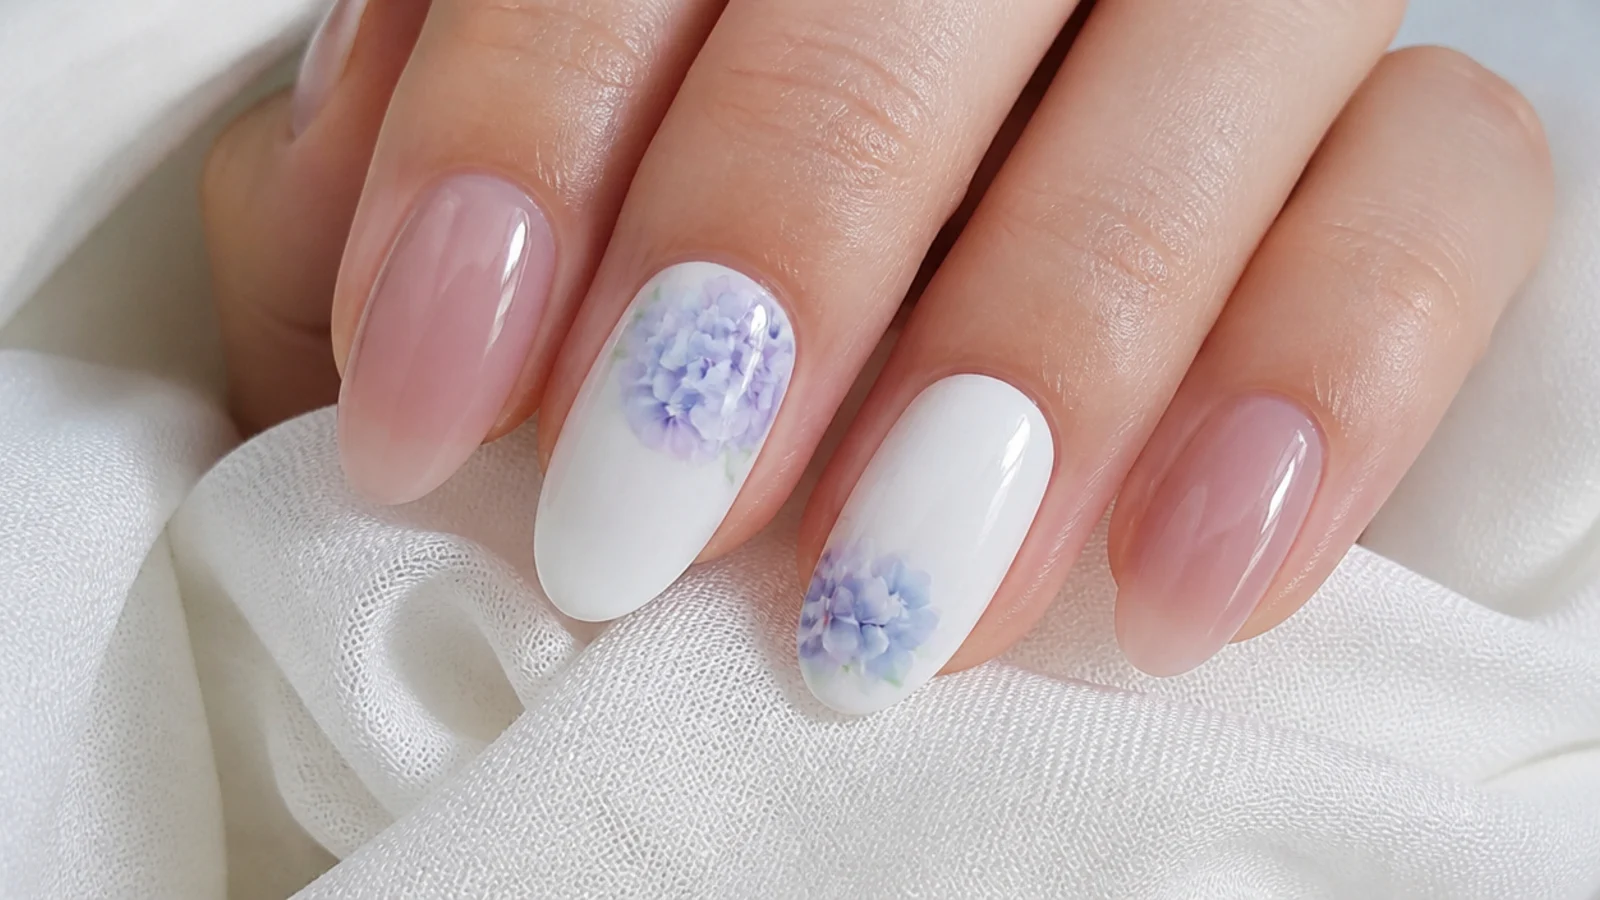
A rounded cluster of tiny hydrangea flowers in pastel blue and lilac over a white base. Brush thin blooming gel and dot many small four-petal flowers close together so they bloom into a soft mophead cluster. Alternating blue and purple dots gives the natural color shift of a real hydrangea. The blooming gel softens each tiny flower so the cluster reads full but delicate. It suits summer sets and medium nails with room for the cluster. Work in small sections, curing as you fill, so early flowers stay defined while you add more around them without smearing.
Who it suits: Anyone wanting a full but soft flower cluster.
Tip: Cure in sections as you build the cluster so flowers do not smear together.
12. Black Ink Orchid
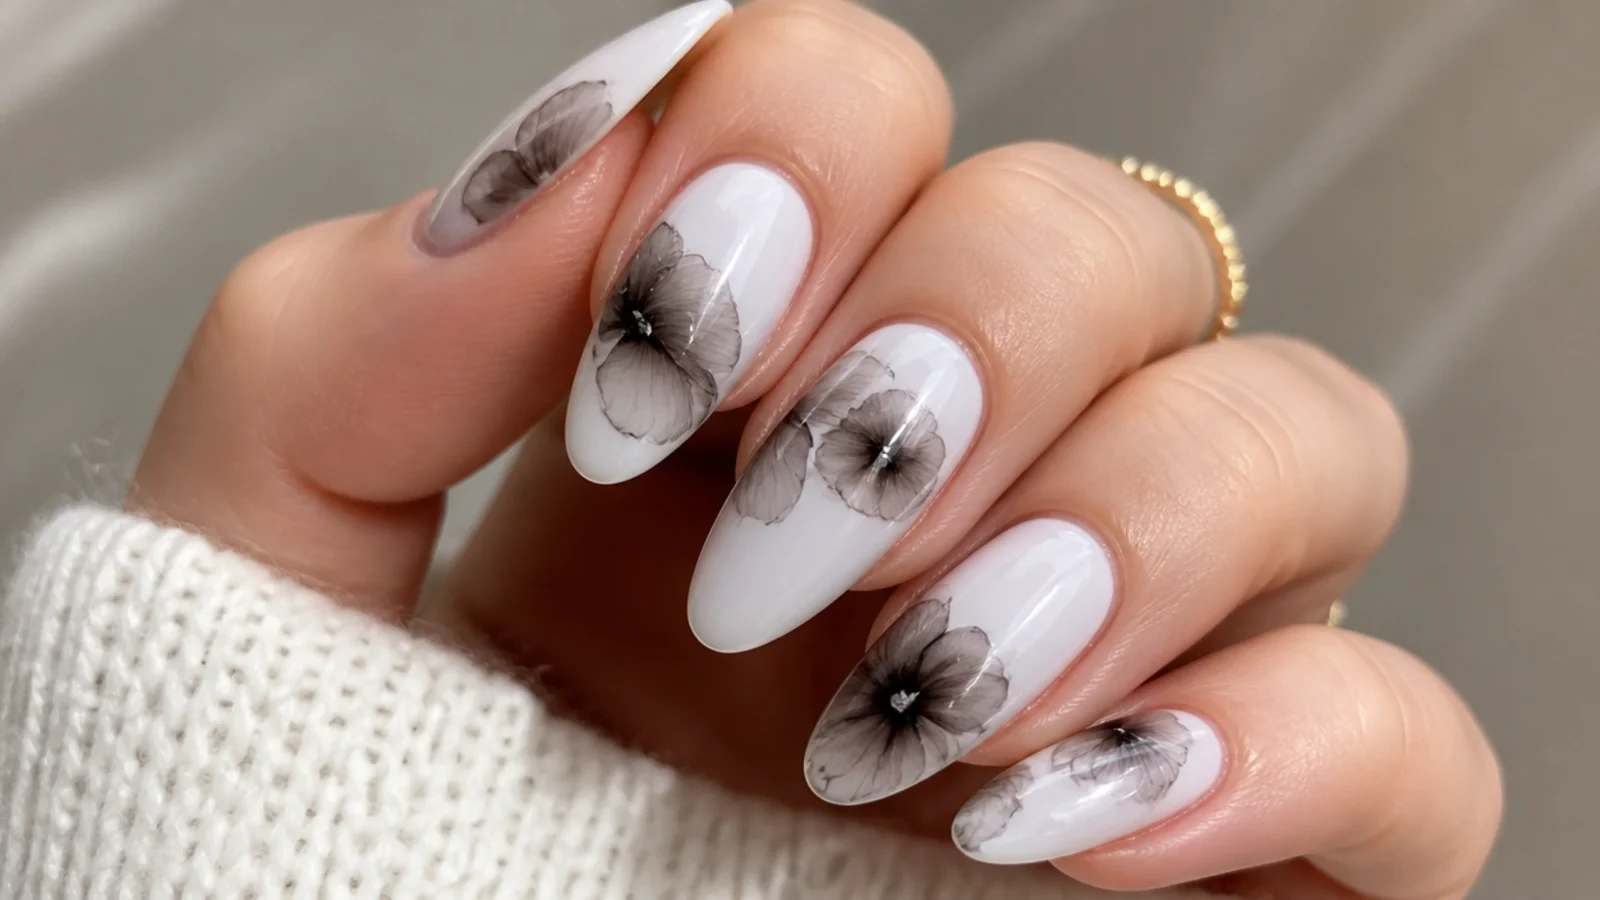
A dramatic orchid in diffused black and gray over a white base for a monochrome, ink-wash look. Brush thin uncured blooming gel, then draw black in long petal strokes and let it feather softly into the gel, adding a little gray to build depth. The blooming gel turns hard black lines into soft, ink-in-water petals. Kept to one accent nail, it is striking and modern against plain white companions. It suits edgy, high-fashion sets and every skin tone. Use very little black at a time - it spreads fast and can flood the whole nail into gray if you overload the wet gel.
Who it suits: Anyone wanting a bold monochrome flower.
Tip: Black spreads fastest of all - use tiny amounts and build slowly.
13. Coral Daisy Chain
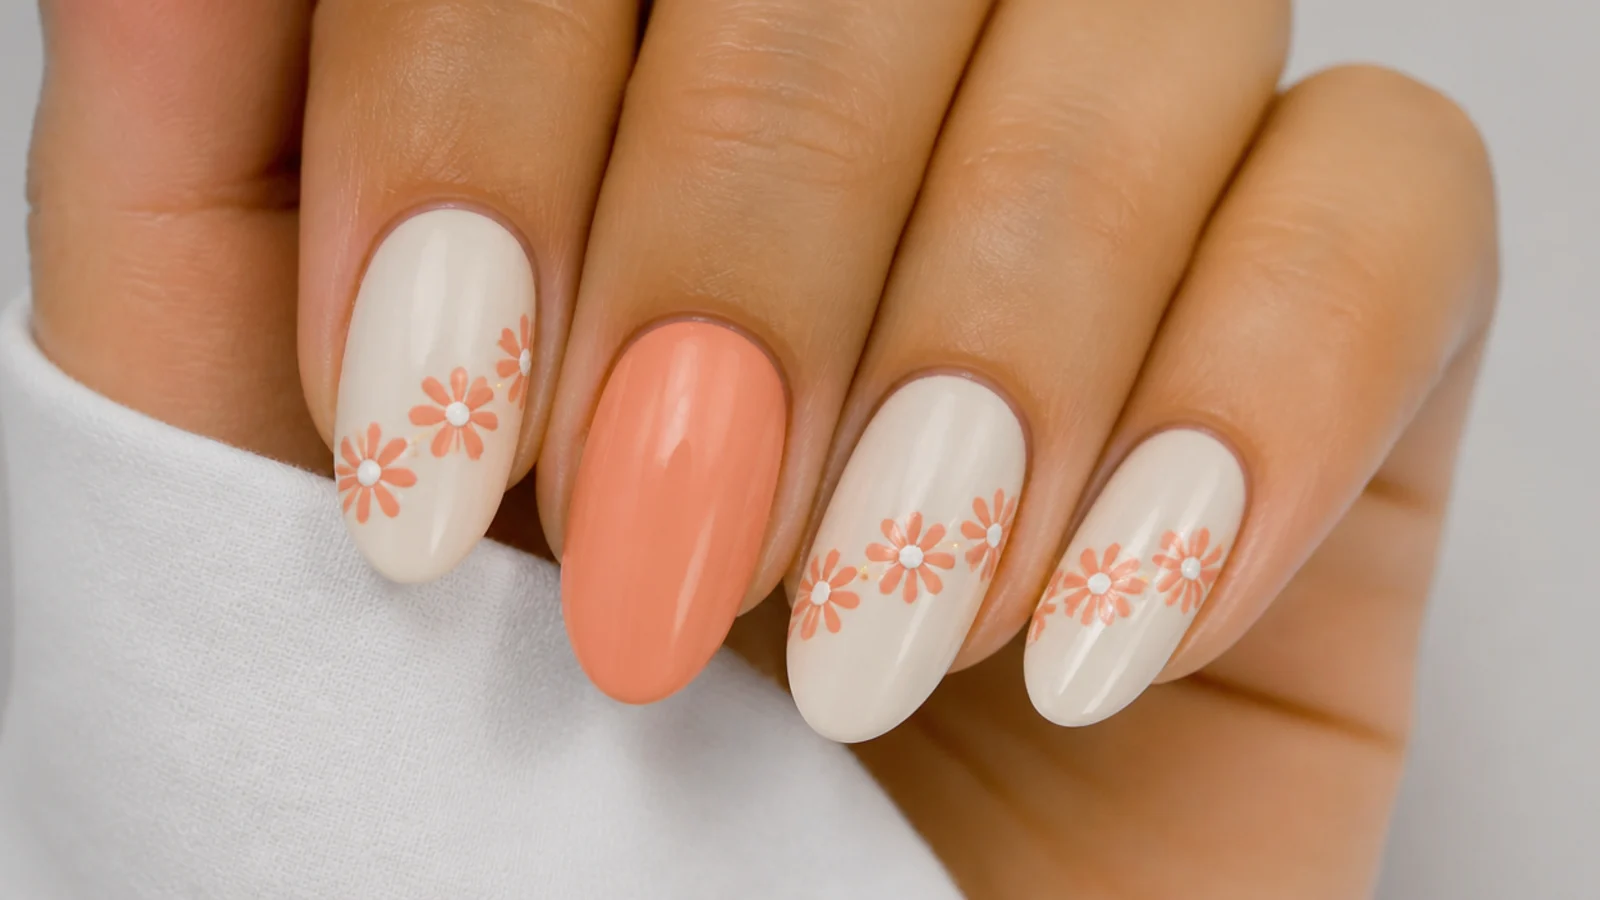
A cheerful chain of coral daisies over a cream base. Brush thin blooming gel and dot coral in five-petal rings across the nail, letting each ring bloom into a soft daisy, then add white or pale yellow centers after curing. The blooming gel softens the coral edges so the daisies look sun-warmed and painterly. A row of them across the tip or the whole nail reads playful and summery. It suits warm skin tones and casual, bright sets. Keep the daisies evenly sized and spaced, and cure before adding centers so the pale middle stays crisp against the coral.
Who it suits: Anyone wanting a playful summer daisy design.
Tip: Keep petal dots even in size so the daisy chain looks tidy.
14. Burgundy Rose Garden
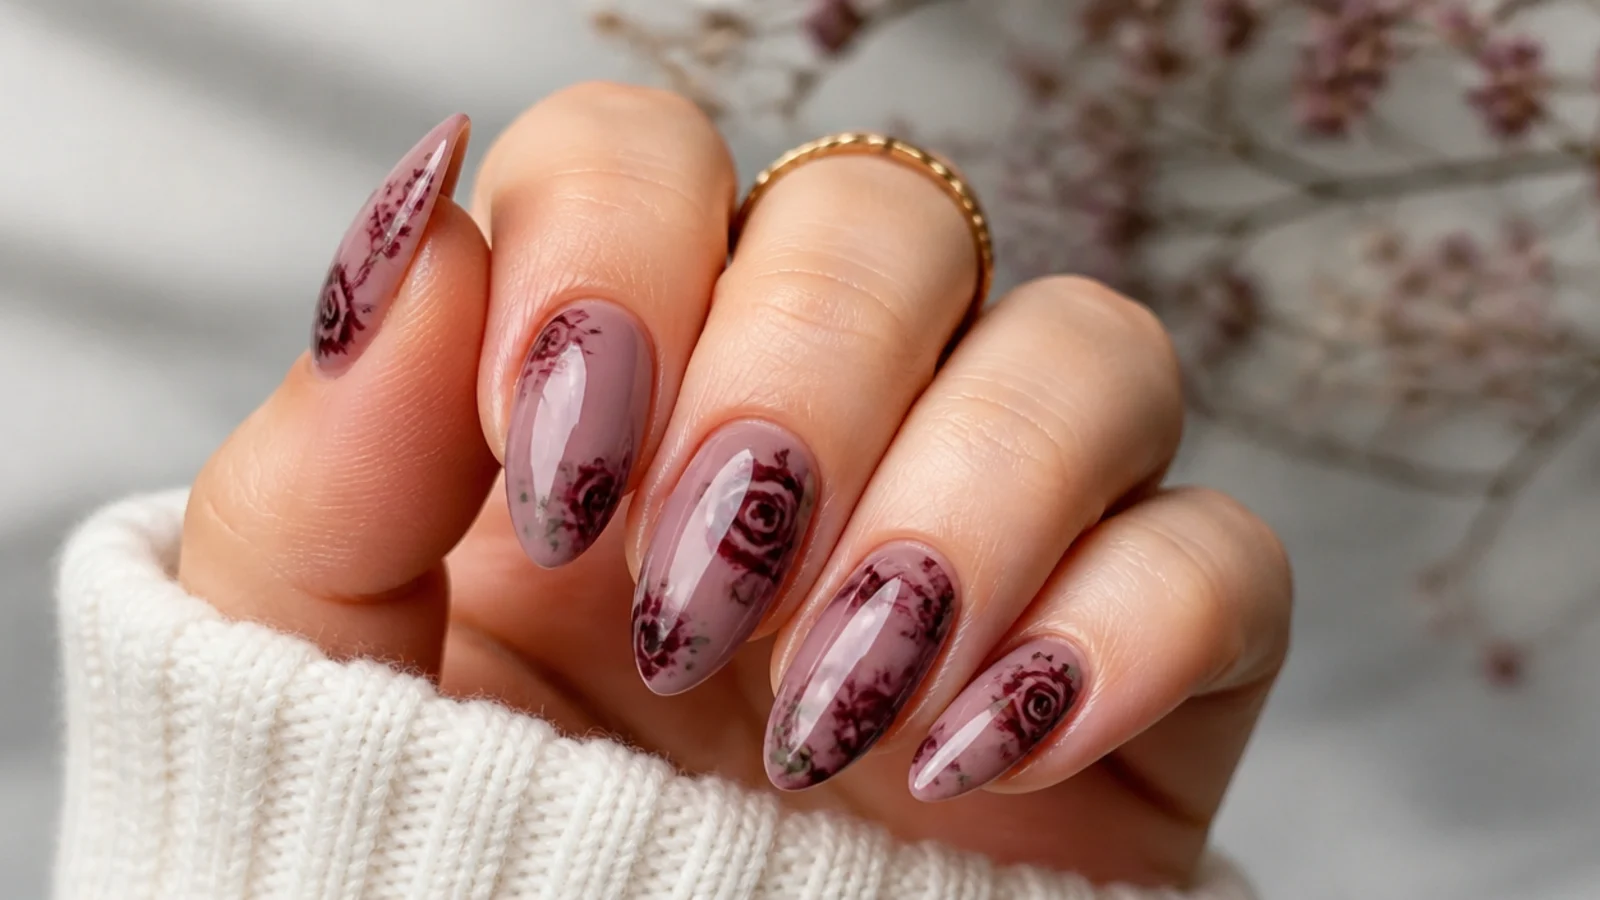
Deep burgundy roses bloomed over a soft mauve base for a moody, romantic set. Brush thin uncured blooming gel, then swirl burgundy and a darker wine tone in loose spirals so they bleed into full, layered roses. Green dotted at the edges blooms into leaves. The blooming gel gives the roses velvety, diffused petals that read rich rather than flat. It suits fall and winter sets, coffin and almond shapes, and warm-to-deep skin tones. Build the roses in two layers, curing between, so the darkest centers stay deep while the outer petals fade softly into the mauve.
Who it suits: Anyone wanting rich, moody fall florals.
Tip: Build the rose in two cured layers so the center stays deep and the edges fade.
15. Mint Eucalyptus Sprig
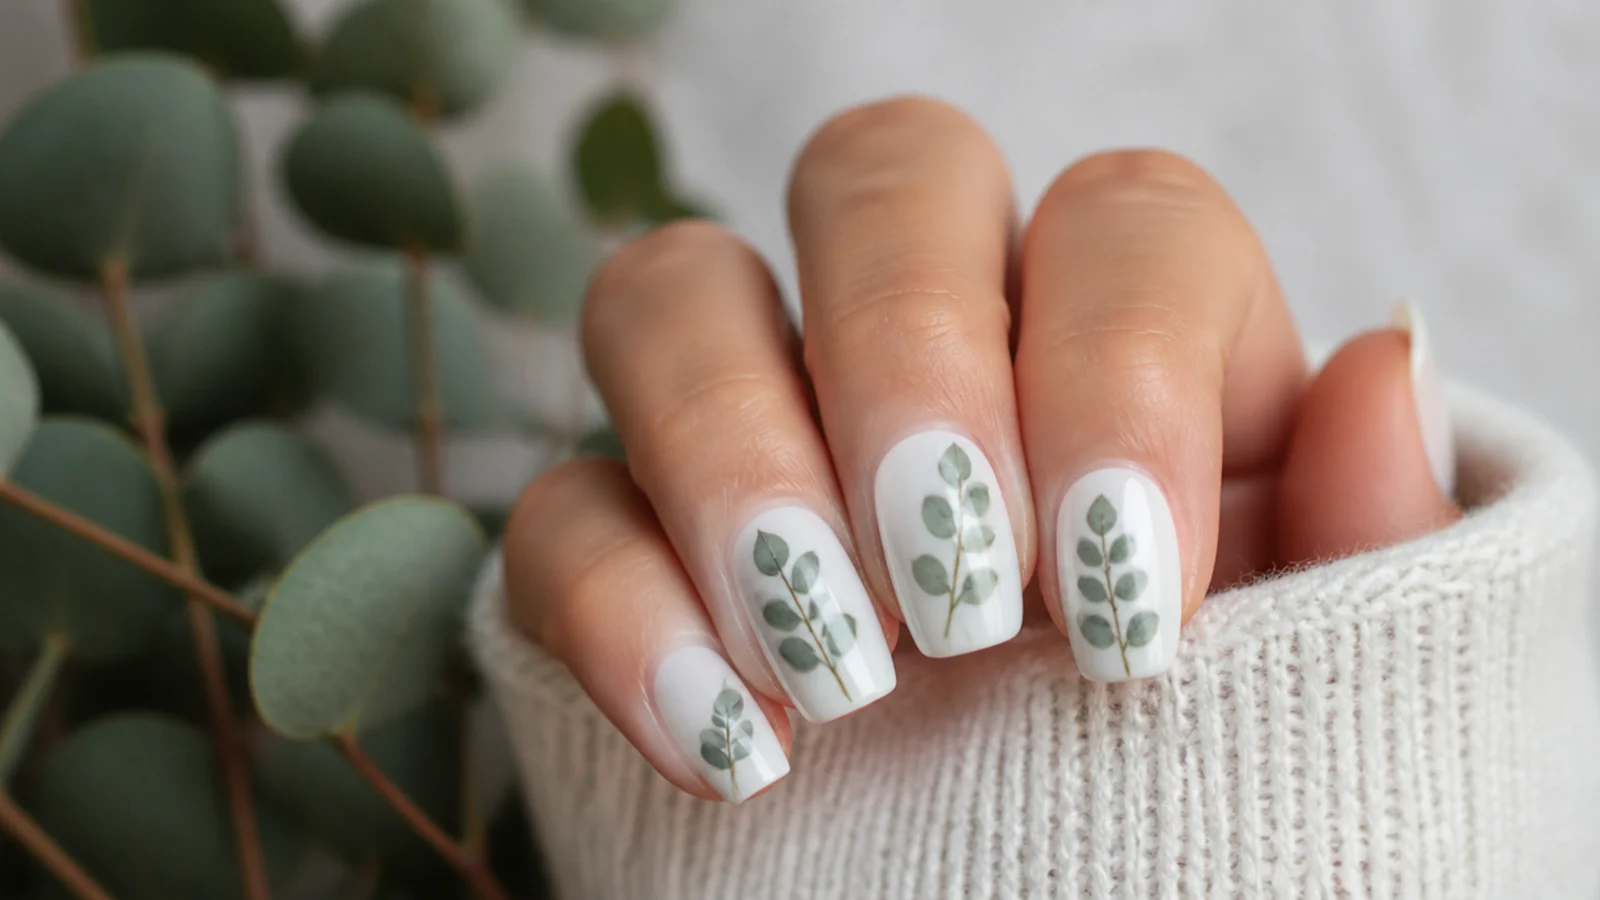
Soft eucalyptus sprigs in diffused sage green over a white base - a botanical, greenery-focused take on floral nails. Draw a thin stem, then brush blooming gel and dot sage and mint green in rounded leaf shapes along it so each blooms into a soft leaf. The blooming gel feathers the green so the sprig looks airy and pressed-flower delicate. It reads fresh and minimal, a modern alternative to bold flowers. It suits neutral, clean sets and every skin tone. Vary the green tones slightly from leaf to leaf so the sprig has natural depth rather than looking like one flat color.
Who it suits: Anyone wanting minimal botanical greenery.
Tip: Mix two greens so the leaves have natural, pressed-flower depth.
16. Sunset Wildflower Mix
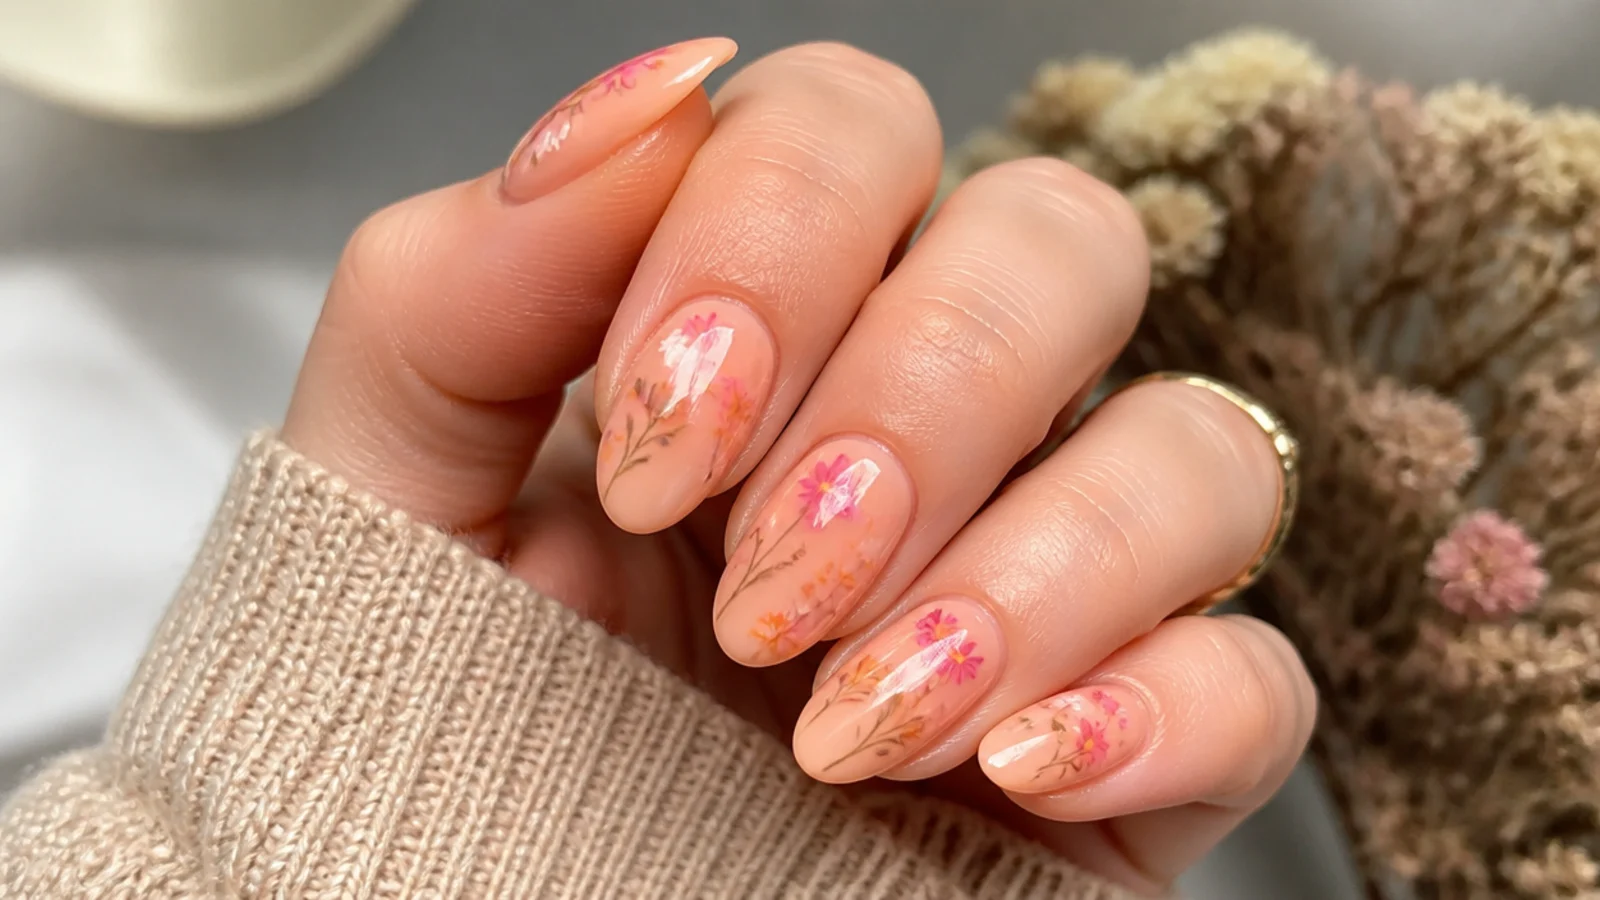
A warm mix of wildflowers in orange, pink and yellow over a peach base. Brush thin blooming gel and dot small flowers in warm sunset tones across the nail, letting each bloom into soft petals that overlap slightly like a meadow. Green dotted between them blooms into leaves and stems. The blooming gel melts the warm colors together at the edges for a golden-hour glow. It suits summer and fall sets and flatters warm and olive skin tones. Keep each color to small drops so the flowers stay distinct - too much and the warm tones flood into one orange wash.
Who it suits: Anyone wanting a warm, meadow-style floral.
Tip: Small drops of each color keep the wildflowers distinct, not one orange blur.
17. Negative-Space Bloom
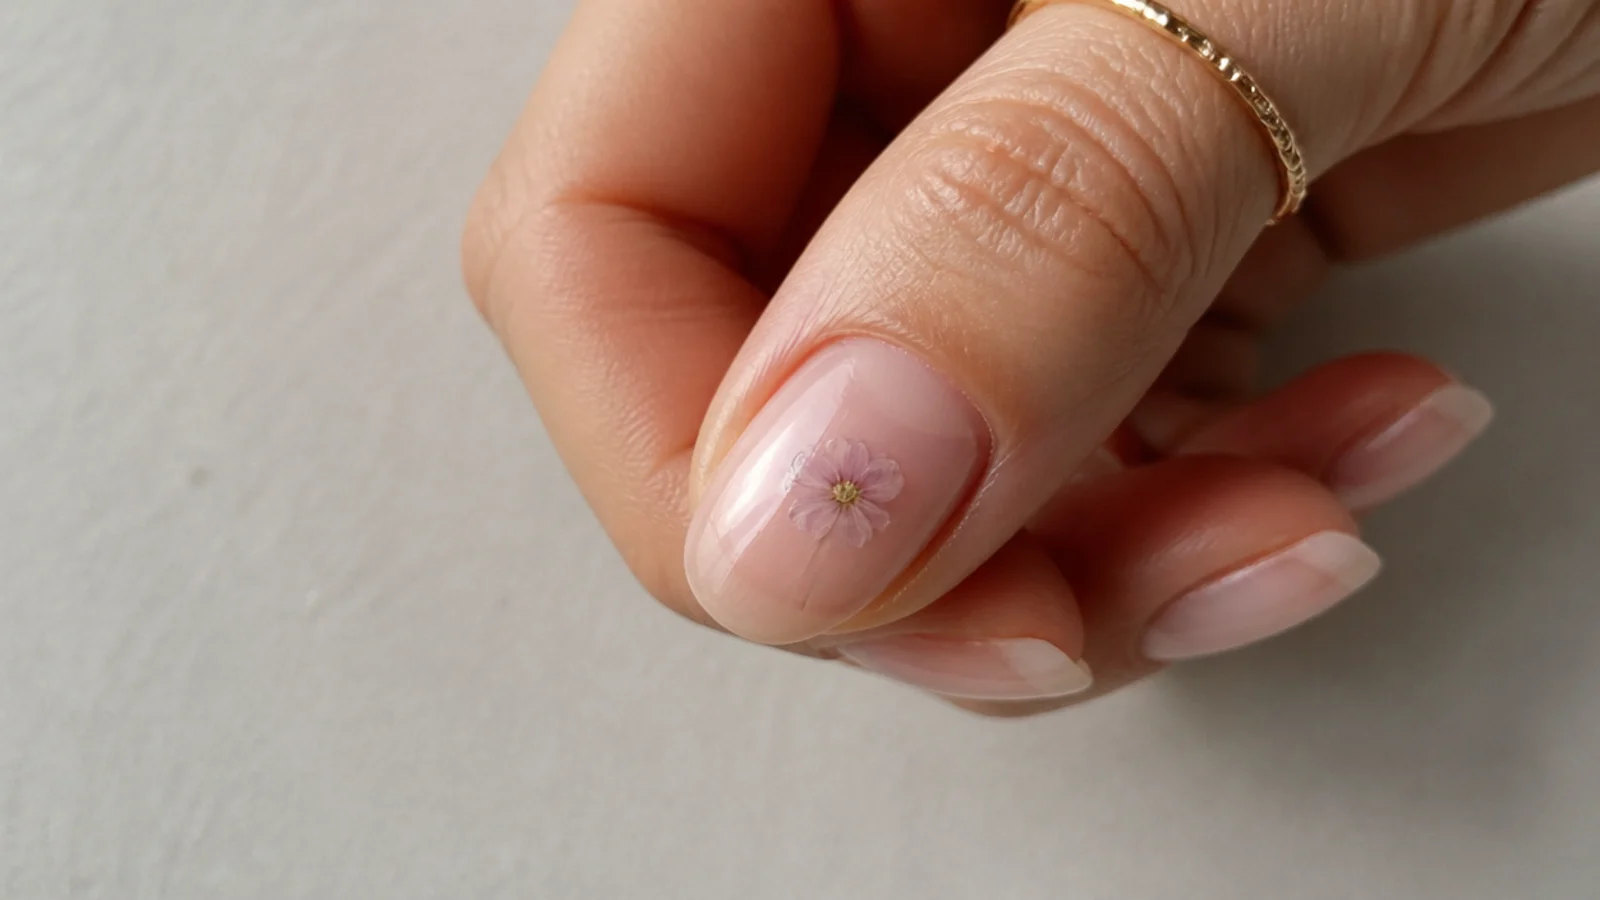
A single soft flower floating on a bare, natural nail for a modern minimalist look. Skip a full color base and brush blooming gel only where the flower will sit, then drop soft color so it blooms into petals surrounded by clear negative space. Curing seals just the flower while the rest of the nail stays sheer and natural. The empty space makes the diffused bloom feel intentional and gallery-like. It suits short nails, minimalist taste and every skin tone. Keep the flower small and off-center for the most modern effect, and seal the whole nail with clear top coat so the bare areas stay protected.
Who it suits: Anyone wanting minimalist, modern floral art.
Tip: Top coat the whole nail, not just the flower, so the bare space stays sealed.
18. Gold-Flecked Camellia
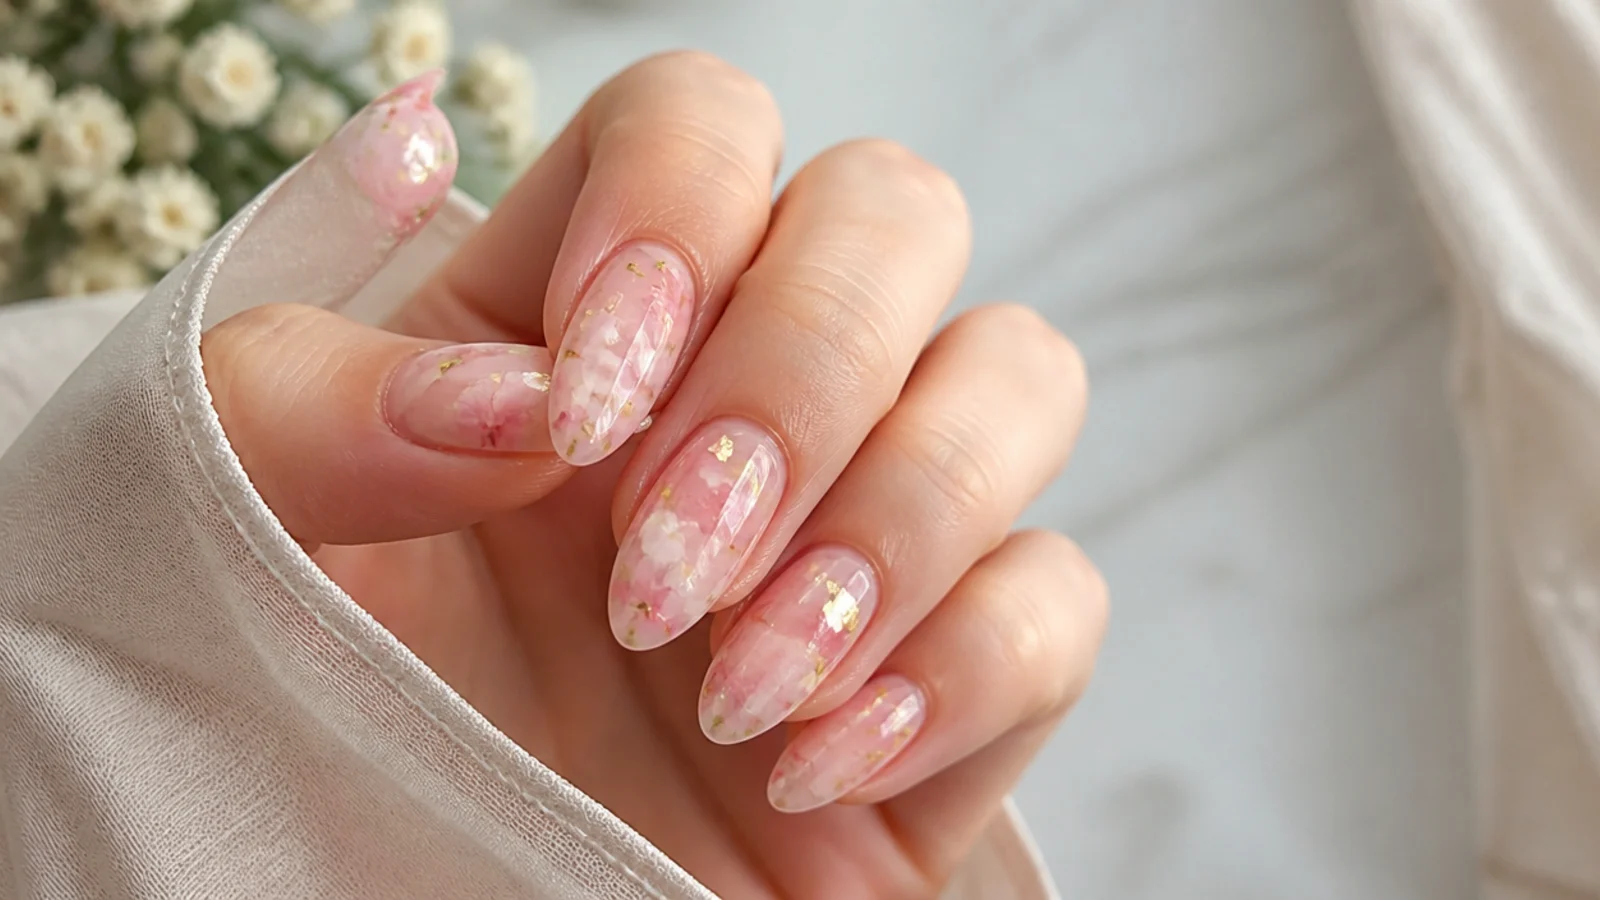
A soft pink camellia with gold leaf accents over a nude base for a luxe finish. Brush thin blooming gel and swirl pale and deeper pink into layered, rounded petals, letting the blooming gel diffuse the edges. After curing, press a few tiny gold leaf flakes near the center and seal under top coat. The gold catches the light against the soft pink for an expensive, event-ready look. It suits weddings, parties and every skin tone. Add the gold only after the flower has cured and always seal it well, so no flake edges lift or catch on fabric.
Who it suits: Anyone wanting a luxe, event-ready flower.
Tip: Press gold flakes on after curing, then seal firmly so no edges catch.
19. Two-Tone Tulip
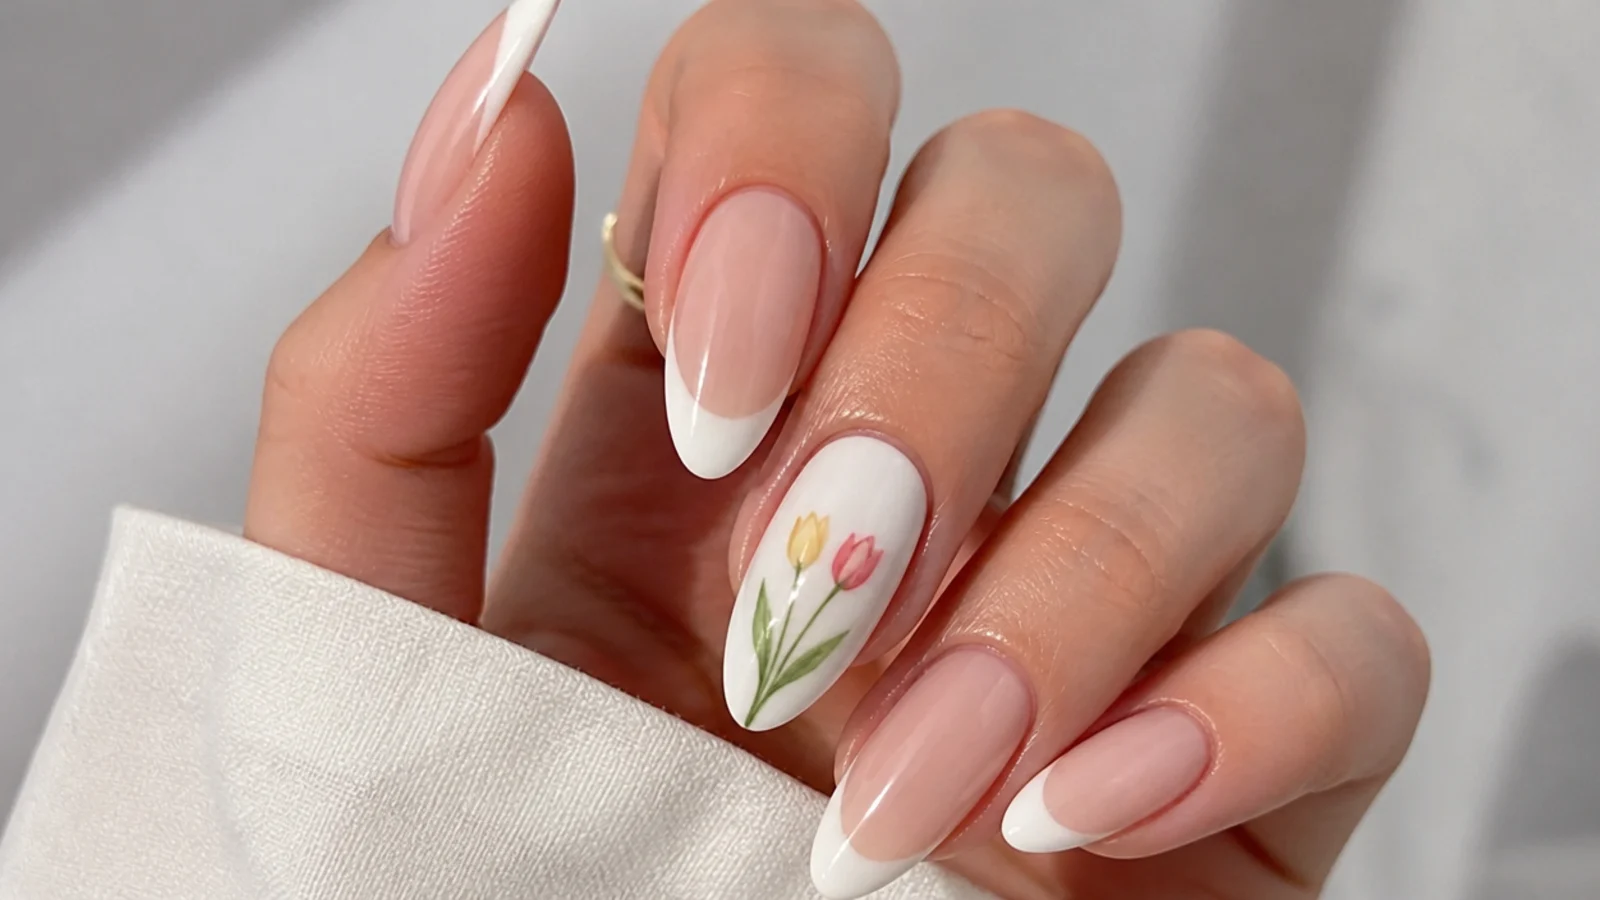
Simple tulips in blended pink and yellow rising from the cuticle over a white base. Draw thin green stems, cure them, then brush blooming gel and drop pink at the top of each stem with a touch of yellow at the base so the two colors bloom and merge into a soft two-tone cup. The blooming gel diffuses the join so the tulip glows rather than looks striped. Vertical stems elongate the nail, flattering shorter shapes. It suits spring sets and every skin tone. Cure the stems first so they stay crisp lines beneath the blooming tulip heads.
Who it suits: Anyone wanting a simple, elongating spring flower.
Tip: Cure the stems first so they stay sharp under the soft tulip heads.
20. Full Garden Statement
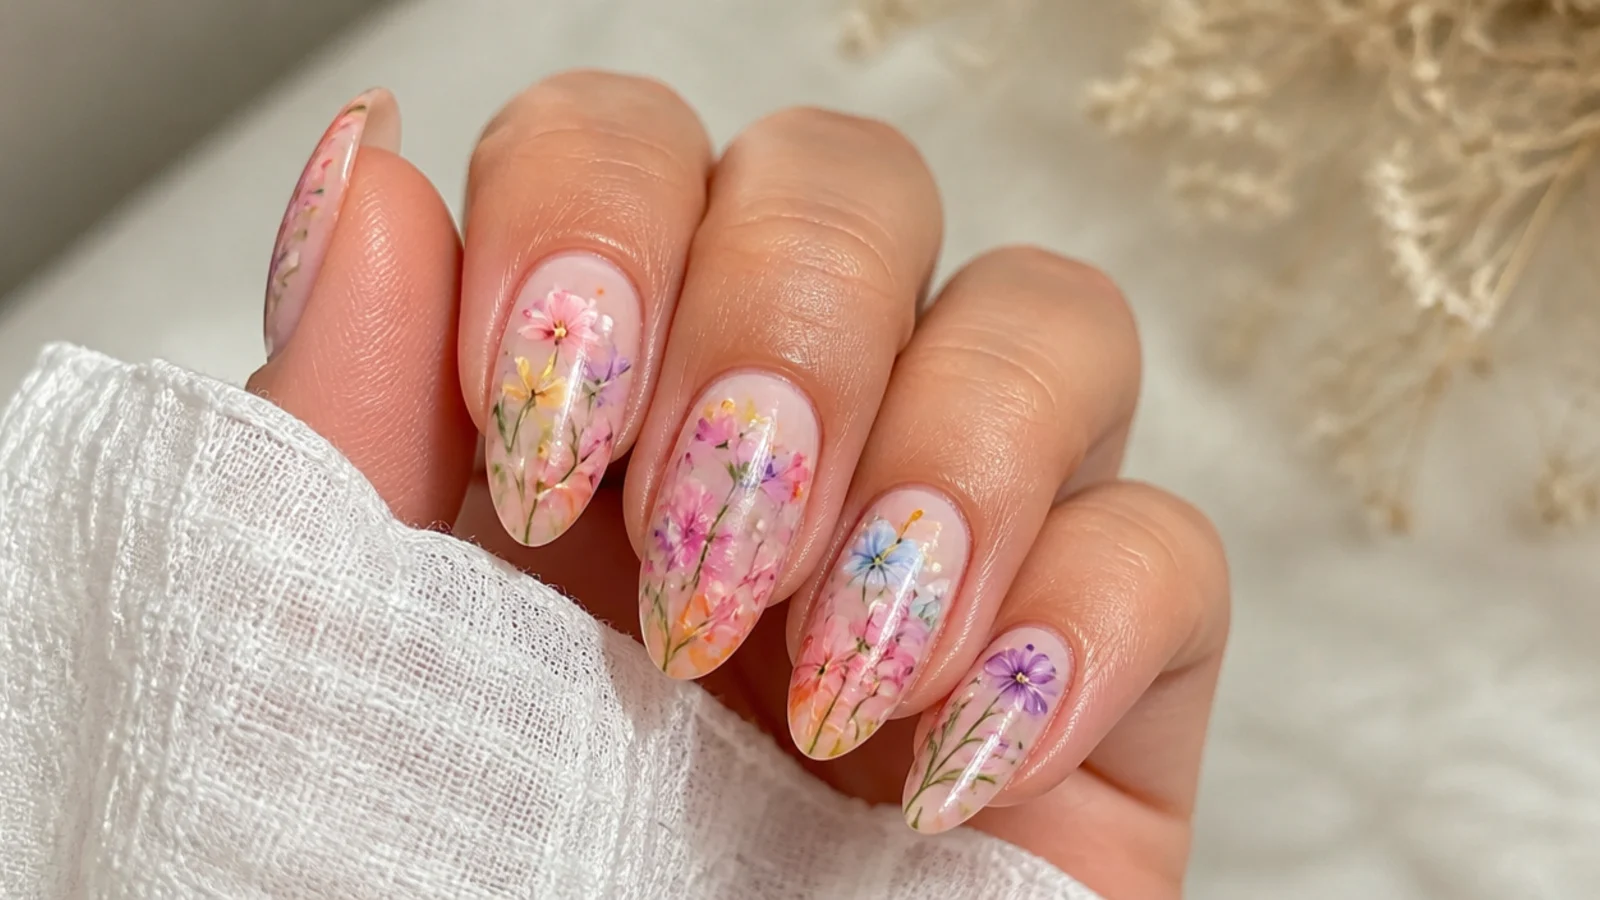
The maximalist version - every nail covered in mixed watercolor flowers over a nude base. Across all ten nails, brush thin blooming gel and bloom a different flower on each, roses, daisies, forget-me-nots and blossoms, in a coordinated pink, blue and coral palette. Green blooms fill the gaps as leaves. The blooming gel keeps even a packed design soft and cohesive rather than busy. It is a show-stopping set for a big occasion or milestone. It suits confident wearers and every skin tone. Work one or two nails at a time, curing as you go, so the wet gel never dries before you finish blooming each flower.
Who it suits: Anyone wanting maximum floral impact.
Tip: Keep every flower in one palette so a full garden reads cohesive, not chaotic.
What Is Blooming Gel and How Does It Work?
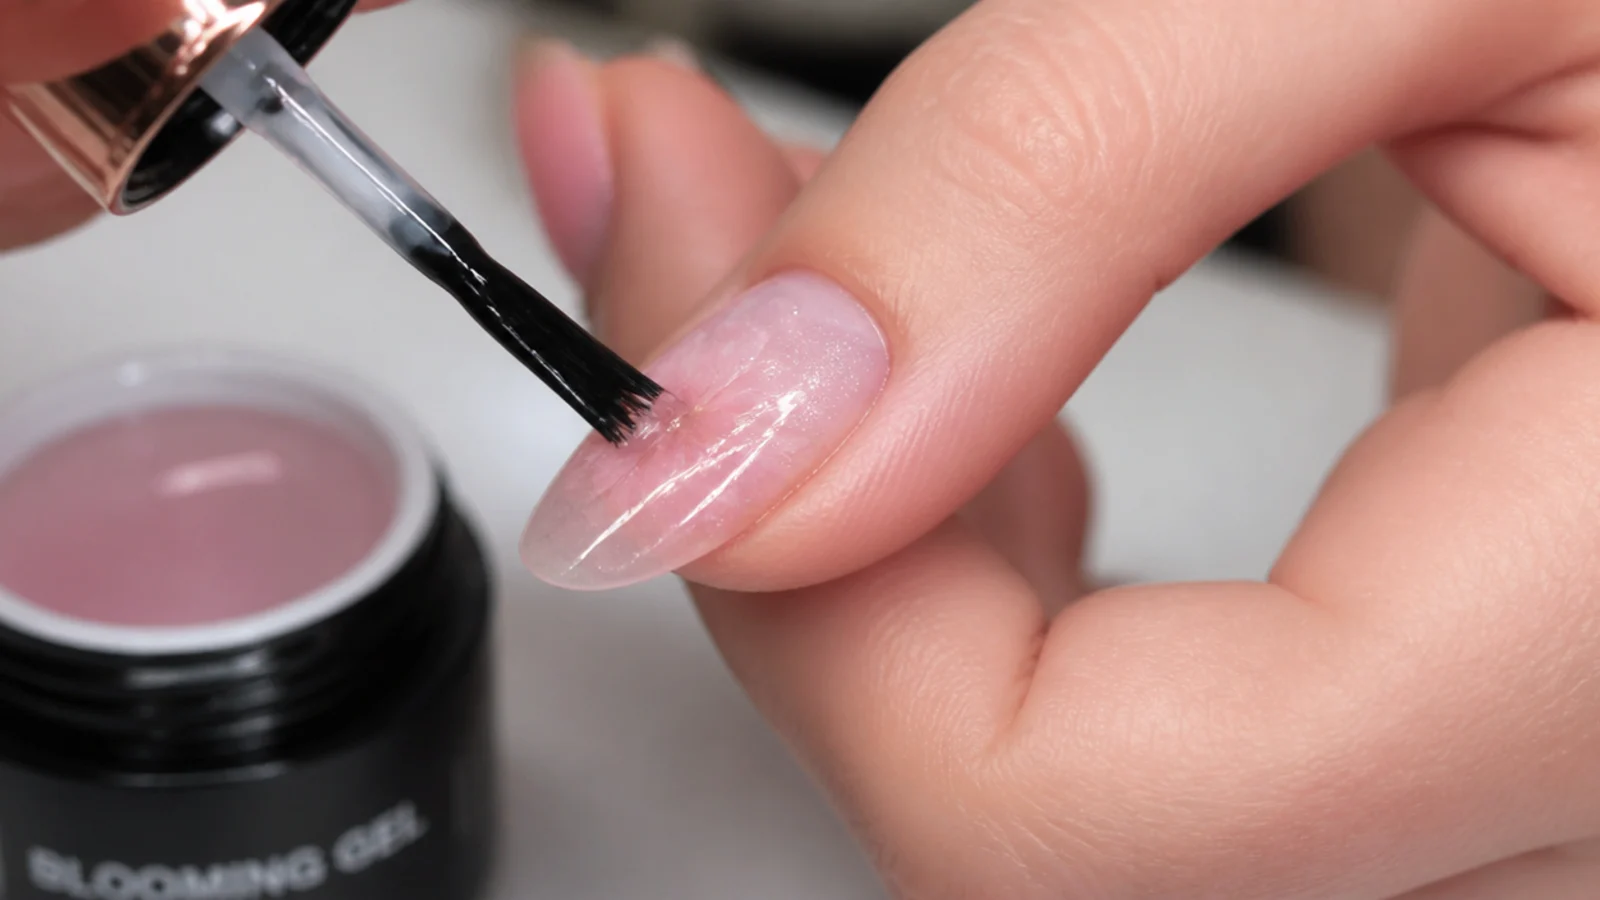
Blooming gel is a clear gel that makes gel color spread and diffuse into soft, watercolor patterns instead of sitting where you place it. To use it, apply a thin layer of blooming gel over a cured color base and leave it uncured. Then drop or draw gel color onto the wet blooming gel, and it feathers out into petals and diffused shapes within seconds to about a minute. Once the bloom looks right, cure under an LED or UV lamp to lock the pattern. The key rule: curing the blooming gel before you add color kills the effect, because the gel has to be wet for the color to travel. Thickness controls the spread - a thinner layer blooms more, a thicker layer blooms less. It is the wet gel doing the blending, which is why flowers look hand-painted without a painter's hand.
How to Get the Blooming Gel Flower Look at Home
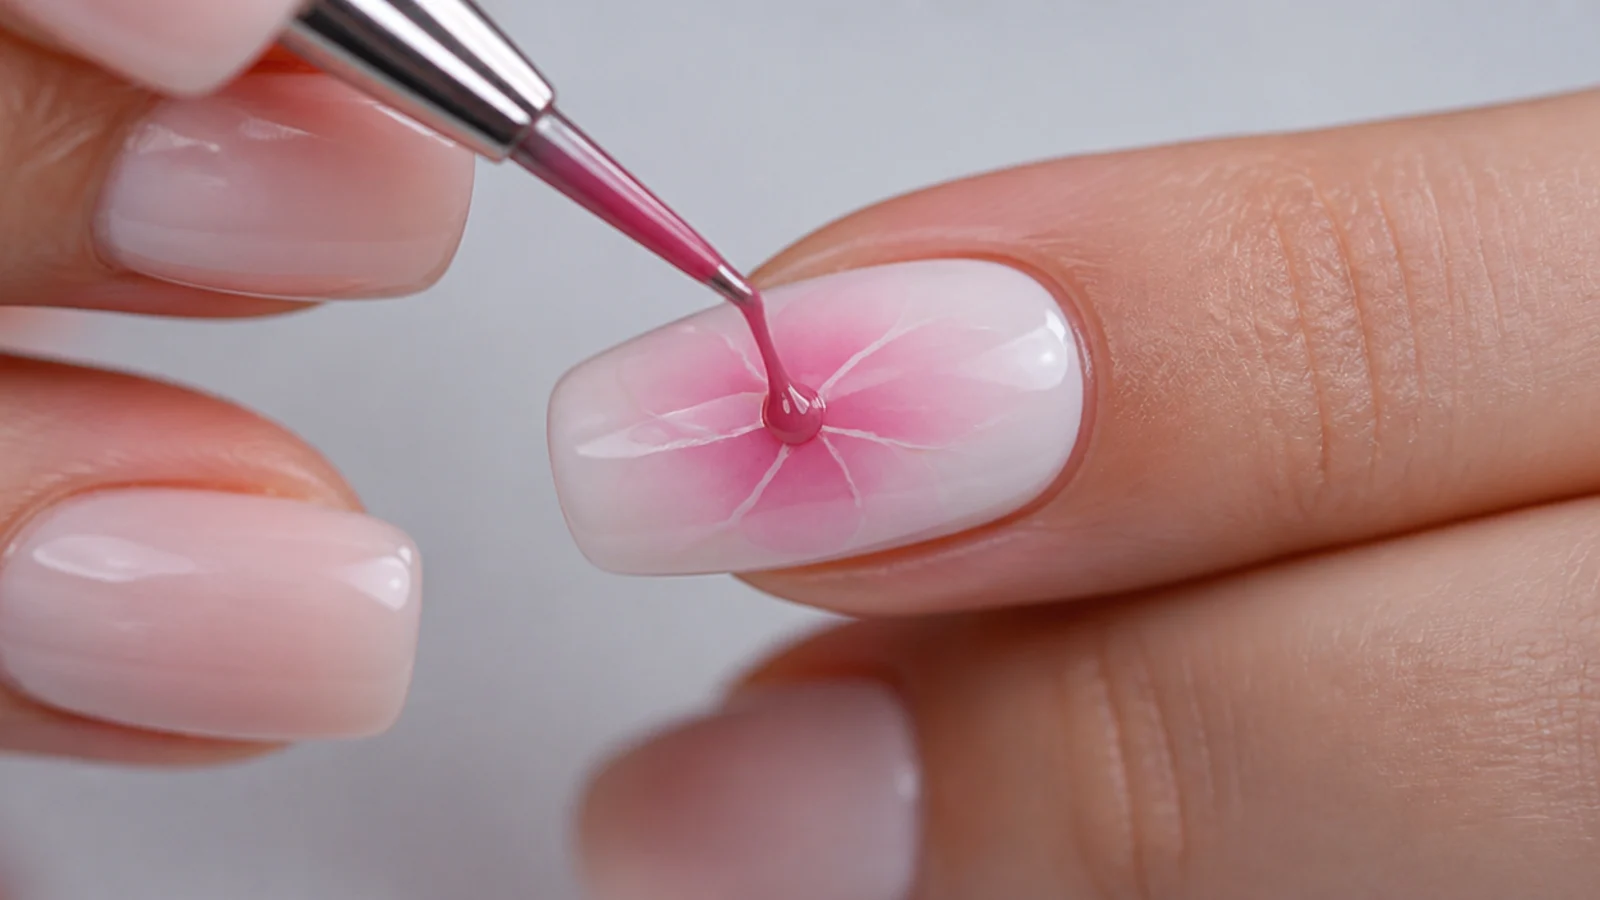
Start with clean, prepped nails, a base coat and a cured color base in your chosen background shade. Brush a thin, even layer of clear blooming gel over the whole nail and do not cure it. Load a thin detail brush with a little gel color and touch it to the wet gel - the color blooms out into a petal on its own. Add petals in a ring for a flower, or dot color in clusters for scattered blooms. Use a little color and let it spread rather than flooding it, which goes muddy. Once the flower looks right, cure 30 to 60 seconds under LED or about 2 minutes under UV. Build depth by adding a second layer of blooming gel and more color, curing between. Finish with a no-wipe gel top coat, cap the free edge, cure, and apply cuticle oil.
Supplies You Need
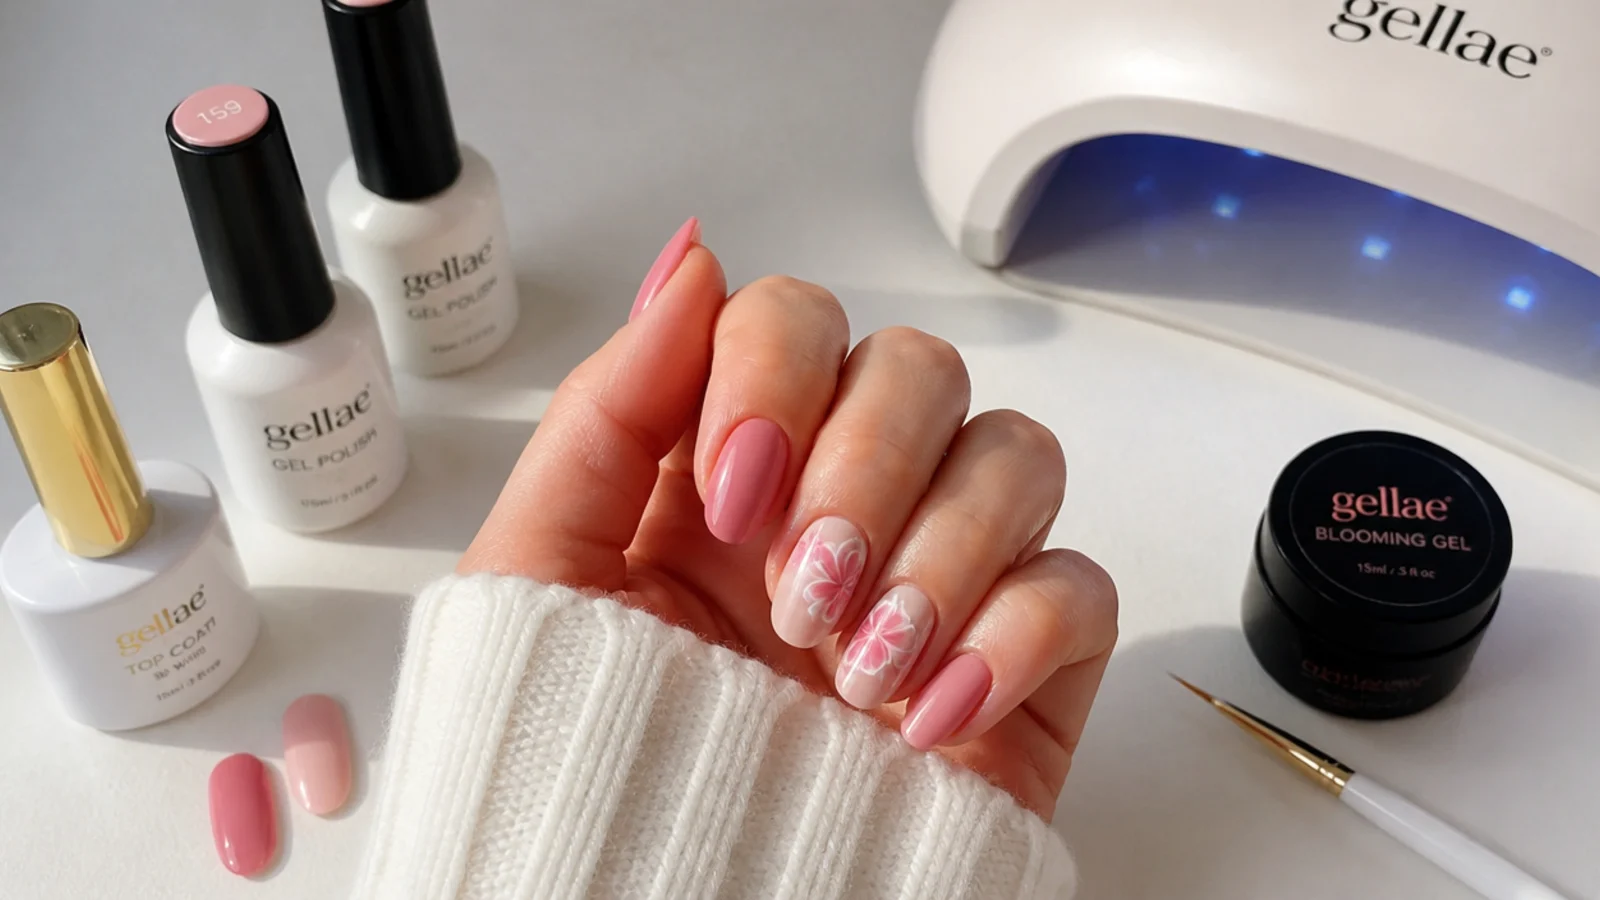
The blooming gel flower look needs a short, specific kit. Essentials: a base coat; gel color polish for both your background and your flowers; a bottle of clear blooming gel; a no-wipe gel top coat; and an LED or UV lamp to cure. For the art itself, a thin detail or liner brush lets you place small amounts of color and shape petals. Lint-free wipes keep your brush and nail clean between colors. Cuticle oil keeps the finished set flexible and long-wearing, and 100% acetone is what you will use later for a safe soak-off removal. A DIY kit of blooming gel, a few gel colors and a small lamp pays back fast versus per-visit salon art. Skip nothing on the base coat and lamp - they are what make the design cure hard and last.
Common Blooming Gel Mistakes to Avoid
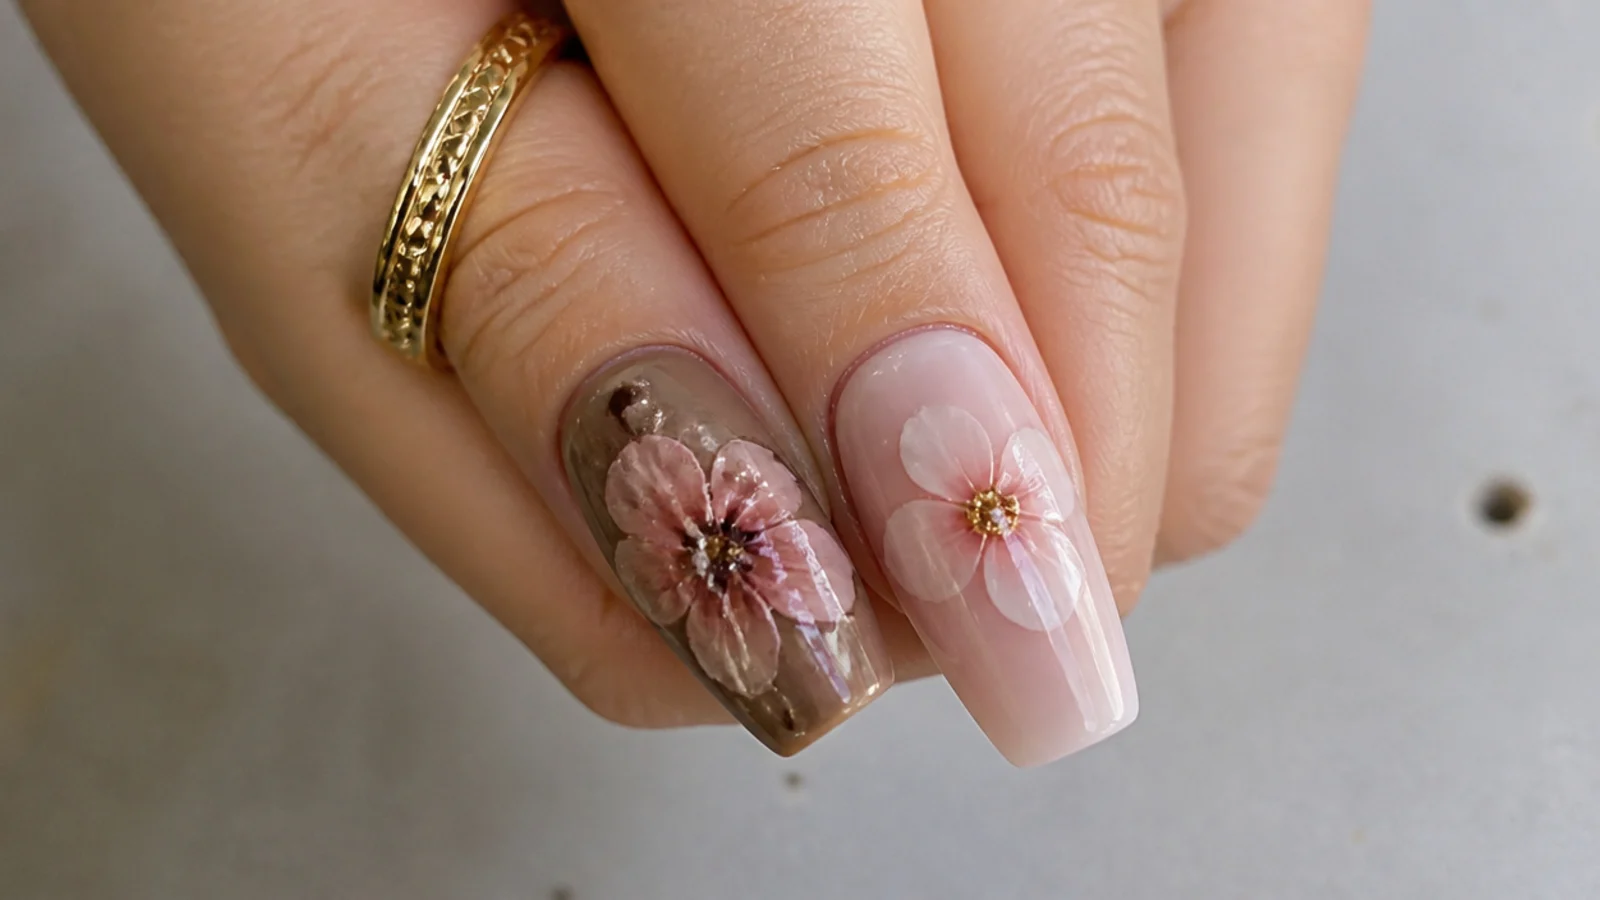
Most failed blooming gel flowers come down to a few fixable errors. The biggest is curing the blooming gel too early - it has to stay wet and uncured for color to bloom, so cure only after the color is placed. The second is flooding too much color, which blends into a muddy blur instead of soft petals; use a little and let the gel spread it. Third is a layer that is too thick, which stops the bloom entirely, so brush the blooming gel thin. Not sealing or capping the free edge lets the design smear and chip early, so always run top coat along the tip. Finally, skipping base prep causes lifting, so cleanse and buff first. Build depth in cured layers rather than one heavy pass, and your florals stay crisp.
How Long Do Blooming Gel Nails Last?
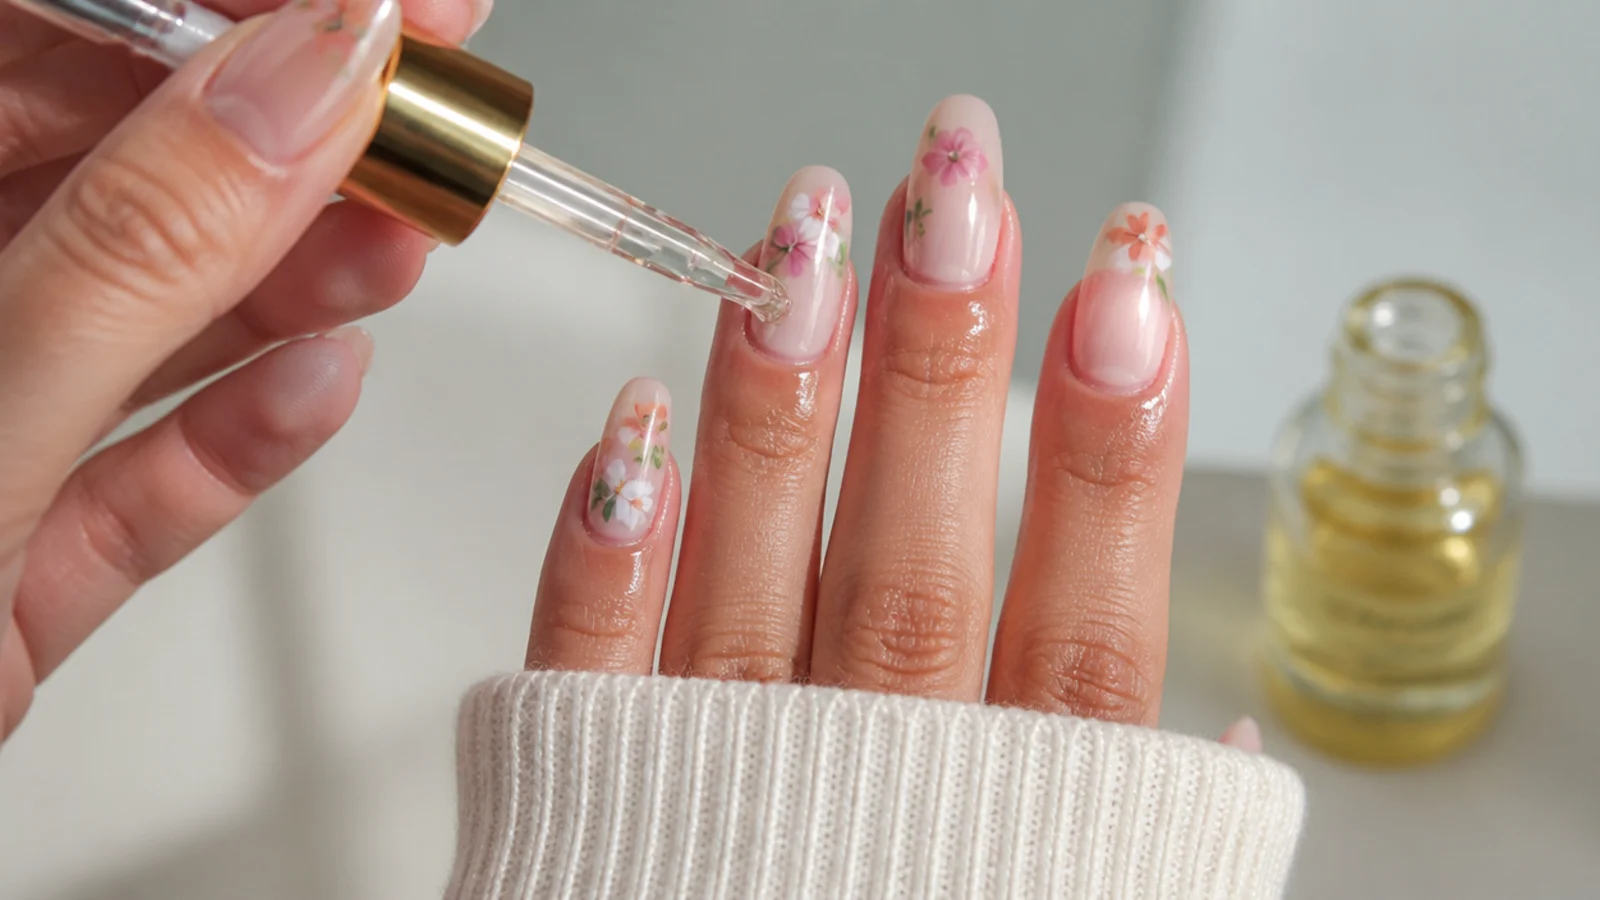
Because blooming gel is a gel technique, the design is cured hard and wears far longer than painted polish art. Typical wear is 2 to 3 weeks, and up to 4 with good prep, daily cuticle oil, and capping the free edge to seal the tip. By contrast, regular non-gel polish flower art lasts only about 5 to 7 days before it chips. To get the most life out of a set, keep these in mind - Prep: cleanse and buff so nothing lifts. Sealing: cap the free edge under top coat. Care: cuticle oil daily and gloves for chores. The soft, diffused design also hides minor tip wear better than a hard-edged painted line, so it grows out gracefully. Book a refill or redo every 2 to 3 weeks to keep the florals fresh and the edges lift- free.
Cost - Salon vs DIY
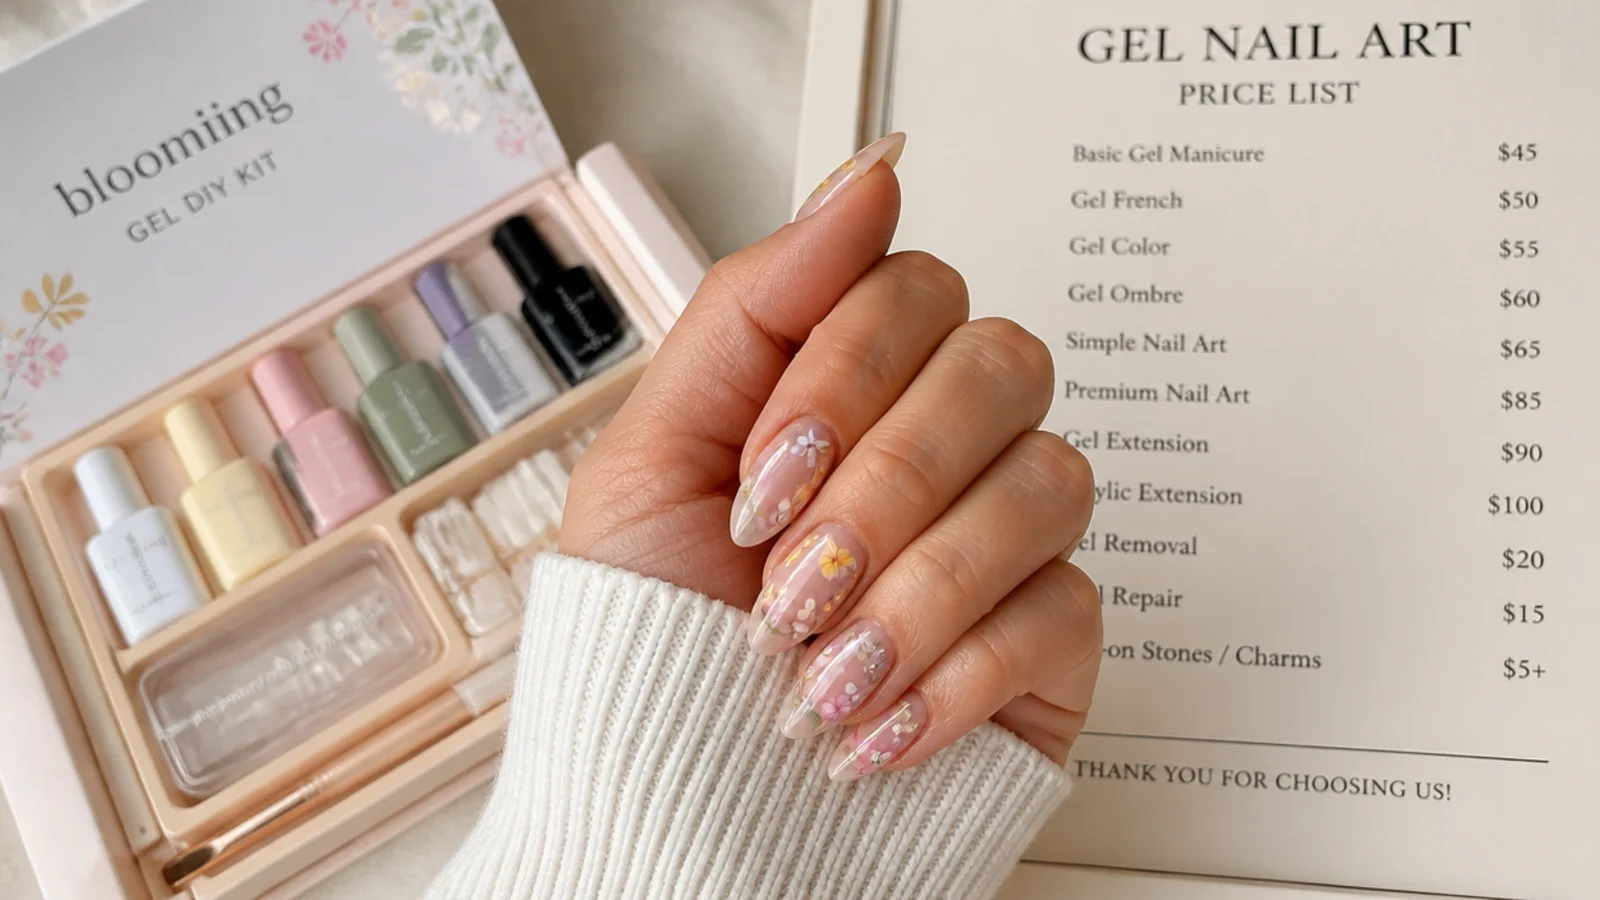
Blooming gel flower nails can be a splurge or a bargain depending on where you get them. At a salon, a standard gel manicure runs about $30 to $55, and nail-art add-ons cost around $5 per accent nail, so a full blooming-gel flower set often lands around $45 to $70 or more depending on how many nails are decorated. Doing it yourself changes the math - Kit: blooming gel, a few gel colors and a small LED lamp is a one-time outlay. Per set: pennies in product once you own the kit. Payback: the kit usually pays for itself within a couple of at-home sets versus salon art. DIY takes practice to match a tech's finish, but blooming gel is forgiving because the diffused look hides small imperfections, making it one of the most cost-effective nail-art techniques to learn at home.
Frequently Asked Questions
What is blooming gel and how does it work?
Blooming gel is a clear gel that makes gel color spread into soft, watercolor patterns. You brush a thin layer over a cured color base, leave it uncured, then drop or draw gel color onto the wet gel and it diffuses into petals within seconds. Curing under an LED or UV lamp locks the pattern in place.
Do you cure blooming gel before adding color?
No - that is the most common mistake. The blooming gel has to stay wet and uncured for the color to spread and bloom. If you cure it first, the gel hardens and the color just sits where you place it with no diffusion. Only cure after the flower or pattern looks right.
How long does blooming gel take to bloom?
The color usually spreads within a few seconds to about a minute once it touches the wet blooming gel. A thinner blooming gel layer makes color bloom faster and further, while a thicker layer slows and limits the spread. Work fairly quickly and cure once the bloom looks the way you want.
How long do blooming gel flower nails last?
Because it is a gel technique, a blooming gel set typically lasts 2 to 3 weeks, and up to 4 with good prep, daily cuticle oil and capping the free edge. Regular non-gel polish flower art only lasts about 5 to 7 days by comparison, so the gel method is far more durable.
Do you need a UV or LED lamp for blooming gel?
Yes. Blooming gel and gel color both need a lamp to cure and set. LED lamps cure a gel layer in about 30 to 60 seconds, while UV lamps take around 2 minutes per layer. Without curing, the design stays soft and will smear, so a lamp is an essential part of the kit.
Is blooming gel good for beginners?
Yes - it is one of the more beginner-friendly nail-art techniques because the gel does the blending for you, so you do not need a steady painter's hand. The diffused look also hides small imperfections. It is rated intermediate but becomes easy with practice, making it very DIY-friendly.
Why did my blooming gel go muddy or not bloom?
Muddy color usually means you flooded too much color, so use a little and let it spread. No bloom at all usually means the blooming gel layer was too thick or was cured too early - brush it thin and leave it uncured until the color is placed. Building depth in cured layers also keeps colors from blending into mud.
How much do blooming gel flower nails cost?
At a salon, a gel manicure runs about $30 to $55, plus roughly $5 per accent nail for art, so a full blooming-gel flower set is often $45 to $70 or more. A DIY kit of blooming gel, a few gel colors and a small lamp costs more upfront but pays for itself within a couple of at-home sets.
What colors work best for blooming gel flowers?
Soft, pigmented gel colors bloom best - pinks, blues, corals and purples give the classic watercolor petals, while a nude or white background lets the flowers stand out. Darker colors like black and deep red spread fastest, so use tiny amounts of those to avoid flooding the whole nail.
How do you remove blooming gel nails?
Remove it as a soak-off gel. Lightly file the shiny top coat, then wrap each nail with 100% acetone on a cotton pad held under foil for 10 to 15 minutes, and gently push the softened gel off. Never peel or pry it off, which takes your natural nail with it. Finish with cuticle oil.
Which blooming gel nails look are you saving?
Blooming gel flower nails prove you do not need a painter's hand to get soft, gallery-worthy florals - the clear gel does the blending for you as the color feathers out into petals. The secret is a thin uncured blooming gel layer, a little color rather than a flood, and curing only once the bloom looks right. Whether you keep it to one accent flower or cover every nail in a diffused garden, the diffused watercolor finish always looks expensive and lasts 2 to 3 weeks. Save the sets you love, keep a bottle of cuticle oil going, and take the exact photos to your nail tech so your blooms come out just how you picture them.