Quick Comparison
| Half Up Half Down | Full Updo | |
|---|---|---|
| Cap stability over a four-hour ceremony | High, as long as the gathered section sits below the occipital bone | High; a low bun gives the band a dry, flat surface to grip |
| Risk of a visible cap dent | Low; the dent lands inside the pinned section where nobody sees it | Very low; there is nothing at the crown left to crush |
| Styling time the morning of | 5 to 20 minutes for most versions, 25 to 30 for a fishtail or Dutch braid | 12 to 30 minutes, and more if you are pinning it yourself |
| Pins needed | 2 to 6 pins for the style, plus 2 crossed pins for the cap | 6 to 10 pins for the style, plus 2 crossed pins for the cap |
| Performance in spring humidity | Mixed; the loose lengths can swell and frizz outdoors | Better; pinned hair cannot expand outward |
| Photos with the cap on | Strong; length and texture read against a dark gown | Strong from the front, plainer from behind |
| Photos after the cap comes off | Excellent; the crown is already covered by the pinned section | Excellent; the shape is unchanged |
| Comfort in a hot polyester gown | Warmer; length sits on the neck | Cooler; the neck stays clear |
| Best hair lengths | Chin-length bobs through waist-length hair | Shoulder-length and longer, or extensions for shorter hair |
1. Classic Half-Up With Loose Curls
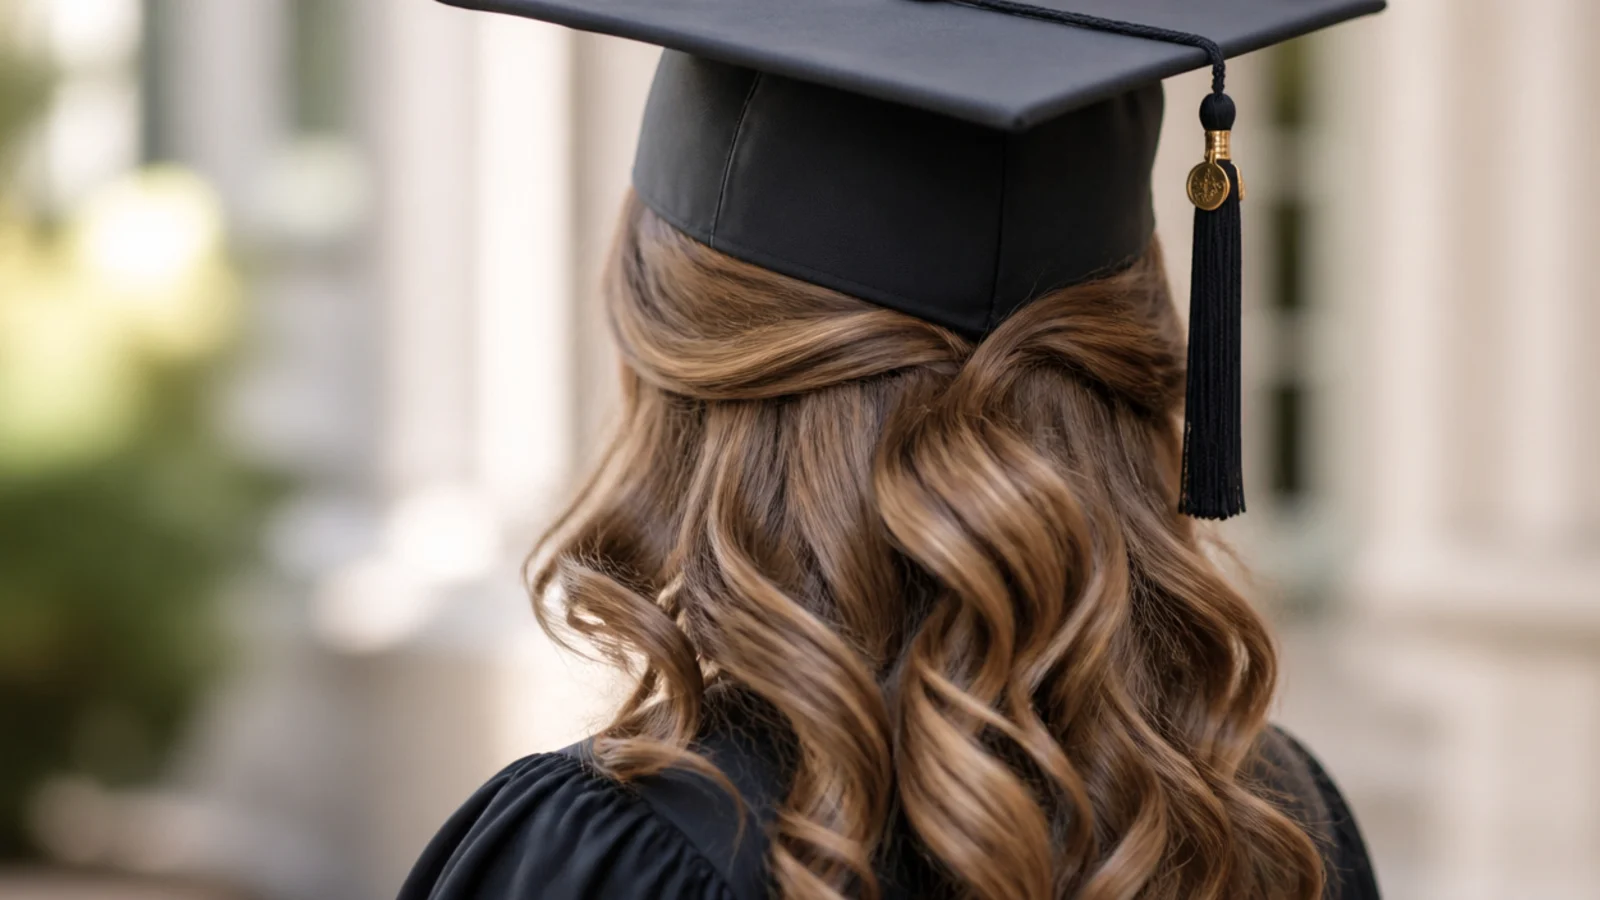
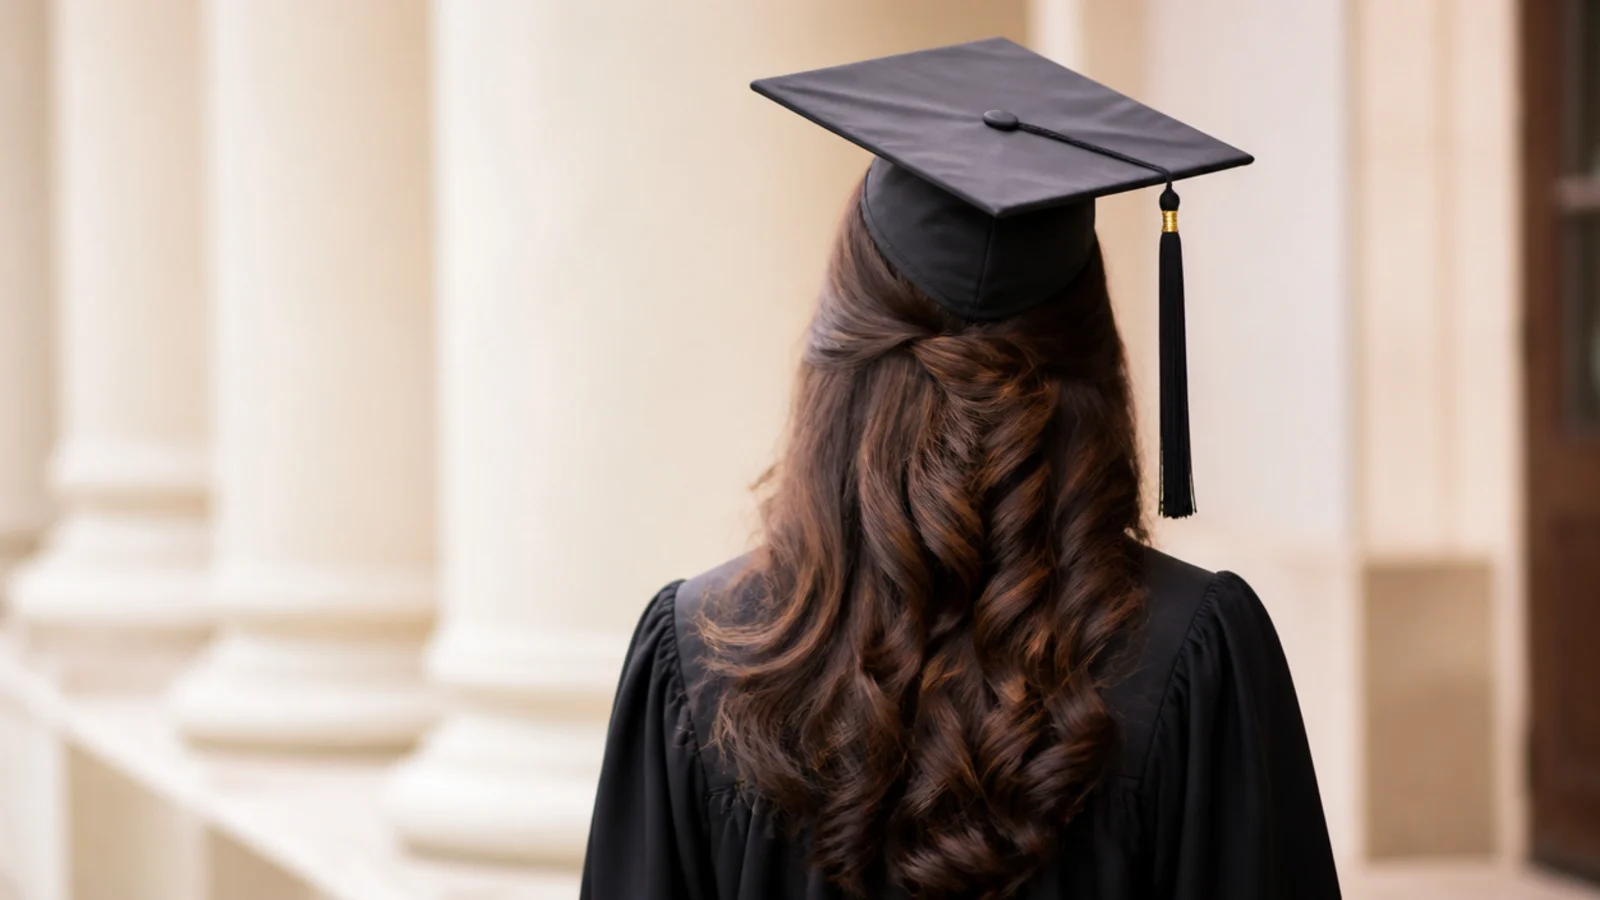
The default half-up for a reason. Curl the lengths with a 1.25 inch barrel iron, let the curls cool completely in your hand for 30 seconds each before you release them, then take the section from temple to temple back to just below the crown and secure it with a small clear elastic hidden under a covering strand. It takes 15 to 18 minutes on shoulder-length hair. The gathered point sits about an inch below where the cap band lands, so the board sits flat and nothing is crushed.
Who it suits: Shoulder-length to long hair, any texture that holds a curl.
Tip: Let every curl cool before the cap goes on, or the band will flatten them into a crease.
2. Low Half-Up Bun Under the Cap
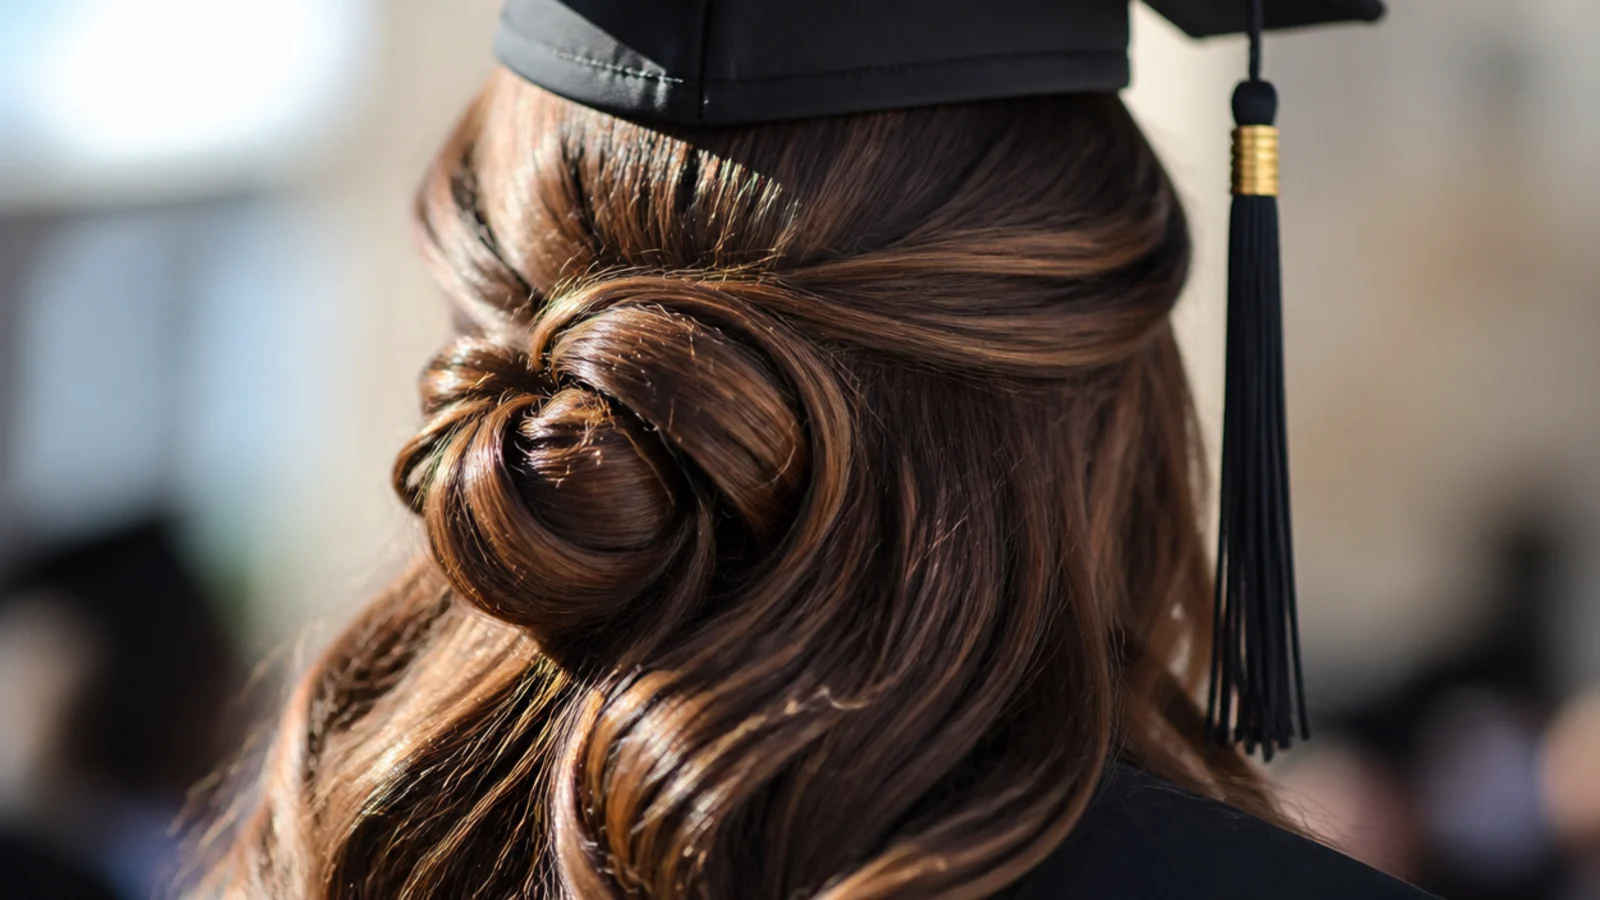
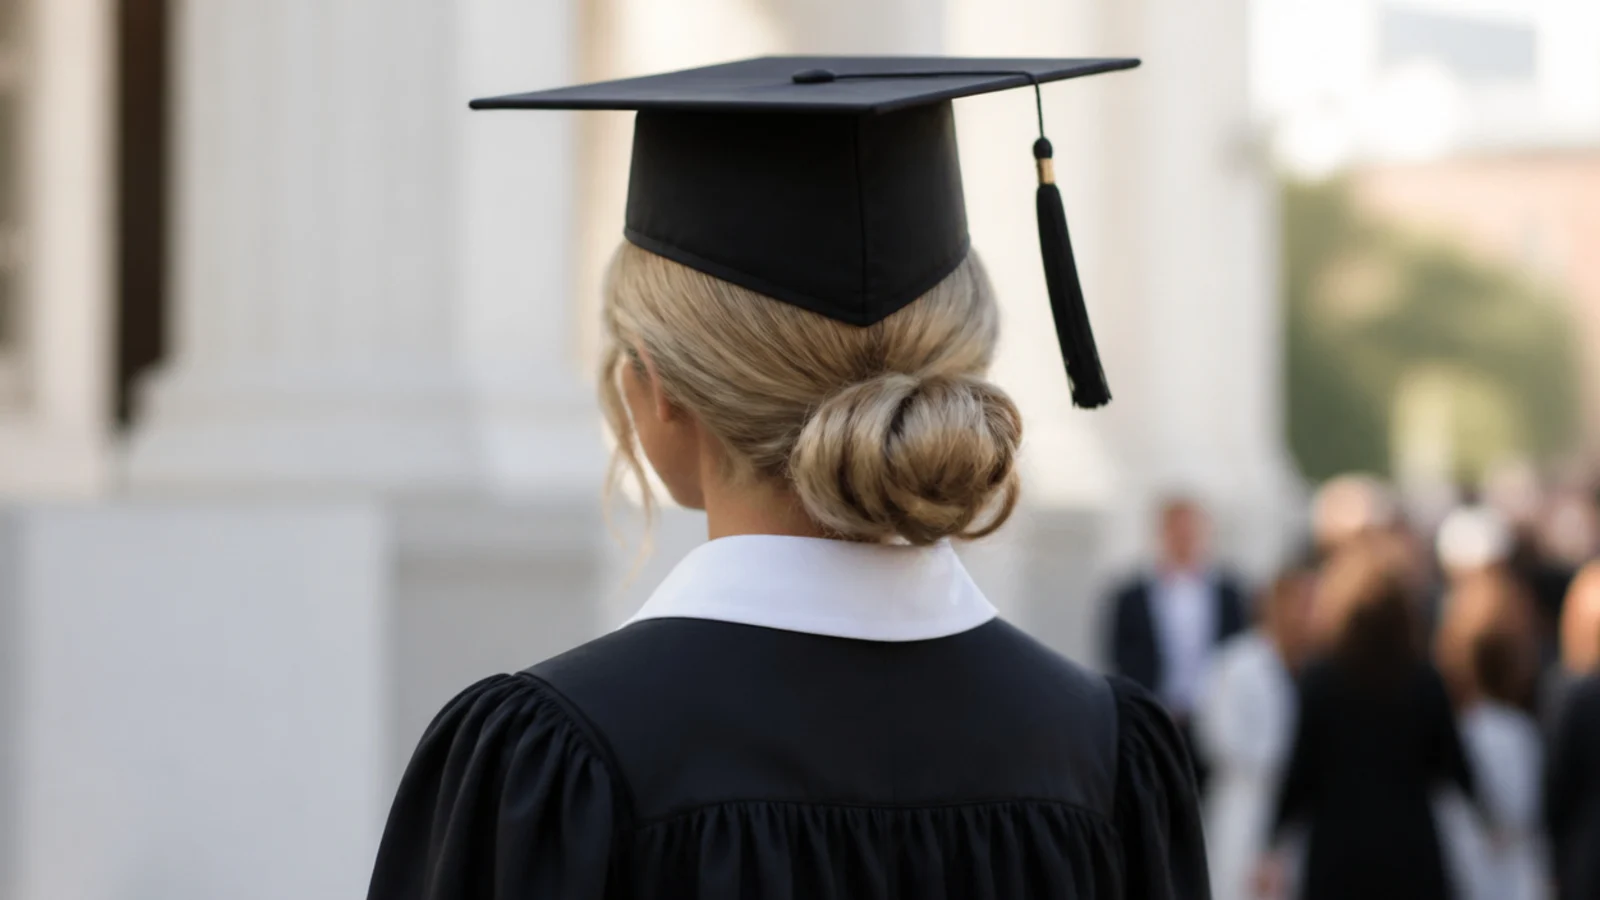
Half-up buns fail at graduation for one reason only: people put them on top of the head. Drop the bun to the occipital bone and it clears the band completely. Gather the top section, twist it into a small coil about 2 inches wide, and pin it with four bobby pins pushed in toward the scalp from four directions. Eight minutes total. The bun sits behind the cap rather than under it, which actually gives the board a small ledge to rest against so it stops sliding backward.
Who it suits: Anyone whose cap slides back; fine to medium hair density.
Tip: If the bun is bigger than 2.5 inches it will tip the cap forward, so keep the coil small.
3. Dutch Braid Half-Up Crown
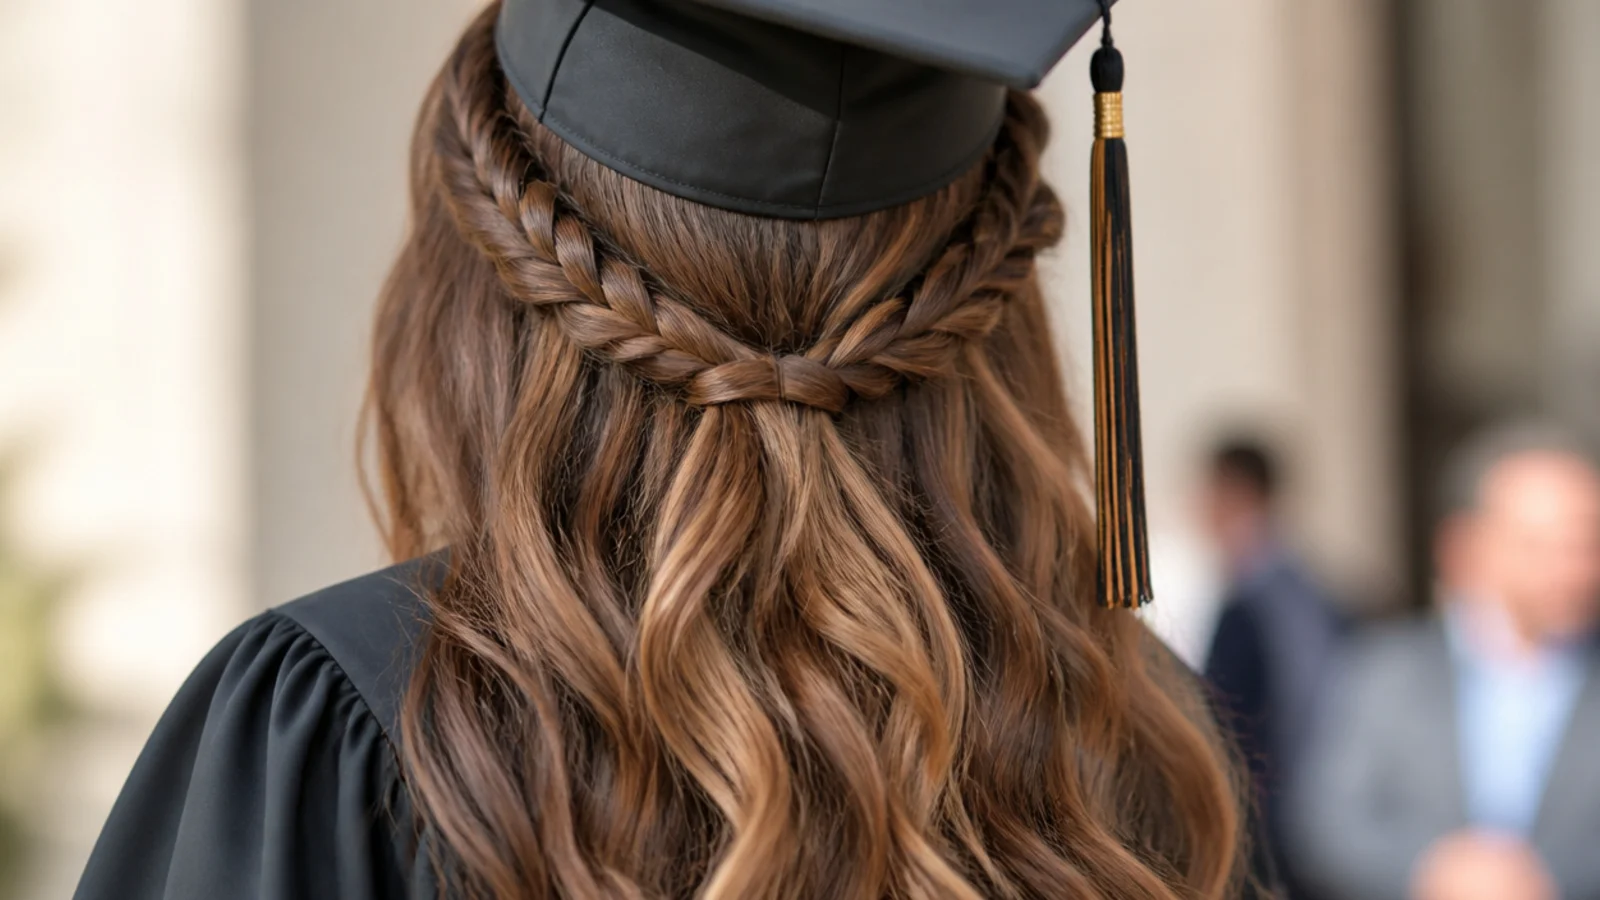
Two Dutch braids started at the front hairline, run back along the sides above the ears, and joined at the back with an elastic while the rest hangs loose. Dutch braids sit raised on the scalp, which is the risk here, so keep them tight to the head along the temples and stop the braiding before the crown. Allow 25 to 30 minutes if you are braiding on yourself. Braided half-ups are the only ones that survive being styled the night before, which makes this the choice for an early ceremony.
Who it suits: Anyone who braids confidently; thick or textured hair.
Tip: Run a finger under the cap band once it is on and flatten any braid ridge you can feel.
4. French Braid Half-Up Into a Twist
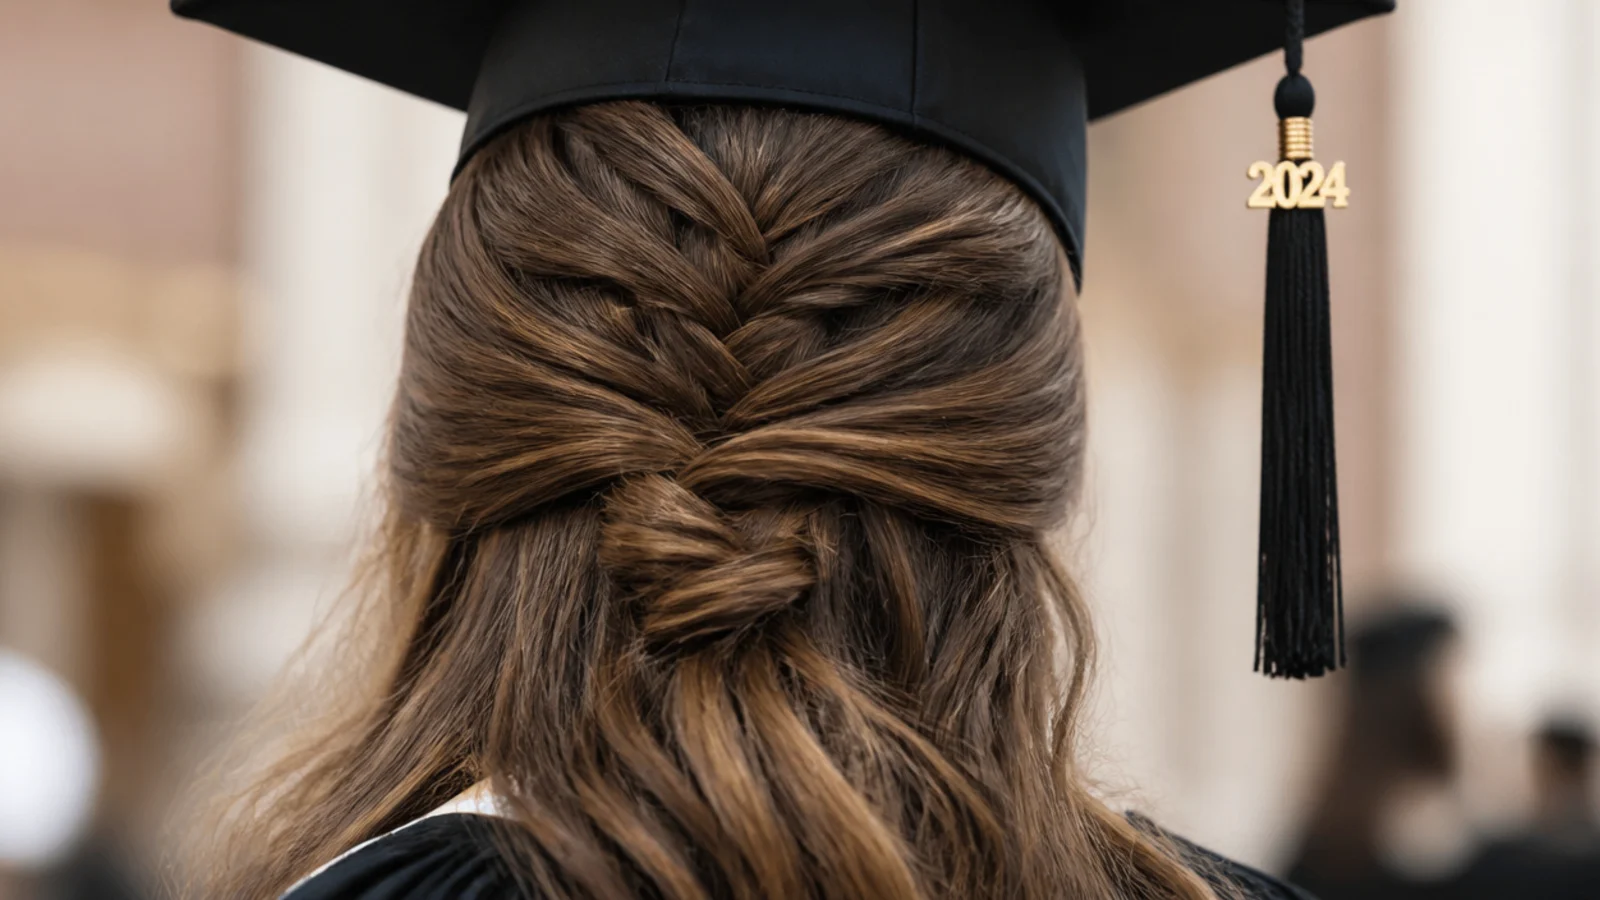
A single French braid worked from the top of the head straight back, stopped at the occipital bone, then twisted into a flat knot and pinned with three U-pins. Because a French braid weaves under rather than over, it lies flatter than a Dutch braid and never fights the band. The loose lengths below can stay straight or take a quick wave. Around 20 minutes. This is the version to pick if your cap has already slid off once in a practice run, since the flat knot gives it a grip point.
Who it suits: Straight to wavy hair, shoulder length and longer.
Tip: Braid with damp-to-dry hair, not freshly washed slippery hair, or the braid will loosen by noon.
5. Twisted Halo Half-Up
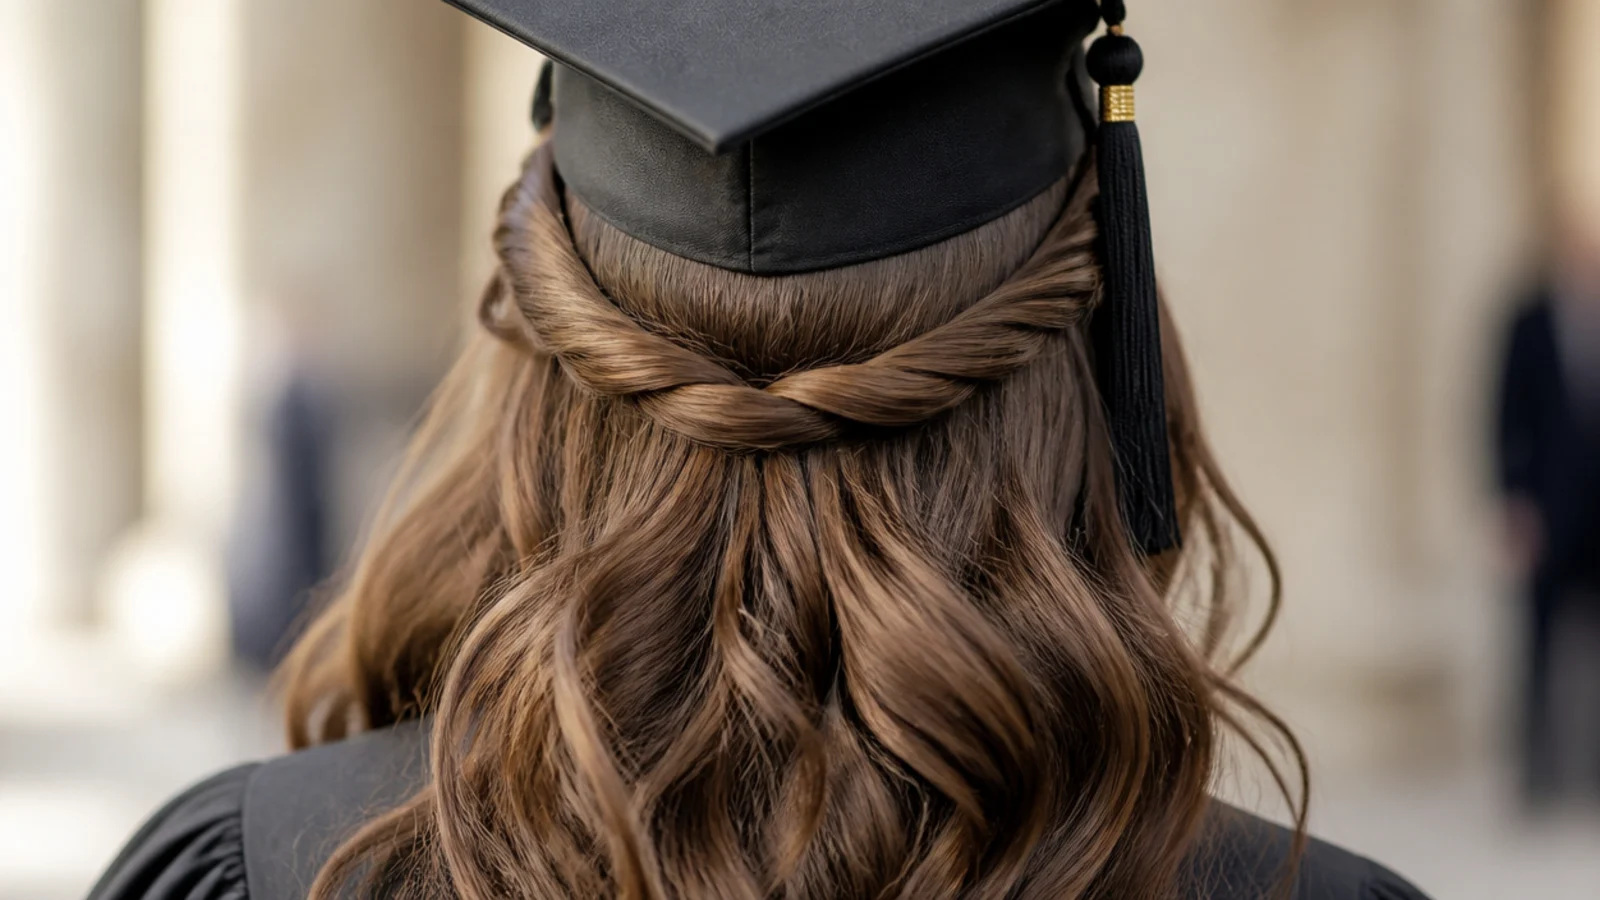
Take a 2 inch section above each ear, rope-twist it backward, cross the two at the back and pin them under each other so the join disappears. No braiding skill required and it reads far more formal than it is. Ten minutes flat. The twists sit at ear height, well below the band, which makes this one of the safest half-up choices under a mortarboard. It is also the easiest to repair mid-day: if a twist loosens, untwist and redo that side in under a minute.
Who it suits: Beginners, and anyone who cannot braid on their own head.
Tip: Twist each rope away from your face so it lies flat instead of standing off the scalp.
6. 90s Half-Up Ponytail at the Nape
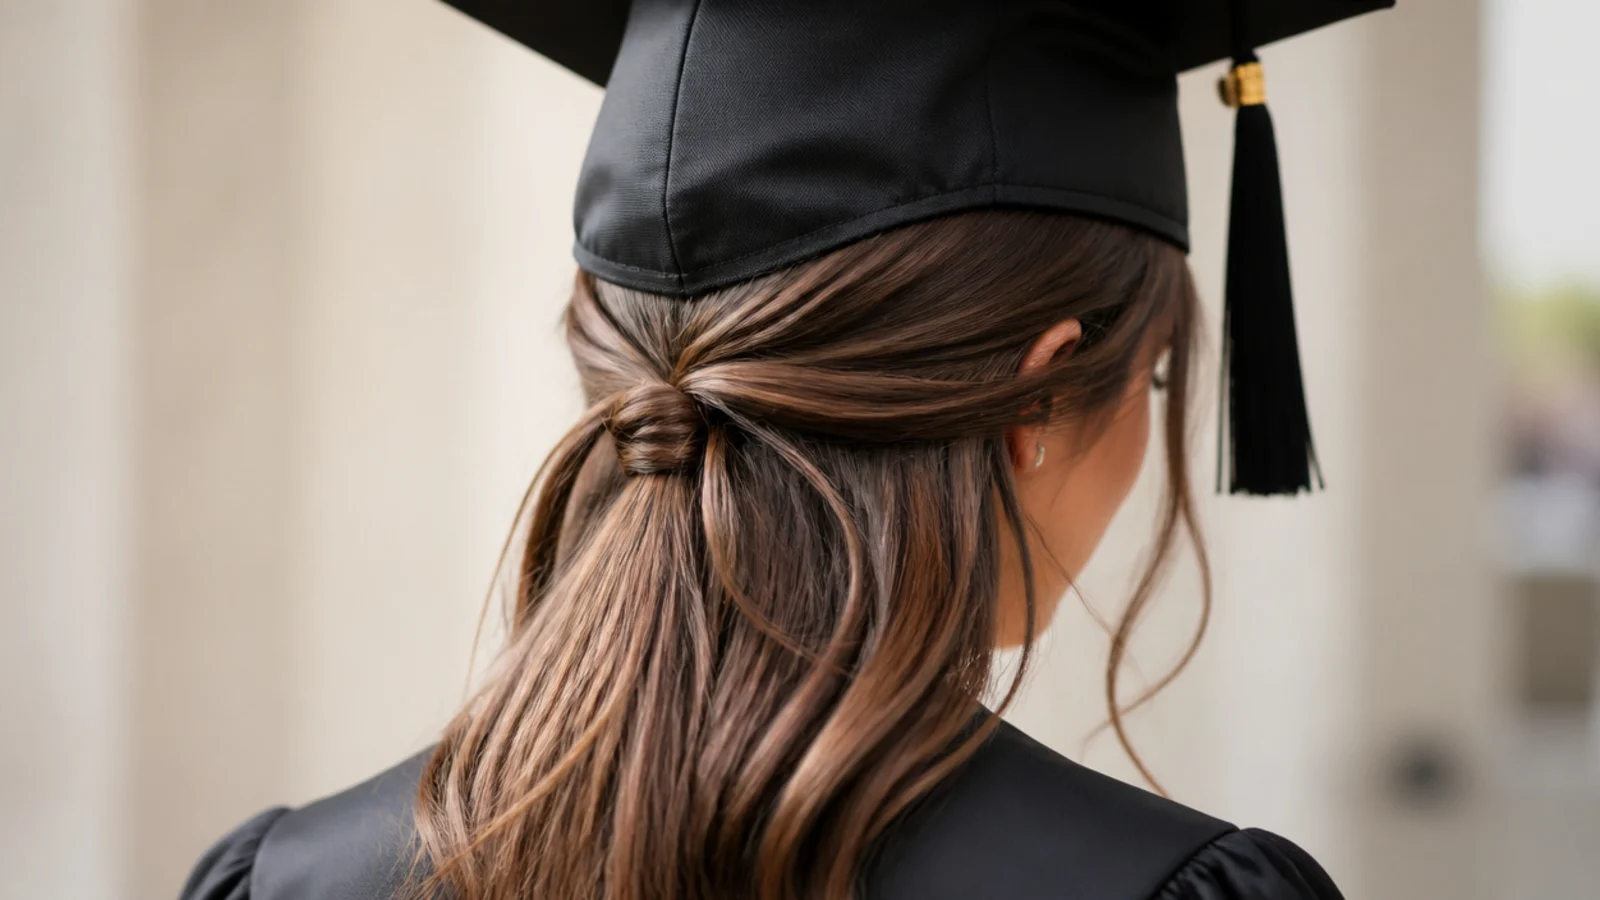
The revived 90s version, with the half-up ponytail dropped low rather than perched high. Gather the top and side sections, smooth them back with a boar bristle brush and a pea of serum, and tie at the occipital bone. Six minutes. This is the fastest style on the list and the least likely to shift, because there is nothing structural to collapse. Pair it with poker-straight lengths for a sharp graduation look, or with a slight bend if your hair is naturally wavy. More variations sit in ponytail styles.
Who it suits: Anyone running late; straight or blown-out hair.
Tip: Wrap a half-inch strand around the elastic and pin it underneath so no rubber band shows in photos.
7. Bubble Half-Up Ponytail
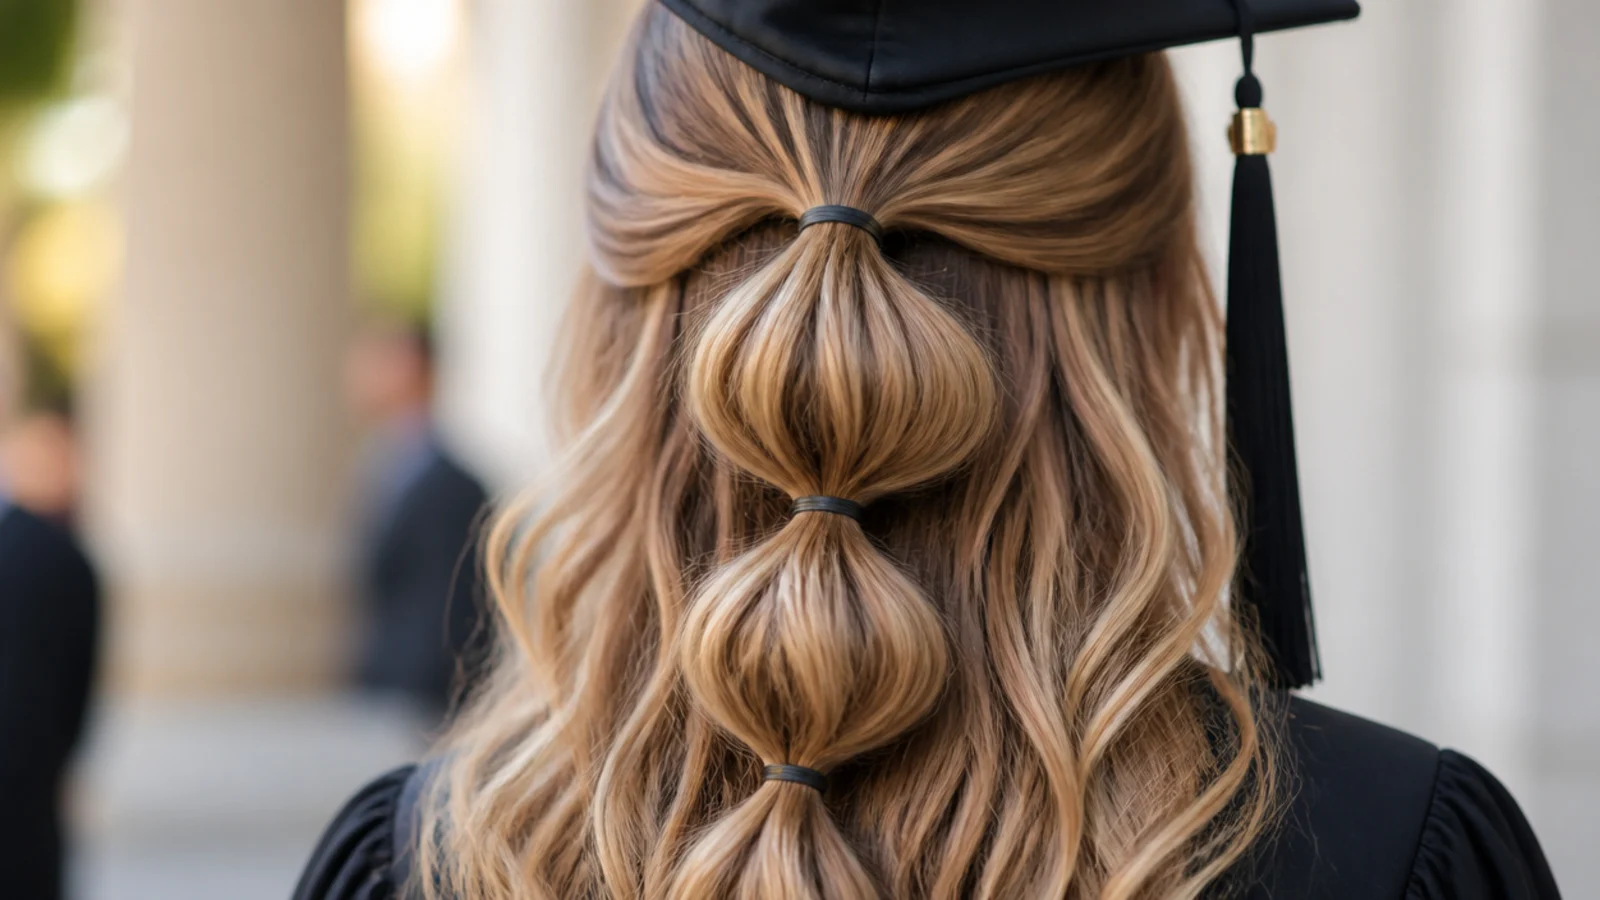
A low half-up ponytail divided into three or four bubbles with clear elastics spaced about 2.5 inches apart, each section gently pulled wide before you move to the next. Twelve minutes. The bubbles run vertically down the back of the head, which means the cap band crosses above all of them and none get crushed. It photographs unusually well from behind, which matters more than people expect at graduation, since half the ceremony photos are taken as you walk away from the camera.
Who it suits: Long hair, and anyone wanting something more interesting than a plain half-up.
Tip: Pull each bubble wider than feels right, because they tighten as the day goes on.
8. Two-Strand Twist Half-Up for 4C Hair
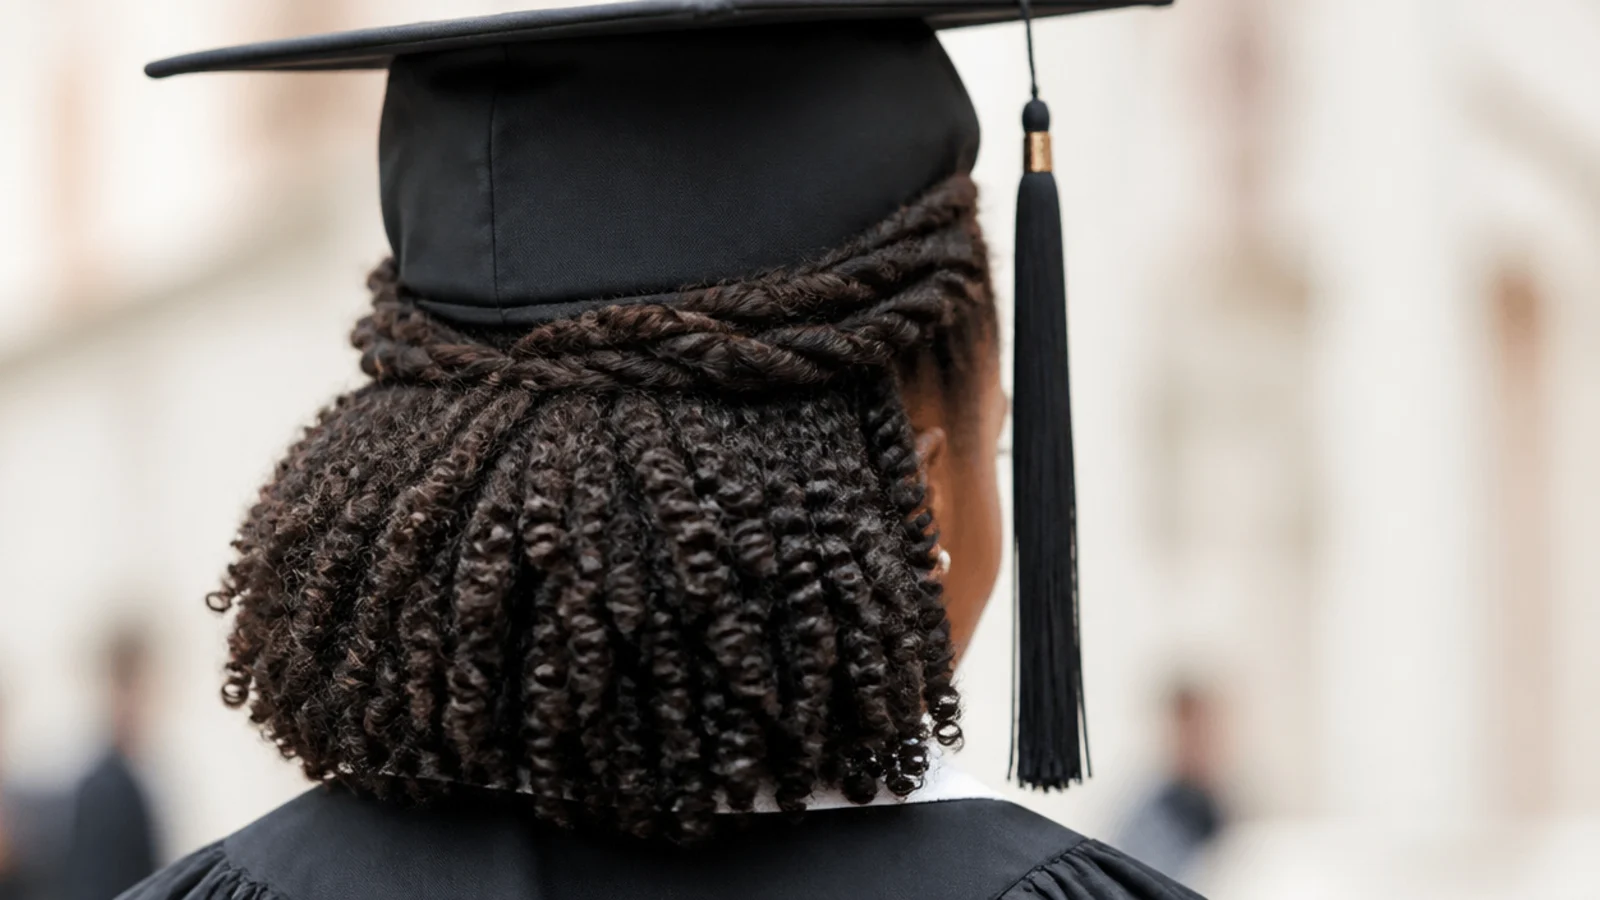
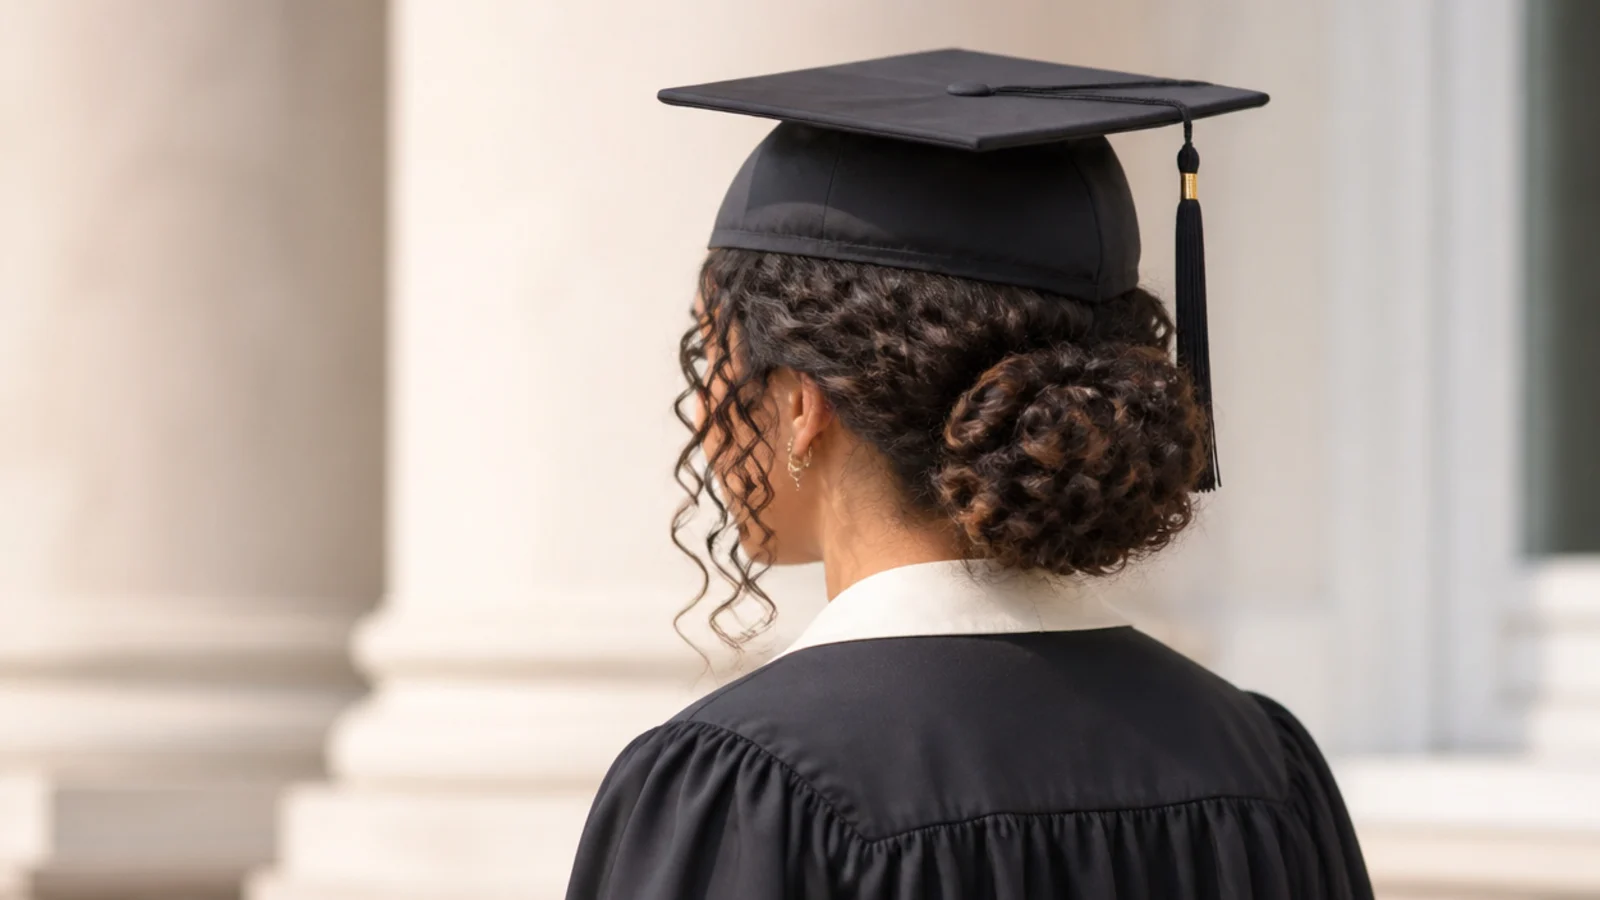
Six to eight flat two-strand twists taken from the front and sides, gathered into a low puff or pinned at the nape, with a twist-out left loose underneath. Because the twists lie against the scalp, the cap sits on a smooth surface instead of on compressed coils. Allow 30 to 40 minutes. Do the twist-out the night before on damp hair with a leave-in and a cream, then only assemble the half-up in the morning. More on this texture in graduation hairstyles for curly hair.
Who it suits: 4A through 4C hair, including shorter lengths that will not hold a curl.
Tip: Carry a pick in your clutch and lift the loose section from the roots the second the cap comes off.
9. Half-Up With Curtain Bangs Left Out
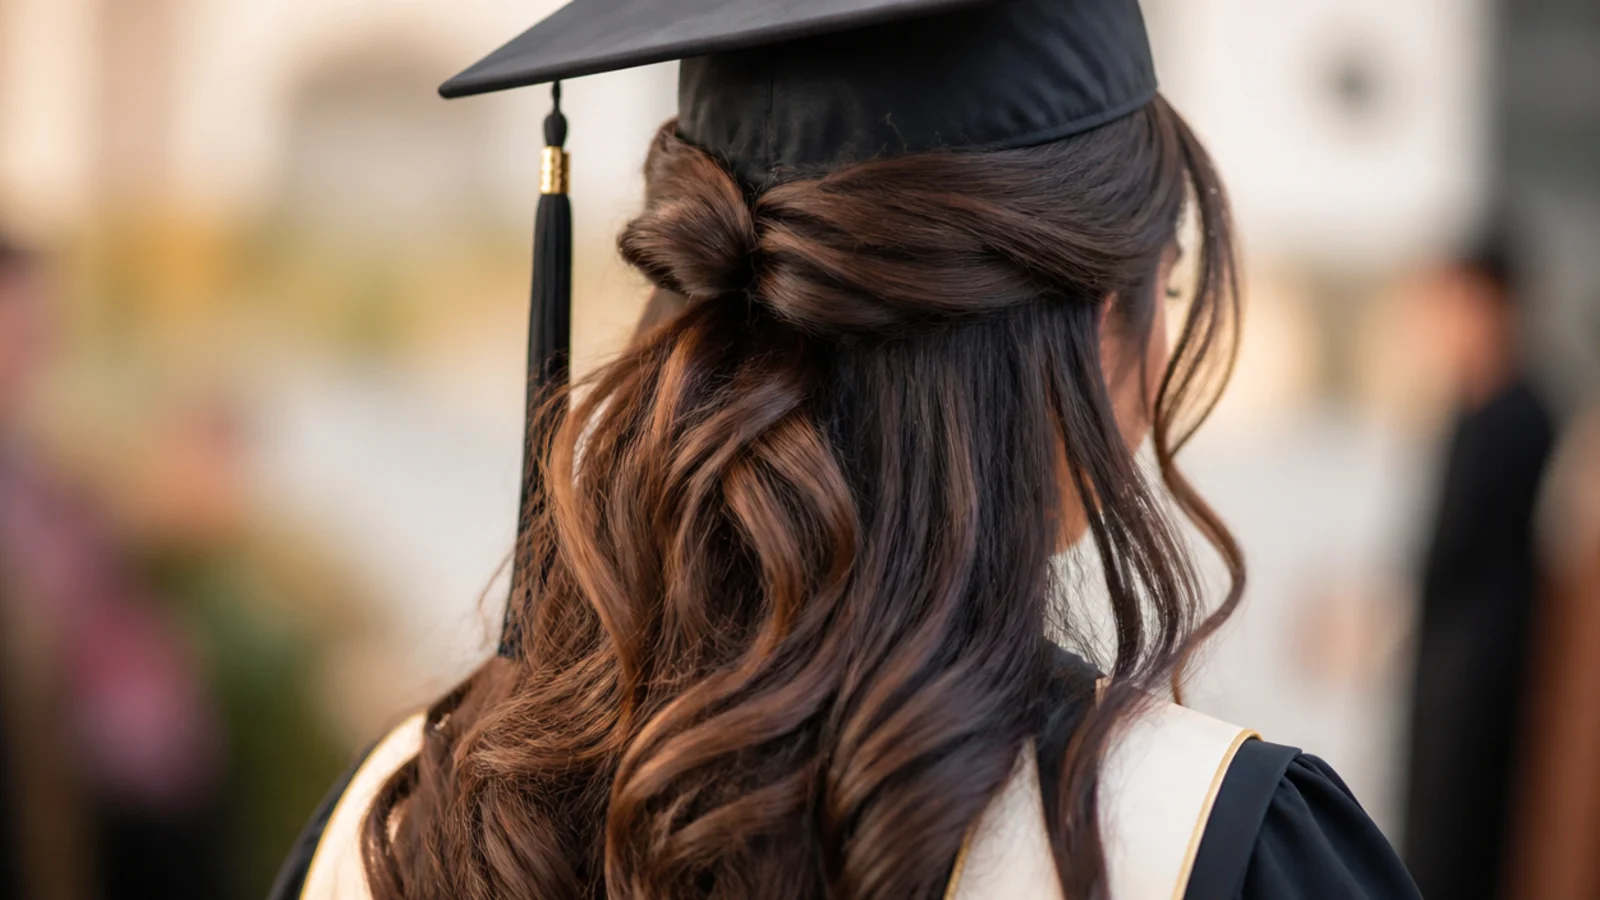
The half-up gathers everything except a curtain fringe, left out and swept away from the face with a round brush so the shortest pieces hit the cheekbone. Add three minutes to whatever half-up you pick. This matters under a cap because the band presses fringe flat against the forehead and makes it look greasy in photos. Curtain bangs, cut long and parted in the center, escape sideways instead of getting pinned down, so they survive the band far better than a blunt fringe.
Who it suits: Anyone with a fringe already; round and heart face shapes.
Tip: Set the bangs with a dry texture spray, not a wax, since wax plus a cap band means flat by hour two.
10. Sleek Slicked Half-Up With Laid Edges
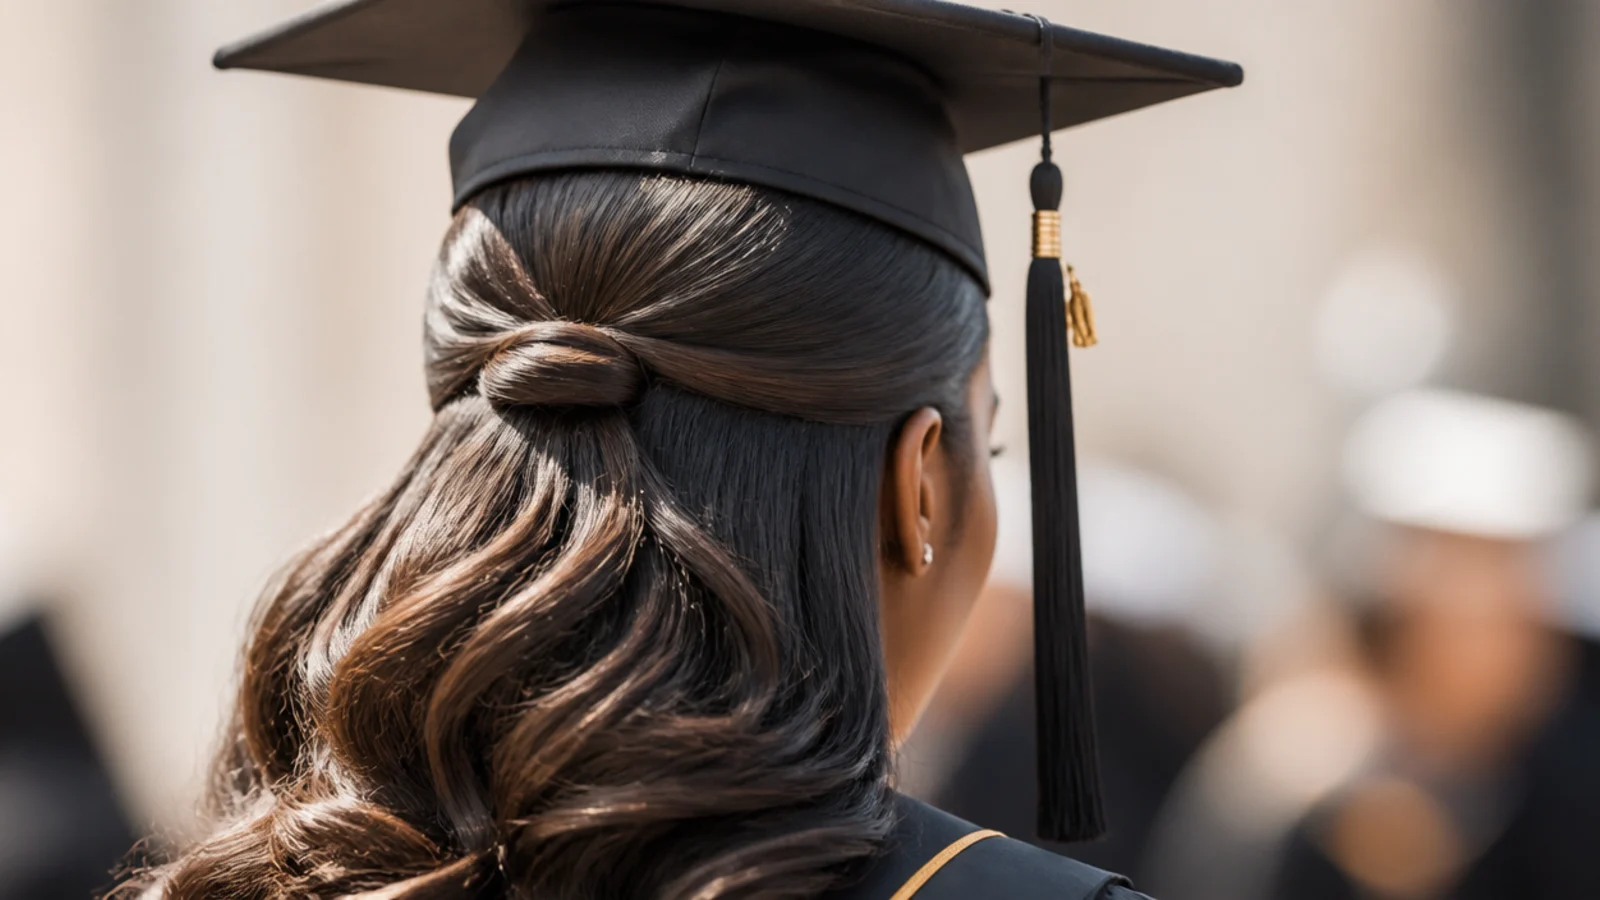
Alcohol-free gel worked through the top section only, brushed back with a soft edge brush until the crown reads glass-smooth, then gathered low with a clear elastic. Ten to fifteen minutes. Slicked half-ups are the most cap-friendly finish there is, because there is zero volume for the band to fight. The trade-off is humidity: gel reverts and flakes at outdoor spring ceremonies, so use a light lightweight gel rather than a heavy one and skip the second layer.
Who it suits: Fine hair, and anyone wanting a polished formal look under a gown.
Tip: Run a drop of hair oil over the slicked section so it stays shiny instead of turning dull and crunchy.
11. Half-Up Fishtail Braid
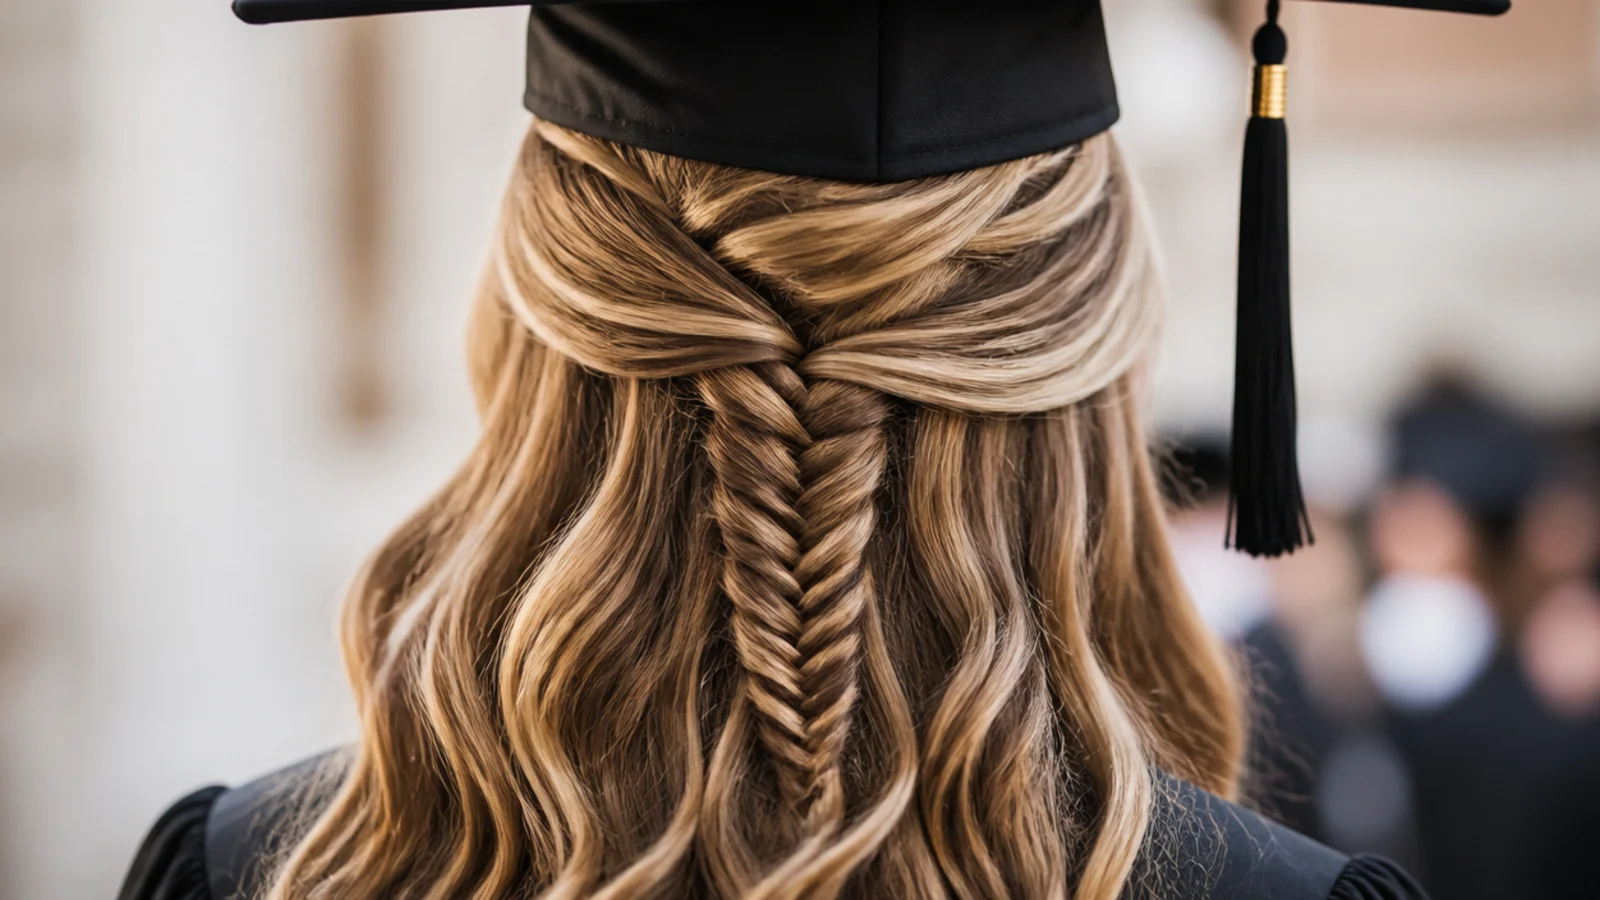
The top section pulled back and fishtailed down the center of the head, the rest left loose. A fishtail is slow, roughly 25 minutes, but it is the flattest braid there is because you cross tiny quarter-inch pieces rather than thick strands. That flatness is exactly why it works under a board. Start the braid at the occipital bone rather than the crown, and pancake the edges gently once it is tied so it reads full without gaining height. Braid technique is covered in easy braided hairstyles.
Who it suits: Long hair, patient hands, and anyone who wants detail in close-up photos.
Tip: Pancake only the outer edges, never the center, or the braid gains the height the cap cannot take.
12. Half-Up on a Chin-Length Bob
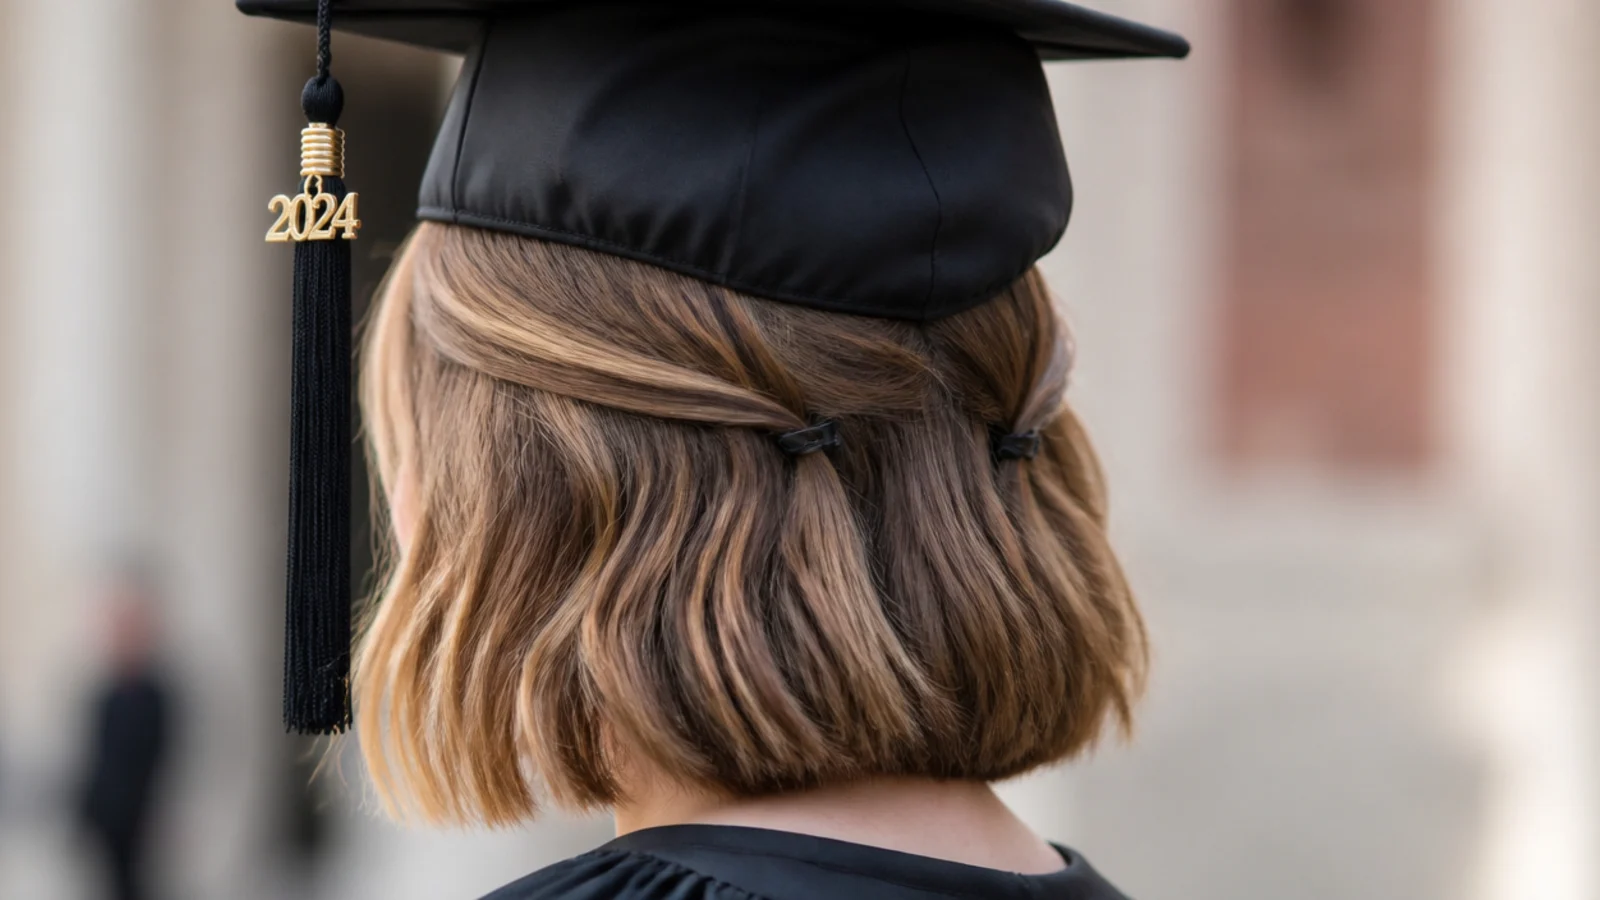
On a bob, a full half-up will not reach, so take two smaller sections from the temples instead and pin them together at the back with two crossed bobby pins or a small claw. Five minutes. The point is not to gather much hair, it is to move weight off the face and create a flat back surface for the band. Bend the ends outward with a flat iron so the bob flicks away from the jaw. There is a full length breakdown in graduation hairstyles for short hair.
Who it suits: Chin-length to collarbone bobs, including blunt cuts.
Tip: Cross the two pins in an X rather than sliding them in parallel, or short hair will slip straight out.
13. Half-Up With Side Accent Braids
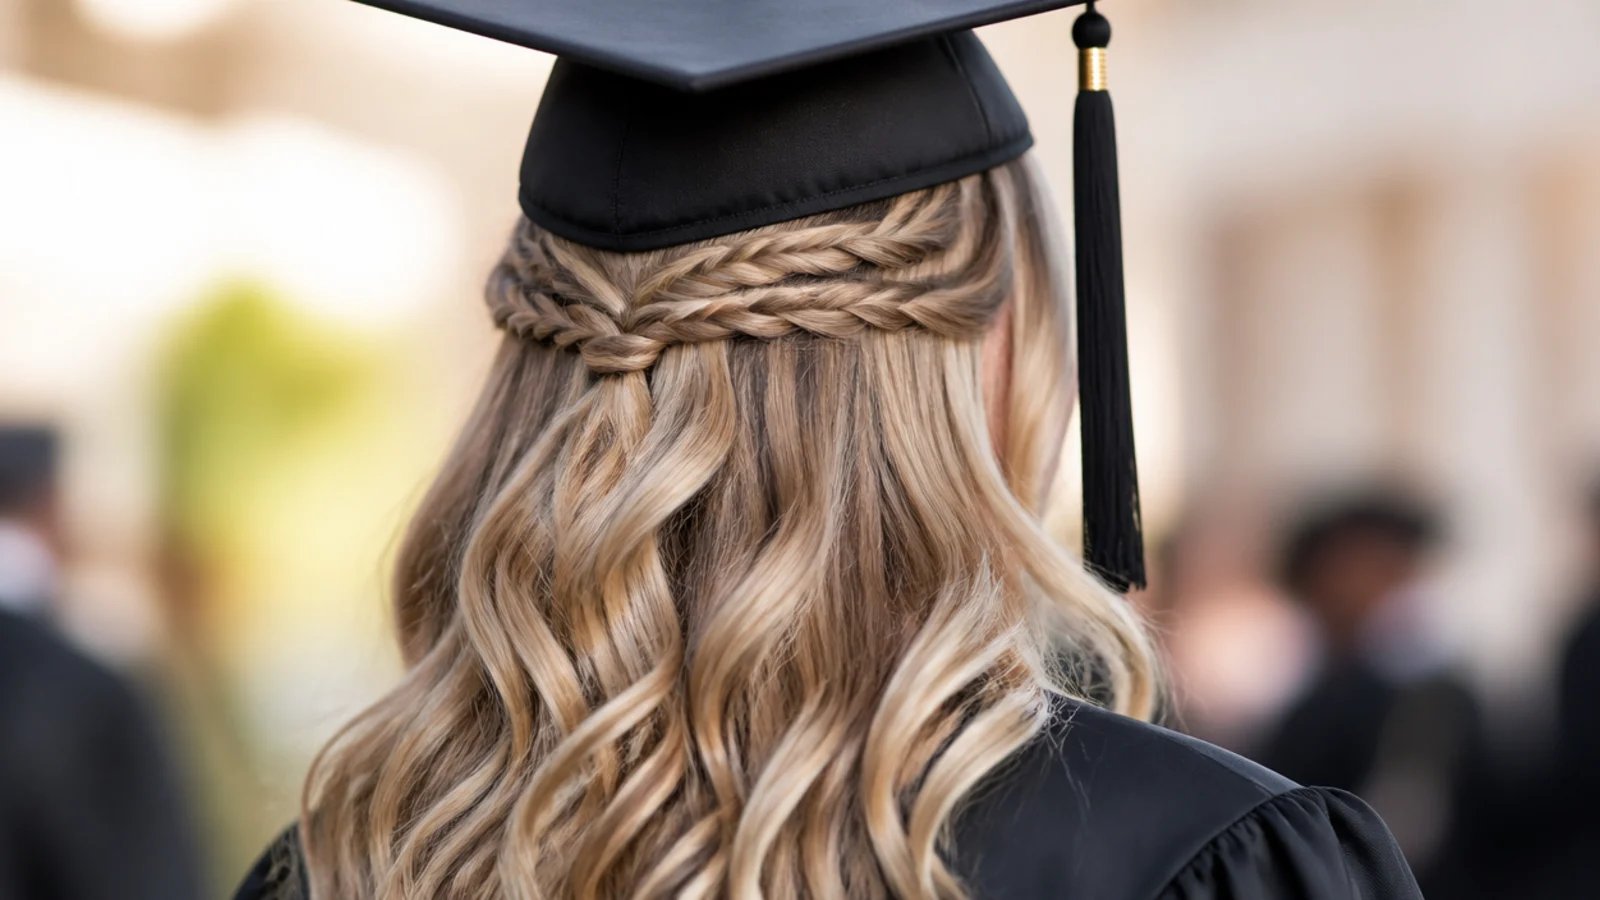
One or two thin three-strand braids taken from beside the part, run back along the side of the head and swallowed into the half-up elastic. Twelve minutes, and you only need to braid a half-inch section, which is achievable on your own head in a mirror. The braids sit flat against the temple, below the band on both sides, so they add visible detail without adding a millimeter of height. This is the highest detail-to-difficulty ratio on the entire list.
Who it suits: Anyone with basic braiding skill; all hair lengths past the shoulder.
Tip: Braid all the way to the end, tie it, then hide the tie inside the gathered section.
14. Pearl-Pinned Half-Up
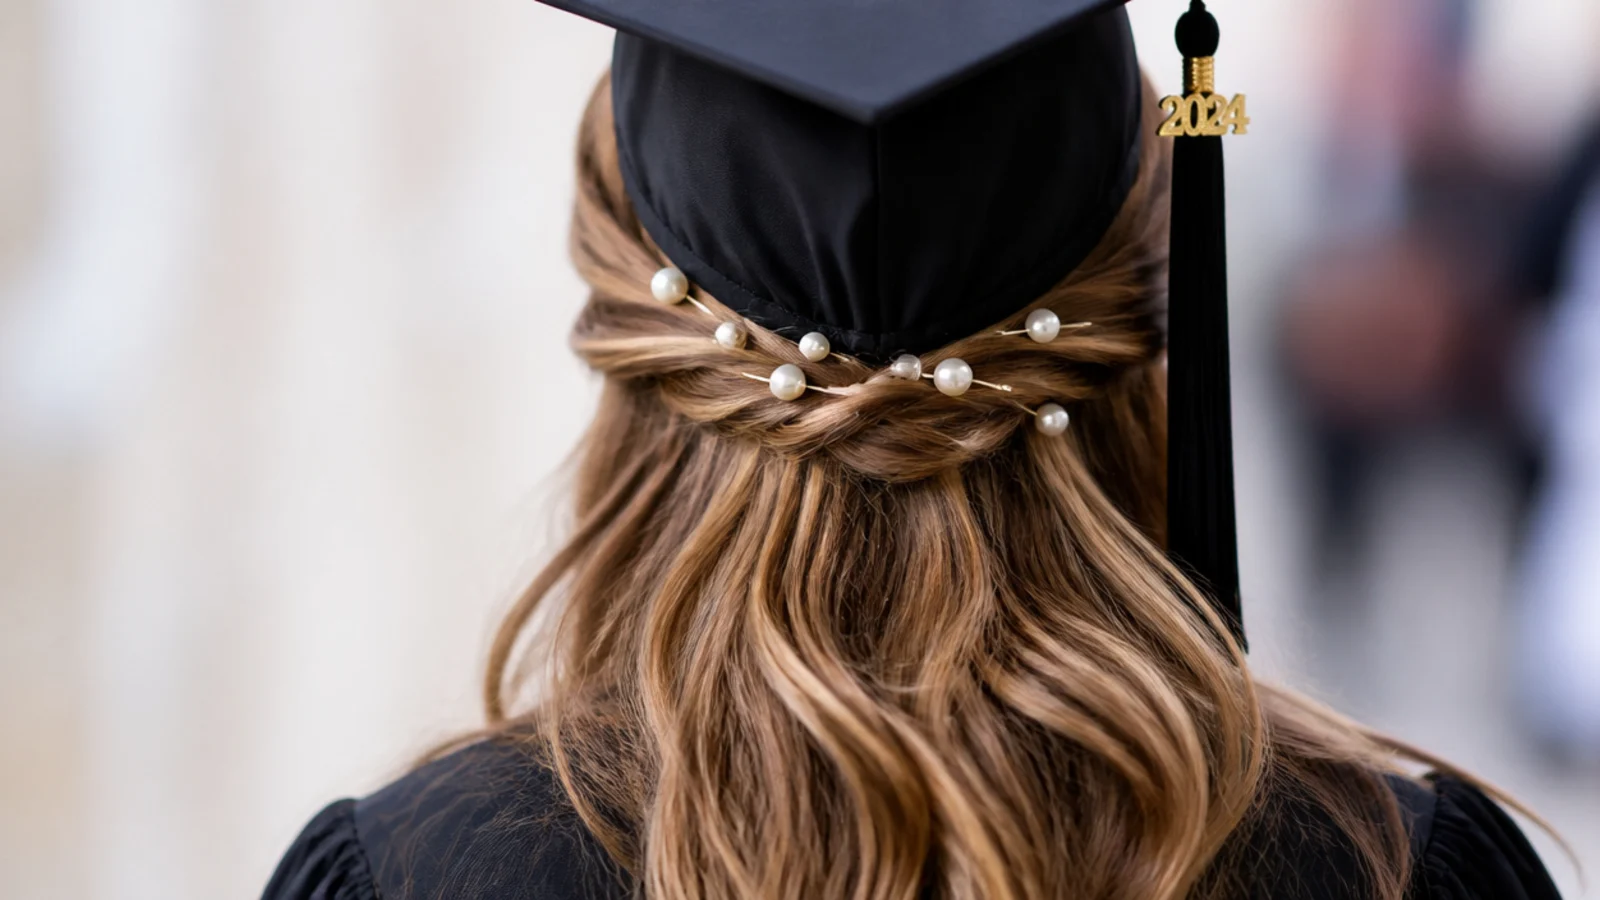
A plain half-up upgraded with five to seven pearl or crystal bobby pins scattered along the gathered line, most in the 8 to 15 dollar range for a multipack. Two minutes on top of the base style. Placement rules here: put every pin below the band line and on the sides where the camera sees them, because anything on the crown gets hidden by the board and dents the fabric from underneath. Pearl reads warmer against a black gown than rhinestone, which can flare in flash photos.
Who it suits: Anyone wanting an accessory without a whole new technique.
Tip: Push the decorative pins in from below and anchor each one with a plain pin behind it.
15. Low Half-Up Space Buns
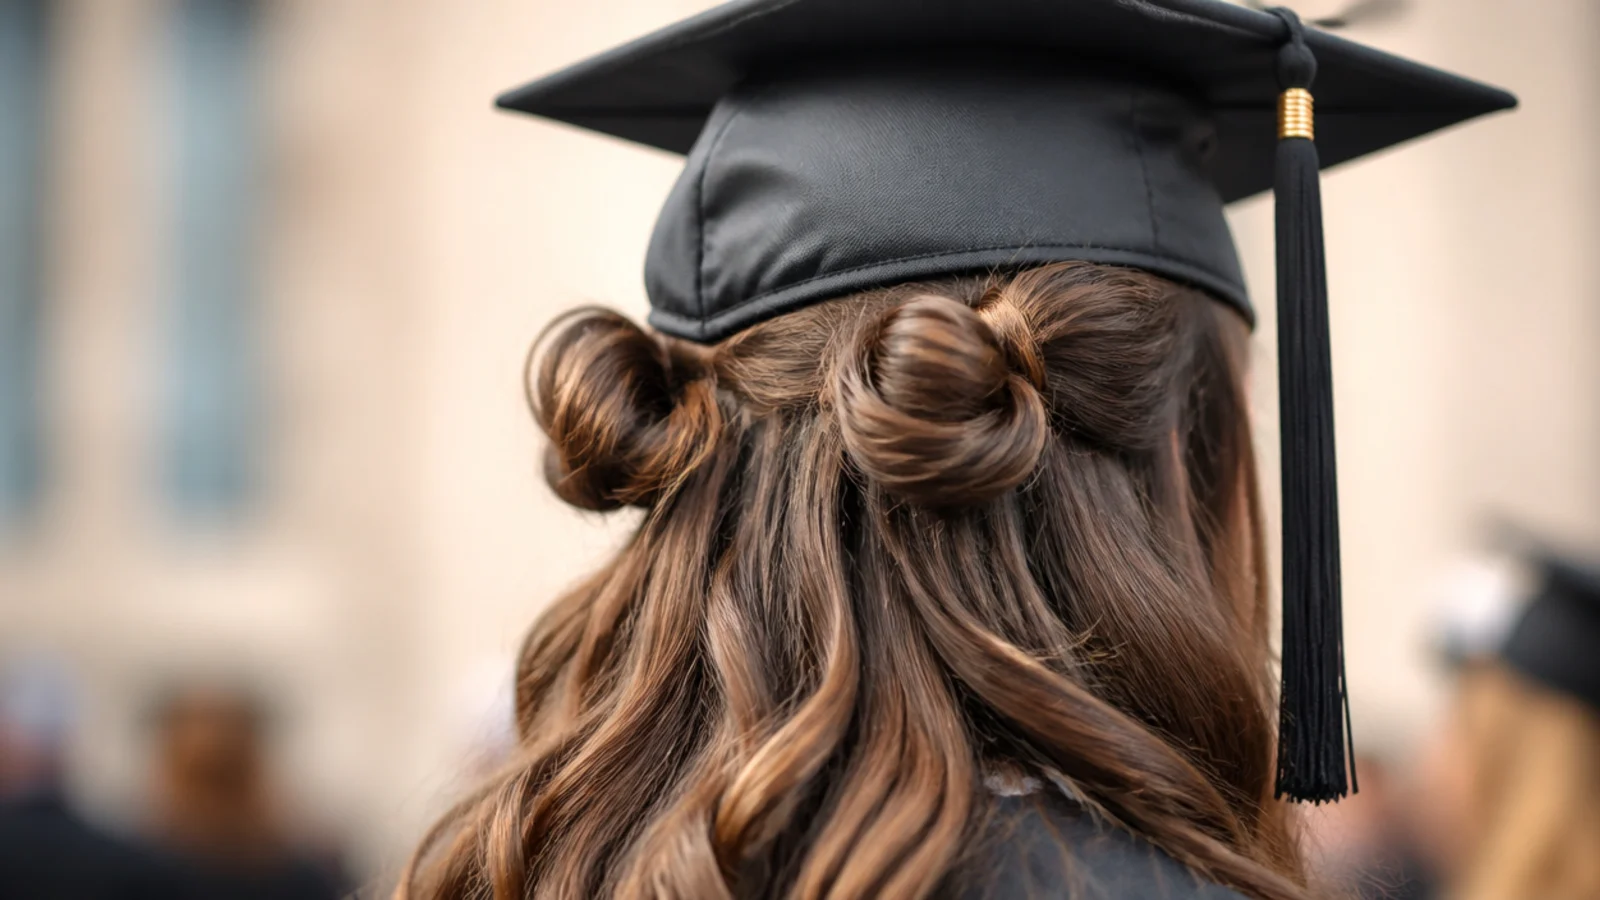
Two small buns instead of one, dropped to ear level at the back rather than sitting high like the usual version. Twelve minutes. Standard space buns are a guaranteed cap failure because they occupy the exact volume the band needs, but at ear level they sit outside the band entirely, one on each side of it. Keep both buns under 2 inches across. The full low placement method is in low space buns.
Who it suits: Shoulder-length and longer hair; a younger, less formal graduation look.
Tip: Check both buns are level in a hand mirror before the cap goes on, since the board exaggerates a tilt.
16. Half-Up Rope Twist for Fine Hair
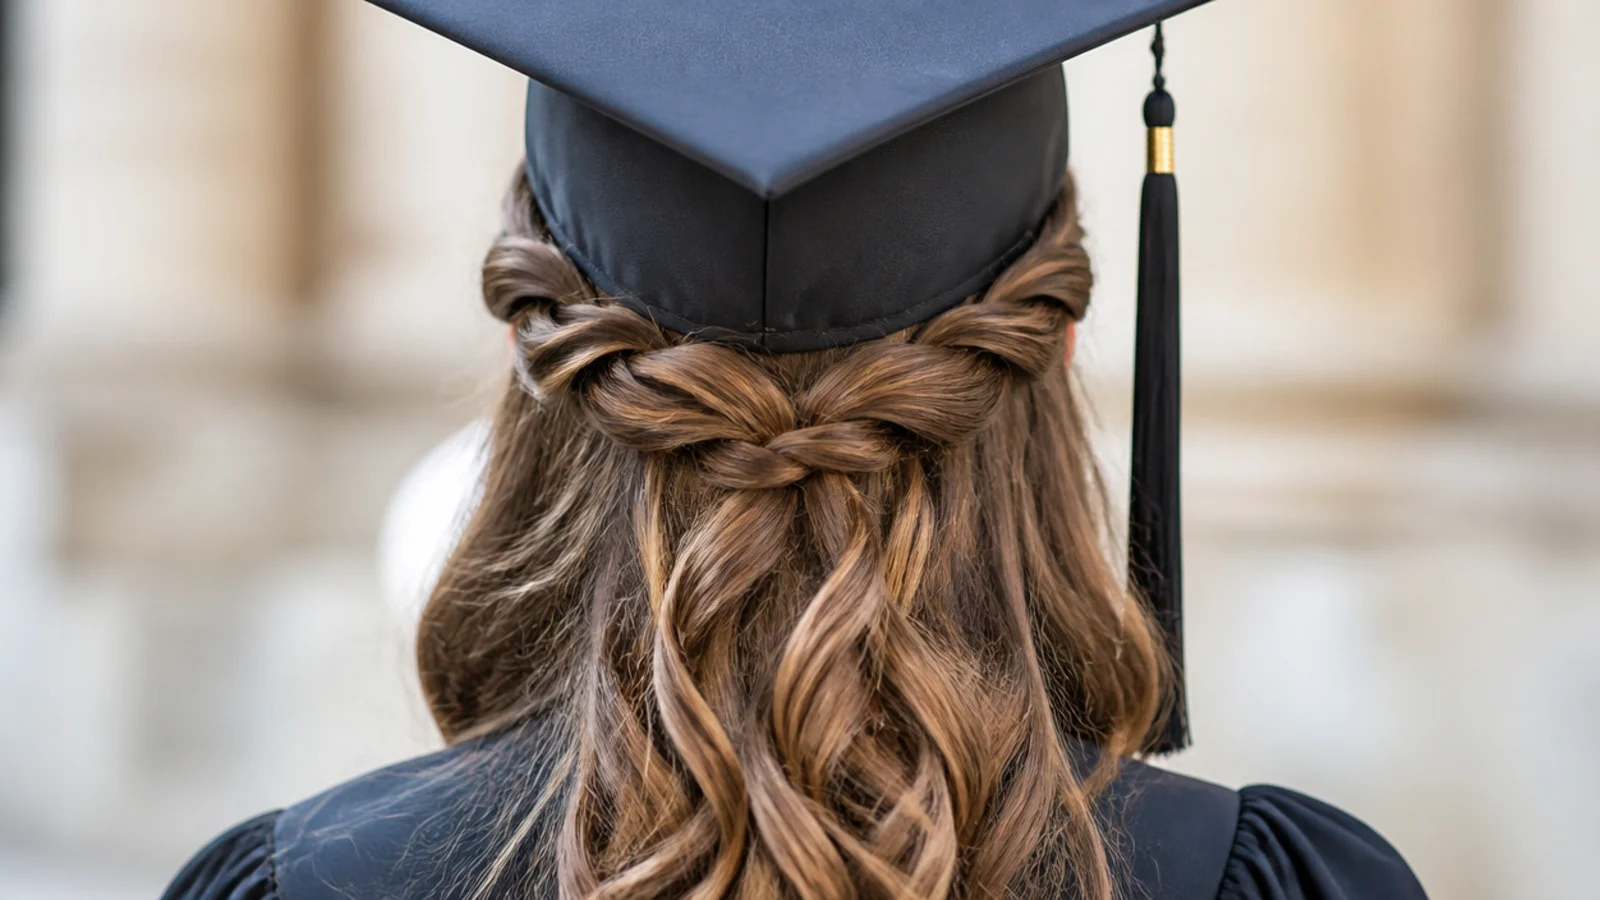
Two sections twisted around each other in opposite directions to form a rope, then pinned low. Rope twists suit fine hair better than braids because you can loosen the twist after tying it, which fakes about twice the density. Ten minutes. Prep with a light mousse at the roots on the sides, not the crown, so the volume lands where the camera sees it once the cap is on. Fine hair also slips, so use ribbed bobby pins rather than smooth ones.
Who it suits: Fine or thin hair that will not hold a thick braid.
Tip: Twist both sections the same direction, then wrap them the opposite way, or the rope will unravel.
17. Half-Up With Heatless Beach Waves
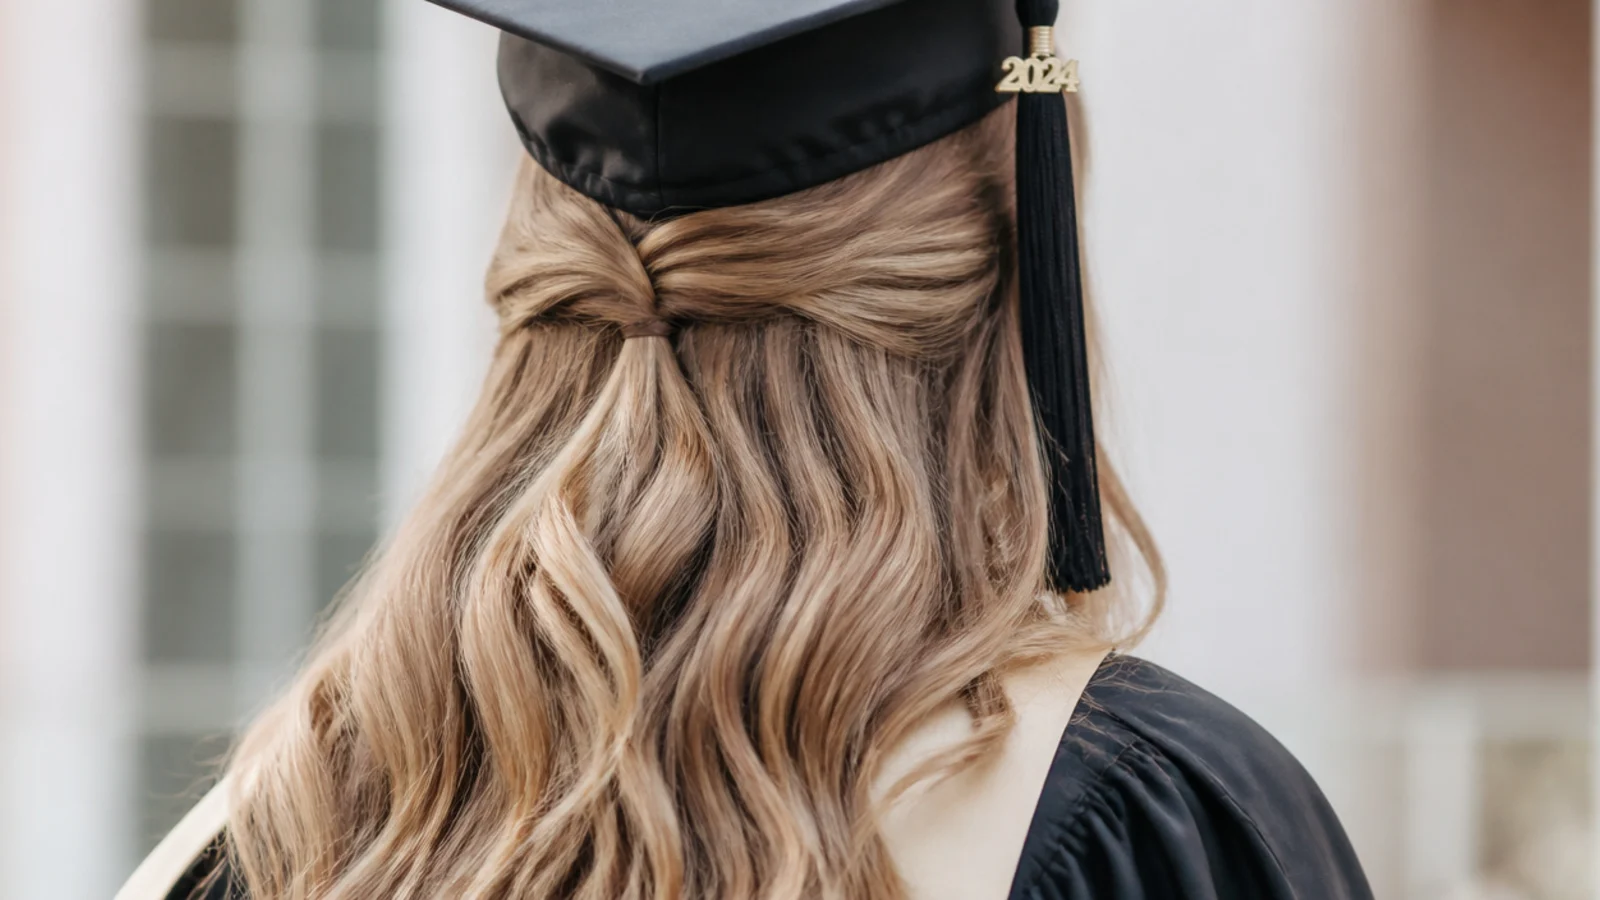
Waves set overnight on damp hair with two loose side buns or a robe-belt curl, then half-pinned in the morning. Zero heat, and the whole morning cost is the five minutes it takes to pin. This is the one style where night-before prep is genuinely better, because heatless waves keep improving as they dry. The waves fall below the band, so the cap never touches them. More heatless methods sit in beach hairstyles.
Who it suits: Damage-conscious hair, and anyone with a 7am ceremony call time.
Tip: Take the buns out no less than 90 minutes before you leave so the set has time to relax.
18. Half-Up Claw Clip Style
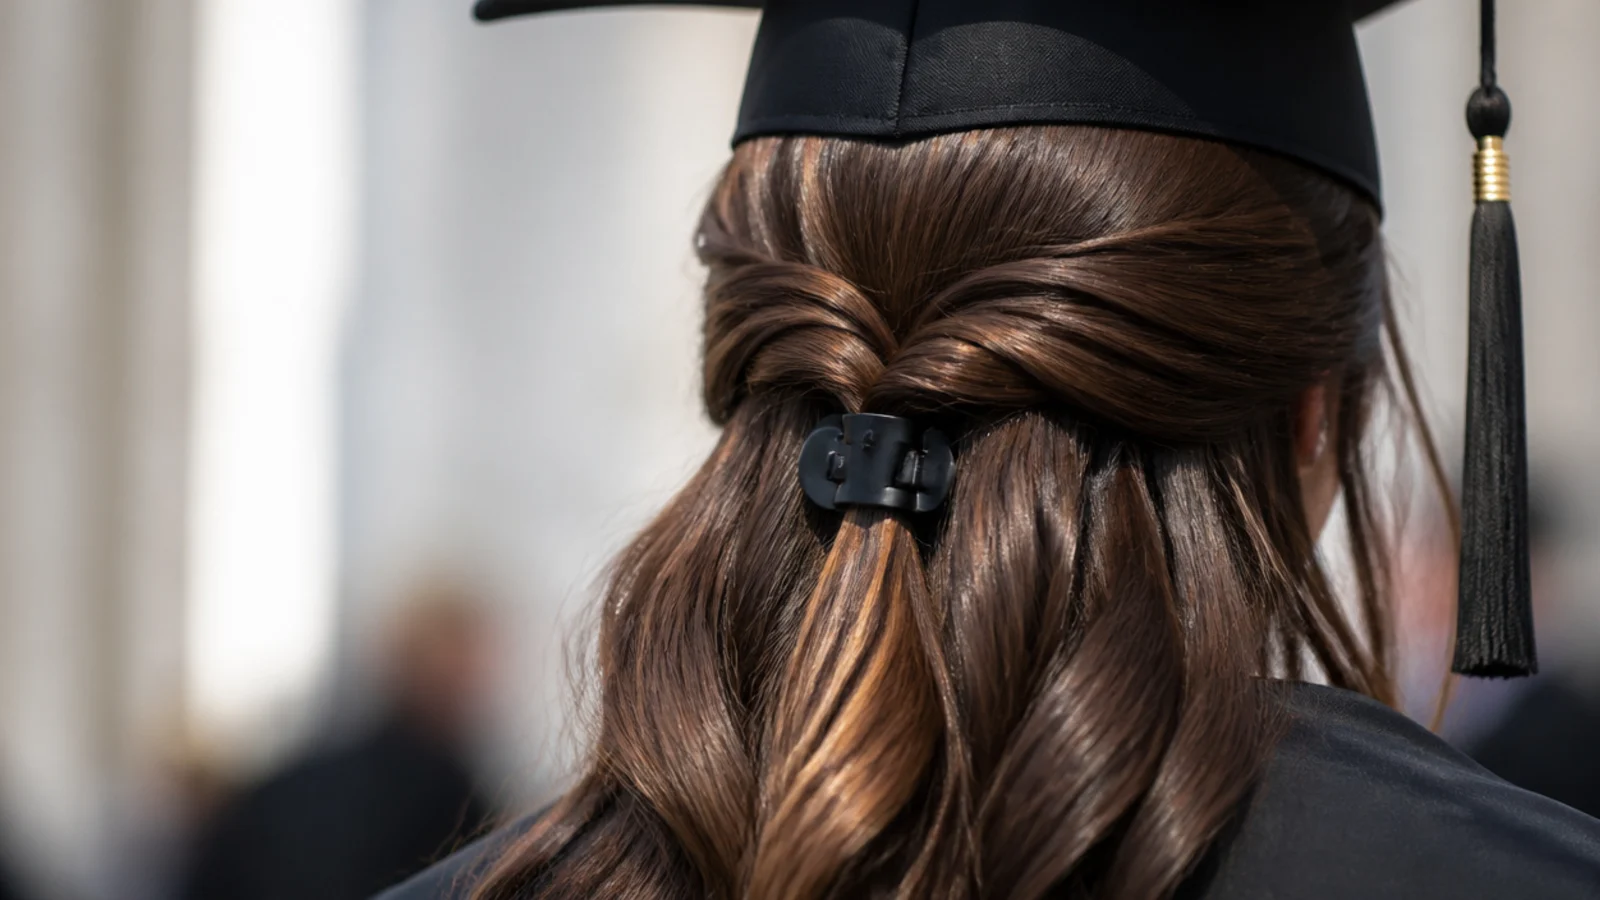
The top section twisted once and caught in a small matte claw clip, roughly 3 inches long, positioned at the nape. Three minutes and it is the only style here you can redo one-handed while holding a diploma. The catch is clip size: a large jaw clip collides with the band and pushes the cap forward, so stay small and keep it low. Choose matte black or tortoise rather than metallic, which throws glare under indoor auditorium lighting.
Who it suits: Thick or medium hair with enough weight to hold a clip closed.
Tip: Test the clip with the cap on the day before; if you feel it through the band, go one size smaller.
19. Half-Up With a Ribbon Bow
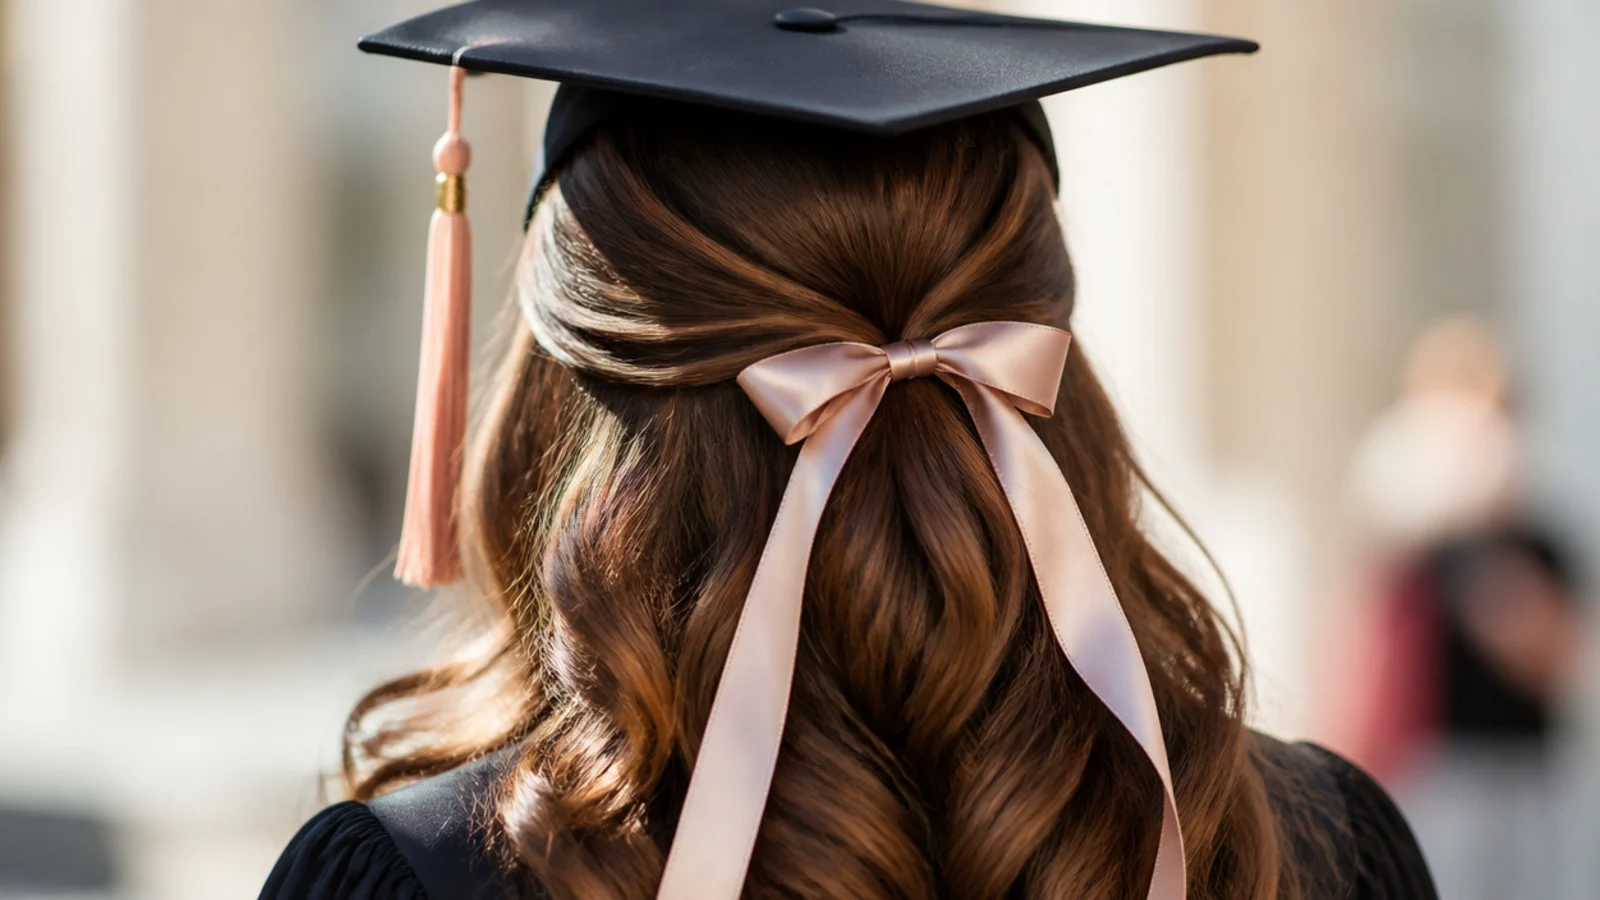
A satin ribbon, about 1.5 inches wide, tied over the half-up elastic in a flat bow. Two minutes on top of the base style, and a spool costs under 5 dollars. Pick your school color or a neutral cream, and tie the bow flat rather than fluffed so the tassel does not catch in it when it swings across your face. Keep the bow at or below the nape, since a bow at crown height is the same mistake as a topknot: it lifts the board.
Who it suits: High school graduations and anyone matching school colors.
Tip: Sew or pin the bow center flat so it does not slowly untie during a four-hour ceremony.
20. Half-Up Half-Down Low Chignon
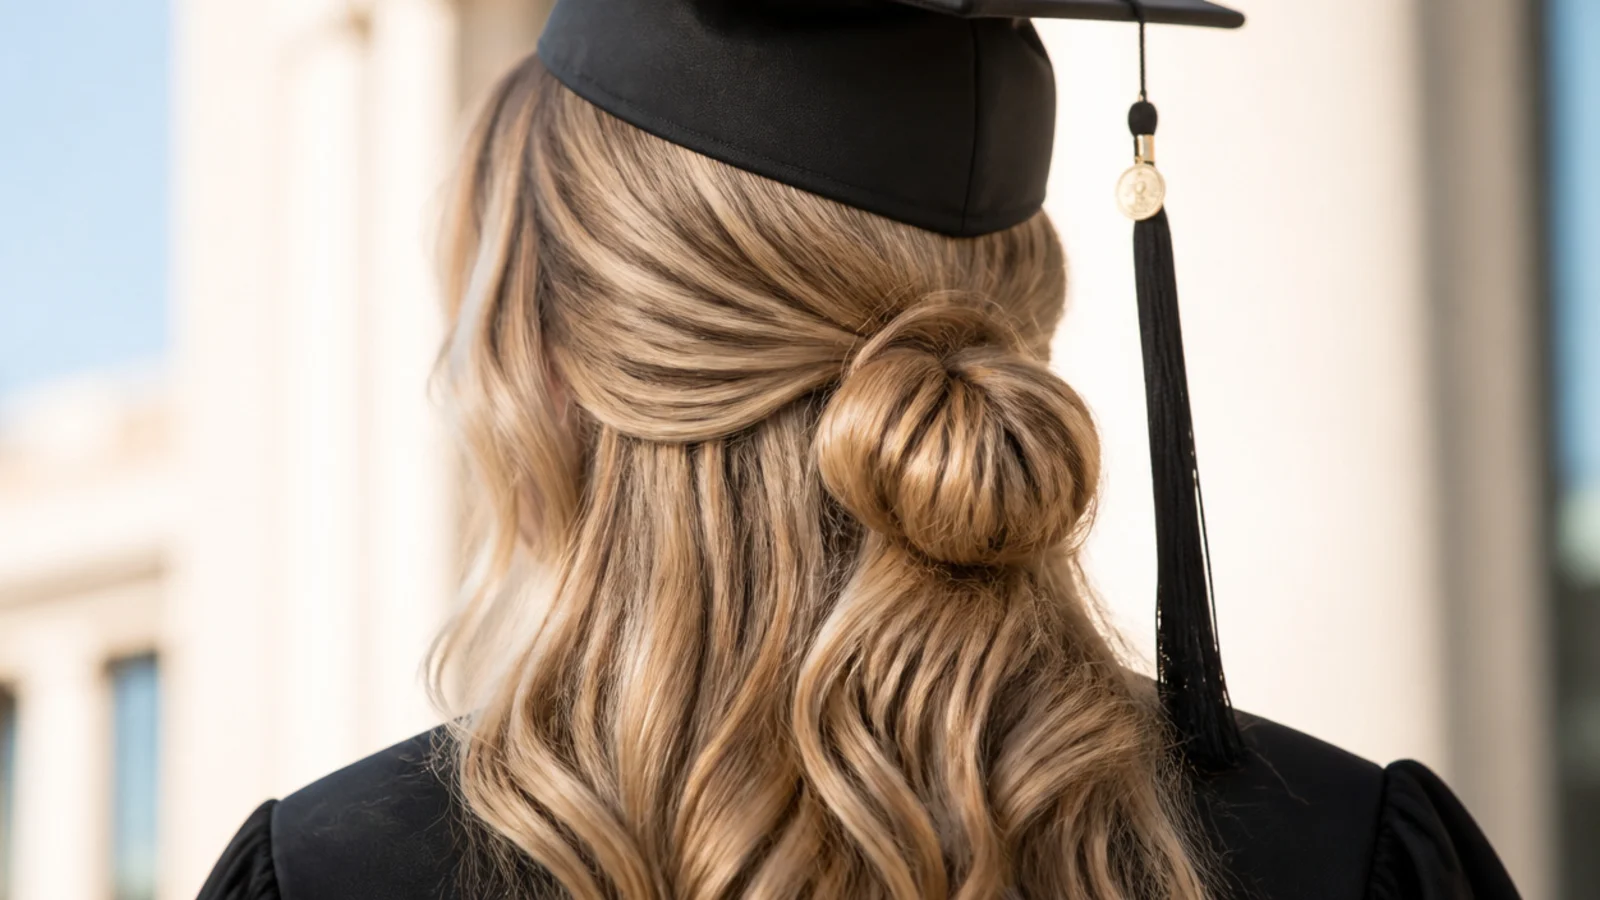
The most formal option here: the top section rolled into a flat looped chignon at the nape and pinned with four U-pins, with waved lengths hanging loose beneath it. Twenty minutes. It reads like a full updo in photos taken from the front while keeping all your length visible from behind, which is the exact trade-off most people want at graduation. It also gives the cap the flattest possible landing surface. Related structured options are in long hair updos that last.
Who it suits: College and postgraduate ceremonies; shoulder-length and longer hair.
Tip: U-pins hold a loop better than bobby pins here, since the chignon is hollow rather than solid.
Where the Cap Sits on a Half Up Half Down Style
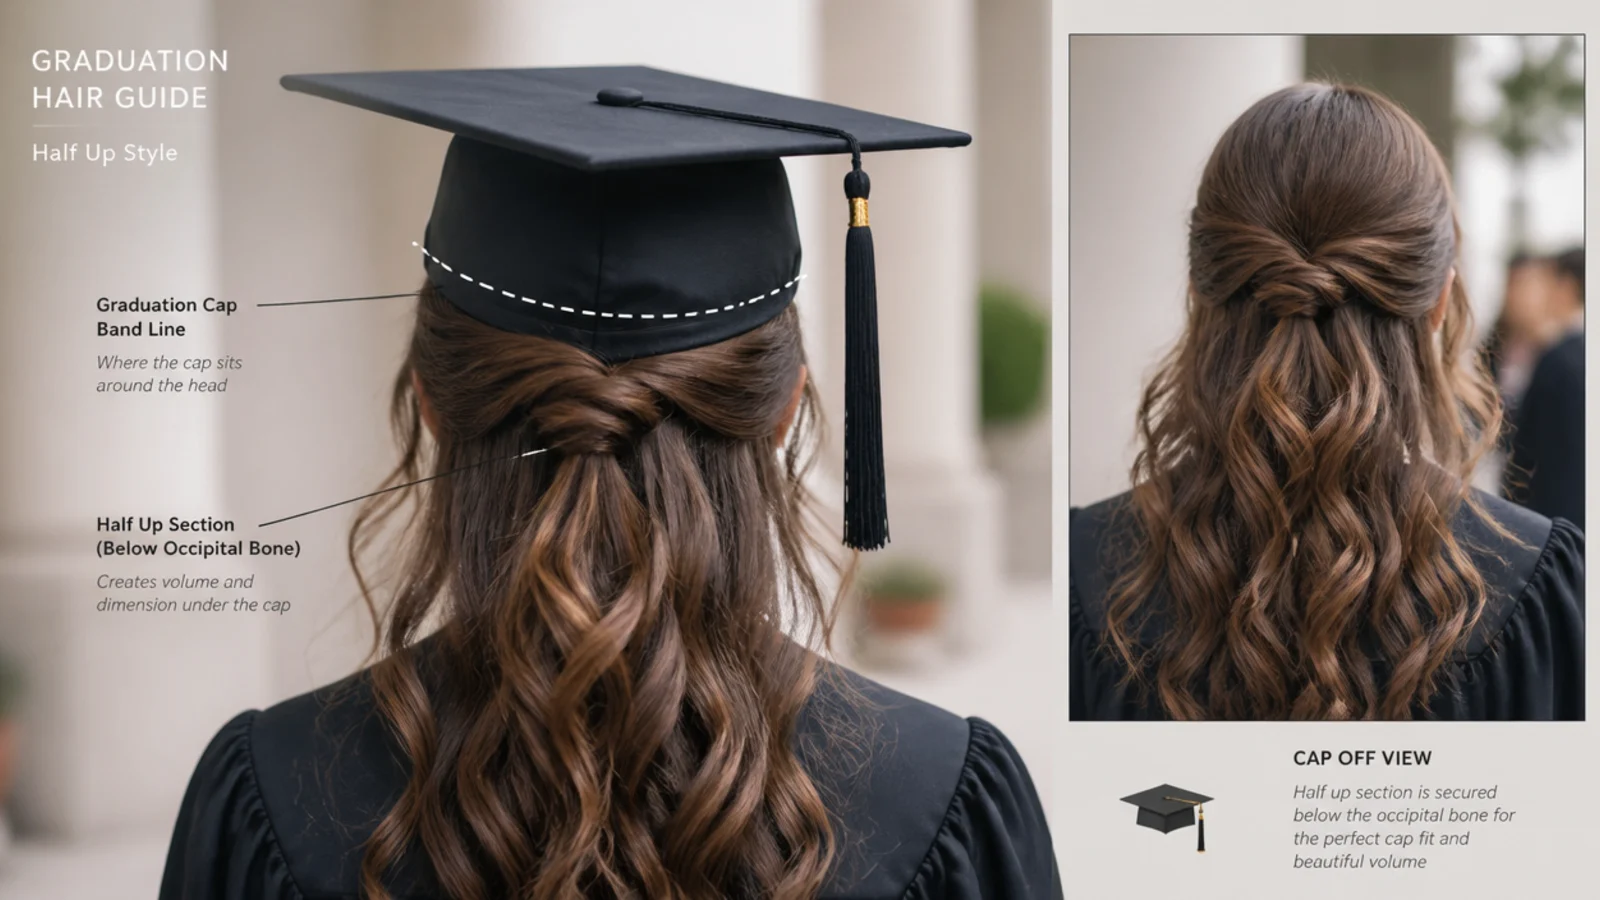
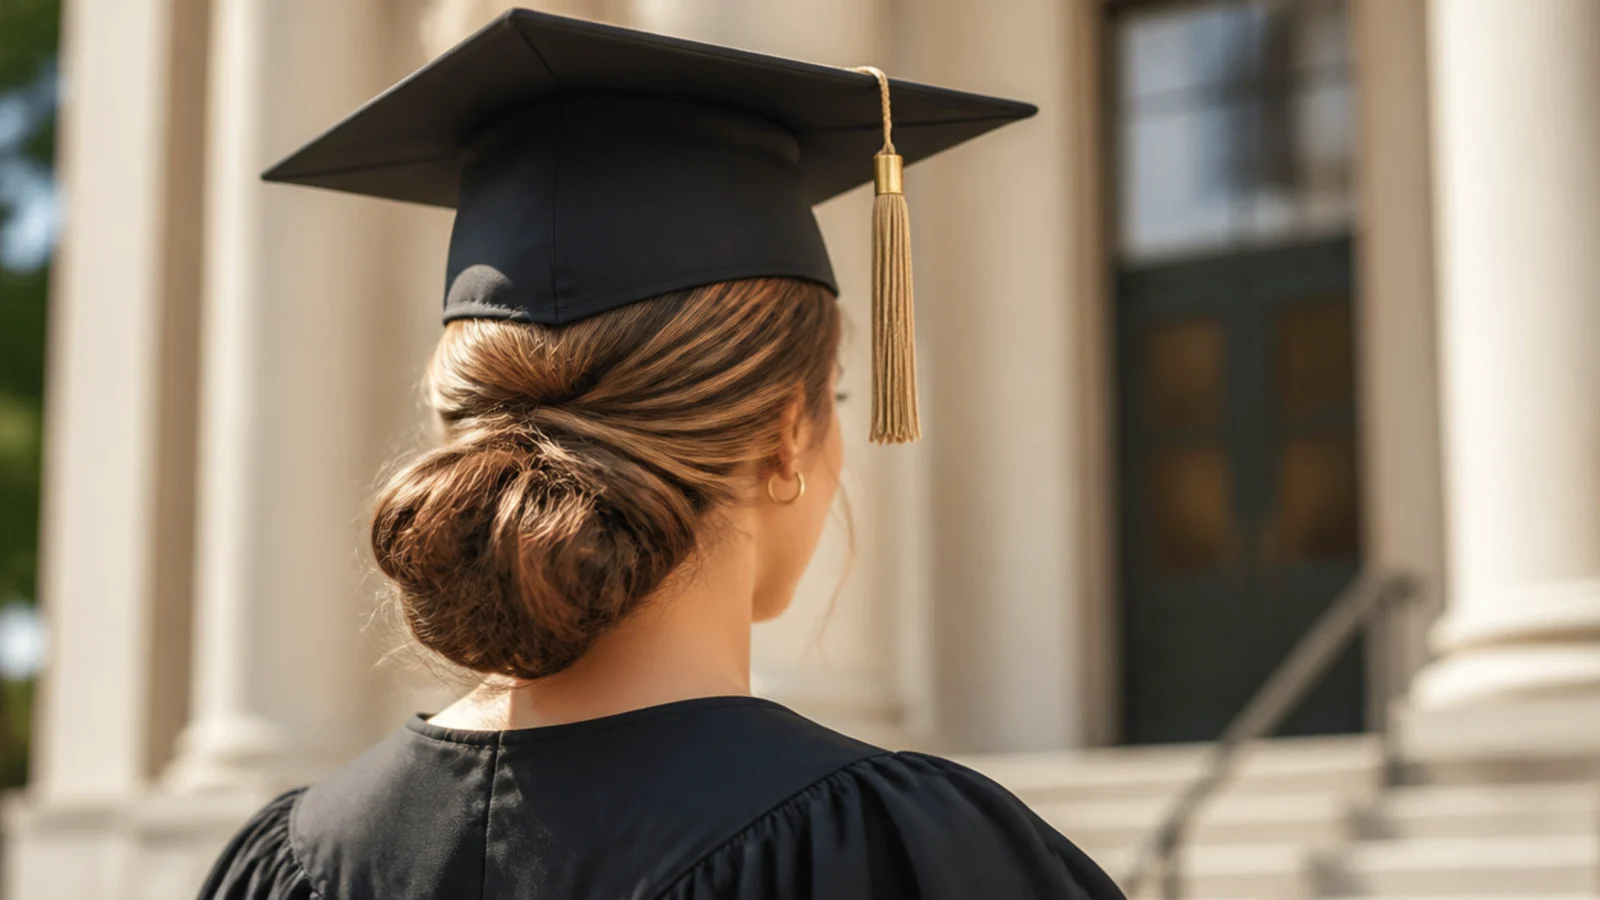
Put the cap on before you do anything else. The band is designed to sit level with the floor, which puts its front edge about two fingers above your eyebrows and wraps the head at roughly that same height all the way around. Mark that line in the mirror with your fingers and you have the only measurement that matters. Everything above it is dead space for the next four hours, and everything below it is where your half-up has to live. The practical target is the occipital bone, the bony ridge you can feel at the back of your skull. Gather at or below that point and the band passes cleanly over the top of the gathered section. Gather above it, at crown height, and you have built a bump exactly where the band needs to be flat, which lifts the front of the board, tips it backward and starts it sliding. This is the same reason high topknots and crown ponytails fail, covered in more detail in graduation hairstyles with cap.
How to Put a Graduation Cap on Over a Half-Up Style
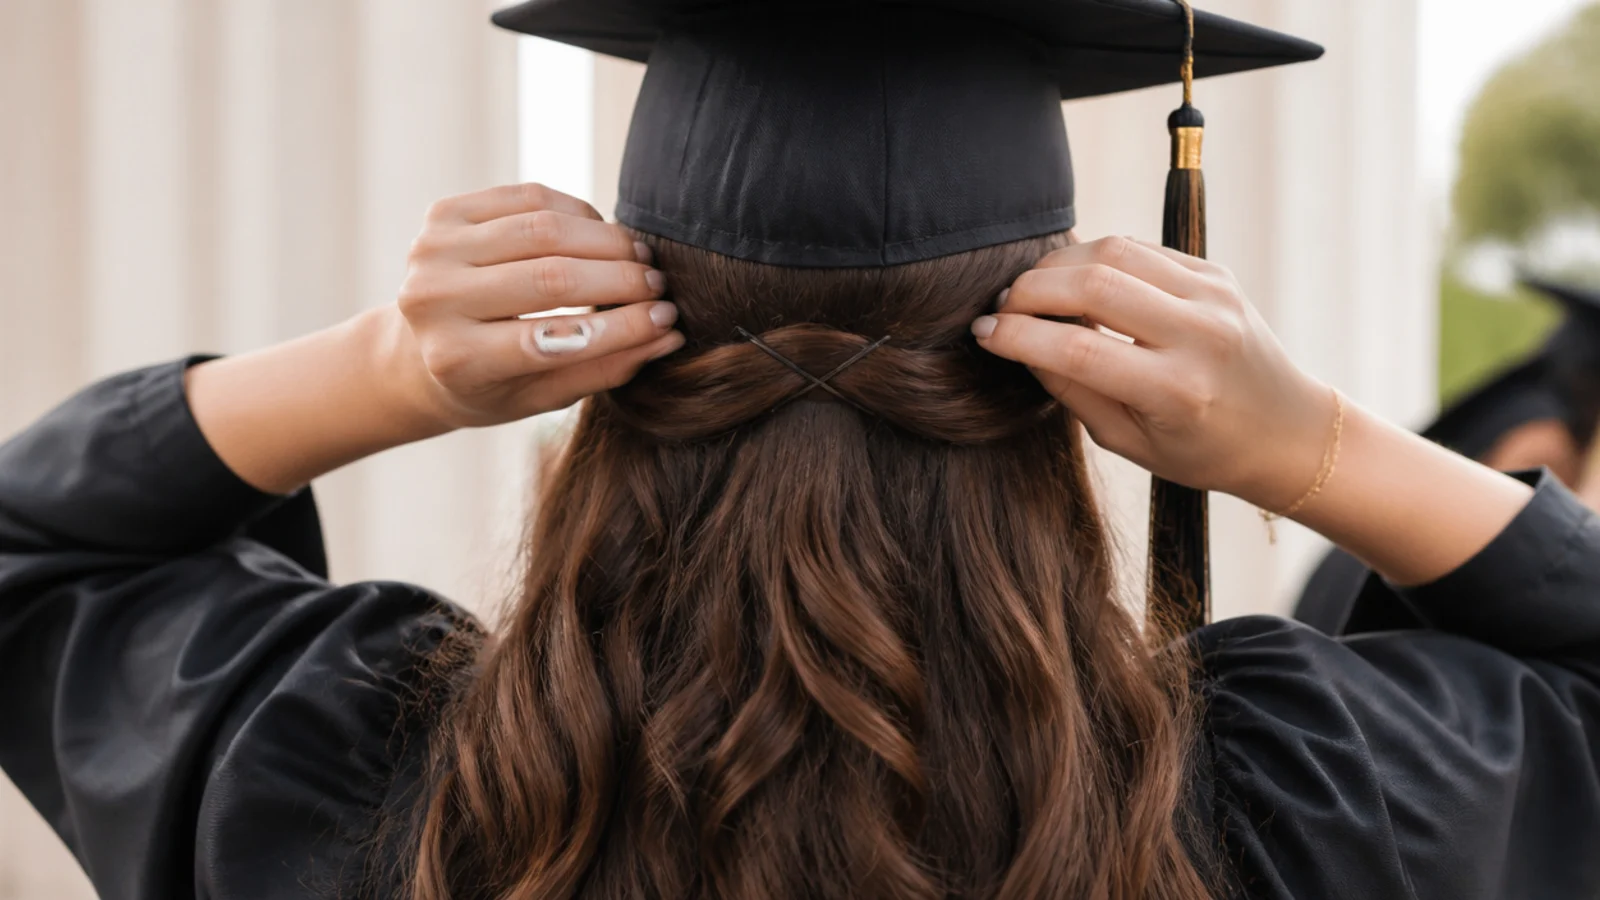
Slide the cap on from front to back, not down from above. Set the front edge on your forehead first, then lower the back over the gathered section so the band rides over it rather than crushing into it. Do not press down. Once it is seated, anchor it: take a bobby pin, push it through the inside edge of the band and into the hair just above each ear, then cross a second pin over the first in an X. Two pins per side is enough, four if your hair is silky or freshly washed. On a half-up, the pins have something solid to bite because the gathered section gives them density, which is why half-up caps stay put better than caps over loose hair. Give it a test walk and one head turn before you leave the house, then leave it alone. Fiddling with the board mid-ceremony is what dislodges it.
Half Up Graduation Hairstyles by Hair Length
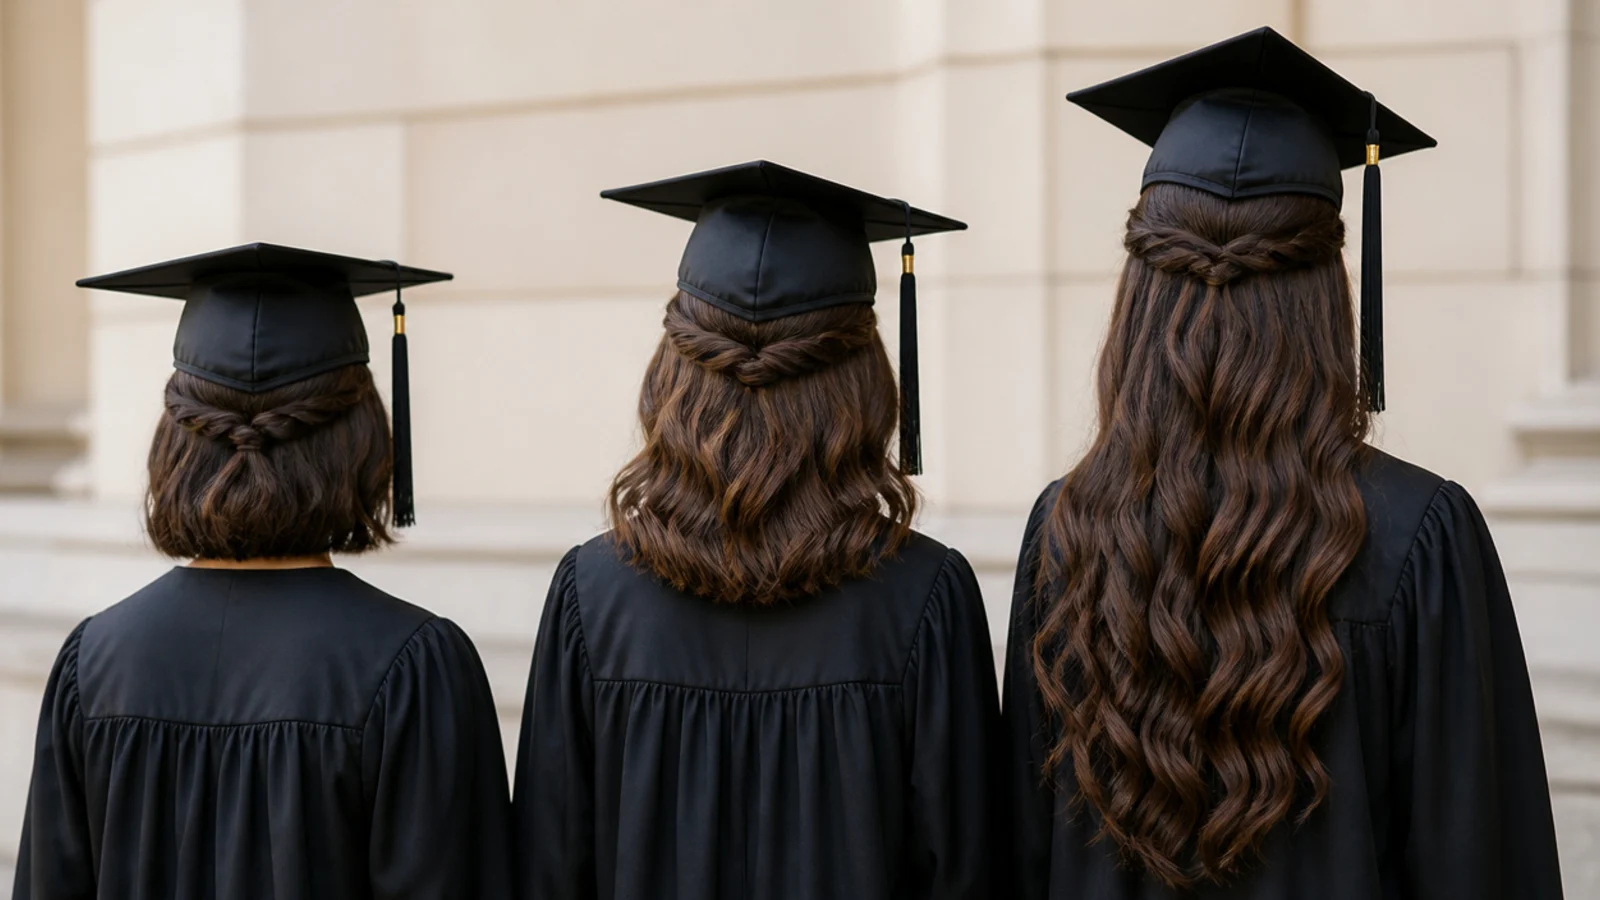
On a chin-length bob, a full half-up will not reach the back, so take two temple sections and cross-pin them instead, then flick the ends outward so the cut still reads. Collarbone hair is the easiest length of all: the gathered section naturally lands near the occipital bone with no adjustment. At shoulder blade length and beyond, weight becomes the issue, because a heavy gathered section pulls backward and drags the cap with it. The fix is to take less hair, roughly the top third rather than the top half, and to pin the gathered point up half an inch rather than letting it hang. Very long hair also needs a decision about the gown collar, since anything past the shoulder blades falls behind the polyester and disappears in photos, so sweep the loose lengths forward over one shoulder before the camera. Length specifics are broken out in graduation hairstyles for long hair and graduation hairstyles for short hair.
Half Up vs Full Updo for Graduation Photos
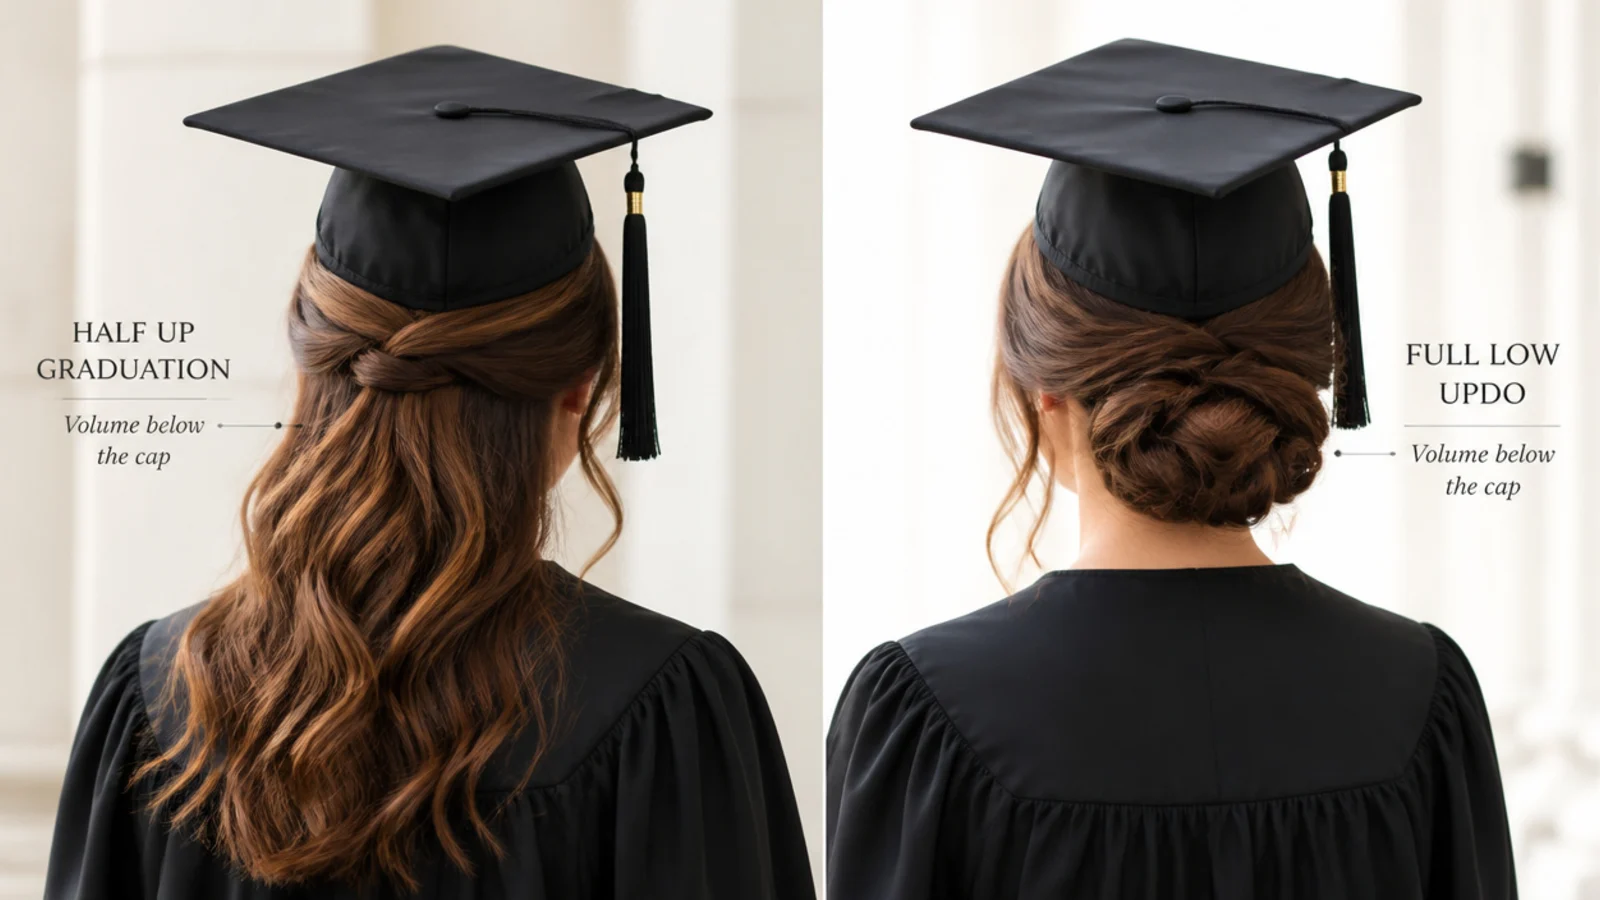
Structured hair photographs better than loose hair at graduation, because loose hair moves, catches shadows and disappears into a black gown. A full updo holds its shape in every single frame. A half-up sits between the two: the top section gives the camera the crisp silhouette an updo gives, while the loose lengths keep the texture and color that make the photo look like you. The comparison table above breaks the trade-off down row by row, but the short version is this. Choose a full updo if your ceremony is outdoors in humidity, if your gown has a high neck, or if you overheat easily. Choose a half-up if you want your length visible, if you are styling yourself in a hurry, or if you know most of your photos will be taken after the cap comes off. Half-up also wins on recovery, since the crown is already covered. Structured alternatives are in long hair updos that last.
Making a Half-Up Hold for Four Hours
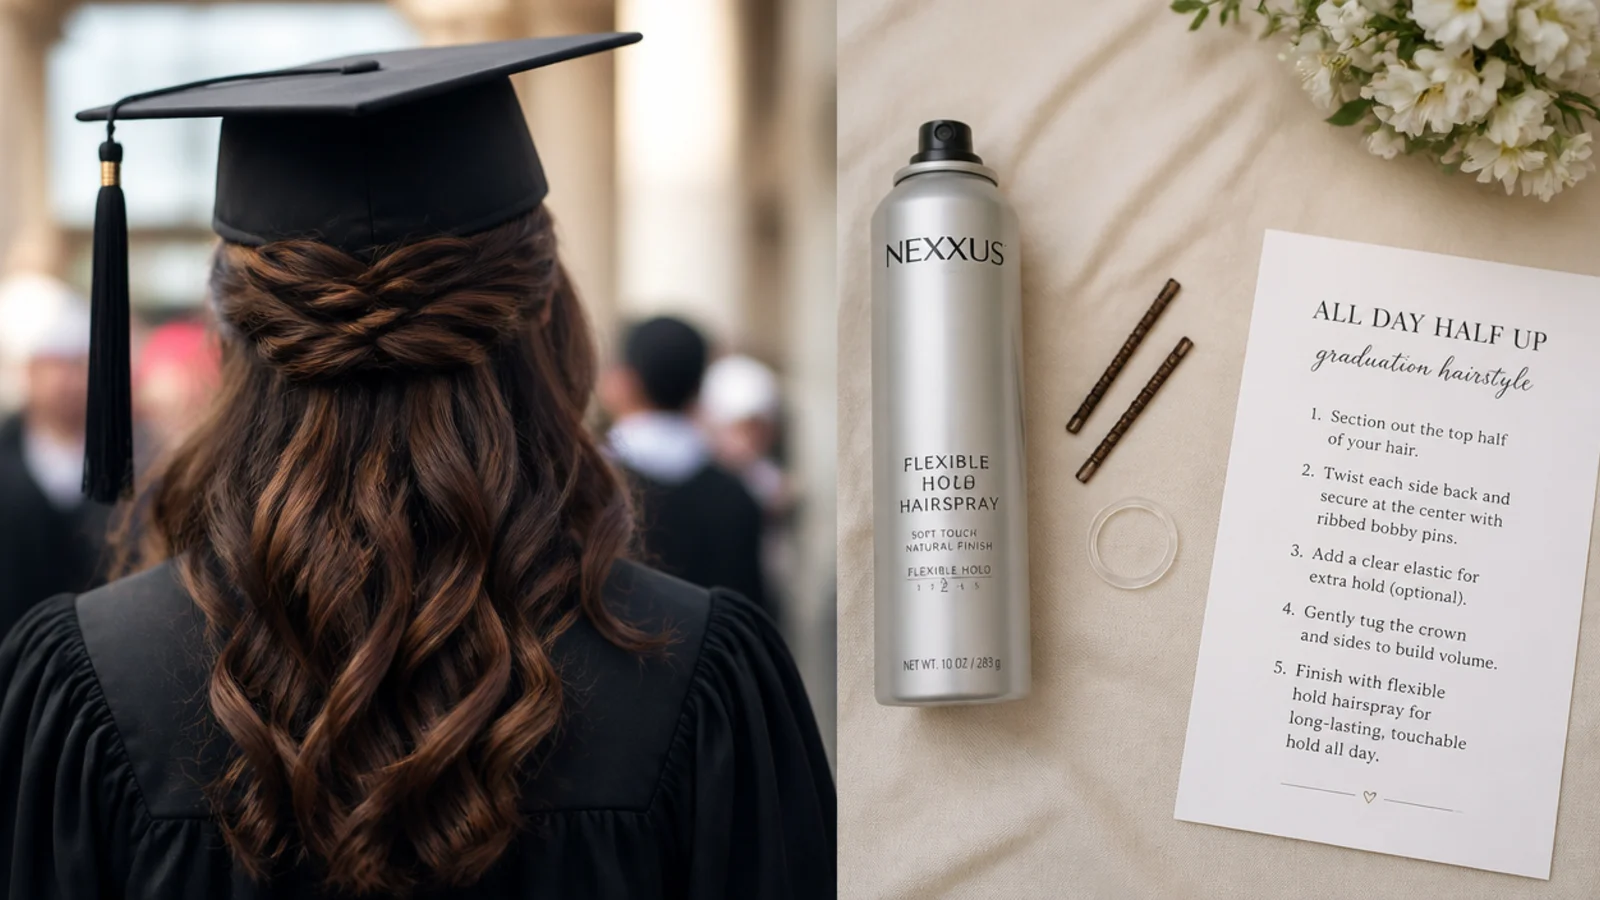
Use flexible-hold hairspray, not a stiff freeze spray. This is the single most useful rule on graduation day, because a stiff cast shatters under the cap band and leaves a permanent crease, while flexible hold lets the hair spring back once the board comes off. Spray from about 10 inches away, lightly, and let it dry fully before the cap touches your head. Use ribbed bobby pins rather than smooth ones, wavy side against the scalp, and push them in toward the head rather than sliding them along the surface. Carry four spares, a clear elastic and a small comb in your clutch, which covers every realistic failure. For outdoor ceremonies add an anti-humidity finishing spray over the loose lengths, since those are what swells, not the pinned section. More hold techniques are in cute hairstyles that last all day.
Timing Your Half-Up the Morning Of
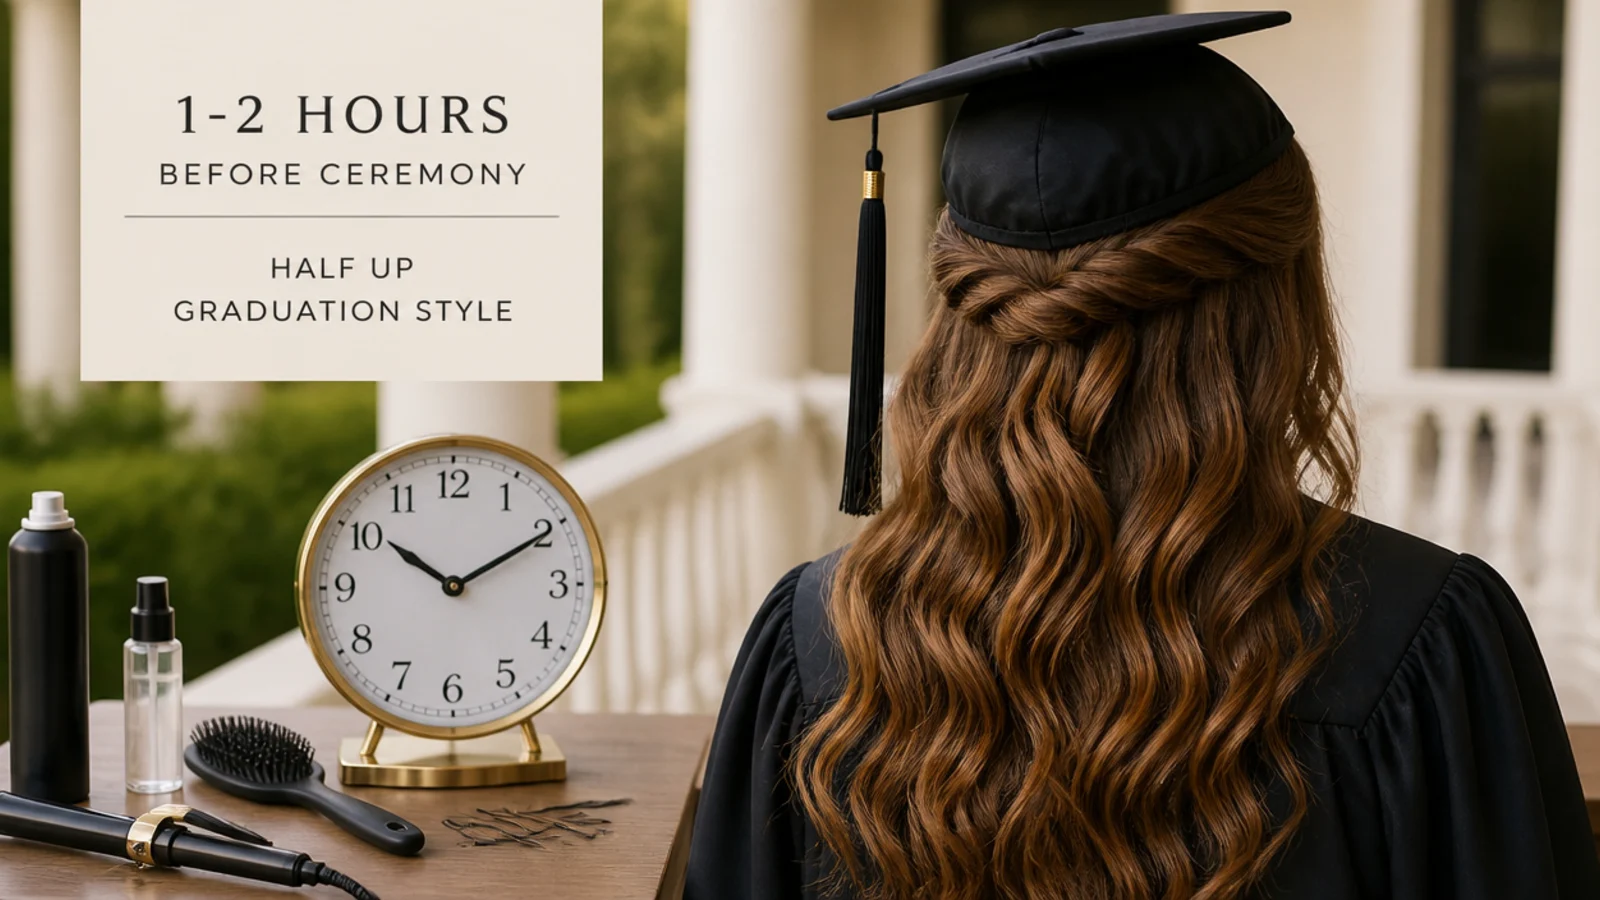
Style one to two hours before you leave, never the night before, with one exception: braided half-ups hold overnight and actually look better slightly loosened. Anything curled needs to be done the morning of, because a curl set on Friday evening is a bend by Saturday noon. Work backward from your call time, not from the ceremony start, since most schools want graduates lined up 45 to 60 minutes early. Wash the night before rather than the morning of, because clean, slippery hair does not hold pins and a half-up on day-two hair grips twice as well. Build in a 10 minute buffer for one full practice run with the actual cap on, which is the step almost everybody skips and the one that catches a bun that is too big or a clip that sits too high. Quick options if you run short are in 5-minute everyday hairstyles.
Frequently Asked Questions
How do you put a graduation cap on half up half down hair?
Slide the cap on front to back rather than pressing it down from above. Set the front edge two fingers above your eyebrows, then lower the back so the band passes over the gathered section instead of into it. Anchor it with two bobby pins crossed in an X through the inside of the band above each ear.
Does half up half down hair work under a graduation cap?
Yes, and it is one of the most cap-friendly options there is, provided the half-up section is gathered at or below the occipital bone. At that height the band clears it completely. A half-up gathered at the crown does not work, because it puts volume exactly where the band needs a flat surface, which tips the cap backward.
Where should the half-up section sit for a graduation cap?
At or just below the occipital bone, the bony ridge at the back of the skull, roughly level with the tops of your ears. That is about an inch below where the cap band lands. Anything gathered higher collides with the band, and anything gathered much lower loses the flat anchor point that keeps the cap from sliding.
Will a graduation cap ruin a half up hairstyle?
It will flatten the crown, but on a half-up that flattening happens inside the pinned section where it is not visible. That is the main advantage over wearing hair fully down. Use flexible-hold hairspray rather than a stiff one so the hair recovers, and the style usually needs nothing more than a quick finger-fluff after the cap comes off.
How many bobby pins do I need for a half up graduation hairstyle?
Two to six pins for the style itself, depending on whether you are pinning twists, a chignon or just a clipped section, plus two crossed pins per side to anchor the cap. Carry four spares in your clutch. Use ribbed pins rather than smooth ones and push them in toward the scalp instead of sliding them flat.
Should I curl my hair the night before graduation?
Only if the set is heatless, like overnight buns or a robe-belt wrap, which improves as it dries. Heat curls should be done one to two hours before you leave, because a curl set the night before has already dropped to a soft bend by the time you line up. Braided half-ups are the other style that holds overnight.
What is the fastest half up graduation hairstyle?
The low half-up ponytail at the nape takes about six minutes, and the claw clip version takes three. Both need nothing more than a brush, one clear elastic or a small matte clip, and a light mist of flexible-hold spray. Both also sit well below the cap band, so neither needs adjusting once the mortarboard goes on.
Is half up or an updo better for graduation photos?
An updo holds its silhouette in every frame and performs better in humidity. A half-up keeps your length and texture visible, which is what most people want in a photo taken after the cap comes off. If your ceremony is outdoors in May or June heat, choose the updo. If most of your photos happen afterward, choose the half-up.
How do you keep a graduation cap from sliding on smooth hair?
Smooth, freshly washed hair gives pins nothing to grip. Style on day-two hair, add a light texture spray at the sides where the pins go, and use four pins per side crossed in Xs instead of two. A small low bun or chignon inside the half-up also gives the back of the band a ledge to rest against.
Which graduation hairstyles look are you saving?
The one rule that carries all 20 of these half up graduation hairstyles is placement, not technique. Put your cap on before you touch a brush, mark the band line with two fingers above your eyebrows, and gather every half-up section below it. Do that and a Dutch braid crown, a bubble half-up and a simple curled half-up all behave the same way under the board: flat, anchored, and unchanged when it comes off. Use flexible-hold spray so the hair recovers, carry four spare bobby pins, and style one to two hours before you leave. For more options, browse the graduation hairstyles hub or the cap-specific breakdown in graduation hairstyles with cap.