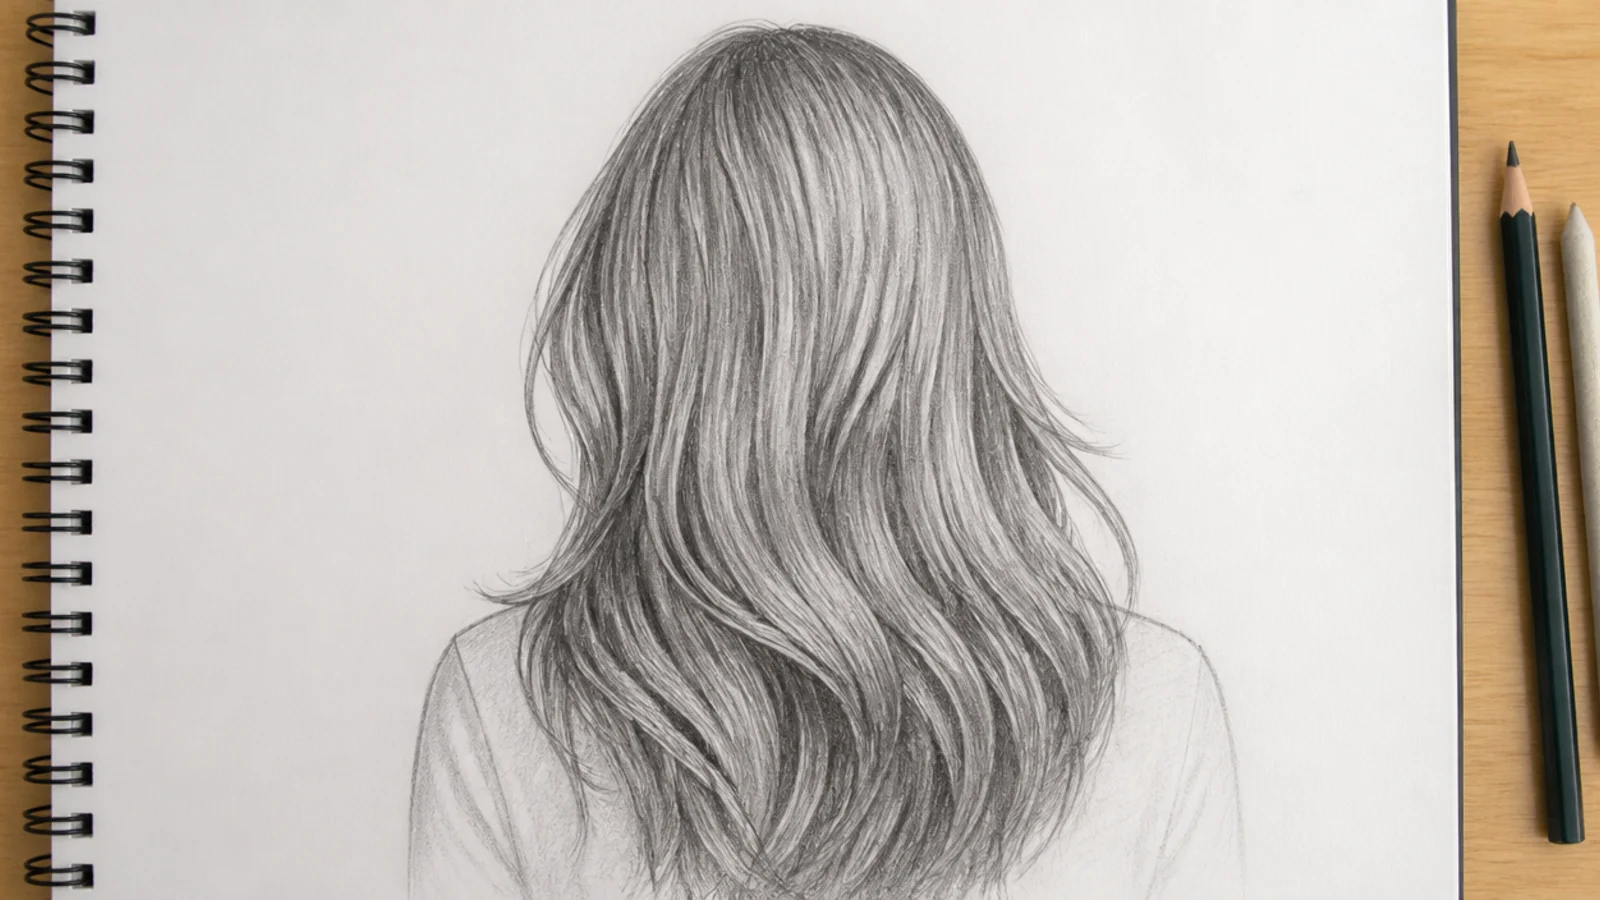
Quick Comparison
| Pencil Hair Sketch on Paper | Digital Hair Sketch on a Tablet | |
|---|---|---|
| Starting the silhouette | 2H guide lines, kept light enough to erase | A separate low opacity layer under everything |
| Building dark values | 6B layered slowly; you cannot go darker than the lead | One brush at full opacity reaches black instantly |
| Creating highlights | Leave paper white or lift with a kneaded eraser | Erase on the layer, or paint white on top |
| Fixing a wrong flow line | Erase and redraw; the paper tooth remembers | Undo, or move the layer with a transform |
| Blending for volume | Blending stump or tortillon, then lift back | Soft airbrush or a smudge tool at low strength |
| Drawing stray strands | Sharp 2B, one flick per strand, no undo | Tapered pressure brush, undo as often as needed |
| Time for a full head | 45 to 90 minutes for a rendered portrait | 30 to 60 minutes once brushes are set up |
| Best for | Learning value control and committing to marks | Iterating on character designs and color tests |
| Biggest trap | Overworking until the paper is gray and shiny | Relying on undo instead of planning the silhouette |
1. Hair Made of Flowing Water
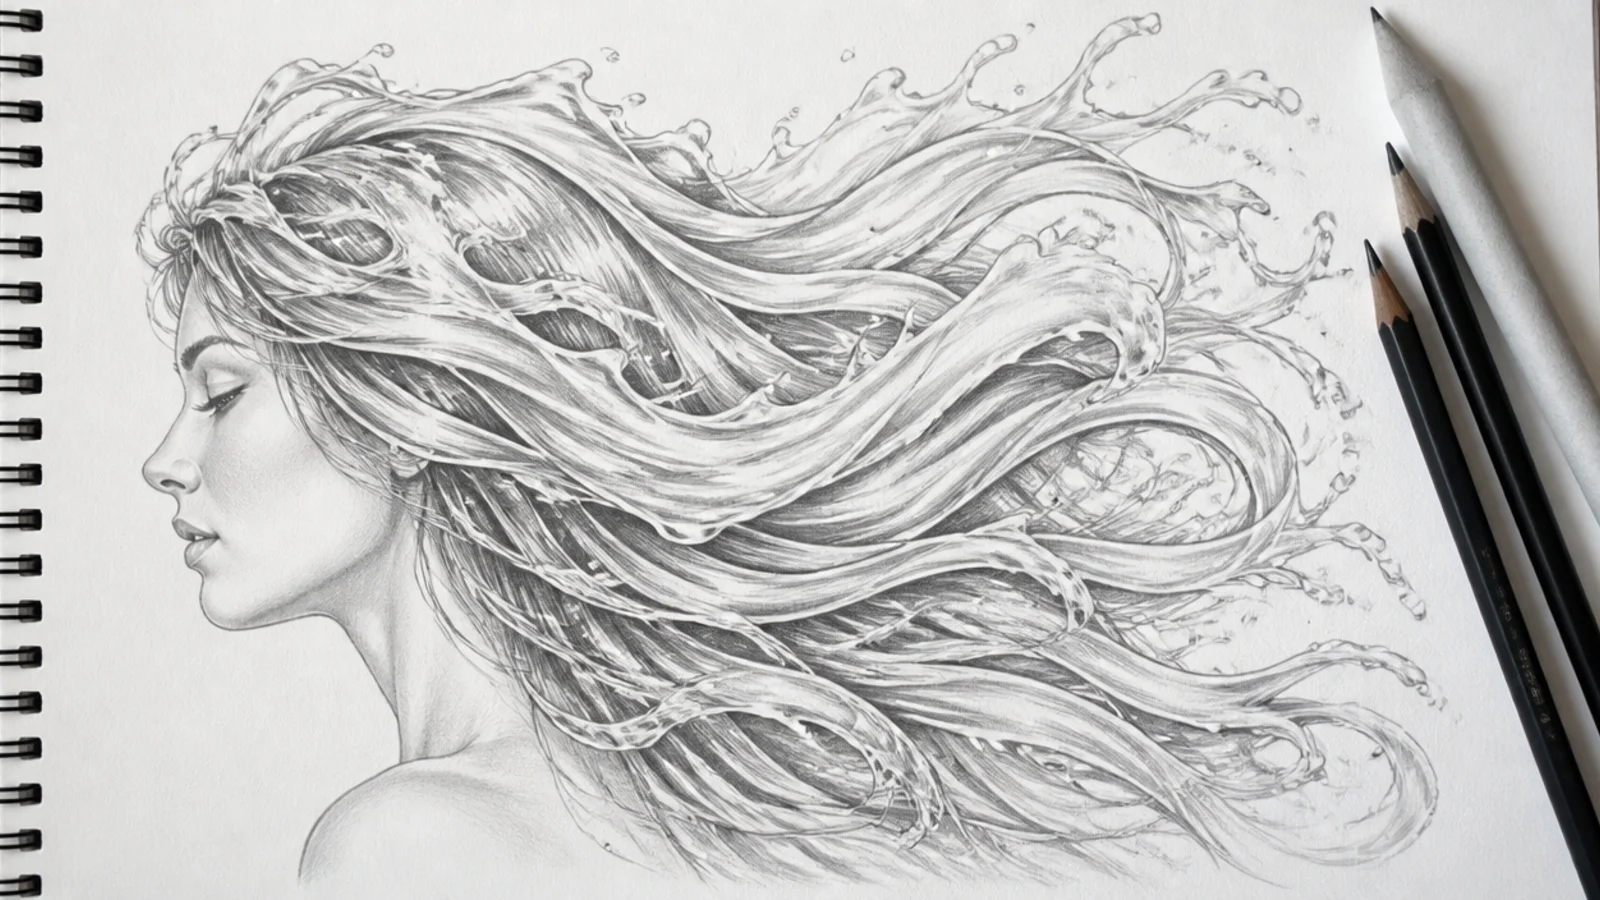
Draw the head and shoulders lightly in 2H, then replace the hair mass with three or four wide water ribbons that twist as they fall, each one showing its inside surface at least once. Water hair works because water and hair share the same ribbon logic: a surface that turns, catches light on the outer curve and goes dark on the inner one. The technical trick is contrast. Keep the ribbon interiors almost untouched white paper and push 6B into the crossing points where ribbons overlap. The mistake that ruins it is outlining every droplet, which turns the whole thing into bubbles.
Who it suits: Anyone who wants a fantasy concept that secretly teaches ribbon shading.
Tip: Add three or four detached droplets flicking off the ends to sell the motion.
2. Fire Hair with Ember Tips
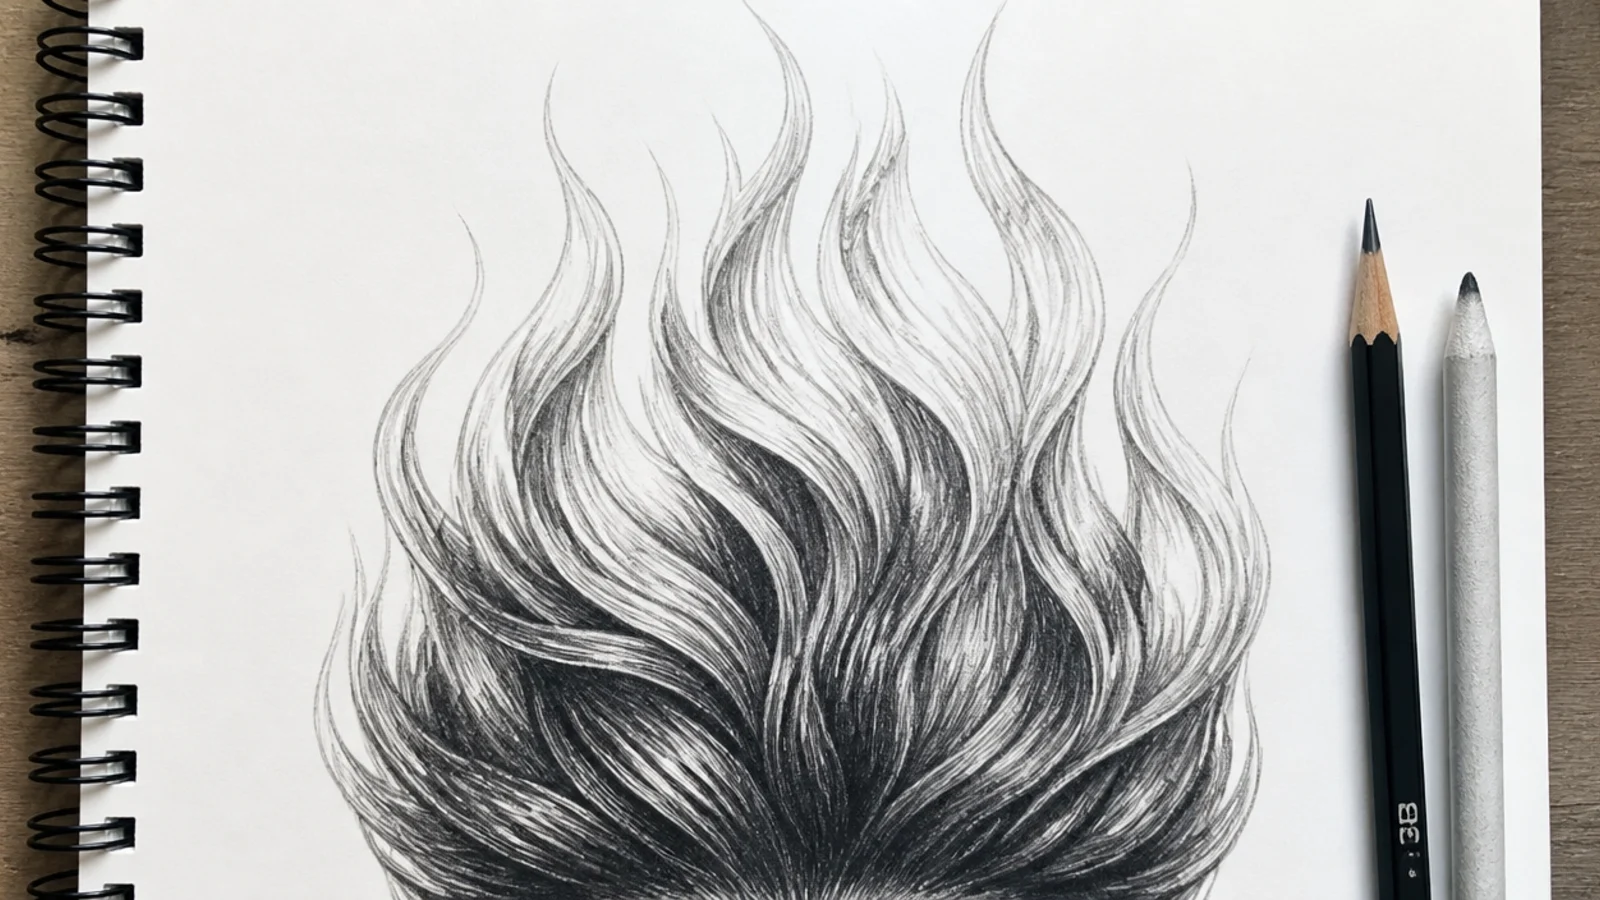
Fire hair inverts the normal value map. Real hair is usually darkest at the roots and lightest at the tips only when it catches light, but flame hair should be almost black at the scalp in 6B and fade to bare paper at the tips. Block the flame silhouette first as one tall teardrop mass, then carve individual tongues out of it with a kneaded eraser rather than drawing them as outlines. That subtractive approach is what makes the edges feel hot instead of cut out. The mistake to avoid is symmetrical flames; stagger the heights so no two tongues peak at the same level.
Who it suits: Character artists designing a villain or an elemental.
Tip: Sharpen the kneaded eraser to a wedge and lift narrow slivers for the brightest tongues.
3. Wind-Blown Long Hair from Behind
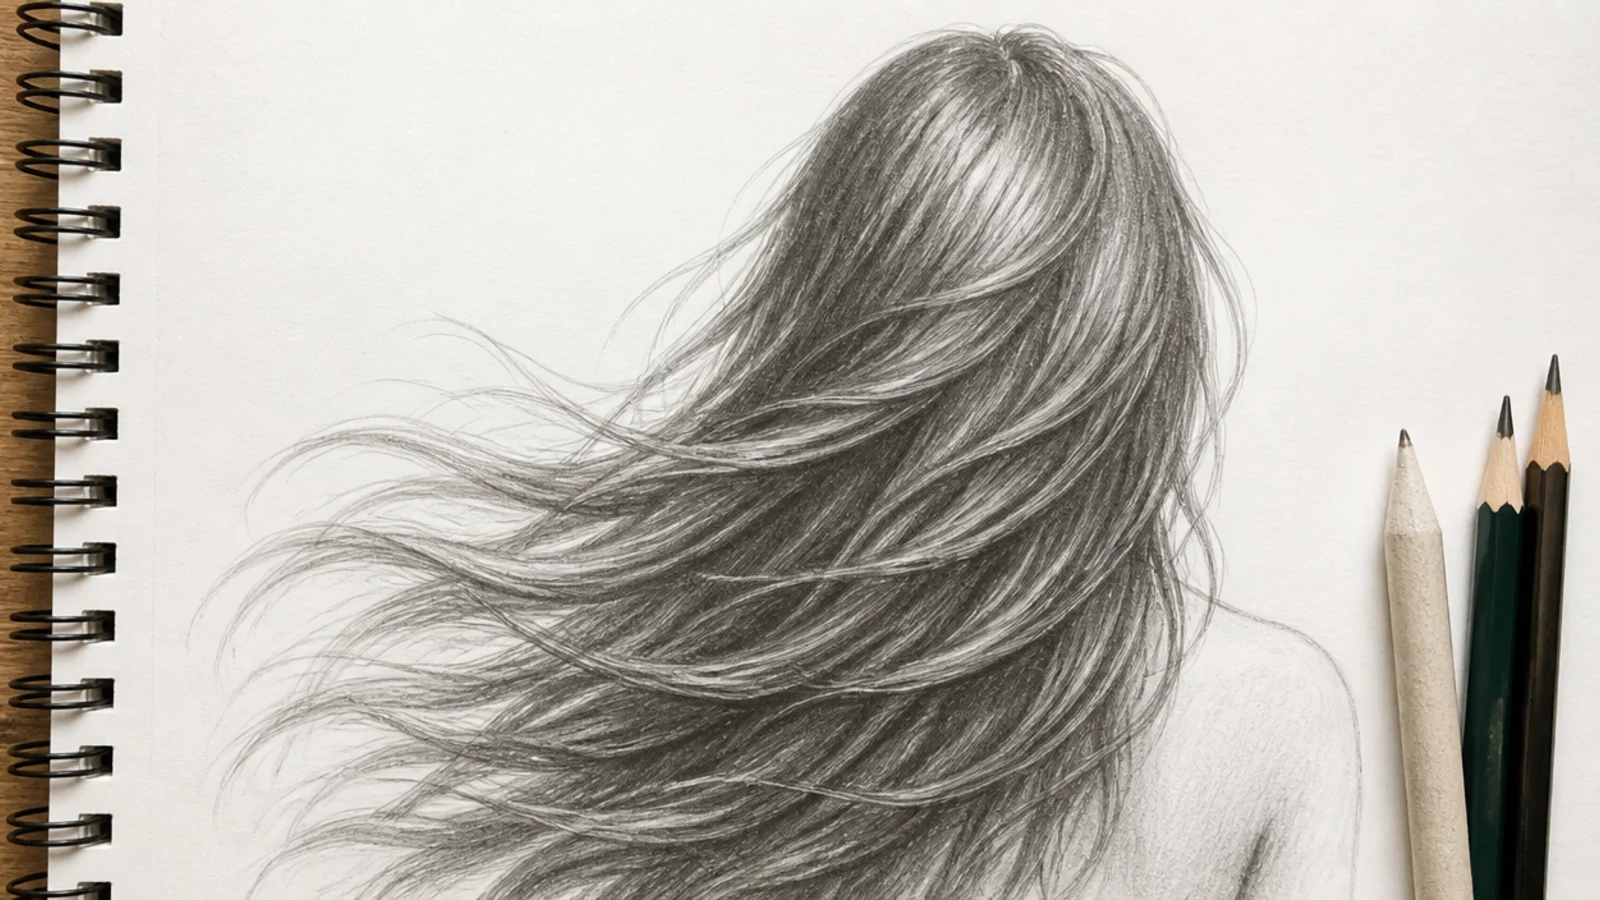
The back view is the most underdrawn angle in hair, and wind is the easiest way to make it interesting. Draw the crown as a small oval, mark the whorl where the hair actually starts, then run every flow line out of that single point and bend them all in one direction about a third of the way down. Length groups should separate into three or four masses, not one curtain, because wind splits hair rather than moving it as a sheet. Draw the far edge softer than the near edge. The mistake is parallel lines: hair fans, it never runs in tram tracks.
Who it suits: Illustrators who avoid back views and need the practice.
Tip: Draw one stray strand crossing back against the wind so the direction reads as motion.
4. Hair Made of Leaves and Vines
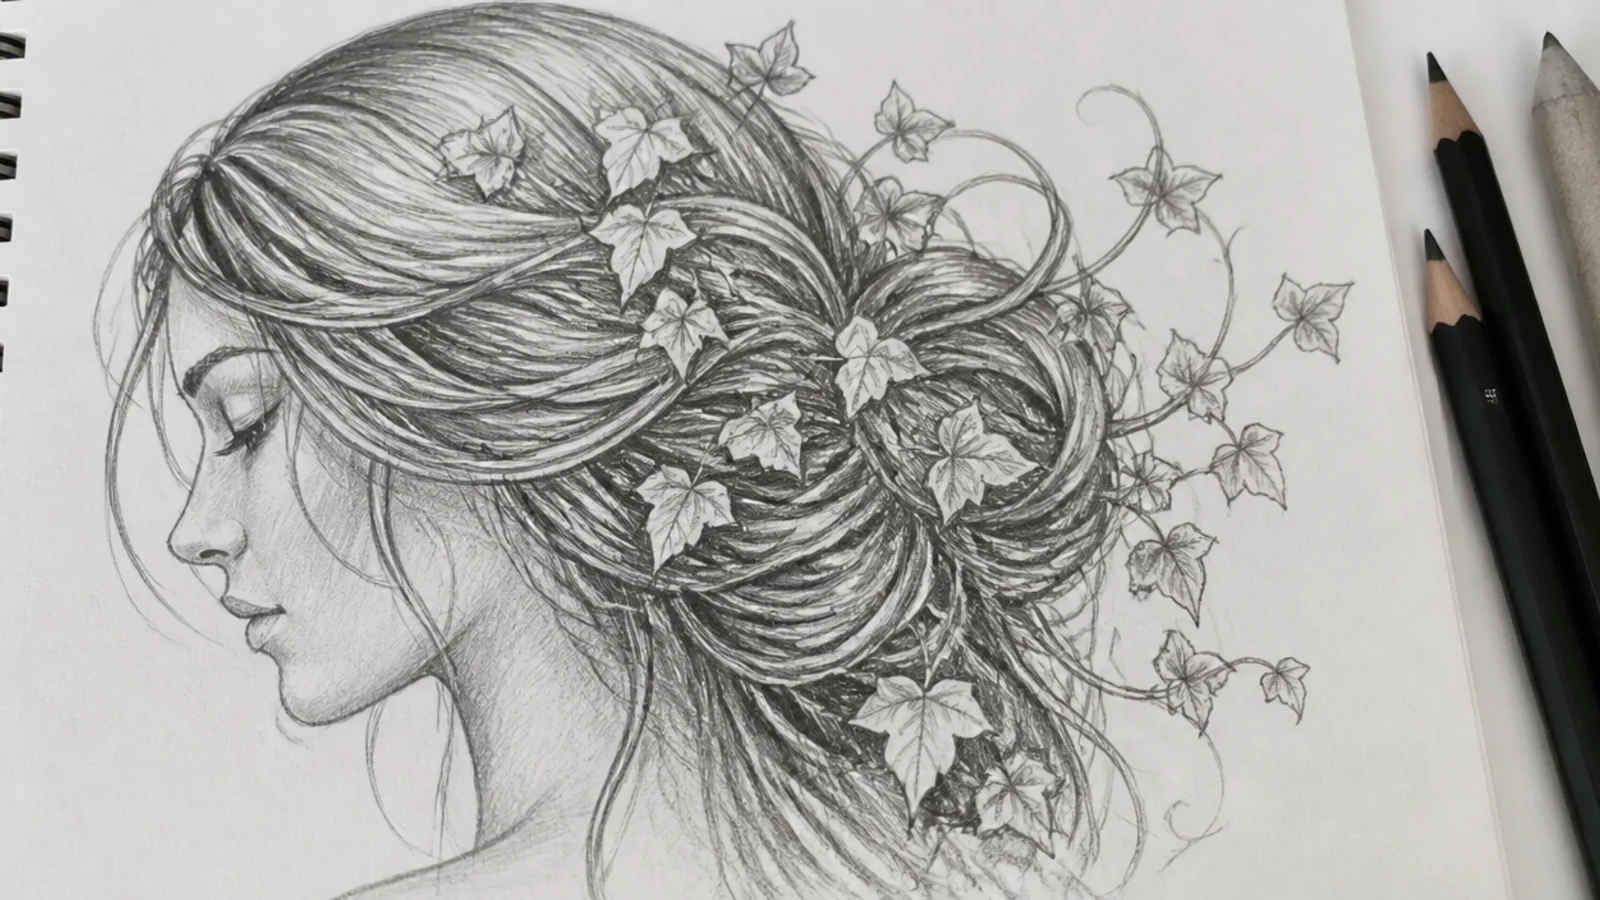
Start with a normal long hair silhouette so the shape still reads as hair from three feet away, then convert the outer 30 percent into leaves and the inner mass into twisting vines. The trick that carries the whole drawing is density gradient: pack the leaves tightly near the scalp and let them thin out toward the tips, which is how a real overgrown mass behaves. Use 4B for the shadow gaps between leaf clusters and leave the top plane of each leaf untouched. The mistake is drawing every leaf the same size and angle, which flattens it into wallpaper instead of a growing form.
Who it suits: Botanical illustrators and anyone drawing a forest spirit.
Tip: Choose one real leaf shape, oak or ivy, and stay with it for the entire drawing.
5. Galaxy Hair with Star Highlights
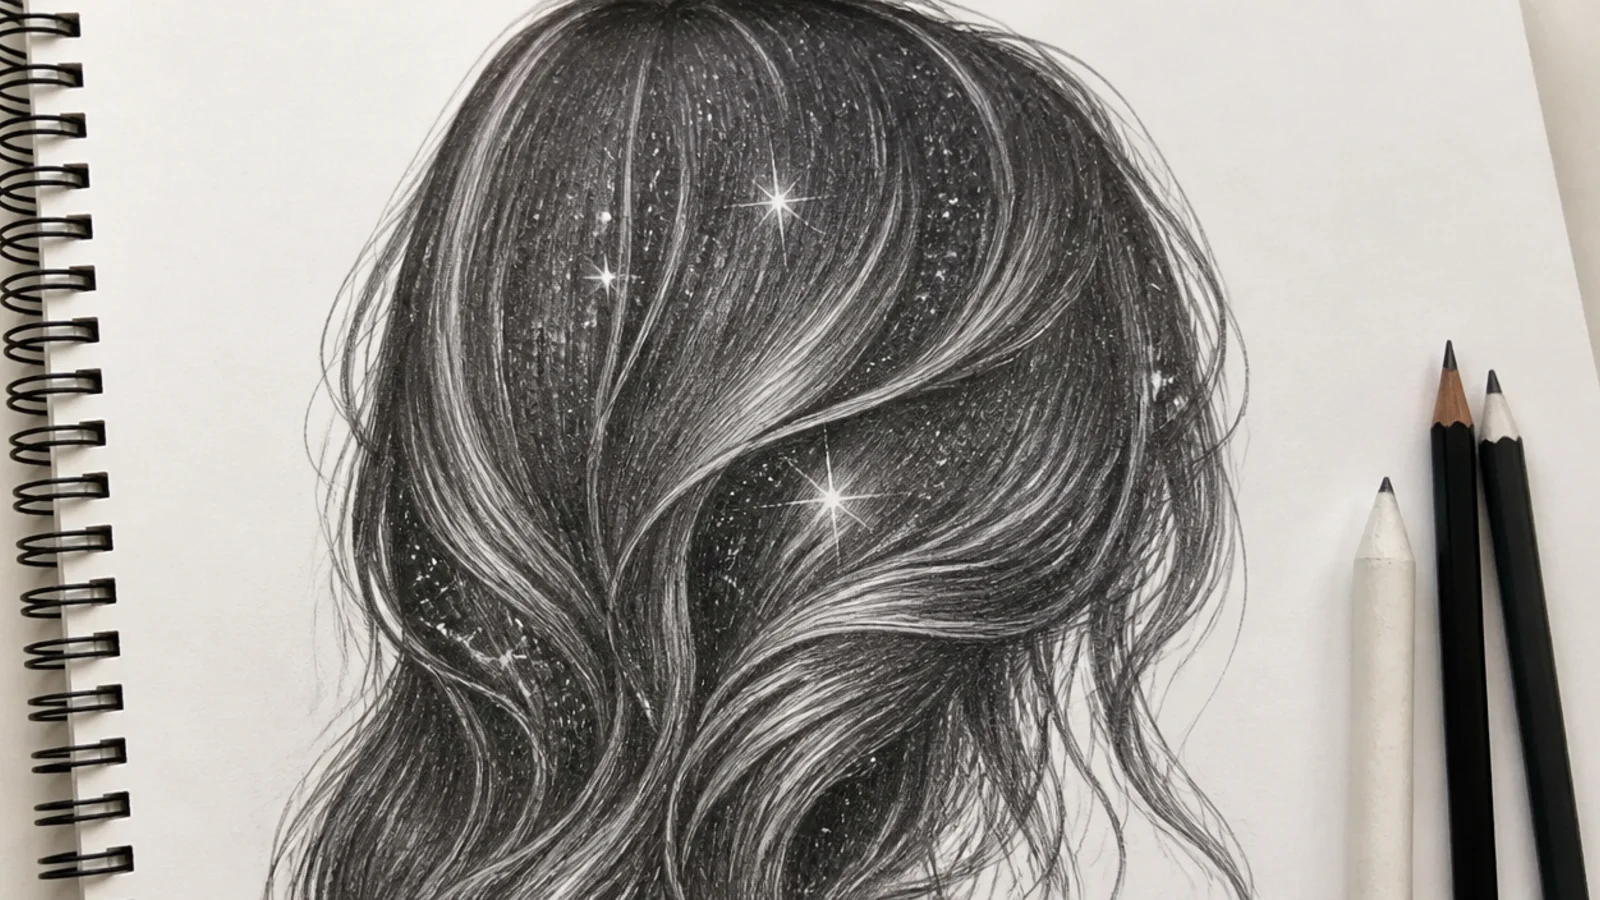
Galaxy hair is the most saved fantasy concept on Pinterest and the most commonly ruined. Shade the entire hair mass to a deep even 6B tone first, blending with a stump until there is no visible pencil line, then lift the highlights back out. Every star is a lifted point, never a drawn dot. The band of the galaxy should follow the hair's flow line, curving with the sections rather than sitting on top of them like a sticker. The mistake is stars scattered evenly across the whole mass; cluster them along one diagonal so the eye follows the hair's direction.
Who it suits: Anyone who wants a dramatic finished page in under an hour.
Tip: Press a kneaded eraser to a needle point and stab, do not drag, for crisp stars.
6. Wet Hair Clinging to the Face
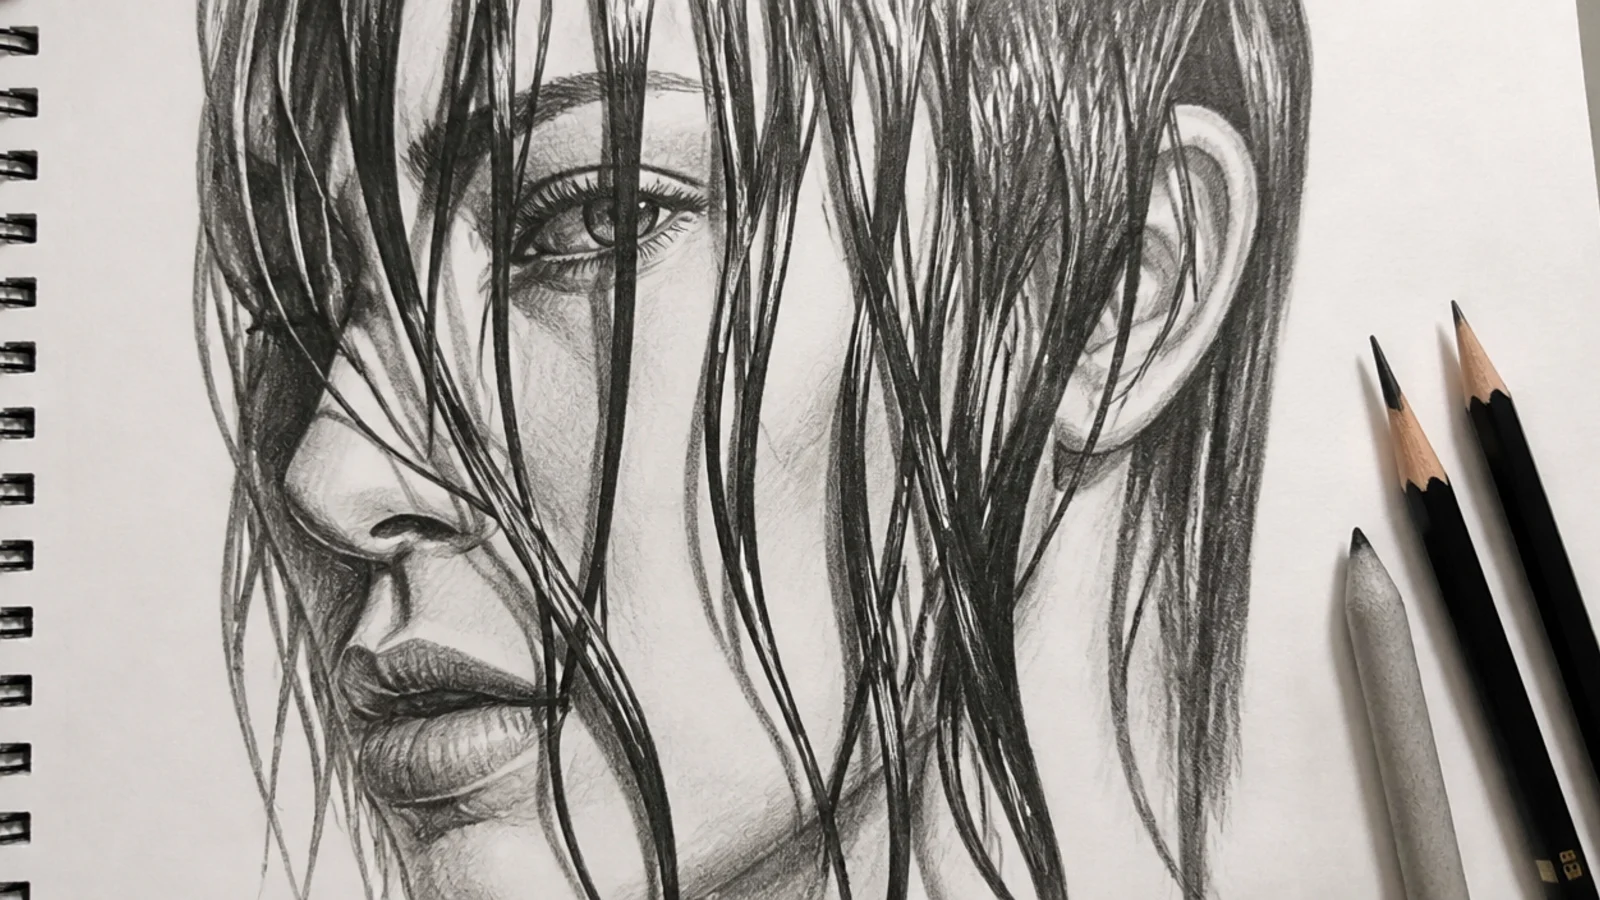
Wet hair reads wet because of two things only: the clumps get fewer and heavier, and the highlights get harder edged. Draw far fewer sections than you would for dry hair, maybe six thick ropes instead of twenty, and let them stick to the forehead and cheek rather than floating away from the skull. Keep the darkest 6B values right beside the brightest white paper with almost no transition, because water creates specular highlights rather than soft ones. The mistake is fine strand texture; the moment you add wispy flyaways the hair reads as dry again.
Who it suits: Portrait artists working on a rain or shower scene.
Tip: Add two or three drips leaving the lowest points of the clumps, not the sides.
7. Mid-Snip Haircut in Progress
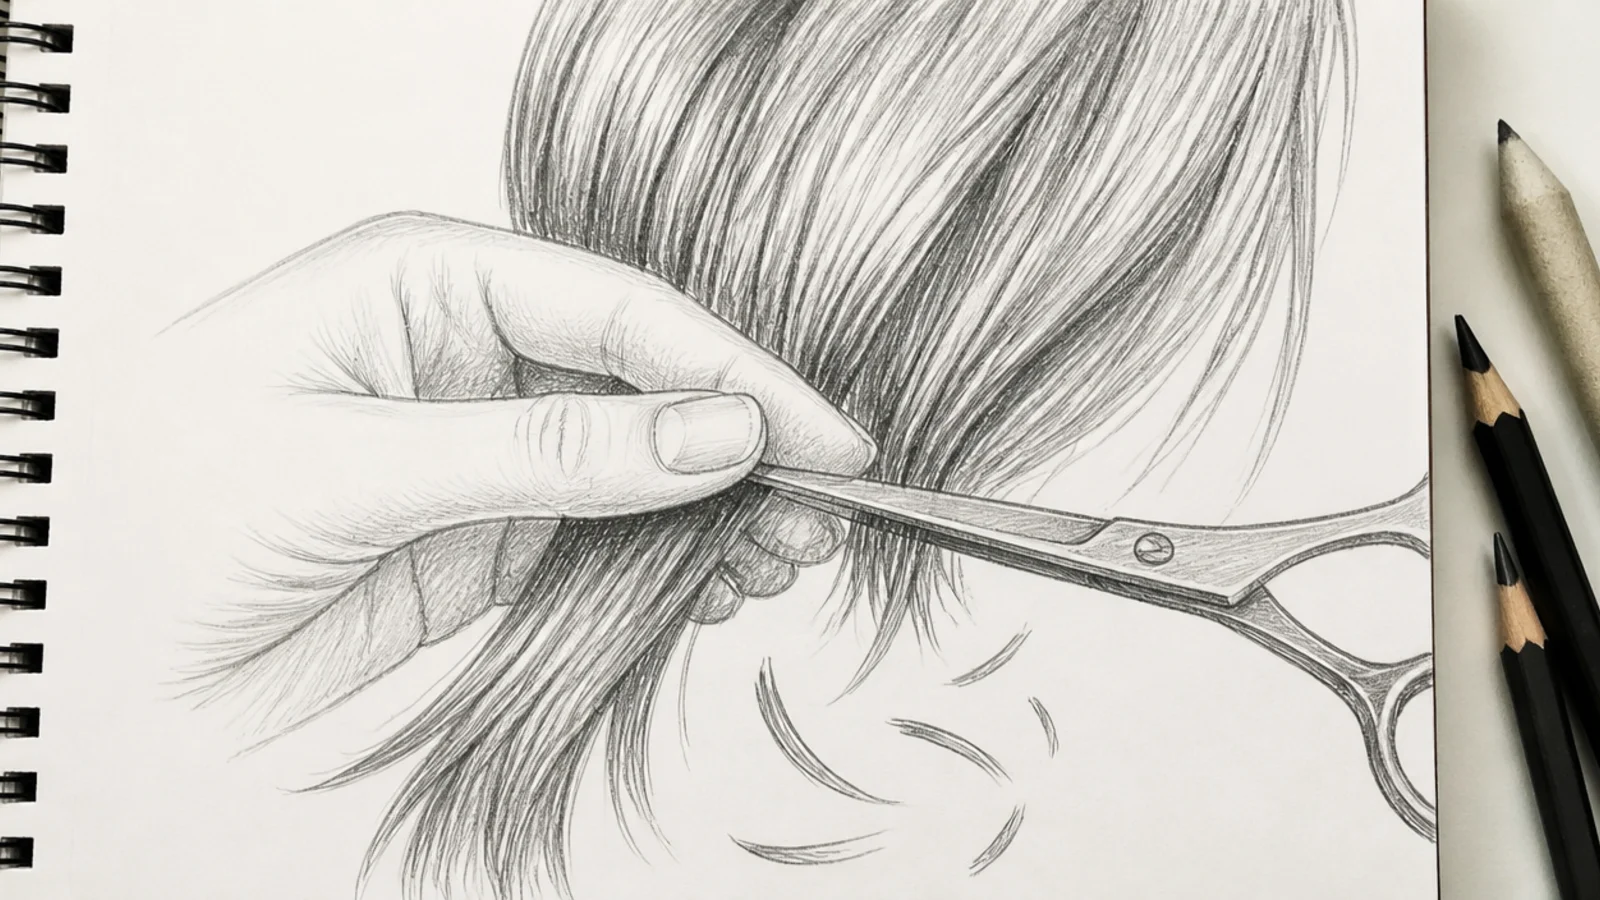
A pair of scissors closing on a lifted section turns a hair study into a story, which is exactly what makes a pin get saved rather than scrolled past. Draw the held section as a flat ribbon pulled taut between two fingers, which gives you a clean straight edge to contrast against the loose mass behind it. The cut strands falling below should be drawn as short curved slivers at different angles, none of them parallel. The mistake is drawing the scissors carefully and the hair loosely; keep both at the same level of finish or the tool steals the drawing.
Who it suits: Artists who want narrative practice inside a hair study.
Tip: Leave the lower half of the head unfinished to imply the cut is not done yet.
8. Face Half-Covered by a Curtain of Hair
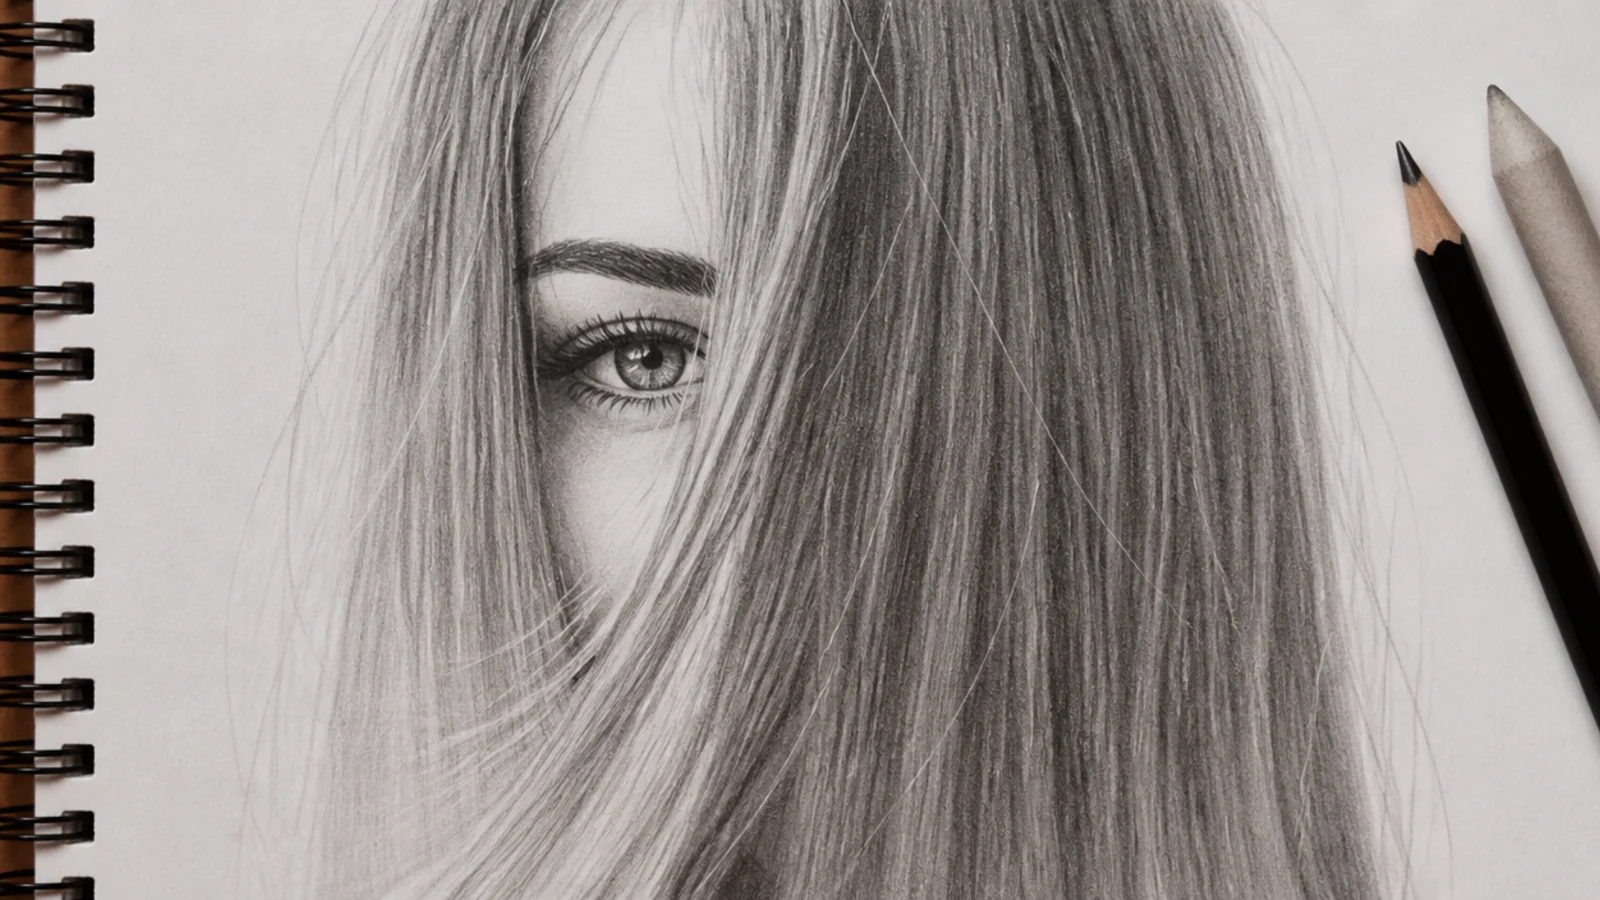
Hair over one eye is the single most repeated pose in character sketching and almost nobody draws the overlap correctly. The hair curtain has to sit in front of the facial features, which means you draw the whole face first, including the eye you are about to hide, then lay the hair mass over it. Where the hair crosses the eye socket, the strands should dip slightly following the curve of the skull rather than running dead straight. Keep the visible eye the darkest point of the drawing. The mistake is drawing the hair as a flat wall with the face stopping at its edge.
Who it suits: Character artists building moody portrait pages.
Tip: Let two or three thin strands cross the visible eye so the curtain feels continuous.
9. Underwater Hair Suspended and Drifting
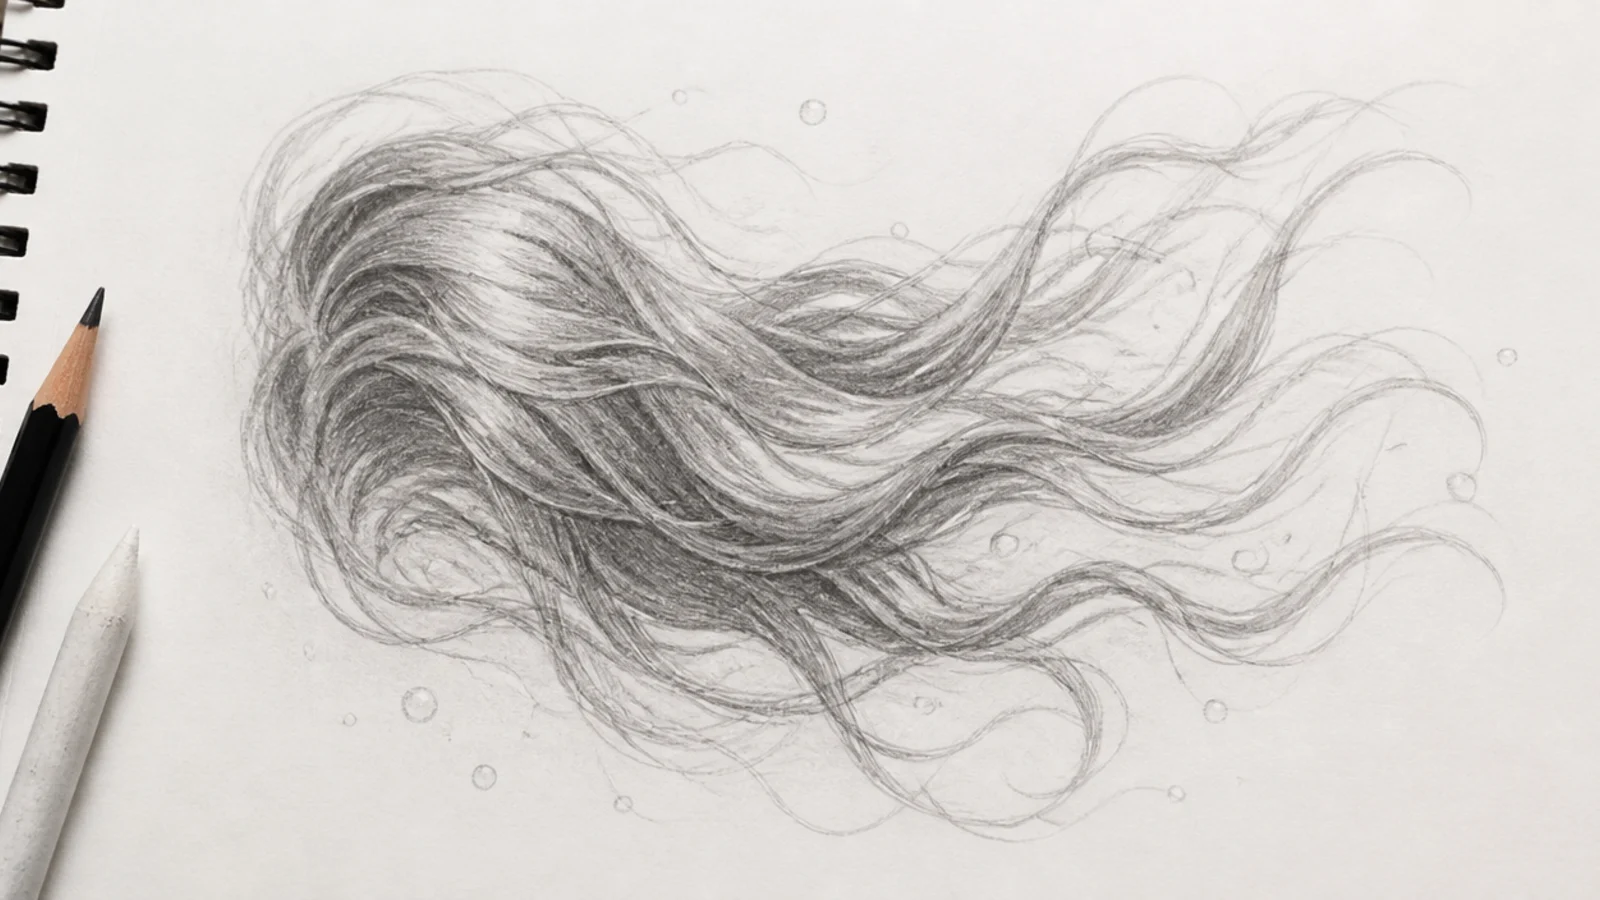
Underwater hair follows one rule that no other hair follows: gravity is gone, so the sections drift upward and outward instead of falling. Draw the crown, then let every section leave the head at an angle above horizontal and curl lazily at the end. Use much softer edges than usual, blending the outer strands into the paper with a stump so the mass looks suspended in something. Values should be lower contrast overall, because water eats light. The mistake is drawing crisp pointed tips, which snaps the illusion instantly and makes the hair look like it is standing in wind.
Who it suits: Anyone drawing mermaids, divers or dream sequences.
Tip: Keep the whole value range between 2H and 4B and never reach for the 6B here.
10. Smoke Hair Dissolving at the Ends
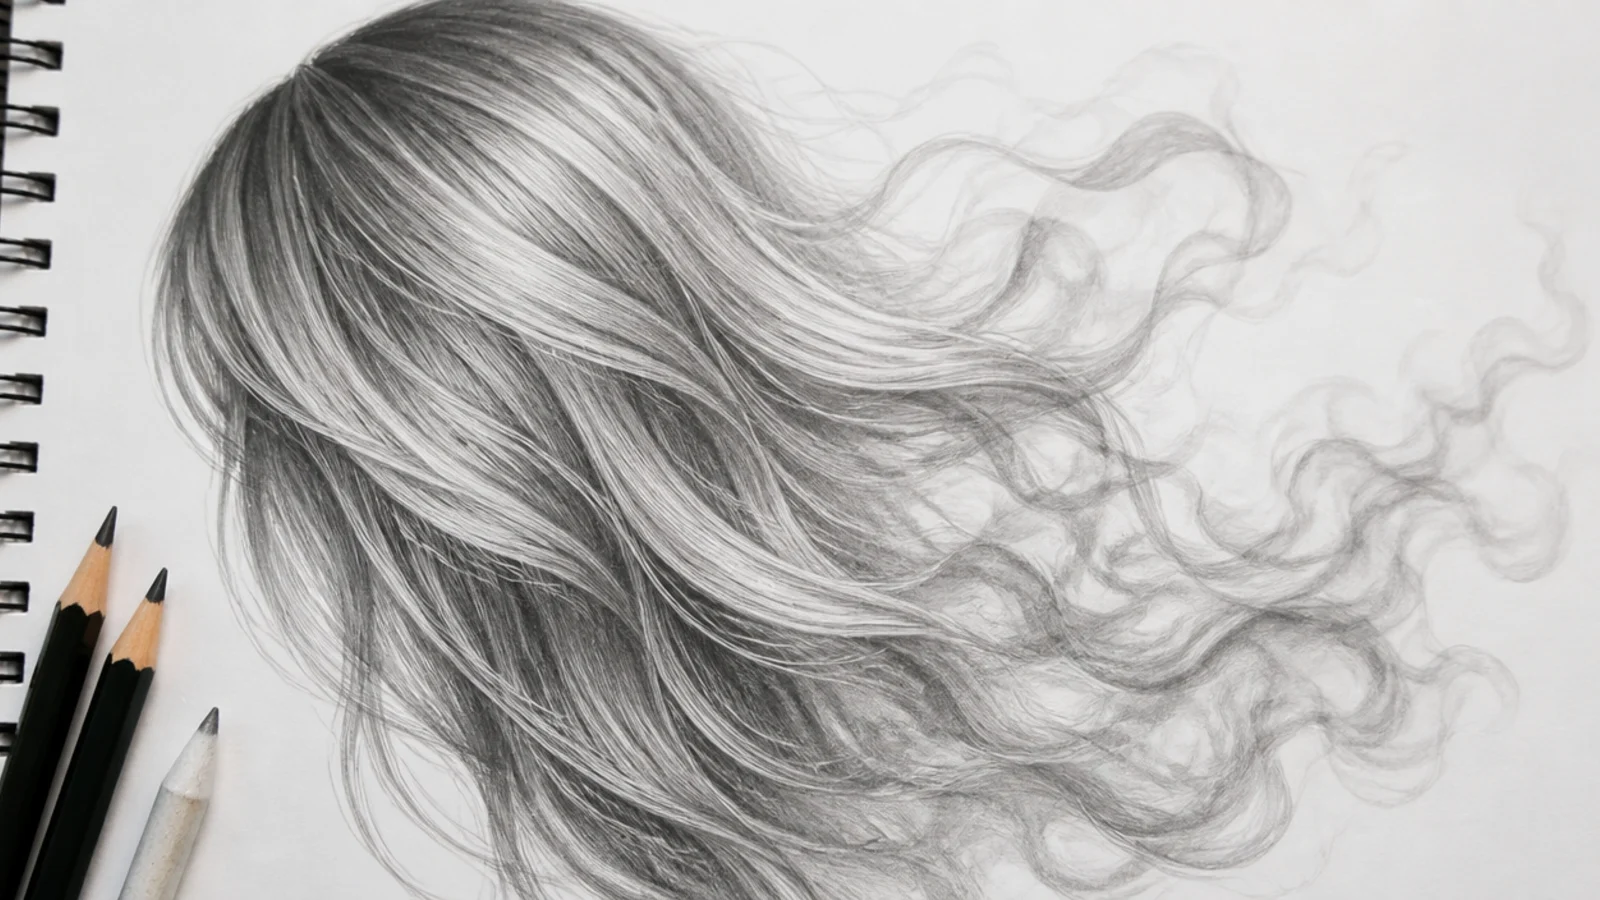
Smoke hair is a lesson in edge control disguised as a fantasy concept. The top third stays solid, readable hair with real sections and a clear part. The middle third loses its outline and keeps only value. The bottom third is nothing but blended graphite fading into untouched paper with no edge at all. Work with the side of a 4B and a blending stump, and resist every urge to define a tip. The mistake that kills it is a hard outline anywhere below the shoulders, because a single crisp edge tells the eye the whole form is solid.
Who it suits: Artists who want to practice lost and found edges.
Tip: Turn the paper upside down while blending the ends so you stop drawing shapes.
11. Beaded Box Braids in Three-Quarter View
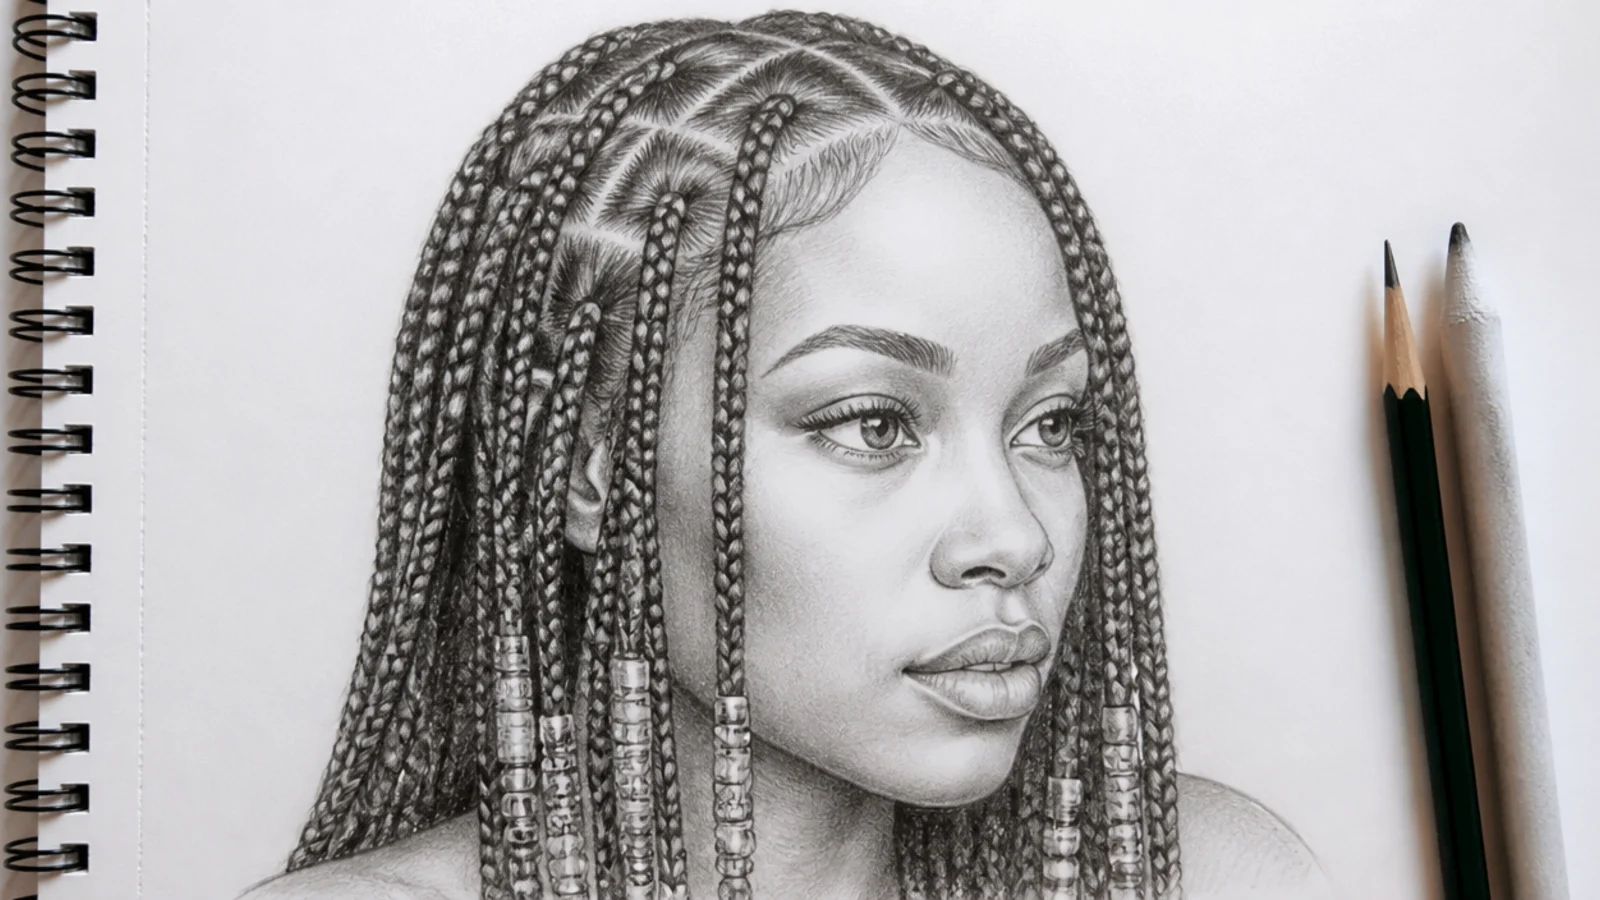
Box braids are drawn badly across almost the whole internet, and the fix is at the scalp, not the length. Start by drawing the square parting grid on the crown in 2H, following the curve of the skull so the squares get narrower toward the edges of the head. Each braid then leaves its own square. The braid itself is a stack of alternating wedges, not a rope of X shapes. Beads are cylinders that sit on the braid and cast a small shadow underneath. The mistake is uniform braid spacing all across the head, which ignores perspective entirely.
Who it suits: Artists drawing textured hair and wanting real structure.
Tip: Draw only eight braids in full detail and suggest the rest with value alone.
12. Loc Bun with Wrapped Roots
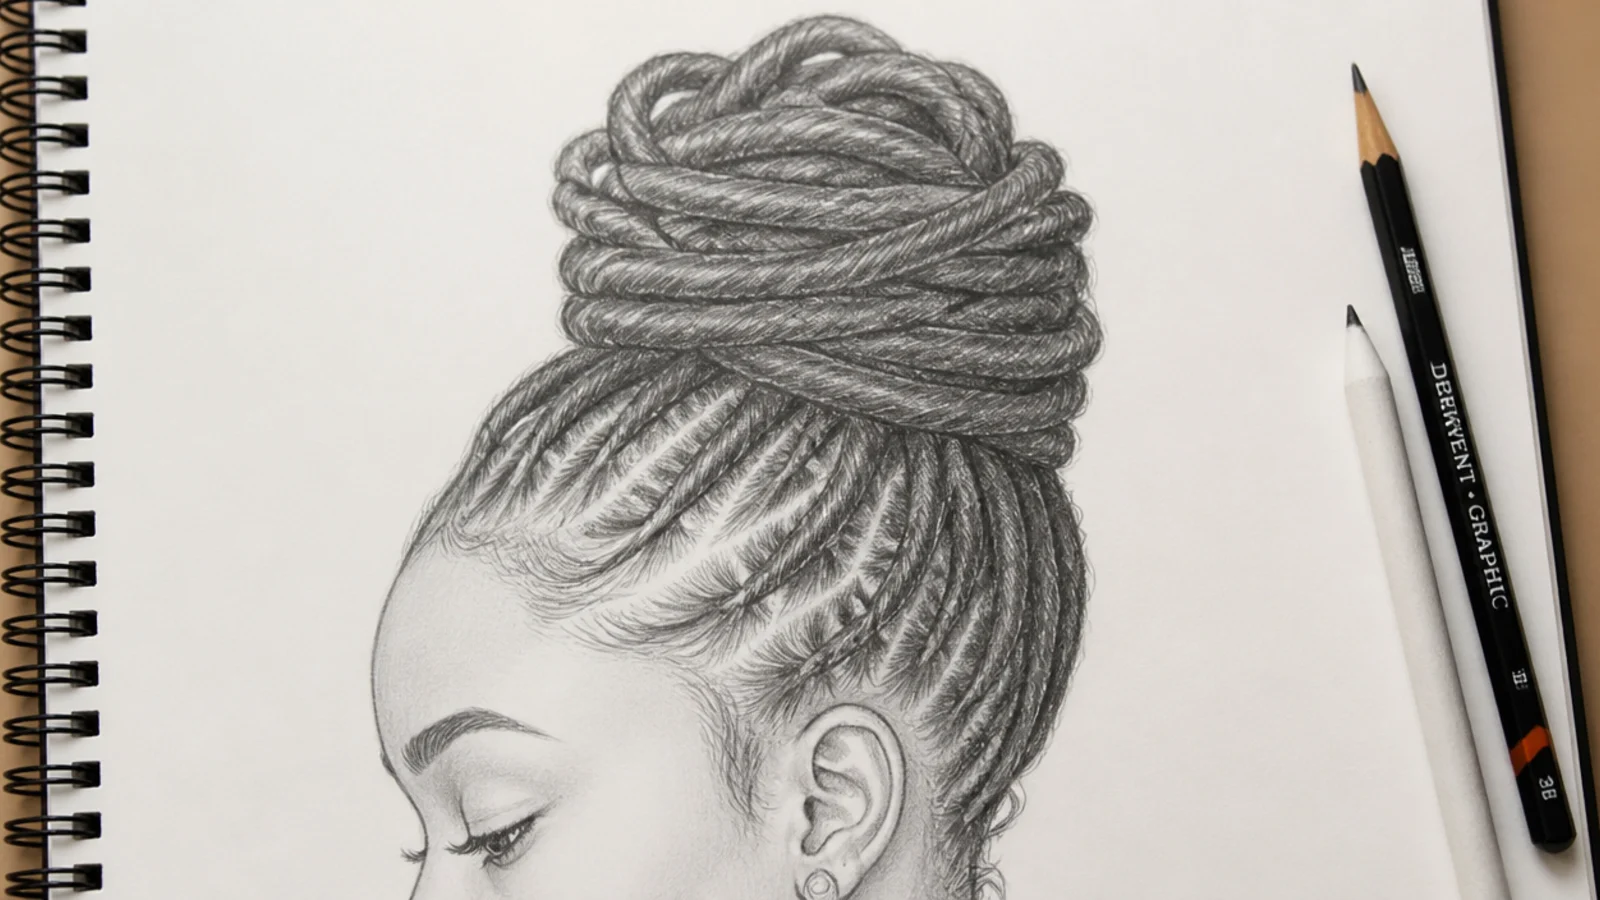
Locs are cylinders with a slightly irregular surface, which makes them easier than loose hair once you commit to that. Draw each loc as a tube with a light side and a shadow side running its length, then break the tube surface with short irregular marks in 2B rather than drawing every fiber. For the bun, coil the locs around a hidden center like rope on a deck, letting the ones at the back go soft and the front ones stay sharp. The mistake is drawing all locs the same width; real locs vary and taper, and identical widths look printed.
Who it suits: Portrait artists working on natural and protective styles.
Tip: Use 6B only in the tunnels where one loc passes behind another.
13. 4C Afro Silhouette in Backlight
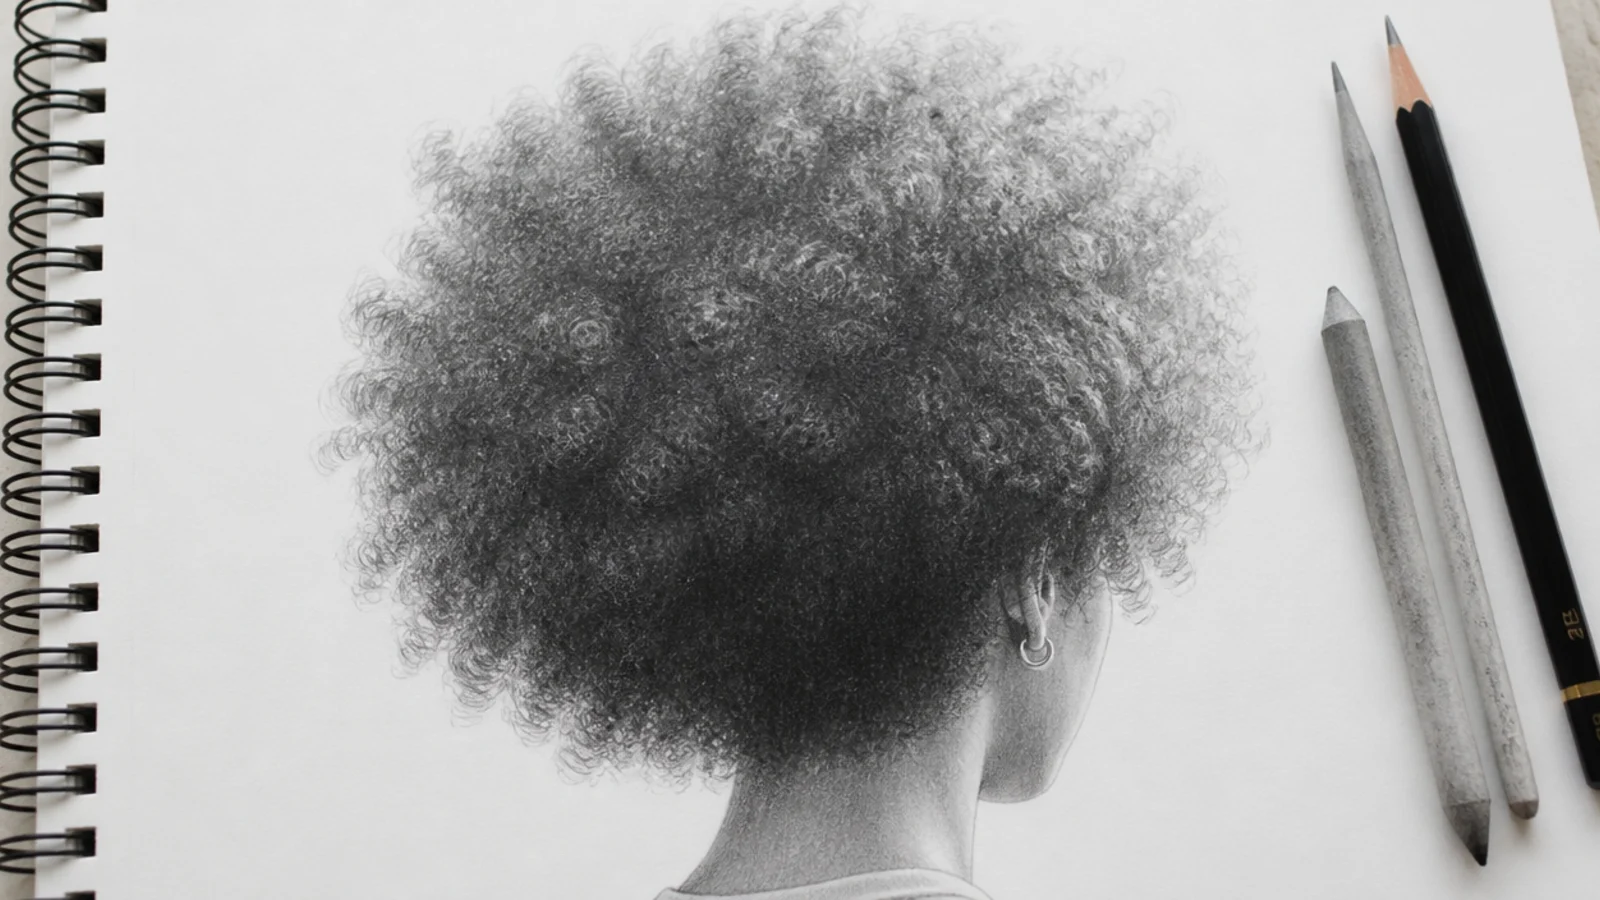
Backlighting is the most flattering way to draw a 4C afro and the fastest to execute. Block the whole afro as one soft cloud silhouette, shade the interior almost solid with 6B, then work the outer edge with hundreds of tiny short flicks that get lighter as they leave the mass. That fuzzy halo is the entire drawing. Coily hair reads through edge quality and overall value, not through individual curls, so do not draw a single defined coil in the interior. The mistake is a smooth outlined edge, which turns 4C hair into a helmet immediately.
Who it suits: Anyone drawing natural hair who has struggled with coily texture.
Tip: Rotate the paper as you flick the edge so every flick points outward from the scalp.
14. Spiral Curls Drawn as Ribbons
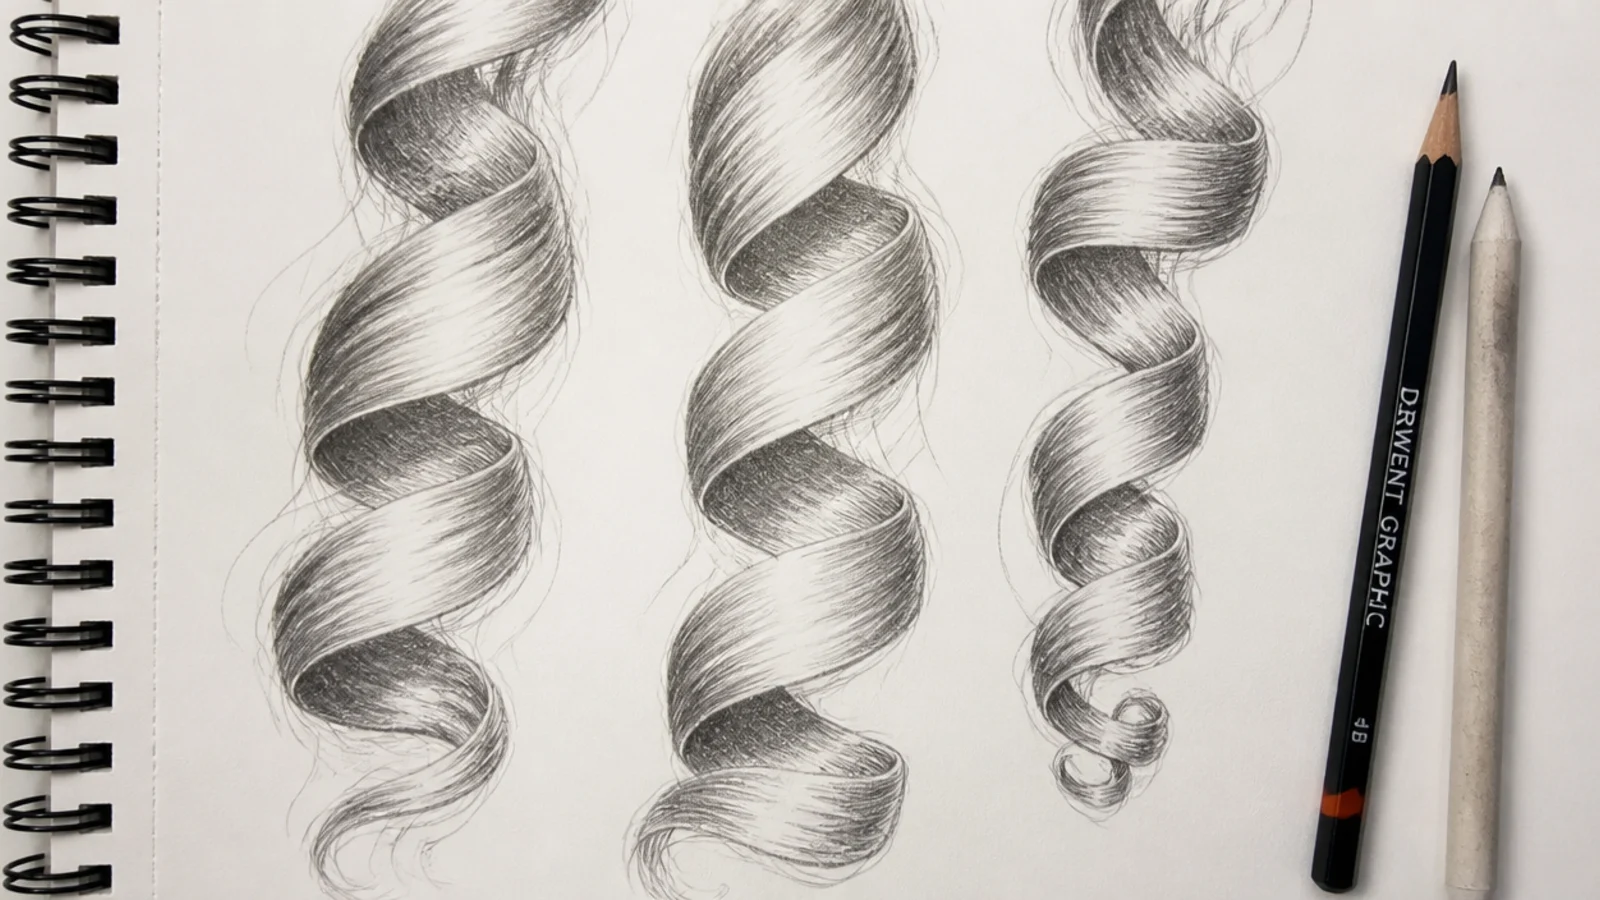
This is the exercise that fixes curly hair for most people. Take one curl and draw it as a ribbon that twists, so you see the front surface, then the edge, then the back surface, repeating down its length. Light the front surfaces and shade the back surfaces in 4B, and the spiral appears without a single outline. Do a row of twelve of these at different curl diameters before you attempt a full head. The mistake is outlining a corkscrew shape and shading inside it, which produces a spring rather than hair. Full curl work is in the curly hair sketch guide.
Who it suits: Beginners whose curls keep coming out as flat squiggles.
Tip: Sketch the ribbon centerline in 2H first, then build width on both sides of it.
15. Crown Braid Seen from Above
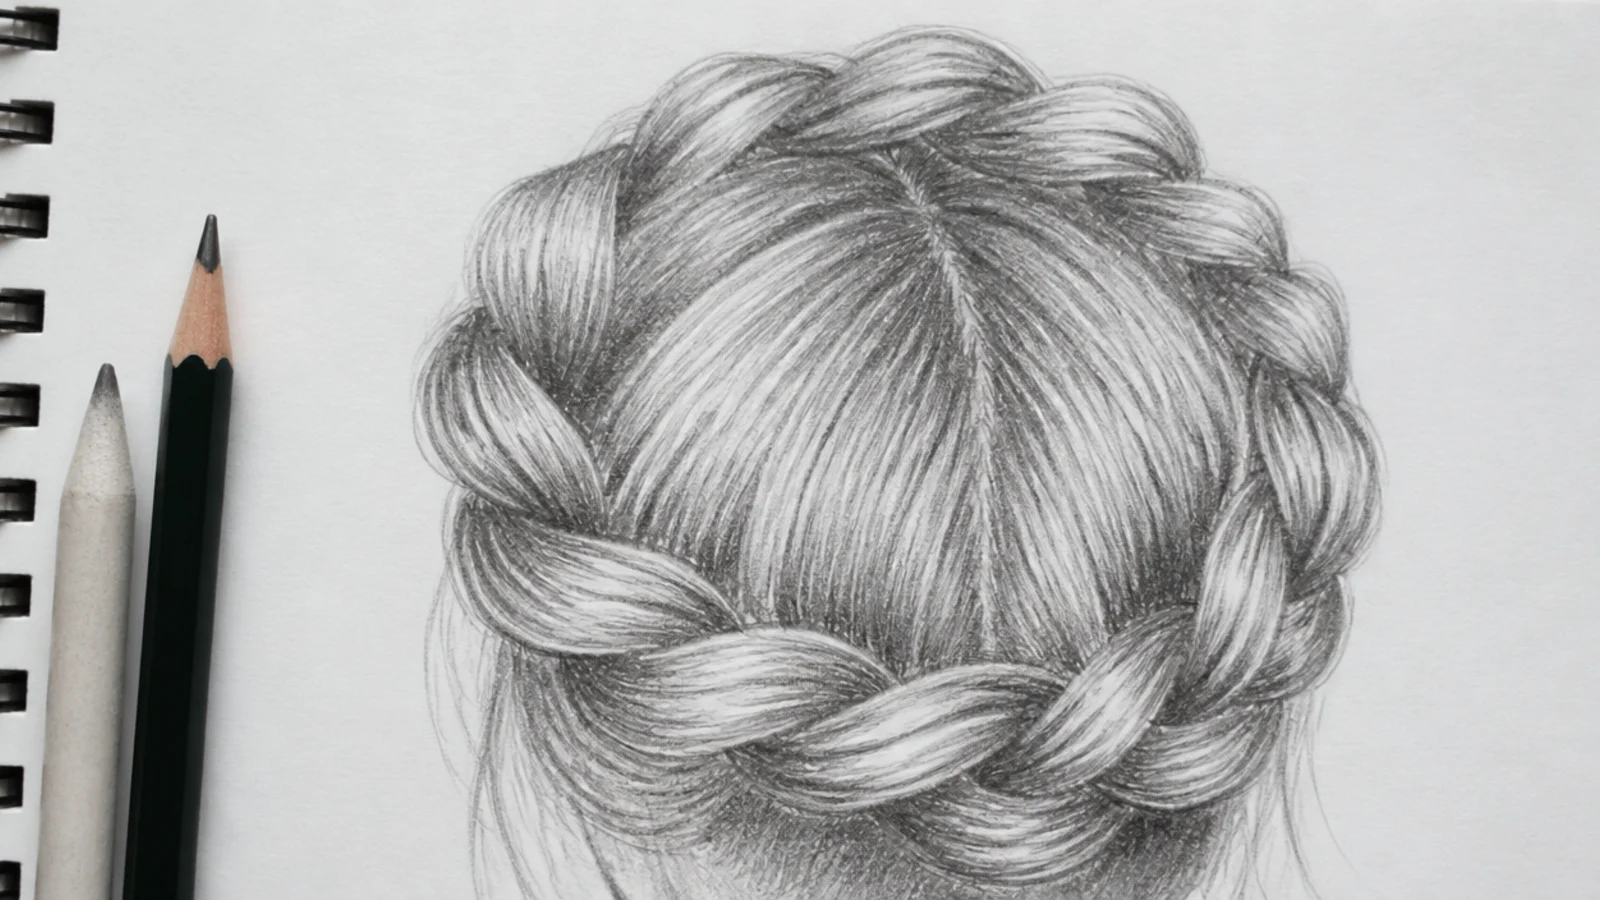
The overhead angle forces you to solve overlap and perspective at the same time, which is why it is worth doing. Draw an ellipse for the top of the skull, then run the braid around it as a band that narrows as it turns away from you. Inside the band, the braid wedges compress on the far side and open up on the near side. The single trick is drawing the shadow the braid casts onto the scalp beneath it, which instantly lifts it off the head. The mistake is keeping the wedges the same size all the way around, which flattens the whole crown.
Who it suits: Artists who want perspective practice inside a hair drawing.
Tip: Number the wedges lightly in 2H first so the over and under sequence stays consistent.
16. Messy Bun with Escaping Baby Hairs
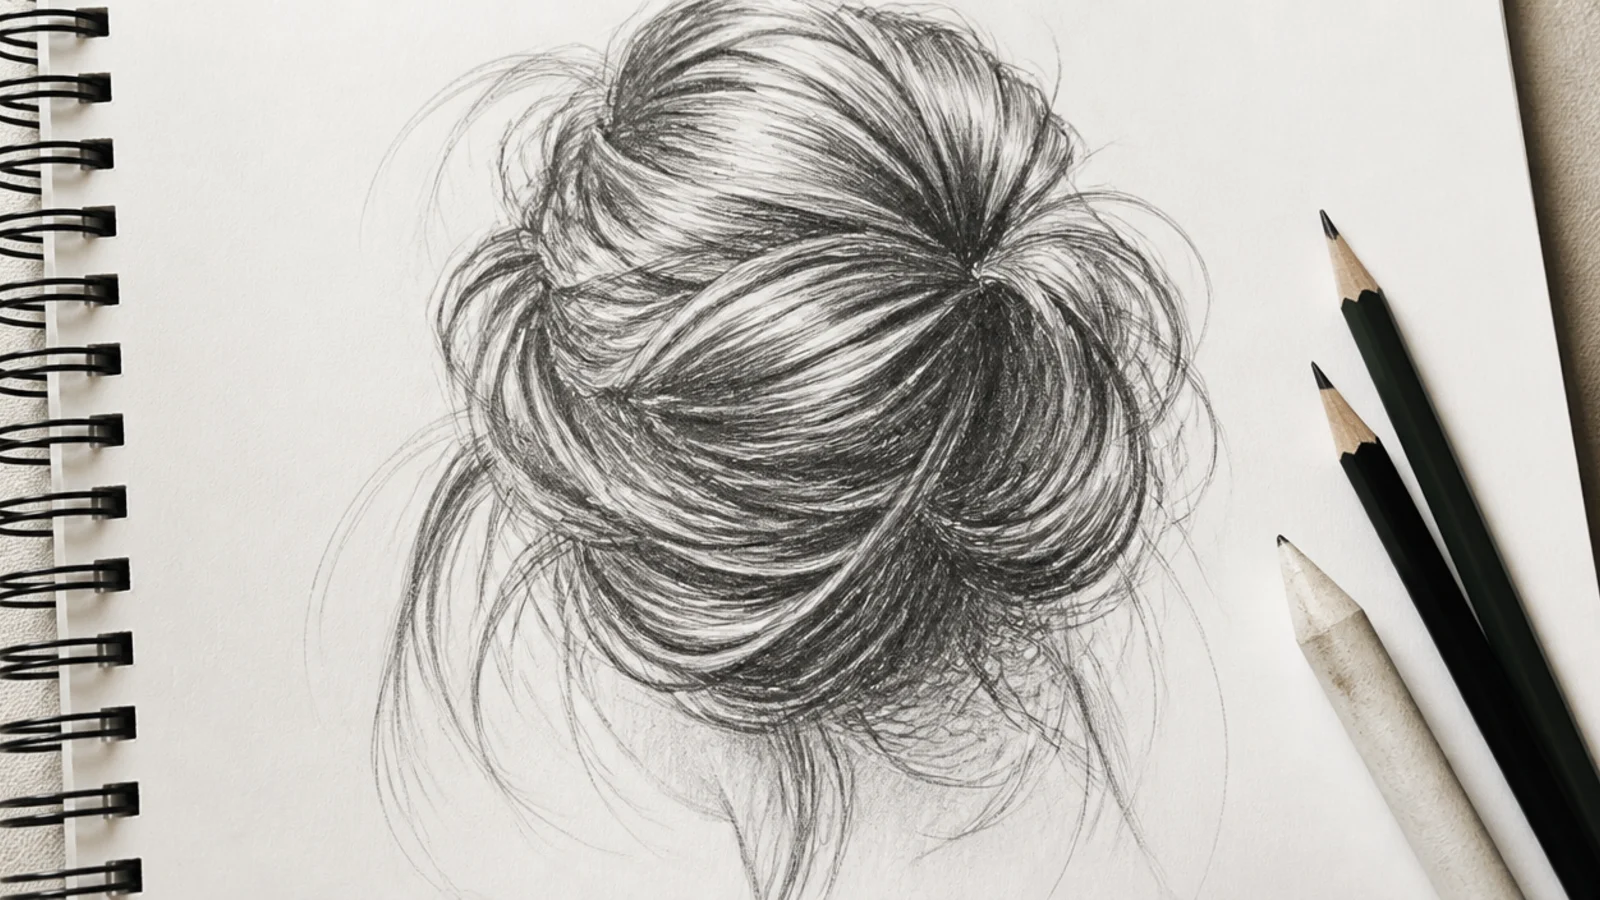
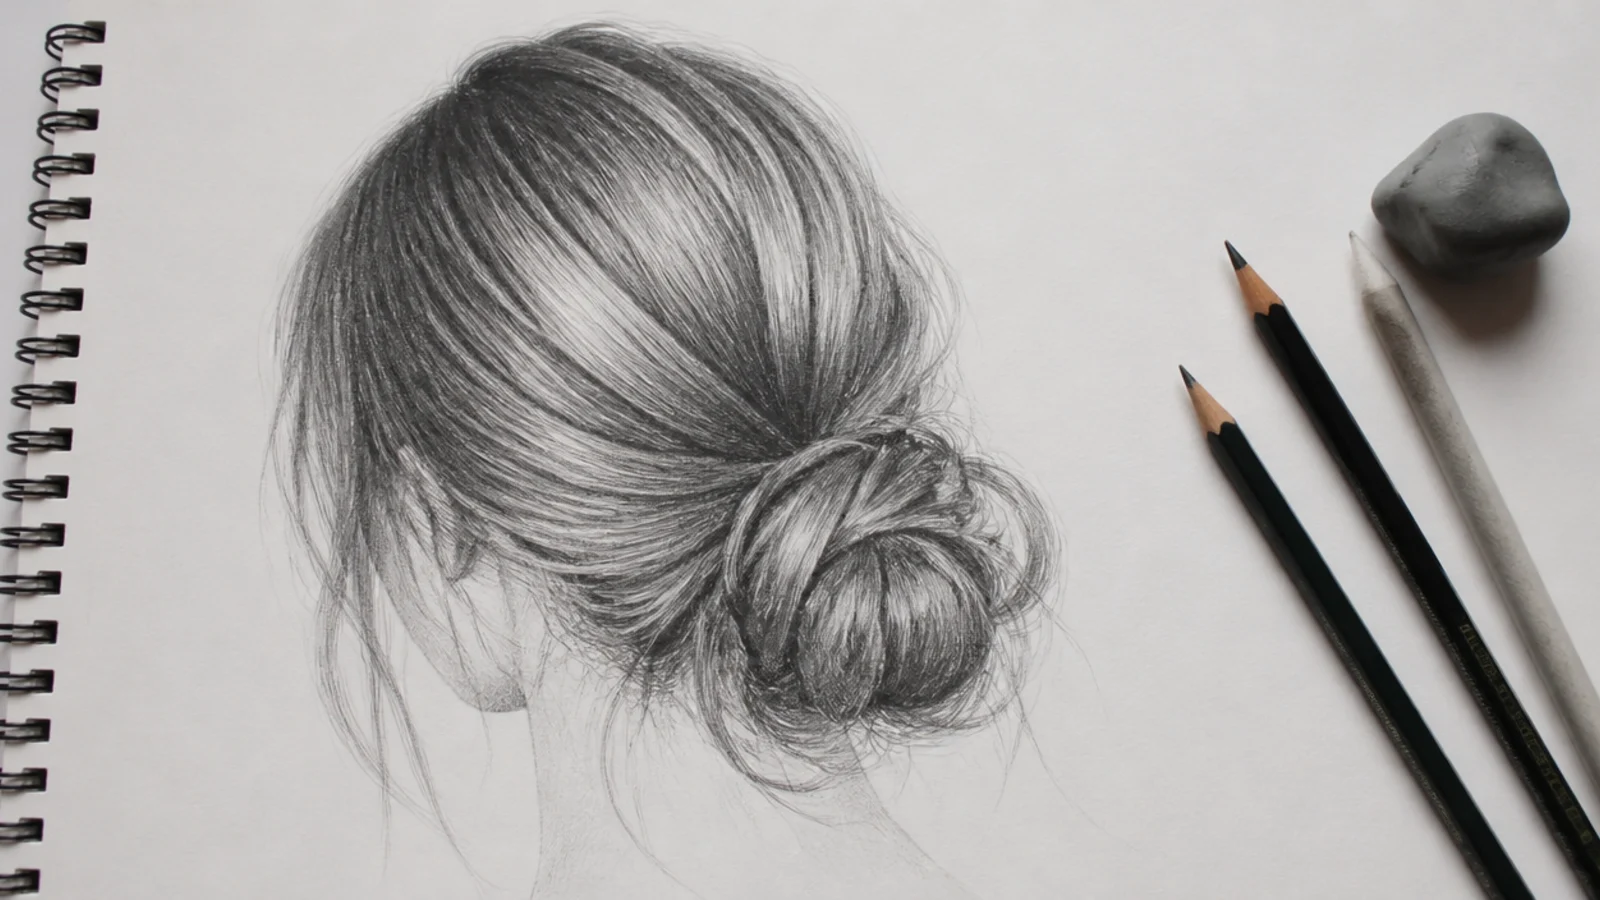
A messy bun is two things stacked: a tight gathered base and a loose chaotic knot. Draw the gathered section first as converging flow lines pulling toward one point at the back of the crown, and make those lines genuinely tight, almost straight. Only then build the knot as three or four overlapping loops with 6B pushed into the tunnels between them. Baby hairs come last, no more than eight of them, each curving away from the scalp and tapering to nothing. The mistake is starting with the mess, which leaves the bun with no anchor and no direction. Reference a real one in messy ponytail styling photos.
Who it suits: Anyone sketching everyday hairstyles from life.
Tip: Draw the baby hairs with the very tip of a 2B held almost parallel to the page.
17. Buzz Cut and Fade with a Sharp Hairline
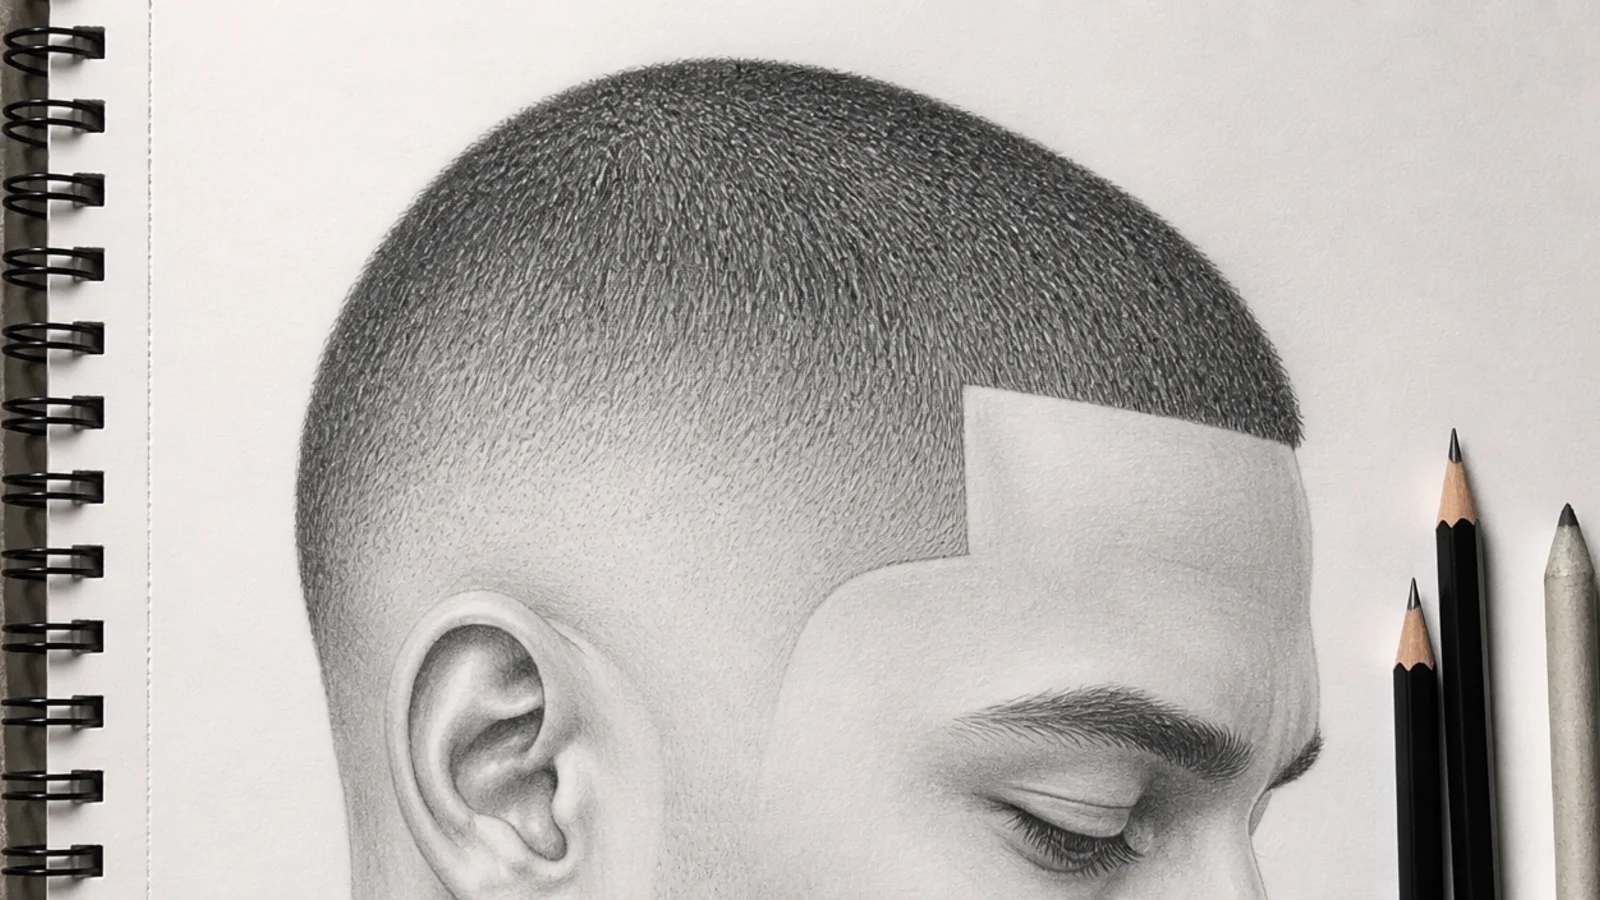
Very short hair is a value problem, not a line problem. Shade the whole skull as a form first, exactly as if it were bald, so the light wraps correctly. Then lay a stippled or lightly cross-hatched 2B tone over it, densest at the crown and thinning toward the fade. The hairline is where all the detail goes: a crisp edge at the temples and forehead with a slightly irregular front edge, never a ruled line. The mistake is drawing individual short hairs, which reads as static. Male hair specifics get more room in the hair sketch tutorial.
Who it suits: Character artists drawing men and short cropped styles.
Tip: Keep the fade transition about a quarter inch wide at sketchbook scale, no wider.
18. Hair Turning into Birds at the Ends
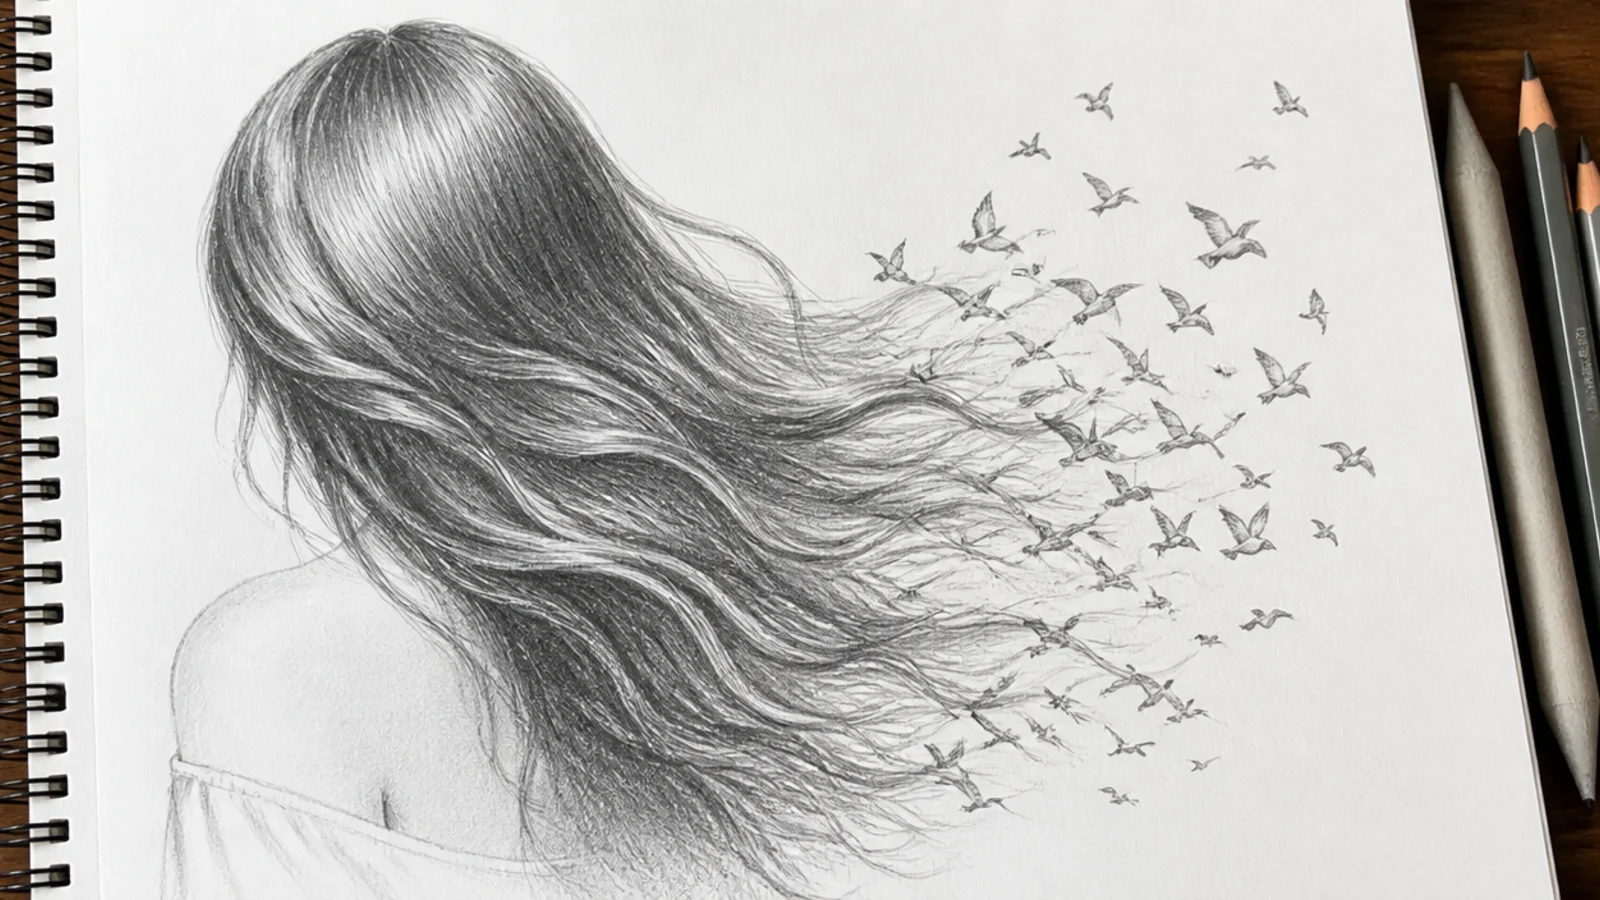
Surreal transformation concepts save well because they read instantly at thumbnail size. The rule that makes them work is a gradual handoff, not a hard switch. The upper hair is fully rendered, the mid length loses detail, and the last few sections split into wing shapes that only become birds once they have separated from the mass. Keep the birds small, silhouetted and unrendered, so they read as shapes rather than competing subjects. The mistake is drawing detailed birds, which turns one drawing into two. Scatter them along a single diagonal so the eye travels.
Who it suits: Illustrators building a surreal or poetic sketchbook page.
Tip: Use five to seven birds; more than nine and the transformation becomes decoration.
19. Hair Against a Dark Background
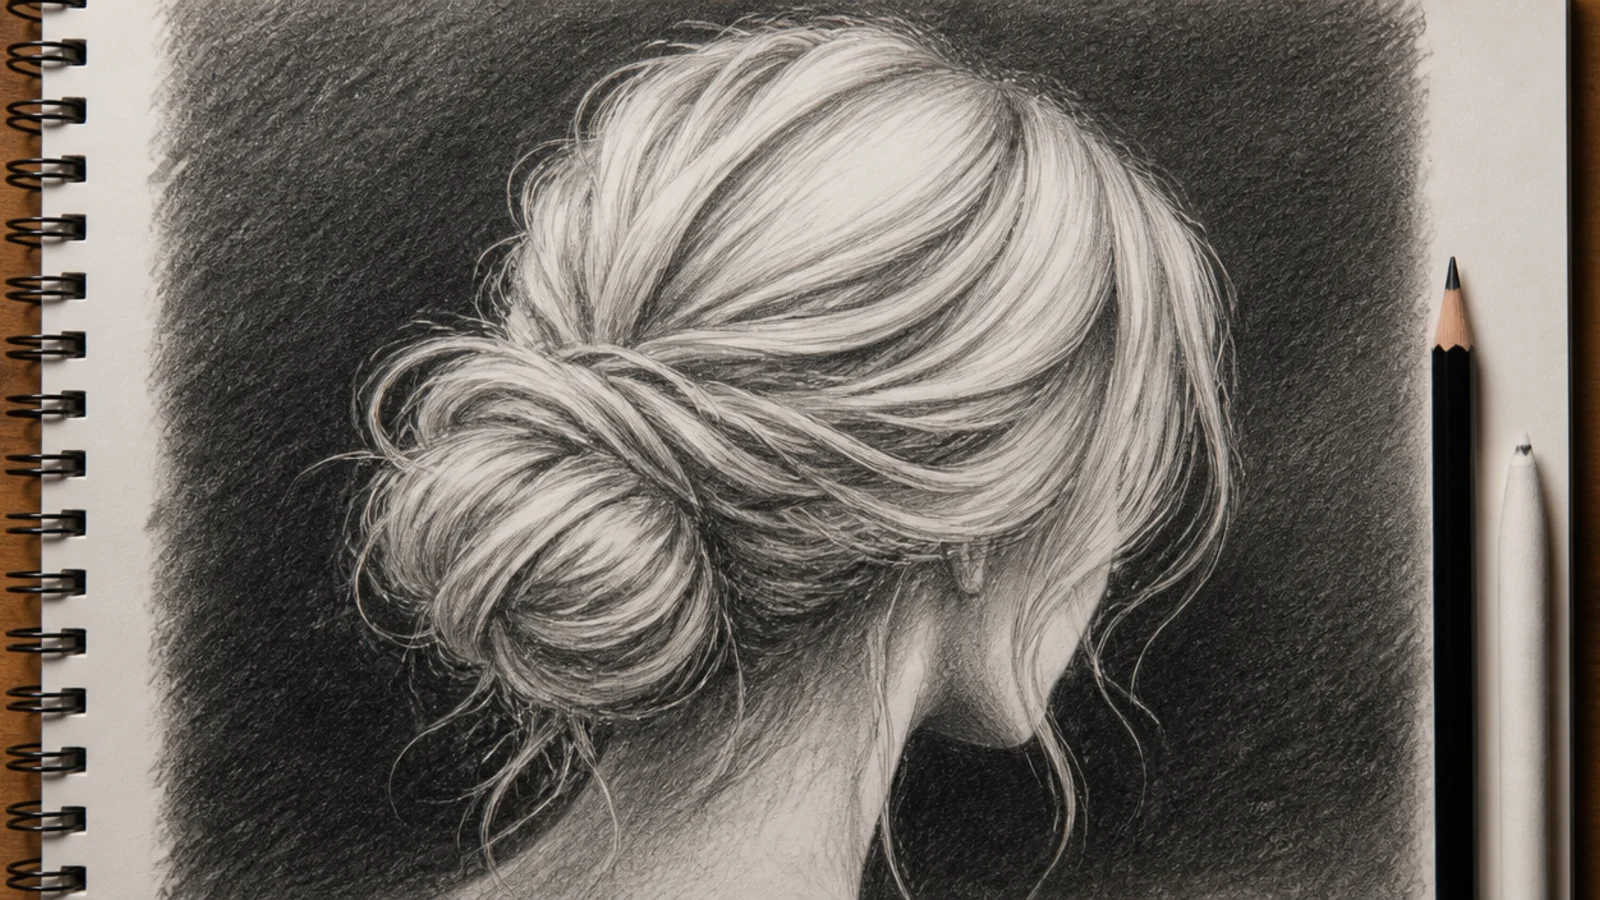
Flip the usual process: shade the entire background solid with a 6B laid down with the side of the lead, then lift the hair out of it with a kneaded eraser and a battery eraser. You are drawing light instead of drawing hair, which forces you to think in masses rather than strands. This is the fastest way to make blonde, silver or backlit hair convincing, because pale hair is defined almost entirely by what surrounds it. The mistake is lifting evenly; keep the strongest lifts at the crown and along the outer contour and leave the interior mid gray.
Who it suits: Anyone stuck drawing light colored hair that keeps disappearing.
Tip: Lay a scrap of paper under your hand so the solid background does not smear.
20. Half-Shaved Undercut with a Long Sweep
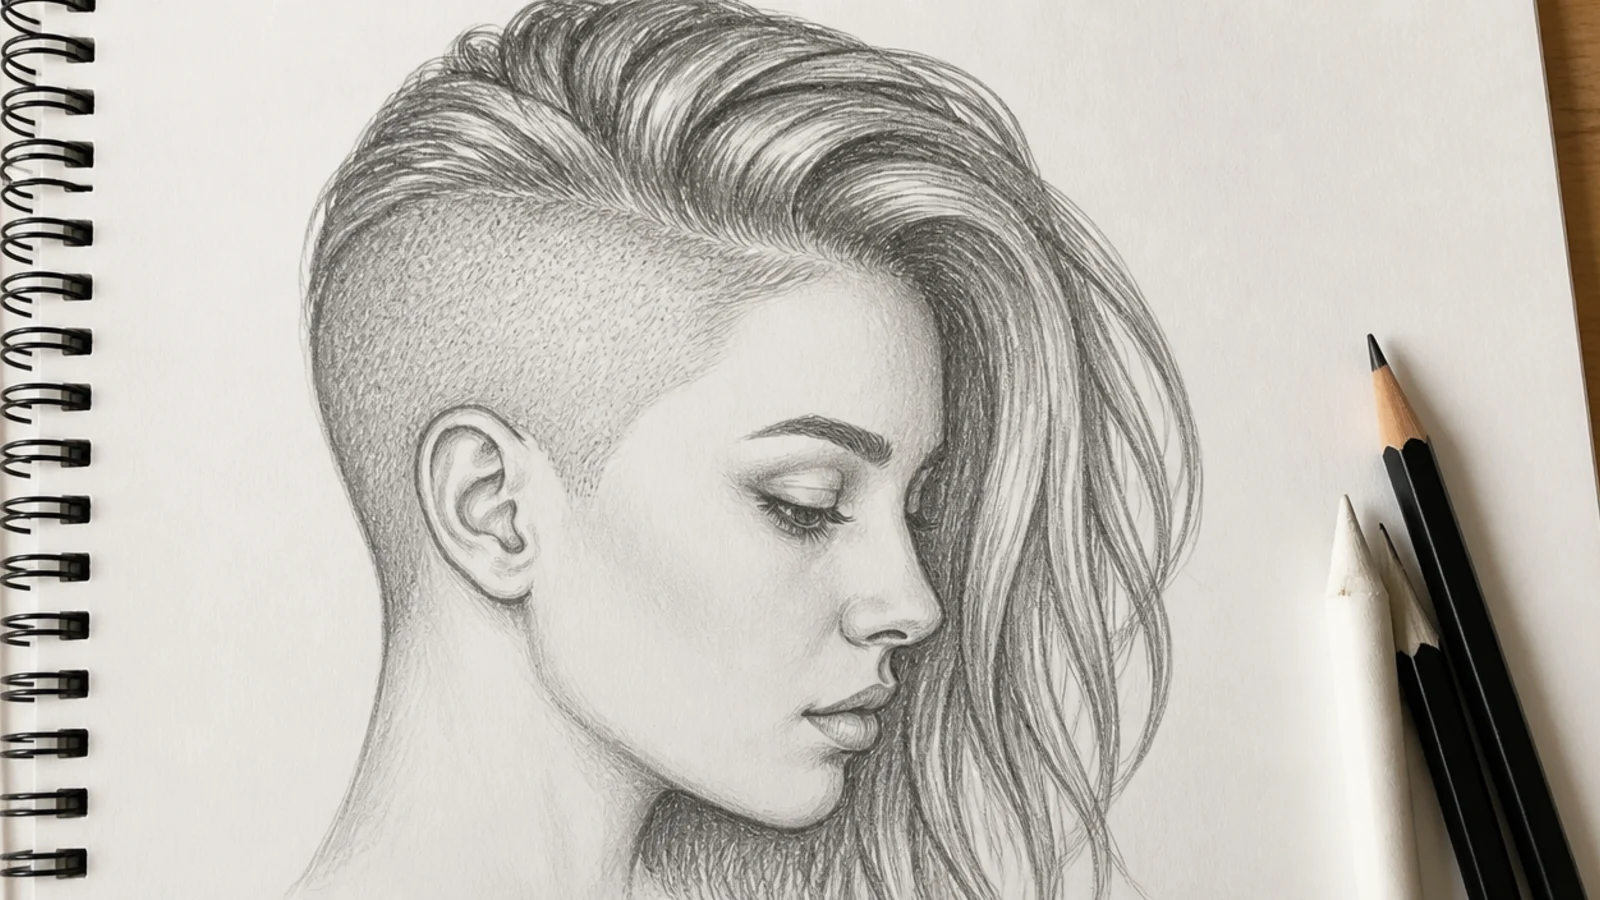
An undercut gives you the two hardest hair textures side by side in one drawing, which is why it is such good practice. The shaved side is pure value with a stippled 2B tone and a hard edge at the part line. The long side is flow lines sweeping across the crown and falling past the jaw. The trick is the transition line itself: it should follow the curve of the skull, dipping behind the ear, never running straight across. The mistake is equal detail on both halves, which loses the contrast that makes the cut read as an undercut at all.
Who it suits: Artists drawing alternative and editorial character looks.
Tip: Push a 6B shadow right under the swept section where it overhangs the shaved side.
21. Braid Being Undone Mid-Unravel
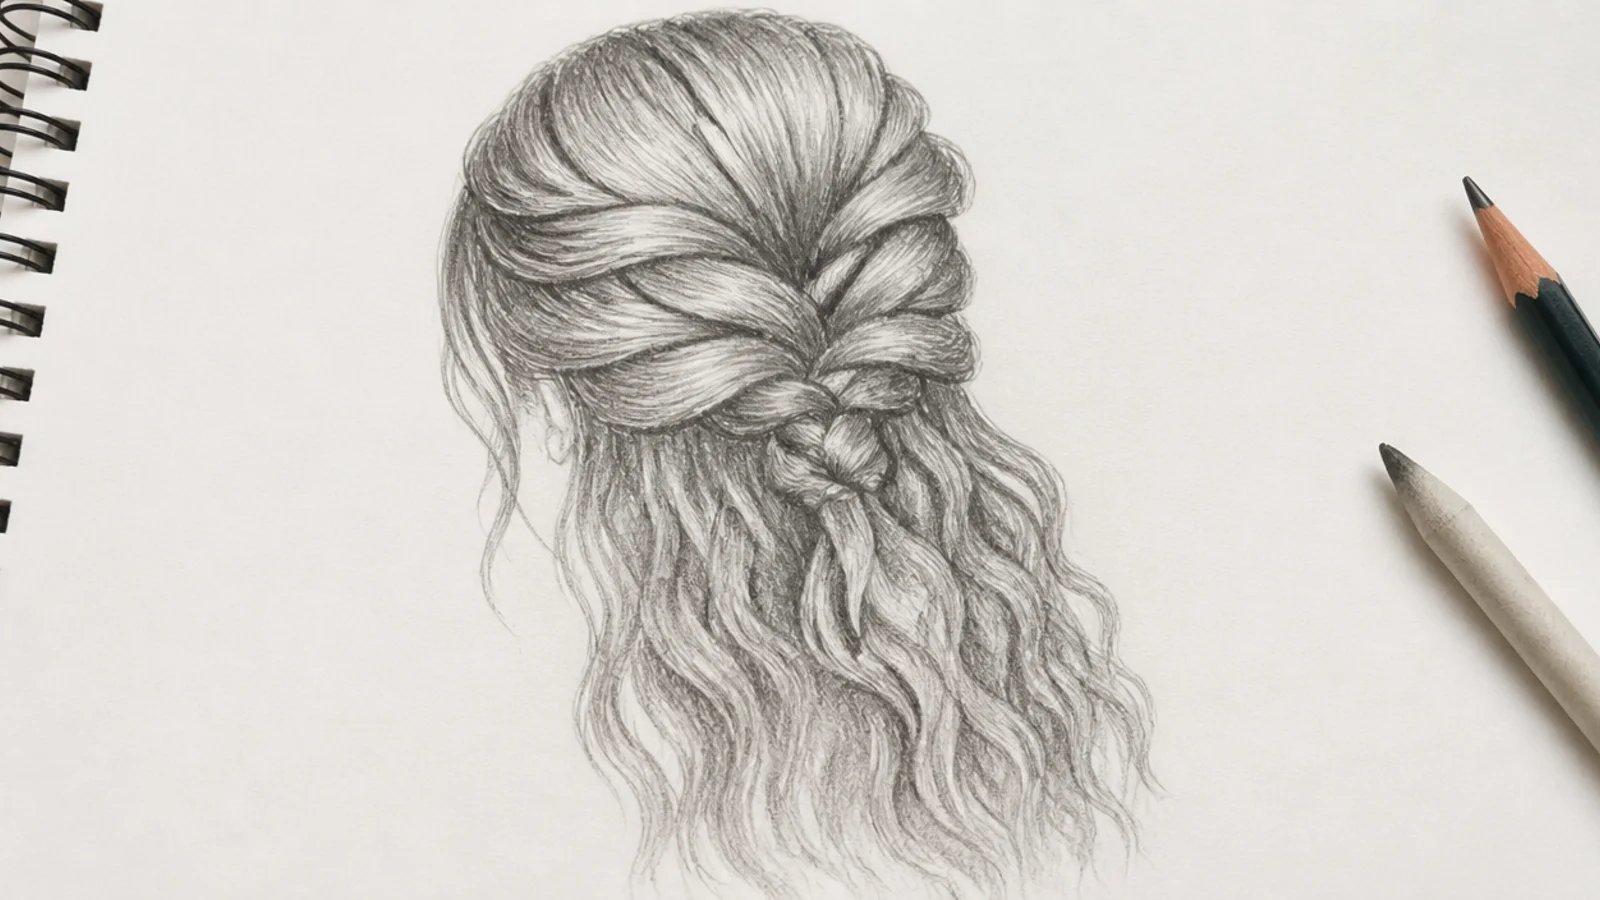
This one idea teaches braid structure and wave texture in a single drawing. The top half is a tight three-strand braid drawn as stacked wedges, each overlapping the one below. The bottom half is the same hair released, so it keeps a crimped memory of the braid: soft repeating S bends at exactly the braid's rhythm, getting looser toward the tips. The trick is matching the wave frequency to the wedge spacing above. The mistake is drawing the loose half as straight hair, which breaks the story. Braided reference lives in mermaid braids.
Who it suits: Artists who want texture contrast without changing subject.
Tip: Draw the released section first while your eye still remembers the wedge spacing.
22. Silver Gray Hair with Inverted Values
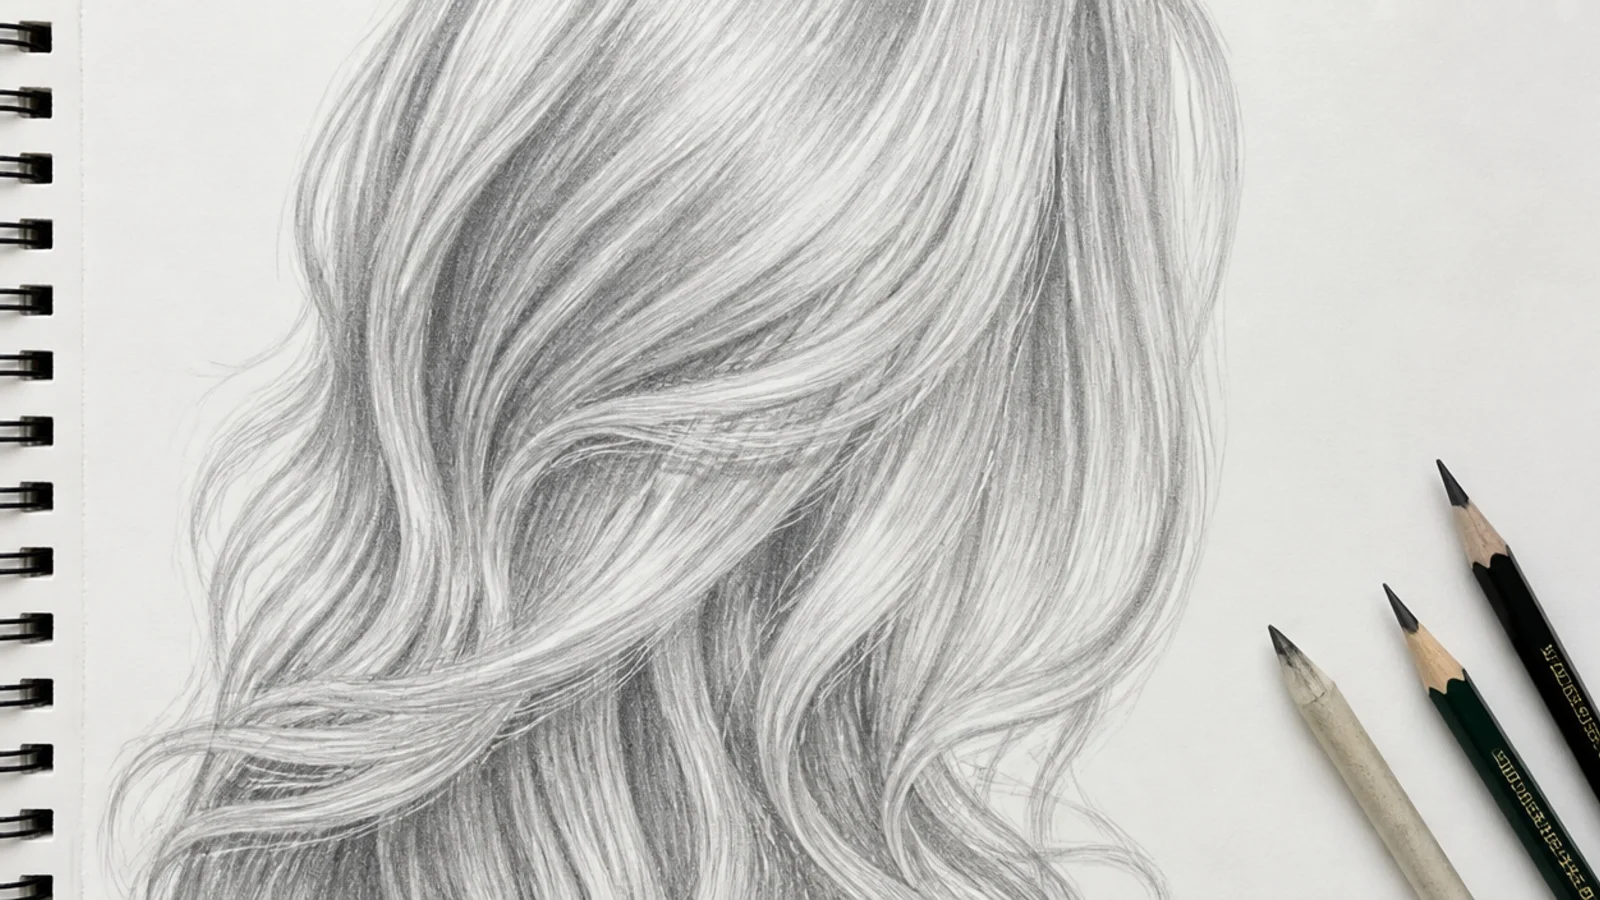
Nearly every hair tutorial online teaches dark hair, so gray and silver catch people out. The value range inverts: the hair surface stays in the 2H to HB band, and the only dark marks in the whole head are the narrow shadow tunnels where one section passes behind another. Those tunnels can still be 6B, and they should be, because without them silver hair reads as unfinished pencil work. Keep the strand marks sparse and confident. The mistake is shading the whole mass mid gray to make it look like hair, which produces dirty blonde instead of silver.
Who it suits: Portrait artists drawing older subjects or platinum characters.
Tip: Count your dark marks; a convincing silver head usually needs fewer than fifteen.
23. Mermaid Waves in One Continuous Line
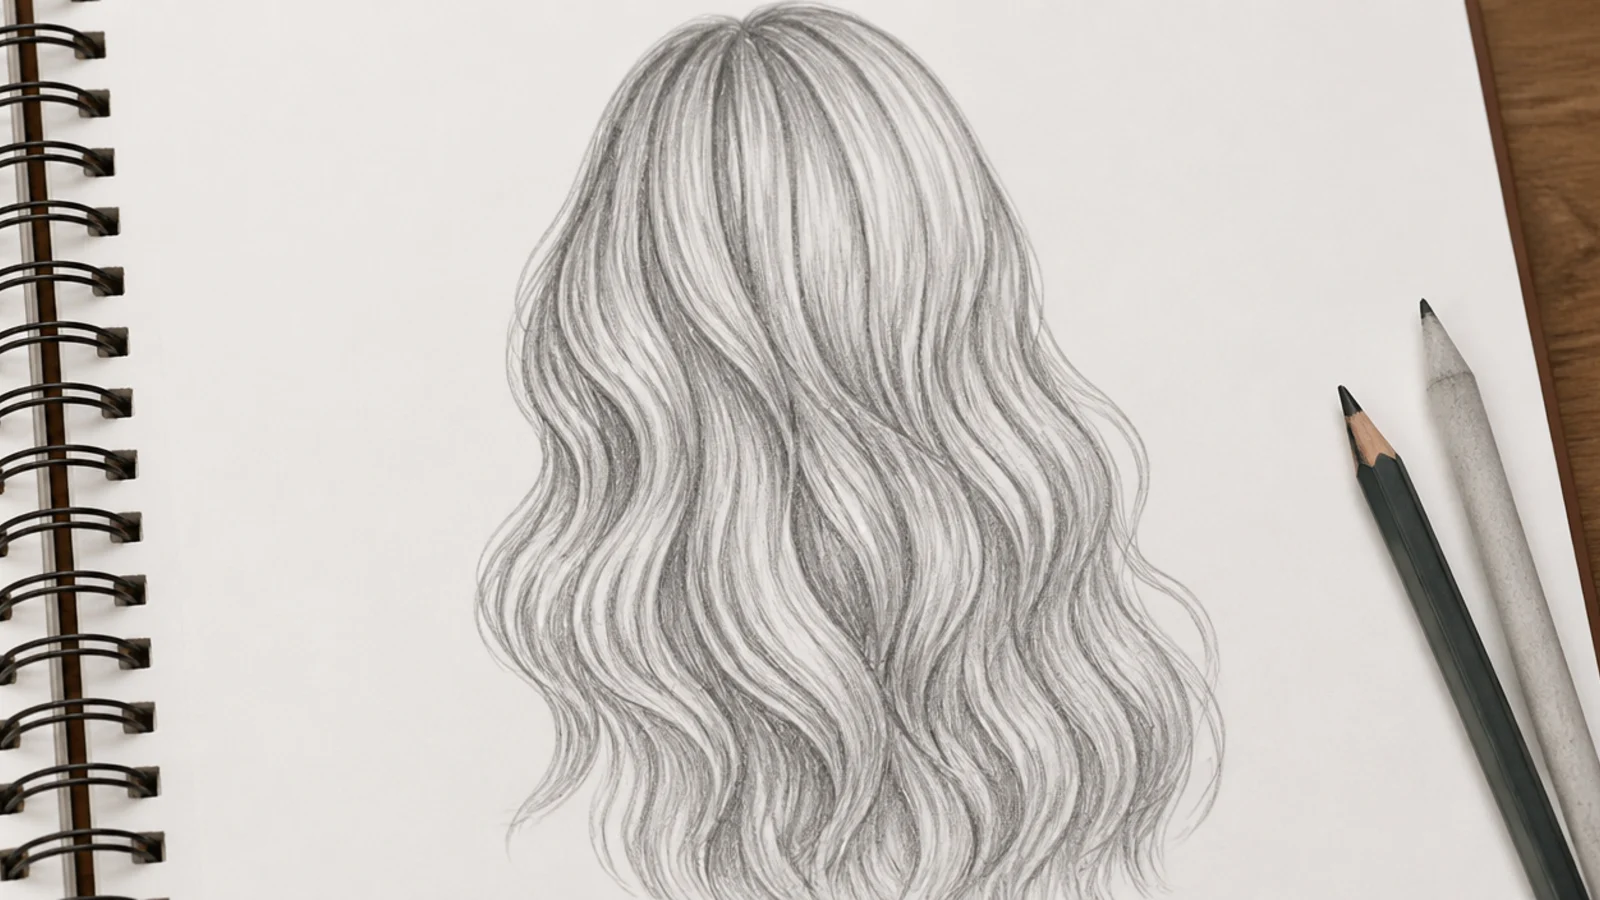
Put the pencil down at the crown and do not lift it until the drawing is finished. The line travels down one wave, loops at the tip, comes back up, crosses the mass and heads down the next section. Because you cannot lift, you are forced to think about how sections connect and where hair actually flows, which is the exact skill that transfers to rendered work. Do it in ink so you cannot cheat. The mistake is going slowly; a hesitant continuous line wobbles, and the whole appeal of this exercise is the confidence of the stroke.
Who it suits: Anyone whose hair drawings look overworked and tight.
Tip: Run ten of these on one page at three minutes each before picking a favorite.
24. Anime Spiky Hair Silhouette Plan
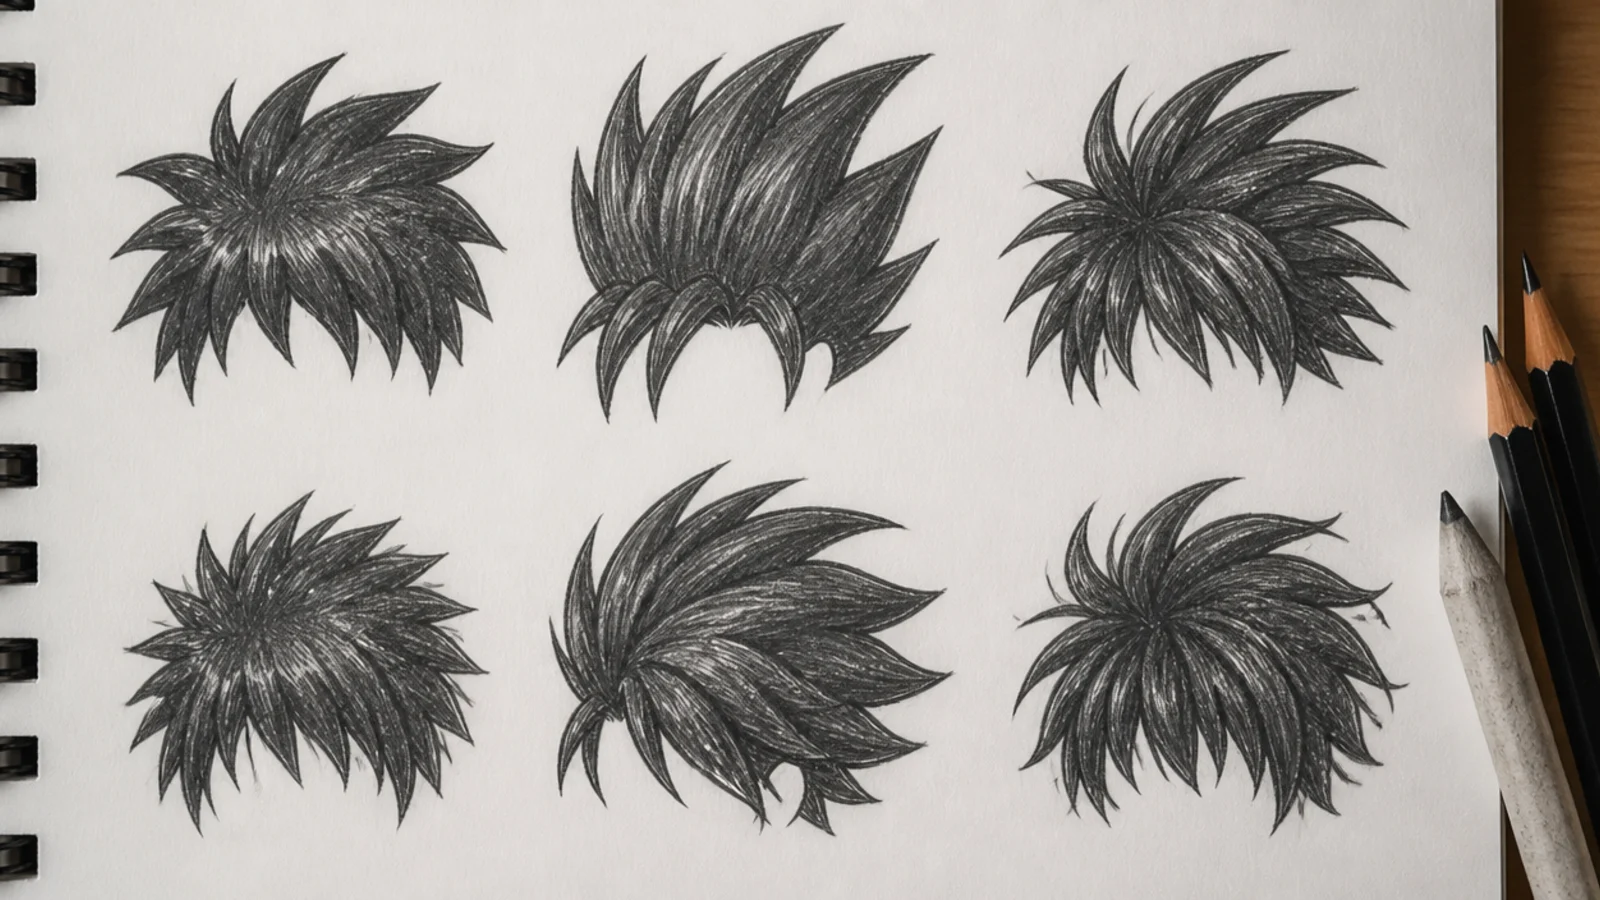
Professional character designers plan spiky hair as a filled black silhouette before they draw a single strand, and it is the reason their spikes read at any size. Fill six small shapes solid with a 6B, judging each purely on outline: is it top heavy, does it have a clear direction, does it look like anything else in the set. Only then pick the strongest and open it up into sections. Spikes should still imply gravity, sagging slightly at the tips. The mistake is spikes radiating evenly like a star, which removes both weight and character.
Who it suits: Character designers and anime style artists.
Tip: Keep the silhouettes at one inch tall so you cannot fake it with detail.
25. Hair at Sketchbook Scale, Two Centimeter Head
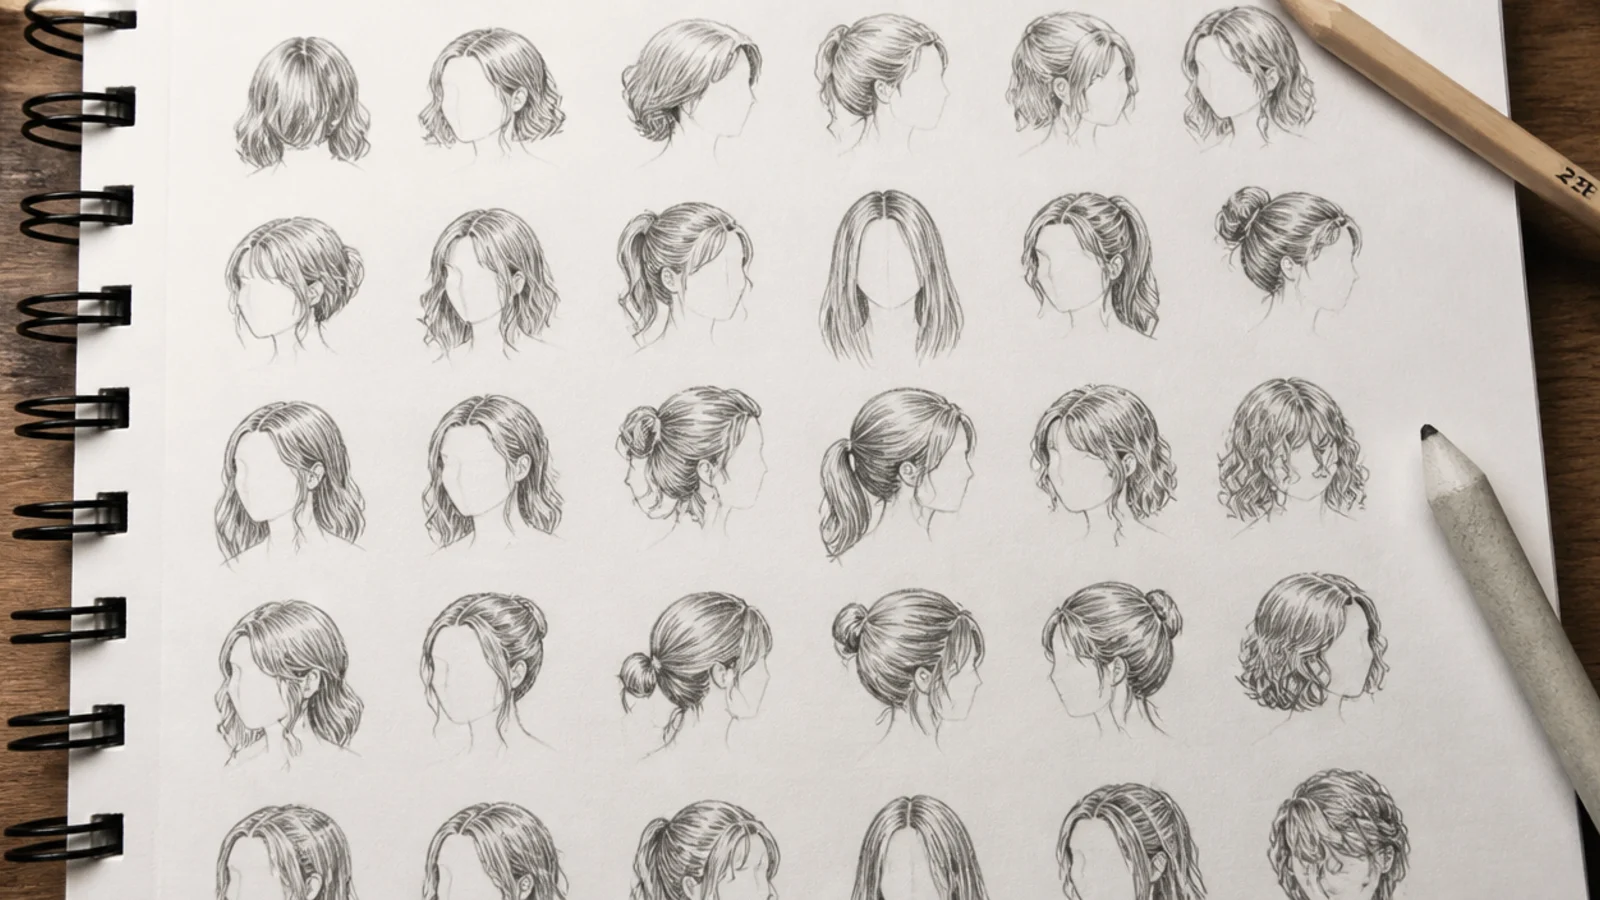
Almost nobody teaches how hair technique changes when the head is only two centimeters tall, which is the size most sketchbook figures actually are. At that scale strands are invisible, so you get three tools: the silhouette, one mid value, and one dark accent where the hair meets the neck or falls behind the ear. That is the whole drawing. Fill a page with twenty tiny heads in different styles using only those three moves. The mistake is trying to fit real strand texture into two centimeters, which turns into gray mush and takes ten times as long.
Who it suits: Sketchbook practicers and anyone drawing figures rather than portraits.
Tip: Use a 4B blunt rather than a sharp 2B; the blunt tip stops you adding detail.
How to Start a Hair Sketch: Shape Before Strands
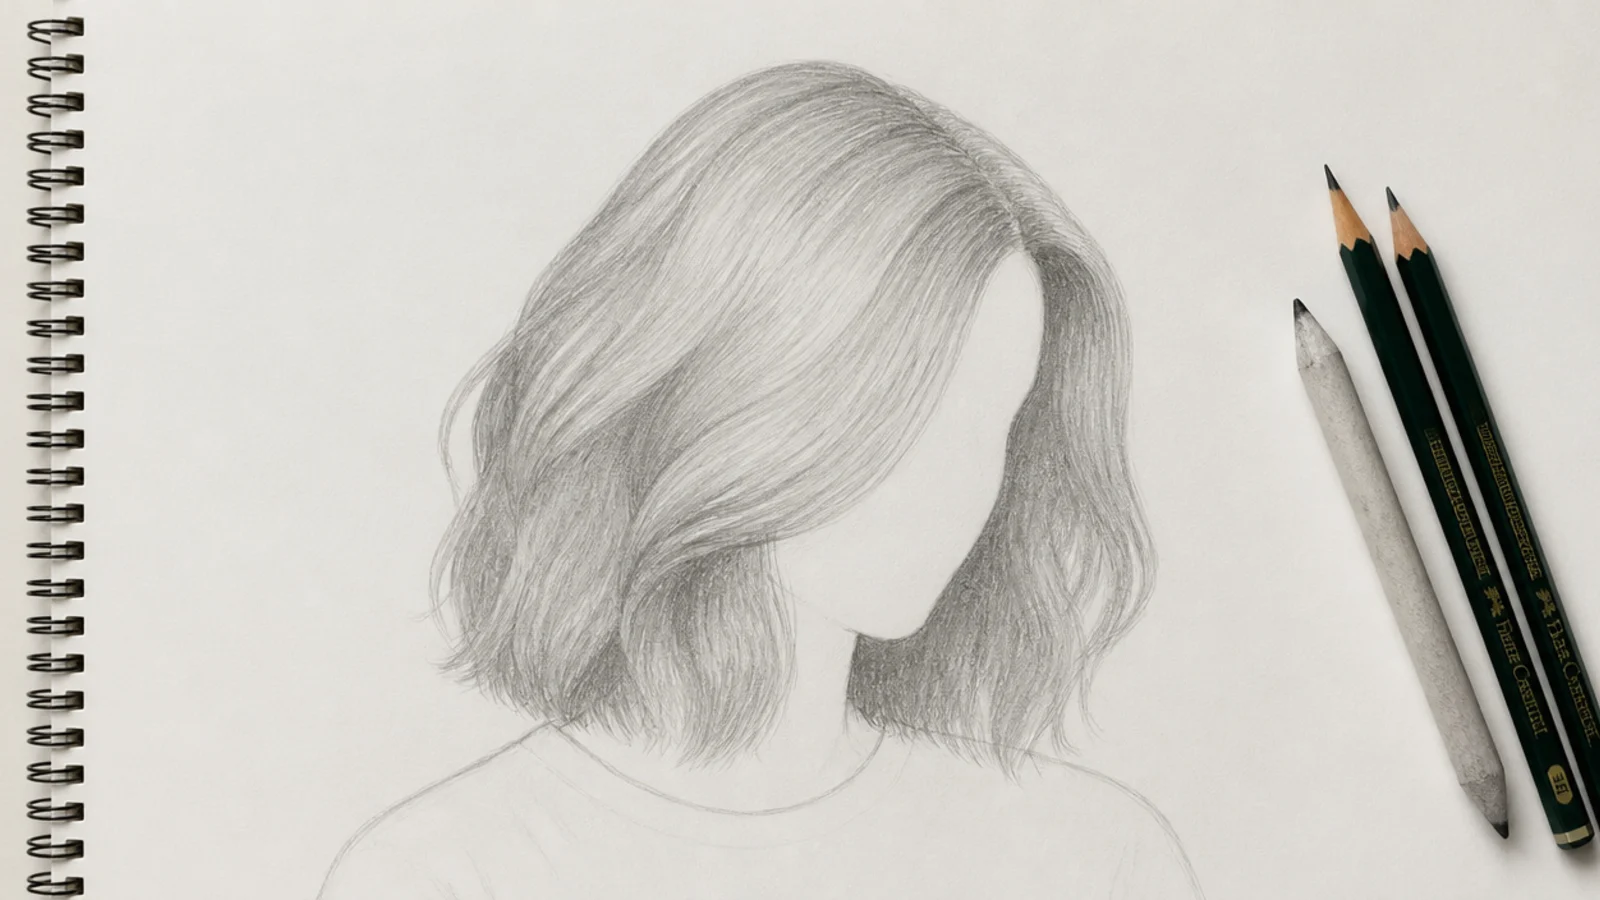
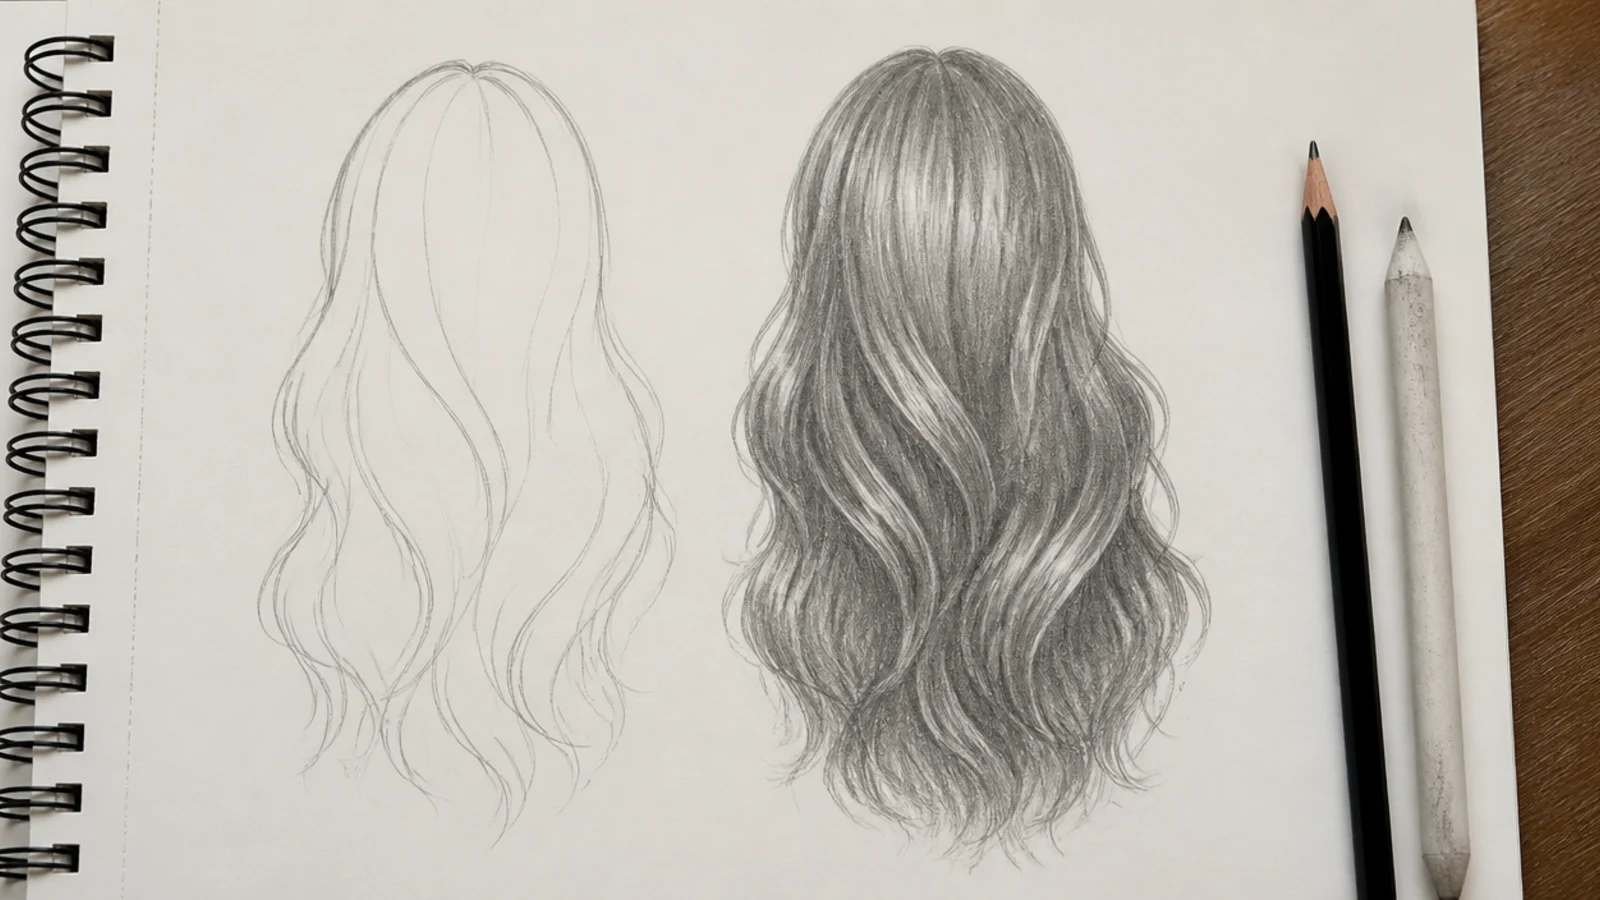
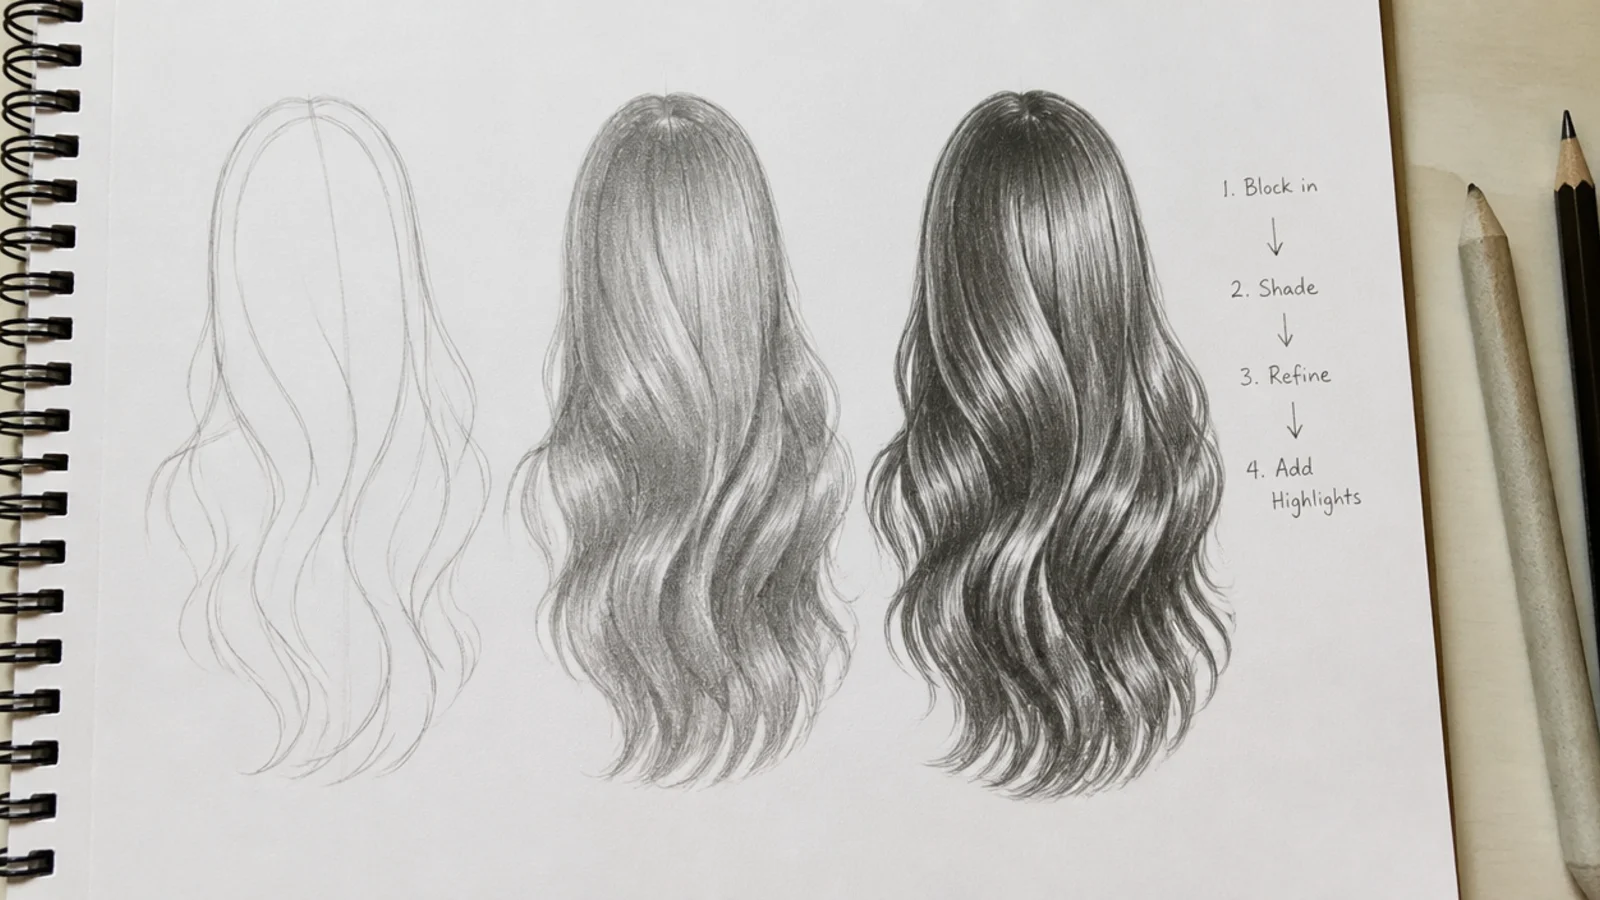
The number one beginner mistake in hair drawing is starting with individual strands, and it happens in the first thirty seconds. Do this instead. Draw the skull, including the top of the cranium that beginners always flatten, then draw the hairline as an irregular soft edge rather than a clean curve. Now block the hair as one solid silhouette in 2H, sitting a visible distance off the scalp, because hair has volume and never lies flat against bone. Check that silhouette from arm's length: if it does not read as the hairstyle you intended while it is still a blank shape, no amount of strand detail will rescue it. Only when the shape is right do you divide the mass into three to six large sections, and only then do you draw flow lines. Hair grows in sections out of the crown, so every flow line should originate from that whorl and follow the curve of the skull outward. Strands come last, and there should be far fewer of them than you think. This same order is broken down step by step in the hair sketch tutorial.
Shading Hair for Volume and Depth with 2H, 4B and 6B
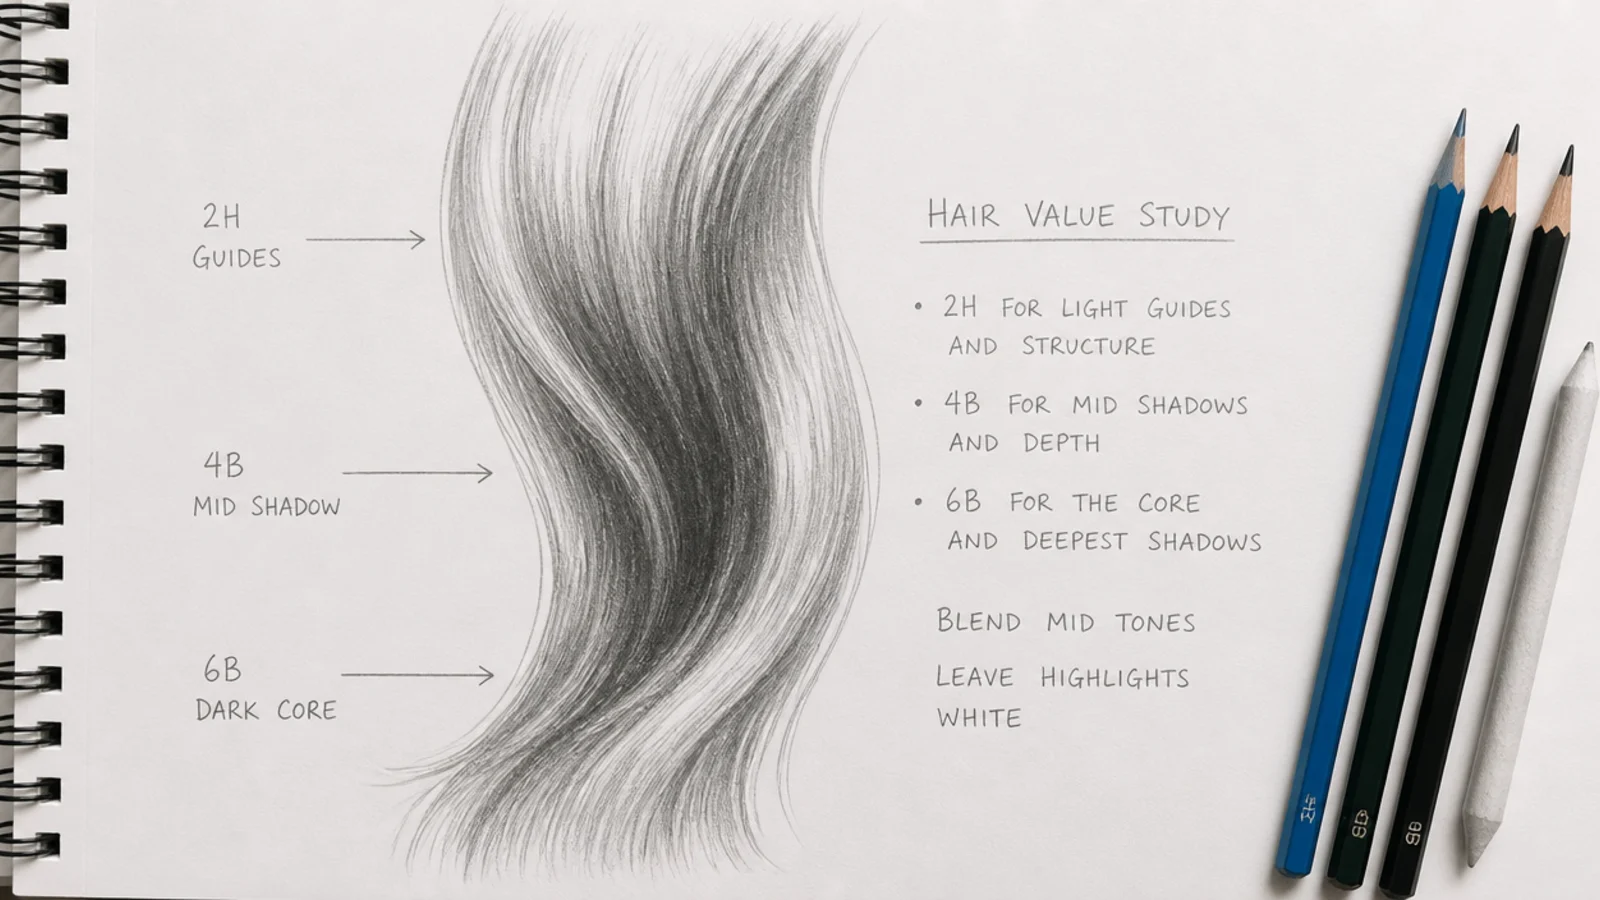
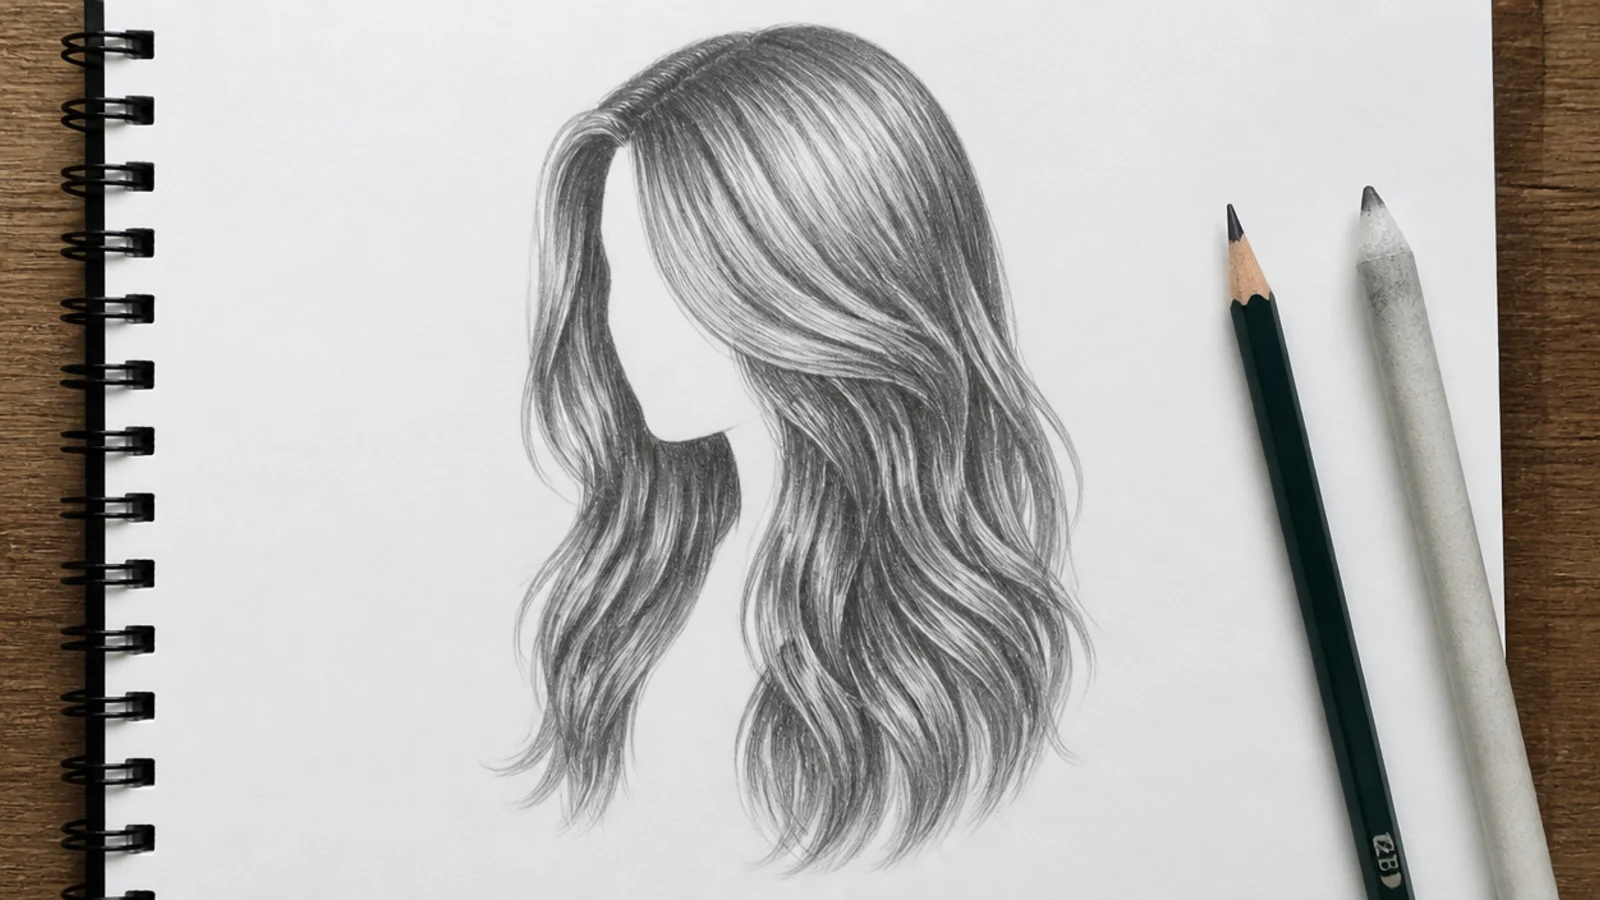
Hair looks flat for one reason: not enough value range. A convincing head of hair needs at least four distinct values and a real black somewhere in it. Map them this way. 2H does the guide lines and the lightest planes near the crown where light lands first. HB and 2B handle the broad mid tone across most of the mass. 4B builds the shadow sides of each section. 6B goes only into the narrow tunnels where one section passes behind another, and those tunnels are what create depth, because they tell the eye that hair has layers stacked in space. Highlights are not drawn, they are reserved: leave the paper white where light hits, or lift the tone back out with a kneaded eraser pressed and pulled rather than rubbed. Always stroke in the direction the hair grows, from root toward tip, and lift pressure as you finish each stroke so the mark tapers naturally. Work light to dark throughout, because you can always add graphite and you can rarely take it back cleanly. Value practice at beginner level is covered in easy hair sketch ideas.
Drawing Straight, Wavy, Curly and Coily Hair Differently
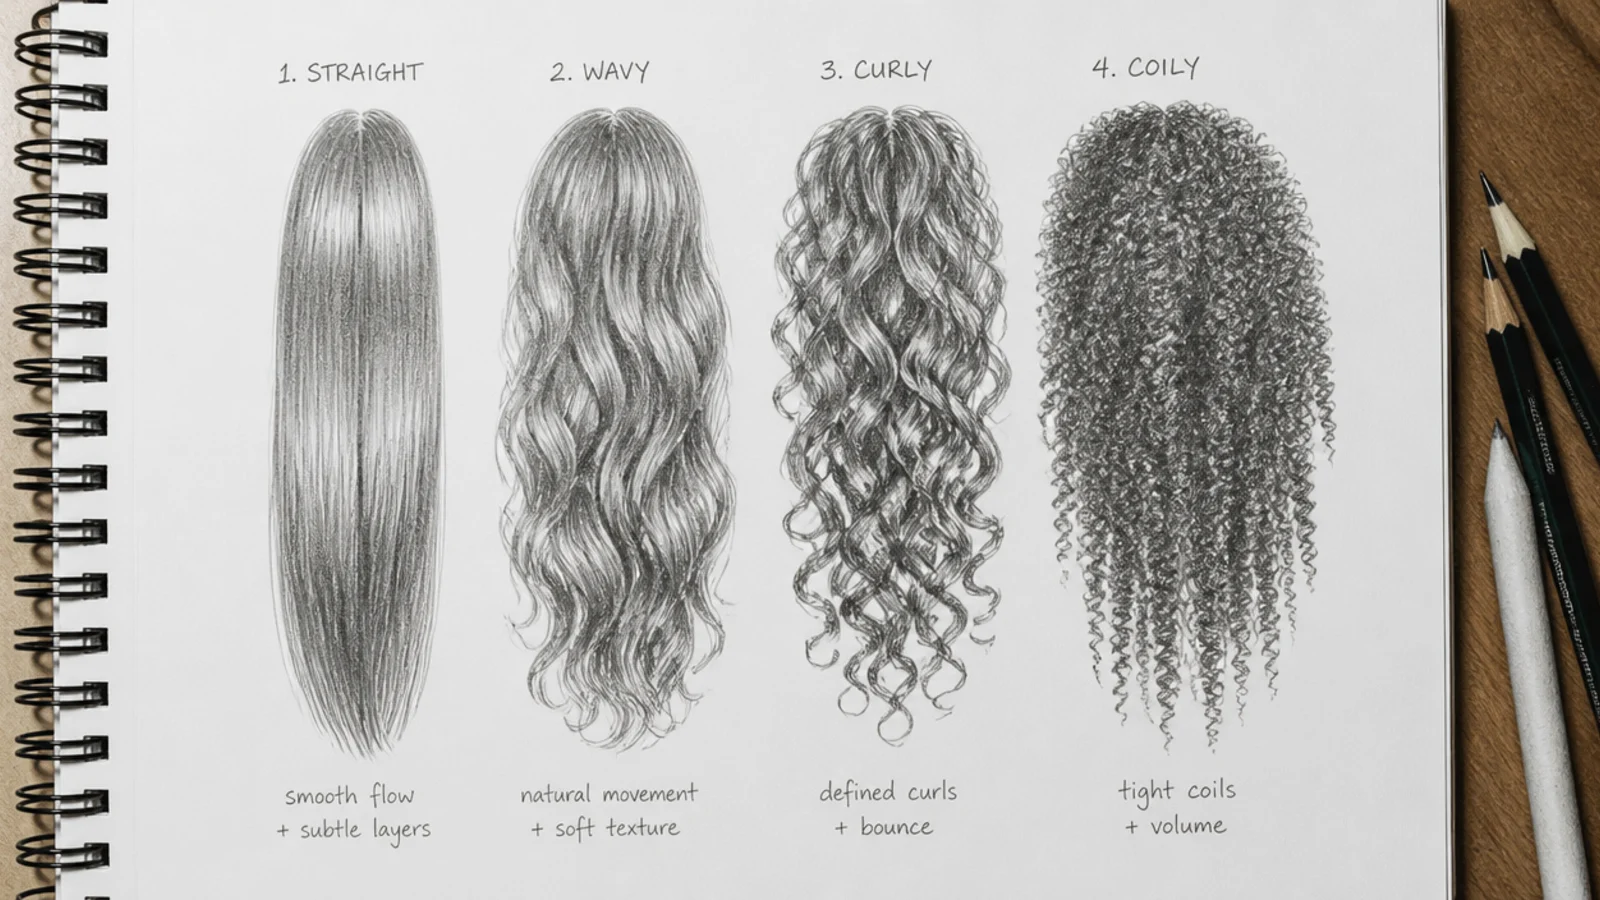
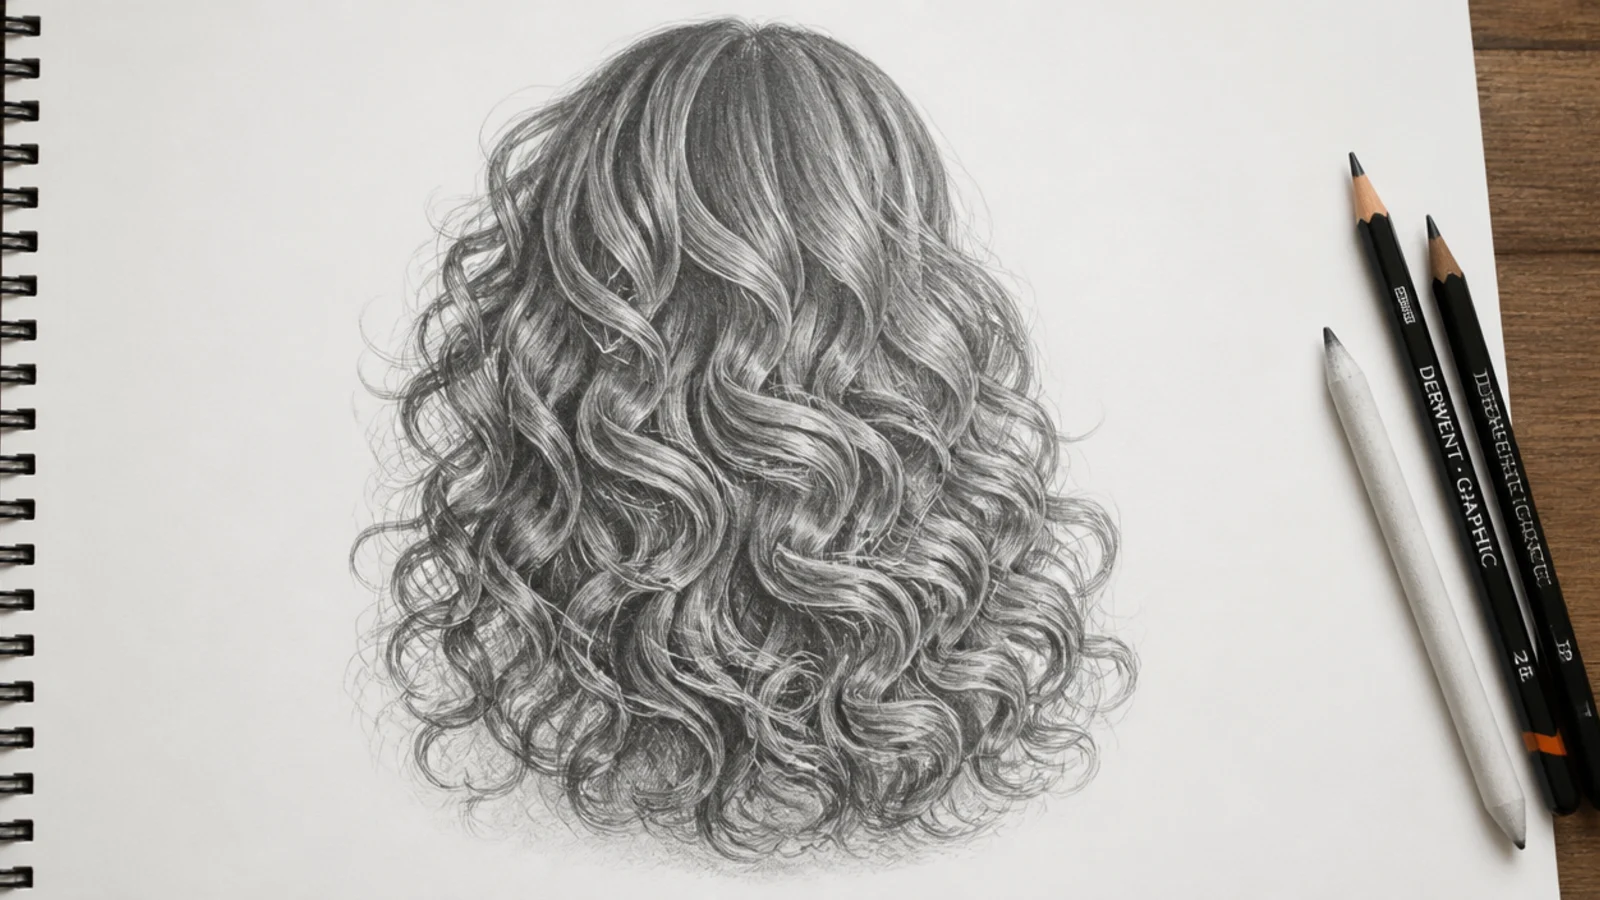
Each texture needs a different mark, and using one method for all four is why hair drawings look generic. Straight hair is about long uninterrupted flow lines and a strong crown highlight band, with the darkest values close to the scalp where light cannot reach. Wavy hair, roughly 2A to 2C, is drawn with a light S curve guideline first, then strands that follow it, and the shadows land in the troughs of each S. Curly hair, 3A to 3C, is drawn as ribbons: sketch the twisting centerline, give it width, then light one surface and shade the opposite one, which produces a spiral without ever outlining a coil. Coily hair, 4A to 4C, abandons individual definition entirely. Block the cloud silhouette, shade the interior almost solid, and put every bit of your effort into the outer edge with hundreds of short outward flicks. Texture is legible through edge quality and mass, not through drawn coils. The full curl breakdown by pattern is in curly hair sketch, and real texture reference is easy to find in frizzy curly hair photos.
Common Hair Sketch Mistakes and How to Fix Them
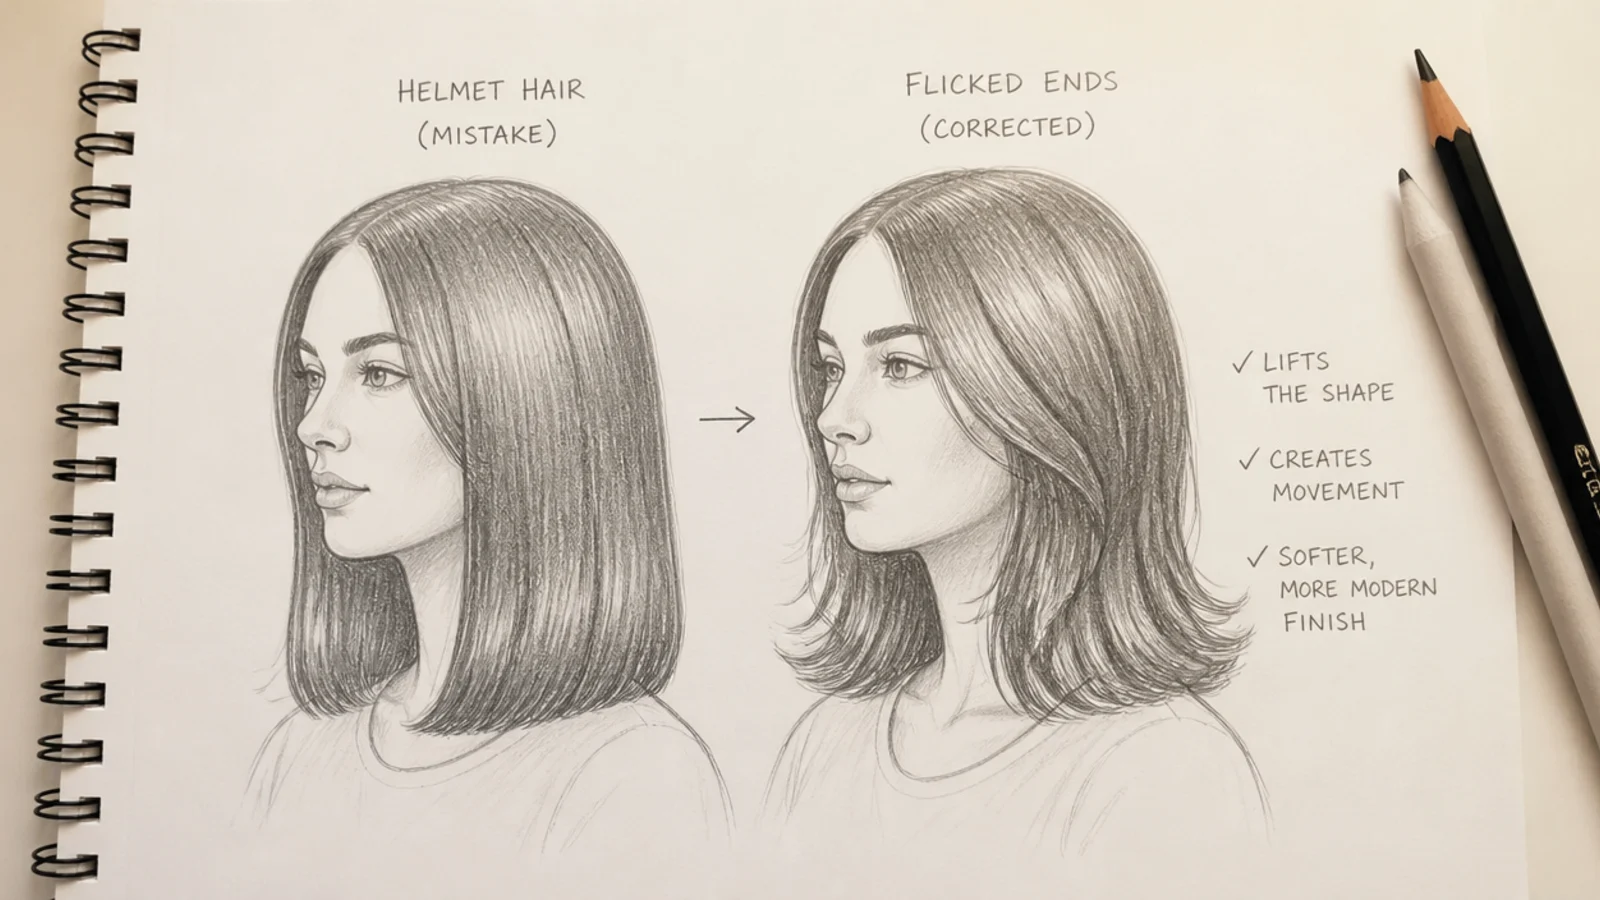
Five failures cover almost everything that goes wrong. Helmet hair happens when the outer contour is a single unbroken smooth line; fix it with short flicks at the ends and two or three strands breaking the silhouette. Spaghetti hair comes from drawing evenly spaced parallel lines of identical weight; fix it by grouping strands into sections of varied width and letting some lines merge into shadow. Flat hair is a value problem, not a line problem: you have no 6B in the drawing, so nothing sits behind anything else. Wig hair sits when the mass starts exactly at the hairline with no volume off the scalp; push the whole silhouette outward by a visible margin. Skullcap hair happens when the top of the cranium is drawn too flat, leaving no room for hair above the eyes, so check the head shape before blaming the hair. Two habits prevent most of these: block first, and stop earlier than feels finished. Overworking turns paper gray and shiny, and once the tooth is gone the highlights cannot be lifted back.
Pencils, Paper and Blending Tools for Hair Sketching
You need less than the shopping lists suggest. Three pencils cover everything in this article: a 2H for guide lines and light planes, a 4B for mid shadows and general rendering, and a 6B for the dark cores between sections. An HB is useful as a bridge if you have one. The kneaded eraser matters more than any pencil, because it is the tool that makes highlights: press and lift rather than rub, and shape it to a point for stars, flyaways and narrow shine bands. A blending stump or tortillon smooths mid tones for galaxy, smoke and underwater work, though most hair looks better with restrained blending, since overblended graphite reads as fog rather than fiber. For paper, smooth or vellum surface drawing paper around 120gsm holds fine strand detail; heavily textured watercolor paper fights you at small scale. A hard plastic eraser cut to a chisel edge cuts crisp white slivers a kneaded eraser cannot. Digital workers need only two brushes, a soft round for value and a tapered pressure brush for strands.
Using Hair References Without Copying Them
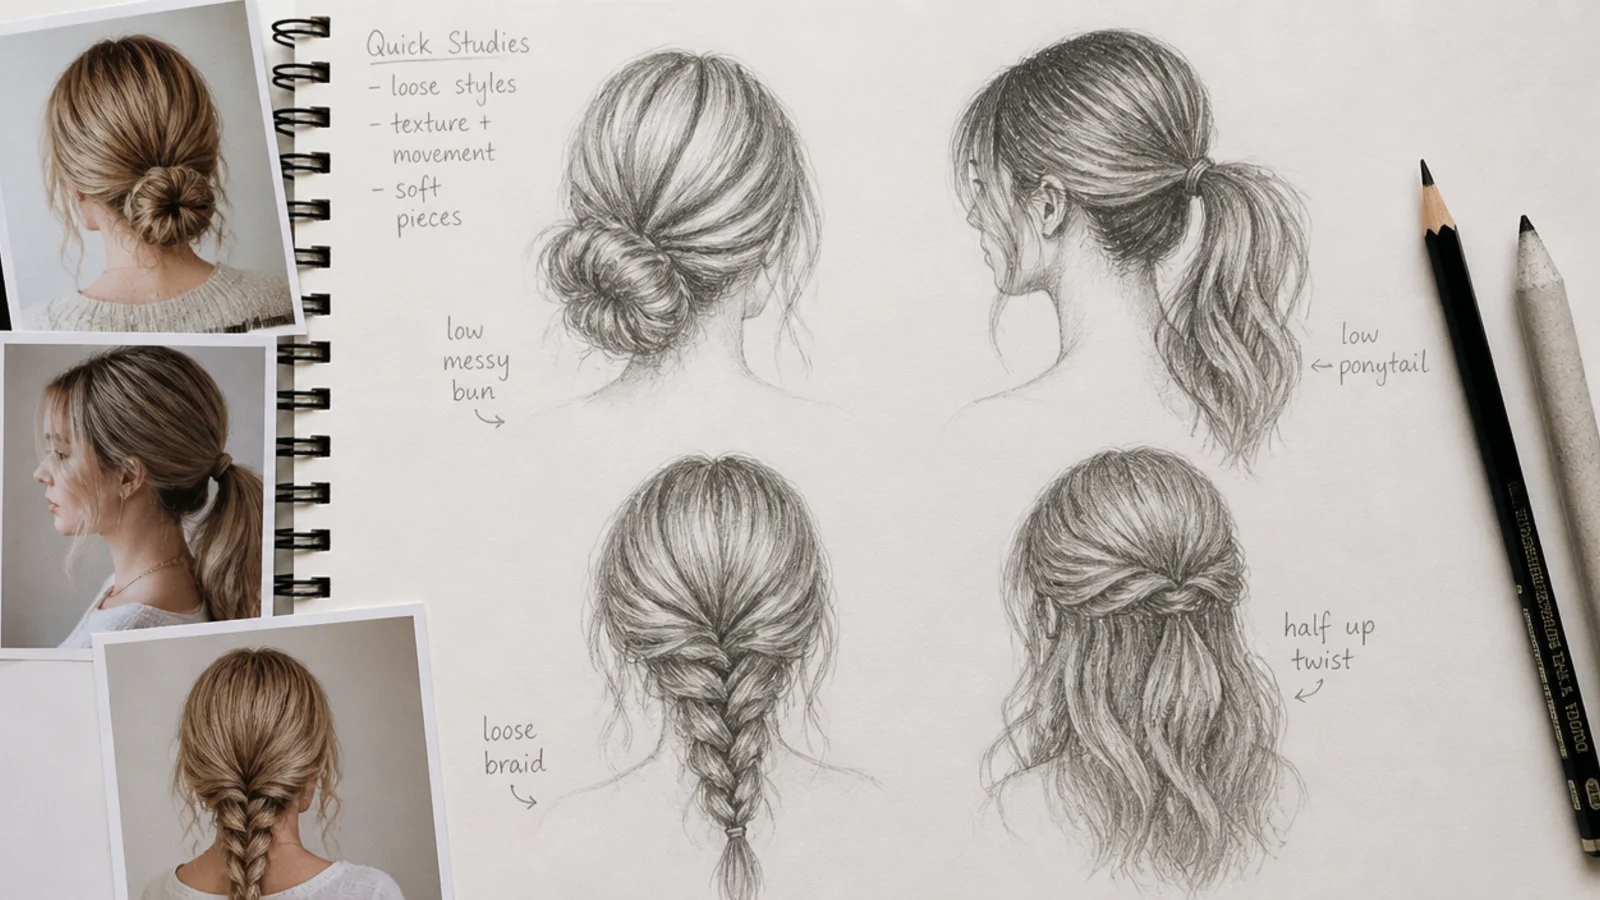
References are how anyone gets good at hair, and using them well is a skill of its own. Work from several images rather than one, because copying a single photo produces a copy while combining four produces a drawing. Before you draw, squint at the reference until the strands disappear and only the big value shapes remain, then draw those shapes first; that habit alone fixes most flow problems. Photo references from real hairstyle galleries are more useful than art references, because other artists have already simplified the information you need to learn to simplify yourself. Style pages like mermaid braids, messy ponytail and short curtain bangs give you clean multi angle views of the same cut, which is exactly what a reference sheet does. On usage rights, treat a photograph you did not take as study material rather than something to reproduce and sell; drawing from it to learn is normal practice, tracing it and selling the result is not. Keep a folder of angles you avoid, usually back views and overheads, and draw one every week.
Frequently Asked Questions
What are some cool things to draw with hair?
The concepts that save best combine a fantasy element with a real technique: hair made of water or fire, galaxy hair with lifted star highlights, hair dissolving into smoke, hair turning into birds at the ends, and hair drawn in reverse as negative space against a solid dark background. Each one teaches edge control or value range while still looking like an idea rather than an exercise.
How do you draw stylized or fantasy hair?
Keep the silhouette readable as hair even after the fantasy element takes over, then let the transformation happen in the outer third only. Block the normal hair mass first, convert the ends into flames, leaves, water or birds, and use a gradual handoff rather than a hard switch. Line weight does the rest: thick lines for the main masses, thin lines for individual strands.
How do I avoid making hair look flat in my sketches?
Flat hair is almost always a missing value, not a missing line. Add real darks with a 6B in the narrow tunnels where one section passes behind another, then reserve untouched white paper at the crown where light lands. Also push the whole hair silhouette a visible distance off the scalp, because hair drawn tight to the skull has no volume to shade in the first place.
Should I draw the head before adding hair?
Yes, always. Draw the full skull including the top of the cranium, then the hairline, then the hair mass over it. Beginners flatten the top of the head, which leaves no room for hair volume and produces the skullcap look. If hair covers an eye or part of the face, draw those features first and lay the hair over them so the overlap sits correctly.
What pencils do you use for drawing hair?
Three grades cover almost everything. Use 2H for guide lines and the lightest planes, 2B to 4B for the mid shadows across the mass, and 6B for the darkest cores between sections. Add a kneaded eraser for lifting highlights and a hard eraser cut to a chisel edge for crisp shine bands. A blending stump is optional and easy to overuse.
How do you draw curly hair so it does not look like springs?
Stop outlining the coil. Draw each curl as a twisting ribbon instead: sketch the centerline, give it width, then light one surface and shade the opposite surface where the ribbon turns away. The spiral appears from the light and shadow rather than from an outline. Vary curl diameter across the head, since identical curls read as machine made rather than natural.
How do you shade hair realistically with a pencil?
Decide where the light is before you make a mark, then work light to dark in the direction the hair grows. Lay a broad mid tone across the whole mass, deepen the shadow side of each section with 4B, and push 6B only into the overlaps. Leave or lift the crown highlight as a broken band, never a solid stripe, because unbroken shine looks like plastic.
Why does my drawn hair look like a helmet?
Because the outer contour is one smooth unbroken line and the ends are closed off. Break the silhouette with short flicks at the ends, let two or three strands escape the outline entirely, and vary the contour so it is not a perfect curve. Also check that the mass sits off the scalp rather than hugging it, since hair molded to the skull always reads as a helmet.
How do you draw hair when the head is very small in a sketchbook?
At around two centimeters tall you have three tools only: the silhouette, one mid value, and one dark accent where the hair meets the neck or falls behind the ear. Skip strand texture entirely, since it turns to gray mush at that scale. Use a blunt 4B rather than a sharp pencil, which physically prevents you from adding detail the drawing cannot hold.
How can I improve at drawing different hairstyles?
Draw the same head with ten different styles rather than ten different heads, so the only variable is the hair. Work from multi angle photo references, spend the first minute on silhouette alone, and keep a page of failed attempts to compare flow lines over time. Deliberately practice the angles you avoid, usually back views and overhead crown views.
Which hair sketch look are you saving?
If you take one thing from these 25 creative hair sketch ideas, make it the order: silhouette, then flow, then form, then texture, then the handful of stray strands at the very end. Almost every drawing that reads as a helmet or a plate of spaghetti went wrong because strands arrived before shape. Pick three ideas from this list that scare you slightly, give each one 30 minutes and a 2H, 4B and 6B, and keep the failed versions in the same sketchbook so you can see the flow lines improving. Fantasy concepts teach edges, textured hair teaches value, and motion teaches gesture. When you want the foundations again, start with easy hair sketch ideas or browse the whole hair sketch board.