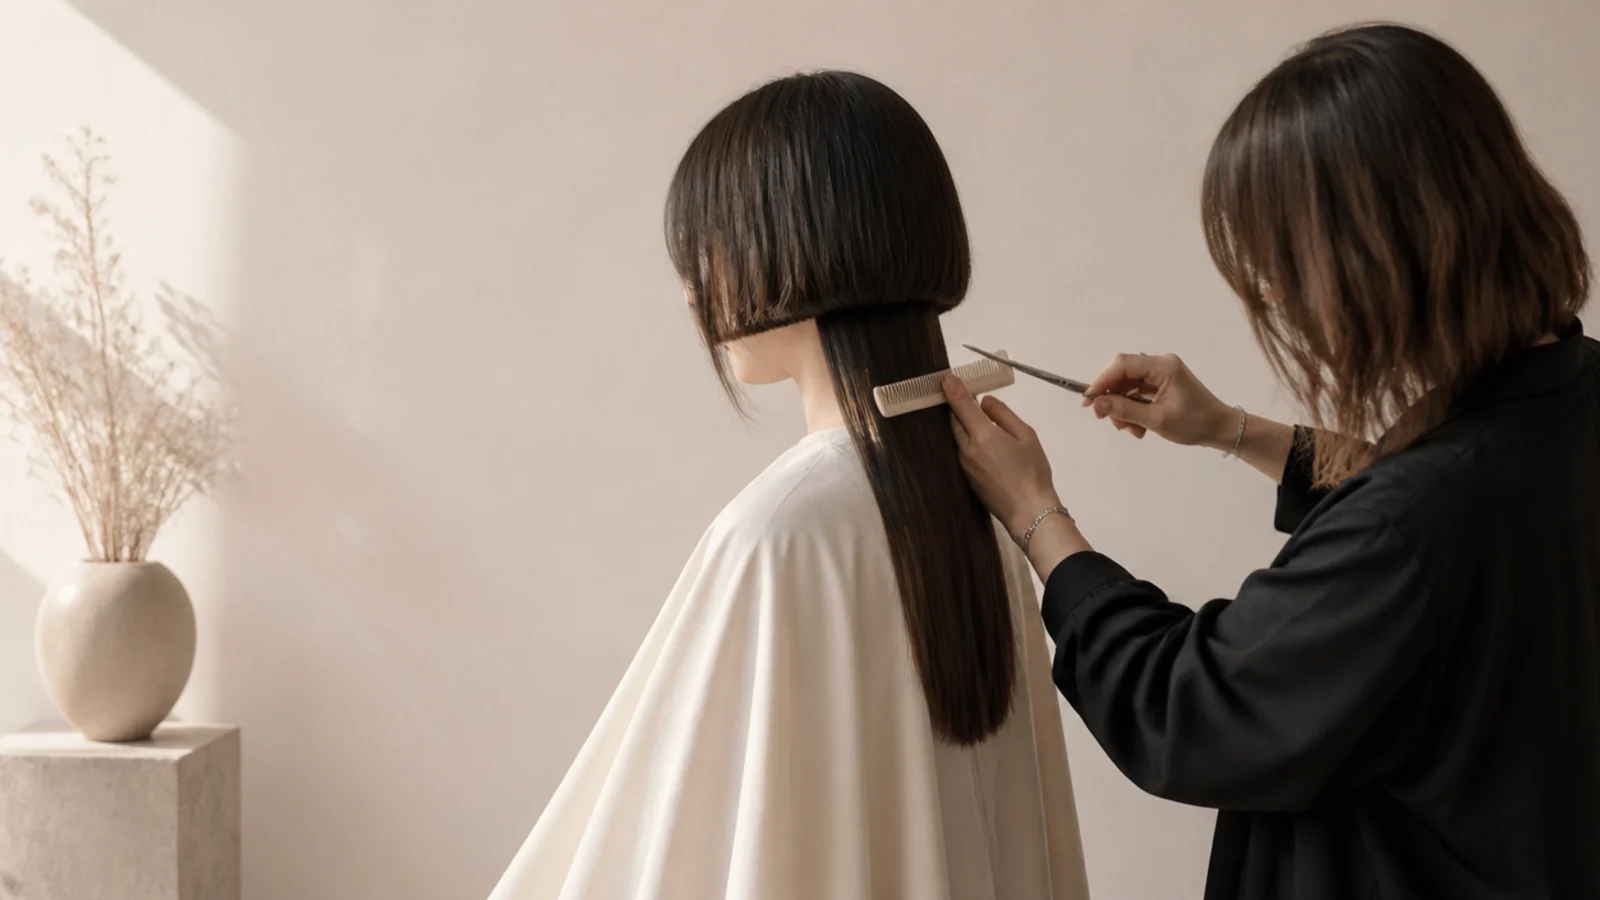
Quick Comparison
| Cutting It at Home | Booking a Salon Appointment | |
|---|---|---|
| Cost | Free, plus about 25 dollars for sharp hair shears | 85 to 200 dollars for the cut, 90 minutes booked |
| The back of the bell | Cut blind in a hand mirror; the most common failure point | Cut with a direct view and checked from three angles |
| Disconnection quality | Tends to soften accidentally as you even out mistakes | Cut deliberately hard and left alone |
| Correcting a mistake | Almost always means cutting shorter, which shrinks the contrast | Fixed inside the same appointment while length is in reserve |
| Handling shrinkage | Guesswork; wavy and curly hair springs up unpredictably | Rough-dried and refined in quarter-inch passes |
| Best realistic outcome | A good front-only bell from temple to temple | A continuous bowl line all the way around the head |
| Time | 60 to 120 minutes, longer if you second-guess the back | 90 minutes including a full consultation |
| Who it works for | Straight hair, chin-length front bell, previous DIY bang experience | Any texture, any bell height, especially a first attempt |
| Verdict | Front sections only, as a low-risk trial version | The right call for the full disconnected shape |
1. Section the Hair Into the Bell Zone and the Tentacle Zone
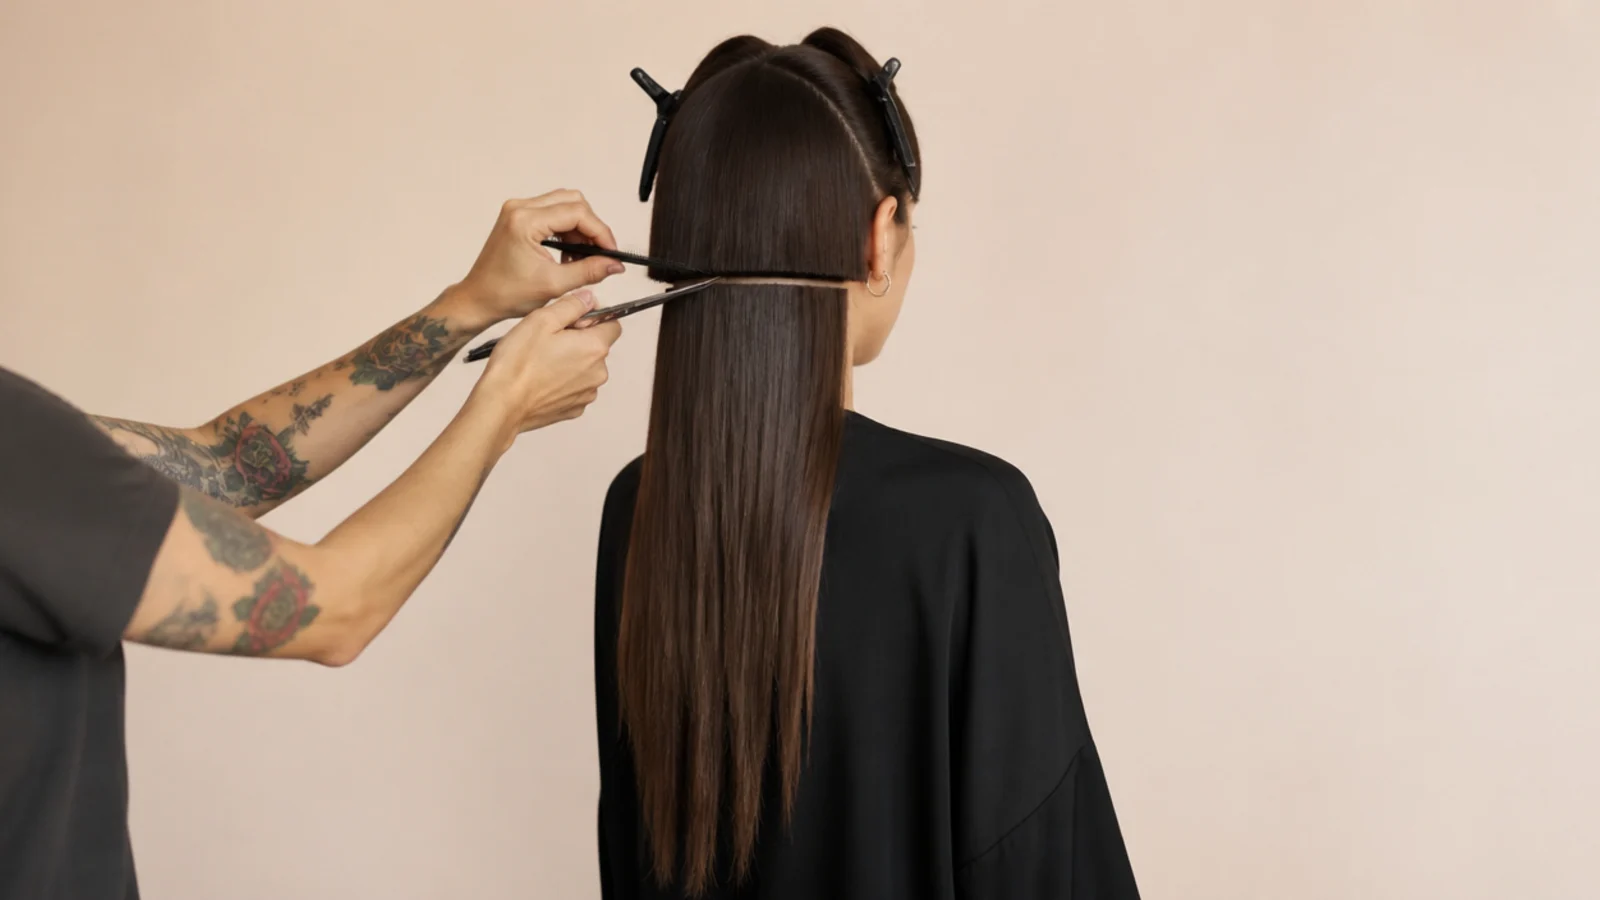
On dry, clean, product-free hair, part a horseshoe from one temple, around the crown, to the other temple. Everything inside the horseshoe becomes the bell; everything outside becomes the tentacles. Clip the lower section away completely and out of the working area. The height of this parting decides the entire cut, because it fixes how much hair each tier gets before a single blade touches anything, and it cannot be raised later without shortening the length underneath.
Common mistake: Sectioning too high leaves the bell thin, so it reads as a broken layer rather than a separate tier.
Pro tip: Fine hair should drop the horseshoe half an inch lower than it looks right, since density is what makes the bell read.
2. Cut or Clean Up the Long Tentacle Length First
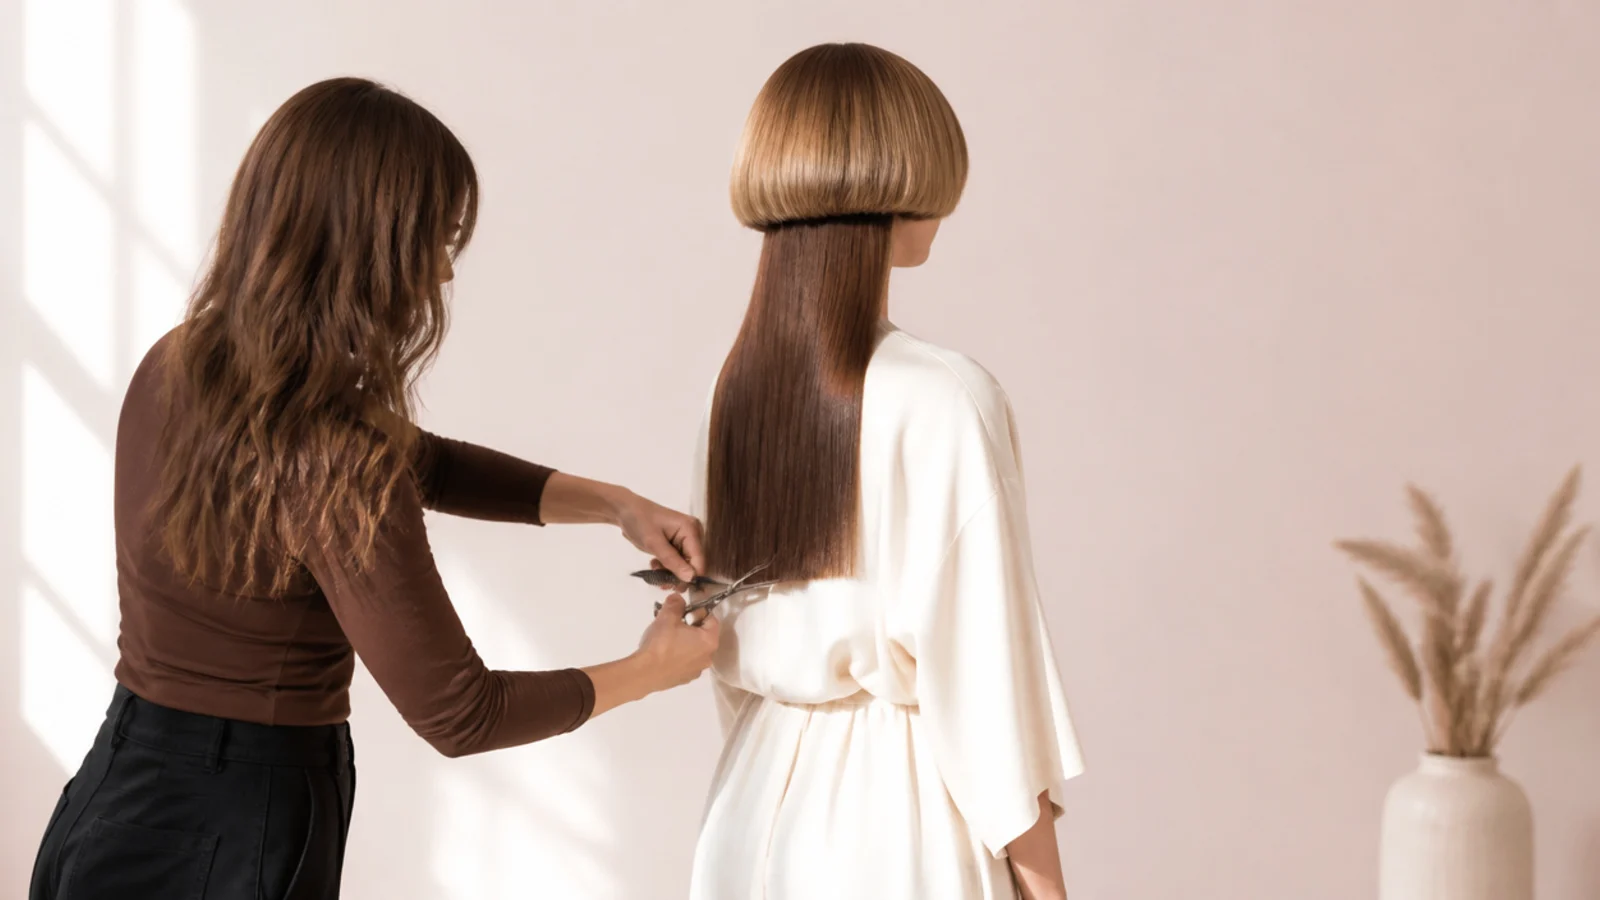
With the bell clipped out of the way, take the lower section down and cut the perimeter you want, which for most people is half an inch of cleanup and nothing more. Cut this edge blunt, straight across or with a very shallow U, so the tentacles have their own visible line. Judging an even perimeter is far easier now than it will be once the bell is falling over it, which is why this always comes before the top layer.
Common mistake: Cutting the tentacles after the bell means the short layer hides the guide and one side ends up shorter.
Pro tip: Cut this section dry and standing up, not wet at the shampoo bowl, so the natural fall of the length is what gets leveled.
3. Remove Interior Weight From the Tentacles Only
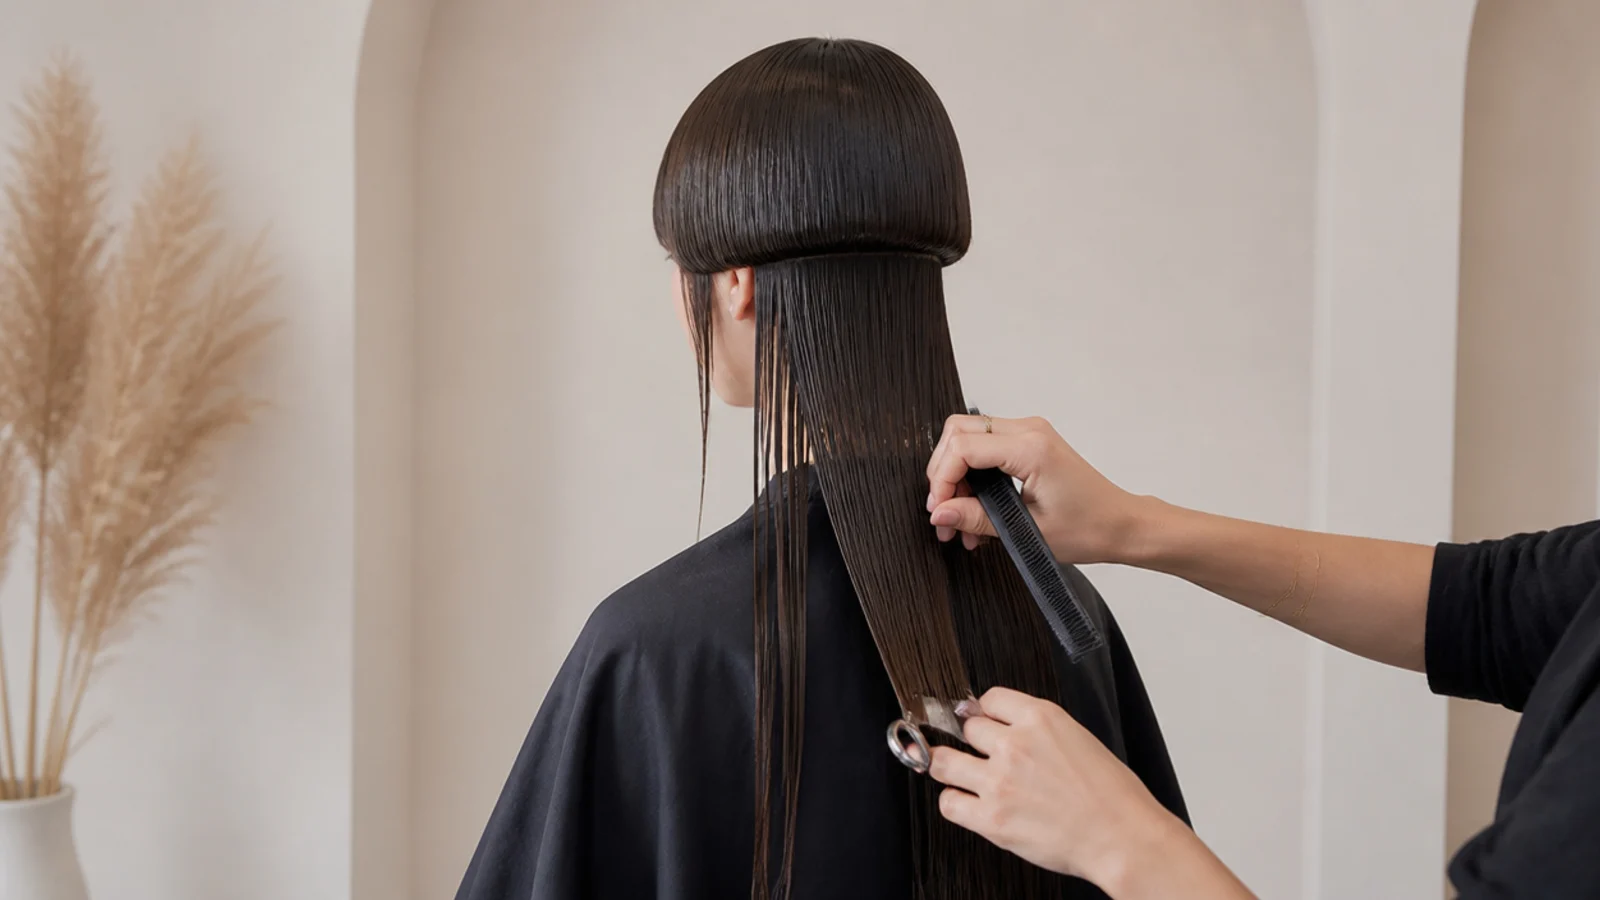
Heavy hair past the mid-back can swallow the bell whole, so take weight out from inside the tentacle section using slide cutting or a light point-cut on the interior, leaving the perimeter blunt. This keeps the tentacles airy enough to move separately from the top layer. On fine or medium hair, skip this step entirely. The goal is contrast in weight as well as in length, and over-thinning the length destroys the swing that makes the cut look alive.
Common mistake: Taking weight anywhere in the bell section, which immediately kills the density the bowl shape depends on.
Pro tip: State it as weight removal inside the lower section only, so there is no ambiguity about where the shears go.
4. Establish the Bell Perimeter at the Front
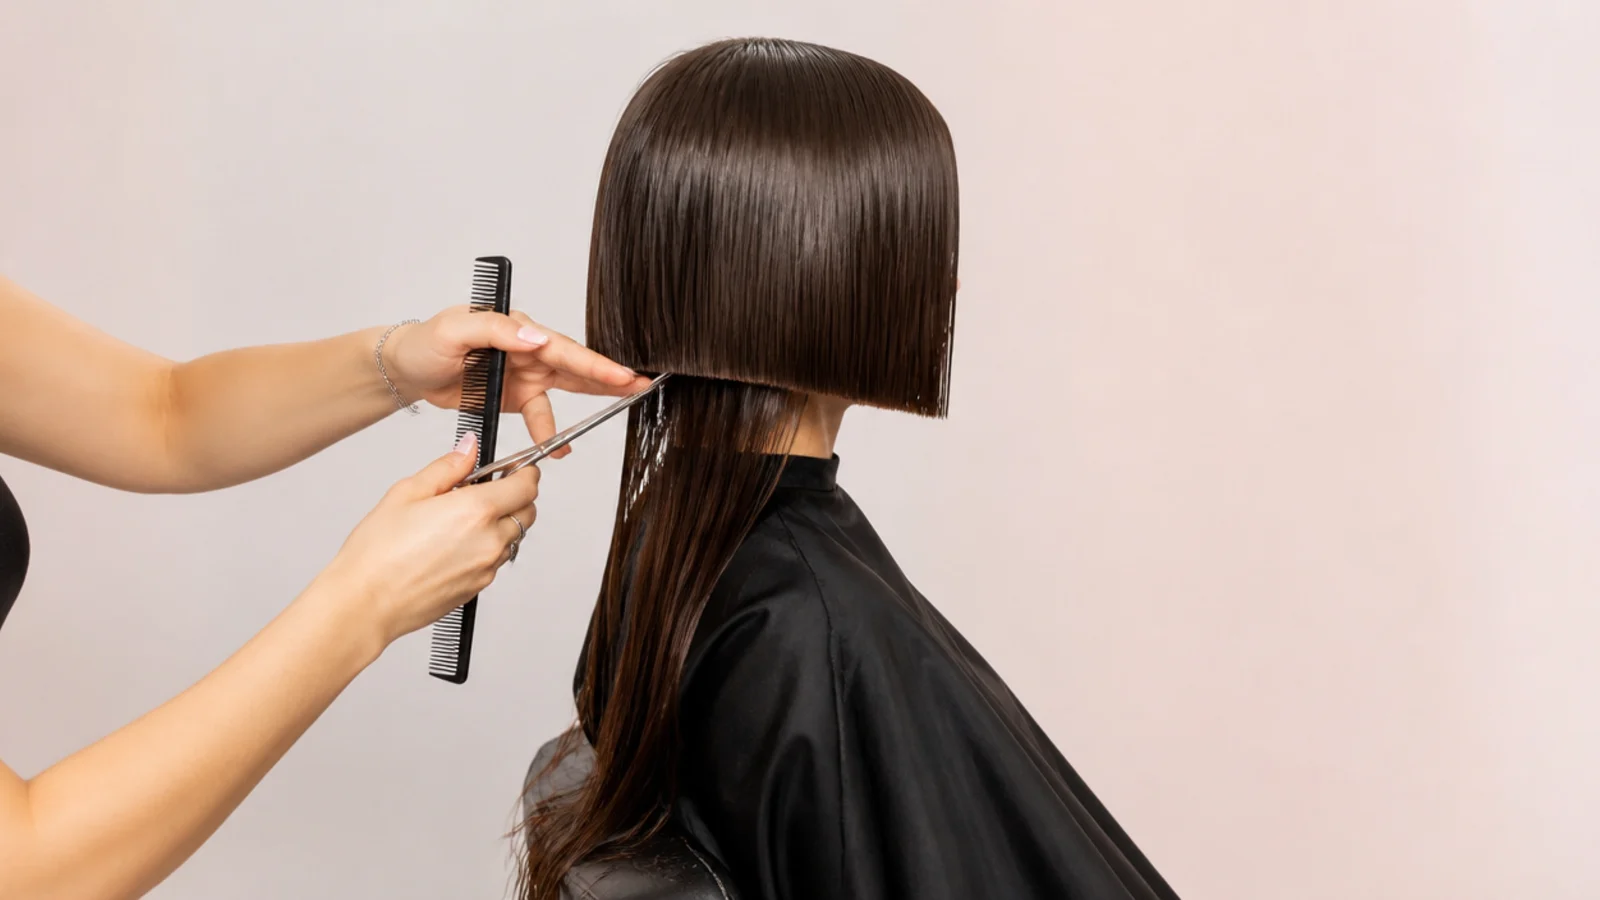
Unclip the horseshoe, comb the bell down flat all around, and cut the front guide first, one full inch below your target length. Cut straight across with shears, held level, so the edge is solid. This front line is the guide every other piece of the bell follows, so take it slowly and check it against a fixed landmark on the face such as the corner of the mouth or the bottom of the chin rather than against the previous section.
Common mistake: Cutting to the exact target length on the first pass, then discovering the dry hair springs up half an inch.
Pro tip: Check the guide in the mirror at eye level, not from above, because looking down drags the front line shorter than it looks.
5. Carry the Bowl Line Around the Sides and Back
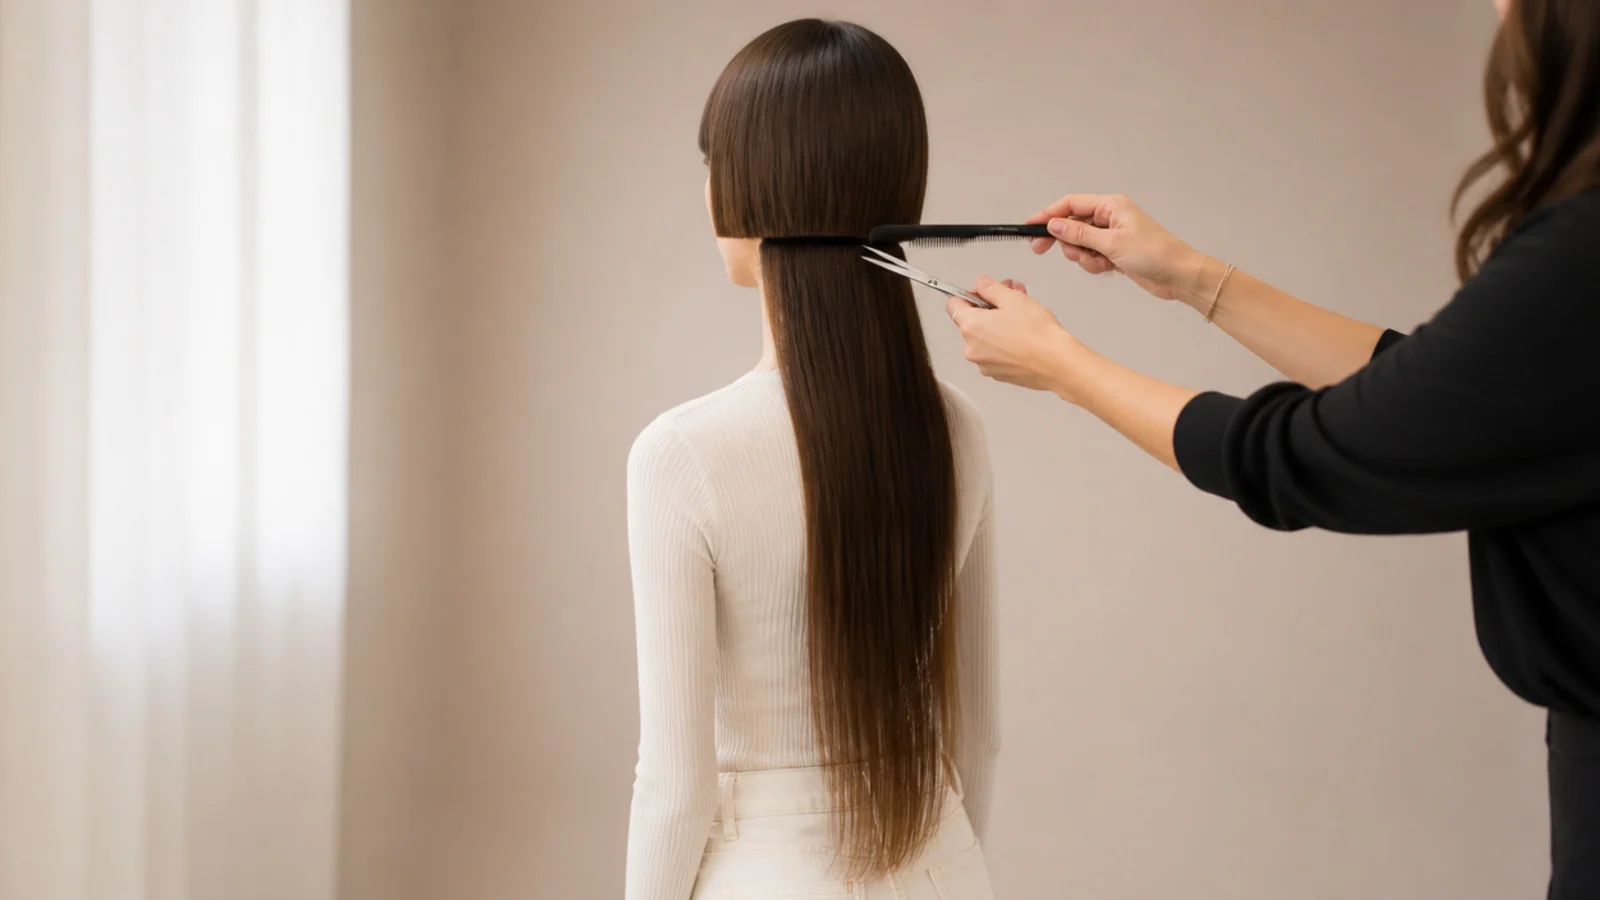
Travel the front guide around the head in small vertical subsections, keeping the line level rather than following the curve of the skull, which is what turns a bowl into a wedge. Check the two sides against each other constantly by pulling a piece from each forward to the chin and comparing. The back needs a hand mirror or a second mirror, since it is the section nobody can judge by feel and the one where an uneven line shows most.
Common mistake: Letting the line drift shorter at the back, which produces the accidental mullet look people post about.
Pro tip: Comb each subsection straight down with no tension pulled toward you; tension is what makes one side finish shorter.
6. Leave the Disconnection Line Completely Unblended
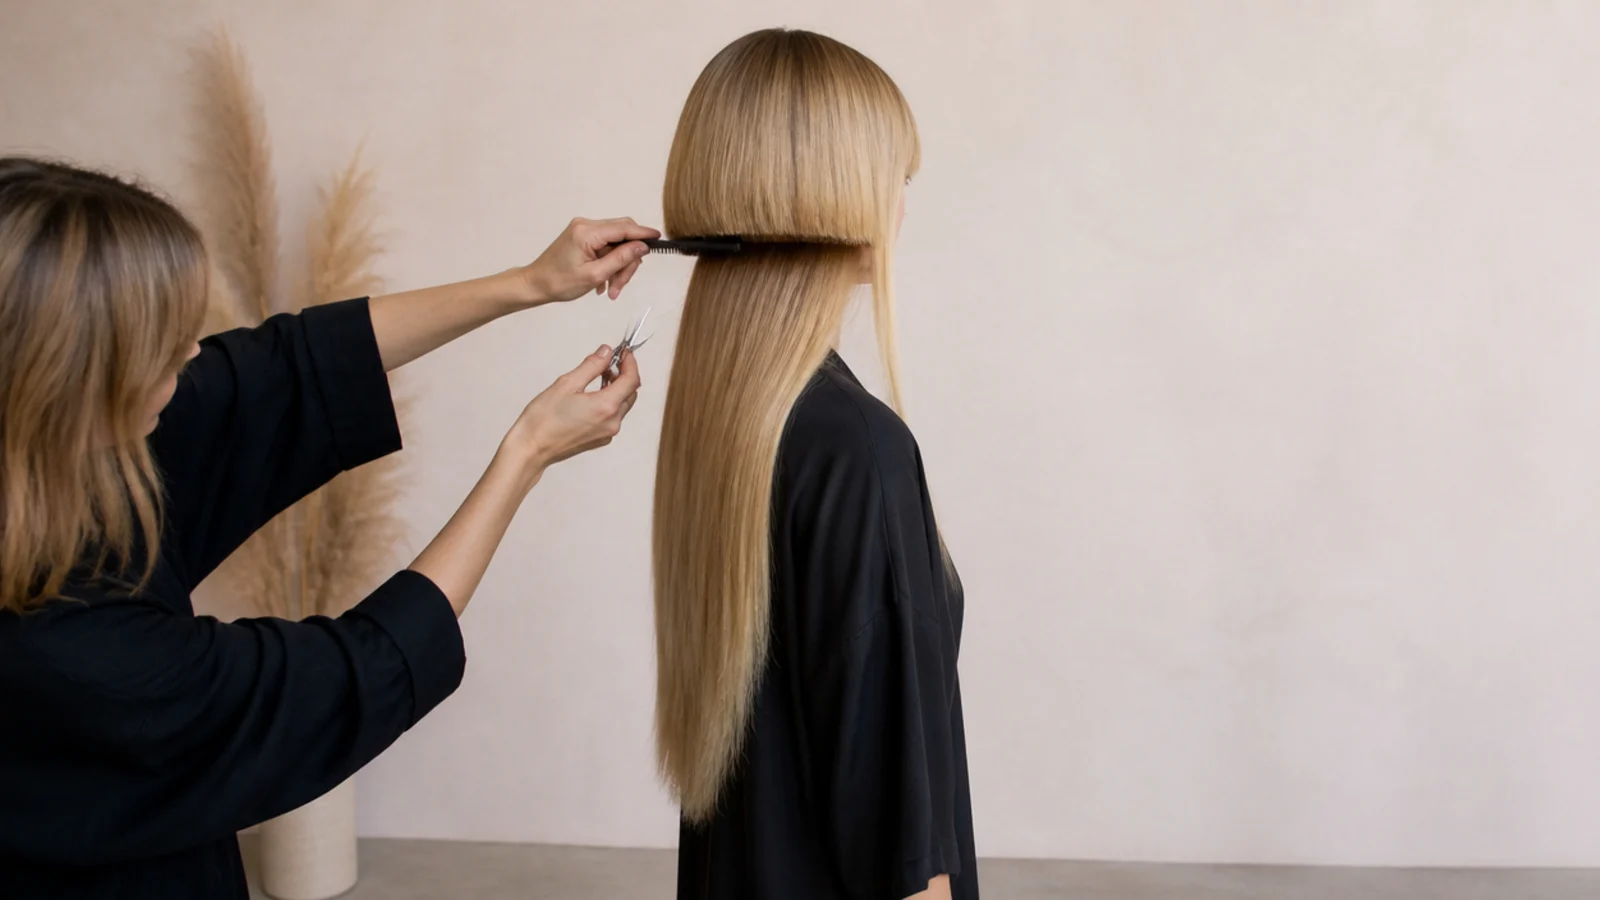
Stop cutting. There is a strong instinct at this point to soften the join between the short bell and the long hair below, and that instinct is exactly what turns this cut into a shag. Do nothing at the junction. If you want a slightly softer look, point-cut half an inch into the bell's own perimeter for movement, but never carry a single cut downward into the length. The break between the tiers is the finished feature, not an unfinished edge.
Common mistake: Running thinning shears through the junction, which cannot be reversed and dissolves the whole shape.
Pro tip: Say the line stays as it is, no thinning shears anywhere near the join, out loud before the mirror check.
7. Rough-Dry, Then Take the Final Inch off the Bell
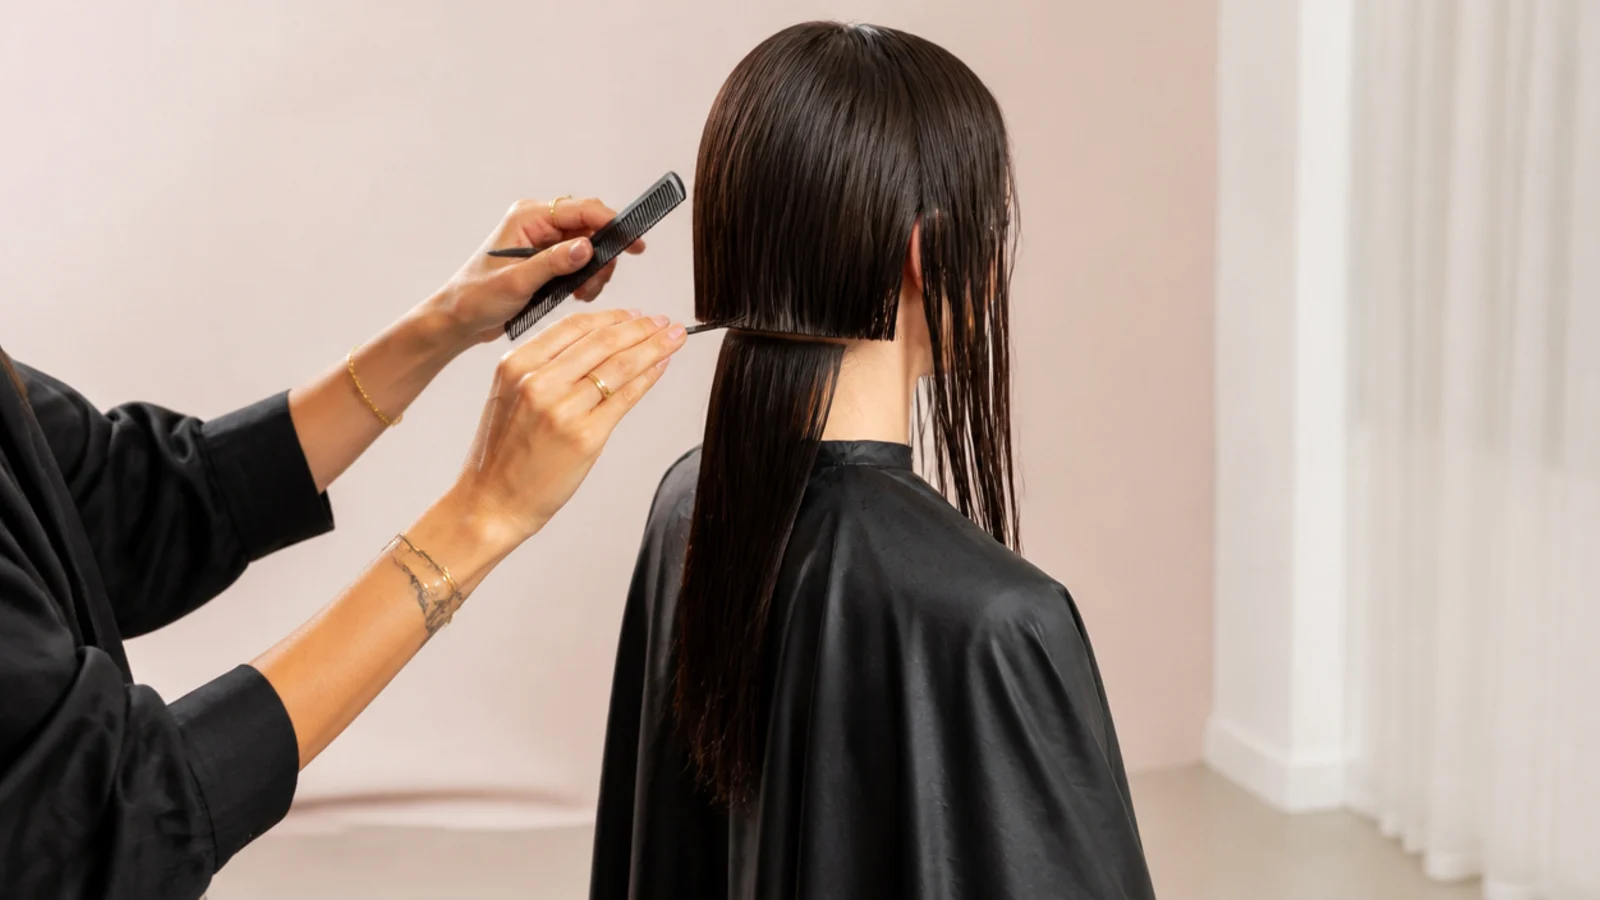
Rough-dry the bell with fingers only, no brush, and let it fall naturally. Now look at where it actually sits: cowlicks push, the crown springs, and waves lift the whole line by an inch or more. Cut the remaining length off in quarter-inch passes, rechecking after each one. This is the step that separates a bell landing exactly at the chin from one sitting somewhere near the mouth, and it only works because step four left the inch in reserve.
Common mistake: Refining while the bell is still damp, since wet hair sits up to an inch lower than it will when dry.
Pro tip: Wavy and curly textures should refine fully dry and take even smaller passes, since the spring-up is unpredictable.
8. Set the Shape and Style Both Layers Against Each Other
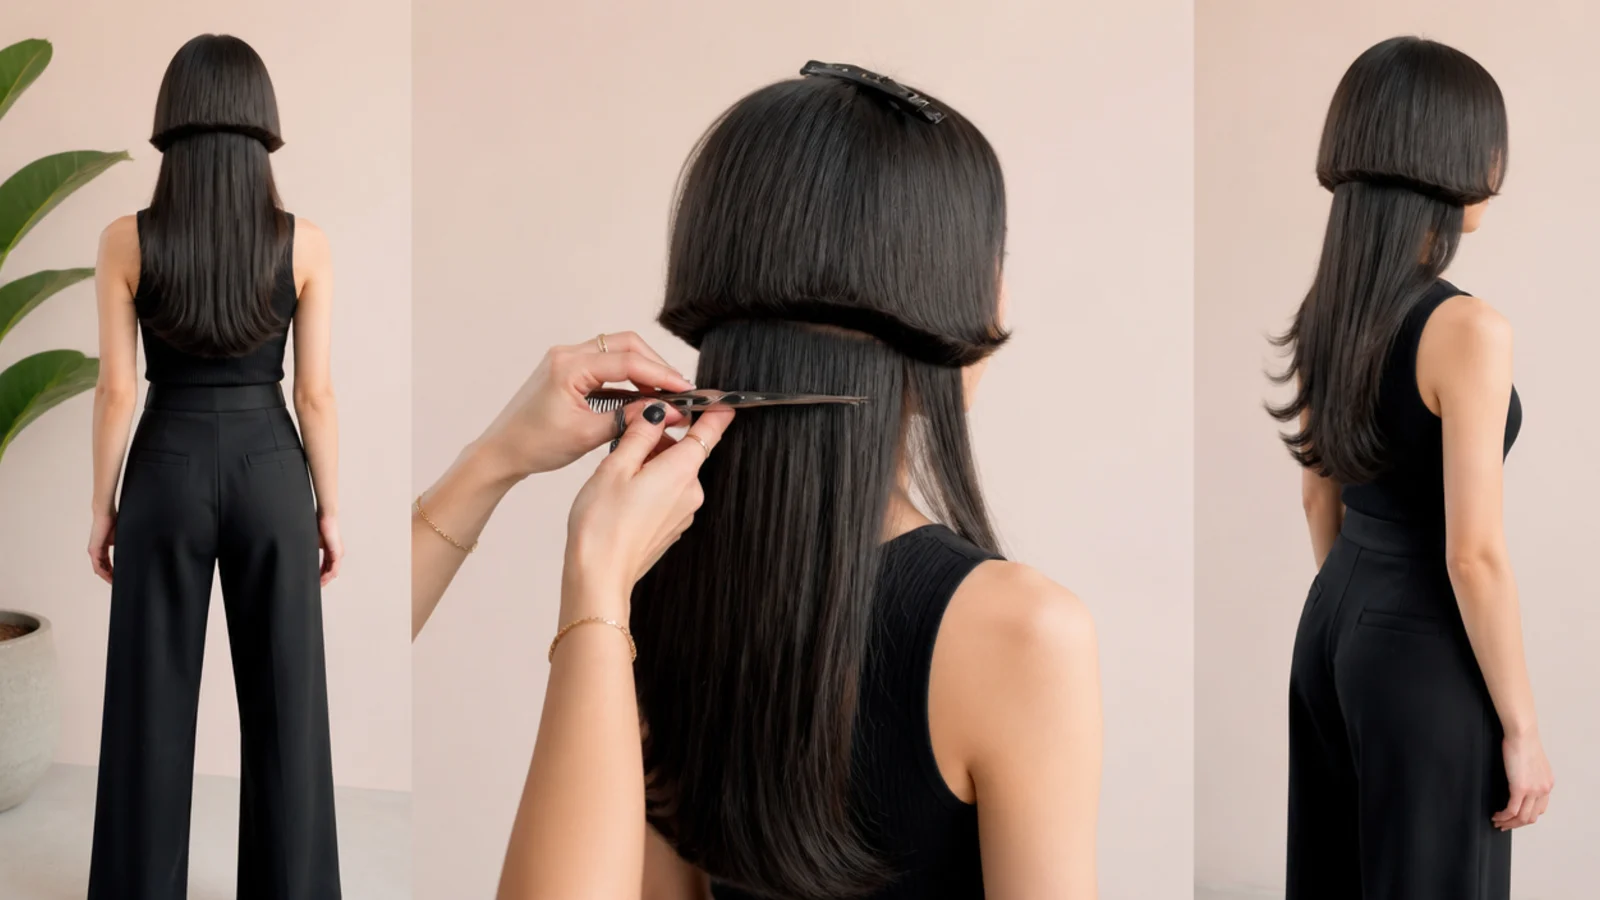
Finish by giving the two tiers opposite directions. Round-brush the bell inward for the last 30 seconds of drying and hold until cool, or flat-iron a C-curve at about 350 degrees. Then flick the tentacle ends outward or leave them straight. Add dry texturizing spray at the bell roots and a pea of serum on the tentacle ends only. The disconnection now reads from every angle, which is the whole reason for the cut.
Common mistake: Curving both layers the same way, which makes the two tiers merge visually and wastes the disconnection.
Pro tip: Photograph the finished style from the back on day one so you have your own reference for the next appointment.
What a Jellyfish Haircut Is: The Two-Layer Structure
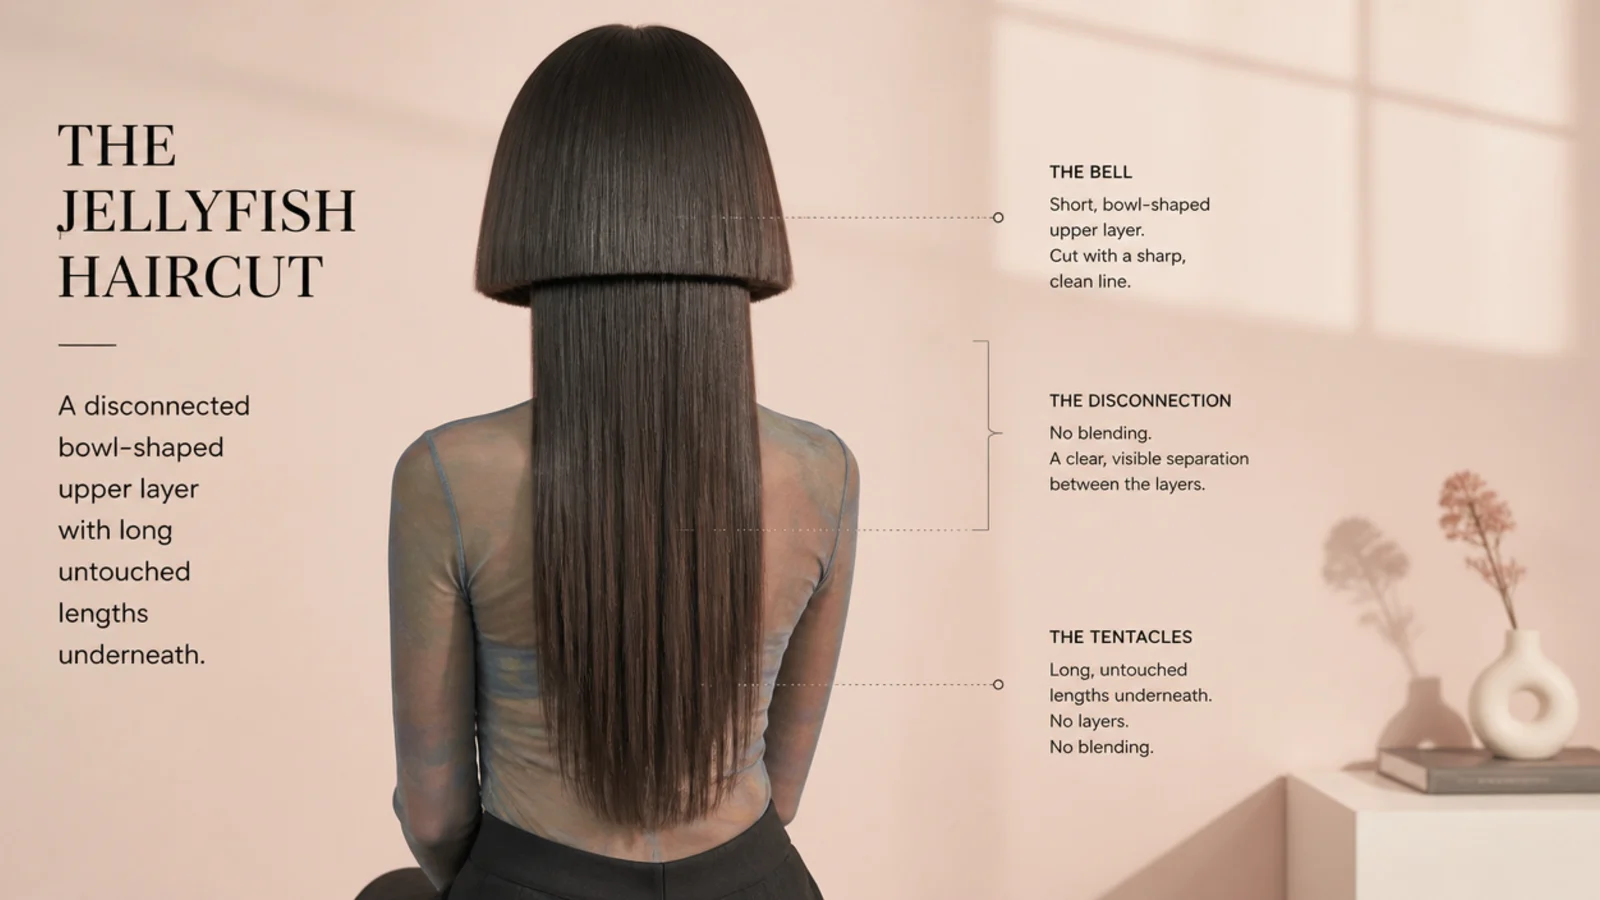
Before any of the steps make sense, the structure has to be clear. A jellyfish haircut is exactly two pieces of hair. The upper piece is cut into a short, rounded, bowl-shaped layer that usually falls between the cheekbone and the chin, known as the bell. Everything below it is left long and largely untouched, the tentacle section. Separating them is a horizontal line the stylist deliberately refuses to blend, and that refusal is the entire definition. Take the same two lengths and gradient them together and you have a shag or a wolf cut. Leave the break visible and you have a jellyfish cut. The silhouette traces back to the Japanese hime cut, which uses the same idea of a short front section against long hair behind, and the modern version simply carries that short section all the way around the crown. This is also why density matters more than length here. A bell with too little hair in it reads as a broken layer rather than a floating tier, which is why step twelve, the sectioning, decides more about the result than any single scissor cut. Every idea on the jellyfish haircut hub is a variation on those two pieces and the line between them.
Can You Cut a Jellyfish Haircut at Home? An Honest Verdict
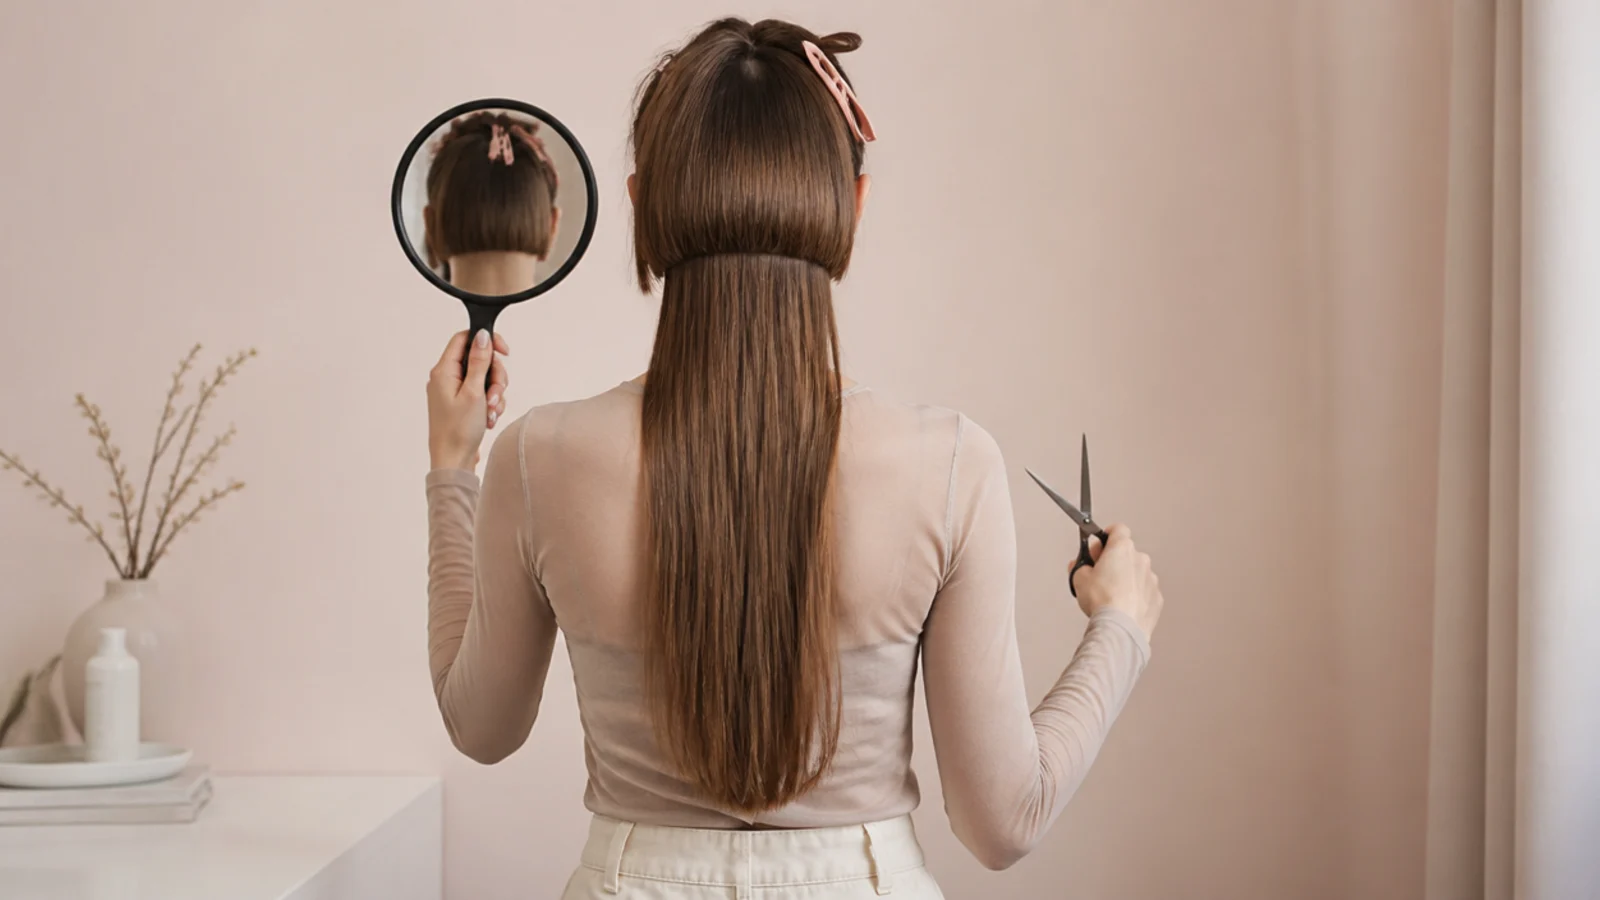
How to cut a jellyfish haircut at home is one of the most searched versions of this question, and the honest answer is a qualified no. Two of the eight cutting steps are genuinely impossible to do well on yourself. Carrying the bowl line evenly around the back requires seeing the back of your own head while your arms are raised, which changes where the hair falls, and judging whether the disconnection line stays continuous at the sides needs a viewing angle you do not have. The front half is manageable. A chin-length front bell, cut in small sections with the length clipped away, is roughly the difficulty of cutting your own curtain bangs, and plenty of people do it successfully. The compromise that actually works is a partial home version: cut only the front sections, from temple to temple, leaving the back uncut. That gives you the hime-adjacent front look with none of the back-view risk, and it converts cleanly into a full jellyfish cut at your next salon visit. If you attempt more than that, cut dry, cut an inch long, use sharp hair shears rather than kitchen scissors, and expect to book a correction. The one thing never to attempt at home is the disconnection itself on tight curls, where shrinkage makes the finished length nearly impossible to predict.
How Much a Jellyfish Haircut Costs and Where to Get One
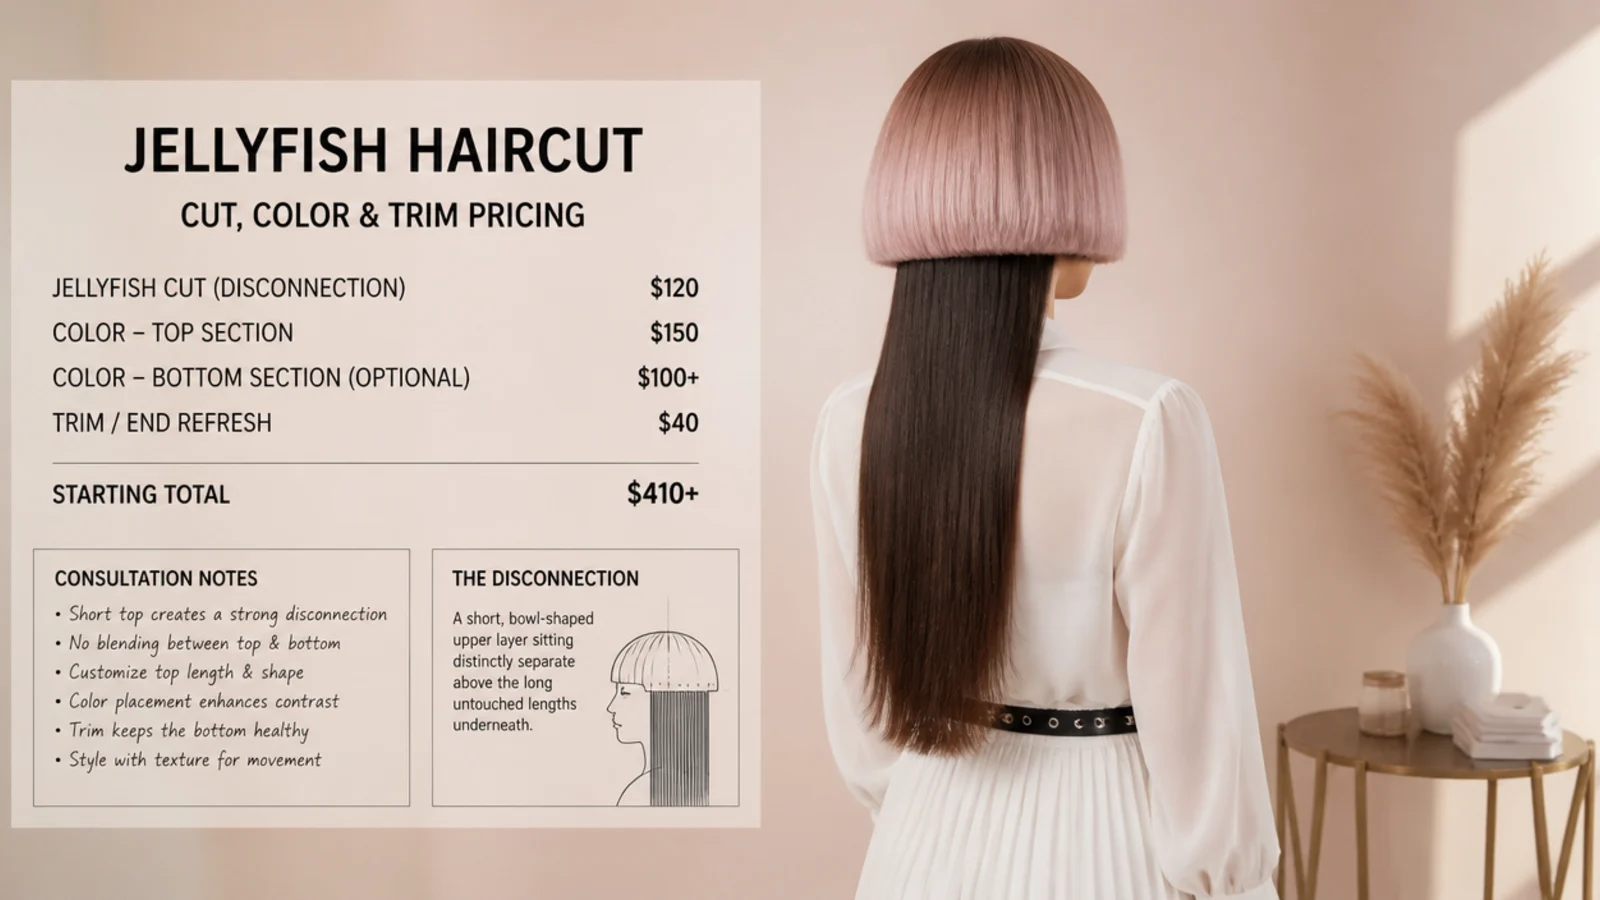
Nobody in this trend writes down the numbers, so here they are. The cut alone runs roughly 85 to 200 dollars in most US salons. The low end is a suburban salon with a stylist comfortable with disconnection; the high end is a specialist or city salon where the appointment is booked as a restyle. Expect 90 minutes, and expect a salon to charge for that time rather than for a standard cut slot. Color changes the math considerably. A money piece at the front of the bell adds about 90 to 150 dollars. Lifting the whole bell to platinum over a dark base, the two-tone version that dominates Pinterest, runs 180 to 350 dollars or more and usually needs two sessions. Maintenance is the cost people forget: a blunt bell needs reshaping every 6 to 8 weeks at roughly 45 to 80 dollars, which is about seven appointments a year. On where to get one, skip the walk-in chains for the first cut and search local salon portfolios for the word disconnected or for hime cuts, then book the specific stylist whose work shows a hard line. A stylist who does structured bobs well is usually a safer bet than one whose portfolio is all soft mid-length layers.
How to Ask for a Jellyfish Haircut Without a Disaster
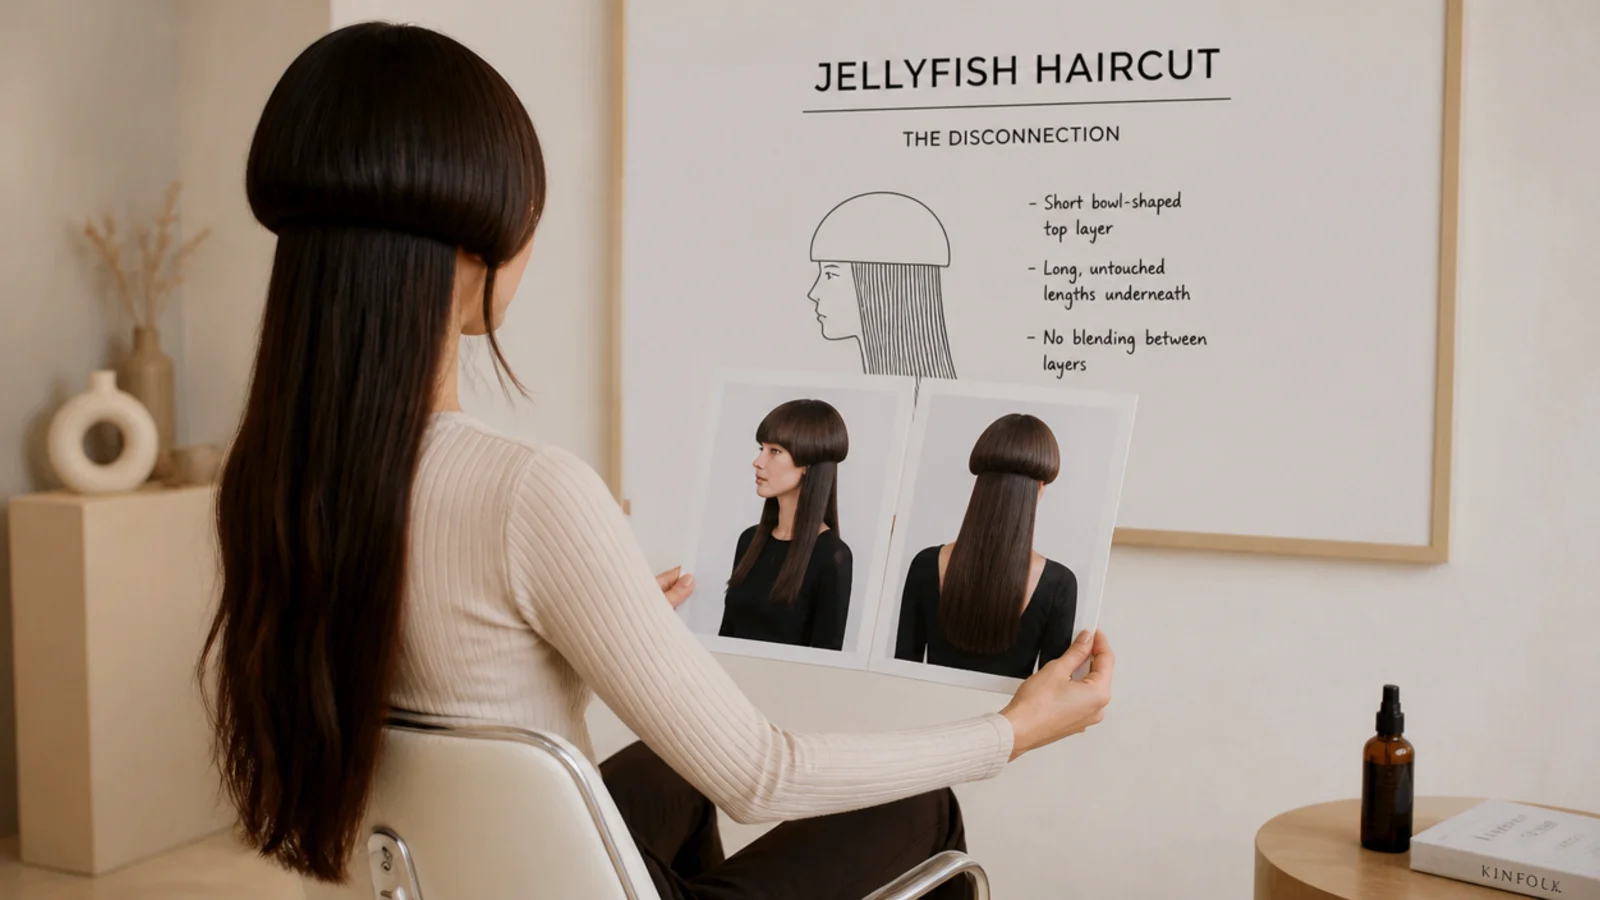
Most jellyfish haircut regret is a consultation failure, not a cutting failure, so treat the twenty minutes before the cut as the most important part of the appointment. Open with the exact phrase: a disconnected bowl-shaped upper layer, with the length left long underneath. Then give three numbers. Where the bell falls, measured against your own face, so cheekbone, jaw or chin. How much length stays underneath, measured against your body, so collarbone, shoulder blade or waist. And how hard the disconnection should be, either fully blunt or softened by half an inch. Two words to avoid entirely: bowl cut, which describes a different and usually much shorter haircut, and layers, which is the industry term for a gradient and is precisely the opposite of what you want. Bring the front and back photos from step six, plus one photo of what you do not want. Then ask two direct questions: have you cut a disconnected upper layer before, and can you cut the bell an inch longer on the first pass. A stylist who answers both comfortably will deliver the cut. One who hesitates on either is telling you something useful. The same consultation discipline applies to any structured shape, including a short jellyfish haircut where the margin for error is smaller still.
Growing Out a Jellyfish Haircut After You Get It
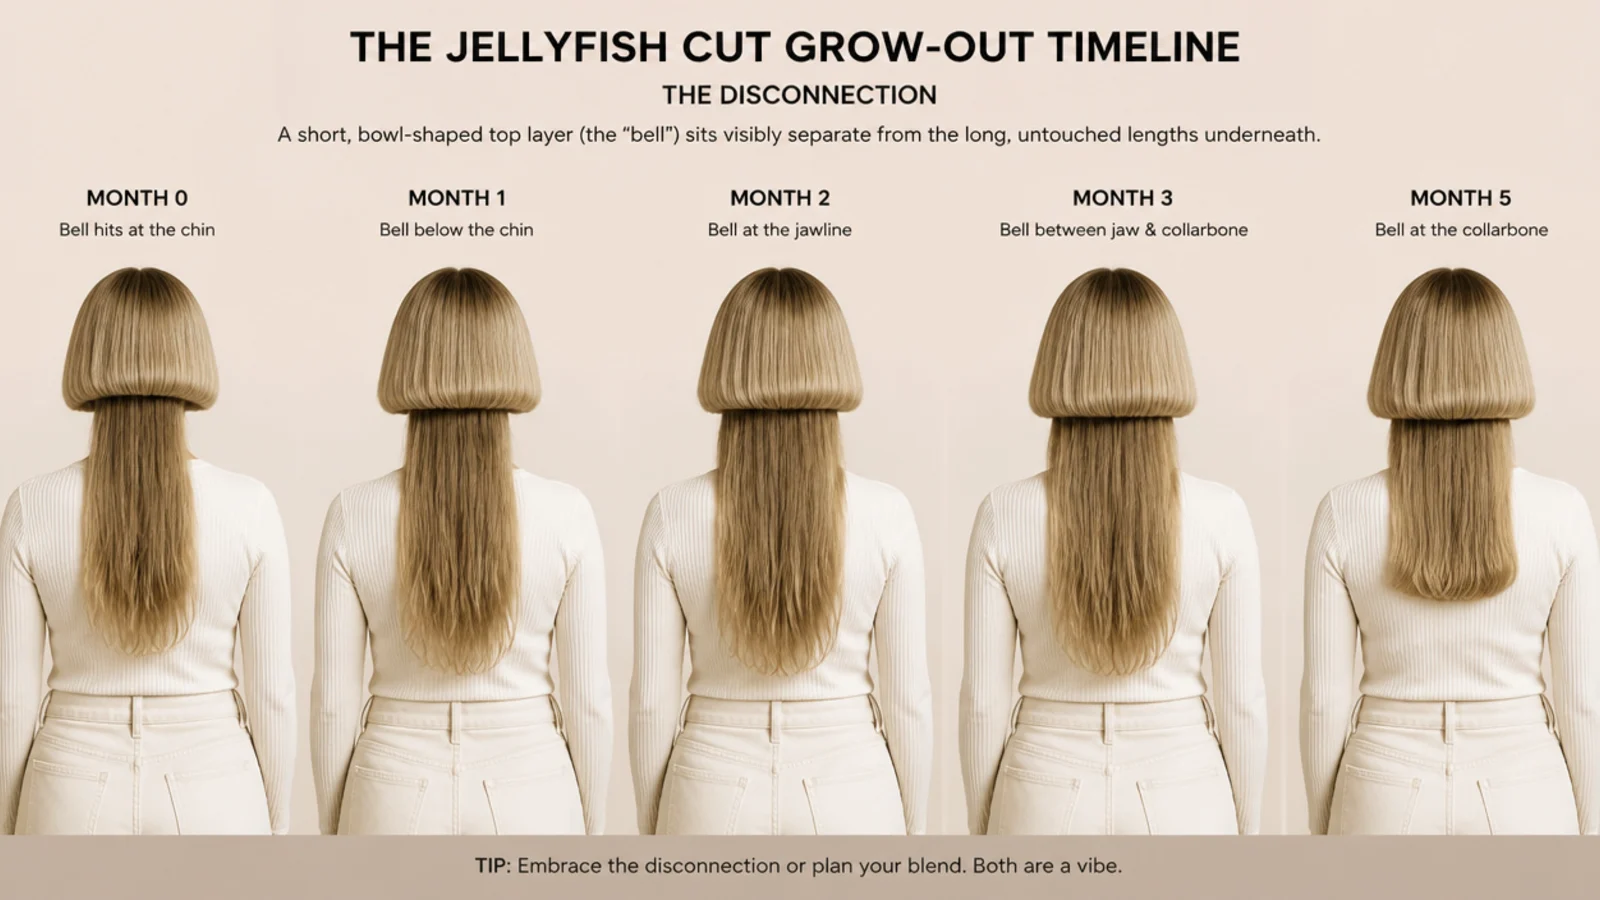
Plan the exit before you book the cut, because the grow-out is the part every tutorial skips. Hair grows about half an inch a month, so a chin-length bell reaches the collarbone in roughly five to six months. The uncomfortable window is months two and three, when the bell has dropped far enough to lose its rounded shape but not far enough to reach the length underneath. In that stretch the short layer sits in a wedge on the shoulders and flips in whatever direction it chooses. There are three ways through it, and picking one in advance removes almost all the anxiety. You can trim the bell back into its bowl shape every 6 to 8 weeks and stay in the cut indefinitely, which is what most people who love it do. You can have the bell point-cut so it feathers into the layers below, which turns the whole thing into a shag in one short appointment with essentially no downtime. Or you can push the front sections forward and wear them as curtain bangs, which is why chin-length bells are so much easier to abandon than cheekbone ones. Anyone who has grown out a fringe already knows this pattern, and grown out short curtain bangs follow almost exactly the same timeline.
Frequently Asked Questions
How do you cut a jellyfish haircut step by step?
Section a horseshoe from temple to temple around the crown and clip the rest away. Cut or clean up the long lower length first, then remove interior weight from that section only if the hair is heavy. Unclip the top, cut the bell as a rounded bowl one inch longer than target, carry that line evenly around the back, leave the join completely unblended, then rough-dry and take the final inch.
Can you cut a jellyfish haircut at home?
The front half is realistic, the back half is not. Carrying an even bowl line around the back of your own head in a hand mirror is where home attempts fail, and correcting it usually means cutting shorter. The safe home version is cutting only the front sections from temple to temple, leaving the back untouched, which gives most of the look with none of the back-view risk.
How much does a jellyfish haircut cost?
Roughly 85 to 200 dollars for the cut alone in most US salons, toward the higher end at specialist or city salons, with a 90 minute appointment. A money piece at the front of the bell adds about 90 to 150 dollars, and lifting the whole bell to platinum runs 180 to 350 dollars or more. Budget a further 45 to 80 dollars for a bell trim every 6 to 8 weeks.
How do I ask my stylist for a jellyfish haircut?
Say a disconnected bowl-shaped upper layer, with the length left long underneath, then name three things: where the bell falls against your face, how much length stays underneath, and whether the disconnection is fully blunt or softened by half an inch. Avoid the words bowl cut and layers. Bring one front photo and one back photo, since the back is the angle that surprises people.
How long does a jellyfish haircut take?
Book 90 minutes. The consultation alone should run fifteen to twenty minutes, because the bell height, the length underneath and the disconnection level all need agreeing before any cutting starts. The cut itself takes longer than a standard trim since the bowl line has to be checked from the front, both sides and the back, and the bell is refined again after a rough-dry.
Is the jellyfish haircut a mullet?
No. A mullet keeps length only at the back with short sides, so the contrast runs front to back. A jellyfish haircut keeps its length all the way around the head with the short bowl-shaped layer sitting on top, so the contrast runs top to bottom. If the bowl line drifts shorter at the back during the cut, though, the result can accidentally read as a mullet, which is why step five matters.
Is a jellyfish haircut high maintenance?
Moderately. A blunt bell needs reshaping every 6 to 8 weeks, a textured one holds 10 to 12 weeks, and the long section can wait three months or more. The bigger commitment is daily, since the bell flips outward on its own and needs a round brush or a flat iron flick to sit right. If you air-dry and go, the softly disconnected version is the more realistic choice.
How do you style a jellyfish haircut after you get it?
Give the two layers opposite directions. Round-brush the bell inward for the last 30 seconds of the blow-dry and hold until it cools, or flat-iron a soft C-curve at about 350 degrees, then flick the tentacle ends outward or leave them straight. Use dry texturizing spray at the bell roots and a pea of serum on the tentacle ends only, since heavy cream on the bell flattens the shape.
Should I get a jellyfish haircut?
Get it if your hair is straight to loosely wavy, sits at collarbone length or longer, and you style it most mornings. Skip it if you have tight coils, you air-dry and leave, or you wear a smooth ponytail regularly, since a ponytail leaves the bell hanging loose. If you are unsure, ask for the softened disconnection first, which reads as long layers from the front and grows out with no awkward phase.
Cutting a disconnected layer into your own hair is difficult to undo and easy to get wrong from behind. For the crispest result, and especially for a first jellyfish haircut, see a licensed stylist. Use heat tools with a protectant and stop if your scalp or ends show damage.
Which jellyfish haircut look are you saving?
Almost every bad jellyfish haircut traces back to one of three steps on this list: the texture check at step one, the wording at step eleven, or the mirror check at step sixteen. Get those three right and the rest is detail. Bring a front photo and a back photo, say disconnected bowl-shaped upper layer with the length left long underneath, ask for the bell an inch longer than your target on the first pass, and refuse any blending between the two tiers. Then book the bell trim for six to eight weeks out before you walk out the door. If you are still deciding on the shape, browse the full jellyfish haircut hub or start with the 25 jellyfish haircut ideas and pick two to take with you.