
Quick Comparison
| Cutting Mid Length Hair at Home | A Mid Length Haircut at a Salon | |
|---|---|---|
| Cost | 20 to 40 dollars once for shears, clips and combs | 45 to 90 dollars per visit, more with a blowout |
| Time | 45 to 75 minutes the first time, 20 to 30 after | 45 to 60 minutes in the chair plus travel |
| What it can do well | Half-inch dusting, softening ends, face-framing touch-ups | New baseline, interior layers, full shape change |
| What it cannot do | Elevated layers, a level bob line, corrective work | Nothing, but you pay for every quarter inch |
| Risk if it goes wrong | 6 to 12 months of grow-out, at half an inch a month | A free redo at most salons within two weeks |
| Best hair type for it | Straight and wavy, dense enough to hide small errors | Curly, very fine, very thick, or any big change |
| Skill needed | Beginner for dusting, intermediate for face-framing | None; bring photos and the ask-for wording |
| How often | Every 8 to 12 weeks as maintenance between visits | Every 8 to 12 weeks, or alternate with a home dusting |
| Honest verdict | Great for upkeep, bad for anything structural | Worth it any time the shape itself is changing |
1. Gather Real Shears and Set Up Two Mirrors
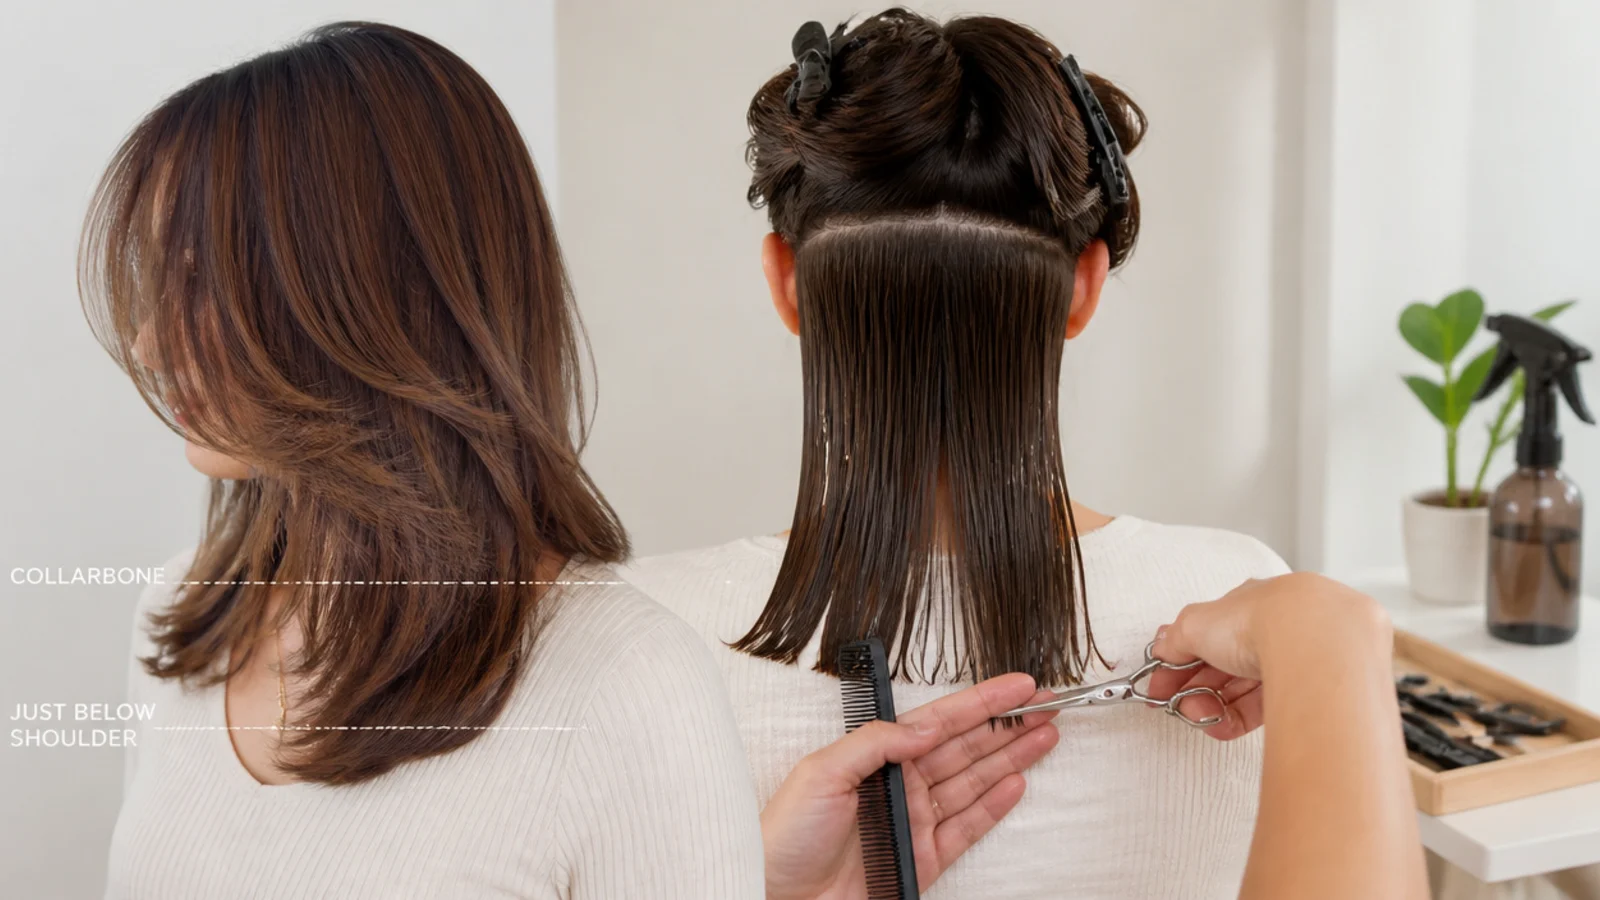
Buy 5.5 inch hairdressing shears in the 20 to 40 dollar band and keep them for hair only. Kitchen scissors and craft scissors bend the hair shaft before they cut it, which is what creates the frayed, split ends that show up two weeks later. Add a wide-tooth comb, a fine-tooth tail comb for parting, six duckbill sectioning clips, a spray bottle and a dark towel so you can see how much hair you have actually removed. Set a wall mirror in front of you and hold a hand mirror behind, or sit facing a bathroom mirror with a second mirror propped opposite. Wear a dark shirt and work over a hard floor.
Common mistake: Using kitchen scissors is the single most common cause of split ends after an at-home cut.
Pro tip: Cut over a dark towel spread on the floor so you can measure the pile of hair against what you intended to remove.
2. Wash, Fully Dry and Detangle Before You Cut
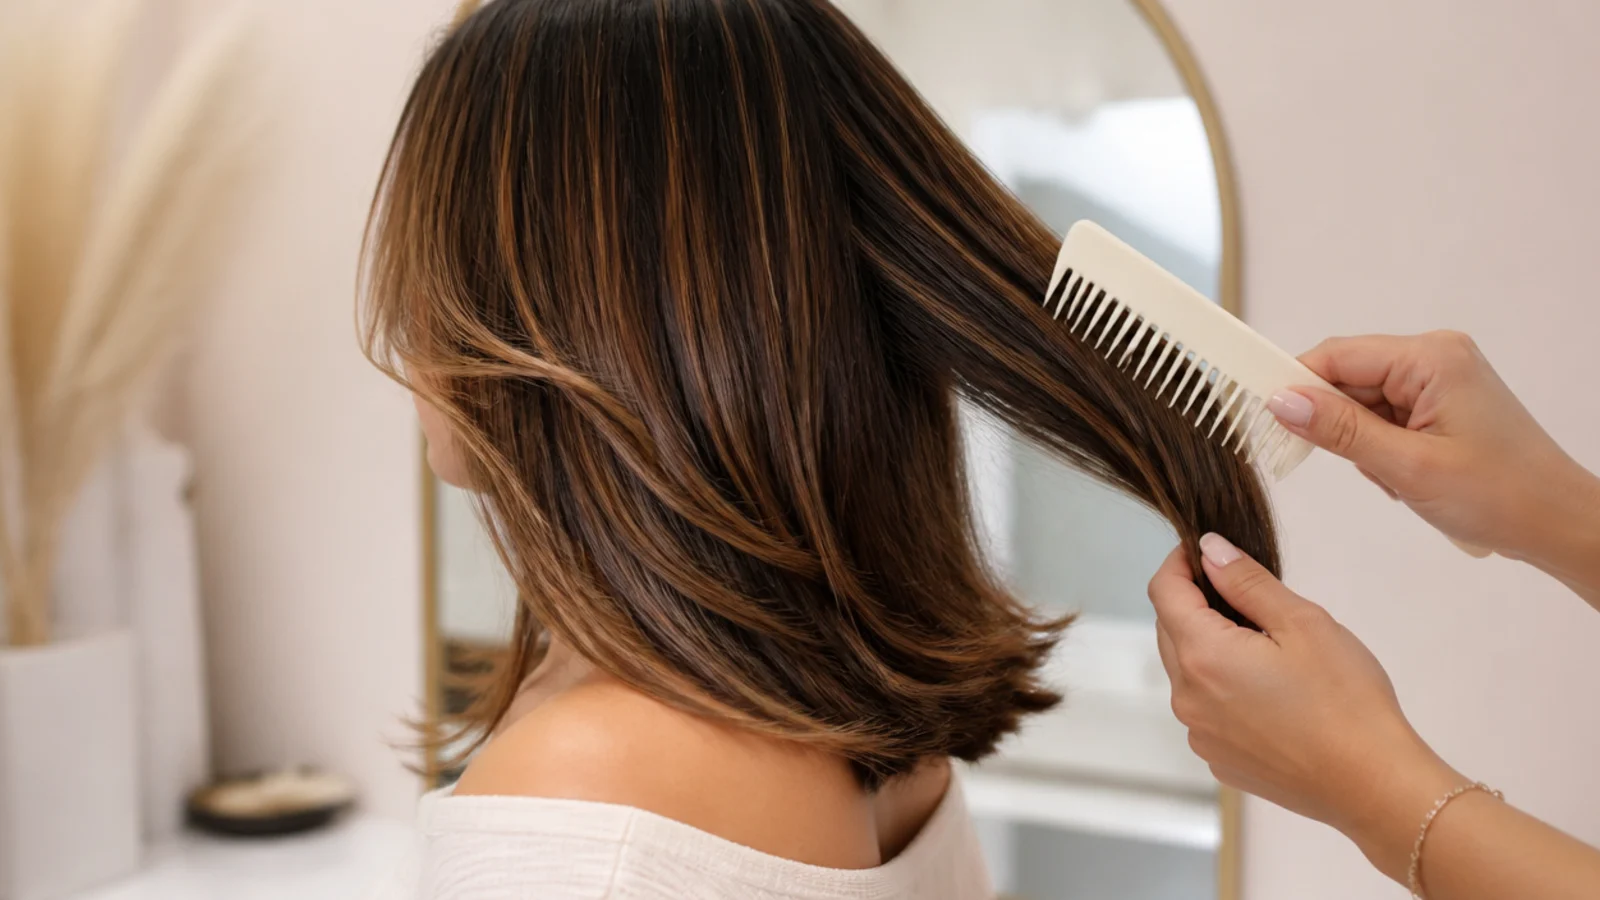
Shampoo, condition, and then dry completely with no leave-in product, no oil and no cream. Wet hair stretches up to a third longer than dry hair and every texture stretches by a different amount, which is exactly how people end up two inches shorter than they planned. Once dry, detangle from the ends upward with a wide-tooth comb, working in small handfuls until the comb runs from root to tip without catching. Straight and wavy hair can be blown out smooth for the baseline pass; curly hair stays in its natural pattern. Product-free matters because silicone makes hair slip through your fingers unevenly.
Common mistake: Cutting wet hair, which is how salons work with tension control you do not have at home.
Pro tip: If you normally straighten, straighten before you cut so the baseline sits where you will actually wear it.
3. Find and Mark Your Target Length on Your Body
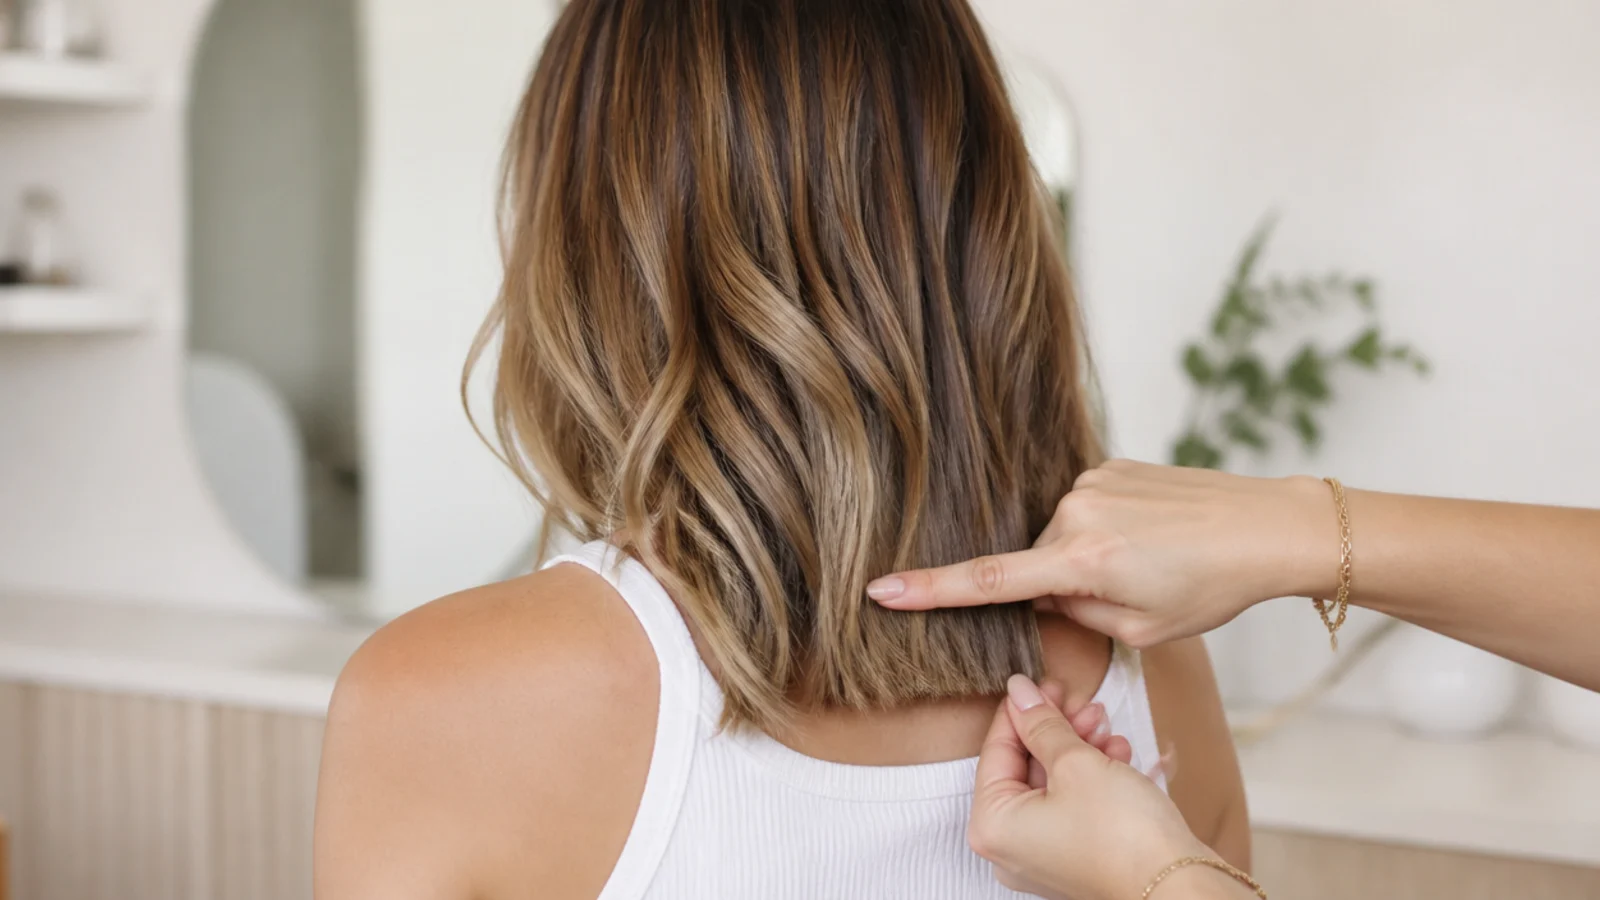
Mid length is a landmark, not a vibe. Decide whether you want the collarbone, one inch below the collarbone, or the shoulder-grazing end of the range, then hold two fingers at that exact point on your body and look in the mirror. Pinch the hair there and note where your fingers sit against your collarbone or shoulder seam. Now decide how much you are removing, in inches, and say it out loud. For a first attempt, half an inch is the correct answer, even if the ends look like they need more. Write the number on a sticky note on the mirror so you do not drift.
Common mistake: Aiming at a look rather than a measured landmark, which produces a length you did not choose.
Pro tip: Take a before photo from the front and the back so you can compare rather than rely on memory.
4. Section With a Center Part From Forehead to Nape
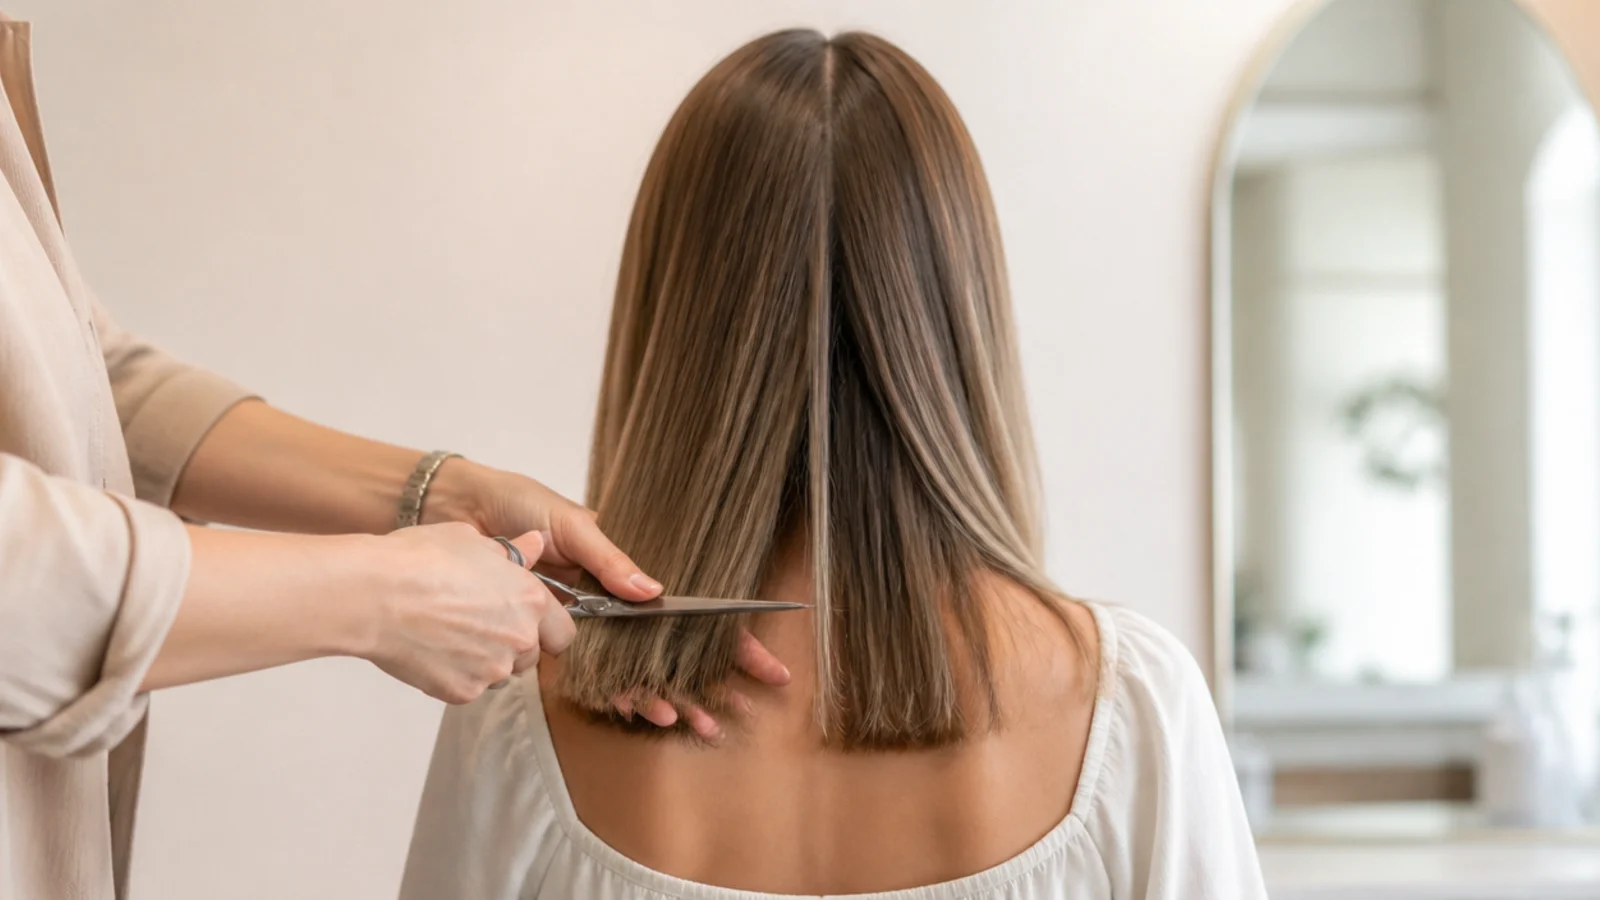
Use the tail of your comb to draw a clean center part from your hairline straight back to the nape, then bring both halves forward over your shoulders. This is the standard at-home method because it converts a cut you cannot see into two front sections you can. Clip the top and crown layers up and out of the way so you are only holding the bottom third of the hair to start. Work with roughly one-inch wide slices. Keep your chin level and your head straight throughout, because tipping your head forward while you cut is what produces a baseline that swings up at the back.
Common mistake: Tilting your head down to see better, which lifts the back and leaves a V or a shorter nape.
Pro tip: Sit on a hard stool rather than a soft chair so your posture does not sink halfway through.
5. Cut the Baseline in Half-Inch Passes
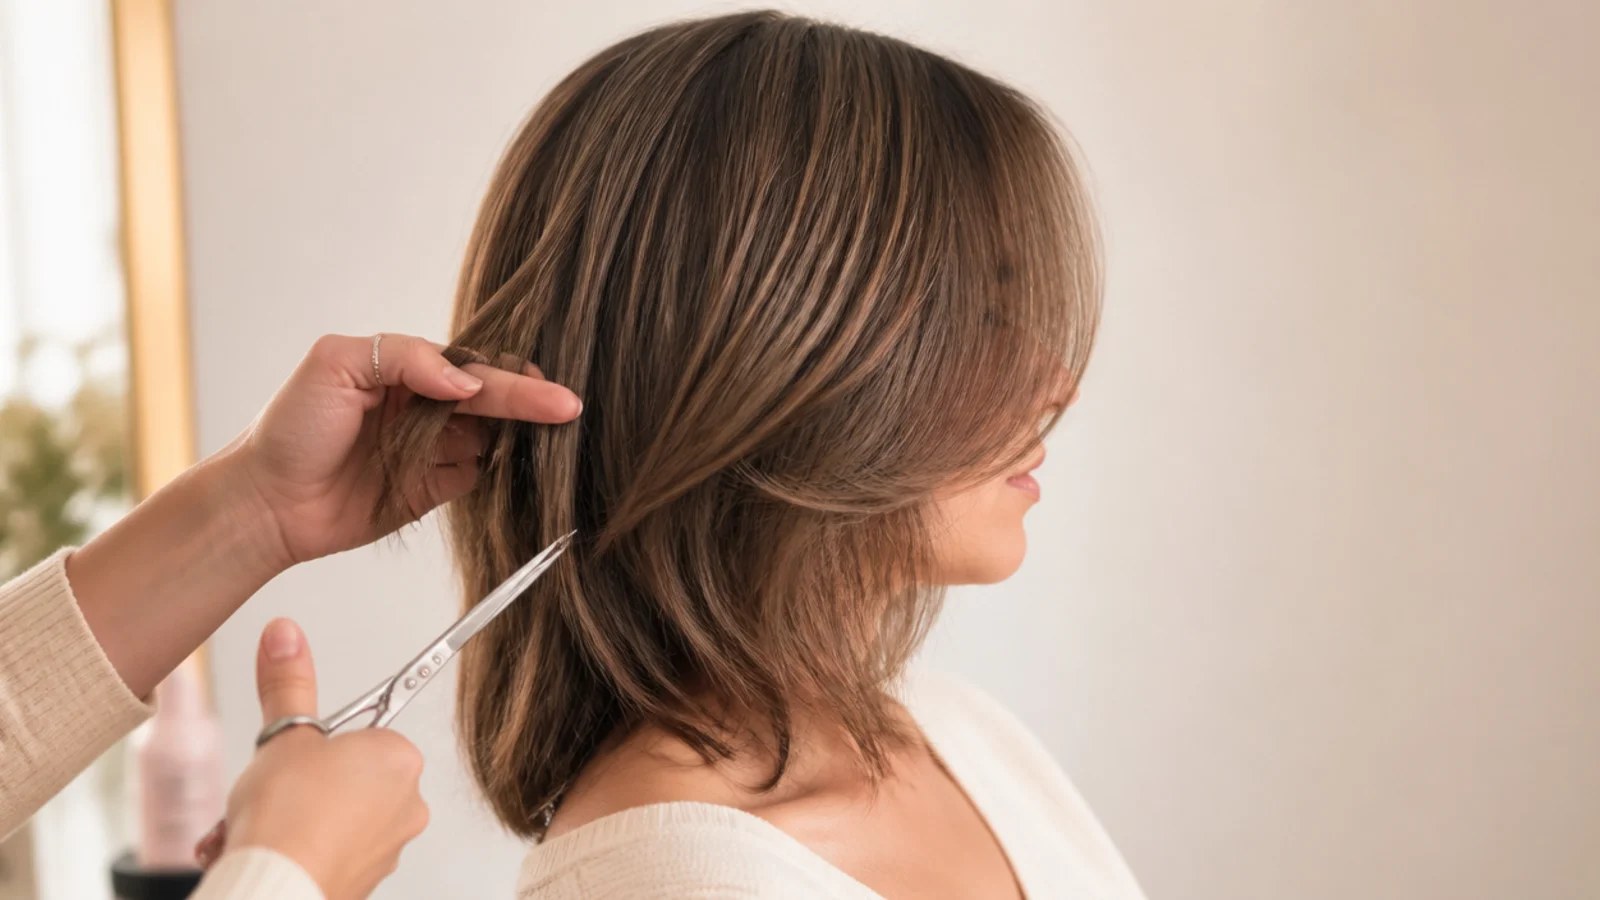
Take the first one-inch slice from the bottom of one front section, comb it flat with light tension, and hold it between your index and middle finger at your marked line. Cut just below your fingers, removing no more than half an inch. Move to the matching slice on the other side and repeat, then work upward slice by slice, using the already-cut hair below as your visible guide. Do not chase length. If it still looks long after a full pass on both sides, do a second full pass rather than taking an inch somewhere in the middle. Two conservative passes beat one confident one.
Common mistake: Removing more from the first section than you can match on the other side.
Pro tip: Count the slices per side. Same number of slices, same finger position, same result.
6. Point Cut Into the Ends Instead of Slicing Across
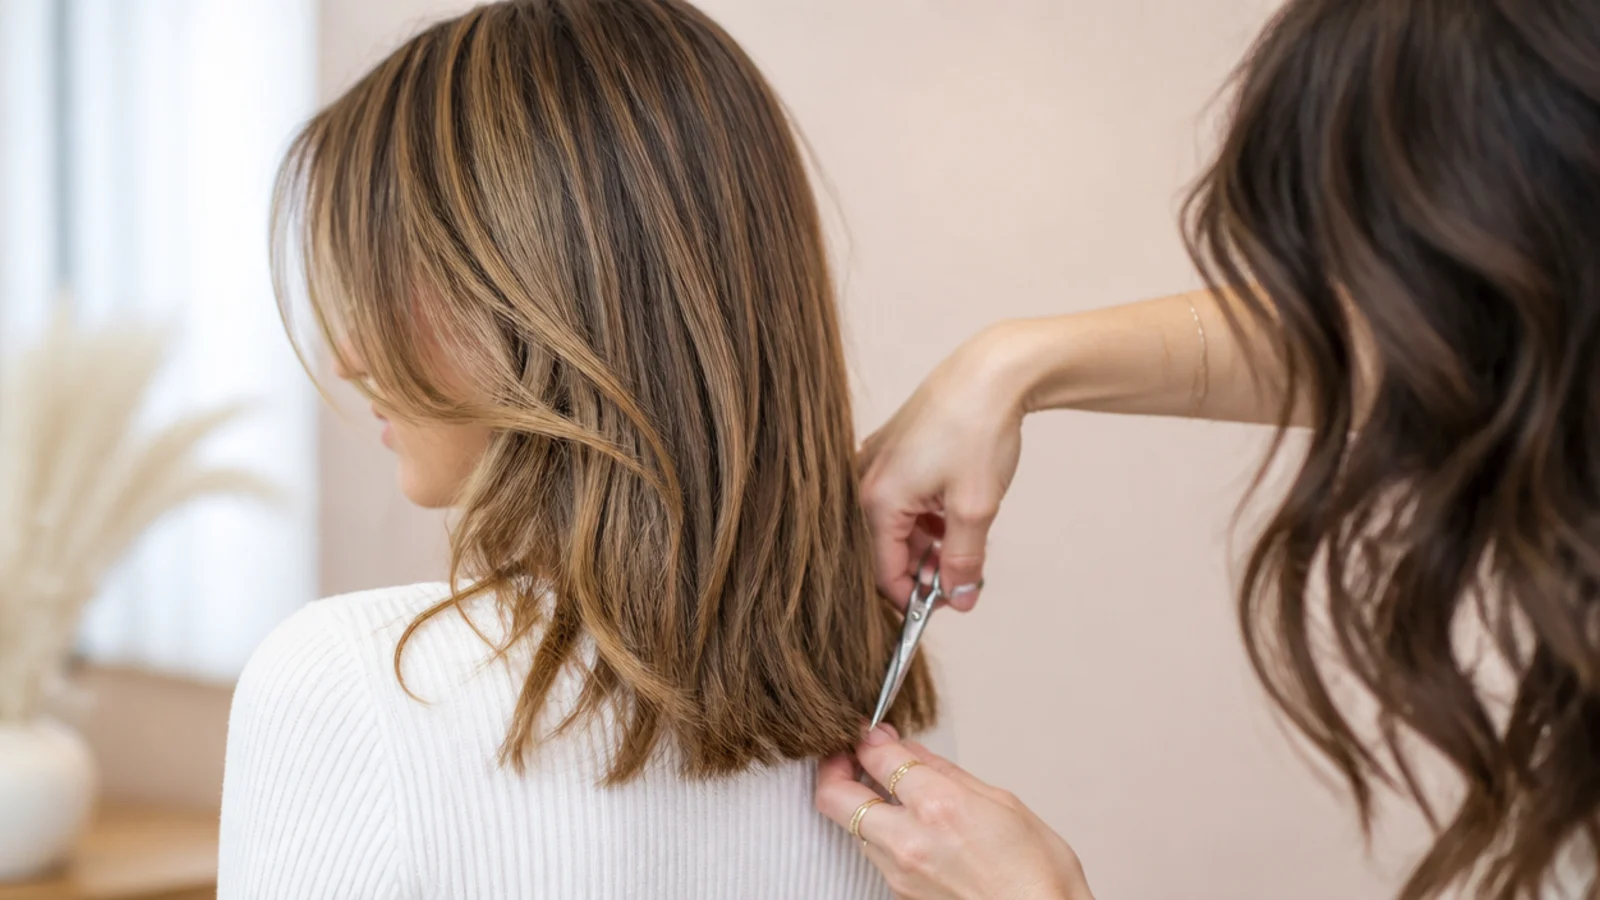
Once the baseline is roughly where you want it, turn the shears vertical and snip up into the ends about a quarter inch deep, moving along the section as you go. This is point cutting, and it is the single most forgiving technique available to a home cutter, because a notched line hides small differences in length that a blunt line displays under any overhead light. It also removes the heavy, shelf-like edge that makes a home cut read as a home cut. Keep the notches shallow and irregular. On fine hair, point cut lightly, since deep notching thins ends that were already sparse.
Common mistake: Point cutting deeper than a quarter inch, which turns a soft edge into visible chunks.
Pro tip: Angle the shears at about 45 degrees rather than straight up for an even softer finish.
7. Trim Face-Framing Starting at the Jaw
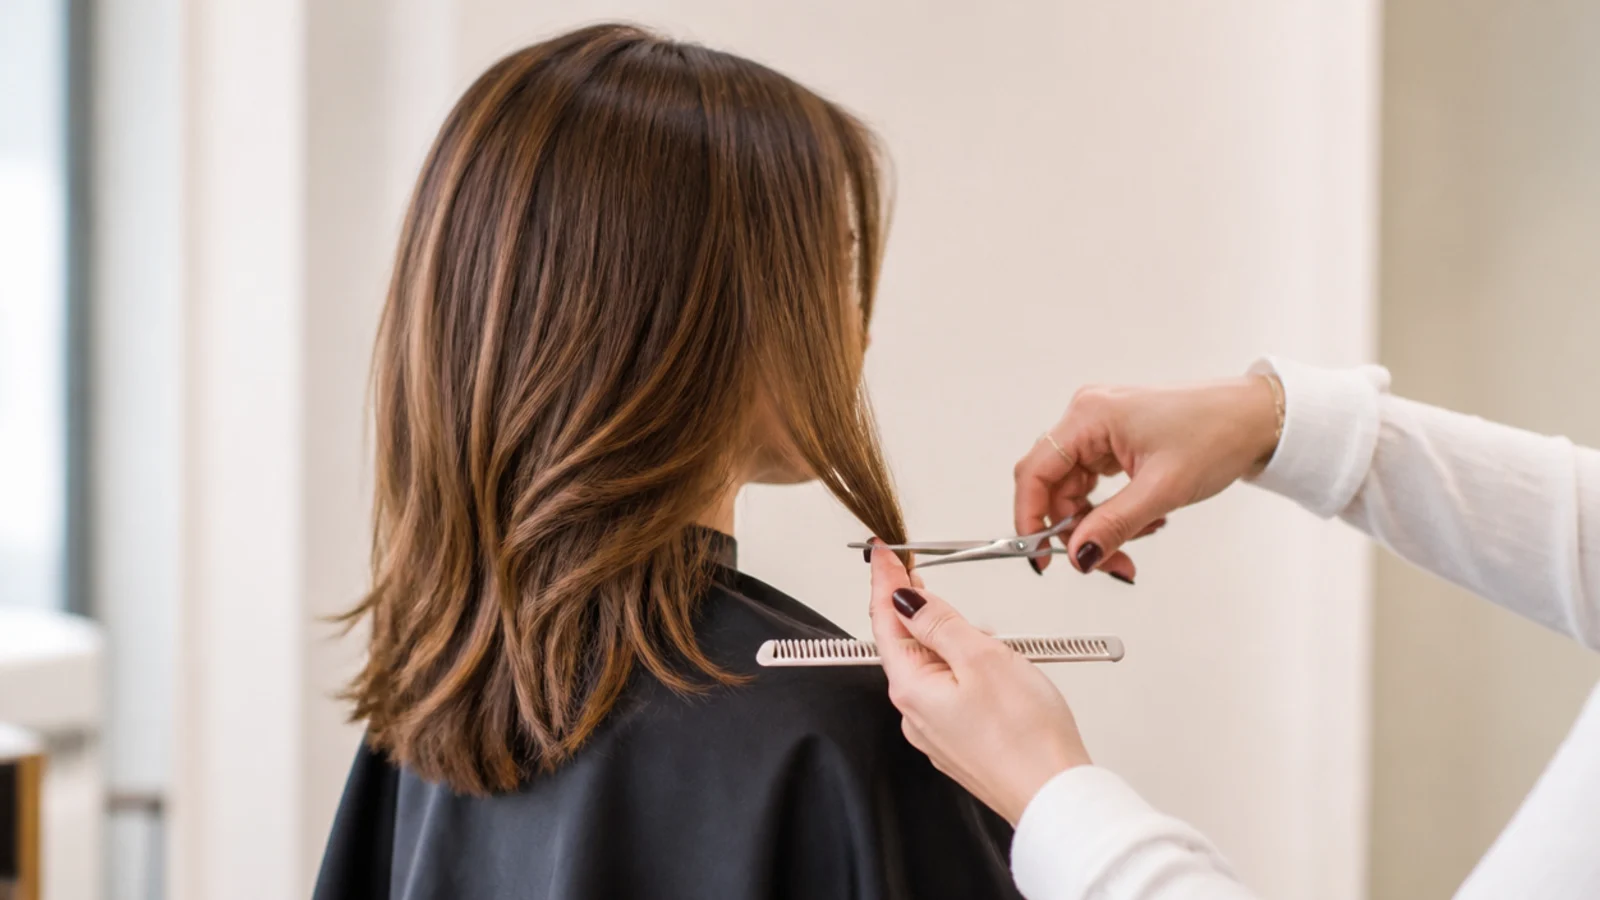
Pull the front two-inch section forward, brush it flat down the center of your face, and decide your start point. The jaw is the safest and most universally flattering place for face-framing to begin on mid length hair, since it opens the face without sacrificing length. Hold the section straight down, not out to the side, and point cut a soft diagonal from your jaw down to your existing baseline. Do one side, then match the other by pulling both forward together and comparing at the same point on your chin. Cheekbone starts are shorter, more dramatic, and much harder to reverse.
Common mistake: Pulling the section out sideways, which makes the finished piece far shorter than intended.
Pro tip: Cut face-framing a half inch longer than your goal. It always sits shorter once it springs back.
8. Check Balance Dry, Clean Up and Book the Next Trim
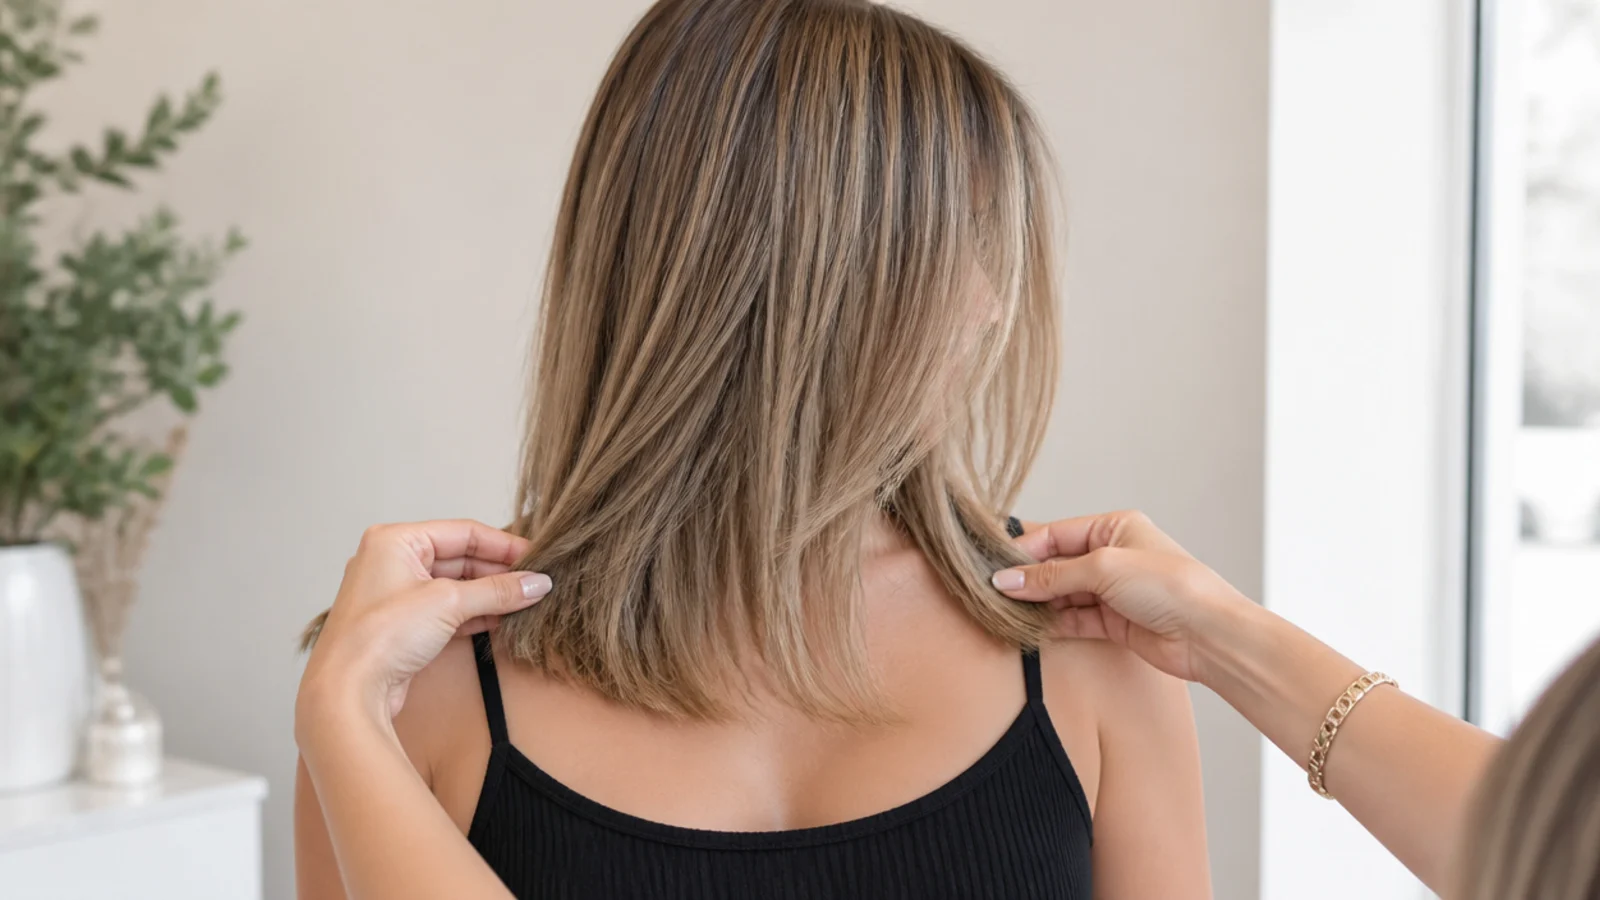
Bring both sides forward and compare the ends against the same point on your body, not against each other in the mirror, since mirrors reverse and your shoulders are not perfectly level. Then let everything fall naturally, shake it out, and look again after five minutes. If one side is a quarter inch longer, leave it. Chasing symmetry with repeated small cuts is how a half-inch trim becomes three inches. Sweep up, oil your ends, and put the next appointment in your calendar for 8 to 12 weeks out. That cadence is what keeps at-home work in maintenance territory.
Common mistake: Fixing a fix, then fixing that fix, until the length is gone.
Pro tip: Photograph the back with your phone camera reversed and compare it to your before shot.
What Counts as Mid Length Hair Before You Cut It
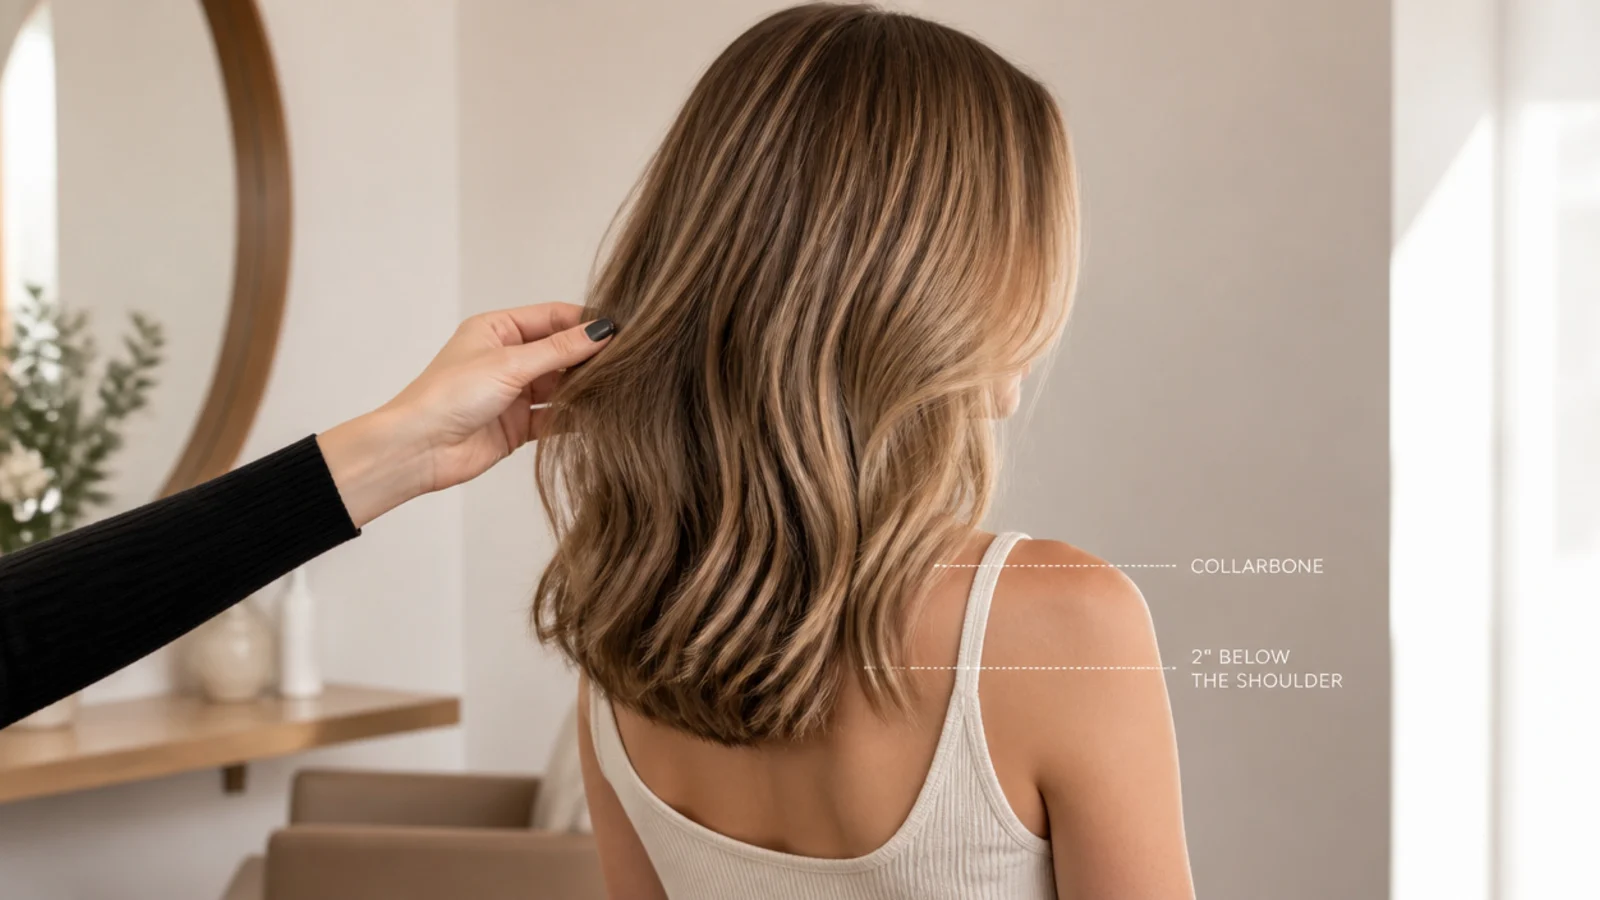
Mid length runs from the collarbone to about two inches below the shoulder. Naming the landmark matters more than saying medium, because medium moves with the person. On a 5 foot 2 frame, collarbone length can sit closer to the chest than it does on a 5 foot 9 frame, and shoulder-grazing on tall shoulders reads considerably longer in photos. Before you cut, put two fingers on your collarbone and pinch the hair there. That is your true reference point and it does not lie the way a mirror does. Anything above the collarbone is entering lob and bob territory, which requires a level baseline you cannot reliably cut on yourself. Anything past two inches below the shoulder is long hair, and long hair hides an uneven line far better, which makes it a more forgiving place to practice. If you are still deciding on a target, the full range is laid out in 25 mid length haircut ideas.
Dusting vs a Real Cut, and What Is Safe at Home
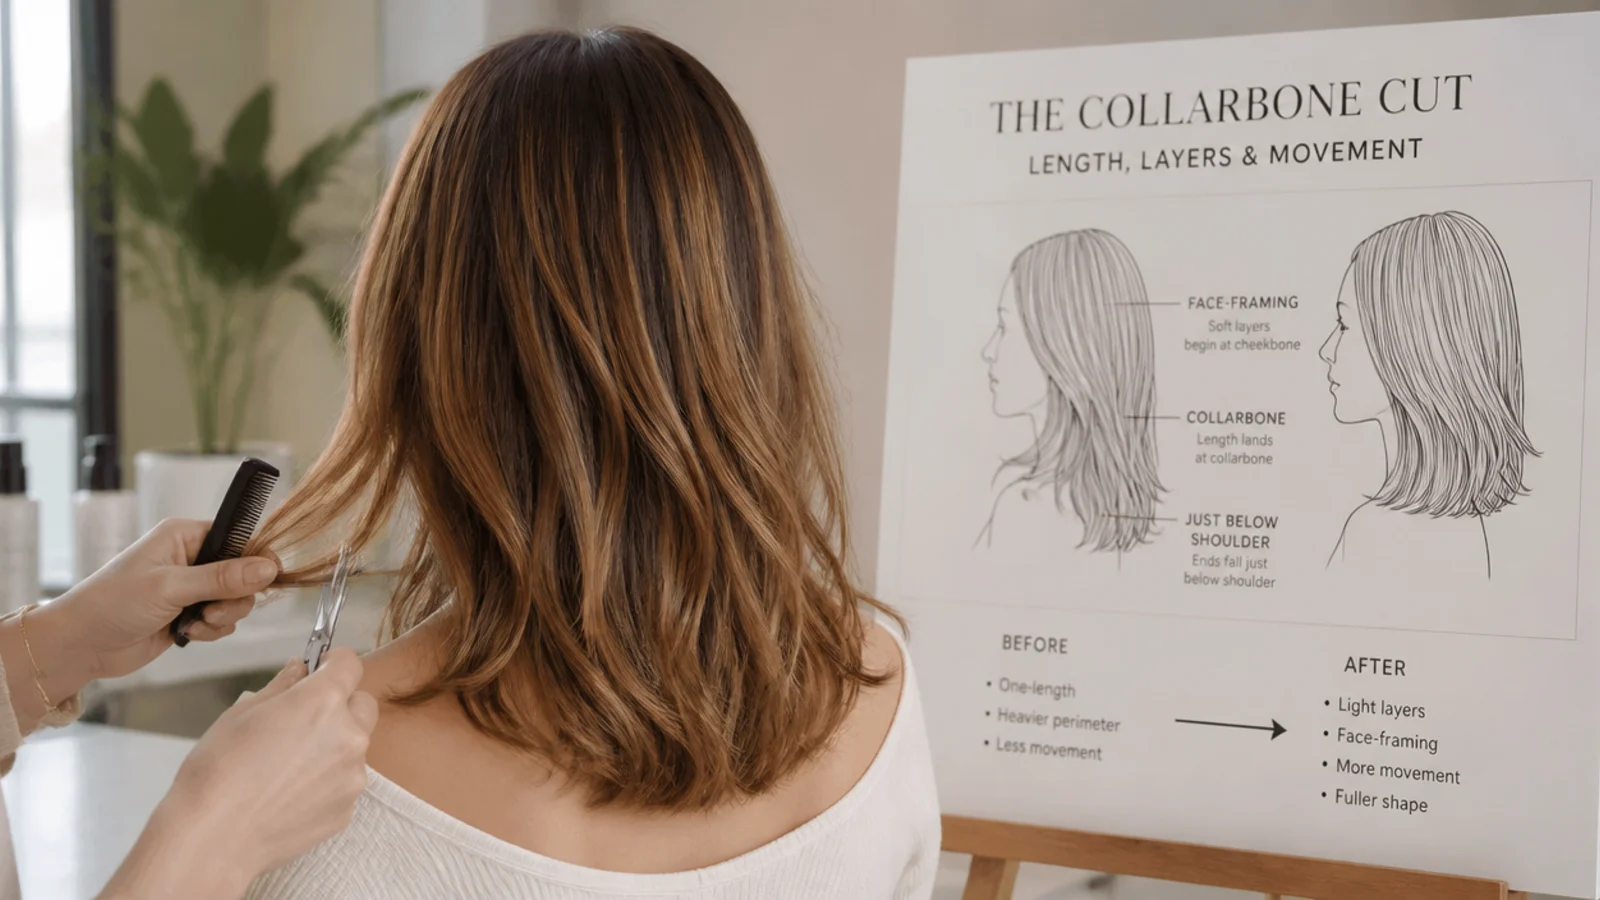
There are two different jobs and the internet blurs them constantly. A dusting removes a quarter to a half inch of damaged ends and does not change your shape at all. It takes 20 minutes, it is genuinely low risk, and it is what most people actually need between salon visits. A real cut changes the shape, which means a new baseline, new layers, or a new face-framing start point, and it involves elevation and over-direction that you cannot judge on the back of your own head. Be honest about which you are doing. If you want the shape changed, the honest at-home answer is to cut nothing and take photos and the exact ask-for wording to a stylist instead. If your ends are just rough, tangling at the bottom two inches, or snapping when you brush, that is a dusting and you can do it tonight. Adding real layers to mid length hair sits firmly in the salon column for a first-timer.
Cutting Fine, Thick and Curly Mid Length Hair at Home
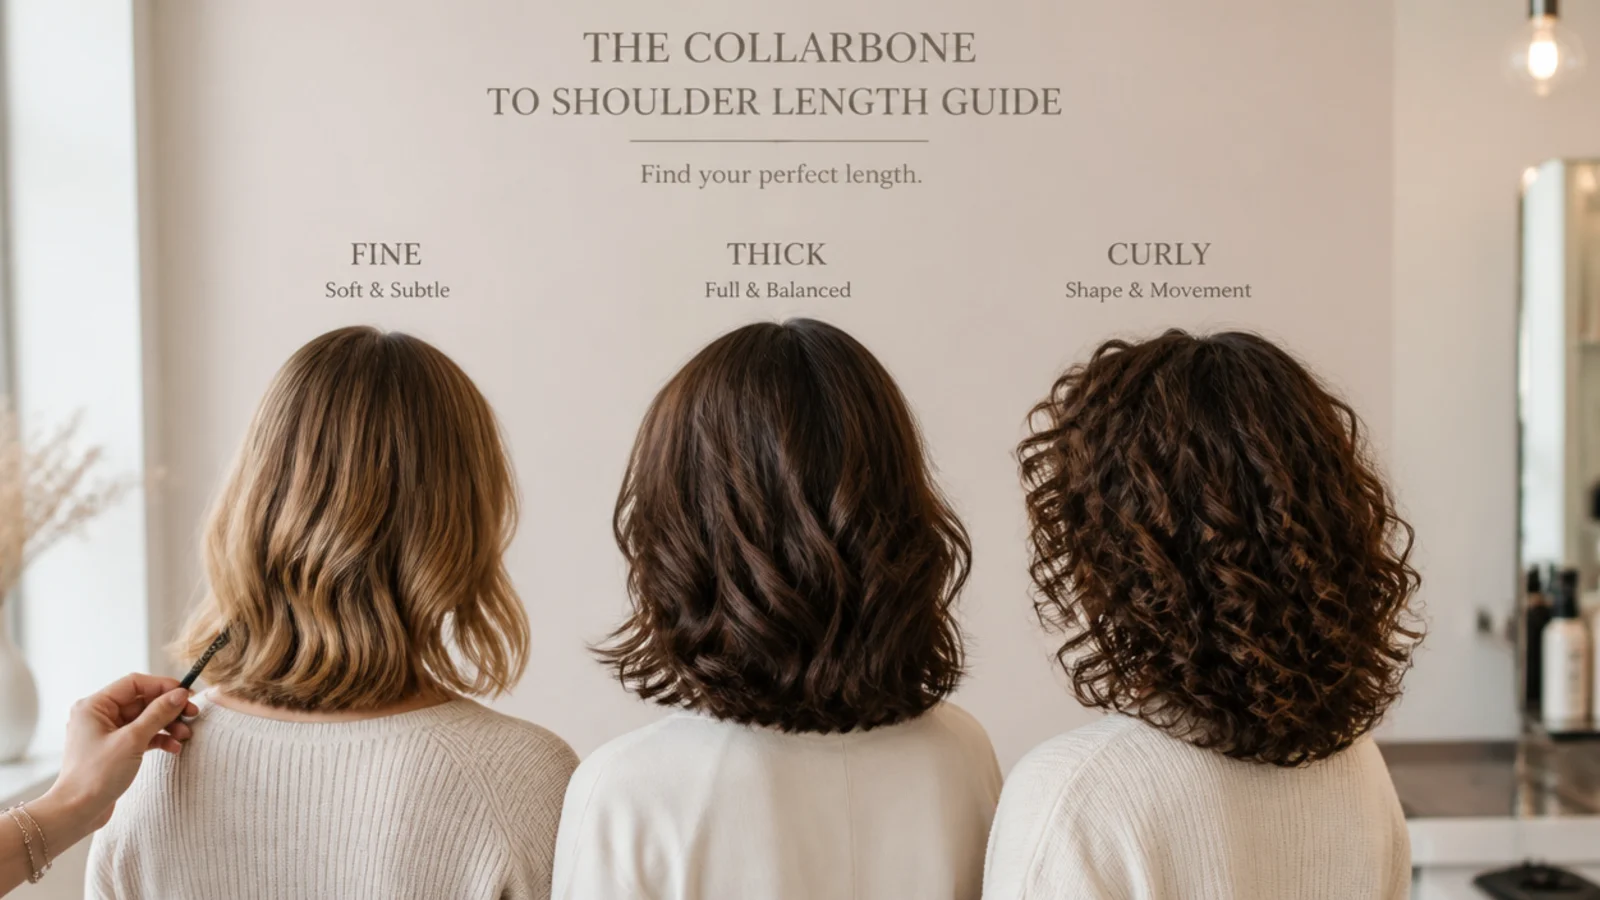
Hair type changes the technique more than the length does. Fine hair wants fewer, longer layers and a blunter baseline, because over-layering removes the weight that makes the ends look dense and leaves them sparse and see-through. Point cut lightly and resist the urge to texturize. Thick hair has the opposite problem, building a triangle at the bottom, so weight comes out from underneath in the interior rather than off the perimeter, which is difficult to do blind and worth paying for. Curly hair should be cut dry, curl by curl, because shrinkage means a curl cut at collarbone length while stretched can spring up to the chin. Never comb curly hair into tension and cut a straight line across it. Work with individual curl clumps in their natural position and remove a quarter inch at a time. The texture-specific shapes are covered in curly mid length haircut ideas and wavy mid length haircut ideas.
Face-Framing, Layers and Where the Start Point Goes
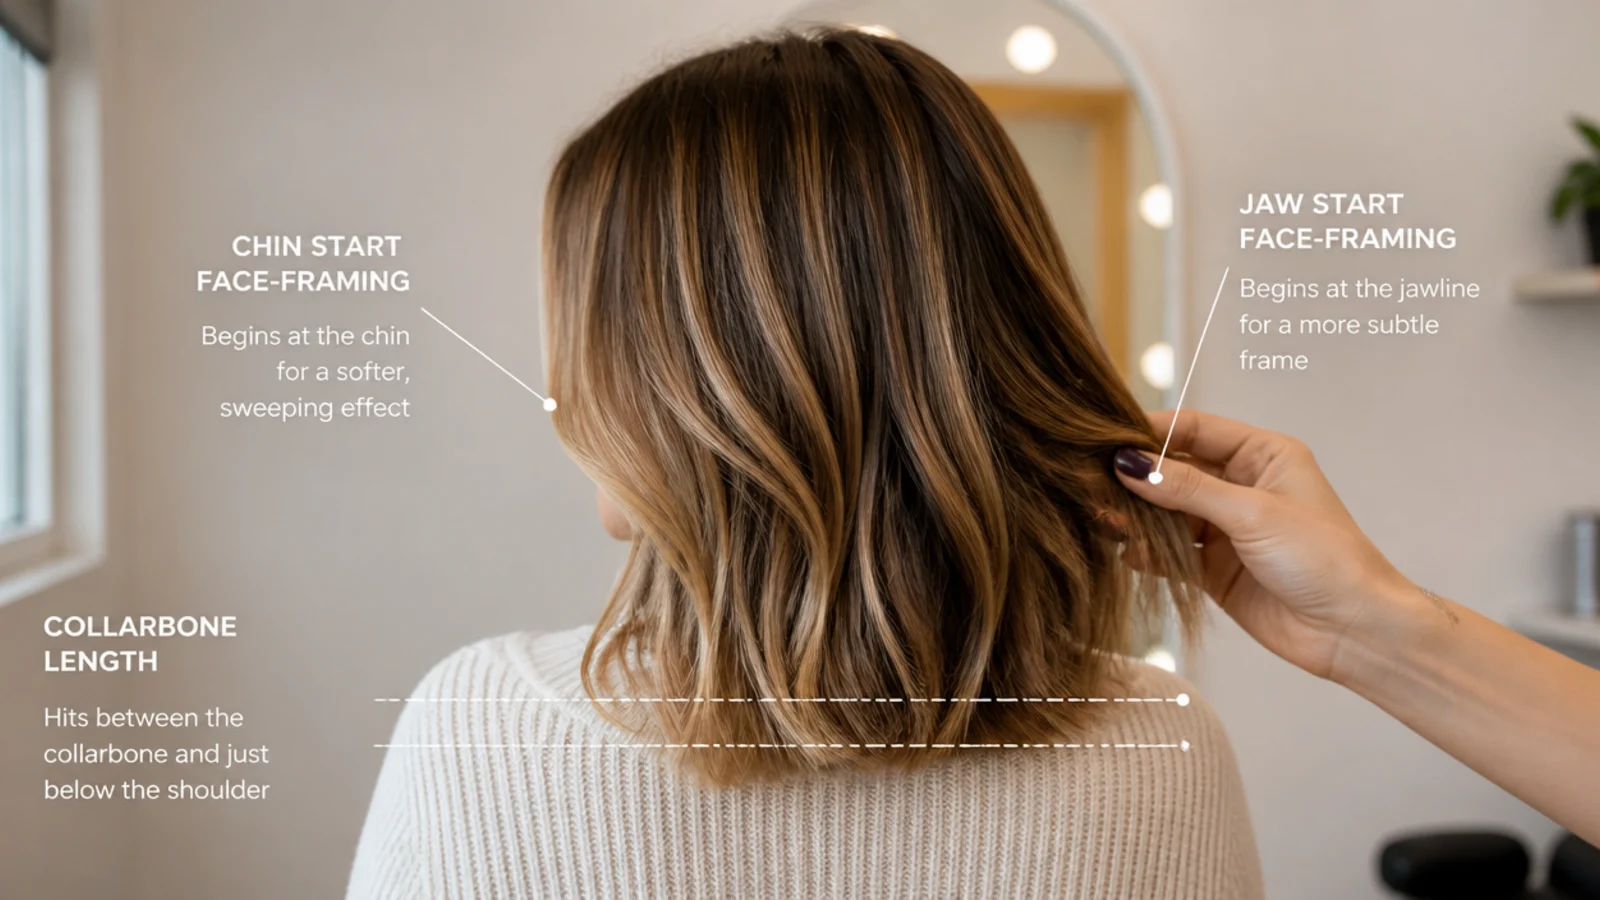
The start point is the whole decision. Face-framing that begins at the jaw opens the face and follows the neckline without costing you length, and it grows out into something wearable rather than something awkward. A chin start is slightly shorter and more noticeable. A cheekbone start reads as a full curtain fringe and commits you to styling it daily. For at-home work, the jaw is the right answer almost every time, because it is the most forgiving as it grows and the easiest to match side to side. Face-framing is not the same thing as curtain bangs, and neither is a money piece, which is a color placement rather than a cut. Real interior layers, the long invisible kind that add movement without visible steps, need elevation and over-direction from behind and belong to a stylist. If curtain bangs are what you actually want, read mid length haircut with curtain bangs before you cut anything above your jaw.
Mistakes, Recovery and When to Stop Cutting
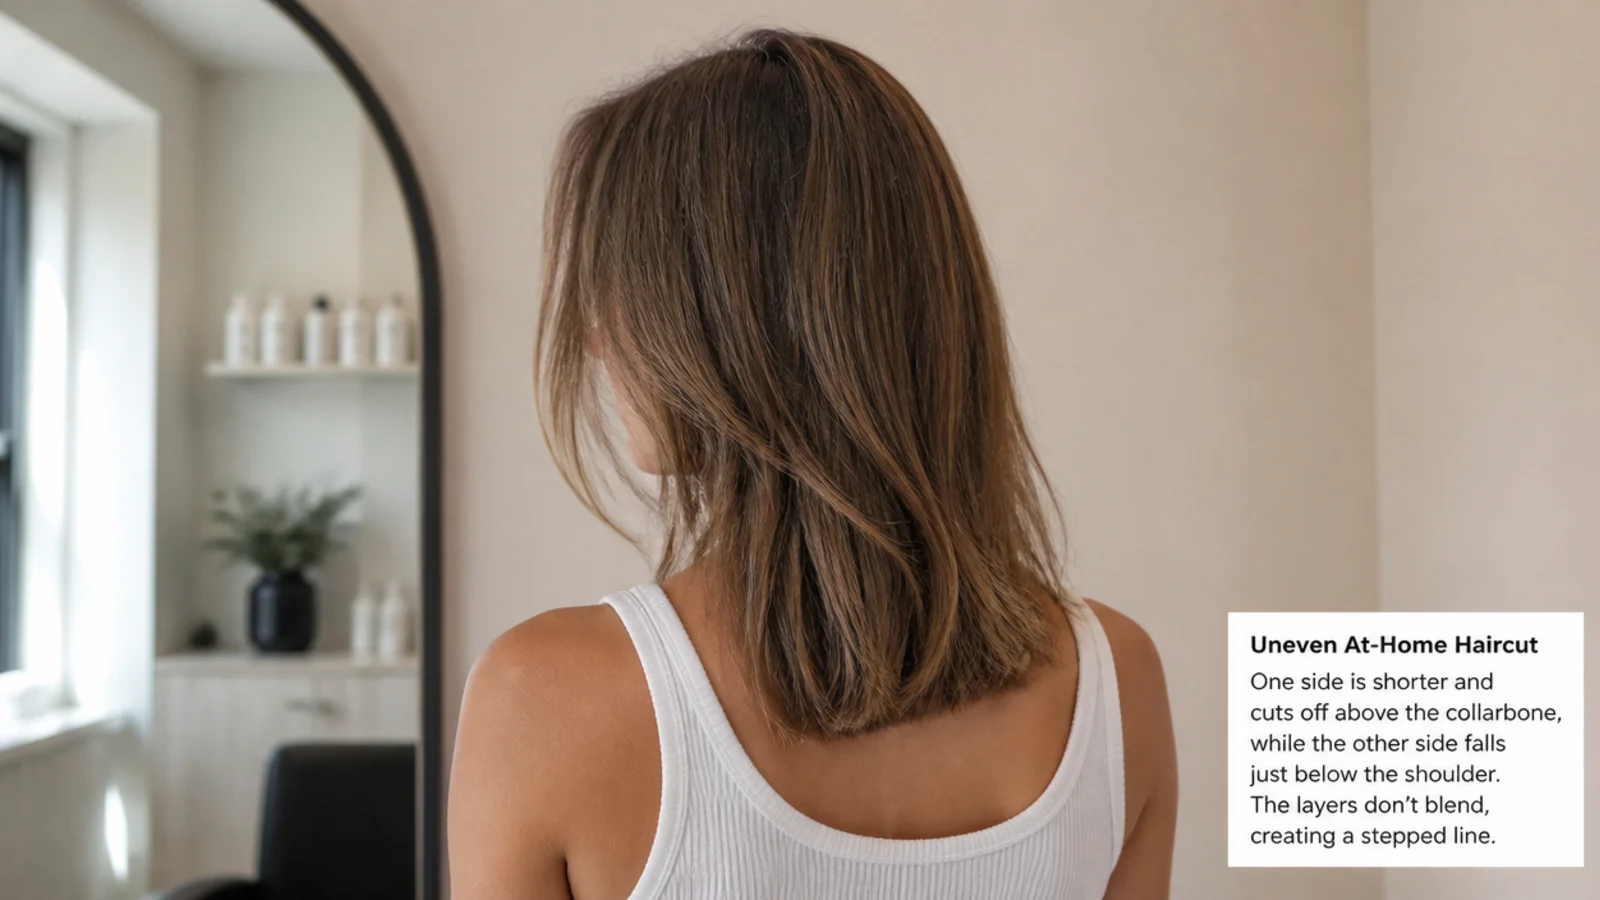
Four failures cover nearly all of them. One side shorter than the other happens because you tilted your head or held the sections at different angles, and the fix is to leave it for a week and take the longer side down a quarter inch with fresh eyes, not to keep evening it out now. A shorter nape or a V at the back means you cut with your chin down. Visible steps mean layers were cut with too much elevation, and those blend with point cutting into the step line, lightly. Ends that look thin and stringy mean you over-texturized, and the only real repair is time. Stop and book a professional if you are correcting a previous mistake, if you have taken off more than an inch and a half, if your hair is bleached or chemically straightened, or if you have already made three corrective cuts in one session. Cutting while upset about the last cut is the reliable path to a bob you did not choose.
Trim Cadence, Cost and Growing It Out Again
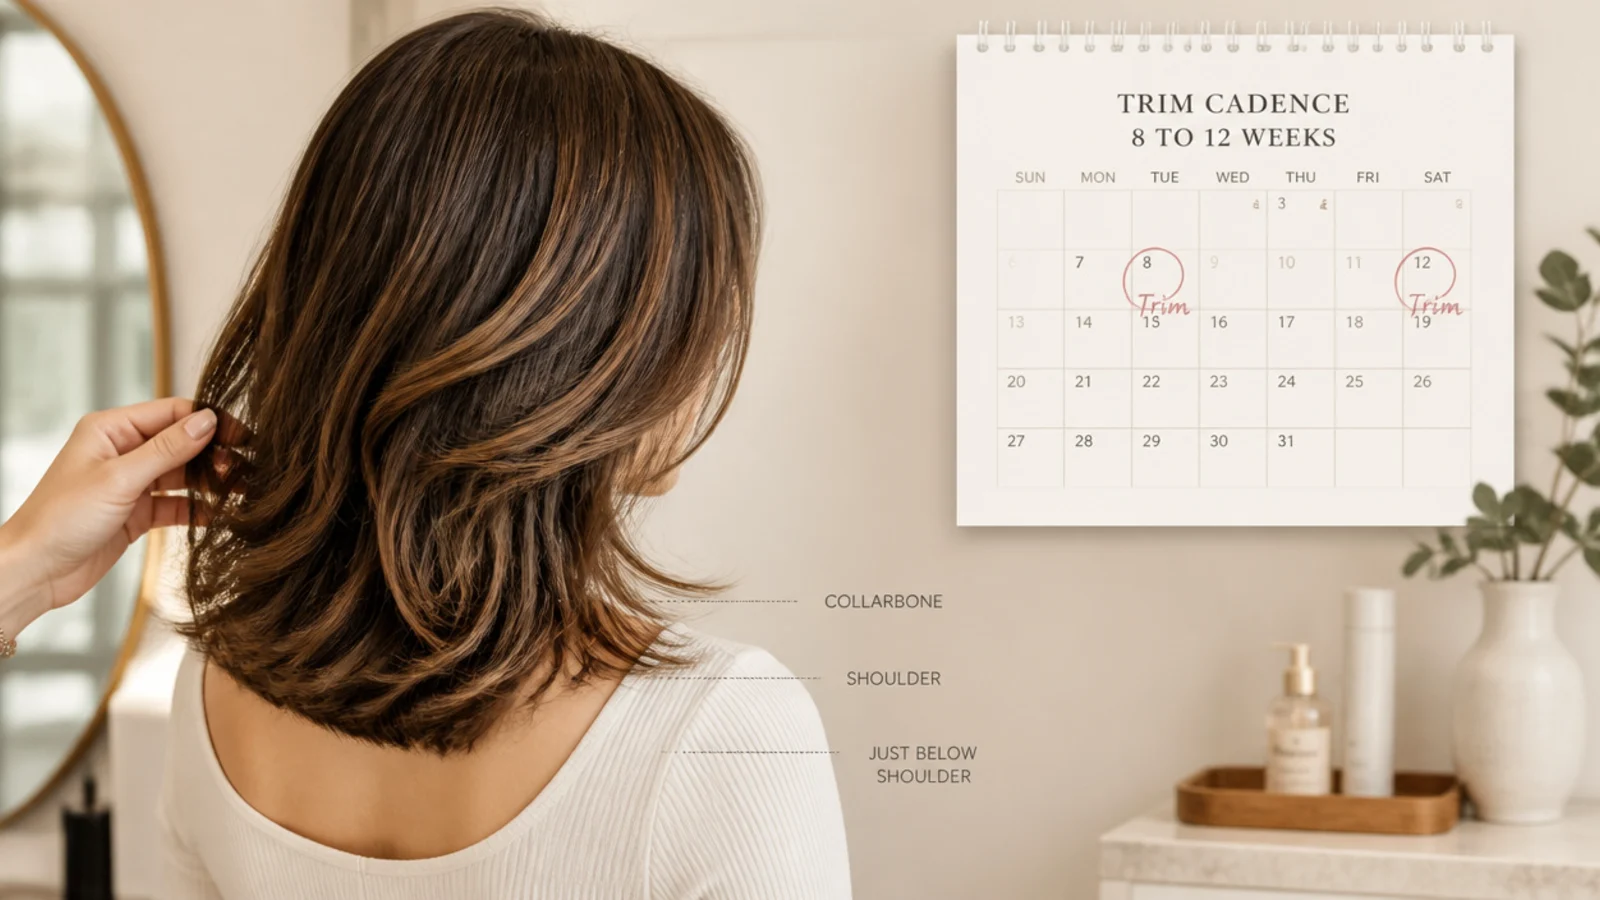
Mid length hair wants a trim every 8 to 12 weeks. Closer to 8 if you heat style most days, use bleach, or wear a blunt baseline that shows every split; closer to 12 if you air-dry, wear layers, and your ends are in good shape. A salon trim runs roughly 45 to 90 dollars in most US cities, so alternating a paid trim with an at-home dusting is a reasonable way to halve the cost without letting the shape drift. Growing mid length back out to long takes about 12 to 18 months at the average half inch a month, and the awkward stretch is the first three, when the shortest face-framing pieces catch on everything. Keep trimming a quarter inch during a grow-out rather than stopping entirely, because split ends travel up the shaft and cost you more length than a small trim does. If you are cutting the other direction, look at straight mid length haircut ideas for shapes that hold a clean line.
Frequently Asked Questions
How do you cut mid length hair at home step by step?
Start with clean, fully dry, product-free hair. Detangle from the ends up, part down the center, and bring both halves forward. Take one-inch slices from the bottom, hold them at your marked collarbone line, and cut no more than half an inch below your fingers, matching each slice on the other side. Point cut into the ends to soften the line, then trim face-framing starting at the jaw.
Should you cut medium length hair wet or dry?
Dry, at home. Wet hair stretches up to a third longer and every section stretches differently, so a line you cut wet lands somewhere unpredictable once it dries. Salons cut wet because they control tension precisely and can see the whole head. Curly hair especially should be cut dry, curl by curl, because shrinkage can pull a collarbone cut up to the chin.
What scissors do I need to cut my own hair?
A 5.5 inch pair of hairdressing shears, usually 20 to 40 dollars, kept only for hair. Kitchen and craft scissors are ground to push through paper and fabric, so they bend and crush the hair shaft rather than slicing it, which produces split ends within a couple of weeks. The 5.5 inch length is short enough to control near your face and long enough for a full section.
How much should I cut off my own hair the first time?
Half an inch, and no more. You can always take a second full pass, and you cannot put length back. Mid length hair grows about half an inch a month, so a half-inch mistake costs you a month while a two-inch mistake costs you four. Mark the number on a sticky note on the mirror so you do not drift as you go.
Can you cut layers in medium length hair yourself?
You can cut long face-framing layers starting at the jaw, and those are genuinely manageable. Interior layers through the back are not, because they need elevation and over-direction judged from behind your own head, and the failure mode is visible steps rather than a slightly wrong length. Fine hair especially should avoid at-home layering, since over-layering leaves the ends sparse.
Why is one side of my hair shorter after cutting it myself?
Almost always because your head tilted or you held one section at a different angle. Mirrors reverse, and shoulders are rarely level, so comparing sides in the mirror misleads you. Bring both sides forward and compare them at the same point on your chin or collarbone. Then leave it for a week before correcting, because chasing symmetry in one session removes far more length than the original error did.
How often should you trim mid length hair?
Every 8 to 12 weeks. Go closer to 8 weeks if you heat style most days, color or bleach, or wear a blunt baseline where every split shows. Stretch to 12 if you air-dry, wear layers, and keep your ends conditioned. Trimming a quarter inch on schedule during a grow-out actually preserves length, because splits travel up the shaft if you leave them.
What is point cutting and why does it matter at home?
Point cutting means holding the shears vertically and snipping up into the ends about a quarter inch deep instead of slicing straight across. The notched, irregular line hides small differences in length that a blunt line puts on display, and it removes the heavy shelf that makes an at-home cut look like one. Keep the notches shallow, and go lighter on fine hair.
When should I stop and see a stylist instead?
Stop if you are correcting a previous mistake, if you have already removed more than an inch and a half, if your hair is bleached or chemically straightened, if you want the actual shape changed rather than maintained, or if you have made three corrective cuts in one sitting. Salon trims run about 45 to 90 dollars, which is cheap against a 12-month grow-out.
Cutting your own hair carries real risk. A mid length cut takes roughly 6 to 12 months to grow back from a mistake. Use sharp hairdressing shears only, never cut toward your face or neck, keep shears away from children, and stop and book a licensed stylist if you are correcting a bad cut, changing your shape significantly, or working on chemically treated or very damaged hair.
Which mid length haircut look are you saving?
If you remember three things from these 20 steps, make them these. Cut dry, so the length you see is the length you keep. Take half an inch at a time and re-check, because you can always remove more and you can never put it back. And point cut into the ends rather than slicing straight across, because a soft textured line forgives the small errors that a blunt line advertises. Keep face-framing starting at the jaw, keep layers long and invisible, and book a real trim every 8 to 12 weeks so your at-home work is maintenance rather than rescue. When you want the shape changed instead of maintained, take photos from mid length haircut ideas to a stylist and use the ask-for wording rather than the scissors.