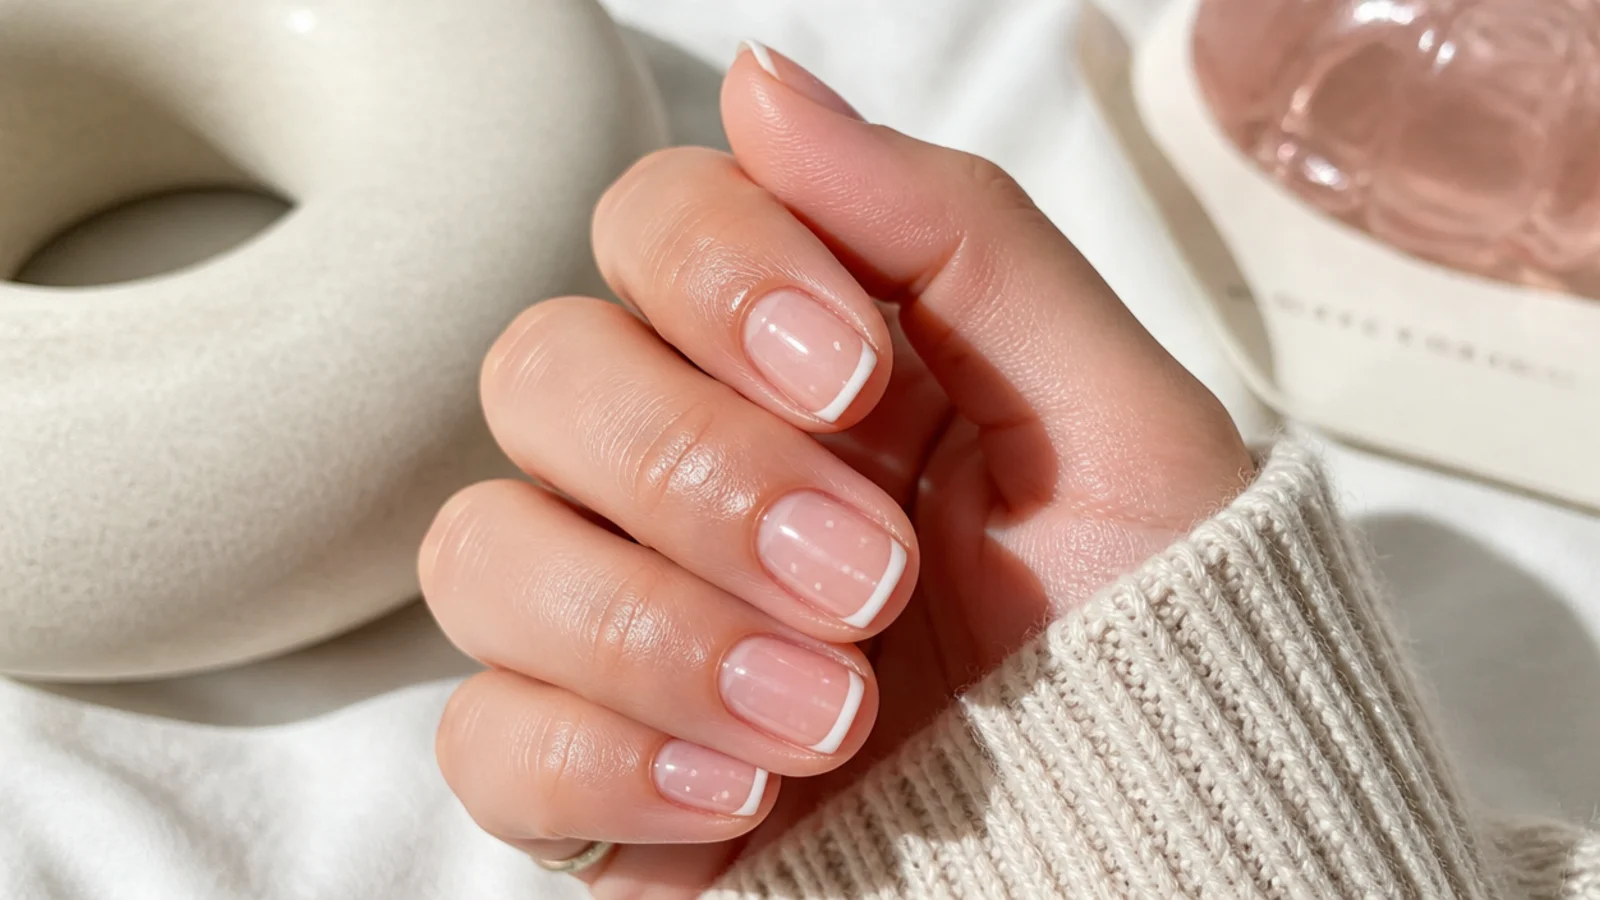
Quick Comparison
| Regular Polish at Home | At-Home Gel Kit | |
|---|---|---|
| Startup cost | 25 to 40 dollars for base, top and two colors | 50 to 90 dollars for a lamp, base, top and colors |
| Time for a full set | 10 to 25 minutes plus 20 minutes of drying | 30 to 45 minutes with no drying wait afterward |
| How long it lasts | 5 to 7 days before visible tip wear | 2 to 3 weeks, longer on short nails |
| When you can do art | After 5 minutes of air drying per coat | Immediately after the cure, no waiting |
| Fixing a mistake | Wipe with remover and repaint that nail | Wipe before curing; after curing you file it off |
| Removal | Remover and a cotton pad, about 2 minutes | Acetone soak in foil for 10 to 15 minutes |
| Damage risk | Very low, mostly dryness from acetone | Comes from peeling it off, not from wearing it |
| Which designs it suits | Dots, tape lines, sponge gradients, stickers | All of those plus chrome, and every design lasts |
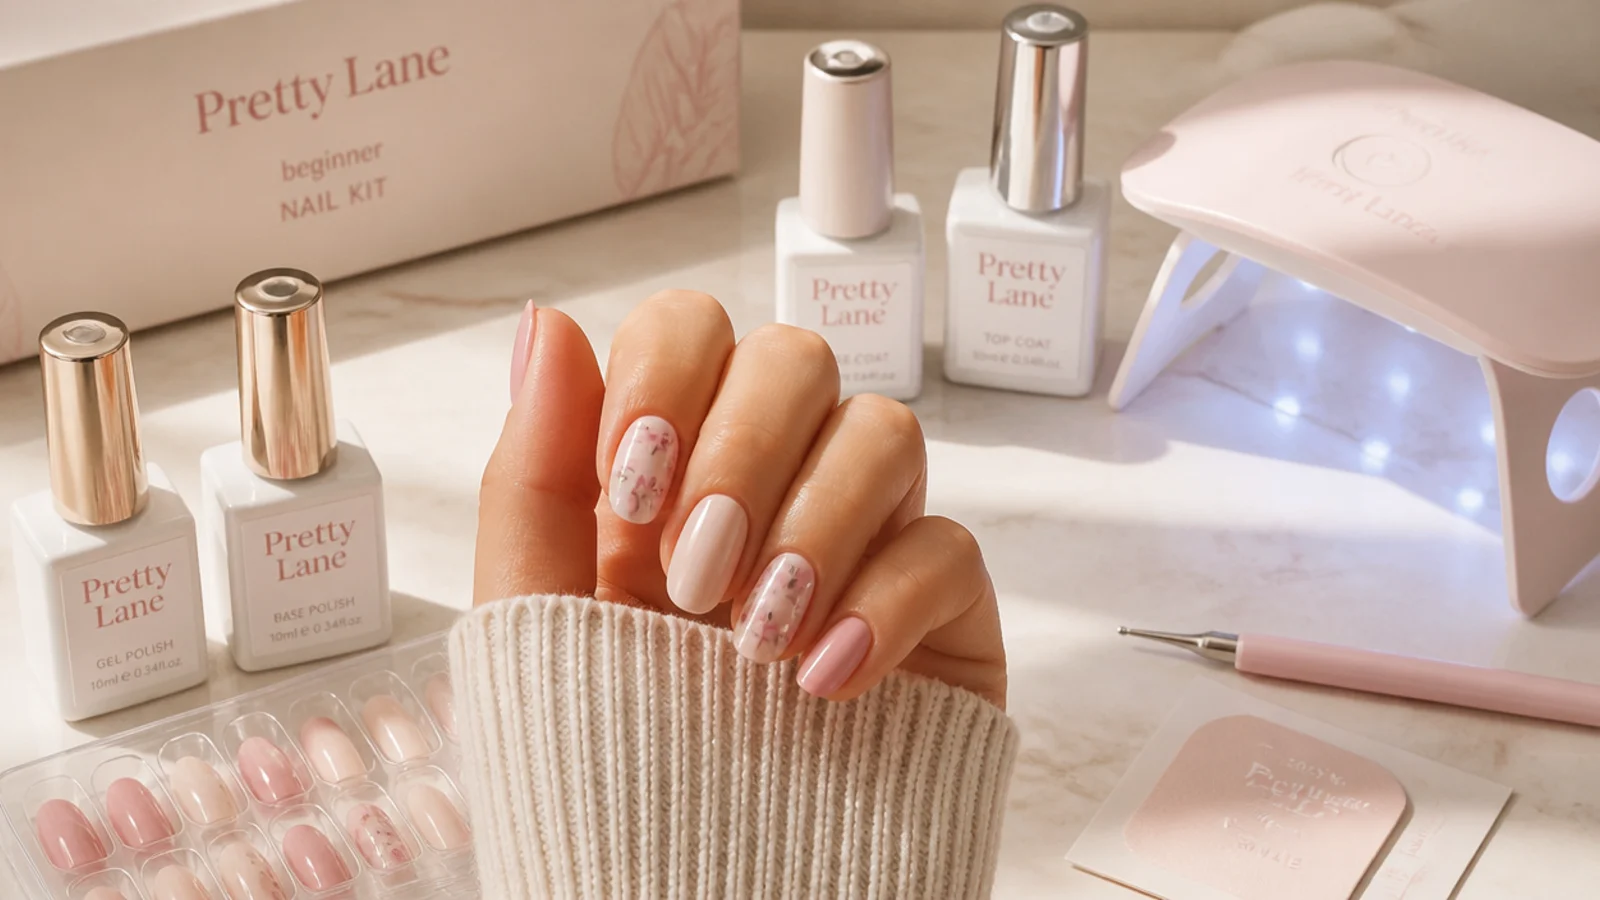
| Best for | Changing your color every few days | One set you keep for two to three weeks |
1. Milky White Base Nails
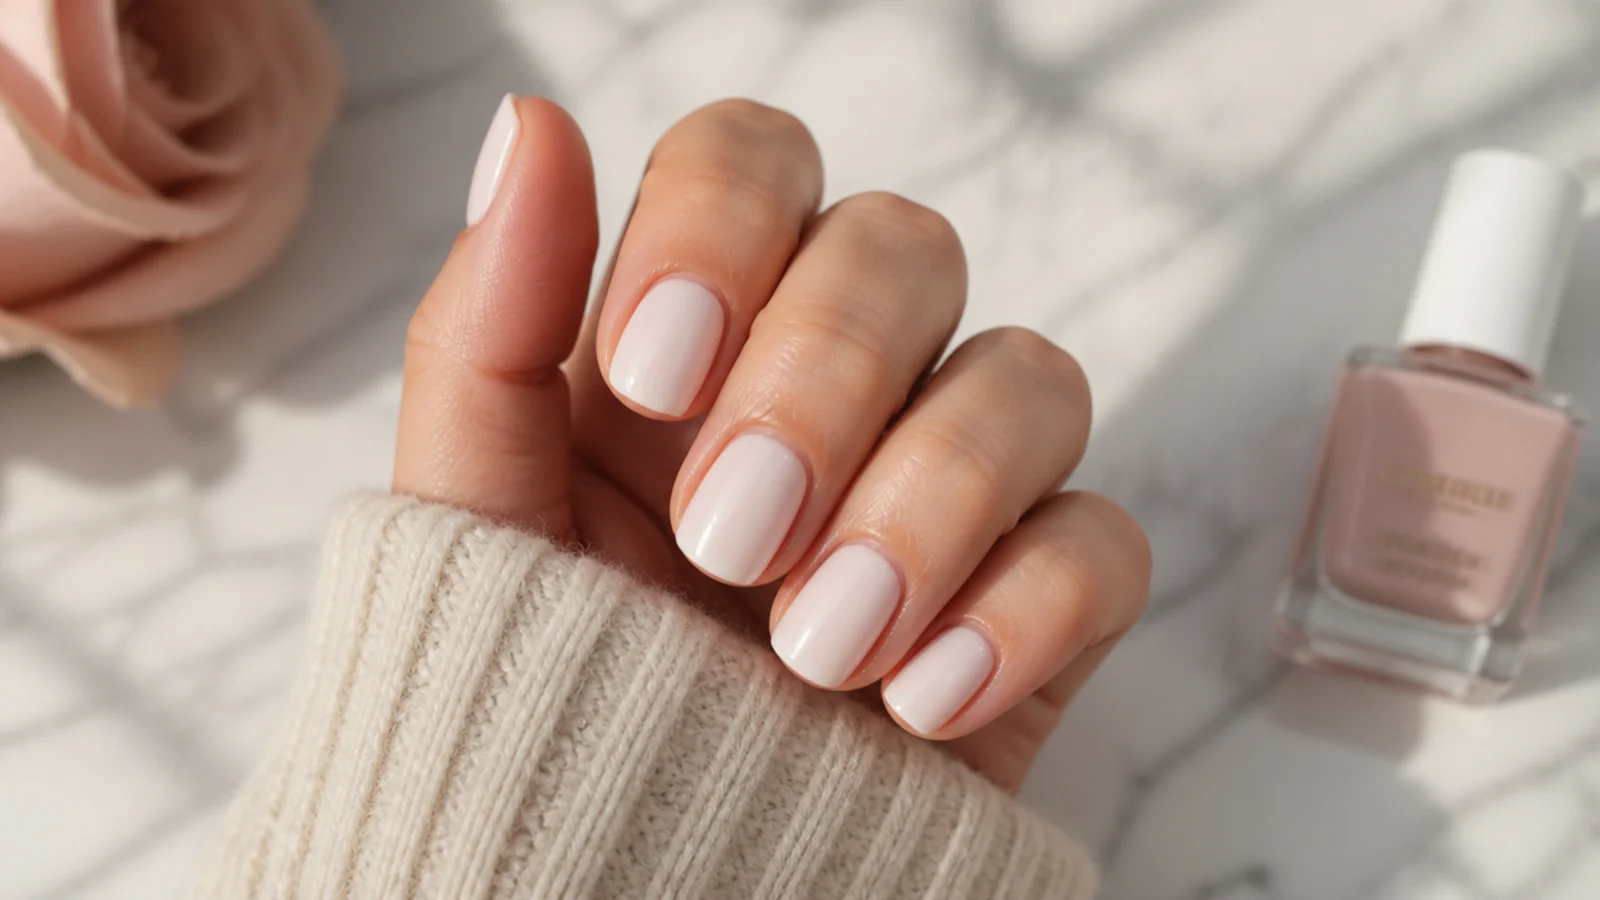
The easiest cute set there is, because there is no art to smudge. 1. Apply one base coat and wait 2 minutes. 2. Brush one sheer coat of a milky white such as OPI Funny Bunny or Essie Marshmallow, keeping it deliberately streaky. 3. Wait 3 minutes, add a second coat, wait 3 more, add a third. The third coat is what kills the streaks. 4. Cap the free edge with top coat by running the brush along the tip edge. Sheer whites need three coats where an opaque shade needs two, so budget the extra 6 minutes.
Who it suits: Total beginners, short nails, office dress codes. Difficulty 1 of 3, 12 minutes.
Tip: If it dries patchy, you rushed a coat. Add one more thin layer rather than trying to even out a wet one.
2. Sheer Jelly Tint Nails
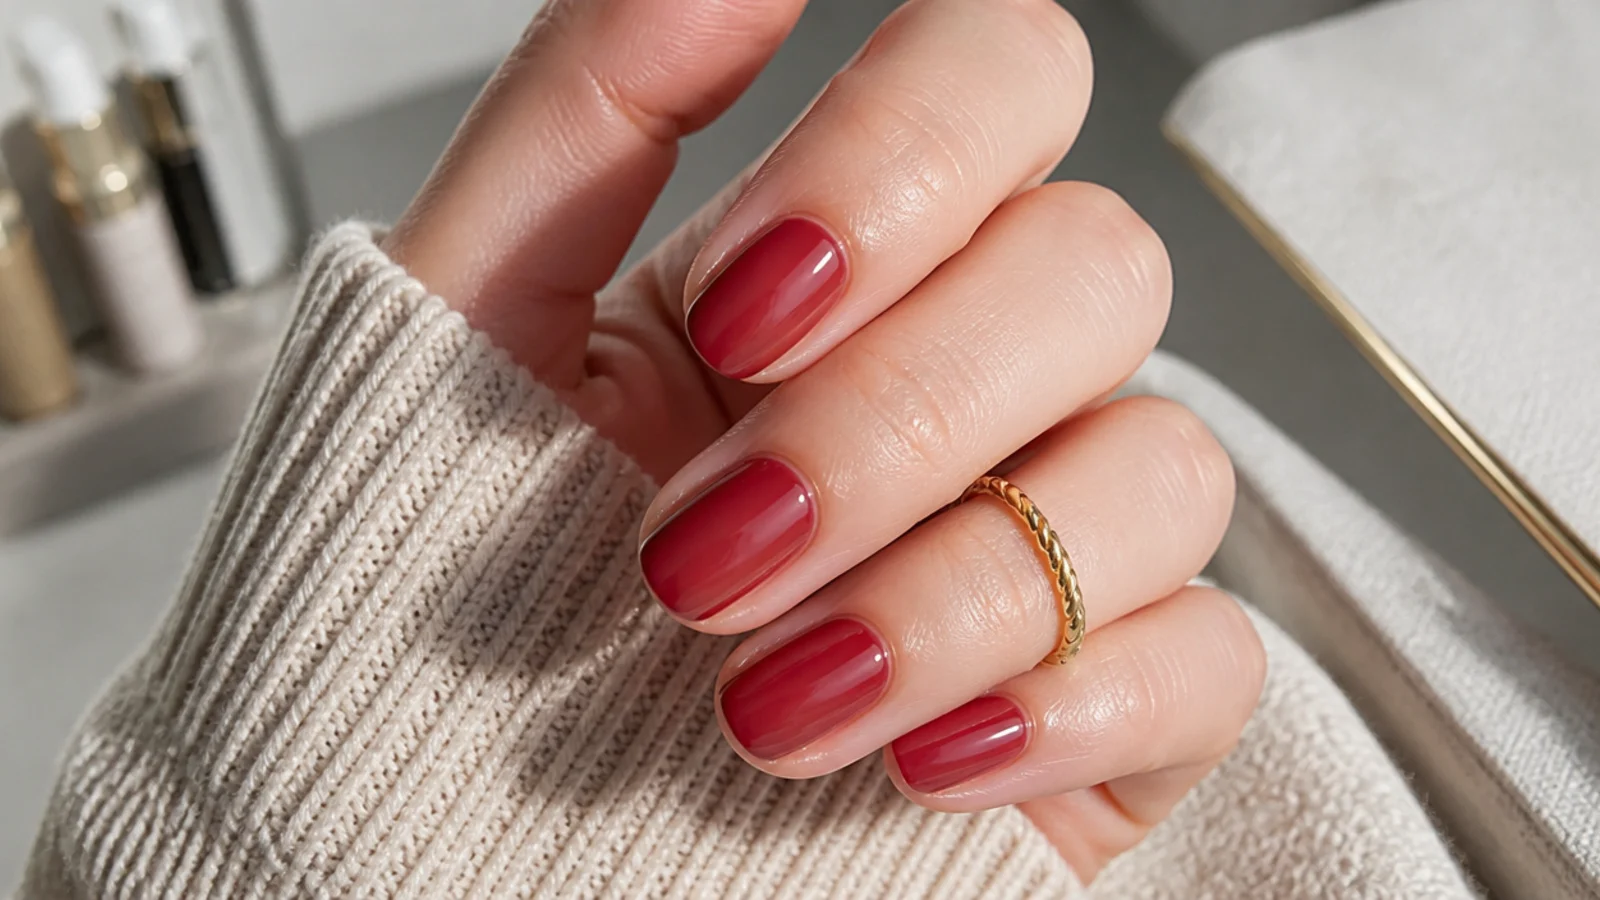
A translucent wash of color that shows the natural nail through it, which makes uneven application almost invisible. 1. Base coat, 2 minutes. 2. One coat of any sheer or jelly shade, such as Essie Ballet Slippers in pink or a cherry jelly red. 3. Wait 3 minutes and add a second coat only. A third turns jelly into flat opaque color and loses the whole effect. 4. Glossy top coat. The see-through band past your free edge is the signature, so do not file the tip shorter first. This is the same glassy logic behind soap nails.
Who it suits: Anyone whose polish always looks uneven. Difficulty 1 of 3, 10 minutes.
Tip: Gone cloudy instead of glassy? You applied a third coat. Remove and restart with two.
3. Cherry Red Single Shade Nails
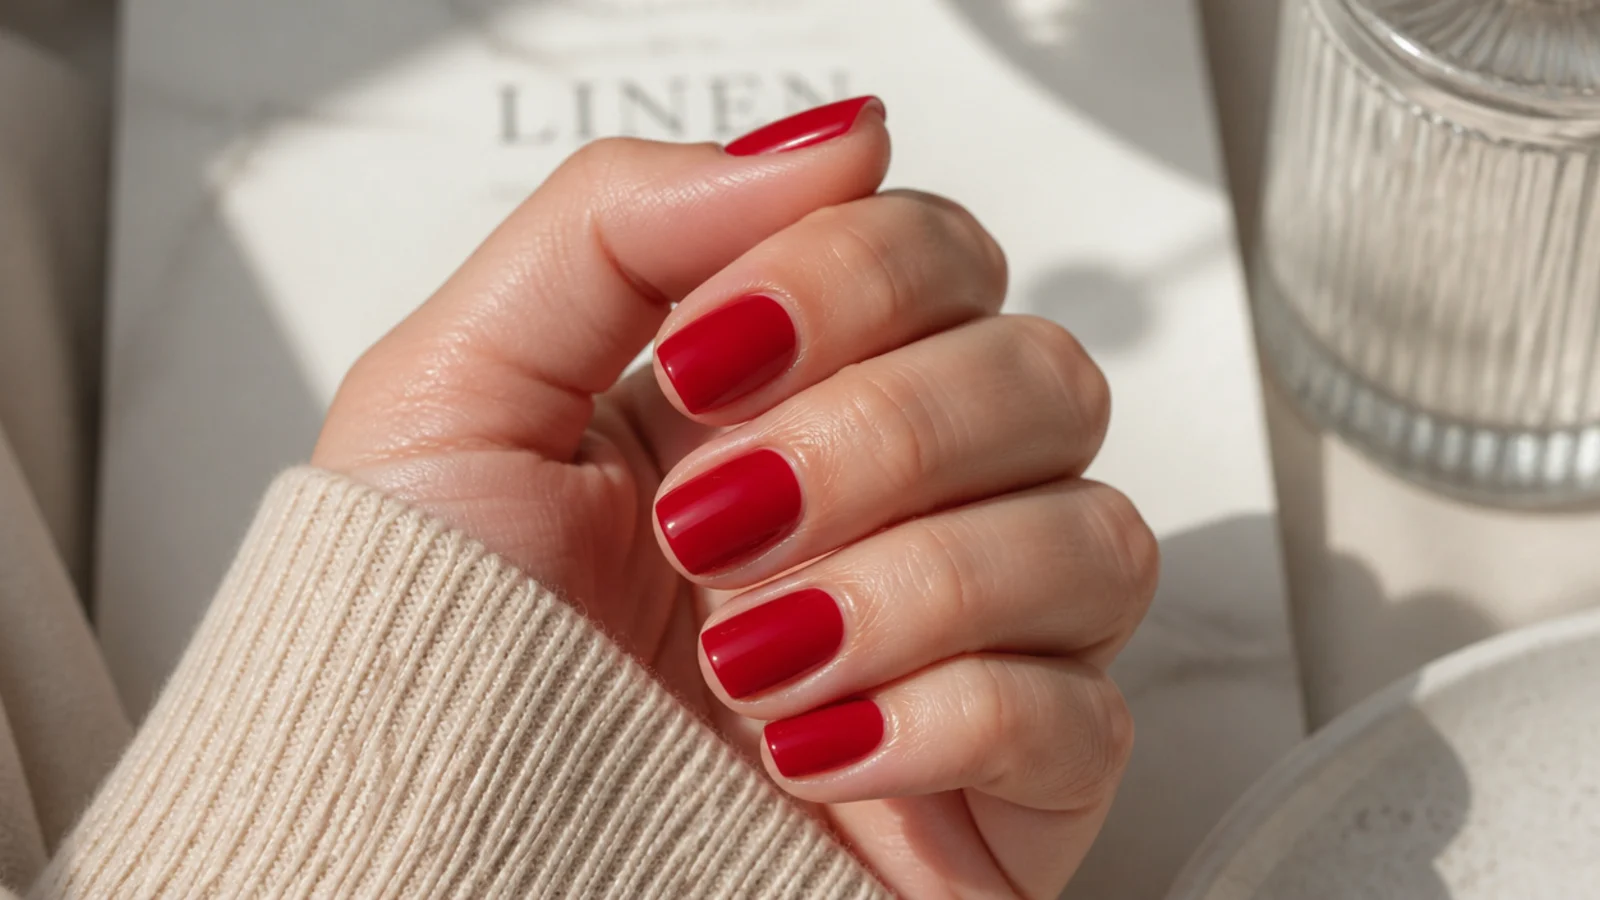
One shade, done properly, beats a bad design every time. 1. Base coat. 2. Wipe the brush on the bottle neck until only one side carries polish. 3. Press the bead down 2mm from the cuticle, push it back gently toward the cuticle line, then pull straight to the tip. 4. Repeat left stripe and right stripe, then a second coat after 3 minutes. 5. Cap the edge. Starting 2mm back is the whole trick against flooded cuticles. Deep reds like those in red French tip nails show every mistake, which is exactly why they train your hand.
Who it suits: Anyone building brush control before trying art. Difficulty 1 of 3, 12 minutes.
Tip: Flooded a cuticle? Dip a small flat brush in remover and cut a clean arc while the polish is still wet.
4. Matte Black Short Nails
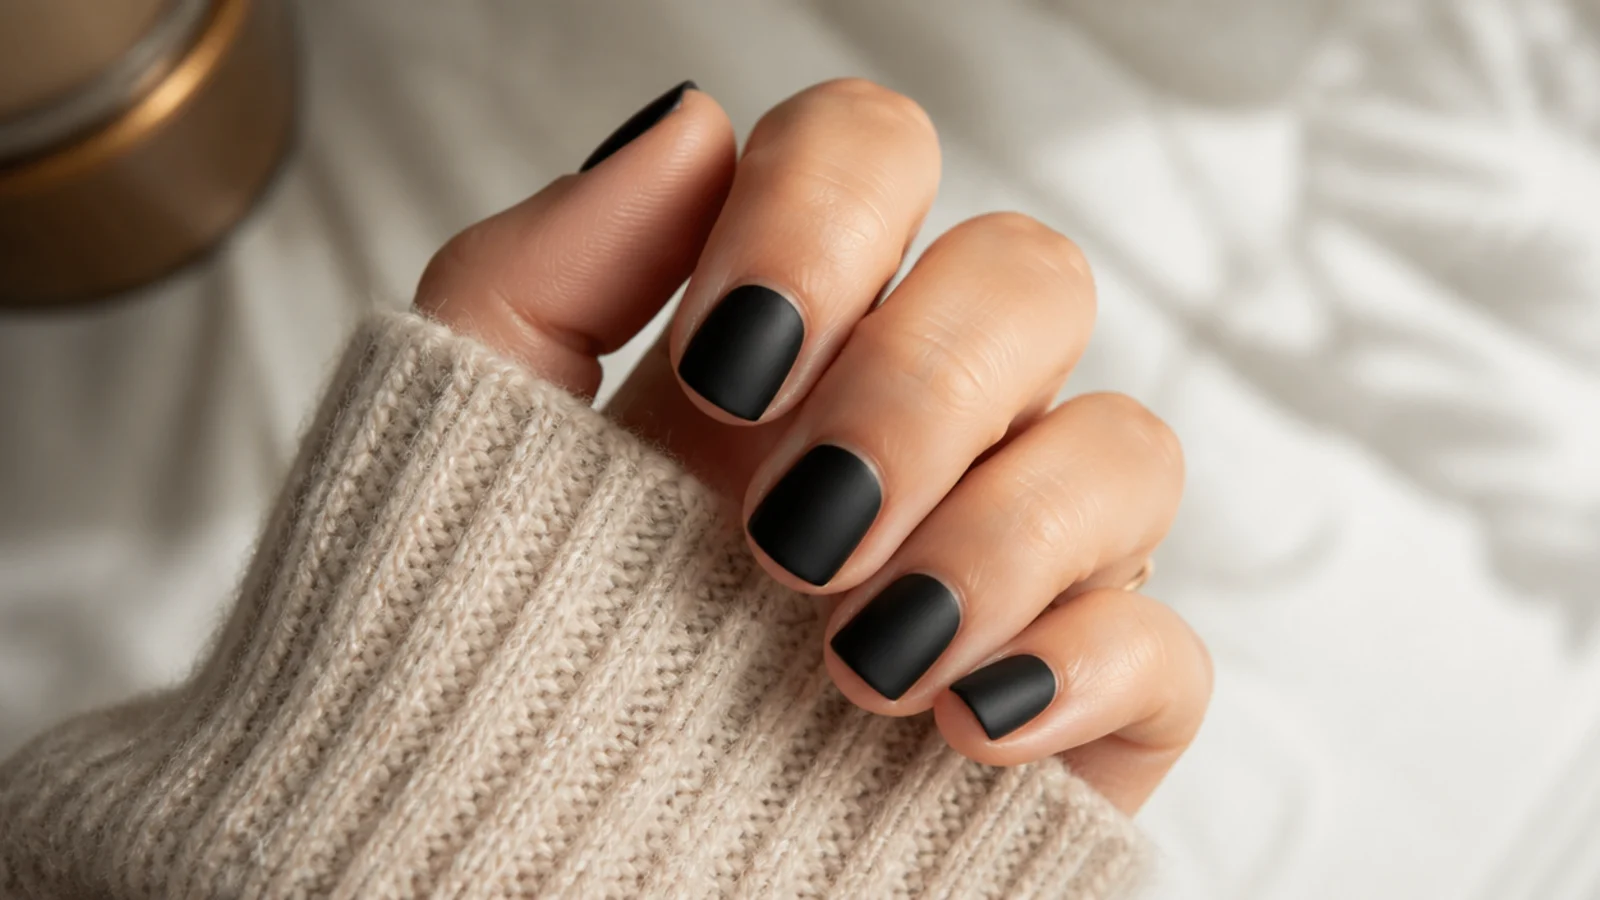
Matte turns a plain black manicure into something that reads deliberate. 1. Base coat, then two thin coats of a true black like Essie Licorice, 3 minutes apart. 2. Wait a full 10 minutes before the matte top coat, because matte over soft polish drags into visible streaks. 3. Apply matte top coat in one single pass per nail, floating the brush, never going back over a stroke. 4. Do not cap the free edge with matte, it lifts. Cap with a thin line of glossy instead if you want the extra days. Full technique detail sits in how to matte nails.
Who it suits: Short nails, dark aesthetic, anyone bored of gloss. Difficulty 1 of 3, 18 minutes.
Tip: Streaky matte means you passed over the same spot twice. One stroke per zone, no corrections.
5. Micro Dot Nails With a Toothpick
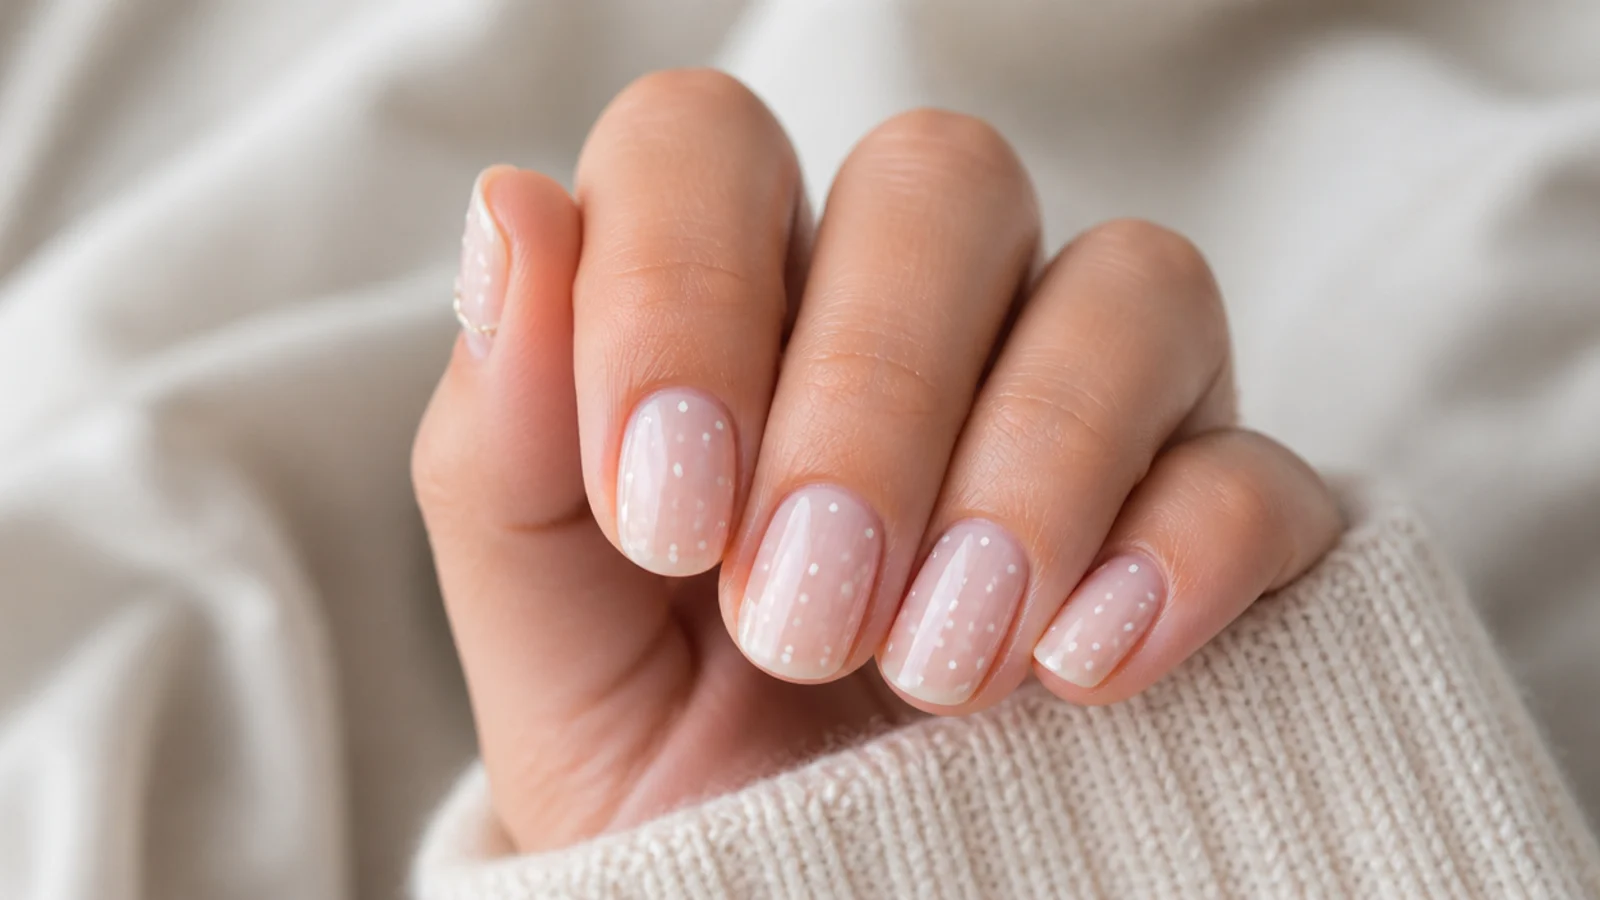
The single best first design, and the reason you never need to buy a dotting tool. 1. Paint two thin coats of a nude or milky base and wait 5 full minutes. 2. Drop a bead of white polish onto foil or a plastic lid. 3. Dip only the sharp point of a wooden toothpick, about 1mm in, and touch it straight down onto the nail. Do not drag. 4. Re-dip every 2 dots so the size stays even. 5. Top coat after 5 minutes. Three to five dots per nail reads refined, the way simple emo nails use restraint; twelve reads cluttered.
Who it suits: First-time nail art, short nails, anyone without a dotting tool. Difficulty 1 of 3, 15 minutes.
Tip: Dots turning into blobs? Your polish bead has thickened. Drop a fresh bead every 3 or 4 nails.
6. Polka Dot Accent Nail With a Bobby Pin
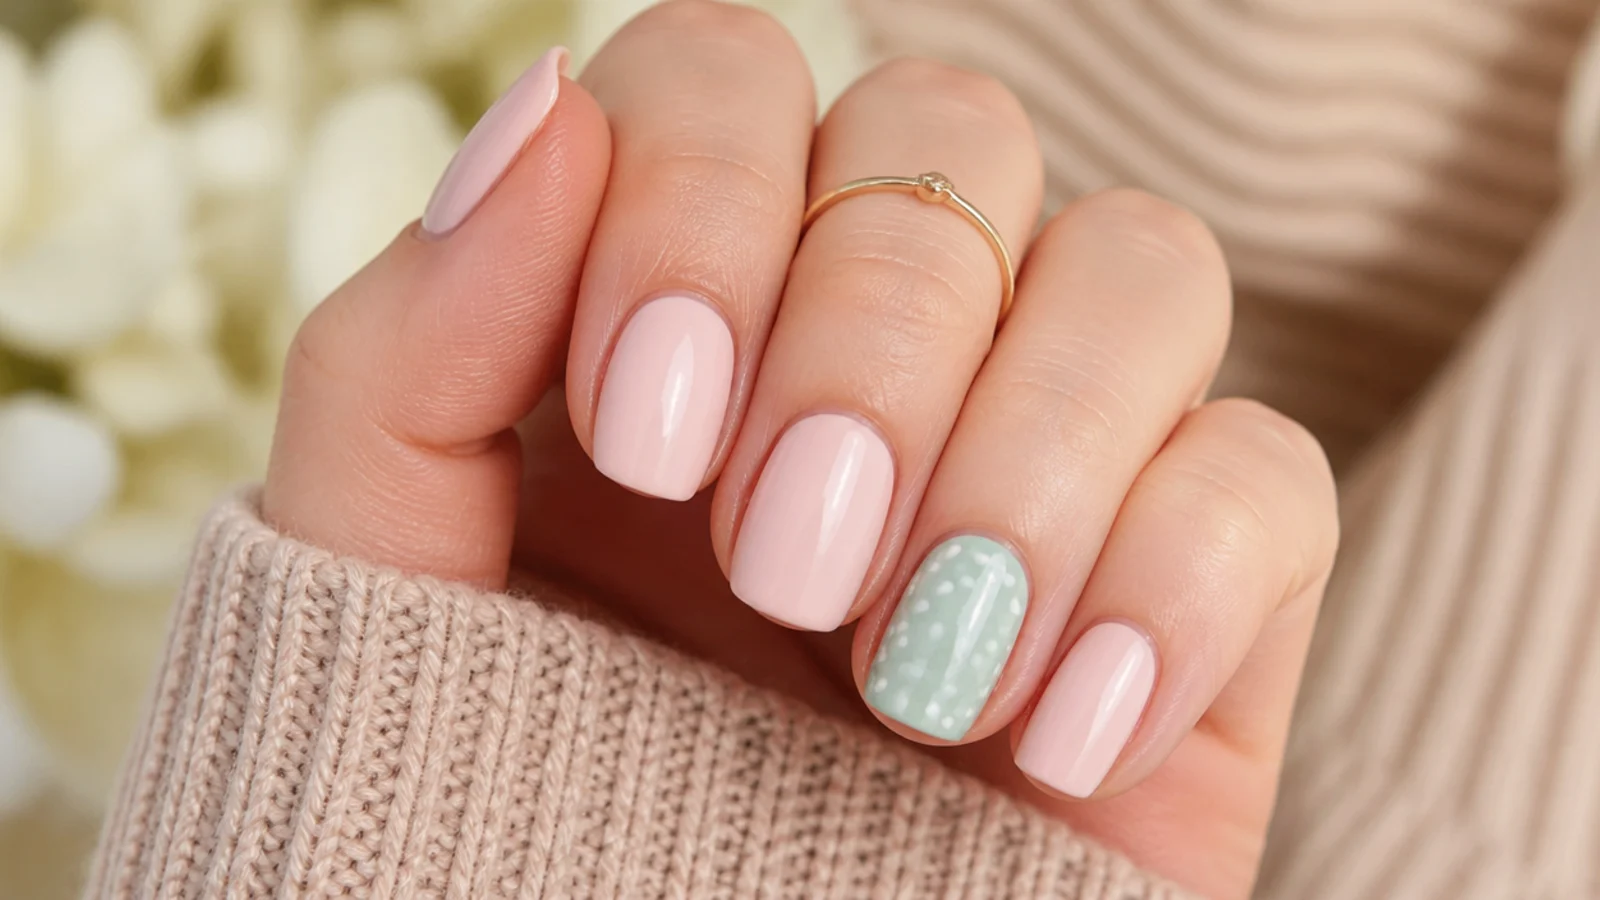
The rounded ball end of a bobby pin makes a larger, perfectly round dot that a toothpick cannot. 1. Paint all ten nails in a pastel base, two coats, and let them set 5 minutes. 2. Open a bobby pin so the rounded tip is free. 3. Dip the ball end into a contrast polish and press straight down on your ring finger only. 4. Space dots roughly 4mm apart in a loose grid. 5. Top coat. Keeping the dots on one accent nail is what stops the set looking like a kids party. Retro is the point, so make the dots big and confident.
Who it suits: Medium nails, retro looks, anyone wanting one statement finger. Difficulty 1 of 3, 14 minutes.
Tip: Dots landing oval means you tilted. Hold the pin perpendicular and drop it, do not swipe.
7. Daisy Flower Nails With a Toothpick
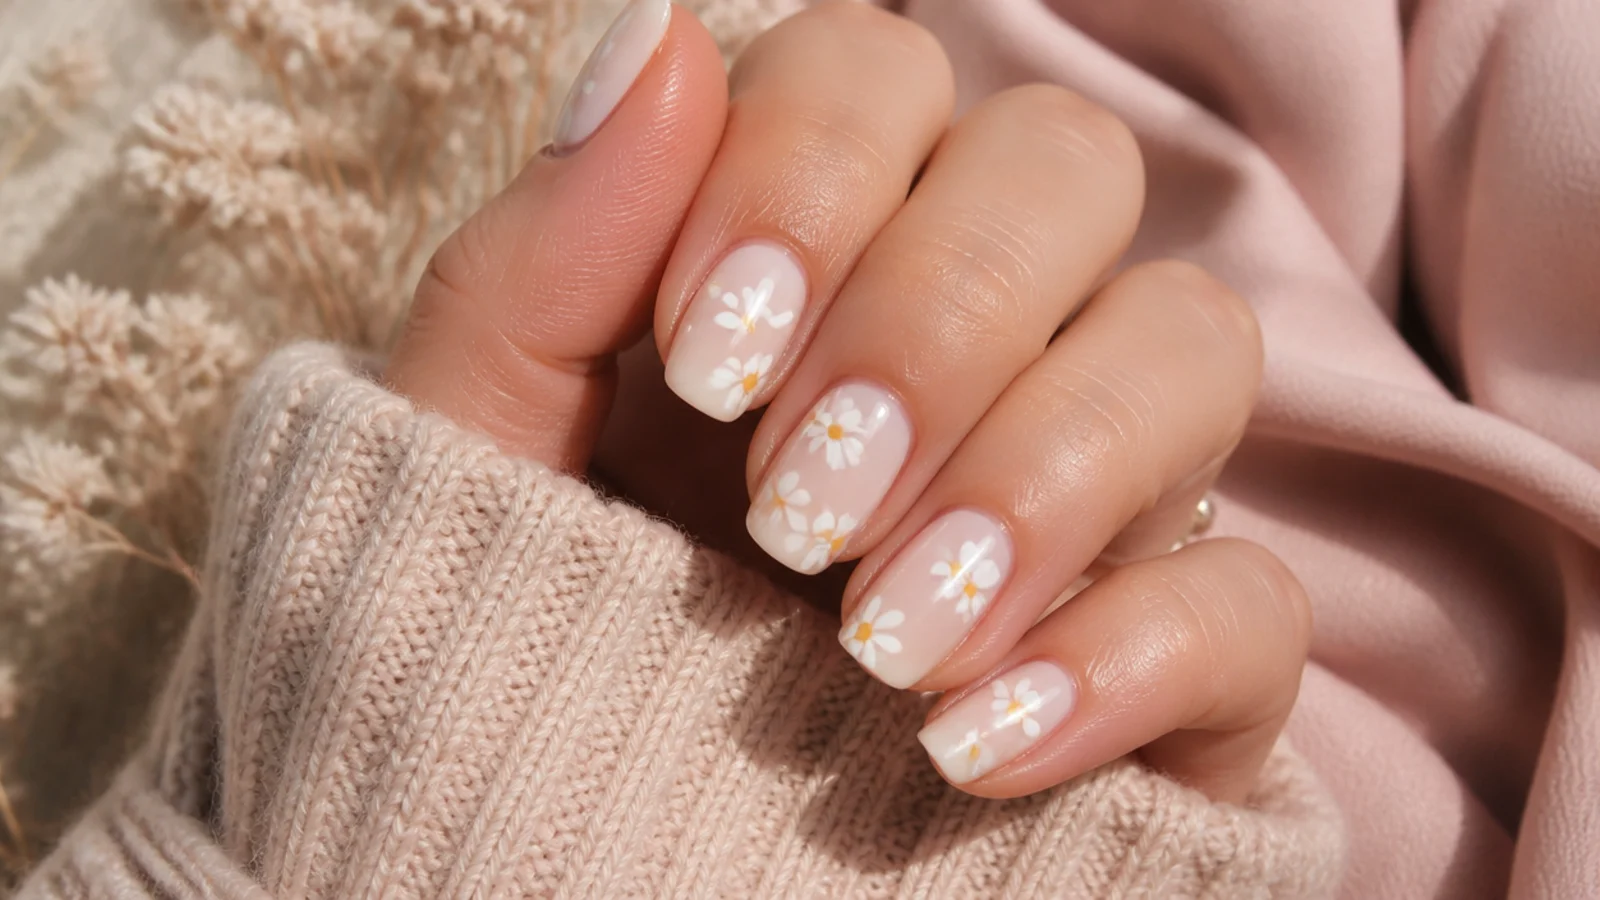
Five dots and a center, which is why daisies are the most beginner-friendly floral there is. 1. Paint a milky or sky blue base, two coats, wait 5 minutes. 2. With a toothpick, place five white dots in a rough circle about 5mm across, leaving a gap in the middle. 3. While those are still tacky, lightly drag the outer edge of each dot inward with the toothpick point to make a petal shape. 4. Wait 2 minutes, then drop one yellow dot in the center. 5. Top coat after 5 minutes. Two daisies per nail, or one per accent nail. For denser floral work see blooming gel flower nails.
Who it suits: Spring sets, short and medium nails, beginners. Difficulty 2 of 3, 20 minutes.
Tip: Petals bleeding into a white blob means you dragged too soon. Let the dots skin over for 60 seconds first.
8. Confetti Dot Nails
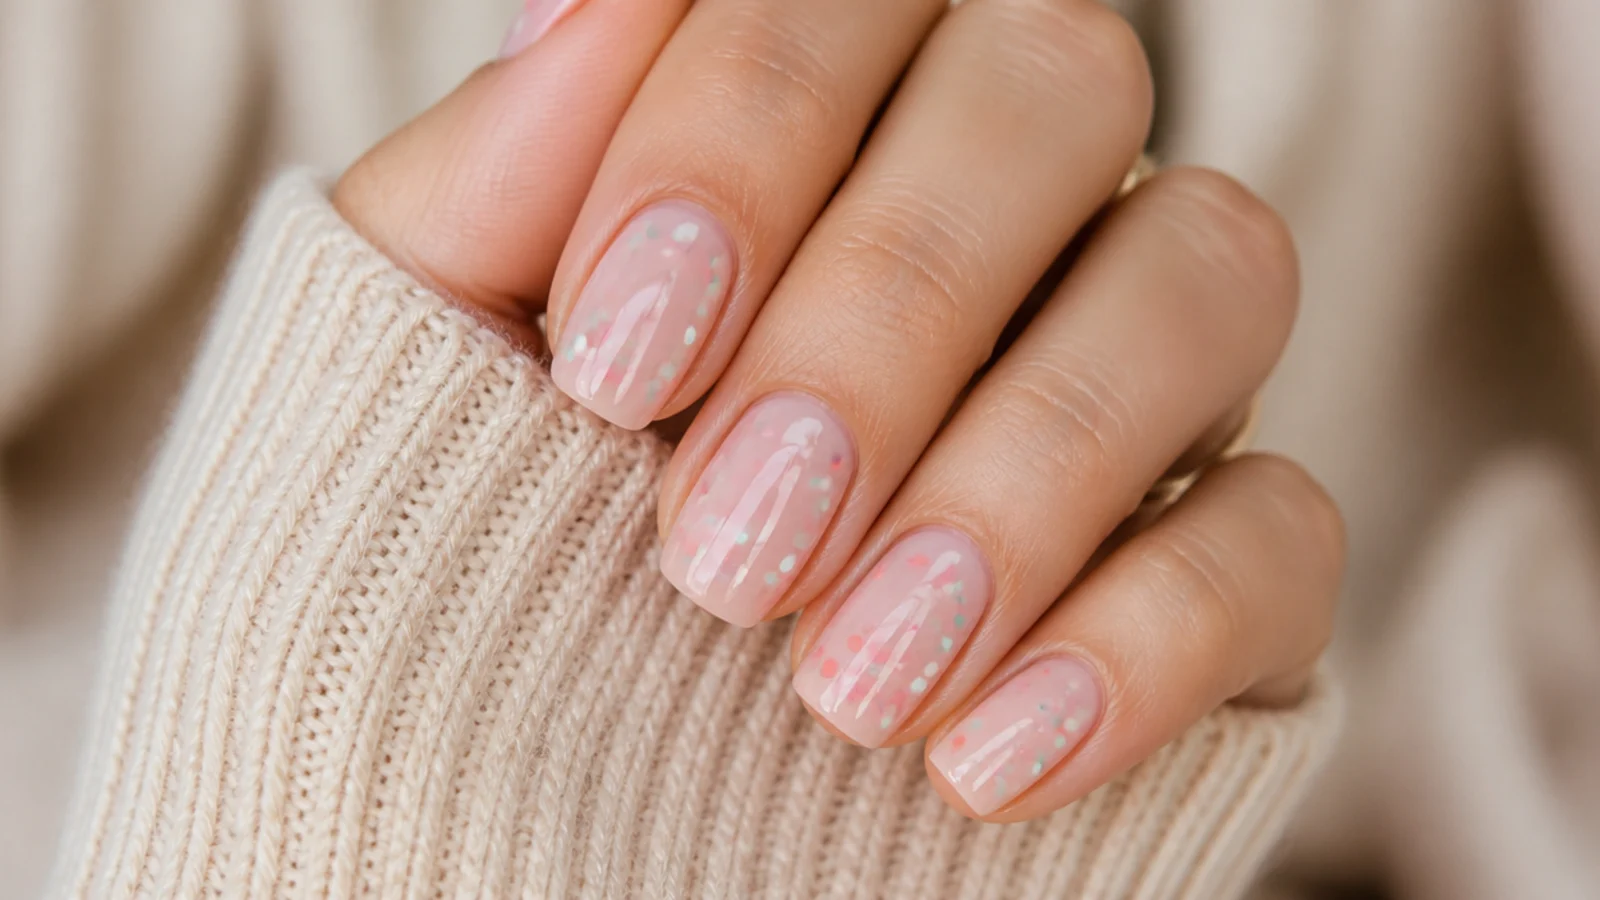
The most forgiving design on this list, because randomness is the design. 1. Paint a sheer nude or white base and wait 5 minutes. 2. Drop three or four contrast colors onto foil, for example coral, mint and bright pink. 3. Using a fresh toothpick per color, scatter dots of deliberately different sizes across each nail. Uneven is correct here. 4. Let it set 5 minutes and finish with two coats of top coat, because raised dots need burying or they catch and peel. Aim for 6 to 10 dots per nail and let a few run off the edge, the same scattered logic as glitter snowflake nails.
Who it suits: Anyone whose hands shake, birthdays, kids. Difficulty 1 of 3, 16 minutes.
Tip: Dots catching on your hair? One top coat is not enough. Add a second once the first is dry.
9. Straight French Tip Nails With Tape
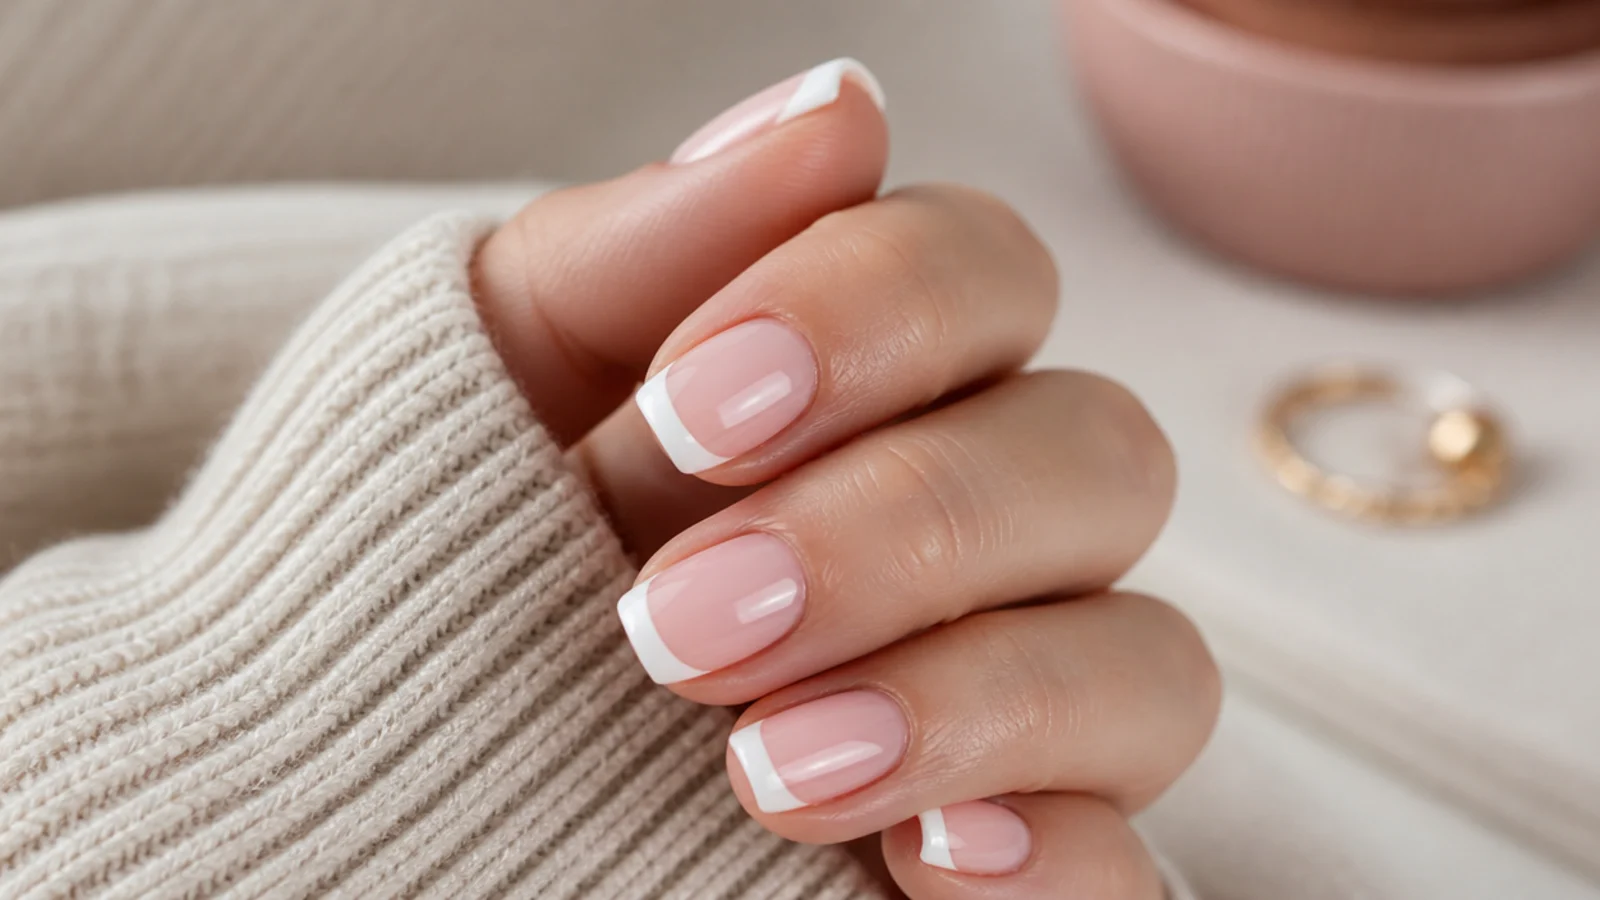
Tape gives you a line straighter than any freehand brush. 1. Paint a sheer pink base and wait 10 full minutes, longer than feels necessary. 2. Press a strip of scotch tape across each nail where you want the smile line, sticking the sticky side to the back of your hand first to reduce tack. 3. Brush white polish over the exposed tip in two thin passes. 4. Peel the tape off immediately while the white is still wet, pulling back on itself, not upward. 5. Top coat after 5 minutes. Straight lines suit square and squoval nails best; a curve suits almond shapes.
Who it suits: Square and squoval nails, formal occasions. Difficulty 2 of 3, 22 minutes.
Tip: Tape lifting the base color means the base was not dry. Wait 10 minutes, not 3, before taping.
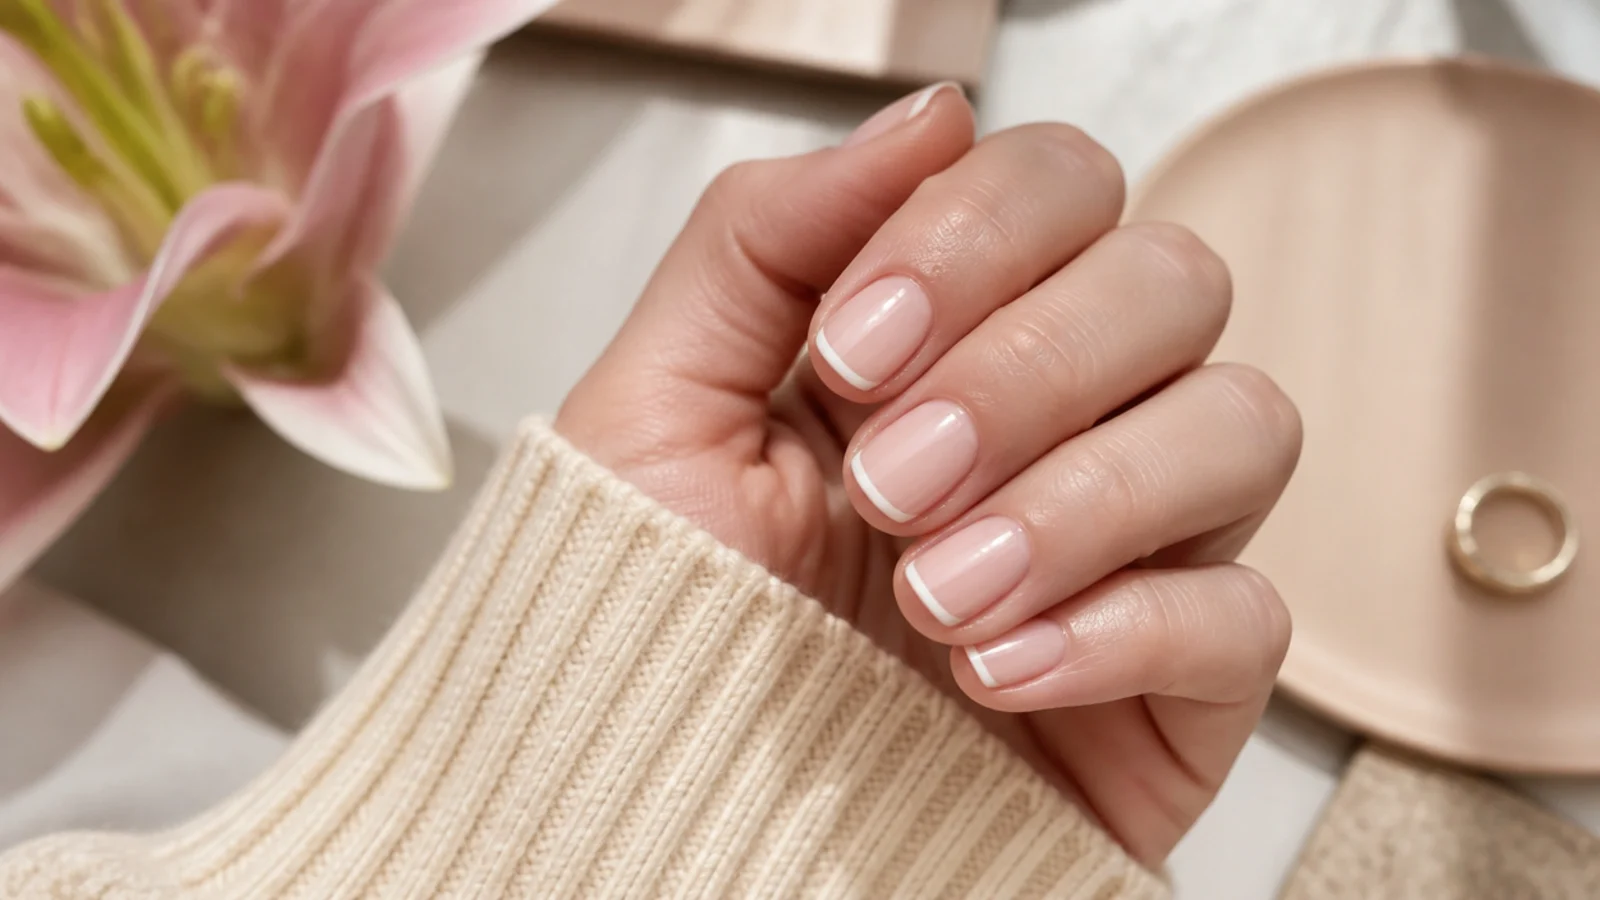
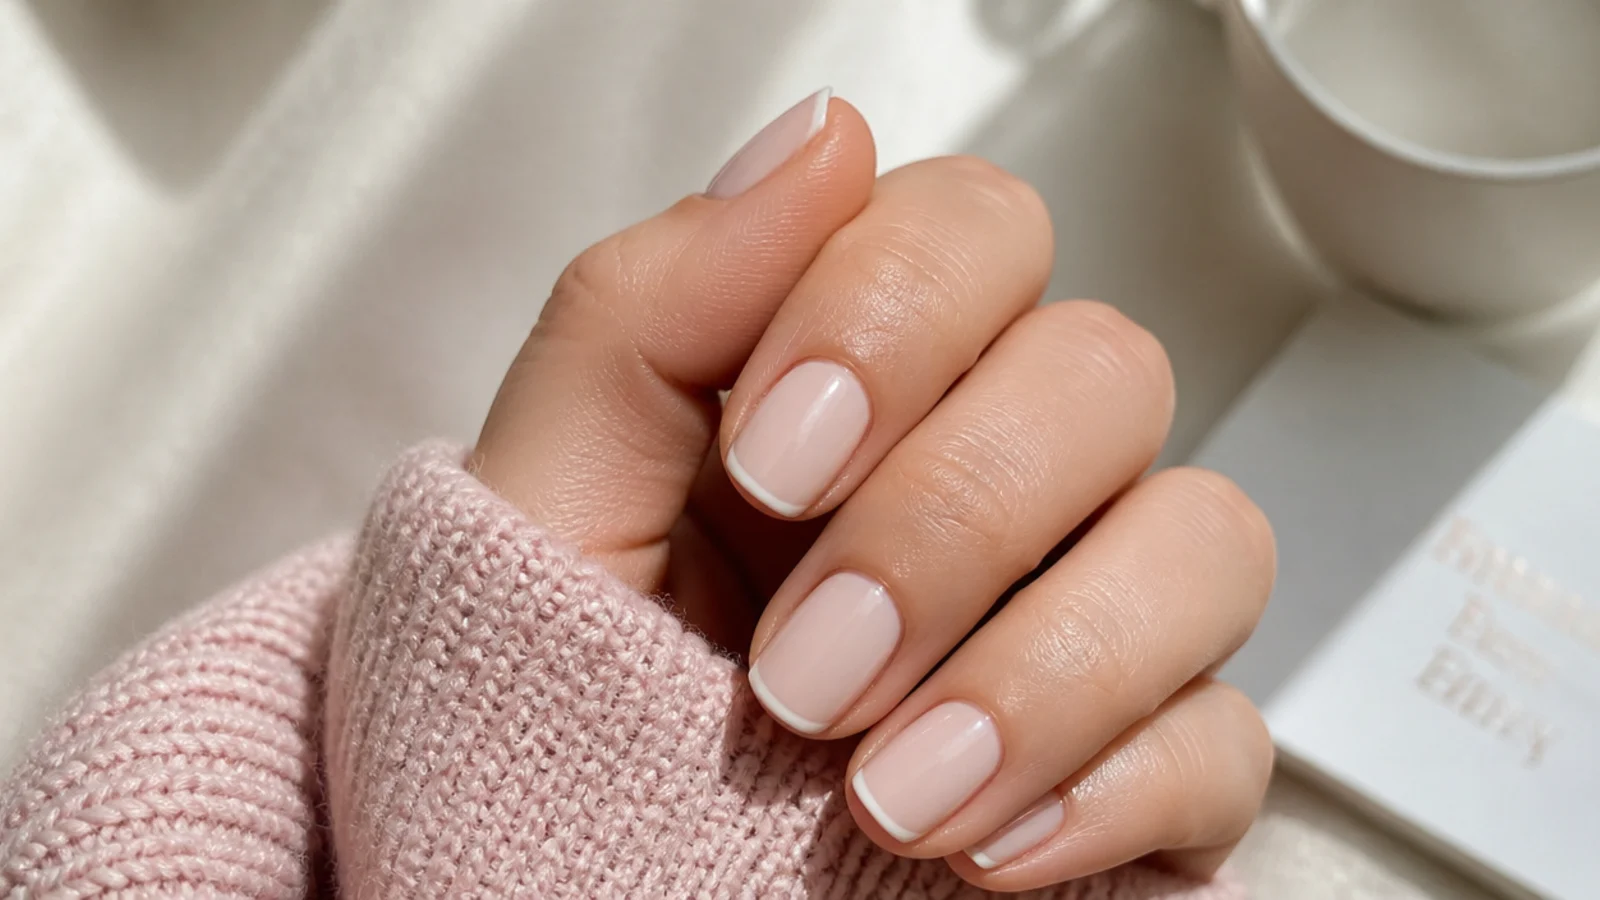
10. Micro French Tip Nails
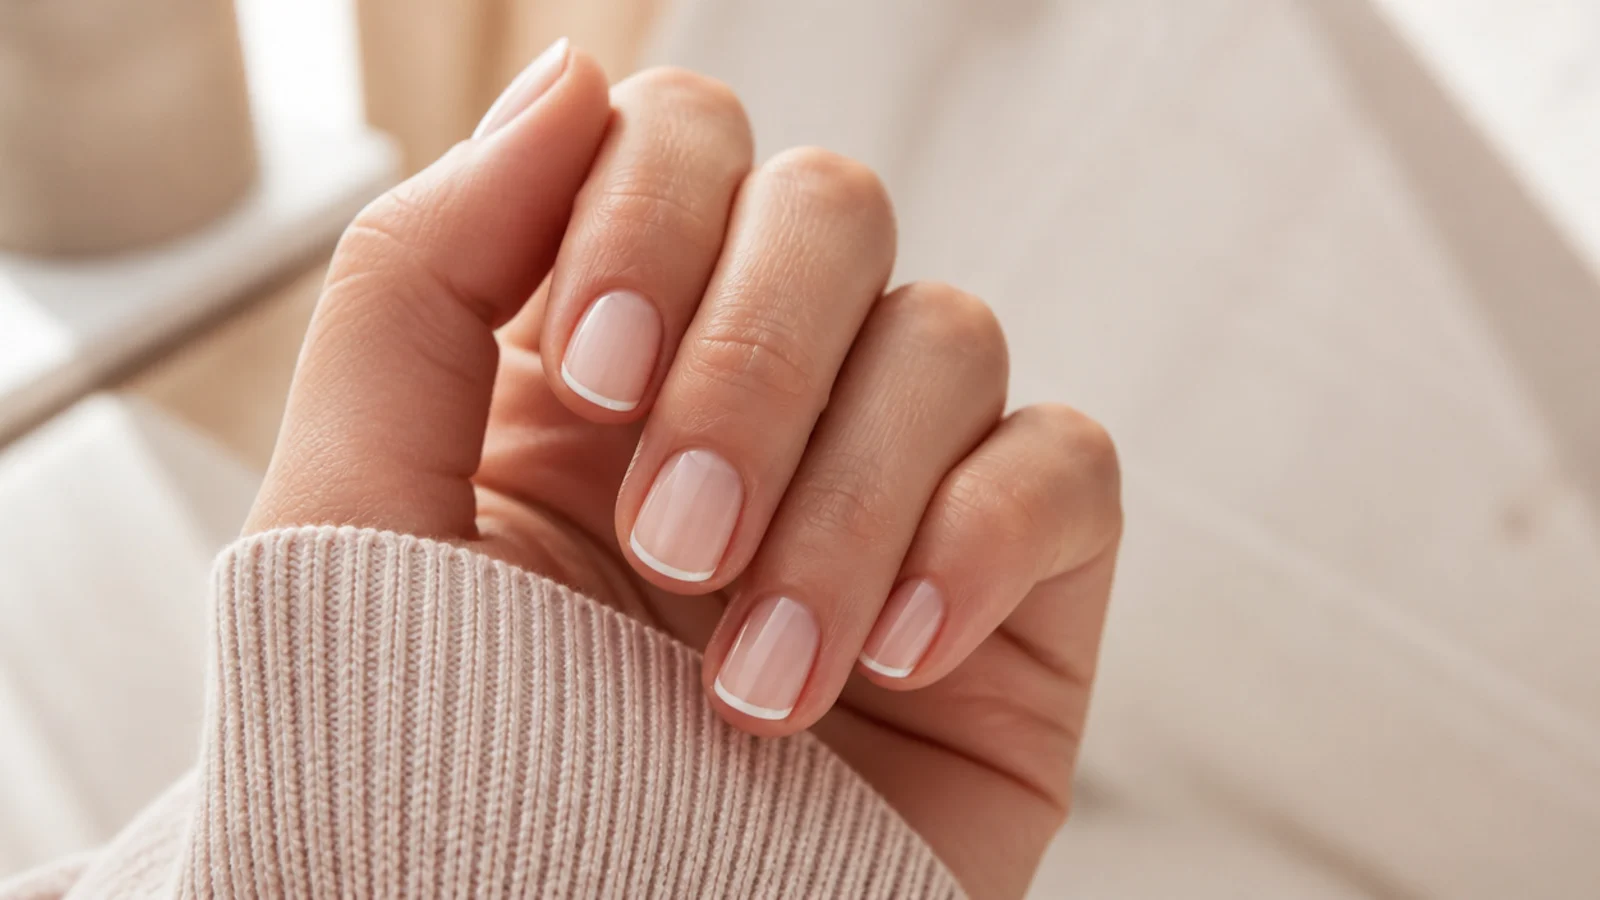
A hairline tip, roughly 1mm, that reads far more expensive than a thick French. 1. Skip color entirely or use one sheer coat, then wait 5 minutes. 2. Load a toothpick or the thinnest brush you own with white. 3. Rest your painting hand on the table and rotate the finger underneath the brush rather than moving the brush along the nail. That single change is what makes the line straight. 4. Run the line right on the free edge, not below it. 5. Top coat and cap. Thinner is more forgiving than thicker here, and it suits short French tip nails perfectly.
Who it suits: Short nails, minimalists, work-safe sets. Difficulty 2 of 3, 18 minutes.
Tip: Wobbly line? Do not repaint it. Wipe with a remover-dipped flat brush and redraw on a clean edge.
11. Diagonal Half Moon Nails With Tape
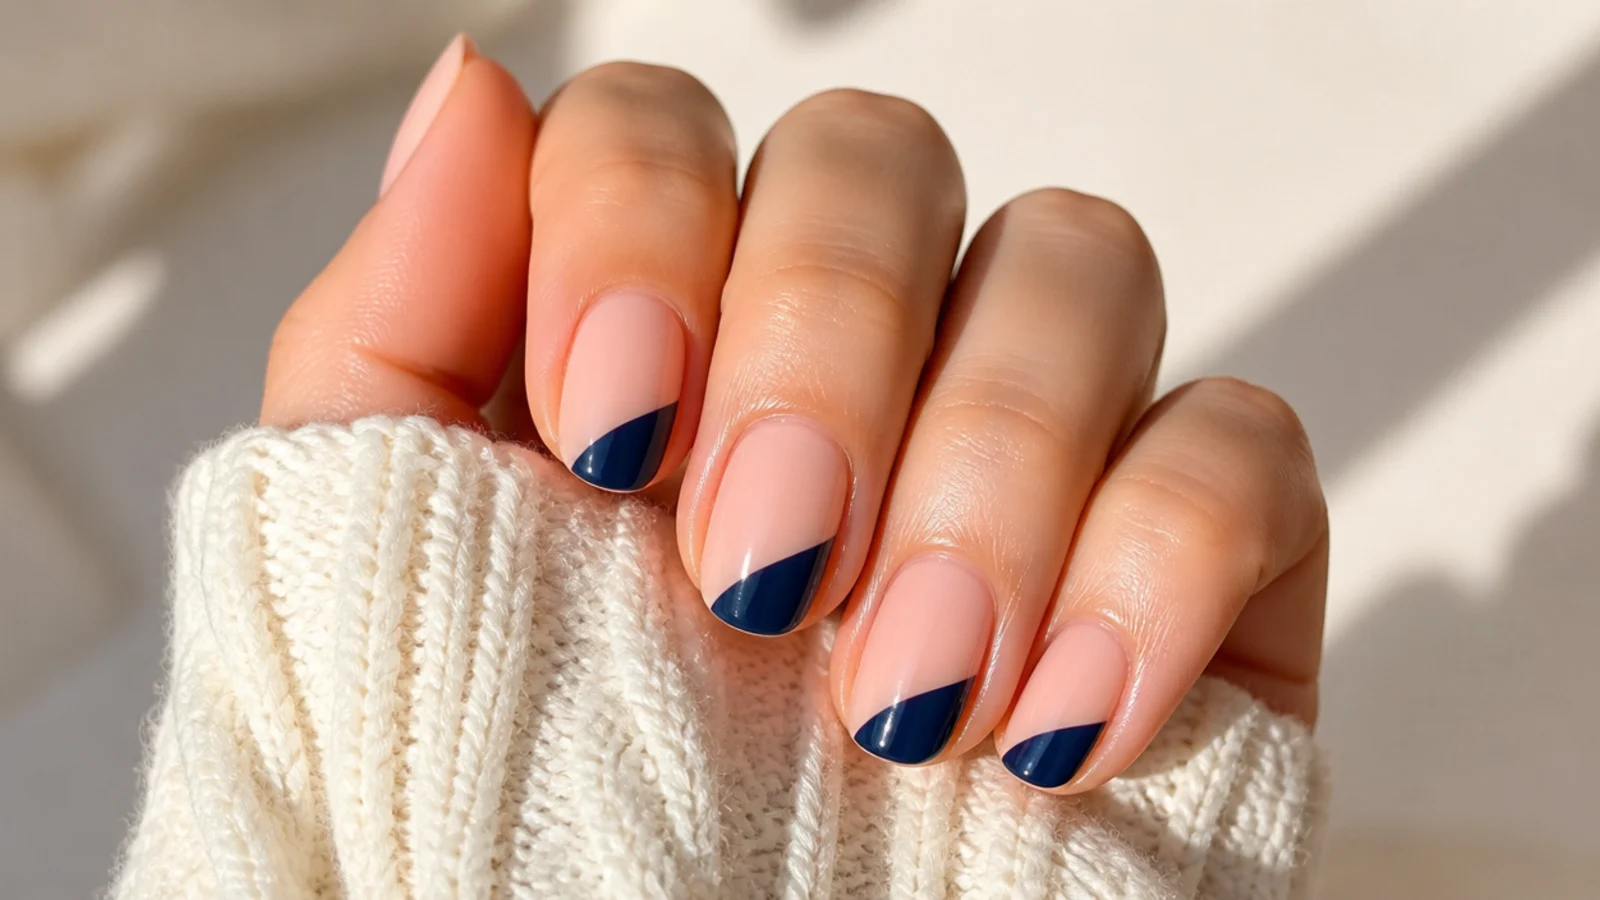
One diagonal line turns two ordinary polishes into a design. 1. Paint the whole nail in your lighter shade, two coats, and wait 10 minutes. 2. Lay tape corner to corner at roughly 45 degrees. 3. Paint the exposed half in a contrast such as navy or black, two thin passes. 4. Peel the tape while wet, pulling back flat. 5. Wait 5 minutes and top coat over the whole nail to level the ridge where the two colors meet. Alternate the diagonal direction on each hand and it reads intentional rather than accidental.
Who it suits: Medium nails, bold color pairings. Difficulty 2 of 3, 22 minutes.
Tip: Polish bled under the tape? Press the tape edge down hard with a fingernail before painting.
12. Color Block Nails With Tape
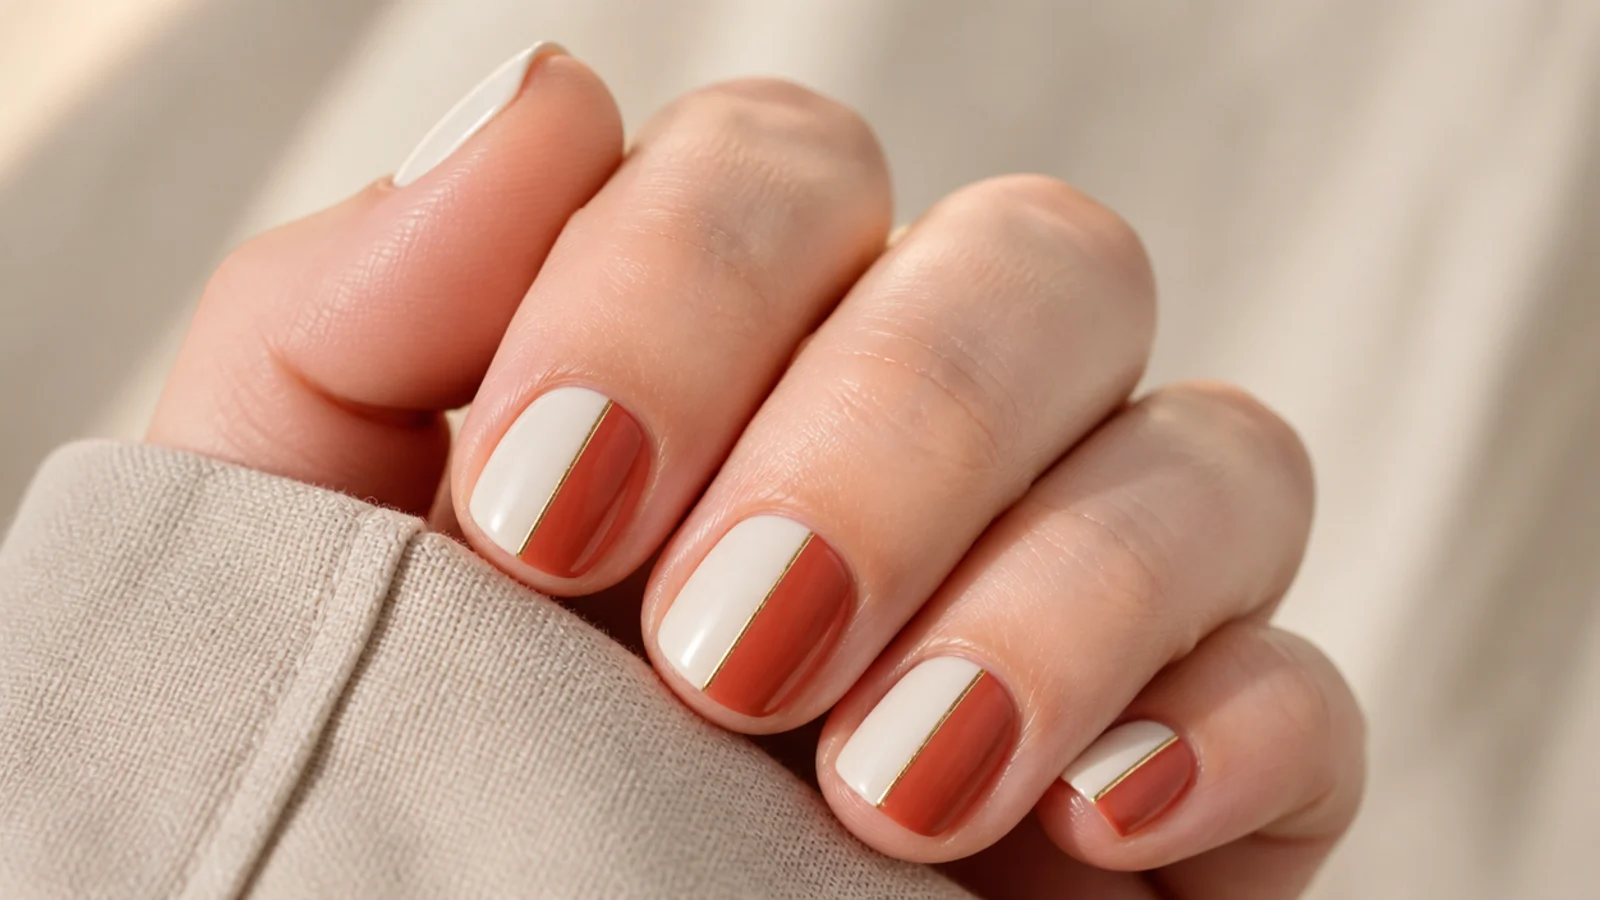
A vertical split, two shades, no brush skill required. 1. Paint every nail in the lighter of your two shades, two coats, and wait 10 minutes. 2. Run tape vertically down the middle of the nail, or slightly off center, which looks better than dead center. 3. Paint the exposed half in the second shade. Cream and terracotta, or black and white, are the easiest pairs. 4. Peel while wet. 5. Top coat after 5 minutes to smooth the seam. Alternate which side is dark across the ten nails, an easy trick borrowed from the cute nails hub.
Who it suits: Short nails, anyone who cannot draw. Difficulty 1 of 3, 20 minutes.
Tip: A visible ridge at the seam means one shade went on thick. Two top coats will level it.
13. Glitter Gradient Nails With a Sponge
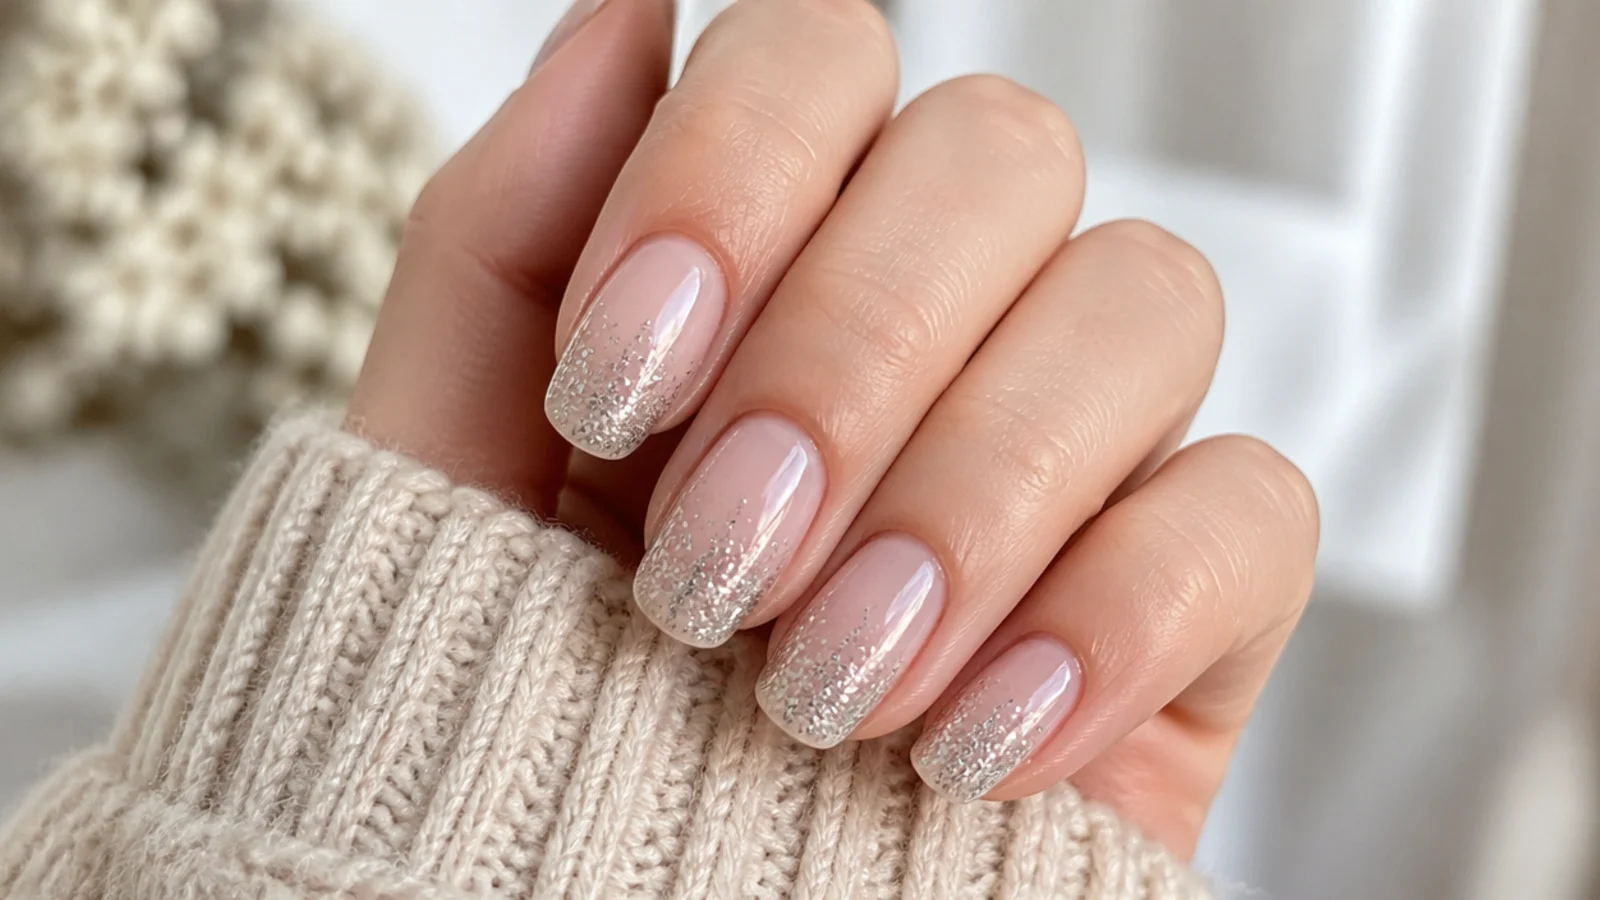
Glitter fading from the tip inward hides every uneven edge you have. 1. Paint a sheer nude base and wait 5 minutes. 2. Dab glitter polish onto a torn piece of makeup sponge. 3. Press the sponge onto the tip and bounce it, lifting straight up, working the glitter about a third of the way down. 4. Repeat the bounce two or three times, building density at the tip only. 5. Two coats of top coat, because glitter is textured and one coat leaves it gritty. Fine glitter grades more smoothly than chunky hex, as in light purple glitter nails.
Who it suits: Holidays, chipped tips you want to hide. Difficulty 1 of 3, 16 minutes.
Tip: Gritty finish after top coat? Glitter needs two coats, and a third on the free edge.
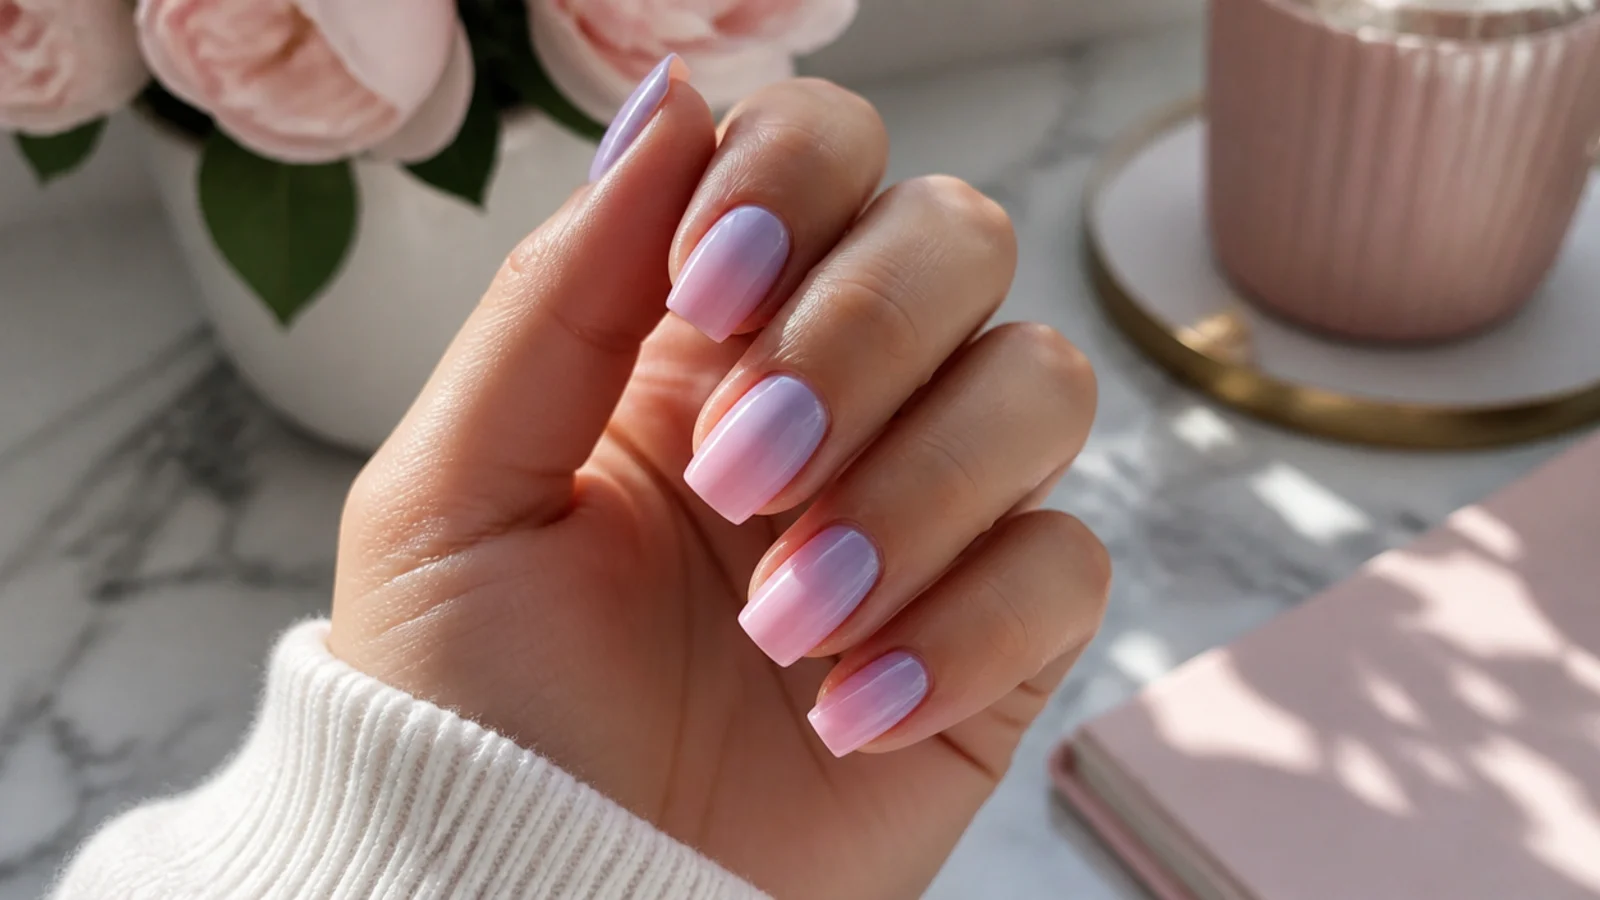
14. Two Color Ombre Nails With a Sponge
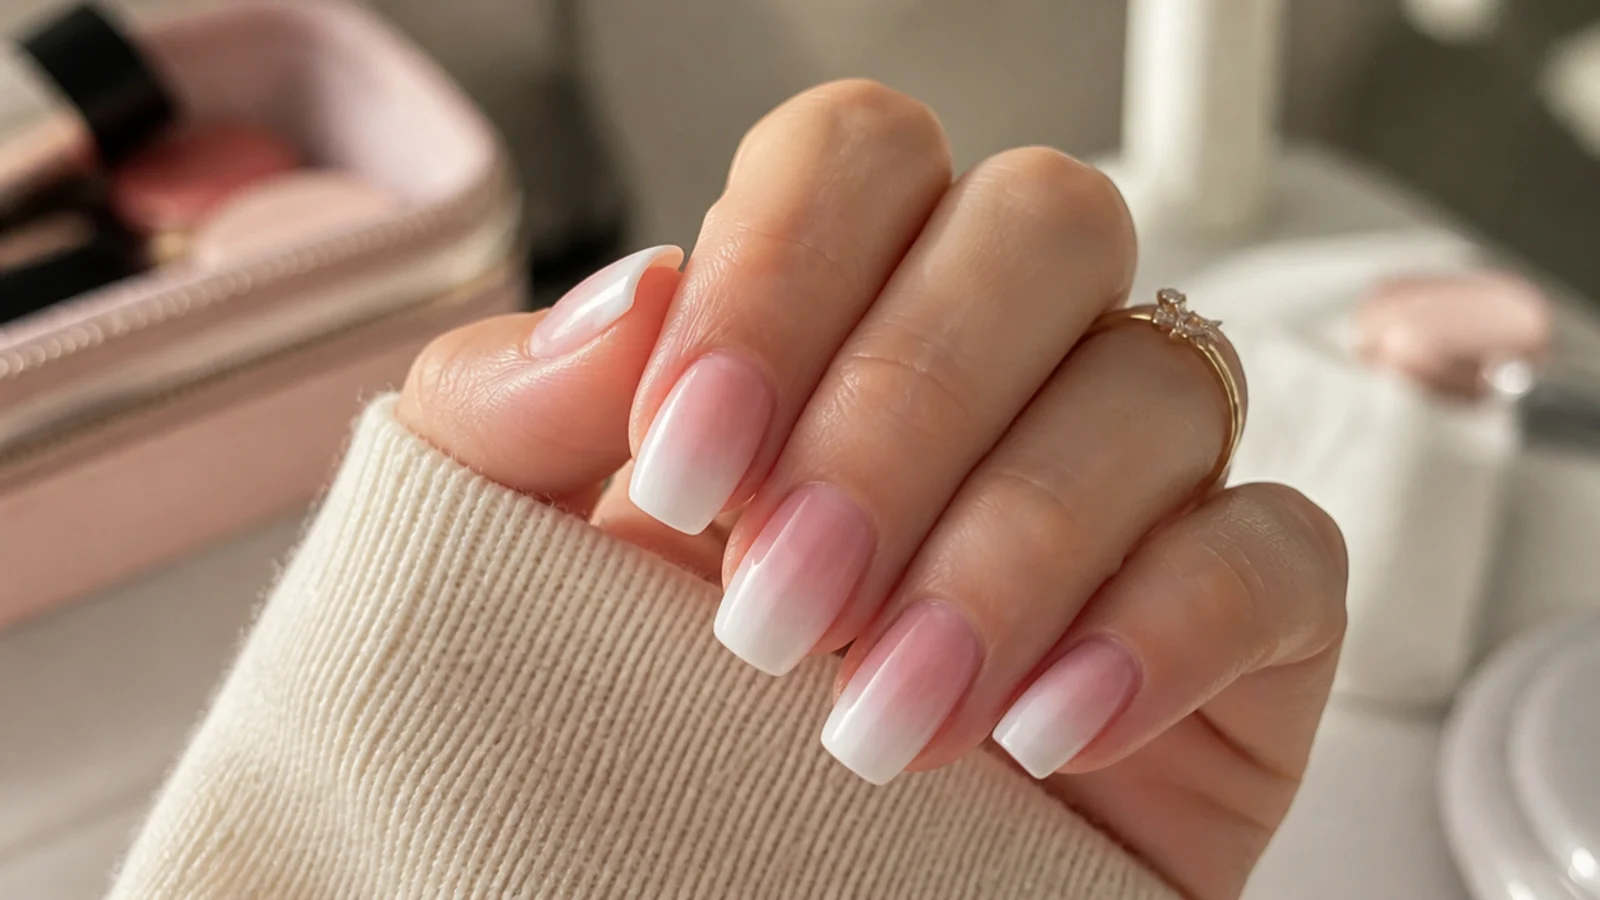
A real fade, no airbrush, no gel lamp. 1. Paint two coats of the lighter shade over the whole nail and wait 5 minutes. 2. On a torn sponge, paint two overlapping stripes of your two colors so they touch in the middle. 3. Press the sponge onto the nail and bounce 5 or 6 times without lifting sideways. 4. Reload the sponge every single nail. This is the step everyone skips and it is why gradients go patchy. 5. Clean the skin with a remover-dipped brush, then two top coats. Pink to white is the most forgiving pair; try lavender ombre nails once you have the motion.
Who it suits: Medium nails, soft girl sets. Difficulty 2 of 3, 25 minutes.
Tip: A hard line instead of a fade means you pressed once. Bounce repeatedly and reload every nail.
15. Abstract Swirl Nails With a Striping Brush
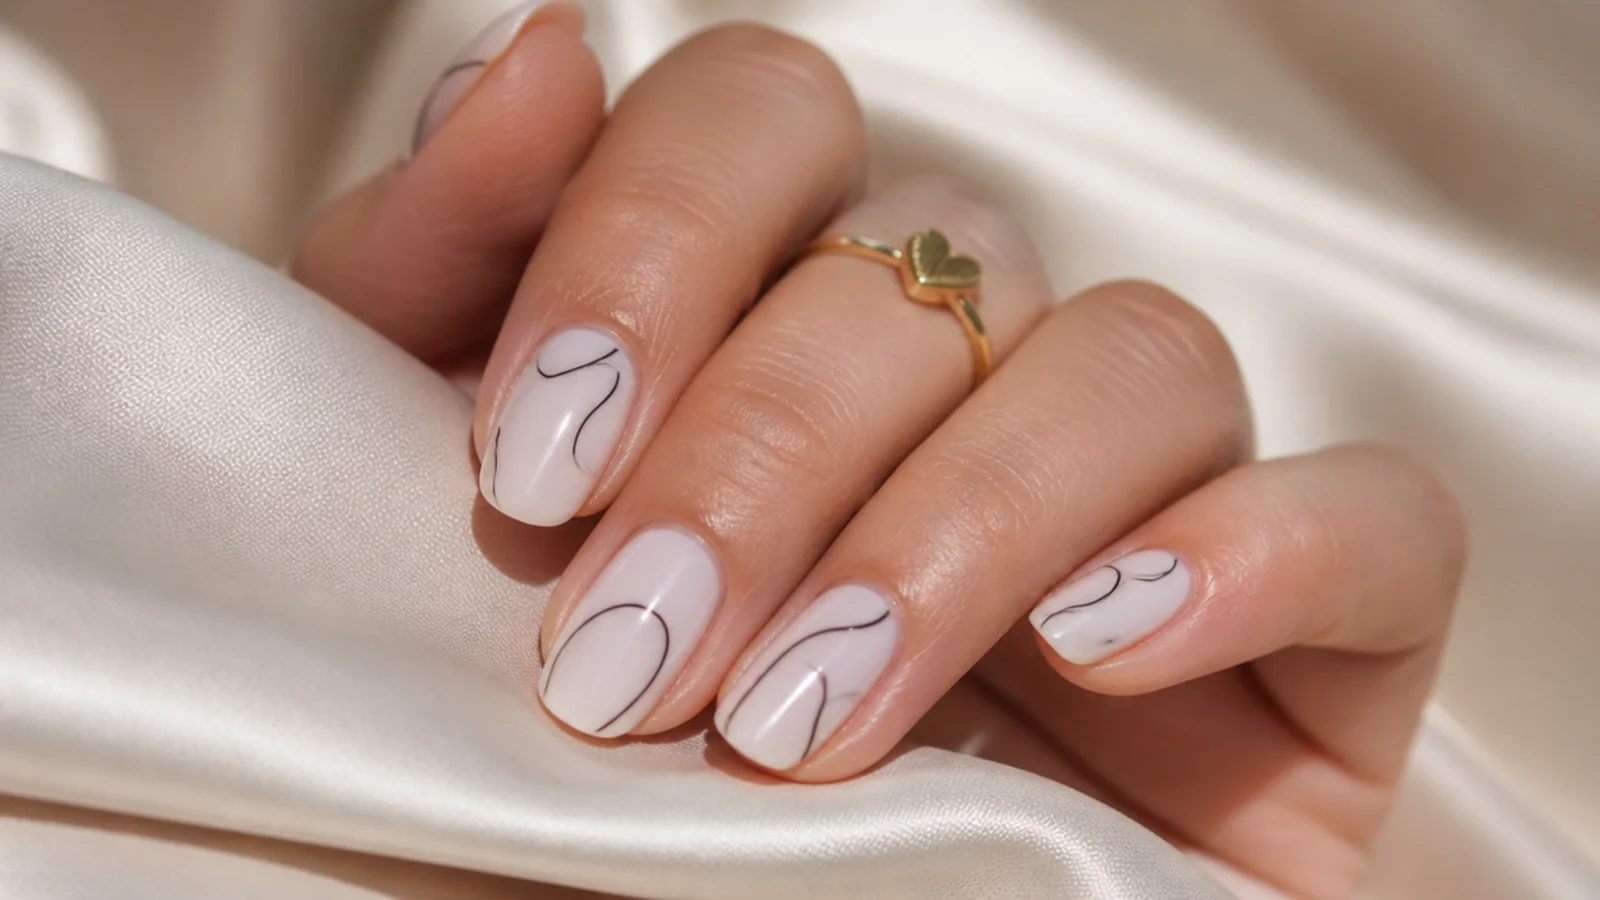
Two curved lines per nail and you have the most saved design of the last two years. 1. Milky or sheer base, two coats, wait 5 minutes. 2. Load a thin striping brush, or a toothpick laid on its side, with black or a bright contrast. 3. Draw one continuous S curve from the lower left toward the upper right, in one movement without stopping. 4. Add a second, thinner swirl that runs roughly parallel but never touches the first. 5. Top coat after 5 minutes. Do not vary all ten nails, use two swirl patterns across the set, the same discipline behind boho mandala nails.
Who it suits: Medium nails, anyone with a steady hand. Difficulty 3 of 3, 25 minutes.
Tip: Broken lines mean the brush ran dry mid-stroke. Reload before every single swirl, not every nail.
16. Marble Nails With a Toothpick Drag
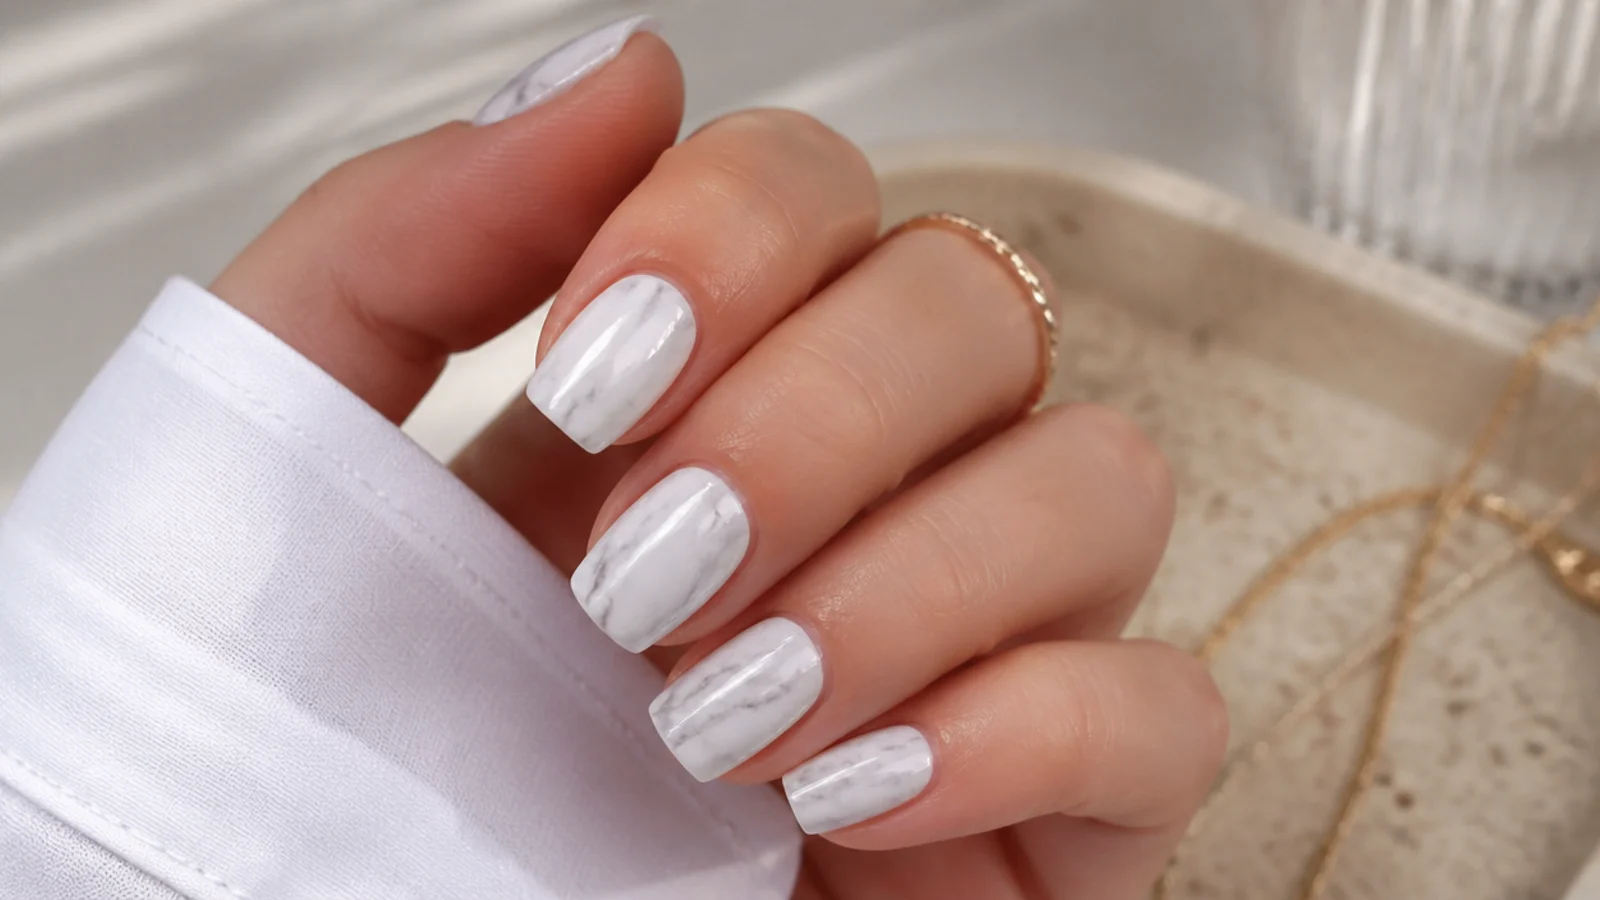
Real marbling, done in the wet polish, no water bowl required. 1. Paint one coat of white and wait 3 minutes. 2. Add a second white coat and work immediately, while it is wet. 3. Drop two or three small dots of gray or taupe onto the wet coat. 4. Drag a toothpick through the dots in irregular, wandering lines, wiping the toothpick clean on a paper towel after every drag. 5. Let it dry a full 8 minutes, then top coat. Fewer veins look more like stone, more veins look like tie-dye.
Who it suits: Medium nails, quiet luxury sets. Difficulty 3 of 3, 22 minutes.
Tip: Muddy gray mush means you dragged too much. Three drags per nail, maximum, then stop.
17. Single Glitter Accent Nail
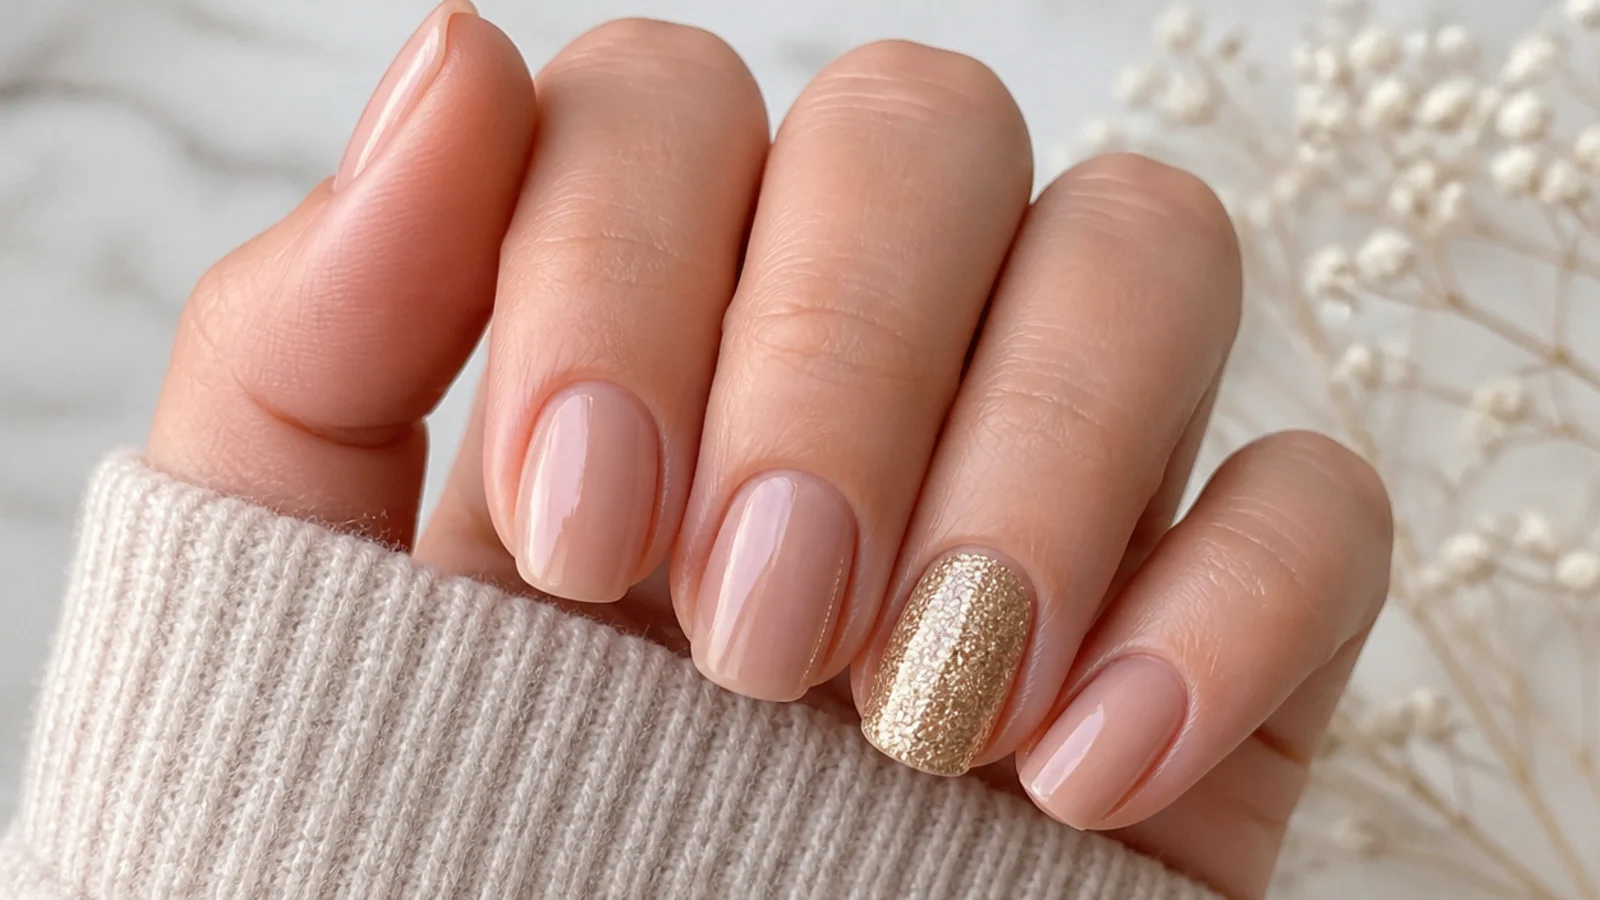
The lowest-effort way to make a plain manicure look finished. 1. Paint all ten nails in a neutral, two coats. 2. On the ring finger only, add one coat of glitter over the dry neutral. 3. If the glitter looks sparse, do not add a thick second coat. Instead dab the brush repeatedly onto the tip half to build density where it is seen most. 4. Top coat the glitter nail twice and the rest once. Gold glitter over beige and silver over gray are the two combinations that never miss. It costs nothing in skill and about 4 extra minutes.
Who it suits: Anyone short on time, work sets that need one detail. Difficulty 1 of 3, 14 minutes.
Tip: Glitter looking patchy? Dab, do not stroke. Strokes push glitter particles into gaps.
18. Negative Space Dot Line Nails
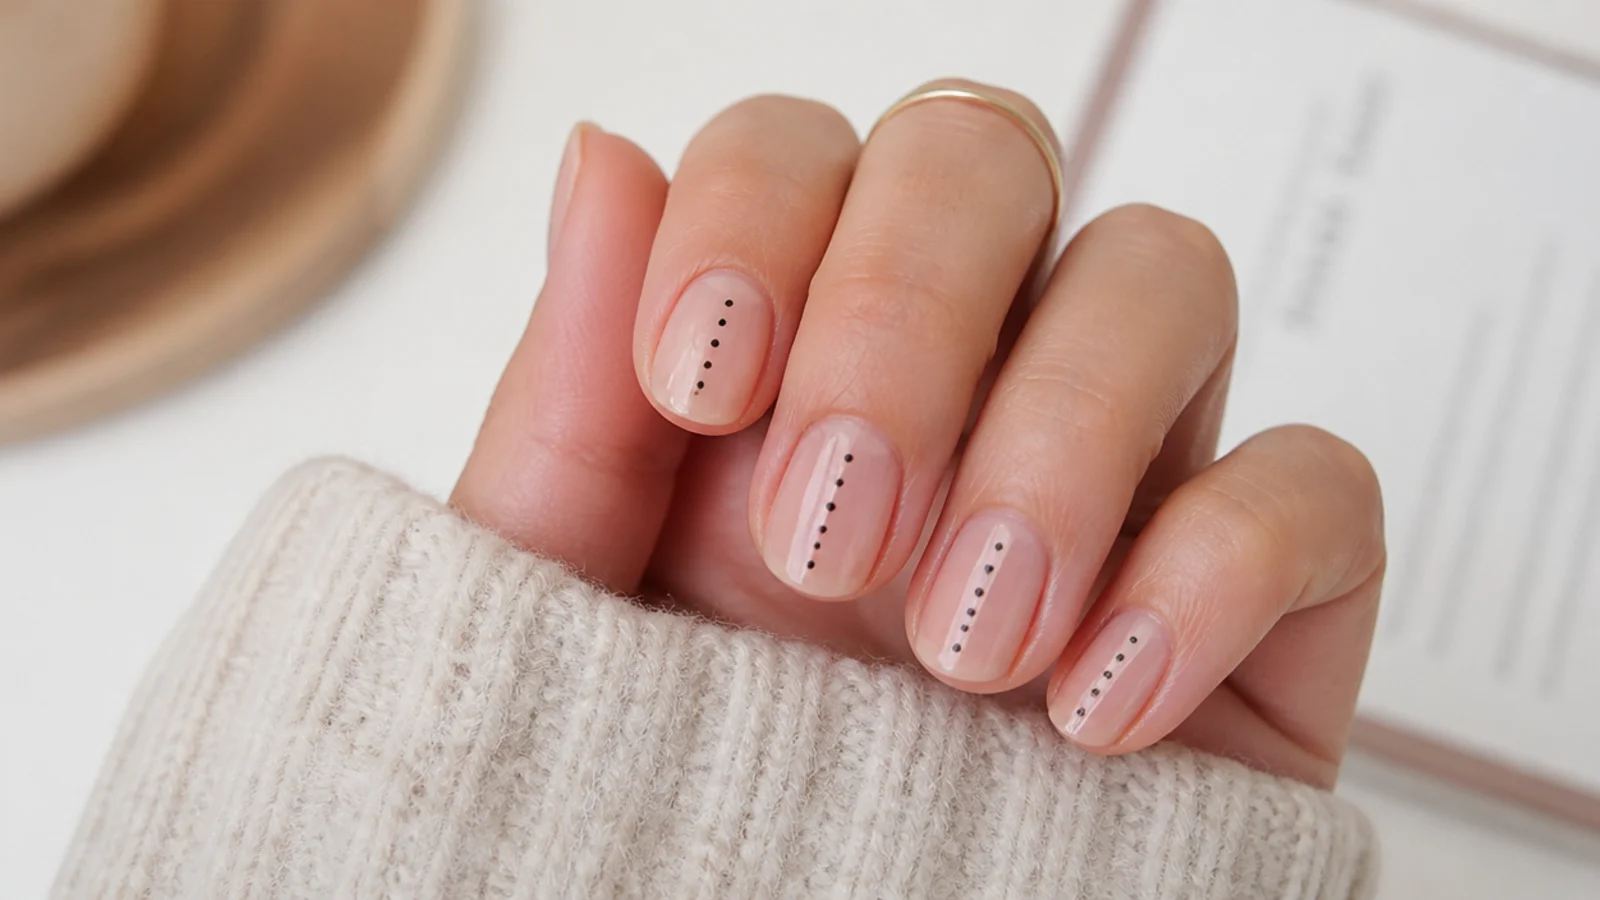
Bare nail, three dots, and it still reads as a designed set. 1. Apply base coat only, no color, and wait 3 minutes. 2. With a toothpick, place three evenly spaced dots down the vertical center of each nail, starting about 3mm from the cuticle. 3. Keep the dots identical in size by re-dipping between each one. 4. Top coat the whole nail after 5 minutes. Because there is no color to grow out, this set still looks clean on day 8, which is longer than any painted design here. It is the closest thing on this list to expensive-looking short nails.
Who it suits: Bitten or short nails, growth-out phases, minimalists. Difficulty 1 of 3, 10 minutes.
Tip: Dots drifting off center? Look down the nail lengthwise, not across it, before placing the second dot.
19. Chrome Powder Accent Nails
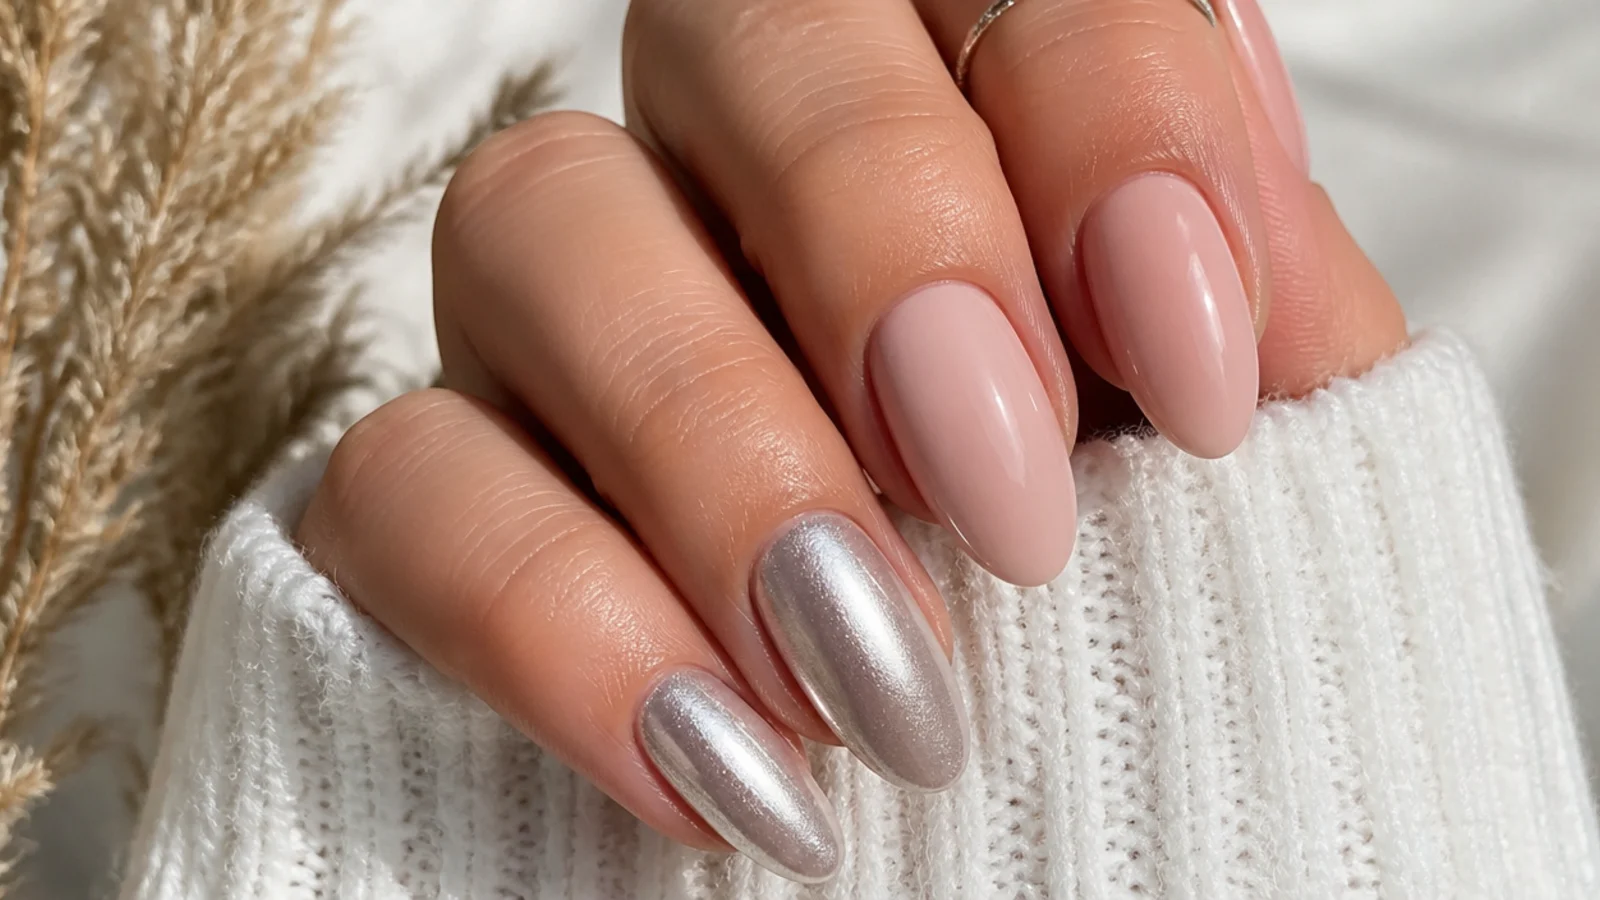
The one design here that needs a lamp, and it is worth the exception. 1. Build your color in gel and cure it. 2. Apply a no-wipe gel top coat and cure for 60 seconds. Chrome will not stick to anything else, which is the entire reason home chrome fails. 3. Rub chrome powder onto the cured surface with the silicone applicator or a clean eyeshadow sponge, pressing firmly for 20 seconds until it turns mirror. 4. Brush off the excess. 5. Seal with one more gel top coat and cure. Full walkthrough in how to white chrome nails.
Who it suits: Anyone with a starter gel lamp, special occasions. Difficulty 3 of 3, 30 minutes.
Tip: Chrome looking dull instead of mirror? You used a wipe top coat. It must be a no-wipe formula.
20. Star and Heart Sticker Nails
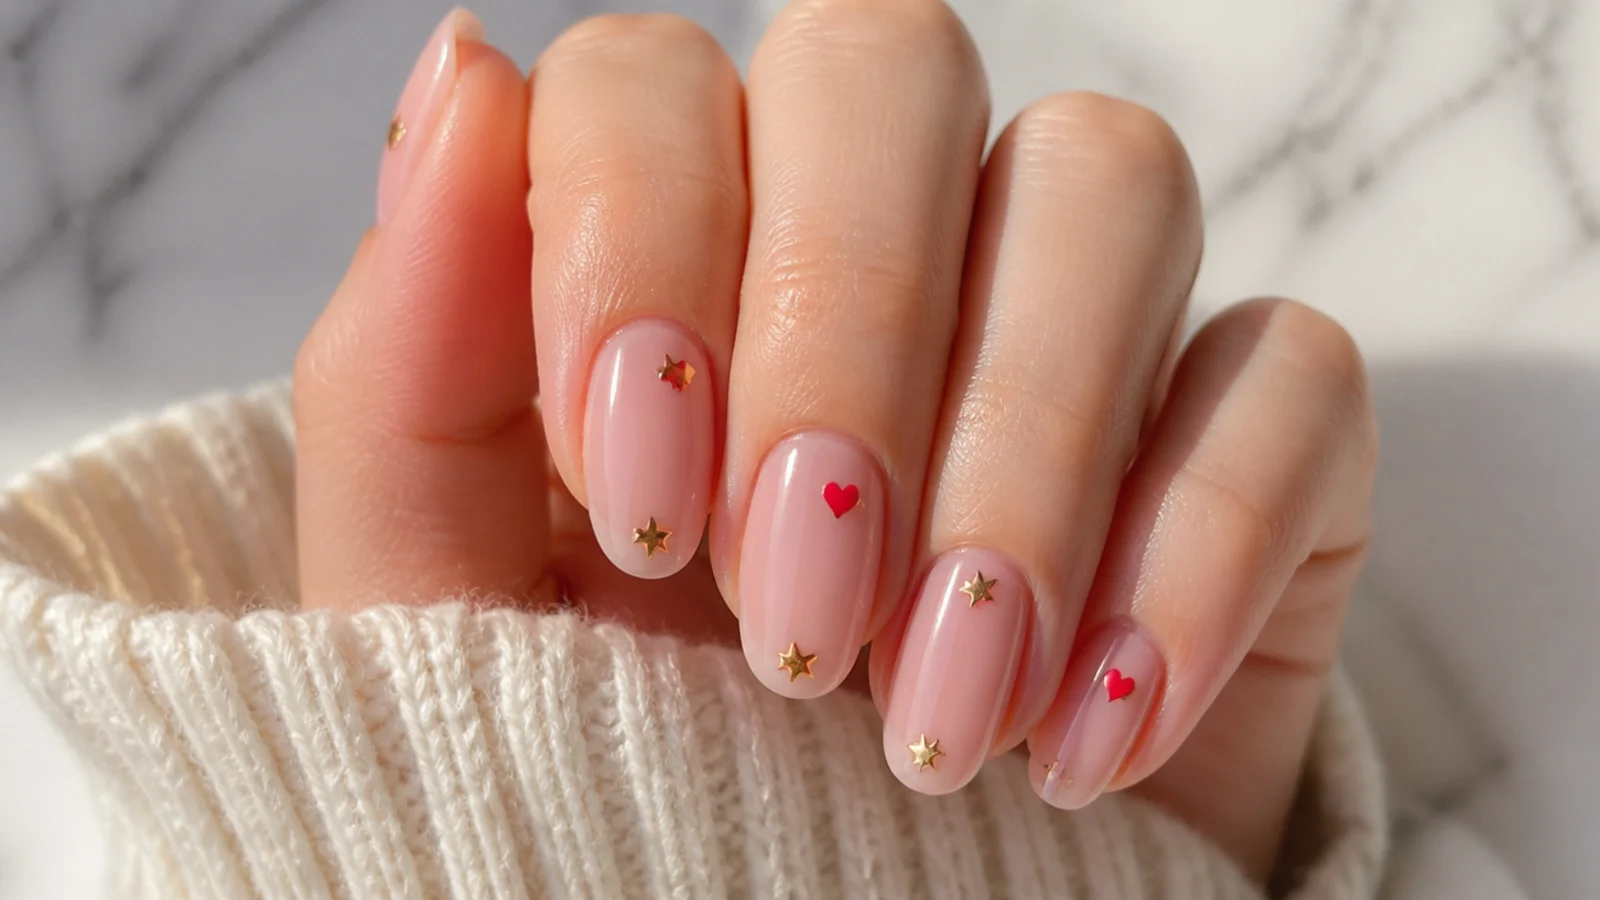
Stickers are not cheating, they are how you get detail no beginner can freehand. 1. Paint your base color and let it dry a full 10 minutes, because stickers pull soft polish. 2. Lift each sticker with a damp toothpick tip rather than your fingers, which leave oil. 3. Place the edge down first, then roll the sticker flat so no air gets trapped. 4. Press for 5 seconds. 5. Seal with two top coats, working the brush over the sticker edge so nothing lifts. One or two stickers per nail, never a full sheet.
Who it suits: Beginners who want detail without brush skill. Difficulty 1 of 3, 15 minutes.
Tip: Sticker corner lifting on day 2? You capped the tip but not the sticker edge. Add top coat over both.
How to Do Nail Art Without a Dotting Tool
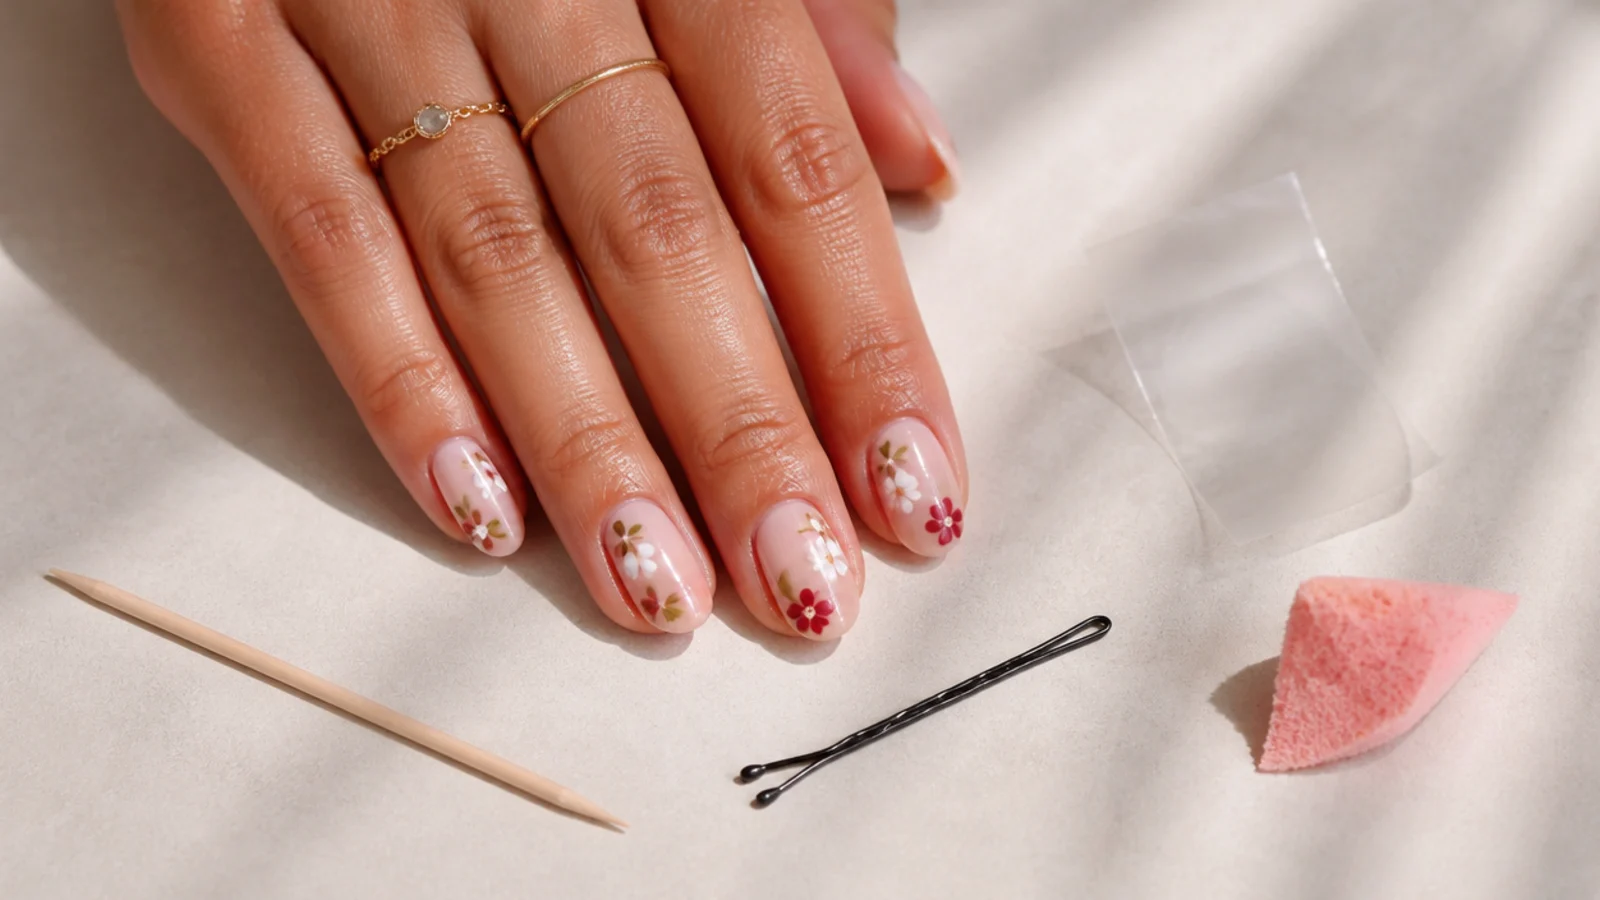
You need four household objects and none of them cost anything. A wooden toothpick makes dots between 0.5mm and 1.5mm depending on how deep you dip it, and laid on its side it draws a passable thin line. The rounded ball end of a bobby pin makes a larger, cleaner round dot, roughly 2 to 3mm, and it is more even than a toothpick because the ball is a fixed size. Regular scotch tape masks straight lines, but reduce the tack first by pressing it on the back of your hand twice or it lifts your base color. A torn makeup sponge, torn rather than cut, gives the ragged edge that makes a gradient fade instead of stopping in a line. Add one small flat brush kept in a lid of remover for cleanup and you can do 18 of the 20 designs above. Only chrome powder needs a real purchase. If you would rather buy a set, compare the options in cute nail kits for beginners.
Painting Your Non-Dominant Hand Without Ruining It
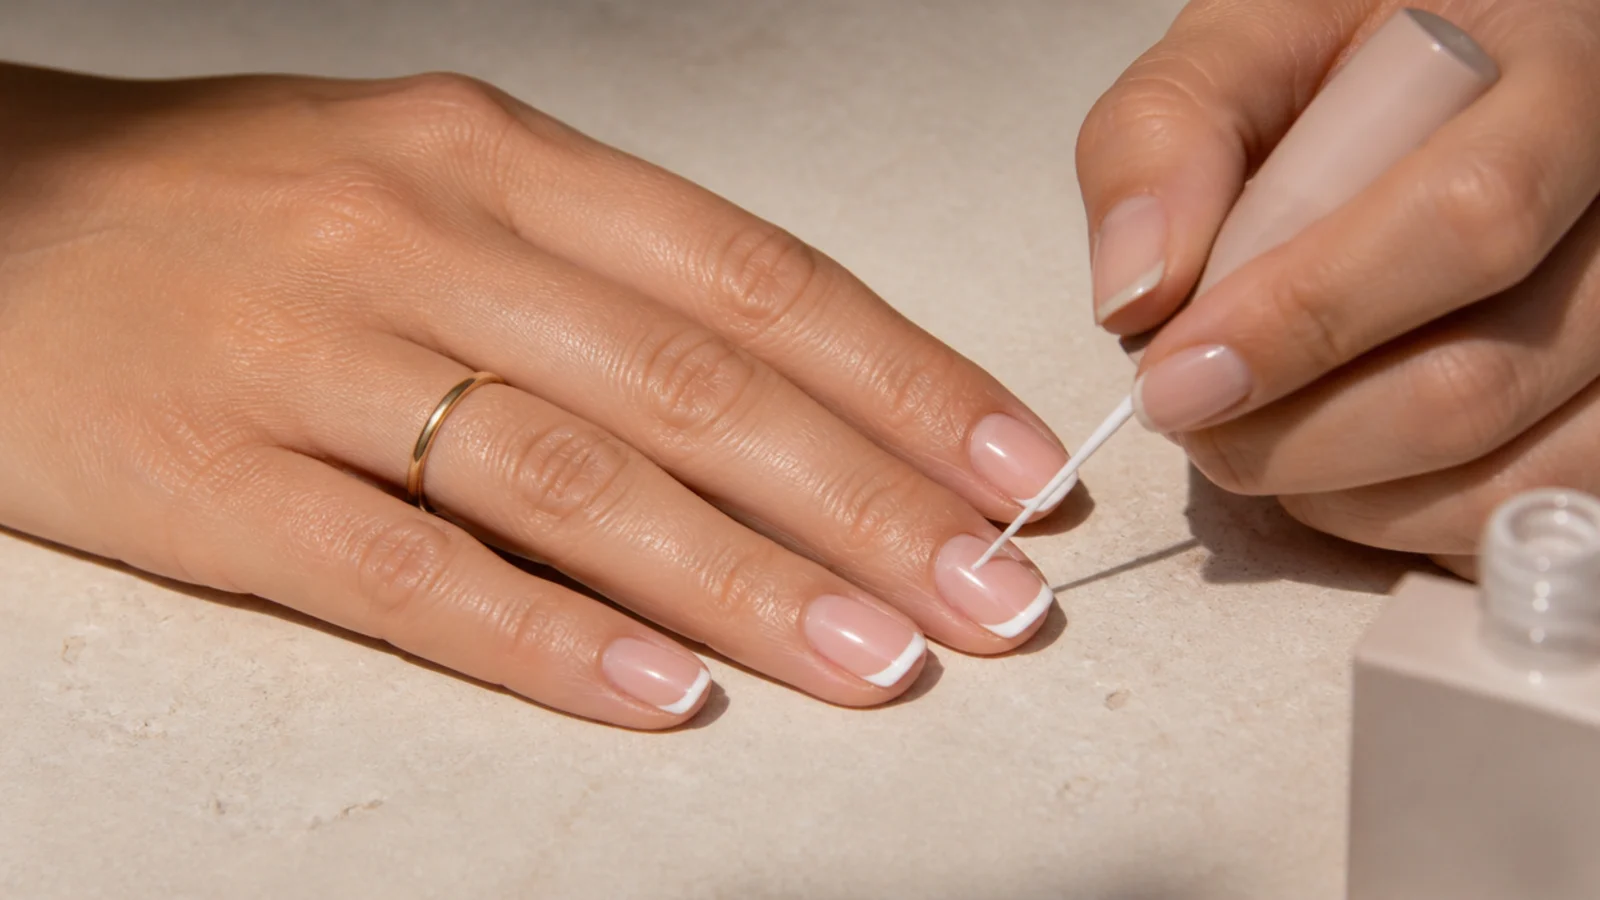
This is the failure point nobody writes about, and it has three fixes. First, paint your dominant hand second, not first. Your weaker hand does the harder job, so give it the practice run on nails nobody studies as closely, then paint your good nails when your wrist has warmed up. Second, do not move the brush. Rest the heel of your painting hand on the table, hold the brush still, and rotate the finger underneath it. A finger turns more smoothly than a shaky wrist travels. Third, brace both hands together: hook the pinky of your painting hand under the palm of the other so they move as one unit rather than two. Take polish off the brush before it reaches the nail, wiping one side clean on the bottle neck, because a loaded brush needs pressure and pressure is what wobbles. Cleanup is not failure, it is step six, so keep that remover brush loaded. The same bracing works for the freehand lines in how to do cute nails at home.
Dry Times, Thin Coats and Why Designs Smudge
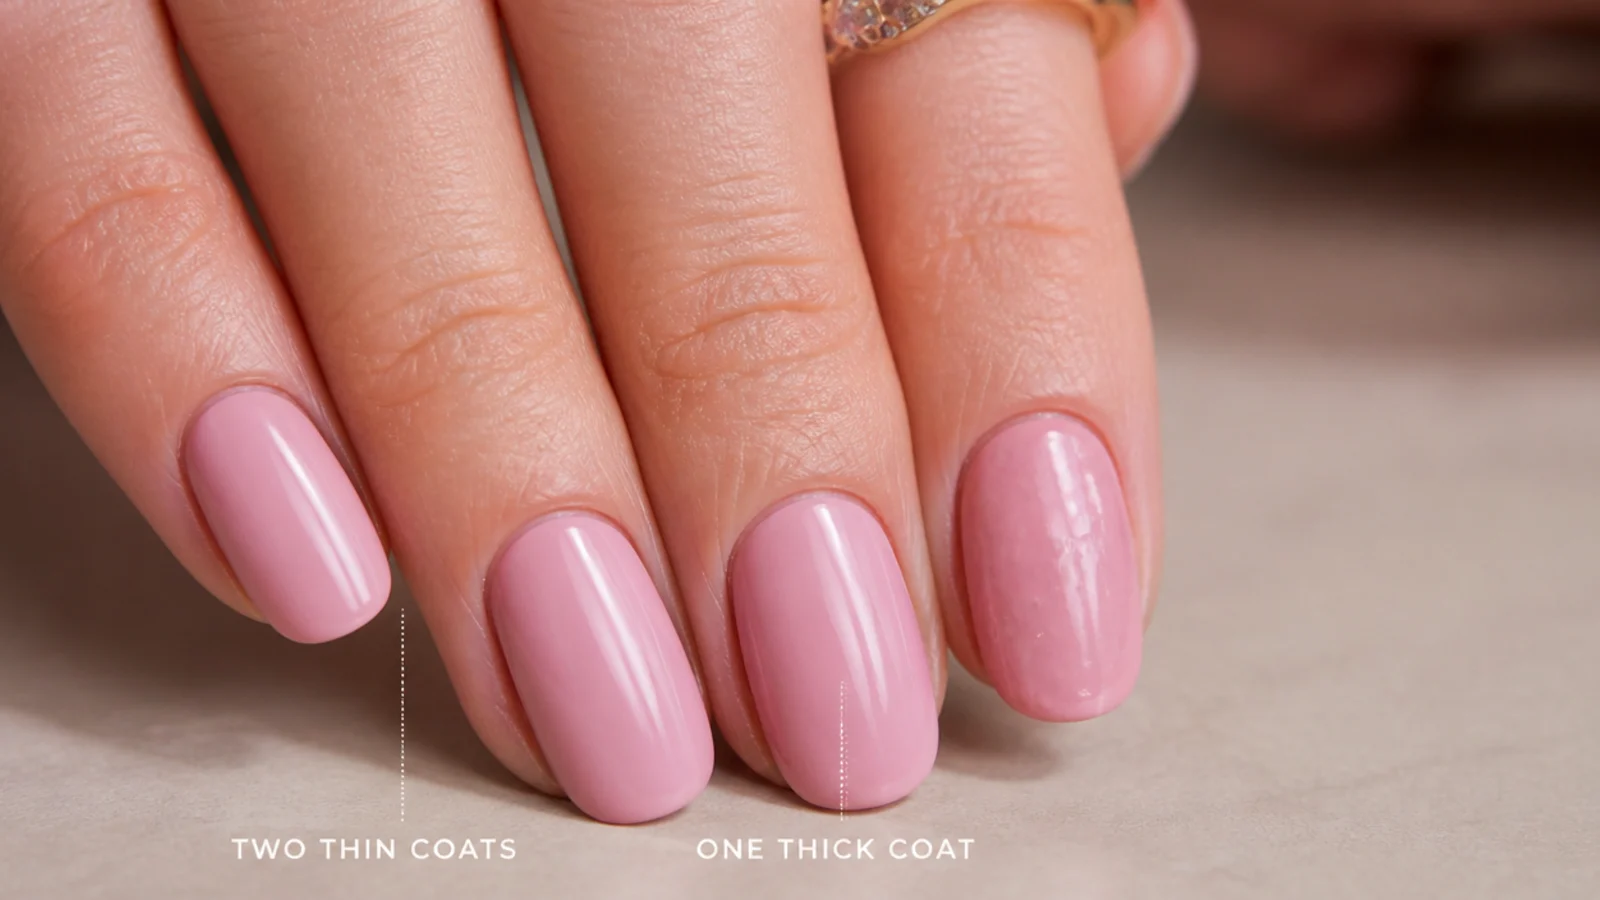
Almost every smudged design comes from one thick coat instead of two thin ones. Polish dries from the surface down, so a thick layer skins over on top while staying liquid underneath. It feels dry, you press a dot into it, and the dot sinks. Two thin coats with 3 minutes between them are dry through in about 10 minutes; one thick coat can still be soft at 30. Give a color base 5 minutes before dotting, and a full 10 minutes before taping, because tape applies sideways force that a dot never does. Bubbles come from shaking the bottle instead of rolling it between your palms, and from polish that has thickened. Thin it with two drops of polish thinner, never remover, which breaks the formula. Cold polish drags, so if the bottle has been by a window in winter, warm it in your hand for a minute. Top coat only when the design passes the tap test: tap two nails together and they should click, not stick. Thin coats are the same rule that prevents streaking in matte nails mistakes.
What These Designs Cost at Home Compared to a Salon
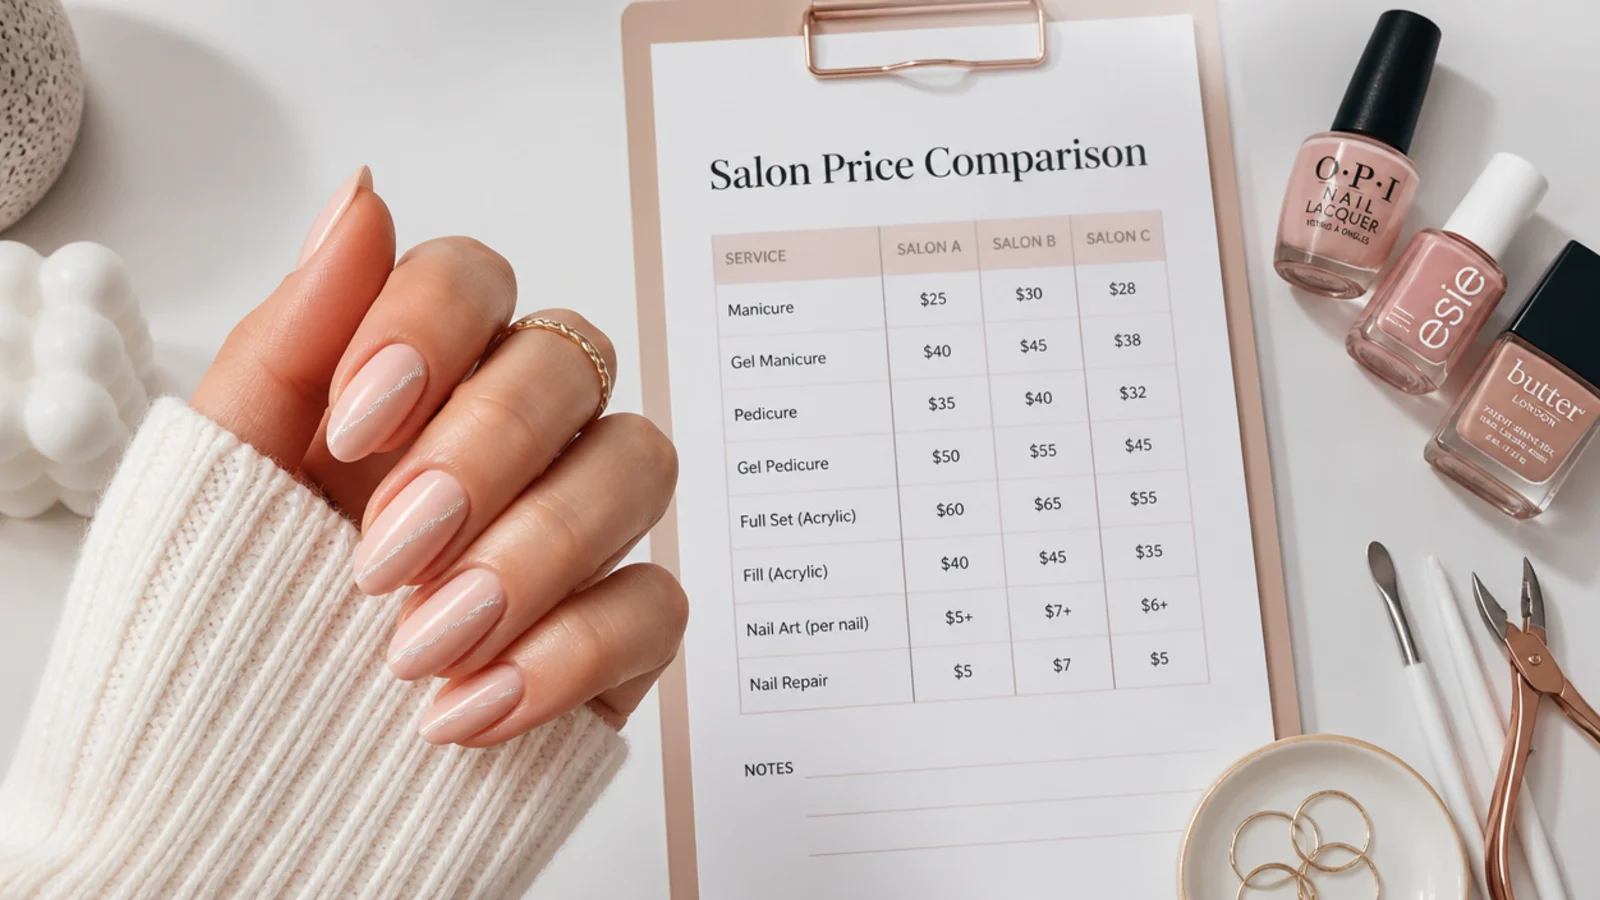
A salon gel manicure runs about 25 to 50 dollars, and hand-painted art typically adds 35 to 50 dollars on top, more for detailed work across all ten nails. Every design on this list is achievable for the price of the polish. Two polishes, a base coat and a top coat cost roughly 25 to 40 dollars for good drugstore formulas, and that kit paints 15 to 20 manicures, so your per-set cost lands under 3 dollars. The household tools are free. The only paid additions are chrome powder, at about 8 to 15 dollars for a jar that lasts dozens of sets, and a starter gel lamp with base and top coat if you want 2 to 3 weeks of wear instead of 5 to 7 days. That is where the real money question sits: regular polish is cheaper per bottle, but you repaint four times as often. Costed over a year, a gel setup is usually the cheaper route for anyone doing their nails weekly, which is exactly the calculation behind cute short nails that look expensive.
Troubleshooting: Smudges, Bald Dots and Early Chips
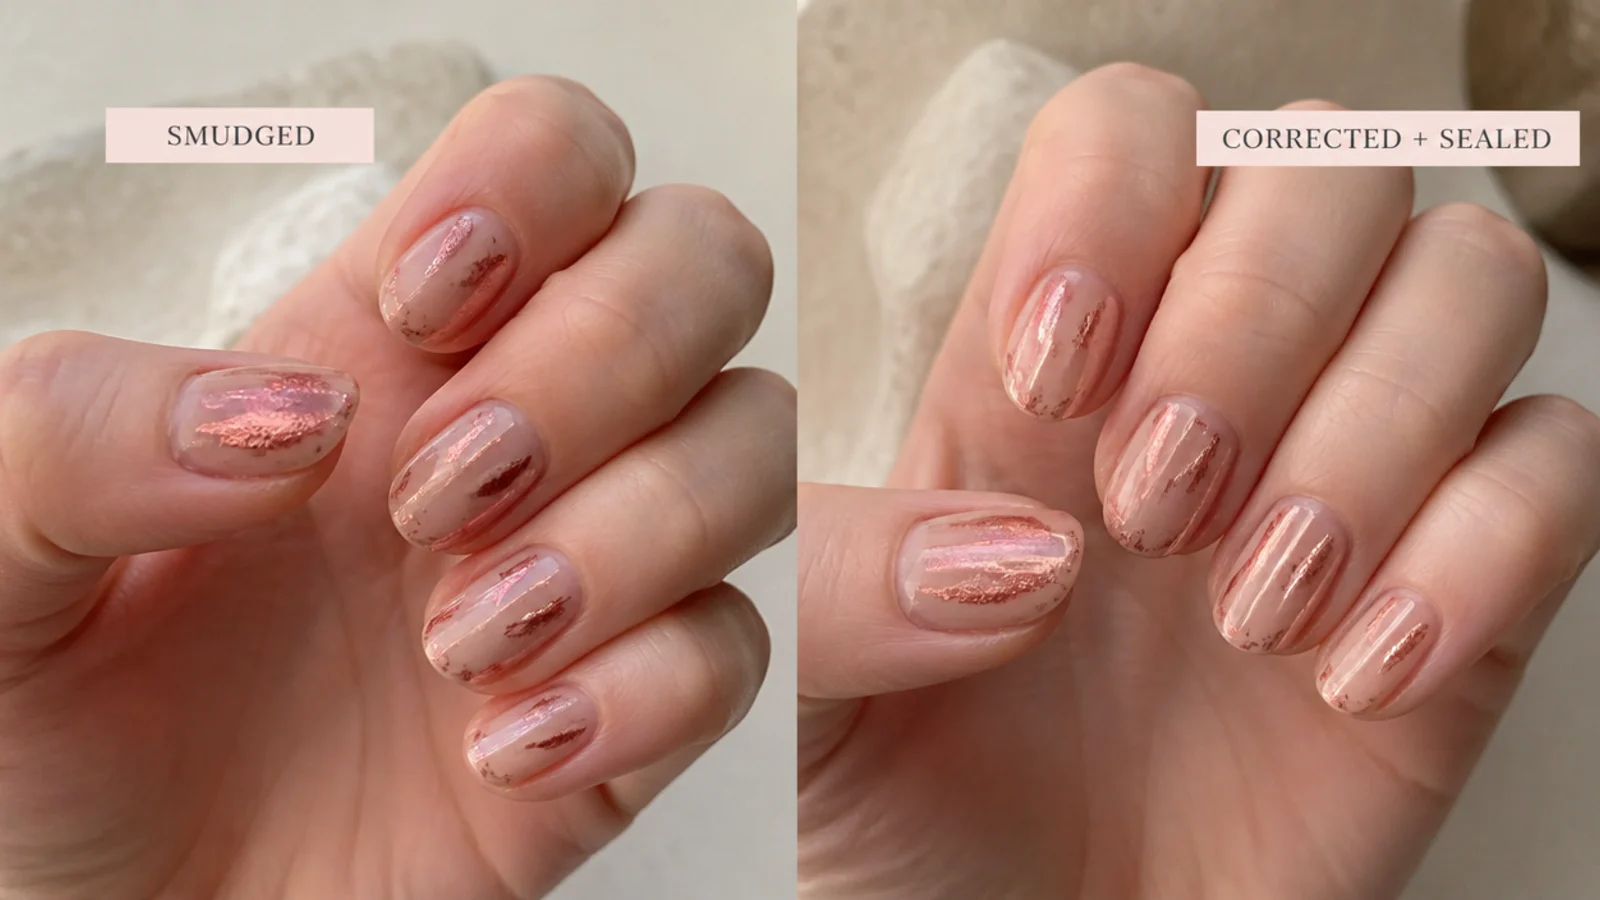
Six failures cover nearly everything. Sheet marks pressed into the design overnight: you top coated too early, so wait for the tap test and give top coat 20 minutes before bed. Dots that spread into blobs: the polish bead on your foil has thickened, so drop a fresh bead every three or four nails. Tape pulling the base color off: the base was not fully dry, so wait 10 minutes and de-tack the tape first. A gradient with a hard line instead of a fade: you pressed the sponge once instead of bouncing it, and you did not reload between nails. Chipping at the tips by day 2: you never capped the free edge, which is the single biggest determinant of how long a home manicure lasts, so run the brush along the tip edge with every coat including top coat. Glitter and stickers catching on fabric: one top coat is not enough over texture, add a second the next morning. For a full prep-to-seal routine, read how to do cute nails at home.
Frequently Asked Questions
What are the easiest nail designs for beginners to do at home?
Micro dots with a toothpick, a single glitter accent nail, confetti dots and negative space dots are the four easiest, and all four are level 1 in under 16 minutes. They forgive uneven placement because randomness or simplicity is the design. Save tape French tips and sponge gradients for your third or fourth attempt.
How do you do nail art without a dotting tool?
A wooden toothpick dipped about 1mm deep makes dots from 0.5mm to 1.5mm, and the rounded ball end of a bobby pin makes even 2 to 3mm dots. Drop the polish onto foil first rather than dipping into the bottle, touch straight down without dragging, and re-dip between every two dots so the size stays consistent.
How long should I wait before doing nail art on top of polish?
Five minutes after a thin color coat before you dot or draw, and a full 10 minutes before you apply tape. Tape puts sideways force on the polish that a dot never does, so it lifts a base that only feels dry. Test by tapping two nails together: they should click, not stick.
Why does my nail art always smudge?
Almost always because the base coat underneath was too thick. Polish dries from the top down, so a thick layer skins over and stays liquid beneath, and your dot sinks into it. Use two thin coats with 3 minutes between them instead of one thick one, and wait 5 more minutes before adding any art.
How do I paint nails on my non-dominant hand?
Paint that hand first while you have patience, rest your painting hand on the table, and rotate the finger under a still brush rather than moving the brush across the nail. Hook your pinky under the other palm so both hands move as one. Then clean the edges with a flat brush dipped in remover.
Does scotch tape work for nail art?
Yes, if the base is fully dry and you reduce the tack first. Press the tape on the back of your hand twice so it grips less, lay it down and press the edge hard with a fingernail, paint over it in two thin passes, and peel it away immediately while the new color is still wet, pulling back on itself rather than upward.
How long do at-home nail designs last?
Regular polish with a capped free edge lasts about 5 to 7 days before the tips wear, and a fresh top coat on day 3 buys you another 2 or 3. The same design built in gel and cured lasts 2 to 3 weeks. Stickers and glitter need two top coats or the edges lift by day 2.
How much does simple nail art cost at home versus a salon?
Hand-painted art at a salon usually adds 35 to 50 dollars on top of a 25 to 50 dollar gel manicure. At home, a base coat, top coat and two polishes cost roughly 25 to 40 dollars and cover 15 to 20 manicures, so each set works out under 3 dollars. The toothpick, tape and sponge cost nothing.
Do I need a UV lamp for these designs?
Only for the chrome powder set, which needs a cured no-wipe gel top coat to stick to. The other 19 designs work with regular air-dry polish. A lamp is worth buying only if you want 2 to 3 weeks of wear rather than 5 to 7 days, and it changes the cost math if you repaint weekly.
Which nail shape suits simple designs best?
Short square and squoval hold straight tape lines and micro French tips most cleanly because the tip edge is already a straight line. Round and almond suit dots, swirls and gradients better, since curved motifs follow the curved edge. Pick the design to match the shape you already have rather than filing to fit.
Acetone, nail glue and UV or LED lamps should be used as directed. Stop if you notice pain, lifting, redness or irritation around the nail fold, and see a licensed nail technician if a design has to be filed or force-removed.
Which cute nails look are you saving?
If you take one thing from these 20 designs, take the wait. Two thin coats of color, three full minutes between them, and every dot, stripe and tape line below lands clean the first time. Start with micro dots or a tape French tip, both under 12 minutes and both level 1, then move up to swirls and sponge gradients once your non-dominant hand stops shaking. Keep a small flat brush soaked in remover beside you so cleanup is part of the process. Then cap every free edge with top coat, reapply it on day 3, and pick your next set from cute short nails that look expensive or the whole cute nails hub.