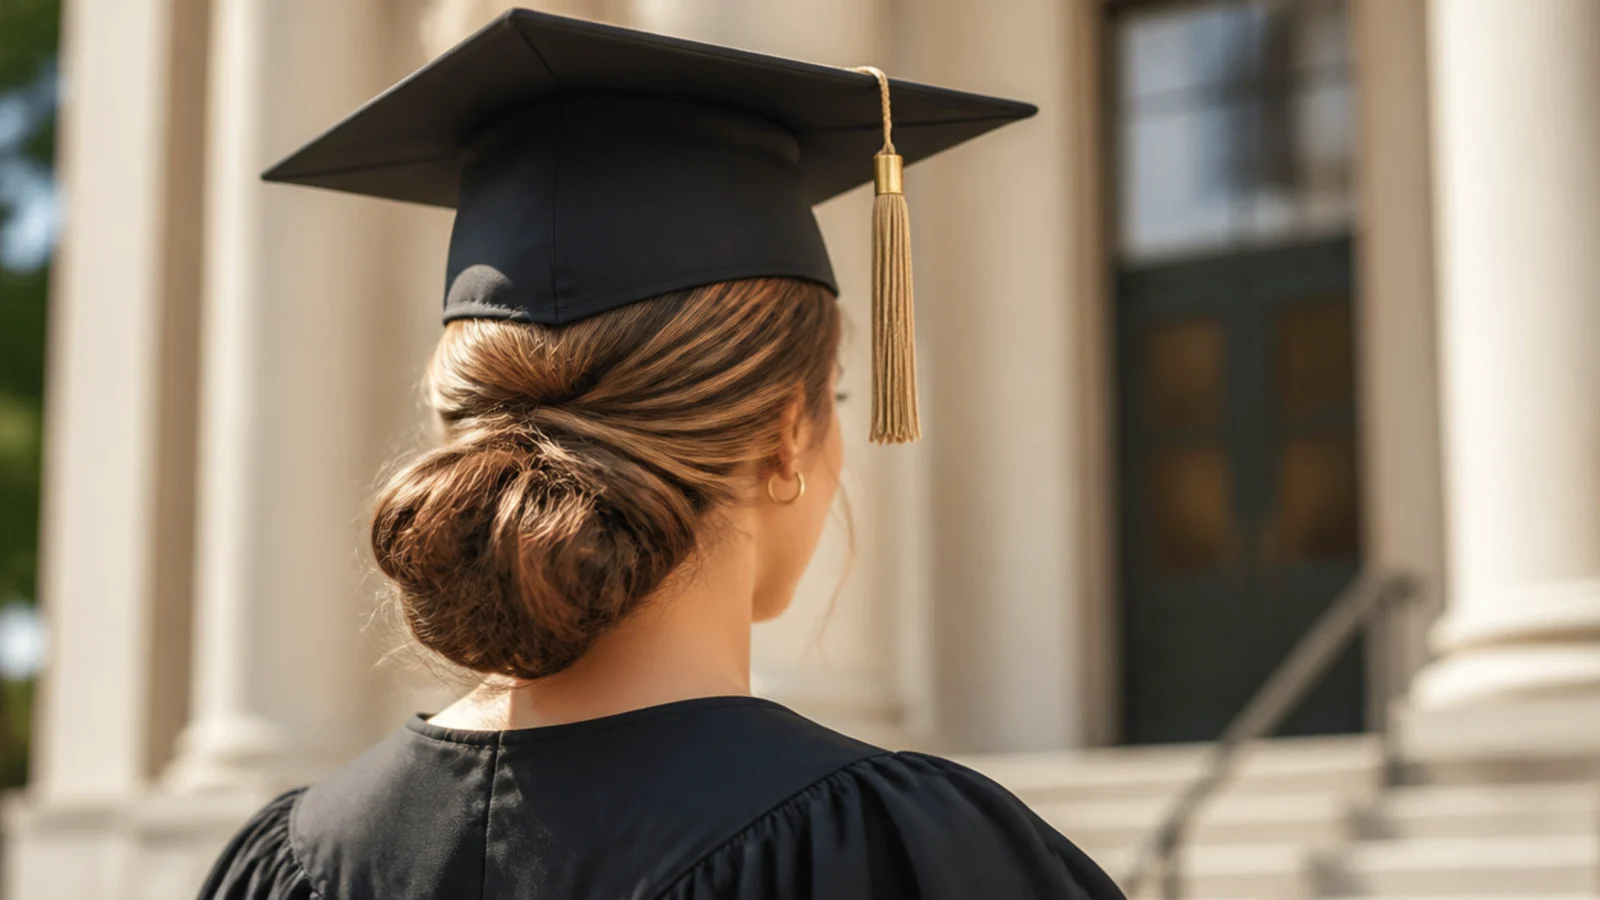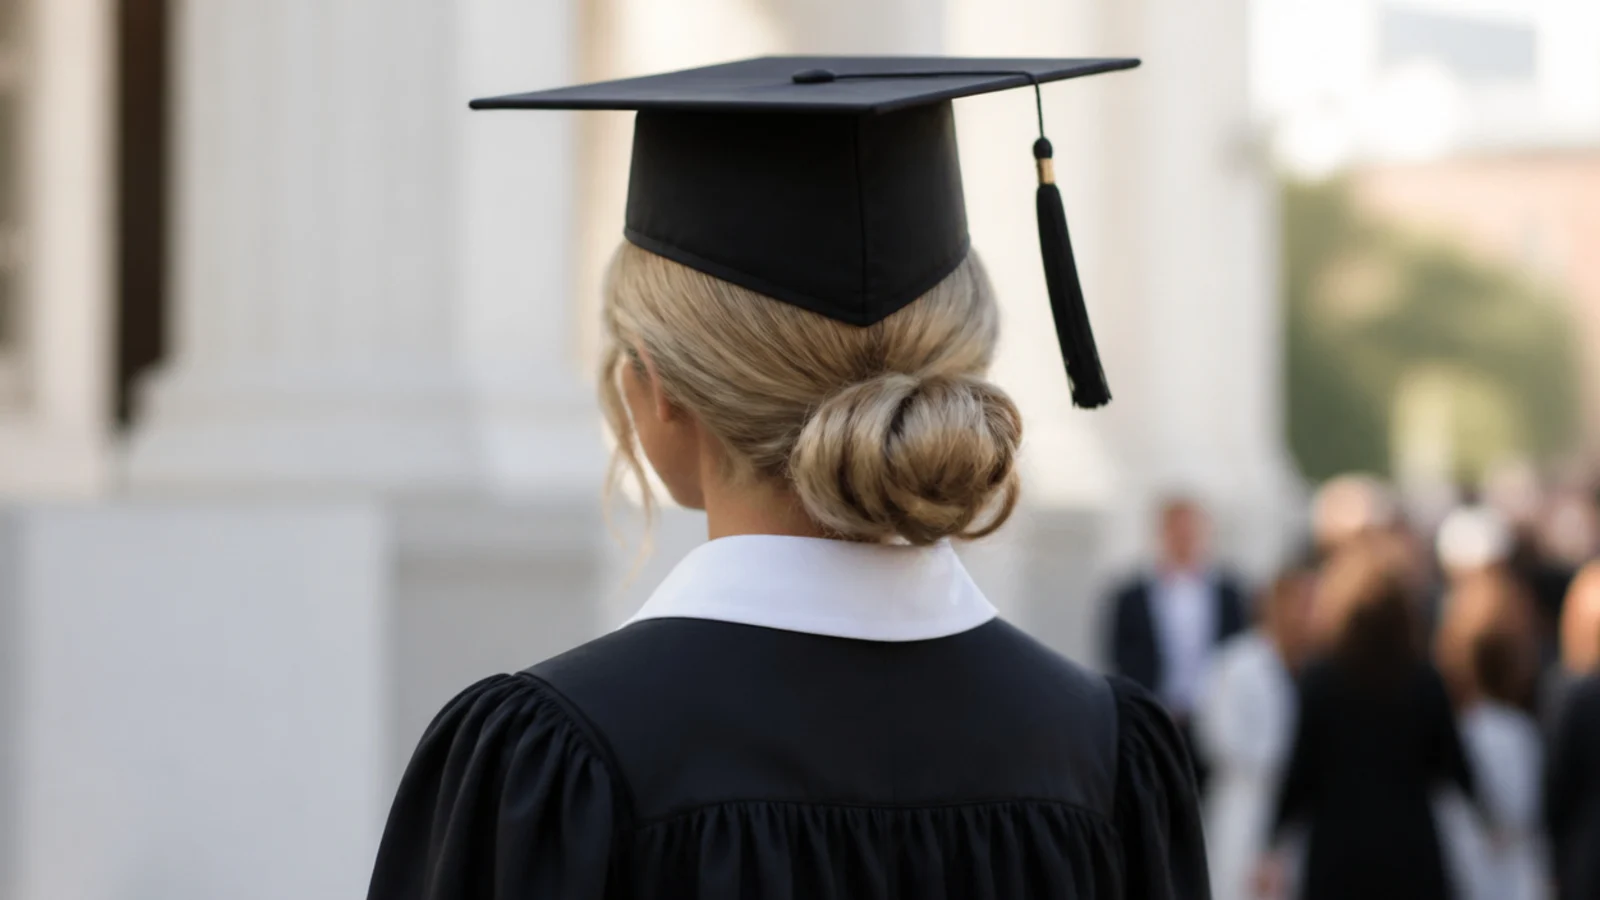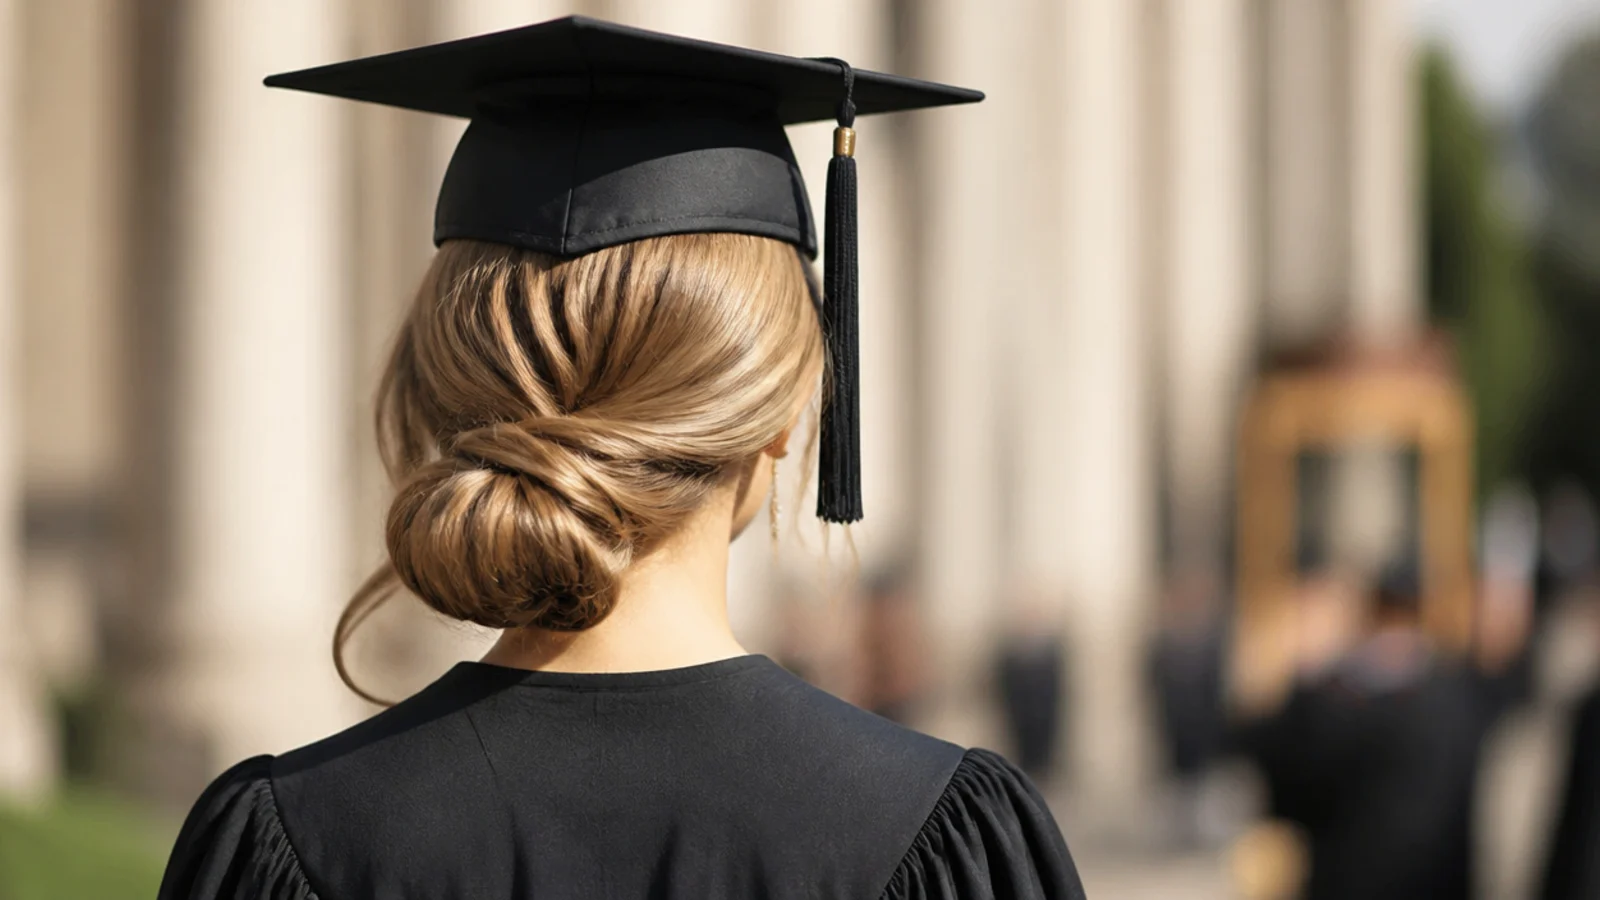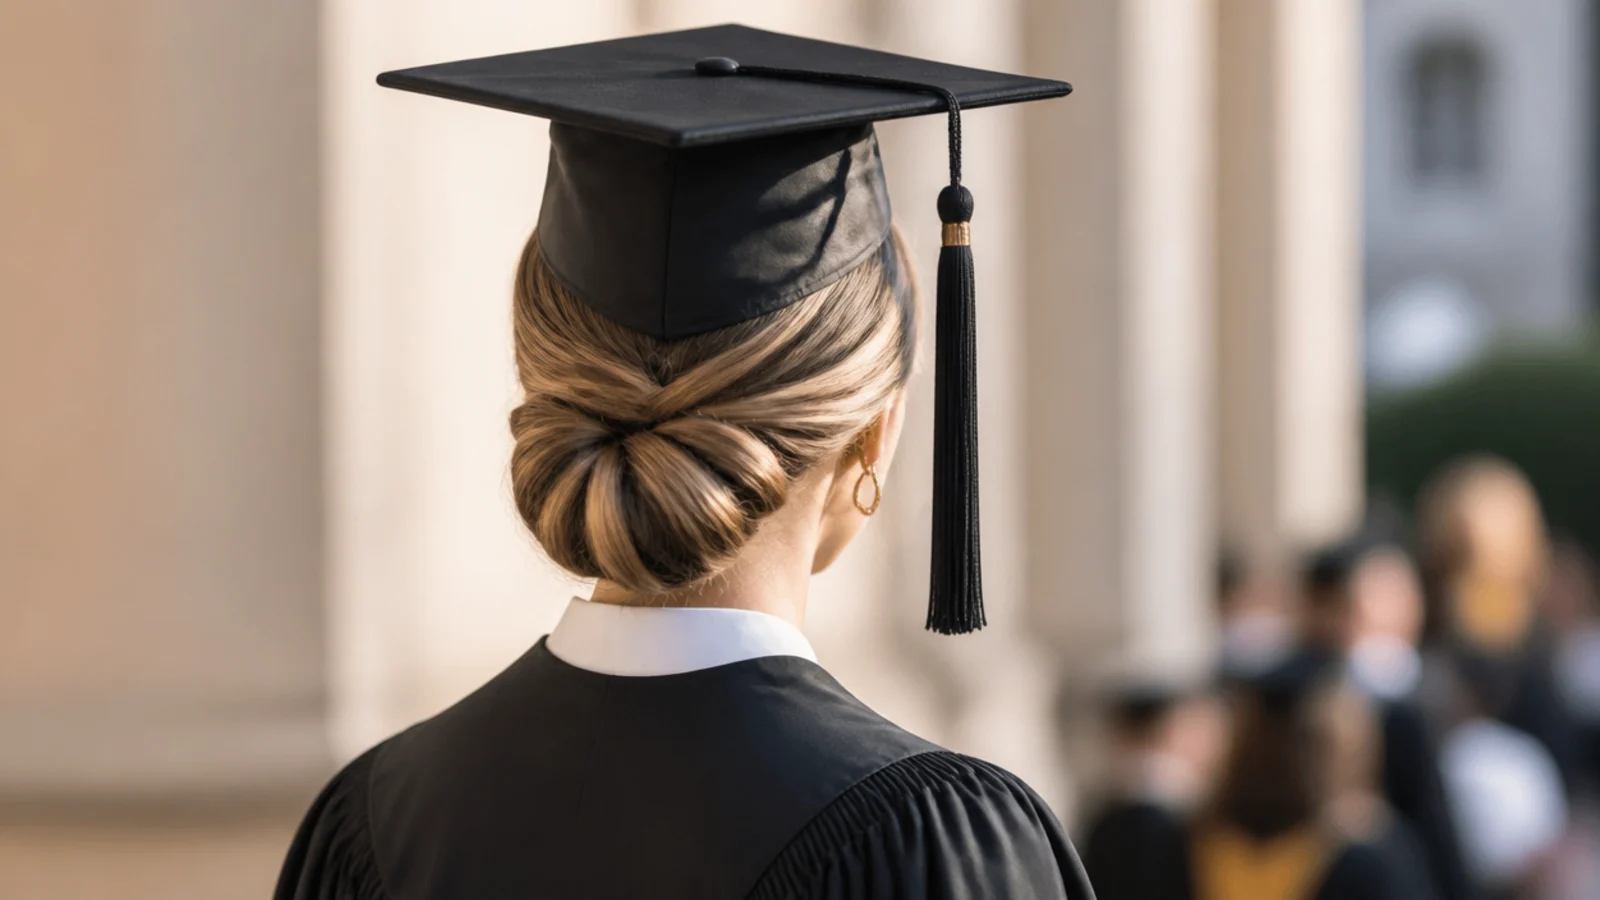
Quick Comparison
| Sleek Low Bun | Sleek Hair Worn Down | |
|---|---|---|
| Cap stability over four hours | High; the coil gives the band a dry, flat surface to grip | Low; slicked-down hair is slippery and the cap creeps backward |
| Risk of a crown dent | Very low; nothing sits at the crown to be crushed | High; the band presses a visible crease into ironed hair by hour two |
| Gel flaking risk | Medium; concentrated at the hairline where the band rubs | Low; you use far less product, mostly serum on the mid-lengths |
| Performance in humidity | Strong; pinned hair cannot expand or frizz outward | Weak; outdoor spring ceremonies swell the lengths within an hour |
| Photos with the cap on | Strong; a crisp silhouette that reads clearly against a black gown | Mixed; dark straight hair can disappear into the gown |
| Photos after the cap comes off | Excellent; the shape is unchanged, maybe one edge touch-up | Needs a fix; budget 5 minutes with water, fingers or a mini iron |
| Styling time the morning of | 12 to 22 minutes depending on the bun | 20 to 30 minutes, most of it flat ironing |
| Comfort in a hot polyester gown | Better; the neck stays clear the whole ceremony | Warmer; length sits against the neck and collar |
| Best hair lengths | Shoulder-length through waist-length, plus braids and locs | Chin-length bobs through collarbone; long straight hair tangles |
1. Sleek Low Bun at the Nape, Two Inches Below the Cap Band
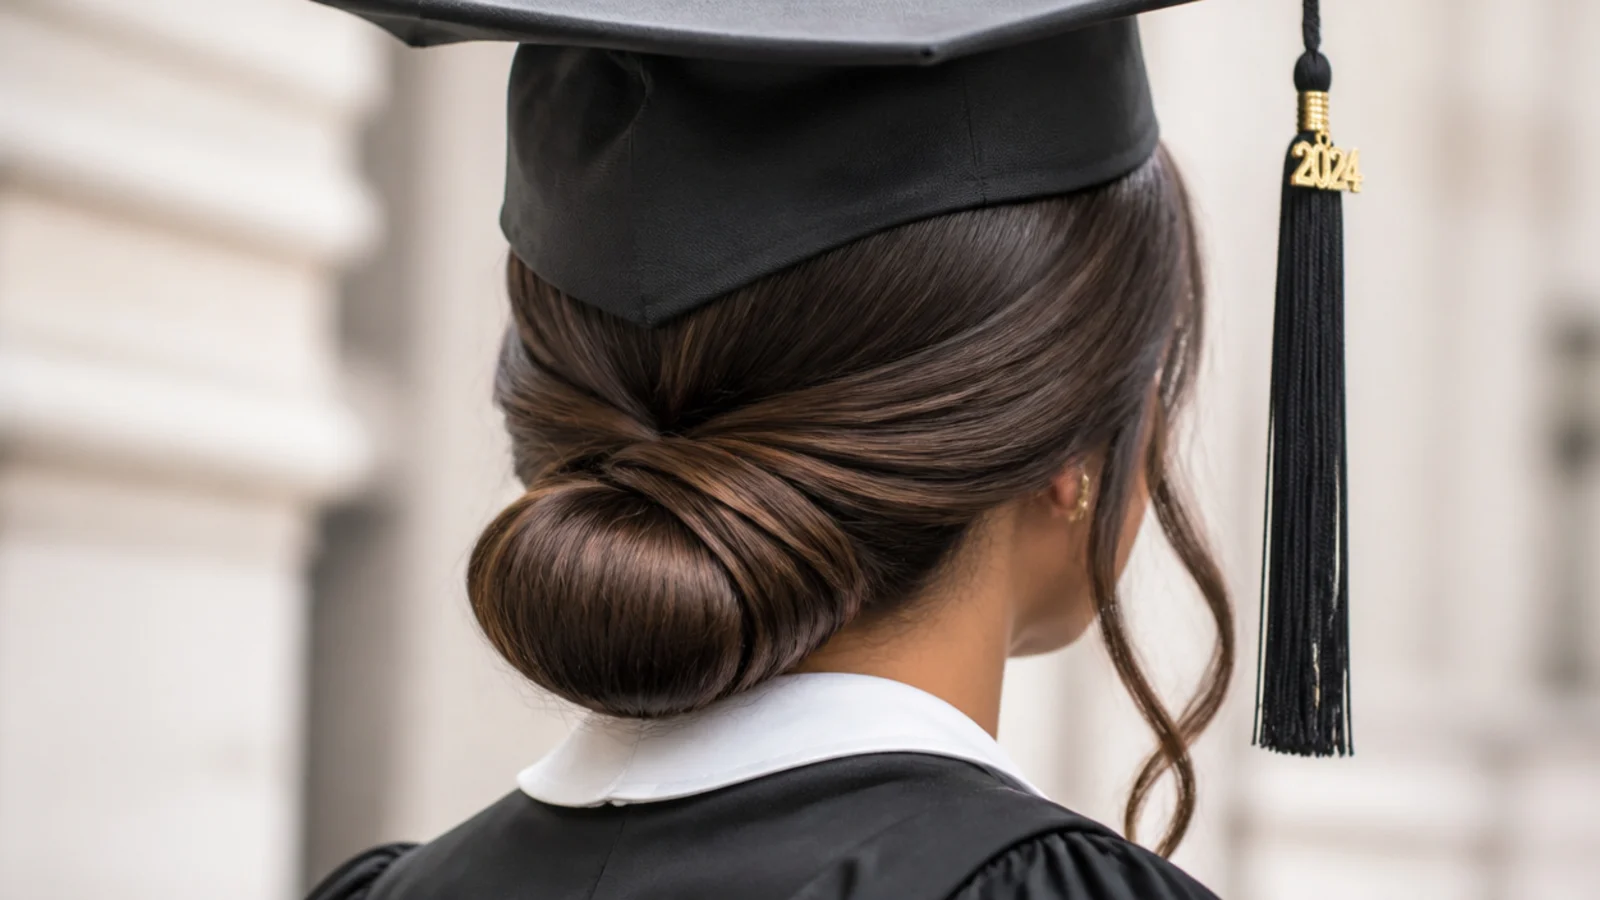
The one I ended up wearing on the second attempt, and the only sleek style I would recommend to someone with no practice time. Brush damp hair back with a boar bristle brush, a pea of alcohol-free gel at a time, then coil the length flat at the nape and pin the coil at four points with U-pins. The bun has to sit at or below the occipital bone, roughly two inches under the cap band, or the mortarboard rides on it and tips forward. Fifteen minutes. Held four hours outdoors in 71 degrees with no slippage.
Who it suits: Shoulder-length to waist-length hair, any texture, formal ceremonies.
Tip: Pin the coil at a downward angle toward the scalp so its weight cannot drag the cap backward.
2. Slicked-Back Low Ponytail With a Hair-Wrapped Elastic
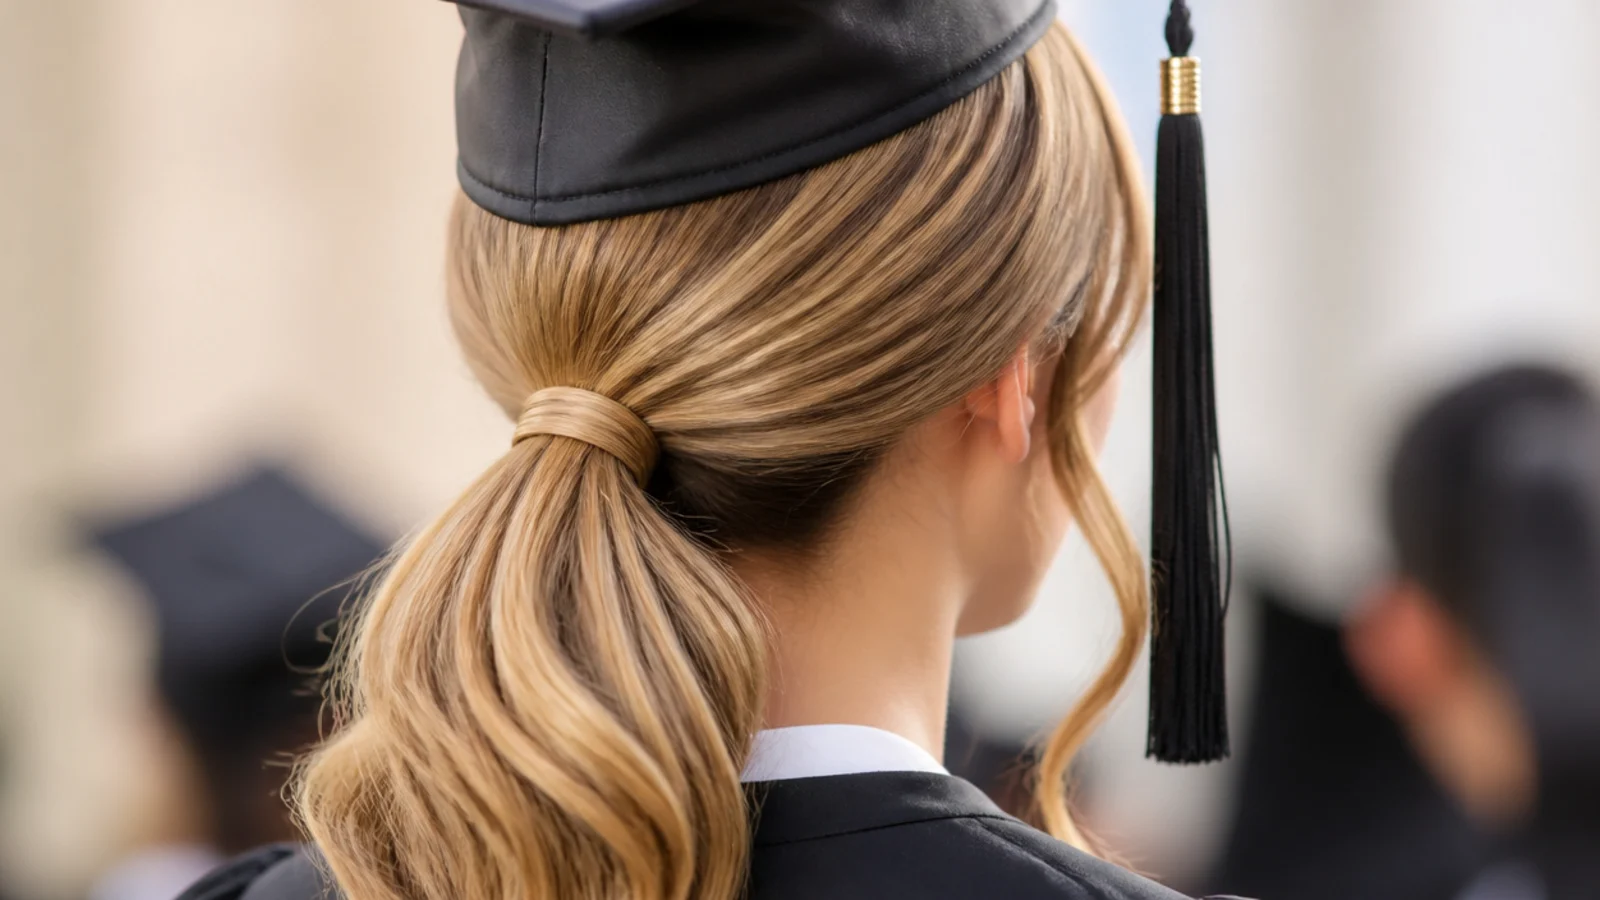
Slick everything to the nape, secure with a clear elastic, then wrap a half-inch section of the tail around the elastic and pin it underneath. That wrap is the difference between a gym ponytail and a graduation one, and it takes ninety extra seconds. The tail hangs below the gown collar, which reads long and polished in photos. My sister wore this and the elastic did not slip once, but the tail did tangle against polyester by hour three, so she finger-combed it before the photo line. Twelve minutes total.
Who it suits: Anyone who wants length visible and hates pinning updos.
Tip: Use a clear elastic, not black, so the wrapped section hides it completely on dark hair.
3. Wet-Look Slicked Back Bun on Second-Day Hair
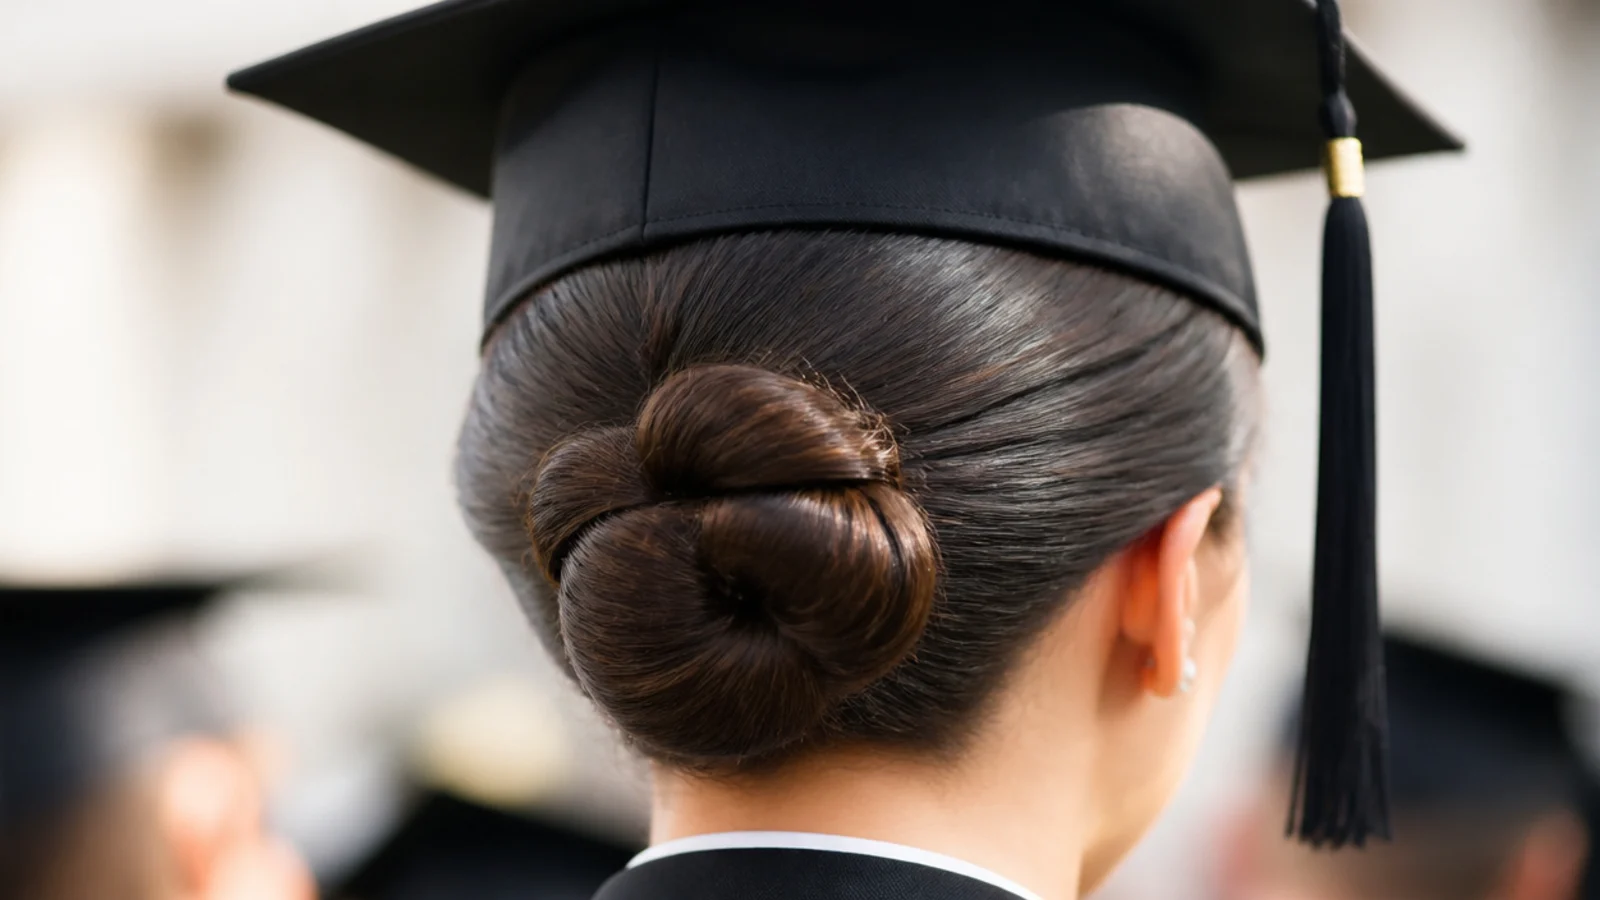
The full glossy, still-wet finish, built with gel on genuinely damp hair rather than dry hair. This is the one that failed my first practice run: on dry hair the gel sat on the surface, dried chalky, and flaked white onto my gown shoulders. On damp second-day hair with three pea-size scoops worked through in sections, it stayed glassy. Second-day hair grips better than freshly washed. It photographs the most dramatic of anything here against a black gown. Twenty minutes including the damp-down.
Who it suits: Straight to 2C hair, indoor ceremonies, high-contrast photos.
Tip: Never apply gel to dry hair. Mist each section with water first or you will get flakes by hour two.
4. Sleek Middle-Part Low Chignon
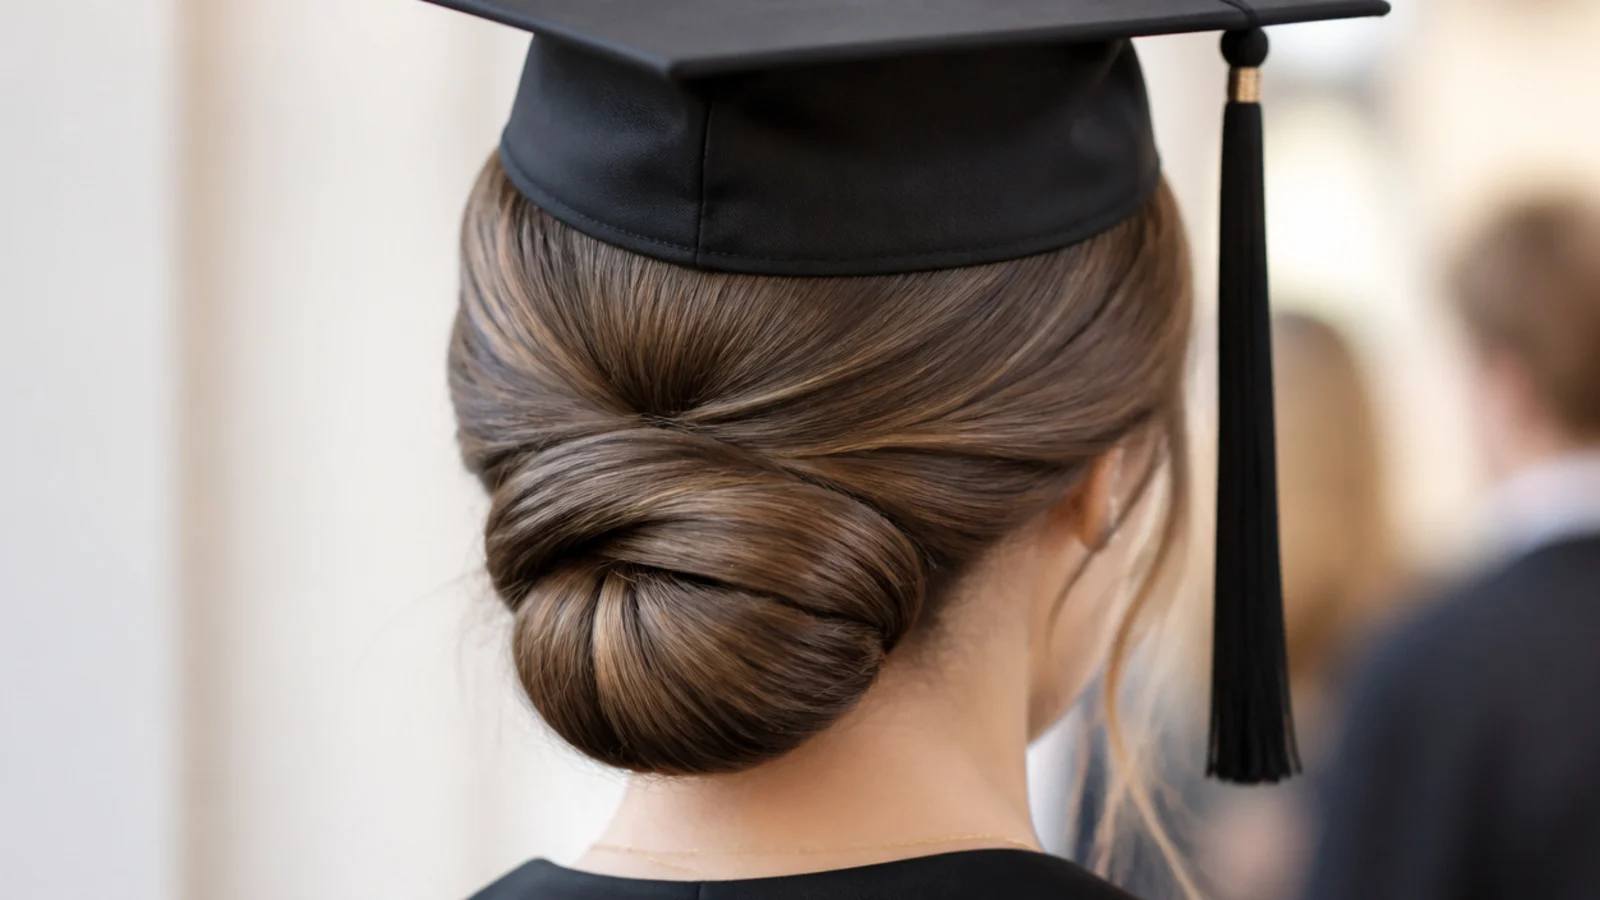
A hard middle part, smoothed flat on both sides, into a rolled chignon rather than a coiled bun. The roll sits vertically at the nape and pins with six bobby pins pushed in horizontally against the roll. What makes this work under a cap is that the middle part gives the band a symmetrical surface, so the mortarboard sits level instead of tipping toward the heavier side. It is the most formal sleek option here and the one I would pick for a hooding ceremony. Twenty-two minutes. More structure options in the graduation updo guide.
Who it suits: Shoulder-length and longer, master's and doctoral ceremonies.
Tip: Comb the part with a rat-tail comb and set it with a drop of gel, or it drifts once the cap goes on.
5. Sleek Deep Side Part Low Bun
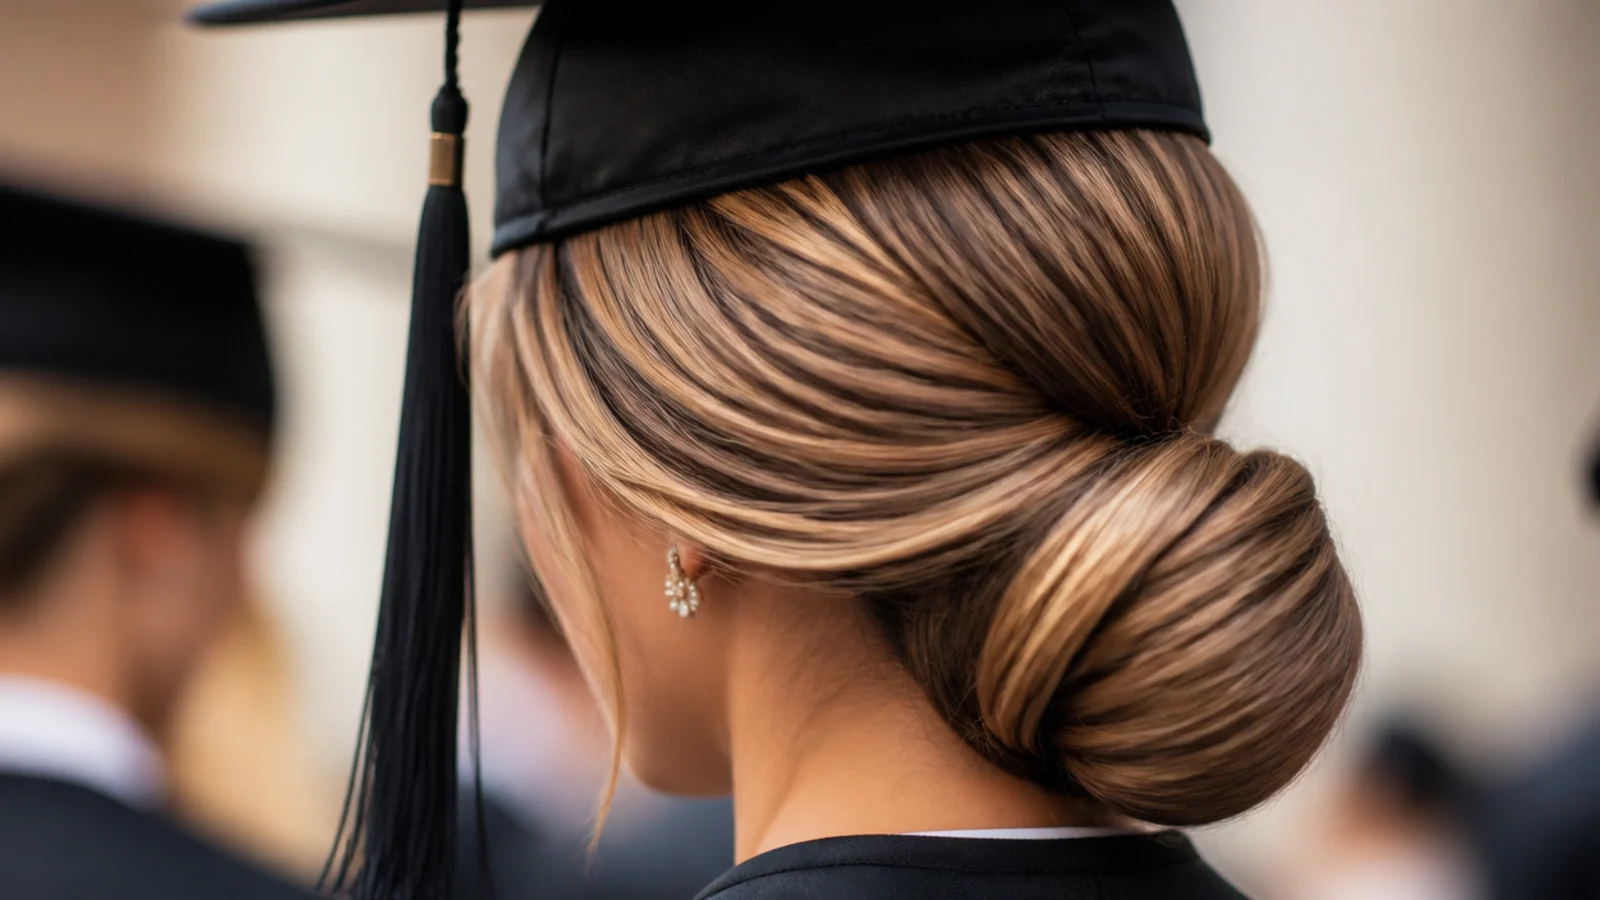
Part deep, around the arch of one eyebrow, sweep the heavy side across and slick everything into a low bun set slightly off-center at the nape. The sweep gives the front a little lift, which matters because a fully flat crown under a cap can read severe in photographs. I liked this best on my sister, who has a high forehead. The one issue: the heavy side wants to fall forward, so it needs two hidden bobby pins crossed in an X behind the ear. Eighteen minutes.
Who it suits: High foreheads, fine hair that needs the illusion of thickness.
Tip: Set the cap so its front corner sits just behind the sweep, not on top of it, or the sweep flattens.
6. Glass Hair Flat Ironed Straight to the Collarbone
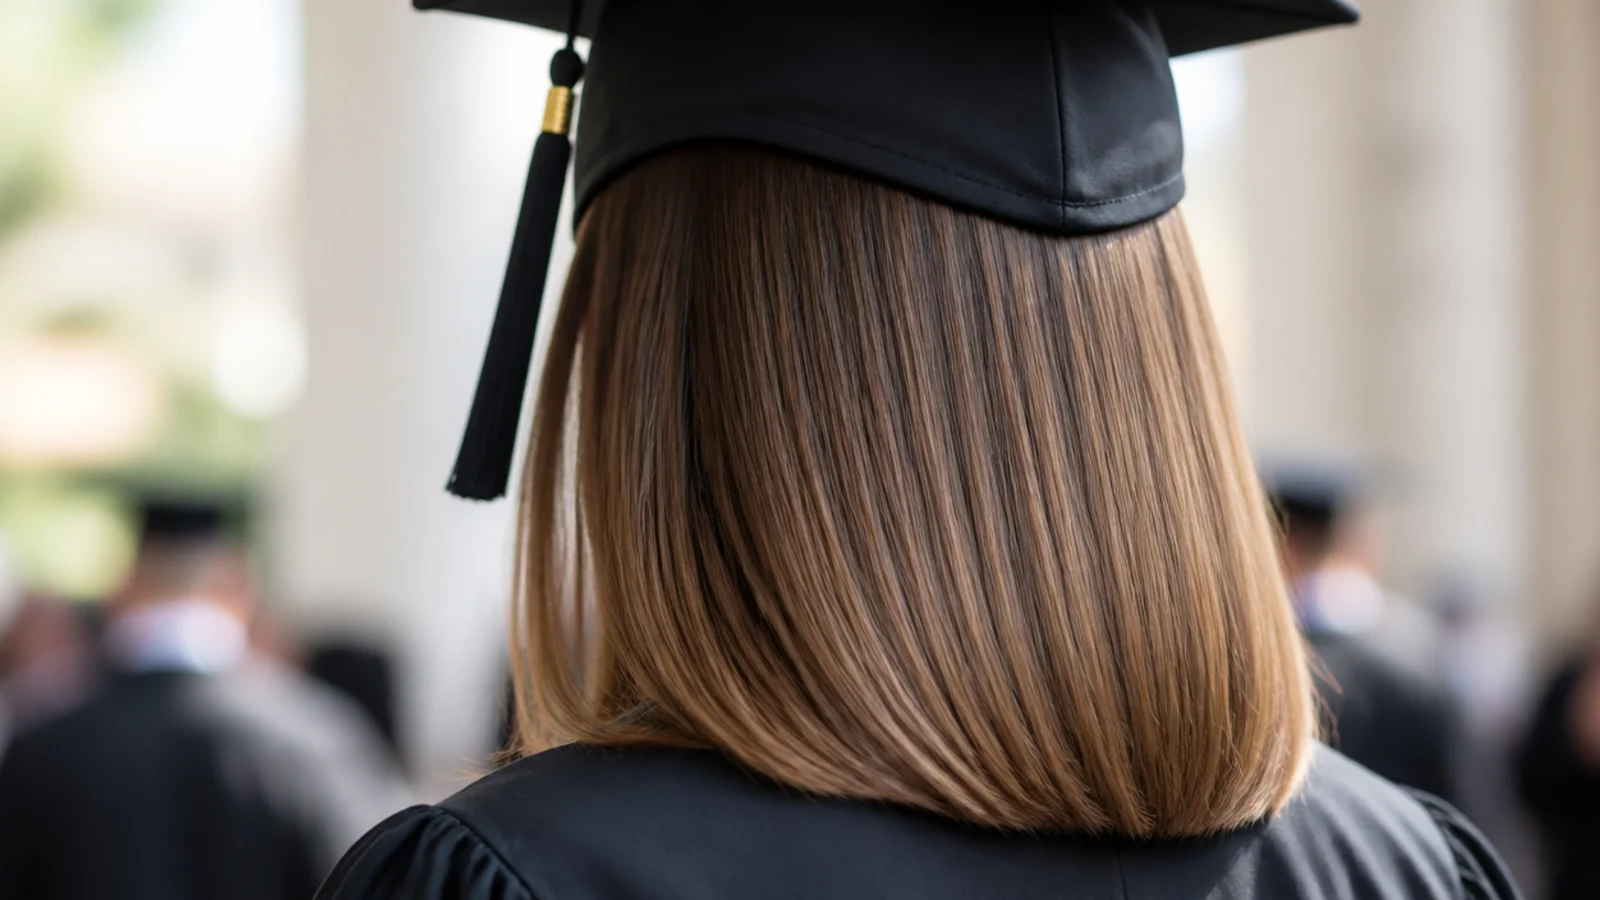
Hair worn down, ironed dead straight in half-inch sections at 350 degrees, finished with two drops of lightweight shine serum on the mid-lengths only. This is the sleek style with the biggest cap risk: the band presses a visible crease into the crown after about ninety minutes and straight hair shows every dent. It looks incredible for the first hour and in the cap-off photos if you carry a mini flat iron. I would only wear this indoors. Twenty-five minutes plus dry time.
Who it suits: Straight to 2A hair at collarbone length, indoor air-conditioned ceremonies.
Tip: Iron the crown last and flattest, since that is exactly the section the cap will crush.
7. Sleek Half-Up With the Top Section Pinned Flat
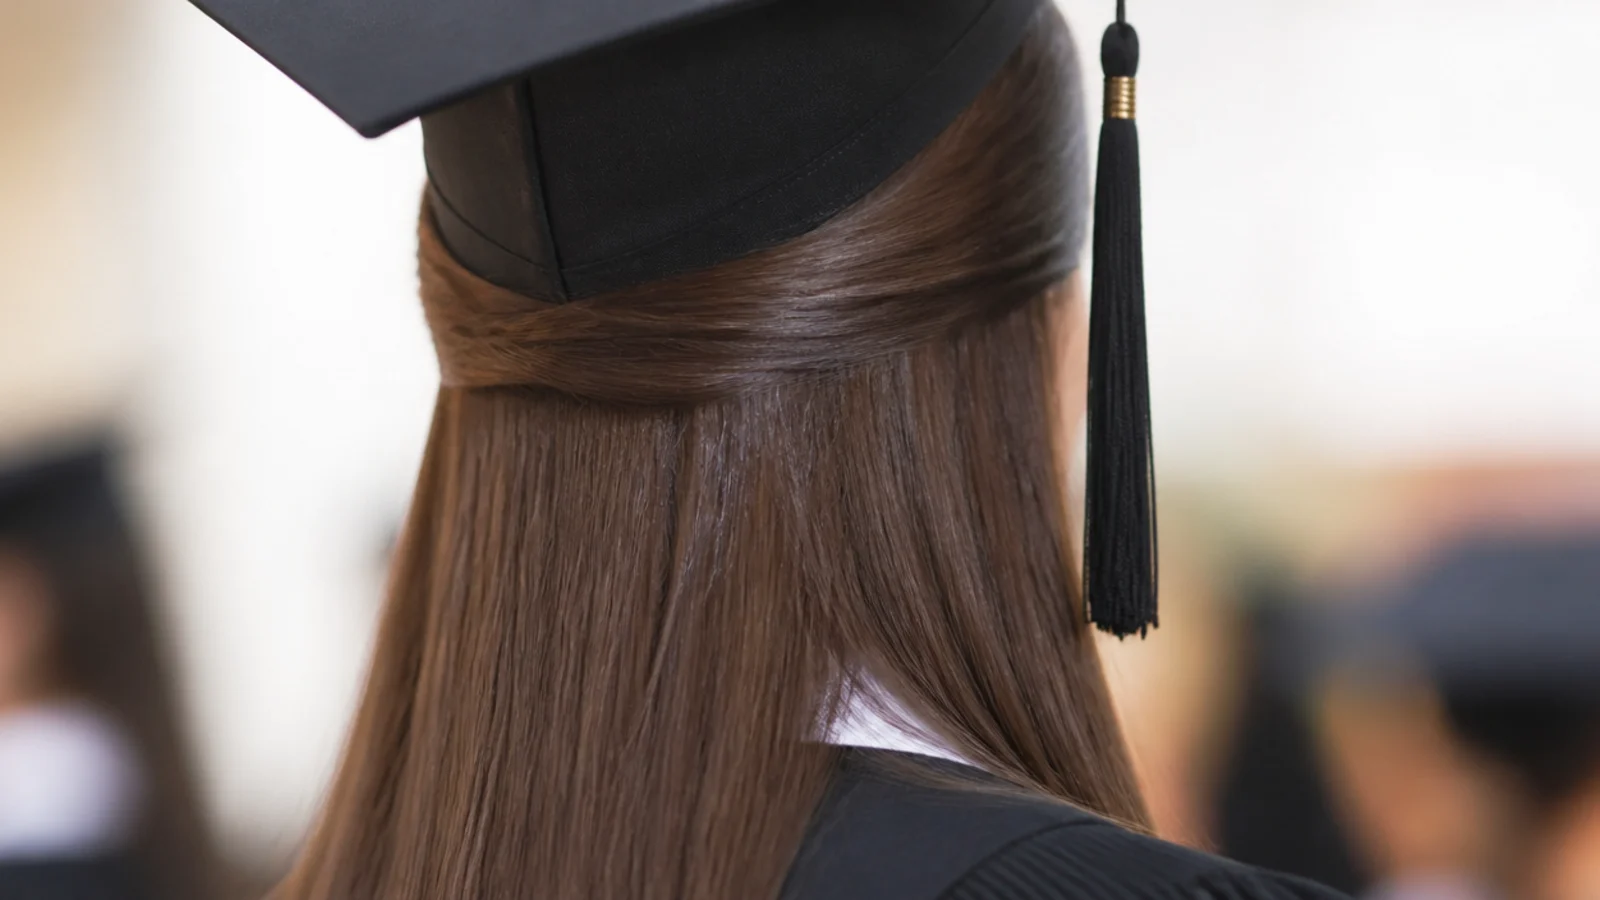
Take temple to temple, smooth it back with gel on the roots only, twist once and pin it flat against the head below the crown. Not a puff. A flat pinned half-up disappears under the cap band while a bouffant one fights it. The lengths below stay ironed and glossy and do all the work in photos. This is the sleek style with the best cap-on-to-cap-off recovery of anything I tested, because nothing under the band gets crushed. Twelve minutes plus ironing. More at half up graduation hairstyles.
Who it suits: Anyone who wants length visible but hair off the face.
Tip: Two pins crossed in an X at the join, then set the cap band directly over the hardware to hide it.
8. Sleek Low Ponytail With the Last Two Inches Curled
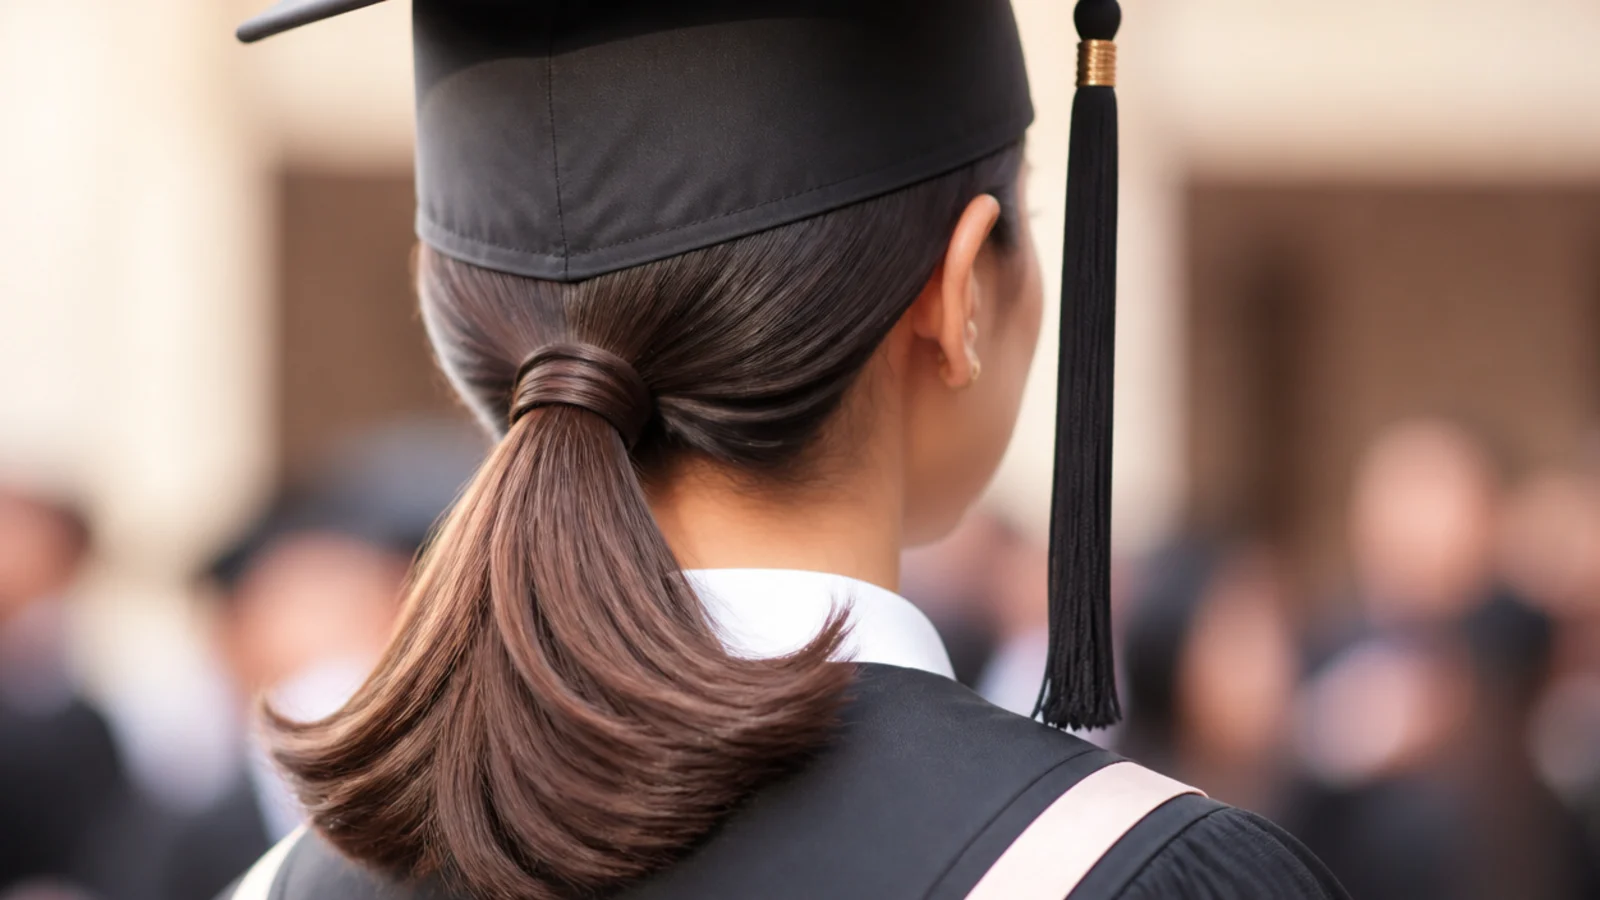
Two textures on purpose: mirror-smooth from hairline to elastic, then the final two inches curled outward with a one-inch iron. The contrast reads expensive and it solves the flat, stringy tail problem that plain slicked ponytails have in photos. I tested it in June humidity and the curled ends dropped by hour three while the slicked top half held perfectly, which is exactly the trade you are making. Sixteen minutes. See more low options in easy graduation hairstyles.
Who it suits: Long hair that goes limp, and anyone bored of a plain ponytail.
Tip: Curl the ends before you slick the top, so the iron never touches product.
9. Sleek Ballerina Bun Placed at the Occipital Bone
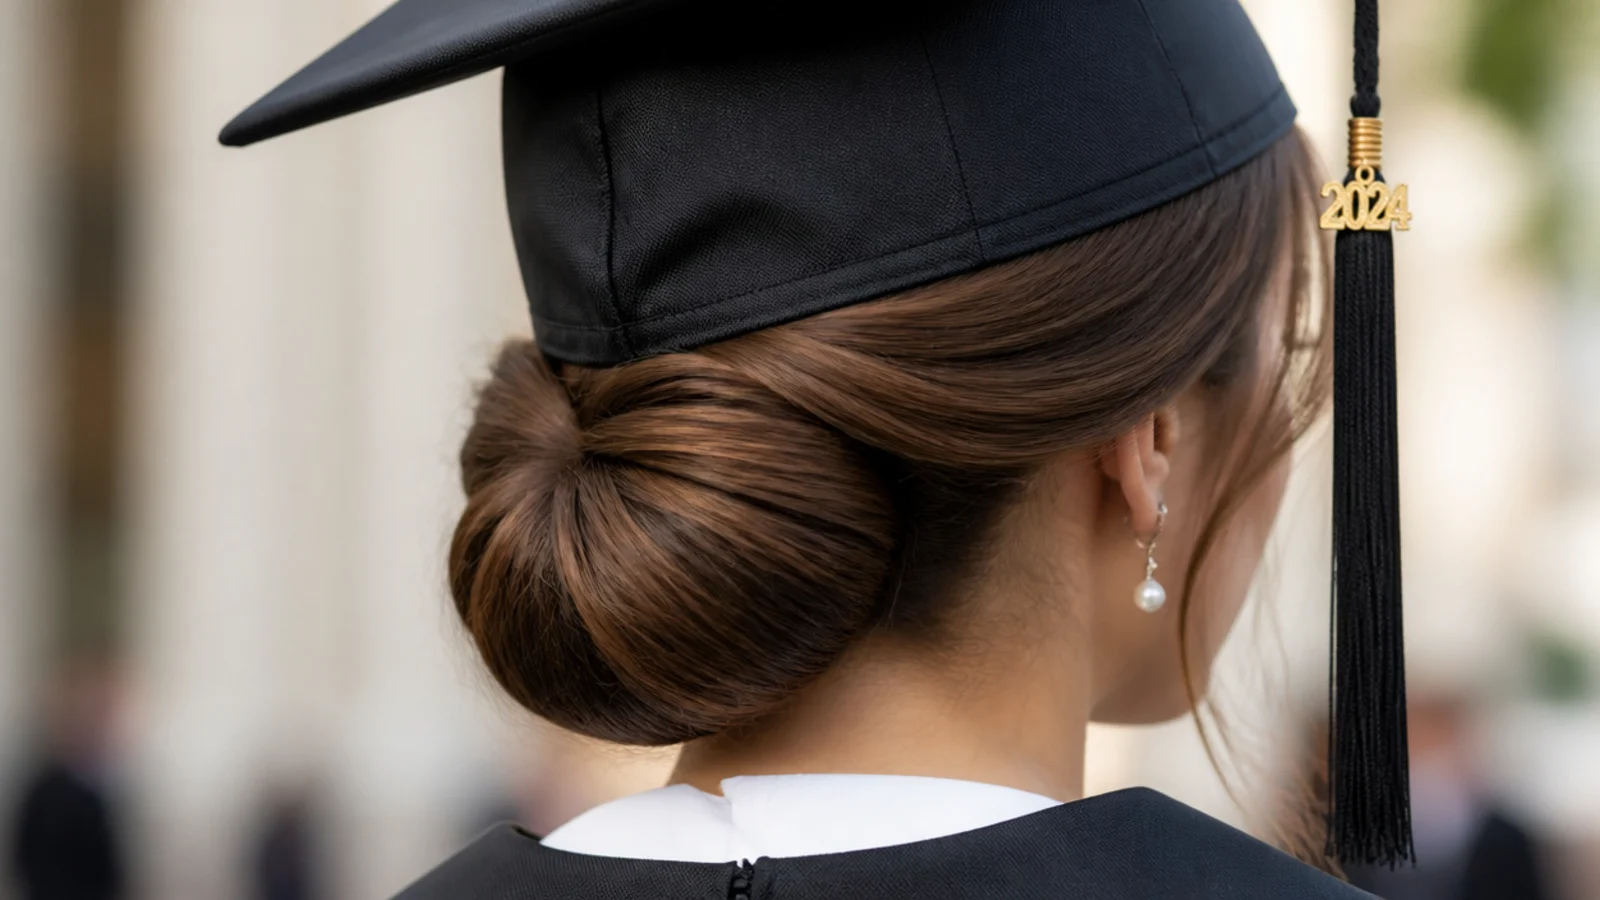
A donut-supported round bun, but placed low, right on the bony ridge at the back of the skull rather than at the crown. Height is the trap here. The mortarboard descends deep on the head, so a true ballet bun at the crown physically will not let the cap sit flat, and I watched exactly that happen at a rehearsal. Dropped three inches, it is the neatest sleek shape there is. Uses a bun donut, ten bobby pins and a hairnet. Twenty minutes.
Who it suits: Thick or long hair that will not stay in a coiled bun.
Tip: Put the cap on before you finish pinning and mark where the band lands with a finger.
10. Sleek Rope Twist Low Bun
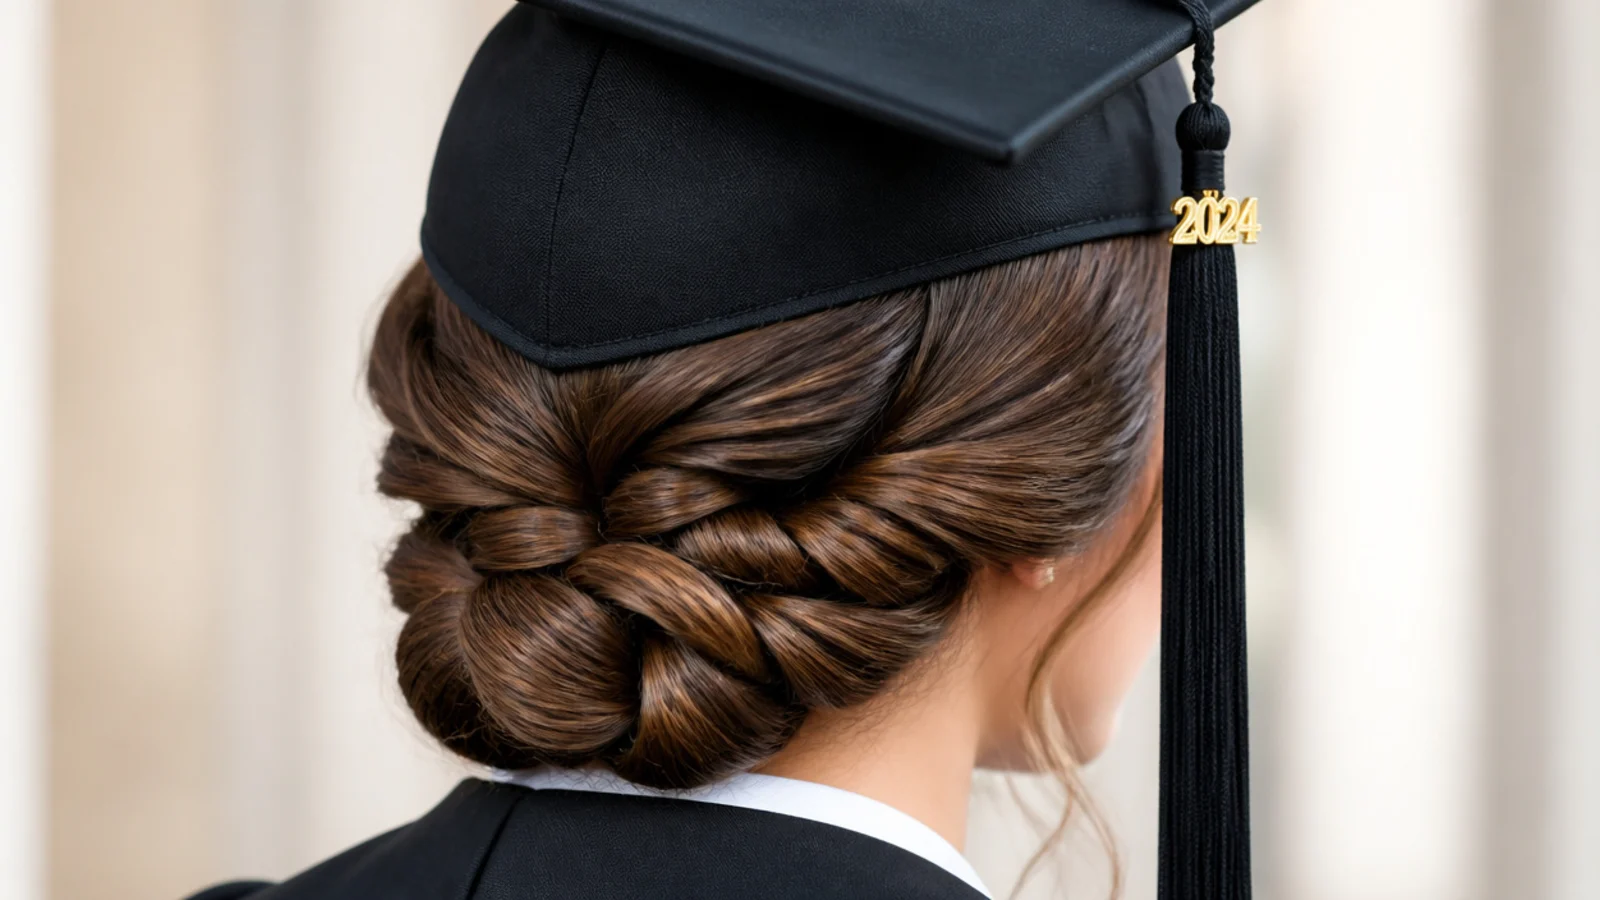
Split the ponytail in two, twist each section clockwise, then wind them around each other counterclockwise and coil the resulting rope at the nape. The rope texture catches light where a plain bun goes flat, which matters when a black gown eats detail in photographs. It also holds itself better than a smooth coil, so I used four pins instead of eight. Eighteen minutes and genuinely doable behind your own head once you have done it twice.
Who it suits: Medium to long hair with layers that slip out of plain buns.
Tip: Twist tight at the roots and looser at the ends so the rope pattern stays visible.
11. Sleek French Twist Pinned Vertically
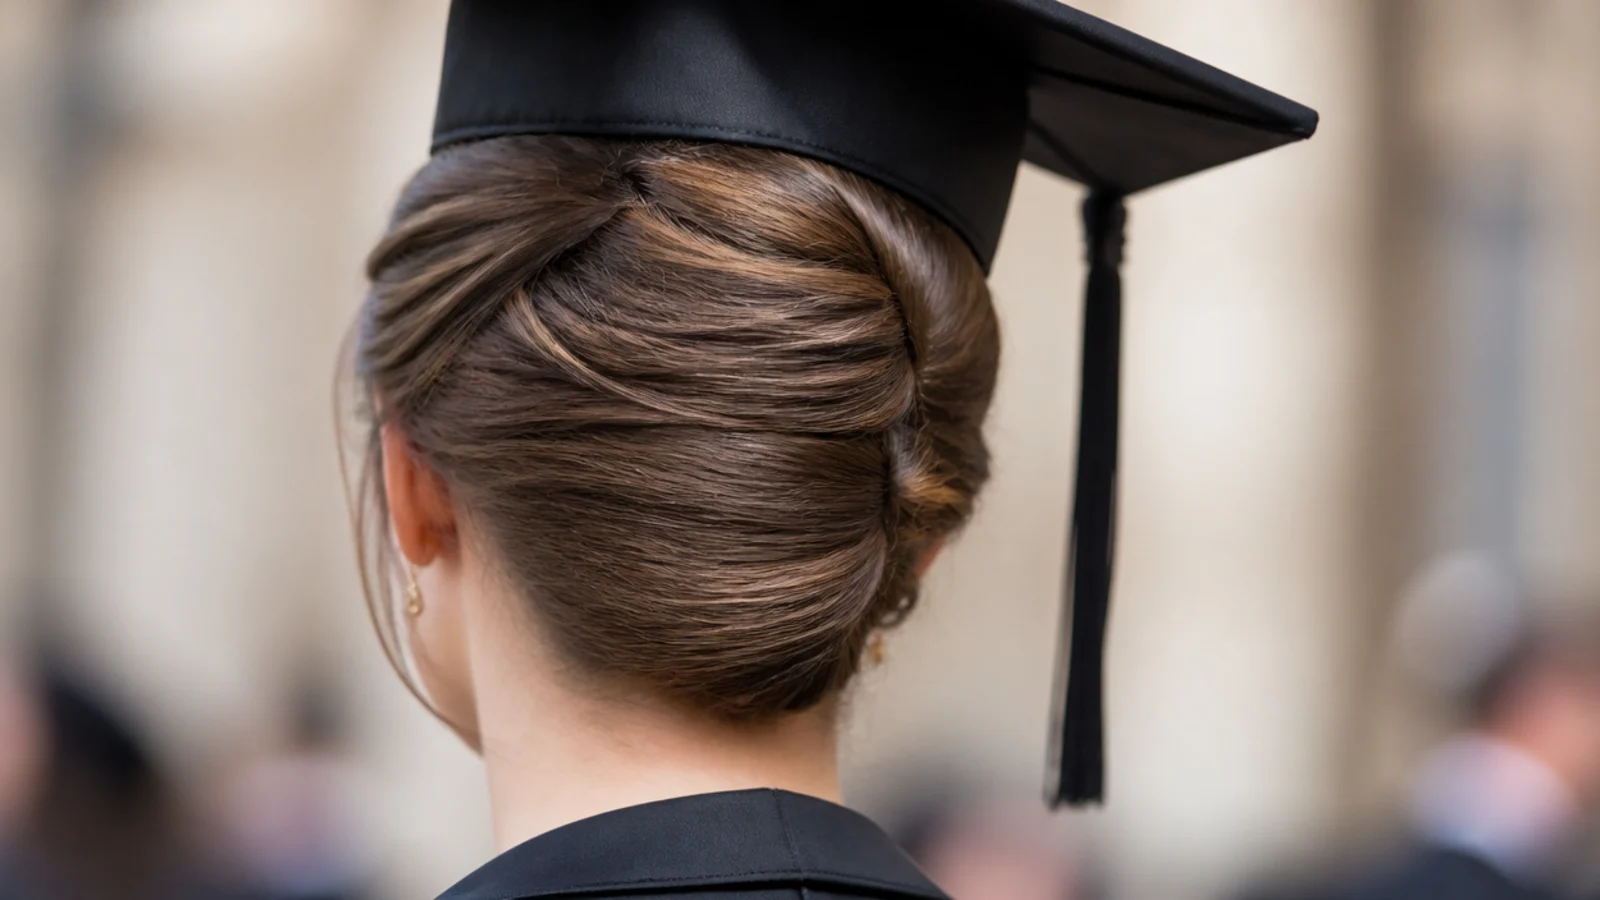
The most formal thing on this list and the slowest. Gather everything to one side, twist upward, fold the twist against the head and pin down the seam with eight to ten bobby pins pushed in against the fold. The finished roll runs vertically up the back, which means it ends near the cap band, so keep the top of the twist at least two inches below where the band lands. Twenty-eight minutes and my first attempt collapsed. The second held six hours.
Who it suits: Shoulder-length to long hair, formal or graduate ceremonies.
Tip: Practice once the week before. This is the only style here I would not attempt cold on the day.
12. Low Sleek Bubble Ponytail
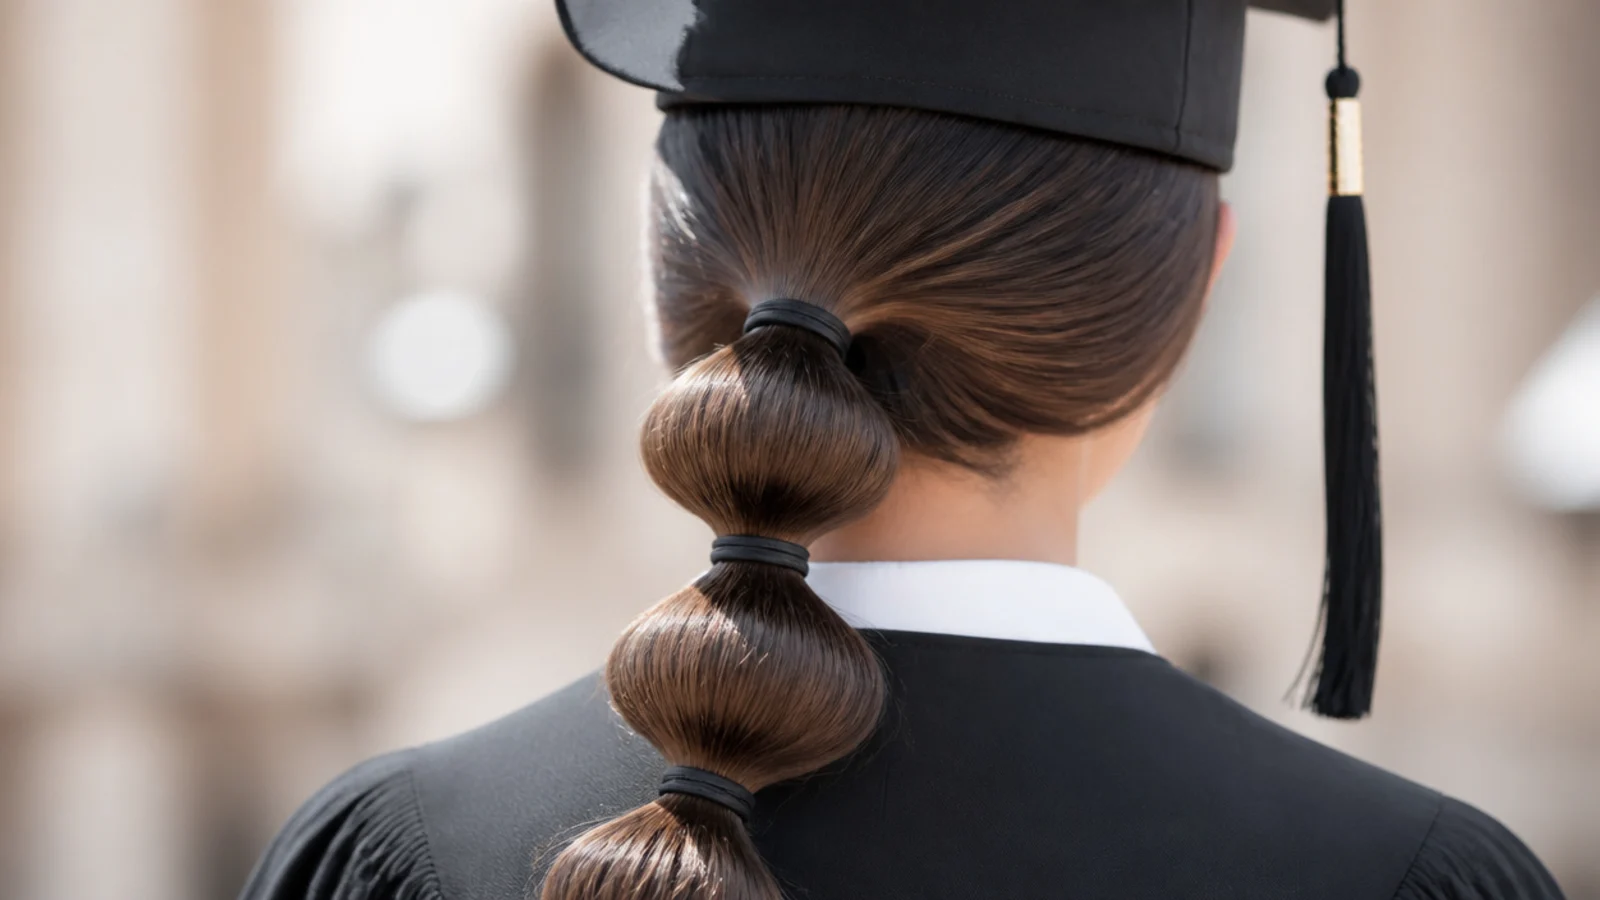
Slicked to the nape, then clear elastics every three inches down the tail with each section pulled gently outward into a bubble. It gives you volume in the tail without a single inch of volume near the cap band, which is exactly the geometry you want. It also photographs well from behind, which is the shot most families actually get during the walk. Fourteen minutes. Do not pull the bubbles too wide or they sag under their own weight by hour two.
Who it suits: Long hair, undergraduate ceremonies, anyone who wants something less severe.
Tip: Pull each bubble out from the underside so the elastics stay invisible from the front.
13. Sleek Low Bun With Laid Edges
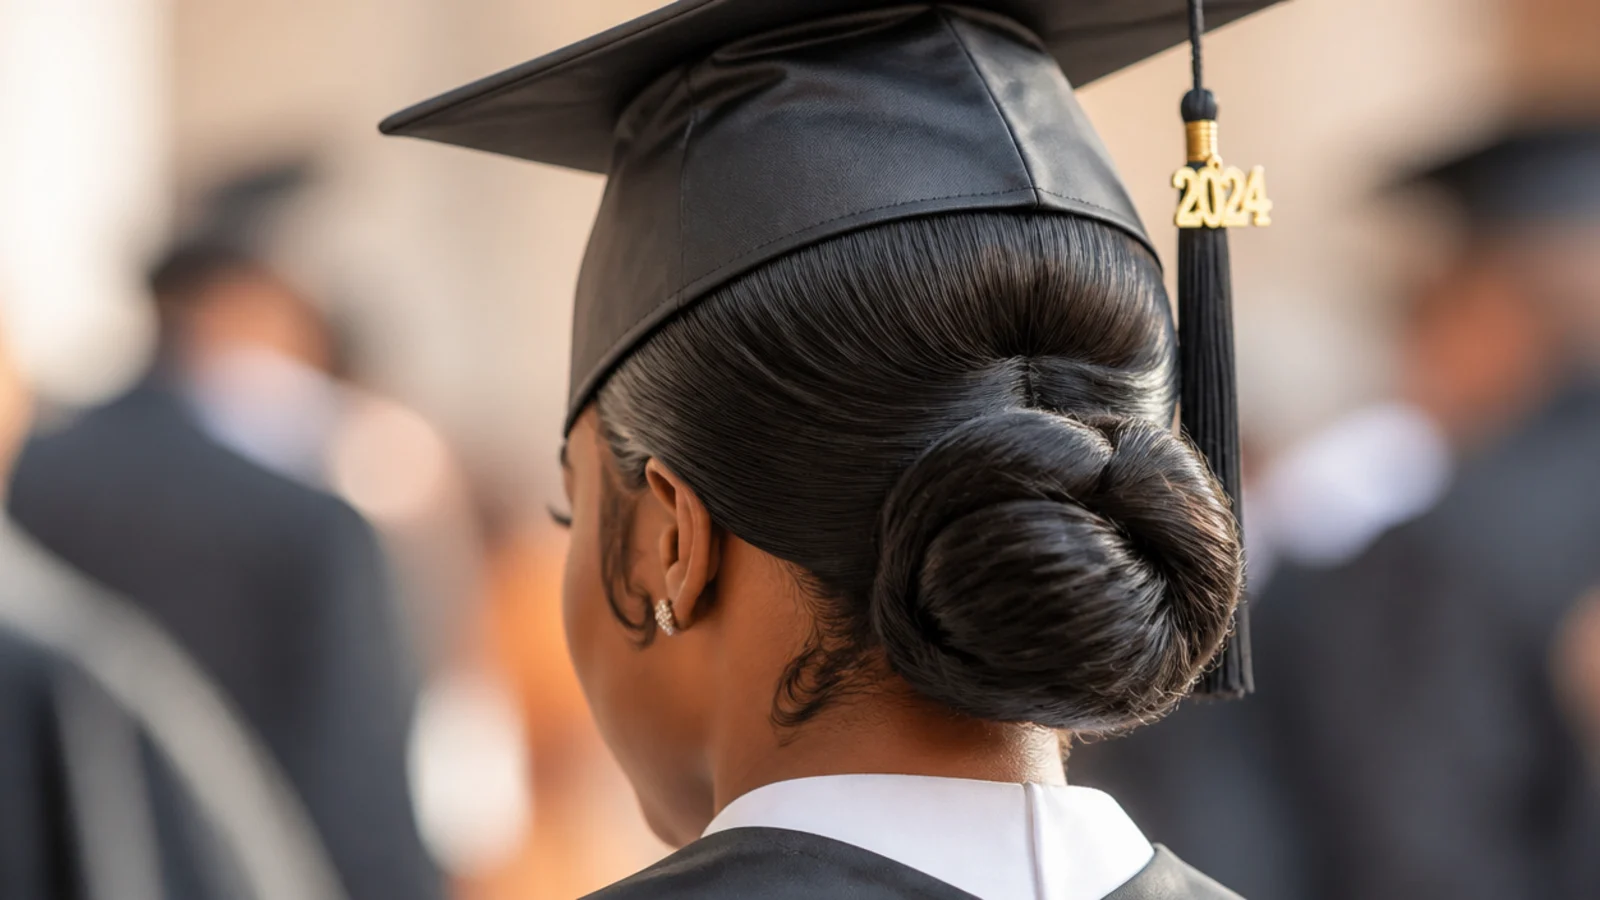
A slicked low bun with the baby hairs laid along the hairline using an edge control and a soft edge brush. The problem nobody warns you about: the cap band sits right at the edge line, so edges laid with a stiff wax get pressed flat and shiny into a hard band mark. A lighter, water-based edge control survives it. Lay them, tie a scarf over for ten minutes to set, remove before the cap. Twenty-five minutes. More on textured options in graduation hairstyles for natural hair.
Who it suits: Type 3 and 4 textures, relaxed hair, anyone who lays edges.
Tip: Carry a travel edge brush. One 30-second pass fixes the band mark before photos.
14. Sleek Blunt Bob, Flat Ironed to the Jaw
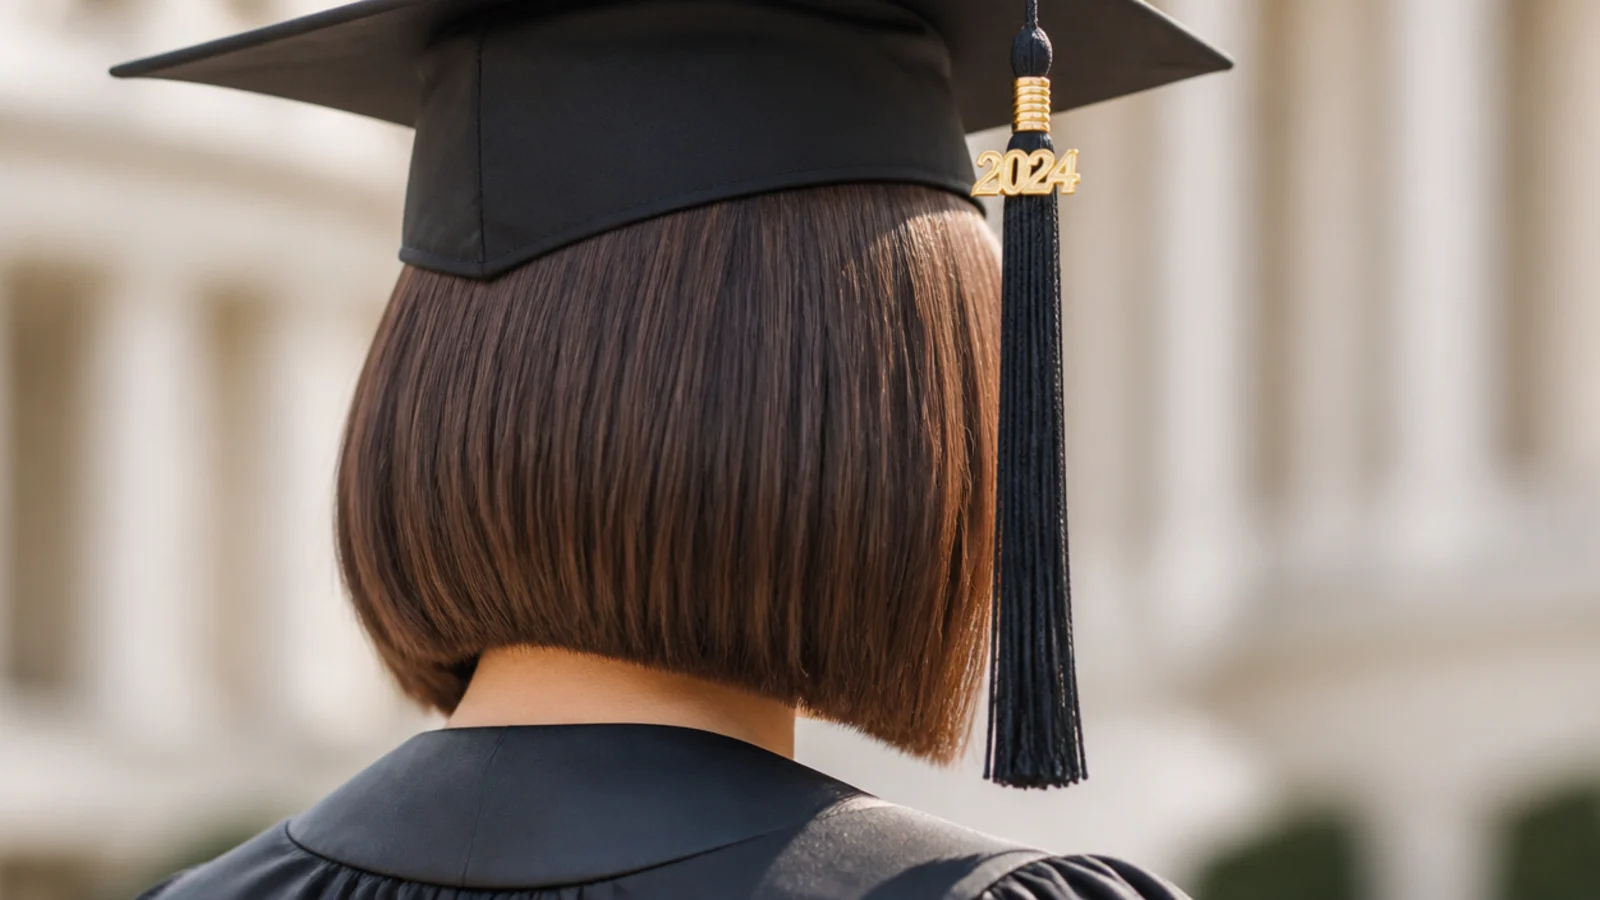
A chin-length blunt bob ironed straight with the ends turned very slightly under. Short hair has a specific cap problem: there is no length to hide a crown dent and nothing to pin the cap to. The fix is to build the fullness at the sides and just below the ears, which is below the band line, and to keep the crown deliberately flat so there is nothing to crush. Eighteen minutes. Full length guide at graduation hairstyles for short hair.
Who it suits: Chin to jaw-length bobs, straight to wavy texture.
Tip: Anchor the cap with two crossed pins above each ear, since a bob has no bun to grip.
15. Sleek Pixie Slicked Back Behind the Ears
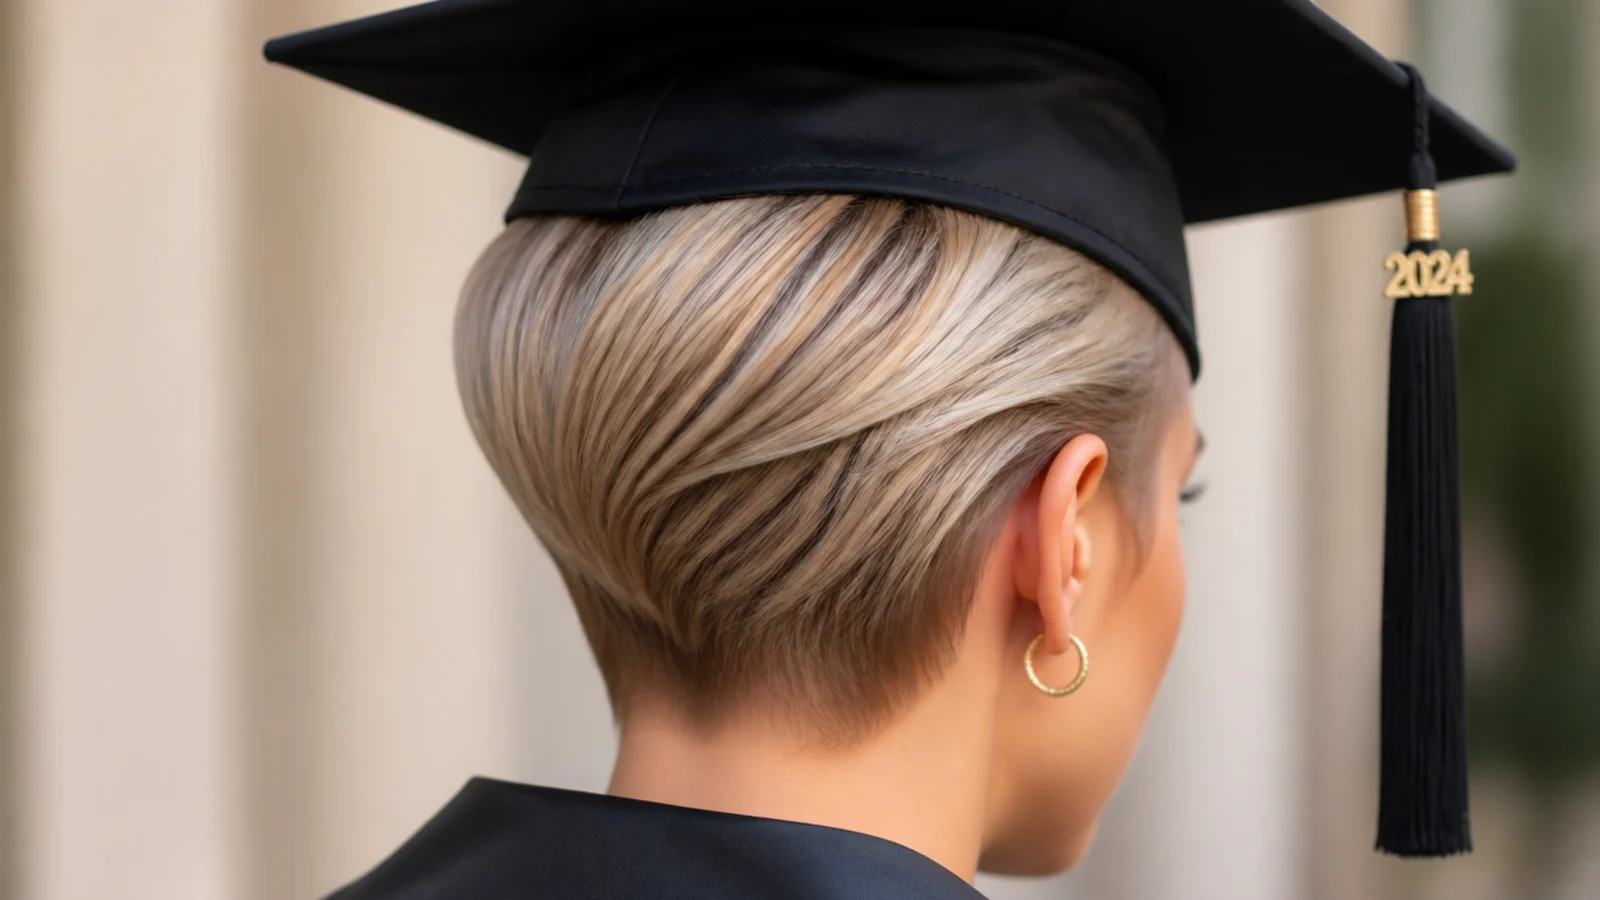
A pixie taken fully back off the face with a lightweight pomade rather than gel, so it stays flexible under the cap instead of setting into a helmet that dents. This is the cleanest sleek look for very short hair and it photographs sharply because the whole silhouette is visible against the gown. The catch is anchoring: with a pixie you pin the cap into the hair itself with two crossed pins per side, angled toward the crown. Eight minutes, the fastest style here.
Who it suits: Pixies, crops and grown-out undercuts.
Tip: Use pomade, not gel. Gel on a pixie sets rigid and cracks visibly when the cap presses down.
16. Sleek Side-Swept Waves Over the Left Shoulder
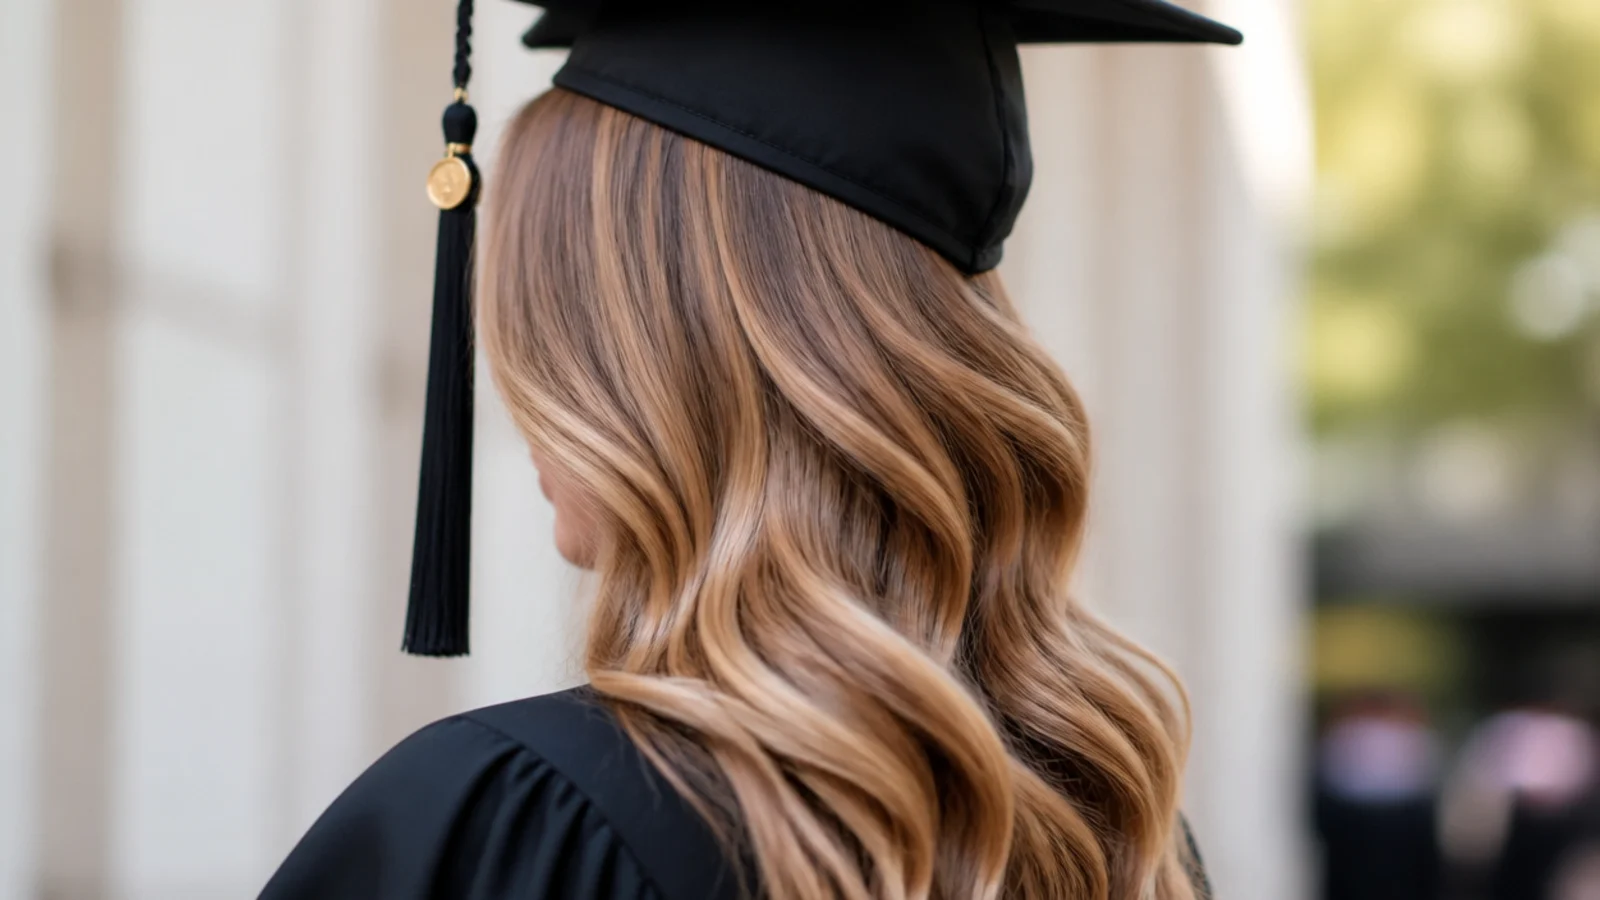
Smooth, polished roots into soft S-waves, all pulled over one shoulder and pinned at the opposite side with three bobby pins hidden under the top layer. It is the sleek compromise for people who do not want an updo. The pinned side gives the cap a flat surface and the waves sit forward where the mortarboard cannot flatten them. This survived four hours better than fully-down glass hair by a wide margin. Twenty-two minutes with a one-inch iron.
Who it suits: Shoulder-length and longer, outdoor ceremonies, anyone wanting hair down.
Tip: Let the waves cool completely before the cap goes on or they drop within the hour.
17. Sleek Low Three-Strand Braided Ponytail
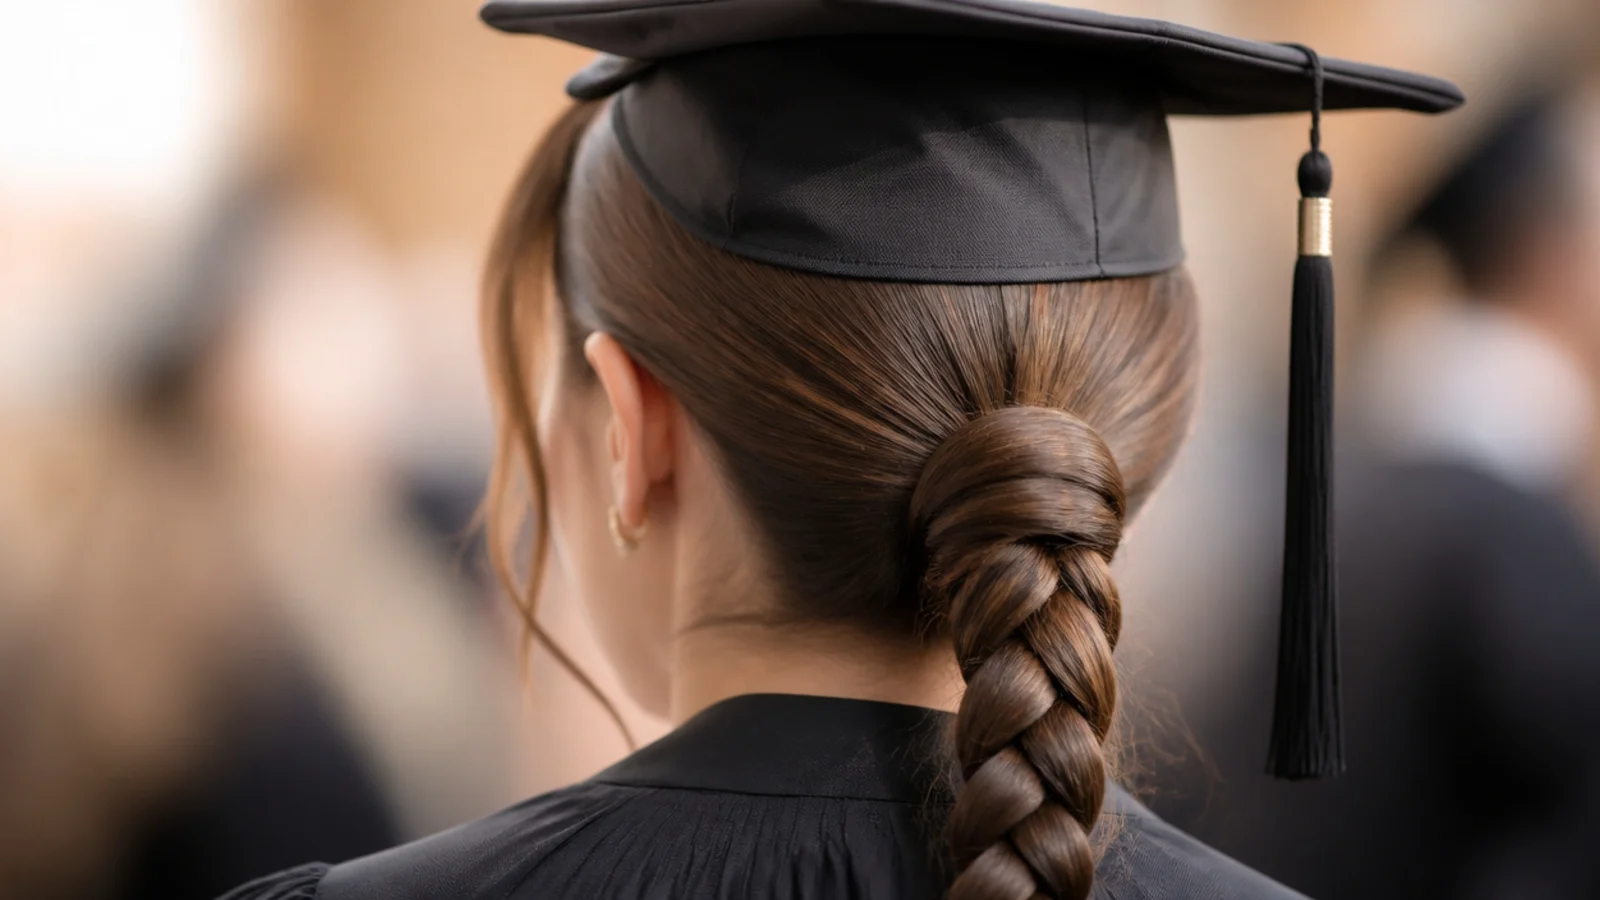
Slick to the nape, then a plain tight three-strand braid down the back. Boring on paper and the single most reliable style I tested. It is the only one you can genuinely style the night before, because a braid does not care what you sleep on. It holds through wind, humidity, gown friction and four hours of sitting. Ten minutes. Its weakness is photographs from the front, where it reads as a plain slicked ponytail, so it needs the crown to be genuinely glossy. See braided graduation hairstyles for more.
Who it suits: Long hair, outdoor ceremonies, anyone with a 6am call time.
Tip: This is the one style here you can do the night before. Sleep on a satin pillowcase to keep the shine.
18. Sleek Low Bun Gathered From Knotless Braids
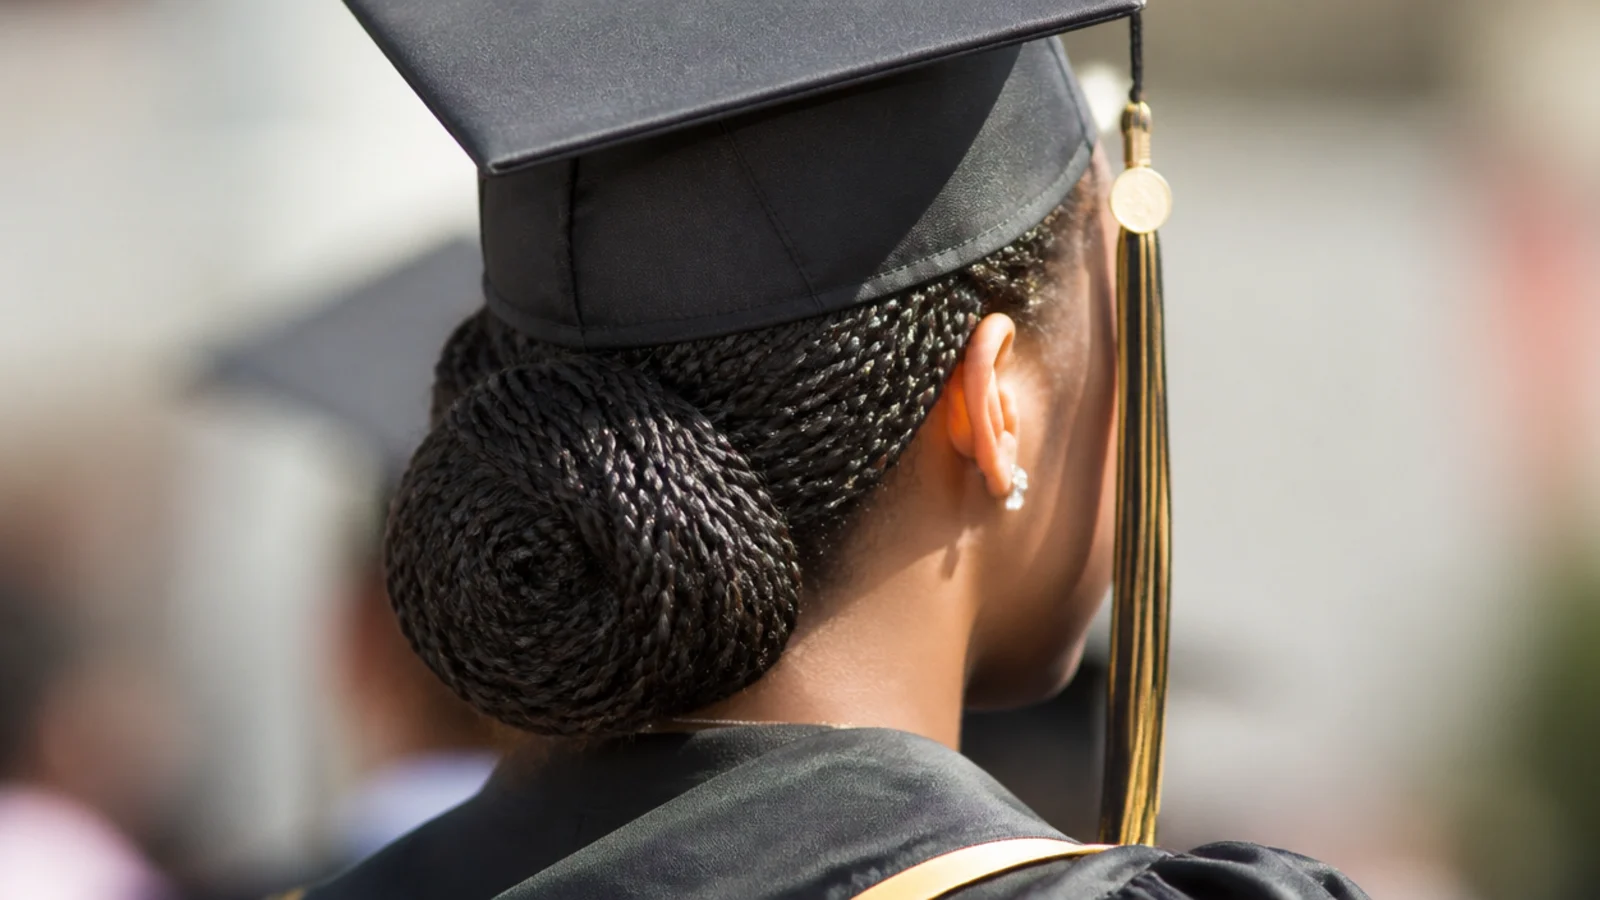
Knotless braids or medium twists gathered low and coiled into a flat bun at the nape, held with a strong spiral tie plus four U-pins. The timing matters more than the style: a fresh install is often too tight to sit comfortably under a cap for four hours, so schedule it five to seven days before, not the day before. The braids also add real weight, so pin the bun upward against the scalp or it drags the cap backward. Fifteen minutes to style once installed.
Who it suits: Knotless braids, box braids, medium twists and locs.
Tip: Book the install a week out. Day-of tightness plus a cap band is a four-hour headache.
19. Sleek Low Claw Clip Twist
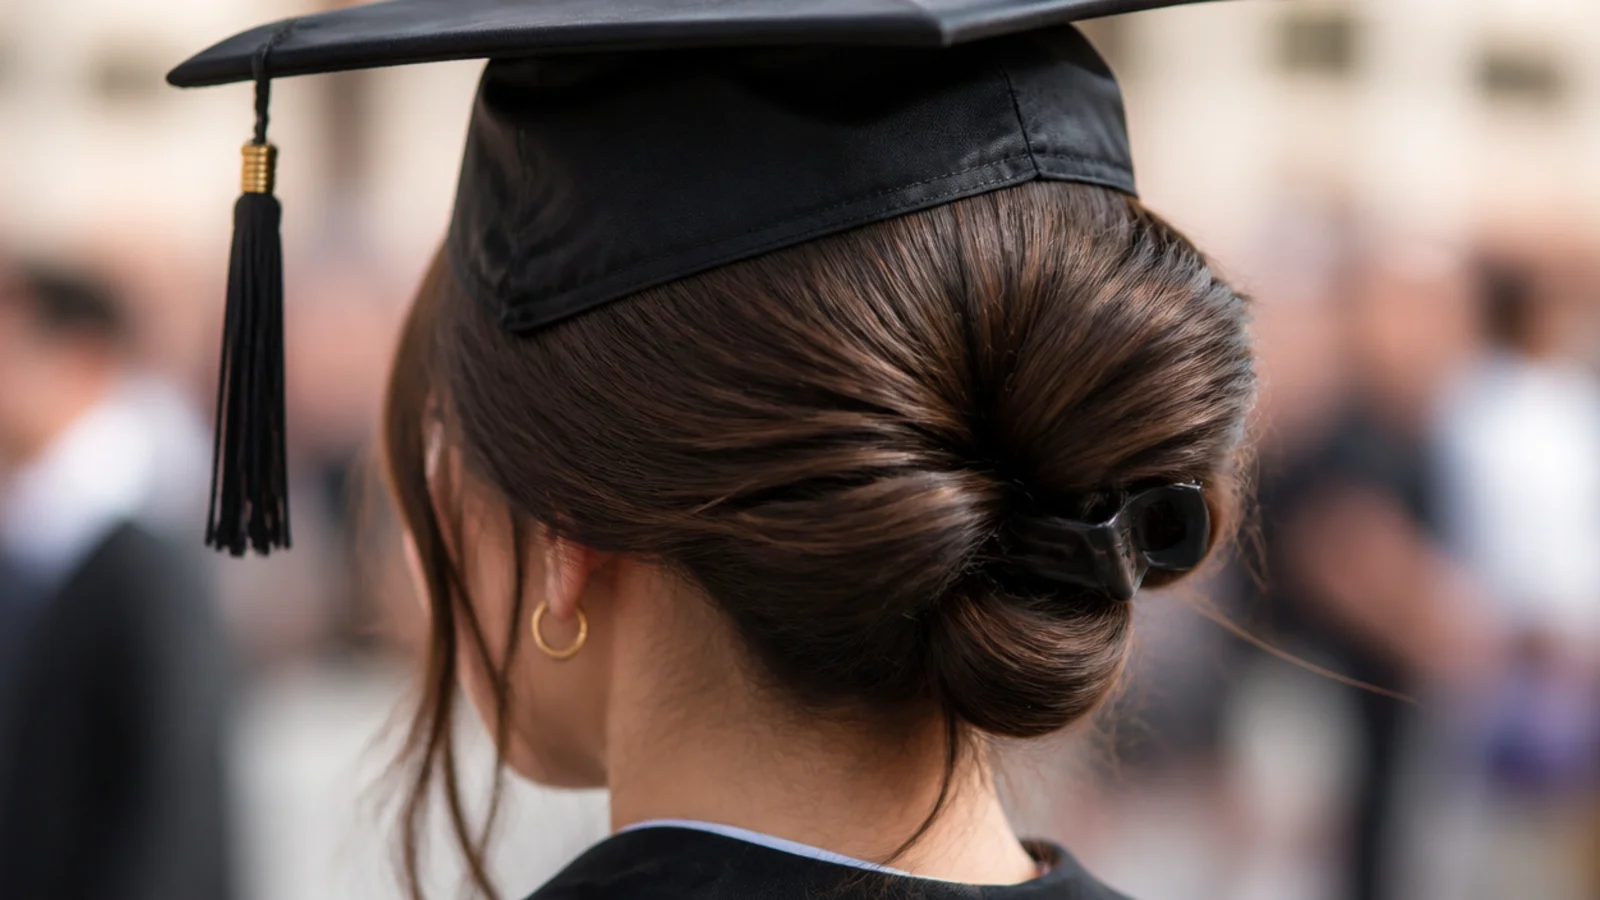
Slick the crown, twist the length upward and clamp a matte claw clip low on the back of the head. Two minutes, and it is the style I would tell a nervous 7am self to do. The honest warning: a claw clip is the least secure option here. Mine slipped twice during the ceremony and I re-clipped it while seated. Use a clip with real teeth, not a decorative one, and place it below the band so the cap does not knock it. Five minutes.
Who it suits: Thick medium to long hair, casual ceremonies, low-stress mornings.
Tip: Add two bobby pins under the clip's lower jaw. That alone stopped the slipping on the second try.
20. Sleek Low Bun With a Black Satin Ribbon
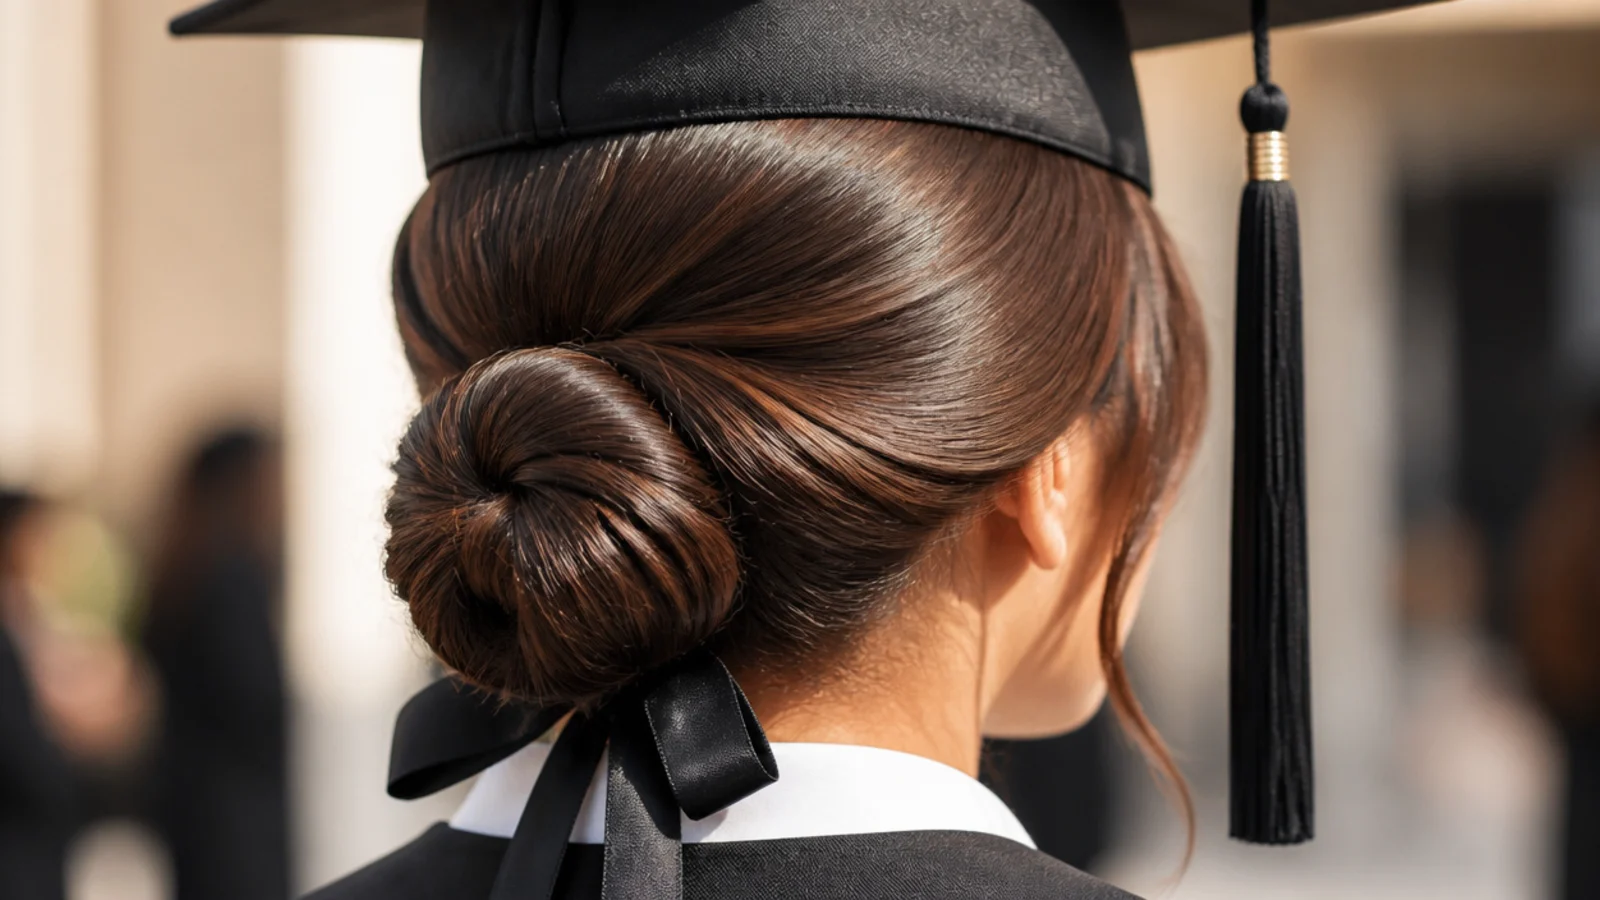
The plain sleek low bun with a half-inch satin ribbon tied in a flat bow underneath, matched to the gown color. It costs about four dollars of ribbon and it is the only accessory I would put anywhere near a mortarboard, because it sits low, adds no height, and gives the cap-off photos a focal point. Anything with height, combs or clips at the crown will collide with the band. Sixteen minutes including the bun.
Who it suits: Anyone wanting one detail without risking the cap fit.
Tip: Tie the bow after the cap is on and adjusted, so you never have to re-tie it flat.
Where the Cap Band Falls and Why Sleek Placement Matters
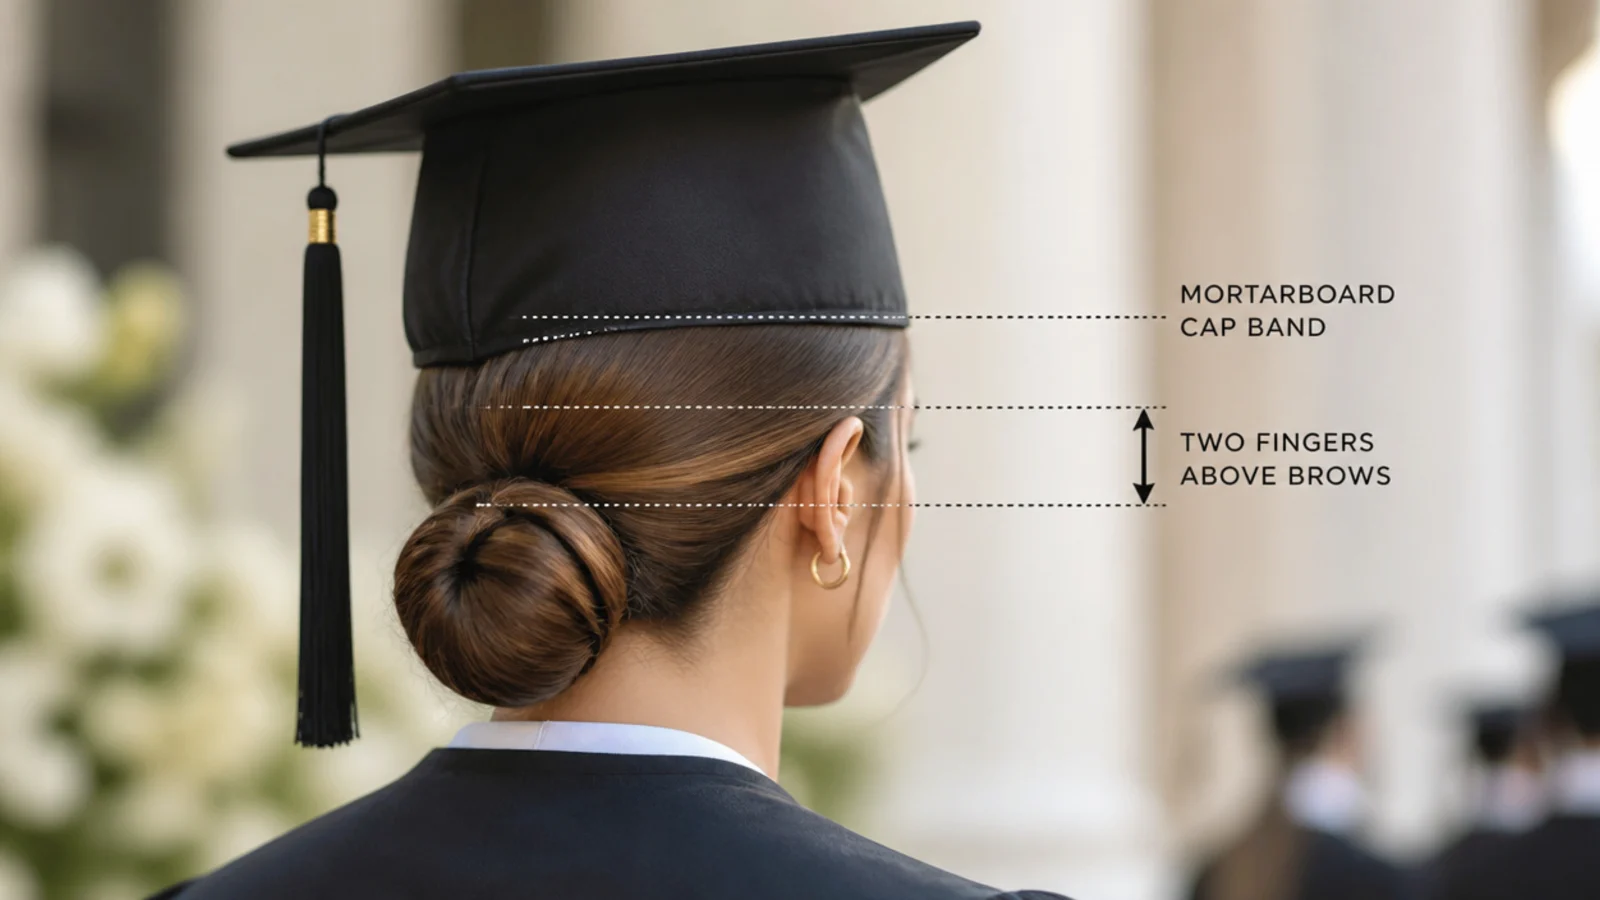
Put the cap on before you decide anything else. The mortarboard is designed to sit flat on the crown with the front band about two fingers above your eyebrows, and it descends much deeper on the head than photos suggest. Everything you build has to live below that line. This is the whole reason the slicked-back high bun, which is the shape most people picture when they hear sleek, does not work at a graduation. I tried it at a rehearsal and the cap simply would not sit flat: it perched on the bun and tipped forward over my forehead every time I moved. Dropped to the occipital bone, the same bun was fine for six hours. So measure first. Put the cap on, press a finger where the band lands, take the cap off and style at least two inches below that finger. Volume at the sides and back is not just allowed, it actually photographs better once the cap is on, because it stops the flat crown reading severe. More cap mechanics in the graduation hairstyles with cap guide.
Sleek Graduation Hairstyles by Hair Length: Pixie to Waist
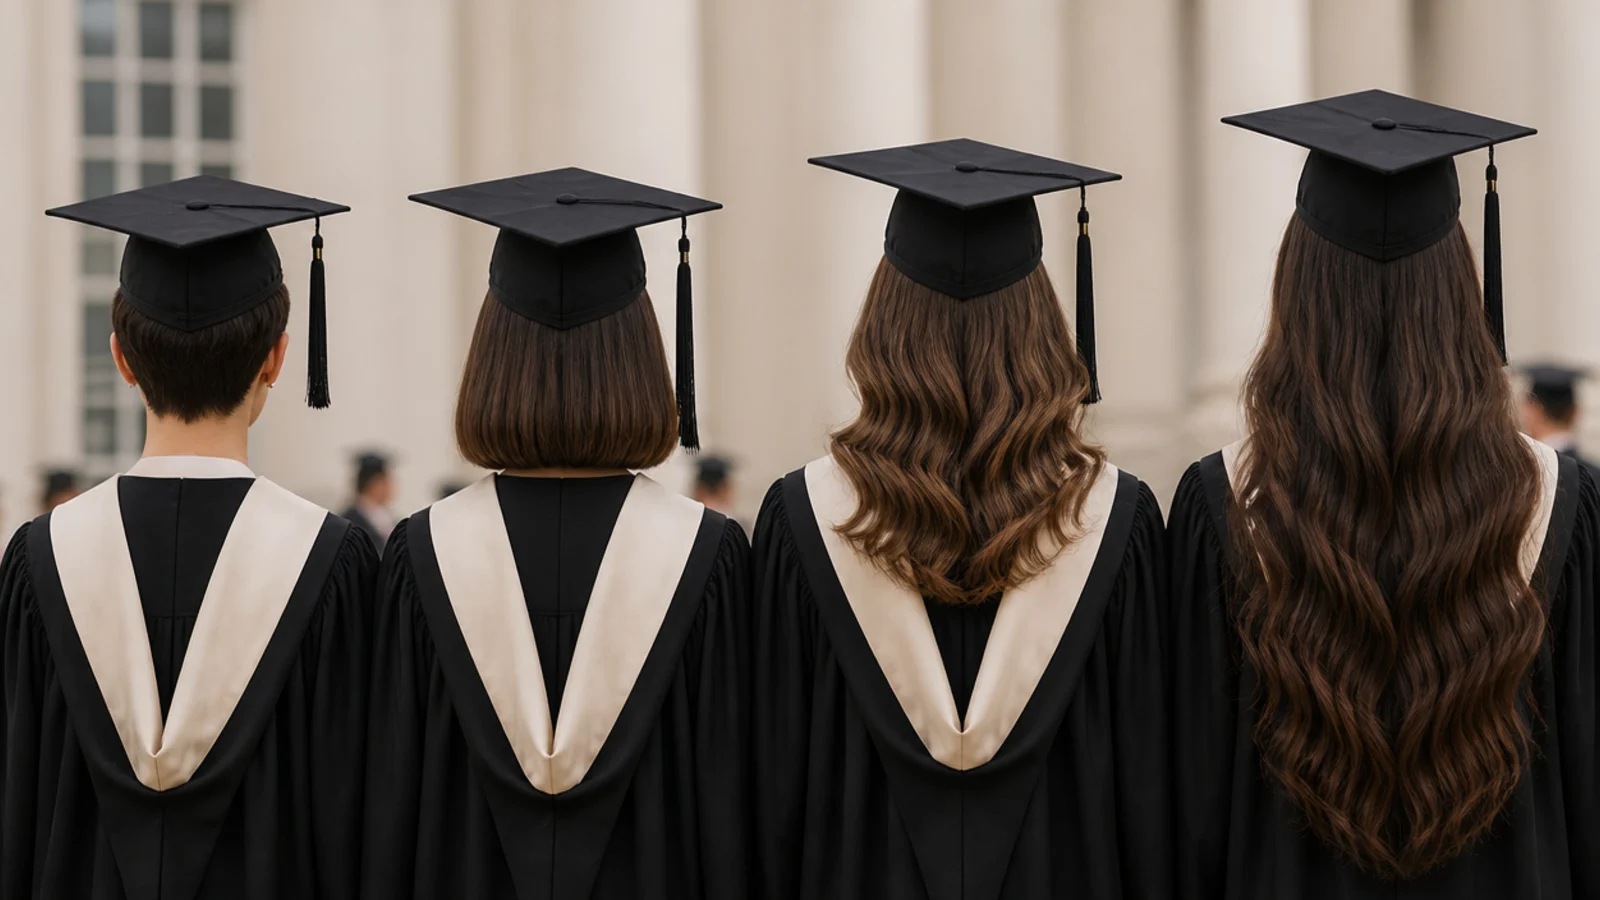
Length changes the problem completely. On a pixie or crop there is no length to hide a crown dent and nothing substantial to pin the cap into, so use flexible pomade rather than gel and anchor the cap with two crossed bobby pins per side, angled up toward the crown. On a chin-length bob, build the fullness just below the ears and keep the crown deliberately flat, since there is nothing there worth protecting. See graduation hairstyles for short hair for the full set. At shoulder length you get the widest choice: half-up, low ponytail, chignon and side-swept waves all work. Past mid-back the issue reverses and becomes weight. A heavy slicked ponytail or a low bun full of long thick hair pulls backward and slowly drags the cap off the crown, which is why every long-hair bun here gets pinned upward against the scalp rather than straight through. Graduation hairstyles for long hair covers the weight problem in more depth.
Gel, Flaking and Humidity: Making Sleek Hold Four Hours
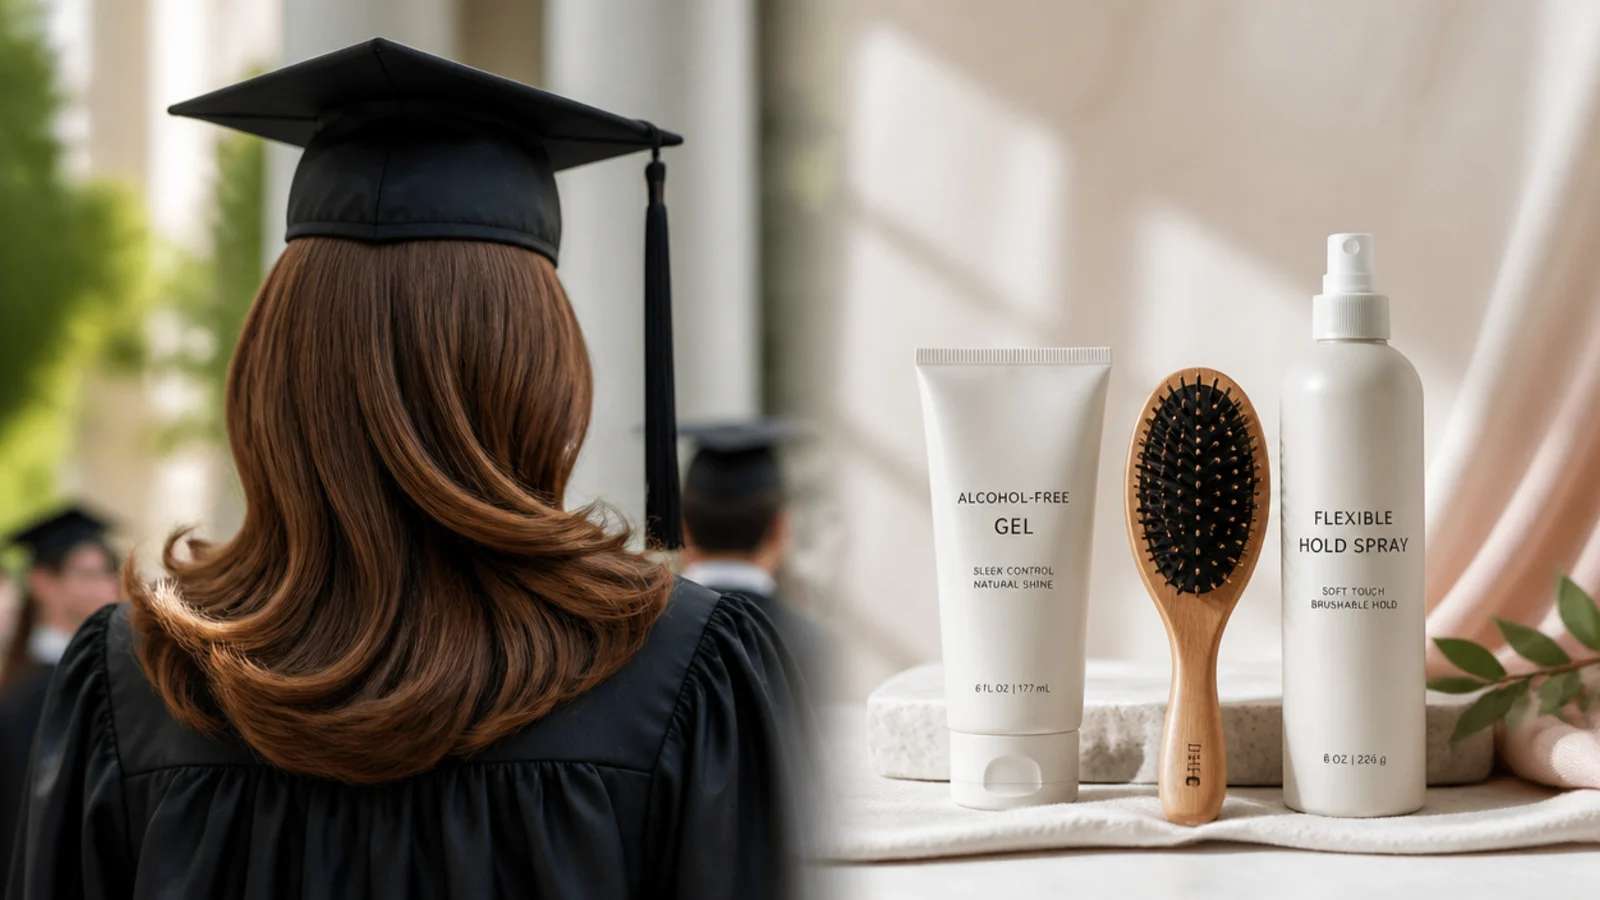
Here is what actually went wrong on my first attempt. I used a large scoop of a strong-hold alcohol based gel on dry hair, and by hour two there was a chalky white line across my hairline exactly where the cap band rubbed. The fix has three parts. First, alcohol-free gel only, and always on damp hair, applied a pea-size amount at a time in sections rather than a handful at once. Second, build gradually and brush each section through with a boar bristle brush, which distributes product and adds the shine gel alone does not create. Third, finish with a flexible-hold hairspray rather than a stiff freeze spray, so the hair recovers its movement when the cap comes off instead of staying in a cracked shell. For outdoor May and June ceremonies, humidity will lift the smoothed sections at the hairline first. A small amount of lightweight oil smoothed over the top layer once the gel is dry slows that considerably, and one travel edge brush in a clutch fixes what is left in thirty seconds.
Cap-On to Cap-Off: How Sleek Styles Look in the After Photos
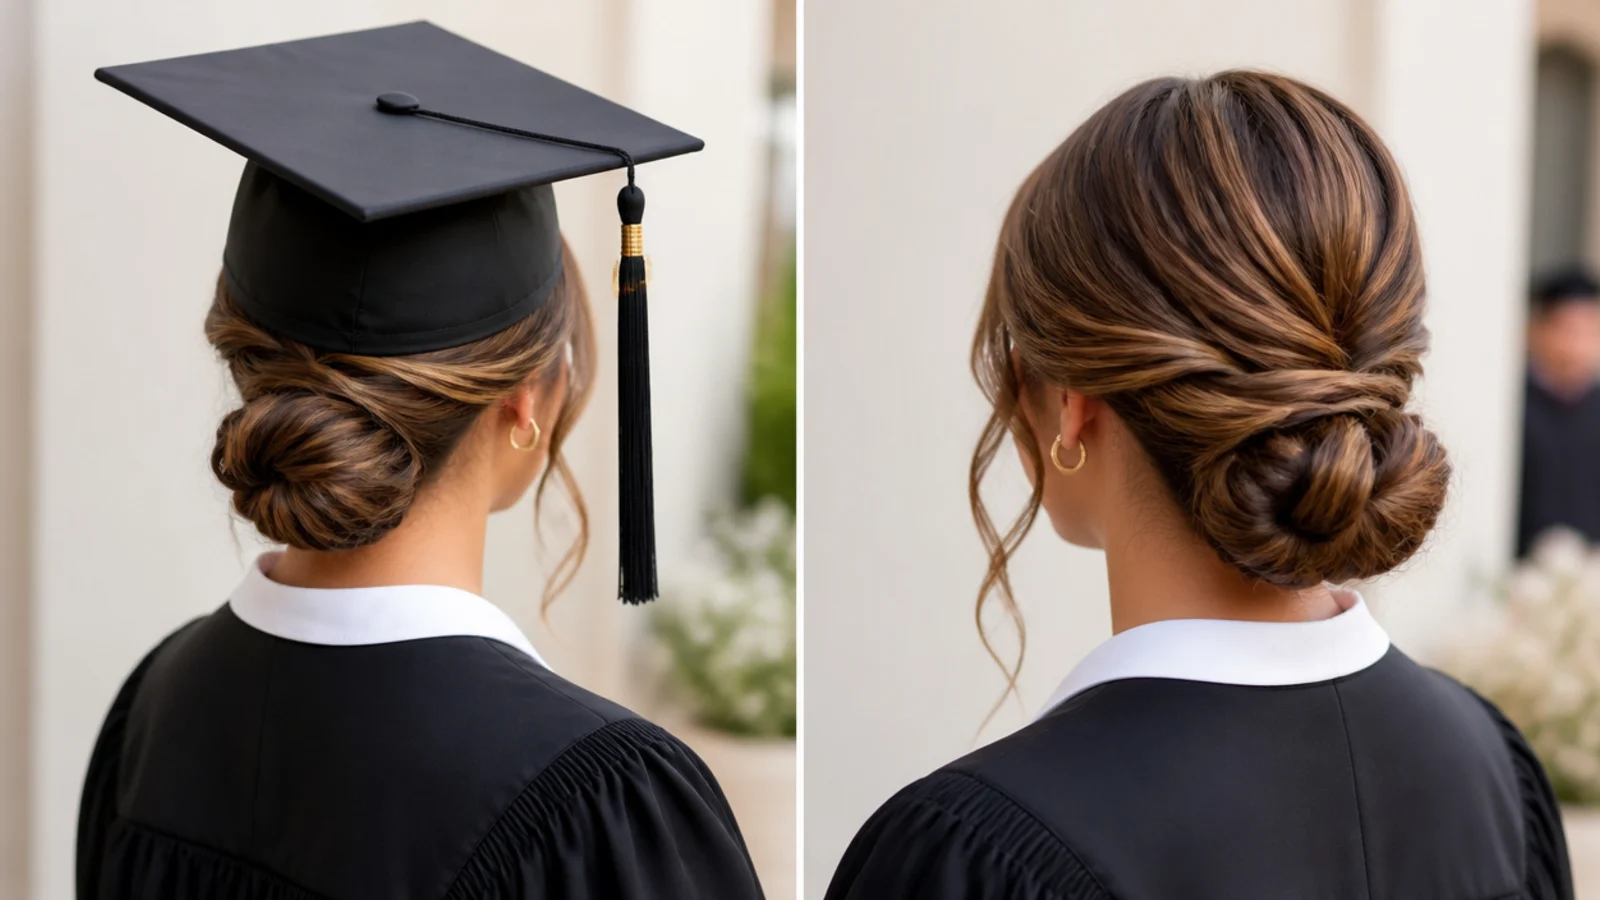
Nearly every real photograph happens after the cap comes off, and this is the part no styling guide covers. Sleek updos win here outright. A low bun, chignon or braided ponytail looks identical the second the cap is removed, because nothing under the band was carrying shape in the first place. What needs a fix is anything worn down. Glass hair takes a visible crease across the crown after roughly ninety minutes, and slicked edges get pressed into a flat shiny band where the cap sat. The recovery kit is small: a travel-size water mister, a folding brush, a travel edge brush and four spare bobby pins. Mist the crown lightly, lift the roots with your fingers rather than a brush, then smooth the top layer. It takes about three minutes. If you wore soft waves, let them cool fully before the cap goes on in the first place, because warm curls set flat under a band and never come back.
Timing the Morning Of: My 90-Minute Sleek Hair Schedule
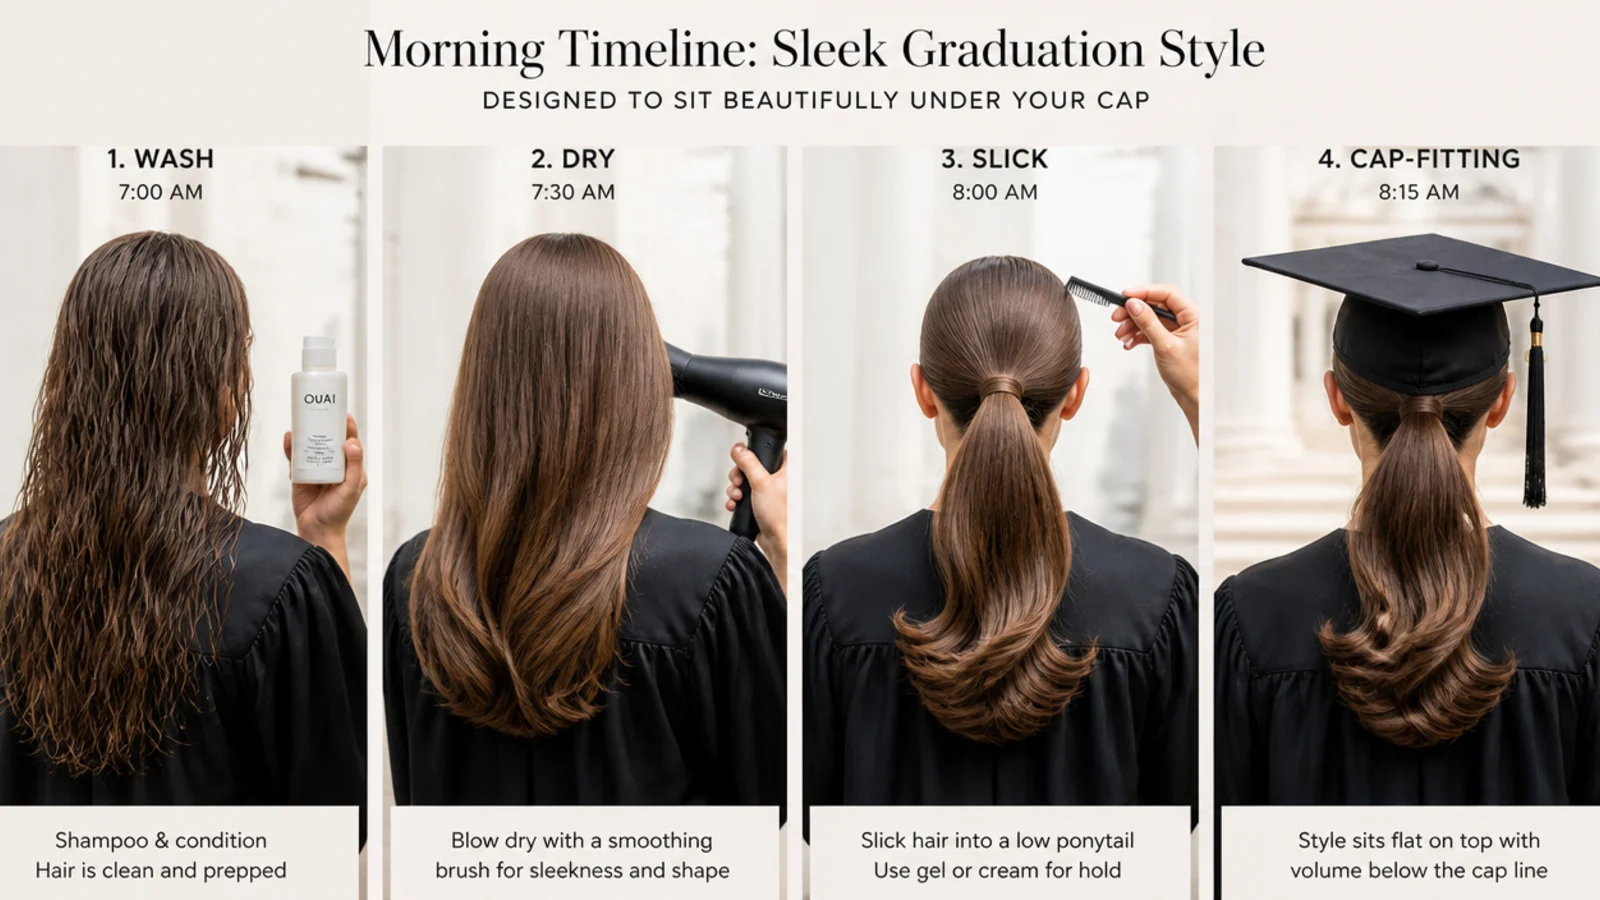
Style one to two hours before you leave, not the night before, unless you chose the braided ponytail. Gel applied at 10pm goes brittle overnight and cracks along the hairline when you put the cap on the next morning. Here is what worked. Wash the night before, not the morning of, because freshly washed hair is too slippery to grip gel or pins. Ninety minutes out, mist the hair damp and blow dry the crown flat with a paddle brush, ten minutes. Seventy minutes out, section and slick, working in four quadrants and using one pea of gel per quadrant, fifteen minutes. Fifty minutes out, build the bun or ponytail and pin, ten to twenty minutes. Thirty minutes out, put the actual cap on, walk around your house in it, sit down in it, and fix whatever moves. That rehearsal step is the one everybody skips and it is the reason my second attempt worked. If you are short on time, start with easy graduation hairstyles.
Sleek on Fine, Thinning or Textured Hair
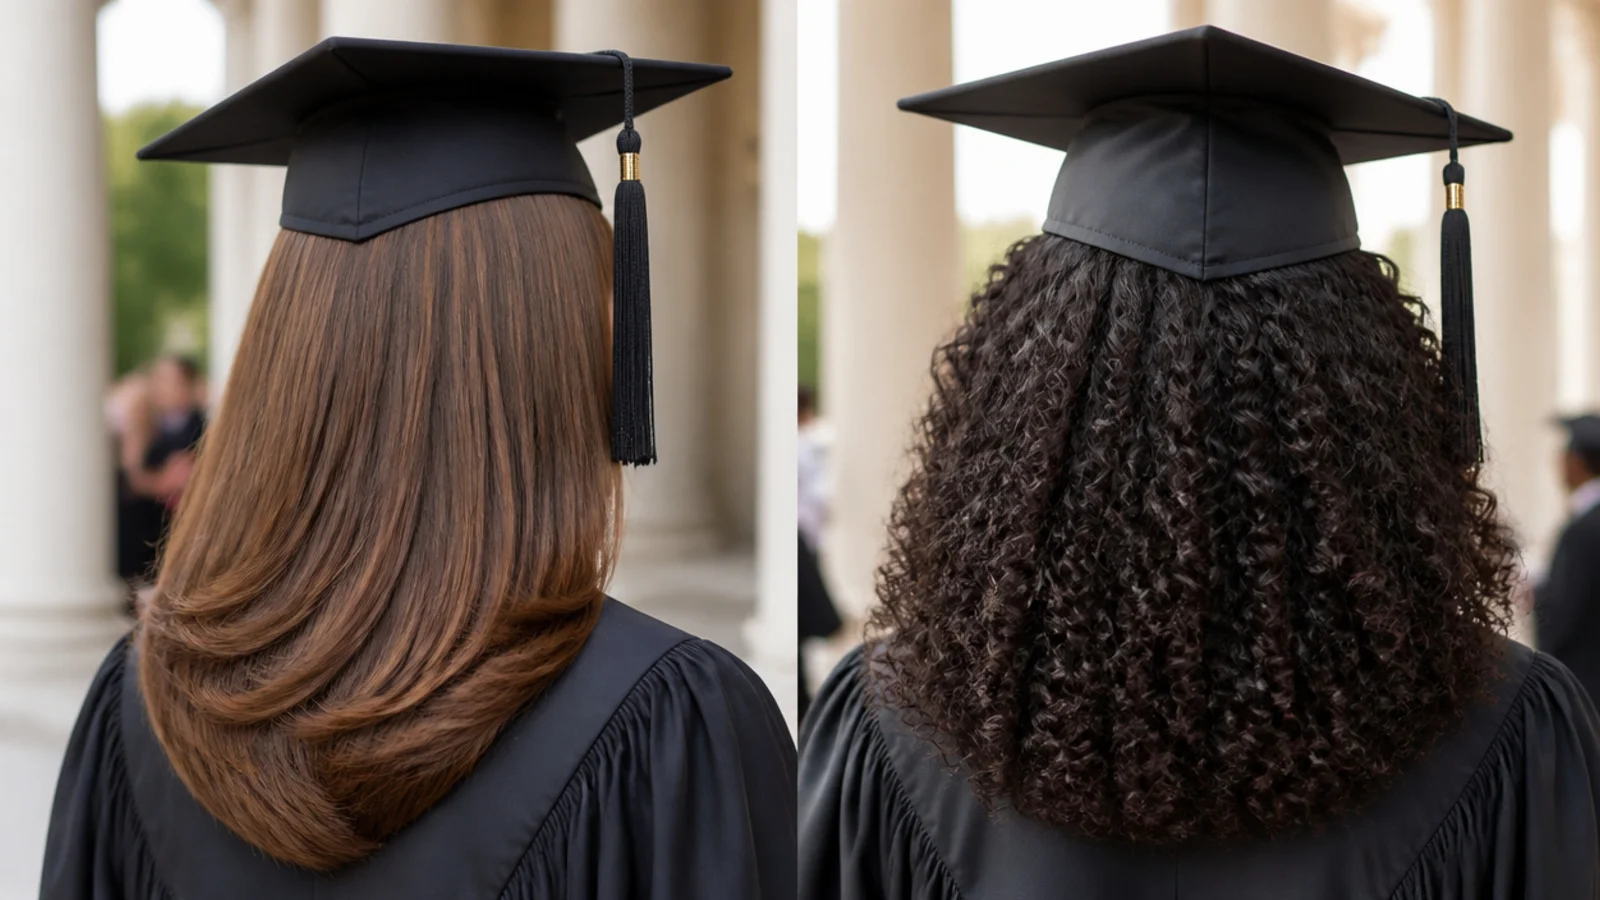
Sleek is unforgiving on fine hair because slicking removes the only volume you had, and any scalp showing at the part gets more visible, not less. Two things help: a deep side part rather than a middle part, which lays hair across the sparse area, and a bun built over a small foam donut so the finished shape looks intentional rather than thin. Avoid wet-look finishes, which separate fine hair into visible strands. On curly and coily textures, the honest answer is that a truly sleek finish means either a blowout or a heavy gel slick, and a four-hour cap will flatten a blowout at the crown regardless. A gel slick into a low bun holds far better and protects the length underneath. Type 4 textures should schedule the slick for the morning of and avoid brushing the crown once it has set. Graduation hairstyles for curly hair covers the non-sleek alternatives if you would rather keep the texture.
Frequently Asked Questions
Does a slicked back bun fit under a graduation cap?
Yes, as long as it is low. The mortarboard sits flat on the crown with the front band about two fingers above your eyebrows, so a bun at the crown physically stops the cap from lying flat and tips it forward. Placed at or below the occipital bone, roughly two inches under the band, a slicked bun is the single most cap-compatible style there is.
What kind of hairstyles actually work under a graduation cap?
Anything that keeps its volume below the cap band. Low buns, low ponytails, flat-pinned half-up styles, side-swept waves and braids all work. High topknots, crown-height ballerina buns, bouffant half-ups and anything with a comb or clip at the crown do not, because they collide with the band and push the cap forward off your head.
How do you keep a sleek bun from flaking?
Use an alcohol-free gel and apply it only to damp hair, never dry, working a pea-size amount at a time through sections with a boar bristle brush. Flaking is almost always caused by too much product applied at once onto dry hair, then rubbed by the cap band at the hairline. Finish with flexible-hold spray rather than a stiff freeze spray.
Should I go for a sleek updo or wear my hair down for graduation?
A sleek updo if the ceremony is outdoors, long, or humid, since pinned hair cannot frizz or crease and looks identical when the cap comes off. Hair down if the ceremony is short and indoors and you want length in photos. If you want both, a flat-pinned sleek half-up gives you visible length with almost no cap-dent risk.
How long before the ceremony should I do my hair?
One to two hours before, not the night before. Gel applied overnight goes brittle and cracks along the hairline when the cap presses on it in the morning. The only exception is a slicked braided ponytail, which holds fine overnight on a satin pillowcase. Build in a final thirty minutes to wear the actual cap around the house and fix what shifts.
How do I stop the graduation cap from sliding off a sleek style?
Slicked hair is slippery, so the cap needs mechanical anchoring. Slide two bobby pins into the hair just under the cap band on each side and cross them into an X, which grips the band from underneath. Aim the pins upward toward the crown. Leave a small unslicked patch at each anchoring point so the pins have something dry to bite into.
Will a sleek style leave a dent after the cap comes off?
An updo will not, because nothing under the band is holding shape. Hair worn down will, usually a visible crease across the crown after about ninety minutes. Carry a small water mister and a folding brush: mist the crown lightly, lift the roots with your fingers rather than a brush, then smooth the top layer. It takes roughly three minutes.
What is the best sleek graduation hairstyle for short hair?
A blunt bob ironed straight with fullness built below the ears, or a pixie taken back with a flexible pomade instead of gel. Short hair has no length to hide a crown dent and nothing to pin the cap into, so keep the crown flat on purpose and anchor the cap with two crossed bobby pins above each ear rather than relying on a bun.
Does a sleek style work with braids or locs?
Yes, and it is one of the most reliable options. Gather knotless braids, box braids or locs low and coil them into a flat bun at the nape with a spiral tie plus four U-pins. Schedule the install five to seven days ahead rather than the day before, since a fresh tight install under a cap band for four hours becomes genuinely painful.
Which graduation hairstyles look are you saving?
If you take one thing from all 20 of these sleek graduation hairstyles, take the measuring step. Put the cap on, mark where the band lands with a finger, and build everything at least two inches below it. That single habit is what separated my failed first attempt from the version that held six hours. After that it is small choices: alcohol-free gel on damp hair in pea-size amounts, a flexible-hold spray instead of a stiff one, a rehearsal in the actual cap thirty minutes before you leave, and a mister and edge brush in your clutch for the cap-off photos. The sleek low bun at the nape is the safest place to start. Save the ones you like, then browse the rest of the graduation hairstyles hub or compare structures in the graduation updo guide.