Quick Comparison
| Protective Style Installed Ahead (Braids, Twists, Cornrows) | Your Own Natural Hair Styled on the Day (Twist-Out, Bun, Puff) | |
|---|---|---|
| Cost | 150 to 350 dollars for a salon install, plus hair if you add length | Zero beyond products you already own, or about 15 dollars for rods |
| Time commitment | 3 to 7 hours in a chair, booked 3 to 5 days before the ceremony | 5 to 45 minutes on the morning, 1 to 2 hours before you leave |
| Cap fit | Excellent if the scalp work is flat; poor with knots or crown height | Excellent on flat twists and low buns; poor on a high puff |
| Hold over 3 to 4 hours | Total; nothing moves for weeks, let alone one afternoon | Good below the band, moderate at the crown, which compresses |
| Humidity at an outdoor May or June ceremony | Almost immune; only flyaways at the hairline | Twist-outs swell and gel-slicked edges revert within 90 minutes |
| How it looks when the cap comes off | Identical to how it looked going on; nothing to fix | Flat crown; needs a pick, a water mist and about 30 seconds |
| Comfort | A fresh install can feel tight; 3 to 5 days of settling fixes it | No tension, but pins at the temples can ache by hour two |
| Best for | Waist-length braids, locs, anyone traveling or with back-to-back events | TWAs, shoulder-length 4A to 4C, last-minute deciders, tight budgets |
| Main risk on the day | Booked too late; a day-old install is sore and sits too high | Set is not fully dry, so the pattern frizzes under the cap |
1. Flat Twist Crown Into a Low Nape Bun
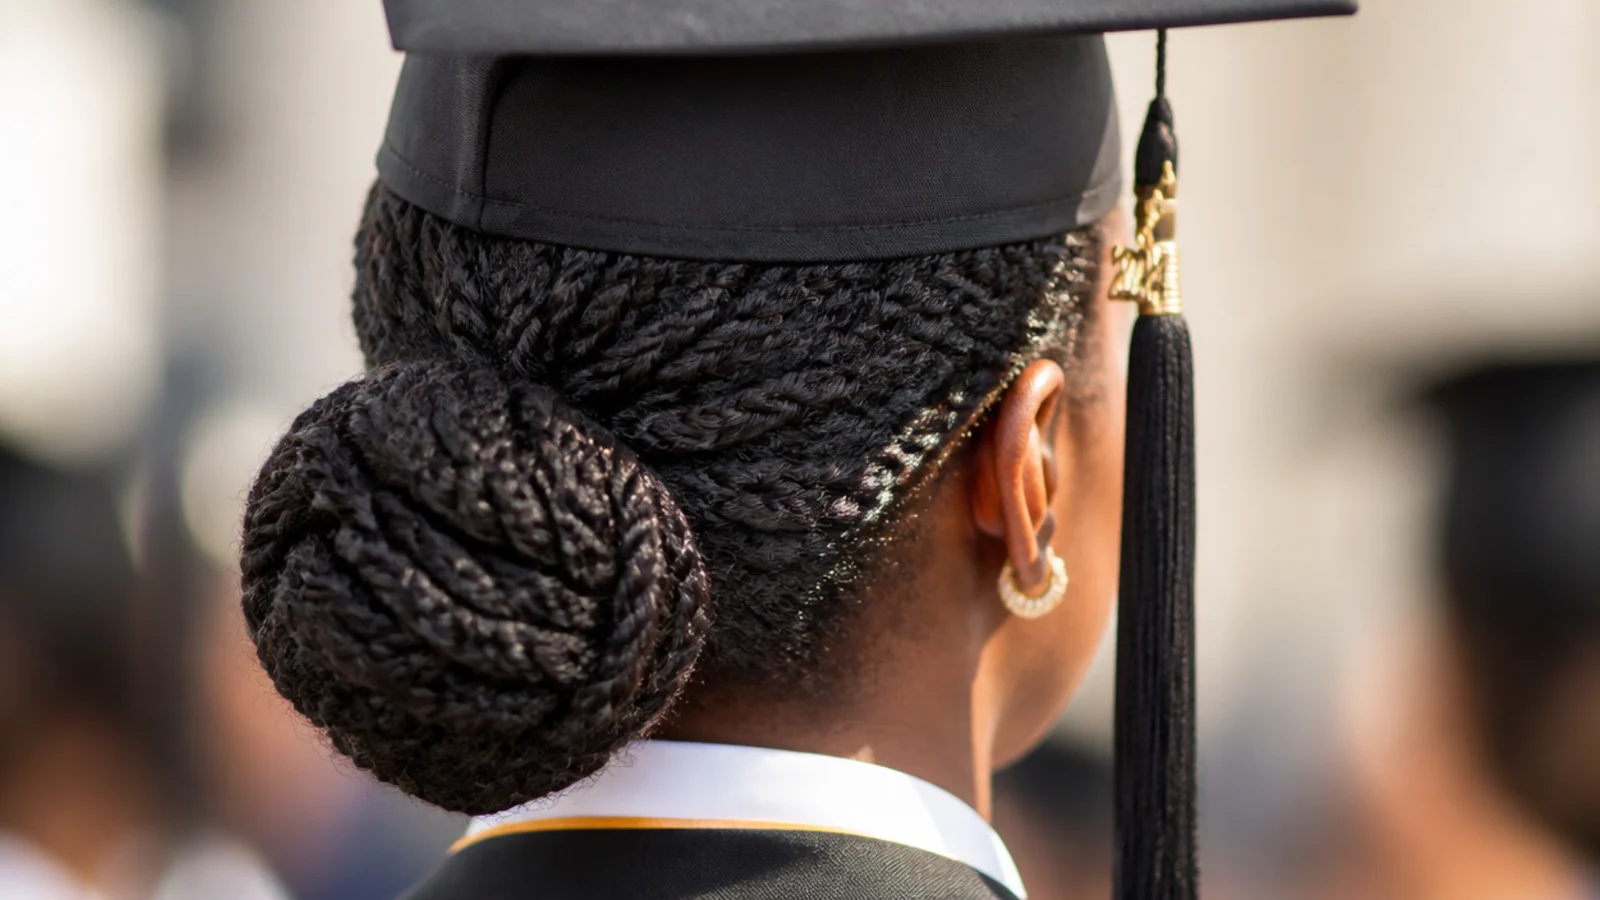
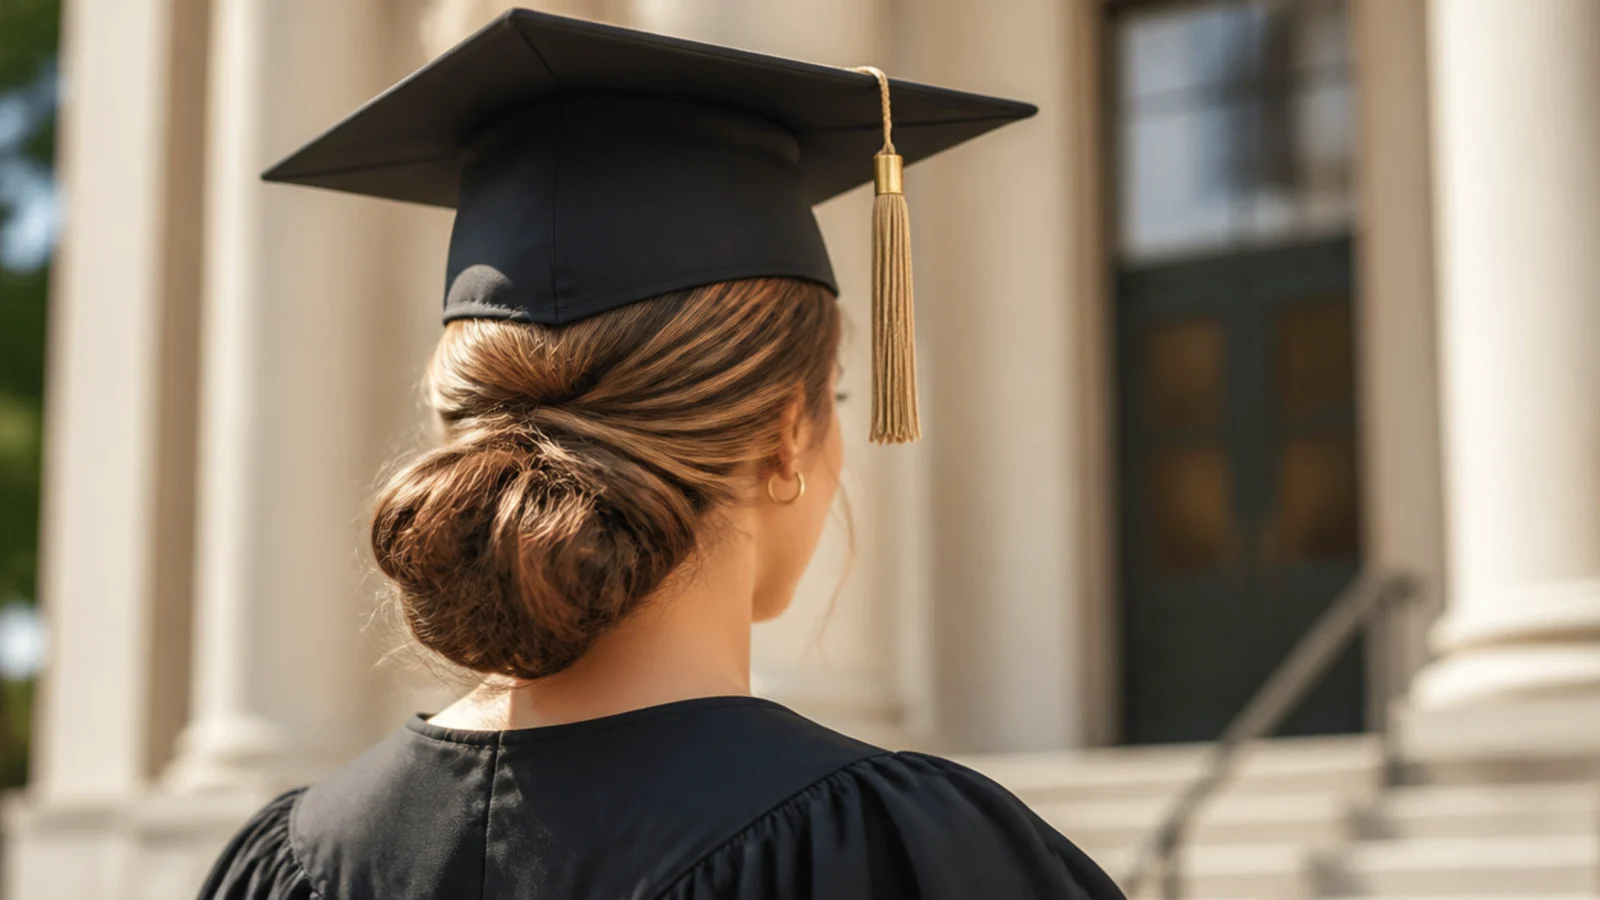
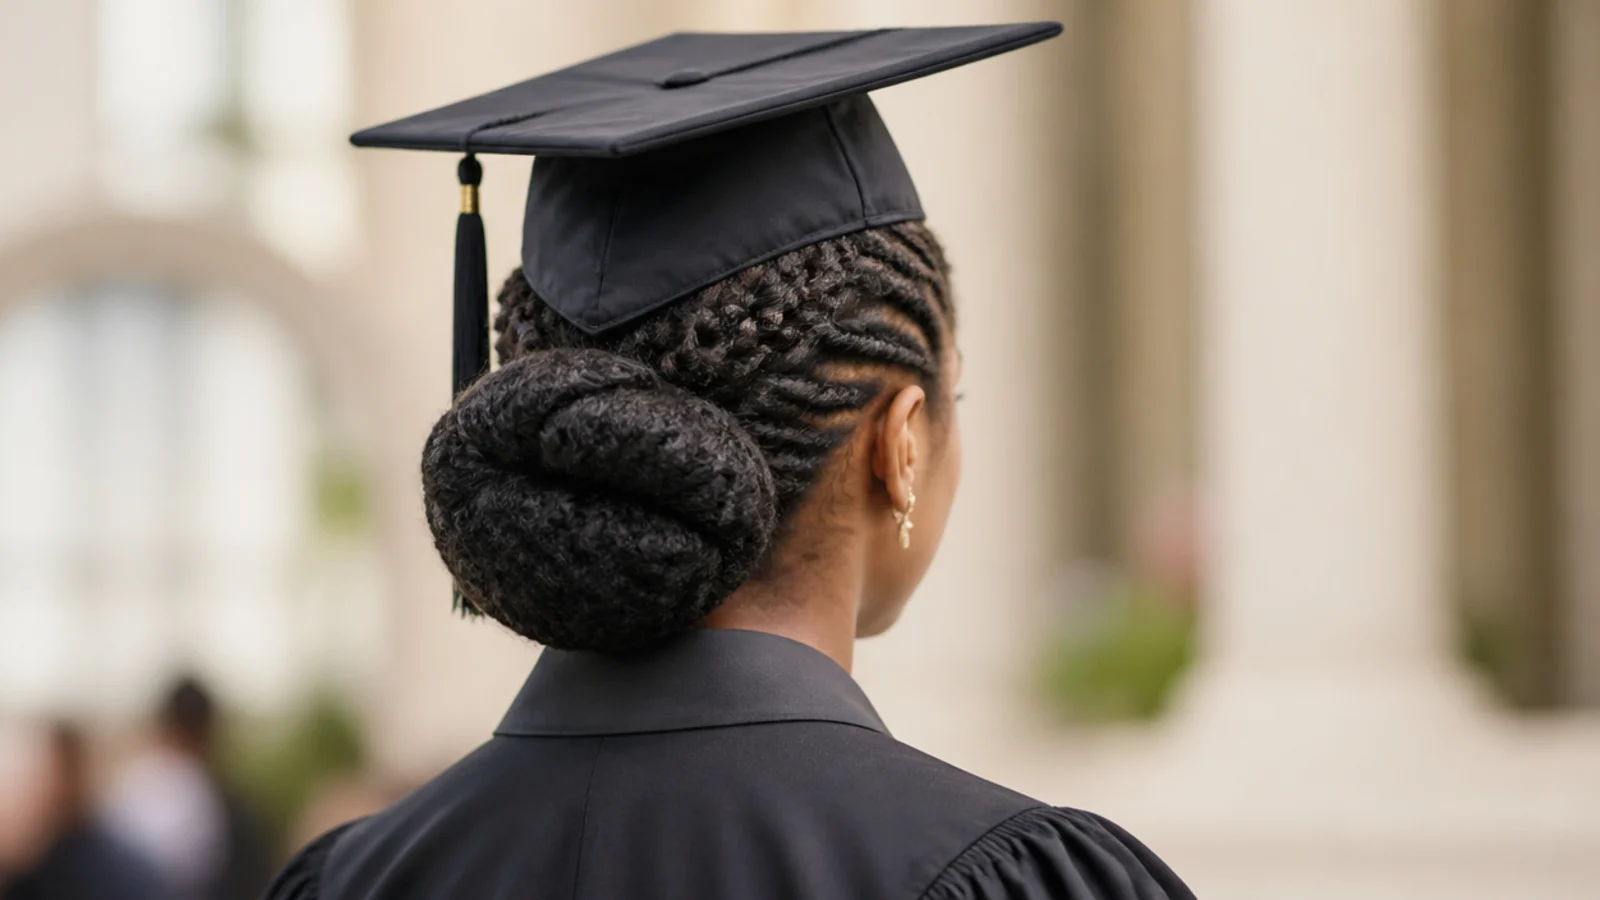
Four to six flat twists taken straight back from the hairline, then gathered and pinned into a bun at the nape. This is the single best cap style on natural hair because the flat twists give the crown a smooth, low channel that the mortarboard lies on perfectly level, and they give bobby pins something structural to grip instead of loose coils. Budget 30 to 45 minutes on damp, moisturized hair. The bun sits four to five inches below the cap band, so nothing gets crushed. Fuller versions live in graduation hairstyles with a cap.
Who it suits: 4A to 4C hair, shoulder length or longer, anyone who wants zero cap dent.
Tip: Anchor the cap by crossing two pins in an X through the second twist on each side.
2. Chunky Two-Strand Twist-Out Worn Below the Cap Line
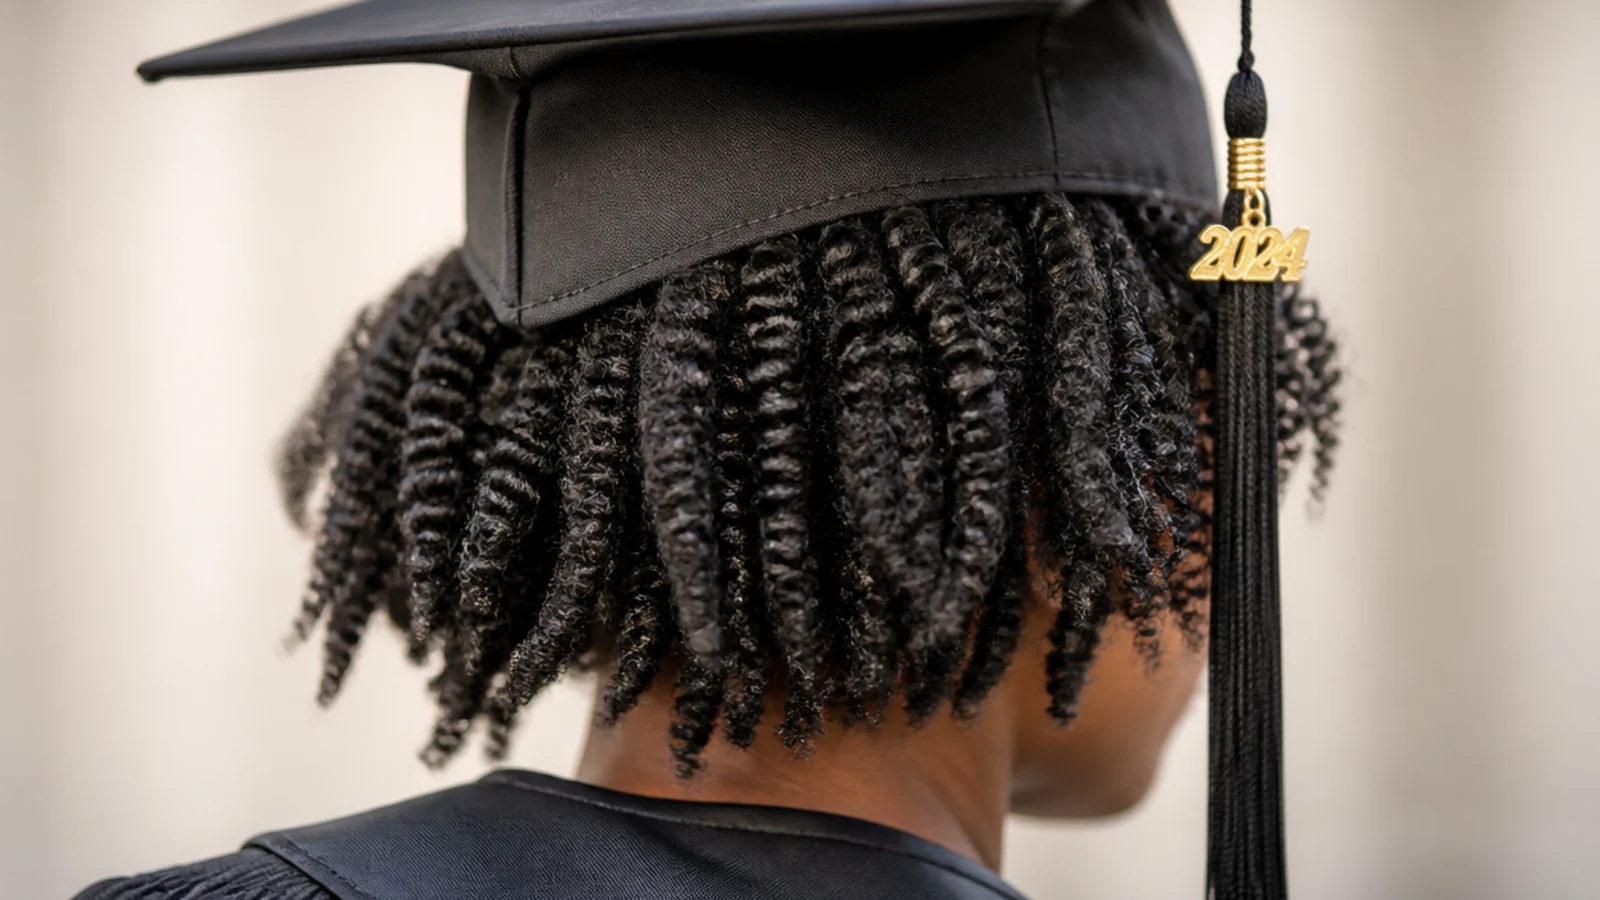
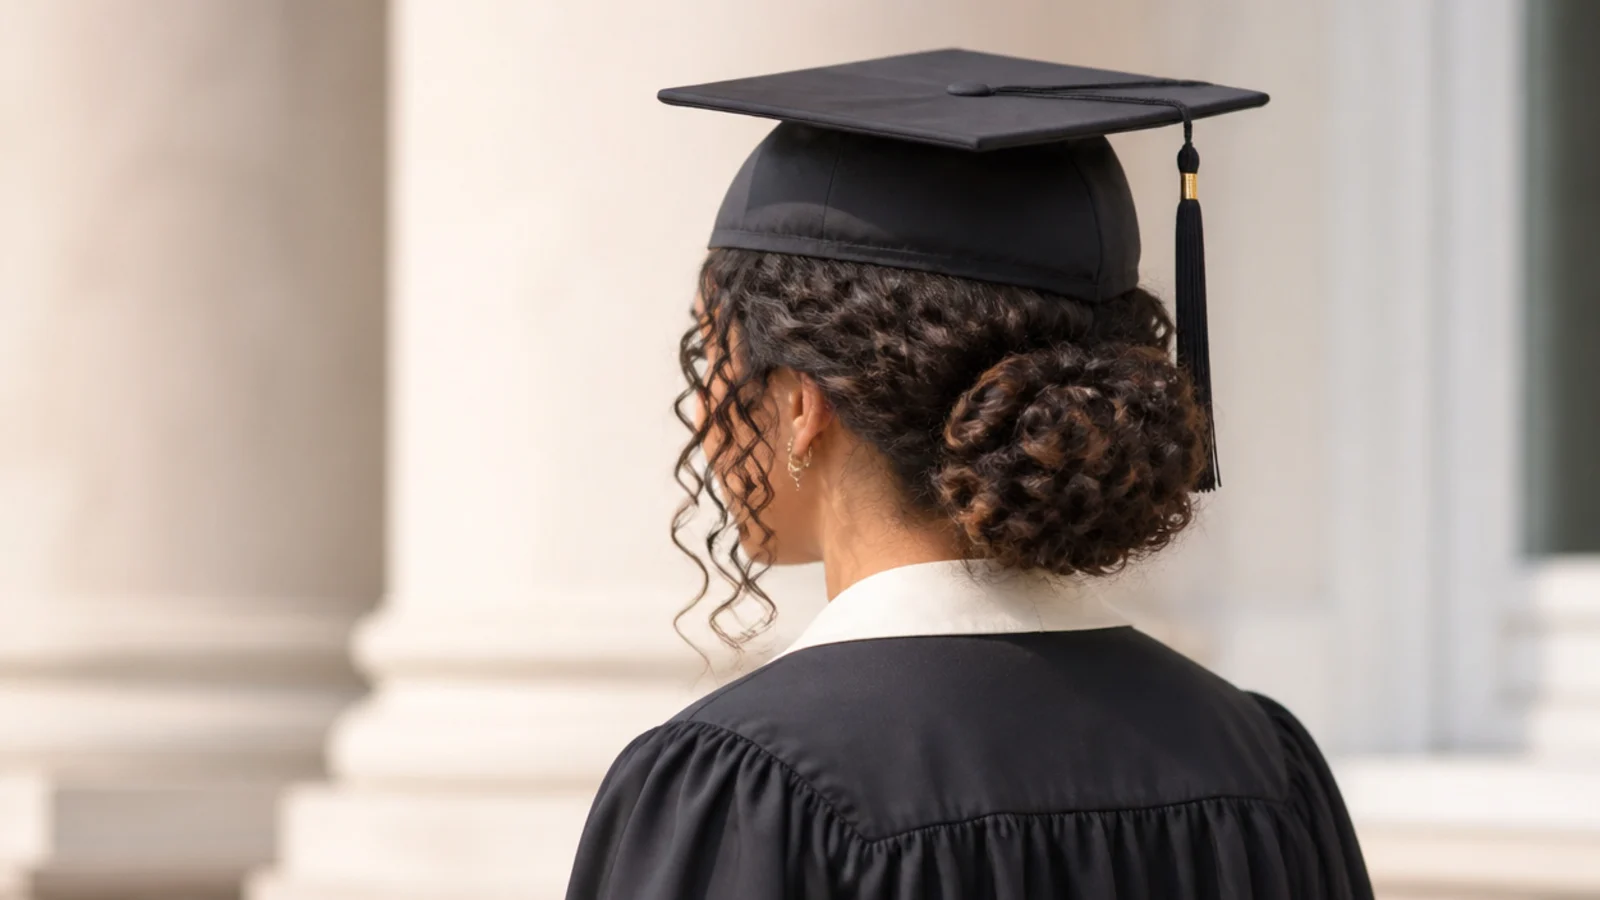
Eight to twelve chunky twists set on damp hair the night before, unraveled in the morning and separated with oiled fingertips. The trick for graduation is directional: twist the front sections back and down rather than up, so the definition sits at the temples and sides where the cap cannot reach. On 4B and 4C hair, shrinkage works in your favor here, since a twist-out that lands at shoulder length is already entirely below the band. Ten minutes to unravel and fluff on the morning. See the pattern breakdown in graduation hairstyles for curly hair.
Who it suits: 3C to 4C hair that wants definition without heat or a salon visit.
Tip: Separate each twist into two, not four, or the definition collapses under the cap.
3. Knotless Box Braids Pulled Into a Low Bun
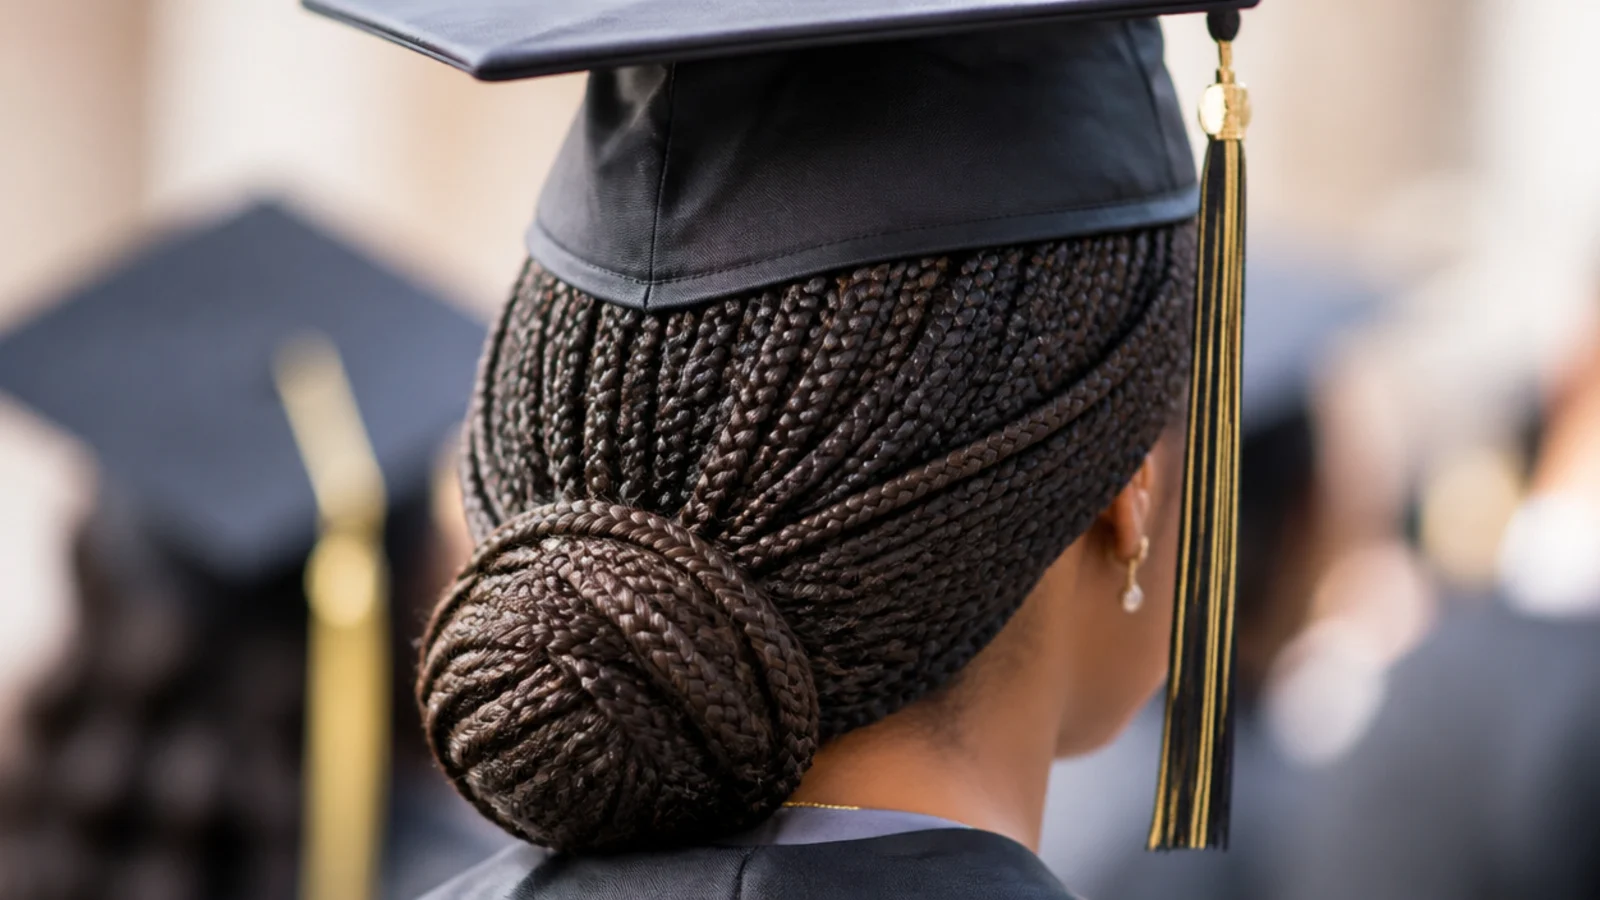
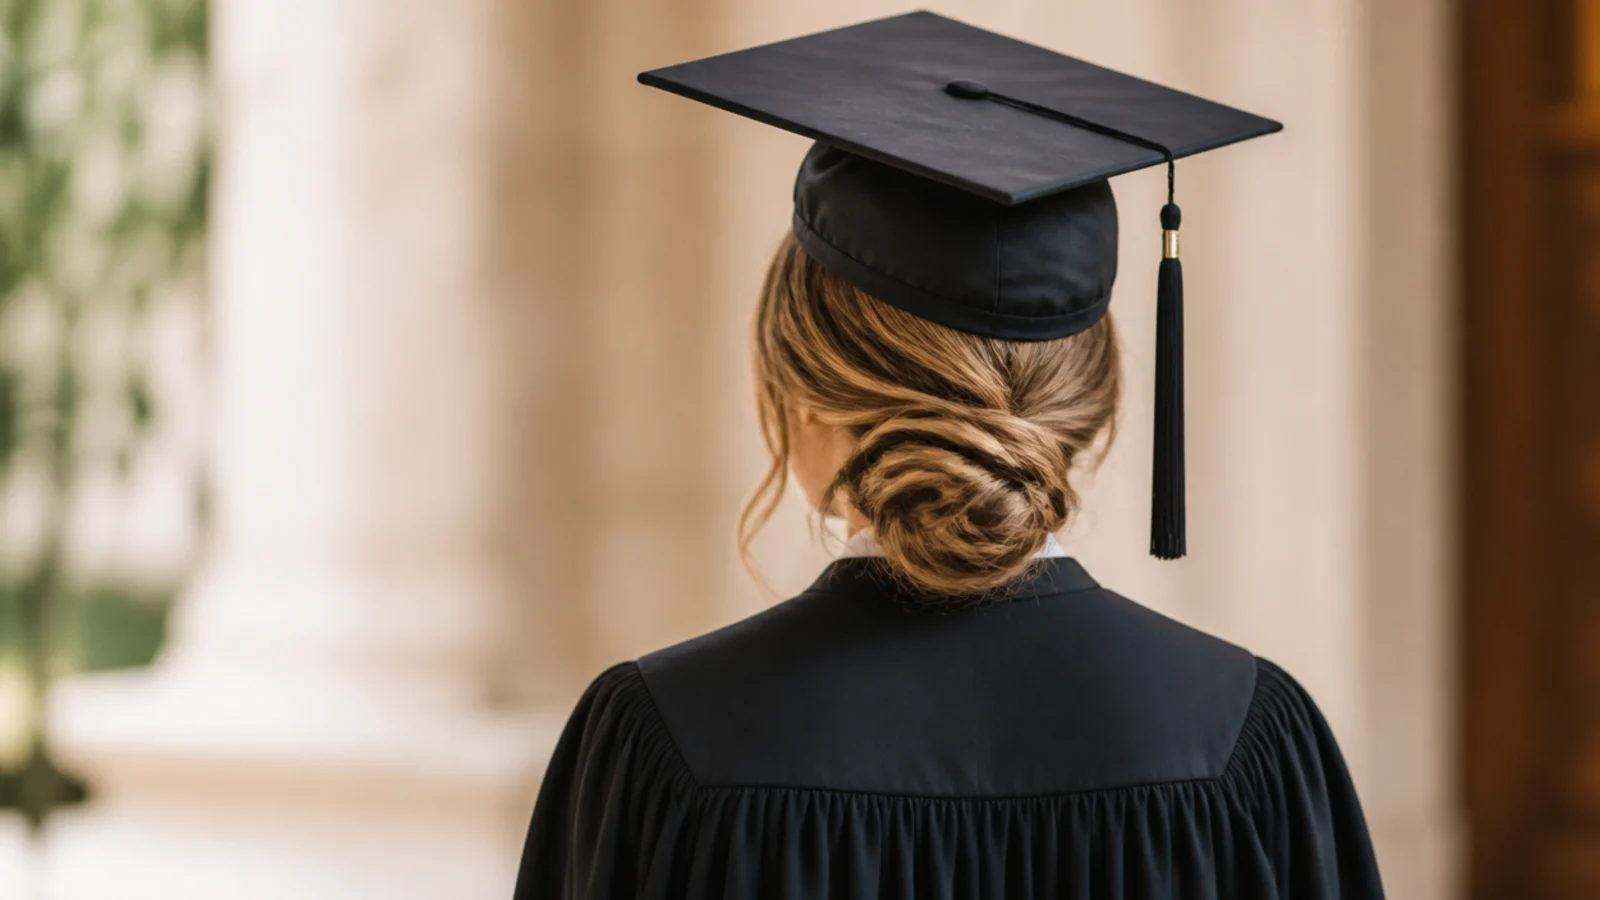
Mid-back knotless braids gathered low and coiled into a bun that sits at the nape. Knotless matters more than usual on grad day because the feed-in start lies flat against the scalp, so the cap does not ride up on a row of knots. Book the install three to five days before the ceremony, never the day before, so scalp tenderness settles and the parts relax. Waist-length braids in a bun are heavy, so use three to four U-pins plus an elastic. Weight strategy for long hair is in graduation hairstyles for long hair.
Who it suits: Anyone wanting a two month protective style that doubles as grad hair.
Tip: Ask for the perimeter braids lighter, so the bun does not drag the cap backward.
4. Cornrows Straight Back Into a Low Puff
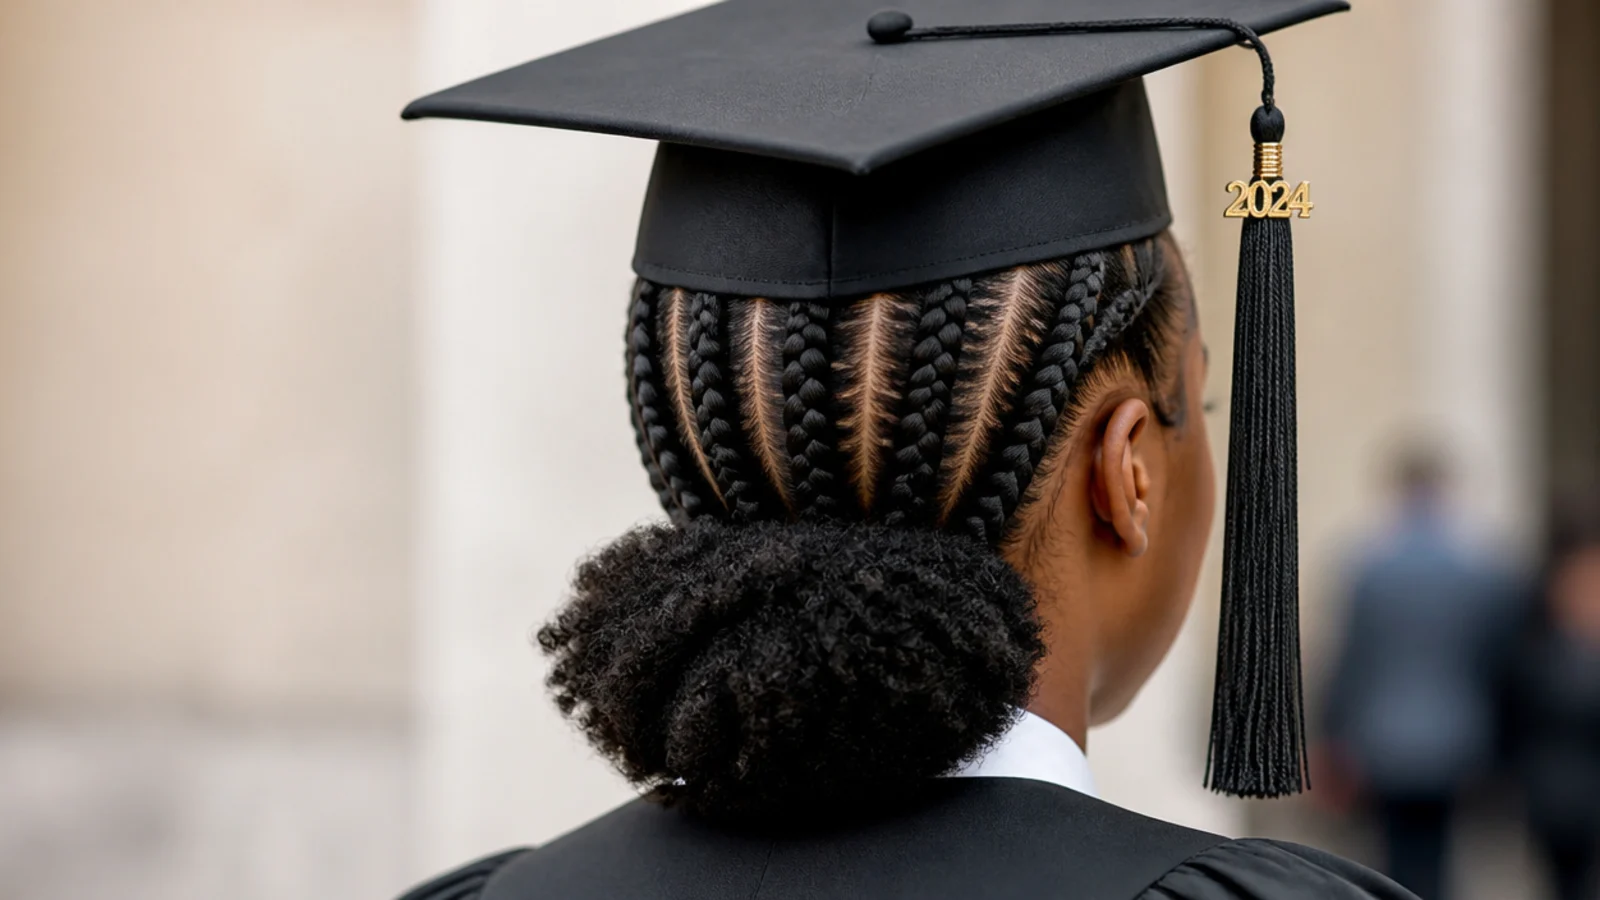
Six to eight cornrows braided straight back on your own hair, released at the crown of the neck into a round puff. It is the most cap-friendly silhouette on this whole list: the braided section is essentially flat, so the board sits level and level boards photograph square in every shot, and the puff sits well under the band. Expect 45 to 90 minutes if a friend braids, longer solo. On 4C hair the puff reads full without a single product beyond leave-in and a light gel on the edges.
Who it suits: 4B and 4C hair, outdoor ceremonies, anyone who hates fussing with pins.
Tip: Have the last two rows braided lower than feels natural so the puff clears the band.
5. Defined Braid-Out on Shoulder-Length 4A Hair
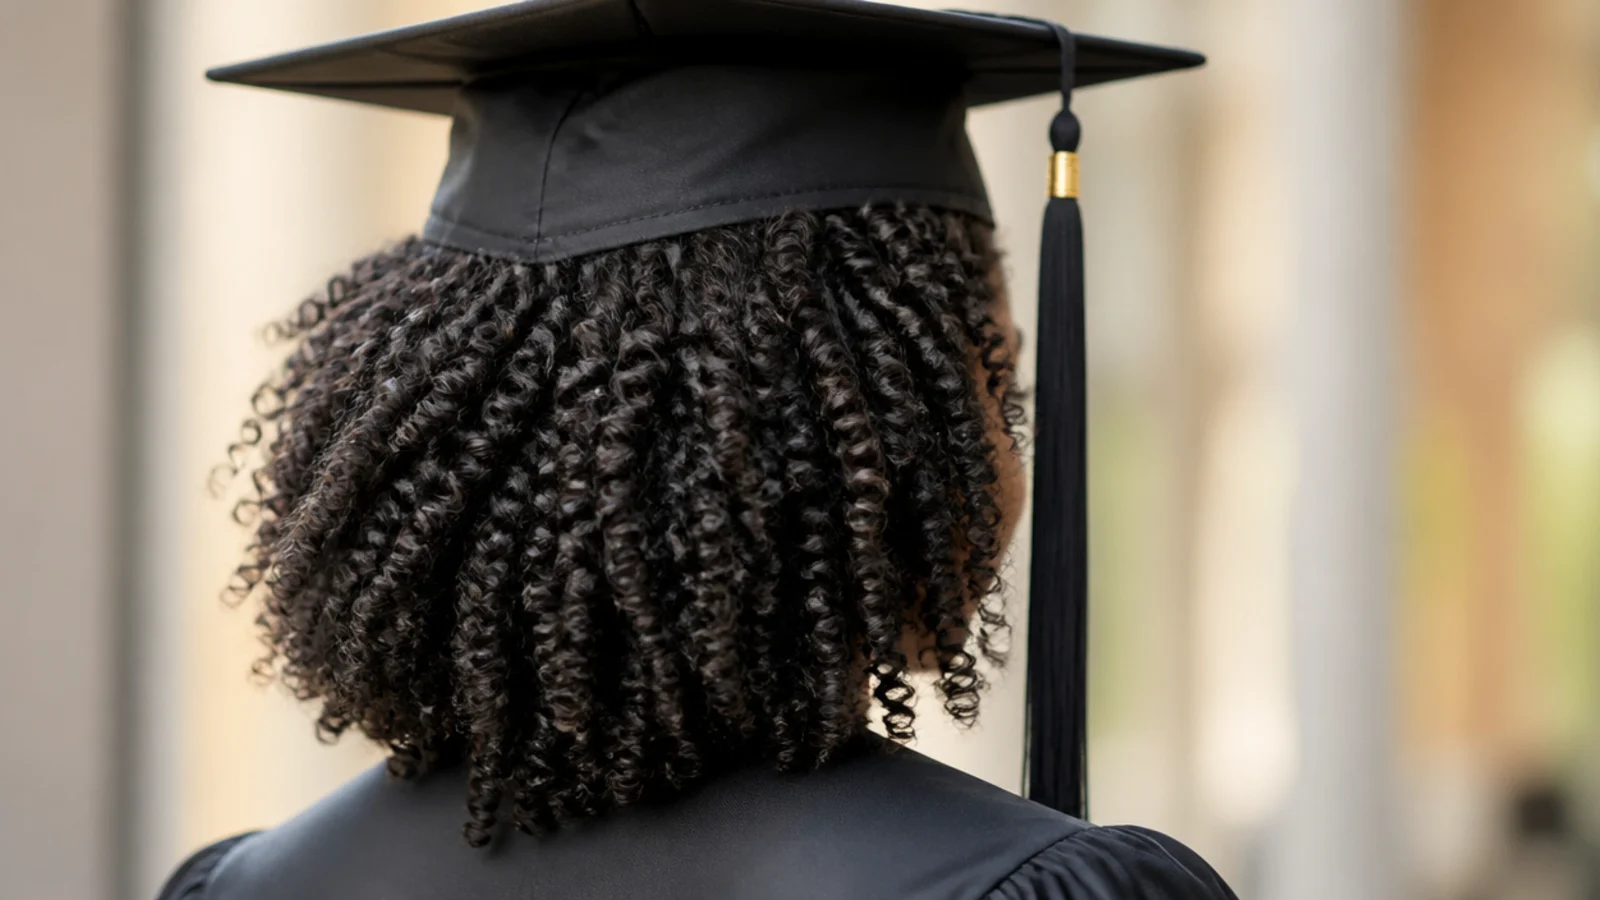
Ten to fourteen three-strand braids set on damp, product-loaded hair and dried fully, giving a tighter crimp than a twist-out and noticeably more hold under pressure. That extra hold is the reason to choose it for a four hour ceremony: a braid-out that gets compressed at the crown recovers faster than a twist-out does. Shoulder length is the sweet spot, roughly 12 to 14 inches stretched, because the waves sit entirely below the band. Allow eight to ten minutes to take down and separate. More heatless sets in heatless curl tools compared.
Who it suits: 3C to 4A hair that loses a twist-out to humidity by noon.
Tip: Braid to the very ends so the last inch does not stick out straight in photos.
6. Flexi-Rod Set on Stretched Natural Hair
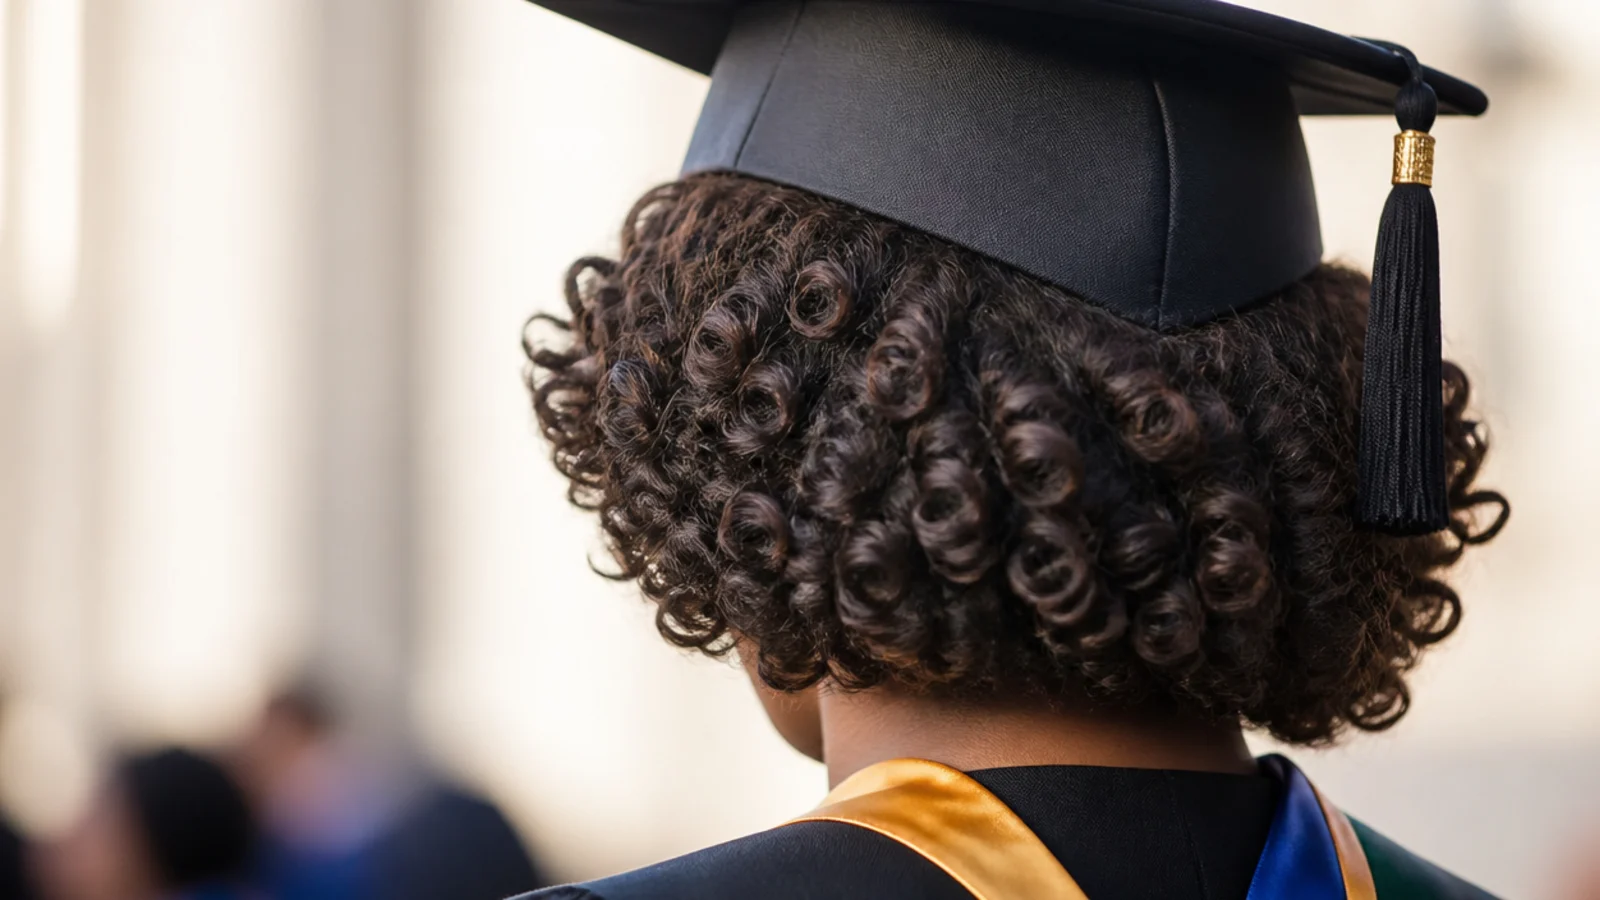
Stretched hair wrapped on medium flexi-rods, roughly 3/4 inch, and dried until completely cool. The result is a bouncy, uniform curl that photographs beautifully because it catches light in a way an undefined set does not. For grad day, set the top two rows pointing backward and down instead of up, so the curl mass builds behind the ears rather than at the crown. A dozen rods and a hooded dryer run 45 minutes, or set overnight. Cost is a one-time 10 to 15 dollars for a rod pack, with nothing else to buy.
Who it suits: Blow-dried or stretched natural hair that wants polished, camera-ready curl.
Tip: Let the rods cool fully before unwrapping or the curl drops the moment the cap goes on.
7. Half-Up Puff With Curls Left Down
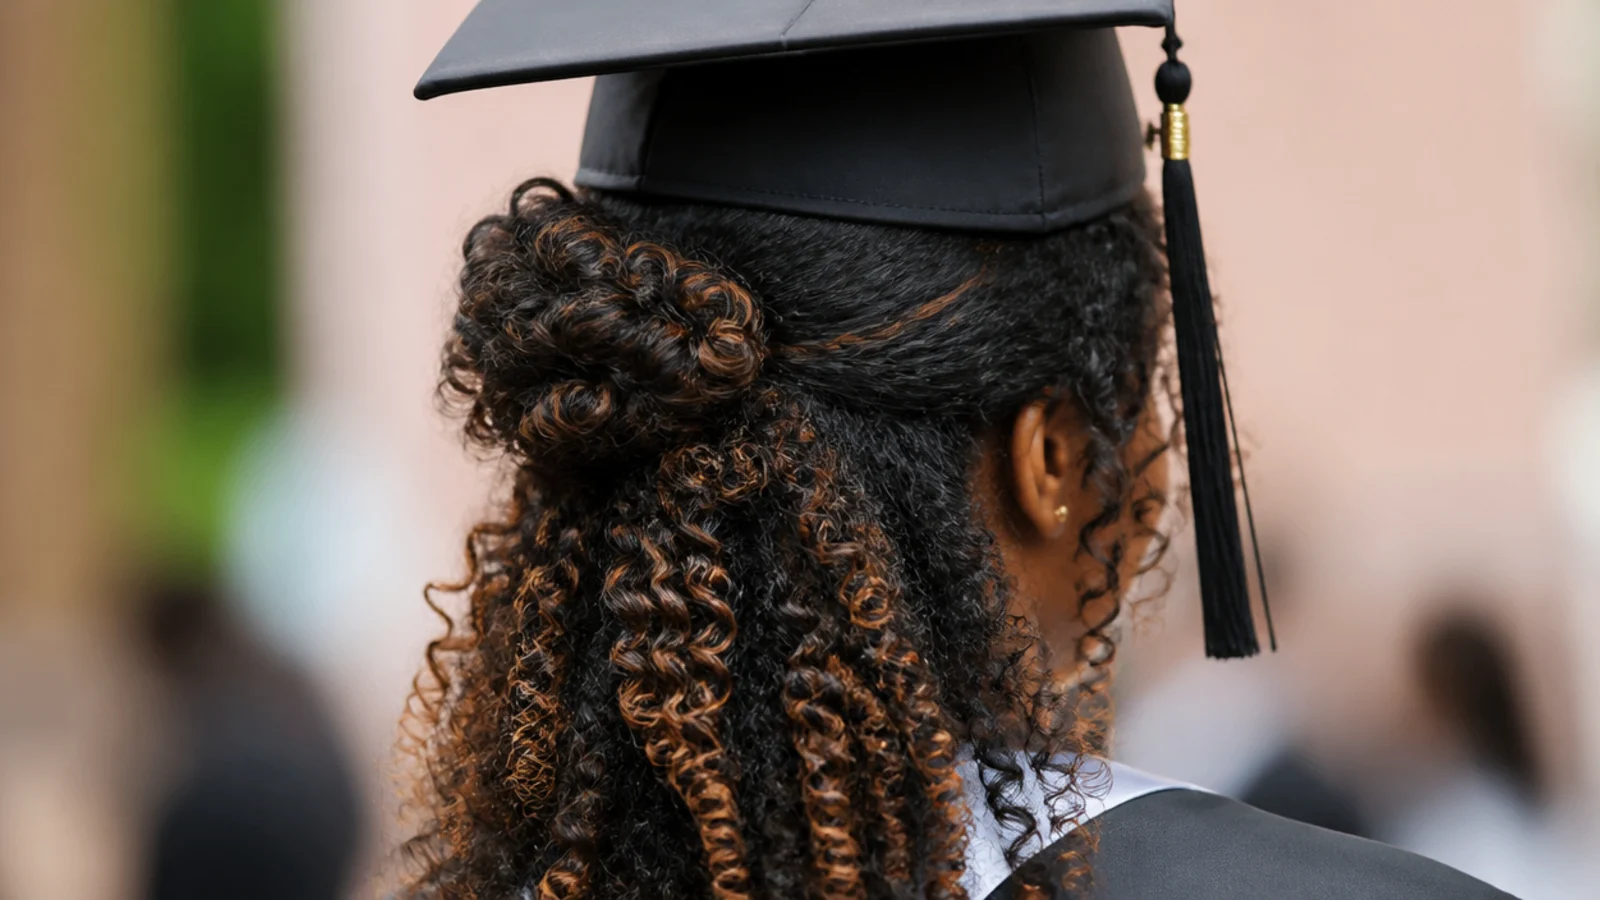
The top third gathered into a small puff at the mid-crown, the rest left loose in a twist-out or wash-and-go. This is the compromise style: the gathered section absorbs the cap's pressure so the loose curls below stay completely intact, and you get two silhouettes in one, cap on and cap off. Keep the puff small and set it low, no higher than the top of your ears in profile, or it fights the board. Five to eight minutes. The half-up logic applies at every length in easy graduation hairstyles.
Who it suits: 3B to 4A hair, and anyone who cannot decide between up and down.
Tip: Use a seamless spiral elastic, not a snag-prone band, so takedown for photos is instant.
8. Sleek Low Bun on Natural Hair With Laid Edges
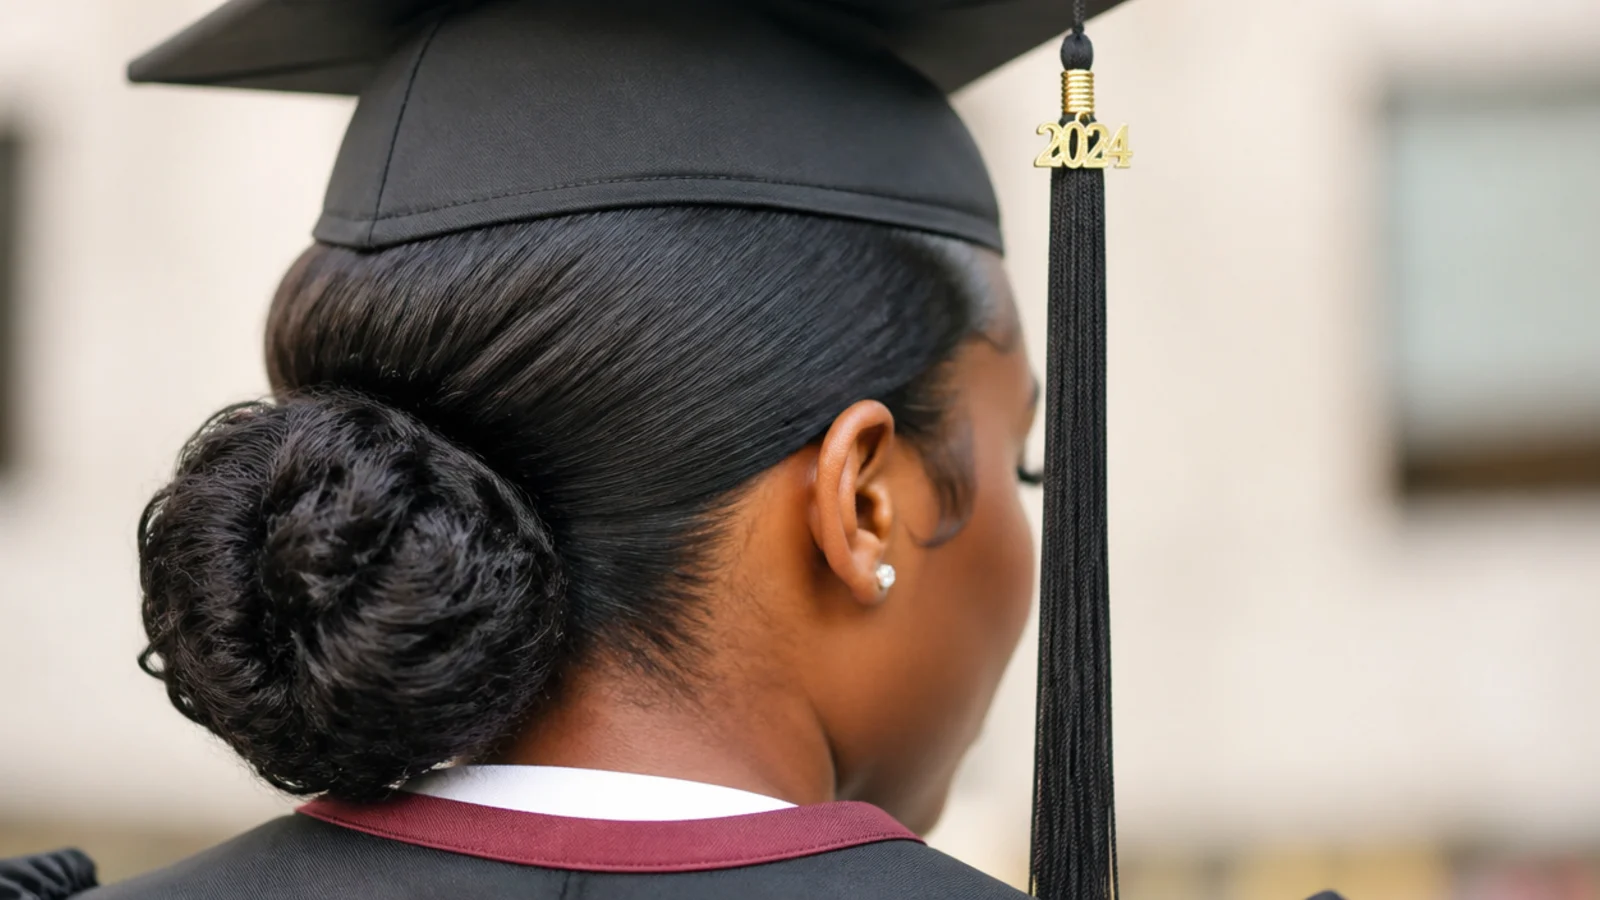
Hair smoothed back with an alcohol-free gel and a boar bristle brush, gathered at the nape and coiled into a compact bun. The flattest option here, and the reason it dominates every graduation list: there is literally nothing on the crown for the cap to compress. Ten to fifteen minutes. The honest catch is humidity. At an outdoor May or June ceremony, gel-slicked natural hair reverts at the hairline within about 90 minutes, so this style is strongest indoors. Related updo mechanics are in long hair updos that last.
Who it suits: Indoor ceremonies, sculptural earrings, and anyone wanting a formal silhouette.
Tip: Build gel in thin layers and finish with a satin scarf for 10 minutes to set it flat.
9. Side-Swept Twist-Out Over One Shoulder
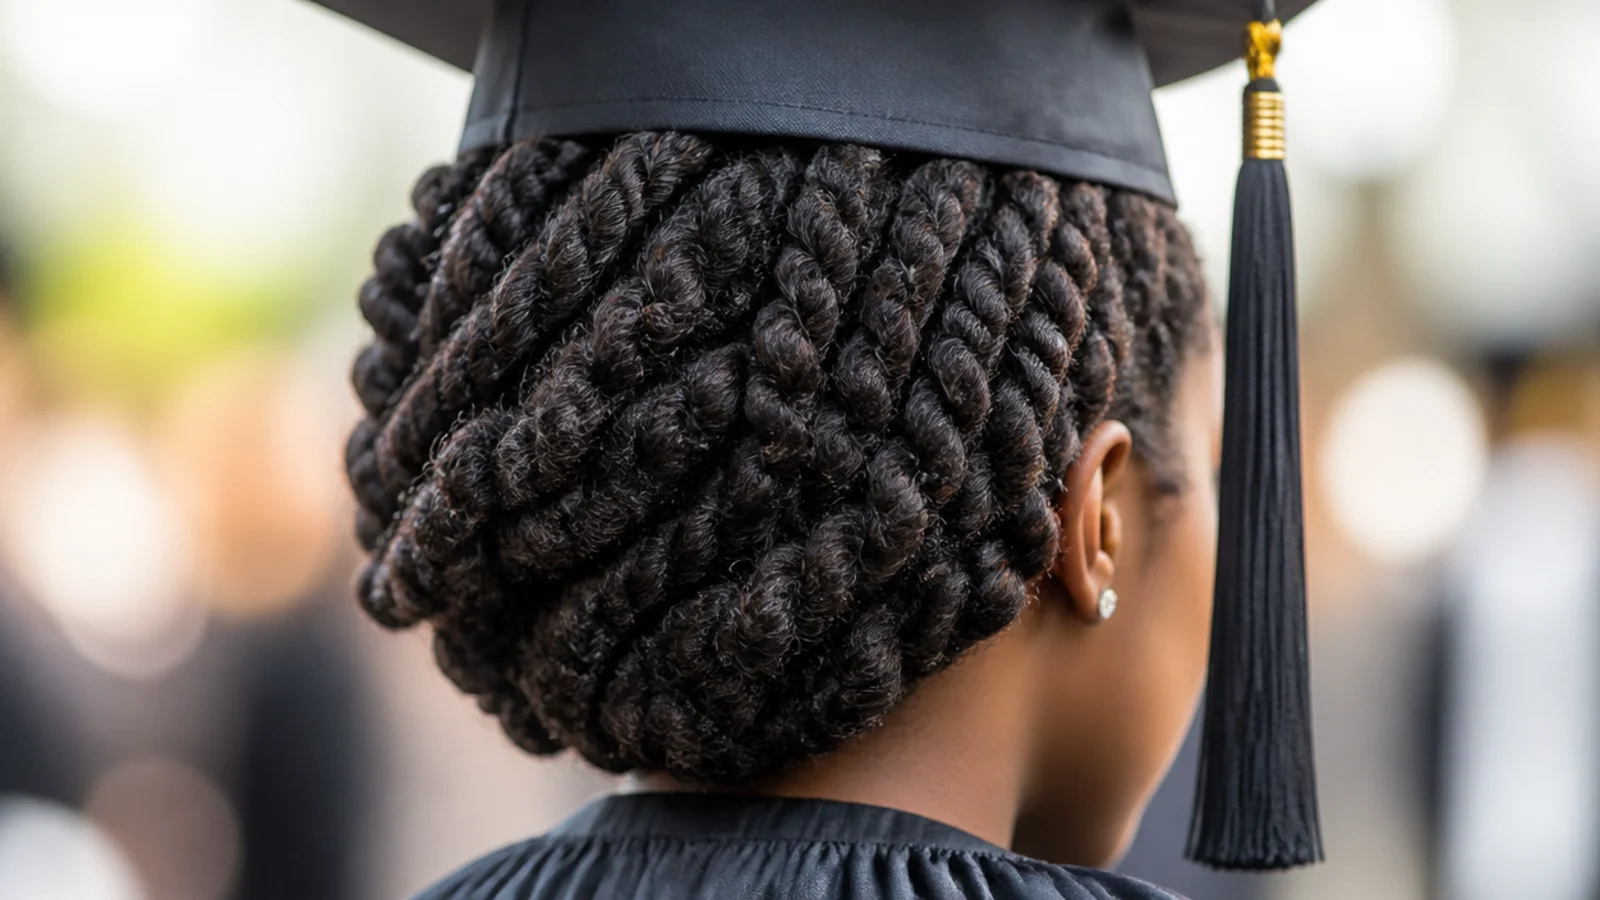
A twist-out swept across and pinned behind one ear with three or four bobby pins, so the full mass falls over one shoulder. It is the most flattering option for the diagonal angle you actually get photographed at when a stranger hands you a diploma. The pinned side gives the cap a firm anchor point, and the loose side reads as volume rather than a crushed crown. Two minutes to sweep and pin once your set is done. Do the sweep before the cap goes on, never after.
Who it suits: Any texture with 10 inches or more of stretched length, and off-shoulder gowns.
Tip: Pin into the twist itself, not the scalp, so you can release it one-handed for photos.
10. Barrel Roll at the Nape on Locs
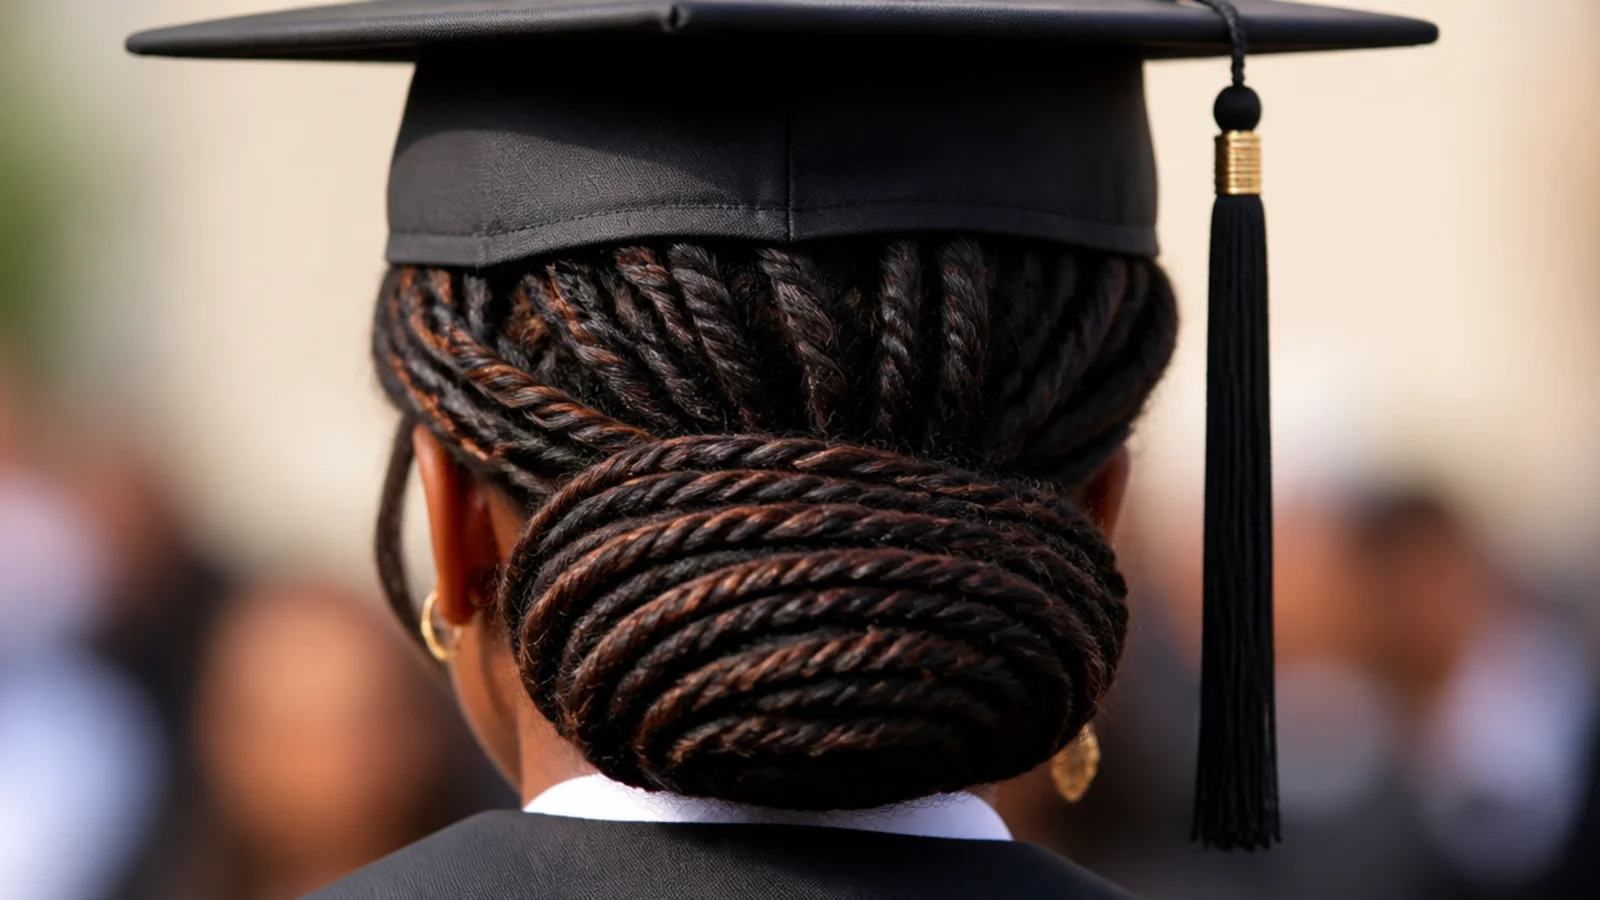
Locs gathered low, rolled forward into a horizontal barrel across the nape and secured with four to six large hairpins. Nobody writes about locs and mortarboards, and they deserve it: locs have weight and no give, so a high bun physically levers the cap backward off the head, while a nape barrel puts the mass at the lowest possible point. It also handles the four hour sit without a single re-pin. Fifteen minutes. Shorter locs can be pinned in two smaller rolls instead of one.
Who it suits: Locs from shoulder length to waist, and anyone whose cap keeps sliding back.
Tip: Use two-inch U-pins rather than bobby pins; bobby pins slip straight out of locs.
11. Bantu Knot-Out With Volume at the Temples
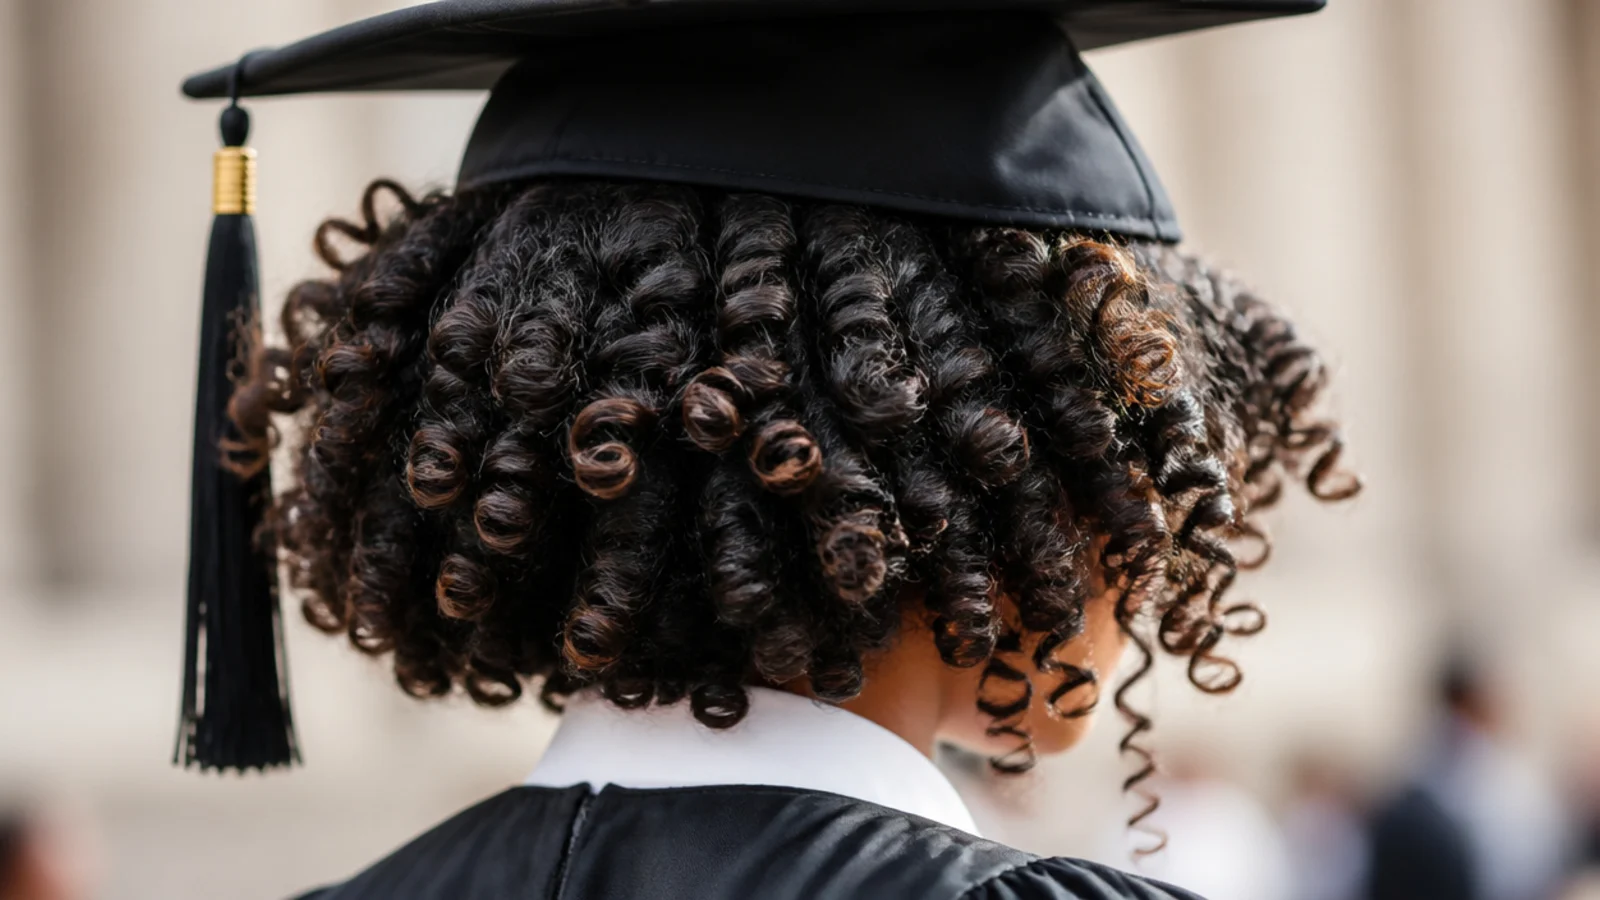
Eight to twelve knots coiled on stretched hair, dried fully, then unwound into wide spiral curls. The specific graduation advantage is where the curl starts: a knot-out curls from the mid-shaft down, so the roots stay flat and the pattern lives at ear level and lower, which is exactly where the cap is not. Set the two front knots angled backward for temple width. Dry time is the constraint, so set overnight or plan 60 minutes under a hooded dryer, not a 20 minute rush on the morning.
Who it suits: 4A to 4C hair that wants big, wide curl without rods or heat.
Tip: Knots must be bone dry; a damp center unravels into frizz within an hour of the cap.
12. Two Flat Twists Into a Low Side Ponytail
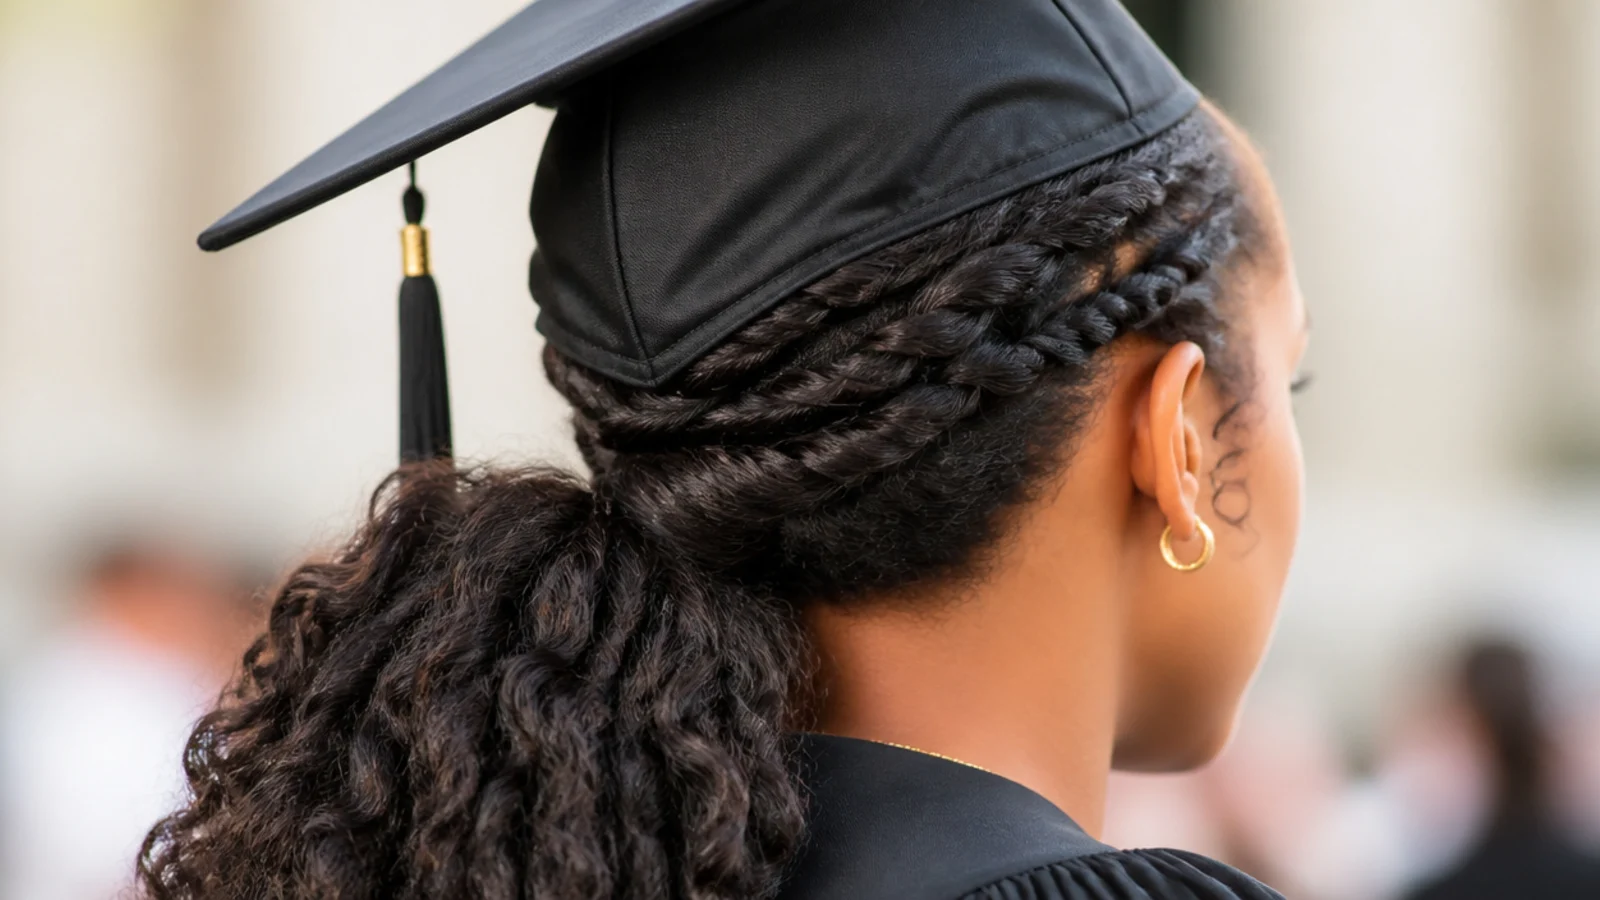
Two flat twists taken along the hairline on one side, feeding into a low ponytail gathered just behind the opposite ear. It is the fastest structured style here at 12 to 15 minutes, and the twists solve the one problem loose natural hair has under a cap, which is that pins have nothing to hold. The asymmetry also gives you a defined shape in profile shots when the board hides everything above the brow. Finish the ponytail as a puff, a twist-out or a small bun depending on your length.
Who it suits: Beginners, 3C to 4B hair, mornings with 15 minutes and no help.
Tip: Keep the twists tight for the first two inches only; tension at the nape causes headaches.
13. Fulani-Style Braids With a Low Gathered Ponytail
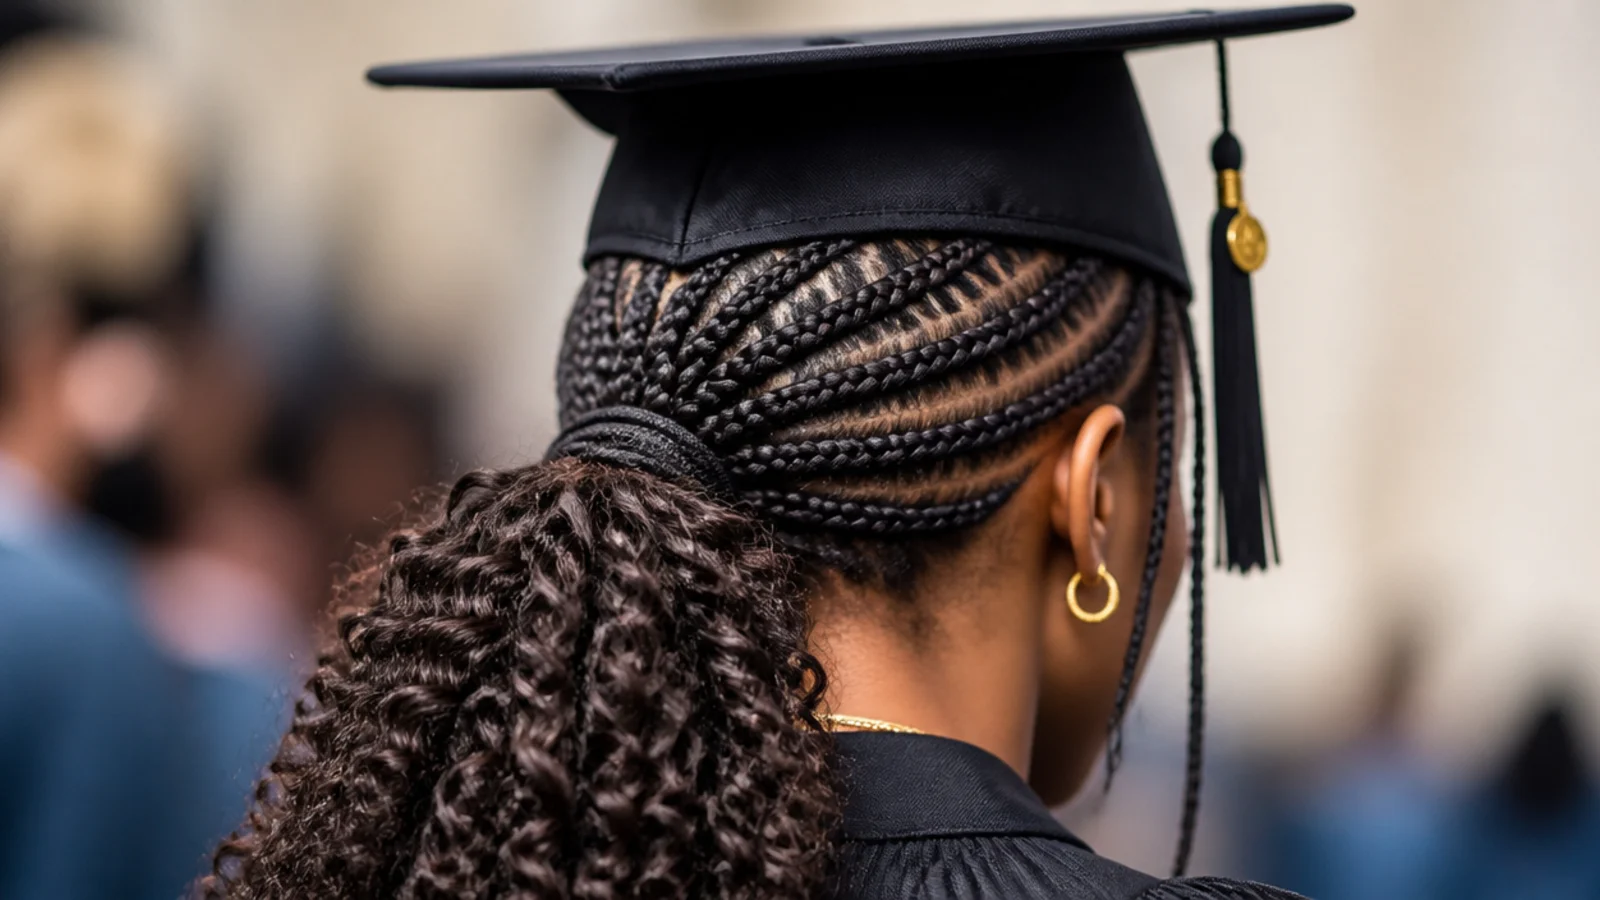
A center cornrow running front to back with side braids angled toward the ears, everything gathered into a low ponytail at the nape. The pattern is flat enough that the board lies level, and the visible parting lines actually read well in photos because they frame the face below the cap edge. Done on your own hair with no added length it takes about two hours, and holds for two to three weeks, which covers grad day plus every party after. Braid-pattern basics are in easy braided hairstyles for every day.
Who it suits: Anyone wanting a decorative style that is still completely flat on top.
Tip: Skip heavy beads at the crown; they sit exactly where the cap band lands and dig in.
14. Wash-and-Go on a TWA Under the Cap
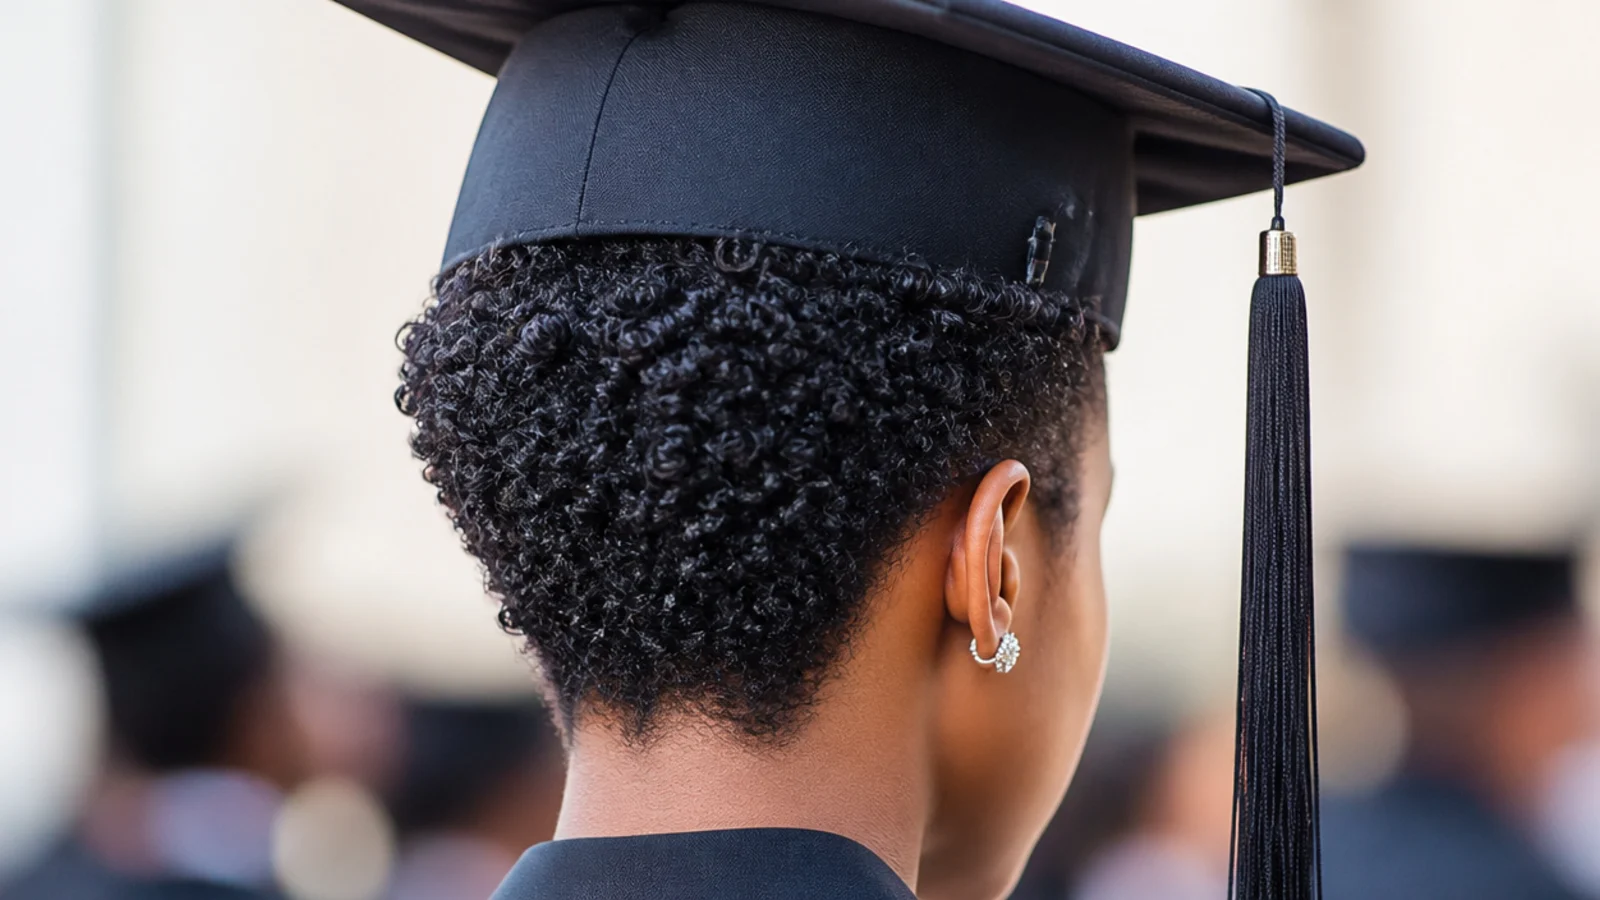
A defined wash-and-go on a TWA of roughly two to four inches, shaped a little wider at the temples with a pick. The real problem with short natural hair at graduation is not the look, it is anchorage: there is not enough length to pin a cap into. Solve it with two small combs or clips slid in above each ear before the cap goes on, then pin the band to those. Twenty minutes including drying under a diffuser. The full short-hair anchoring method is in graduation hairstyles for short hair.
Who it suits: TWAs, big chops, tapered cuts and anyone under about five inches of length.
Tip: Pick out the sides, not the top, so the cap still lands flush on the crown.
15. Nape-Level Halo Braid on Stretched Natural Hair
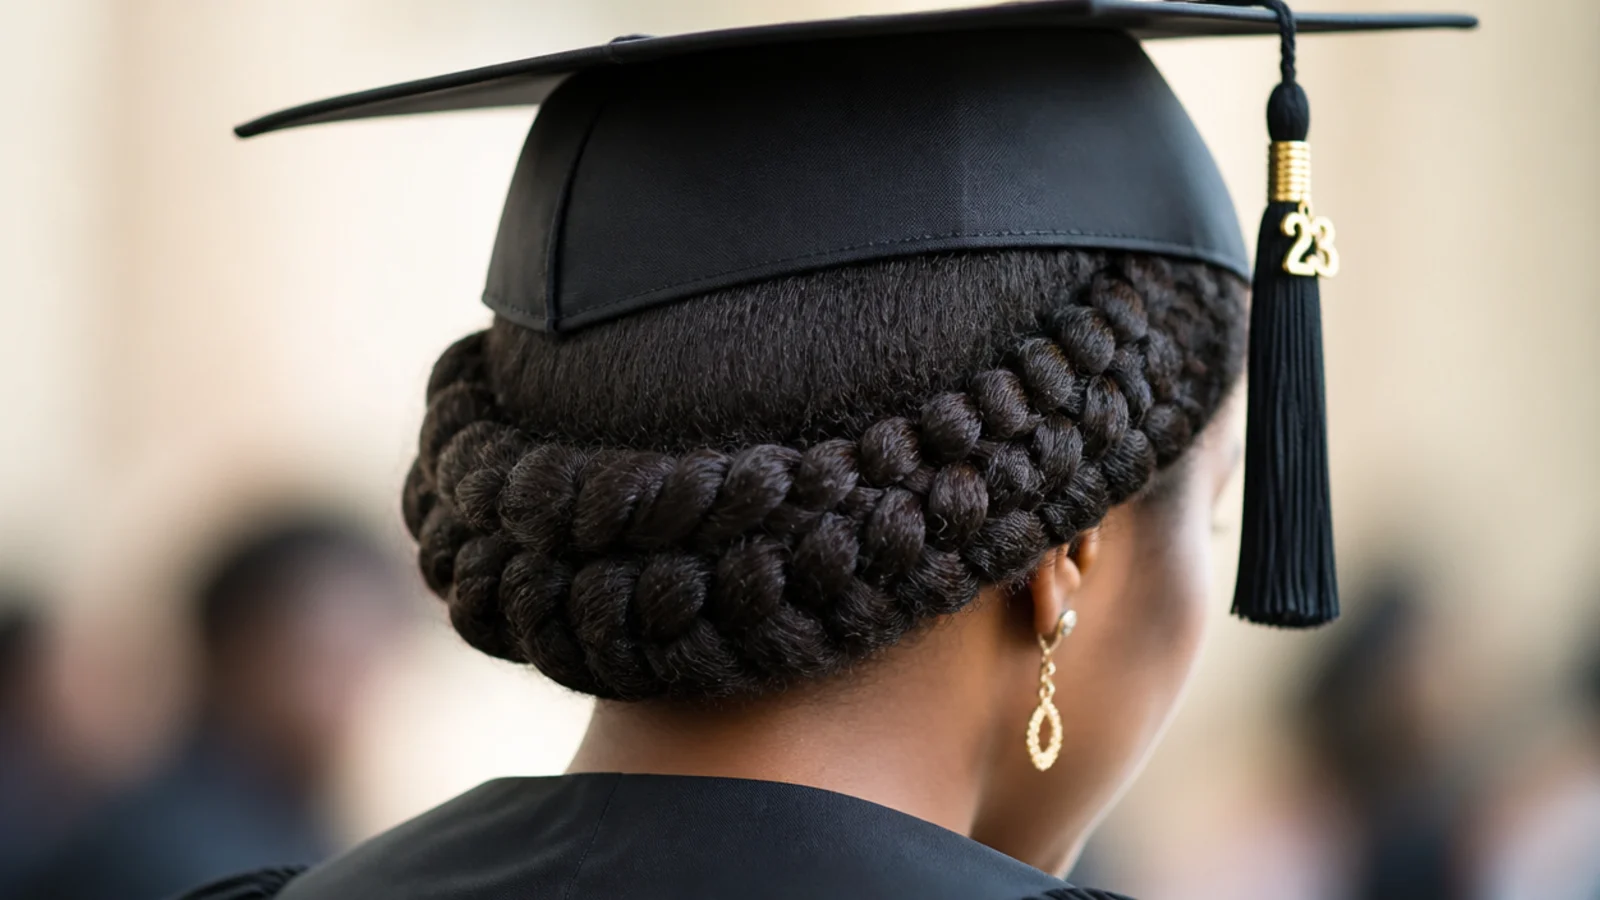
A single fat braid wrapped around the back of the head at nape level rather than across the crown, pinned in a low ring. The standard crown halo is the classic mistake at graduation, because it sits precisely where the front edge of the mortarboard lands and pushes the board upward at an angle. Dropping the ring to the nape keeps everything flat and still gives you a woven, formal look from behind. Twenty to twenty five minutes on stretched hair. Nothing to buy beyond eight bobby pins.
Who it suits: Stretched natural hair 12 inches or longer, high-neck gowns, hooding ceremonies.
Tip: Wrap the braid below the occipital bone, the bump at the back of the skull, not above it.
Where the Graduation Cap Sits on Natural Hair and Why Volume Goes Below It
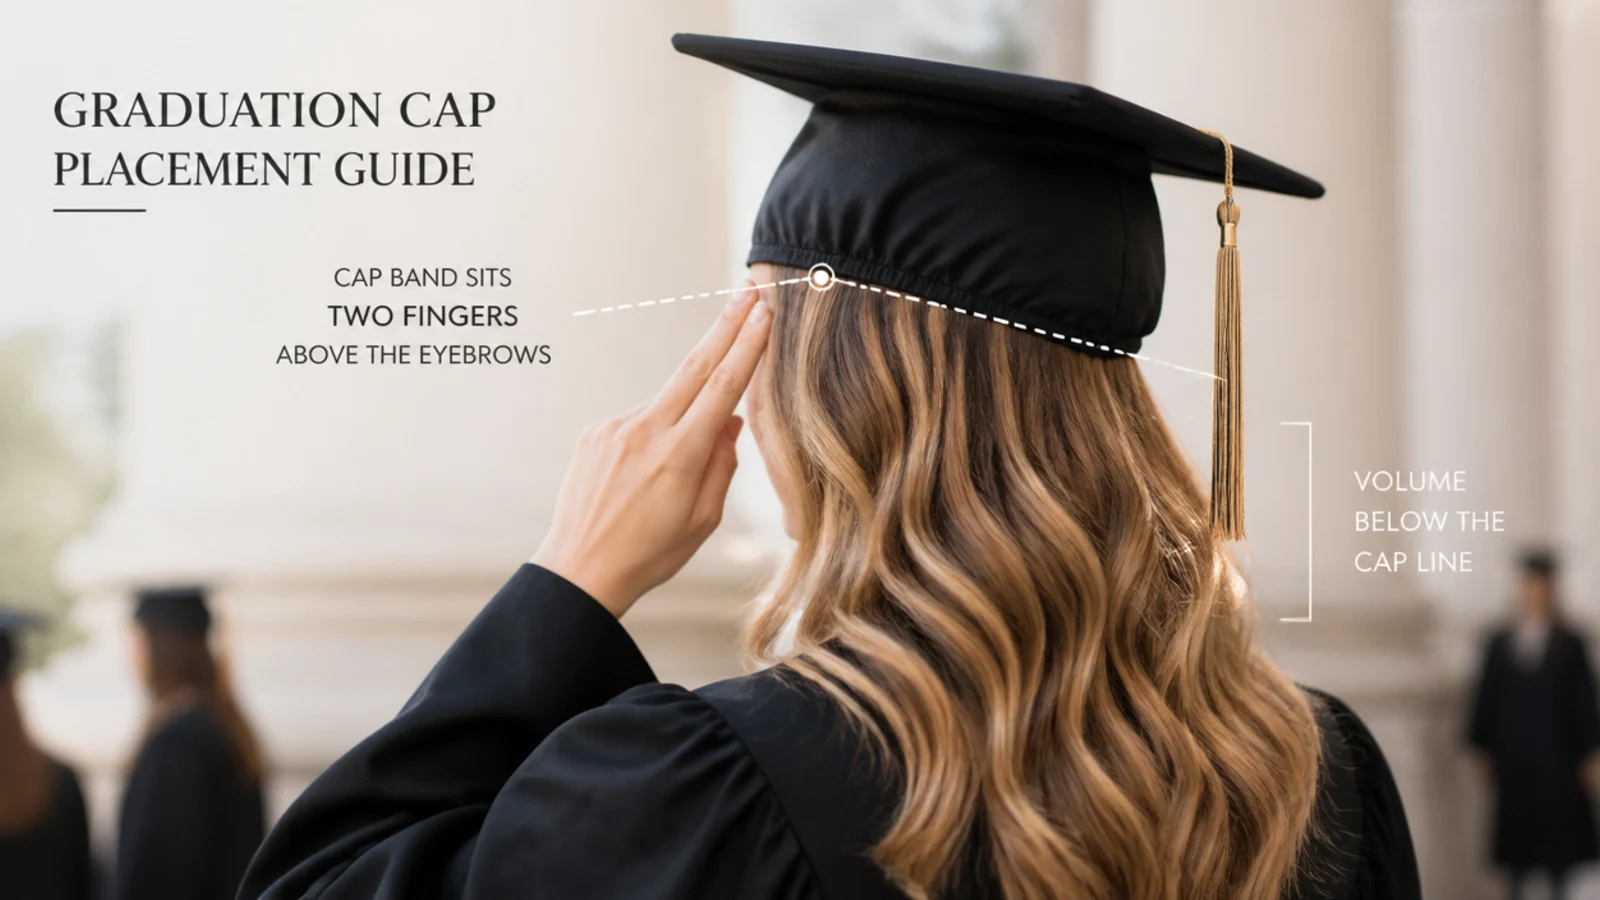
A mortarboard does not perch, it lies. The inner band lands about two fingers above your eyebrows and runs level all the way to the back of the head, so the board rests on a plane rather than a point. Draw that line on yourself with a finger before you style anything. Everything above it is compressed for the entire ceremony. Everything below it is untouched. On natural hair this single measurement decides more than texture does: a 4C puff worn at the nape survives perfectly while the same puff worn at the crown either flattens or levers the cap backward until the tassel swings in your face. Build width at the temples, the sides and the nape instead. Sideways volume also photographs better once the board is on, because it frames your face and the cap at the same time, where crown height simply disappears under a square of black fabric.
Graduation Hairstyles for Natural Hair by Length: TWA, Shoulder-Length and Waist-Length Braids
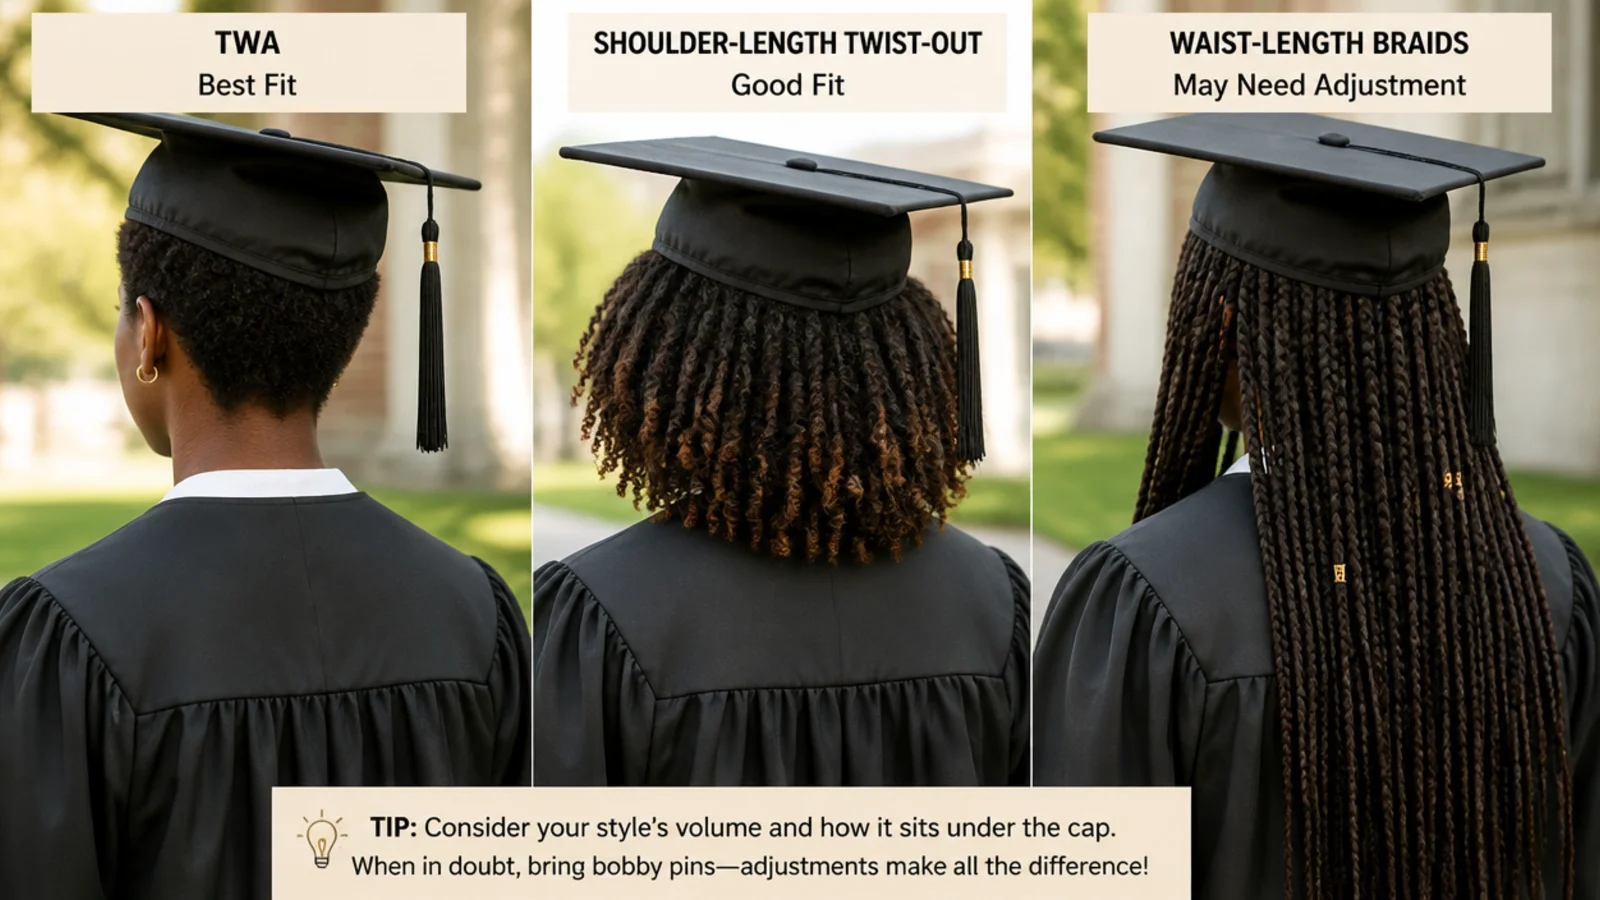
Length changes the problem entirely. Under about five inches, on a TWA or tapered cut, the look is easy and the anchoring is hard, because there is not enough hair to pin a cap into. Slide two small combs in above each ear first and pin the band to those. Between six and fourteen inches stretched, which covers most shoulder-length 4A to 4C hair, shrinkage does the work for you: a twist-out that hangs at collarbone level is already entirely below the cap line, so you can wear it fully down. Past about eighteen inches, and especially with waist-length knotless braids or mature locs, weight becomes the enemy. A heavy mass gathered high acts as a lever on the back of the board and slides it off. Drop everything to the nape and pin with U-pins. The same weight math applies in graduation hairstyles for long hair, and if you are unsure of your own pattern, start with choosing a hairstyle for your hair type.
Updo or Natural Hair Down for Graduation Photos: Which Actually Photographs Better
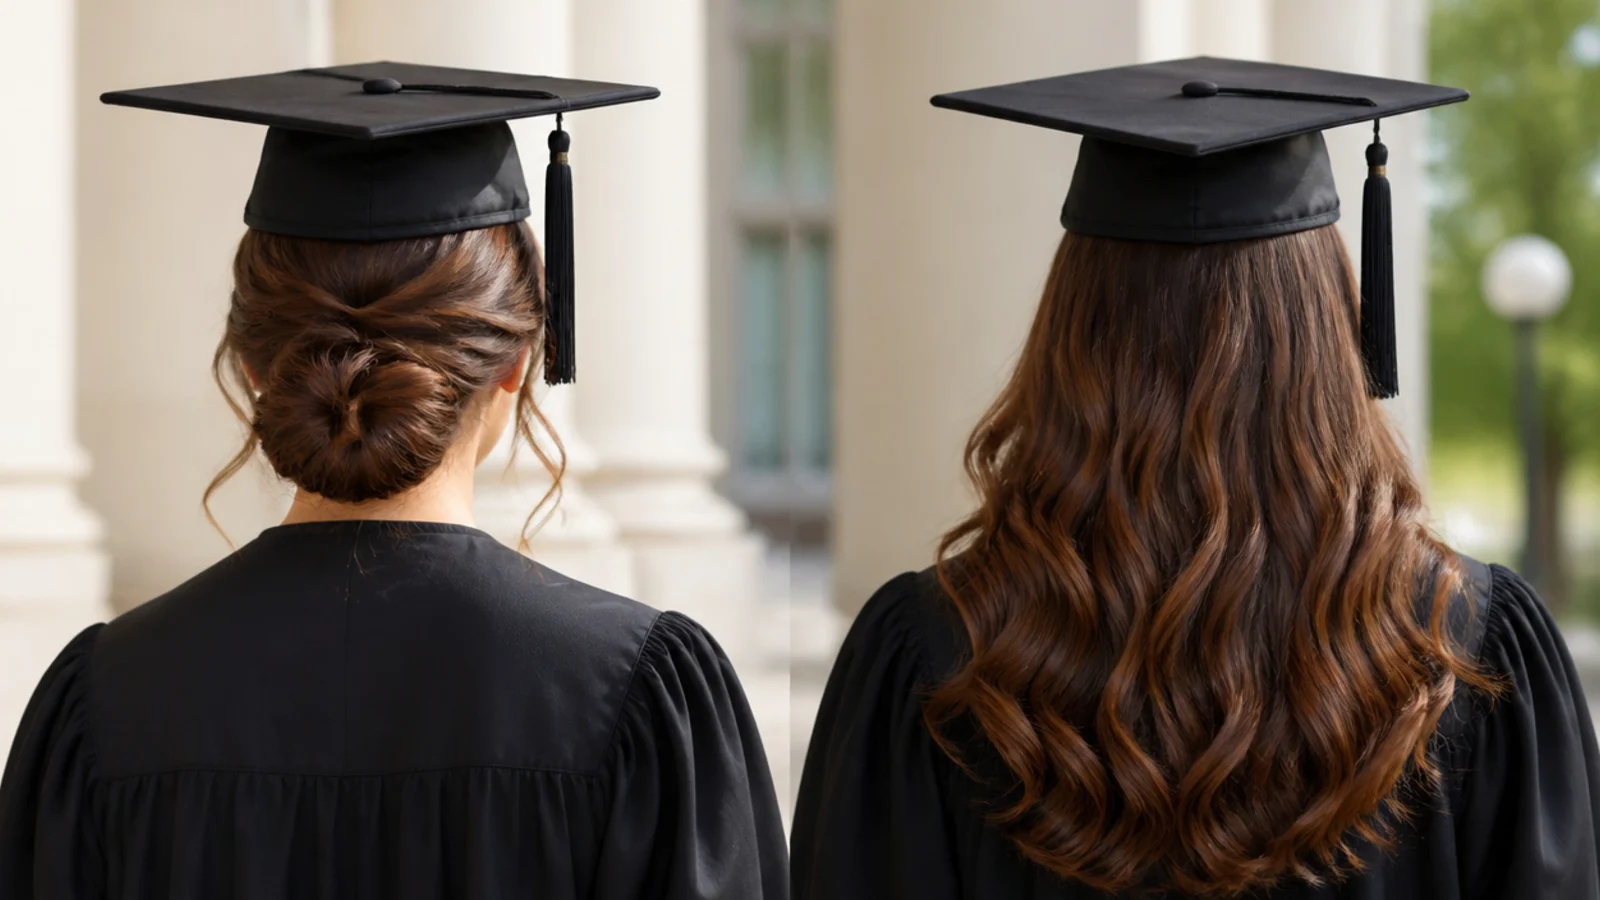
With the cap on, natural hair worn down usually wins the photo. The board hides your entire crown, so a pinned updo leaves a front-facing shot with a black square, a gown and almost nothing that reads as you, while a twist-out or braid-out falling at the sides gives the frame shape and texture. Down styles carry two real costs: the crown flattens, and outdoor humidity swells the hairline inside an hour. Updos win on comfort in a hot gown, on locs and waist-length braids that would otherwise drag the board backward, and on the reception afterward, where a nape bun looks identical at 9pm. The honest middle is a half-up puff, since the gathered section takes the pressure and the loose curls below stay intact. The table above breaks the two paths down row by row, and graduation hairstyles for curly hair goes deeper on curl pattern behavior.
All-Day Hold on 4C Hair: Products, Pin Placement and a Four-Hour Outdoor Ceremony
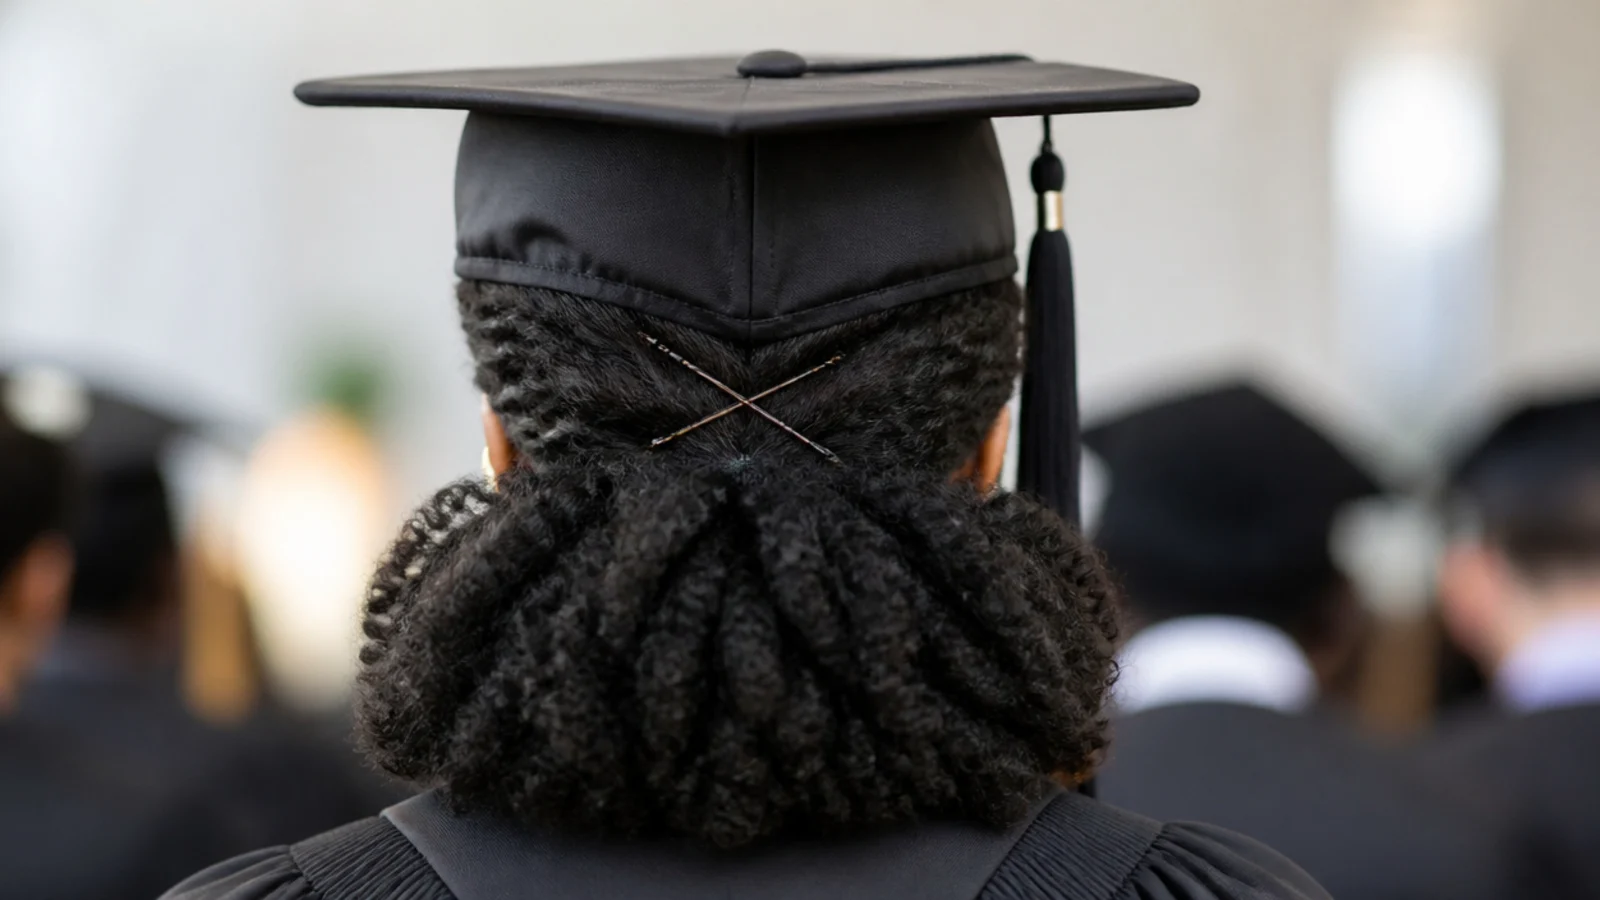
Reach for flexible-hold hairspray, not a firm-hold or freeze formula. Stiff spray locks your pattern into whatever shape the board presses it into, so when the cap comes off the flattened section stays flattened. Flexible hold lets the coil spring back. For the cap itself, cross two bobby pins in an X underneath the inner band on each side, and push them through a twist, braid or gathered section rather than loose coils, which give a pin nothing to bite. Four pins total handles an indoor ceremony, six if it is windy or outdoors. Skip heavy butters and oils on the day, because they collect lint from the cap lining and go greasy under four hours of trapped heat. A light leave-in and an alcohol-free gel on the edges is enough. If your ceremony is outdoors in May or June, assume the hairline will swell and choose a style whose shape does not depend on it. More hold tactics live in cute hairstyles that last all day.
Cap On to Cap Off: Fixing a Flattened Crown Before Photos
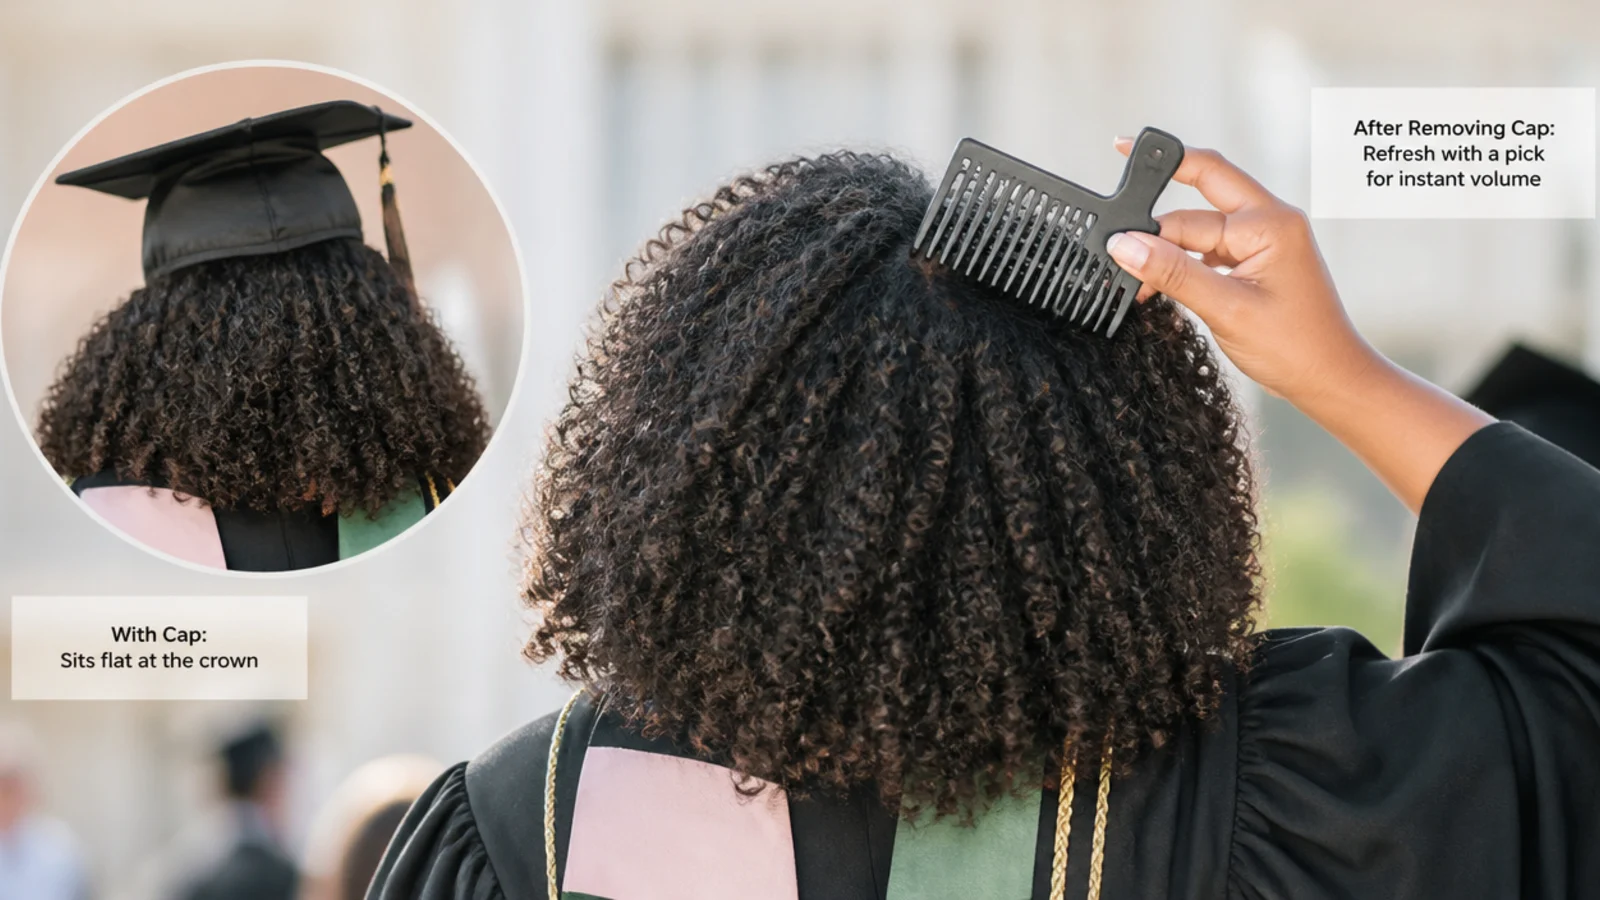
Almost everybody takes the cap off within minutes of walking, and no other article on this topic plans for that moment. Pack three things in your gown pocket: a wide-tooth pick, a two ounce spray bottle of water with a squeeze of leave-in, and four spare bobby pins. The sequence takes about thirty seconds. Lift the cap straight up rather than sliding it backward, because sliding drags and frizzes the crown. Mist the flattened band lightly, then use the pick at the roots only, lifting from underneath in short strokes instead of combing through your pattern, which would separate a twist-out into fuzz. Shake your head forward and back once to redistribute. Braided styles, locs and buns need none of this, which is a genuine argument for them if photos matter more to you than the ceremony itself. Protective options for finer textures are covered in protective styles for fine 4C hair.
Timing the Morning Of: A Natural Hair Countdown for Graduation Day
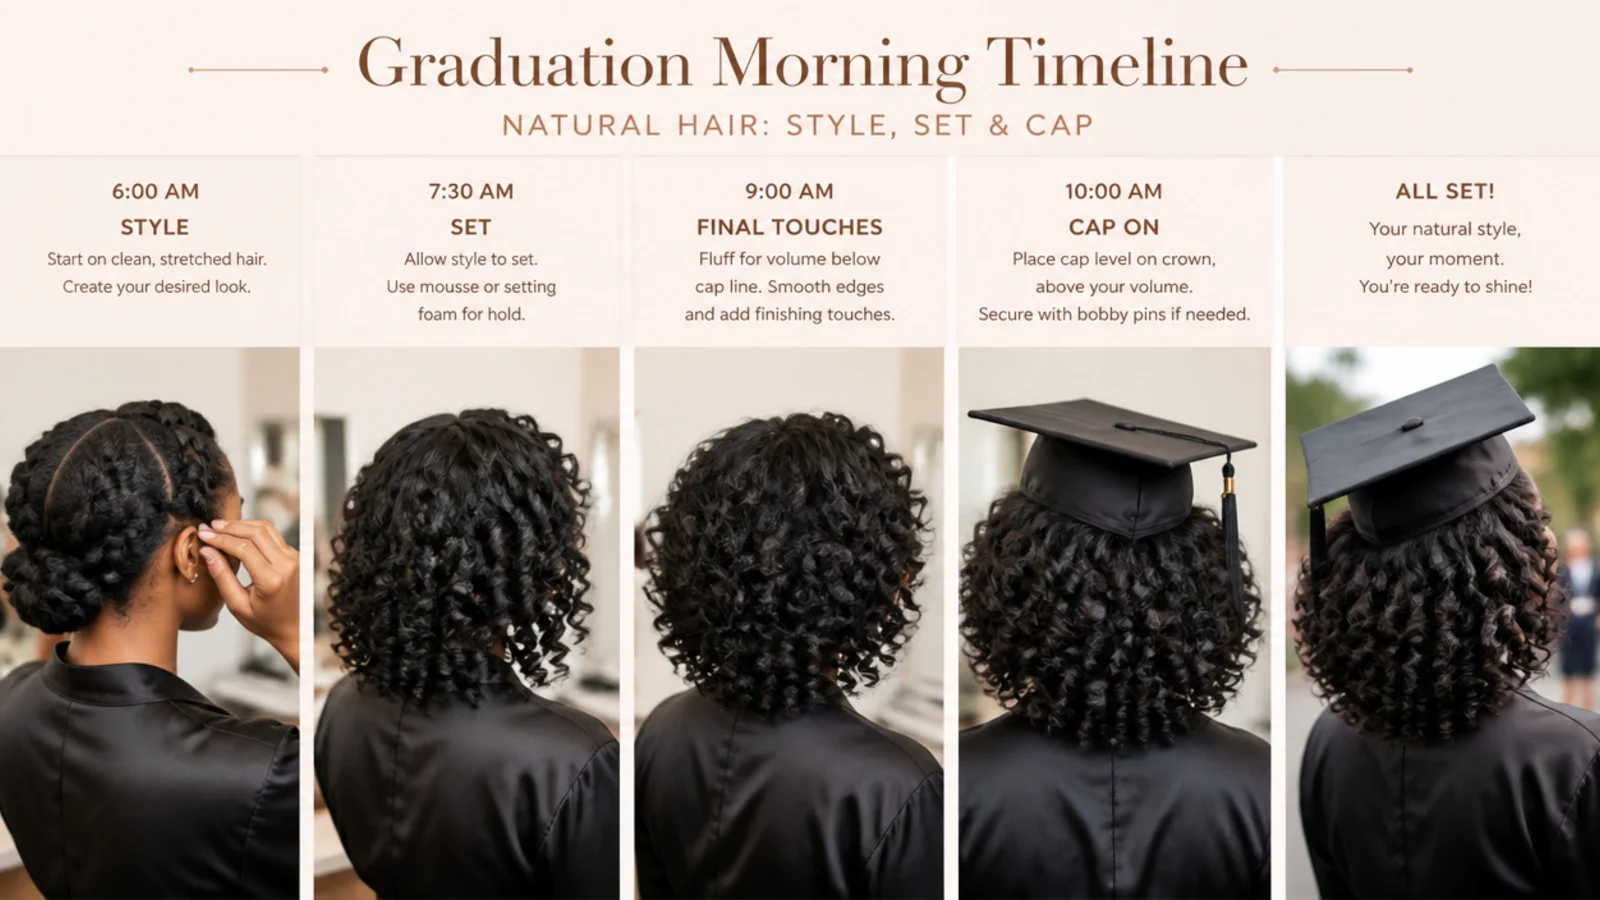
Work backward from the ceremony start. Five days out, get any braid, twist or cornrow install done, so tenderness settles and the parts relax before a cap presses on them. The night before, set your twist-out, braid-out, Bantu knots or flexi-rods and sleep in a satin bonnet, since a set that is even slightly damp in the morning will frizz within an hour under a cap. On the day, style one to two hours before you leave, never at the last minute and never the night before if the style is loose, because natural hair needs time to settle and expand into its final shape. Thirty minutes out, do a full practice run with the actual cap and the actual pins, in a mirror, so you find out about the dent or the slide now rather than in the seating line. Then leave it alone. Fussing at the crown in the car undoes an hour of work.
Frequently Asked Questions
What hairstyles work under a graduation cap for natural hair?
Anything flat on the crown with volume below the band. Flat twists into a low bun, cornrows into a nape puff, a shoulder-length twist-out, a half-up puff and a sleek low bun all sit under the board without a fight. High puffs, crown halo braids, top knots and pineapples do not, because they occupy exactly the space the mortarboard needs and either crush or tilt it.
How do you wear a graduation cap with box braids?
Gather the braids into a low bun or a low ponytail at the nape, well below where the band lands, and secure with an elastic plus three or four two-inch U-pins. Then anchor the cap by crossing two bobby pins in an X through a braid on each side, under the inner band. Waist-length braids worn loose or high will lever the board off the back of your head.
Should I wear my natural hair up or down for graduation?
Down usually photographs better, because the cap hides your crown entirely and loose texture at the sides is the only thing giving the shot shape. Up wins for comfort in a hot gown, for locs or waist-length braids that would drag the board backward, and for events afterward. A half-up puff splits the difference and is the safest single answer.
How far in advance should I get braids for graduation?
Three to five days before the ceremony. A same-day or day-before install is still tender, and the parts sit high and tight, so a cap band pressing on a fresh scalp for four hours is genuinely painful. Five days gives the tension time to relax without the style losing its crispness for photos. Two weeks out is usually too early for the neatest possible look.
How do you keep a graduation cap from slipping on natural hair?
Give the pins something structural to grip. Cross two bobby pins in an X under the inner band on each side and push them through a flat twist, a cornrow, a braid or a gathered section rather than loose coils. Four pins is enough indoors, six outdoors or in wind. On very short hair, clip two small combs above each ear first and pin the band to those.
Can you wear an afro under a graduation cap?
Yes, but shape it wide rather than tall. Pick out the sides and temples and leave the crown flatter, so the board still lands flush instead of perching on top of a dome. A tall afro pushes the cap up and back until the tassel swings across your face. Carry a pick and rebuild the height in about thirty seconds once the cap comes off.
How do I fix a flat crown after taking the cap off?
Lift the cap straight up instead of sliding it backward, then mist the flattened band with water and a little leave-in. Use a wide-tooth pick at the roots only, lifting from underneath in short strokes rather than combing through the pattern, which turns a twist-out into frizz. Shake your head forward and back once. The whole reset takes about thirty seconds.
Do I need a wig for graduation?
No. Most articles ranking for this topic are published by wig and extension retailers, which is why the advice points that way. Every style on this page works on your own hair with pins, a pick and products you likely already own. A wig is a legitimate choice if you want it, but it is a preference, not a requirement, and it adds its own cap-slipping problem.
How do locs sit under a mortarboard?
Fine, as long as the weight goes low. Locs have no give and real mass, so a high bun acts as a lever against the back of the board and slides it off within minutes. Roll them into a horizontal barrel at the nape or two lower rolls, and secure with two-inch U-pins rather than bobby pins, which slip straight out of locs without gripping.
Which graduation hairstyles look are you saving?
If you take one thing from these 15 graduation hairstyles for natural hair, make it the cap line. Volume below two fingers above the brow survives the ceremony; volume above it becomes a dent you will be finger-fluffing in every photo. Choose a style with something solid on the crown for pins to bite into, whether that is a flat twist, a cornrow or a smoothed section. Book braids three to five days out, not the day before. Pack a wide-tooth pick, a small water and leave-in mist, and four spare bobby pins in your gown pocket. Then compare your options against graduation hairstyles with a cap or the full graduation hairstyles hub.