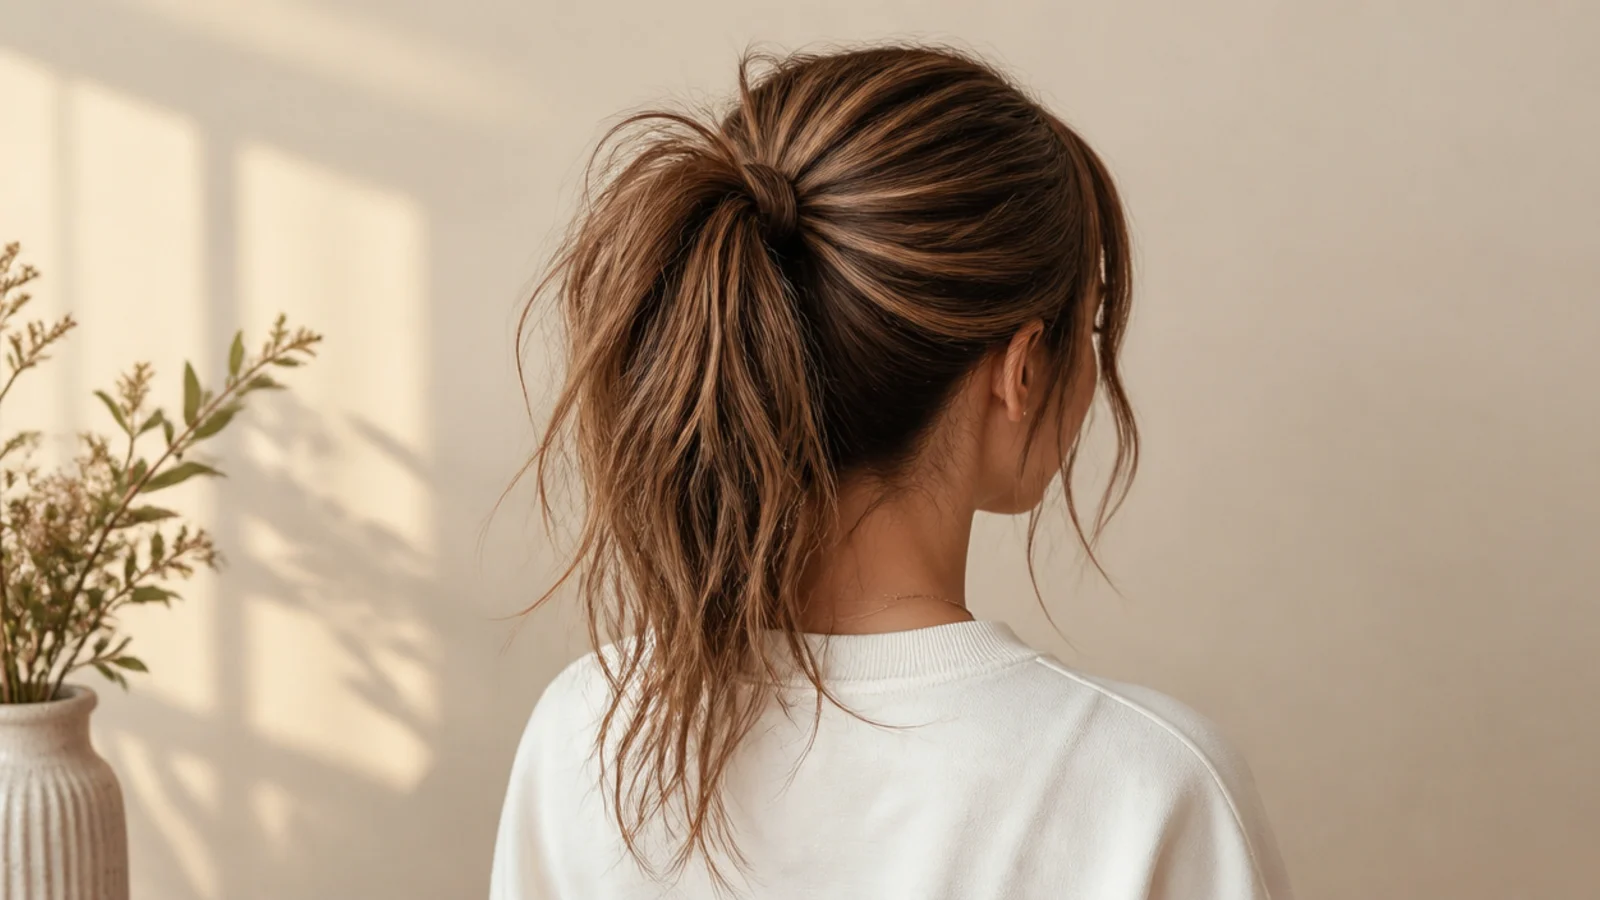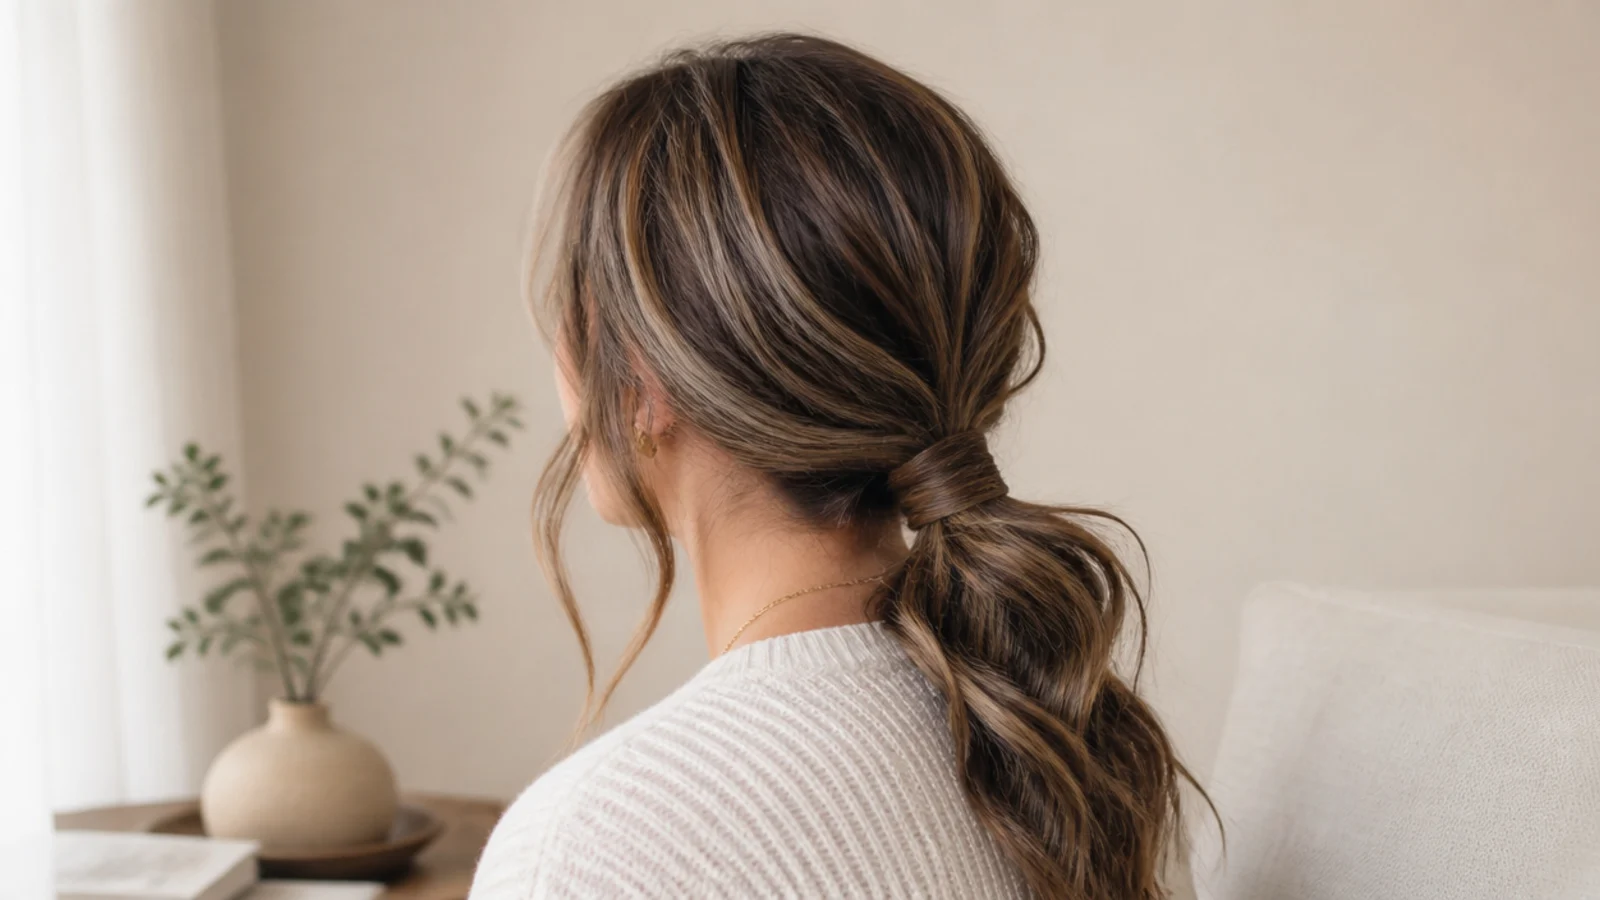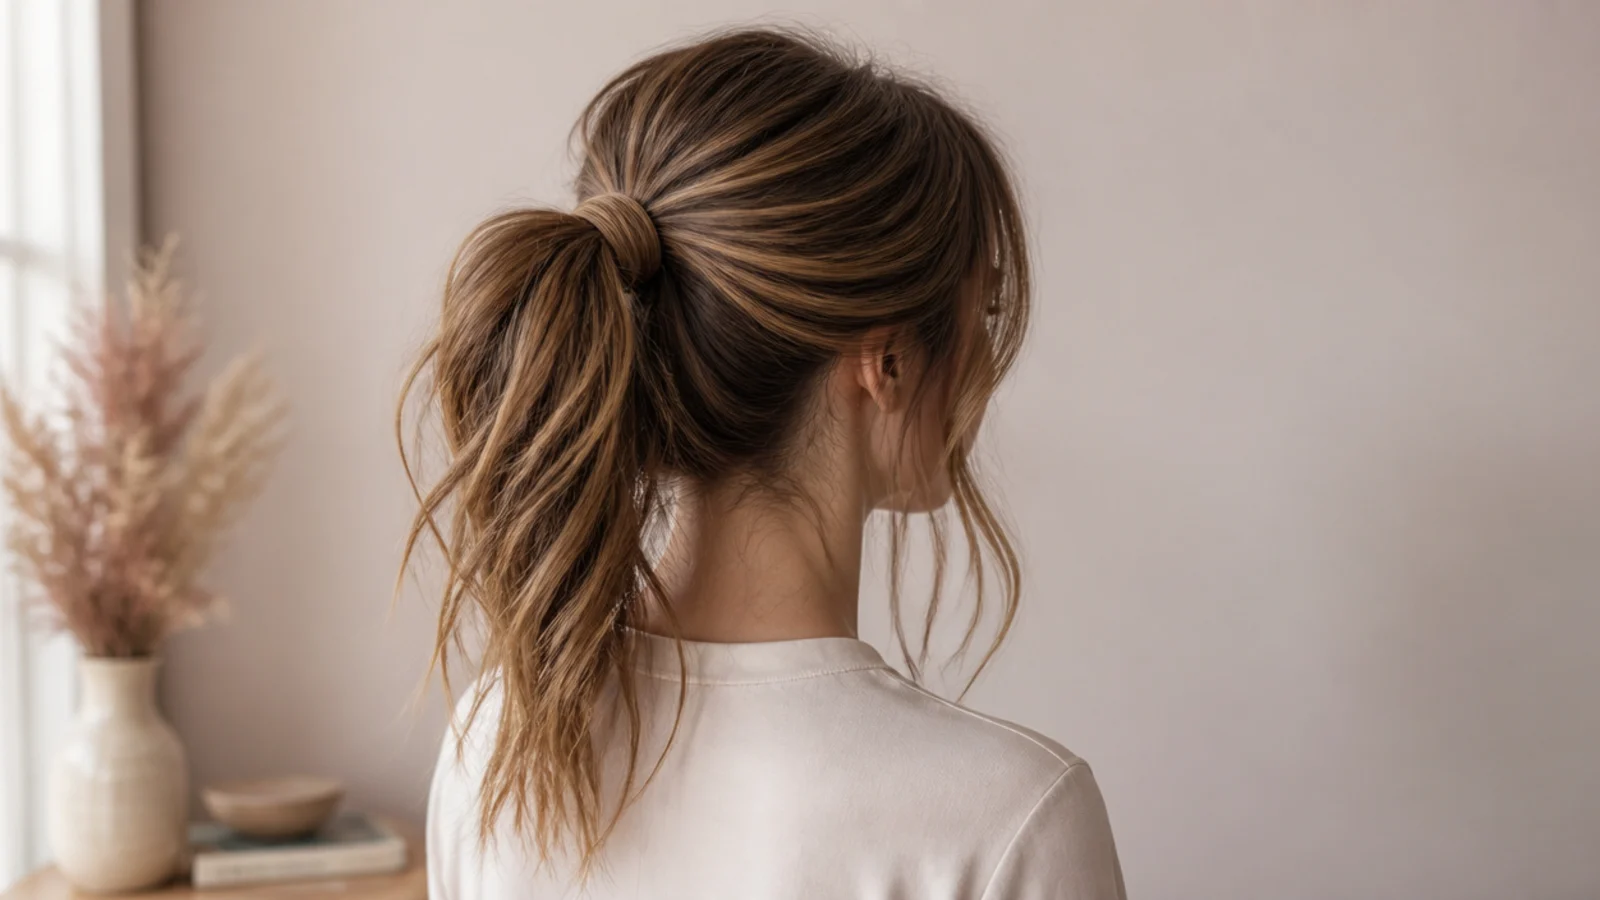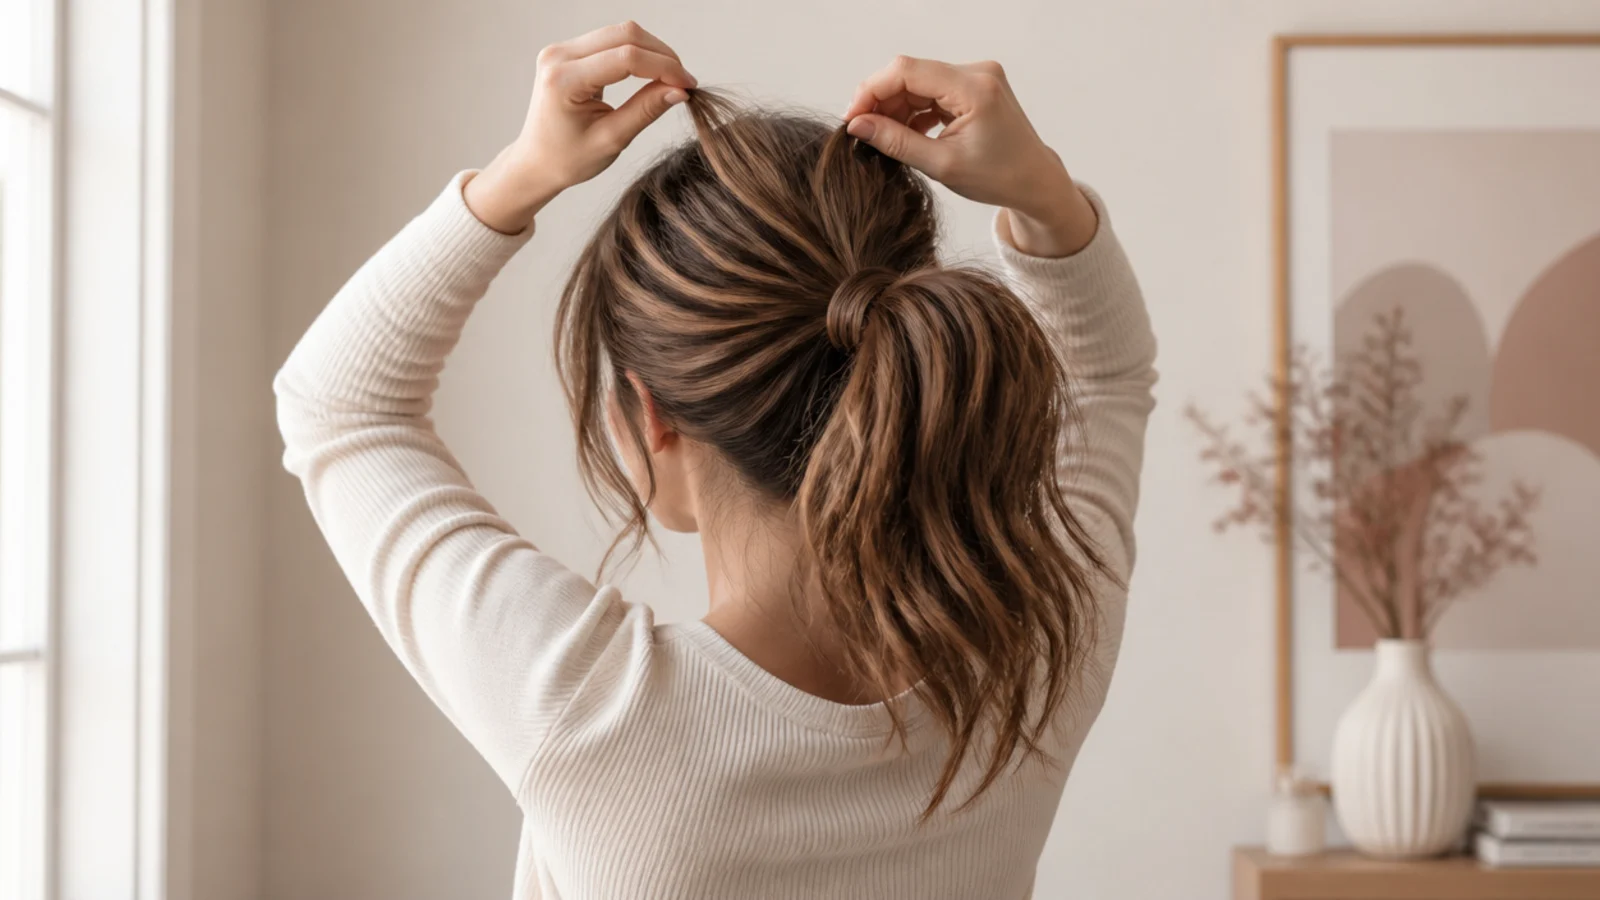
Quick Comparison
| Messy Ponytail | Sleek Ponytail | |
|---|---|---|
| Hair condition it needs | Day-two or dry-shampooed hair, for grip | Any wash day; gel and a brush do the work |
| Time to do it | 3 to 5 minutes plus 2 for finishing | 8 to 15 minutes, longer on curly or coarse hair |
| Products required | Dry shampoo, texture spray, flexible hairspray | Edge gel or pomade, boar brush, strong-hold spray |
| Hides greasy roots | Yes, texture disguises oil well | Yes, and arguably better, because oil reads as shine |
| Scalp tension | Low; the base is deliberately loose | High; the look depends on tension at the hairline |
| Humidity performance | Excellent; frizz reads as intended texture | Poor; every escaped hair shows against the smooth surface |
| How long it holds | 6 to 10 hours, and re-tugging resets it | 4 to 6 hours before flyaways break the finish |
| Best occasions | Work, school, gym, casual events, hot weather | Formal events, presentations, photography, red carpet |
| Best hair types | Fine, wavy, curly, layered and short cuts | Thick, straight, one-length hair with no short layers |
1. Start With Day-Two Hair or Build Grip With Dry Shampoo
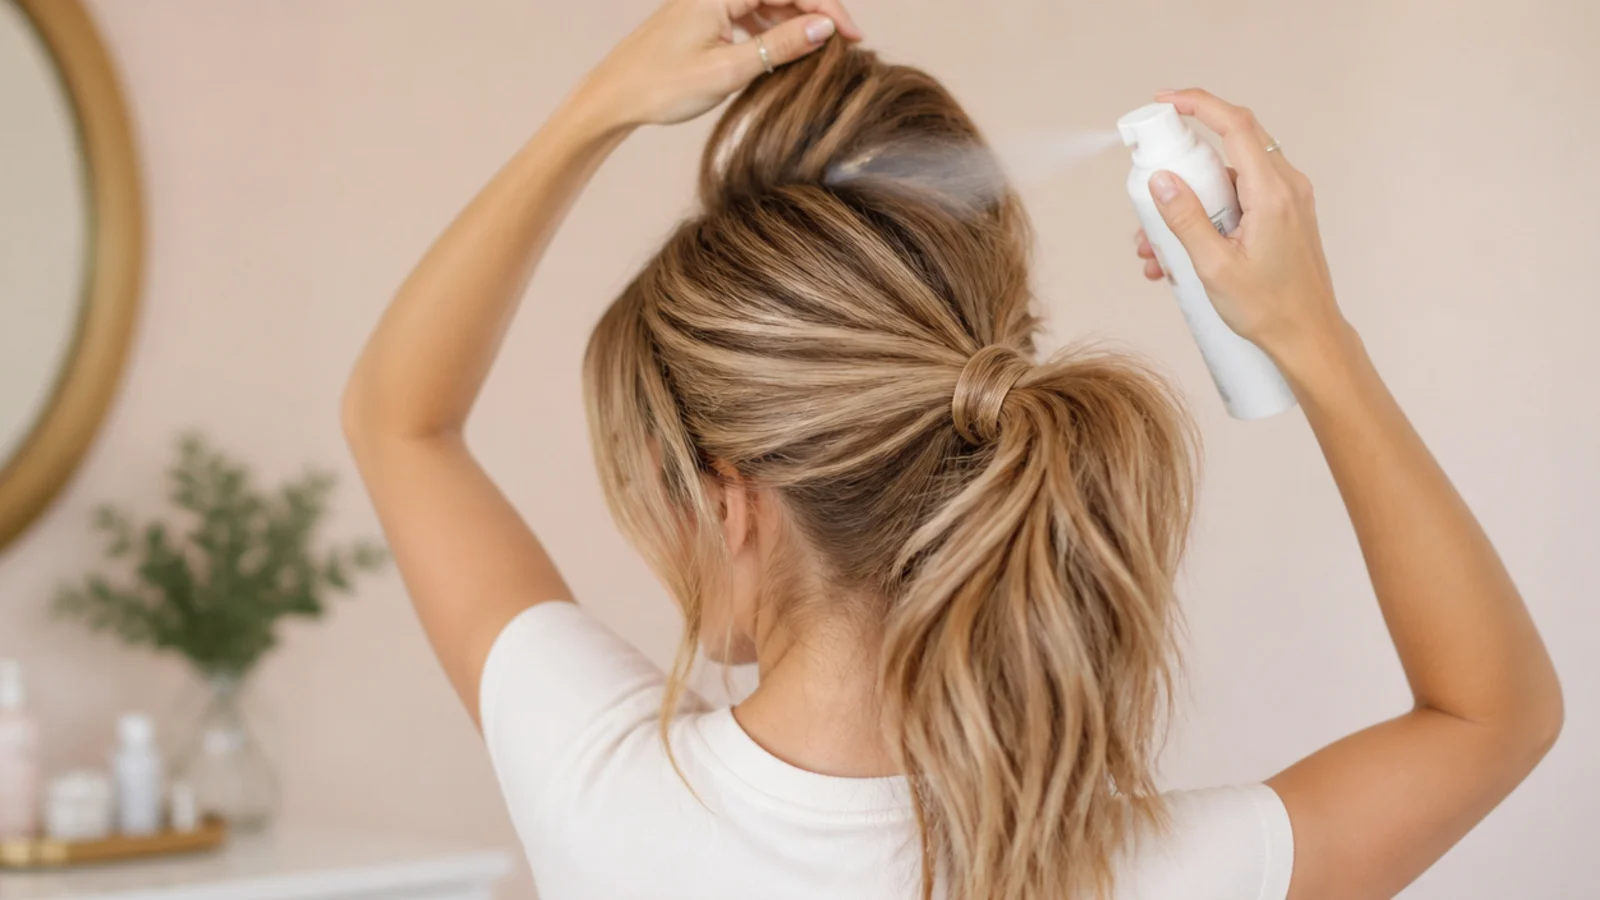
Freshly washed hair has no friction, and a messy ponytail is held together almost entirely by friction. Day-two or day-three hair grips far better than clean hair, which is why the style looks so good on the mornings you skipped washing. If you did wash today, spray dry shampoo in a zig zag along four or five root partings, wait 30 seconds for the starch to absorb, then rub it in with your fingertips rather than a brush. Add texture spray from the mid-lengths down for the tail. Fine hair needs both; thick hair usually needs only the texture spray.
Common mistake: Spraying dry shampoo onto the surface of the hair instead of into the root partings, which leaves white cast and zero grip.
Pro tip: Spray the roots the night before and sleep on it. The grip is noticeably better by morning.
2. Finger-Comb the Length, Never Brush It Smooth
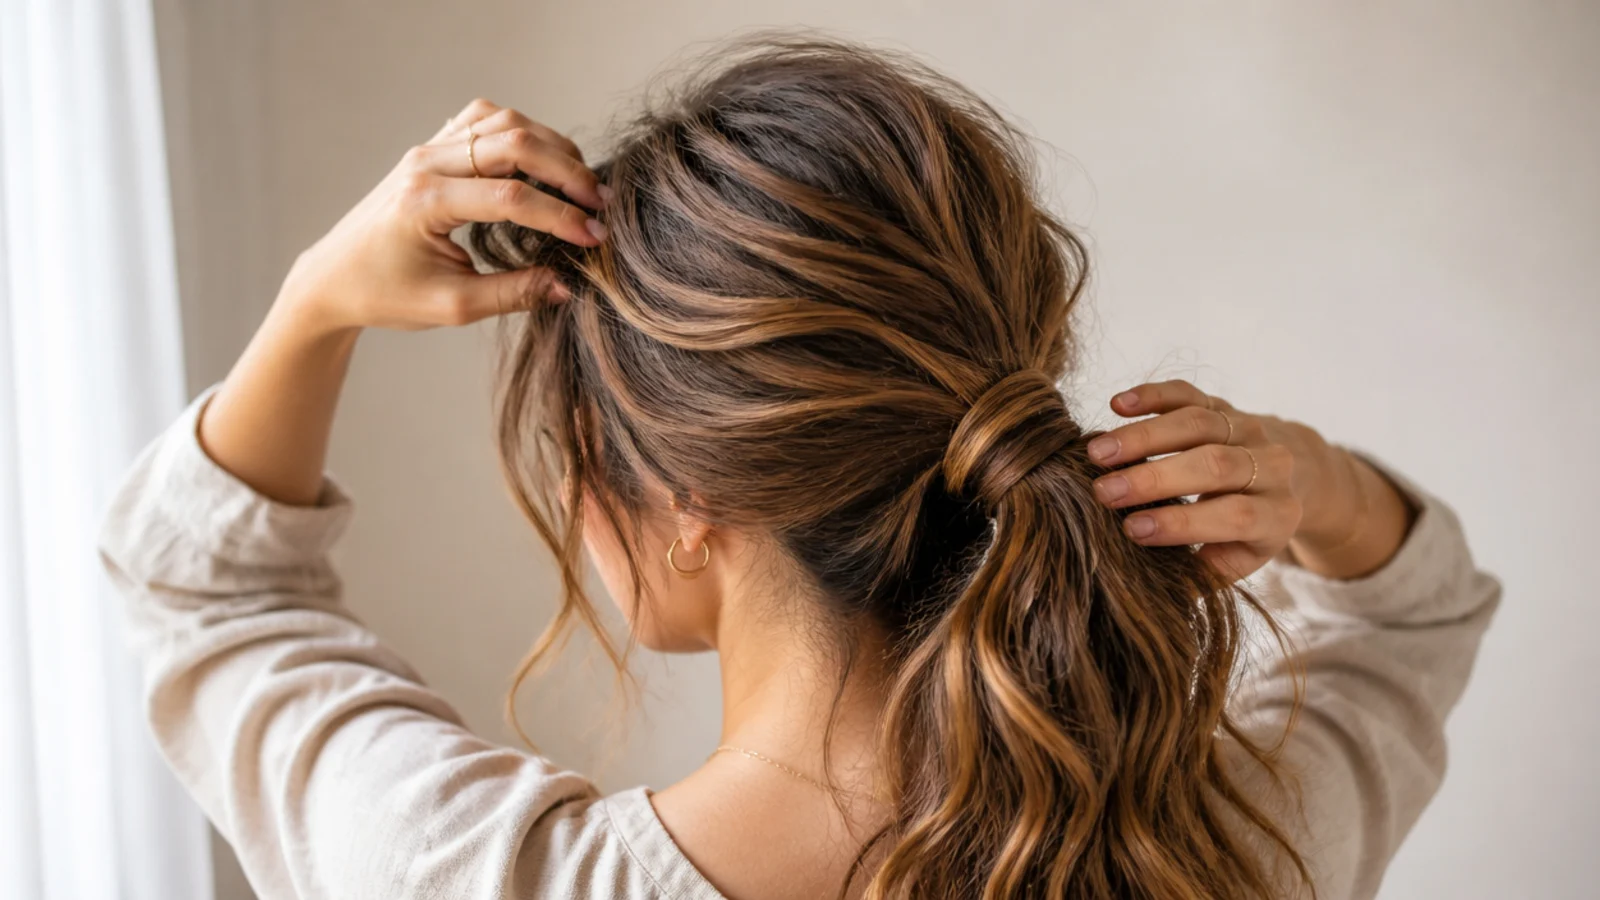
A paddle brush flattens the cuticle and removes exactly the separation you are trying to keep. Run your fingers through from the crown to the ends two or three times to clear tangles, working out any knots at the nape with the pads of your fingers. If your hair is genuinely matted, use a wide-tooth comb on the bottom four inches only and leave everything above it alone. Straight, fine hair benefits from a two minute detour here: bend two or three inches of the ends around a 1.25 inch wand so the tail has something to separate into later.
Common mistake: Brushing the whole head smooth and then trying to add texture back with product. It never fully comes back.
Pro tip: Flip your head upside down and shake it out once. That alone loosens the roots enough to gather.
3. Decide the Height: Crown, Mid-Back or Nape
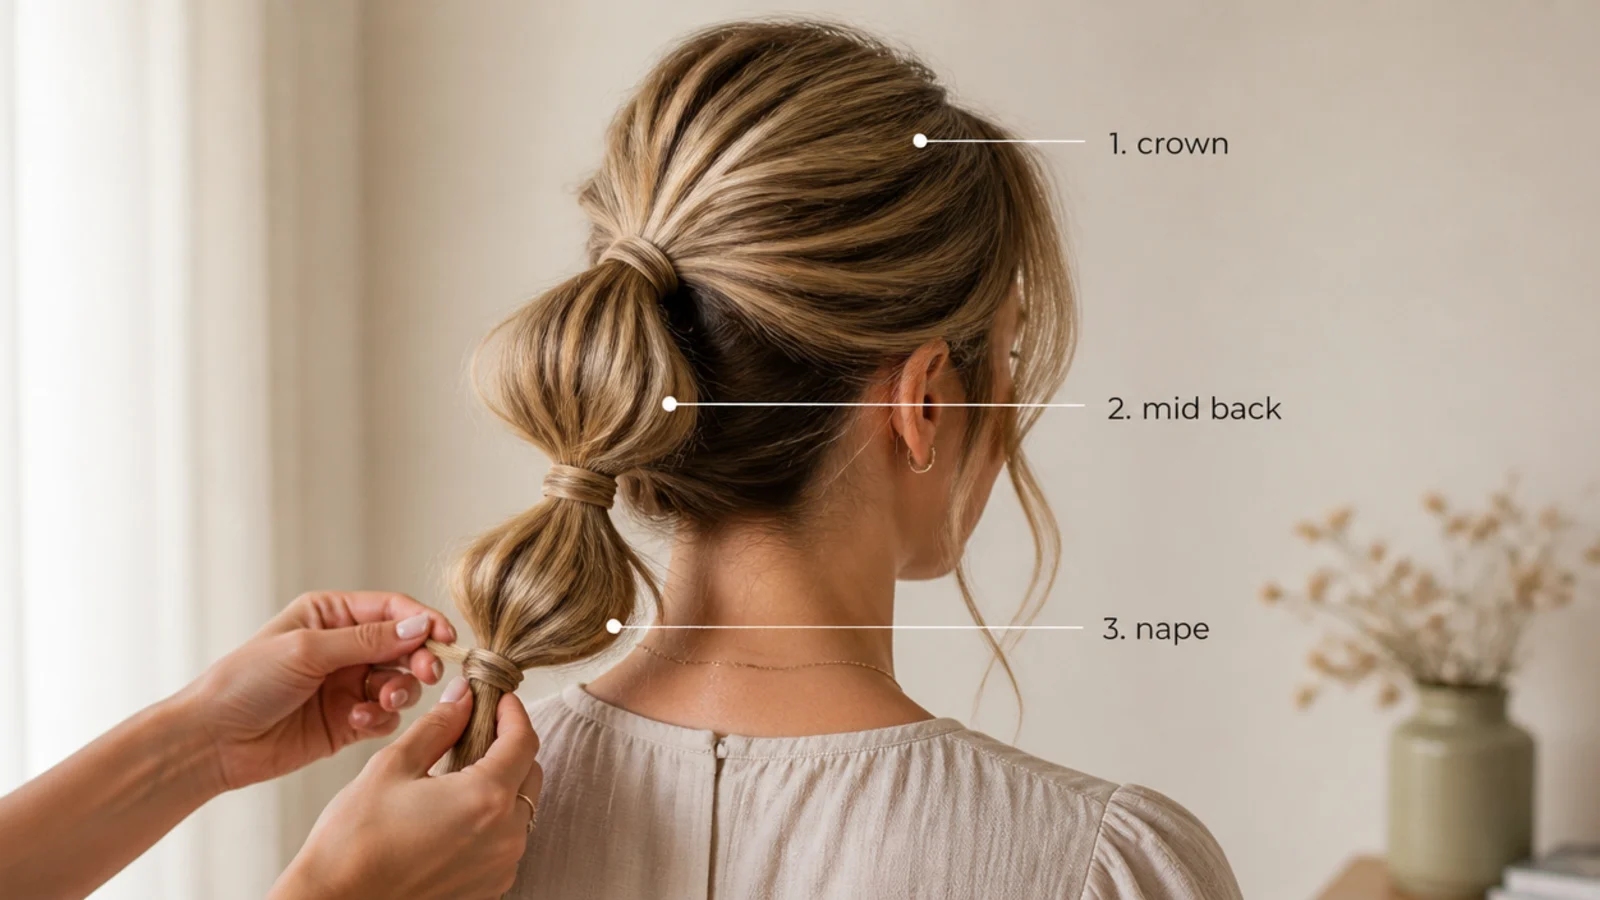
Placement decides the mood before a single strand is loosened. A crown tie, level with the top of your ears when you look straight ahead, reads lifted, youthful and sporty, and it visually pulls the cheekbones up. A mid-back placement is the everyday middle ground. A nape tie, sitting just above the hairline at the back, reads soft, romantic and office-appropriate, and it is the kinder option for a headache-prone scalp. Tilt your chin up slightly while you gather a nape ponytail so it does not sag when you look down later. See the difference laid out in the messy ponytail pillar guide.
Common mistake: Choosing high because it looks better in the mirror at 8am, then fighting a tension headache by noon.
Pro tip: Round faces usually prefer crown height; long faces are flattered by a nape tie with volume at the sides.
4. Gather With Your Hands, Leaving the Hairline Untouched
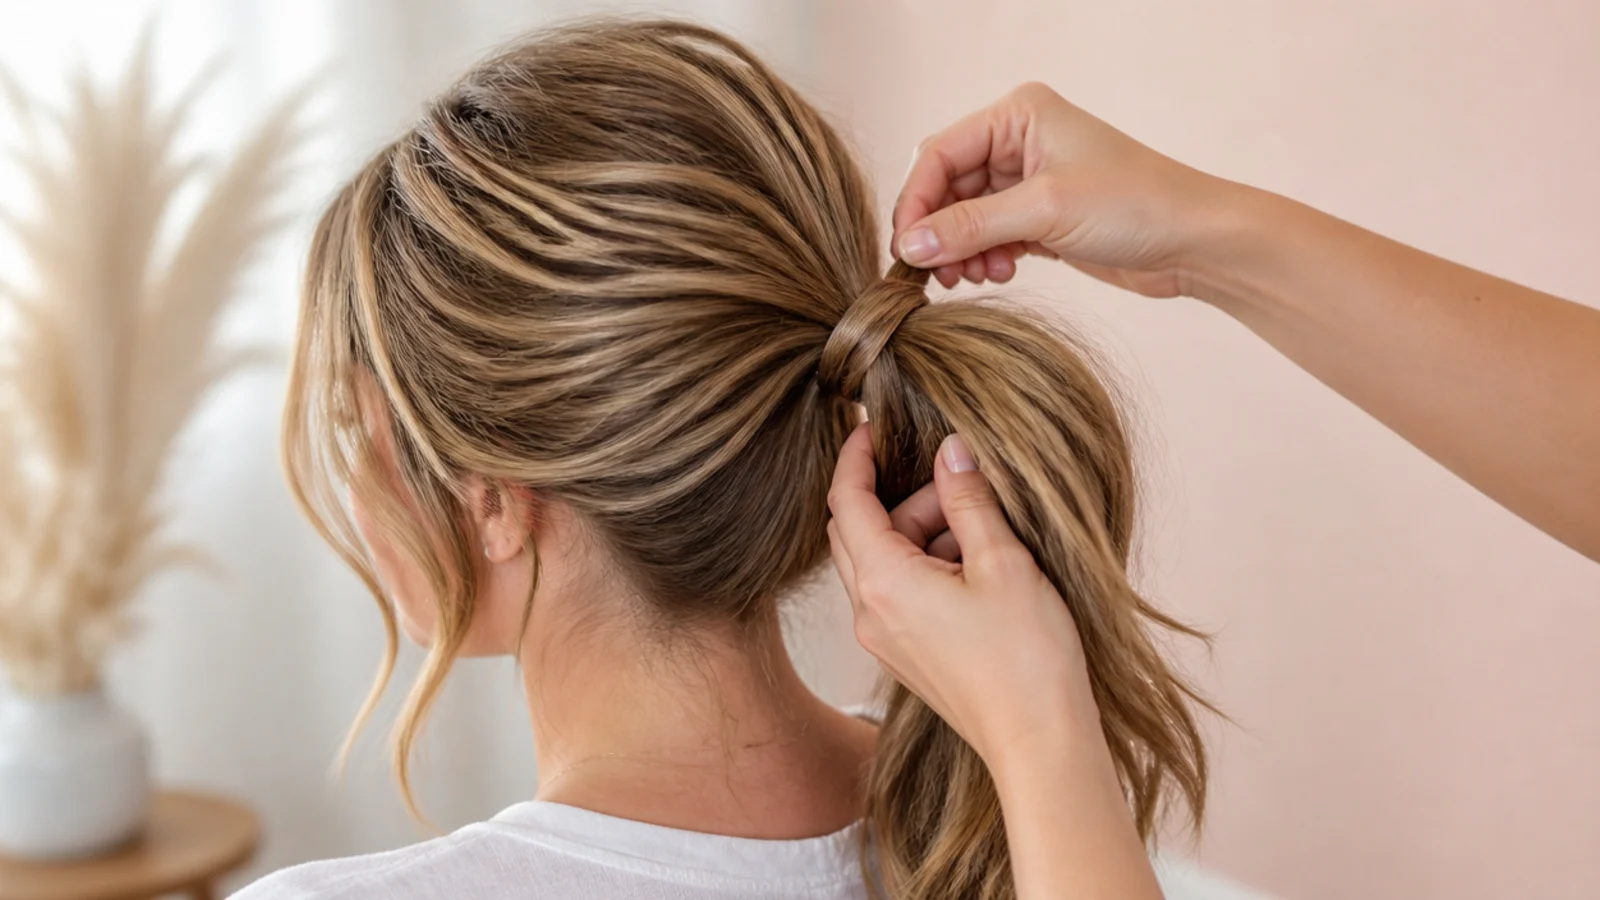
Scoop the hair up with both hands, palms flat against the head, and hold the gathered section with your non-dominant hand. Do not tighten the hairline with your fingertips as you go, because that is what turns messy into slicked back. For a crown ponytail, flip your head forward and gather from the nape upward so the roots at the back lift instead of pulling flat. Hold the base slightly loose, about a finger's width of give between your scalp and your fist. That slack is what you will convert into volume in step six.
Common mistake: Gathering so tightly that there is nothing left to loosen. You cannot add slack back after the tie is on.
Pro tip: Gather in front of a mirror but tie by feel. Watching your hands makes you pull tighter than you mean to.
5. Secure It With the Right Tie for Your Hair Type
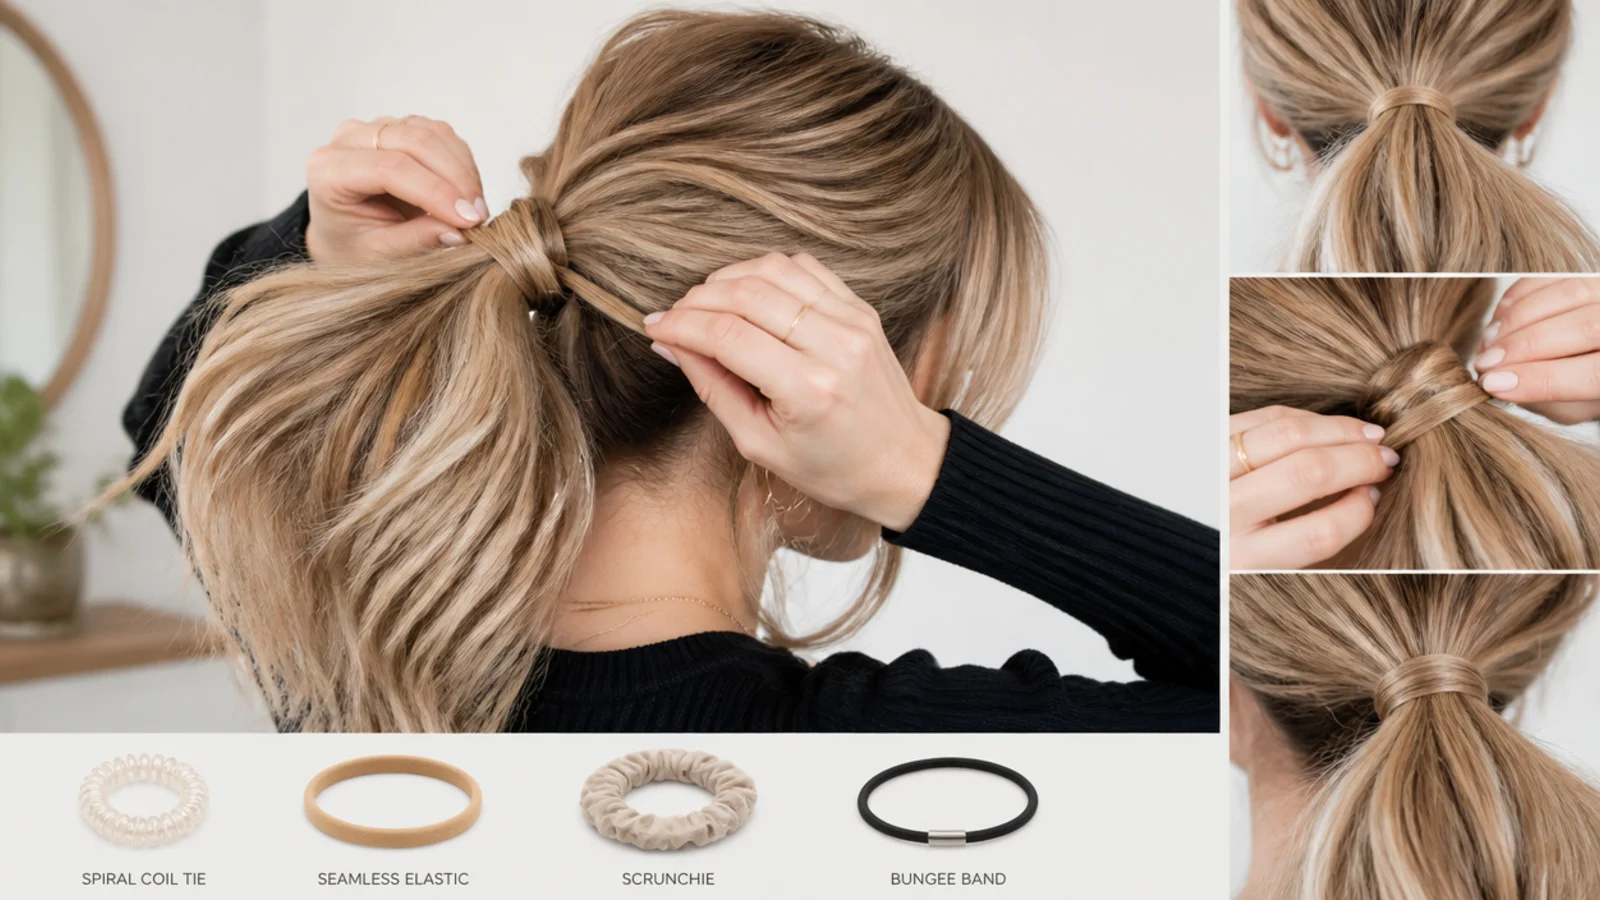
The tie does more work than any product. A seamless elastic grips fine and medium hair in two or three wraps. A spiral coil tie spreads pressure and leaves no dent, which matters most on long hair. A scrunchie is the gentlest on the shaft but slips on silky straight hair unless you double it. A bungee band, the elastic with a hook at each end, is the single best tool for short hair and thick hair because you set the tension yourself rather than fighting three wraps. Whatever you use, stop one wrap earlier than feels secure.
Common mistake: Using a rubber band or a tie with a metal crimp, which snaps the shaft right at the tension point.
Pro tip: Thick hair past 20 inches: use two seamless elastics stacked half an inch apart instead of one strained tie.
6. Tug Small Crown Sections Straight Upward for Volume
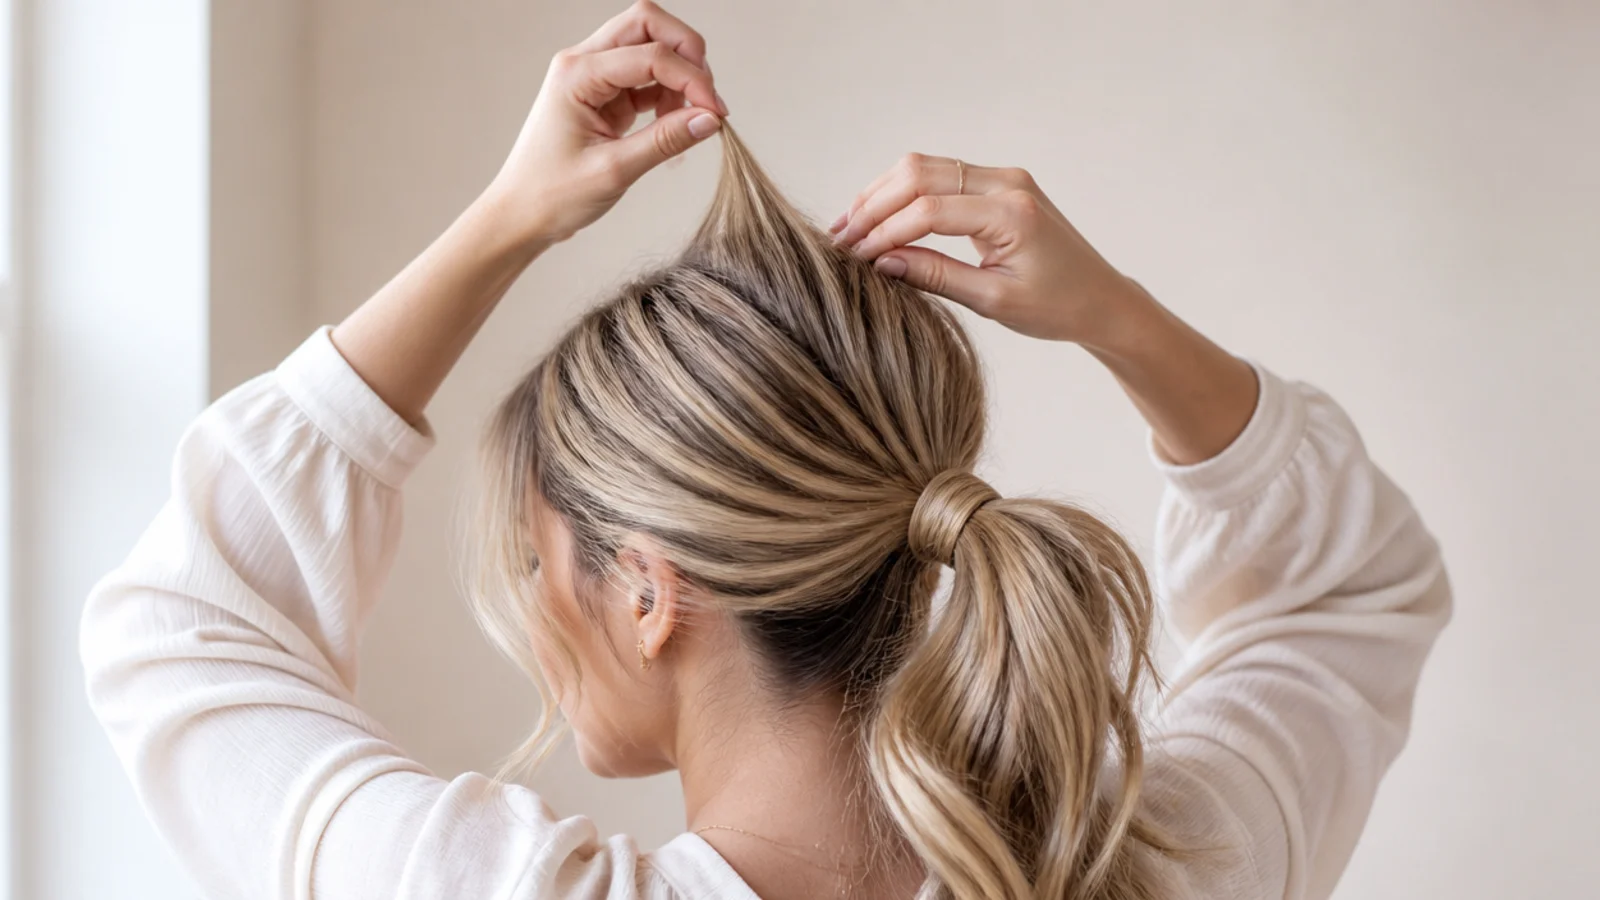
This is the step that separates a good messy ponytail from a flat one. Pinch a section about the width of your thumb between finger and thumb, right at the crown, and tug it straight up roughly a quarter of an inch. Repeat five or six times across the top of the head, then twice more on each side above the ear. You are lifting the hair away from the scalp without loosening the elastic itself. Work in small pinches: one big handful pulls the whole ponytail loose and drops a bump into the crown that will not sit flat again.
Common mistake: Tugging outward or backward instead of straight up, which just drags the ponytail off center.
Pro tip: Hold the base of the ponytail steady with your other hand while you tug so the tie does not travel.
7. Backcomb the Base of the Tail, Not the Whole Head
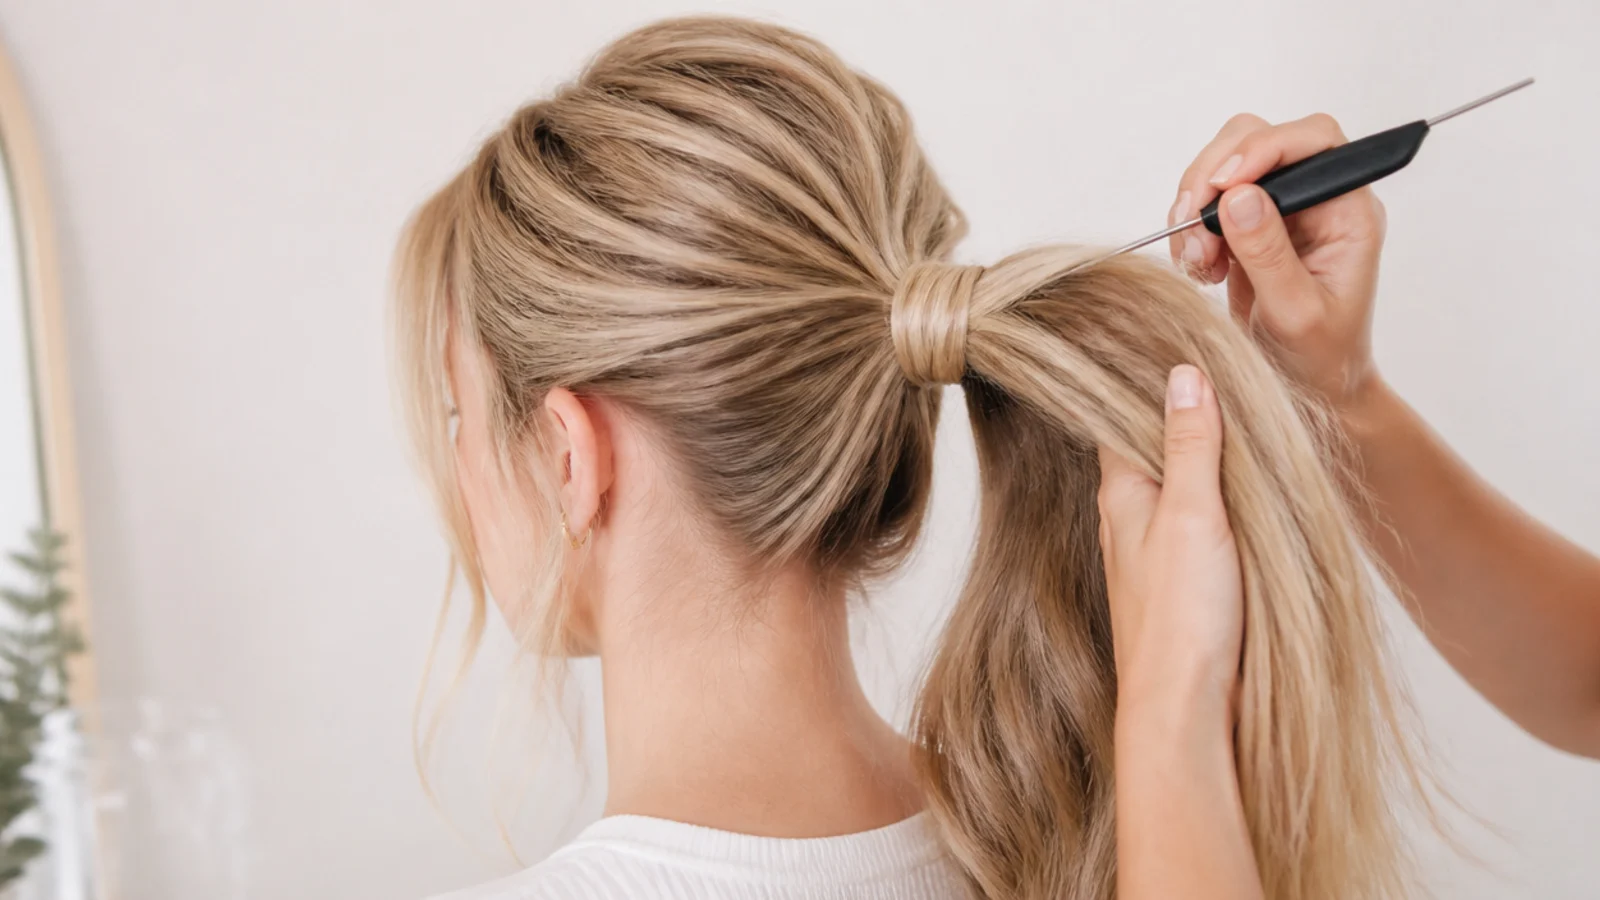
Lift the ponytail and take a tail comb to the underside of the first two inches, three or four short strokes toward the elastic. This builds a cushion that props the tail up and stops a heavy ponytail from sagging by lunchtime. Then pull two or three random sections in the body of the tail gently apart with your fingers so the ends separate instead of hanging as one block. Fine hair should also get a light mist of texture spray through the backcombed cushion so it holds. Thick hair rarely needs more than the cushion itself.
Common mistake: Backcombing the visible top layer, which shows as frizz all day and takes ten minutes to comb out at night.
Pro tip: Mist the cushion with flexible-hold hairspray, not firm hold, or the crown goes crunchy and stops moving.
8. Wrap a Strand Around the Elastic and Pin It Underneath
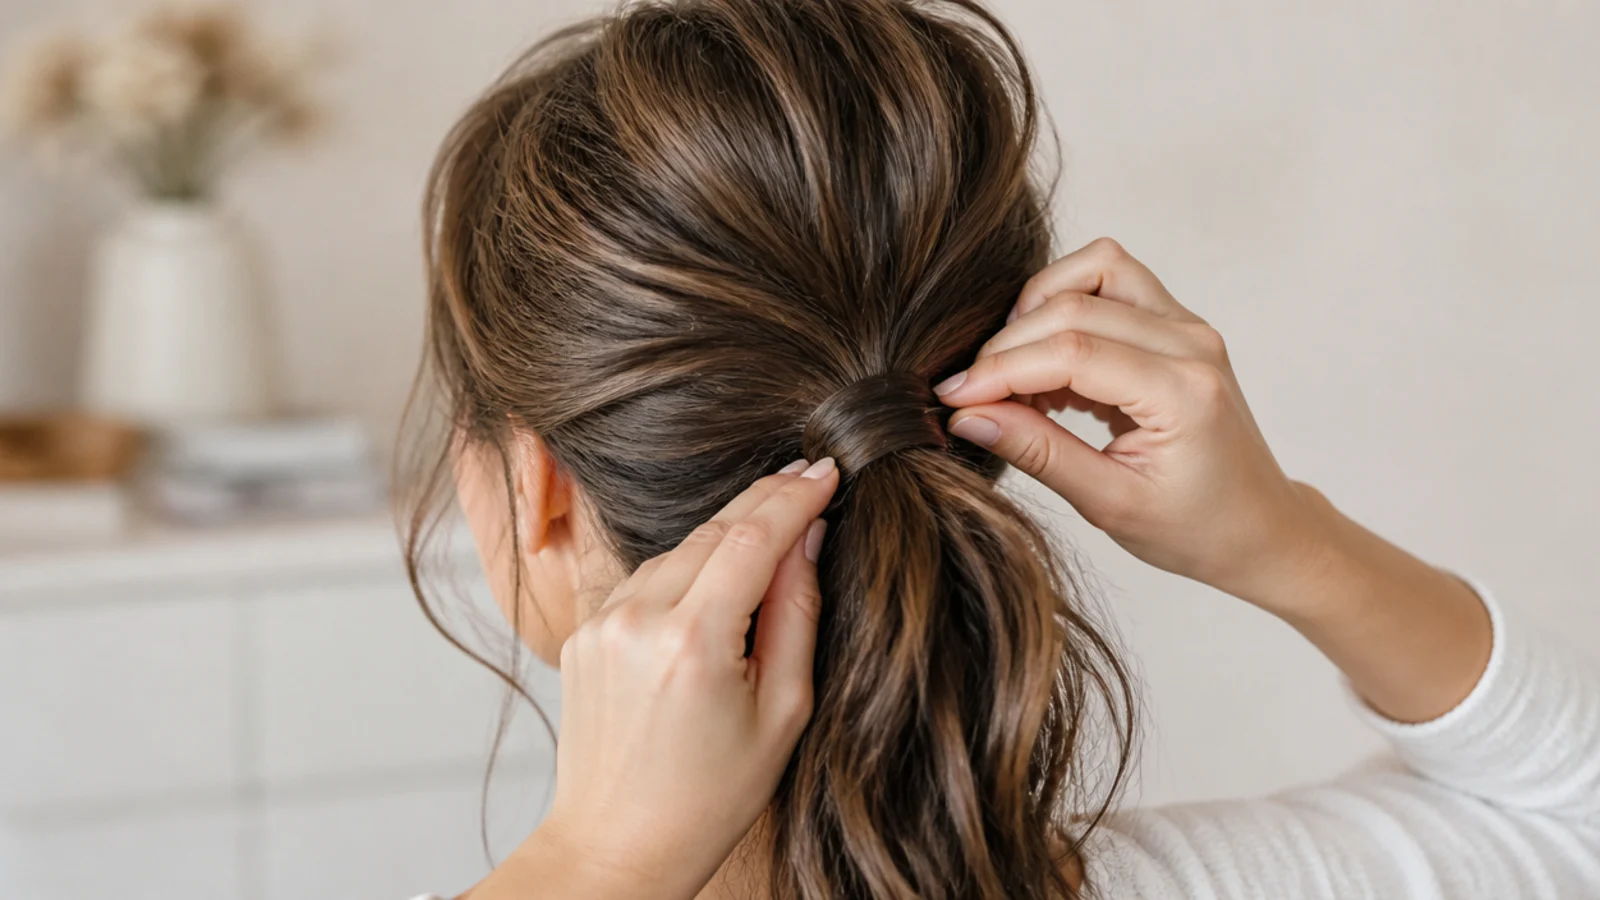
This is the single biggest polish upgrade available, and it takes 30 seconds. Take a half-inch section from underneath the ponytail, twist it loosely once so it does not fan out, wrap it around the elastic two or three times, and pin the tail end upward into the base with a bobby pin, wavy side against the scalp. The elastic disappears and the whole style stops reading as a gym ponytail. Pull the wrap slightly loose after pinning so it matches the softness of the rest. Every look on the messy ponytail board uses this.
Common mistake: Taking the wrap section from the top of the tail, which leaves a visible gap in the crown you just built.
Pro tip: Use two crossed pins in an X rather than one. A single pin slides out within an hour on silky hair.
9. Pull Out the Temple and Ear Pieces Last, Then Set It
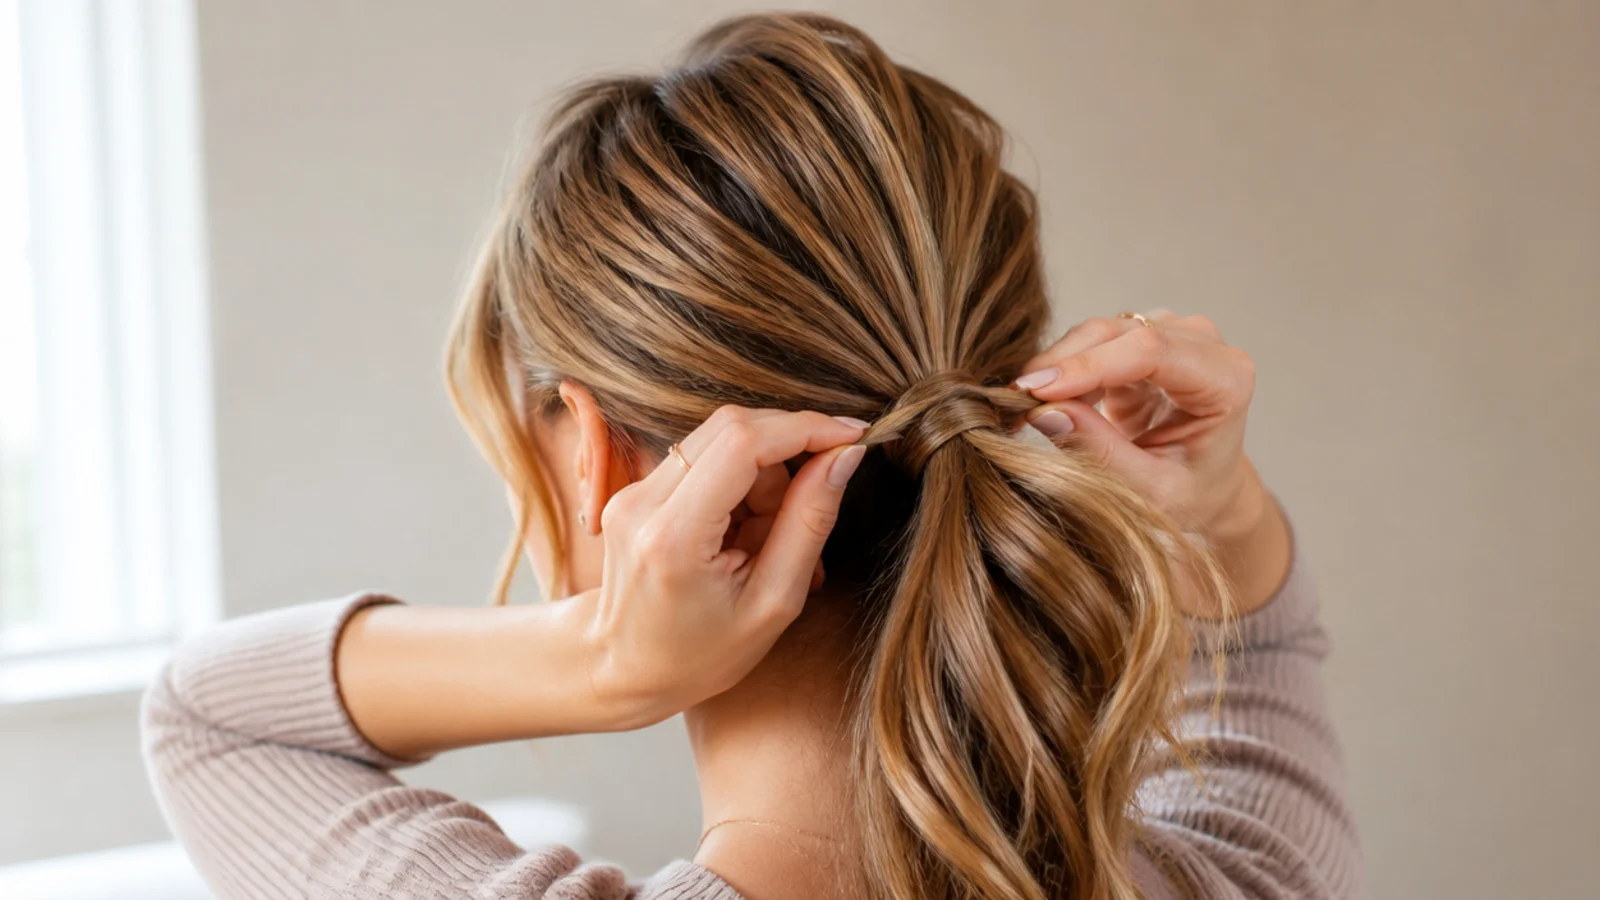
Everything before this was structure. Now pull out one thin piece at each temple, about a quarter inch wide, and one shorter piece in front of each ear. Two to four pieces total, no more. Pulling them out last is what reads as intentional, because they stay soft and untouched instead of getting dragged through the tugging and combing. Bend them around a wand for two seconds each if they hang poker straight. Finish with a light mist of flexible-hold hairspray held 10 inches away, then stop touching it.
Common mistake: Releasing the face-framing pieces before you tug and tease, so they end up kinked, flat and in the way.
Pro tip: Fewer, thicker face pieces read expensive. Lots of thin wisps read like the ponytail is falling out.
What Makes a Ponytail Read Messy and Not Untidy
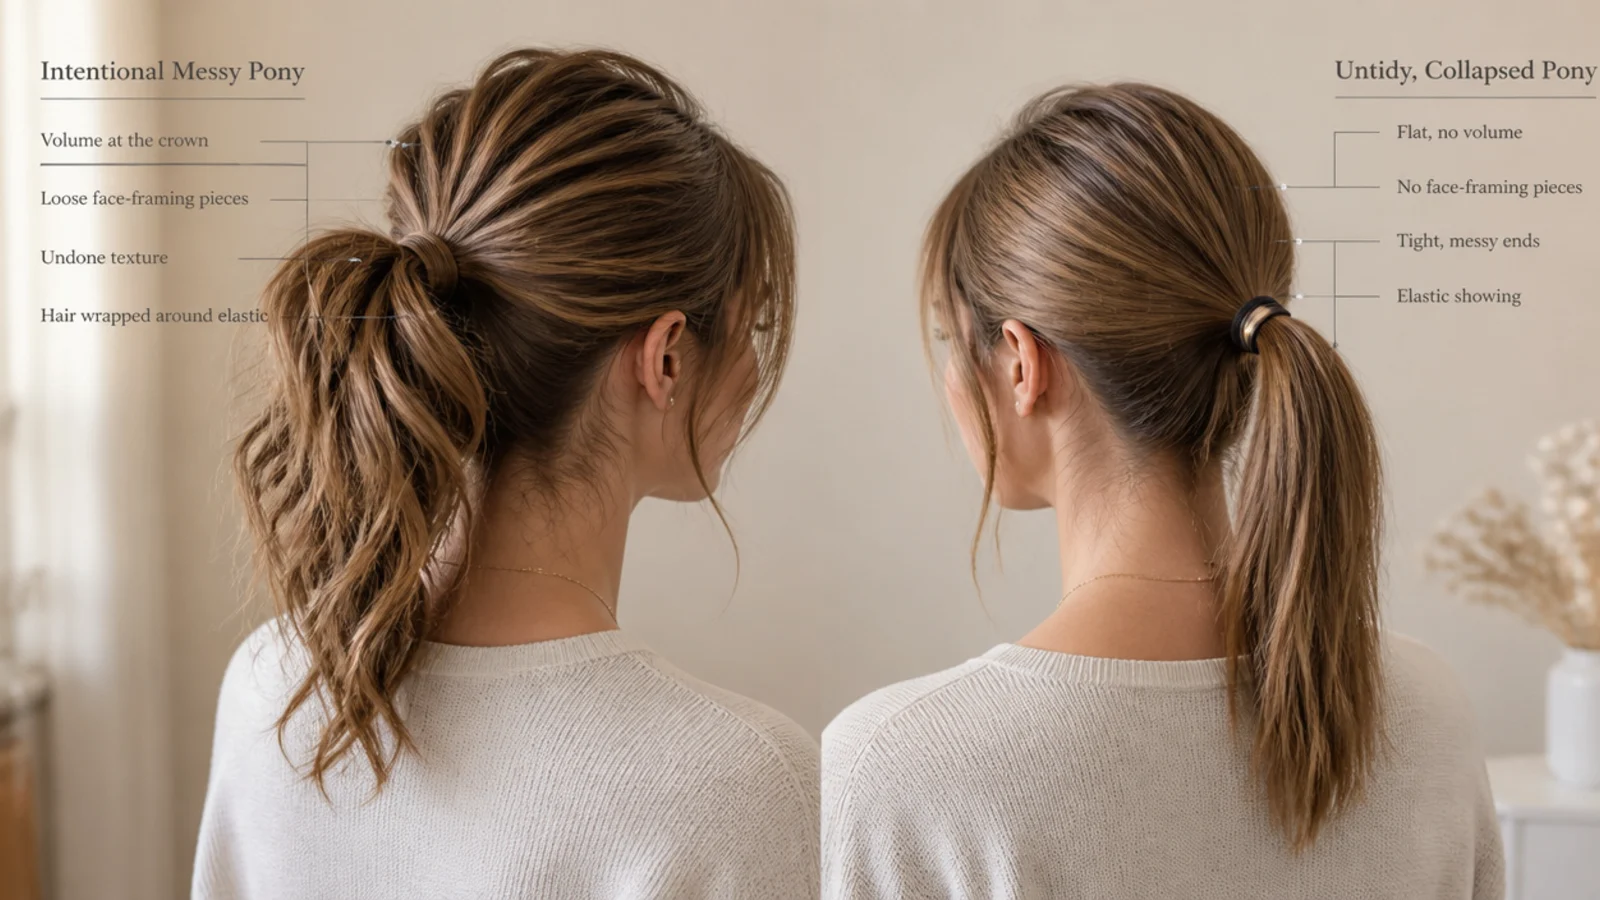
The line between the two is repetition and symmetry. An untidy ponytail has hair escaping in random places and random amounts, usually low down near the nape where it looks like the style is failing. An intentional messy ponytail has a small number of deliberate breaks, placed symmetrically and high, where they frame the face rather than escape the tie. That is why the temple and ear pieces come out last, after the tugging and the teasing: pulled at the end, they stay smooth and curved, and the eye reads them as styling. Pulled at the start, they get dragged through everything else and end up kinked. The second difference is volume distribution. A messy ponytail is full at the crown and at the base of the tail, and separated at the ends. An untidy one is flat on top with bulk at the bottom, which is what happens when you tie without tugging. Two pieces per side, lift at the crown, and a hidden elastic will carry the look even on a rushed morning. Everything else, including all 20 versions above and the rest of the messy ponytail board, is decoration on those three points.
How to Do a Messy Ponytail by Hair Length
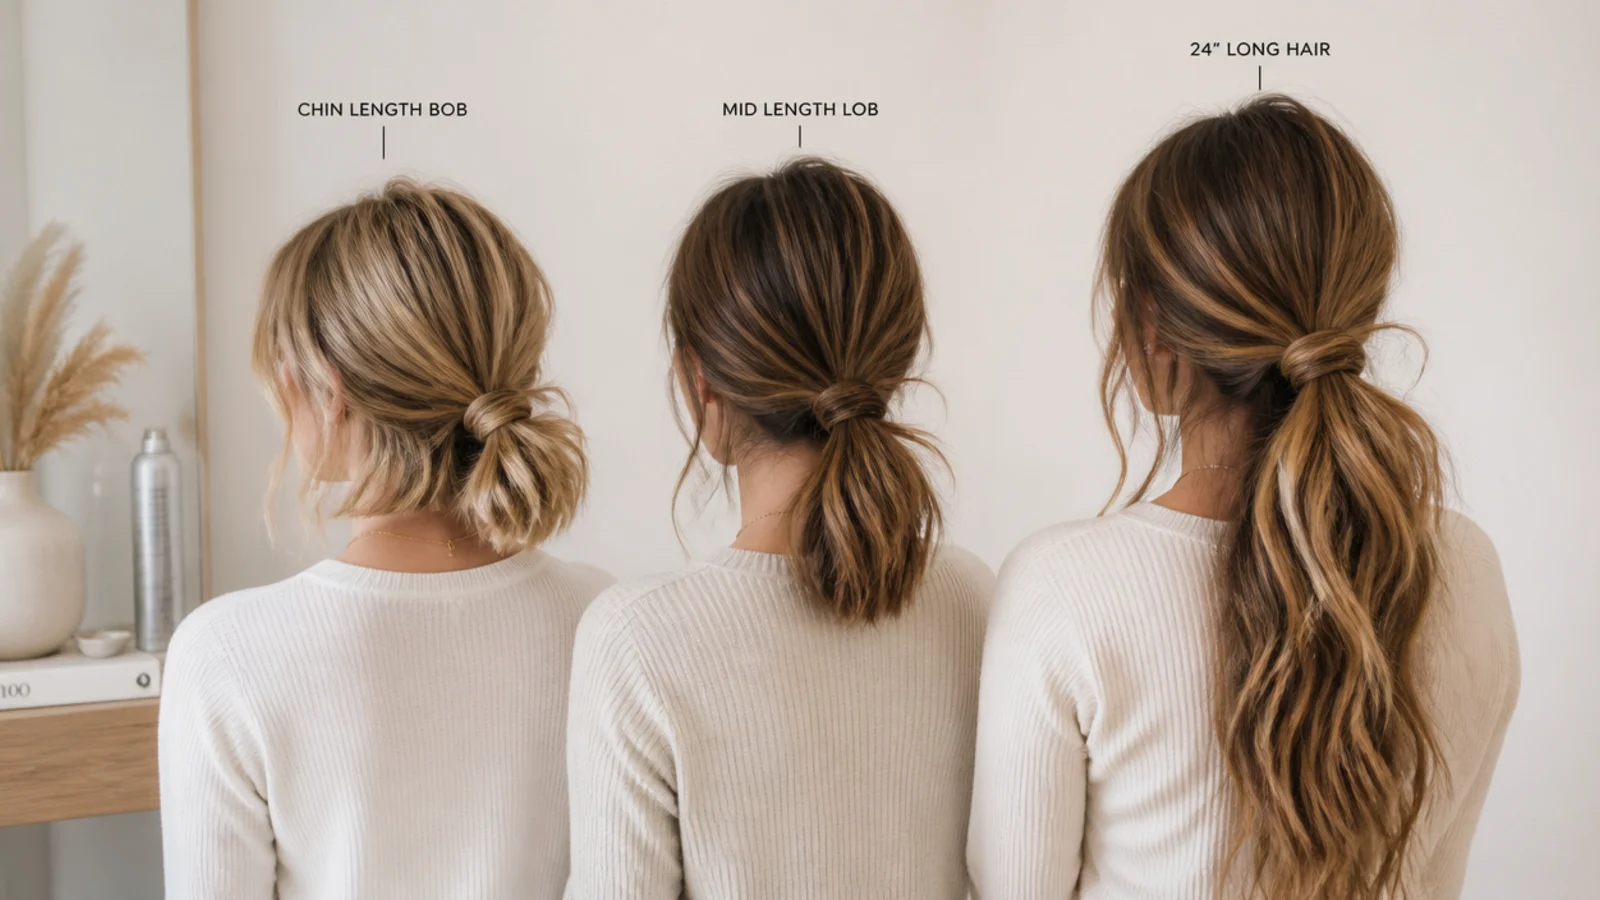
Length changes the mechanics more than the method. Under about 8 inches, a full ponytail will not hold and a half-up version is the honest answer. From 8 to 12 inches, a bungee band or two stacked elastics is what makes it work, with bobby pins pushed upward under the base to catch the nape layers that cannot reach. From 12 to 18 inches everything is easy, and this is the range where placement matters most: crown for lift, nape for softness. Past 20 inches, weight becomes the problem, so drop the tie to mid-back, use a spiral coil tie or two stacked elastics, and backcomb the underside of the tail base so it props itself up instead of dragging the crown backward. At 24 inches and beyond a crown ponytail will sag within two hours no matter how well you tie it, and pulls hard enough at the temples to cause a headache. Length-specific guides live at messy ponytail short hair and messy ponytail long hair. If your cut is the problem rather than your technique, a mid-length haircut with layers gives a ponytail far more to grip.
Volume and All-Day Hold: Making It Survive to 6pm
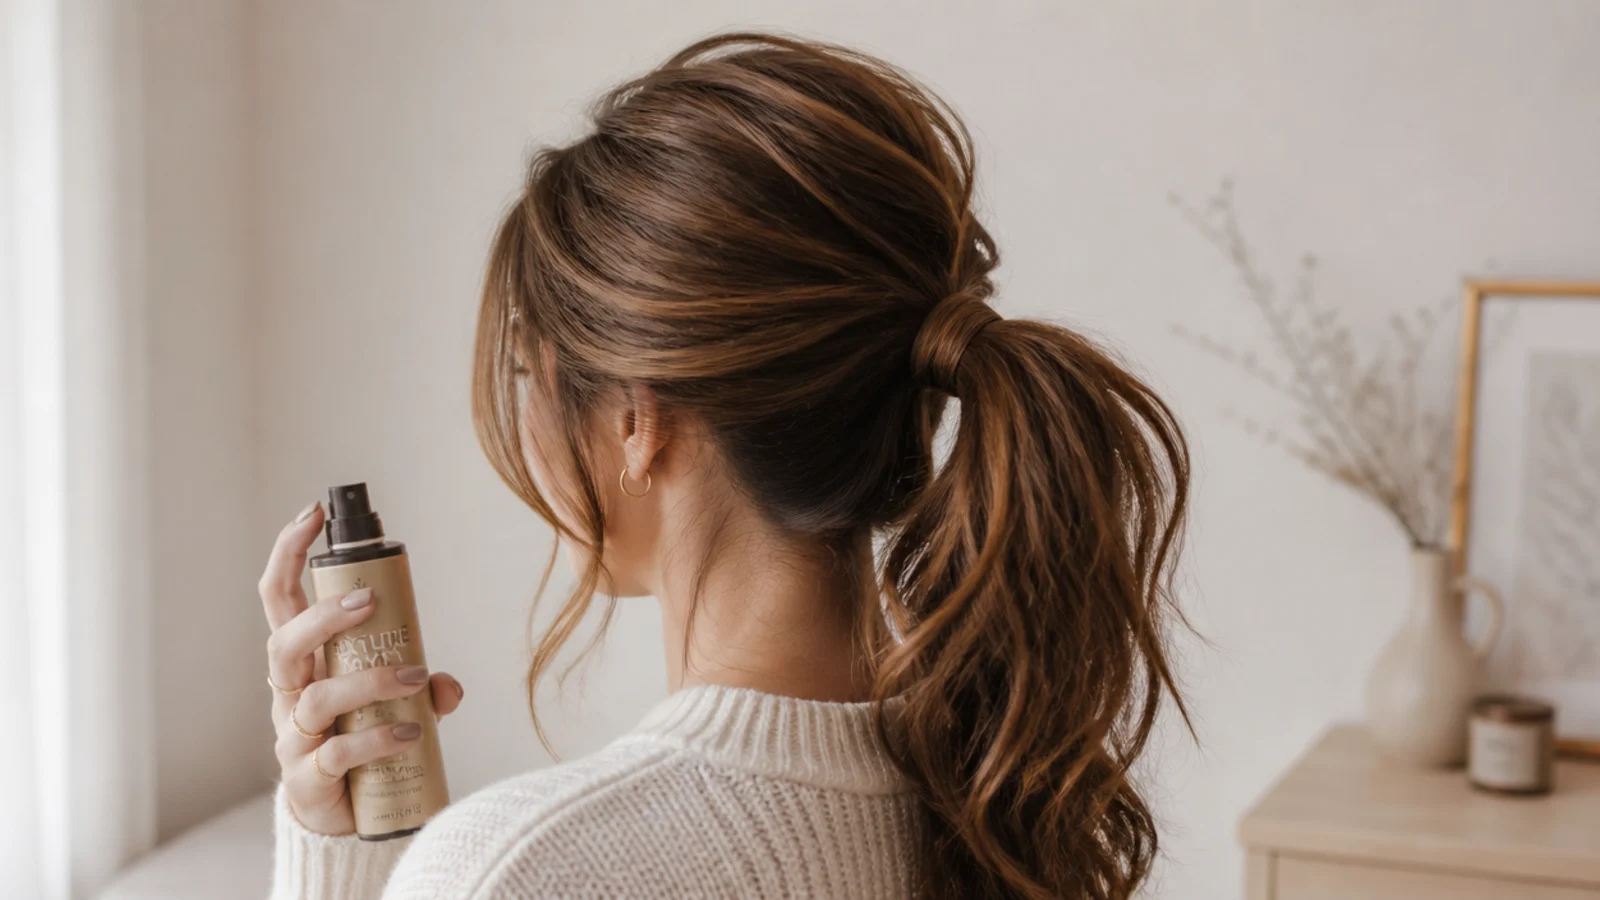
Most messy ponytails fail in one of two ways: the crown flattens or the tie migrates down the tail. Flattening is a friction problem, and the fix is prep, not spray. Dry shampoo at the root partings the night before beats anything you can do in the morning, because the starch has hours to absorb oil. Backcombing the underside of the first two inches of the tail builds a cushion that props the ponytail up, which is what stops a heavy tail dragging the crown backward by mid-afternoon. Migration is a tie problem: a single stretched elastic loosens with every head turn, so stack two half an inch apart or use a bungee band you can set to the right tension in one pass. Two bobby pins crossed in an X under the base stop the whole assembly traveling. When it does drop, do not re-tie it, because re-tying costs you the texture you built. Just tug four crown sections up again and it resets in about eight seconds. A high messy ponytail needs this maintenance more than a low one, simply because gravity has further to work.
Fine Hair vs Thick Hair: Two Different Problems
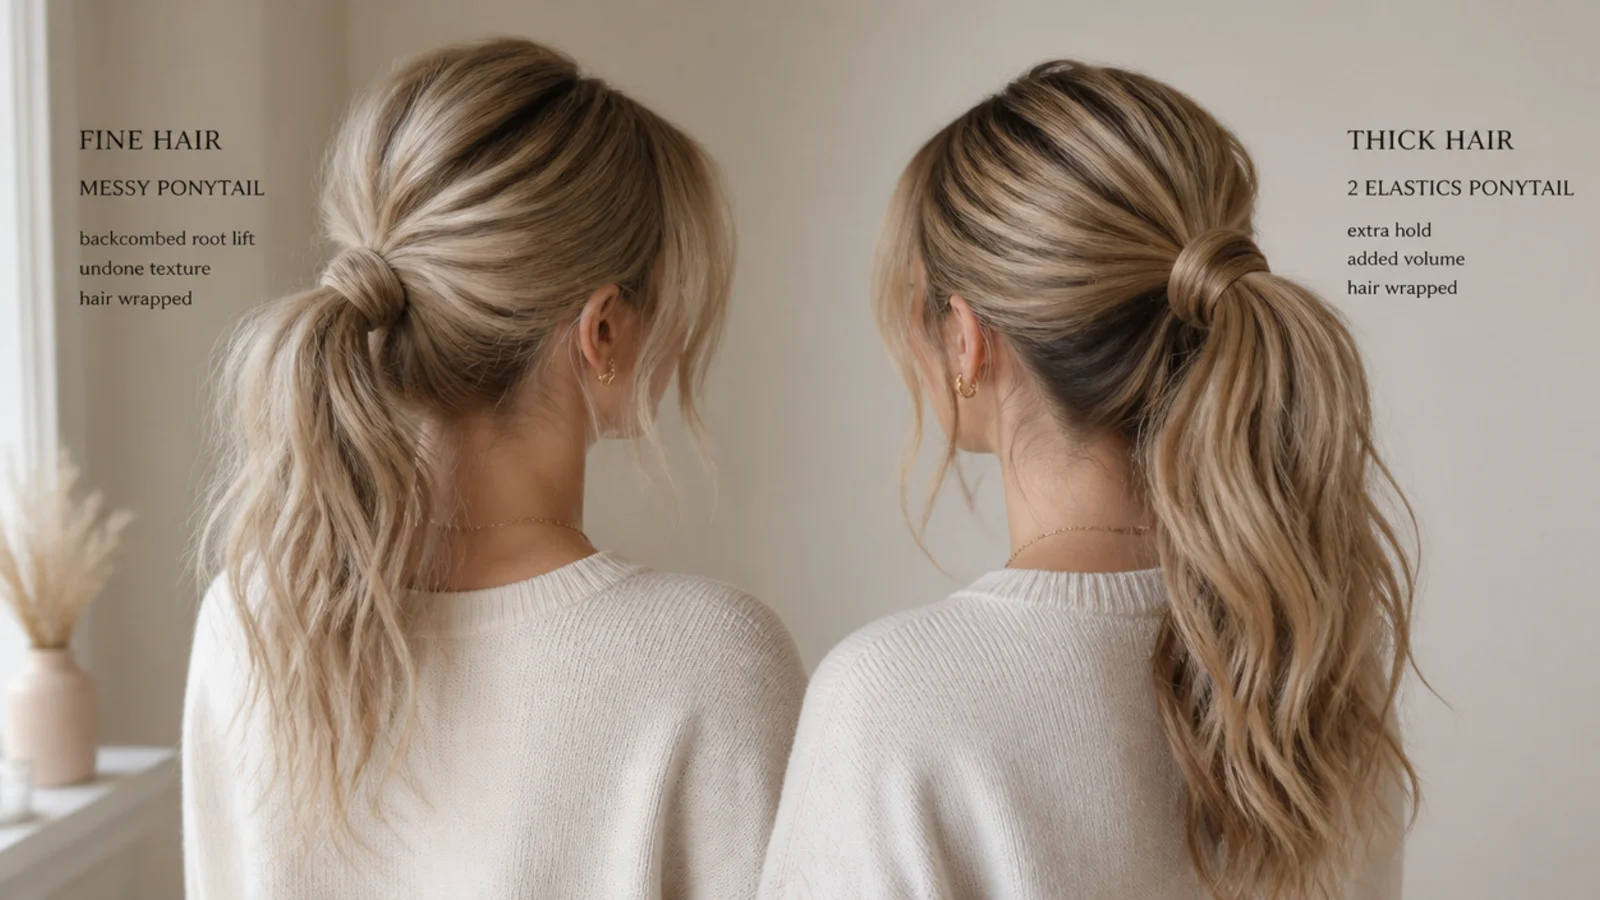
Fine hair is a fullness problem. The tail looks thin no matter how well you tie it, so the work goes in before the elastic: backcomb three horizontal crown sections at the root, use volumizing powder rather than more hairspray, and consider a scrunchie, which physically bulks out the base so the tail reads thicker where it matters most. Fine hair also holds better dirty than clean, so plan the style for day two or three. Thick hair is a control and tension problem. The tail is heavy enough to pull the crown flat and strain a single elastic to breaking point, so use two stacked ties or a bungee band, drop the placement lower, and skip most of the texture spray, which thick hair rarely needs. Coarse thick hair also holds backcombing so well that four strokes is plenty. If your thickness comes with frizz, the prep routine in hairstyles for thick frizzy hair makes the ponytail considerably easier to gather. Both hair types benefit from moving the tie point half an inch every day.
The Products That Actually Matter for a Messy Ponytail
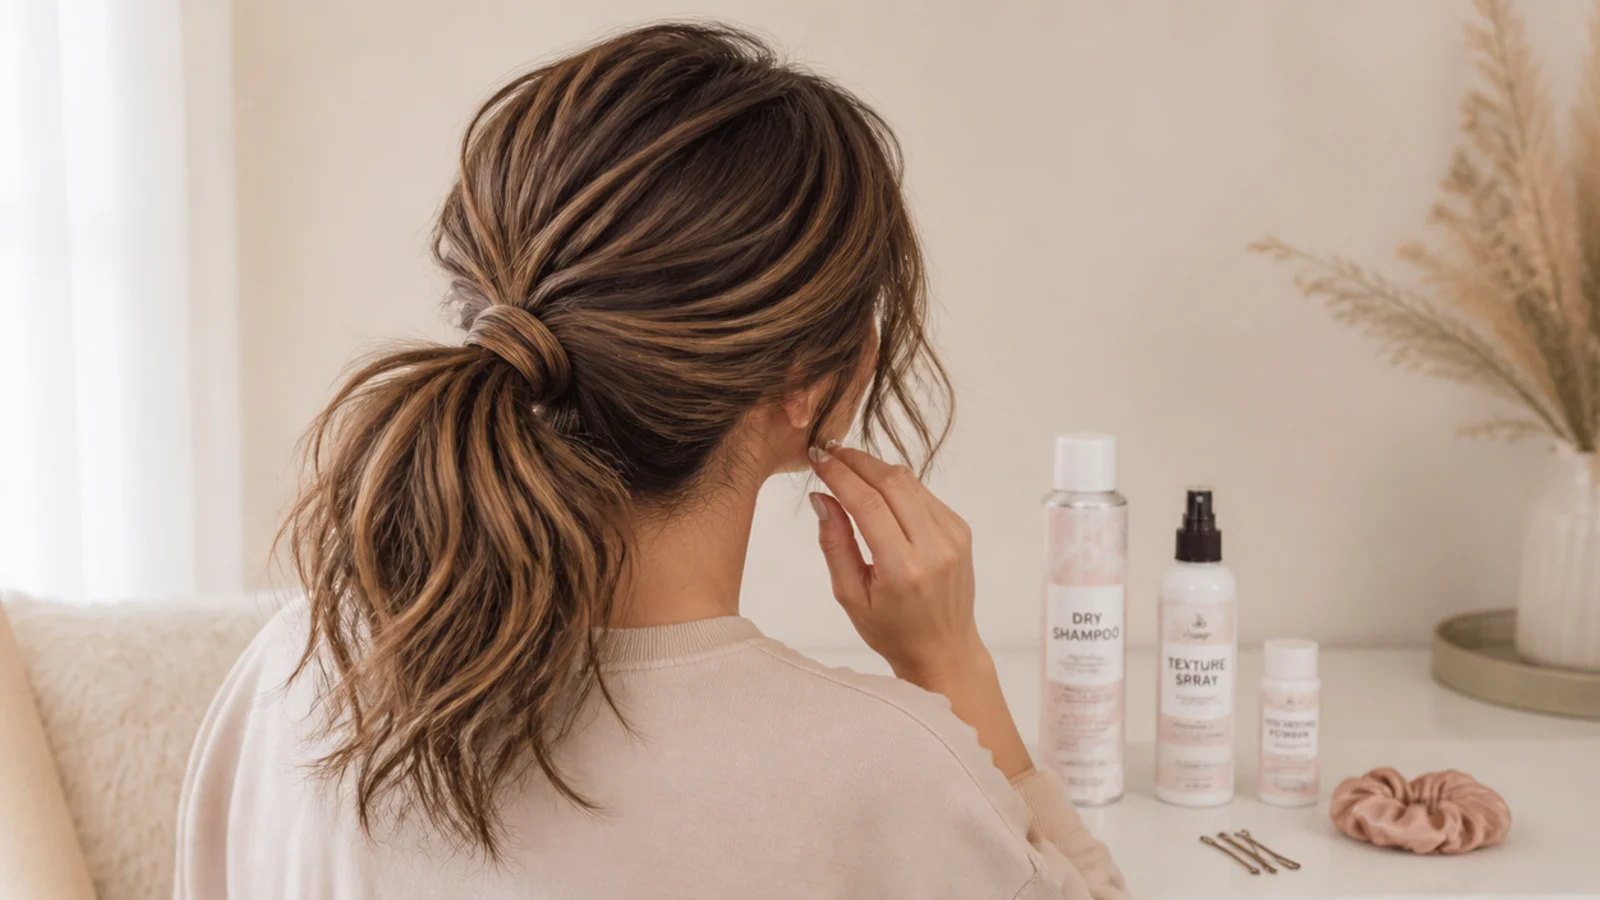
Five things, and only one of them is optional. Dry shampoo, roughly 8 to 15 dollars at a drugstore, is the grip layer and goes into the root partings, not onto the surface. Texture spray, 15 to 30 dollars, is the separation layer for the mid-lengths and ends so the tail breaks into pieces rather than hanging as a block. Flexible-hold hairspray, 10 to 20 dollars, sets the shape while still allowing movement, which is why firm hold is the wrong choice here: it freezes the crown and kills the softness you built. Your tie matters more than any of them, and a spiral coil tie or a satin scrunchie at 8 to 15 dollars will do more for the finished look than an expensive spray. Bobby pins are the fifth: buy the ones that match your color and place them wavy side against the scalp so they grip. The optional item is volumizing root powder, worth it for fine hair and pointless on thick. Skip gel, mousse and shine serum entirely. They all pull the hair back toward smooth, which is the opposite of what this style needs, and they are better spent on a frizzy hair routine instead.
Common Mistakes, Scalp Tension and When to Loosen Up
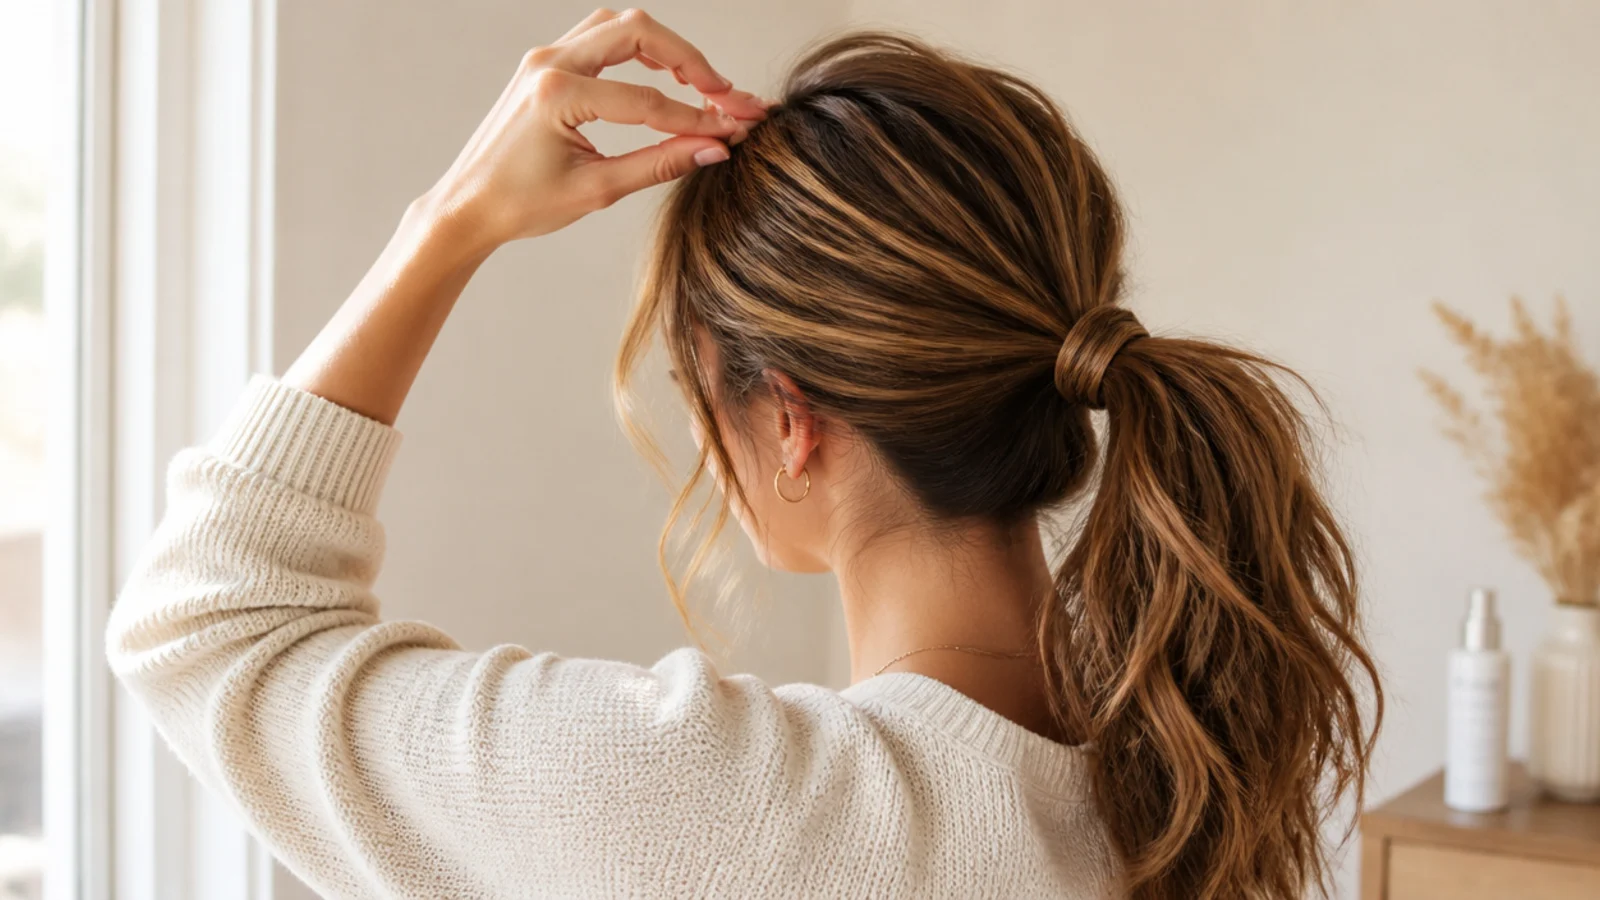
Five mistakes account for nearly every bad messy ponytail. Doing it on freshly washed hair, which has no grip and slides out within an hour. Pulling the face-framing pieces out first, so they are kinked and flat by the time you finish. Tugging one big handful at the crown rather than six small sections, which collapses the base. Using a firm-hold hairspray that freezes the texture solid. And leaving the elastic visible when a 30 second wrap would hide it. The sixth is not cosmetic: tying tightly in the same spot every single day puts sustained tension on the same follicles, and the hairline is where that shows first as thinning edges. If you can feel your ponytail at the temples, or you get a dull headache an hour in, it is too tight. Move the tie point half an inch up or down each day, alternate between a high and a low placement, use fabric-covered or coil ties instead of rubber bands, and take it down before you sleep. If you notice persistent shedding at the hairline or soreness that lasts after taking the style out, see a dermatologist or trichologist rather than adjusting your technique.
Frequently Asked Questions
How do you do a messy ponytail step by step?
Start with day-two or dry-shampooed hair for grip, finger-comb rather than brush, then gather at the crown or nape without tightening the hairline. Secure with a seamless or coil tie, tug six small crown sections straight up, backcomb the underside of the tail base, wrap a strand around the elastic and pin it, then release two temple pieces last.
Should hair be clean or dirty for a messy ponytail?
Dirty, or at least day-two. Freshly washed hair has almost no friction, so the ponytail slides loose and the crown tugs fall flat within an hour. Day-two or day-three hair grips far better. If you washed today, spray dry shampoo into four or five root partings, wait 30 seconds and rub it in with your fingertips before you gather.
How do you make a messy ponytail look intentional and not just sloppy?
Keep the breaks few, symmetrical and high on the head. Two temple pieces and one piece in front of each ear, pulled out at the very end rather than the start, read as styling. Random escaped hair at the nape reads as failure. Add volume at the crown, hide the elastic with a wrapped strand, and stop touching it once it looks right.
How do you hide the hair tie on a ponytail?
Take a half-inch section from underneath the tail, twist it once so it does not fan out, wrap it around the elastic two or three times, and pin the end upward into the base with two bobby pins crossed in an X. Always pull the wrap section from underneath, never the crown, or you leave a gap in the volume you just built.
How do you get volume in a messy ponytail?
Tug five or six thumb-width crown sections straight upward about a quarter inch each after tying, holding the base steady with your other hand. Then backcomb the underside of the first two inches of the tail to build a cushion that props it up. Fine hair should also backcomb three crown sections at the root before tying.
Can you do a messy ponytail with short hair?
Yes, from roughly 8 or 9 inches. Use a bungee band, or two small elastics stacked half an inch apart so the lower one takes the strain and the upper one holds the shape. Push two bobby pins upward into the base from underneath to catch the nape layers. Under about 8 inches, a half-up messy ponytail works better than a full one.
How do you stop a messy ponytail from falling out during the day?
Grip and tension, in that order. Dry shampoo the roots the night before, use a bungee band or two stacked elastics rather than one stretched tie, and cross two bobby pins in an X under the base so the tie cannot travel down the tail. When it does drop, tug four crown sections back up rather than re-tying, which costs you the texture.
Are messy ponytails bad for your hair?
A loose messy ponytail is one of the gentler styles, far kinder than a tight sleek one, because the base is deliberately slack. The risk comes from tying tightly in the same spot daily, which stresses the same follicles at the hairline. Move the tie point half an inch each day, avoid rubber bands, and take it down before sleeping.
Messy ponytail or sleek ponytail, which is better?
It depends on the occasion and your hair. Messy wins for work, school, gym, humidity and layered or fine hair, and it holds 6 to 10 hours with almost no scalp tension. Sleek wins for formal events and photography on thick, straight, one-length hair, but it needs gel, a brush and real tension at the hairline, and flyaways ruin it faster.
Which messy ponytail look are you saving?
If you take one thing from these 20 steps, take the sequence: grip first, placement second, volume third, face-framing pieces last. Everything that makes a messy ponytail look accidental is deliberate, and everything that makes it look untidy comes from doing those four things out of order. Tug six small crown sections rather than one handful, wrap a strand around the elastic and pin it under, and stop touching it once it looks right. Re-tie every second day rather than every morning so the tension point moves. Then pick your version from the messy ponytail hub, whether that is a high messy ponytail or a softer low messy ponytail.