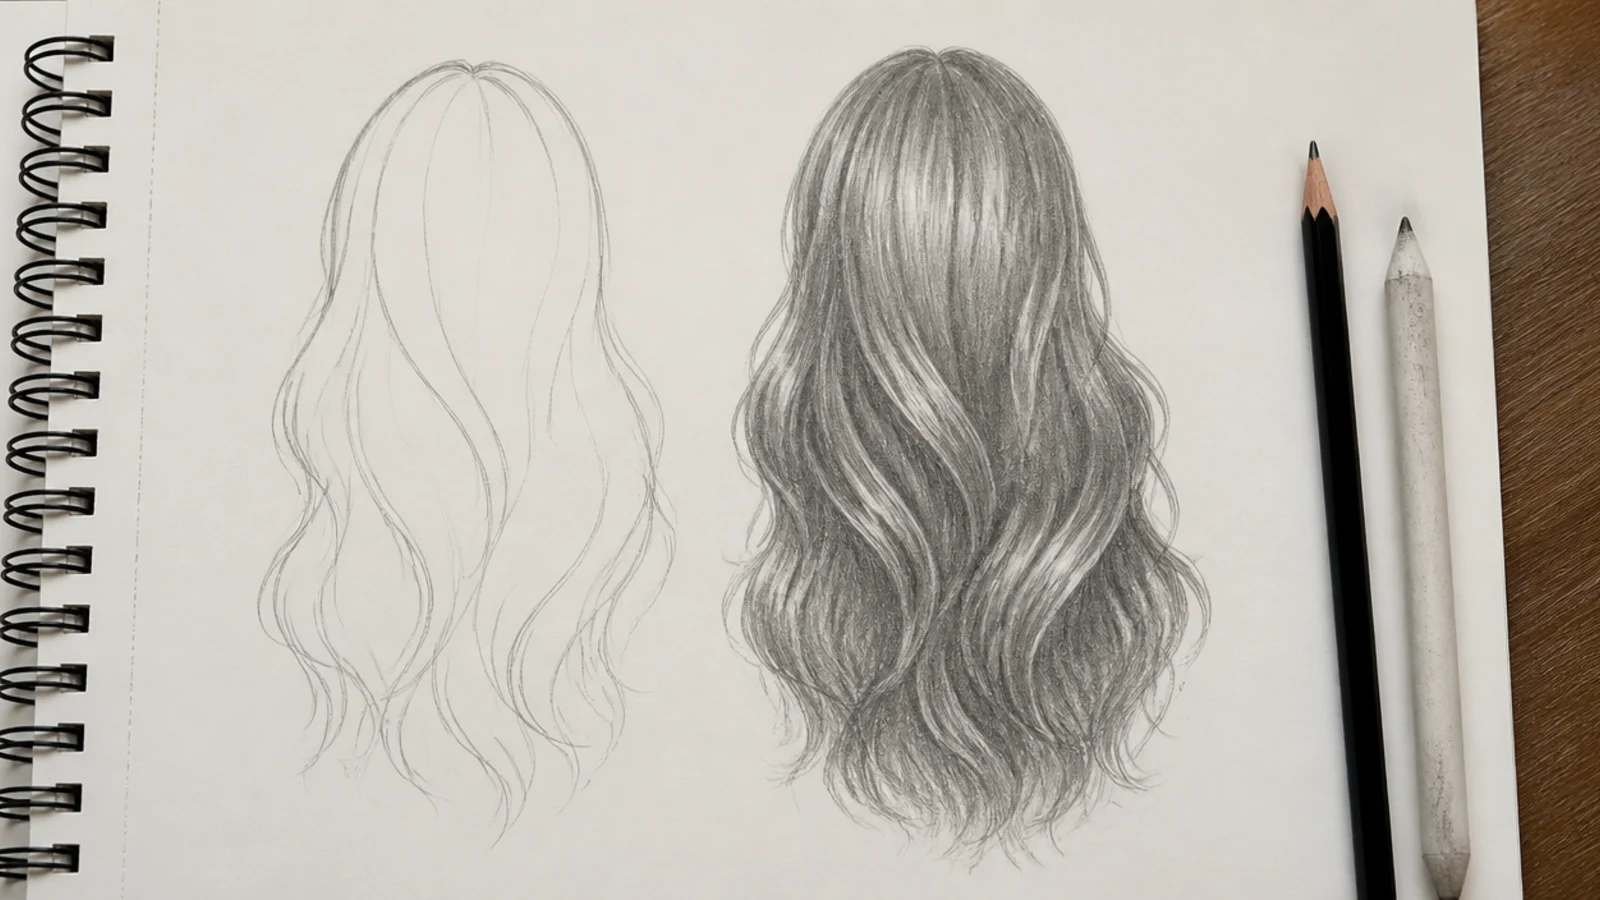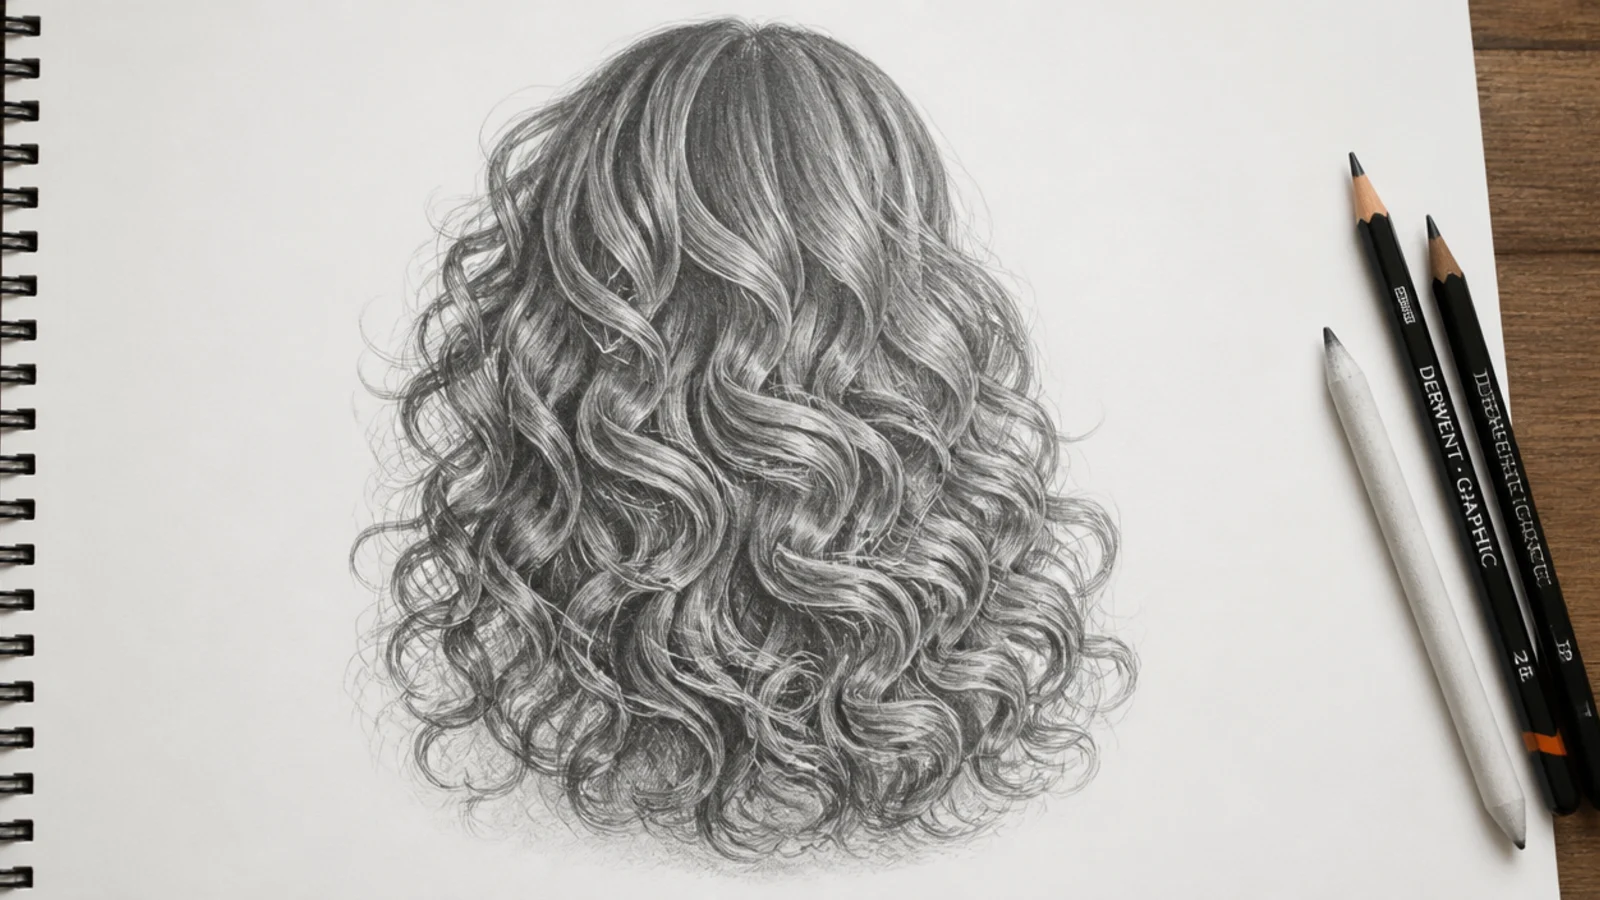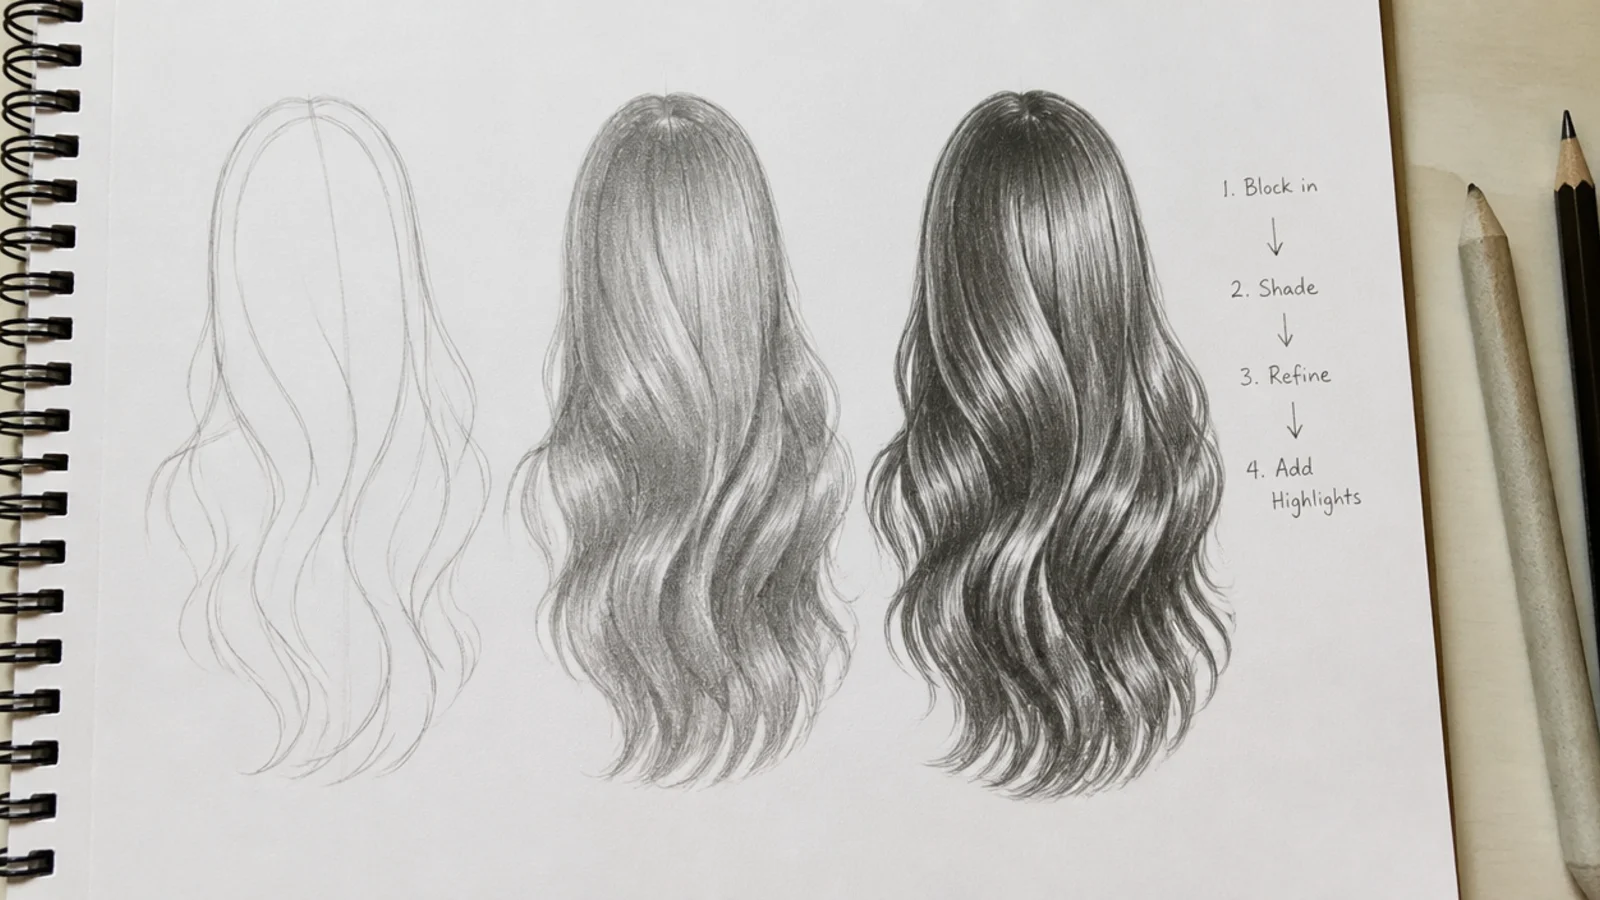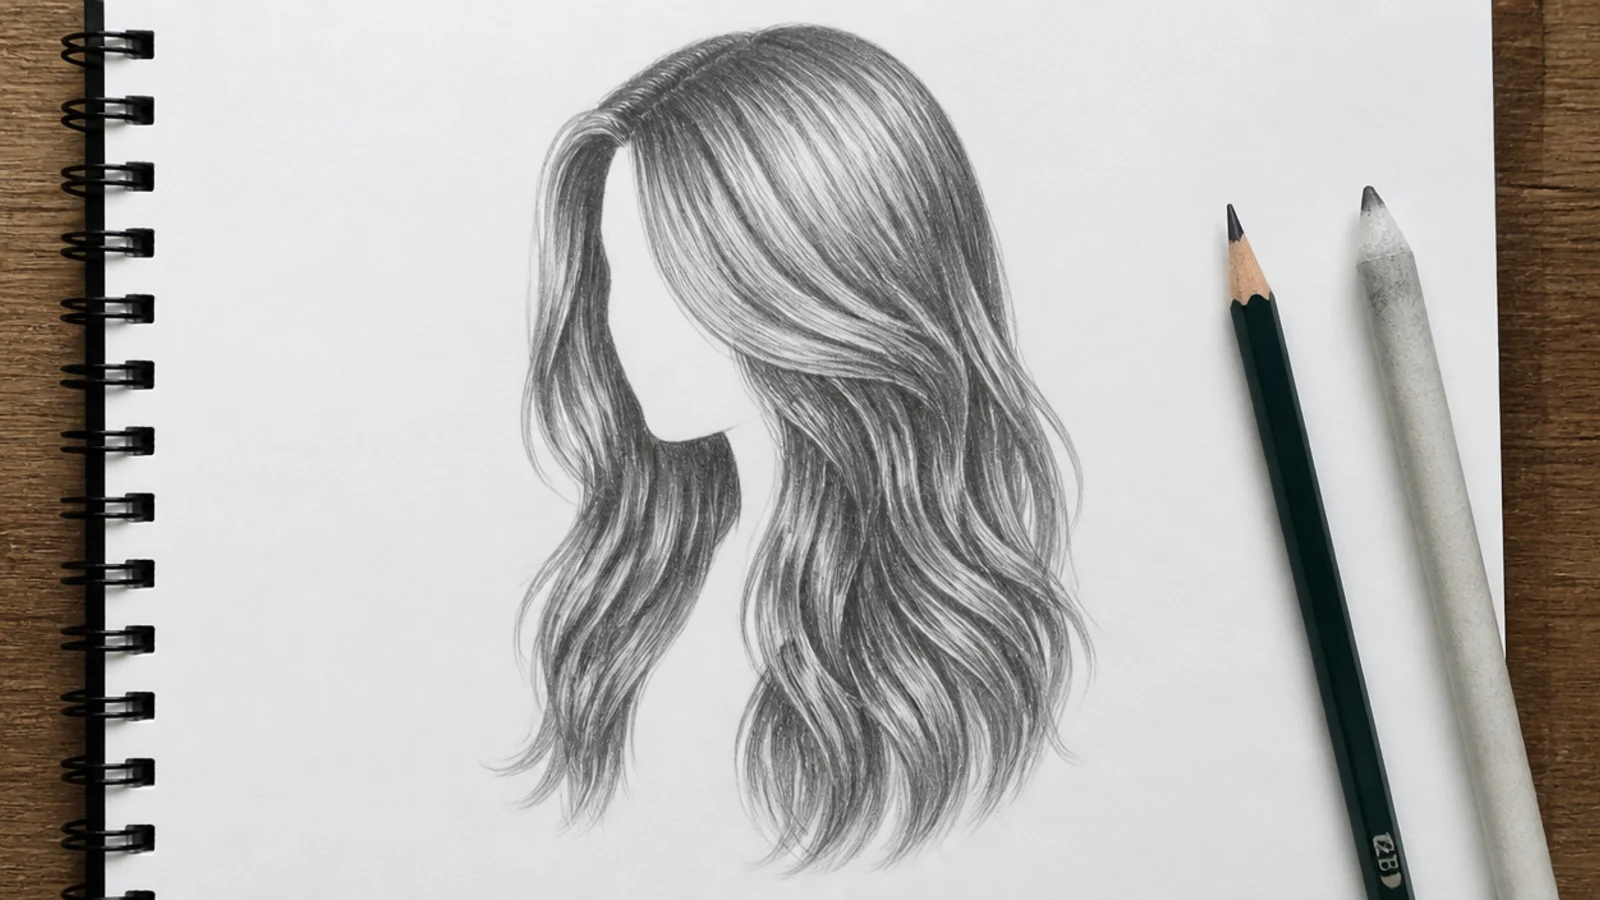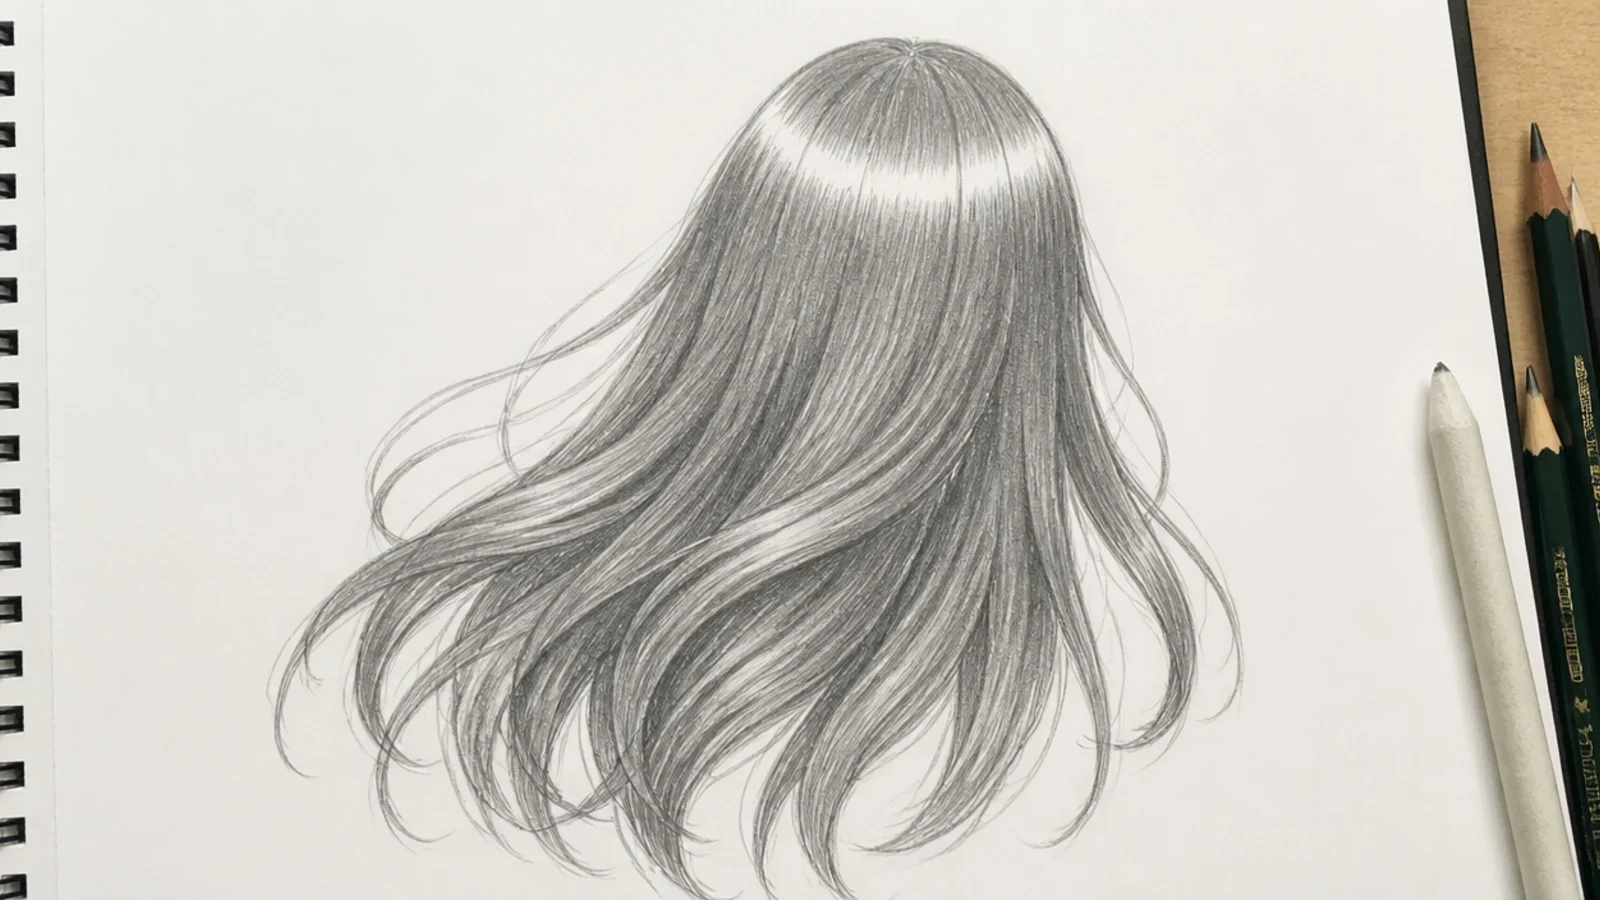
Quick Comparison
| Anime Hair Sketch | Realistic Hair Sketch | |
|---|---|---|
| Starting shape | Silhouette blocked as three to twelve large clumps | Silhouette blocked as one soft mass with no divisions |
| Number of values | Three flat values with hard edges between them | A continuous gradient with soft transitions |
| Highlight treatment | One curved band of bare paper across the crown | Scattered soft bands lifted with a kneaded eraser |
| Line weight | Visible outline in HB around every clump | No outline at all; edges are value changes only |
| Strand detail | Roughly 20 to 40 lines for a whole head | Hundreds of overlapping strokes in layers |
| Pencil range used | 2H guides, HB lineart, 4B shadow, 6B core | 2H through 8B plus blending stump and kneaded eraser |
| Time per sketch | About 20 to 40 minutes | About 2 to 5 hours |
| Hardest part | Designing a silhouette that reads at thumbnail size | Keeping value transitions smooth without muddying |
| Best for beginners | Yes; shape thinking is easier to learn than value | Later; it demands value control first |
1. Spiky Shonen Anime Hair Sketch
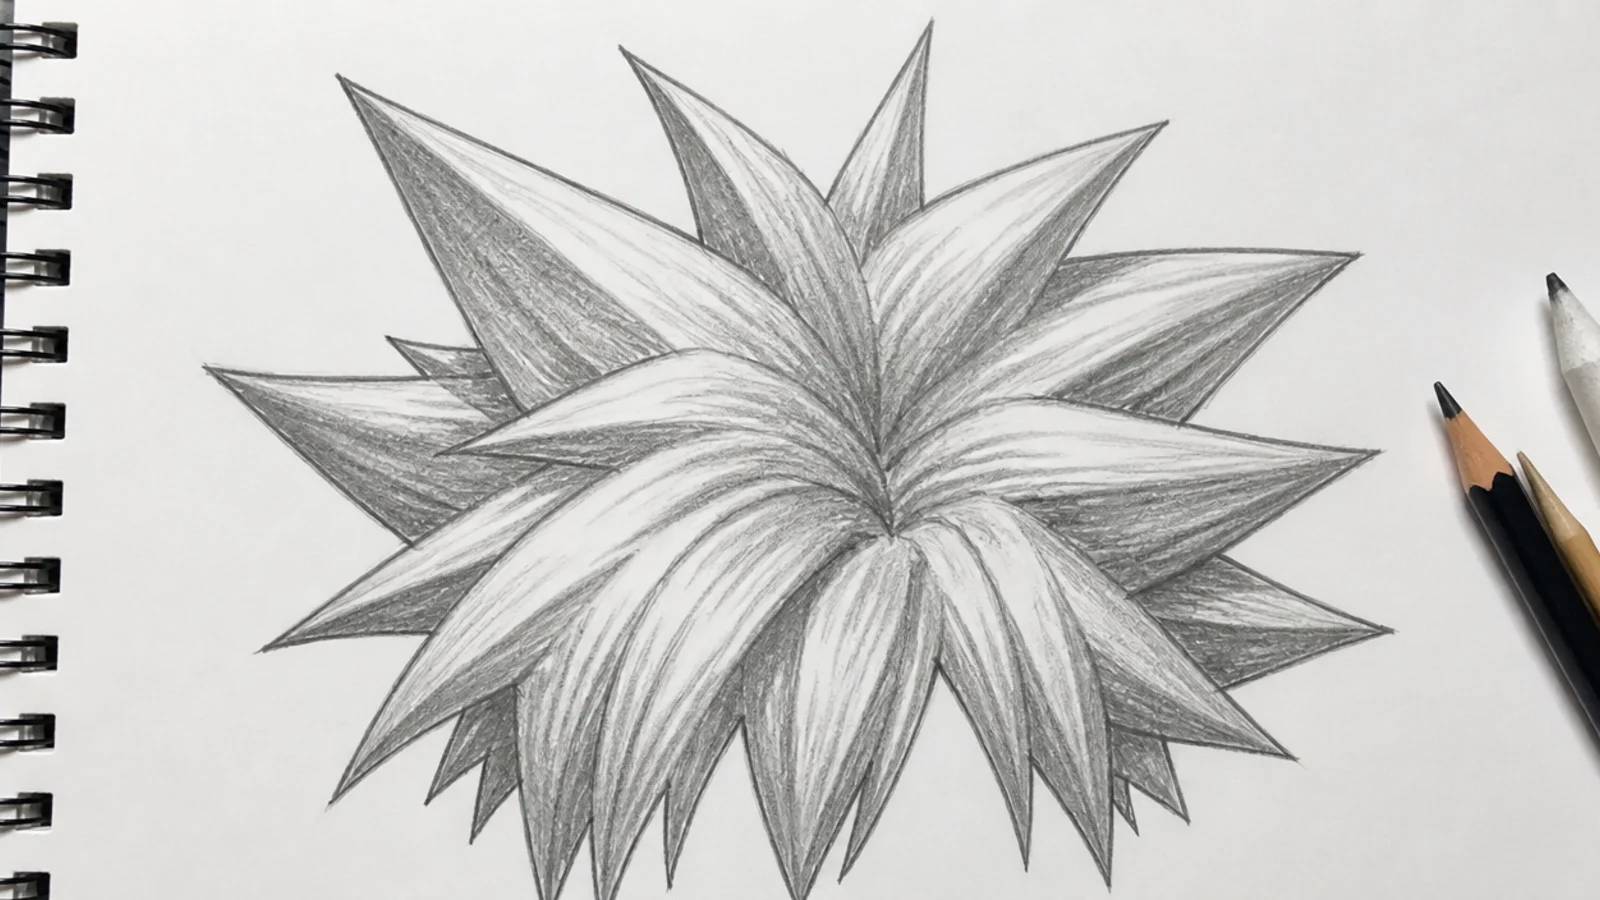
The classic action-hero shape: eight to twelve large triangular clumps radiating out from a single crown point, each spike between one and two head-widths long. Draw the skull circle in 2H, mark the crown, then block one continuous jagged silhouette around it before you split anything into spikes. Only then cut the outer edge into triangles of three different sizes so the rhythm looks natural. Keep implied gravity: the back spikes lift, the front ones drop toward the brow. Ink the outline in HB, shade the underside of every spike in 4B.
Who it suits: Absolute beginners and anyone practicing bold silhouettes.
Tip: Vary spike widths in a 3-2-1 rhythm; identical spikes read as a cartoon crown, not hair.
2. Long Straight Anime Hair Sketch to the Waist
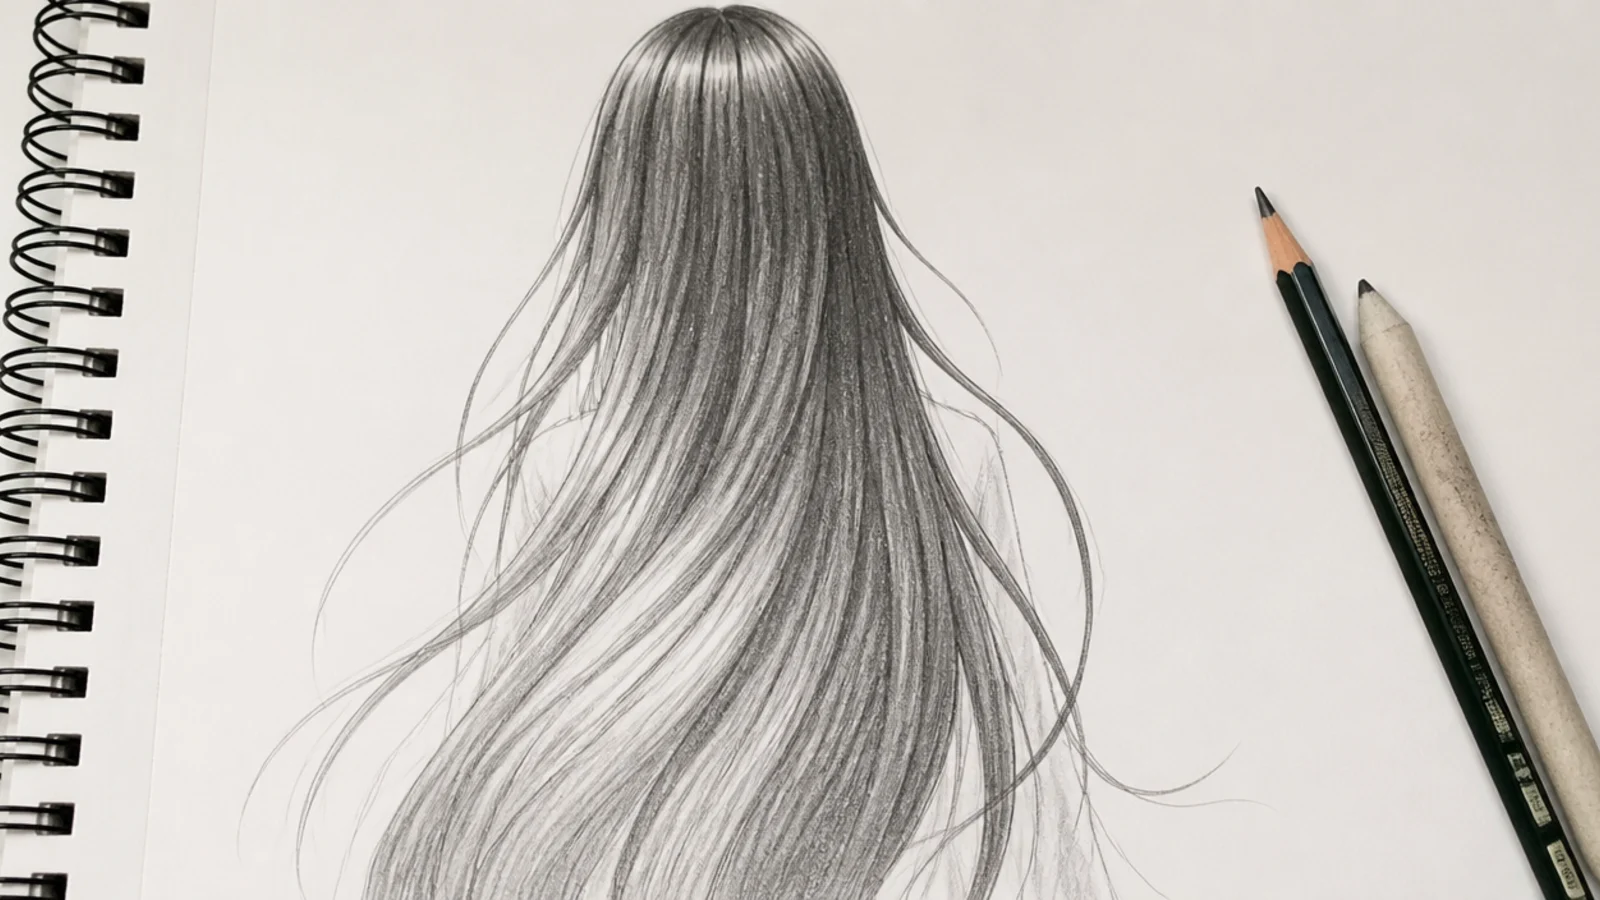
Waist-length hair drawn in single unbroken strokes from crown to hip, roughly two and a half head-lengths down. The trick nobody tells beginners is that even straight anime hair uses a shallow S-curve, never a ruler-straight line, because a slight bend gives it weight and air. Anchor the whole mass to a parting, then run three or four 2H guide lines the full length and build clumps between them. Short flicks at the very ends, no more than a fingernail long, keep the hem from looking cut with scissors.
Who it suits: Heroine designs, standing portrait poses and steady-hand practice.
Tip: Draw the full length in one arm movement from the shoulder, not the wrist, or the line will wobble.
3. Hime Cut Anime Hair Sketch With Blunt Sidelocks
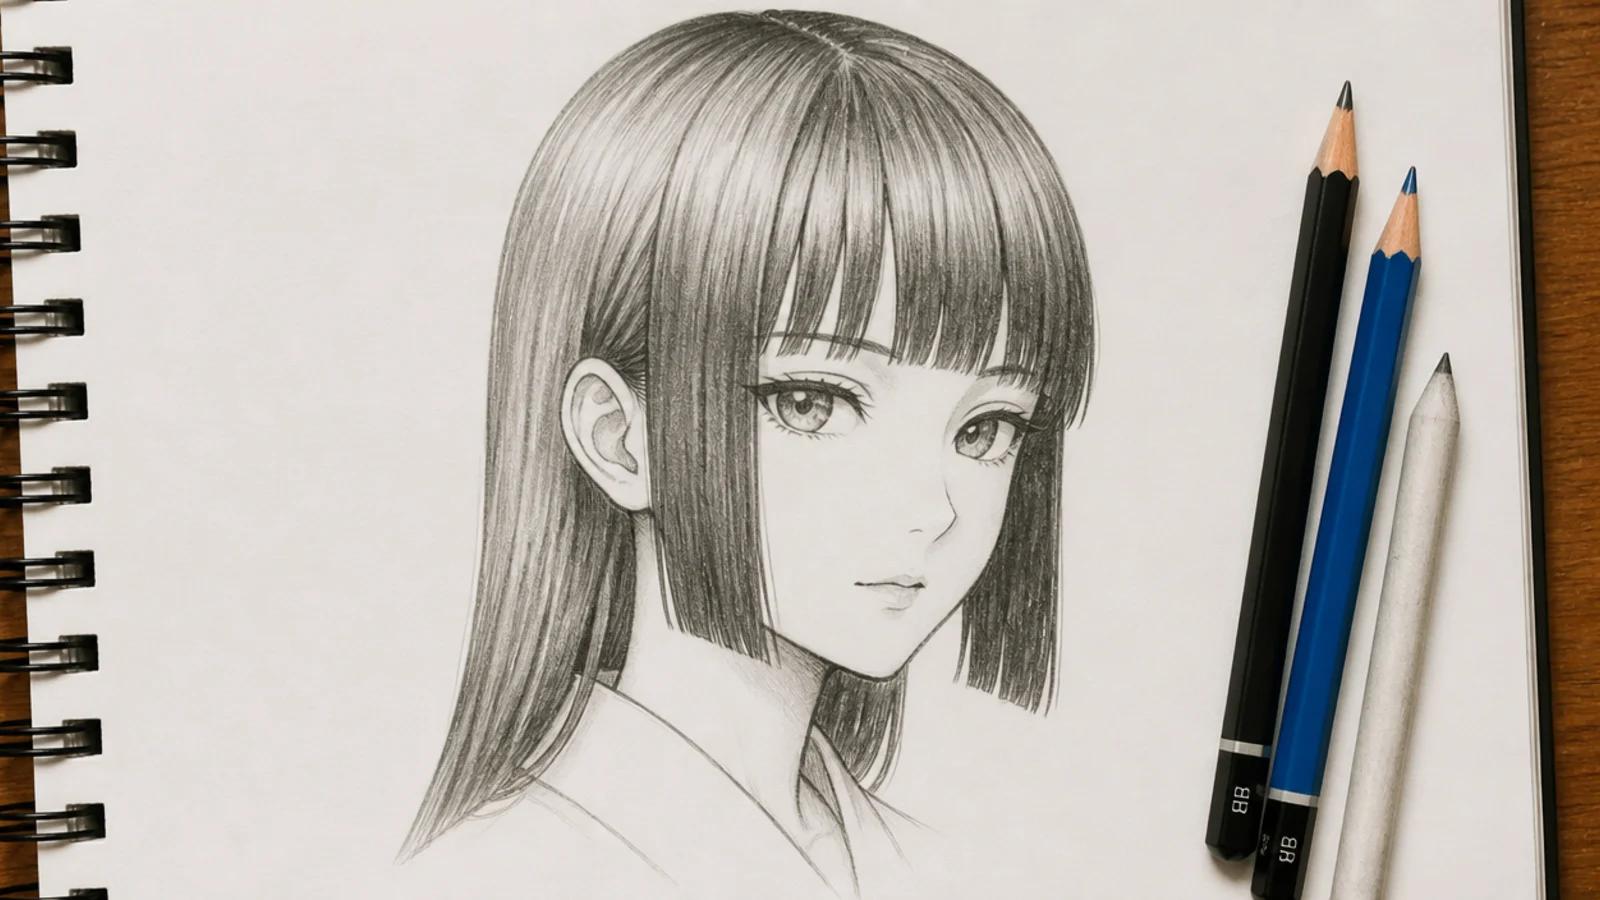
Three flat planes meeting at hard edges: a blunt fringe cut level with the eyebrows, two straight sidelocks ending at the jaw, and a long back mass. The hime reads as royalty because every edge is deliberately horizontal, so the fringe line and both sidelock hems should sit on ruled 2H guides before you commit. Leave a visible gap of a few millimeters between the sidelock and the cheek so the hair reads as hanging in front of the ear, not painted on it. Shade the sidelocks a value darker than the fringe.
Who it suits: Traditional, aristocratic or antagonist-adjacent characters.
Tip: Keep the fringe edge perfectly level; a tilted hime fringe instantly reads as an ordinary bob.
4. High Twin Tails Anime Hair Sketch
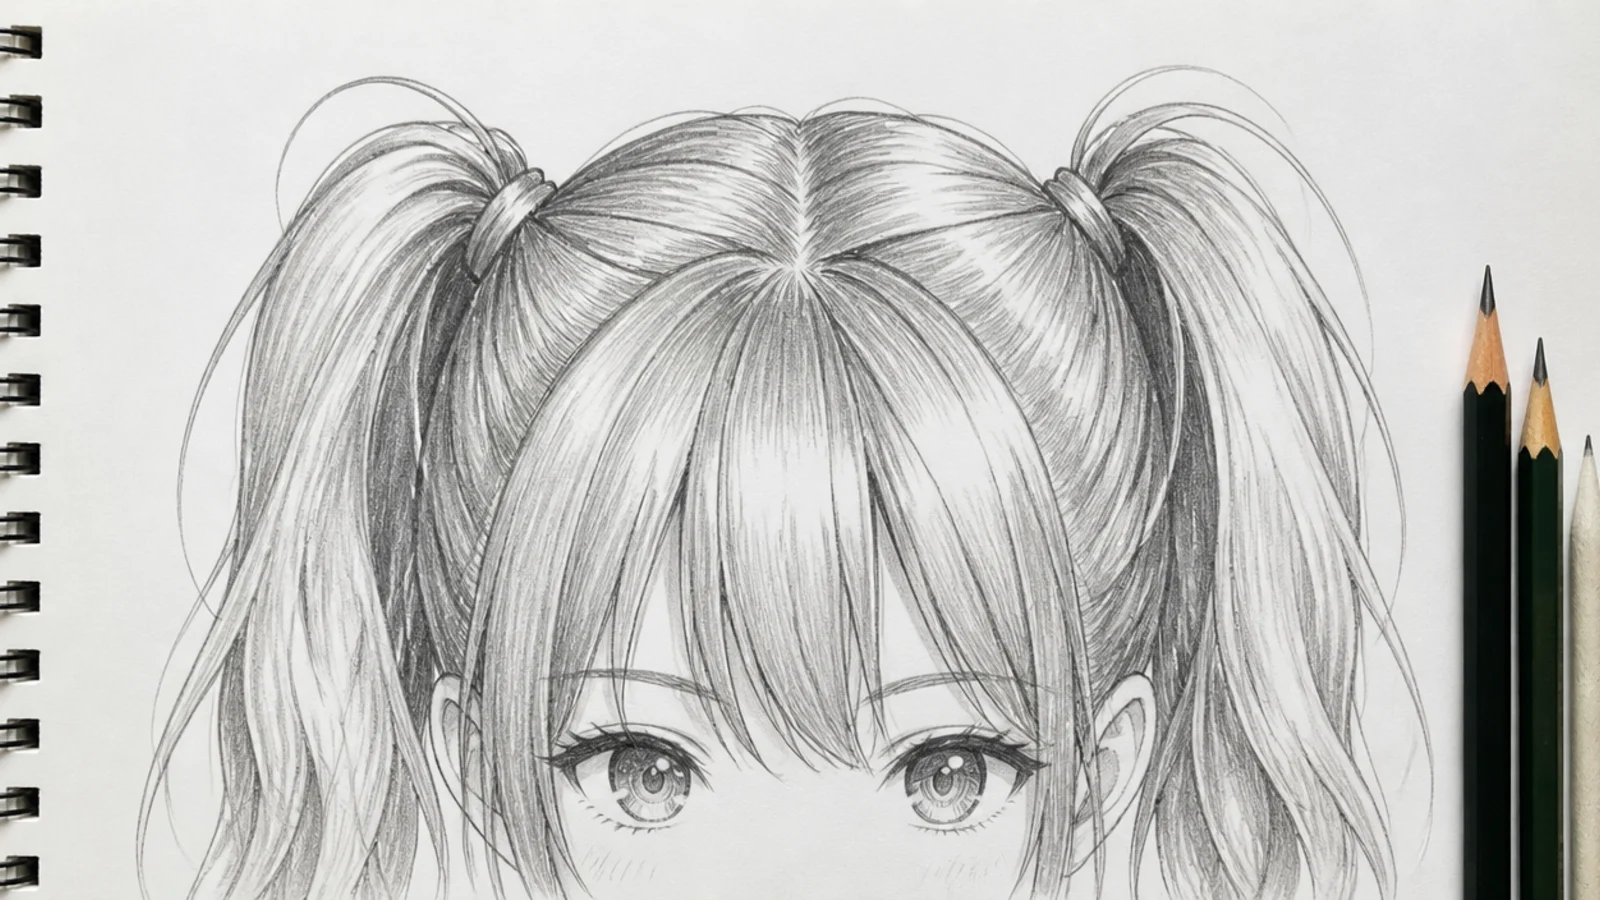
Two tails gathered above and slightly behind the ears, each flaring wider as it falls, like an upside-down teardrop. The gather point is the whole drawing: draw a small pinched knot with four to six converging lines, then let the tail balloon out from it. Beginners usually make the tails perfectly symmetrical, which kills the energy. Offset them by about ten degrees and give one a longer curve. The scalp lines still travel from the crown to each gather point, so sweep them diagonally rather than straight up.
Who it suits: Energetic, younger characters and dynamic poses.
Tip: Add three or four escaped strands at each gather; a perfectly clean knot looks like a wig.
5. High Ponytail Anime Hair Sketch From the Side
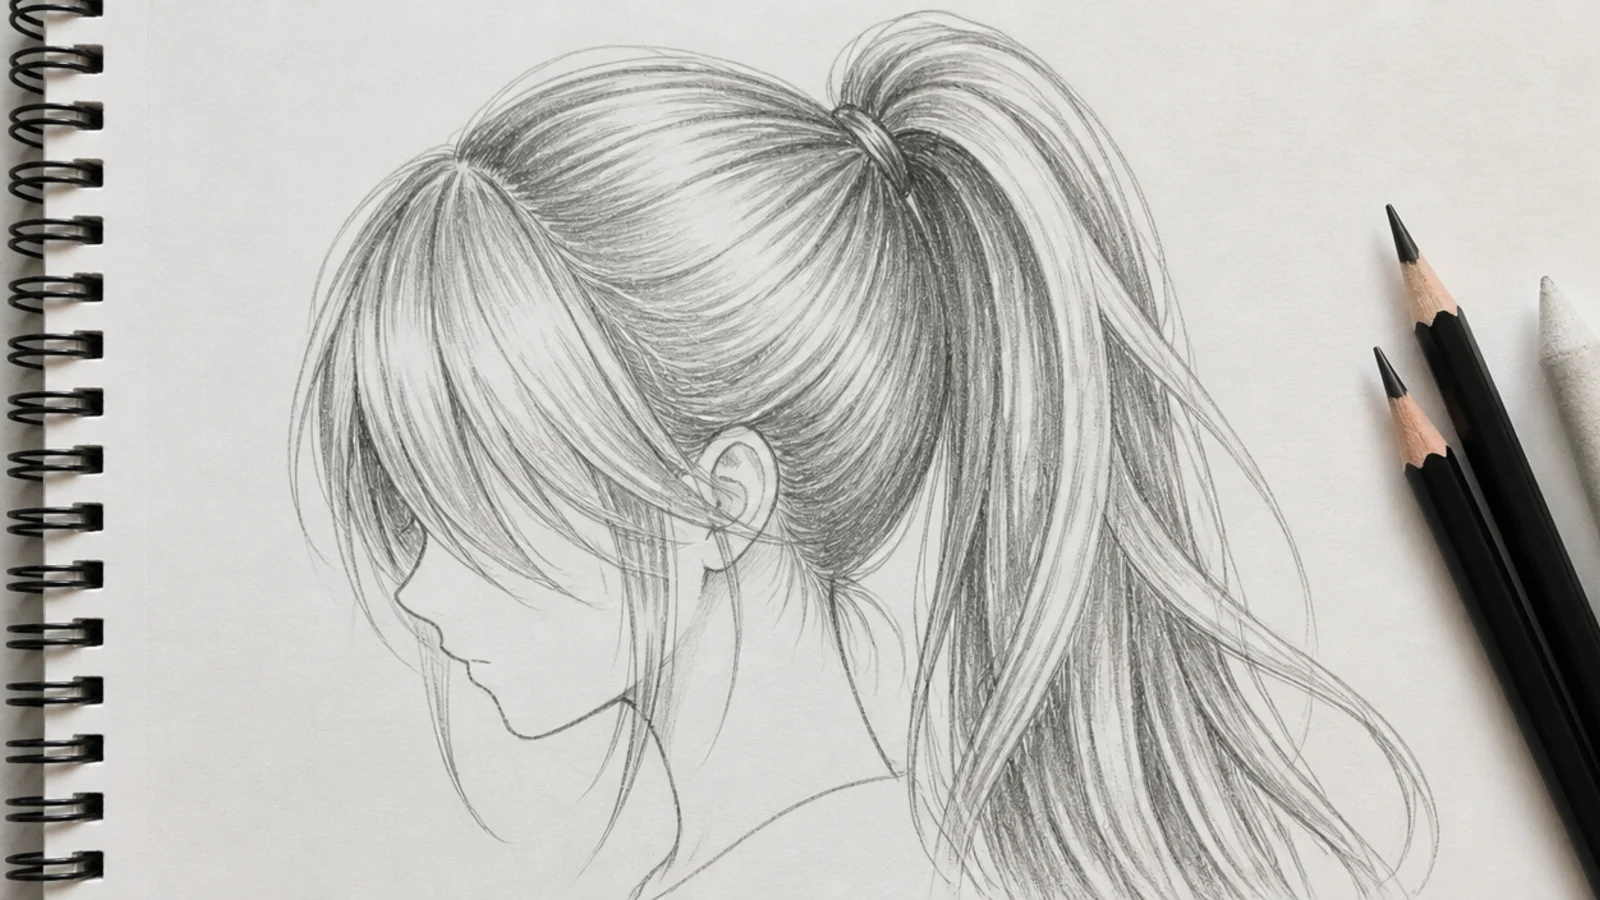
A single gather at the back top of the skull with the tail arcing out, up and then down under its own weight. Side view is the most useful angle to practice, because it forces you to draw the scalp lines sweeping backward across the head instead of hiding them. Sketch the skull, place the gather about one third down from the top of the crown, then draw the tail as one long comma. Anime tails are wider at the midpoint than at the base. A real reference for the shape sits in messy ponytail.
Who it suits: Athletic characters and anyone practicing scalp direction.
Tip: Bulge the tail at its midpoint, not at the base, or it will look like a rope.
6. Short Messy Anime Hair Sketch for Male Characters
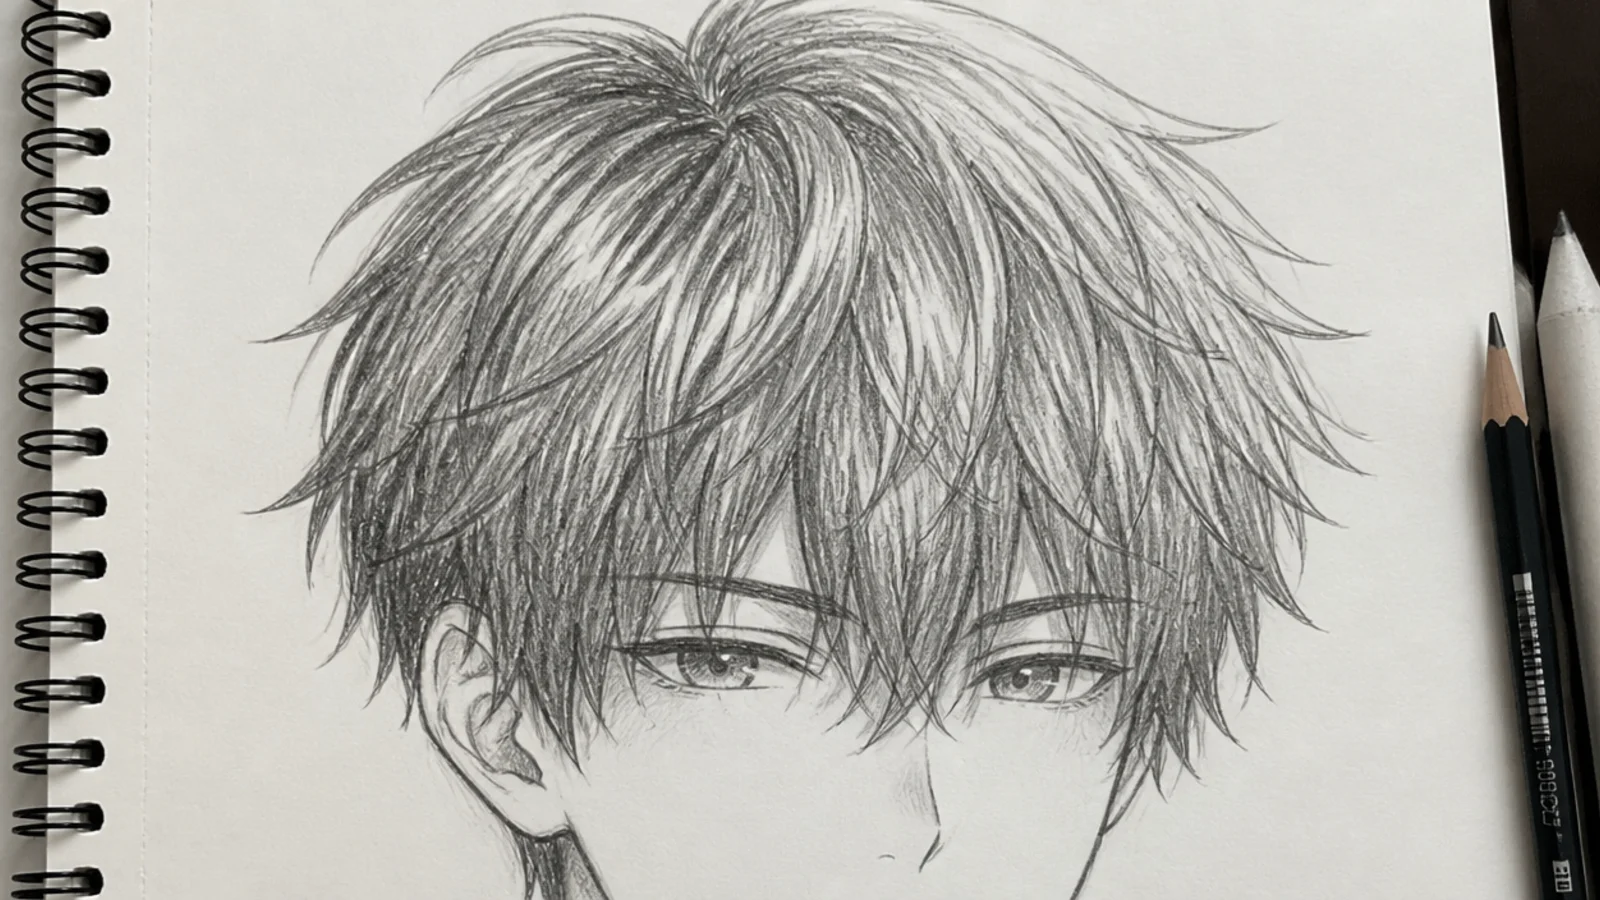
Ear-length hair with clumps pointing in three or four competing directions, the most common male anime cut and the one that most often goes wrong. The fix is to keep the silhouette a smooth rounded dome, roughly a centimeter clear of the skull all the way around, and let the mess live only in the interior clump edges. Mess in the outline reads as damage; mess inside the mass reads as texture. Drop two or three clumps over the forehead and let one cross the eyebrow to break the symmetry.
Who it suits: Male leads, side characters and quick warm-up sketches.
Tip: Keep the outer silhouette calm and put all the chaos in the interior lines.
7. Hair Over One Eye Anime Hair Sketch
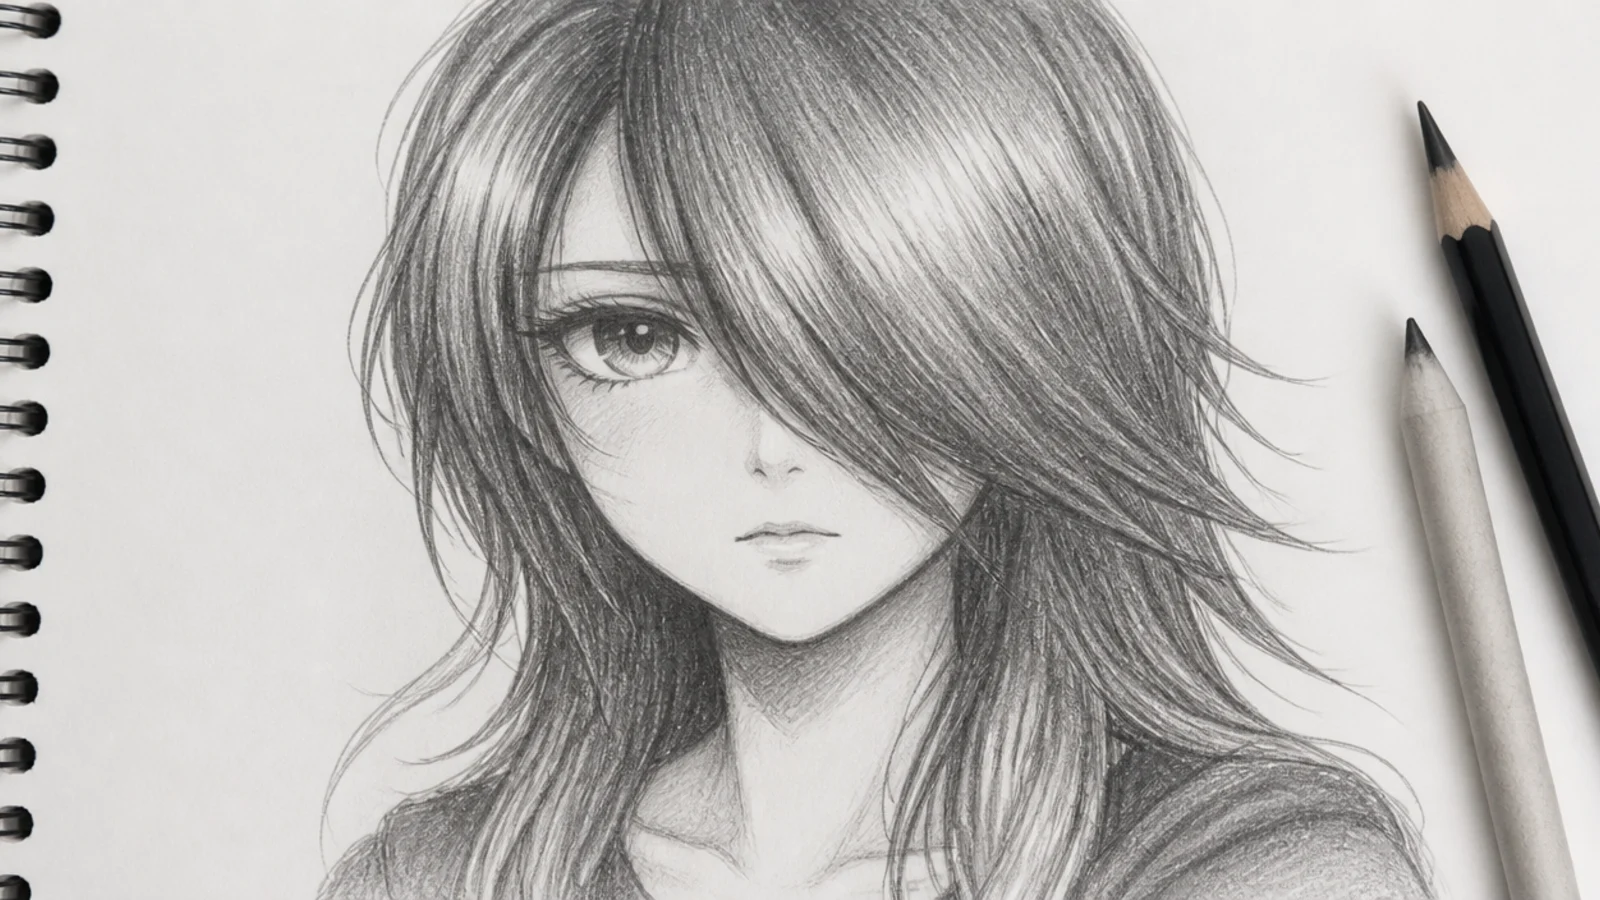
A deep side part with one heavy curtain of hair sweeping diagonally across the face and covering an eye at the outer corner. The angle matters more than the length: run the sweep at about thirty degrees off vertical so it crosses the brow, not the nose. Draw the hidden eye lightly in 2H first, then cover it, because the visible eyelashes and brow edge have to line up with something real. Feather the leading edge with four or five fine strands so it does not read as a solid flap.
Who it suits: Moody, mysterious or reserved character designs.
Tip: Sketch the covered eye first and erase it after; guessing the position always looks off.
8. Curly Anime Hair Sketch With Ribbon Spirals
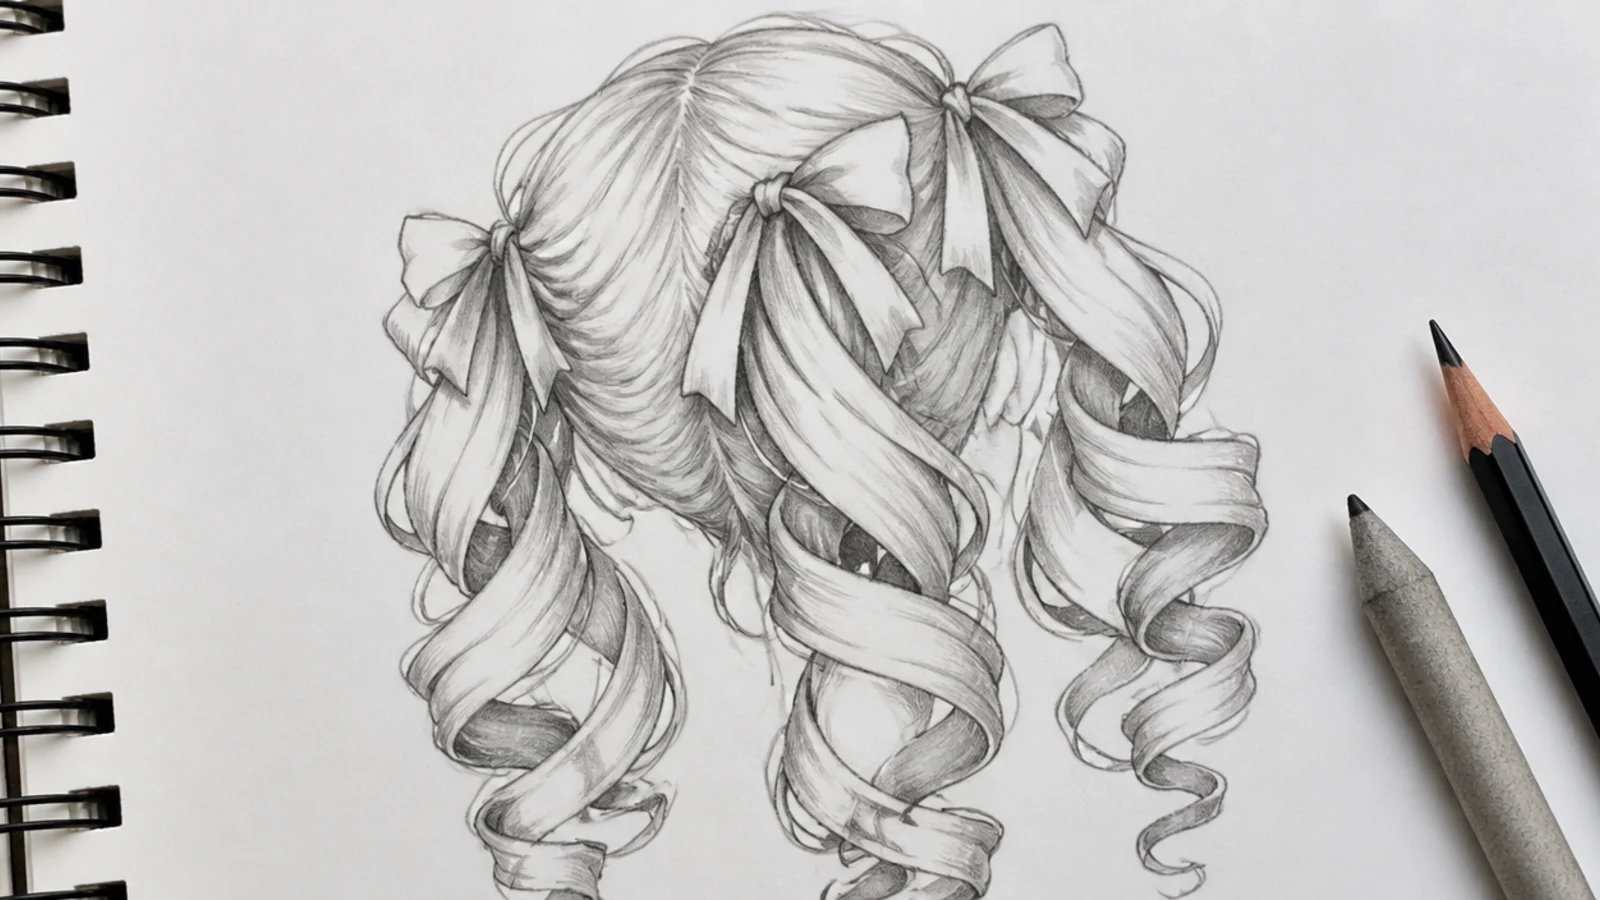
The hardest anime hair type, and the reason is that beginners outline coils instead of drawing ribbons. Treat each curl as a flat ribbon twisting in space: an S or a spiral where light hits one face and the opposite face goes to 4B shadow, alternating down the length. Never draw a closed loop. Block the overall mass as a soft cloud first, mark six to eight curl centers, then build ribbons outward. Full texture breakdowns live in curly hair sketch.
Who it suits: Intermediate artists ready to leave flat shapes behind.
Tip: Alternate light and shadow on opposite faces of each twist; even shading flattens the curl.
9. Double Odango Buns Anime Hair Sketch
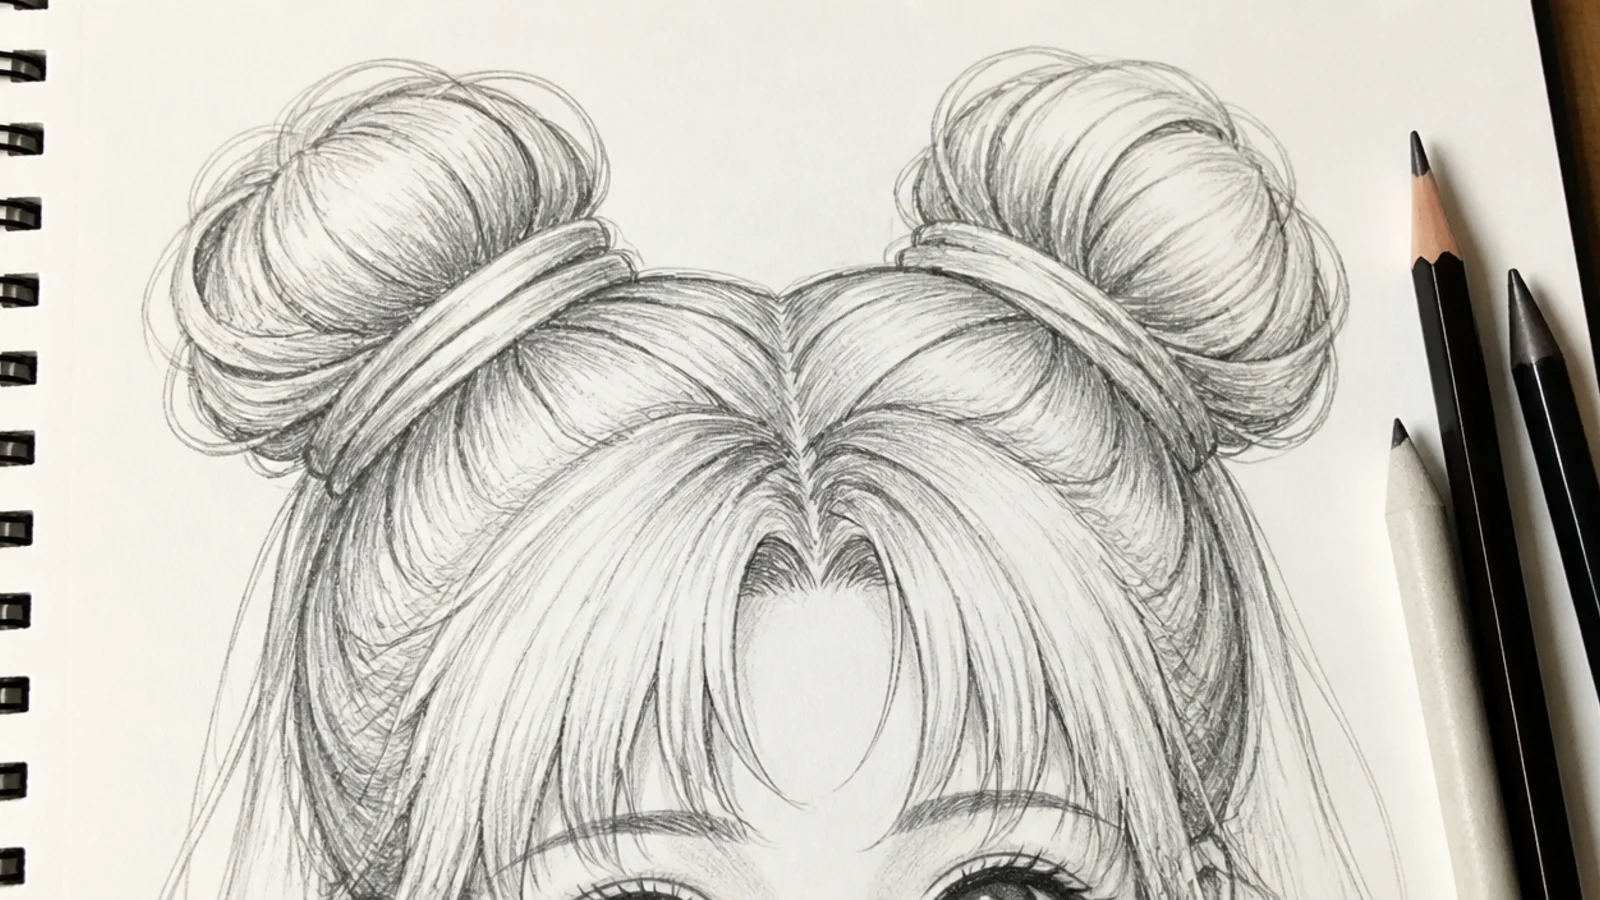
Two round buns sitting high on the skull, each drawn as a slightly squashed sphere with strands wrapping around it like the seams of a ball. Get the sphere shading right and the bun works instantly: a small crescent highlight on the upper outer face and a 6B crescent underneath where it meets the head. Draw the wrap lines curving with the sphere, never straight across. Place the buns wide, about one eye-width outside the skull silhouette, so they read as attached rather than balanced on top.
Who it suits: Playful designs and anyone practicing spherical form.
Tip: Shade each bun as a sphere before adding a single strand line.
10. Single Side Braid Anime Hair Sketch
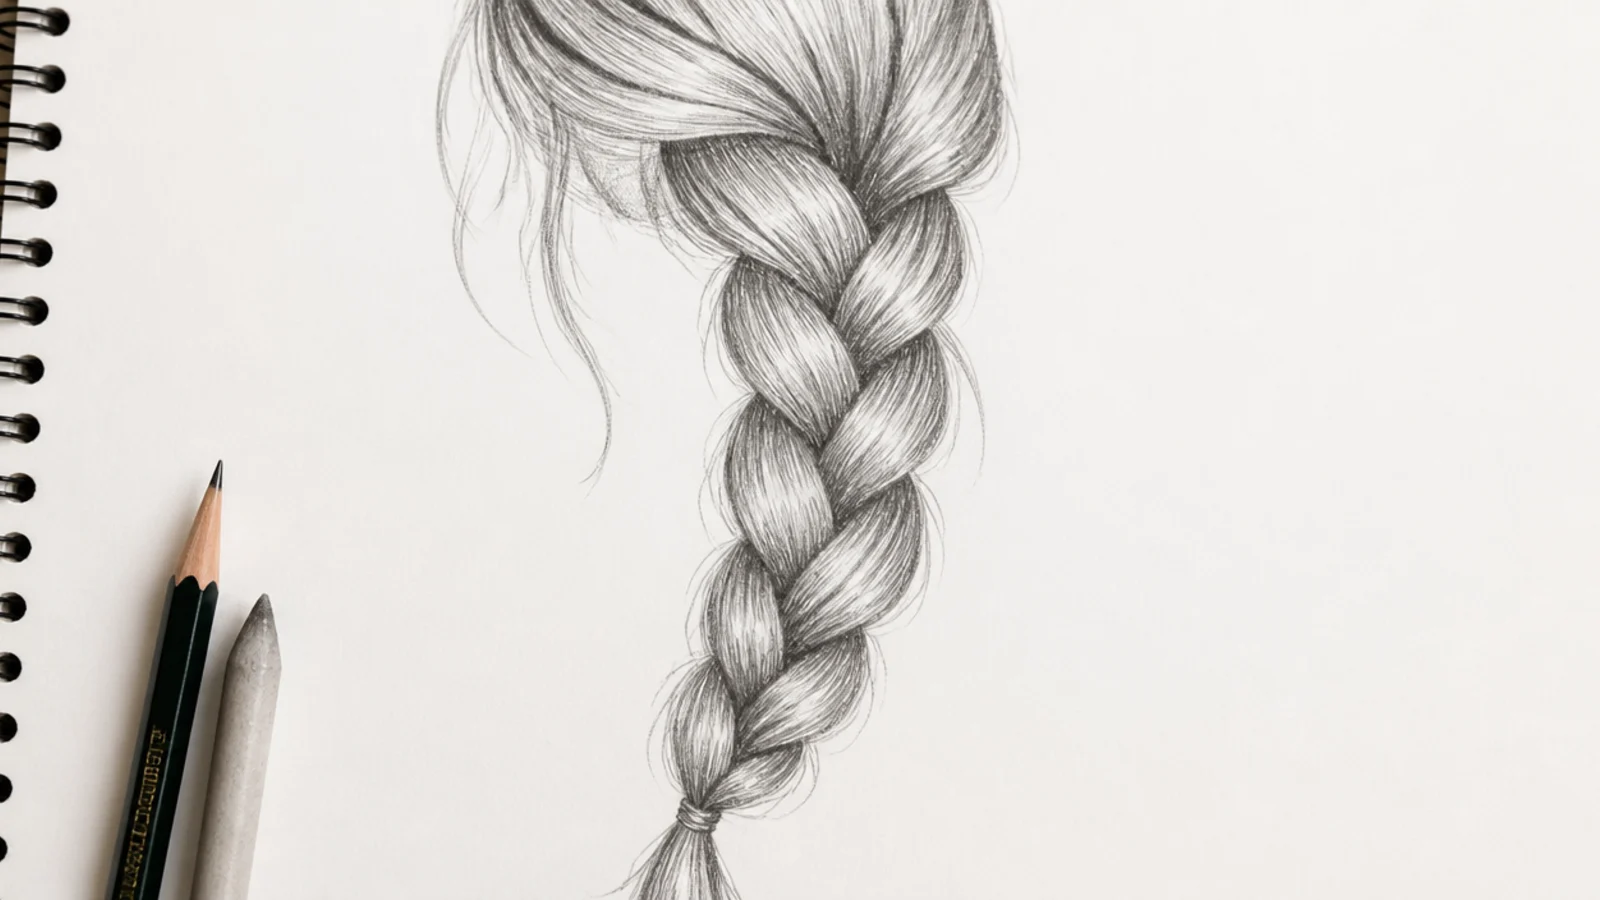
A braid drawn over the shoulder as a column of stacked teardrops that alternate left and right and shrink as they travel down. Anime braids simplify hard: eight to twelve segments is plenty for a chest-length braid, where a realistic one would need thirty. Draw a single curved spine first, then hang the teardrops off it at alternating angles of about forty-five degrees. Shade the deep V between each segment in 6B, since those dark notches are what sells the weave. For the real-world shape, see mermaid braids.
Who it suits: Fantasy characters and long-hair practice.
Tip: Shrink each segment about five percent as you go down so the braid tapers naturally.
11. Wind-Blown Anime Hair Sketch in Motion
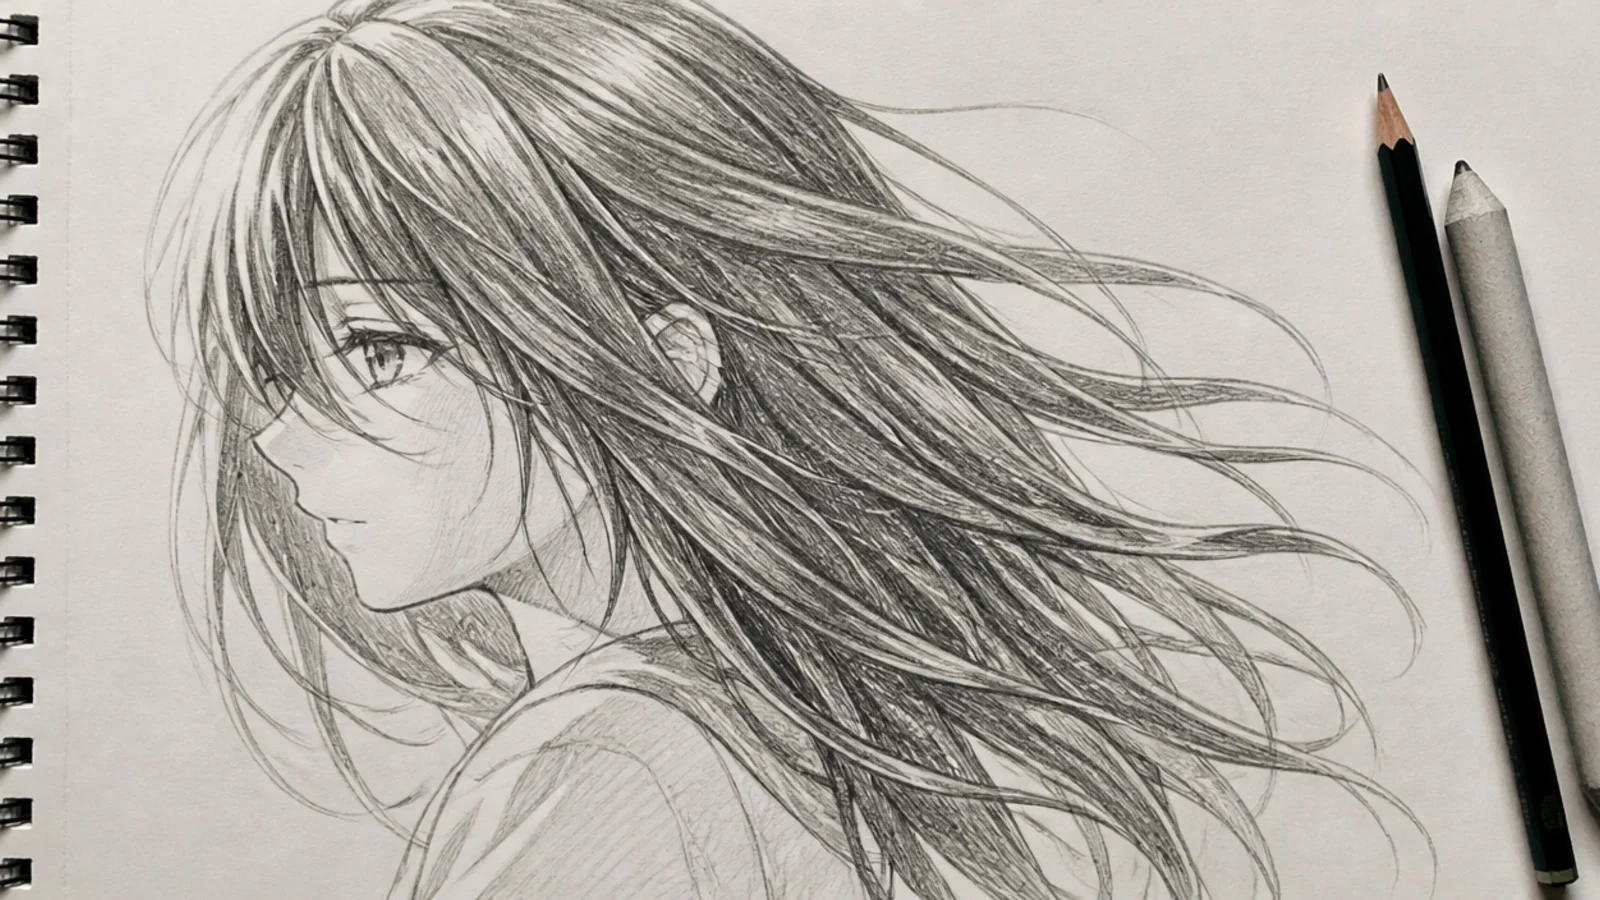
Long hair pulled sideways by an off-frame wind source, with the mass splitting into three or four separated ribbons that trail and curl at the tips. The rule that makes motion work is one direction and one exception: nearly every clump follows the wind, but one strand whips back the other way, and that single contradiction is what reads as air rather than a static sweep. Widen the gaps between clumps toward the tips. Keep the roots tight to the scalp so the head still feels solid.
Who it suits: Action scenes, cover illustrations and dramatic poses.
Tip: Add one strand that fights the wind direction; uniform motion always looks frozen.
12. Chibi Anime Hair Sketch at Small Scale
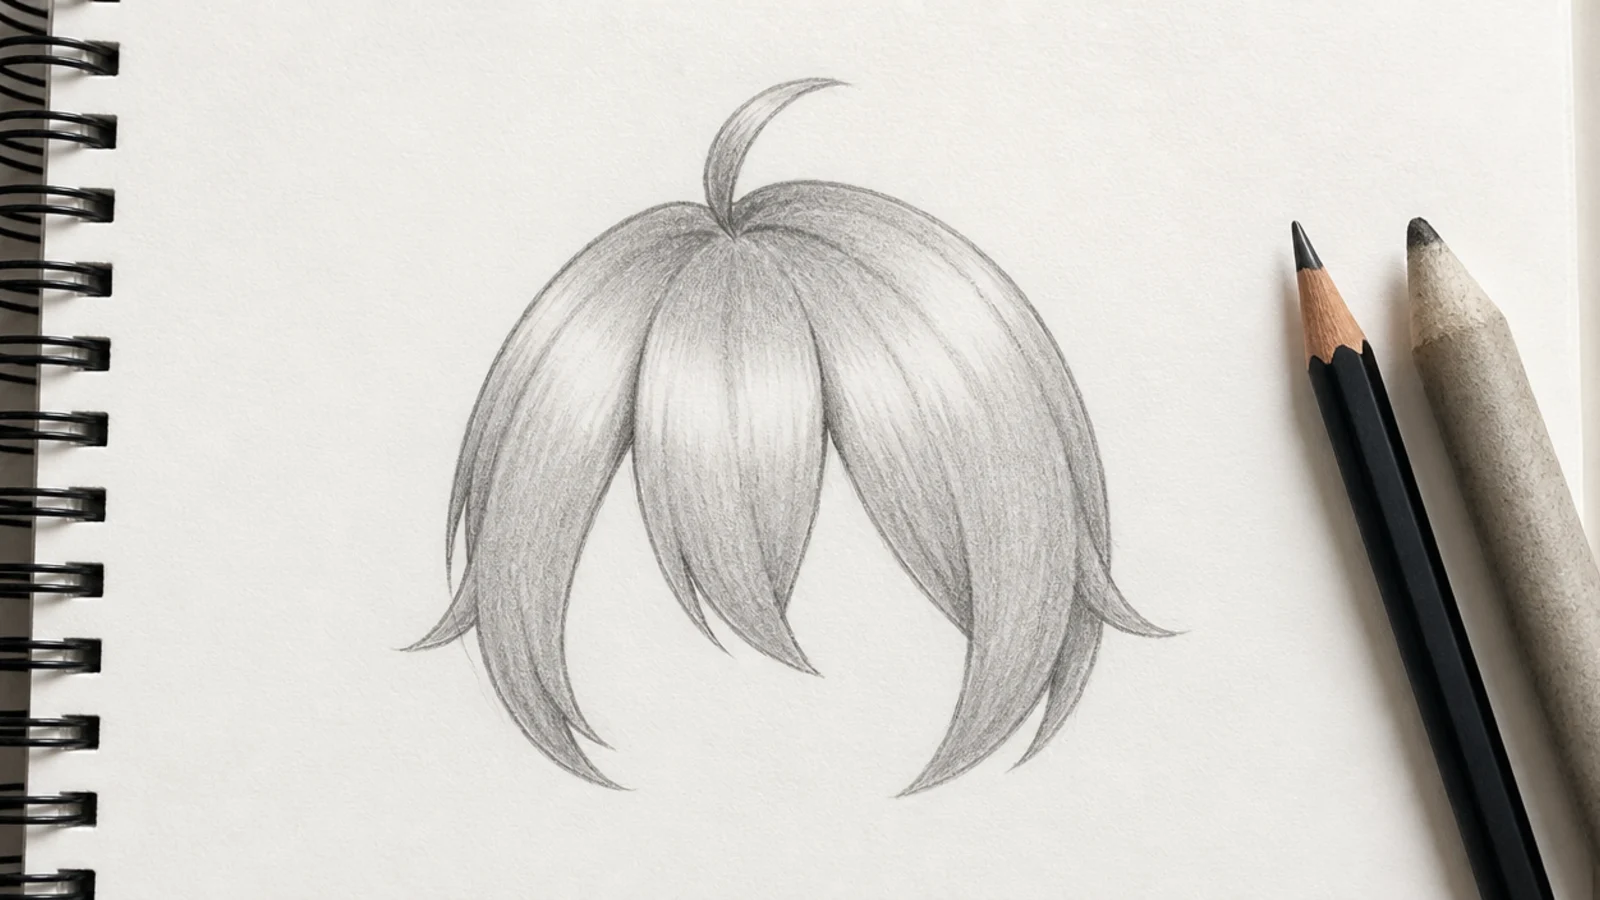
Hair for a head about two to three centimeters tall, which is a completely different problem from full-size hair. At this scale interior strand lines turn into gray mud, so cut the design down to three or four clumps total and let the silhouette carry all the personality. Push the volume: chibi hair should sit well clear of the skull, roughly a third of the head width, or it looks shaved. Use HB only, skip the 2B mid tone entirely, and put a single 4B shadow under the fringe.
Who it suits: Sticker sheets, margin doodles and small sketchbook studies.
Tip: If a detail is under two millimeters wide, delete it rather than drawing it faintly.
13. Villain Anime Hair Sketch With Sharp Angles
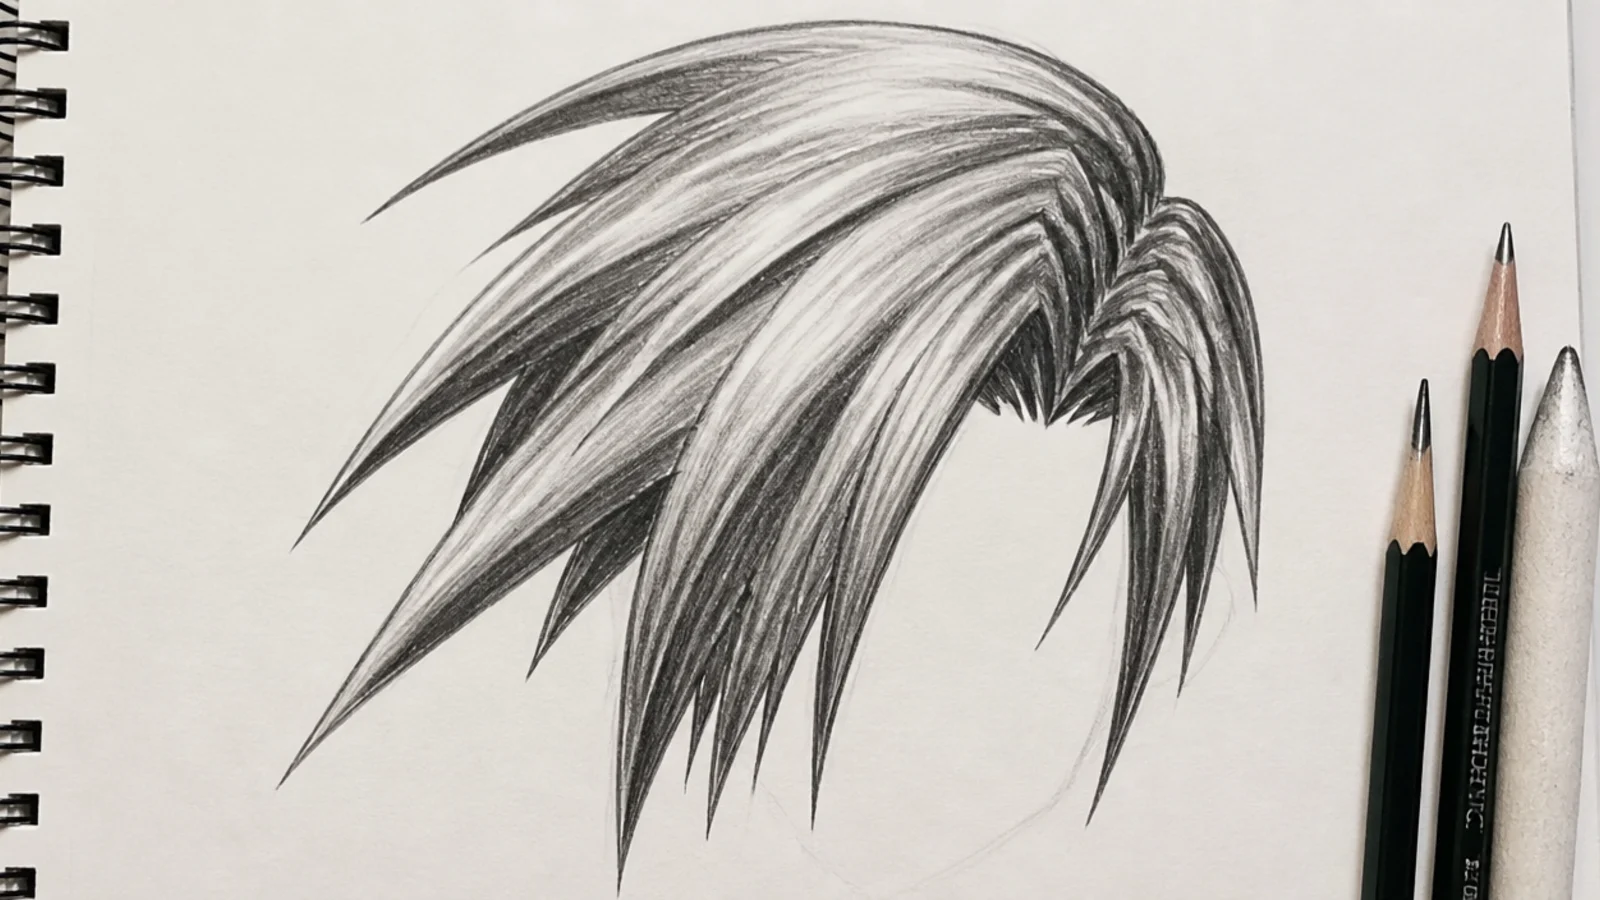
Antagonist silhouettes are built from downward-pointing acute angles, while hero hair points up and out. Slick the mass back tight to the skull, then let three or four long blades fall forward past the cheekbone with points sharp enough to look like weapons. Keep the value range extreme: almost white at the crown highlight, 6B black in the mass, nothing in between. Narrowing the silhouette at the temples makes the face read as colder. The whole effect comes from the silhouette, so thumbnail it in solid black first.
Who it suits: Antagonists, rivals and character design practice.
Tip: Thumbnail the shape as a solid black blob; if it does not read as menacing there, redesign it.
14. Undercut Anime Hair Sketch With Shaved Sides
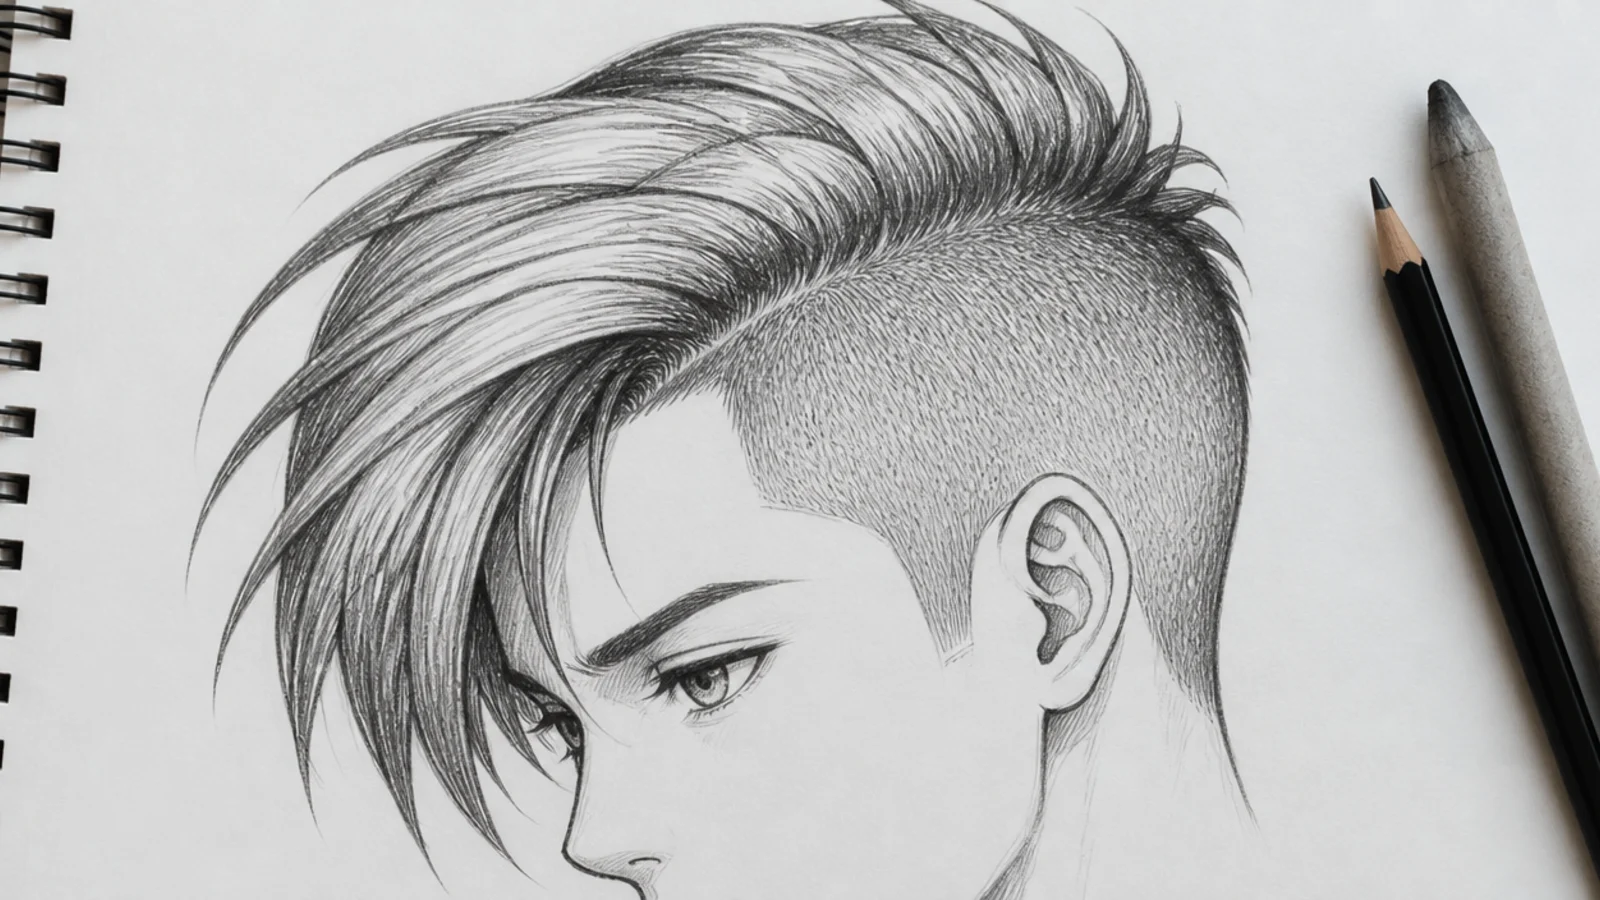
A hard horizontal line about level with the top of the ear divides a long swept top from short shaved sides. The two zones need two completely different marks: long fluid strokes above the line, and light stippling or short 2H flicks below it, never outlines. Shaved hair is a value, not a shape. Keep the shaved side about one value lighter than the mass above so the divide stays visible. Let three or four top strands cross the divide line to soften it.
Who it suits: Modern character designs and mark-making practice.
Tip: Render the shaved side with stipple texture, not lines; outlined stubble looks like a scar.
15. Wet Anime Hair Sketch After Rain
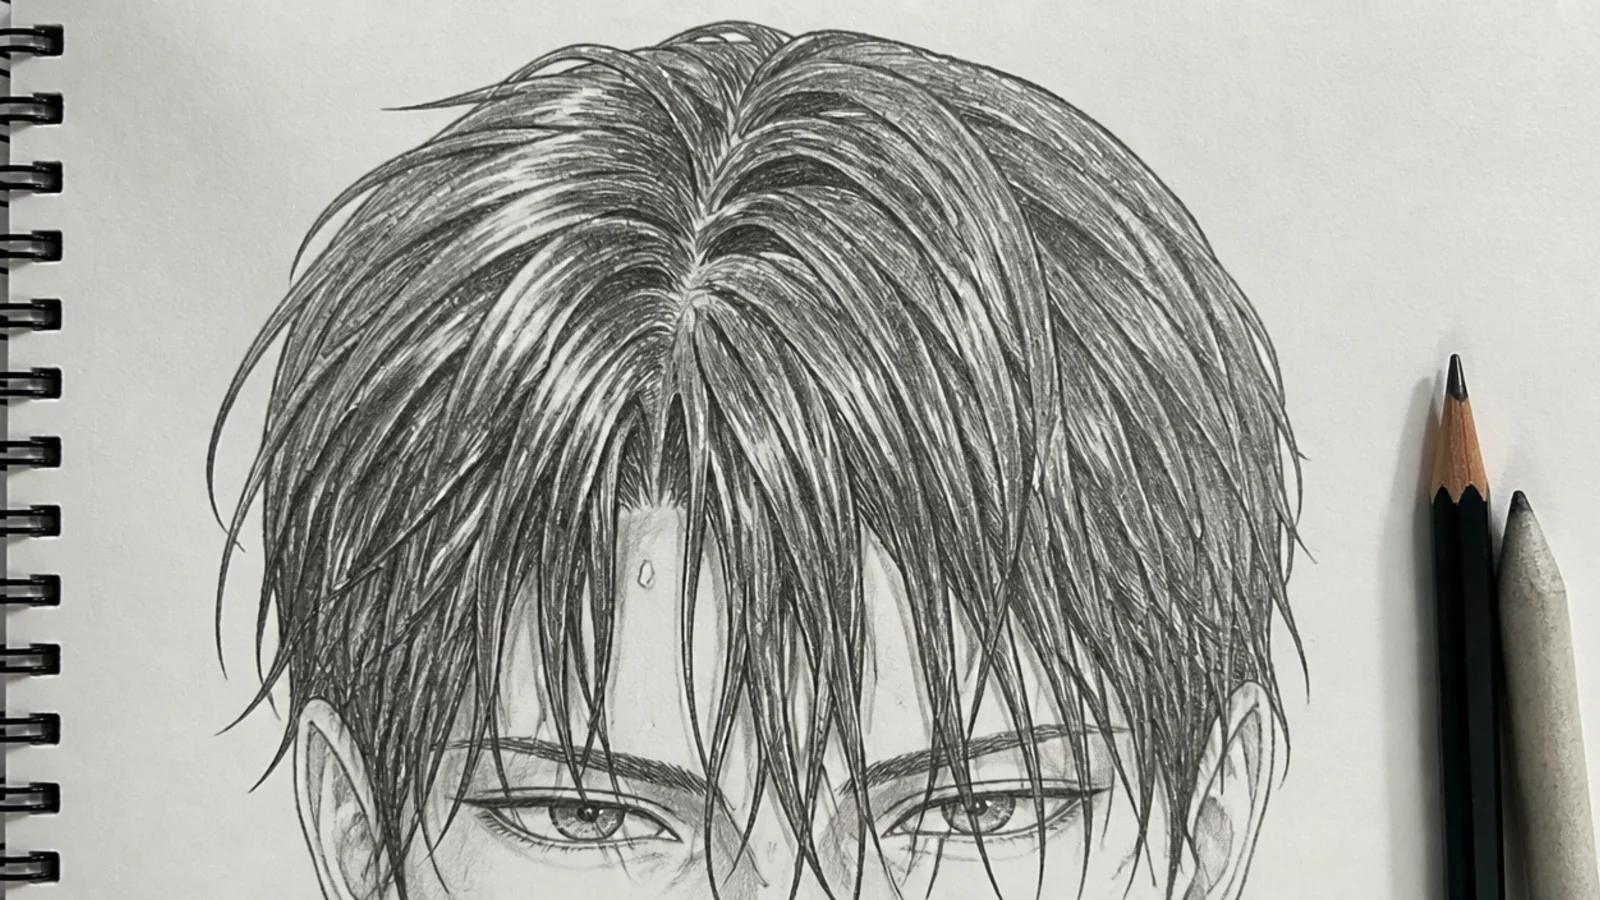
Water collapses volume and merges strands, so wet anime hair sits close to the skull with the clumps fused into fewer, heavier points. Drop the silhouette to within a few millimeters of the head, spike three or four clumps into sharp points over the forehead, and let one plaster flat against the cheek. Contrast does the rest: push the darks to 6B and leave hard-edged paper-white highlights right on the top curve, small and sharp instead of the soft band dry hair gets.
Who it suits: Emotional scenes and value-contrast practice.
Tip: Make wet highlights small and hard-edged; a soft blended highlight instantly reads as dry.
16. Ahoge Cowlick Anime Hair Sketch
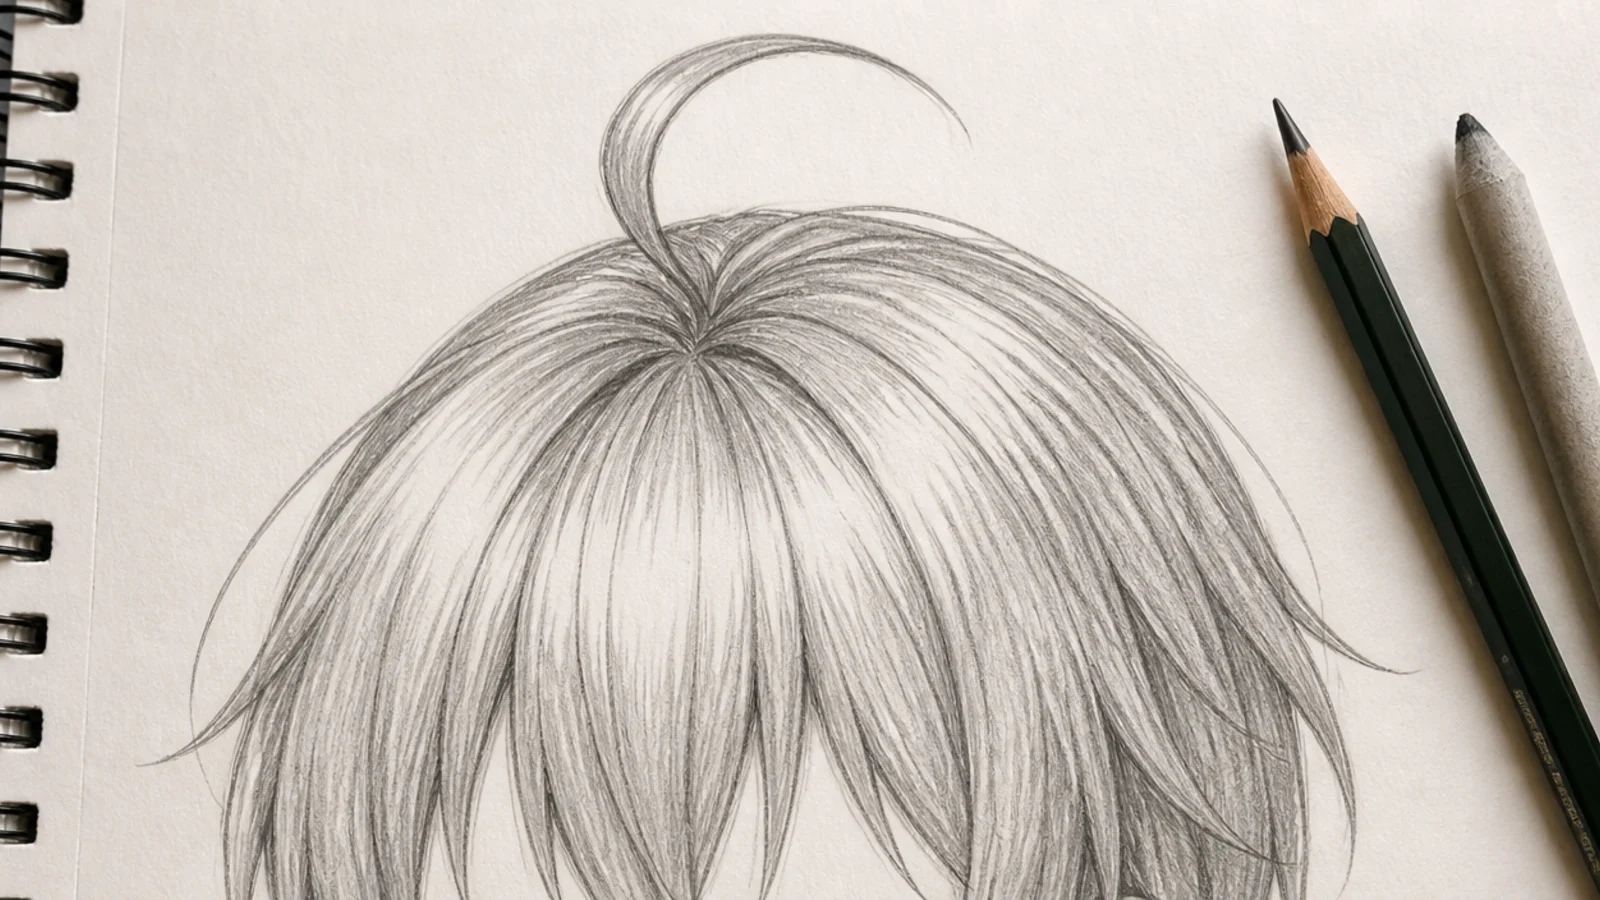
One single strand rising from the crown in a lazy curve or a small loop, the tiniest design element in anime hair and one of the most expressive. It has to grow from the exact crown point where all the other scalp lines converge, or it looks like a stray pencil mark. Draw it as a tapering line, thick at the root and fine at the tip, about half a head tall. Give it a shallow S rather than a rigid arc. On a bedhead design, pair it with two shorter cowlicks at the back.
Who it suits: Cheerful, clumsy or comedic characters.
Tip: Taper the ahoge from thick root to hair-fine tip; a constant-width line looks like an antenna.
17. Light Blonde Anime Hair Sketch in Graphite
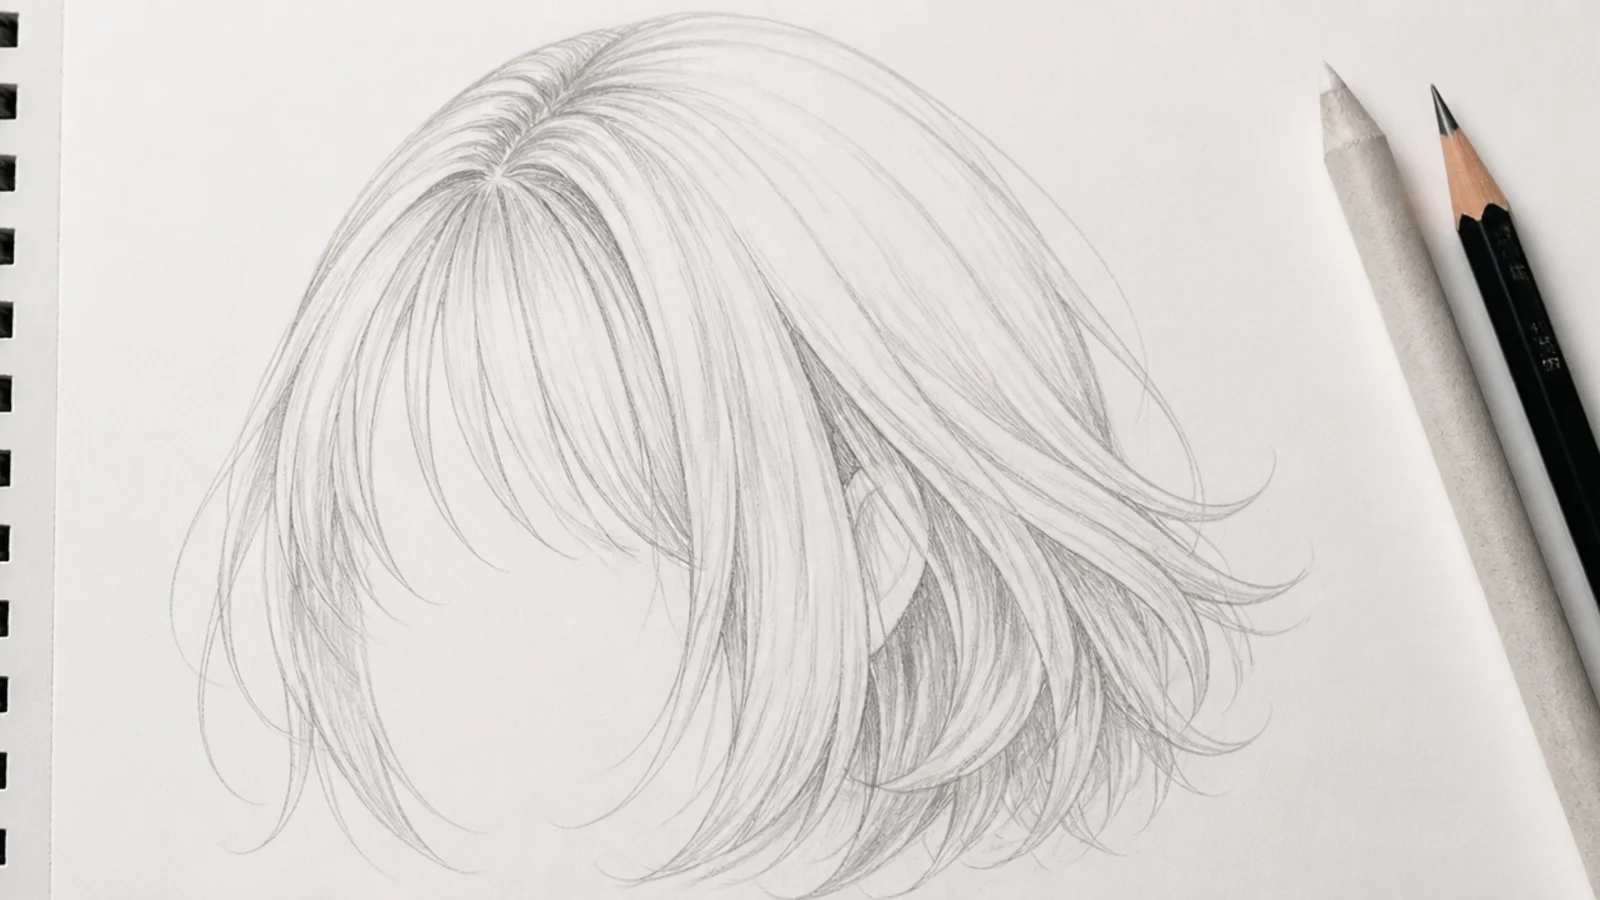
Drawing pale hair in graphite inverts everything you learned on dark hair. Leave most of the paper white, use 2H for nearly all the strand lines, and reserve 2B only for the deep shadow under the fringe and behind the neck. The mistake is shading blonde as gray, which turns it into dirty silver. Instead, define the mass with a few crisp contour lines and one soft 2B core shadow, then lift a bright band with a kneaded eraser. Ink the outline slightly thinner than you would on black hair.
Who it suits: Blonde, white and silver-haired characters.
Tip: Cap your darkest value on blonde hair at 2B; anything heavier and it stops reading as light.
18. Black Anime Hair Sketch With a Highlight Band
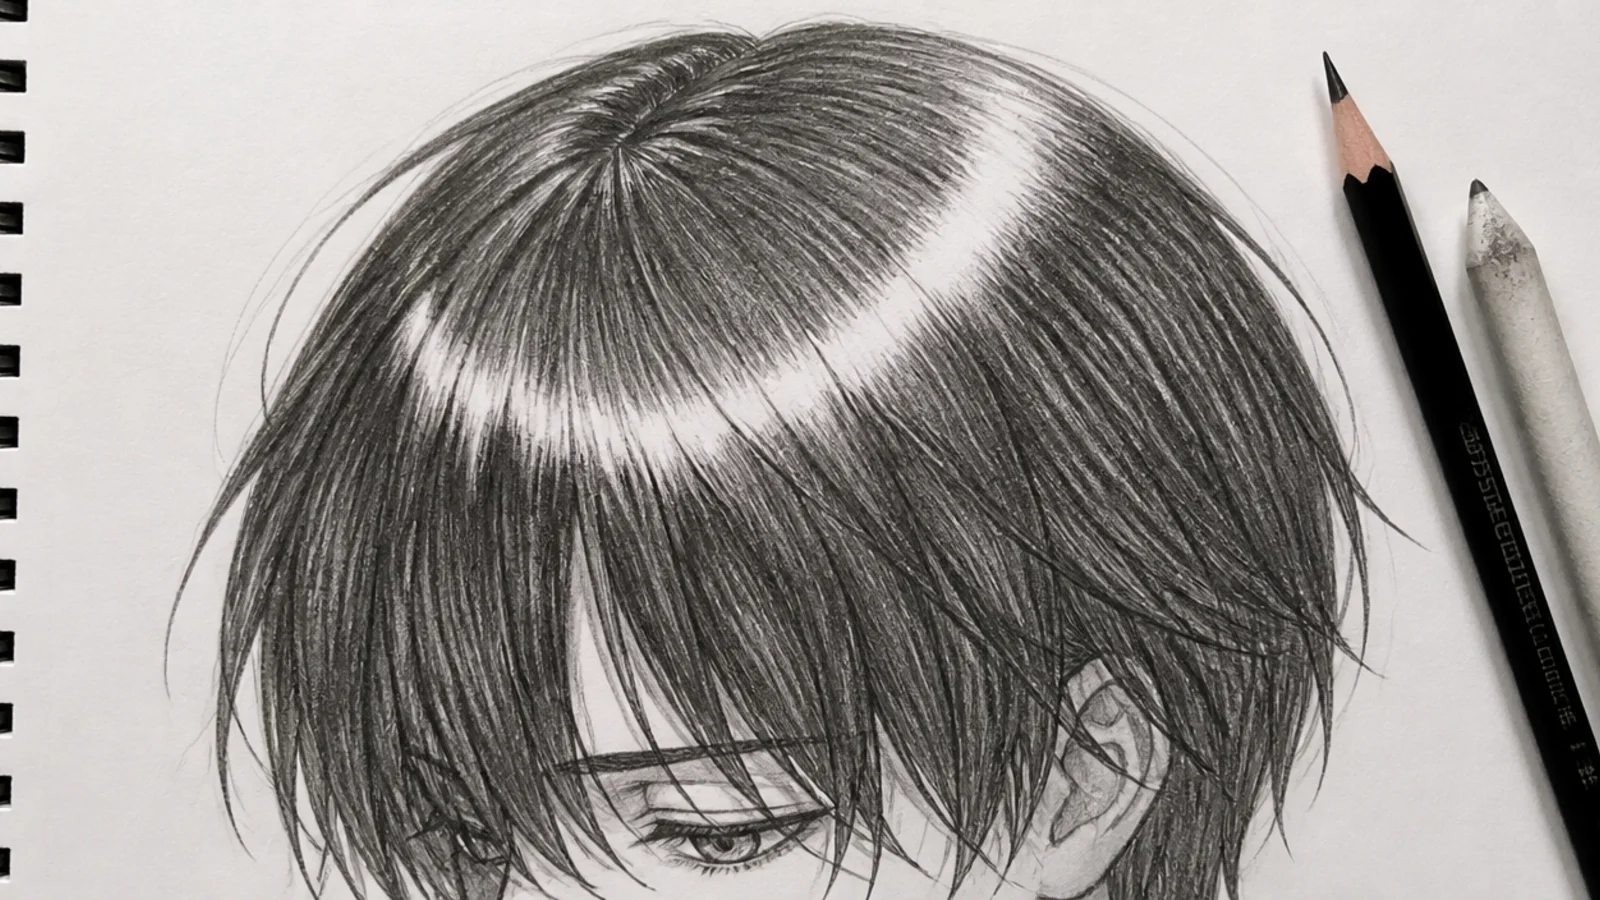
The signature anime shading formula, worth drawing on its own: a solid 6B mass, one mid-value 3B zone, and a single curved highlight band arcing across the crown roughly a third of the way down from the top. Leave the band as bare paper rather than erasing it later, and shape it as a wobbly zigzag ribbon, not a smooth stripe, so it looks like light catching separate clumps. On a side view the band shifts toward the light source. Some styles use two thinner bands stacked.
Who it suits: Everyone; this is the single most useful anime hair exercise.
Tip: Follow the skull curve with the band; a flat straight highlight makes the head look dented.
19. Blunt Bob Anime Hair Sketch With Straight Bangs
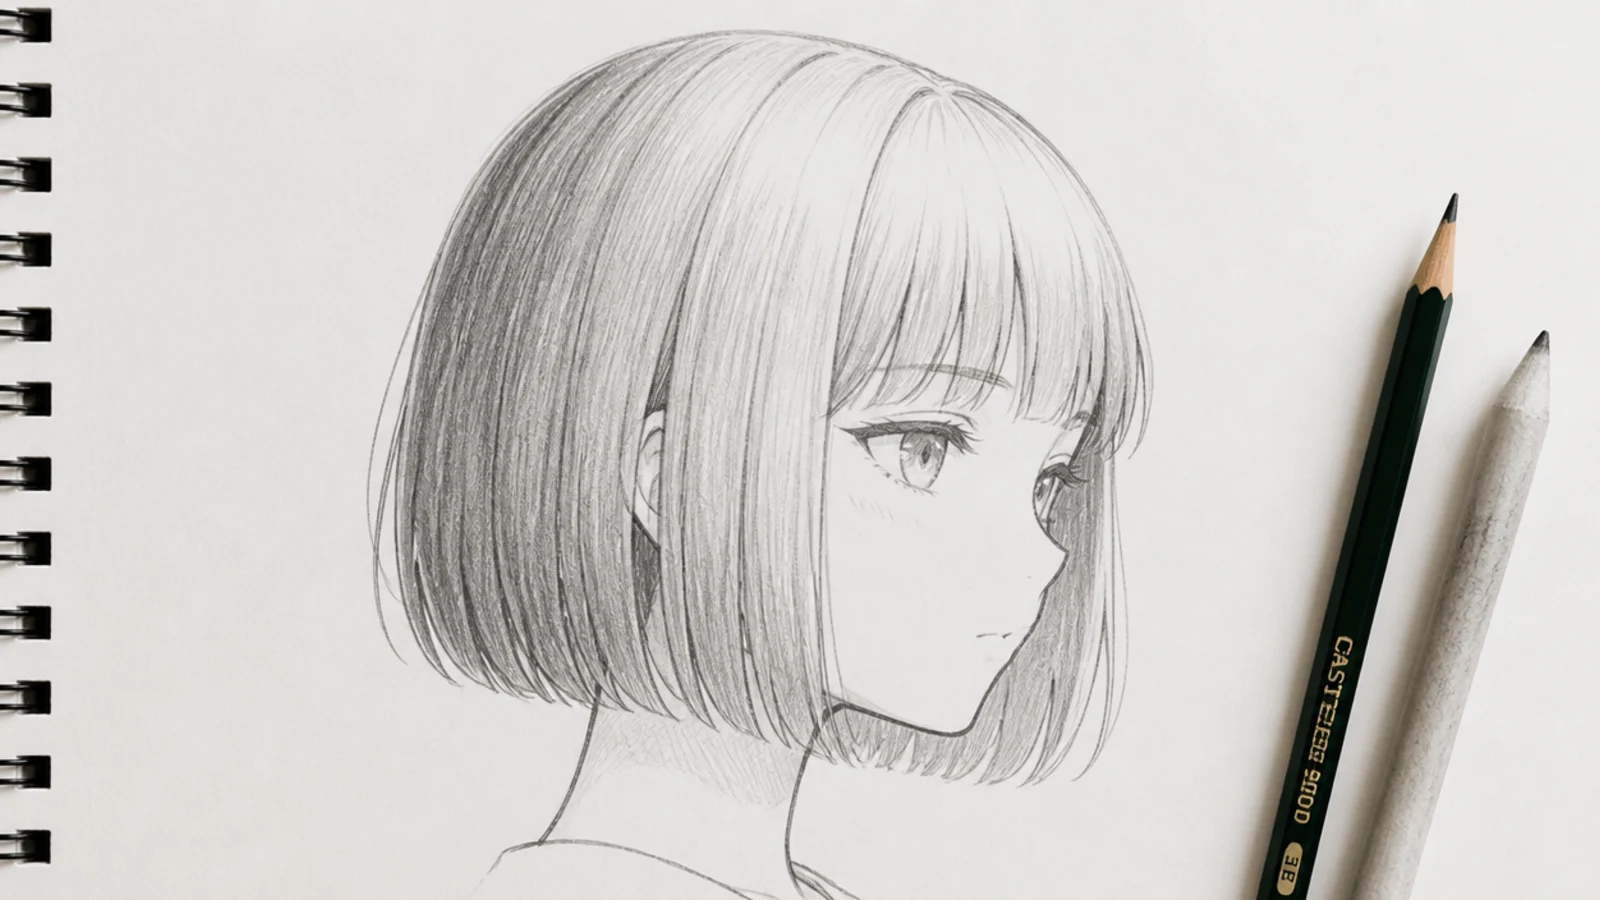
A chin-length bob with a level hem and a straight fringe, the most forgiving idea on this list because the whole shape is two arcs and two lines. Block a rounded helmet silhouette that sits about a centimeter off the skull at the widest point, then flatten the bottom into a clean hem. The one detail that saves it from looking like a bowl is the inward curve at the jaw, where the ends tuck toward the neck. Add four or five short flicks at the hem. Real-world versions sit in mid length haircut.
Who it suits: Beginners and calm, composed character designs.
Tip: Curl the last few millimeters of the hem inward toward the jaw or it will read as a bowl cut.
20. Curtain Bangs Anime Hair Sketch With a Center Part
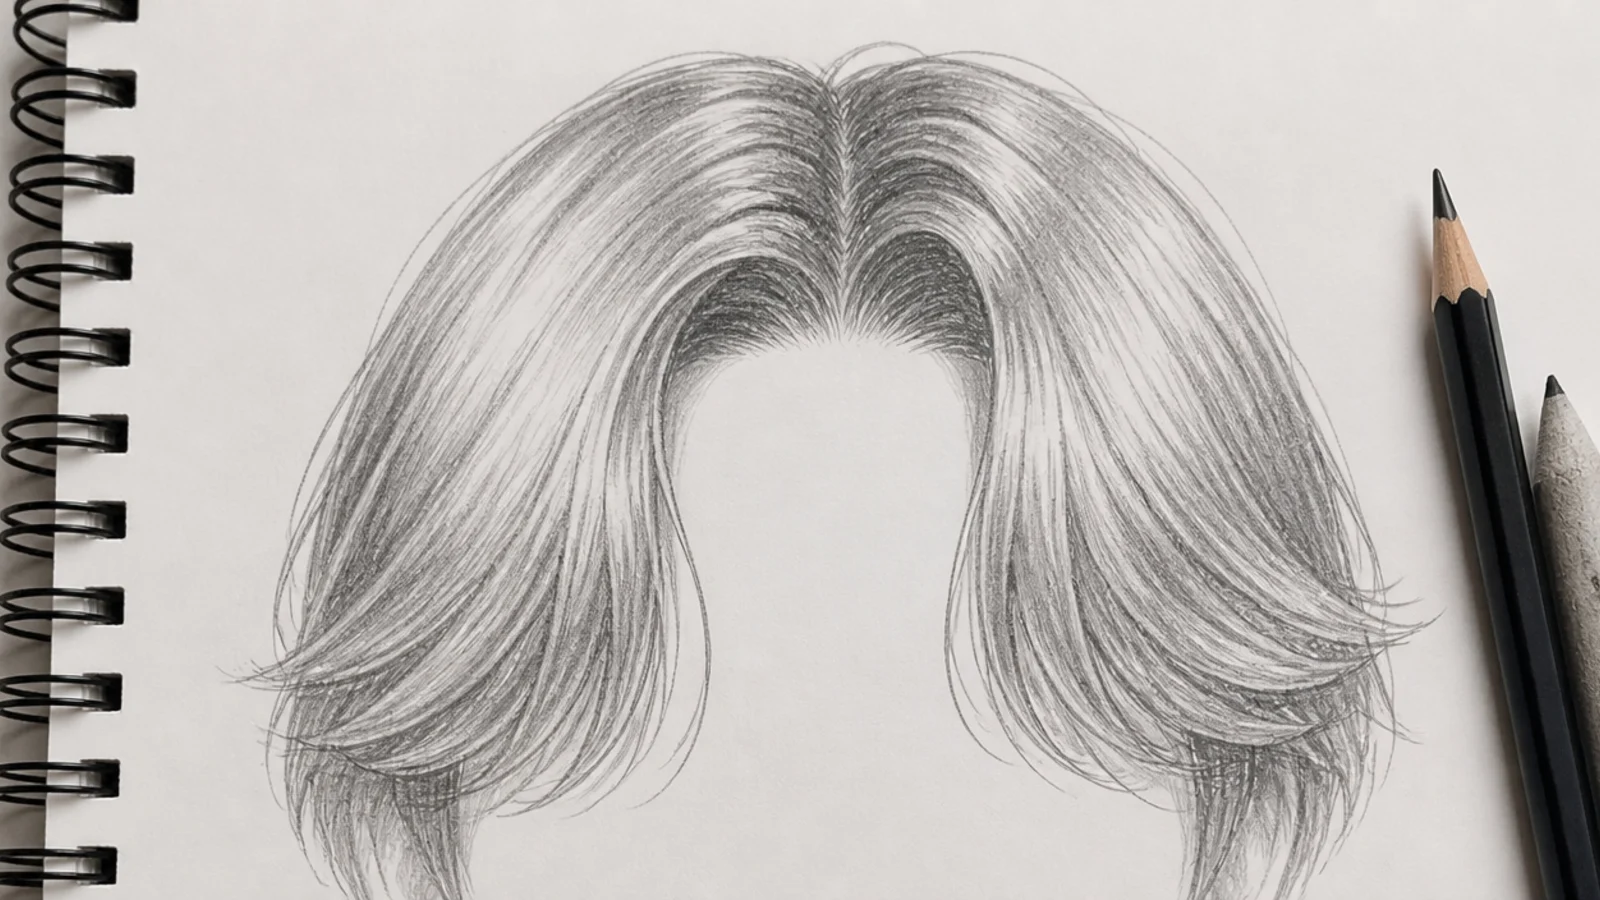
A center part with two soft panels sweeping away from the forehead and lengthening toward the cheekbones, the modern anime fringe. Start with the part as a short 2H line at the crown, then draw each panel as a shallow C curve opening outward. The panels must be uneven, one slightly longer, or the face looks like it is framed by parentheses. Keep the inner tips clear of the eyebrows by a few millimeters so the forehead reads. Reference for the real cut is in short curtain bangs.
Who it suits: Contemporary designs and softer character personalities.
Tip: Make the two panels different lengths; a symmetrical curtain fringe looks stiff and drawn twice.
How to Start an Anime Hair Sketch: Skull, Crown and Silhouette
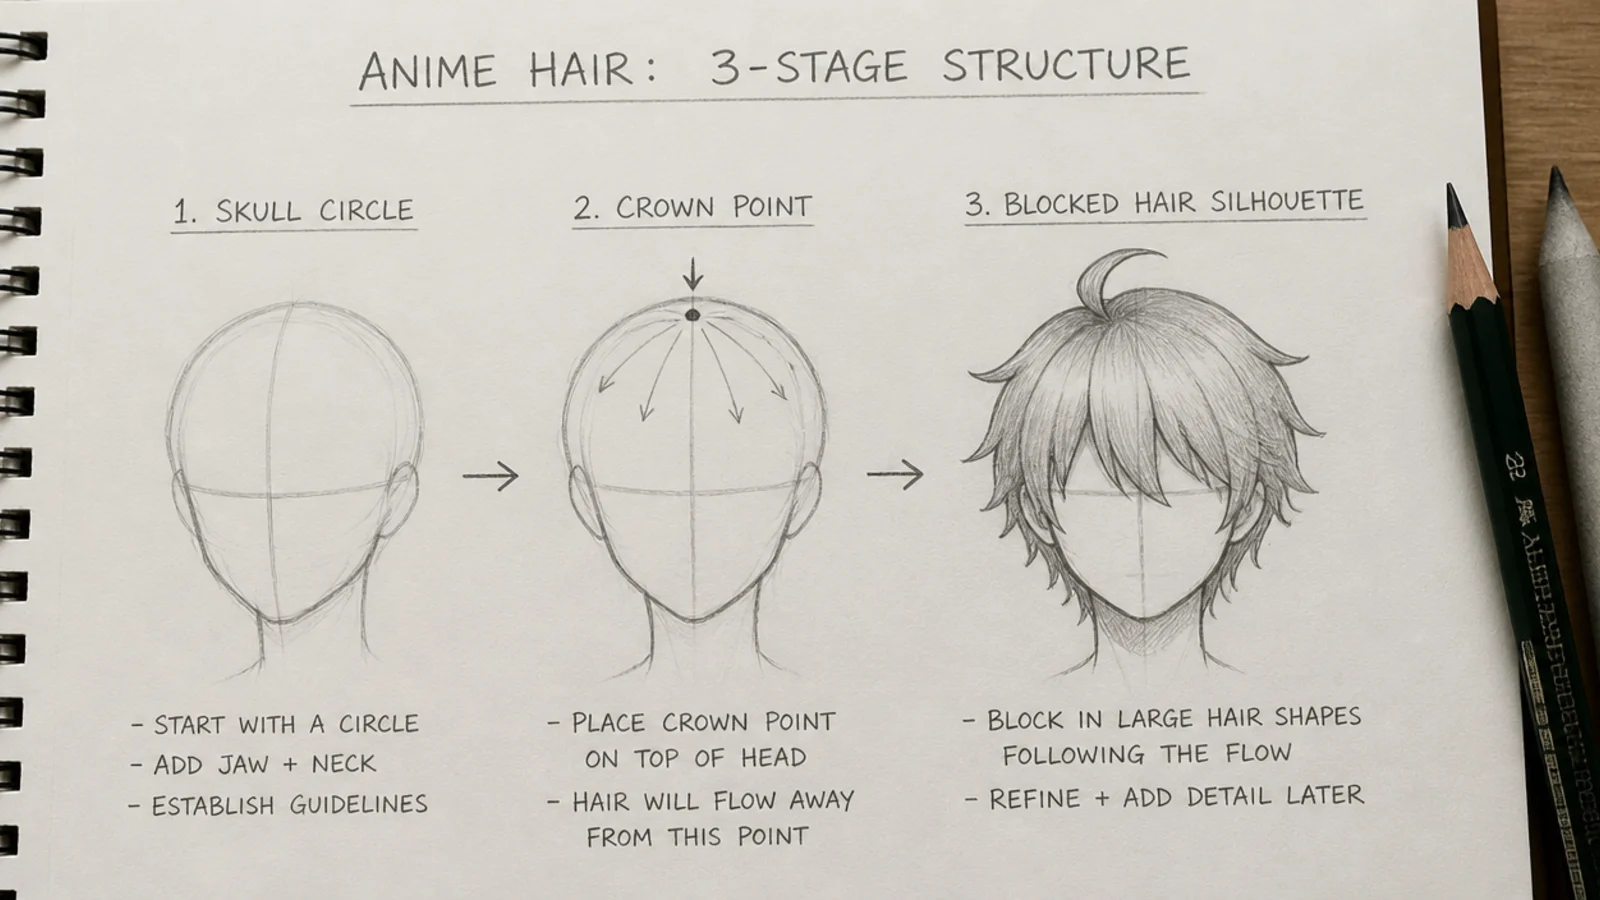
Every anime hair sketch starts with three marks and none of them are strands. First, draw the skull as a circle with the jaw hanging below it, in 2H, light enough to erase. Second, place the crown: a single dot on the top back third of the skull where all the hair originates. Third, block the outer silhouette as one continuous line floating roughly half a centimeter to a centimeter clear of the skull, because hair has thickness and beginners almost always draw it skin-tight. Only after those three marks exist do you divide the mass into clumps, and even then you are drawing clump edges, not hairs. Drawing individual strands too early is the single most common beginner mistake on this board, and it is unrecoverable: once the page is full of lines there is no volume left to find. Test the silhouette by squinting at it. If the shape is unrecognizable as a solid black blob, no amount of interior detail will save it. The full order of operations is set out in the hair sketch tutorial.
Anime Hair Shading: Three Flat Values and One Highlight Band
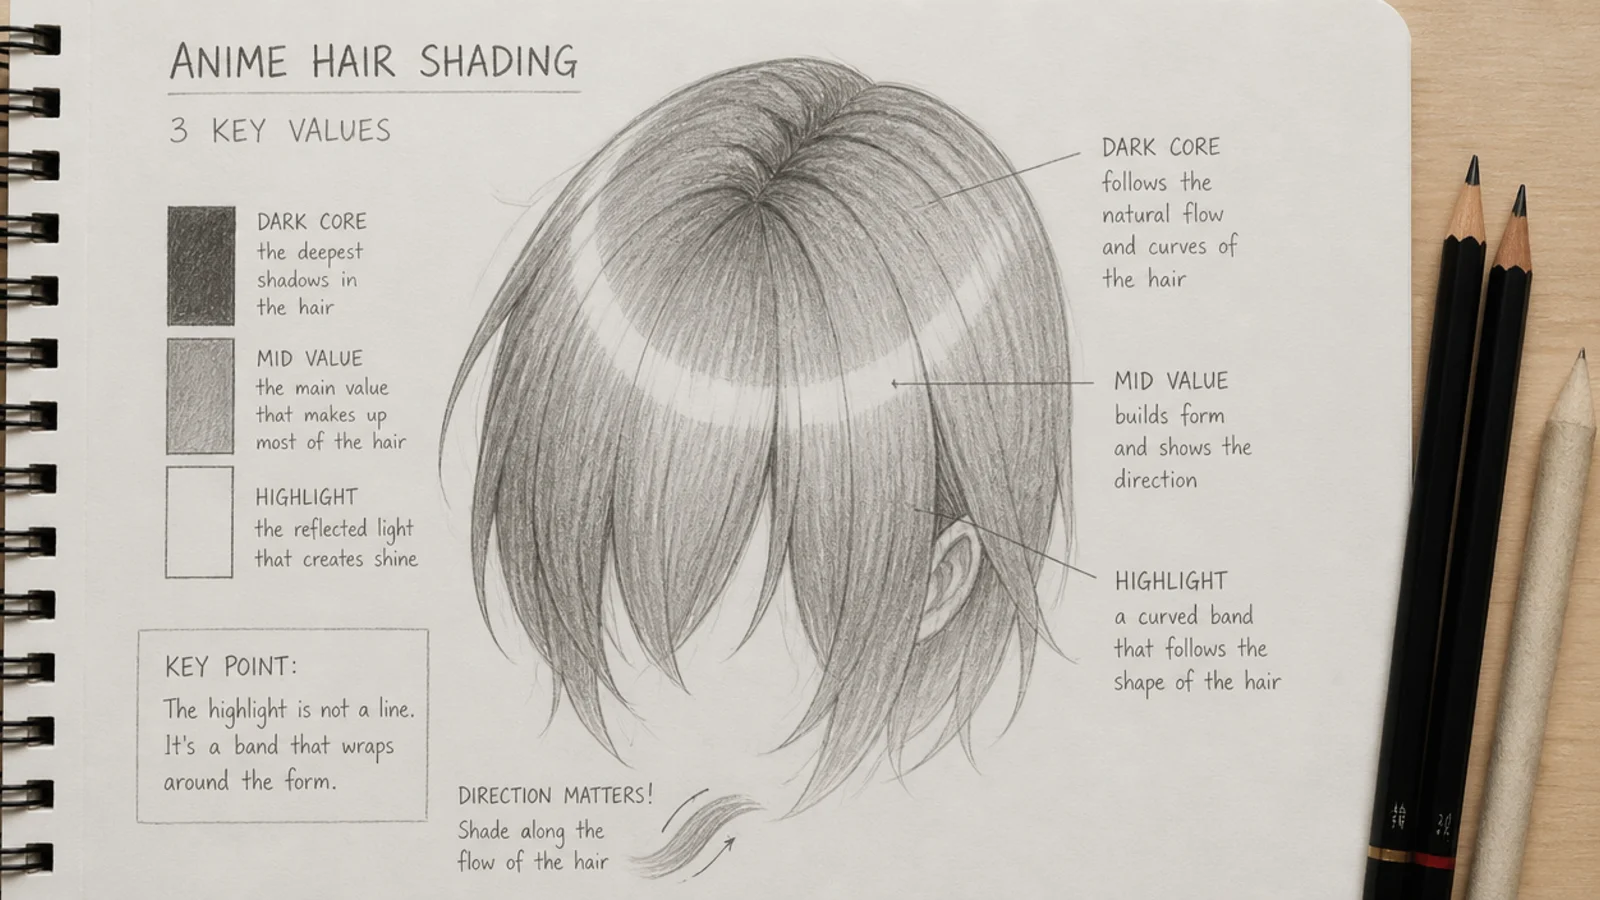
Anime shading is not soft. It is three flat values with hard edges: the dark core in 6B where the hair is thickest and closest to the neck, a mid value in 2B to 4B across the main mass, and bare paper for the highlight. The band is what makes it look like anime rather than a filled shape. Arc it across the crown about a third of the way down from the top of the skull, following the curve of the head, and shape it as a wobbly zigzag ribbon rather than a smooth stripe so it reads as light catching separate clumps. Leave that paper white from the start; erasing a band out of finished graphite gives you a gray smear, not a highlight, though a kneaded eraser can lift a second thinner band later. On a side view the band slides toward the light source and narrows. Two stacked thin bands suit glossy, straight styles; one broad band suits messy hair. Under the fringe, always go a value darker than you think, since that cast shadow is what separates the hair from the forehead. Compare this to gradient shading in the general hair sketch guide.
Drawing Straight vs Wavy vs Curly vs Coily Anime Hair
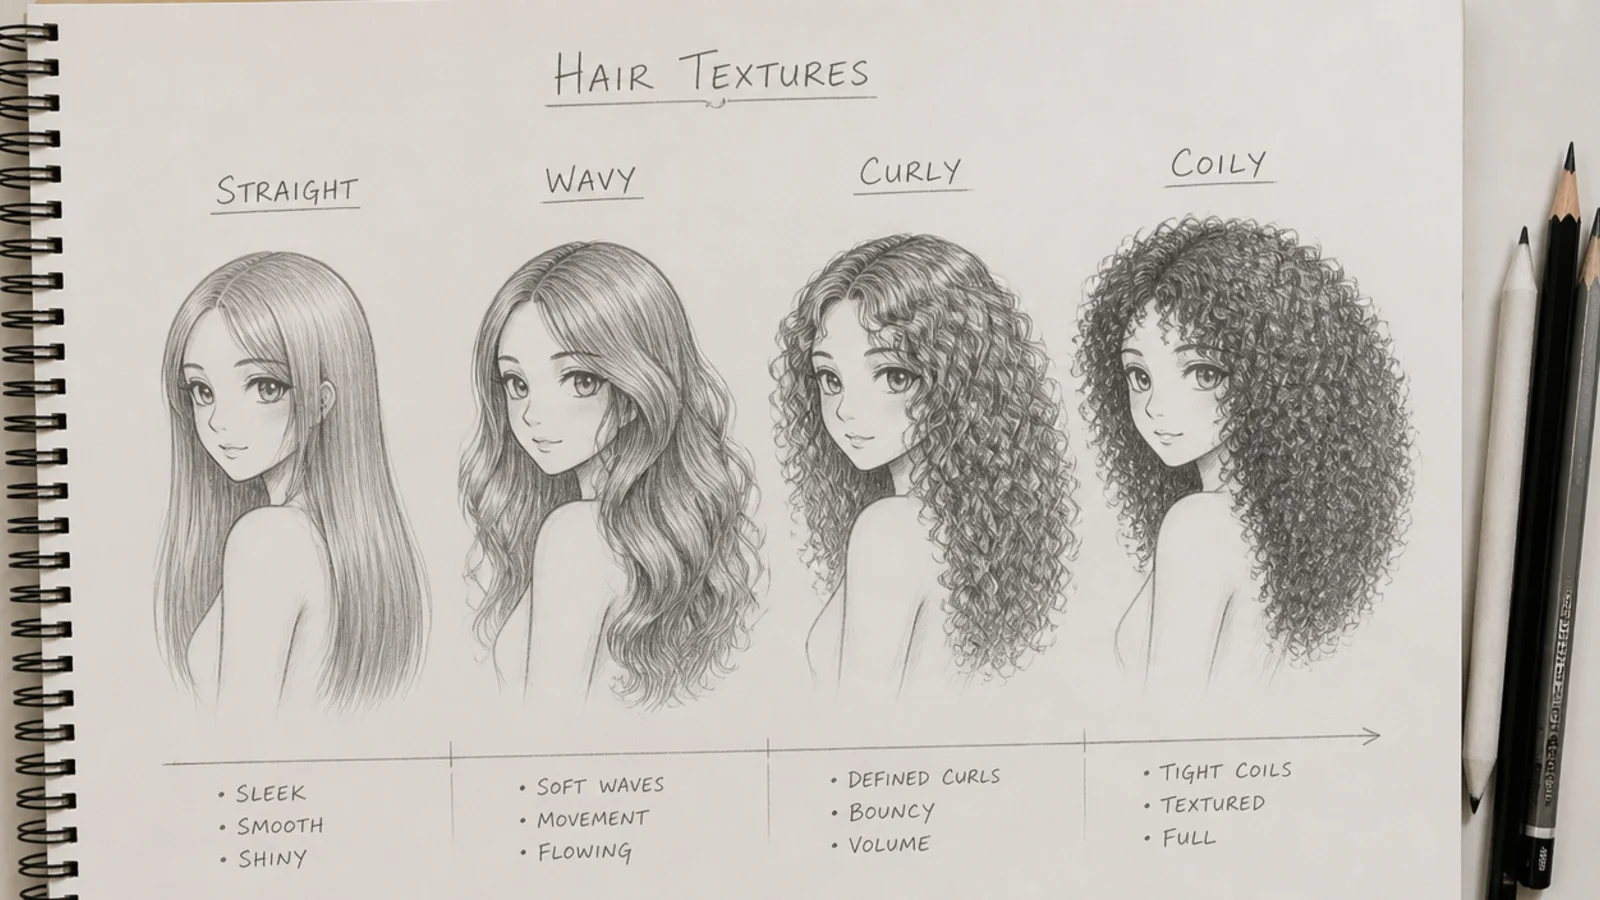
Four textures, four different marks. Straight anime hair uses long unbroken strokes with a shallow S-curve, drawn from the shoulder in one movement so the line does not wobble; short scratchy strokes are what make straight hair look like straw. Wavy hair is the same stroke with two or three gentle bends, and the key is that the bends must line up across neighboring clumps so the whole mass moves as one. Curly hair is drawn as ribbons, not outlined coils: each curl is an S or a spiral with light on one face and 4B shadow on the opposite face, alternating down the length. Coily and 4C-textured hair, which almost every competitor skips entirely, is a value problem rather than a line problem. Block a soft cloud silhouette with a slightly fuzzy edge, then build small tight zigzags in clusters, letting the darkest 6B sit deep in the mass and leaving broken paper highlights on the outer curve of each cluster. Never outline the cloud edge with a hard line. Texture-by-texture practice is in curly hair sketch, and real hair references help too, like frizzy curly hair.
Common Anime Hair Sketch Mistakes and How to Fix Them
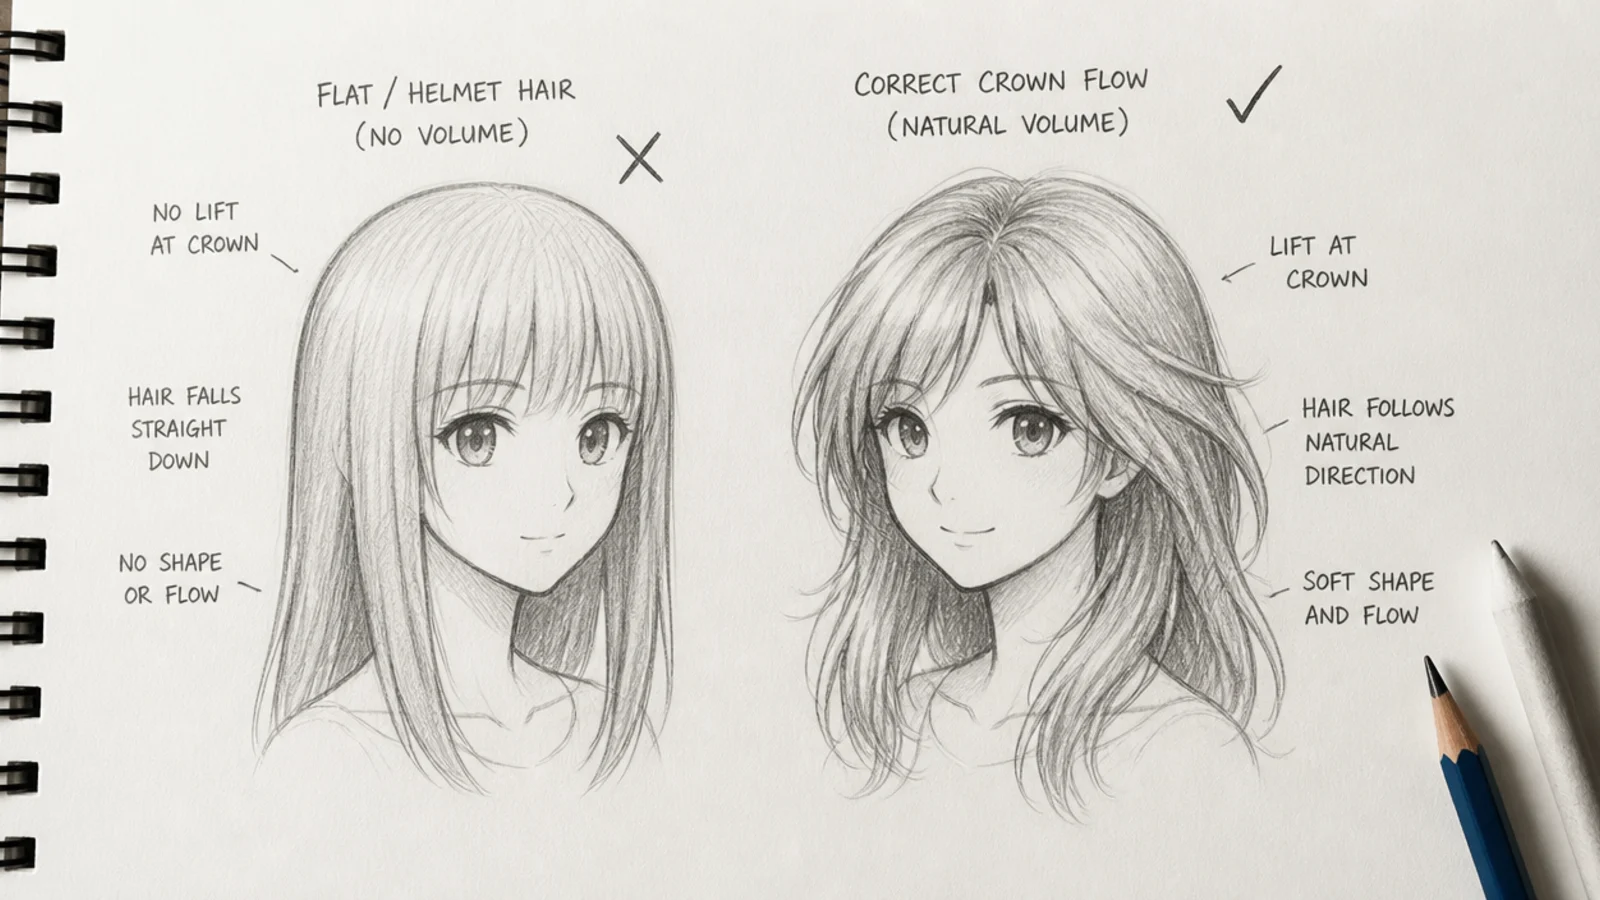
Five failure modes cover almost every bad anime hair sketch. Helmet hair happens when the silhouette hugs the skull and the hem ends in a clean unbroken curve; fix it by lifting the outline further from the head and adding short flicks at every end. Spaghetti hair comes from parallel lines drawn at even spacing; hair grows in sections from the crown, so lines converge and diverge, never run parallel. Glued-on hair means the hairline is a hard even arc, when a real hairline is irregular and slightly ragged at the temples. Dead-flat hair is a value problem: if your darkest mark is a 2B, there is no core shadow and nothing to make the mass turn. And the wig look comes from perfect symmetry, which is fixed by making one side longer, one clump wider and one strand out of place. If a sketch feels wrong and you cannot say why, flip the paper over and hold it to the light. Reversed, the flow errors and the asymmetry problems become obvious in about two seconds.
Pencils, Paper and Blending Tools for Anime Hair Sketches
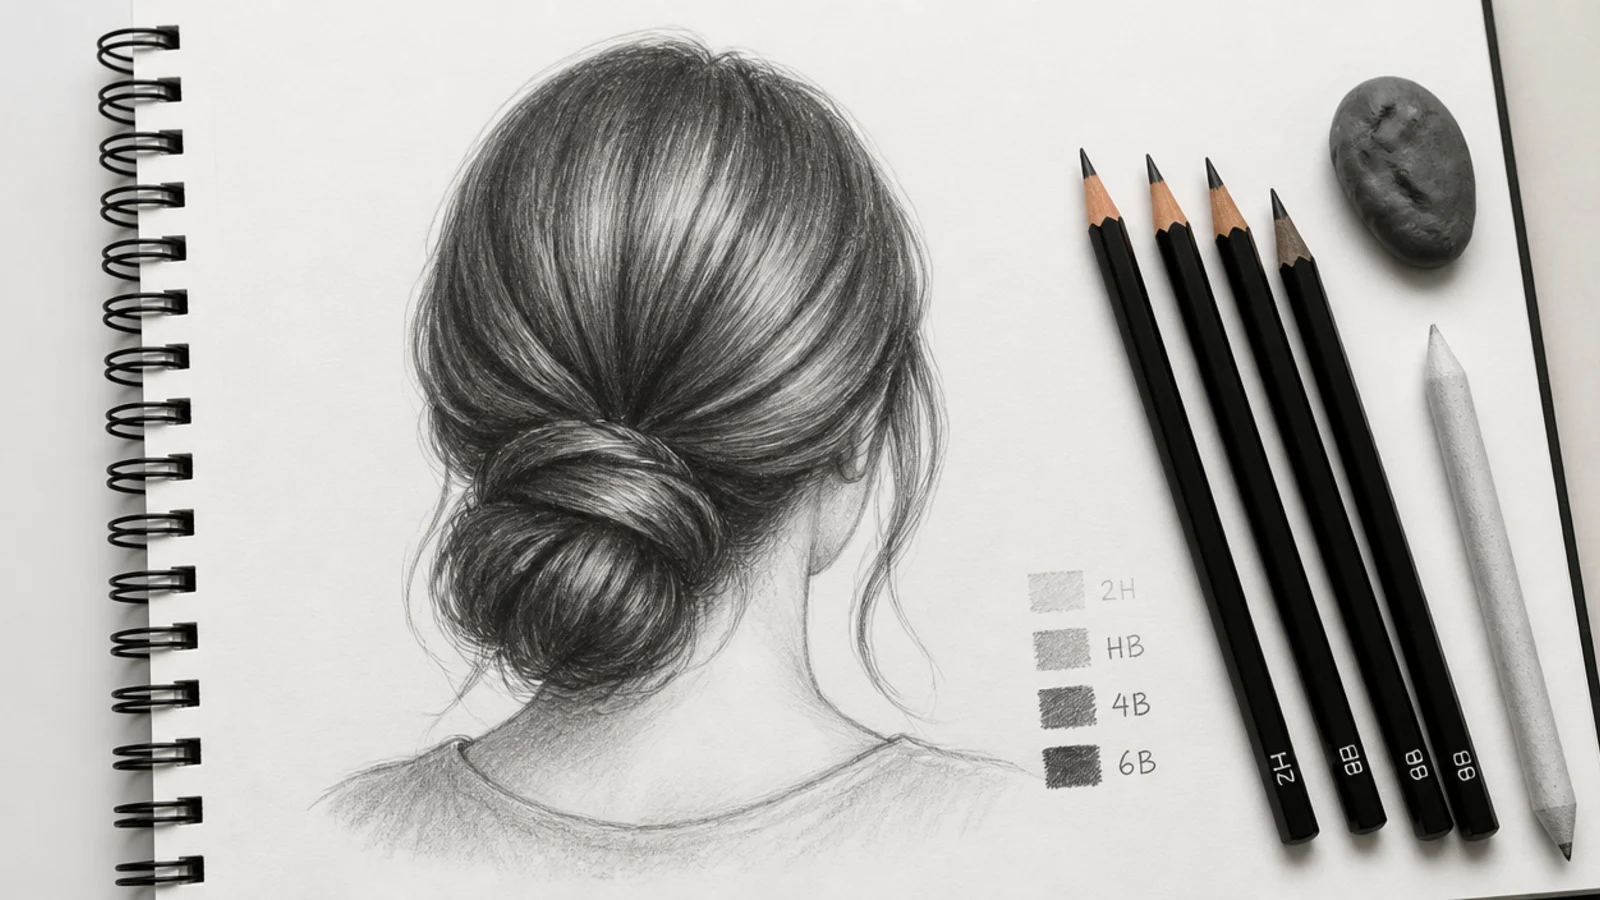
You need four pencils and two erasers, not a twenty-piece set. Use 2H for the skull, crown and silhouette guides, since it barely dents the paper and erases cleanly. HB does the lineart and the light interior clump divisions. 2B to 4B handles the mid shadows across the mass and the cast shadow under the fringe. 6B is reserved for the darkest cores, the notches between braid segments and the shadow at the nape. A kneaded eraser lifts highlight bands without tearing the surface and can be shaped to a point for single strands, while a hard vinyl eraser cuts crisp edges. On paper, smooth Bristol at around 250gsm suits anime lineart because the hard edges stay sharp, whereas toothy cartridge paper breaks them up. Skip the blending stump for anime work entirely: blended edges are what turn a stylized sketch into a muddy realistic one. If you work digitally, a hard round brush at full opacity with pen pressure mapped to size gets you the same tapered stroke.
Using References for Anime Hair Without Copying Them
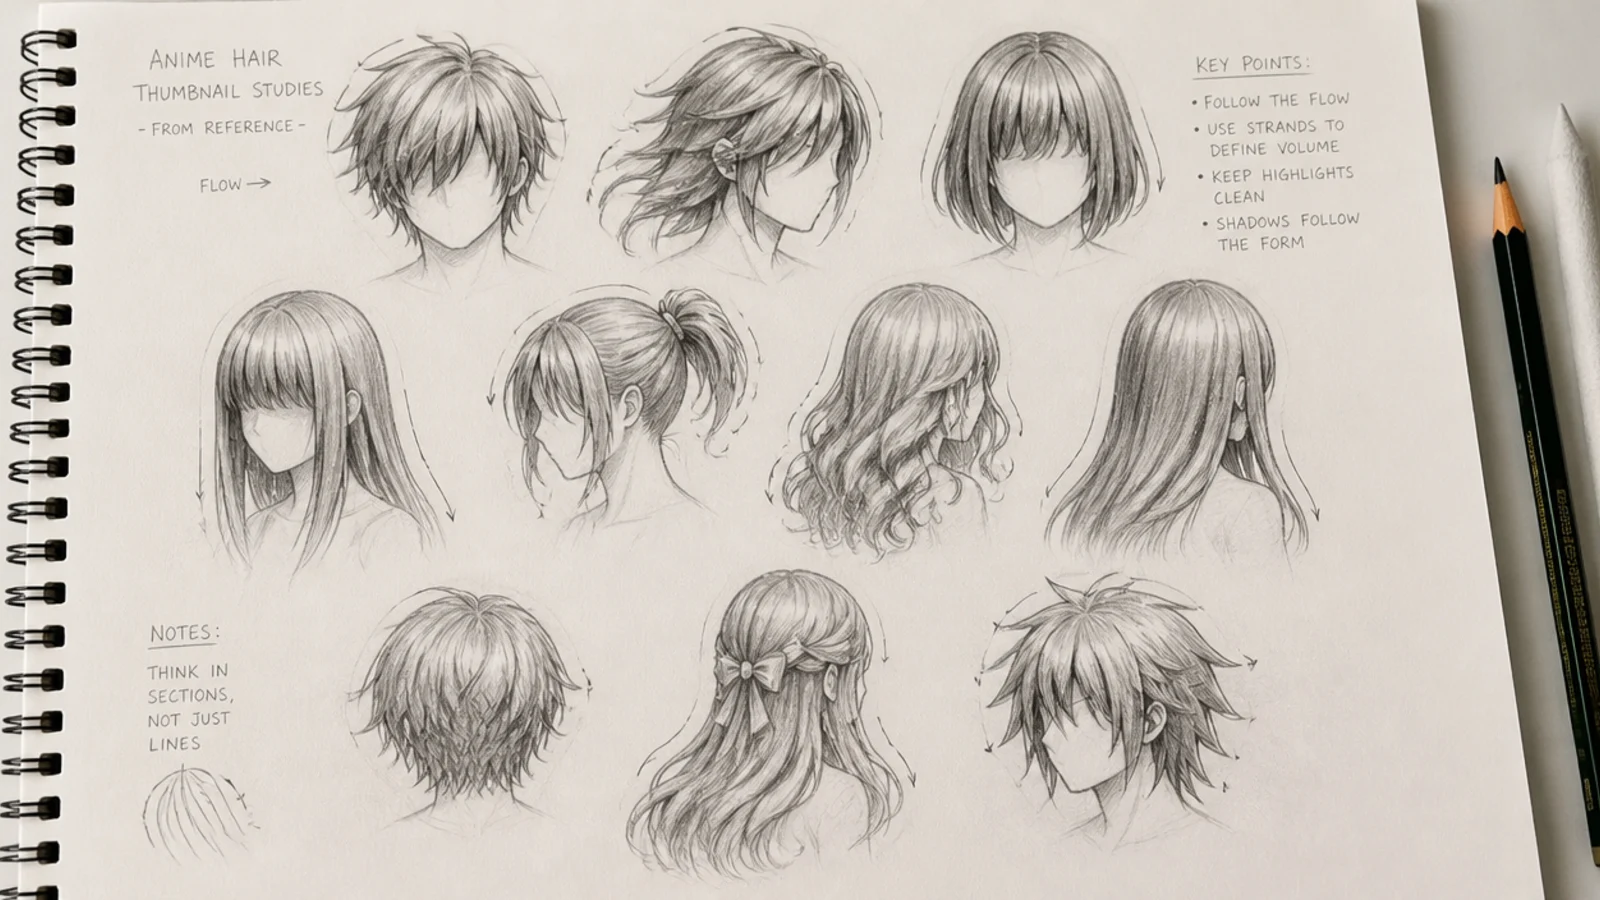
References are how anime hair stays believable, and the way to use one without copying it is to draw what the hair does rather than what it looks like. Take any photo of a real hairstyle and, on scrap paper, mark only three things: the crown point, four or five arrows showing where the major sections travel, and the outer silhouette as a closed shape. Throw the photo away and draw from those three marks. What you get back is the structure translated into clumps, which is exactly what stylization is. Build a reference habit by studying real cuts with strong shapes, since the clearer the real silhouette, the easier it is to simplify: a jellyfish haircut gives you a hard two-layer division, a graduation updo teaches gather points and wrapping, and a high messy ponytail shows how gravity pulls a gathered mass. Keep a page of six thumbnails per session rather than one finished drawing; volume of silhouettes beats polish while you are learning.
Frequently Asked Questions
How do you draw anime hair step by step?
Draw the skull circle and jaw in 2H, mark the crown point on the top back third of the head, then block one continuous silhouette floating about a centimeter off the skull. Divide that mass into clumps, ink the outline in HB, lay a 4B mid value and a 6B core shadow, leave a curved highlight band as bare paper, and add stray strands last.
How do you draw spiky anime hair?
Block one jagged continuous silhouette around the skull before you separate anything, then cut the outer edge into triangular spikes in three different sizes so the rhythm looks natural. Keep implied gravity by lifting the back spikes and dropping the front ones toward the brow, and shade the underside of every spike a full value darker than its top face.
How do you draw anime hair highlights?
Leave the highlight as bare paper from the start instead of erasing it out later. Arc one wobbly zigzag band across the crown about a third of the way down from the top of the skull, following the curve of the head rather than running flat. Straight glossy styles can take two thinner stacked bands; messy hair suits one broad band.
Why does my anime hair look like a helmet?
Two causes. The silhouette is hugging the skull instead of floating half a centimeter to a centimeter clear of it, and the hem is one clean unbroken curve. Lift the outline away from the head to give the hair thickness, then break the hem with short flicks at the ends, no longer than a fingernail, so the edge reads as separate clumps.
What pencils do you need for an anime hair sketch?
Four pencils cover it. Use 2H for the skull, crown and silhouette guides, HB for the lineart and clump divisions, 2B to 4B for the mid shadows and the cast shadow under the fringe, and 6B for the darkest cores at the nape. Add a kneaded eraser for lifting highlights and a hard vinyl eraser for crisp edges.
Should you draw the head before the hair?
Yes, always. Draw the skull circle and jaw first in a light 2H so you can erase them, because the hair silhouette, the hairline and the crown point all depend on knowing where the skull actually sits. Beginners who skip this step flatten the top of the head and lose the room the hair needs to sit above it.
How do you draw curly anime hair?
Draw each curl as a flat ribbon twisting in space, an S shape or a spiral, with light on one face and 4B shadow on the opposite face alternating down the length. Do not outline closed coils, which is what makes curls look like springs. Block the whole mass as a soft cloud first, mark six to eight curl centers, then build ribbons outward.
What is the difference between anime hair and realistic hair drawing?
Anime hair uses three flat values with hard edges, a visible HB outline around every clump and roughly 20 to 40 strand lines for a whole head. Realistic hair uses a continuous gradient, no outline at all, and hundreds of layered strokes. Anime hair is a shape problem; realistic hair is a value problem, which is why beginners find anime easier.
How do you draw male anime hair?
Keep the outer silhouette a smooth rounded dome about a centimeter clear of the skull and put all the mess inside, in the interior clump edges. Mess in the outline reads as damage rather than texture. Drop two or three clumps over the forehead, let one cross an eyebrow to break symmetry, and keep the overall length ear-level or shorter.
How do you draw anime hair blowing in the wind?
Split the mass into three or four separated ribbons that all travel in the wind direction, widening the gaps between them toward the tips and curling the ends. Then add one single strand that whips back against the wind. That contradiction is what reads as moving air. Keep the roots tight to the scalp so the head still feels solid.
Which hair sketch look are you saving?
If you take one thing from these 20 anime hair sketch ideas, make it the order of operations: crown dot, silhouette, clump division, three flat values, highlight band, stray strands last. That sequence works on a spiky shonen lead and on a waist-length hime cut without changing, and it is the difference between hair that sits on a head and hair that looks glued on like a helmet. Start with the spiky short cut and the straight bob, since both forgive uneven clumps, then move up to twin tails and wind-blown hair once the flow lines feel automatic. Keep a 2H, an HB, a 4B, a 6B and a kneaded eraser on the desk and nothing else. When you want the general method in more depth, work through the hair sketch tutorial or browse the rest of the hair sketch hub.