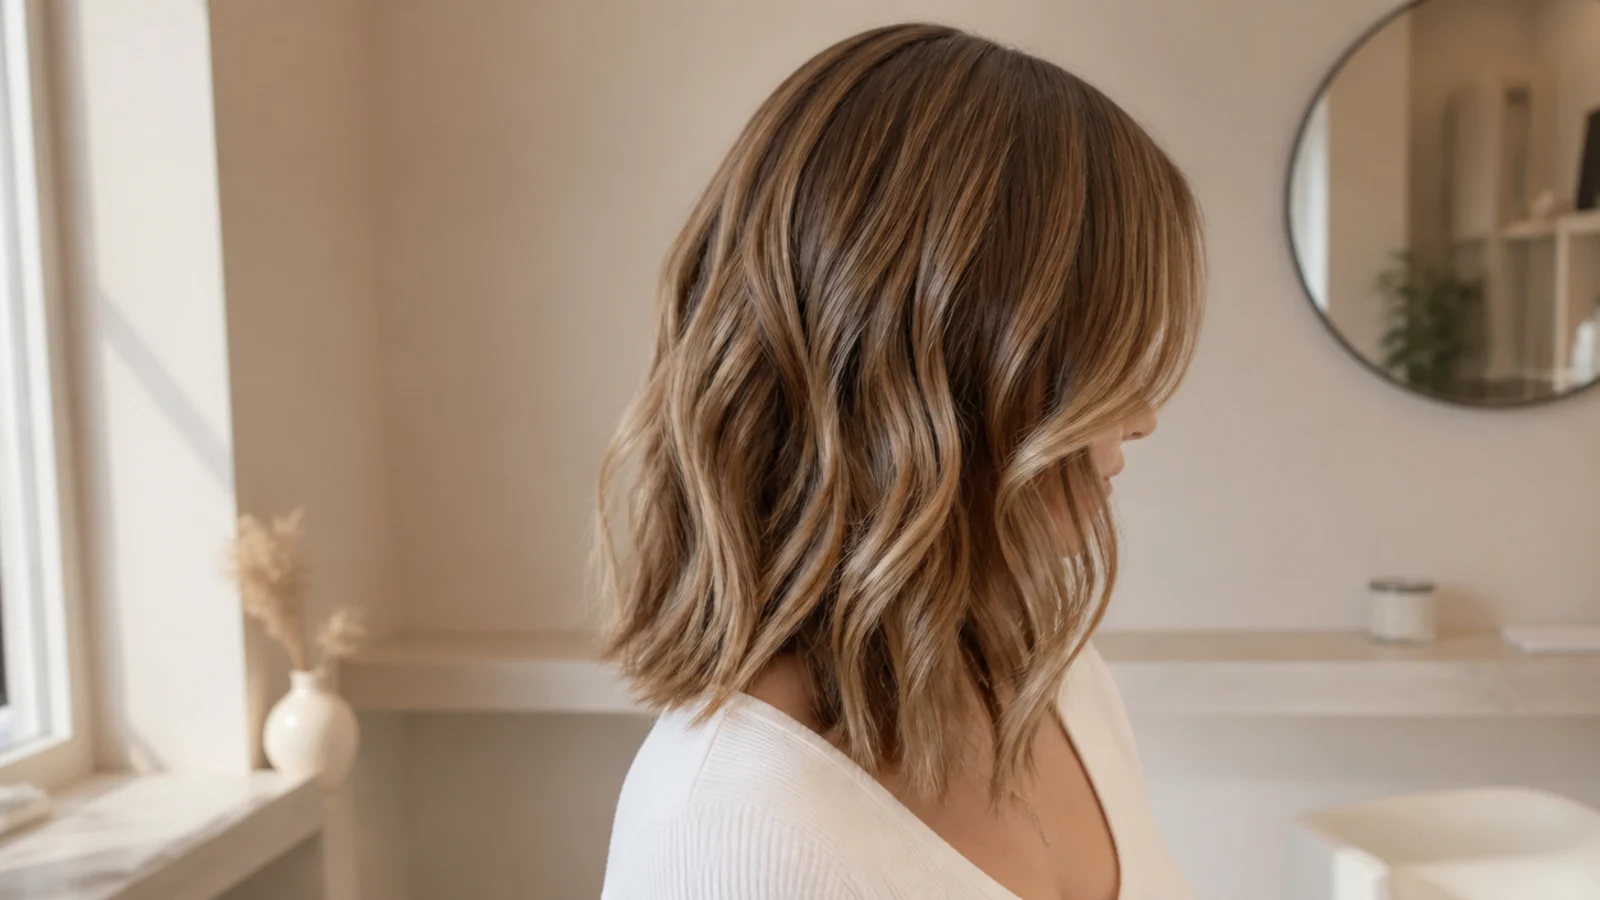
Quick Comparison
| Cheekbone-Start Face Framing | Jaw-Start Face Framing | |
|---|---|---|
| Where the shortest piece lands | Top of the cheekbone, about 6 to 7 inches from the root | Level with the jawline, about 11 to 13 inches from the root |
| Visual effect | Lifts the eyes, widens the upper face, reads bold | Softens width, lengthens the face, reads subtle |
| Best face shapes | Oval, long, narrow, diamond | Round, square, full-cheeked |
| Hair type it needs | Medium to thick; fine hair goes wispy at that height | Works on fine, medium and thick |
| Daily styling required | Round brush or wand most mornings, 5 to 10 minutes | Air-dry friendly, 0 to 3 minutes |
| Trim cadence | Every 6 to 8 weeks before it reads as grown-out bangs | Every 8 to 12 weeks |
| Awkward grow-out phase | Real; roughly weeks 10 to 20 as it passes the nose | Mild; it blurs into the length within a couple of months |
| Time back to one length | About 10 to 14 months at half an inch per month | About 4 to 7 months |
| Risk level | High commitment; hard to undo quickly | Low commitment; the safe first face framing cut |
1. Chin-Start Face Framing Layers on a Collarbone Cut

The default that suits almost everyone. The perimeter stays at the collarbone, and the two front sections are cut so the shortest piece lands at the chin, roughly 10 to 12 inches from the root on an average frame. Everything behind it stays long, so you lose no length in a ponytail. Because the chin sits at the vertical midpoint of most faces, this start point neither widens the top nor drags the eye down. It is the version to ask for if you have never had framing before. Full length definitions live in the mid length haircut guide.
Who it suits: Any face shape; the safest first-time face framing cut.
Tip: Ask for the chin piece point cut, not blunt, so it blurs into the length instead of sitting as a shelf.
2. Jaw-Start Face Framing Layers for a Round Face

The frame begins level with the jawline, about an inch and a half lower than a chin start, so the longest visible line falls past the widest part of a round face rather than across it. That single change is what stops framing from making a round face look wider. The pieces then graduate down to the collarbone perimeter in a long soft diagonal. On a round face this reads as length rather than volume, and it works whether the hair is blow-dried straight or air-dried with a bend. This is the exact wording most stylists expect: face-framing starting at the jaw.
Who it suits: Round and full-cheeked faces, and anyone avoiding width at the top.
Tip: Add a deep side part; a center part on a round face cancels out most of the slimming effect.
3. Cheekbone-Start Face Framing Layers for an Oval Face
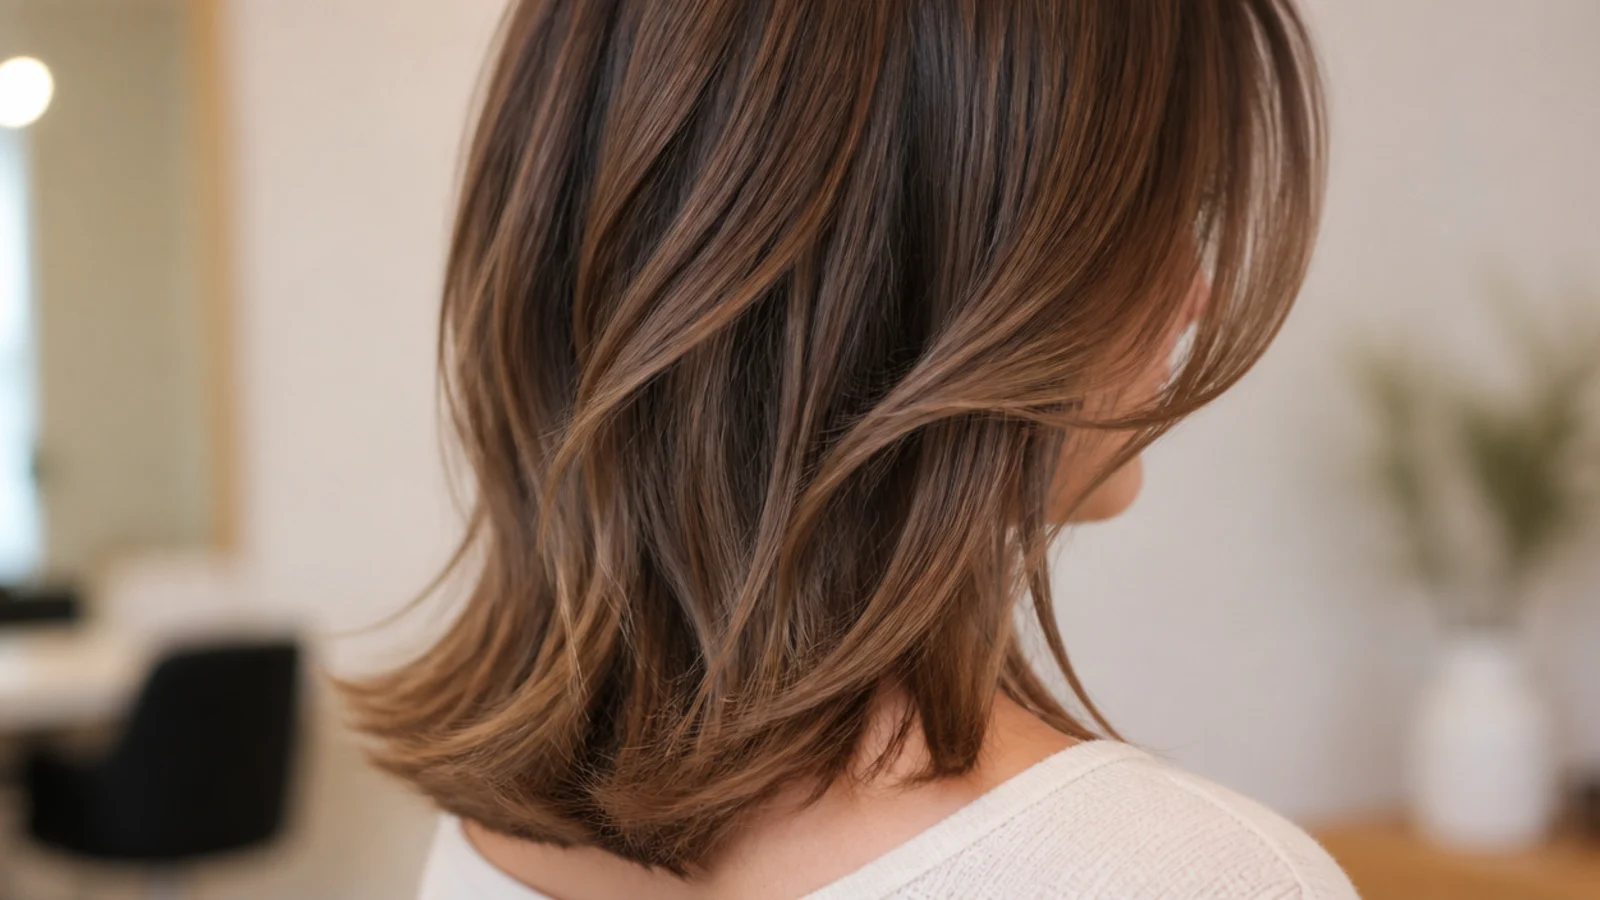
The boldest start point. The shortest framing piece lands at the top of the cheekbone, roughly 6 to 7 inches from the root, then falls away steeply toward collarbone length. It lifts the eye up and out and gives the sharp swoosh you see in salon photos. The trade-off is honest: at this height the front pieces are short enough to need a round brush or a curling wand most mornings, or they will just sit flat against the cheek. Oval and long faces carry it best because the extra width at the cheekbone is welcome rather than a problem.
Who it suits: Oval, long and narrow faces with medium to thick hair.
Tip: Ask for a soft C bend blow-dried away from the face; flat cheekbone pieces look like grown-out bangs.
4. Collarbone-Start Face Framing for a Heart Shaped Face

Barely a layer at all, and that is the point. The framing pieces start only an inch or two above the perimeter, right around the collarbone, so they add a soft curve at the ends without opening up the top half of the face. On a heart shaped face, where the forehead is the widest point and the chin is narrow, this keeps all the movement low and adds visual weight around the jaw. It is also the lowest-risk face framing you can book, since the difference from your current cut is about two inches on two sections.
Who it suits: Heart and inverted triangle faces, and anyone nervous about layers.
Tip: Ask for the ends flicked outward rather than curled under, which builds width exactly where a heart face wants it.
5. Face Framing Curtain Bangs on a Mid Length Haircut

Curtain bangs and face framing are not the same thing, but they stack beautifully. The bang is cut from a triangular section at the front hairline, splits at the center part and sweeps to about cheekbone height. The face framing then continues underneath it down to the chin or jaw, so the two blend into one continuous curve instead of a stepped edge. Ask for them cut in one connected sweep. Expect a bang trim every 4 to 6 weeks, more often than the 8 to 12 weeks the framing needs. Full detail in mid length haircut curtain bangs.
Who it suits: Oval, round and heart faces wanting the full soft-focus effect.
Tip: Say connected, not separate, or you will get a hard step where the bang ends and the framing begins.
6. Bottleneck Face Framing Layers for a Square Jaw
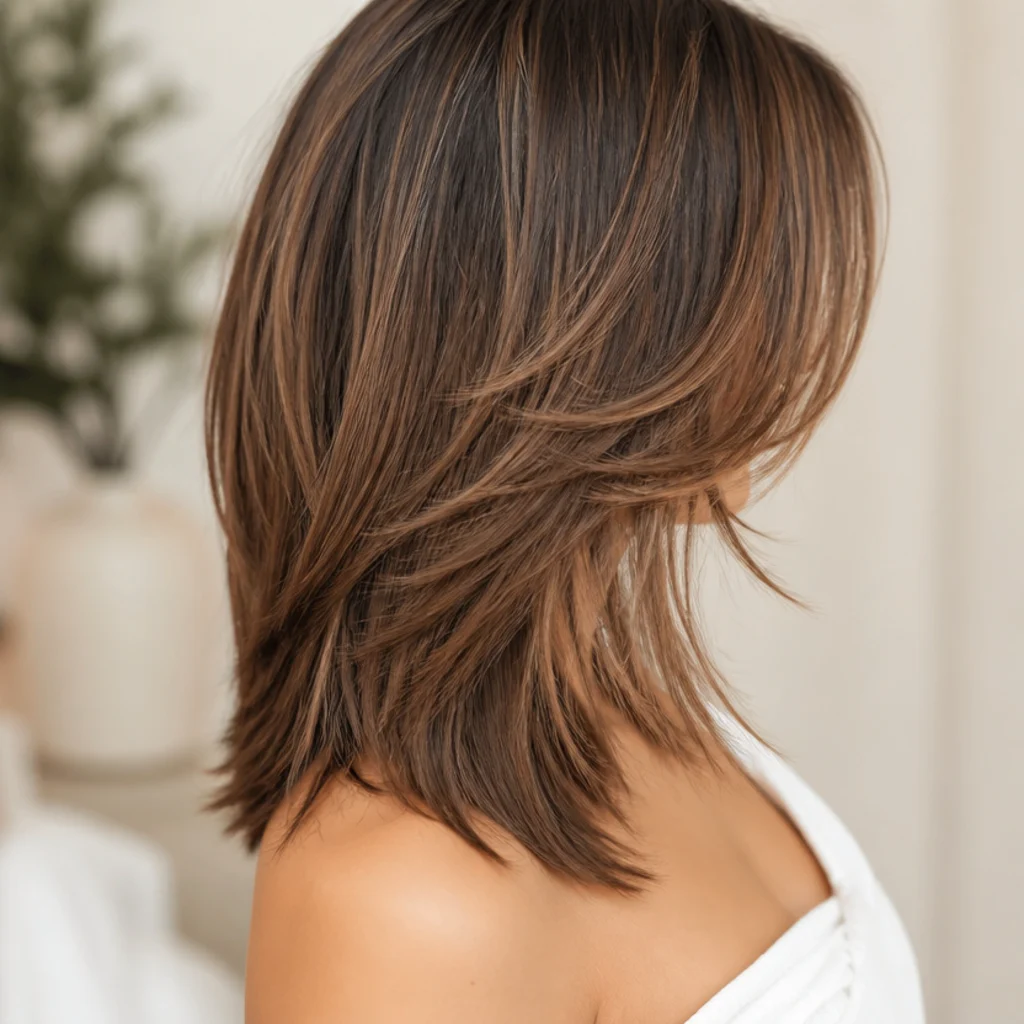
The bottleneck shape is narrow at the top and flares wider lower down, exactly like the neck of a bottle. The framing sits close to the temples, then widens out from the cheekbone and lands at the jaw with a soft outward curve. On a strong square jaw that outward flare sits over the corner of the jawbone and rounds it visually, which a straight vertical frame will not do. It suits medium to thick straight or lightly wavy hair, since fine hair struggles to hold the flare without a round brush.
Who it suits: Square and rectangular faces with medium to thick hair.
Tip: Ask for the widest point of the flare to sit level with your jaw corner, not below it.
7. Money Piece Highlights With Chin-Length Face Framing
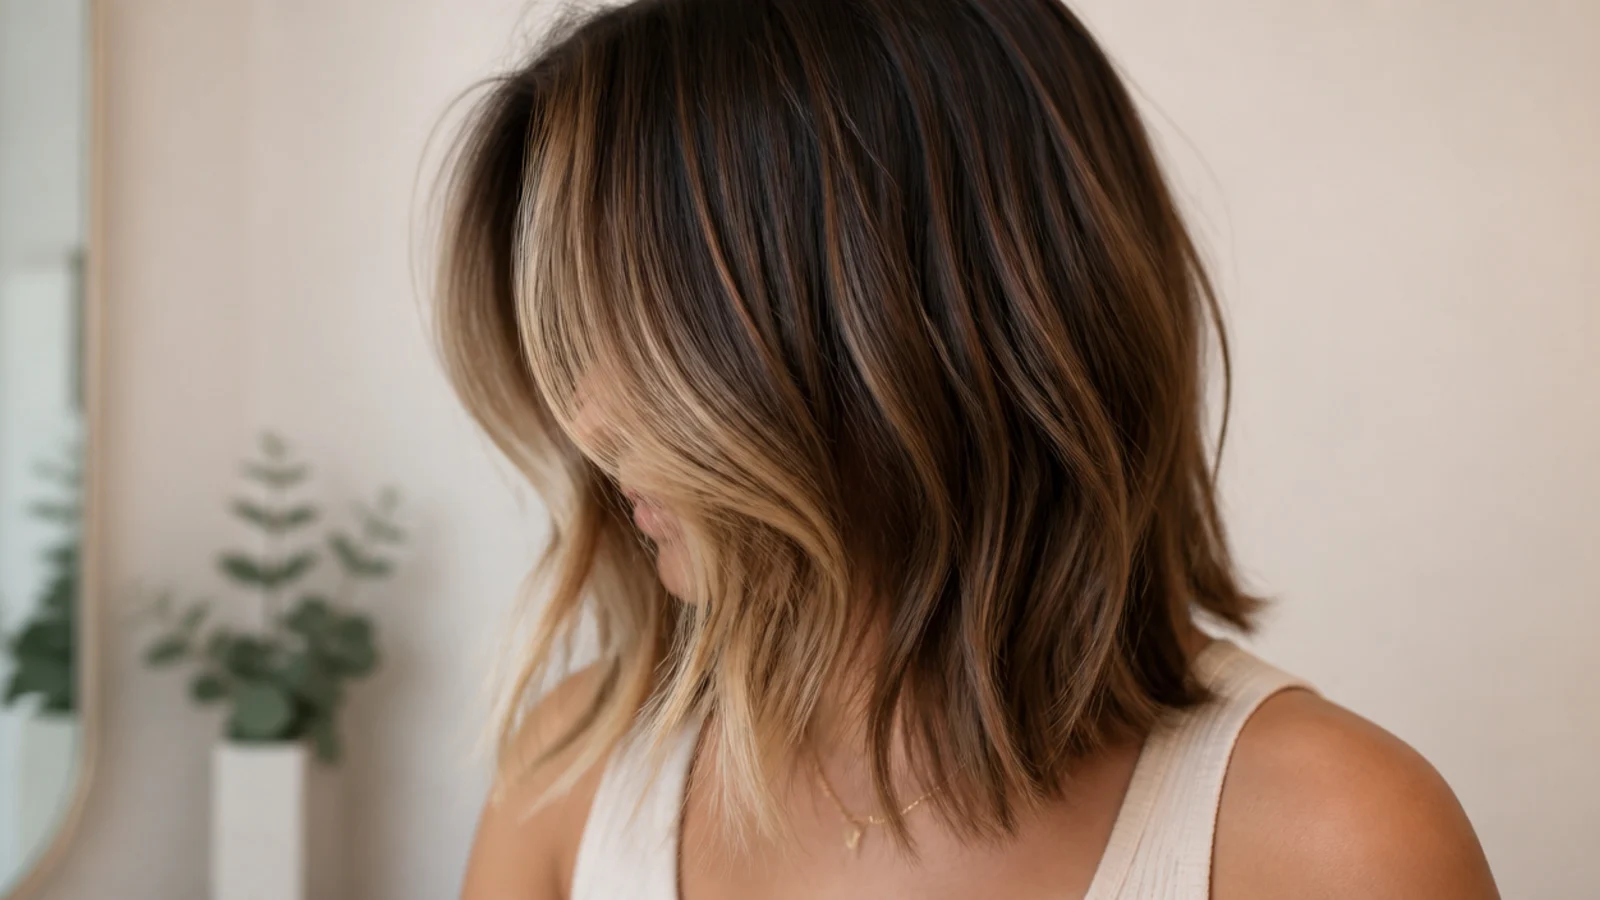
The money piece is color, not a cut, and pairing it with real face framing is what makes both look intentional. Two lightened sections at the front, usually two to three shades brighter than base, sit exactly on the framing pieces so the shape you paid for actually catches the light. Budget 90 to 200 dollars for a partial highlight on top of the cut. Keep the lightened section no wider than an inch and a half at the part or it reads as a stripe. The color side is covered in money piece hair, and tonal options in balayage brunette.
Who it suits: Anyone who wants the framing to read from across a room.
Tip: Have the color done after the cut, so the lightened piece lands on the new shape rather than the old one.
8. Face Framing Layers on a Blunt Collarbone Lob

A one-length lob cut straight across at the collarbone, with the only layering happening at the front two sections. The blunt perimeter keeps the ends looking dense and expensive, which is why this is the go-to for fine hair that cannot afford internal layers, while the framing stops it looking helmet-like around the face. Ask for zero internal layers and framing only. It is the single most flattering compromise on this list, and it is what most people actually mean when they save a photo of a lob. Compare shorter versions in bob haircuts.
Who it suits: Fine to medium straight hair, and anyone growing layers out.
Tip: Say blunt perimeter, face-framing only, no layers through the back, and repeat the last part.
9. Butterfly Cut Face Framing Layers for Thick Hair

The butterfly is two lengths in one head: a short internal layer set that stops near the chin, and a long collarbone perimeter underneath, so it looks like a short cut when styled and a long one when tied back. On thick hair this is genuinely useful, because it removes real weight from the crown while the framing does the flattering. It needs density to work; on fine hair the top layer sits empty and the join shows. Appointments run 90 minutes and 80 to 160 dollars. More layer options in mid length haircut layers.
Who it suits: Thick, dense hair that feels heavy at the ends.
Tip: Ask the stylist to connect the short internal layers to the front framing so there is no visible shelf.
10. Curly Face Framing Layers Cut Curl by Curl
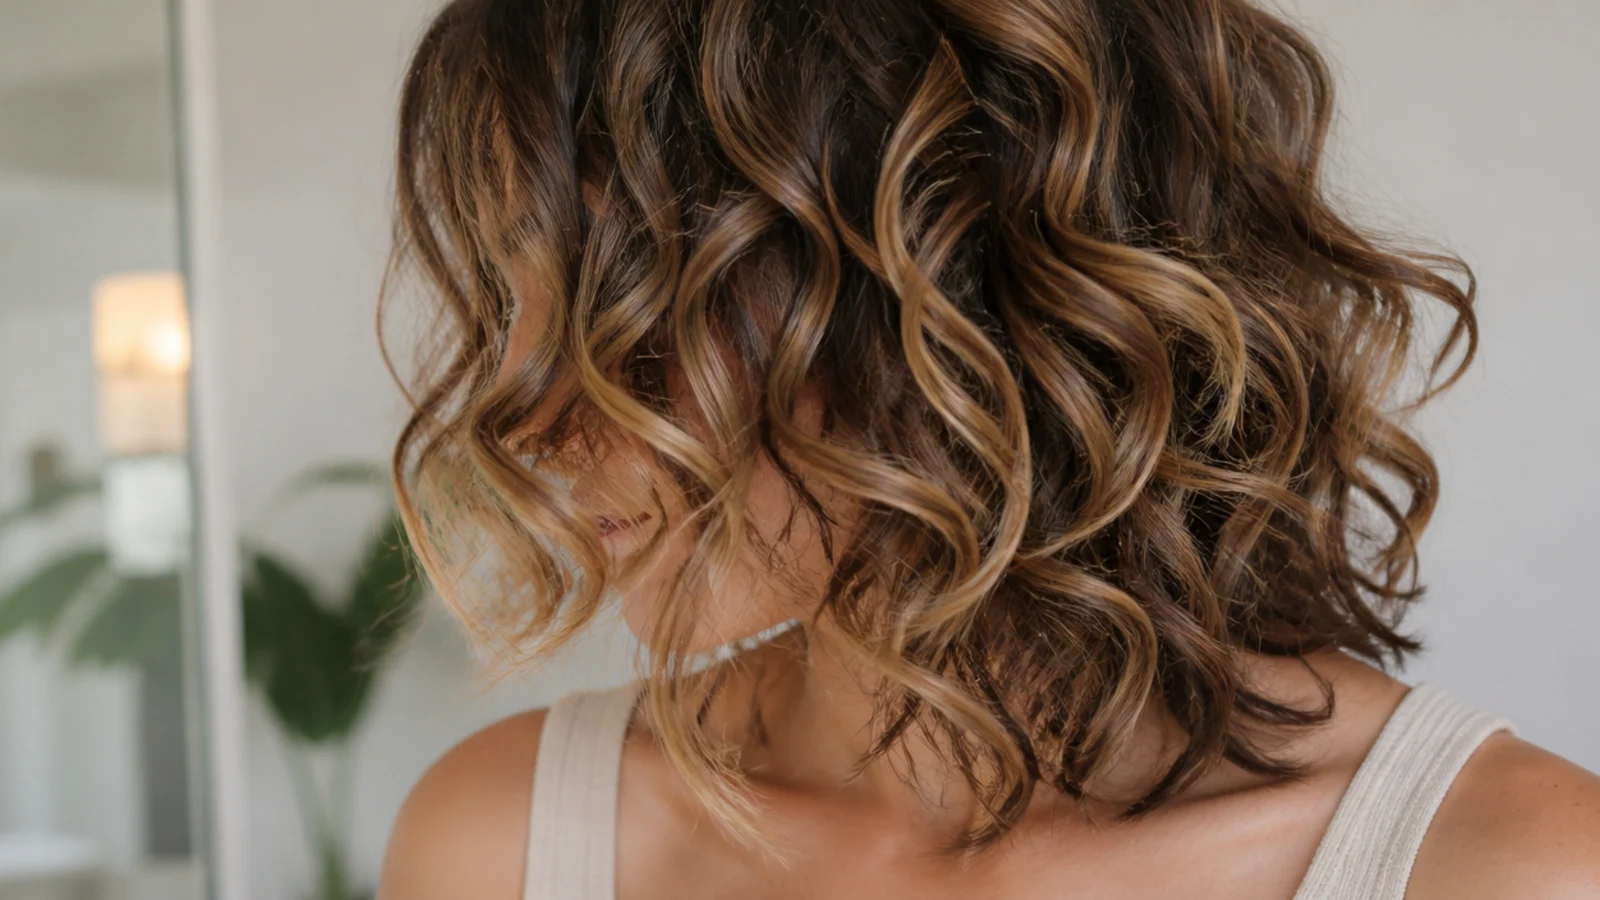
On 3A to 3B curls the framing must be cut dry, curl by curl, or it lands in the wrong place. A curl that measures at the collarbone wet will spring up two to three inches when it dries, so wet-cut chin framing routinely finishes at the cheekbone. A dry cut means the stylist shapes each front curl where it actually sits. Expect 90 to 120 minutes and 90 to 200 dollars at a curl specialist. Ask for the frame to follow the curve of the face rather than cutting a straight diagonal. More in curly mid length haircut.
Who it suits: 3A, 3B and 3C curls at collarbone length.
Tip: Book a dry cut specifically; the word to search on a salon menu is dry cutting or curl-by-curl.
11. Curved Face Framing Layers on Wavy 2B Hair

Waves need the frame cut as a curve, not a straight diagonal line, because the S bend already pulls the hair inward at the cheek and outward at the jaw. A curved frame that starts around the chin and hollows slightly at the cheekbone lets the wave sit where it wants to. Cut it as a straight line and the second bend pushes a chunk forward across the face by lunchtime. Add an inch of allowance for springback on 2B hair. Wave-specific shaping is covered in wavy mid length haircut.
Who it suits: 2B and 2C waves at collarbone to just below the shoulder.
Tip: Say cut for my springback, my hair dries about an inch shorter, before the first section comes down.
12. Long Invisible Layers With Subtle Face Framing for Fine Hair

Fine hair wants fewer, longer layers. Over-layering is the classic mistake here: every layer removes strands from the perimeter, so a heavily layered fine head ends up with wispy, see-through ends. The fix is two or three long internal layers that never come above the shoulder, plus framing that starts at the chin at the very earliest. The result still moves, but the ends stay dense. Ask for long invisible layers and framing only, and say explicitly no thinning shears. Styling help in how to style short fine hair.
Who it suits: Fine or low-density hair that goes limp with layers.
Tip: If a stylist reaches for thinning shears near the ends of fine hair, stop them; ask for point cutting instead.
13. Razored Face Framing Layers for Thick Coarse Hair

Coarse, dense hair cut with shears leaves a heavy blunt framing edge that flips outward at the cheek and refuses to sit flat. A razor tapers the last two inches of each framing piece instead, so the front sections get progressively finer toward the tip and fall softly against the face. It only works on hair that is genuinely thick and healthy, since a razor on dry, damaged or fine hair splits and frizzes. Say razored ends on the framing only, keep the perimeter blunt.
Who it suits: Thick, coarse, healthy hair; not fine, colored or damaged hair.
Tip: Ask when the blade was last changed; a dull razor is what causes the frizz people blame on razoring itself.
14. Side-Swept Face Framing Layers for a Long Face
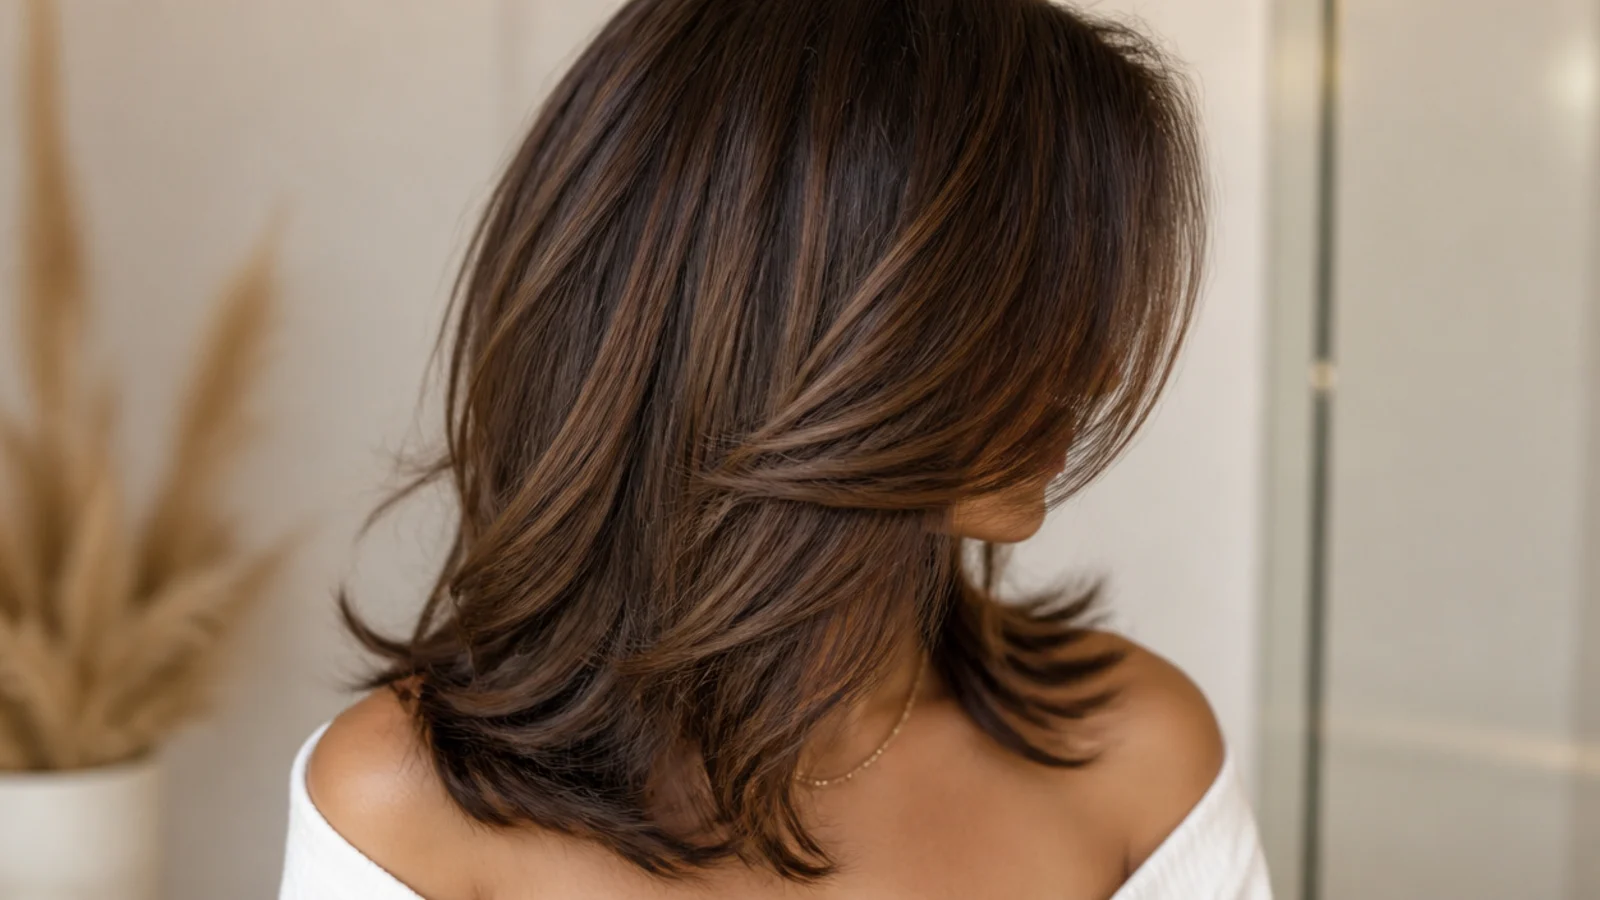
A long or oblong face wants horizontal interest, not more vertical line. A deep side part about two inches off center, with the framing starting at the cheekbone on the heavy side and the jaw on the light side, throws a diagonal across the face and visually shortens it. The asymmetry is the whole trick, and it is why a symmetrical center-part frame often falls flat on this face shape. Keep the perimeter at the collarbone rather than below the shoulder, since extra length lengthens the face further.
Who it suits: Long, oblong and narrow faces of any hair texture.
Tip: Ask for a slightly shorter frame on the heavy side of the part so the diagonal is visible, not accidental.
15. Choppy Face Framing Layers on a Mid Length Shag

The shag version: framing cut with deep point-cutting so the front pieces end in uneven, feathered tips rather than one clean line, sitting over a shag body with stacked crown layers. It reads lived-in and undone, and it is the most forgiving framing to grow out because the edge is already broken. It needs a texture product to look deliberate rather than fluffy, usually a sea salt spray or a matte paste. Diamond and heart faces carry it well. Beachy styling notes in beach hairstyles.
Who it suits: Diamond and heart faces, wavy or medium-texture hair.
Tip: Say deep point cutting, about an inch into the ends, so the choppiness is visible without looking shredded.
What Counts as a Mid Length Haircut: Collarbone to Just Below the Shoulder
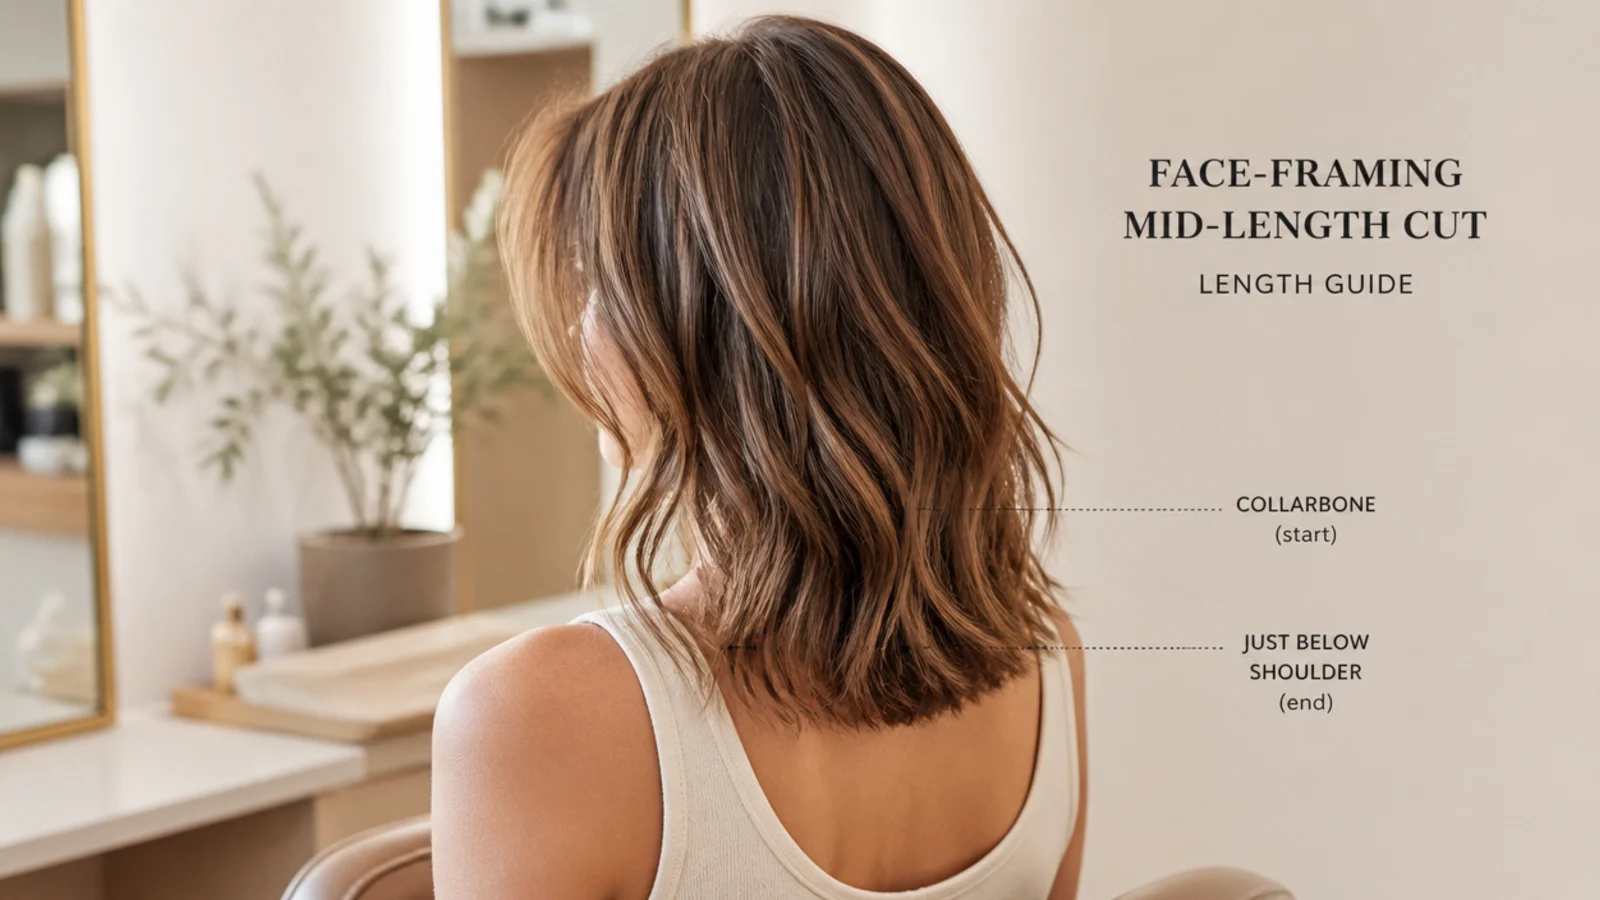
Mid length is a defined window, not a vague middle setting. The perimeter falls somewhere between the collarbone and roughly two inches below the shoulder line. Name the landmark rather than the word medium, because medium means one thing on a five foot two frame and another on a five foot nine one, while a collarbone is a collarbone on everybody. That range matters for face framing specifically. It is long enough that the front sections have somewhere to travel down to, so the frame reads as a soft diagonal instead of a stepped edge, and short enough that the framing pieces are not swallowed by the weight of the length behind them. Below the collarbone you are into short territory and the frame starts competing with the perimeter; past the shoulder blade it disappears entirely from the front view. Measure yours dry, standing up straight, and take a photo from the front rather than trusting the mirror. The full definition and the rest of the length family sit in the mid length haircut hub.
Face Framing Layers vs Curtain Bangs vs Money Piece: What Actually Differs
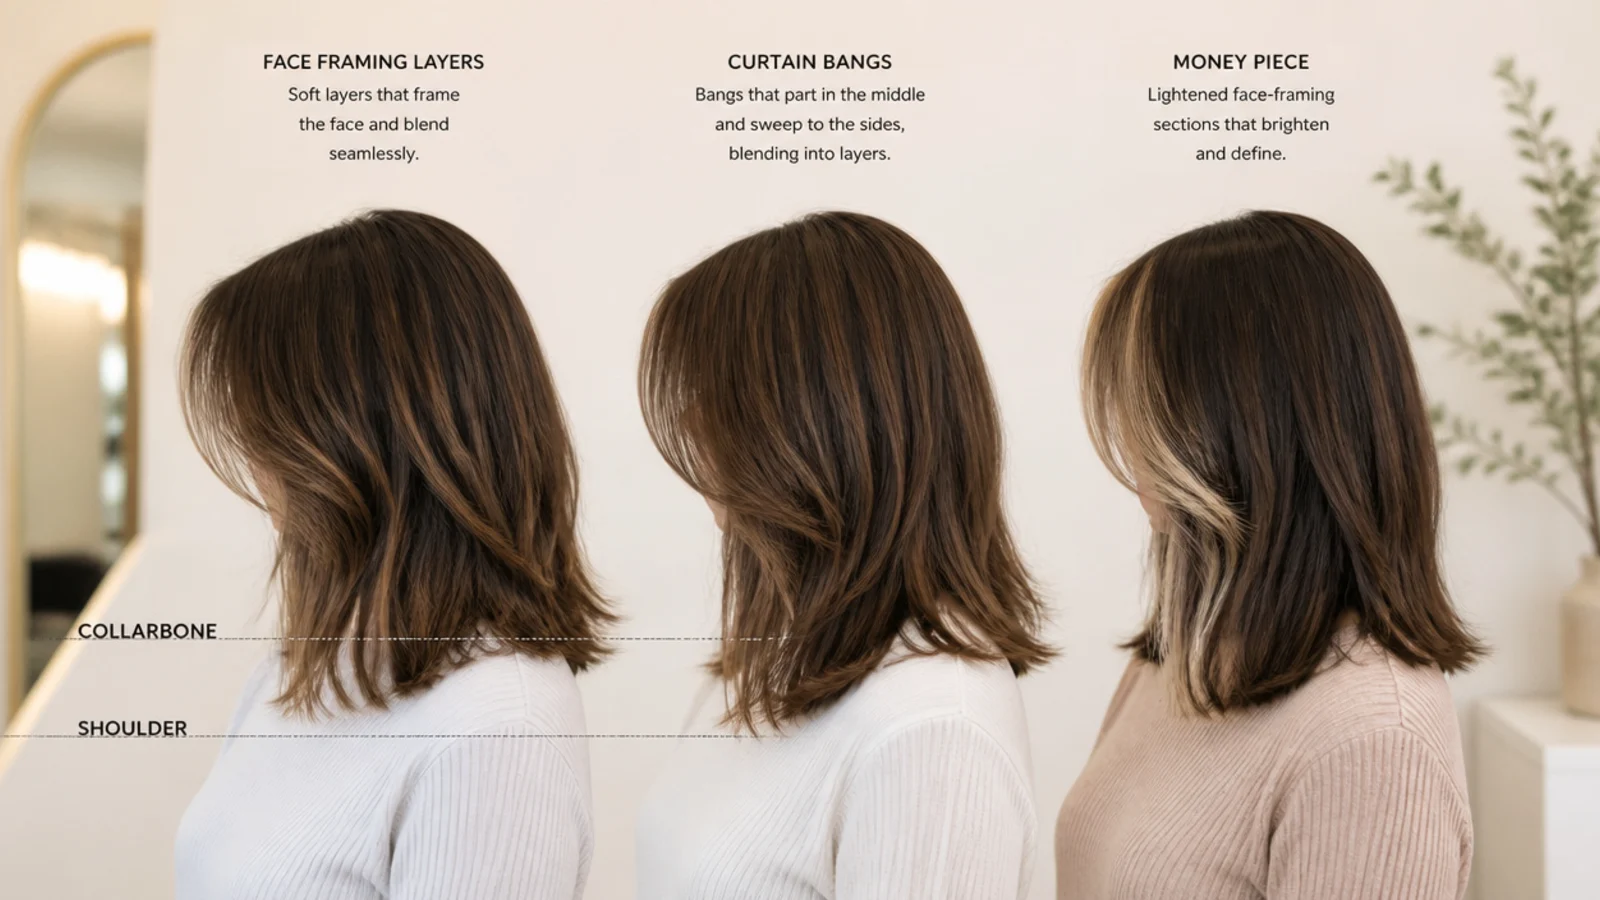
These three get used interchangeably online and they are three different things. Face framing layers are a cut: two sections at the sides of the head, taken from behind the front hairline, cut shorter than the perimeter so they fall against the face. Nothing is cut at the hairline itself, so you can still pull everything back. Curtain bangs are a fringe: hair taken from a triangular section at the front hairline, split at the center and swept to either side, usually landing around the cheekbone. Once it is cut you cannot un-cut it, and it needs trimming every four to six weeks. A money piece is color, not cut: two lightened sections at the front, two to three shades brighter than the base, that make whatever shape is already there catch the light. You can have all three at once, and plenty of salon photos do, but you should ask for them separately by name. If you want the fringe as well as the frame, read mid length haircut curtain bangs, and for the color version see money piece hair.
Where Face Framing Should Start for Your Face Shape
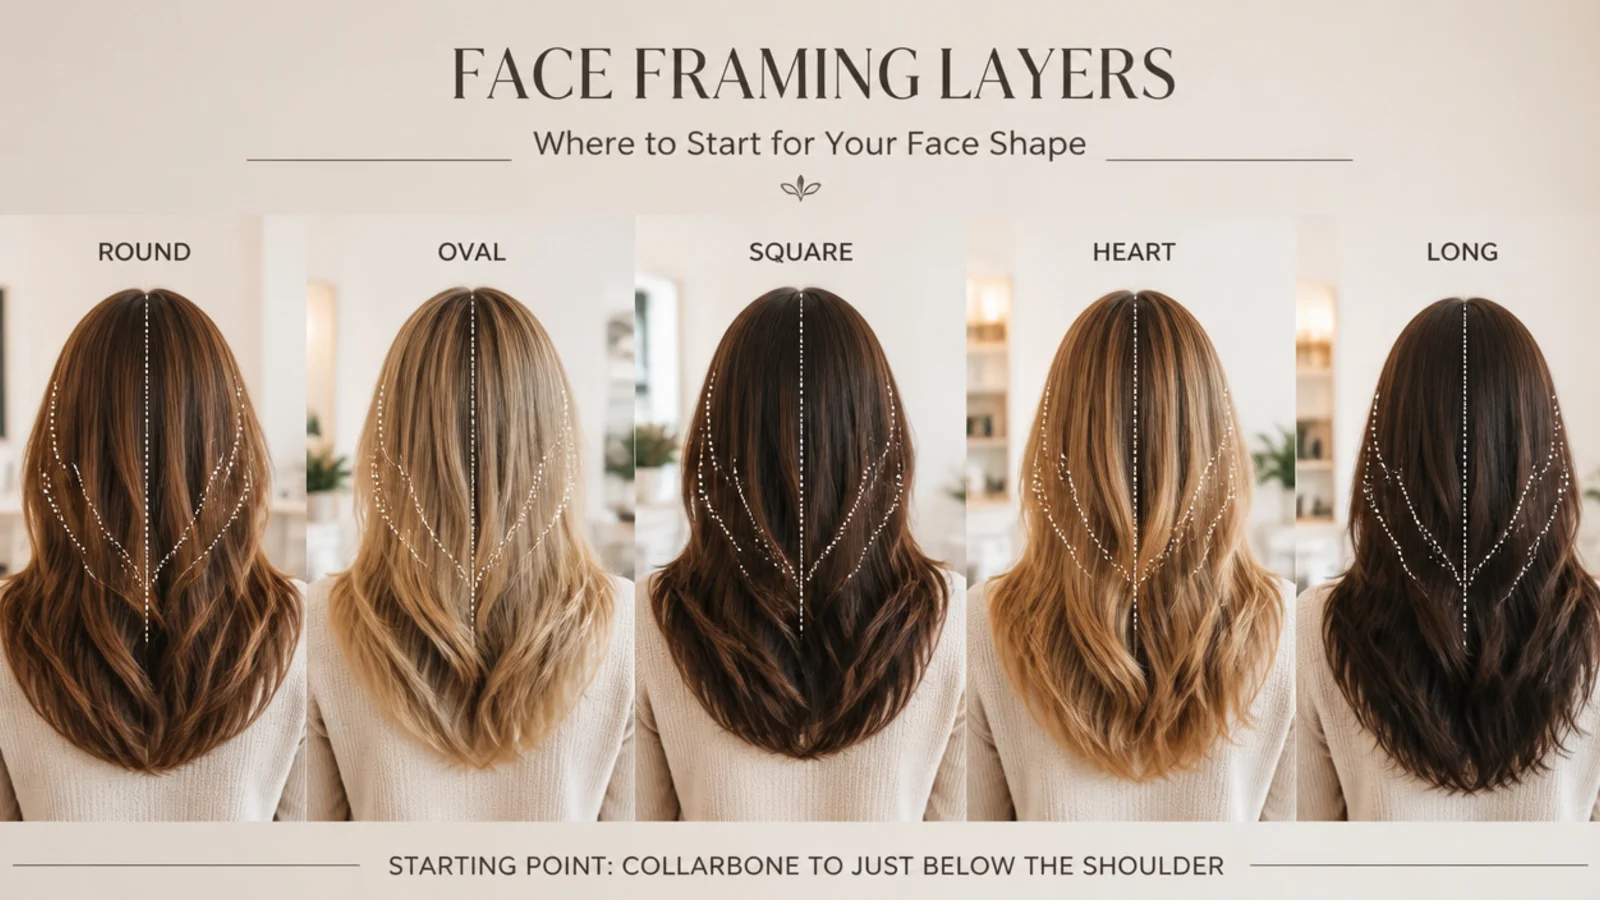
Face framing from the chin or jaw opens up the face without costing you any real length, which is why it is the lowest risk change available on a mid length cut. The start point does all the work. A round face wants the frame beginning at or just below the jaw, so the longest visible line falls past the widest part of the face instead of across it. A square jaw wants a bottleneck shape, narrow at the temple and flaring outward level with the jaw corner, which rounds the angle rather than tracing it. A long or oblong face wants a deep side part with an asymmetric frame, throwing a diagonal across the face to shorten it. A heart shaped face wants the movement kept low, starting near the collarbone, to add weight at the narrow chin rather than the wide forehead. Oval and diamond faces can take the cheekbone start, which is the only one that adds width up top. If you are unsure of your shape, measure forehead, cheekbone and jaw width and see which is largest; the frame should start below your widest measurement, not on it.
How to Ask for a Face Framing Mid Length Haircut: Exact Wording
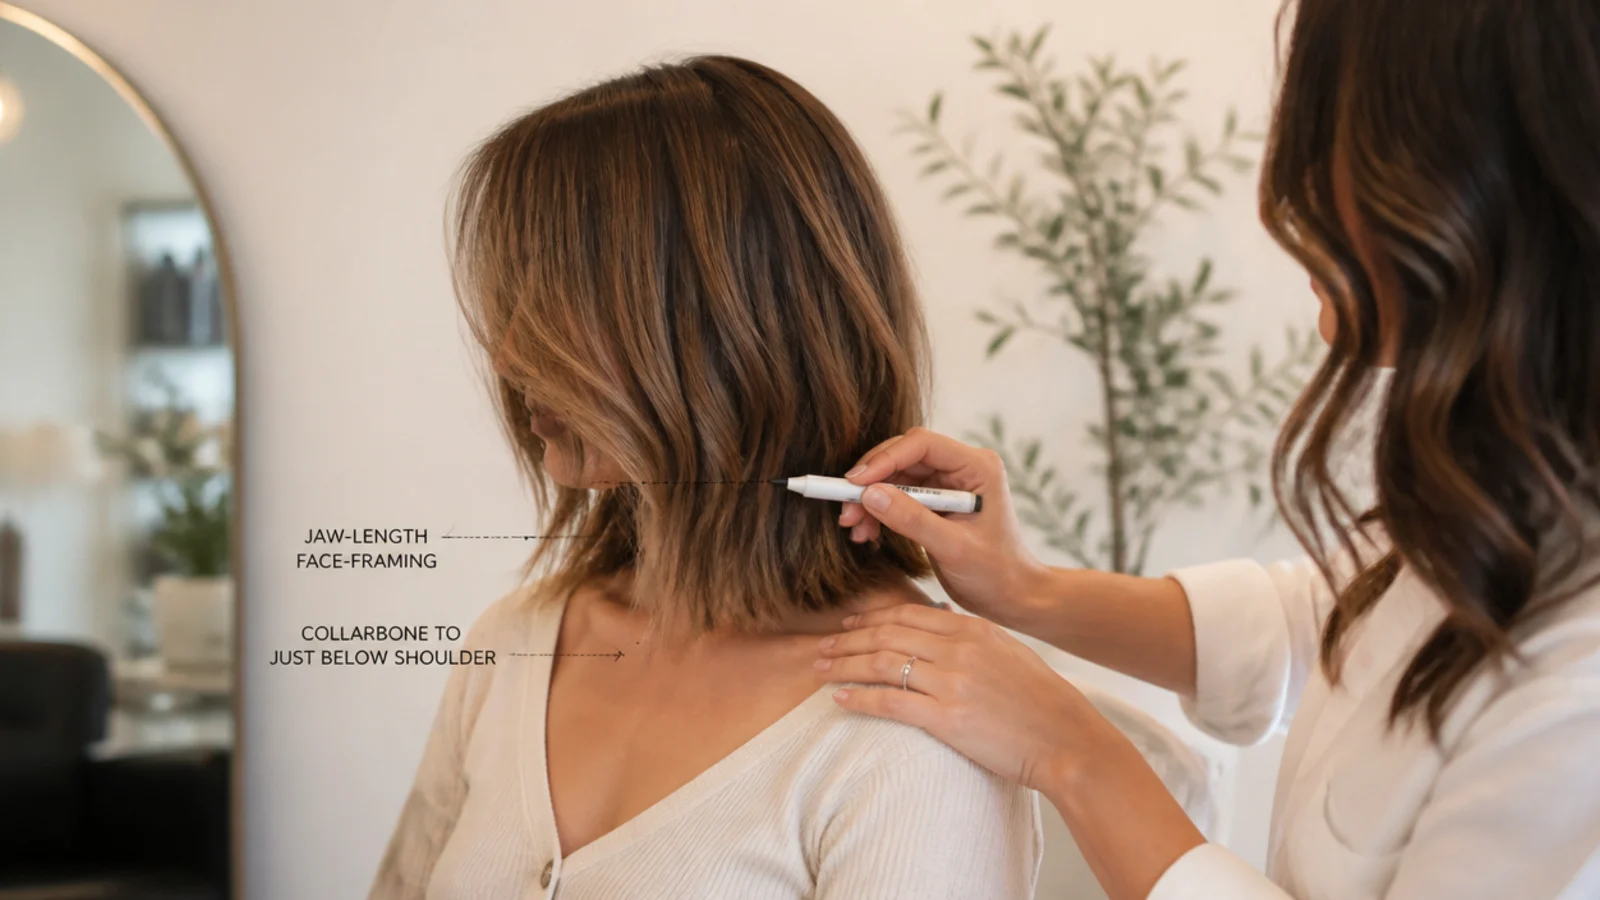
The sentence that gets you the cut in these photos is short: collarbone length, long invisible layers, face-framing starting at the jaw. Swap the landmark for cheekbone, chin or collarbone depending on the start point you chose. Then add three qualifiers. First, name the perimeter treatment: blunt across the back, or softly point cut, because that decides whether the ends look dense or feathered. Second, say how many internal layers you want, and if your hair is fine say two or three long layers, nothing above the shoulder. Third, say how the frame should be finished: point cut so it blurs, not blunt. Bring two photos of hair with your own texture rather than styled photos of a different texture, since straight hair styled into waves and naturally wavy hair need different cuts. Finally, be honest about your mornings. Air-dry with a leave-in is a different brief from a round brush blowout, and a cheekbone start assumes the second. More on layer vocabulary in mid length haircut layers and on texture in hairstyle for your hair type.
Face Framing on Fine vs Thick vs Curly Hair
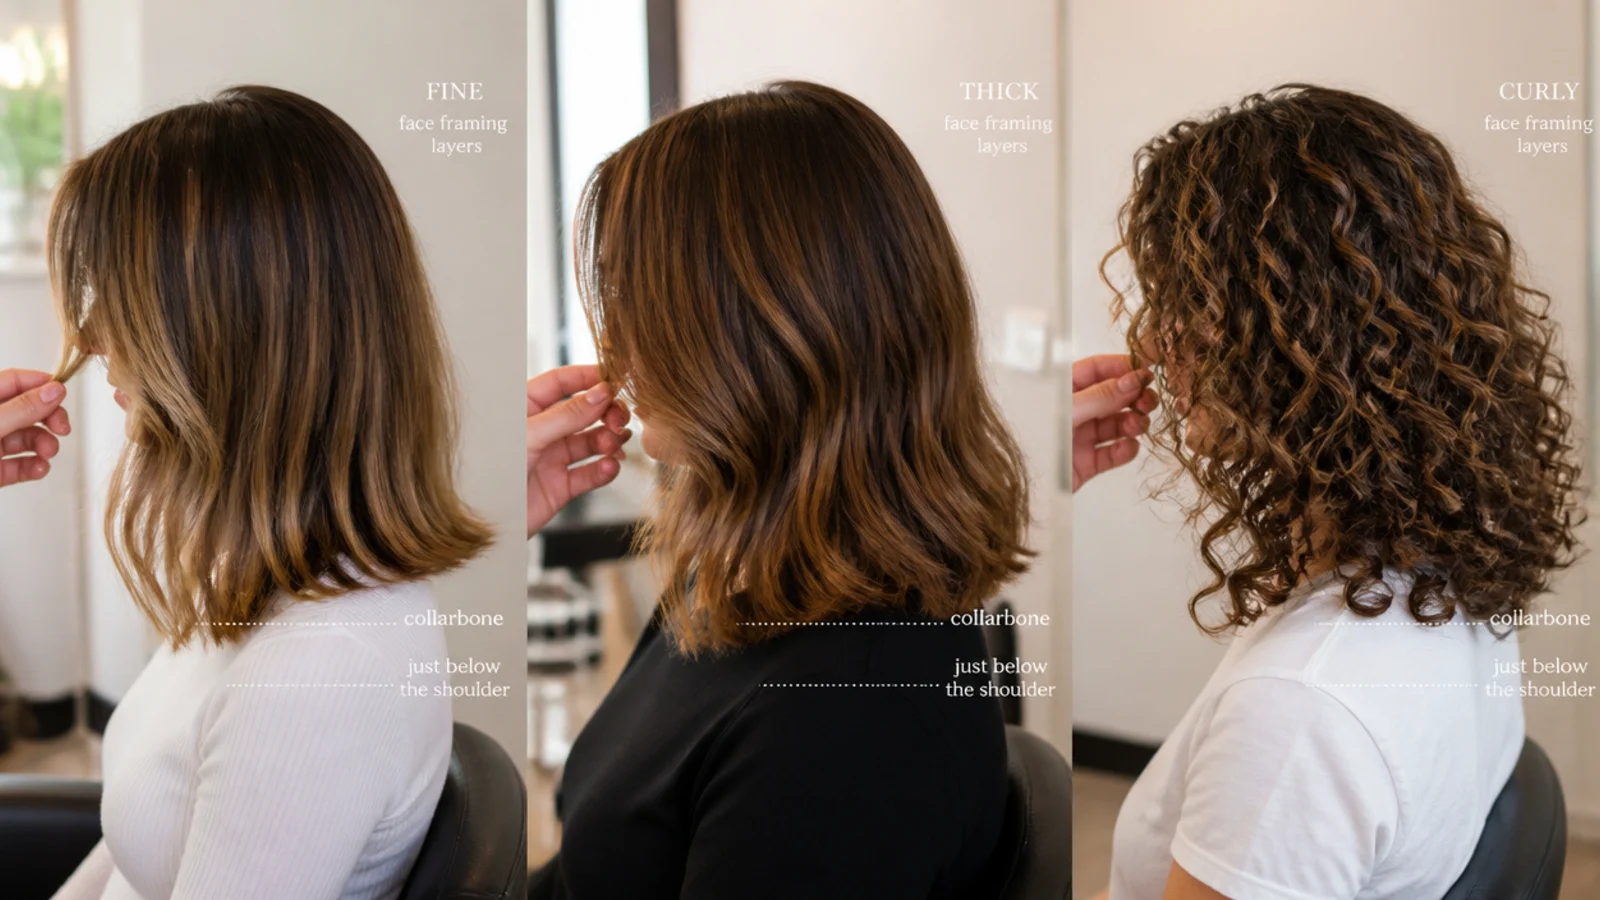
Three textures, three different briefs. Fine hair wants fewer, longer layers, and framing that starts no higher than the chin. Every layer pulls strands out of the perimeter, so a heavily layered fine head ends up with sparse, see-through ends, and the shortest framing pieces are the first to look wispy. A blunt perimeter with framing only is the strongest combination here. Thick hair has the opposite problem: without internal weight removal the front sections sit on top of a solid mass and flip outward at the cheek, so it needs the butterfly approach or razored framing tips to sit flat. Curly hair should be cut dry, curl by curl, so the length lands where it actually falls once the curl springs. A wet-cut chin frame on a 3B curl regularly finishes at the cheekbone once it dries, which is the single most common curly framing complaint. Add one to three inches of springback allowance depending on curl tightness. Straight fine hair also loses the shape fastest during the day, so a texture spray at the roots is doing structural work, not just finishing. Texture-specific guides: wavy mid length haircut and straight mid length haircut.
Day-to-Day Styling and Growing Face Framing Layers Out
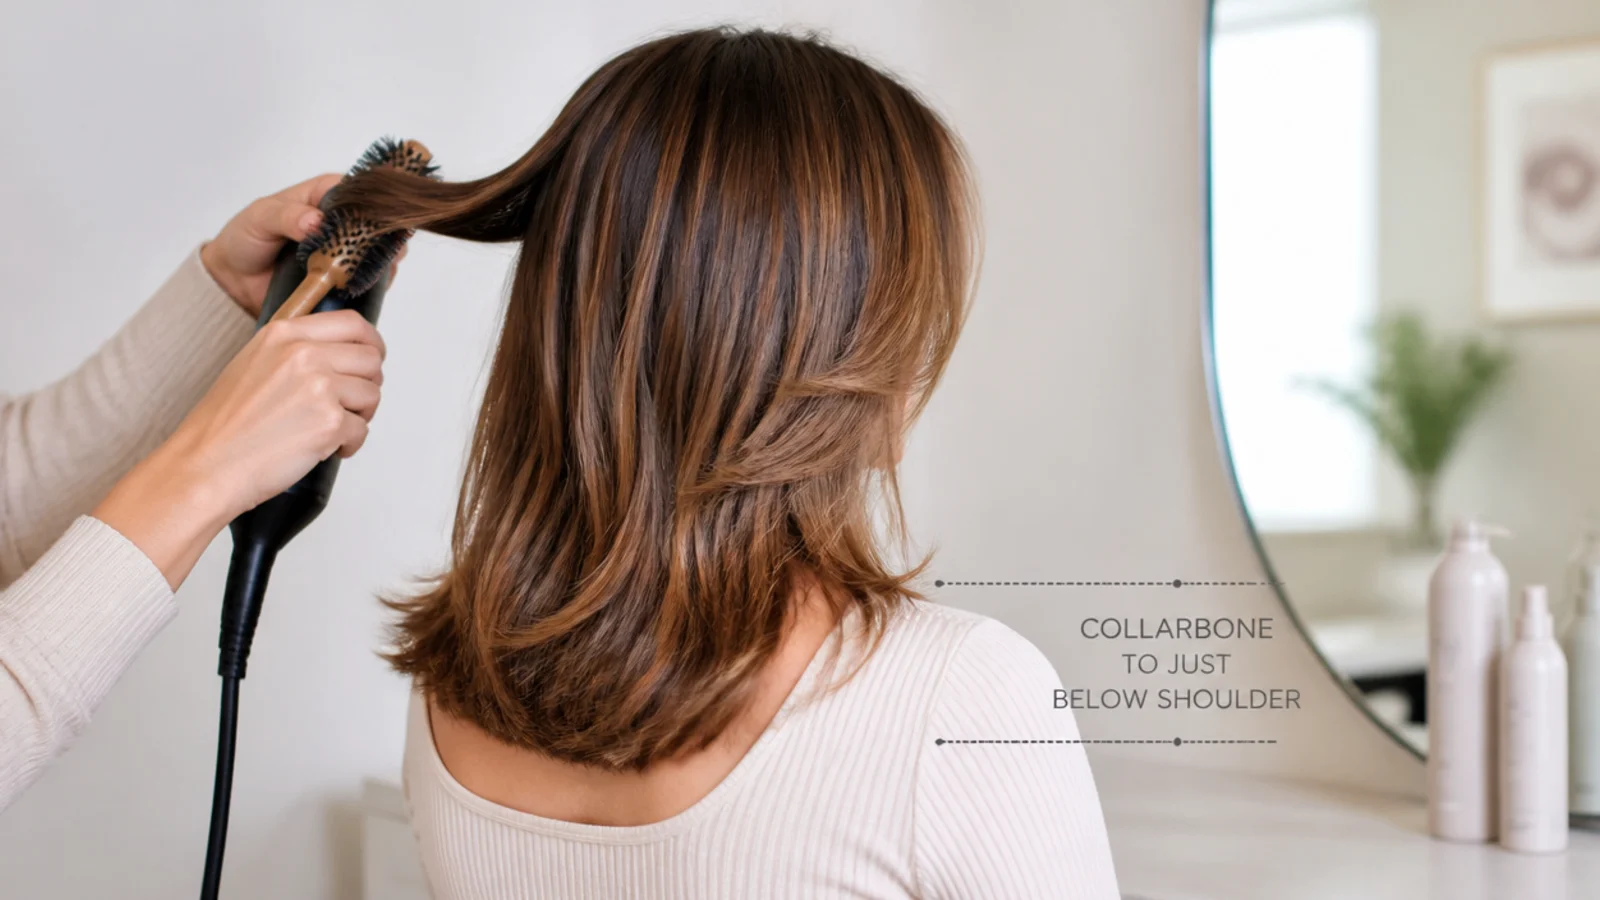
Day to day, the framing takes about five minutes. Rough dry the front sections away from the face, then take a two inch round brush or a one inch wand and put a soft C bend into each piece, curving away from the cheek. Curving toward the face is what makes framing look like grown-out bangs. On day two, a dry shampoo at the front roots and a quick re-bend on the two framing pieces alone will reset the whole cut. Heatless options work too if you set the front sections outward overnight, covered in heatless curls overnight and heatless curl tools compared. Trim every 8 to 12 weeks, because face framing is the layer that blurs first, usually around week ten, when the shortest piece has dropped an inch and stops reading as a deliberate shape. Growing it out is easier than growing out bangs: at roughly half an inch a month, a jaw start rejoins the perimeter in four to seven months and a cheekbone start in ten to fourteen. During the awkward stretch, tuck the front behind one ear or use a low half-up, both of which are in 5 minute everyday hairstyle and ponytail styles.
Frequently Asked Questions
What is a face framing mid length haircut?
It is a collarbone to just-below-shoulder cut where the two front sections are cut shorter than the rest so they fall against the face. Nothing is taken from the front hairline, so it is not a fringe, and the perimeter length stays untouched. The look is defined by where the shortest framing piece starts, usually the cheekbone, chin or jaw.
Where should face framing layers start?
Start the frame below your widest facial measurement. A round or square face is best served starting at the jaw, an oval or long face can take a cheekbone start, and a heart shaped face suits a collarbone start that keeps weight low. Chin is the universal default and the safest choice if you have never had face framing before.
What is the difference between face framing layers and curtain bangs?
Face framing layers are cut from sections behind the front hairline and can still be pulled back into a ponytail. Curtain bangs are cut from a triangular section at the hairline itself, split at the center, and cannot be tied back until they grow. Framing needs a trim every 8 to 12 weeks; curtain bangs need one every 4 to 6.
Do face framing layers suit a round face?
Yes, as long as they start at the jaw rather than the cheekbone. A jaw start places the longest visible line past the widest point of the face, which lengthens it. A cheekbone start does the opposite and adds width exactly where a round face already has it. Pair the jaw start with a deep side part for the strongest effect.
Do face framing layers work on fine hair?
They do, and they are often the only layering fine hair should have. Keep the perimeter blunt, skip internal layers, and start the frame at the chin or lower. Over-layering fine hair removes strands from the perimeter and leaves the ends sparse, which is the most common reason people say layers made their hair look thinner.
How often should I trim face framing layers?
Every 8 to 12 weeks. Face framing is the layer that loses definition first because it is the shortest piece in the cut, and around week ten it has usually dropped about an inch and stops reading as a deliberate shape. A cheekbone start needs the shorter end of that range, closer to 6 to 8 weeks, to avoid looking like grown-out bangs.
How long does it take to grow out face framing layers?
Hair grows roughly half an inch a month. A jaw-start frame rejoins the collarbone perimeter in about four to seven months, while a cheekbone start takes ten to fourteen. The grow-out is much gentler than bangs because the shortest piece is already several inches long, so it blends into the length rather than sitting across your eyes.
Should curly hair get face framing layers cut wet or dry?
Dry, and ideally curl by curl. Curls shrink one to three inches between wet and dry depending on tightness, so a frame cut to the chin while wet routinely finishes at the cheekbone once it springs. A dry cut lets the stylist place each front curl where it actually falls. Look for dry cutting or curl-by-curl on the salon service menu.
Can I add face framing layers without cutting any length?
Yes, and that is the main appeal. The stylist only cuts the two front sections, so the back perimeter, your ponytail length and your overall silhouette all stay the same. Ask for face-framing only, no length off the back, no internal layers, and you will leave with the same haircut plus a softer front.
Which mid length haircut look are you saving?
If you take one thing from these 15 face framing mid length haircut ideas, make it the start point. Cheekbone is dramatic and needs styling. Chin is the safe universal default. Jaw softens width. Collarbone is barely a change at all, which is exactly why it suits fine hair. Say the length landmark out loud in the chair, ask for the frame to be point cut rather than blunt so it blurs as it grows, and book a trim for eight to twelve weeks out rather than waiting for it to look wrong. When the shortest piece finally reaches your jaw and you want a new shape, look at mid length haircut layers or browse the rest of the mid length haircut hub.