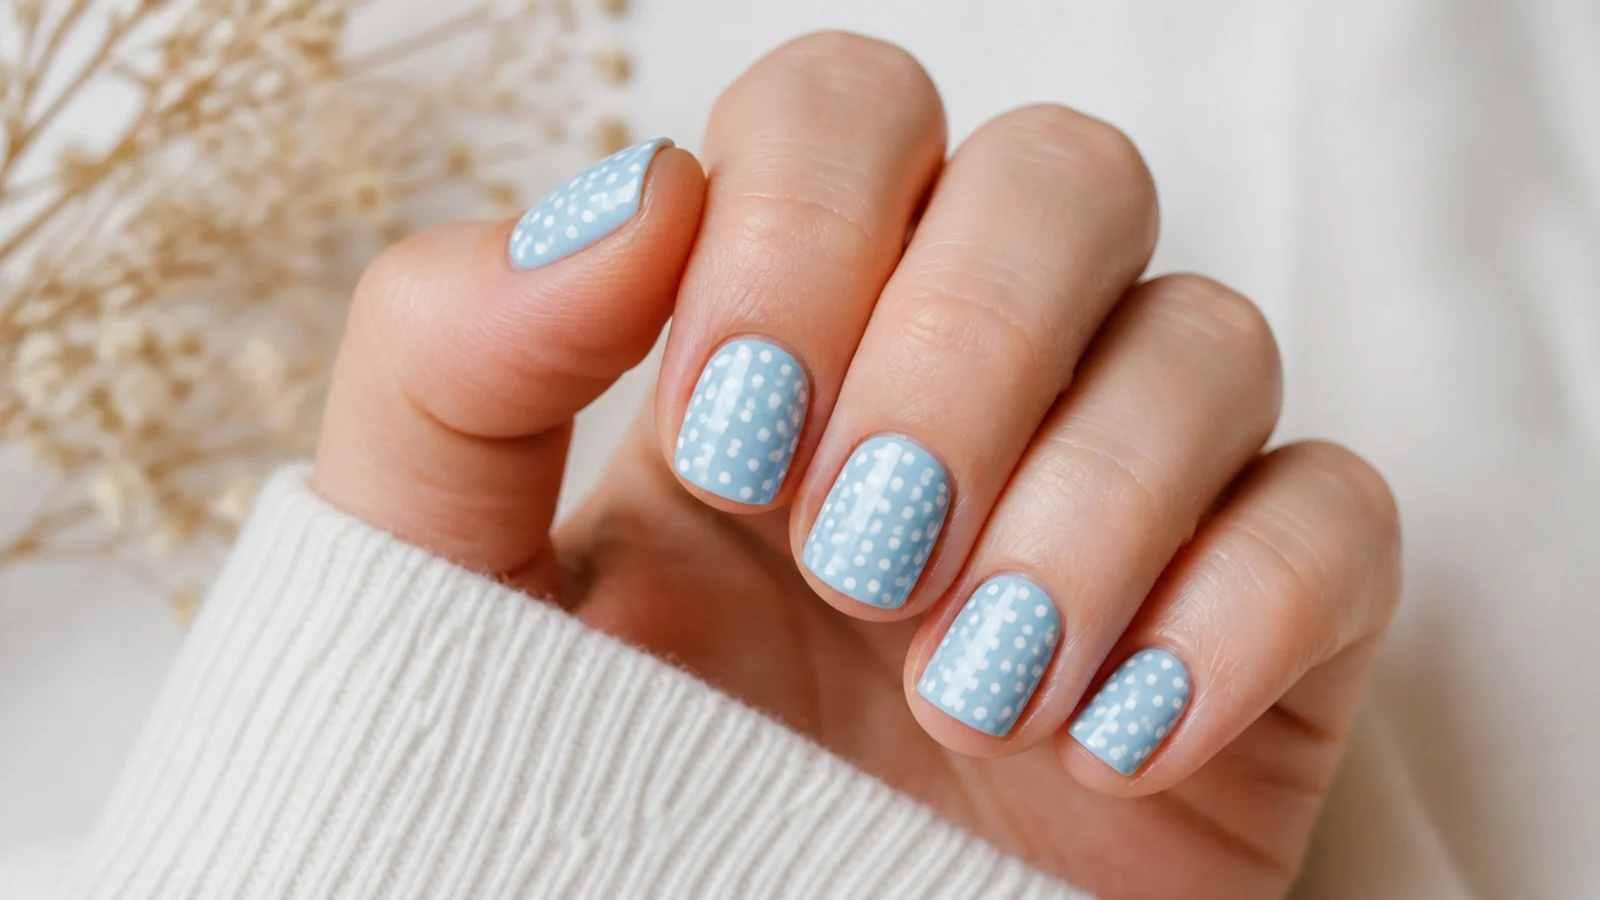
Quick Comparison
| Regular Polish | At-Home Gel | |
|---|---|---|
| Startup cost | About 25 dollars for two polishes, base, top coat and a dotting tool | About 60 to 90 dollars once you add a UV lamp and gel polishes |
| Time per full set | 20 to 40 minutes including air drying between layers | 35 to 55 minutes; curing is faster but there are more steps |
| Wait between layers | 5 minutes minimum, and dots still dent if you rush it | 30 to 60 seconds under the lamp, fully hard every time |
| Smudge risk on art | High; the base stays soft for several minutes after it looks dry | Very low; each cured layer is a solid surface to dot on |
| How long it lasts | 5 to 7 days, less with swimming and dish water | 2 to 3 weeks with normal wear |
| Fixing a mistake | Easy; acetone on a cleanup brush lifts a wet or dry dot | Harder once cured; you file the layer back or start the nail again |
| Sunscreen and saltwater | White and pastel shades yellow within about a week of daily SPF | More resistant, but chrome and glitter still dull in chlorine |
| Removal | One acetone wipe, about 30 seconds per nail | 10 to 15 minutes of foil soaking, and peeling it damages the nail |
| Best for | Trying 20 designs in a summer and changing color weekly | One design that has to survive a 10 day beach trip |
1. White Polka Dot Nails on Sky Blue
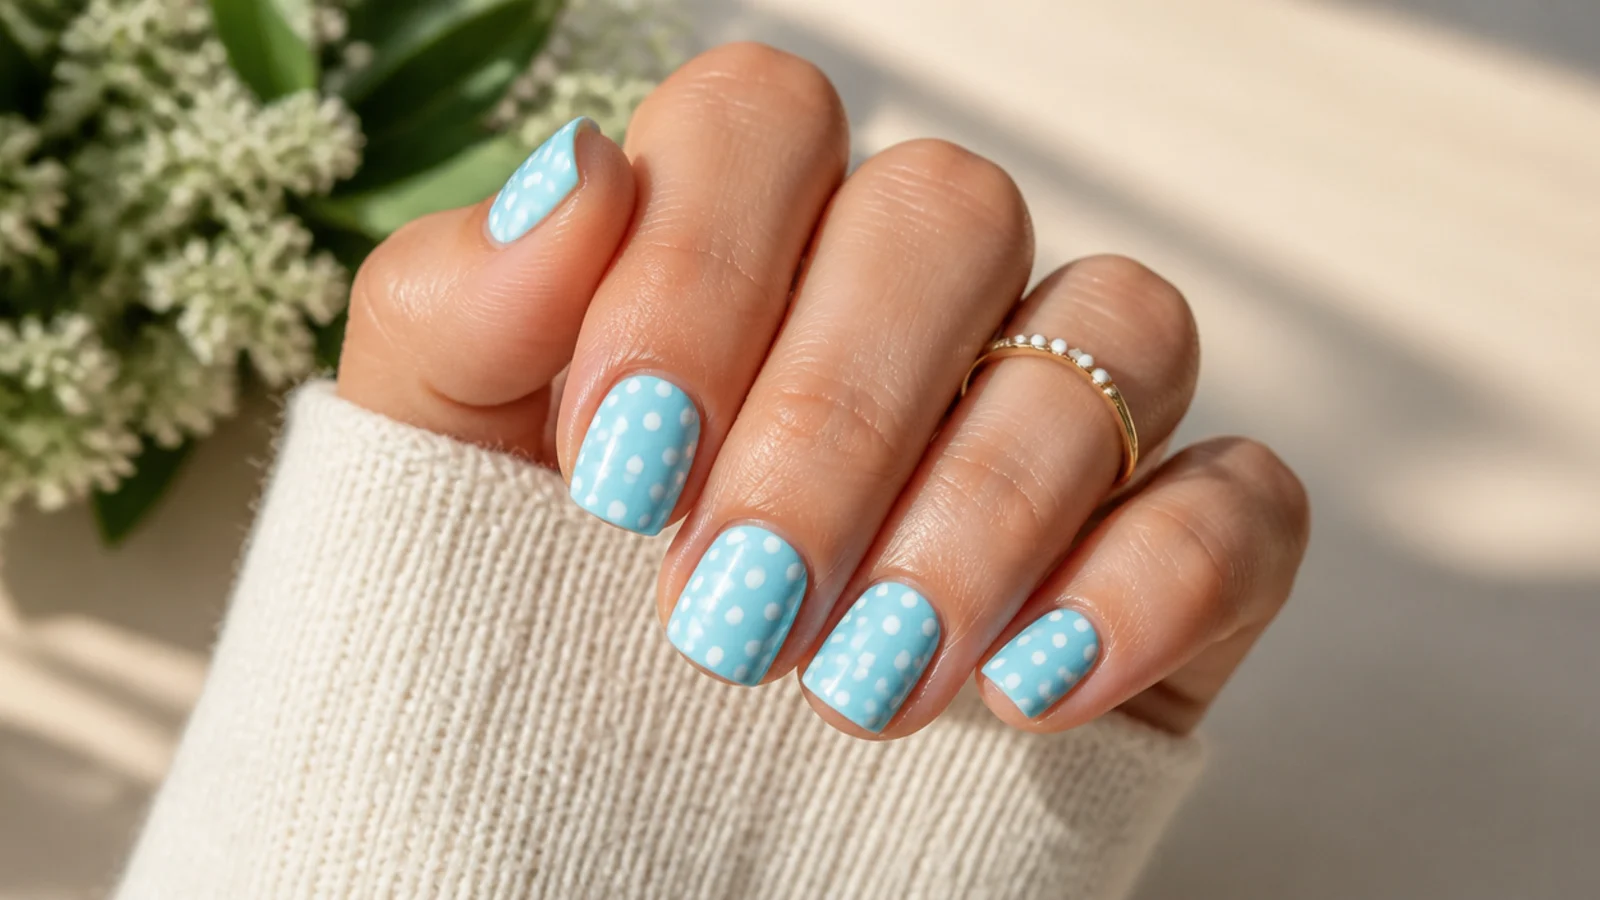
The design to start with. Two coats of a mid sky blue such as Essie Bikini So Teeny, five full minutes of drying, then five or six white dots per nail using the large end of the dotting tool. Space them by eye in a loose diagonal rather than a grid, because a grid exposes every millimeter of error. Total time is about 25 minutes including drying. Blue and white is the most saved summer combination there is, and it is legible even on a 3mm free edge. If you have never painted art at home before, start with the walkthrough in cute simple nails at home.
Who it suits: Absolute beginners and anyone with short nails.
Tip: If a dot spreads into a blob, do not blot it. Let it fully dry, then lift it off with a cleanup brush dipped in acetone and redot.
2. Coral Polka Dot Nails on a Milky Base
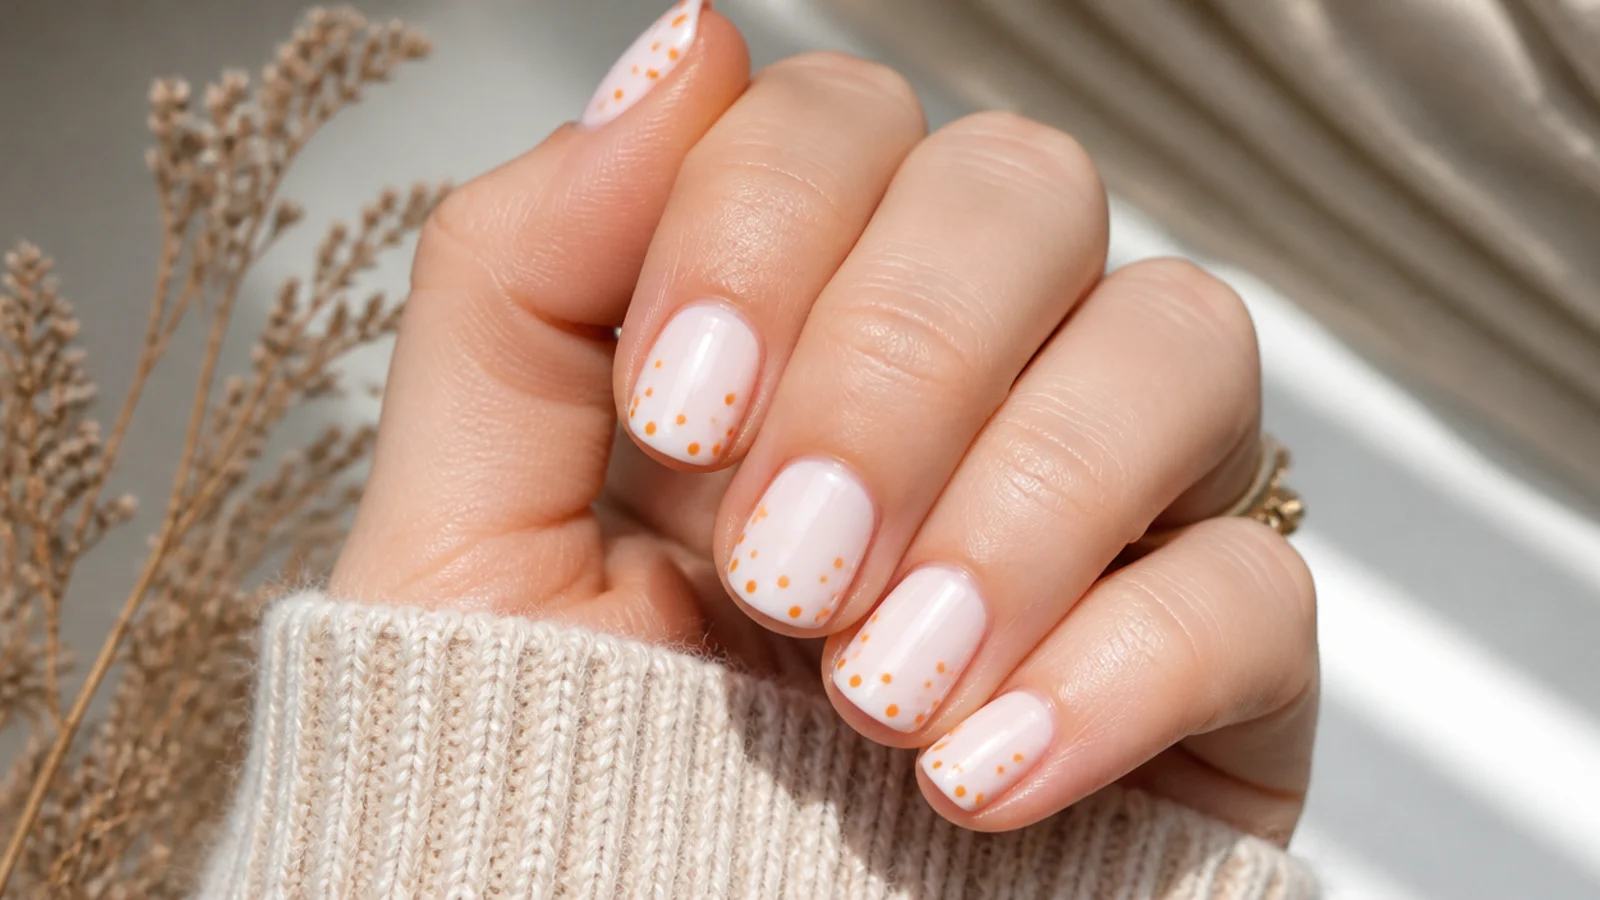
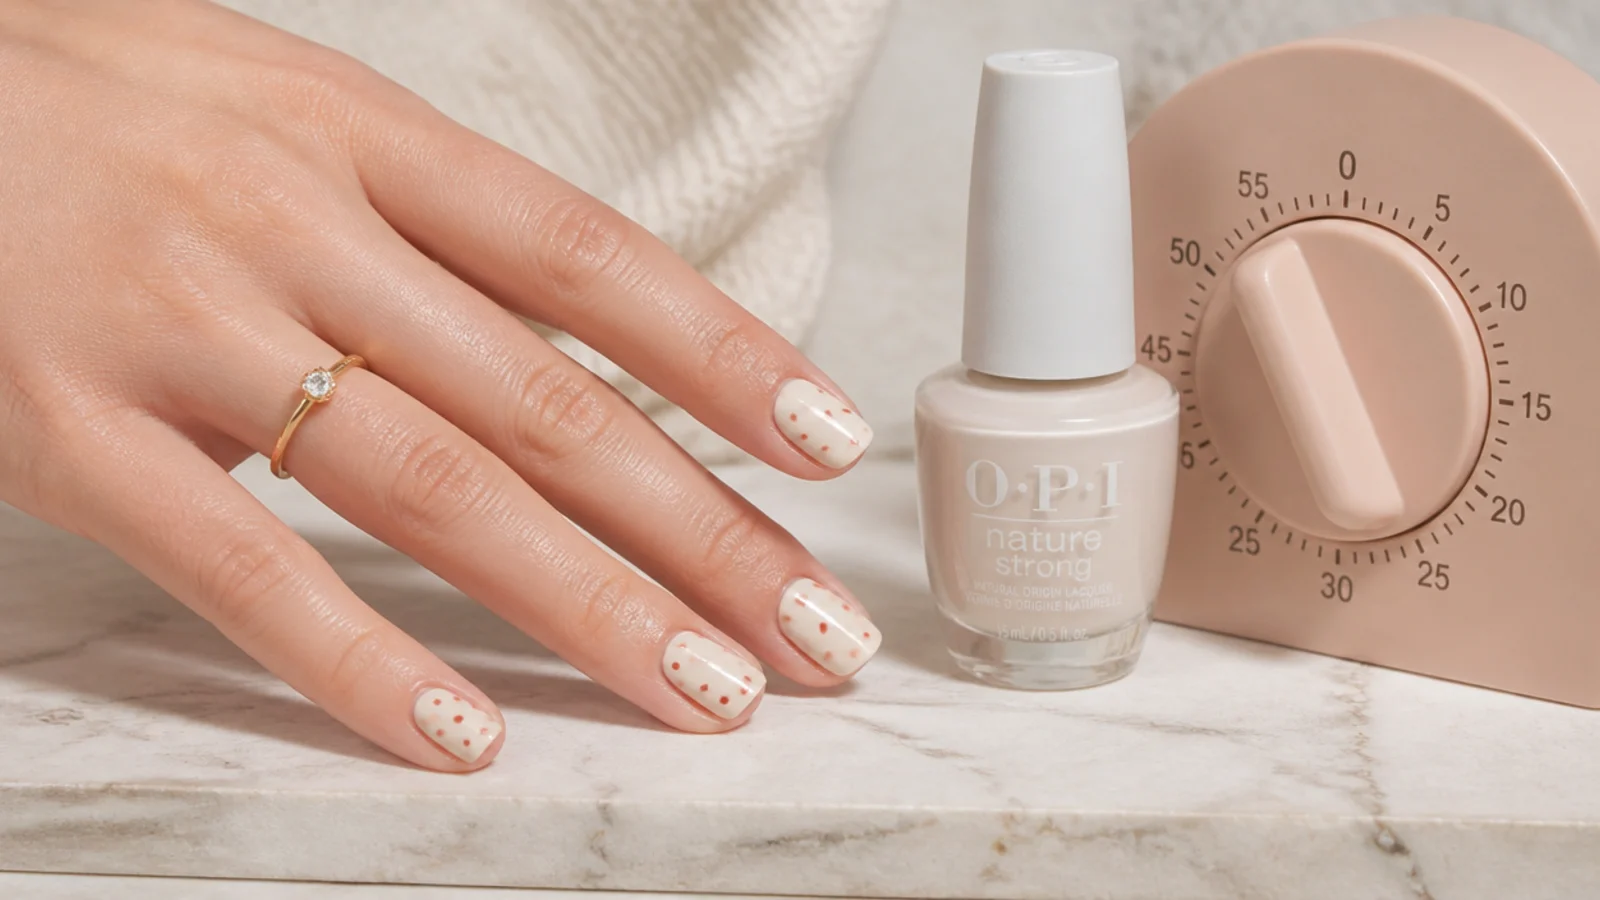
The softer version of dot nails: two sheer coats of a milky white like OPI Funny Bunny, then small coral dots concentrated toward the free edge and thinning out toward the cuticle. Loading the dots at the tip makes short nails look longer, since the eye stops where the pattern stops. Use the small end of the dotting tool and reload polish every two dots so the size stays consistent. About 25 minutes. Coral reads warm against a tan and stays office-safe because the base is neutral.
Who it suits: Work weeks, short nails and anyone who finds full color too loud.
Tip: Dots shrink as they dry. Place them slightly bigger than you want and they will settle to the right size.
3. Black Dot Nails on Butter Yellow
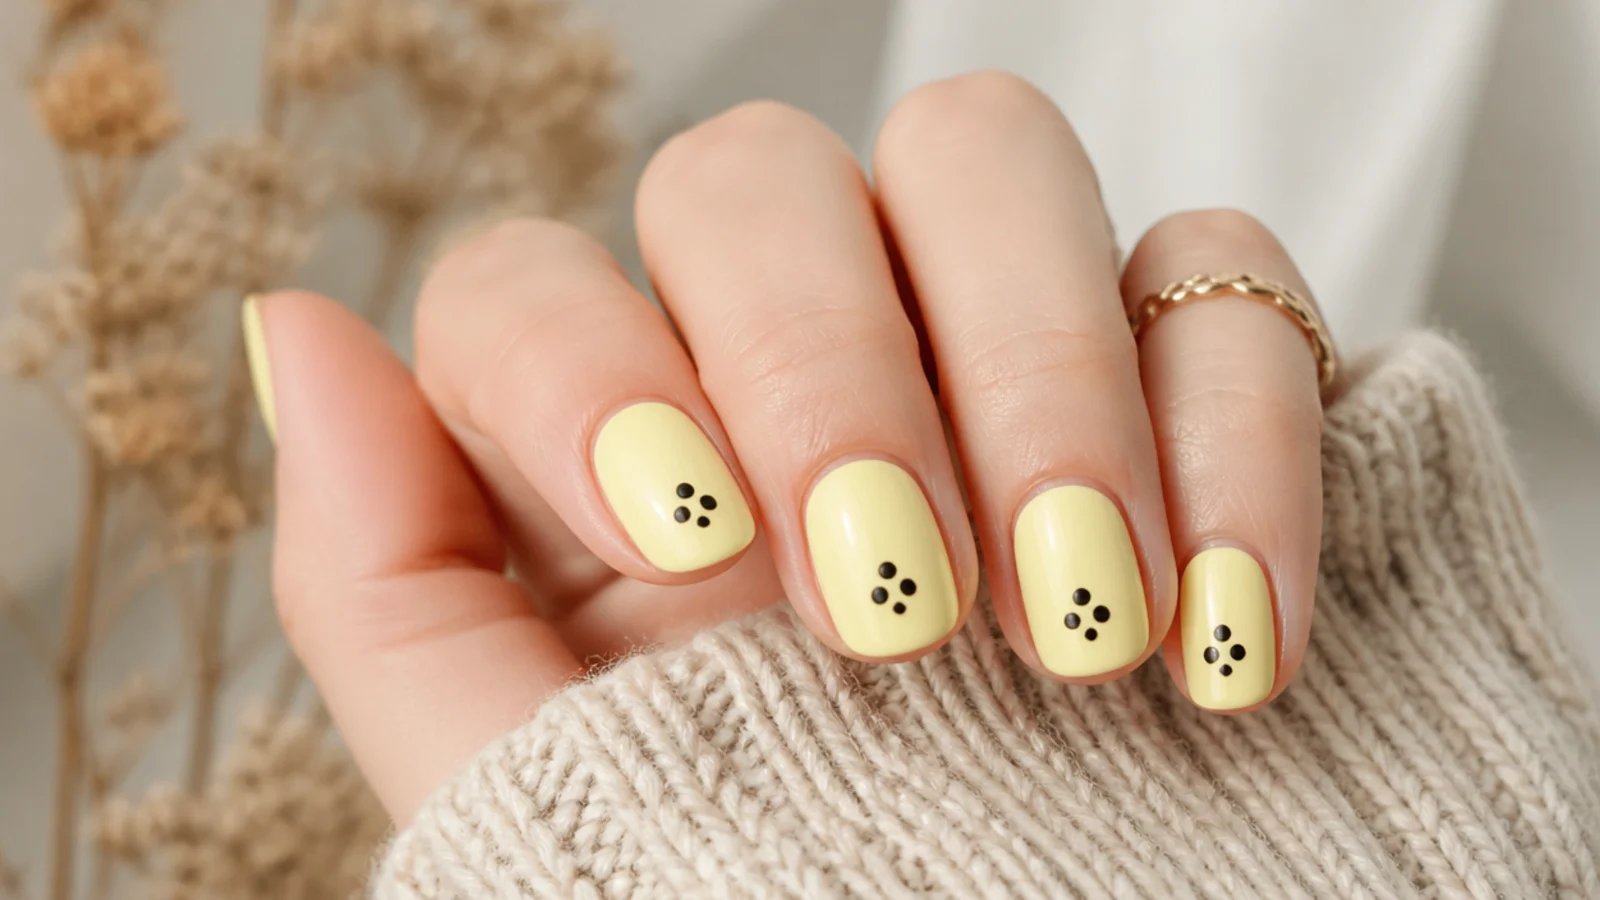
Butter yellow is the summer neutral that keeps coming back, and three small black dots in a loose triangle are all it needs. Yellow polish is notoriously streaky, so use three thin coats instead of two thick ones and expect it to look patchy until the third. Then dry five minutes and add the dots with the small tip. Total time about 30 minutes because of the extra yellow coat. The graphic black keeps butter yellow from reading washed out on fair skin.
Who it suits: Anyone who wants a trend color without buying five polishes.
Tip: If the yellow still looks streaky at coat three, a single sheer white coat underneath fixes it permanently next time.
4. Micro Dot French Tip Nails
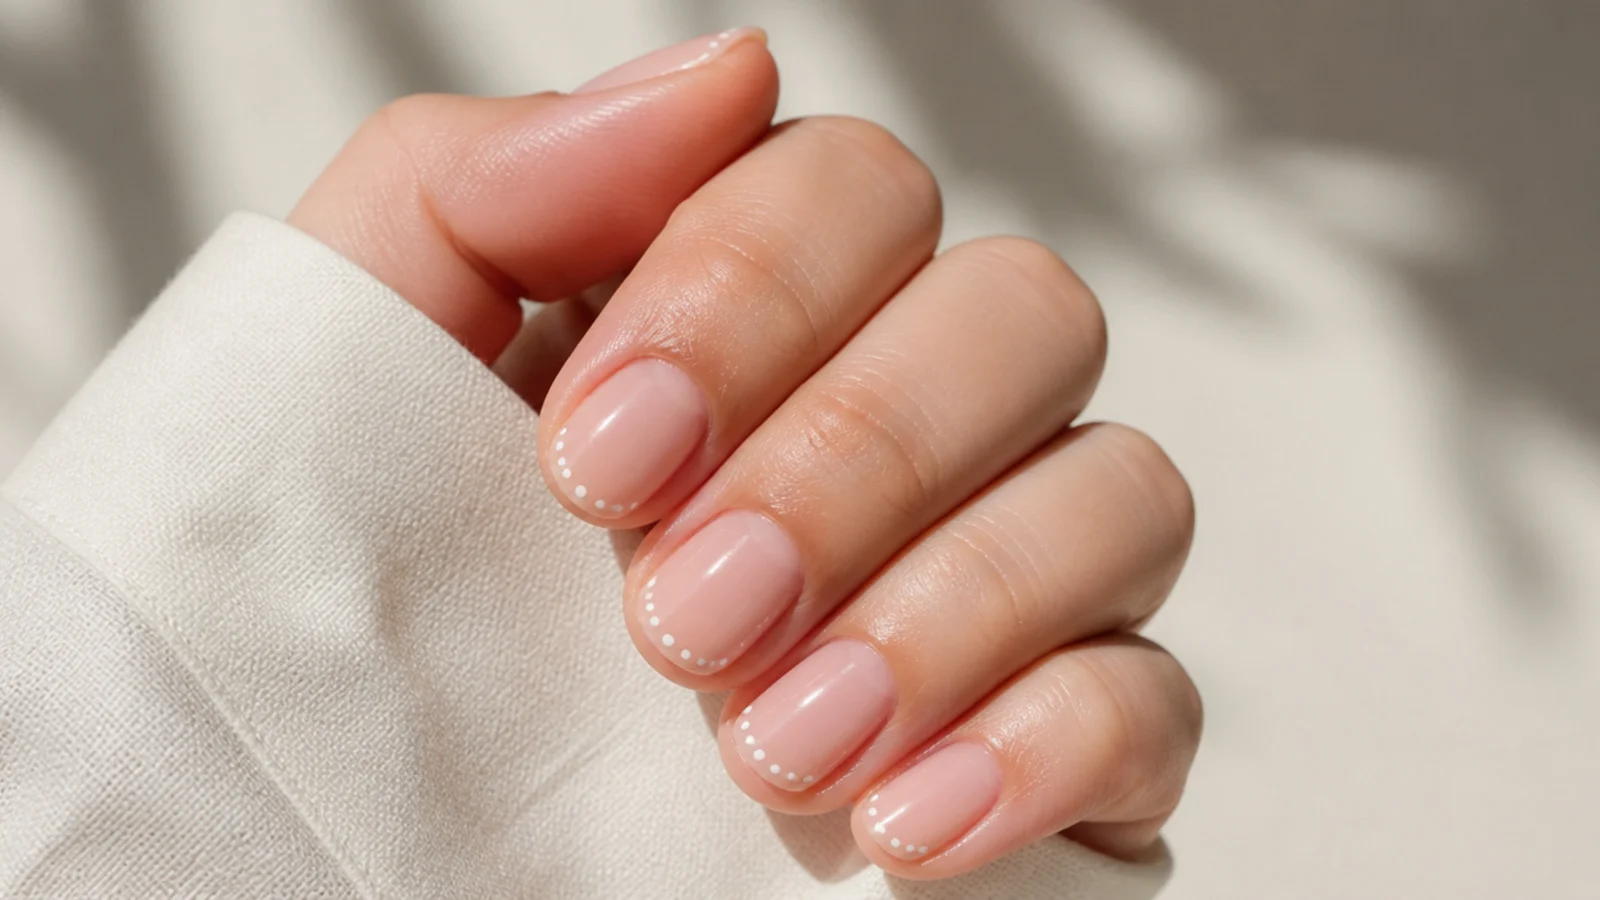
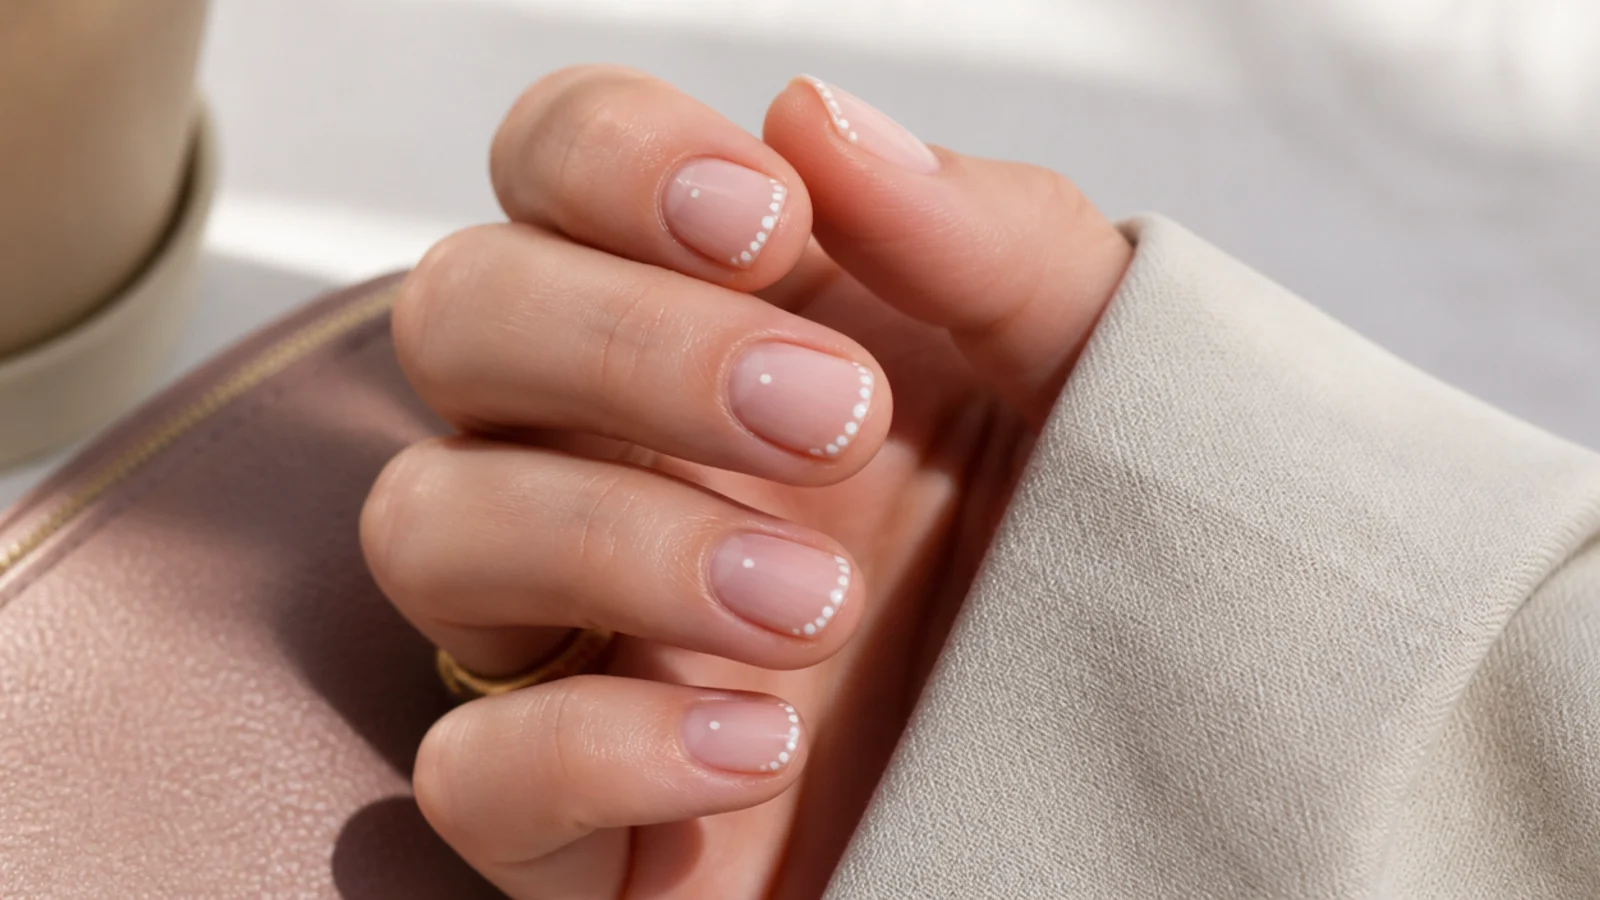
A French tip made of dots instead of a painted line, which removes the hardest part of a French: the smile line. Over a bare or sheer pink nail, run five to seven tiny white dots along the curve of the free edge using the smallest end of the tool. Because dots have gaps between them, an uneven curve reads as intentional rather than crooked. About 20 minutes and the fastest design here. The painted version is covered in how to do French tip nails at home.
Who it suits: Anyone who has failed at a freehand French line.
Tip: Follow the natural curve of your own free edge rather than a drawn line, and the row will look even without measuring.
5. Half Moon Dot Nails
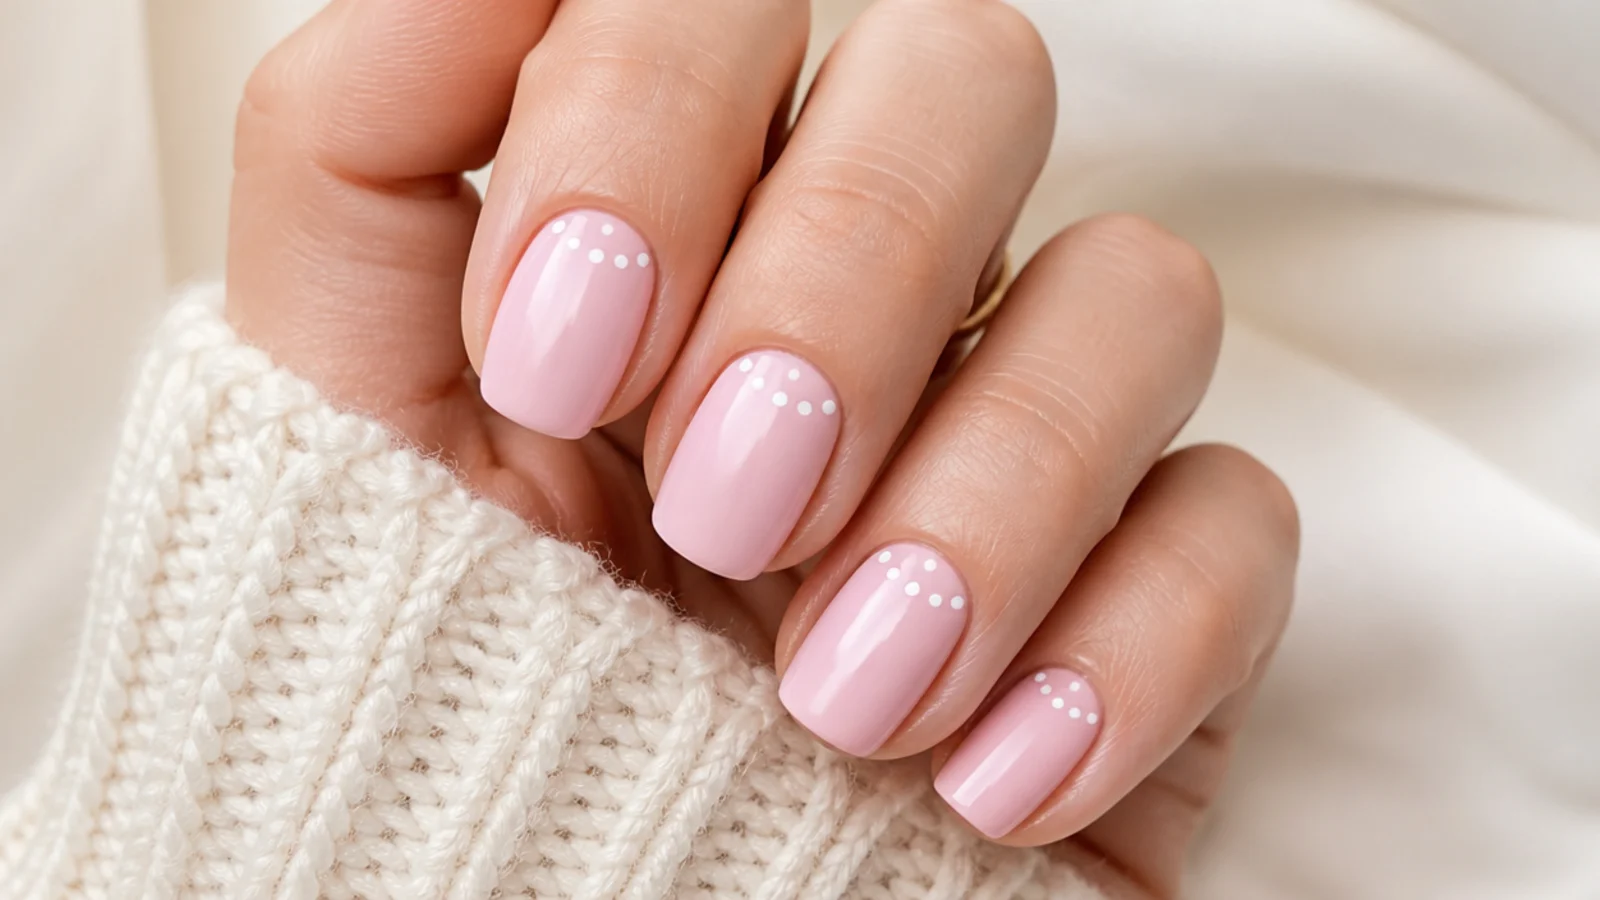
The same trick as the dotted French, flipped to the cuticle end. Paint a pale pink base, dry it, then arc four or five small dots just above the cuticle line following the moon shape of your nail bed. It grows out invisibly, which is the practical reason to put art at the cuticle rather than the tip. About 20 minutes. This one photographs unusually well on short nails because it fills the widest part of the nail instead of the narrowest.
Who it suits: Short nails, and anyone who wants art that survives a week of growth.
Tip: Leave a bare 1mm gap between the dots and the cuticle skin, or the arc will look like it is bleeding into your finger.
6. Tiny Daisy Nails
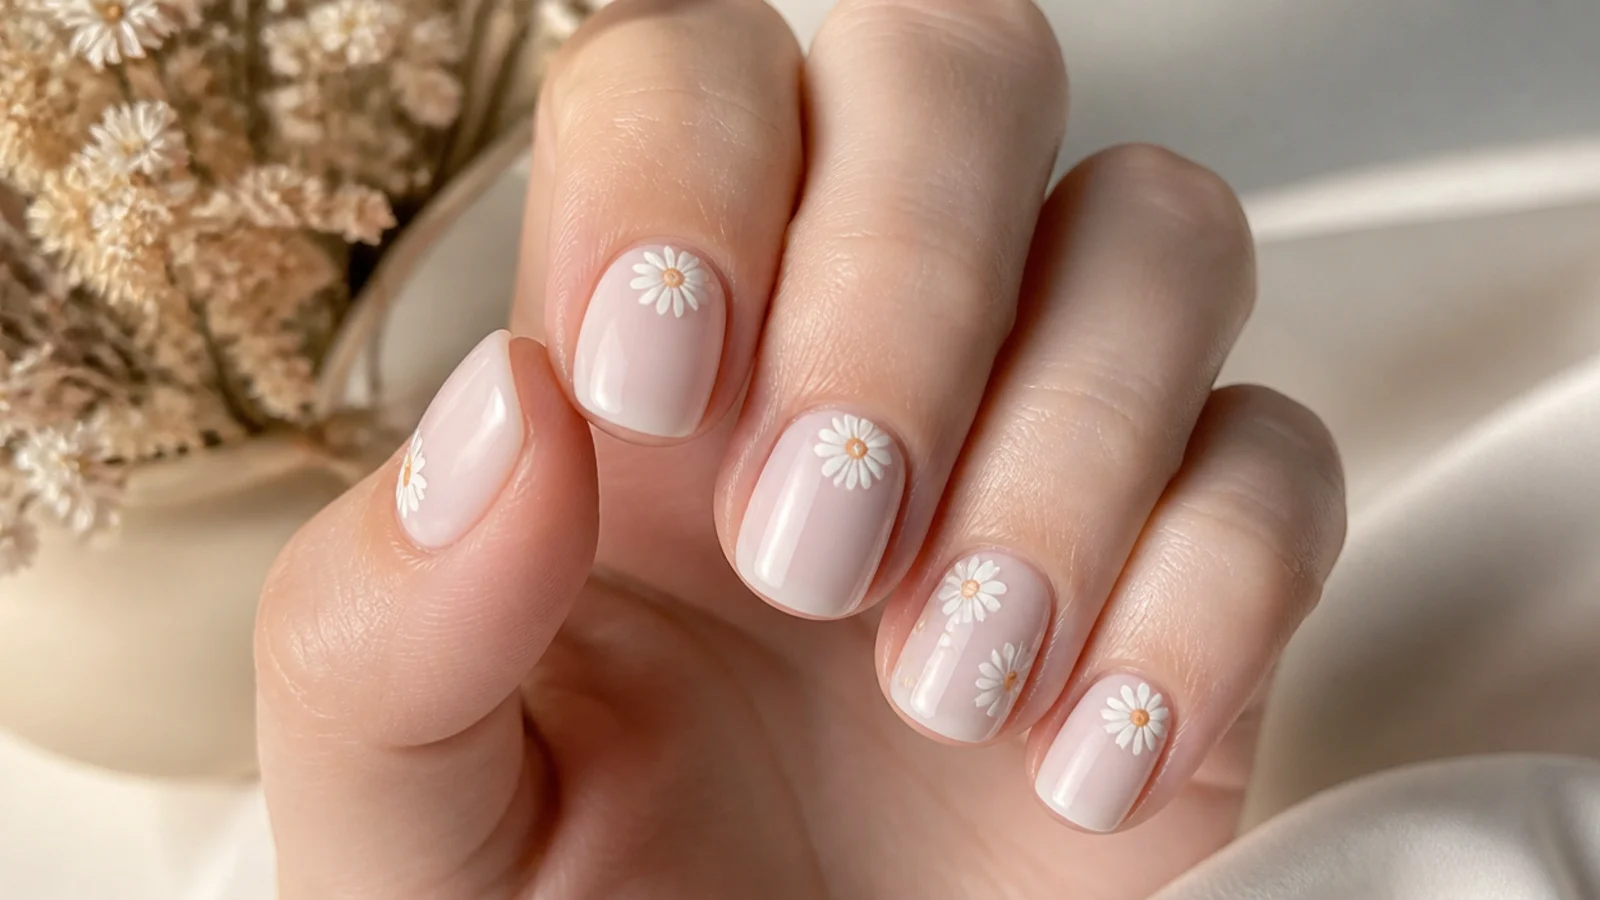
Five white dots in a ring with a yellow dot in the middle. That is the whole daisy, and it is the single most requested beginner design of the summer. Work on a dried milky or sheer base, place the five petals first with the small tip, then let them set for two minutes before adding the yellow center so it does not bleed into wet white. Two or three daisies per accent nail is plenty. About 30 minutes. Two daisies on the ring finger only takes 15. The full beginner method is in how to do cute nails at home.
Who it suits: First-time nail art and anyone wanting florals without a brush.
Tip: If the petals merge into a white blob, your dots were too close. Aim for a gap the width of one dot between each petal.
7. Sunflower Dot Nails
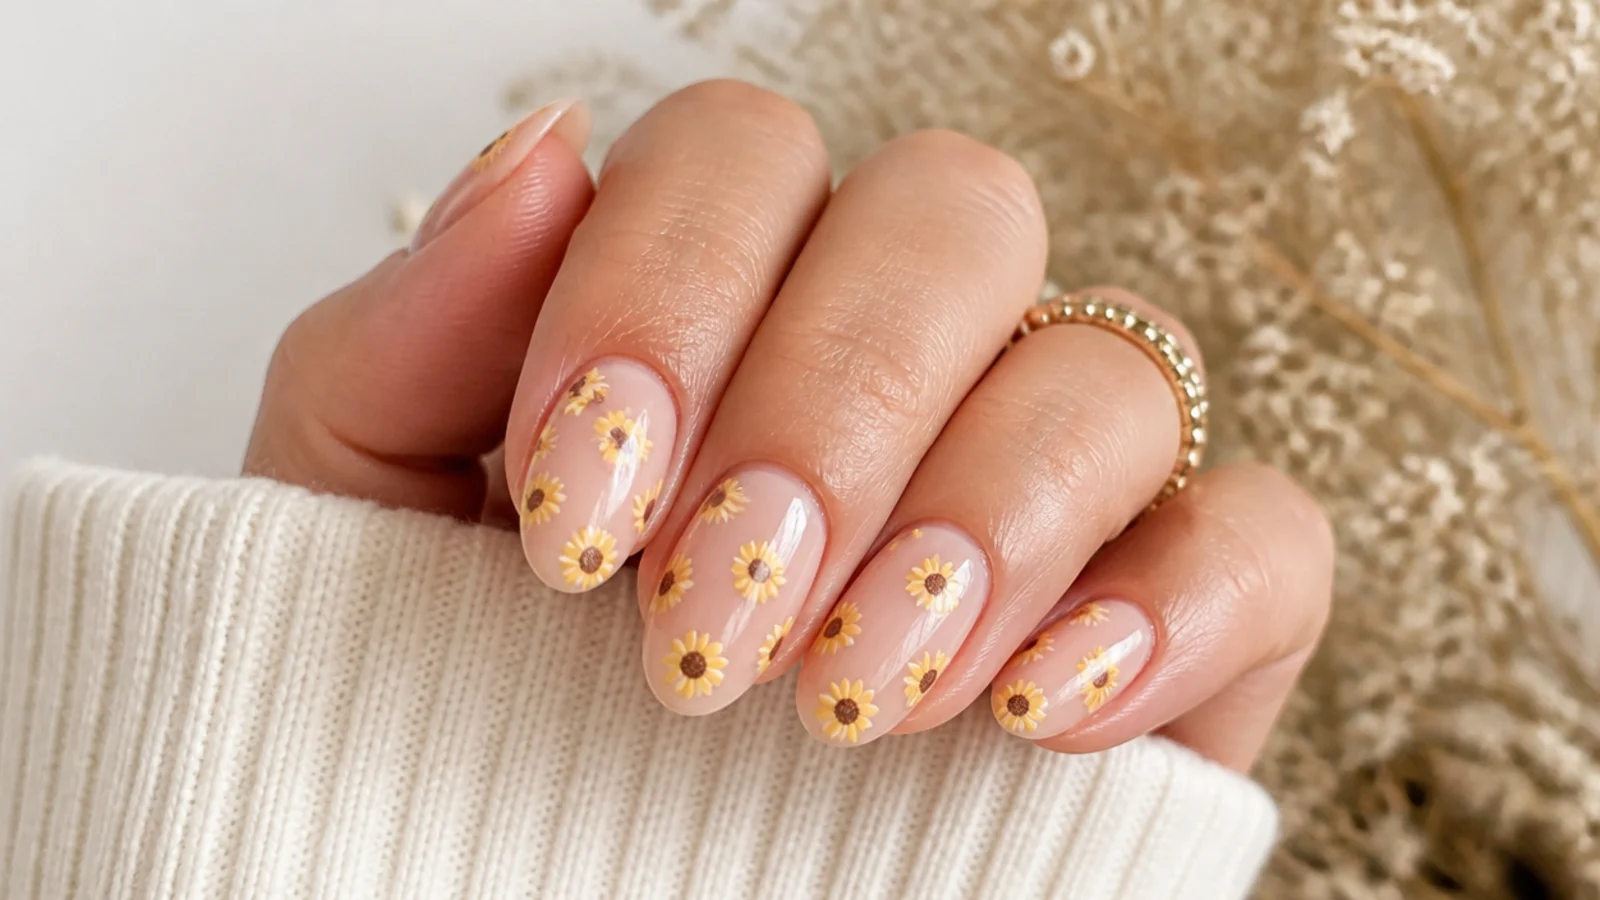
The daisy method in warmer colors: six or seven yellow petal dots around a single brown or dark chocolate center. Sunflowers read later-summer than daisies, so this is the design to switch to in August. Use the small tip and drag each yellow dot outward about 1mm as you lift, which turns a round dot into a petal shape without needing a brush. About 30 minutes. Works best as two accent nails against plain nude, since a full set of sunflowers goes busy fast.
Who it suits: Late summer, warm undertones and neutral wardrobes.
Tip: Drag the petals with the tool almost dry. A fully loaded tool drags a smear instead of a taper.
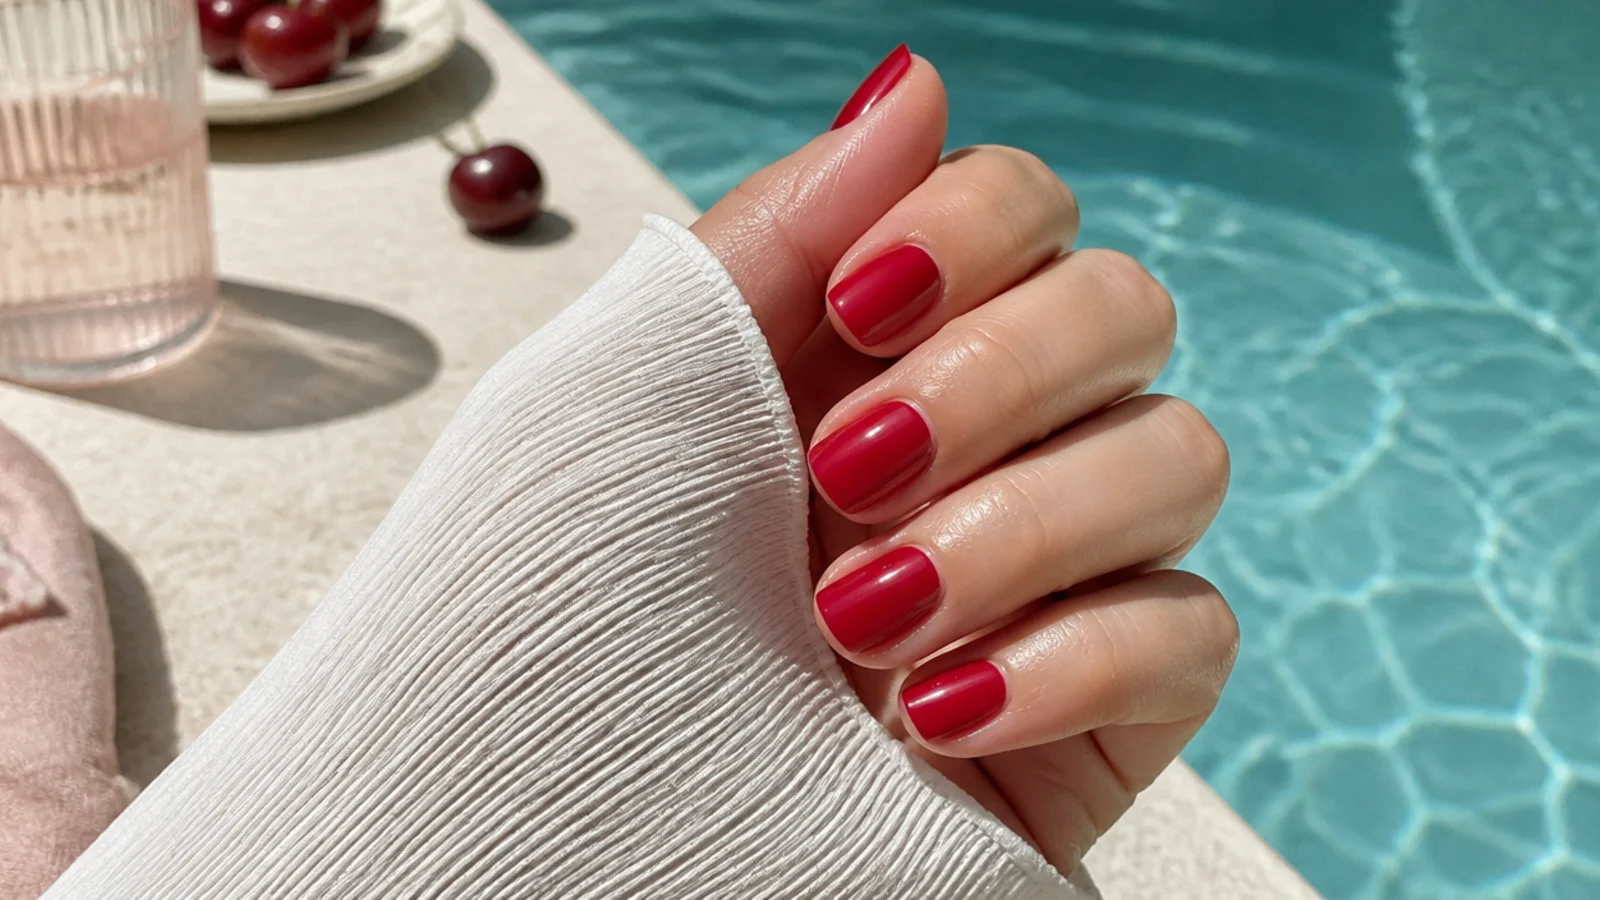
8. Cherry Nails With Two Dots
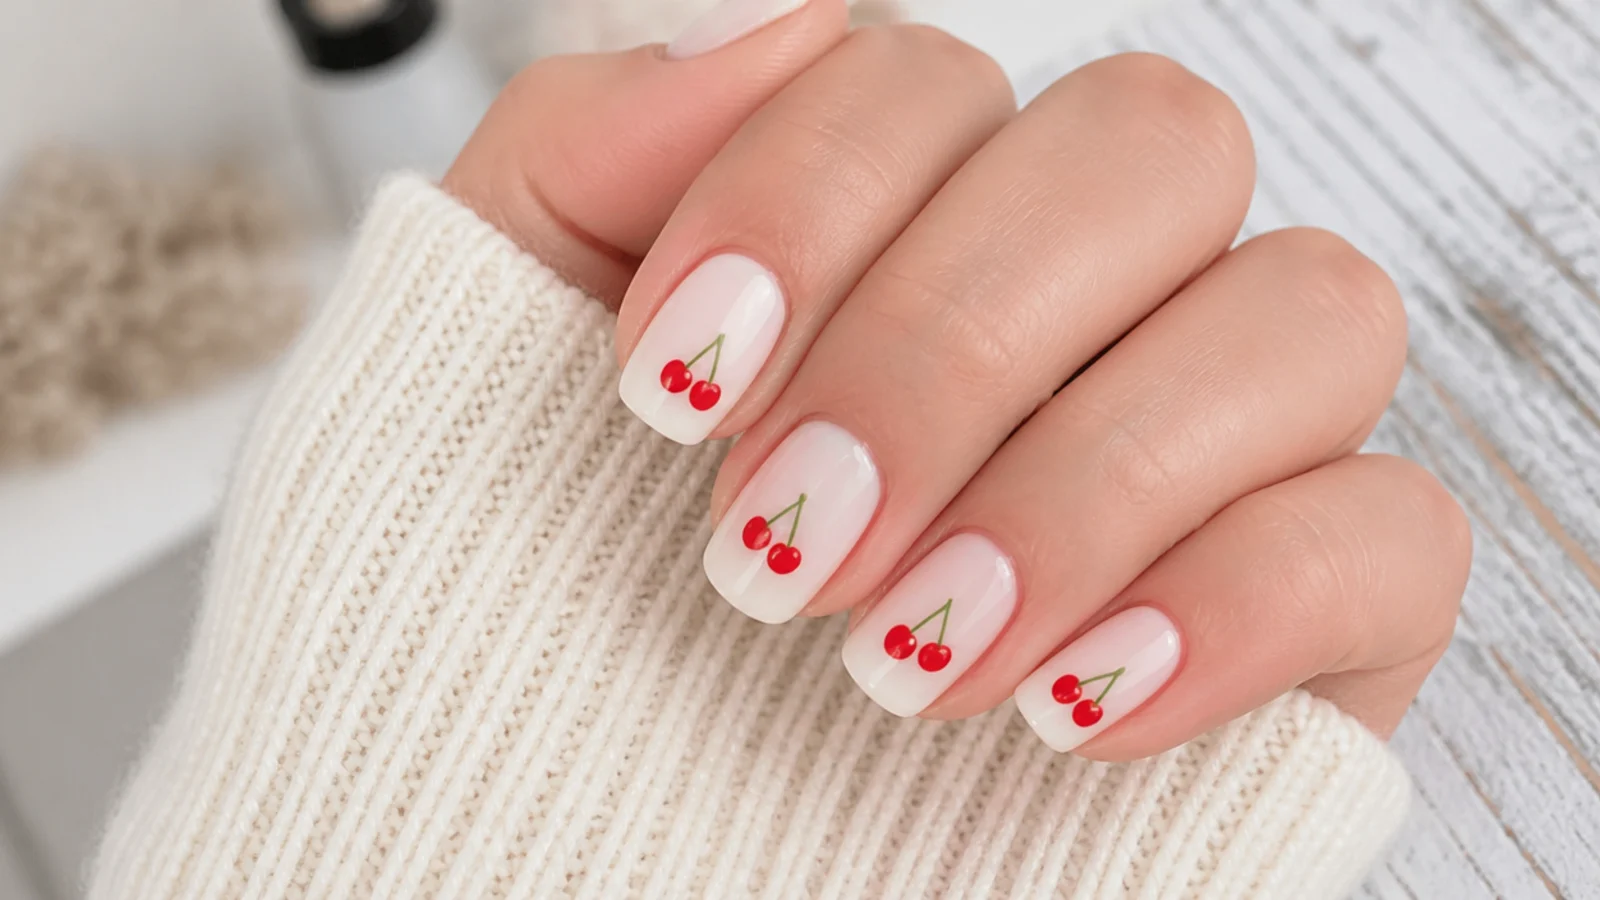
Two red dots side by side, then two thin stems joined at the top. The stems are the only part that is not a dot, and you draw them with the same tool by loading a small amount of green polish and dragging a curved line. Over a milky or sheer base at about 25 minutes total. Cherries have carried over from last summer and still read current, and the design is forgiving because real cherries are not symmetrical either. A cherry accent on longer nails is one of the looks in cute short nails that look expensive.
Who it suits: Beginners who want something more than dots without buying a brush.
Tip: If a stem goes thick and wobbly, cut it short at the halfway point. A short clean stem beats a long shaky one.
9. Strawberry Nails With Seed Dots
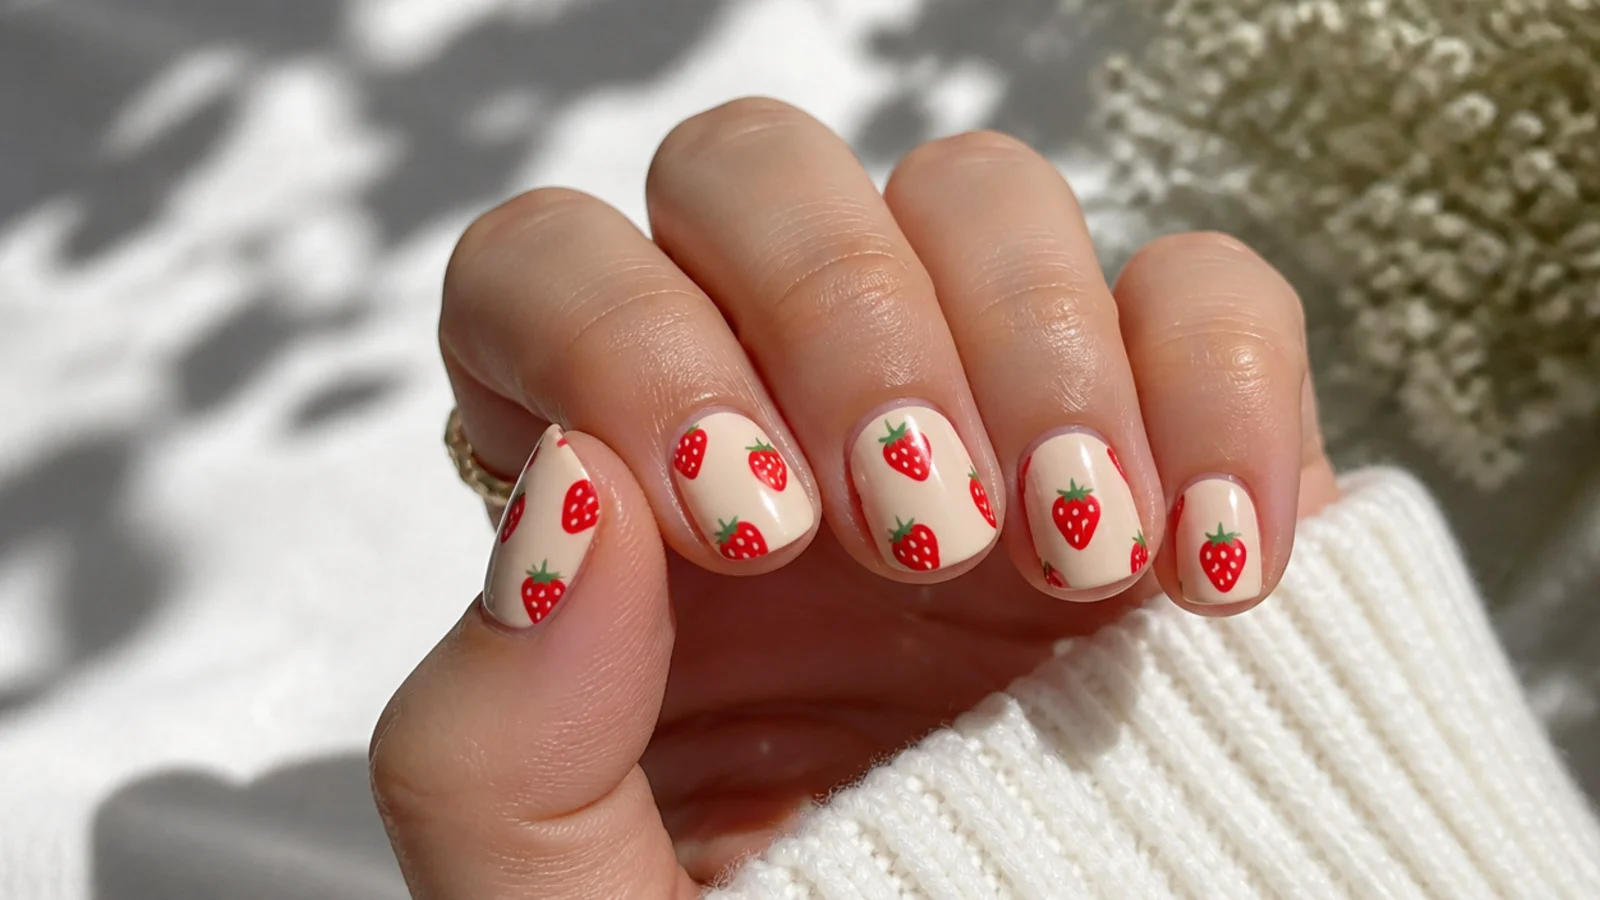
Build the berry from one large red dot pulled to a point at the bottom with the tool, then dry it a full five minutes before adding four or five tiny white seed dots on top. The drying wait is not optional here: white on wet red turns pink instantly and there is no fixing it. About 35 minutes, the longest on this list because of the two drying stages. One strawberry per nail on a cream base looks better than three crowded together.
Who it suits: Anyone who likes fruit nails and has patience for a two-stage design.
Tip: If the seeds go pink, the red was wet. Let everything cure hard, then place the seeds again in white directly over the pink ones.
10. Watermelon Slice Nails
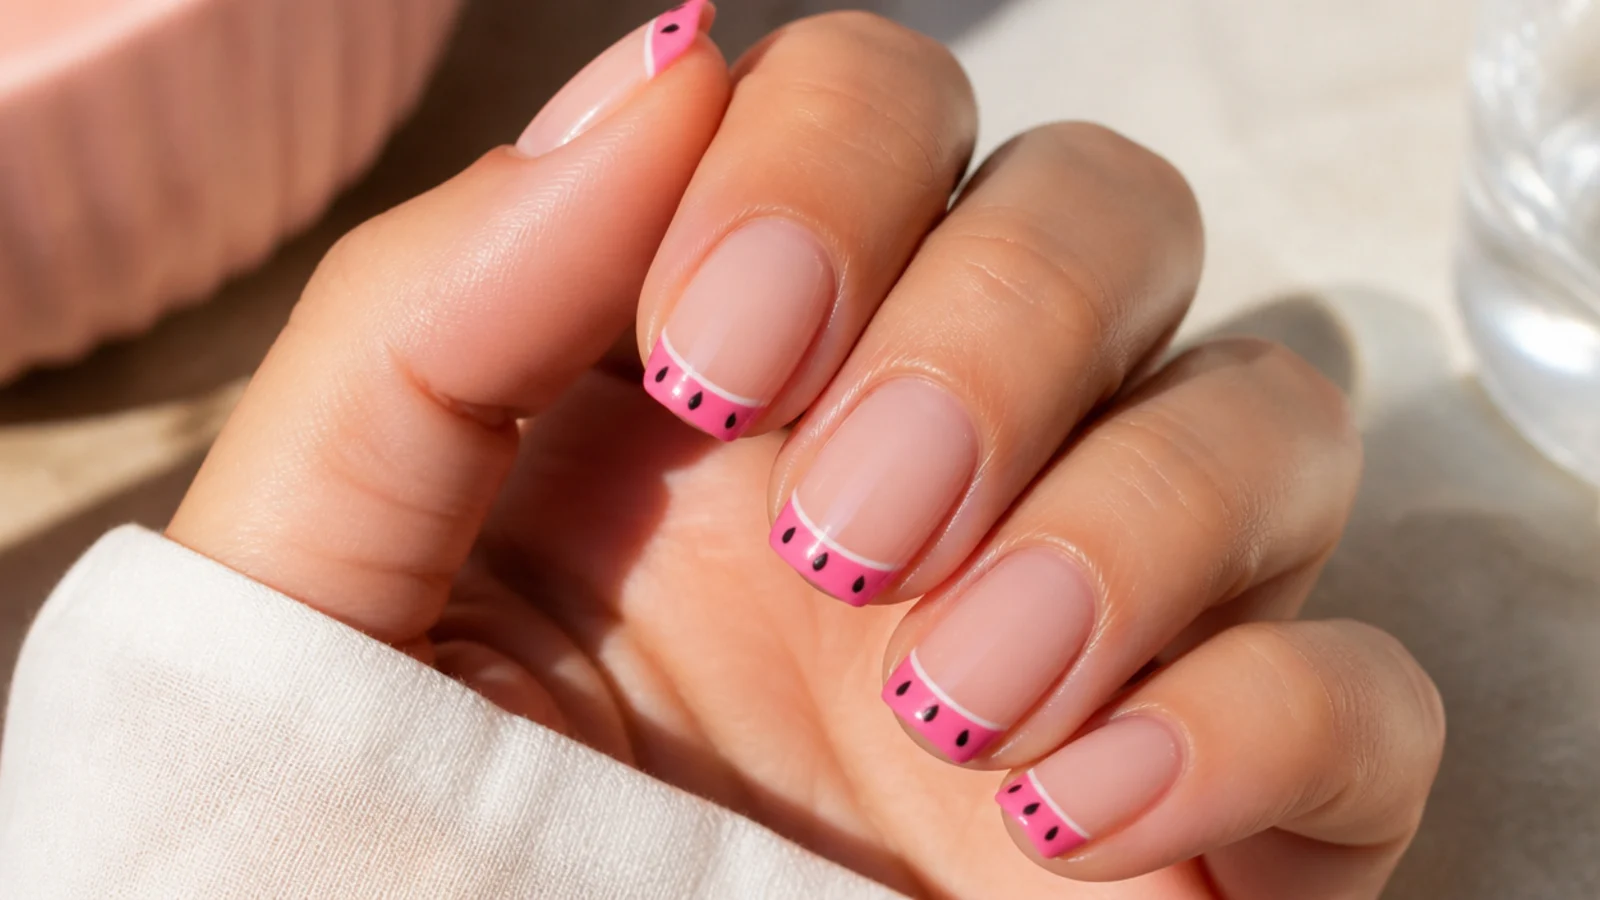
A tip design rather than a whole nail: paint the bottom third of the nail watermelon pink, leave a thin bare stripe, then add three black seed dots inside the pink. The bare stripe stands in for the rind line, which saves you painting a green edge freehand. About 25 minutes. It is a stronger choice on medium length than short, since the design needs a visible free edge to sit in. More short-nail-friendly options live in cute summer nails for short nails.
Who it suits: Medium length nails and pool days.
Tip: Use tape or a cleanup brush to straighten the pink edge; a wobbly rind line is the only thing that gives this one away.
11. Lavender Dot Flower Nails
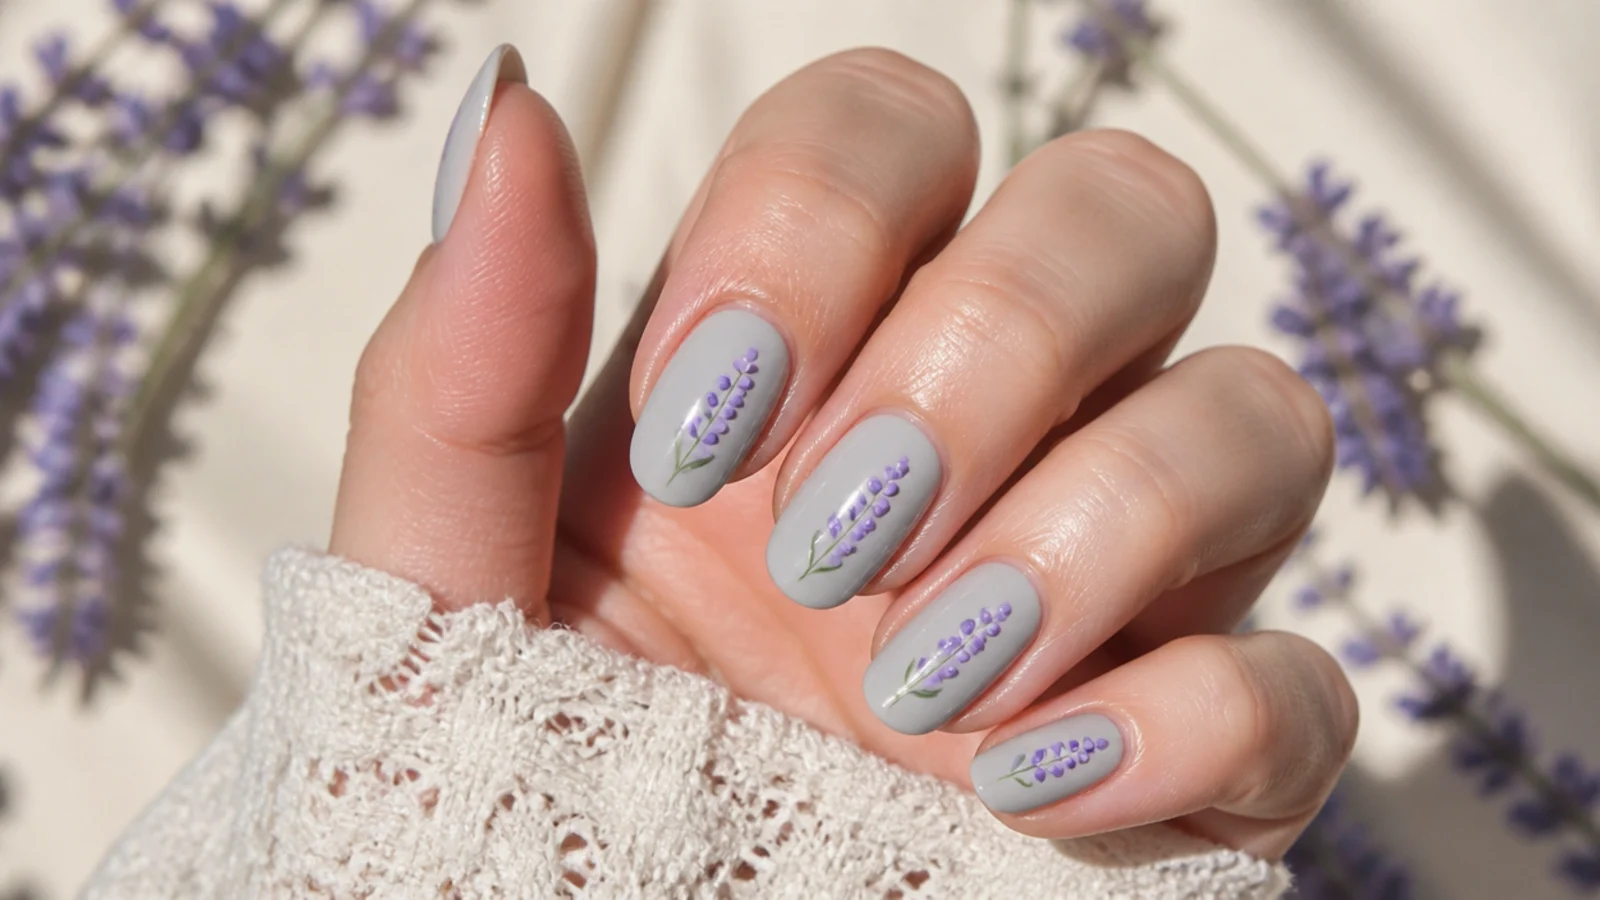
Three or four pairs of small lavender dots stacked in a vertical line, which is enough to read as a sprig of lavender without any leaves. It is the most understated design here and the only one that works on a gray or greige base instead of a summer brights palette. Use the small tip and keep the pairs slightly offset rather than perfectly aligned. About 25 minutes. Two sprigs per nail, angled the same way on every finger, keeps it from looking scattered.
Who it suits: Cool undertones and anyone who finds fruit nails too playful.
Tip: Angle every sprig in the same direction across all ten nails. Mixed angles are what makes this one look accidental.
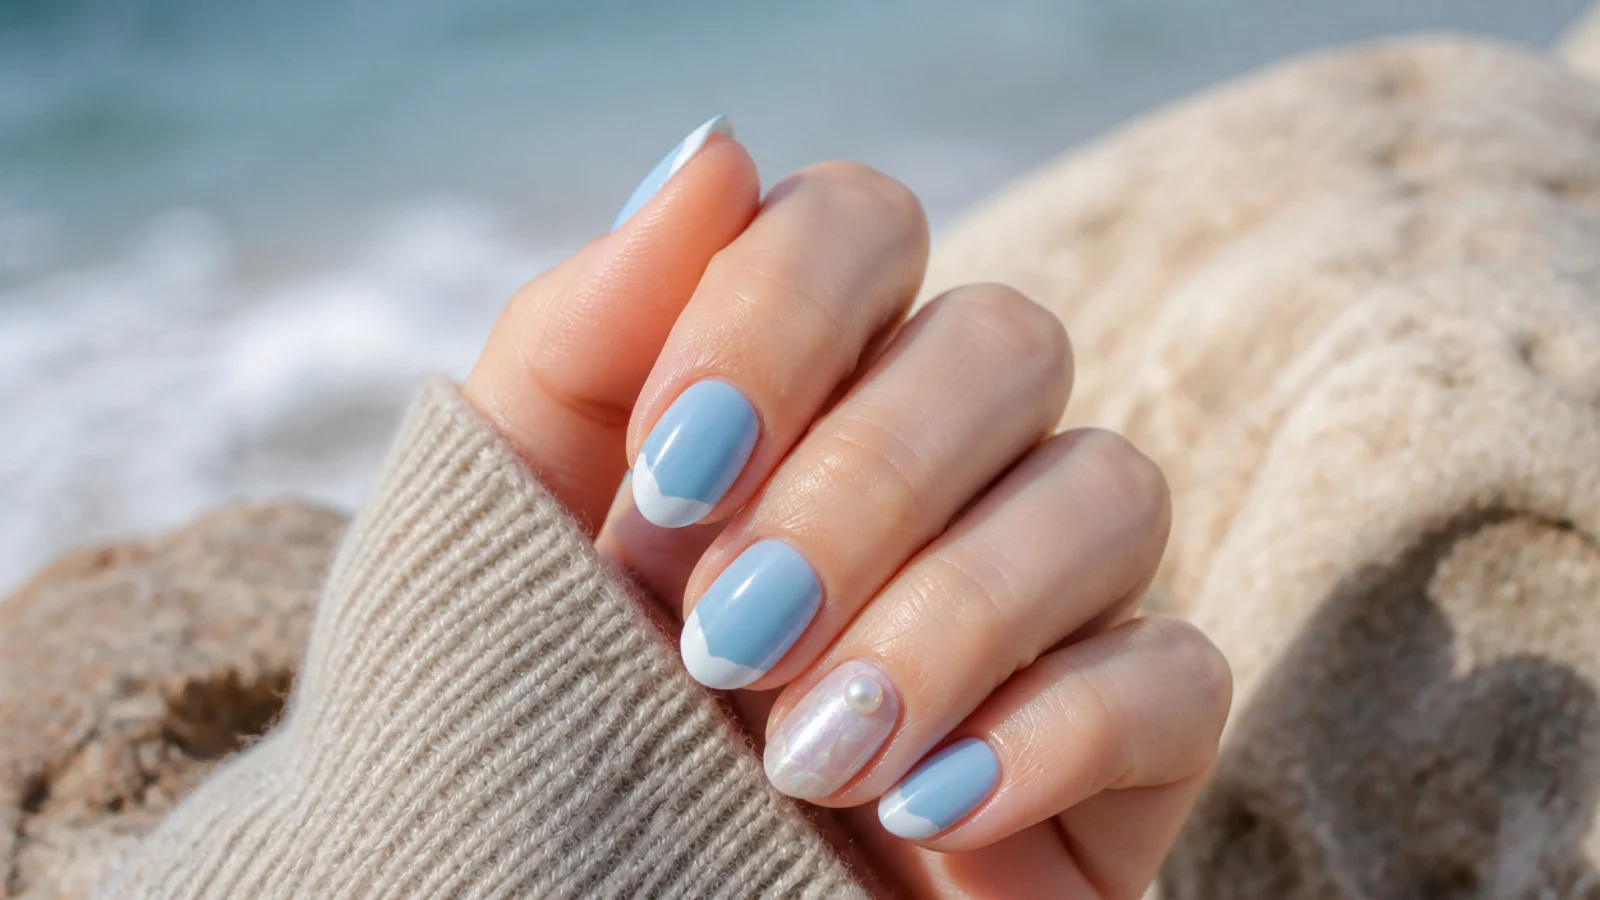
12. Sea Glass Dot Nails
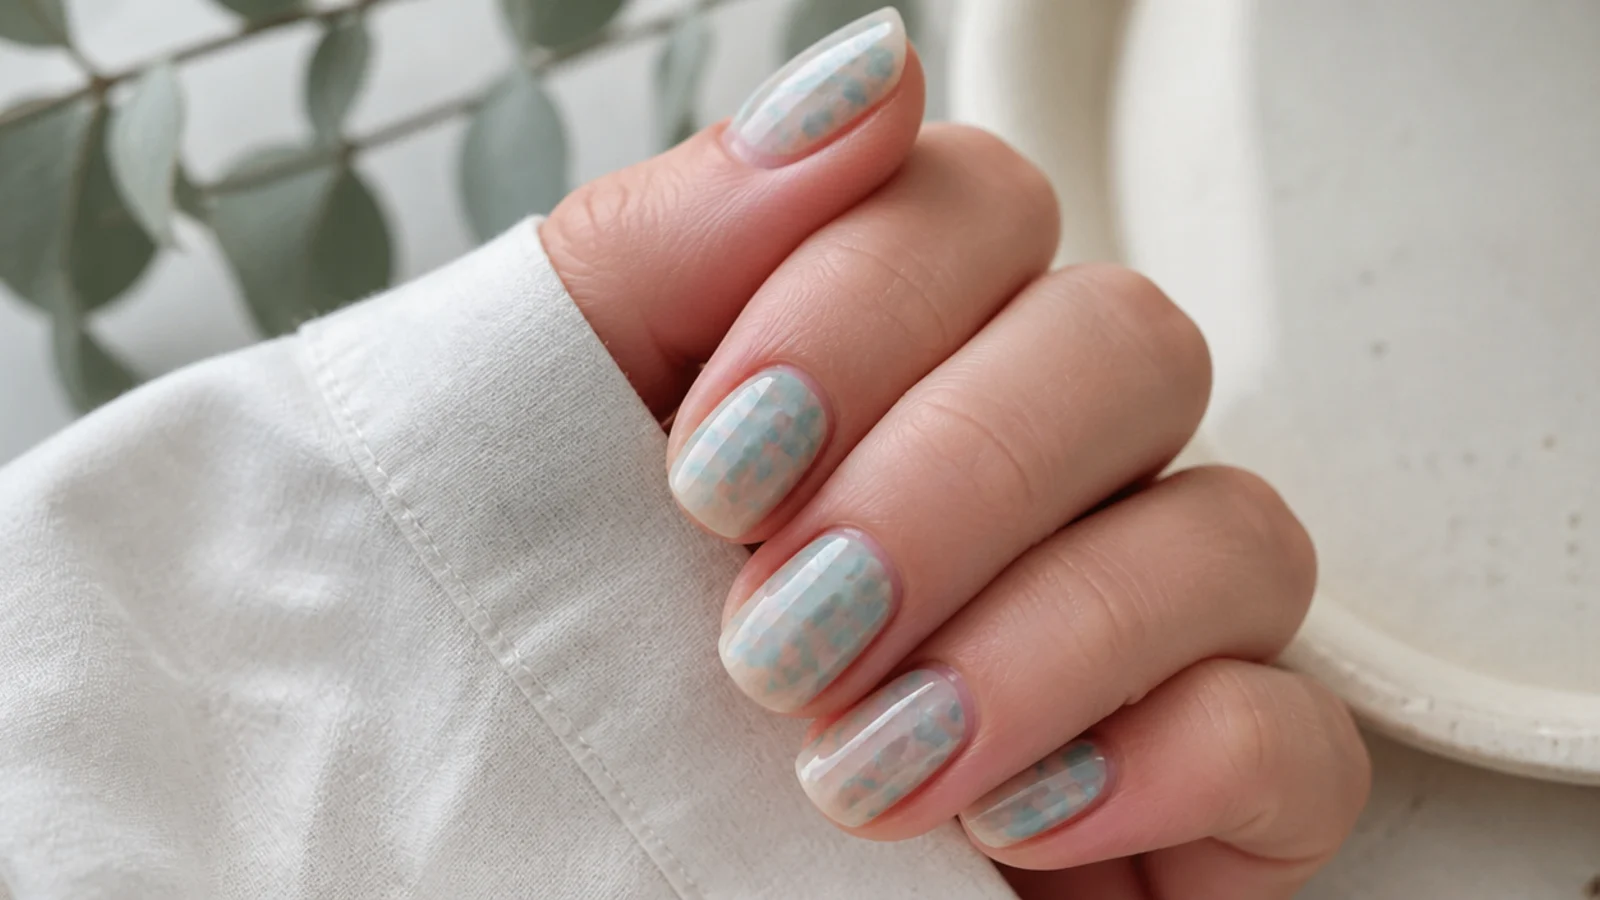
Cluster six or eight dots of a sheer seafoam and a sheer pale blue so they overlap slightly, then top coat heavily so the edges soften and the whole thing looks like frosted glass under water. Overlap is the point, so this is the one design where sloppy spacing helps you. About 25 minutes. It needs sheer polishes rather than creams, since opaque dots read as spots instead of glass. Pairs naturally with the coastal palette in summer boho nails.
Who it suits: Anyone wanting beach nails without literal shells.
Tip: Two coats of top coat, not one. The blur that sells sea glass comes entirely from the thickness of the finish.
13. Bubble Dot Ocean Nails
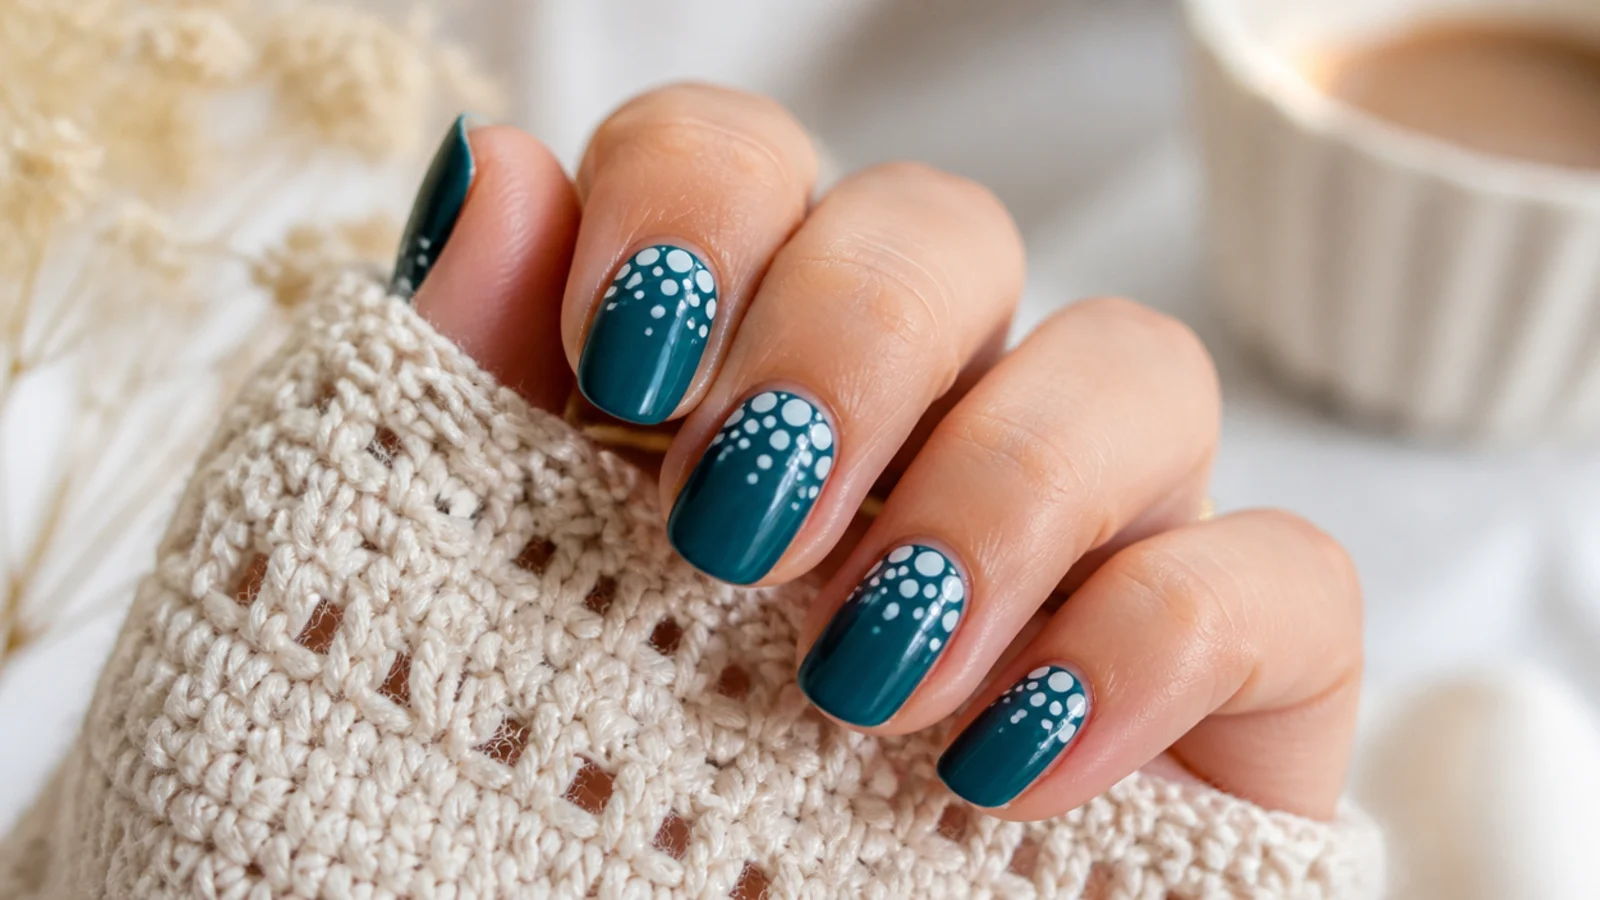
Over a deep teal or ocean blue base, place white dots in three sizes rising from the cuticle toward the tip, largest at the bottom and smallest at the top. Varying dot size is the whole design, and it is the easiest way to use both ends of a two-sided dotting tool in one look. About 25 minutes. The size gradient tricks the eye into reading depth, which is why this reads more advanced than it is. Deeper blues need a base coat or they stain the free edge.
Who it suits: Anyone who wants a darker summer nail that still reads beachy.
Tip: If the small dots vanish into the base, add a second white pass on the same spots once the first has dried.
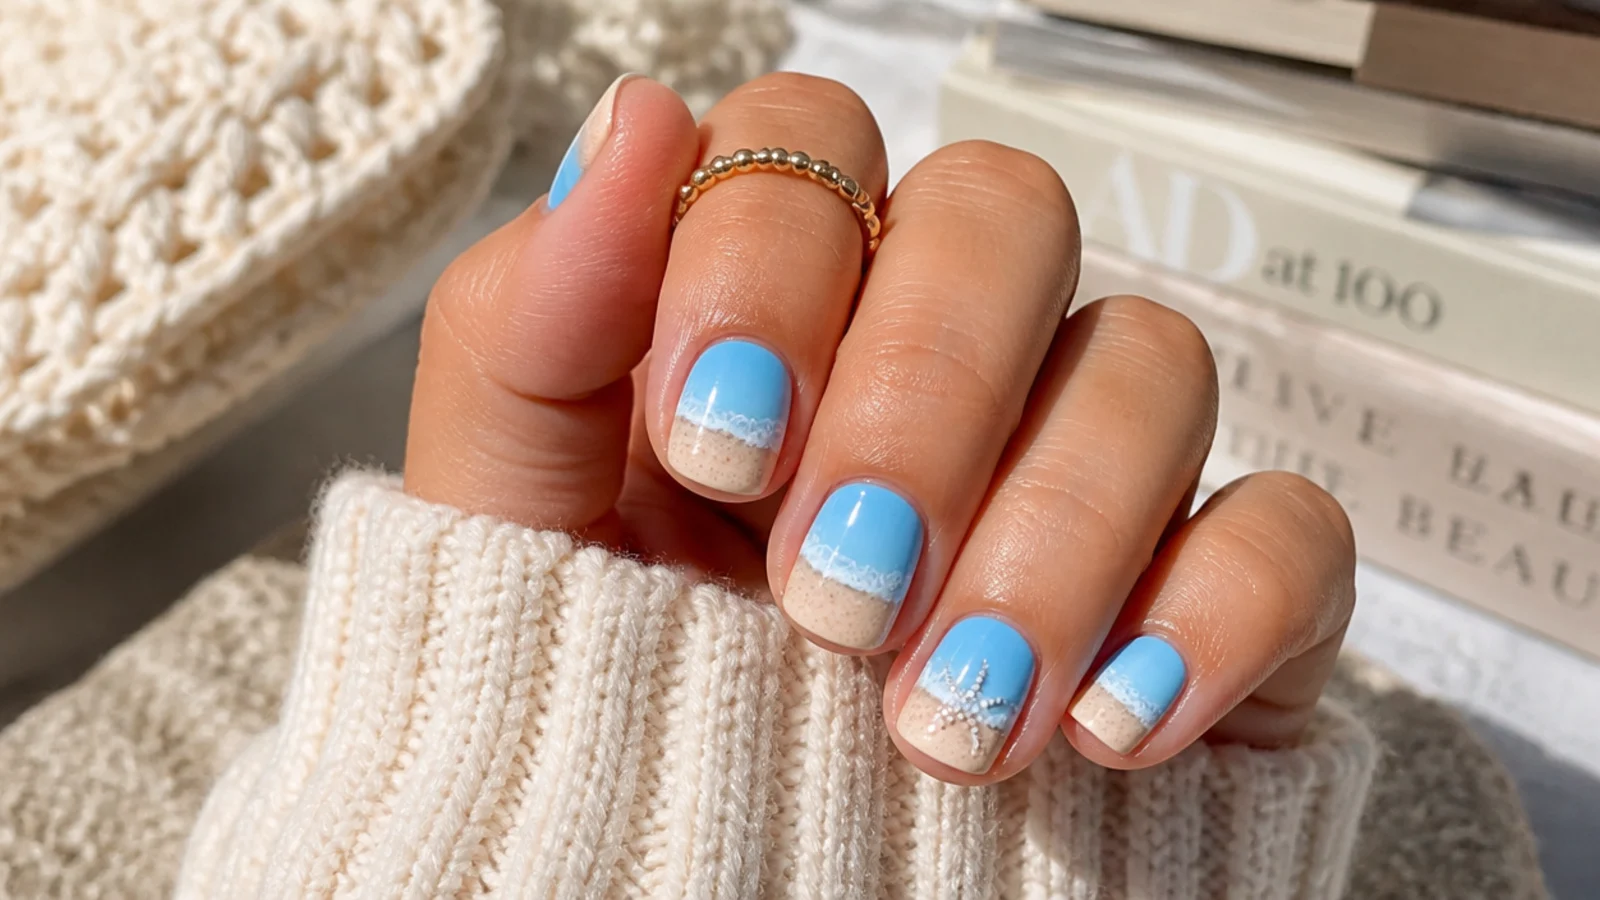
14. Sand and Shell Dot Nails
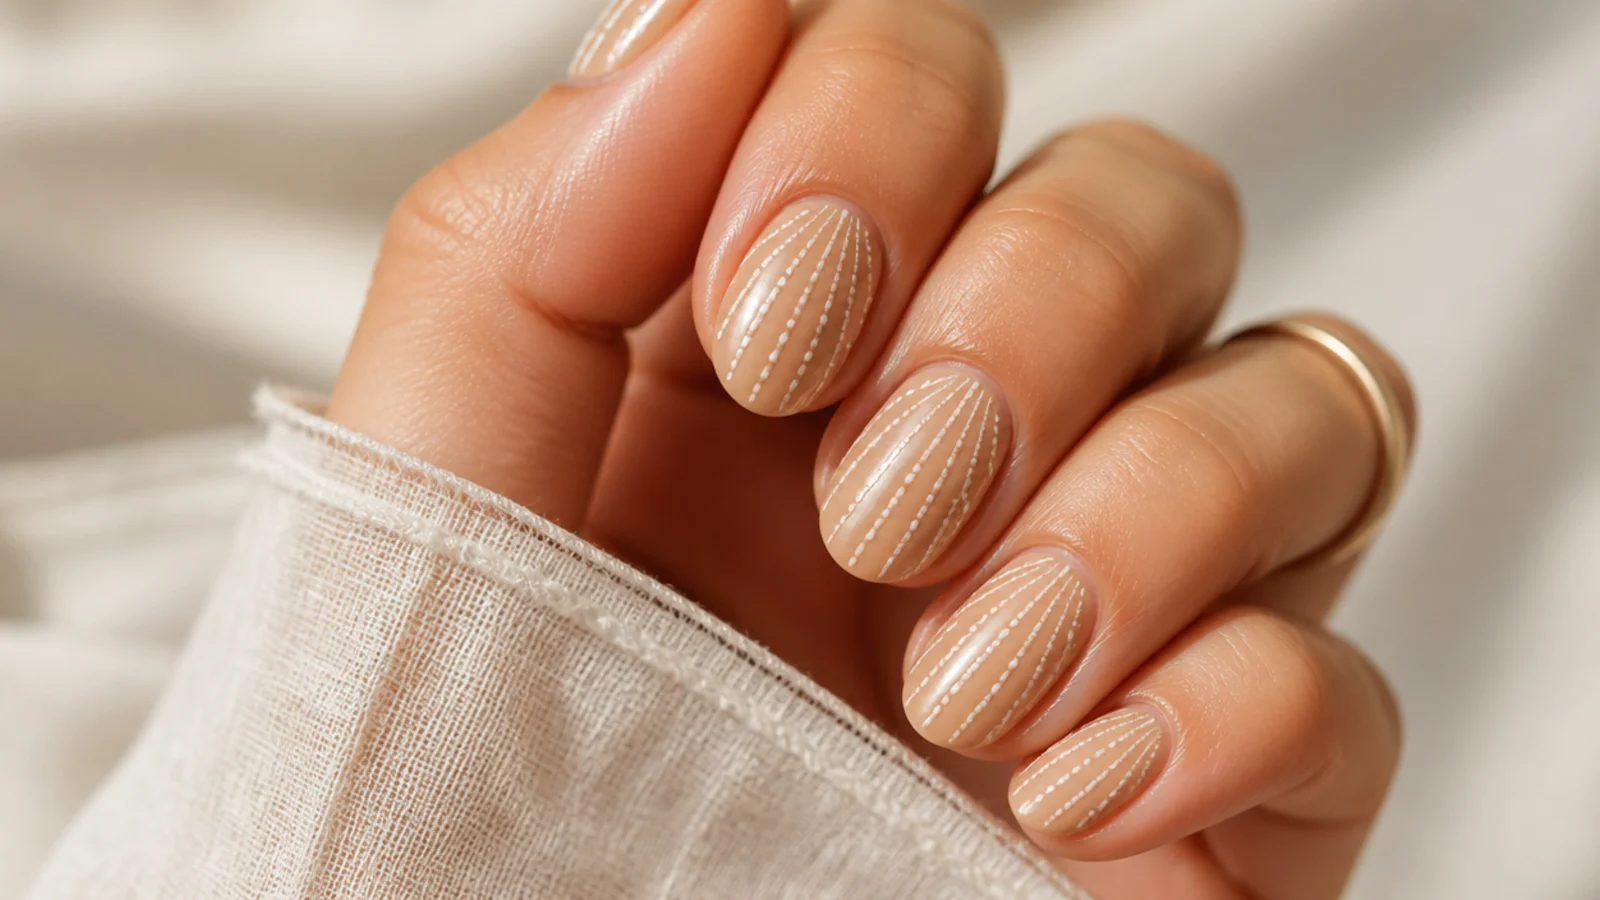
A warm sand beige base with cream dots dragged into short curved lines so they suggest shell ridges. Three dragged dots fanning out from one point makes a passable scallop shell in about ten seconds, and nobody will ask how you painted it. About 25 minutes. Beige on beige keeps the whole thing subtle enough for work, which is rare for a beach design. If you want real shells and waves, the step-by-step is in how to do beach nails at home.
Who it suits: Neutral wardrobes and offices with a no-bright-nails culture.
Tip: Fan the drags from one shared point at the base of the nail; parallel drags look like scratches, not shells.
15. Sunset Dot Gradient Nails
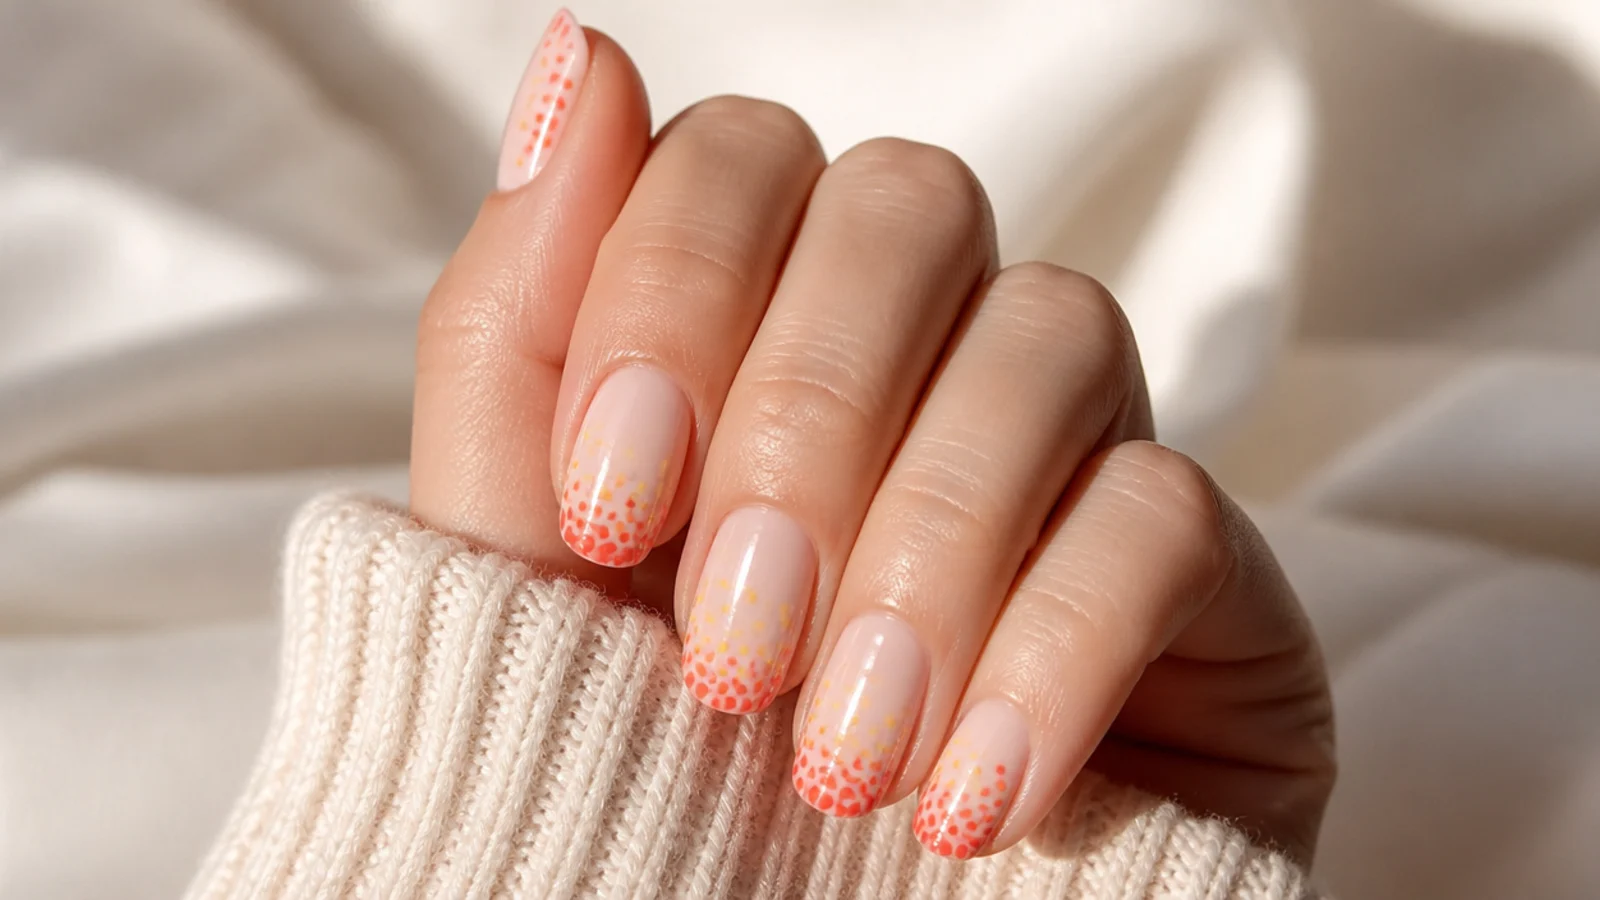
A gradient built from dots instead of a sponge. Pack coral dots densely across the free edge, then thin them out and switch to yellow as you move toward the cuticle, letting the two colors overlap in the middle third. Because the dots stay separate, you never have to blend anything, which is the part that defeats most beginners at ombre. About 30 minutes. The overlap zone is what sells it, so do not keep the two colors in tidy halves.
Who it suits: Anyone who has tried and failed at sponged ombre.
Tip: If it looks striped rather than faded, you kept the colors apart. Go back in and scatter ten more dots across the border.
16. Navy Nautical Dot Nails
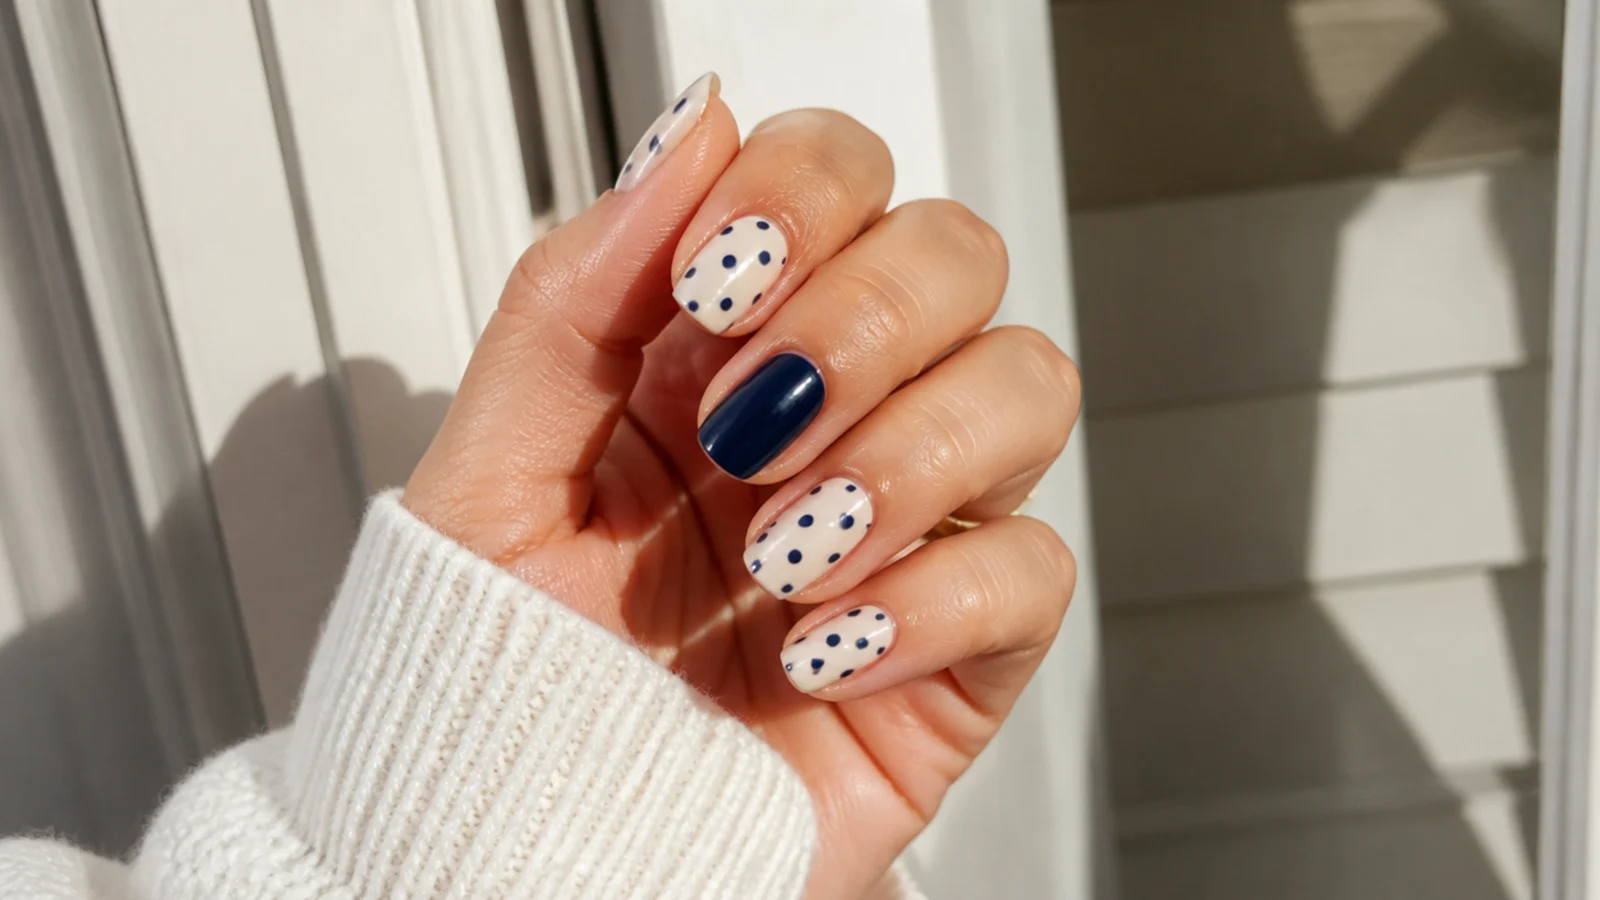
Cream base, evenly spaced navy dots on four nails, and one solid navy accent nail per hand. The solid nail does the heavy lifting so the dotted nails can stay sparse, which is the fastest way to make a two-polish manicure look designed rather than plain. About 25 minutes. Navy is also the most forgiving dark color at home, since it hides thin spots that black would expose. Use a base coat: navy pigment stains the natural nail badly.
Who it suits: Boat days, dinners out and anyone bored of pastels.
Tip: Put the solid navy on the ring finger, not the index. The index nail is the one you see most and full dark shows chips first.
17. Single Line Nails on Baby Blue
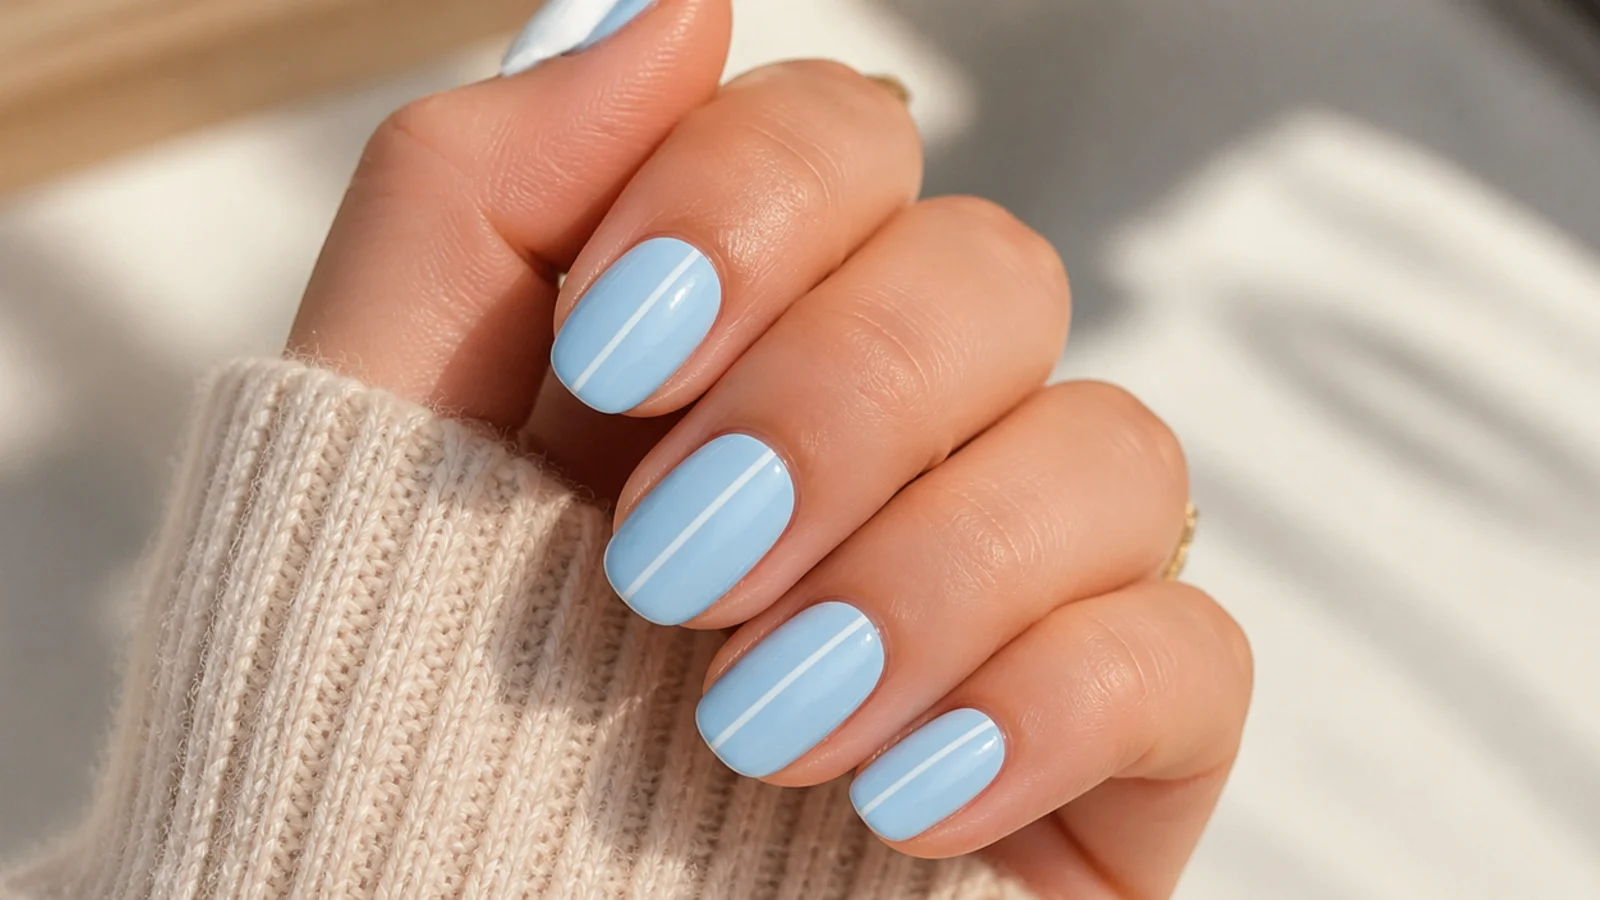
One thin white line drawn down the center of a baby blue nail, made by loading the dotting tool lightly and pulling in a single unbroken stroke from cuticle to tip. It is the minimalist design that keeps showing up on magazine roundups, and it takes about 20 minutes. The line does not need to be perfectly straight; it needs to be one stroke, because a line touched up twice always shows the seam. Anchor your painting hand against the table.
Who it suits: Minimalists and anyone with five spare minutes.
Tip: Never go back over a wobbly line. Wipe it off with a cleanup brush while wet and redraw it in one pass instead.
18. Two-Tone Color Block Nails
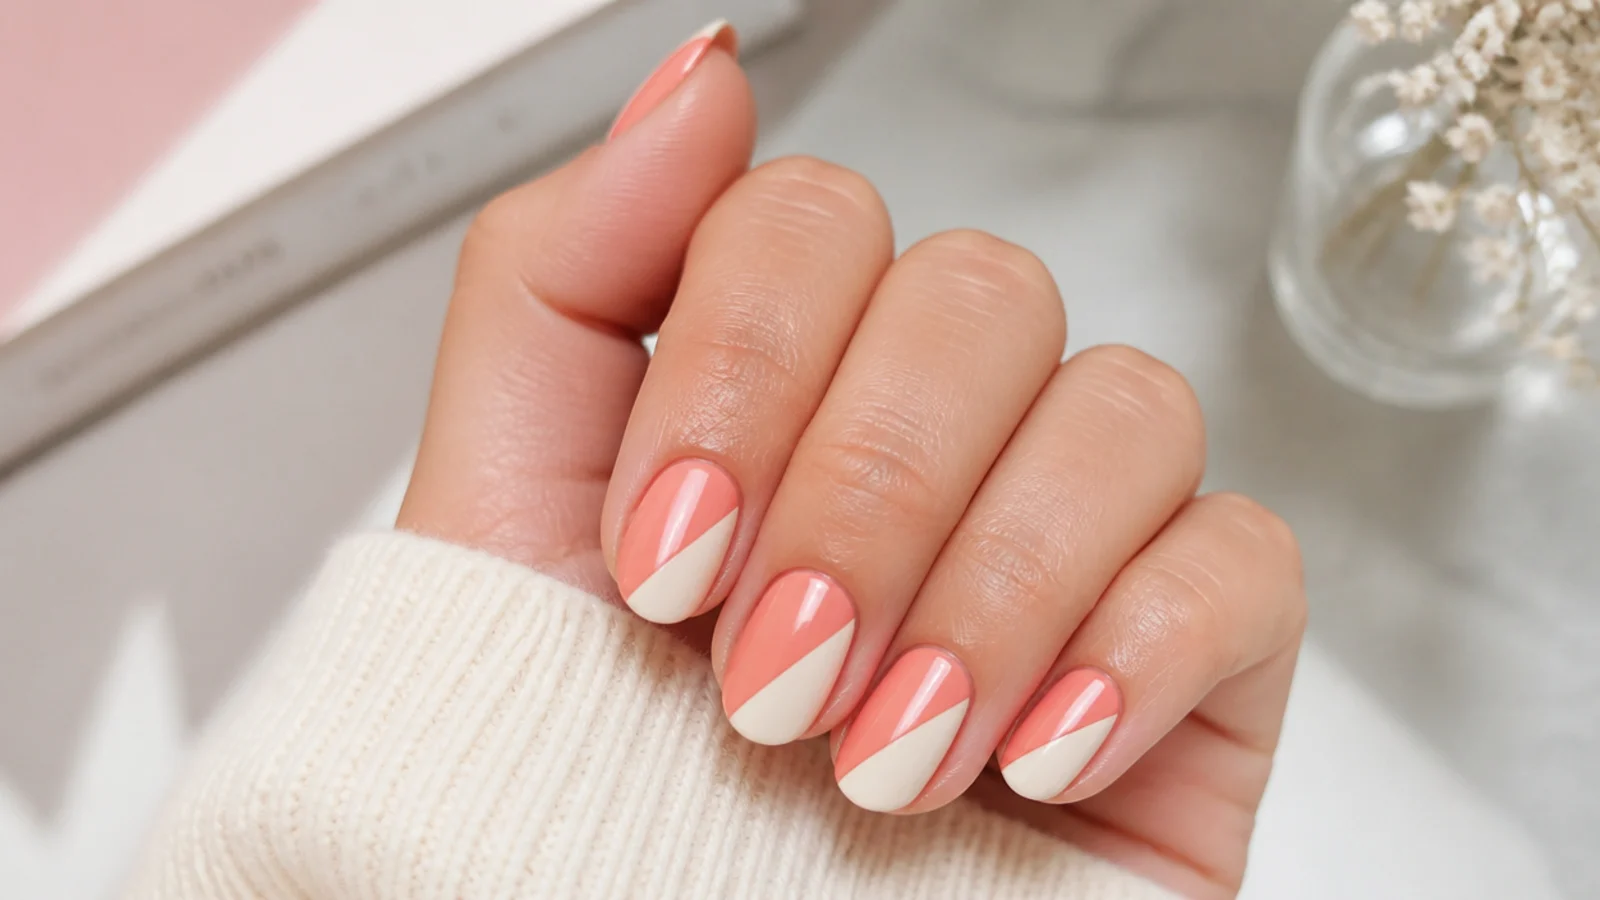
Split each nail diagonally, coral on one side and cream on the other, using a strip of tape as the edge. No dotting tool needed at all, which makes this the lowest-skill design on the list. Paint the lighter color first, dry it a full ten minutes, then tape and paint the darker side. About 30 minutes with the extra drying. Pull the tape while the second color is still wet or it will lift in a jagged edge along with the polish.
Who it suits: Anyone who cannot dot evenly but can cut tape.
Tip: If the tape pulls up polish, the base was underdried. Ten minutes of drying before taping is the minimum, not a suggestion.
19. Rainbow Confetti Dot Nails
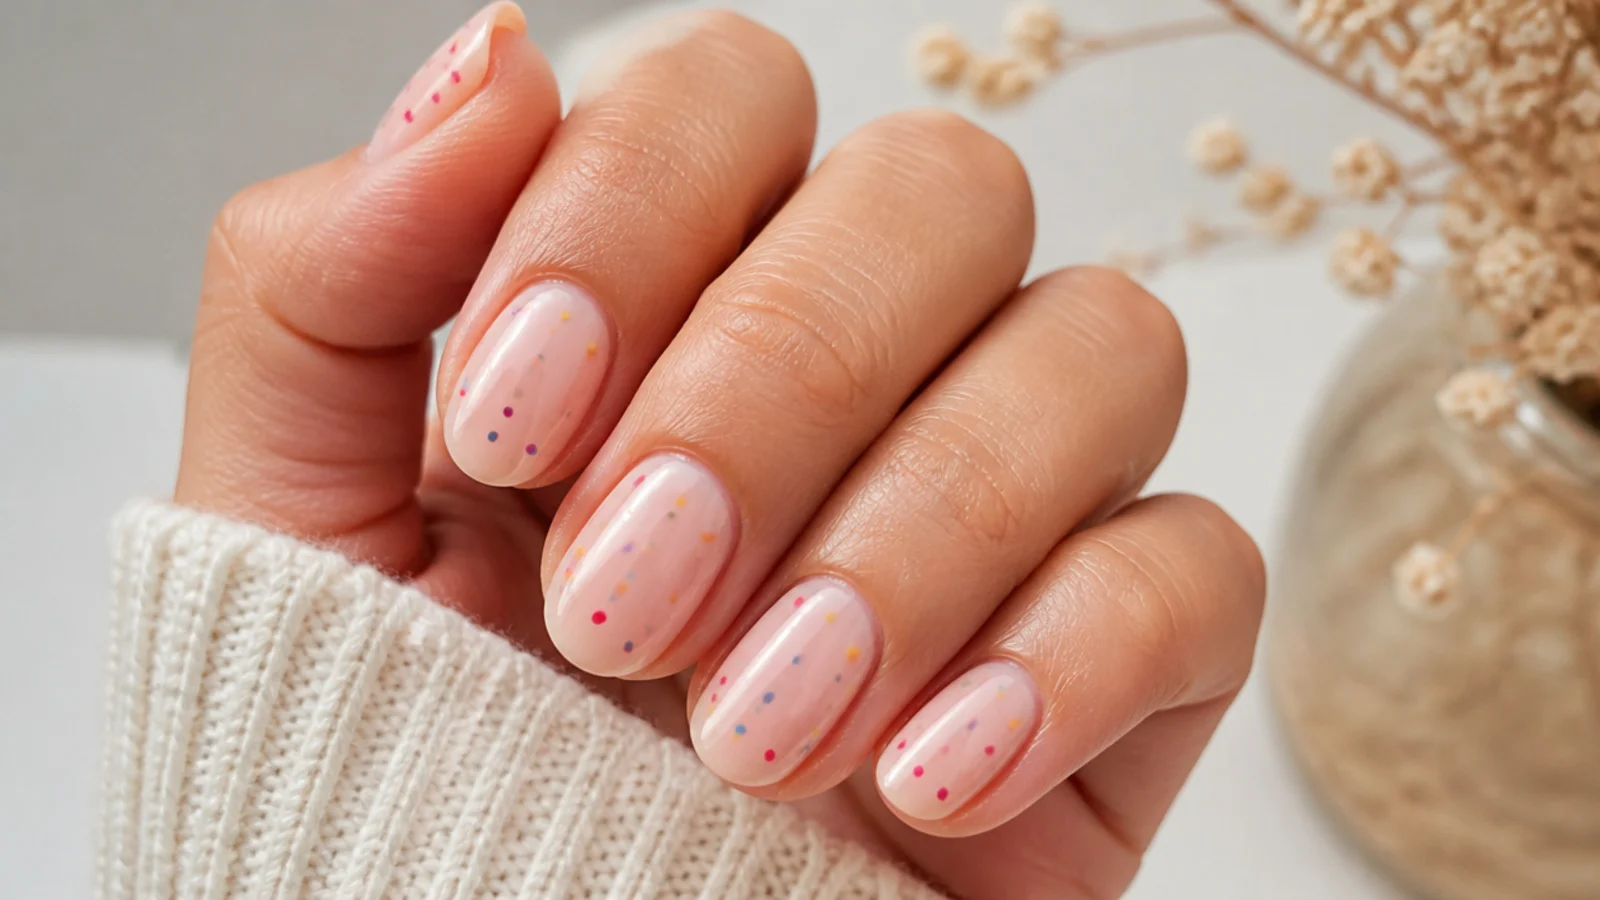
The one design that breaks the two-polish rule, and it is worth it: scatter small dots in four colors across a sheer nude base with no pattern at all. Randomness is the design, so this is the most forgiving idea here and the best use for polish bottles you already own. About 30 minutes. Keep the dots small and the base sheer, because large dots on an opaque base tips it from confetti into clown. Bright-color pairings are worked through in cute summer nails in bright colors.
Who it suits: Beginners with a drawer of half-used polishes.
Tip: Wipe the tool clean between colors. Skipping this is why the fourth color always ends up muddy.
20. White Tip Dot Accent Nails
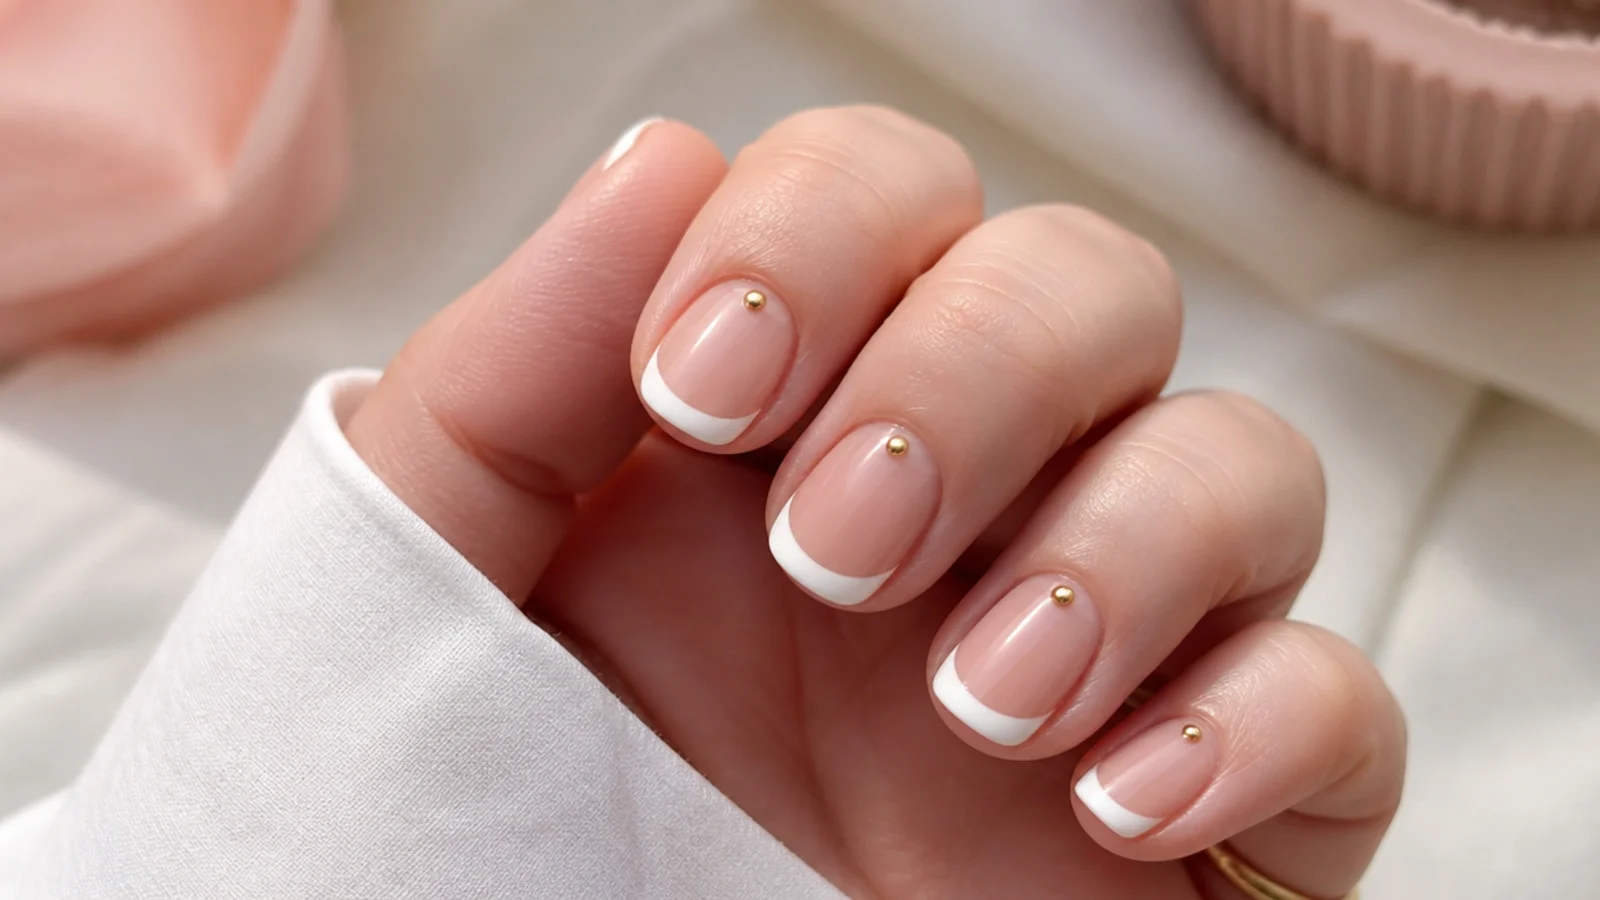
The closer: white tips freehanded along the free edge, a bare or sheer base, and one small gold or cream dot placed just above each cuticle for balance. The single cuticle dot is a trick that makes a plain white tip look finished, and it costs about four seconds per nail. Roughly 25 minutes. White reads brightest against a tan, which is why it dominates every summer nail roundup. More white-tip variations sit in short French tip nails.
Who it suits: Tanned skin, short nails and anyone wanting one design for the whole trip.
Tip: White polish yellows fastest under sunscreen, so reapply top coat every three days if you are on vacation.
What You Need to Do Simple Summer Nails at Home
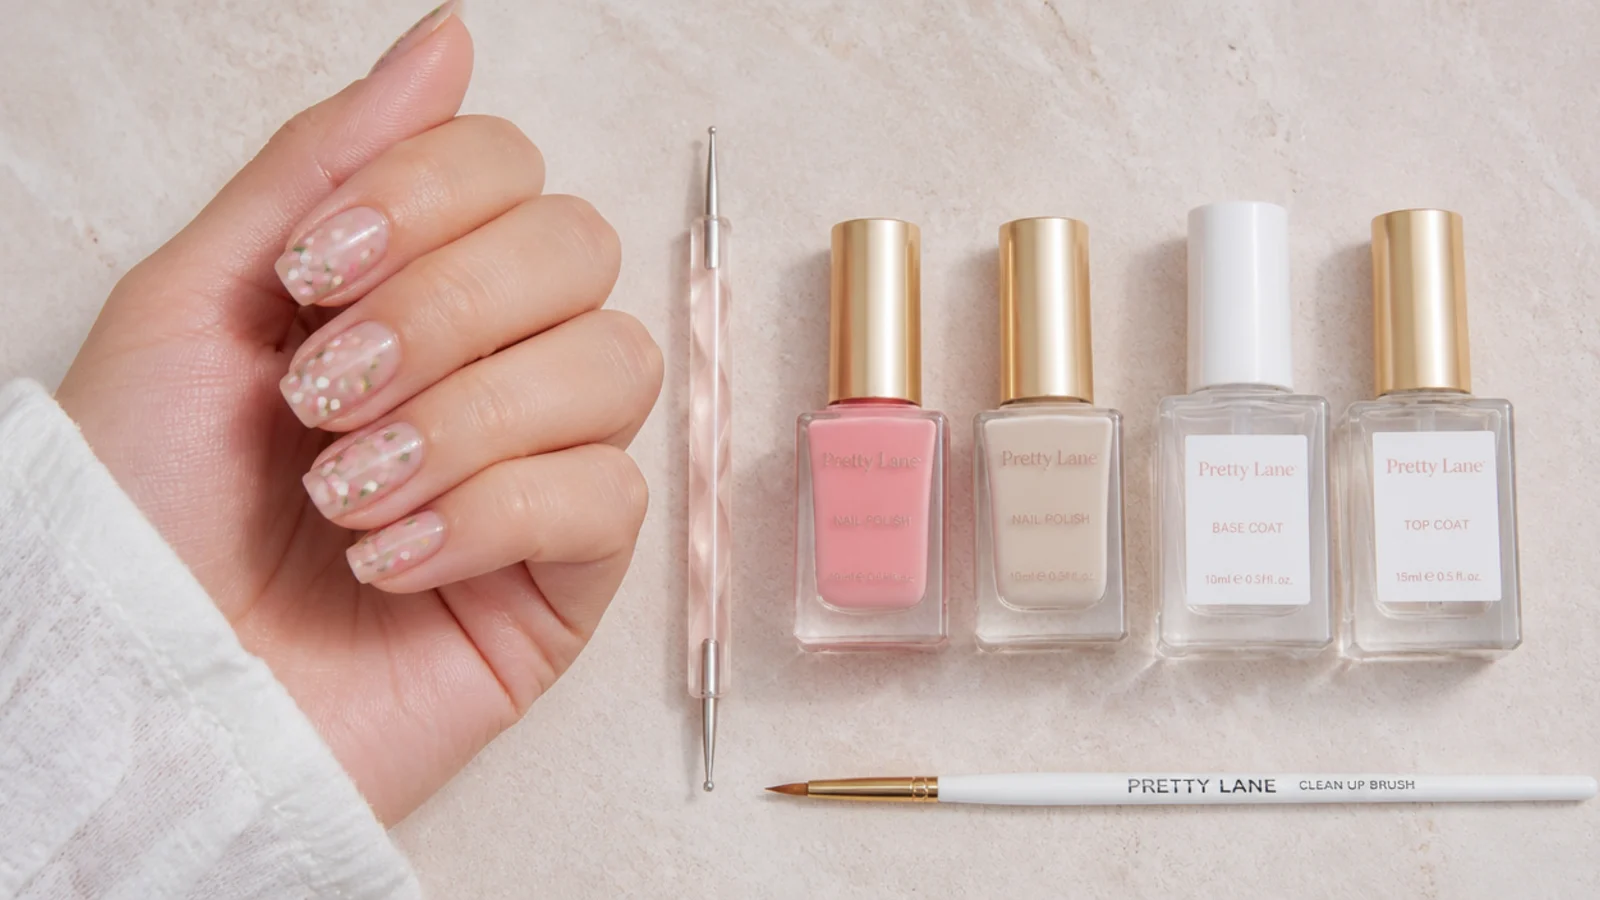
The kit is deliberately small. You need a double-ended dotting tool, which has a small ball on one end and a larger one on the other and costs about 5 dollars for a set of five sizes. You need a base coat, because most summer polish colors stain the natural nail and navy and cherry red are the worst offenders. You need a quick-dry top coat, since a slow top coat drags wet art into smears. And you need two polishes, one light and one bright, which is enough for 17 of the 20 designs above. The optional fourth item is a cleanup brush, a flat synthetic brush about 3mm wide, dipped in acetone. That brush is what turns a ruined nail into a thirty-second fix, and it is the single best 3 dollars in at-home nail art. Skip the nail art pens sold in drugstores. They dry out in a few weeks and give you less control than the tool you already have. If you would rather buy it all at once, look at nail kits for beginners.
How to Use a Dotting Tool: Size, Pressure and Timing
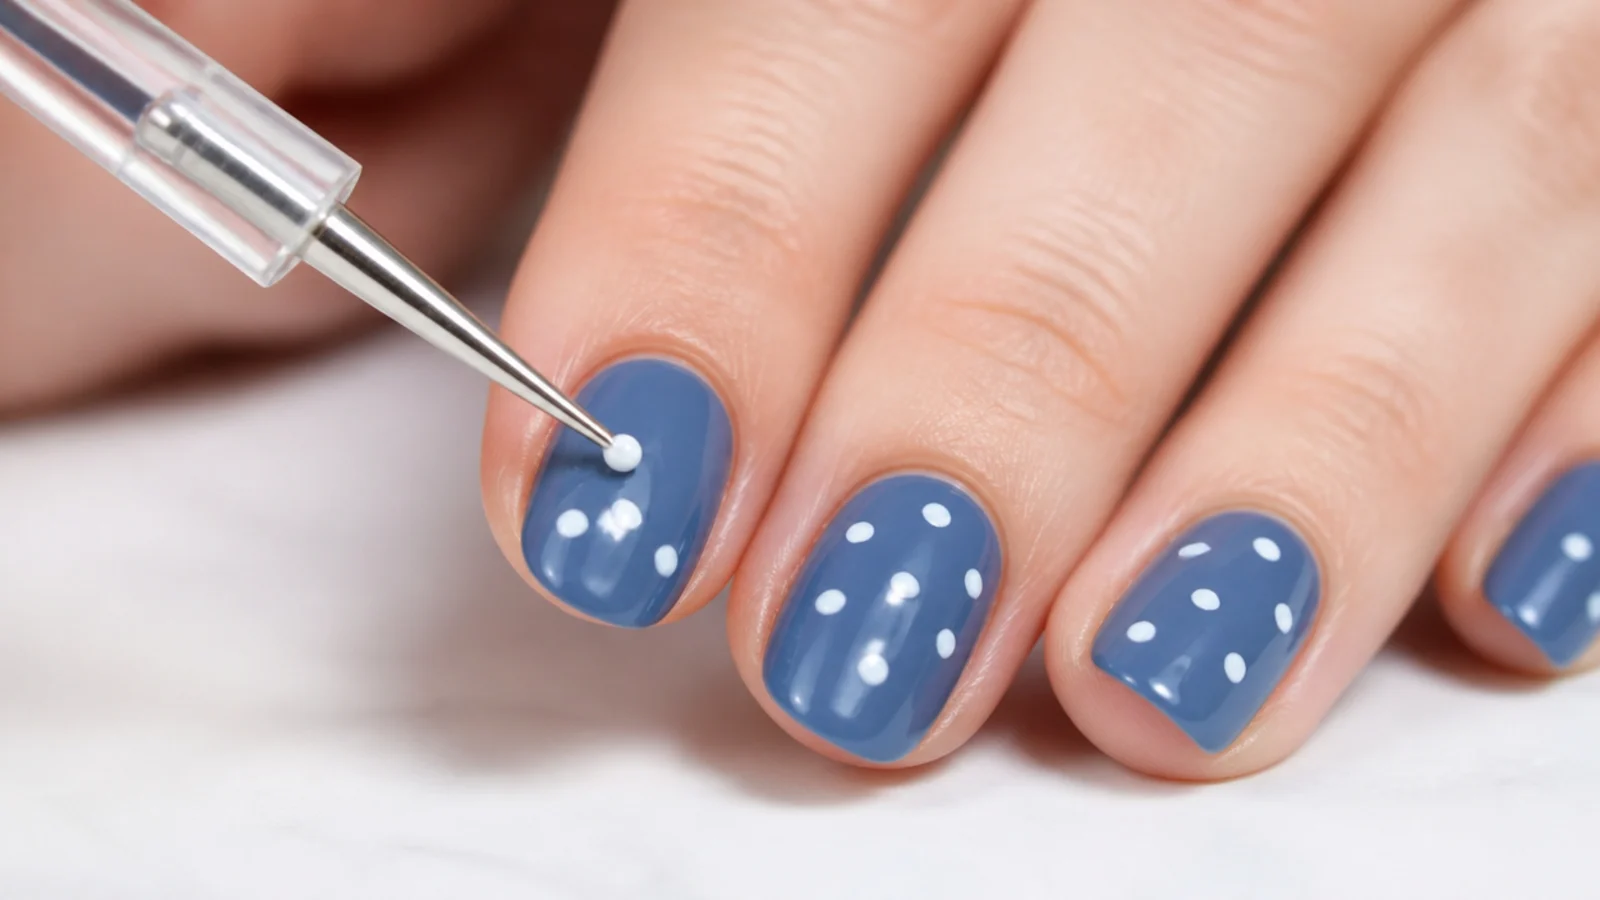
Three variables decide what your dot looks like. Size comes from the ball you use and how much polish you load, not from how hard you press. Dip the tool into a drop of polish on a piece of foil rather than straight into the bottle, so you can control the load. Pressure should be almost none. Touch the ball to the nail and lift straight up; pressing flattens the dot into an oval and pushes polish out to the sides. Timing is the one everybody gets wrong. Polish that feels dry to a light touch is still soft underneath for another few minutes, and a dot placed on a soft base sinks and spreads into a fuzzy circle. Wait five full minutes after your last base coat. Reload for every second dot so the first dot in a row is not twice the size of the third. Wipe the tool on a paper towel between colors, since a trace of red in white polish turns your next dot pink. Work on one nail at a time, complete, rather than doing all ten bases and coming back.
How to Fix Dots That Spread, Bleed or Dry Lopsided
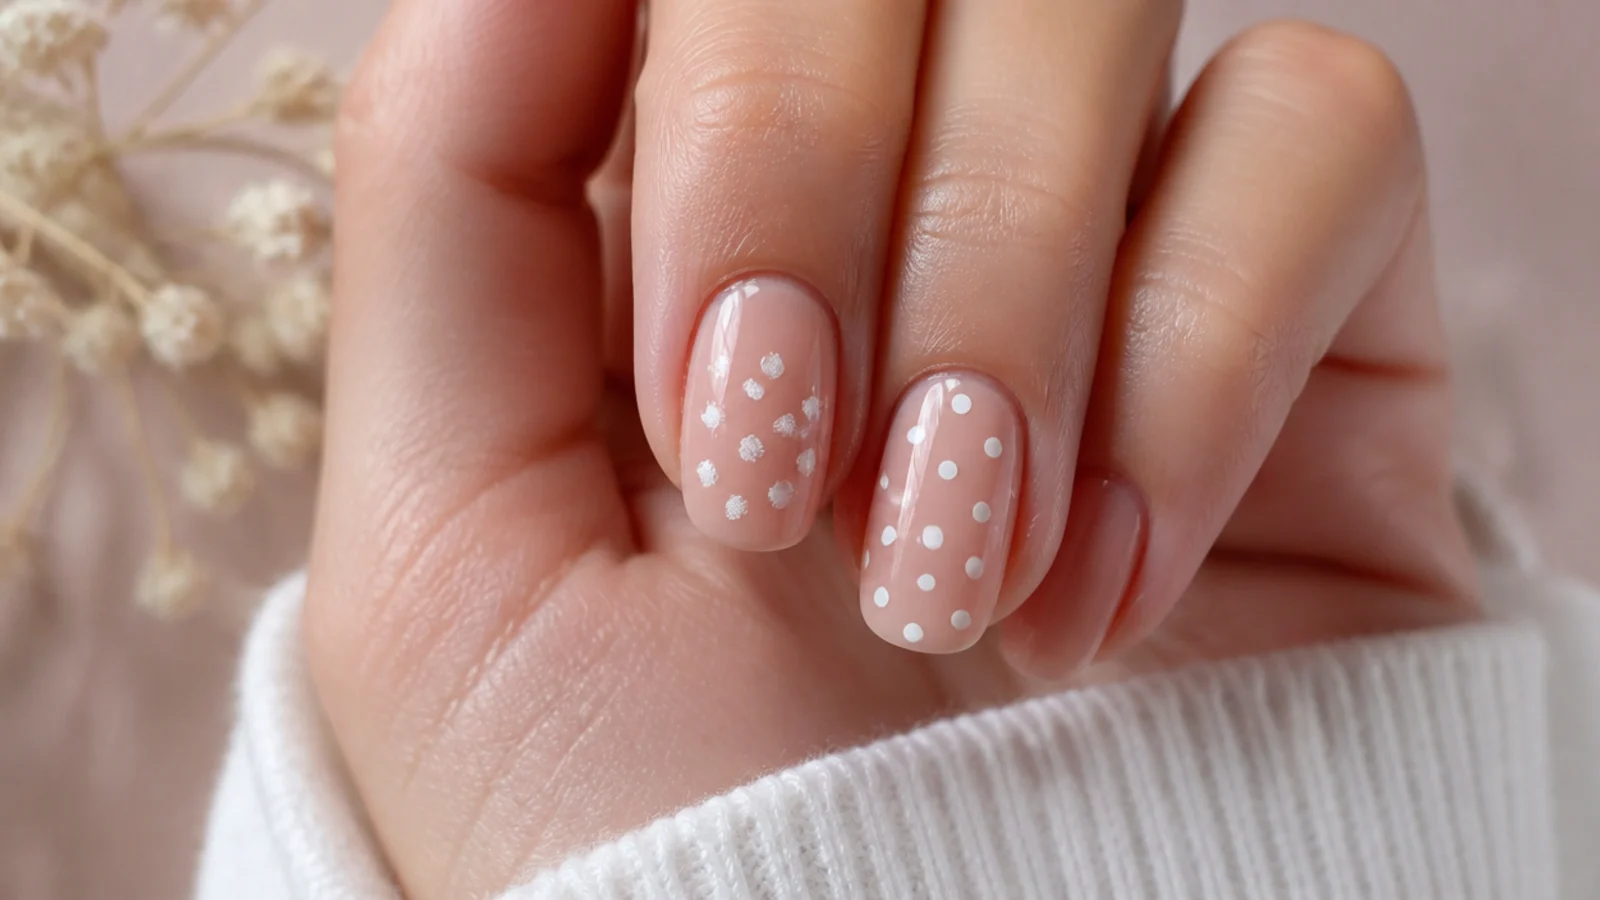
Five failures cover almost everything, and each has a fix that does not involve redoing the nail. If dots spread into fuzzy blobs, the base was wet. Let the nail fully harden, then lift the blob off with a cleanup brush dipped in acetone and place a new dot. If a white dot turns pink or muddy, color from the layer below bled up through it, which means the same wet-base problem plus a strong pigment. Wait longer, then dot again directly over the discolored one. If dots dry as ovals rather than circles, you pressed too hard or dragged as you lifted. Touch and lift vertically. If the top coat smears the whole design, either the art was still wet or you used a slow-drying top coat and pushed the brush. Float the top coat on in one pass without letting the brush touch the nail. If dots dent with fabric marks overnight, the set was not fully hard. Regular polish takes about an hour to harden properly, not the ten minutes it takes to feel dry. Durability over a real beach week is covered in how to make summer nails last.
How Long Simple Summer Nails Take and How Long They Last
Budget 20 to 40 minutes for any design on this list, and understand that most of that is waiting rather than painting. A typical breakdown is 2 minutes for base coat, 6 minutes for two color coats, 5 minutes of drying, 5 to 10 minutes of dotting, another 3 minutes of drying, and 2 minutes for top coat. The fastest designs here are the micro dot French, the half moon dots and the single line, all around 20 minutes. The slowest is the strawberry, at about 35 minutes, purely because it has two separate drying stages built into it. On wear, regular polish over a base coat gives you 5 to 7 days before the free edge starts to chip, and swimming, dish water and sunscreen all shorten that. At-home gel gives you 2 to 3 weeks. One honest note about summer specifically: white and pastel polishes take on a yellow cast after about a week of daily sunscreen contact, and that is a chemical reaction, not dirt, so it will not wash off. Refreshing the top coat every three days slows it noticeably.
Best Summer Polish Colors for Simple Dot Designs
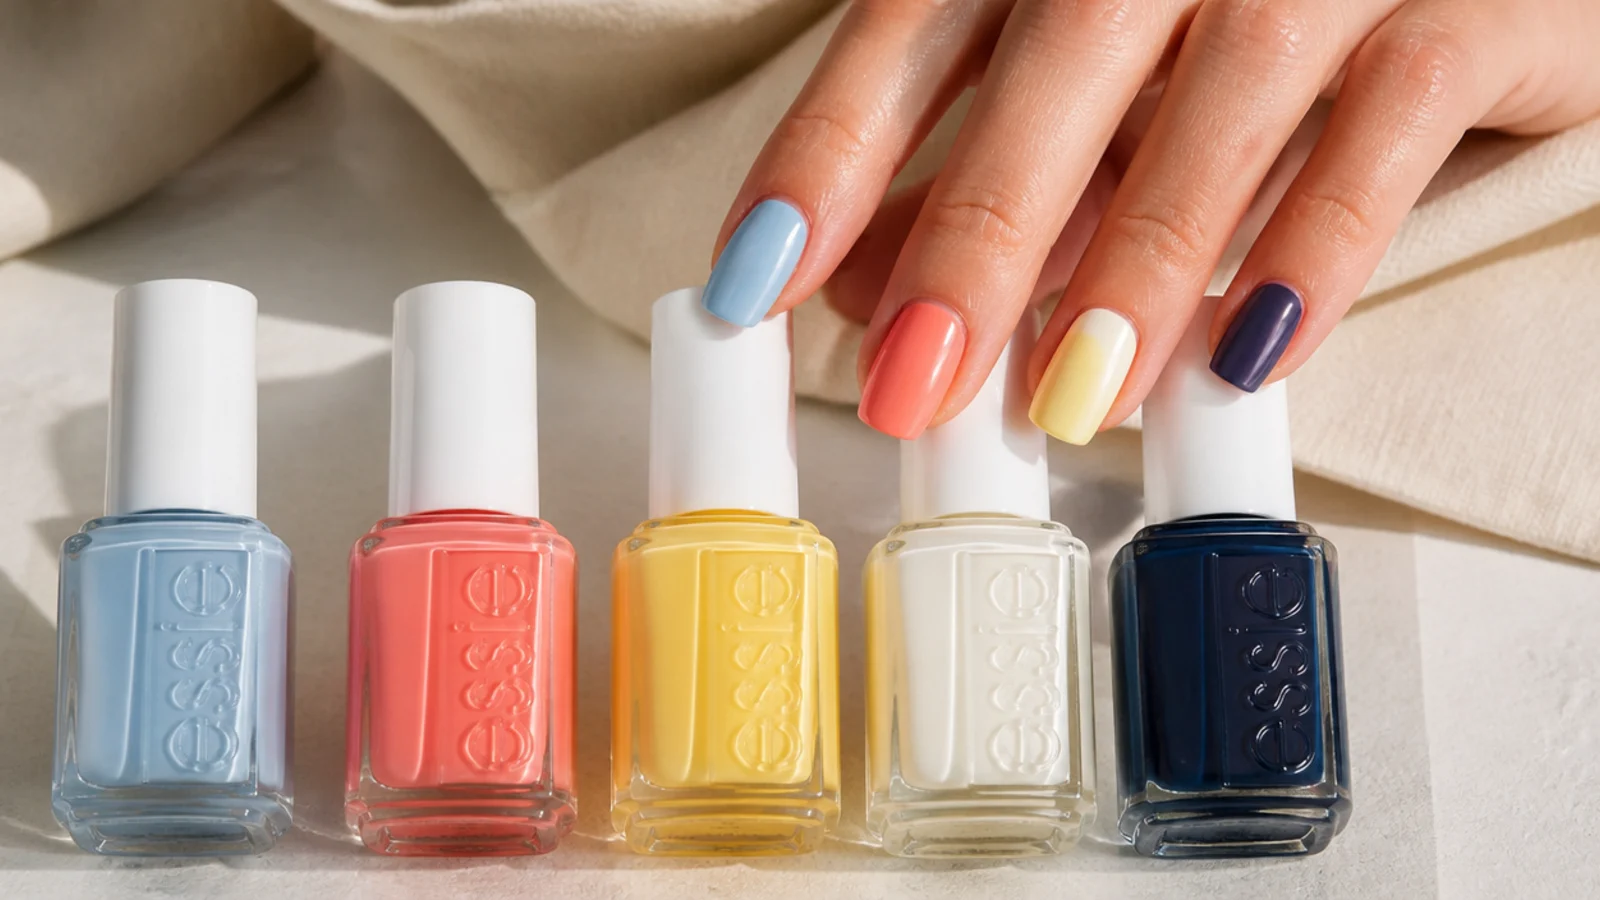
Two-polish designs live or die on contrast, so pick one light and one saturated rather than two mediums. The five that cover this entire list are a milky white such as OPI Funny Bunny, a mid sky blue such as Essie Bikini So Teeny, a warm coral, a butter yellow and a navy. Milky white is the workhorse: it is the base for the daisy, cherry, strawberry, coral dot and confetti designs, and it is the color that makes a tan look deeper by contrast. Coral and butter yellow flatter warm and olive undertones. Sky blue and navy suit cool and fair undertones better, and blue is also the color that reads most clearly in photographs taken in direct sun, which matters if these are vacation nails. Avoid neon for dot work specifically, since neon pigment goes patchy without a white base underneath and streaky dots defeat the point. If your nails are short, summer nail colors for short nails goes deeper on which shades stay legible on a small nail plate.
Do These Designs Work on Short Nails?
Most of them do, and a few actually look better short. The rule is about how much of the nail the design occupies, and if you want your short nails to read longer first, how to make short nails look longer covers the shaping side. Anything built from small scattered dots works at any length, because dots do not need a minimum canvas: polka dots, confetti, sea glass, lavender sprigs and the half moon arc are all fine on a 2mm free edge. Designs anchored to the tip need length to sit in, so the watermelon slice, the sunset gradient and a full white tip all want at least 4mm of free edge or they crowd the nail bed. The half moon dot design is the standout on short nails, since it uses the widest part of the plate instead of the narrowest. Two adjustments help across the board: use the smaller end of the dotting tool throughout, and drop the number of design elements per nail by about a third, because the same three daisies that look sparse on a long almond nail look crowded on a short square one. There are more length-specific ideas in simple short nail ideas.
Frequently Asked Questions
What is the easiest summer nail design to do at home?
White polka dots on a sky blue base. It needs two polishes, one dotting tool and about 25 minutes, and uneven spacing genuinely does not matter because scattered dots are supposed to look random. The dotted French tip is a close second, since dots hide the crooked smile line that ruins most beginner French manicures.
Can you do nail art without a dotting tool?
Yes. The rounded head of a bobby pin makes a good large dot, a toothpick makes a small one, and the back of a hair pin sits between them. All three work, but they hold less polish than a steel dotting tool, so you reload after every single dot and the sizes vary more. A five-piece tool set costs about 5 dollars and solves both problems.
How do you make polka dots on nails?
Drop a bead of polish onto a piece of foil, dip the ball of the dotting tool into it, then touch the ball to a fully dry nail and lift straight up without pressing. Reload every second dot so the sizes stay even. The base must be dry for at least five minutes or the dot will sink and spread.
Why do my dots spread out and go flat?
Almost always because the polish underneath was still soft. Nail polish feels dry to a light touch long before it has hardened, and a dot placed on a soft base sinks into it and widens. Wait five full minutes after the last color coat. Pressing the tool down instead of touching and lifting is the other common cause.
How long do at-home summer nails last?
Regular polish over a base coat with a quick-dry top coat lasts 5 to 7 days before the free edge chips. At-home gel lasts 2 to 3 weeks. Summer shortens both: saltwater, chlorine, sunscreen and heat all soften and lift polish faster than normal wear, so expect the lower end of each range on a beach trip.
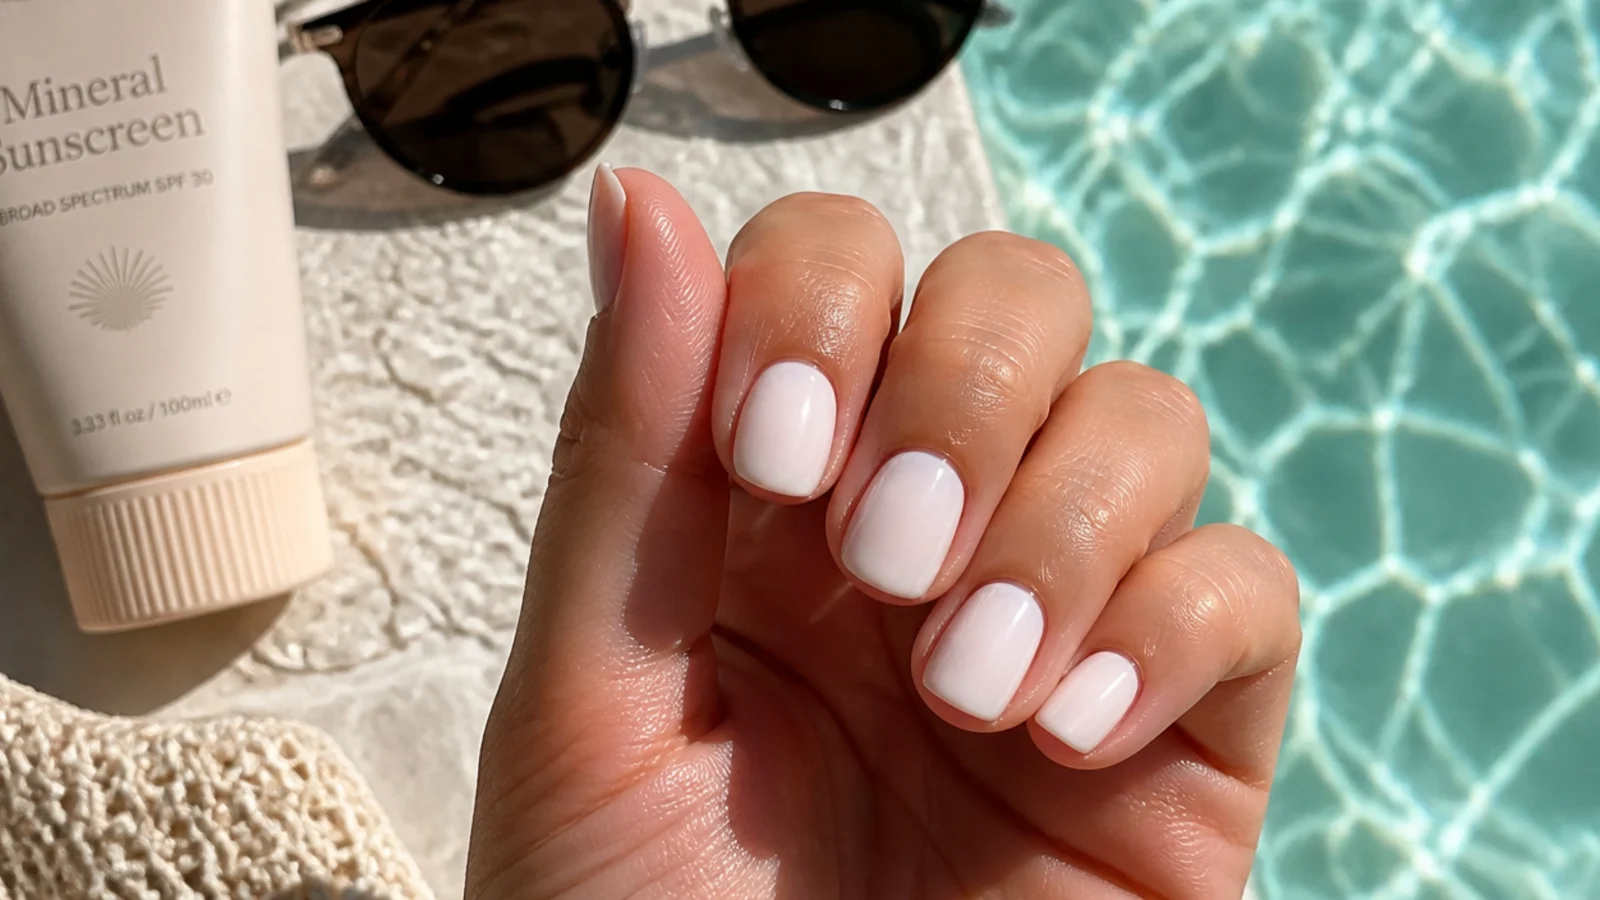
Does sunscreen turn white nail polish yellow?
Yes, and it is a chemical reaction with the UV filters in the sunscreen rather than dirt, so it does not wash off. White, milky and pastel shades show it worst, usually within about a week of daily application. Refreshing your top coat every three days puts a new barrier between the sunscreen and the color and noticeably slows it down.
Do simple nail designs work on short nails?
Scattered dot designs work at any length, including a 2mm free edge, because dots do not need a minimum canvas. Tip-anchored designs like the watermelon slice or a full white tip want at least 4mm of free edge. On short nails use the smaller end of the dotting tool and place about a third fewer elements per nail so the design does not crowd.
How do you fix a smudged dot without redoing the whole nail?
Let the nail dry completely first, which feels counterintuitive but matters. Then dip a flat 3mm cleanup brush in acetone, wipe out just the smudged dot, let the spot flash dry for a minute and place a new dot over it. The surrounding polish survives because acetone on a controlled brush only lifts what it touches.
What two polish colors should I buy for summer nails?
A milky white such as OPI Funny Bunny and one saturated summer shade, most usefully a mid sky blue like Essie Bikini So Teeny or a warm coral. That pairing covers polka dots, daisies, cherries, dotted French tips and confetti nails. Pick one light and one saturated rather than two mid-tones, since dot designs depend entirely on contrast.
Which beach & summer nails look are you saving?
If you take one thing from these 20 simple summer nails, make it the five-minute rule: dots spread, drag and dent because the polish underneath was still soft, not because your hand shook. Paint the base, walk away for five real minutes, then dot. That single pause fixes most beginner nail art. Start with white polka dots on sky blue or the two-dot cherry, since both forgive uneven spacing, and keep a cleanup brush and a capful of acetone next to you so a smeared dot costs you thirty seconds instead of a whole nail. When you are ready for waves and shells, work through how to do beach nails at home, or browse the rest of the beach and summer nails hub.