Quick Comparison
| Short Boy Hair (Buzz, Fade, Crop, Waves) | Longer Boy Hair (Curtains, Shag, Bun, Curly Top) | |
|---|---|---|
| Silhouette distance from skull | 2 to 8mm; the outline is basically the head | 15 to 50mm; a clearly separate mass with air in it |
| What carries the drawing | Value and the hairline shape | Flow lines and section separation |
| Main pencil doing the work | 2B for the field, 2H for the faded edges | 4B for shadow structure, 6B for the tunnels |
| Stroke type | Stipple, pressure dots and short flicks | Long curved strokes following the flow |
| Number of strands to fully draw | Zero to five, all at the front hairline | 15 to 25 across the lit edges only |
| Best viewing angle to draw | Three-quarter, so the fade wraps | Side or three-quarter, so the length shows |
| Typical sketch time | 10 to 30 minutes | 30 to 55 minutes |
| Most common failure | Hatch marks that make short hair look long | A hard perimeter outline that reads as a helmet |
| Best first attempt | Buzz cut, then taper fade | Curtain bangs, then textured crop |
1. Buzz Cut Boy Hair Sketch
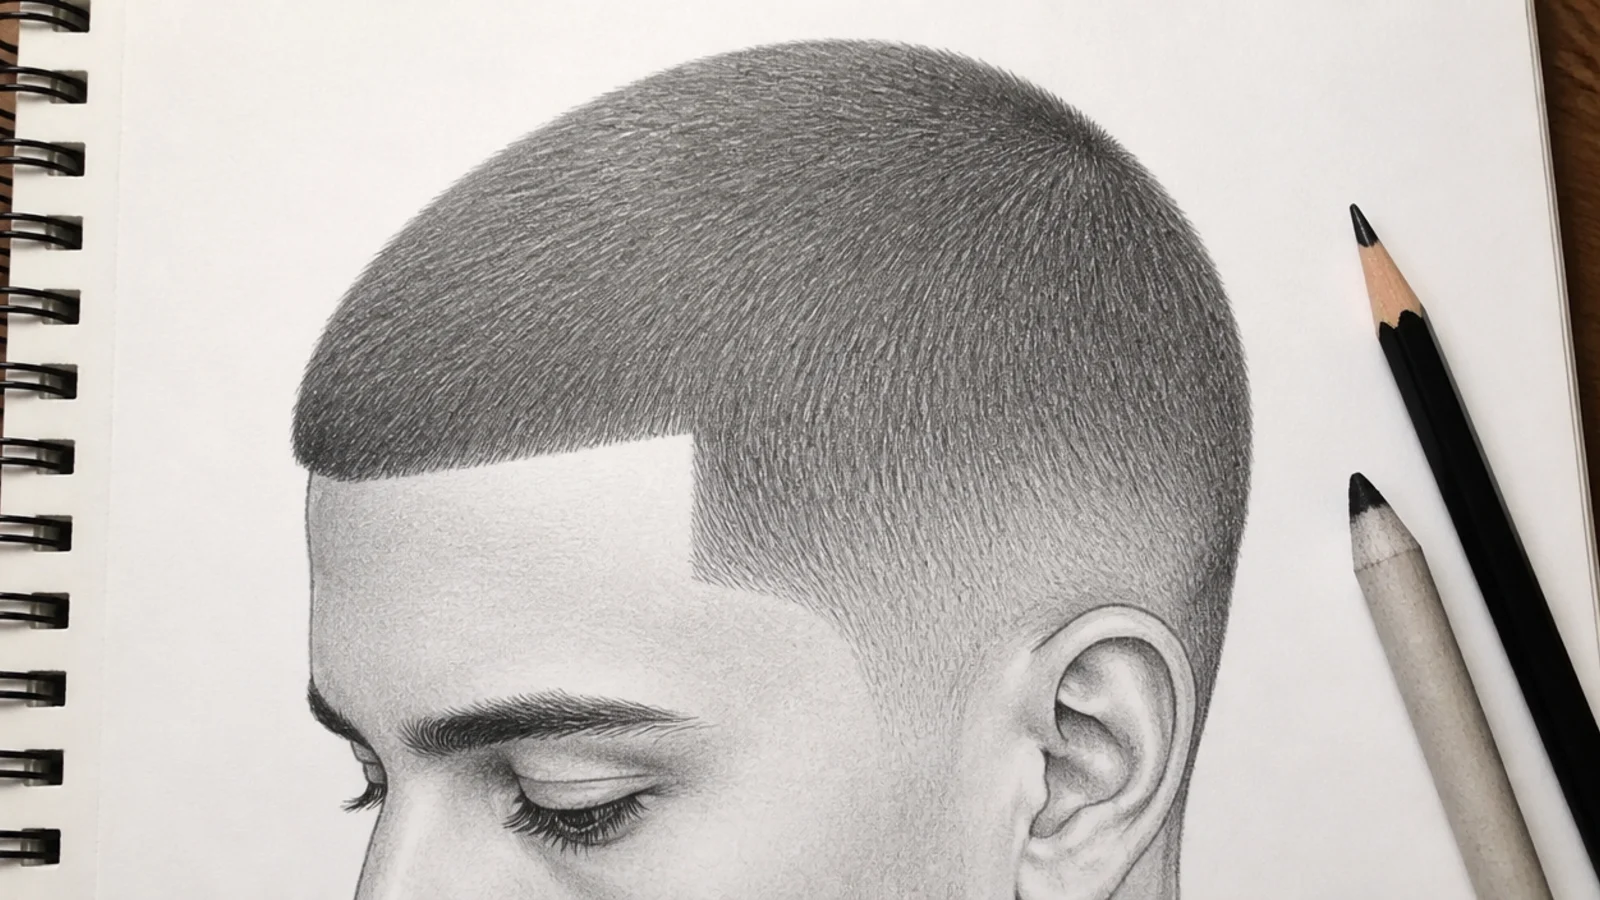
The fastest boy hair sketch there is, and the best first one, because it has no strands at all. Draw the full cranium, then lay an even 2B tone over the top and sides following the curve of the skull, keeping it about 2mm proud of the outline so the hair has thickness. The whole style is value plus a hairline. Keep the front hairline crisp and slightly M-shaped at the temples, and let the tone fade out to nothing behind the ears. Very short hair behaves like a carpet, so texture comes from tiny pressure dots, never from lines. Around 10 minutes start to finish.
Who it suits: Absolute beginners and anyone practicing skull shape and value control.
Tip: Stipple with the pencil tip rather than hatching; hatch marks instantly read as long hair.
2. Taper Fade Boy Hair Sketch
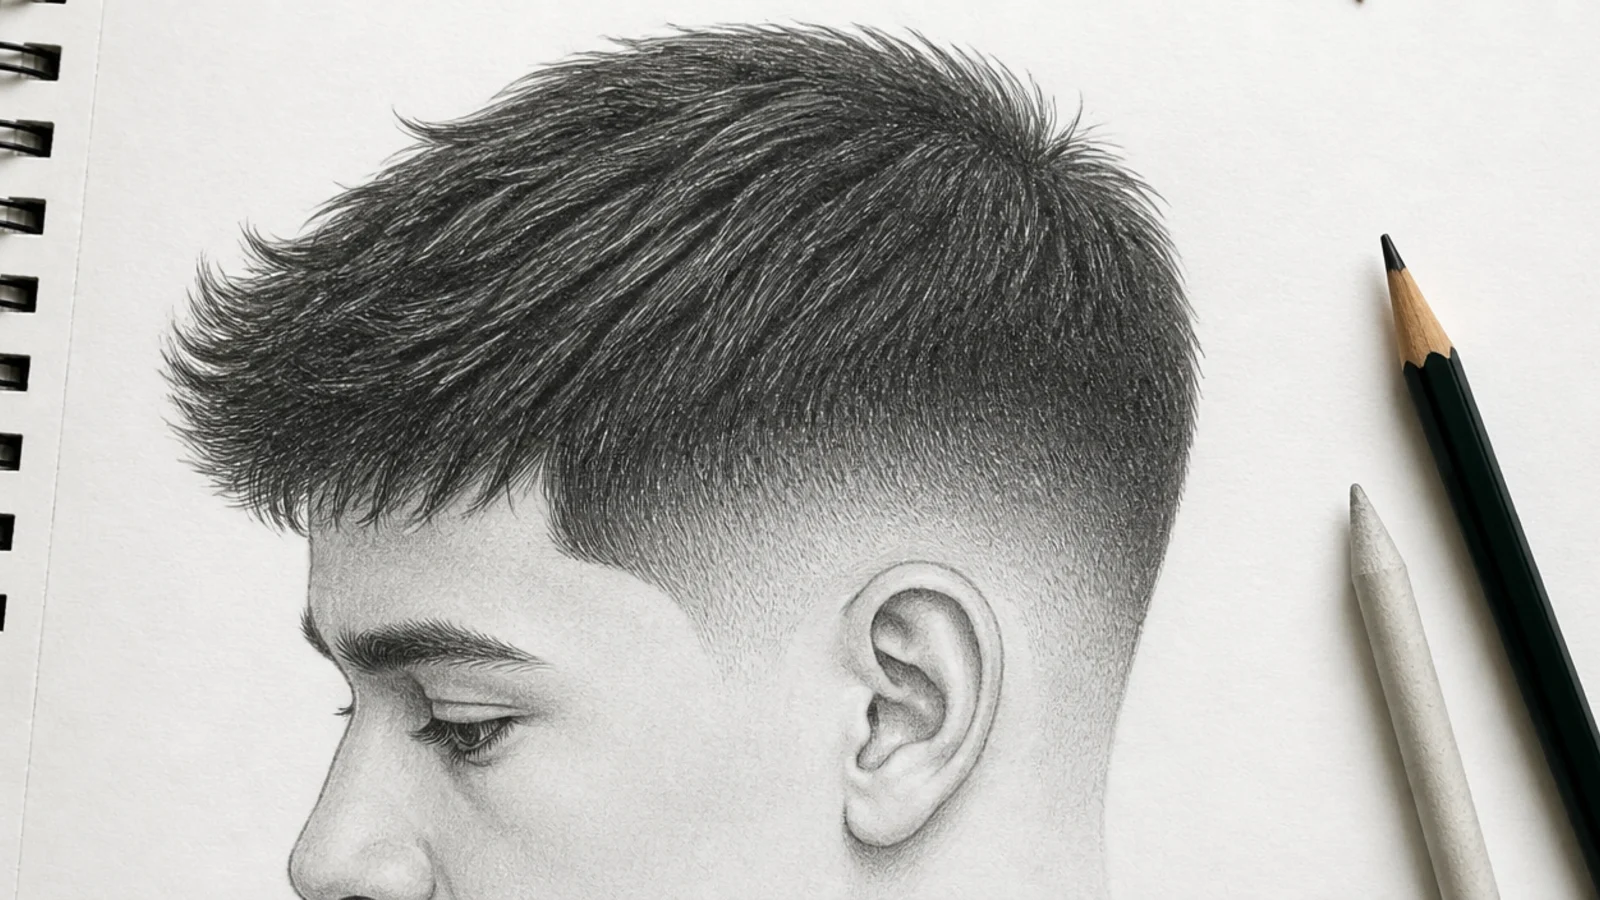
A fade is pure gradient, which makes it the single best exercise for value control on this list. Block the top mass first, then run a continuous 6B to 2H gradient down the side of the head over roughly 40 to 50mm at sketch scale, going from the dark top section to bare paper at the ear. The one rule everyone breaks: the fade line is not a line. If you can see where one value ends and the next begins, blend it further with a stump or overlay lighter pressure. The top section keeps its texture and its crisp perimeter while the sides dissolve. Around 25 minutes.
Who it suits: Artists who want to practice smooth gradients and modern male barbering shapes.
Tip: Work the gradient in three overlapping passes rather than one, so the transition never bands.
3. Curtain Bangs Boy Hair Sketch
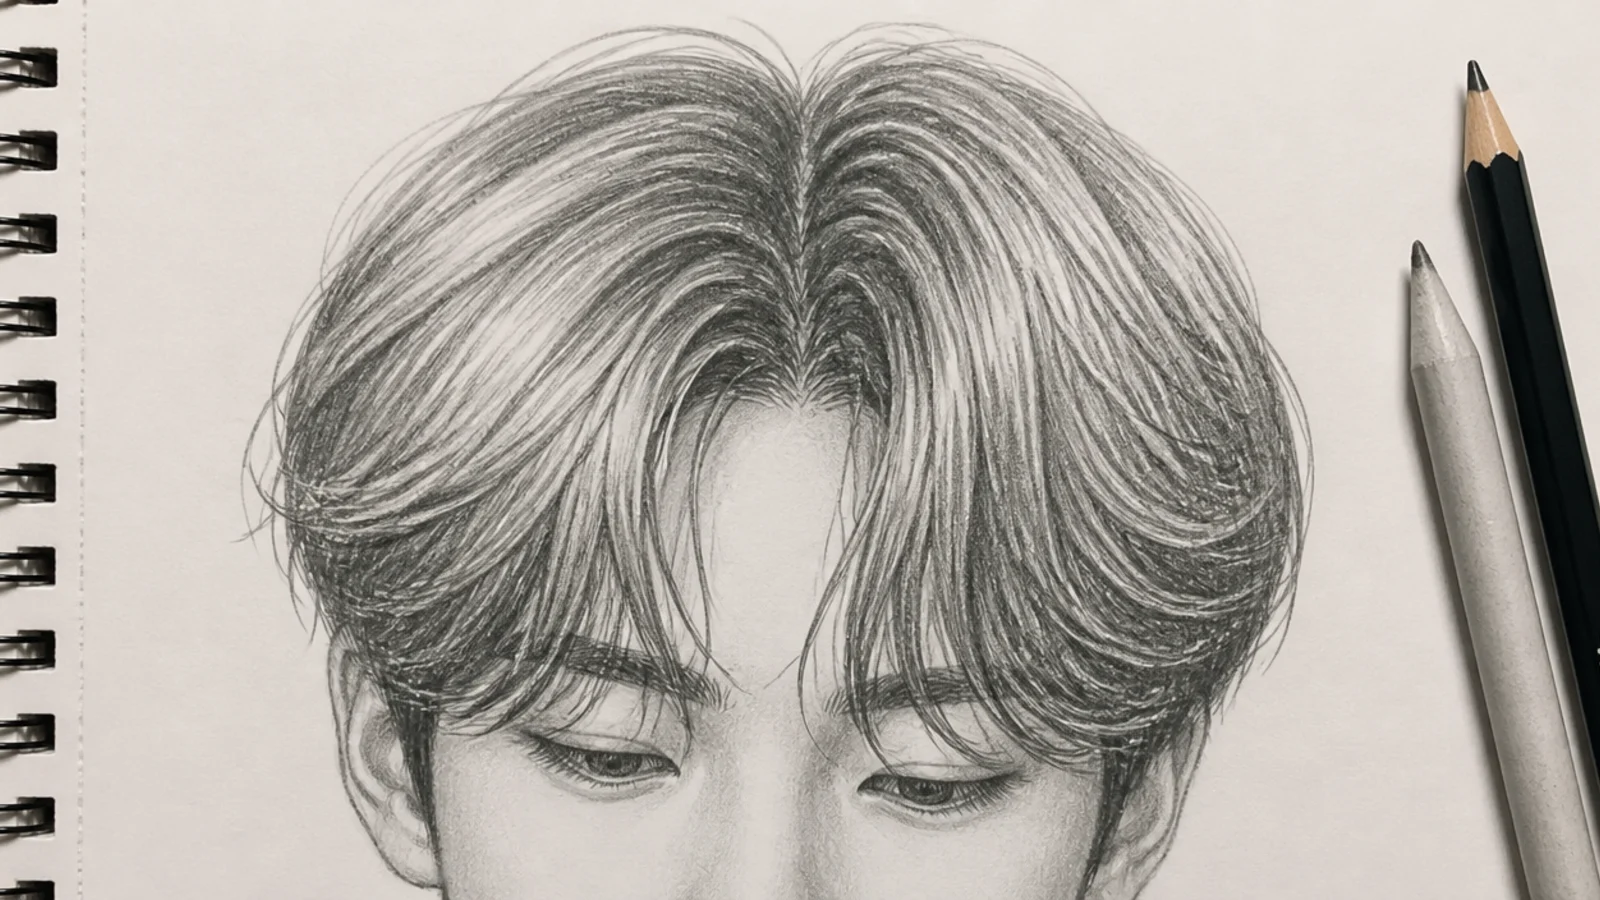
The most requested young male style to draw right now. Mark a center part at the crown, then run two mirrored sweeps of hair down and outward so they frame the forehead and end around the cheekbone, roughly 60 to 70mm long at head-height scale. The trick is that the two curtains should never be identical; make one slightly longer and let a few strands cross the part. Draw an inner bang line just under the leading edge of each curtain to show its underside, then shade beneath it with 4B so the fringe reads as lifting off the forehead. About 30 minutes.
Who it suits: Character artists drawing teenagers and anyone who likes soft face-framing shapes.
Tip: Curve the ends inward toward the jaw; straight-down curtains look like a wig cap. The real-hair shape is in short curtain bangs.
4. Textured Crop Boy Hair Sketch
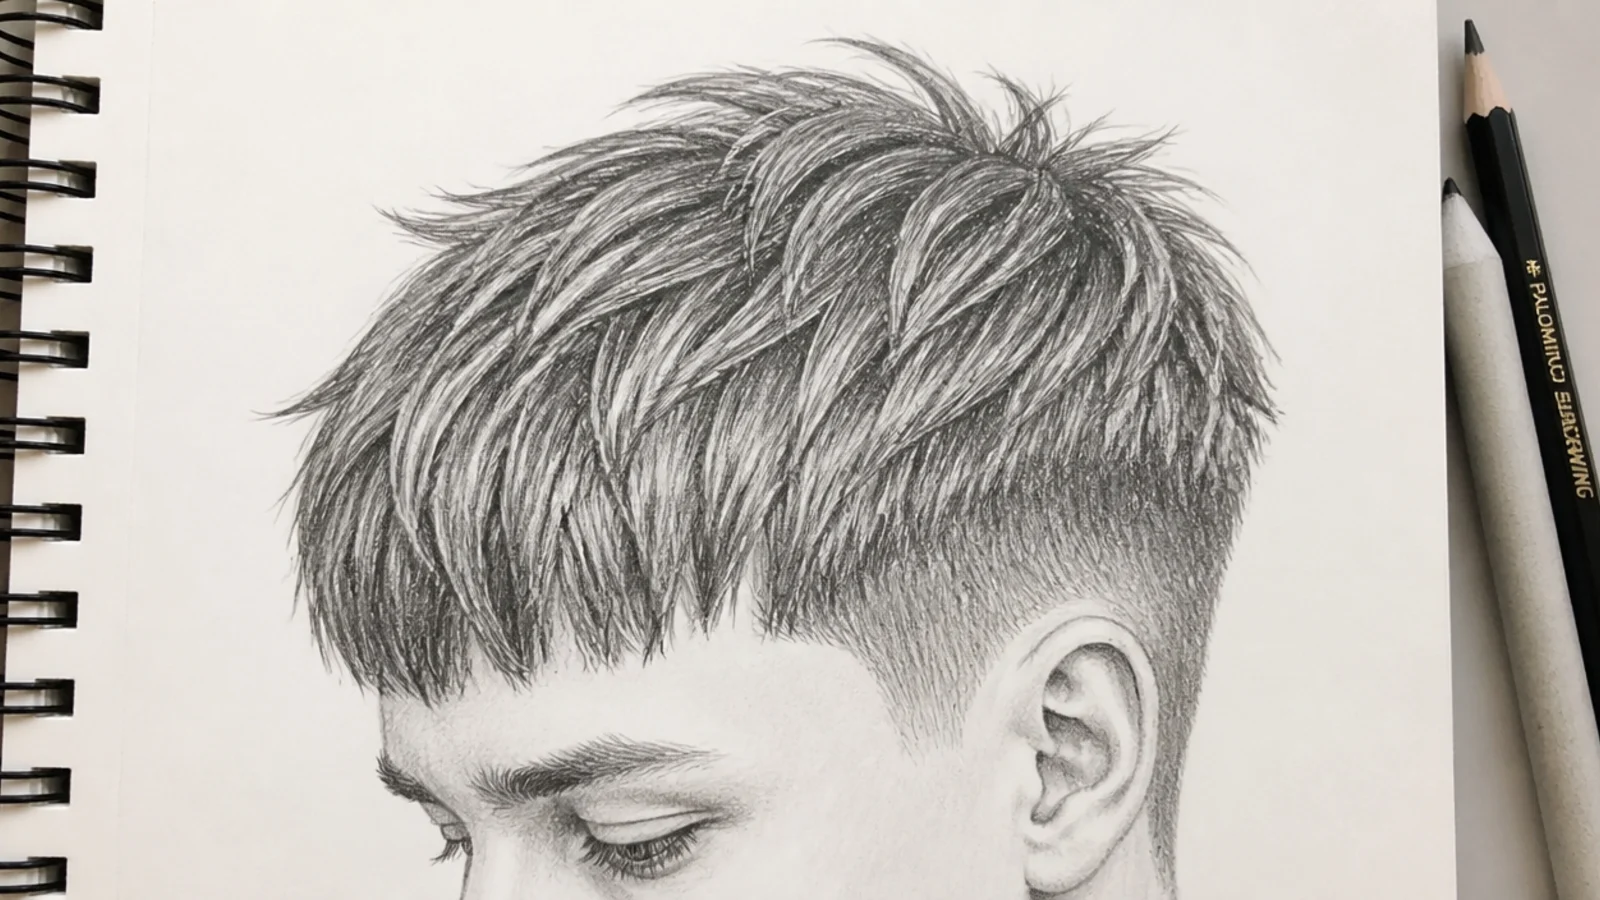
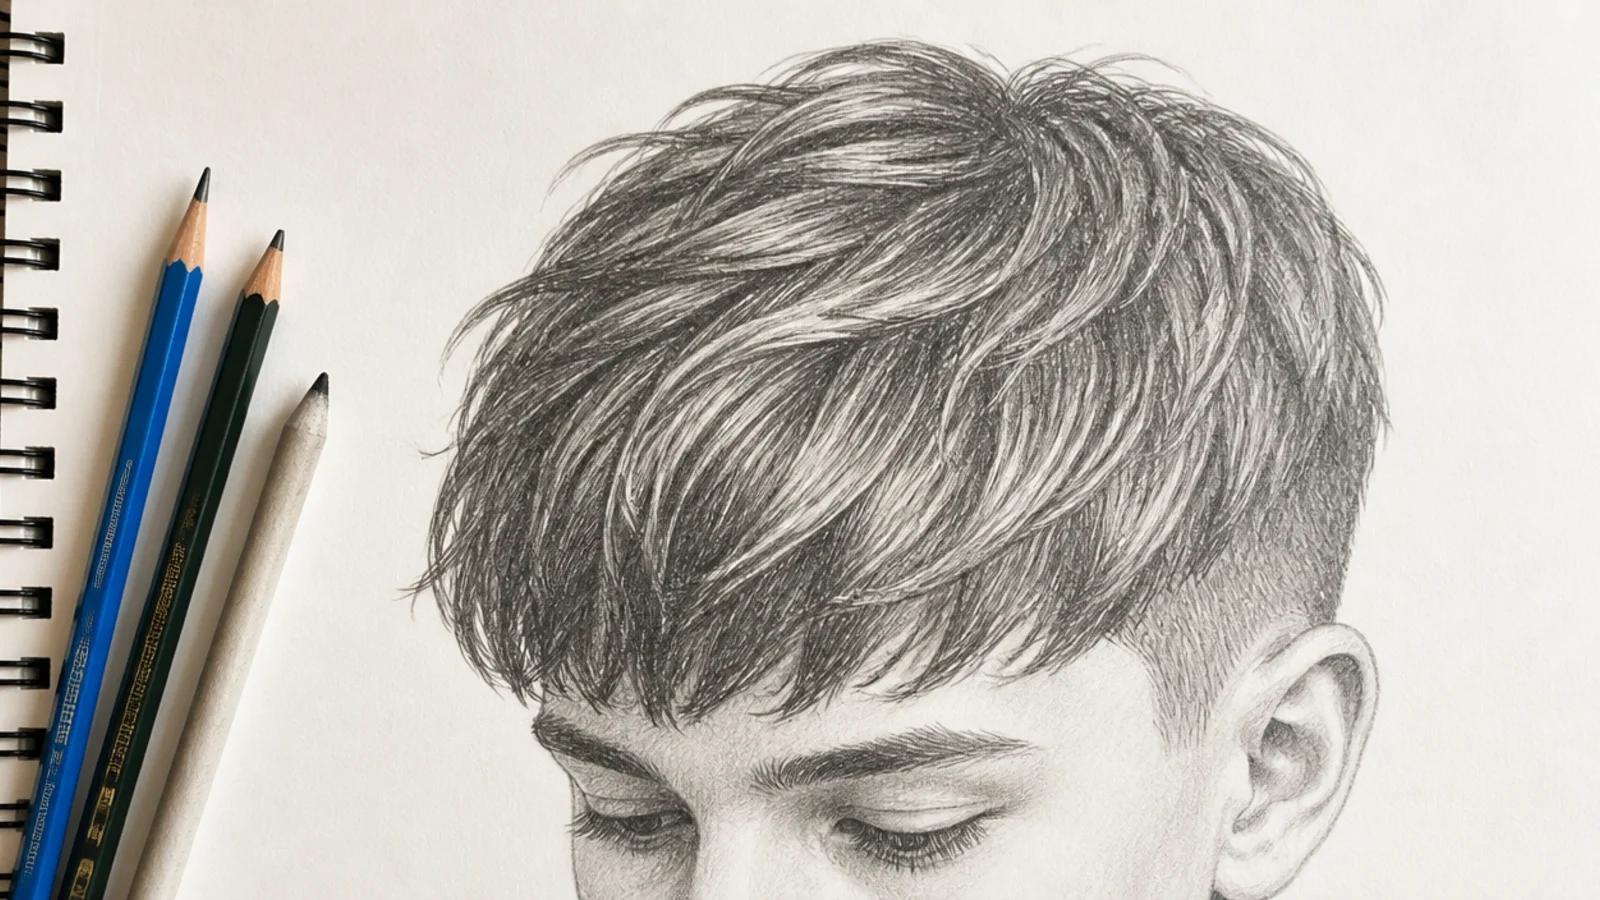
Short on the sides, piecey on top, with a blunt fringe pushed forward onto the forehead. Block the mass as a slightly boxy silhouette, then break the entire top and front edge with short flicks between 2mm and 5mm long, angled forward and at slightly different tilts. That broken edge is the whole style, and it is the same edge logic used across the hair sketch ideas collection. Keep the sides near-flat in value and put your darkest 6B directly under the fringe where it overhangs the forehead, since that single shadow is what makes the crop look like hair sitting on a head rather than a shape drawn onto it. Around 30 minutes. Compare the real-hair version in textured mid length haircut.
Who it suits: Modern character design and anyone drawing contemporary teenage boys.
Tip: Vary the flick angles by about 15 degrees; identical flicks read as a comb, not texture.
5. Spiky Boy Hair Sketch
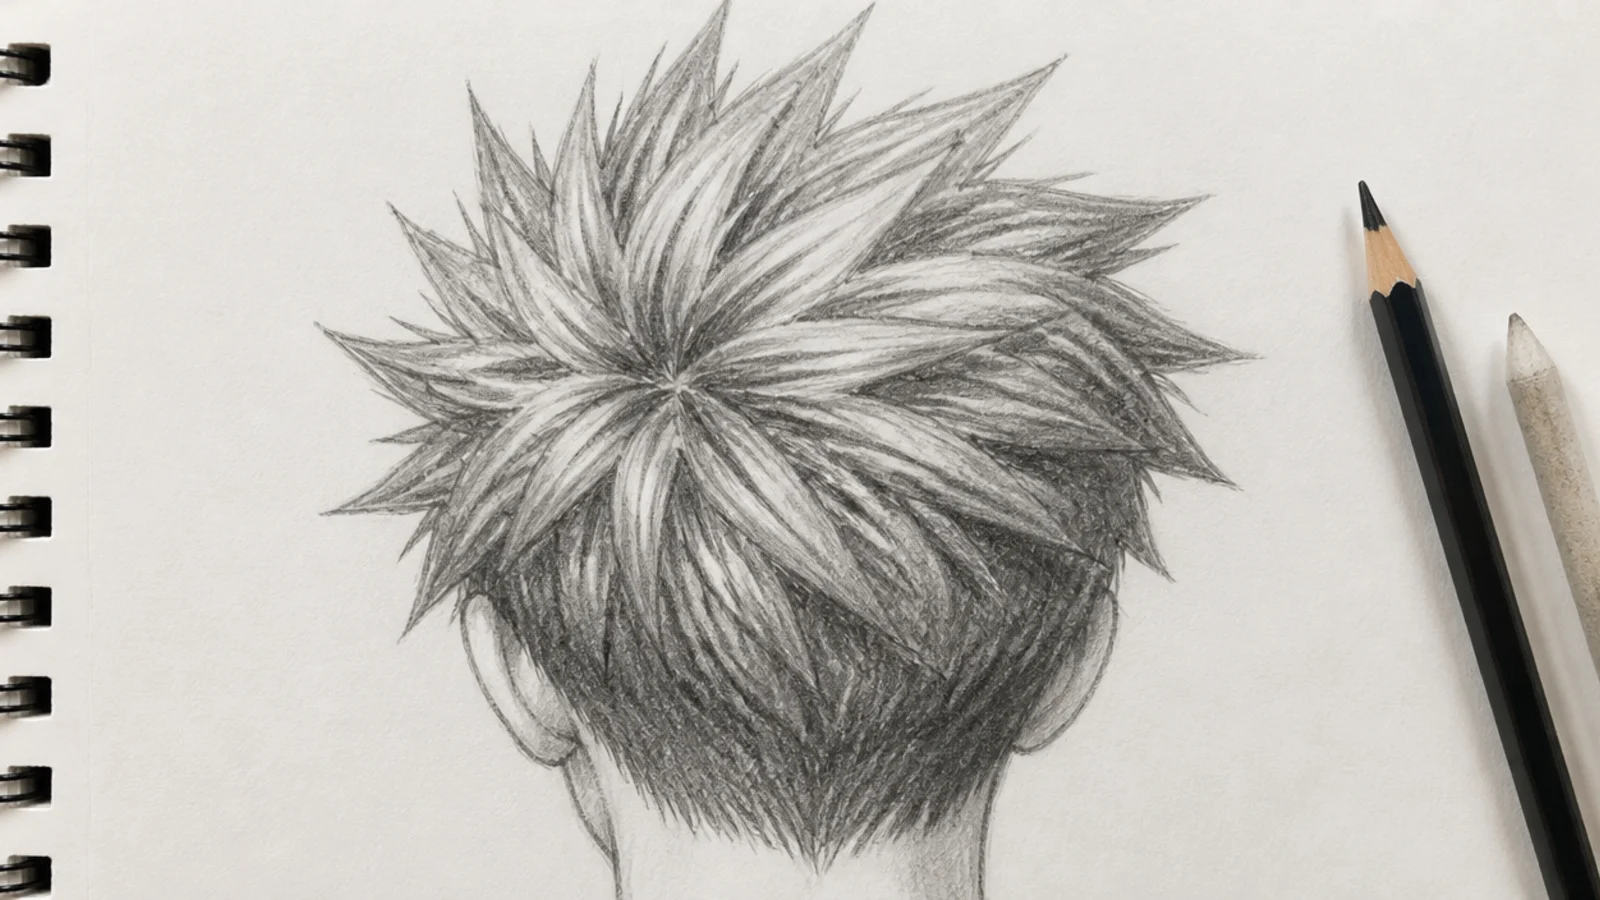
The style most beginners try first and most beginners overdo. Plan the silhouette before committing to a single spike: draw the outer boundary of the spiky mass as one jagged closed shape, then divide the interior into six to nine triangular clumps rather than thirty individual points. Each clump gets a lit outer plane and a dark inner plane, so the spikes separate by value, not by outline. Keep implied gravity in the design; even exaggerated spikes should lean, not stand perfectly vertical. Roughly 25 minutes, and it works equally well in a realistic or anime style.
Who it suits: Anime and comic artists, and anyone drawing energetic young characters.
Tip: Fewer, bigger spikes always look better than many small ones. Cap it at nine clumps.
6. Undercut Boy Hair Sketch
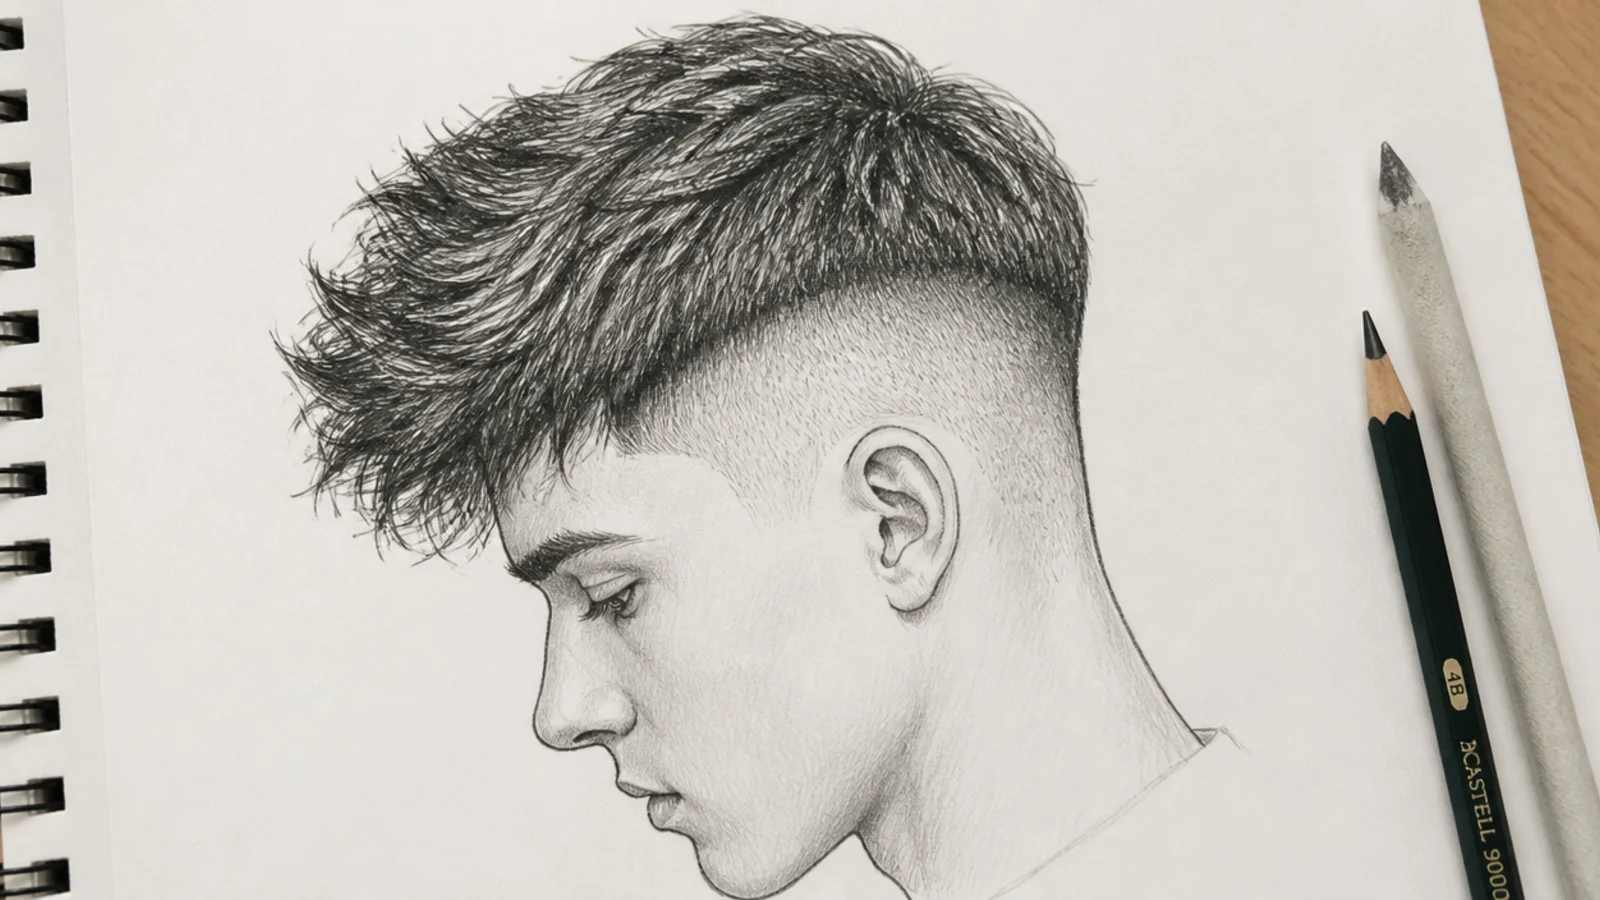
An undercut is a hard disconnect: long on top, buzzed underneath, with no gradient between them. That makes it the opposite exercise to the fade. Draw a clean boundary line running from the temple back above the ear, put the top section at 4B with full texture and a defined perimeter, and drop the sides to a flat 2H stipple with almost no marks. The contrast does all the storytelling. The one detail that sells it is a thin 6B shadow just below the disconnect line, where the longer top hair casts onto the shaved side. Around 25 minutes.
Who it suits: Artists who want strong graphic contrast and edgy character silhouettes.
Tip: Draw the disconnect line first and never cross it; strands wandering over it kill the effect.
7. Slicked Back Boy Hair Sketch
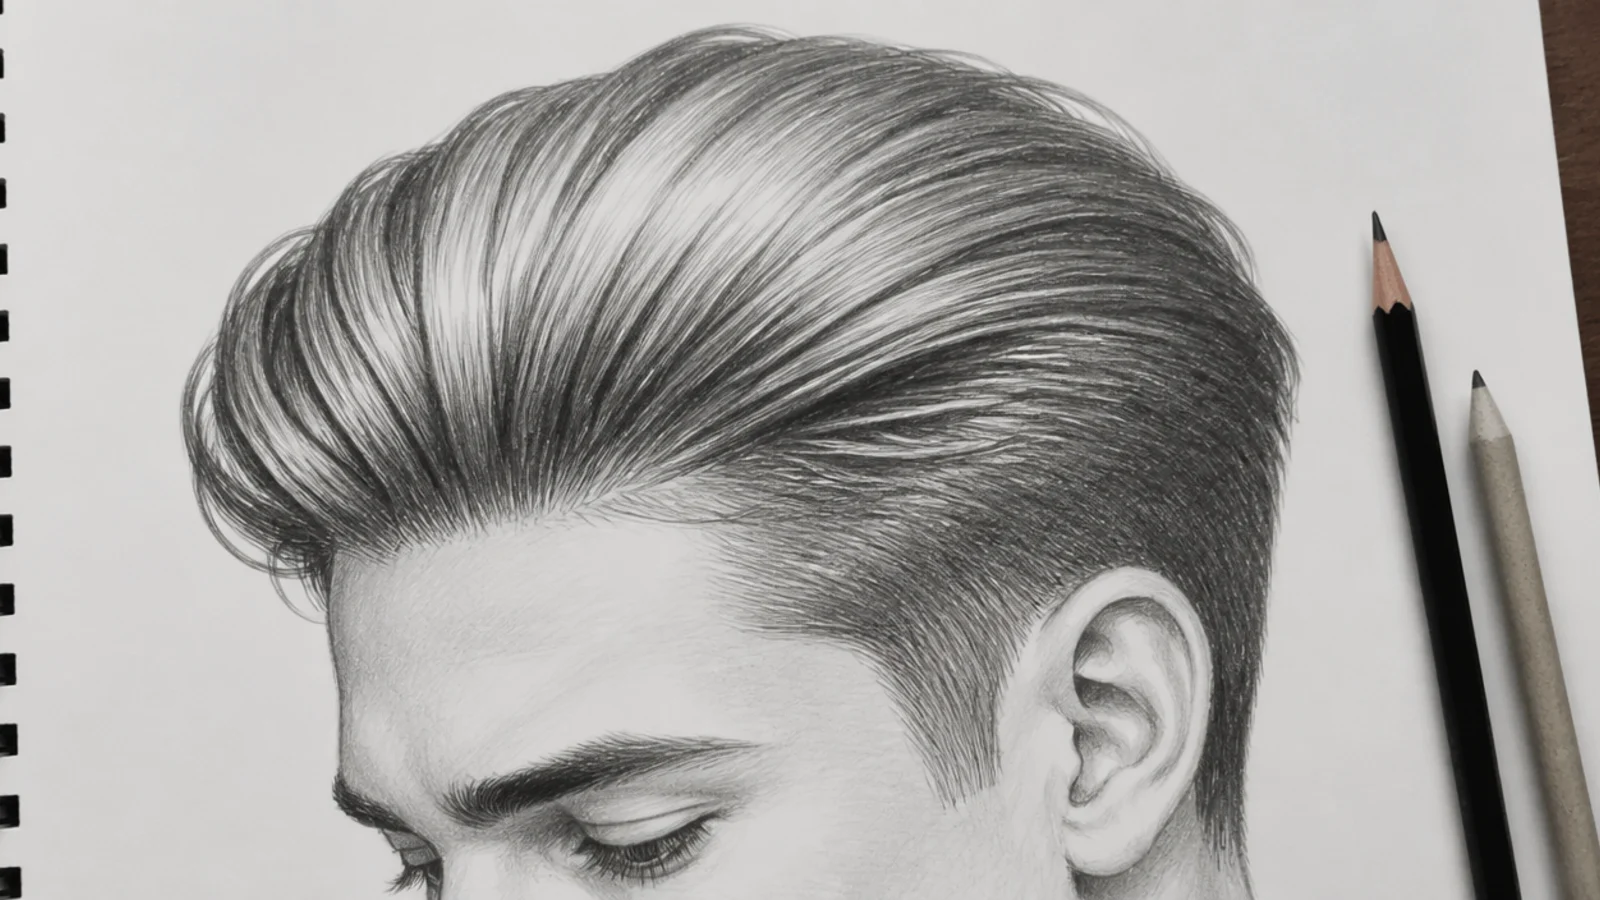
The one boy style where visible directional strokes are the point. Every strand travels the same way, from a high hairline straight back over the crown, so the drawing becomes a study in flow and shine. Lay long 2B strokes from the hairline back to the nape, leave a clean unshaded highlight band 8 to 12mm wide sitting just behind the crown where the skull turns, then push 4B into the recess above the ears. Because the hair is pulled tight, the skull shape must be accurate, and the hairline is fully exposed, so its M shape matters more here than anywhere else. About 35 minutes.
Who it suits: Period pieces, formal character portraits and anyone practicing highlight placement.
Tip: Leave the highlight as bare paper from the start; recovering it later with an eraser never looks as clean.
8. Shaggy Mid Length Boy Hair Sketch
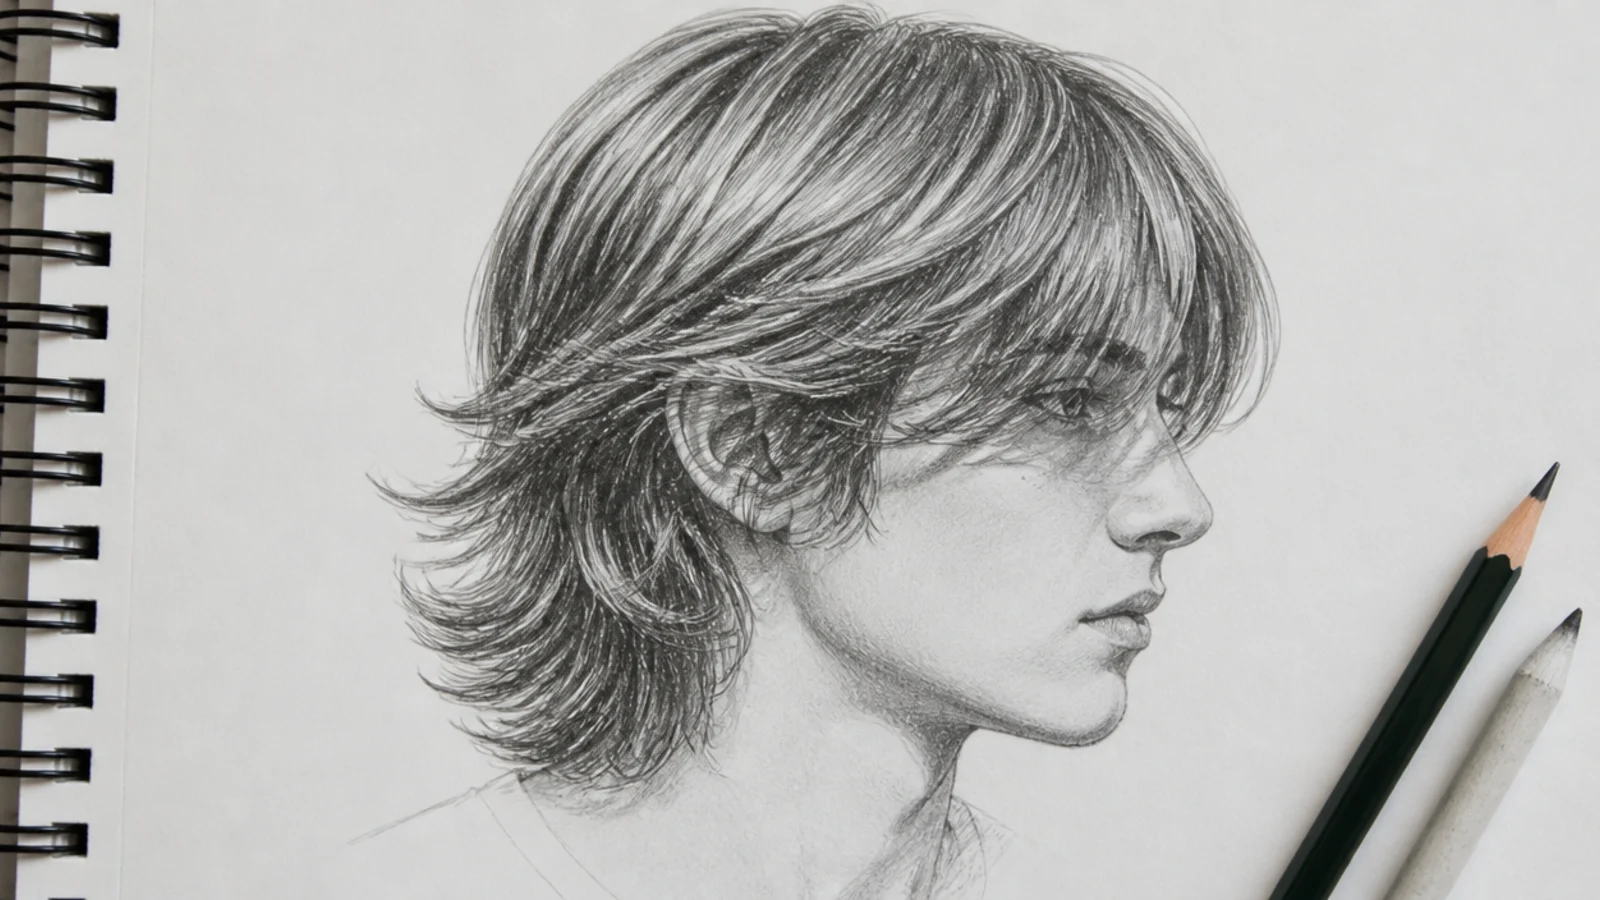
Ear-length, layered and deliberately unstructured, this is the skater or indie-band shape. Block a silhouette that sits noticeably wider than the skull, about 15 to 20mm proud at the sides, since shaggy hair carries air in it. Break the mass into four or five layered sections that each end in a flicked tip pointing a different way, and let a couple of pieces fall in front of the ear. Shade the tunnels between the layers with 4B rather than outlining them. Ends are everything here, so spend your last ten minutes on tips, not on the middle. Around 40 minutes. See the cut itself in shaggy mid length haircut.
Who it suits: Character artists drawing relaxed, informal or musician-type boys.
Tip: No two section ends should stop at the same height; stagger them by at least 5mm.
9. Mullet Boy Hair Sketch
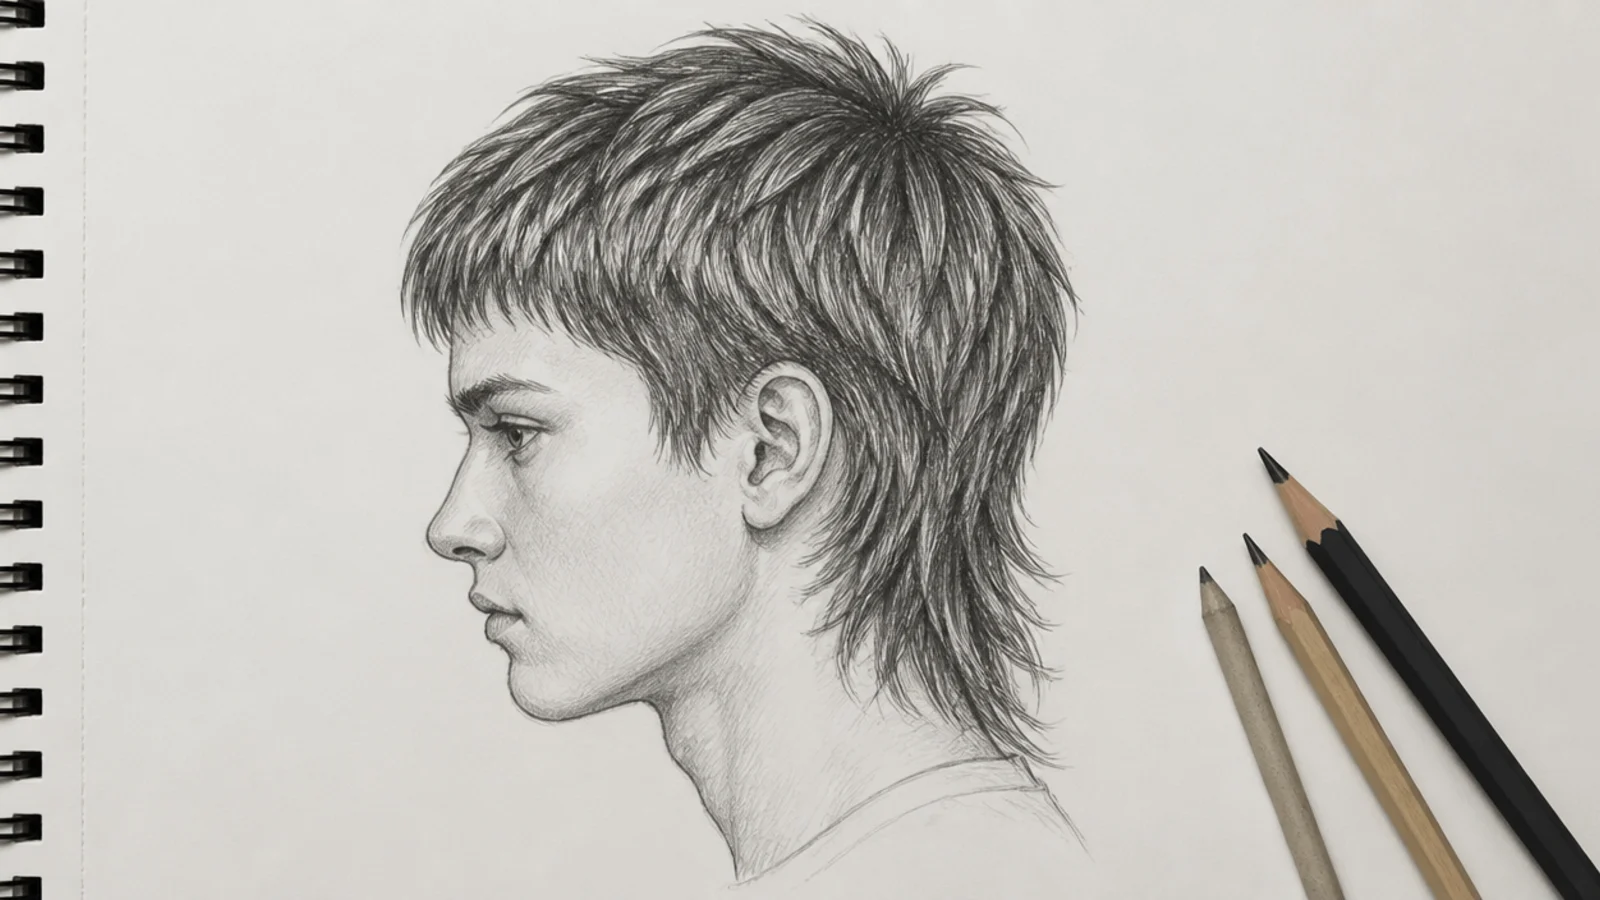
A mullet is two hairstyles sharing a head, and drawing it is a lesson in silhouette transition. Treat the front and sides as a textured crop with a broken perimeter, then let the mass extend backward and down from the occipital ridge into a tapering tail that reaches the neck or shoulder. The turn happens above the ear, and it should be a slope rather than a step. Because the back length falls behind the head, it usually sits in shadow: run 4B through most of it and reserve 2B for the top plane that catches light. About 35 minutes.
Who it suits: Retro and contemporary character work, and anyone practicing profile views.
Tip: Draw the mullet in three-quarter or side view; from the front the shape barely reads at all.
10. Man Bun Boy Hair Sketch
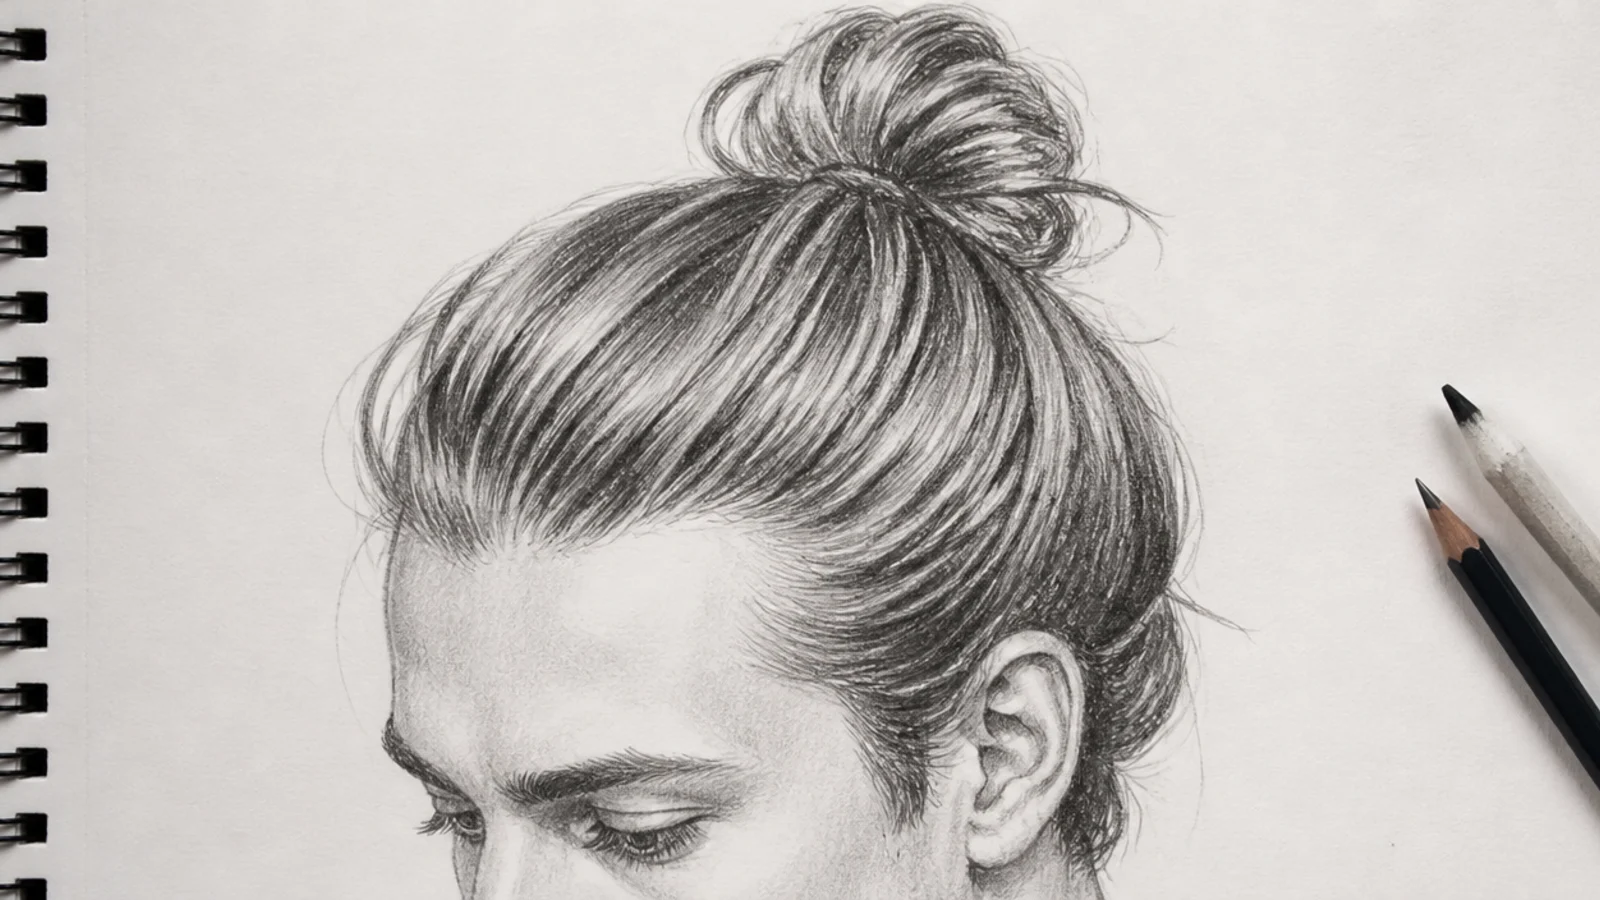
The male bun is tied from the top third of the head, higher than the typical female version, which is the main thing to get right. Draw the tie point first as a small circle sitting just behind the crown, then run every strand from the hairline back toward that point in converging tension lines. The bun itself is a sphere flattened on one side; shade it as a ball, dark on the bottom, with two or three wrapped bands suggested rather than drawn. Leave a few loose strands escaping near the temple so the tension does not look painted on. Around 40 minutes.
Who it suits: Older teen and adult male characters, and anyone practicing converging flow lines.
Tip: Draw the tie point before any strand, and check it sits above the ear line, not level with it.
11. Curly Top Boy Hair Sketch
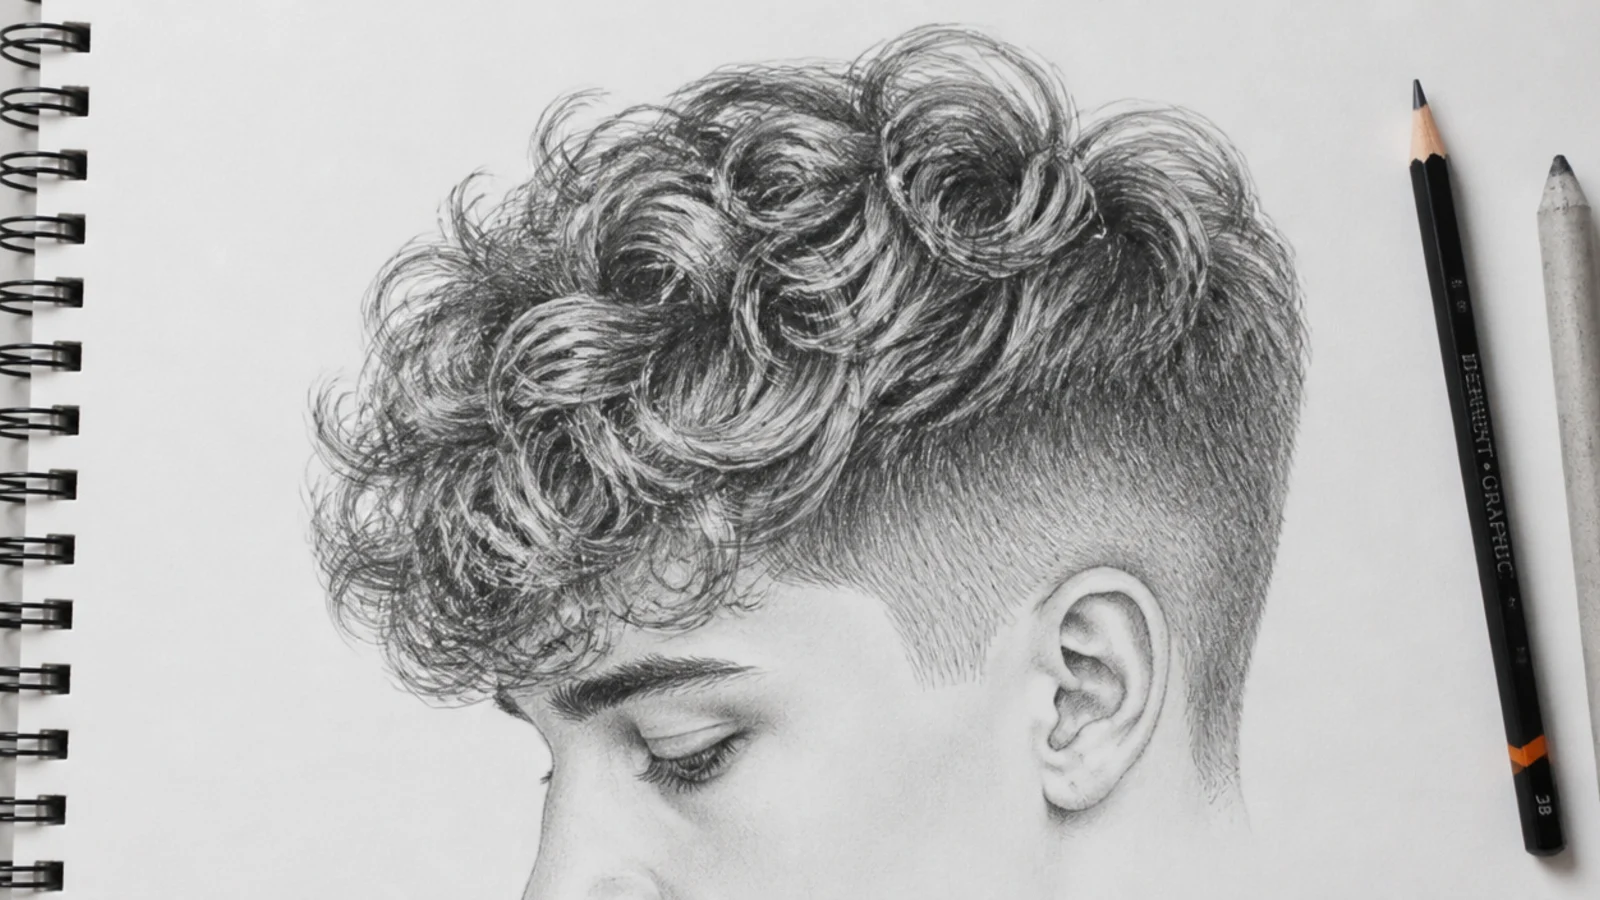
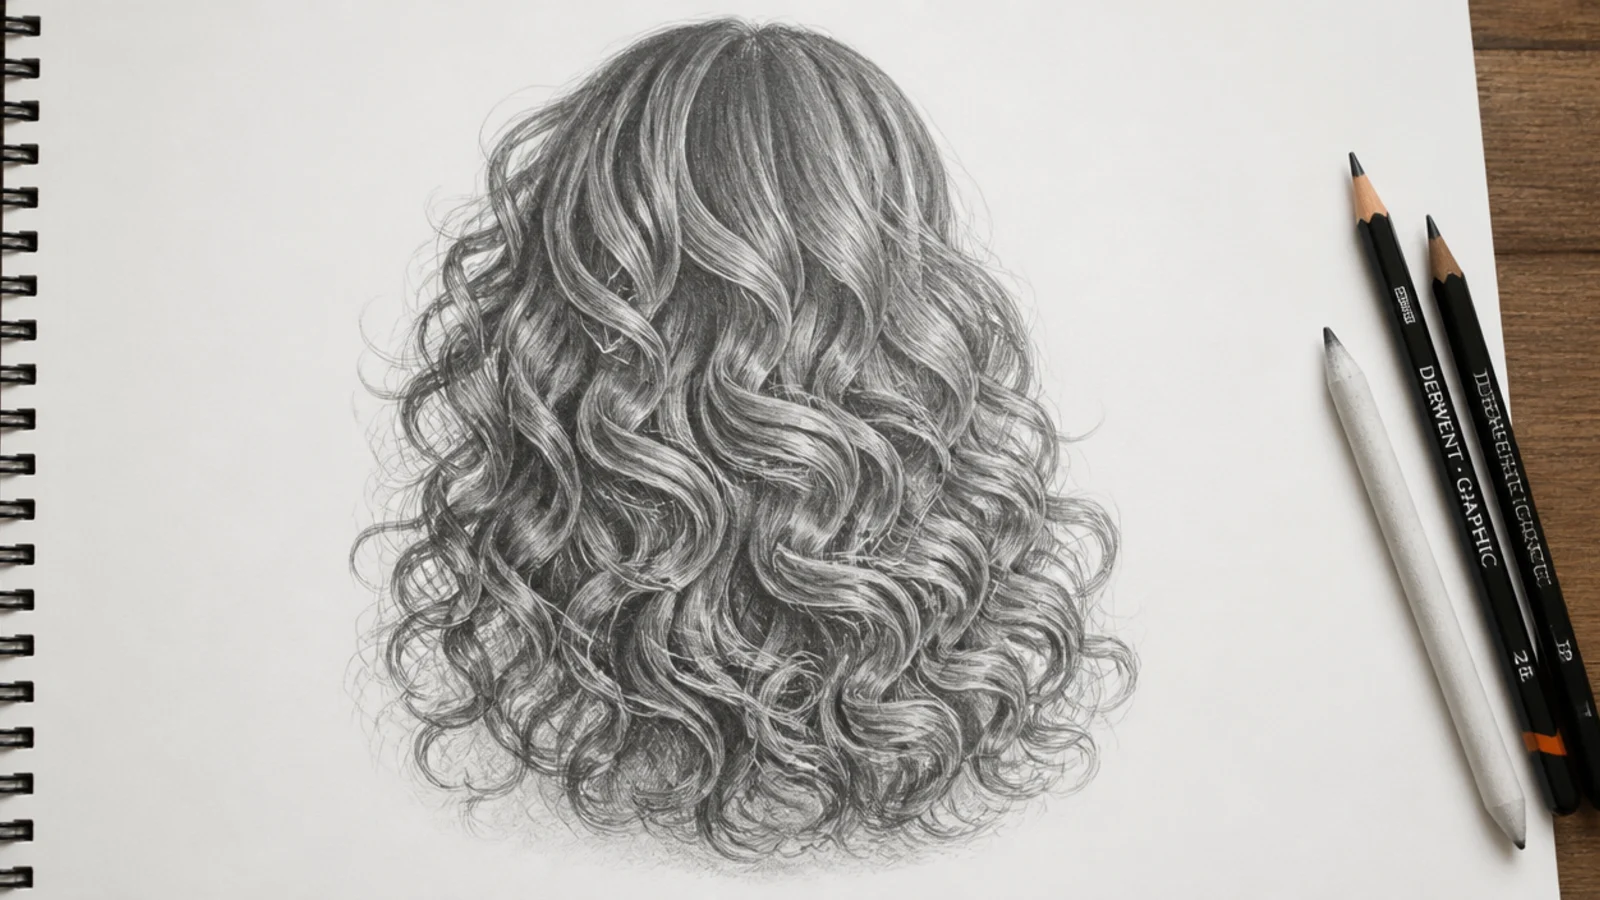
Loose curls piled on top with short tapered sides, the most popular textured boy style to draw. Block a rounded silhouette sitting 20 to 30mm off the scalp on top, then lay a light 2H zig-zag with peaks about 10mm apart through the mass and wrap curls around it. Draw each curl as a ribbon with light on one face and shadow on the other, never as an outlined coil, and push 6B into the tunnels between curl clumps. Six to ten fully described curls along the lit edge is plenty; the rest can stay as value. Around 50 minutes. The full method is in curly hair sketch, and the styled real-world version sits in curly jellyfish haircut.
Who it suits: Anyone drawing textured hair for the first time on a male character.
Tip: Vary curl size by about 20 percent between neighbors so the top does not read as bubble wrap.
12. Afro Boy Hair Sketch
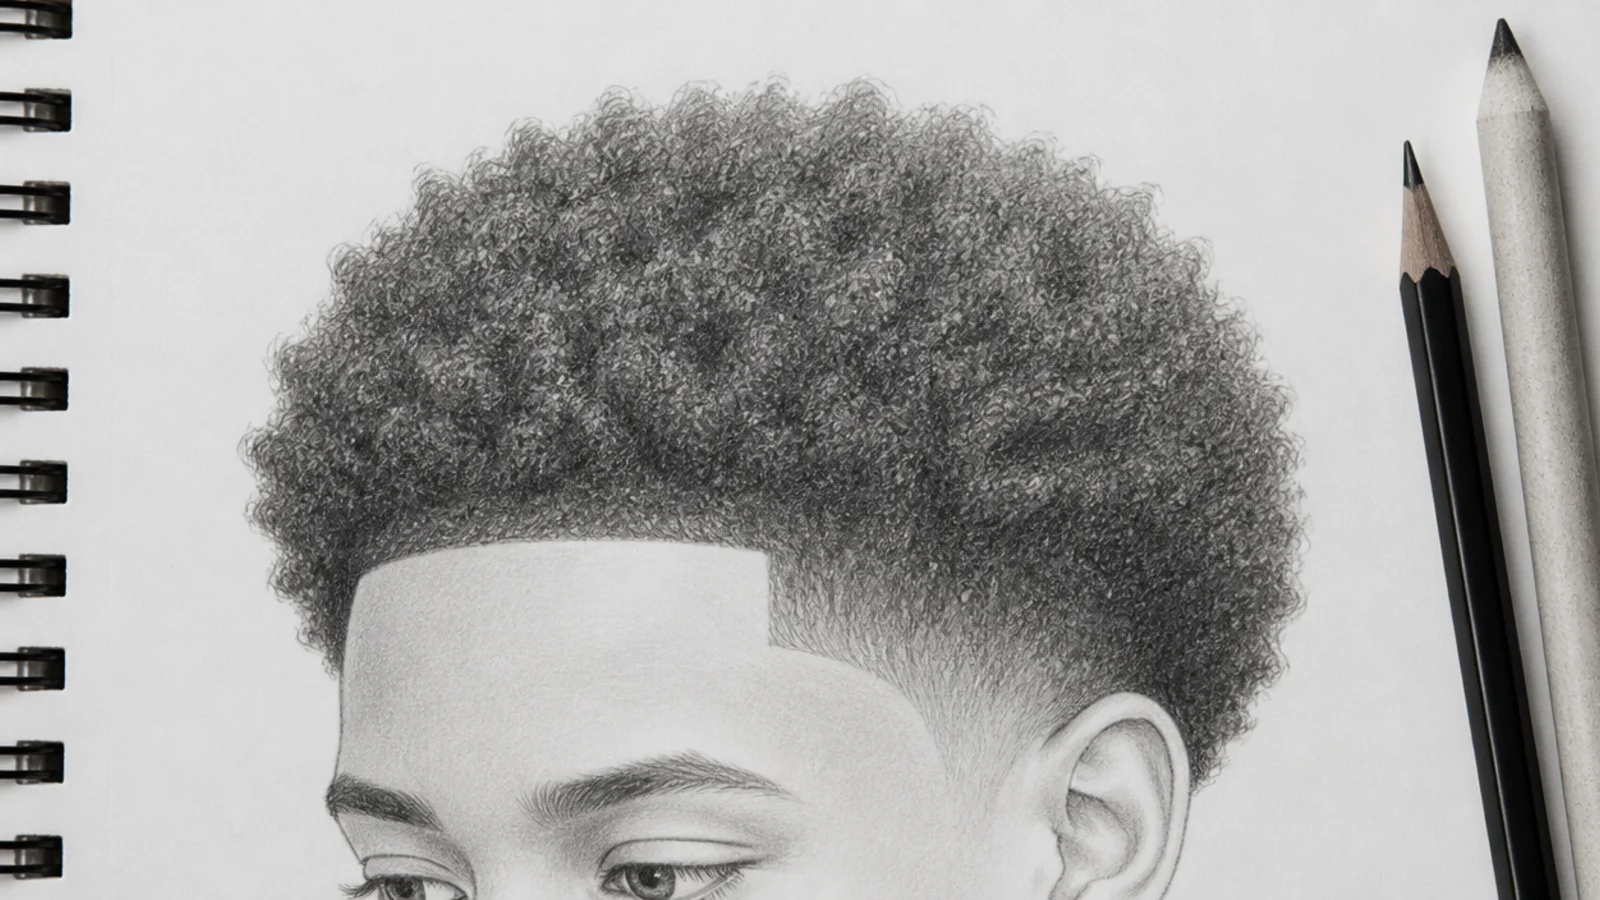
The most under-taught style on every drawing site, and it is mostly a value and edge problem. The coils are tighter than a pencil lead, so stop trying to draw them: build the mass as a rounded silhouette sitting 30 to 50mm off the skull, fill it with clustered circular pressure marks at 4B, and deepen to 6B on the underside and near the ears. The two details that sell it are opposites. Keep the outer edge soft and broken so it fuzzes into the paper, and draw the front hairline sharp and clean, because edged-up hairlines are a defined line in real life. About 45 minutes.
Who it suits: Character artists who want textured hair that finally reads correctly.
Tip: Never outline the perimeter. Let the outer marks thin out until they disappear.
13. Twists Boy Hair Sketch
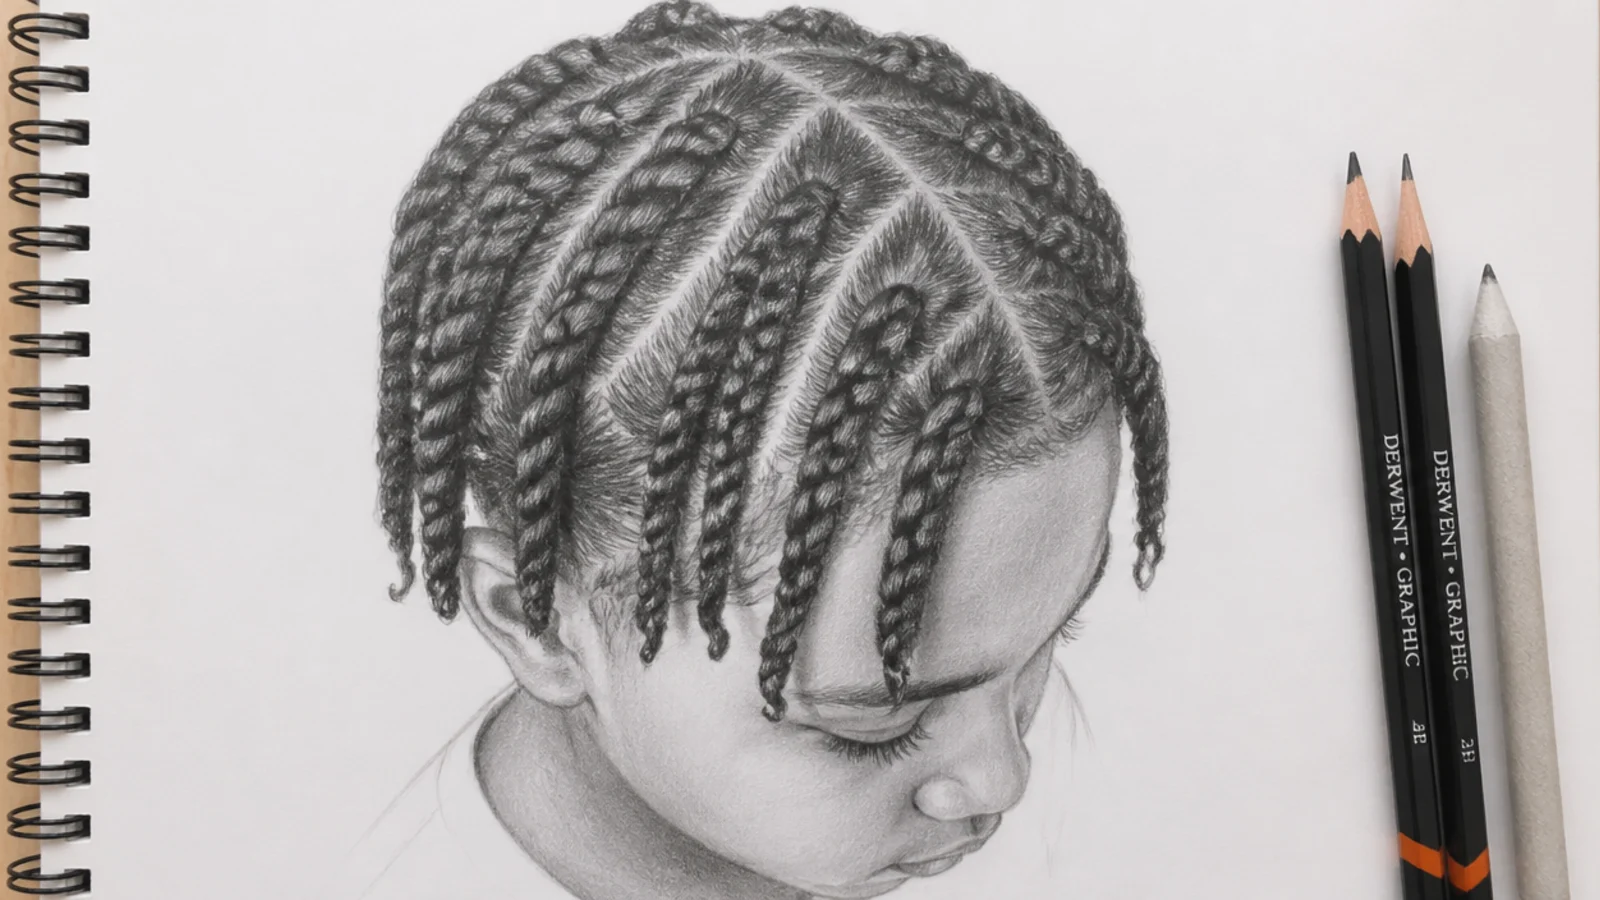
Two-strand twists are the most satisfying textured style to draw because they have an obvious repeating unit. Mark the crown, then draw the parting grid radiating out from it, since hair grows in sections and the partings must follow that origin rather than sit in straight rows. Each twist is a stack of alternating leaf shapes, lit on one side and dark on the other, tapering slightly toward the tip. Push 6B into the scalp partings; that dark separation is what lifts the twists off the head. Draw the front row fully and let the back rows drop to simple value. Around 55 minutes.
Who it suits: Character designers who want specific, respectful textured hairstyles.
Tip: Shrink the leaf shapes slightly toward the ends; identical units up the whole length look mechanical.
14. 360 Waves Boy Hair Sketch
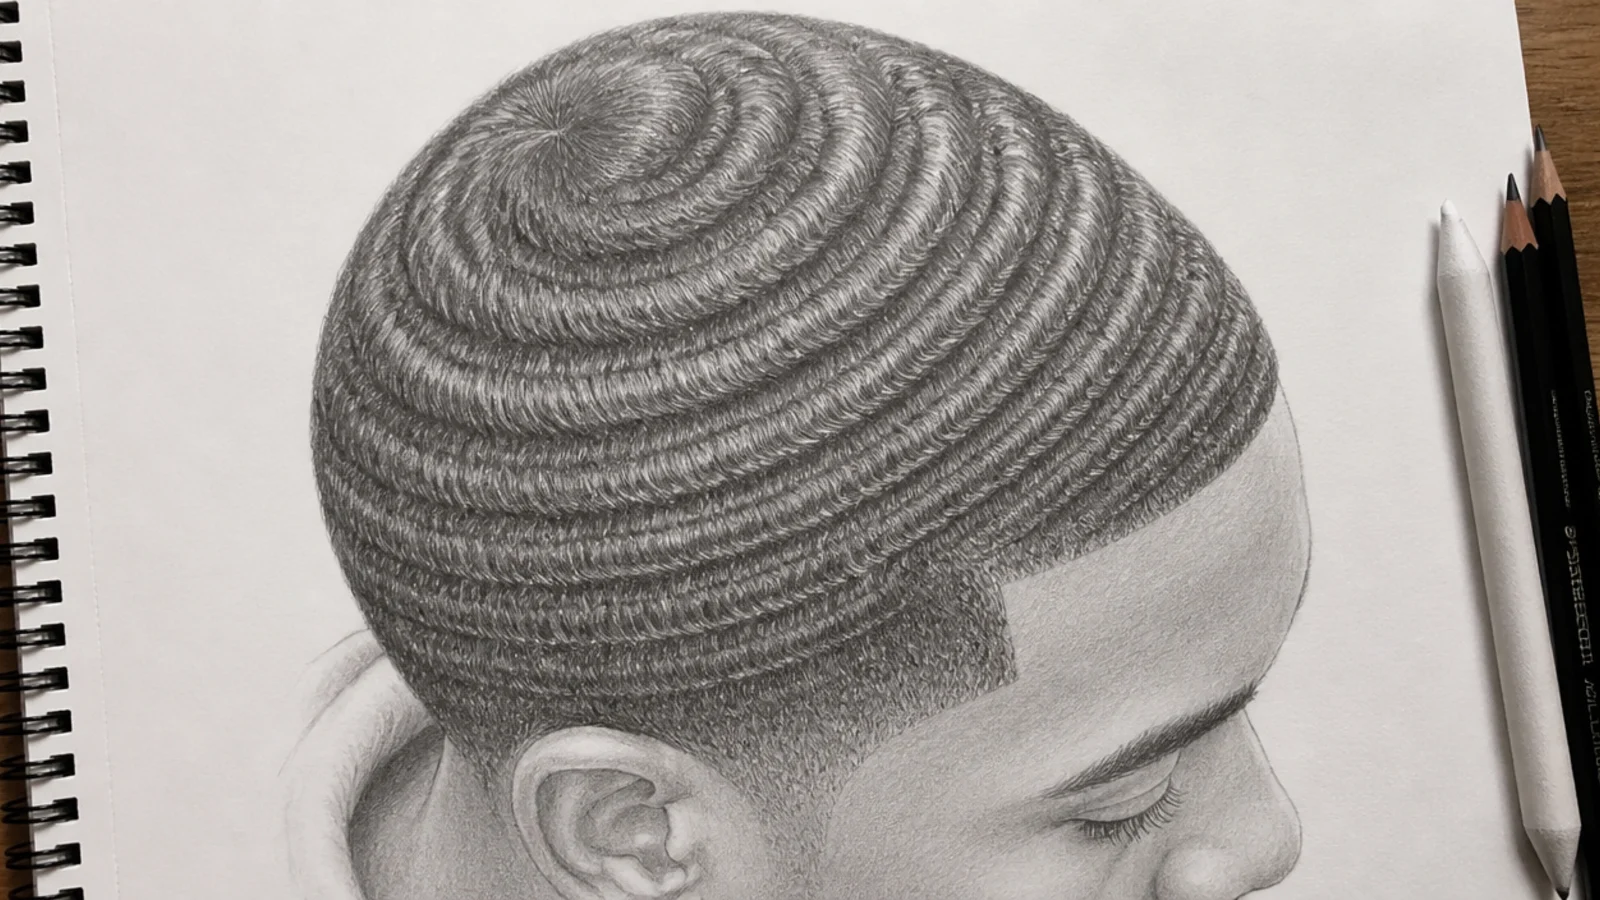
Very short hair brushed into concentric ripples radiating out from the crown, and technically it is the most interesting exercise here because it forces you to draw on a curved surface. Find the crown, then draw a set of concentric arcs expanding from it like ripples on water, spacing them about 3 to 4mm apart and letting them compress as they wrap around the side of the skull. Each ripple gets a light crest and a dark trough. There are no strands anywhere. If the arcs stay evenly spaced across the whole head, the head will look flat, so the compression at the edges is the entire illusion. Around 40 minutes.
Who it suits: Artists ready for a real challenge in form-following pattern work.
Tip: Draw two guide arcs at the crown and the ear, then fill the rest between them.
15. Mohawk Boy Hair Sketch
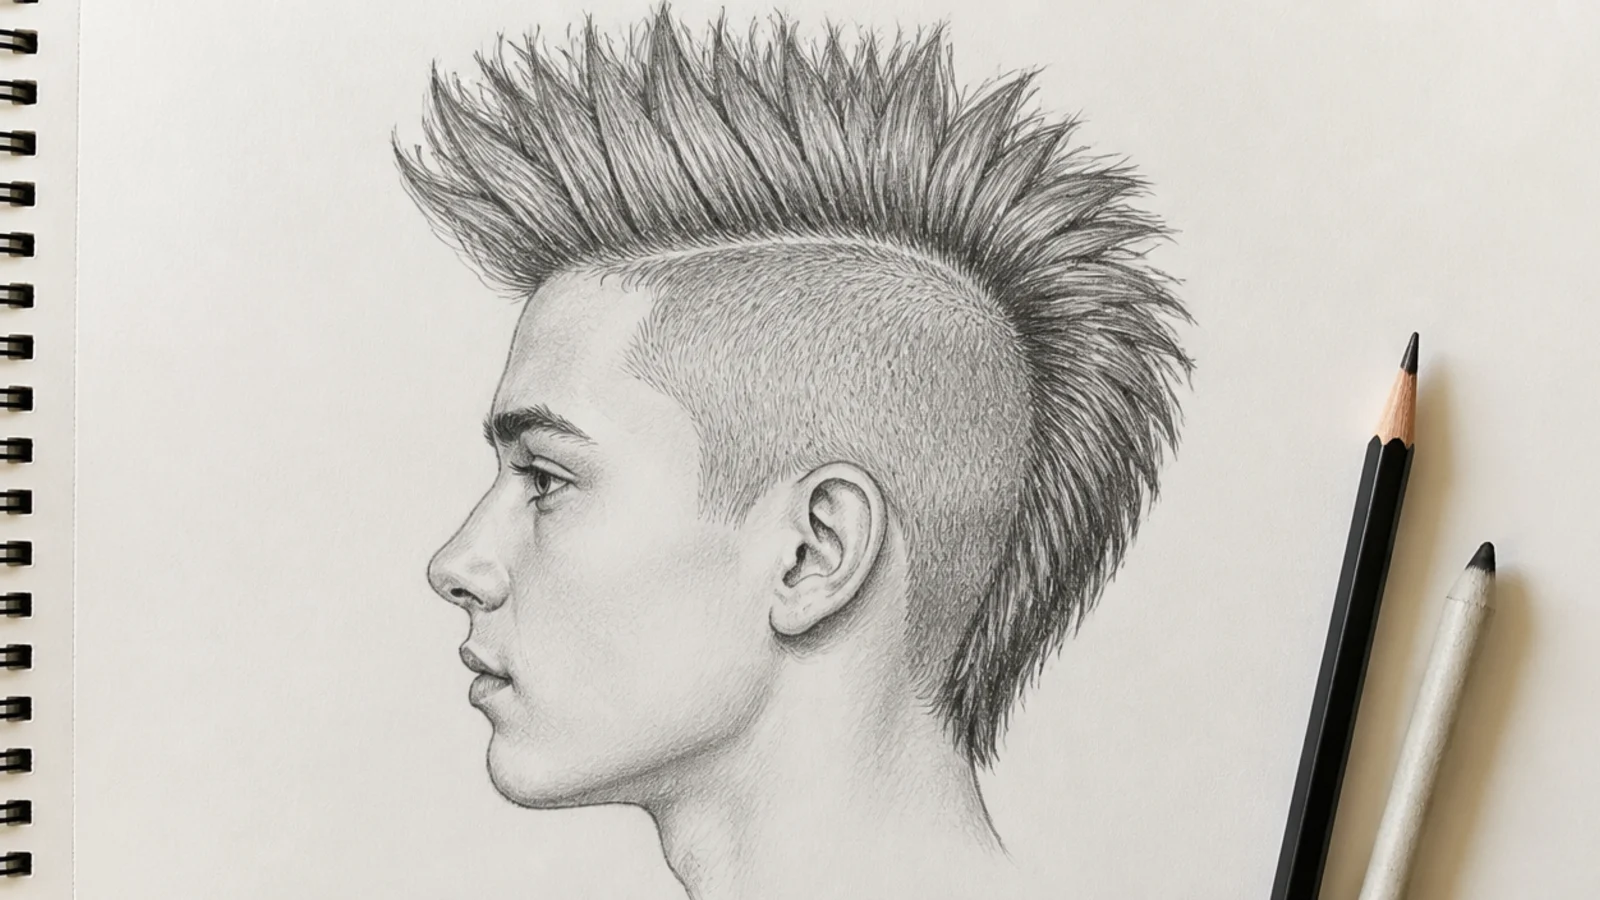
The most graphic style on the list and the best test of whether you understand the skull. A mohawk is a strip roughly 30 to 50mm wide running from the front hairline to the nape, raised into a fan or a set of spikes, with everything either side buzzed to a pale 2H stipple. It only works if the strip sits along the true centerline of the head, so lightly draw that centerline over the cranium before anything else. Shade the near side of the raised strip dark at 4B and leave the crest as bare paper, since the height reads through that value split. Around 30 minutes.
Who it suits: Punk, band and rebellious character designs, and anyone practicing centerlines.
Tip: Sketch the centerline in 2H over the whole skull first; a mohawk drawn off-center is unfixable.
How to Start a Boy Hair Sketch: Shape Before Strands
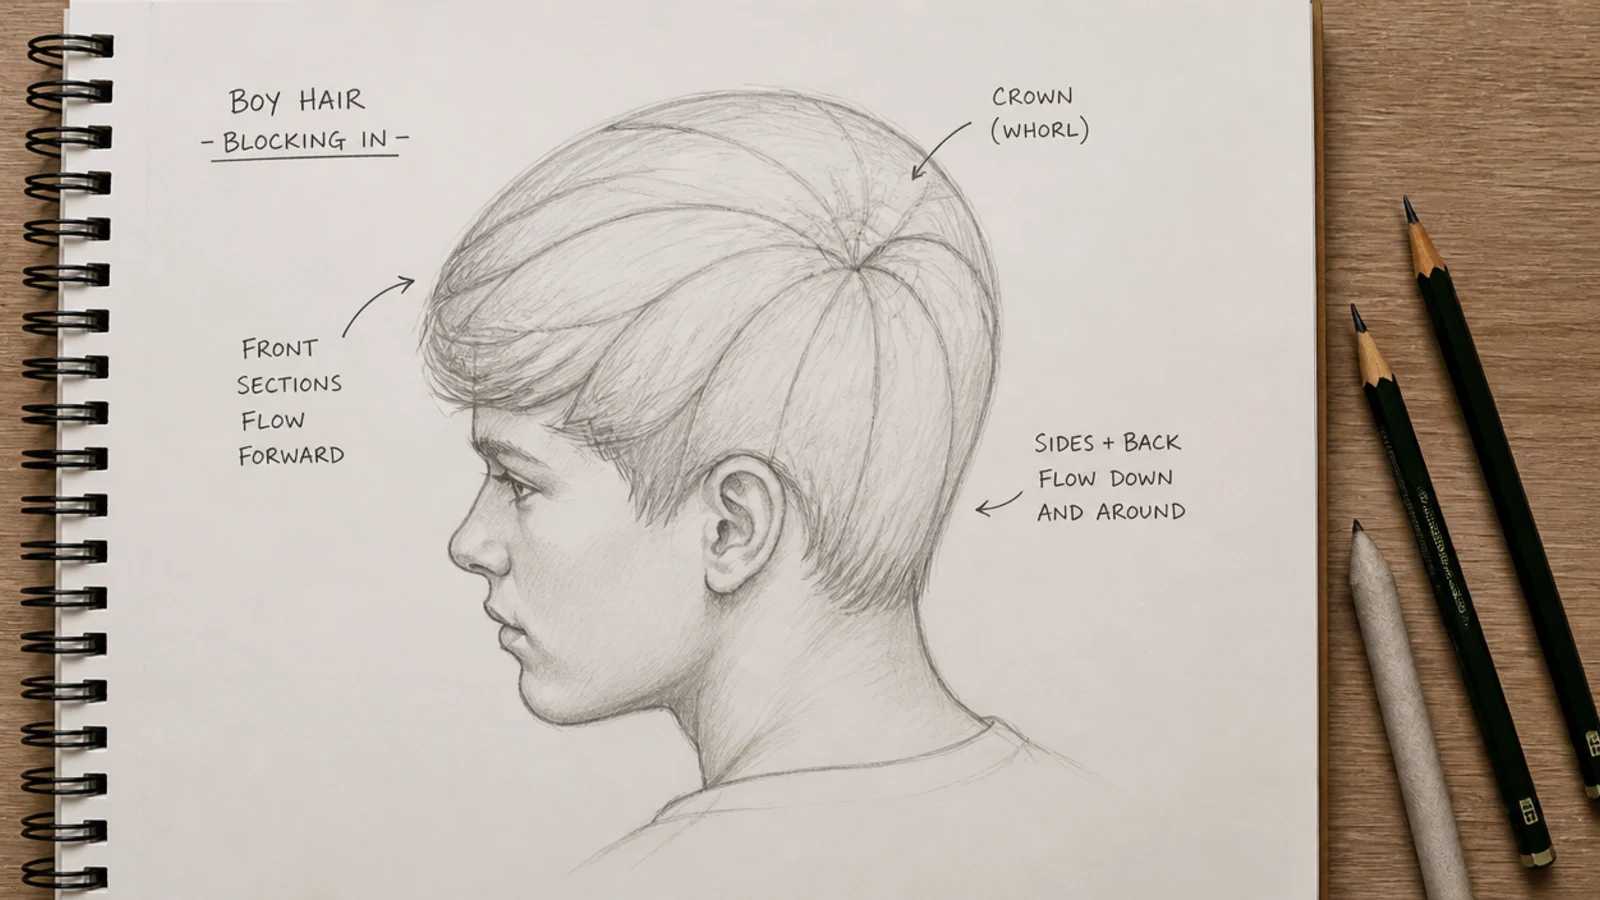
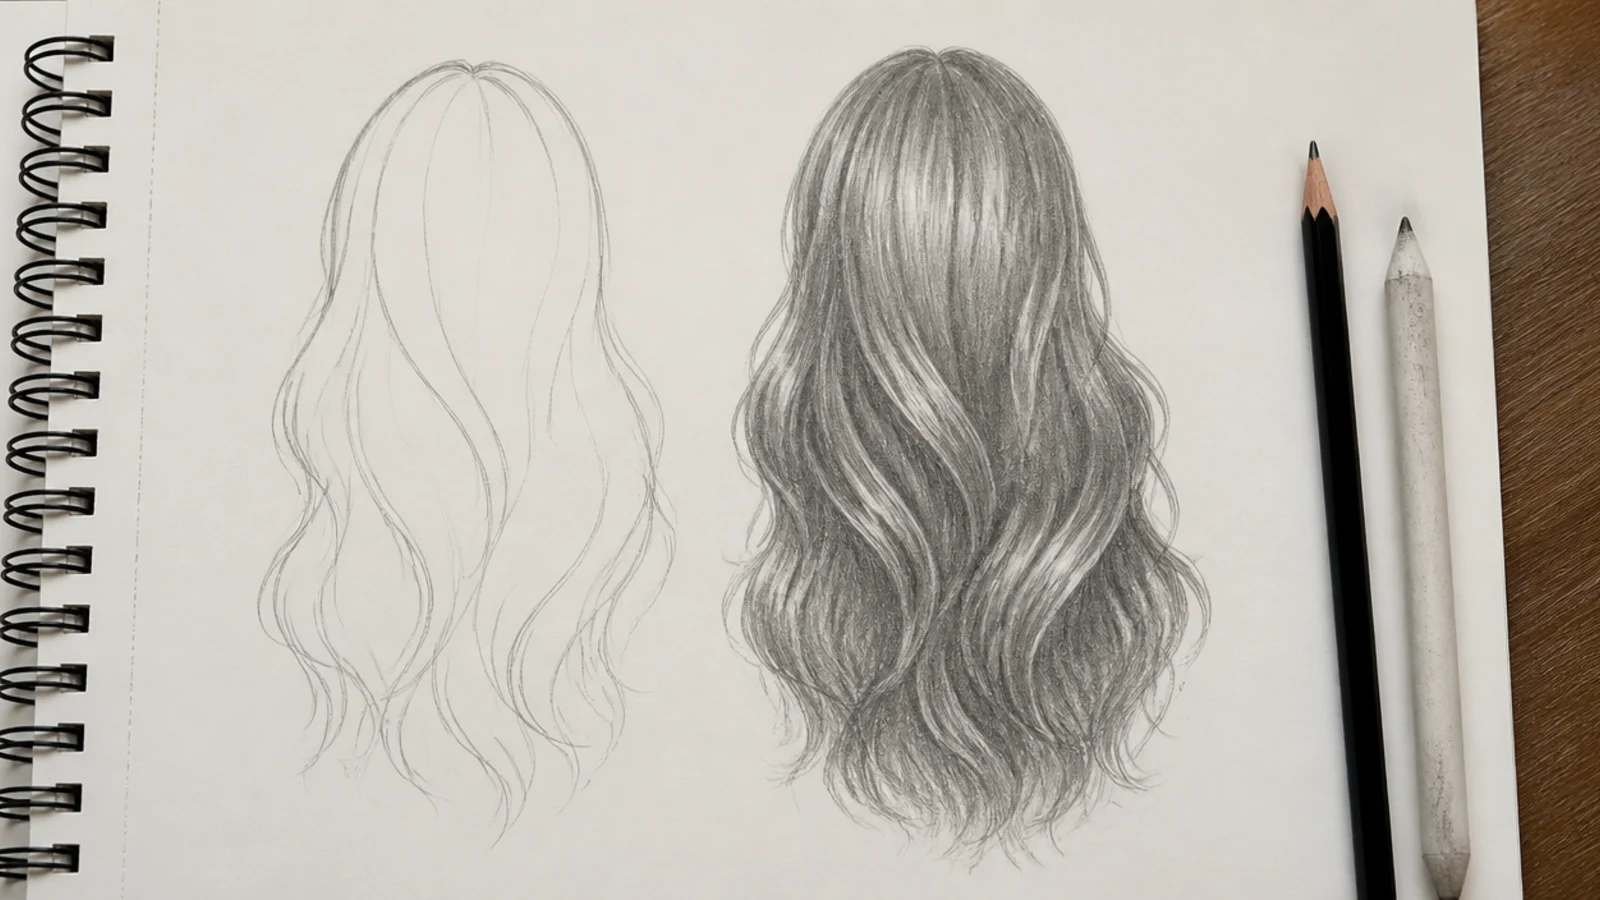
Drawing individual strands too early is the number one beginner mistake, and on short male hair it is the difference between a sketch that looks cut and one that looks glued on. Work in this order every time. Draw the full cranium first, including the part the hair will cover, because beginners who skip it flatten the top of the skull and lose the volume the hair needs to sit on. Then float the hair mass around it as one closed silhouette: 2 to 8mm off the scalp for a buzz or fade, 15 to 20mm for a shag, 30 to 50mm for an afro. Next, mark the crown, the swirl point usually sitting slightly back and off center on the top of the head. Hair grows in sections radiating from the crown, so every flow line in the drawing has to obey that origin, and this is exactly why parallel lines look wrong. Draw three to five flow lines from the crown outward through the mass, and only then commit to a single strand. The same sequence, expanded step by step, is in the hair sketch tutorial.
Drawing the Male Hairline: The Detail That Makes Hair Read Boy
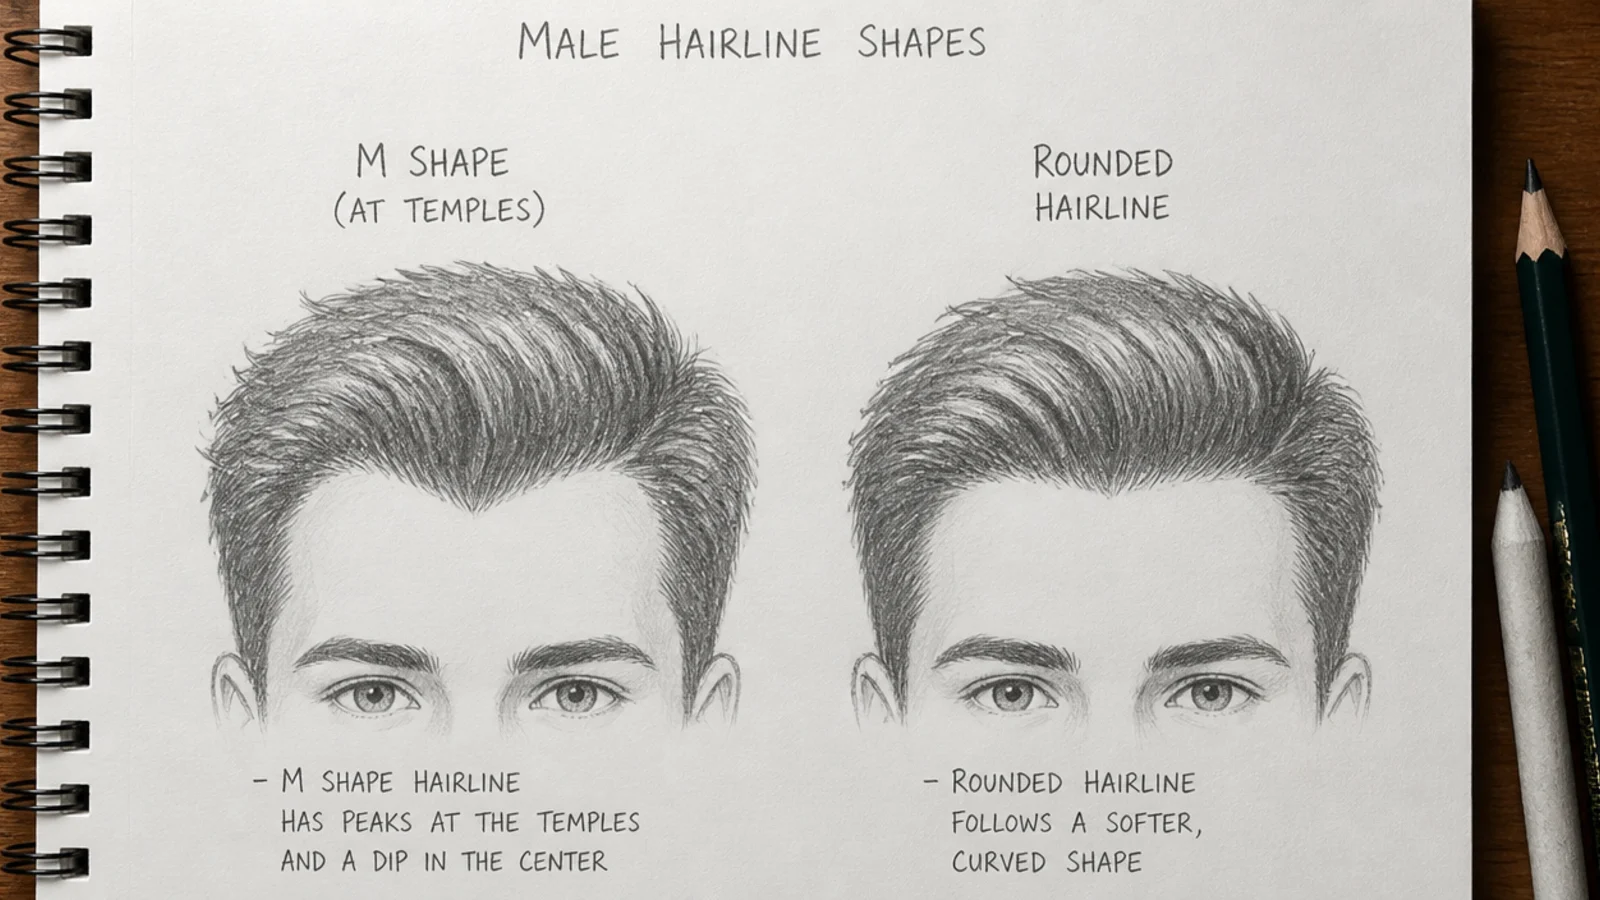
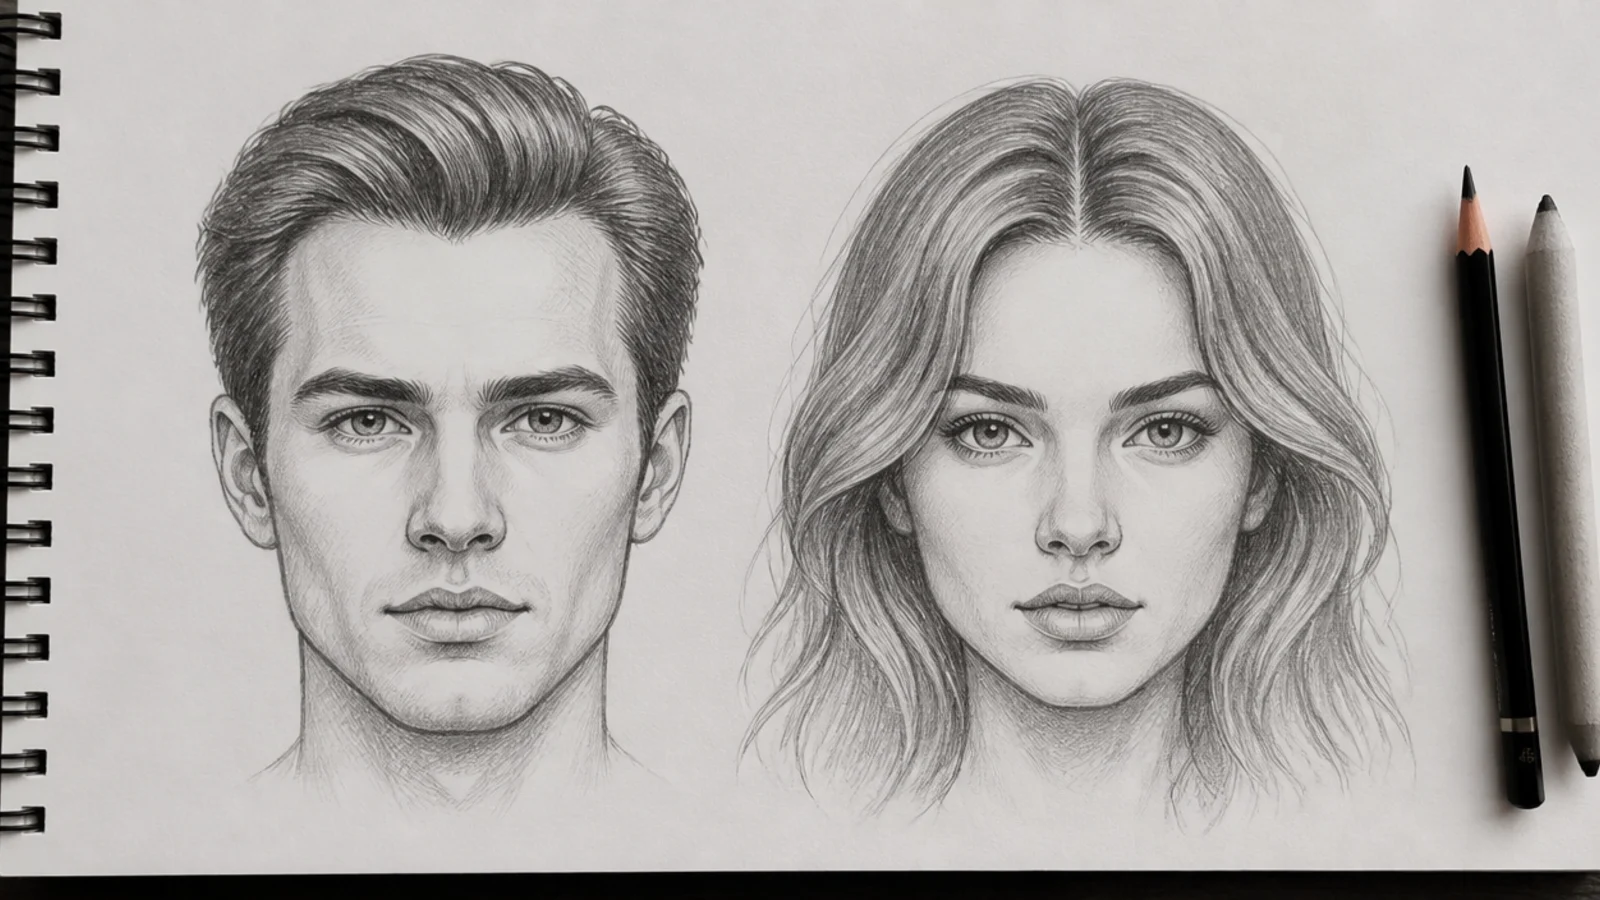
If a drawing looks female no matter what haircut you put on it, the hairline is why. A male hairline sits higher on the forehead, sets further back at the temples and reads angular rather than smooth, often forming a shallow M with a slight widow's peak in the middle and recessions at each corner. A female hairline sits lower, curves as a continuous rounded arc, and reads denser at the edge. On a young boy the M is subtle, more of a squared-off arc than a deep V, and it deepens with age, so the degree of recession is a useful way to signal how old a character is. Whatever shape you choose, never draw it as one clean unbroken line. Real hairlines are irregular, with fine short hairs breaking the boundary at 1 to 3mm. Draw the line lightly in 2H, then go back and roughen it with a handful of tiny flicks angled the way the hair grows. On slicked-back and buzzed styles the hairline is fully exposed, so it carries the entire read. More on the male-female split in male hair sketch.
Shading Boy Hair for Volume and Depth
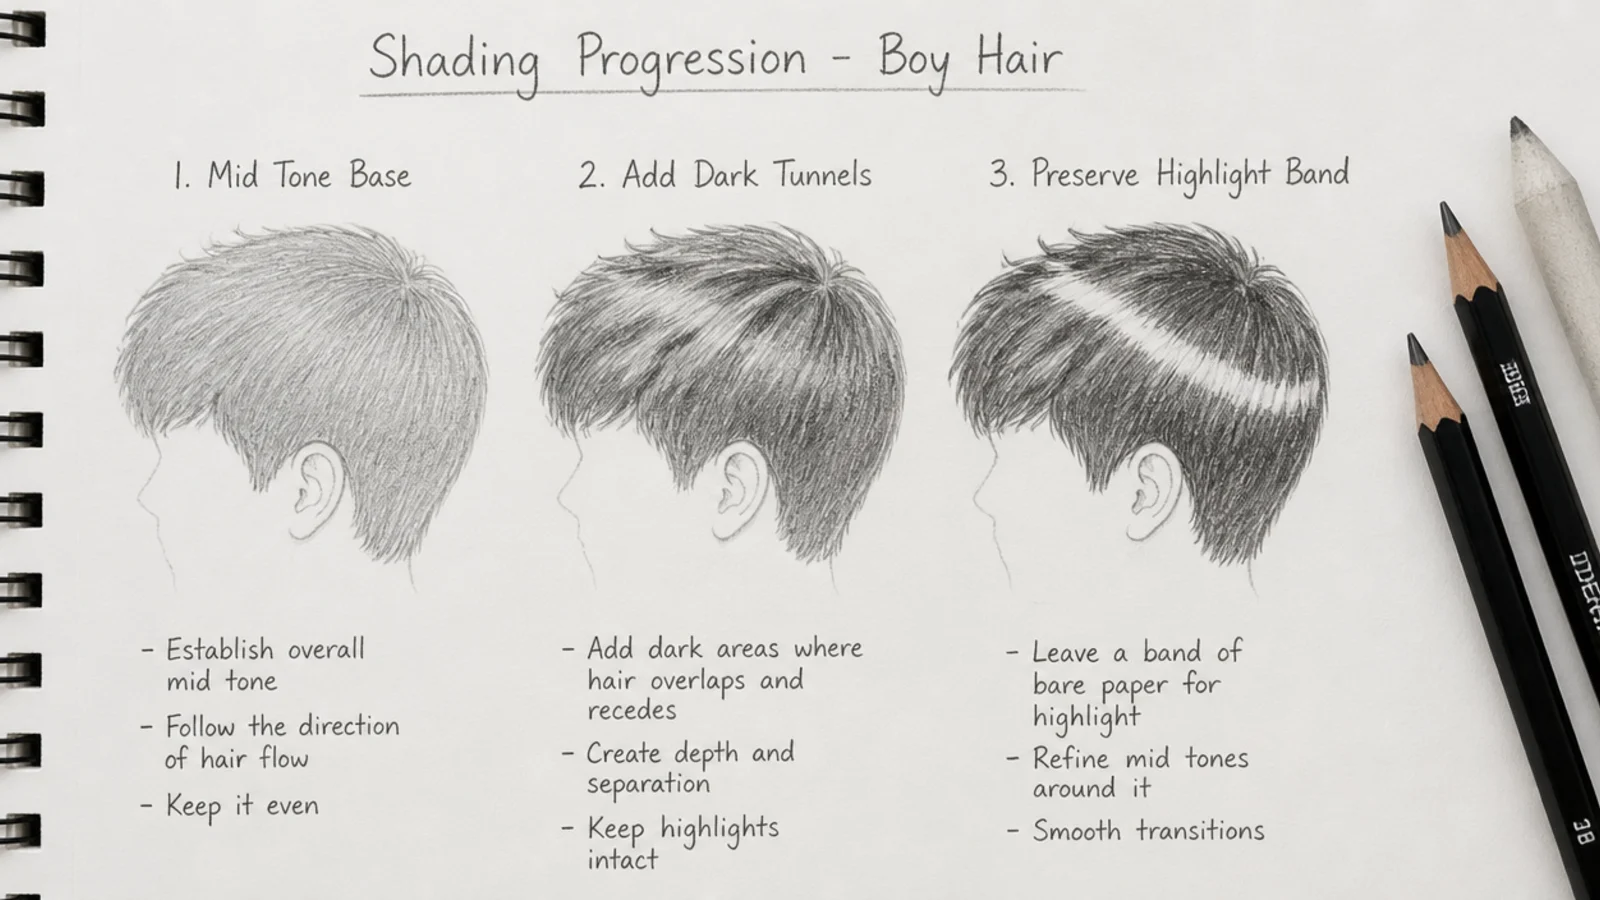
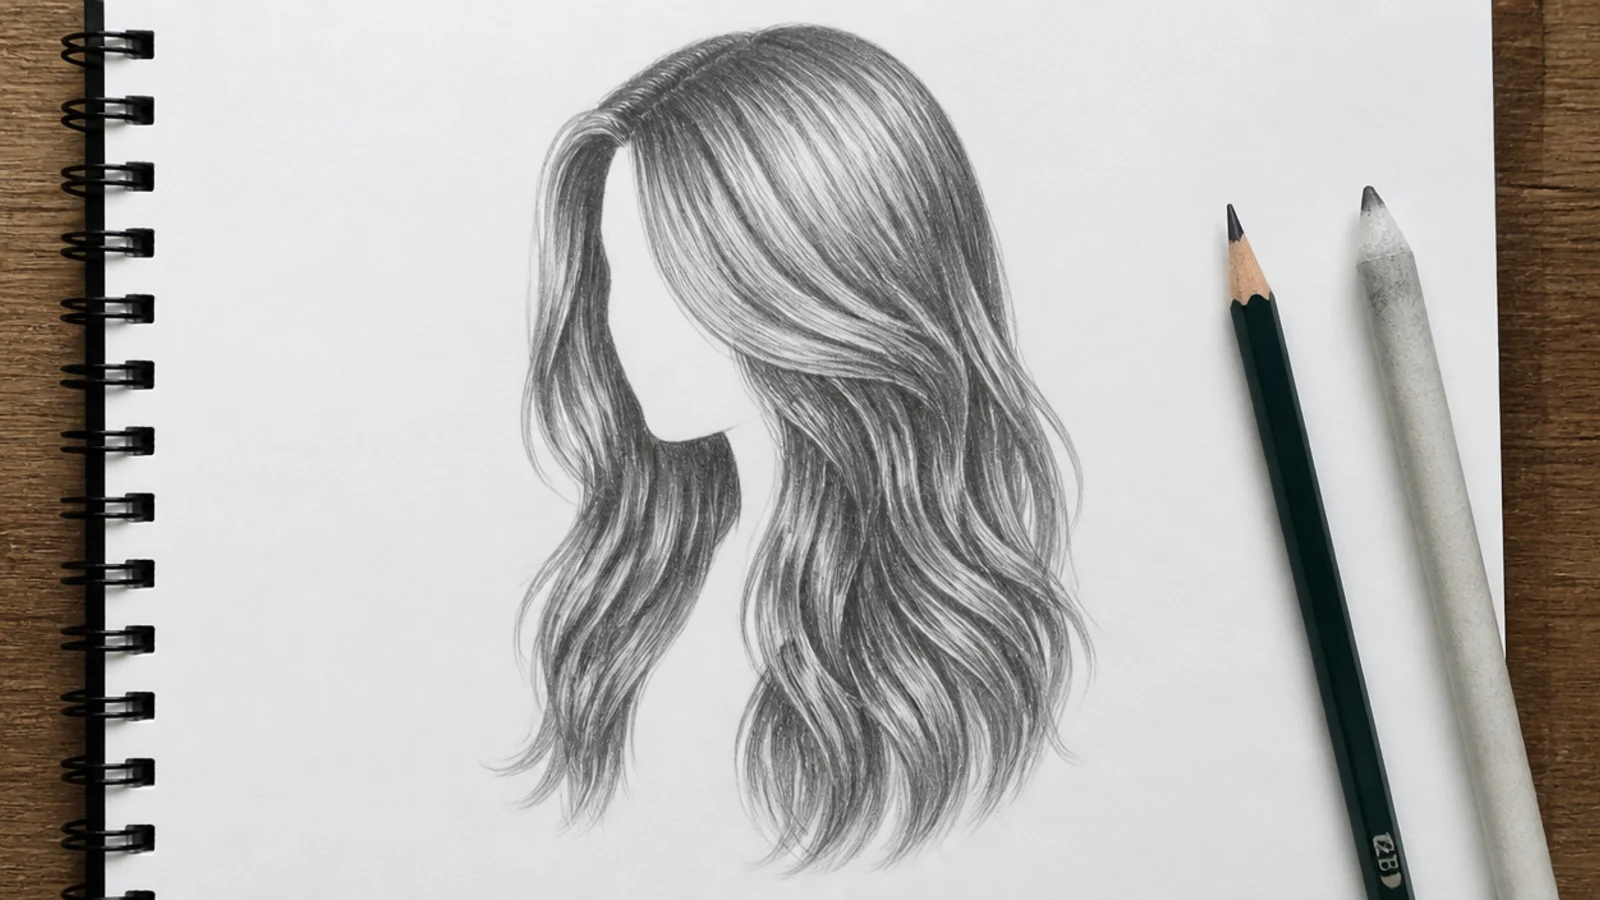
Decide where the light is coming from before the first mid tone goes down, then work light to dark with every stroke traveling in the direction the hair grows. Lay a 2B mid tone across the whole mass first so no bare paper survives except your intended highlight. Add the highlight band as reserved white paper, a soft strip 8 to 12mm wide following the curve of the skull just behind the crown, since that is the plane turning toward the light. Then build 4B into the shadow structure: under the fringe, behind the ears, along the underside of any overhang, and in the tunnels between hair sections. Save 6B for the darkest cores only, which on most boy styles means the shadow directly beneath the fringe and the gaps between clumps. Those dark spaces do more work than any strand you will ever draw, because separation created by value never looks outlined. If you lose the highlight, lift it back with a kneaded eraser shaped to a chisel edge rather than an ordinary eraser, which will smear the graphite into a gray bruise. More shading drills sit in hair sketch ideas.
Straight, Wavy, Curly and Coily Boy Hair Compared
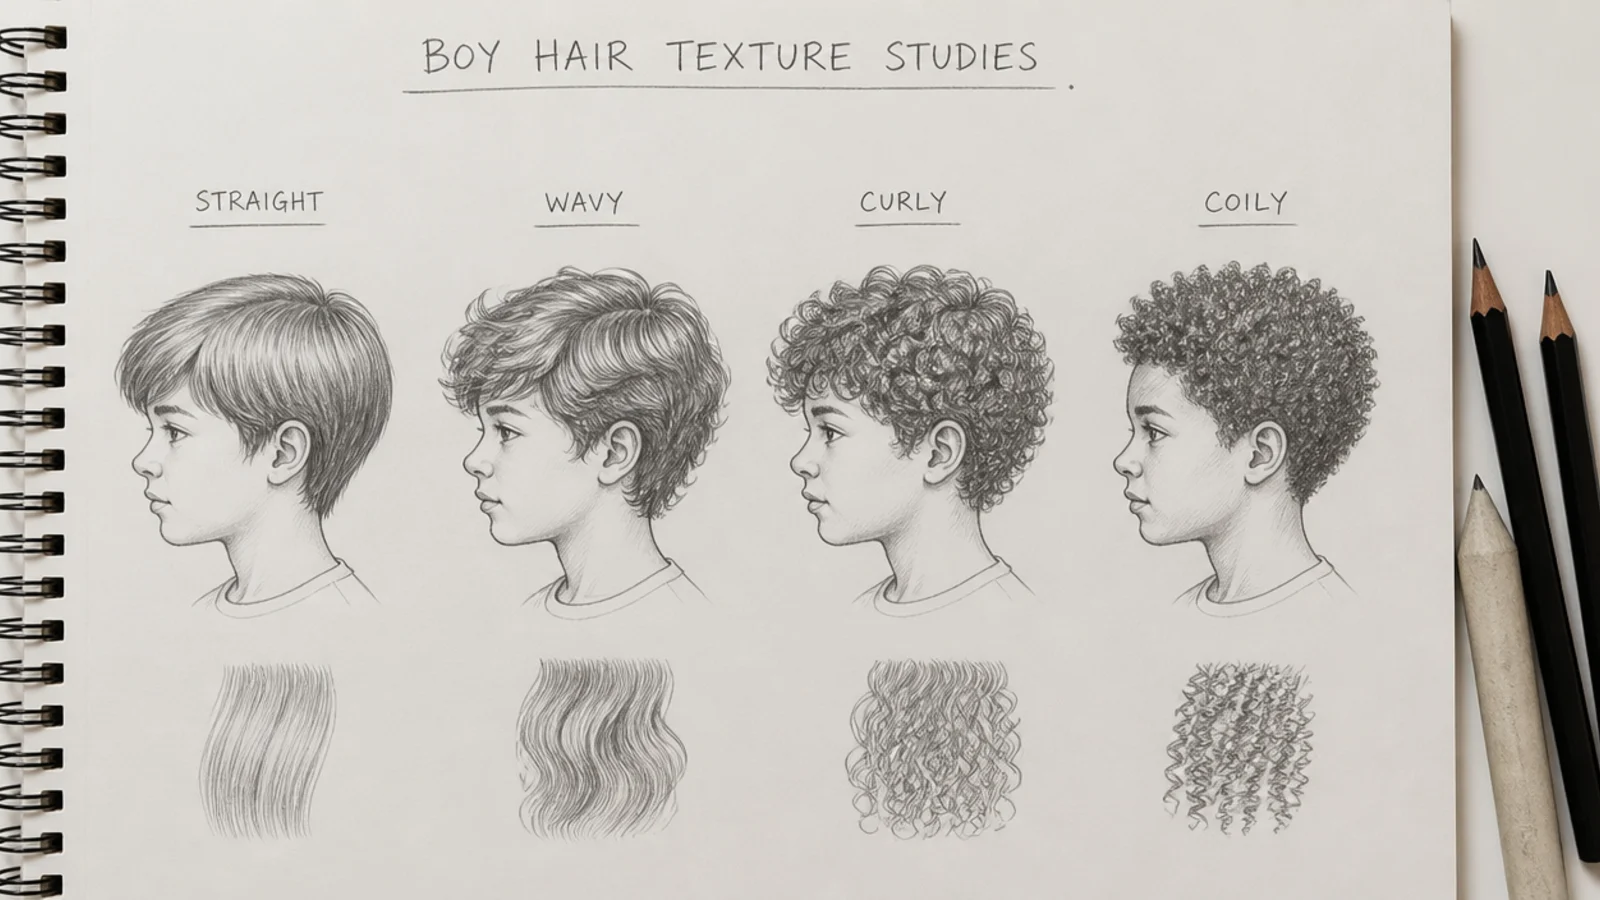
Texture changes the drawing unit, not just the marks. Straight boy hair is drawn in long strokes that follow the flow from crown to tip, with the value shifts doing the separation and the silhouette hugging the skull. Wavy hair takes a light 2H zig-zag guideline with peaks about 18 to 25mm apart, with the actual strands wrapped around it and the peaks staggered between neighboring sections so the waves never line up in rows. Curly hair drops the zig-zag to peaks about 8 to 12mm apart, and each curl becomes a ribbon, an S or spiral with light on one face and shadow on the other, never an outlined coil. Coily 4A to 4C hair abandons line entirely: cluster small circular pressure marks at 4B and 6B, keep the outer edge soft and unfinished, and let the crisp hairline provide the only sharp boundary in the whole mass. That contrast between a sharp front edge and a fuzzy outer edge is the single most convincing thing you can do on textured hair, and it is the detail nearly every tutorial skips. Compare against real texture in frizzy curly hair.
Pencils, Paper and Blending Tools for Boy Hair Sketches
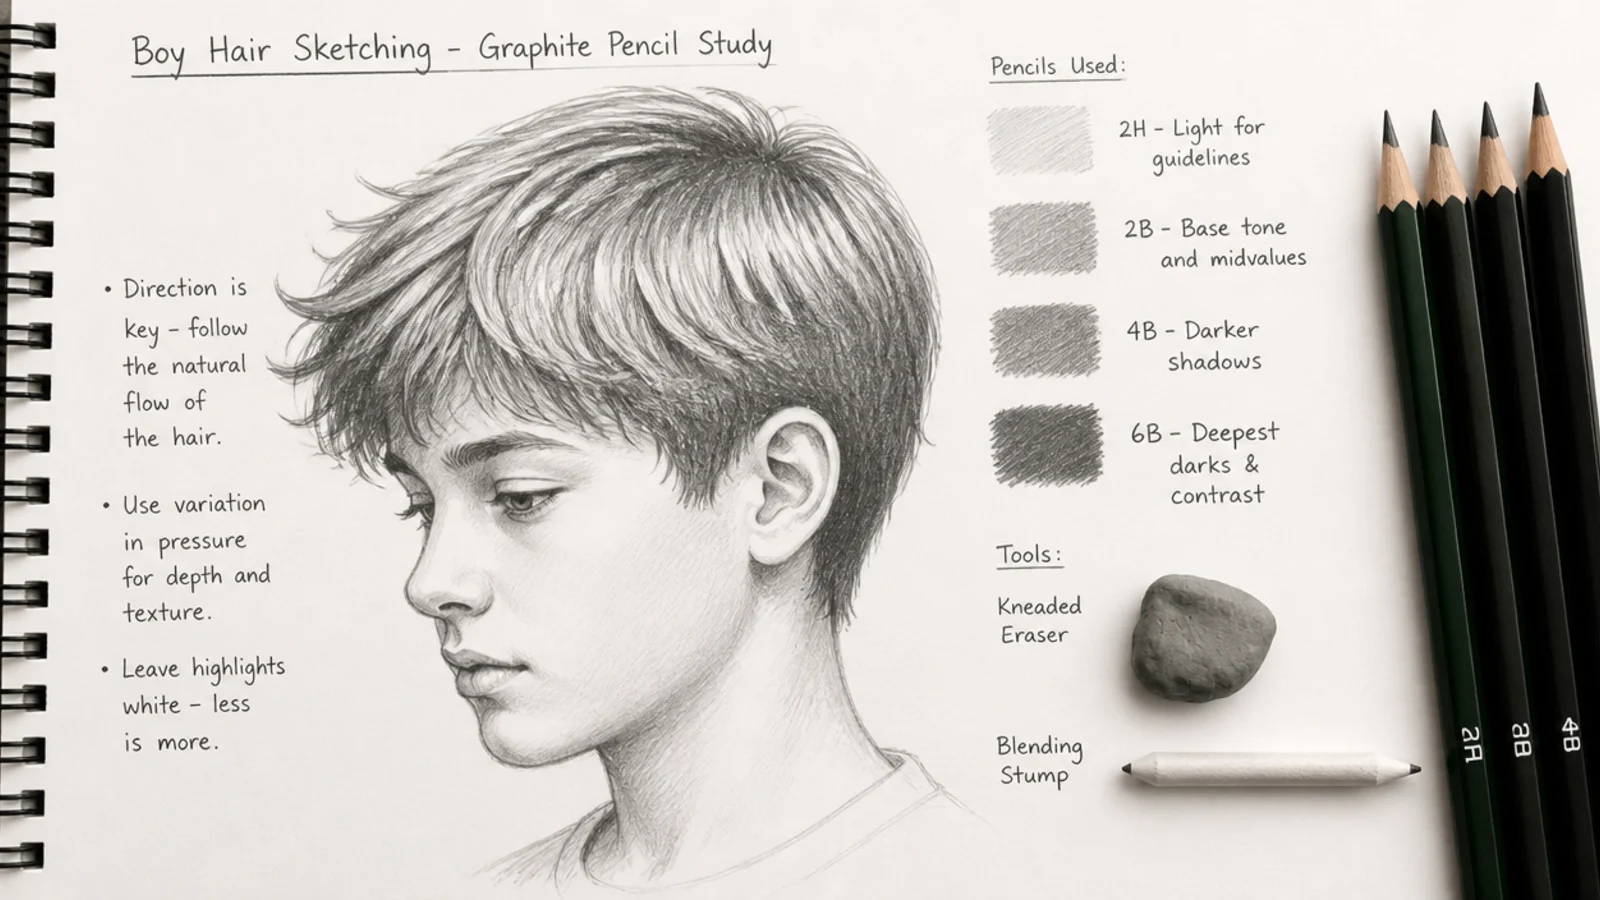
Four grades cover every style on this page. 2H lays guidelines, centerlines and the initial silhouette light enough to erase cleanly. 2B carries mid shadows and most of the work on light hair. 4B builds the main shadow structure on brown and black hair. 6B goes only into the darkest cores. Map the grade to hair color as well as texture: blonde boy hair should top out near 2B and keep large areas of bare paper, brown sits comfortably at 4B, and dense black hair lives at 6B across most of the mass with the highlight doing all the contrast work. A kneaded eraser shaped to a chisel edge is the only eraser that lifts a clean highlight out of a dark field. A blending stump helps on fades and buzz cuts, where you want smooth gradient with no visible marks, but keep it away from longer textured styles because over-blending destroys the crisp value breaks that make hair read. Smooth Bristol suits fades and heavy graphite; lightly toothed drawing paper around 160gsm suits shaggy and curly styles. On a tablet, a hard round brush with pressure-linked opacity matches 2B closely, and a soft airbrush at low flow does fades faster than any pencil. The same kit covers every style on the hair sketch hub.
Common Boy Hair Sketch Mistakes and How to Fix Them
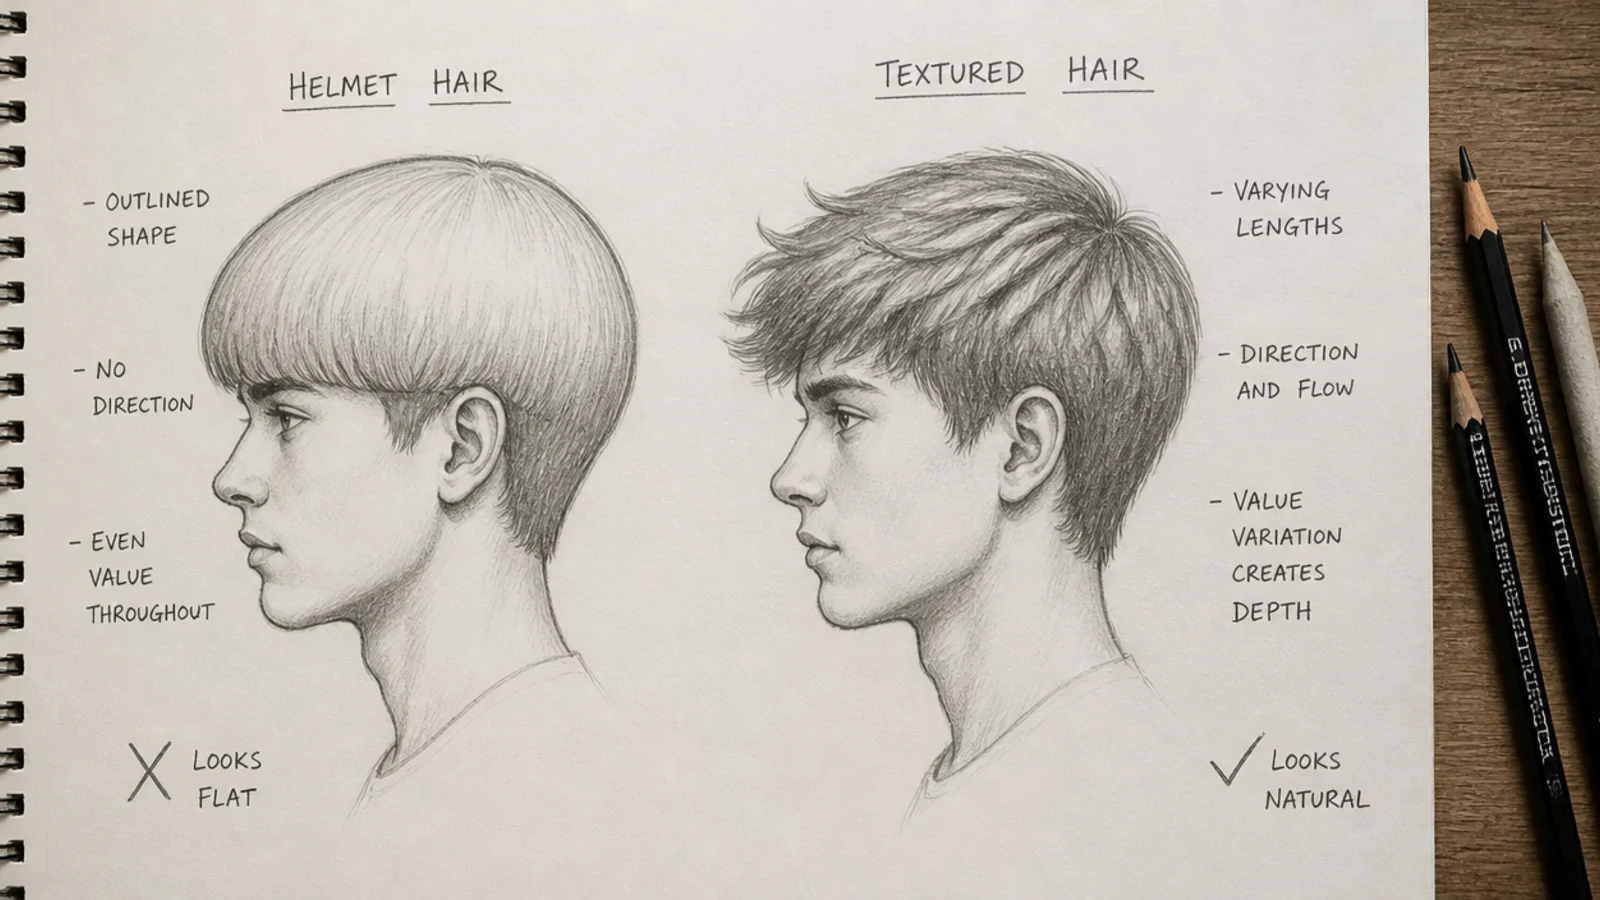
Six failures cover nearly every disappointing boy hair drawing. Helmet hair means you drew a hard continuous outline around the mass; break the perimeter with short irregular flicks between 2mm and 6mm long so the edge becomes texture. Wig hair means the hairline is a smooth arc; roughen it and recess the temples. Spaghetti hair means you drew individual hairs instead of sections; erase and restate three to five flow lines from the crown, then group. Flat hair means the silhouette hugs the skull too tightly for the style, or you never reserved a highlight band. Corduroy hair means your strokes run as parallel identical lines; radiate them from the crown and vary the spacing. Sticker hair means there is no shadow where the hair overhangs the forehead, so add a 6B band right under the fringe. The one diagnostic worth running at any stage is to squint at the drawing until detail disappears. If the hair still reads as a distinct three-dimensional mass sitting on a head, the drawing is working, and if it flattens into a gray blob, the problem is value, not strands, and adding more lines will make it worse. The same six failures, applied to length instead of shortness, are covered in long hair sketch and hair sketch tutorial.
Using References for Boy Hair Without Copying Them
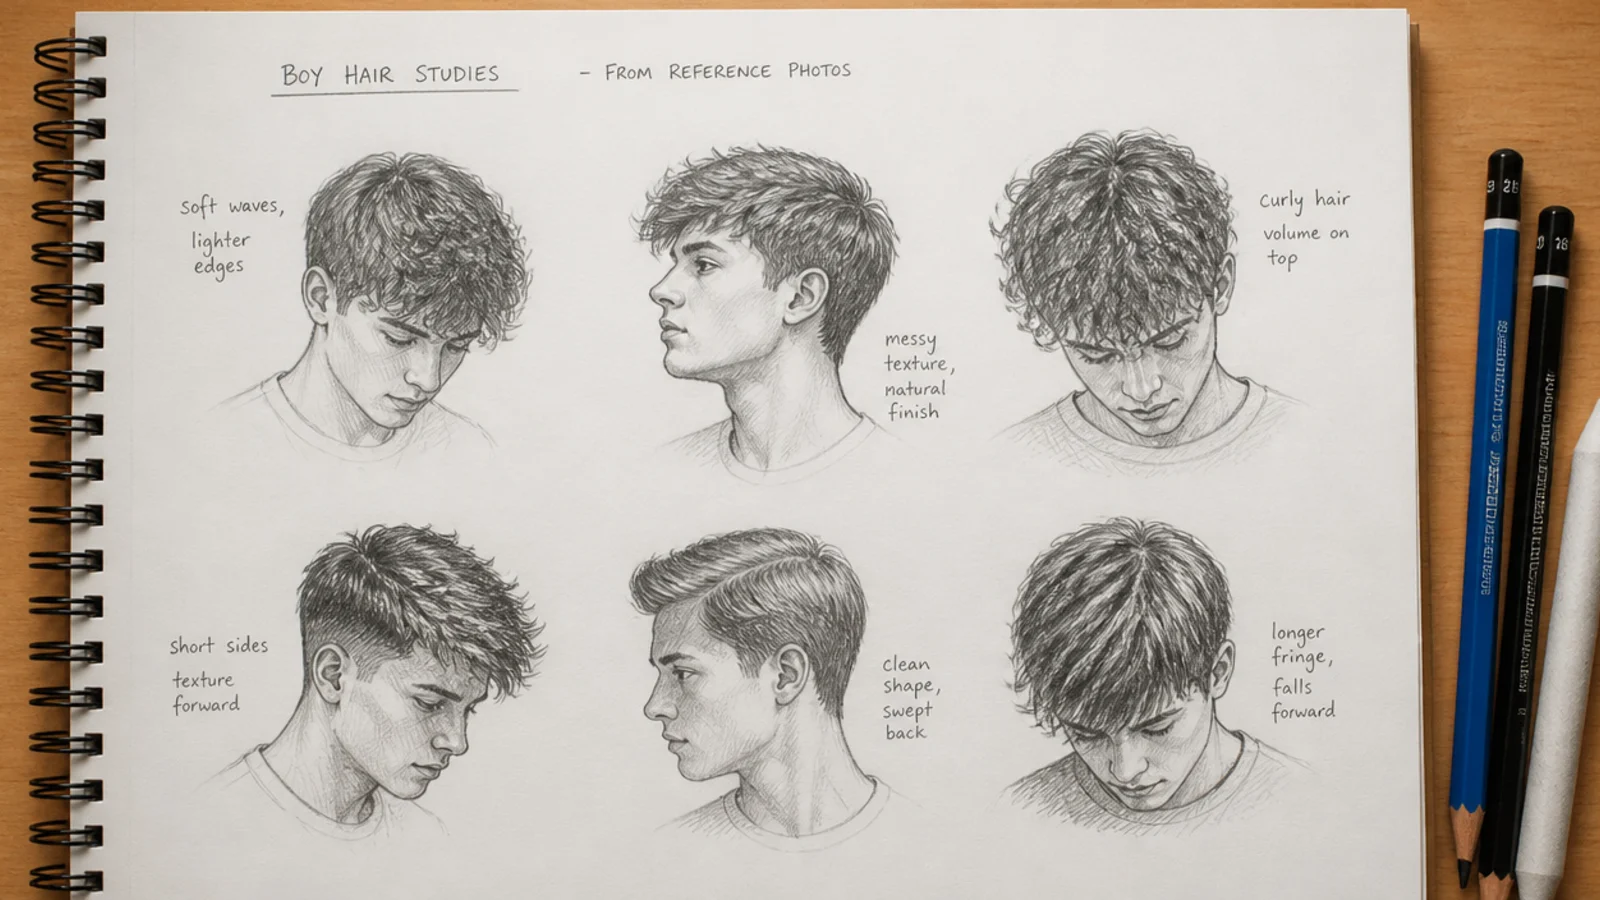
References teach male hair shapes faster than anything else, but tracing teaches your hand nothing. Use this method instead. Look at the reference, name the cut out loud, note where the light is coming from and where the hairline recedes, then turn the photo away and draw the silhouette from memory. Check it, correct it, and only then look back for detail. Barbershop photo galleries are the best source for boy styles, because they shoot the same head from several angles, which is exactly what a character reference sheet needs. Build the habit of drawing one style from the front, the side, the back and three-quarter on a single page. Also practice small, at a head height of about 20mm, since at that scale you physically cannot draw strands and are forced to solve the whole thing with silhouette and value, which is the skill that transfers to everything else. Real-hair galleries such as hair growth tips for men and 4c hair growth tips are useful for studying hairlines and density, and for length work see long hair sketch.
Frequently Asked Questions
How do you draw boy hair step by step?
Draw the full skull first, then block the hair as one closed silhouette floating 2 to 50mm off the scalp depending on the style. Mark the crown and run three to five flow lines out from it. Draw the hairline higher and more angular than a female one, with a shallow M at the temples. Lay a 2B mid tone, reserve the highlight band, build 4B shadows, then add stray flicks last.
How do I make the boy's hair look more curly?
Push the silhouette further off the skull, 20 to 30mm for loose curls and 30 to 50mm for coils, since curly hair is mostly a volume decision. Then lay a light 2H zig-zag guideline with peaks about 10mm apart and wrap curls around it as ribbons, lit on one face and shadowed on the other. Push 6B into the gaps between curl clumps rather than outlining each spiral.
What if my face outline does not fit under the hair?
That happens because the hair was drawn before the head. Redraw the full cranium lightly in 2H, including the covered part, and float the hair silhouette around it rather than onto it. If the face is already inked or committed, adjust the hair mass outward instead of squeezing the face, since hair sitting slightly too full always looks better than a compressed skull.
What pencils do you need for a boy hair sketch?
Four grades. 2H for guidelines, centerlines and the silhouette, 2B for mid shadows and most light-hair work, 4B for the main shadow structure, and 6B for the darkest cores under the fringe and between sections. Match the grade to hair color too: blonde tops out near 2B, brown sits at 4B, dense black hair lives at 6B. Add a kneaded eraser for lifting highlights.
Why does my drawn boy hair look like a helmet?
Because the mass has a hard continuous outline and no broken edge. Real hair has no clean perimeter. Break the boundary with short irregular flicks between 2mm and 6mm long at slightly different angles, especially along the top and at the ends. The other half of the problem is a missing shadow where the hair overhangs the forehead, so add a dark 6B band directly under the fringe.
What is the easiest boy hairstyle to draw?
The buzz cut, because it has no strands at all. It is an even mid tone laid over an accurate skull plus a hairline, and it takes about ten minutes with two pencils. Once that reads correctly, the taper fade is the natural next step since it adds only a gradient, and the textured crop after that since it adds only a broken edge.
How is drawing boy hair different from girl hair?
Mainly hairline and length. A male hairline sits higher, sets back at the temples and reads angular, often with a shallow M, while a female hairline sits lower and curves as a smooth rounded arc. Male styles are generally shorter, so the drawing leans on value and silhouette rather than flow, and male buns tie from the top third of the head rather than lower down.
How long does a boy hair sketch take?
It depends entirely on texture and length. A buzz cut takes about 10 minutes, a taper fade or spiky style around 25, curtain bangs or a textured crop around 30, a shag or man bun 40, and a fully rendered curly top or twists 50 to 55 minutes. Most of the time on the longer ones goes into value and section separation, not into drawing strands.
Should you draw the head before adding the hair?
Yes, always. Hair wraps a skull and follows its curvature, so without the cranium underneath the mass has nothing to sit on. Draw the whole head lightly in 2H first, including the area the hair will cover, then float the silhouette around it. Skipping this is what flattens the top of the skull and produces hair that looks stuck to the head like a sticker.
How do you draw very short or shaved hair?
Treat it as value, not line. Lay an even tone over the skull about 2mm proud of the outline so it has thickness, and build texture with tiny pressure dots rather than hatch marks, since hatching instantly reads as length. Keep the front hairline crisp, fade the tone out to bare paper behind the ears, and add a slightly darker band where the skull turns away from the light.
Which hair sketch look are you saving?
If you take one thing from these 15 boy hair sketch ideas, make it the order: skull, silhouette, hairline, crown, flow lines, value, strands. That sequence works on every style here, from a ten-minute buzz cut to a full hour of coils, and it is the reason a simple drawing can look finished while a fussy one looks synthetic. Start with the buzz cut, the textured crop and the curtain fringe, since those three teach silhouette, edge control and flow without any texture problems on top. Then move into the curly top and the twists. When you want the same order applied to other textures, see the full hair sketch hub or the texture-focused curly hair sketch breakdown.