Quick Comparison
| Waterfall Braid Drops | Waterfall Twist Drops | |
|---|---|---|
| Technique | Three-strand braid, drop the top strand each pass | Two sections crossed once, drop the lower one |
| Difficulty | Intermediate; three strands to track at once | Beginner; one crossing point to control |
| Time across the crown | 8 to 12 minutes on your own head | 2 to 4 minutes on your own head |
| Look of the top row | Lacy woven band with visible plait texture | Smooth rope, reads cleaner and simpler |
| Hold on fine hair | Better; the plait grips the dropped strands | Looser; twists slide unless pinned |
| Hold on thick hair | Excellent, holds 8 hours or more | Good, but needs a pin every second twist |
| Drop section size | Pencil width, about 0.5 inch | Slightly wider, about 0.75 inch, or it disappears |
| Best paired mermaid finish | Wide pancaked fishtail down the back | Half-up fishtail or a low coiled bun |
| Fix if it slips | Re-pick a larger section from above and continue | Bobby pin the last twist and restart the next one |
1. Classic Waterfall Into Mermaid Braid on Long Hair
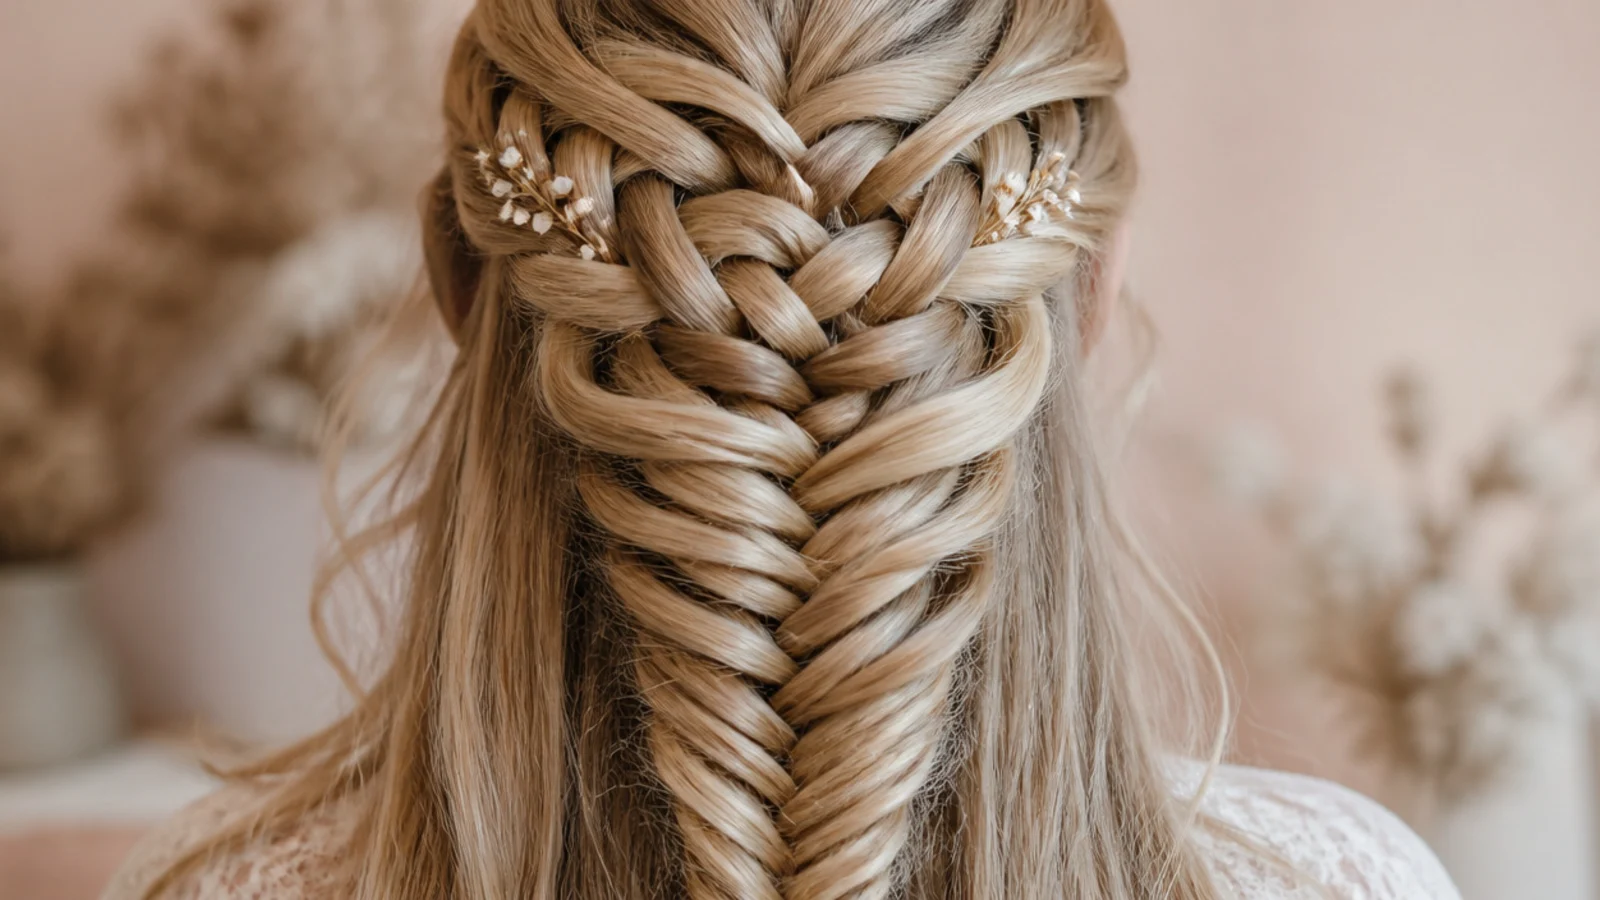
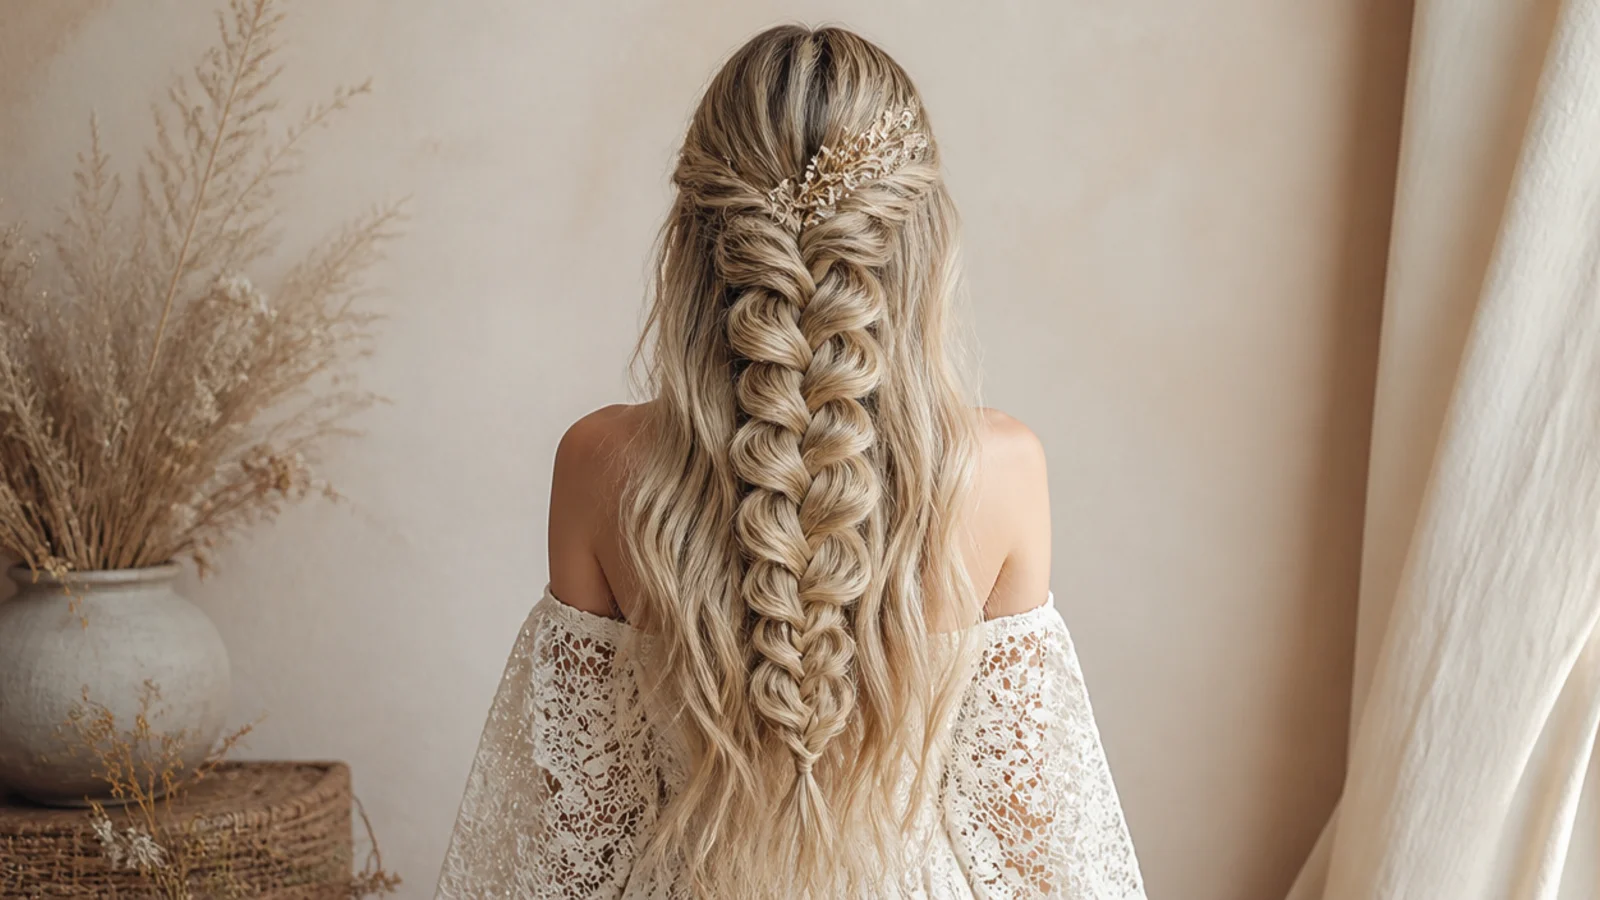
The reference version. Start a three-strand braid at the temple, and every time the top strand crosses to the middle, drop it and pick up a fresh section from above to replace it. Run it in an arc across the back of the head to the opposite ear, about 8 to 10 drops, then gather everything, including the dropped strands, into a fishtail and pancake it. It needs hair to mid-back or longer, roughly 18 inches, so the drops still have length to braid with. Around 20 minutes on yourself. The base technique is covered in mermaid braids.
Who it suits: Mid-back to waist-length hair with minimal layers.
Tip: Drop sections no wider than a pencil so the waterfall stays lacy instead of chunky.
2. Waterfall Twists Into a Mermaid Braid (5-Minute Version)
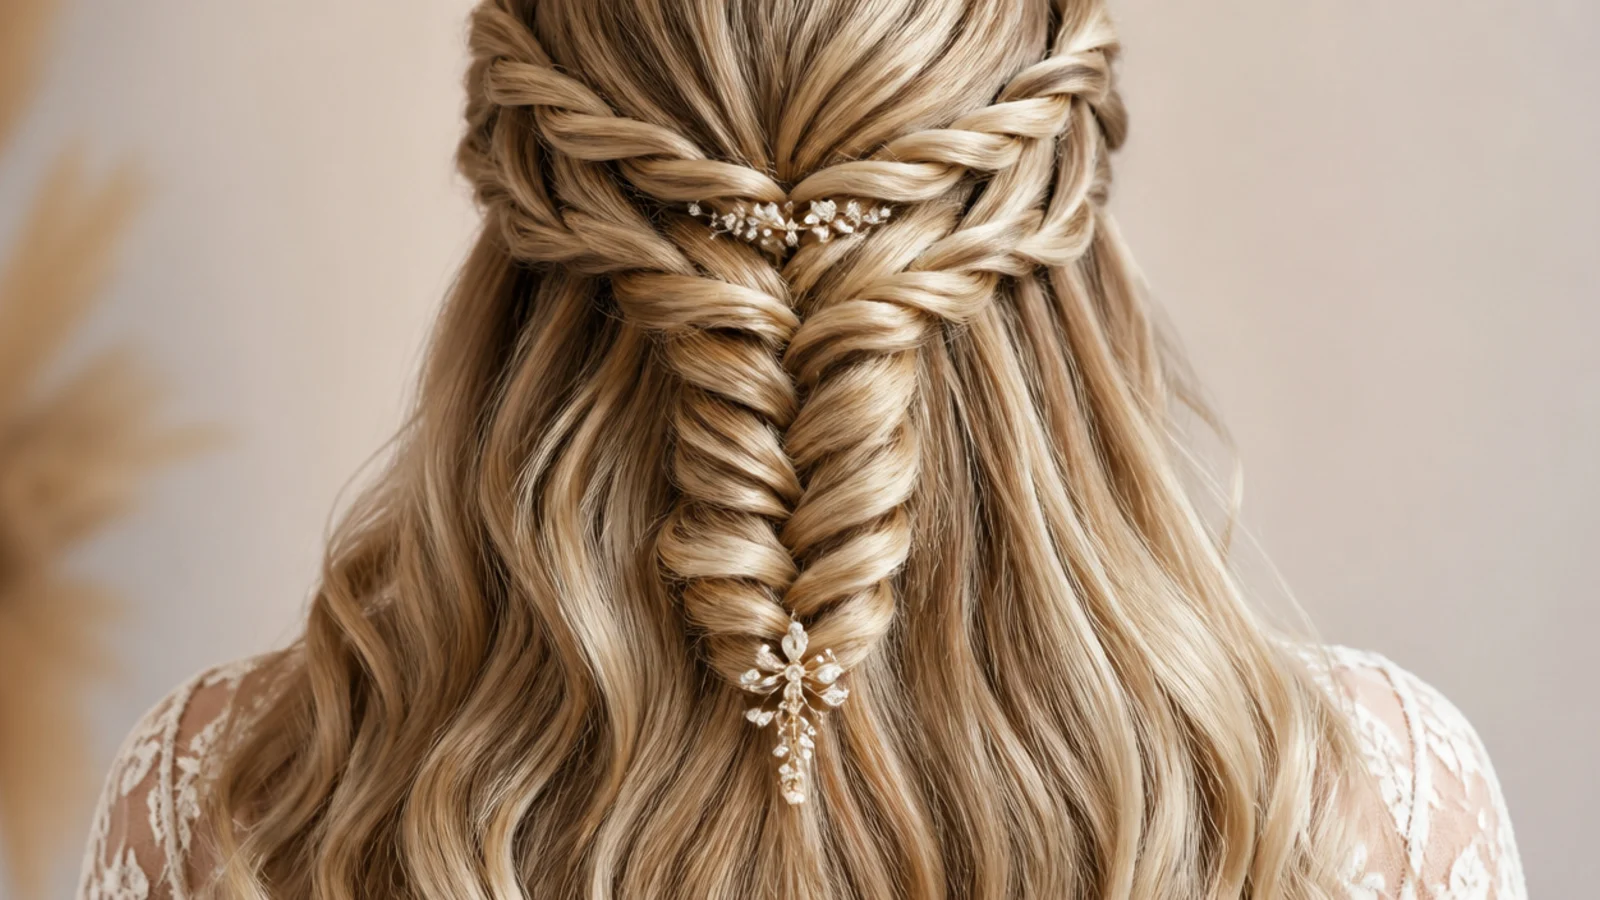
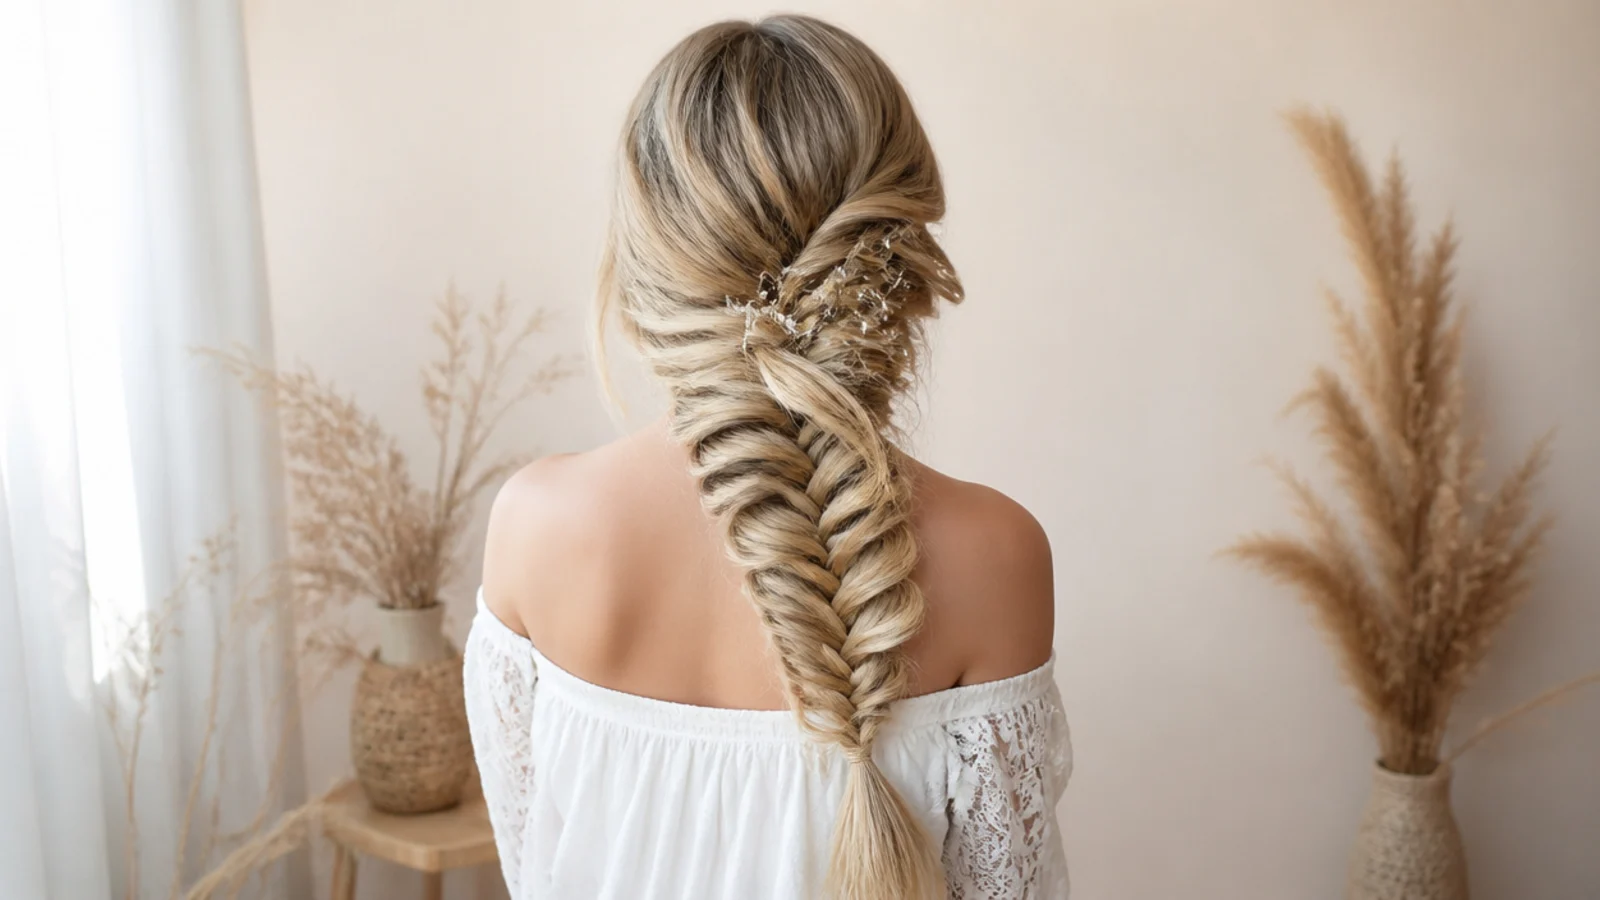
Instead of braiding the waterfall, twist it. Take two sections at the temple, cross them once, drop the lower one, pick up a new section, cross again. Four or five twists per side gets you to the back in under two minutes, and the mermaid fishtail underneath does the visual heavy lifting. This is the version to learn first, because a twist has one crossing point to control instead of three moving strands. It is the fastest waterfall mermaid braid there is at about 8 minutes total, and it sits alongside the other quick options in easy braided hairstyles.
Who it suits: Beginners and anyone braiding on their own head.
Tip: Pin each twist with a bobby pin as you go so it cannot unravel while you fishtail.
3. Criss-Cross Waterfall Mermaid Braid
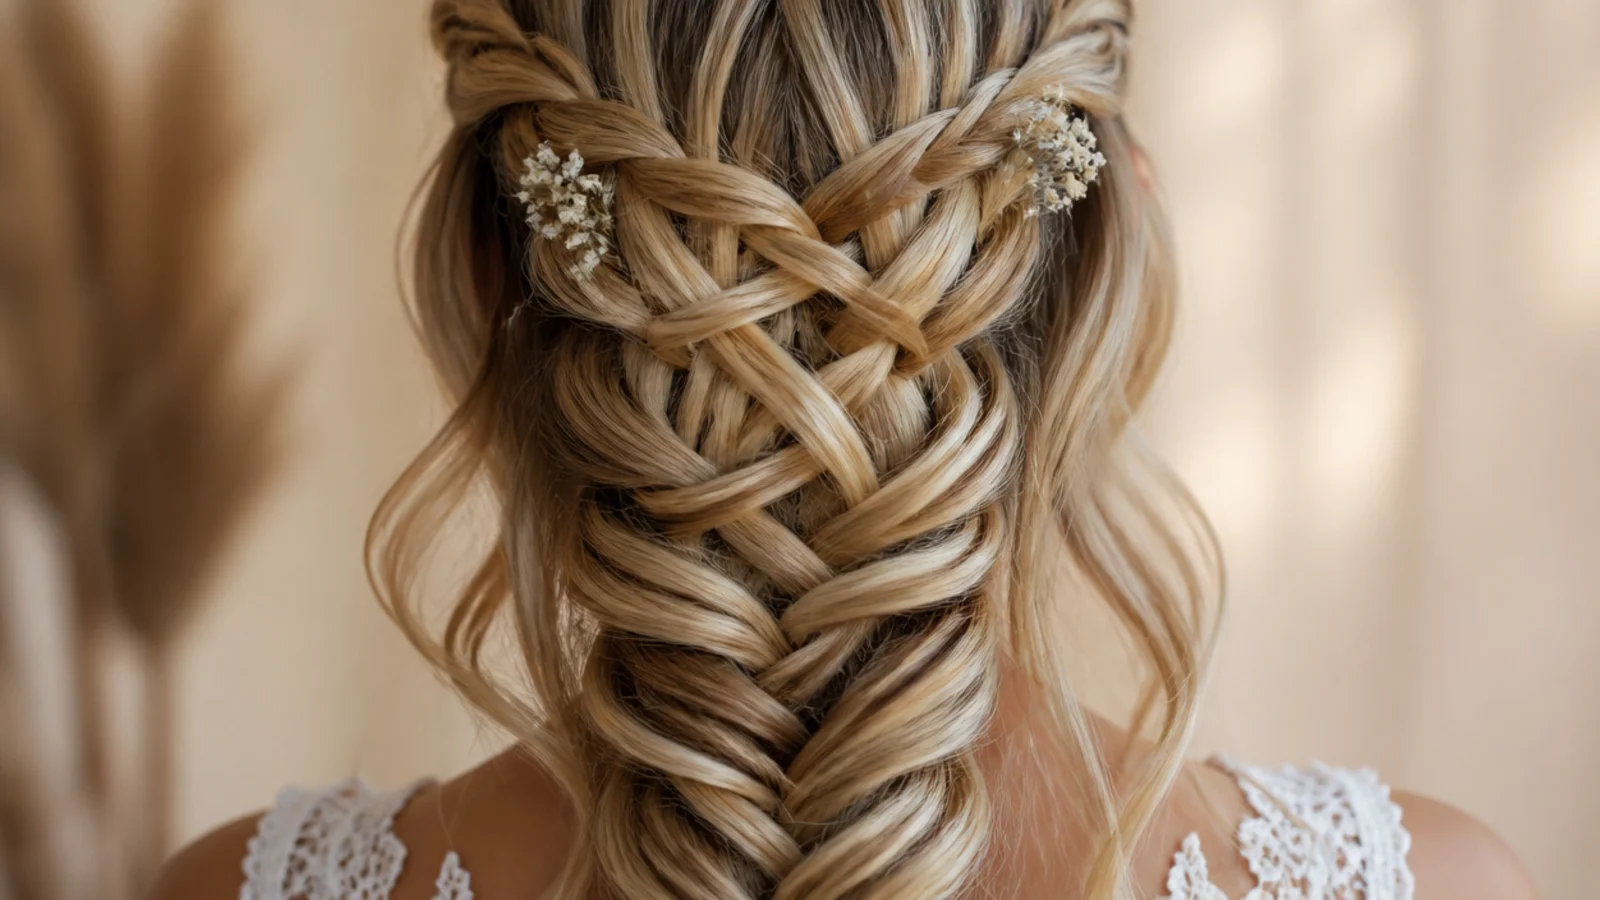
Two waterfall rows run from opposite sides and cross in the middle of the back, so the dropped strands from the left row fall through the right row before joining the mermaid braid. The overlapping lattice is what makes it photograph so well, and it is the one variation the older tutorials handle badly. Work the top row first, pin it, then run the second row underneath it. Budget 30 minutes and expect the first attempt to look uneven. Browse the rest of the mermaid braids hub for simpler starting points.
Who it suits: Confident braiders wanting an intricate back detail.
Tip: Use two different clear elastics to hold each row before you combine them, then cut them out.
4. Double Waterfall Mermaid Braid, One Row Each Side
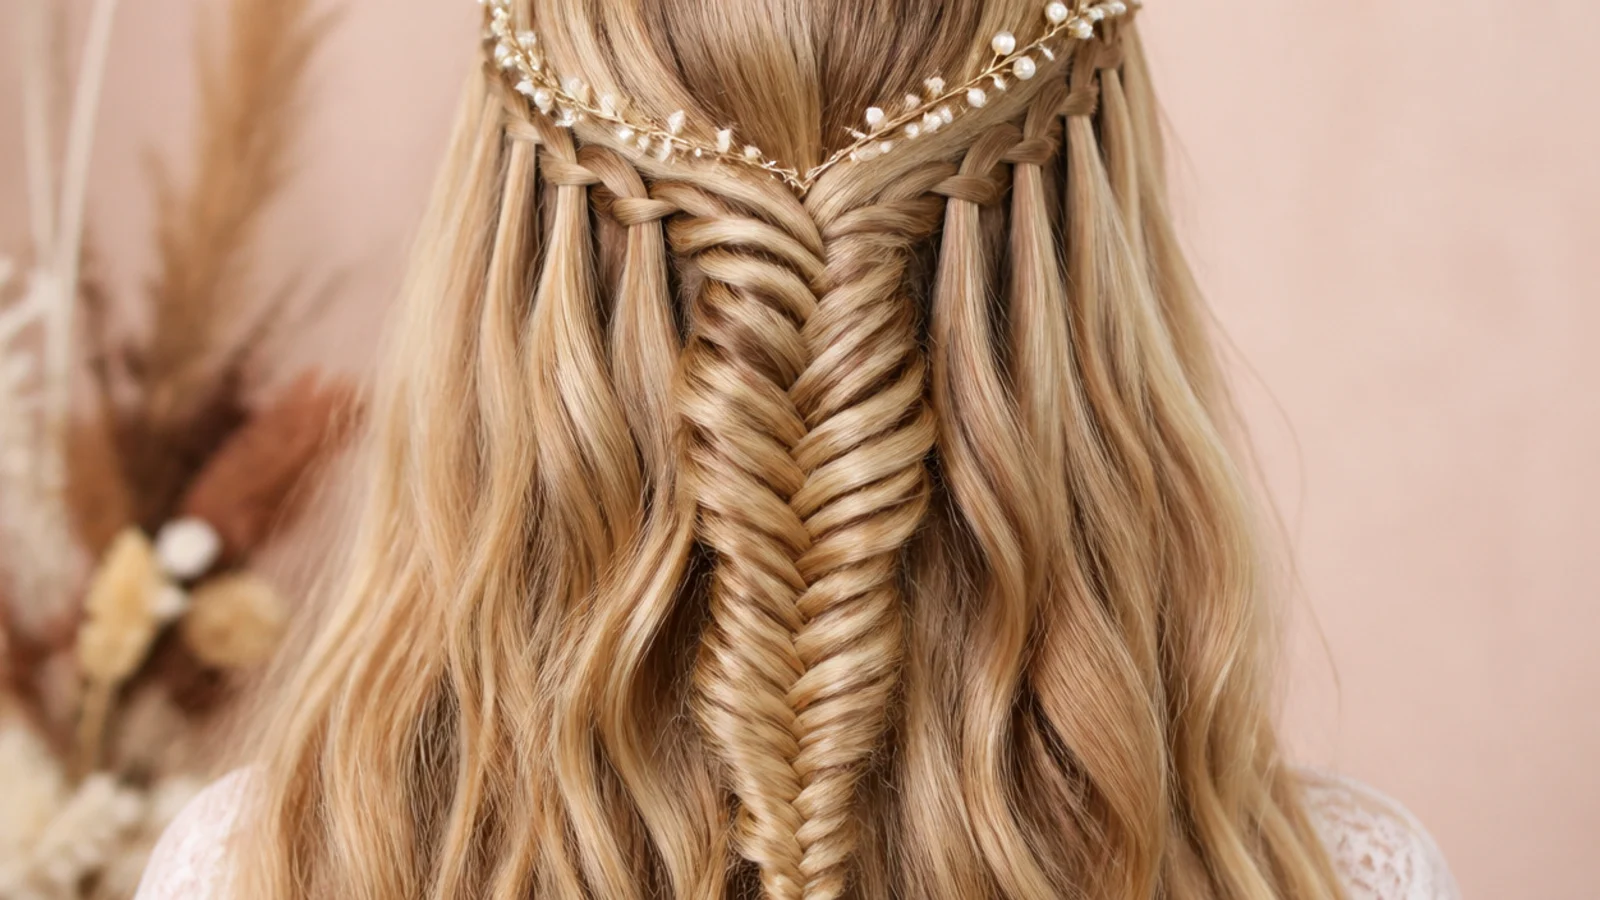
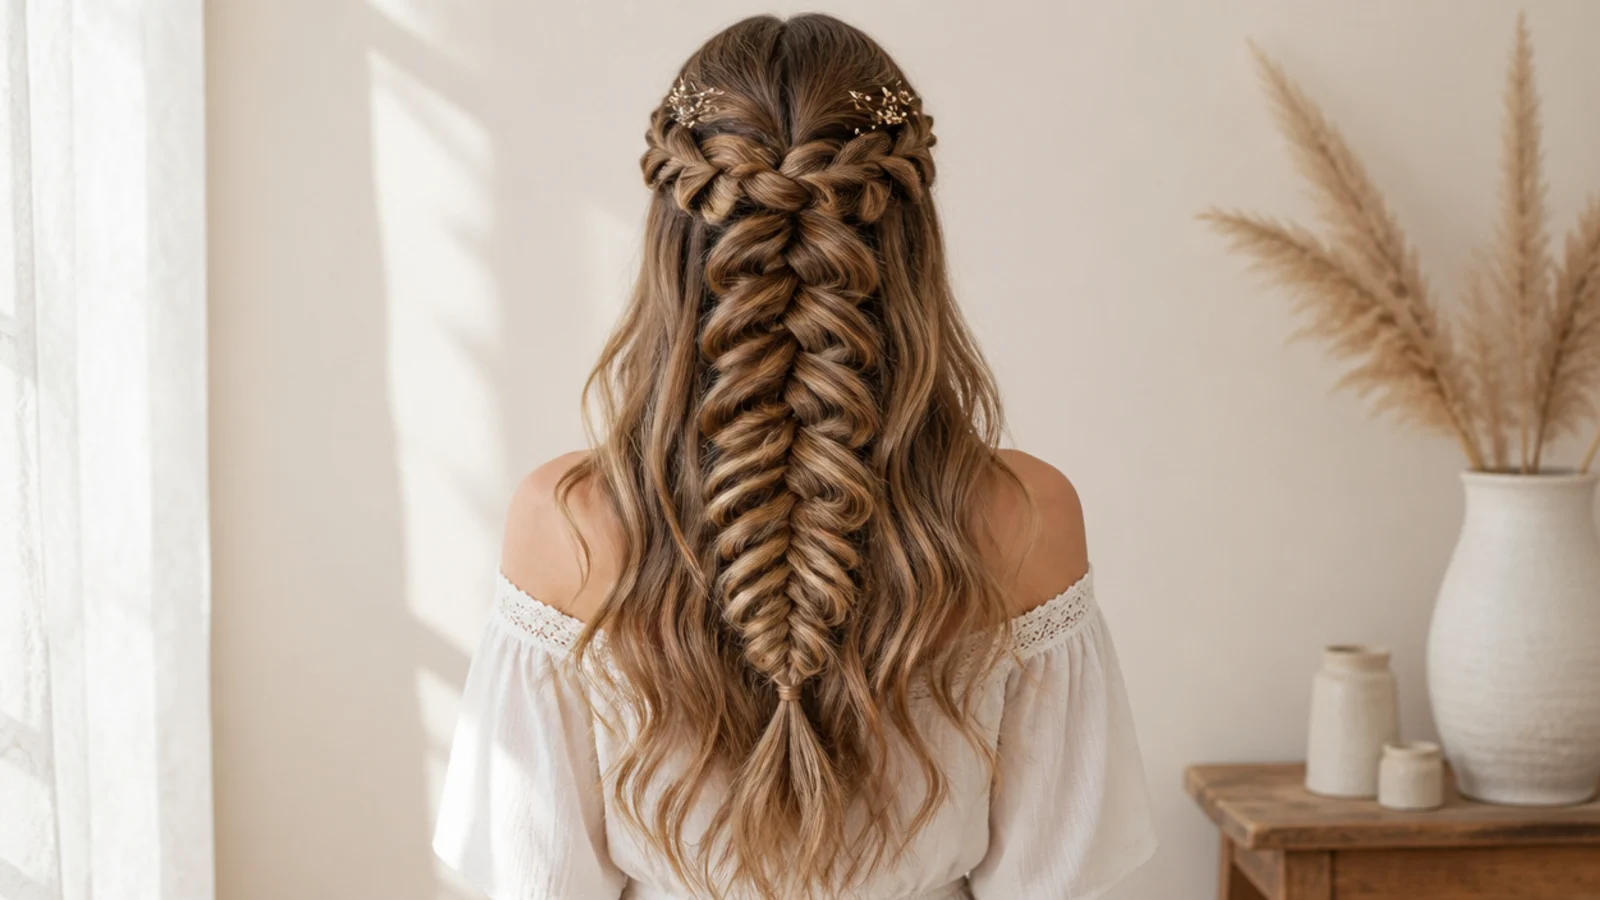
A mirrored pair. One waterfall runs from each temple toward the center back, and both are tied into a single fishtail at the nape with a clear elastic. The symmetry suits a middle part and reads more formal than a single asymmetric row, which is why it turns up so often on wedding guests. It also solves a practical problem: two shorter rows are easier to reach on your own head than one long arc across the whole crown. It also works beautifully under a cap, as in half up graduation hairstyles.
Who it suits: Middle parts, symmetrical faces and formal events.
Tip: Count your drops and match them, five per side, so the two rows land at the same height.
5. Half-Up Waterfall Mermaid Braid
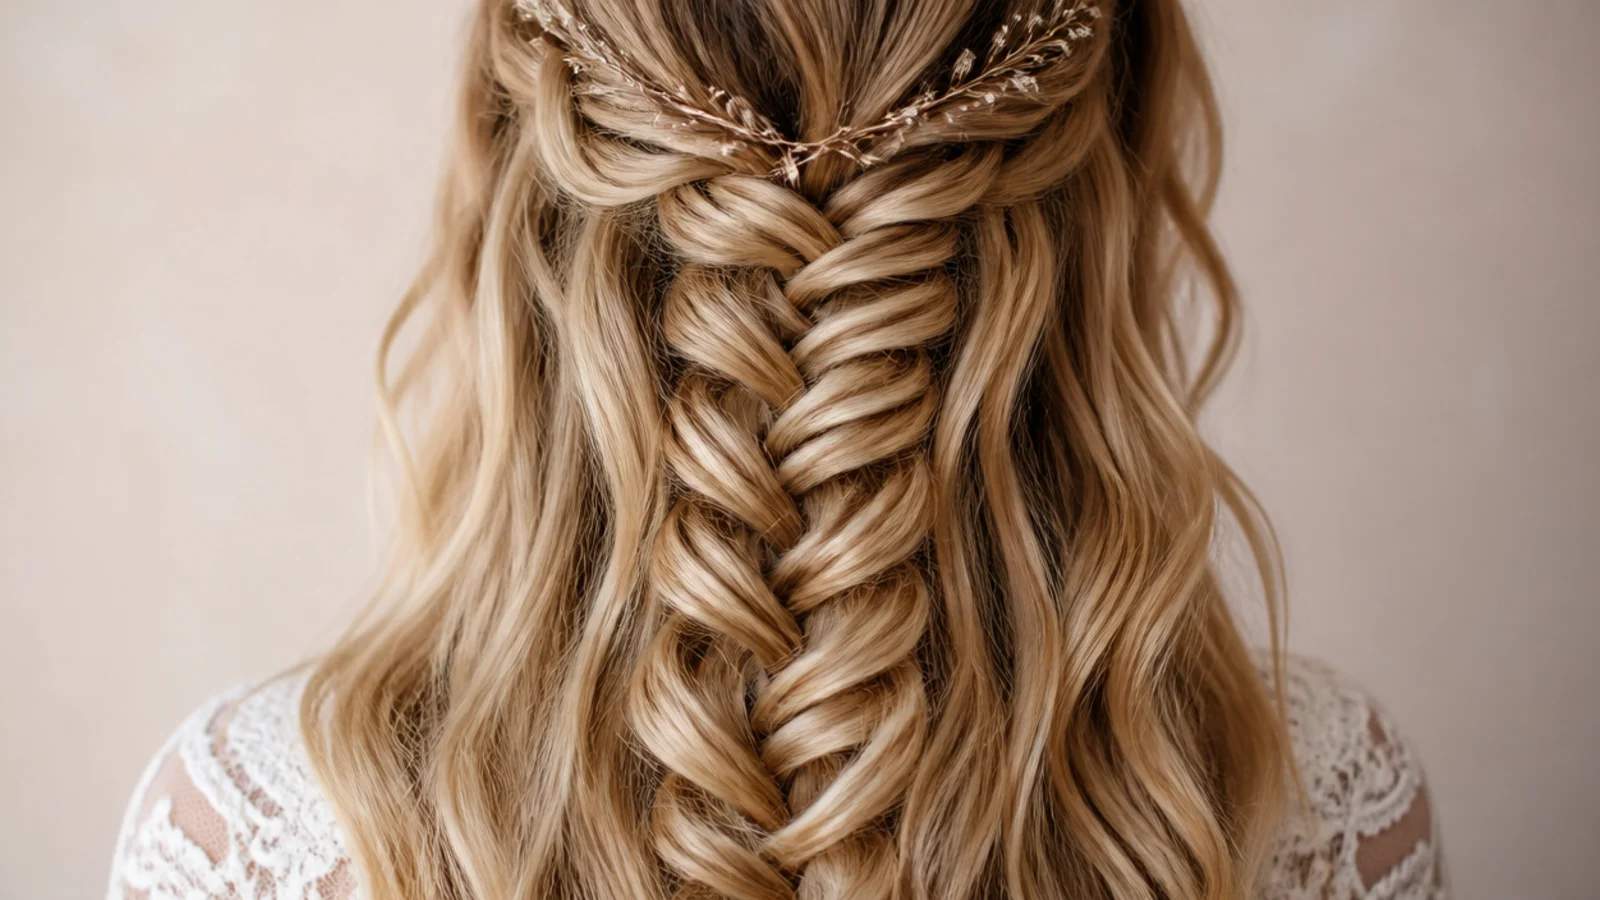
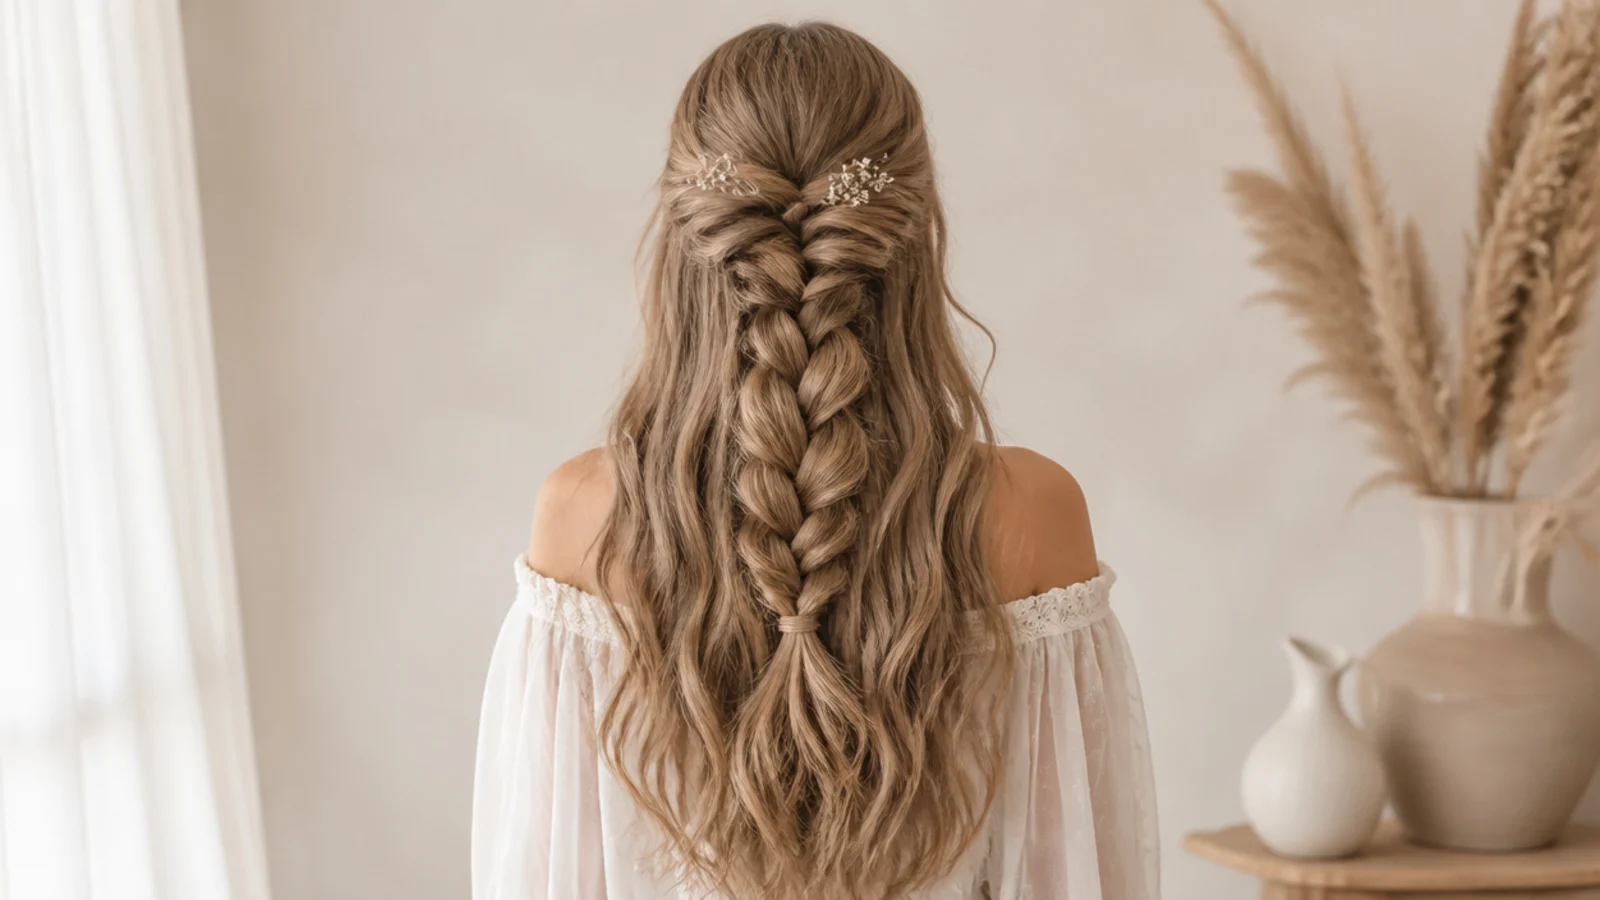
Only the top third of the hair goes into the waterfall, and the fishtail runs down the center of the back while the rest of the hair hangs loose in curls. It is the most wearable option here because nothing has to be gathered at the nape, and the loose bottom layer hides any drop you fumbled. Ten to twelve minutes. This is also the version that survives a long event best, since less weight hangs off the braid. More constructions in half up mermaid braids.
Who it suits: Anyone who wants their length showing, and long events.
Tip: Curl the loose bottom half before you braid; hot tools near a finished braid will frizz it.
6. Side-Swept Waterfall Mermaid Braid Over One Shoulder
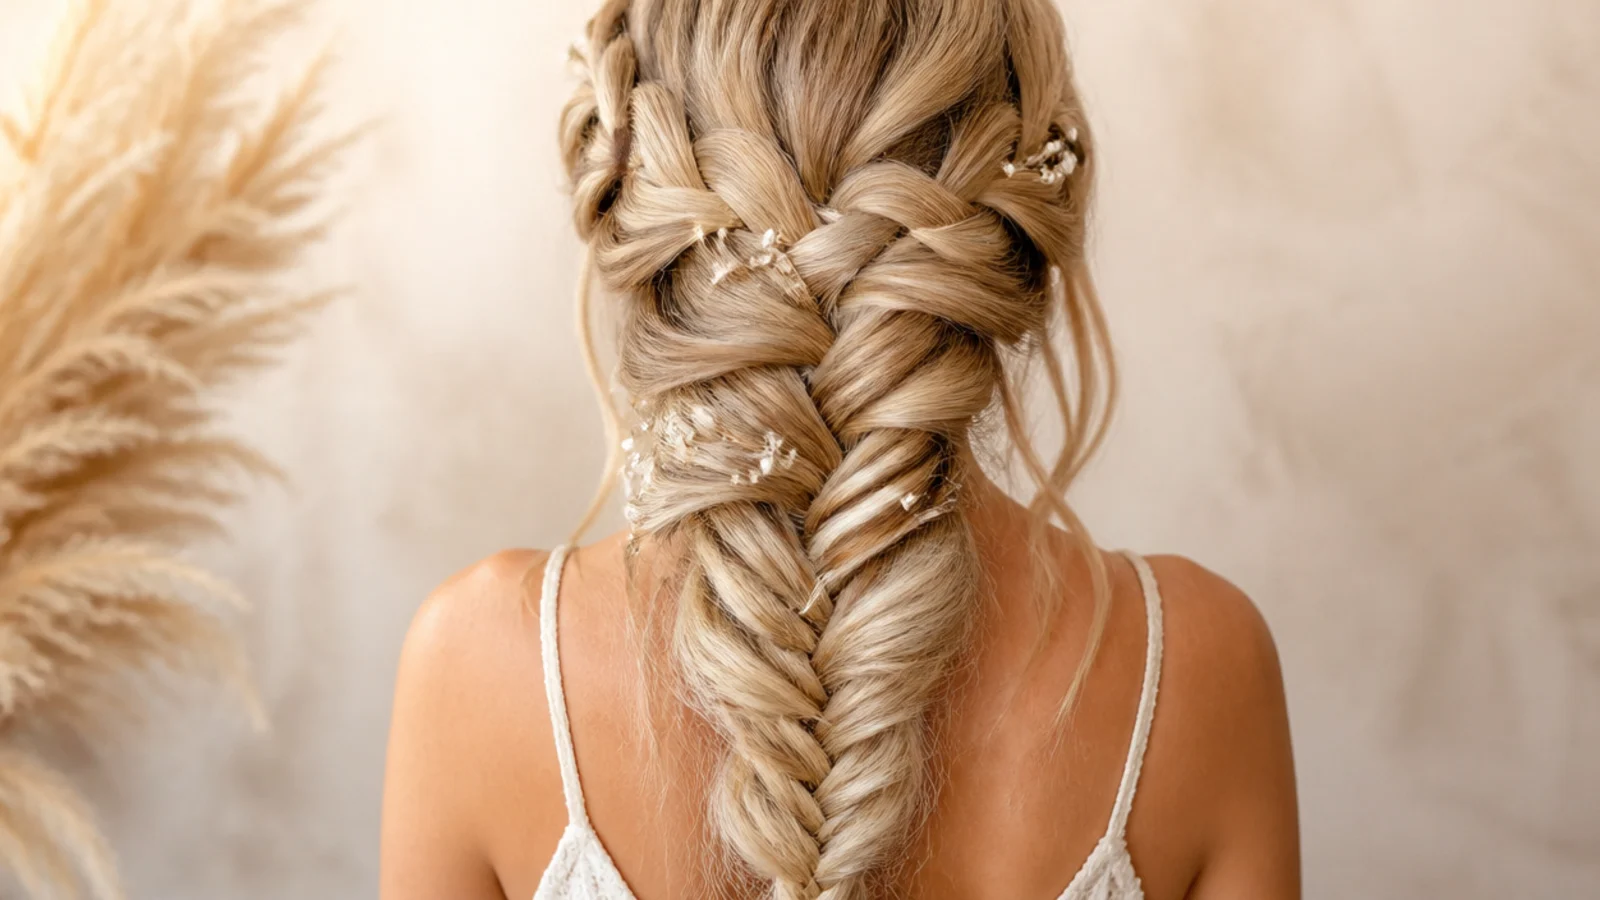
The waterfall runs from a deep part across the front hairline, then everything sweeps to one shoulder and the mermaid braid falls down the front of the chest where it is actually visible to you and to a camera. Asymmetry softens a round or square jaw, and the braid over the shoulder frames the neckline. It takes about 15 minutes because you can see what you are doing in a mirror the whole time. Full breakdown in side mermaid braids.
Who it suits: Round and square face shapes, and one-shoulder necklines.
Tip: Part on the side with less hair volume so the sweep does not go lopsided by hour three.
7. Waterfall Mermaid Braid Crown (Halo)
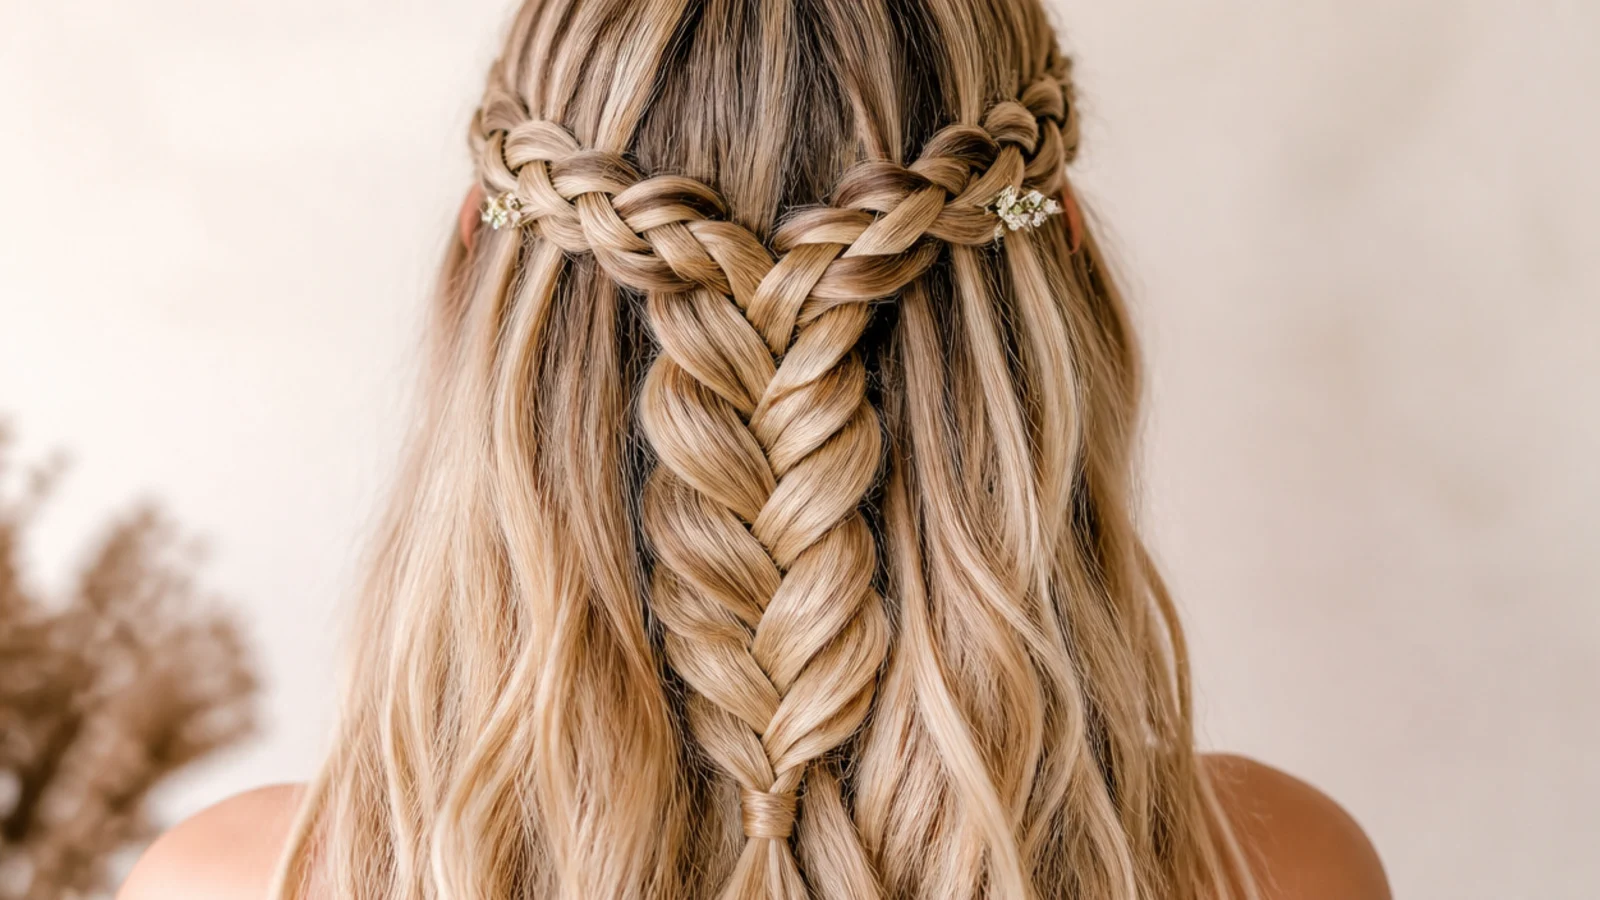
The waterfall row circles the head at about ear height like a headband, dropping strands the whole way, and the loose strands underneath are gathered into a low mermaid fishtail at the back. It reads bridal without any accessories at all, because the braid itself becomes the crown. It needs at least 16 inches of hair to complete the circle, and roughly 25 minutes. See how it plays formally in mermaid braids for your wedding day. Consider having someone else run the back quarter, which is the section you cannot see.
Who it suits: Weddings, bridesmaids and flower-crown alternatives.
Tip: Keep the crown row 2 inches back from the hairline so it does not read like a headband slipping.
8. Waterfall Mermaid Braid on Fine Hair
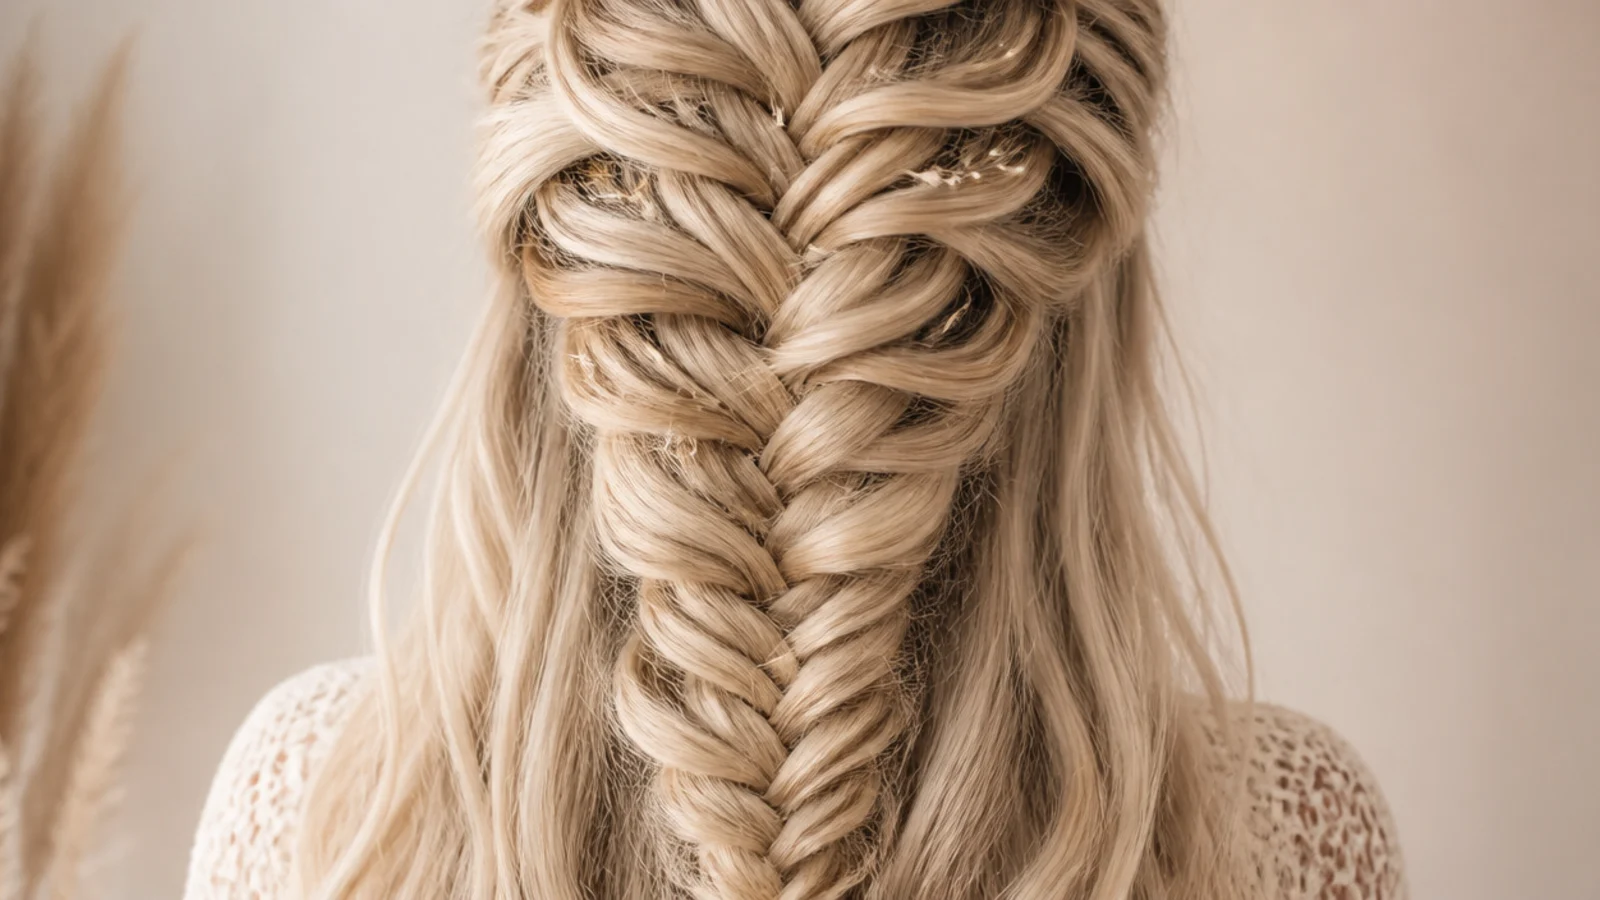
Fine hair slips out of waterfall drops faster than any other type, so this version changes three things: braid on day-two hair, mist texture spray at the roots before you start, and make the drops narrower than usual so each one has enough grip. Then over-pancake the fishtail, because on fine hair the fanned width is the entire illusion of thickness. It can double the apparent size of the braid. Around 18 minutes including prep. Match the method to your texture with hairstyle for your hair type.
Who it suits: Fine, straight or freshly washed hair that will not hold.
Tip: Backcomb the fishtail lightly at the base before pancaking so the top of the braid stays wide too.
9. Waterfall Mermaid Braid on Curly Hair
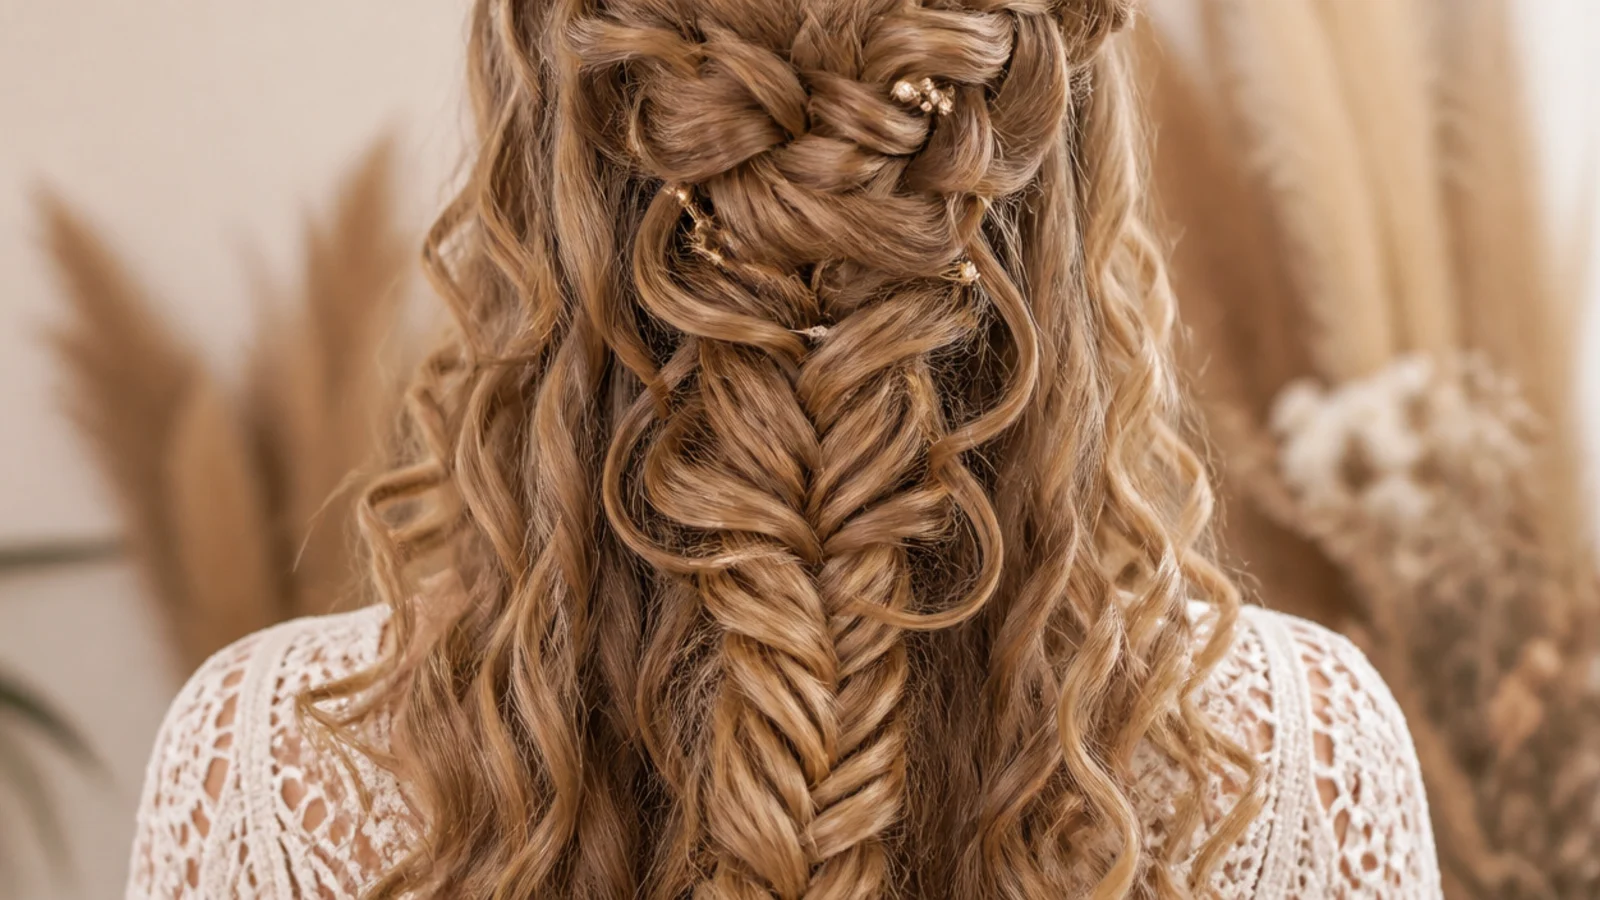
Curls make the drops look like a deliberate design feature rather than escaped strands, so this is the easiest hair type for a waterfall to survive on. Braid on second-day curls with a little leave-in smoothed through the top section only, so the waterfall row lies flat while the drops stay defined. Skip pancaking almost entirely; curly hair fans on its own and tugging will just create frizz. About 15 minutes.
Who it suits: Wavy through curly patterns that hold a braid without product.
Tip: Detangle only the top row you are braiding, not the drops, so the curls keep their shape.
10. Heavily Pancaked Waterfall Mermaid Braid for Thin Hair
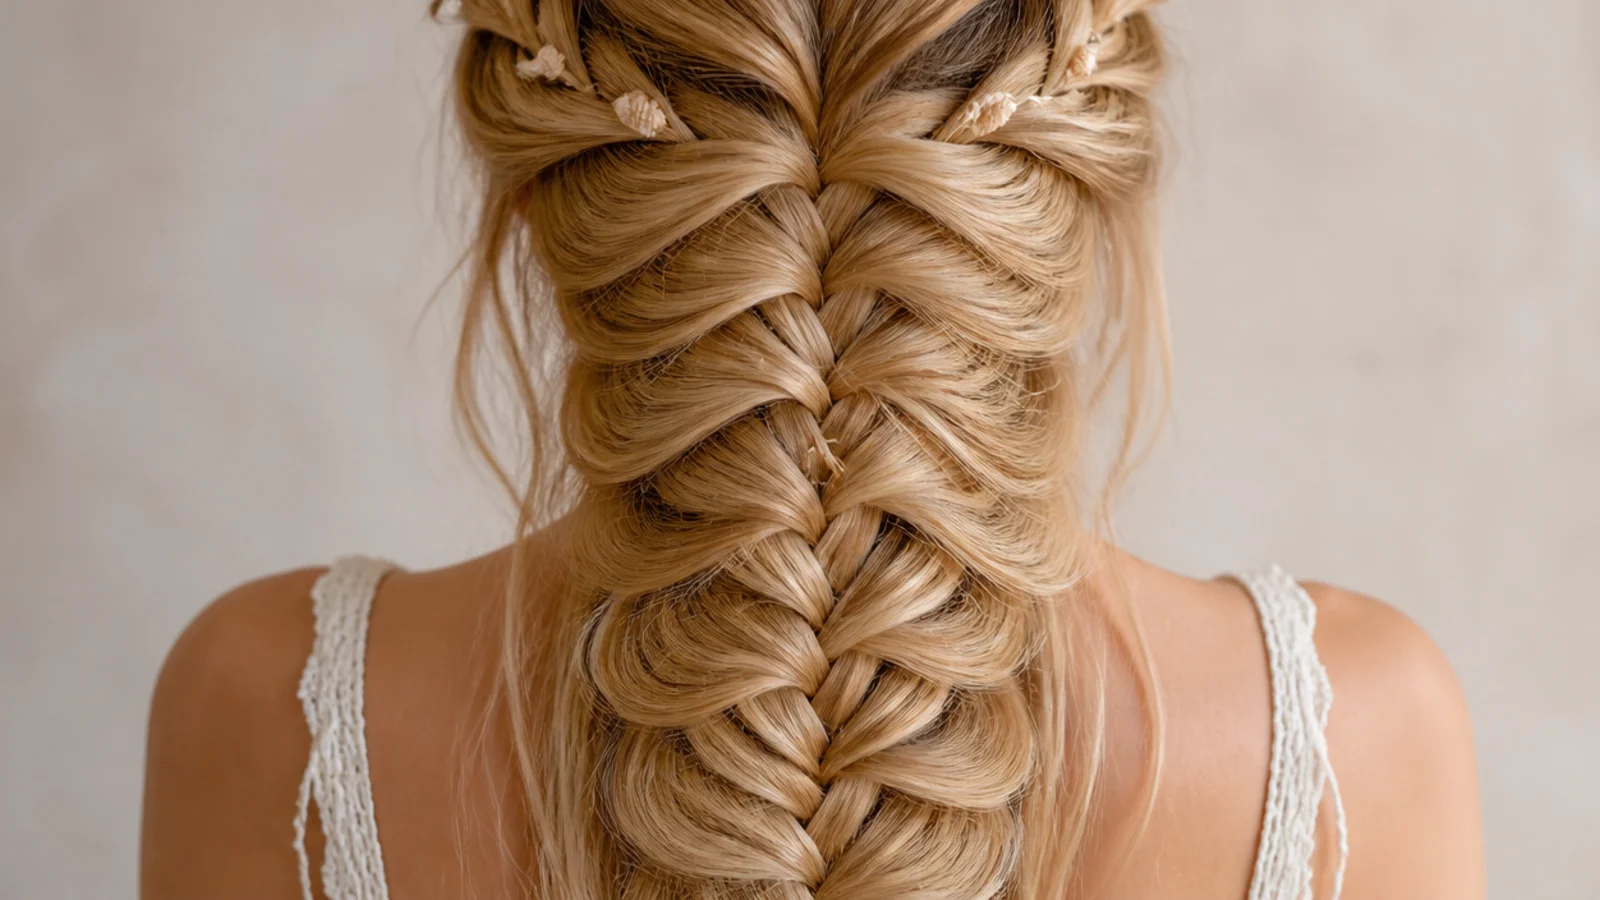
Same construction, different finish. Braid the fishtail tighter than feels right, then spend a full five minutes pulling the outer edge of every single crossover a few millimeters at a time, starting at the elastic and working upward. Tight braiding plus aggressive pancaking is what makes a thin fishtail read as a wide mermaid tail; loose braiding plus pancaking just collapses. Expect the braid to end up two to three times its braided width.
Who it suits: Thin or shoulder-thickness hair that reads flat when braided.
Tip: Pancake the far side of each crossover, not the near side, or the braid twists as it widens.
11. Waterfall Mermaid Braid With Beach Waves
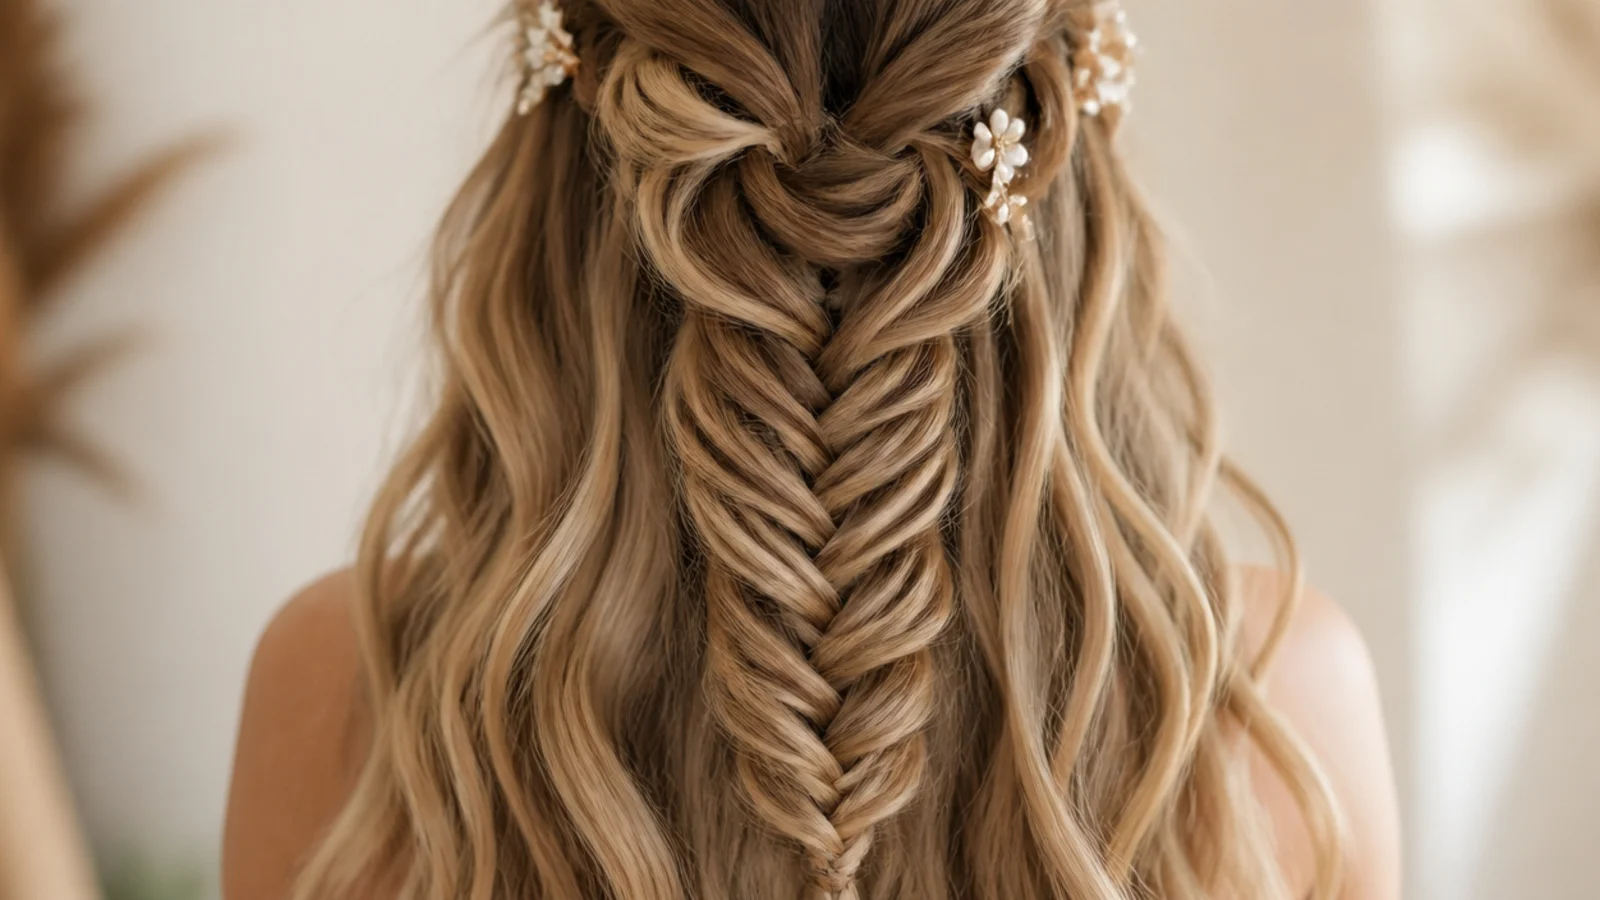
Wave the hair first with a 1.25 inch iron, taking 2 inch sections and leaving the last 2 inches straight, then braid. Loose curls before braiding create the volume that reads thick, and the dropped strands turn into visible ribbons of wave rather than flat sheets of hair. This is the summer version of the style and the one that suits a beach or a festival. Add 20 minutes for the waving, then 15 for the braid. See more texture ideas in beach hairstyles.
Who it suits: Summer events, festivals and vacation photos.
Tip: Let the curls cool completely and shake them out before braiding, or they will drop by noon.
12. Boho Waterfall Mermaid Braid With Ribbon
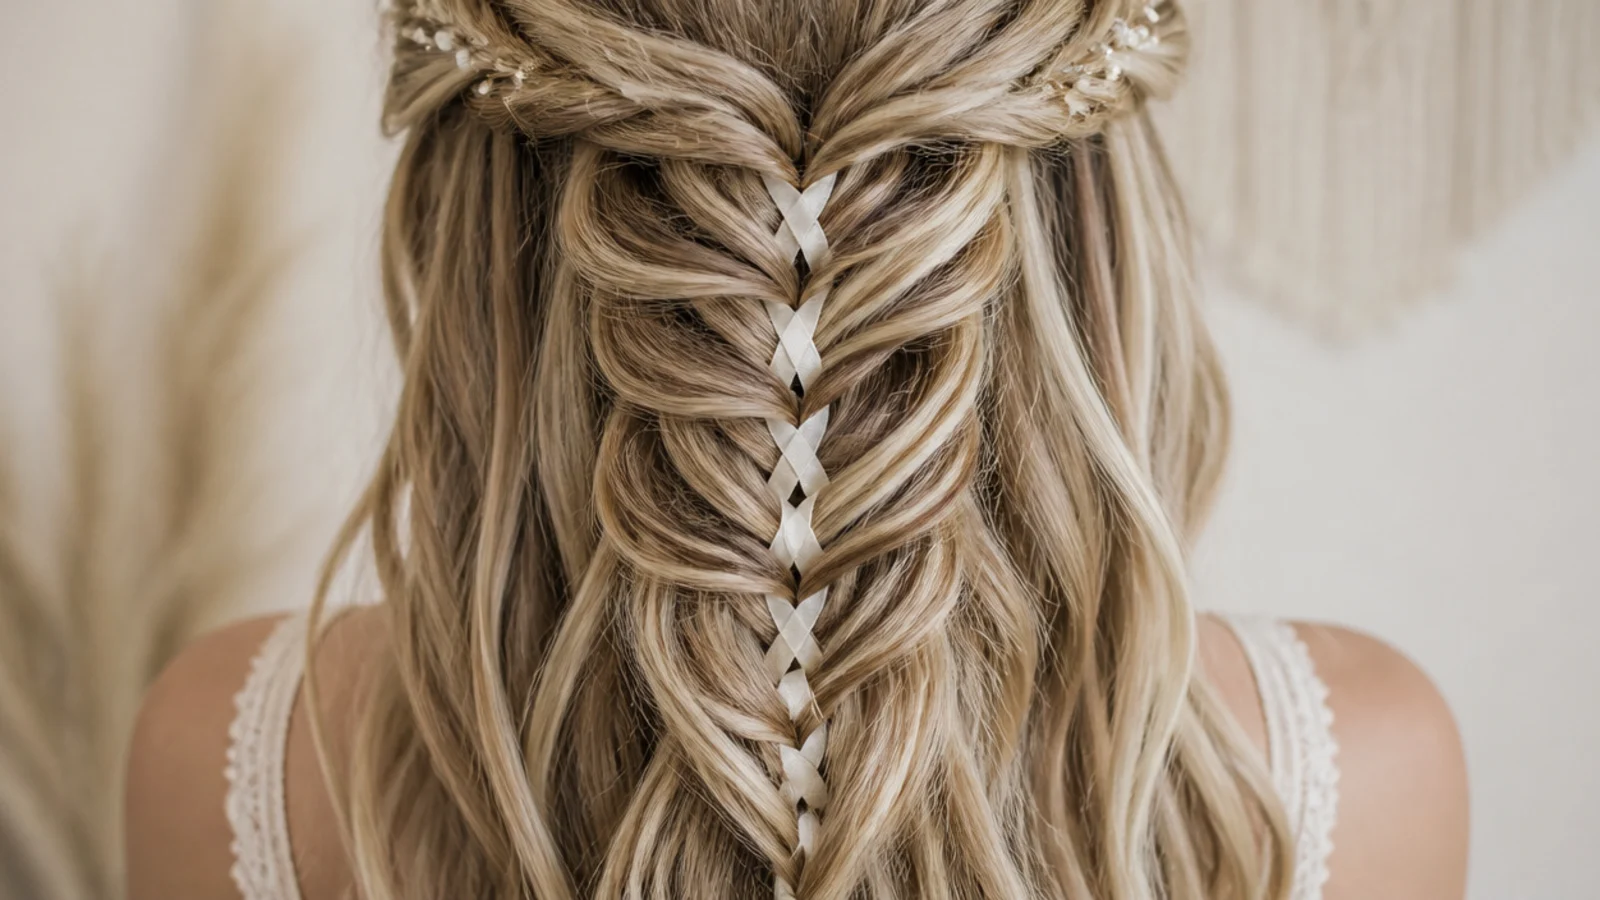
Lay a 0.25 inch silk ribbon along one of the two fishtail sections at the start and braid it in, so it surfaces at every crossover as a running stitch of color. Cream, dusty blue and rust all photograph better than bright shades, which fight with the hair. Leave 6 inches of ribbon hanging past the elastic. The ribbon also adds grip, which is genuinely useful on slippery hair. Adds about 3 minutes. More in boho mermaid braids.
Who it suits: Festivals, boho weddings and anyone wanting color without dye.
Tip: Anchor the ribbon under the first crossover with a bobby pin so it cannot slide out as you pancake.
13. Waterfall Mermaid Braid With Pearl Pins for a Wedding
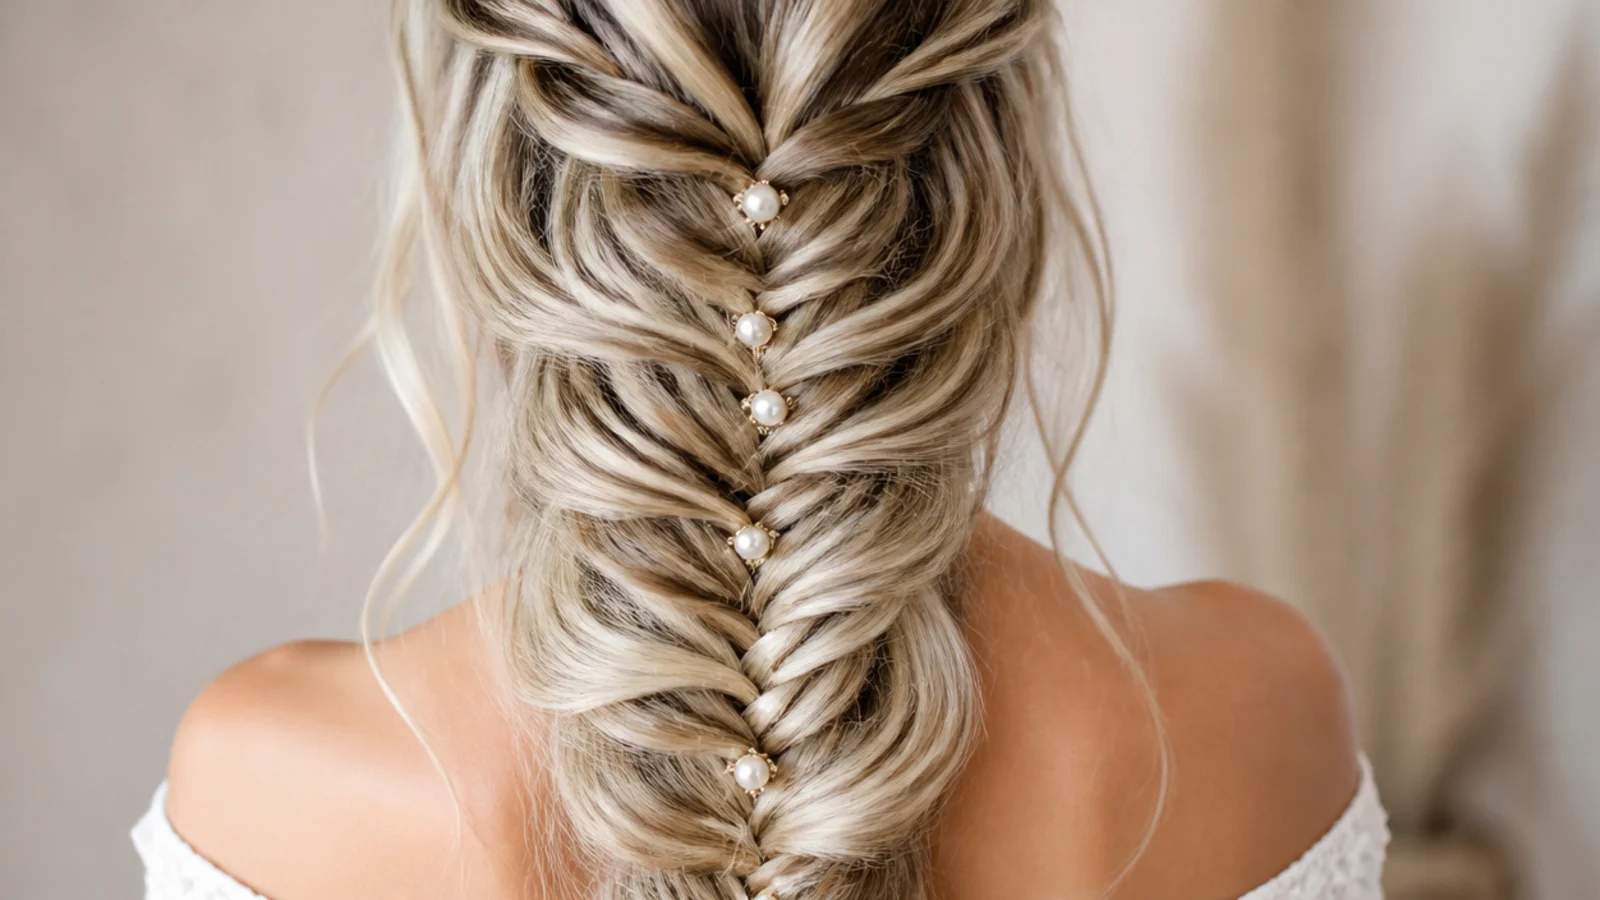
Finish a classic waterfall mermaid braid, then set 6 to 9 pearl-tipped pins into the fanned crossovers, spacing them wider as the braid narrows so they read scattered rather than lined up. Pearls sit better than crystals here because they catch light without flaring in flash photography. Set the pins after pancaking, never before, or they get buried. Adds 5 minutes and works with or without a veil below the braid. See mermaid braids for your wedding day.
Who it suits: Brides, bridesmaids and formal receptions.
Tip: Push each pin in against the braid direction so it grips instead of sliding out during dancing.
14. Waterfall Mermaid Braid on Shoulder-Length Hair
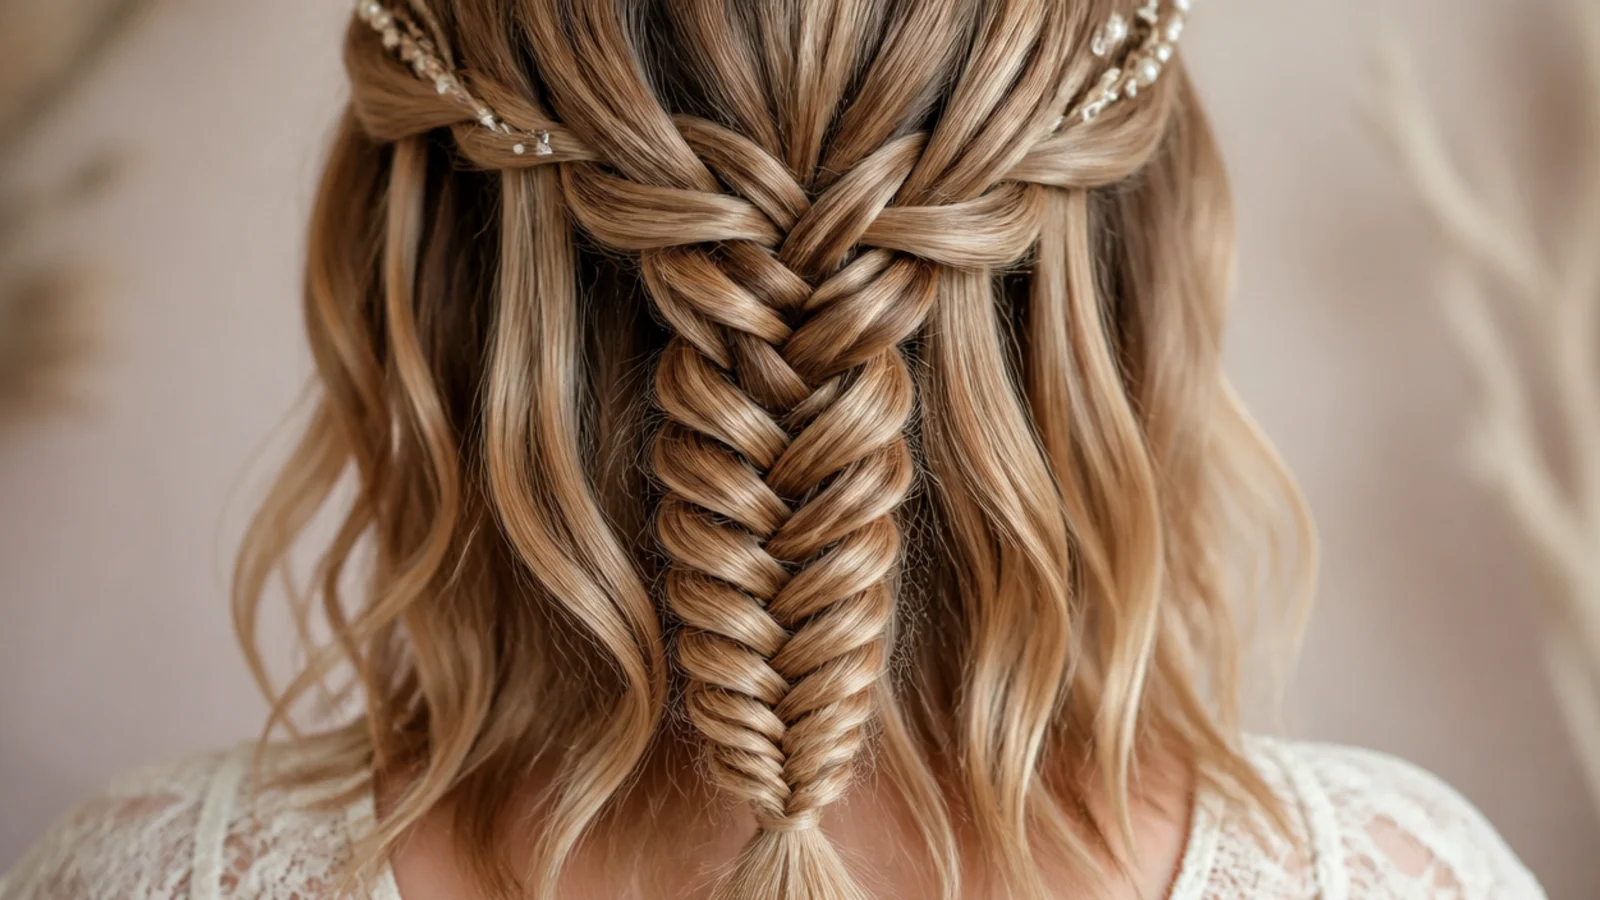
At around 12 inches there is not enough length for a full arc plus a long tail, so run a short waterfall from one temple to the back of the ear only, three or four drops, and let the fishtail be a stubby 4 inch tail. Pancake it hard, because at this length width is the only thing that makes it read as a mermaid braid at all. Secure the fishtail with a clear elastic and let the ends hang free rather than tucking them.
Who it suits: Collarbone to shoulder length, including grown-out lobs.
Tip: Angle the waterfall row downward toward the nape so the drops have farther to travel before the fishtail.
15. Waterfall Mermaid Braid With Clip-In Extensions
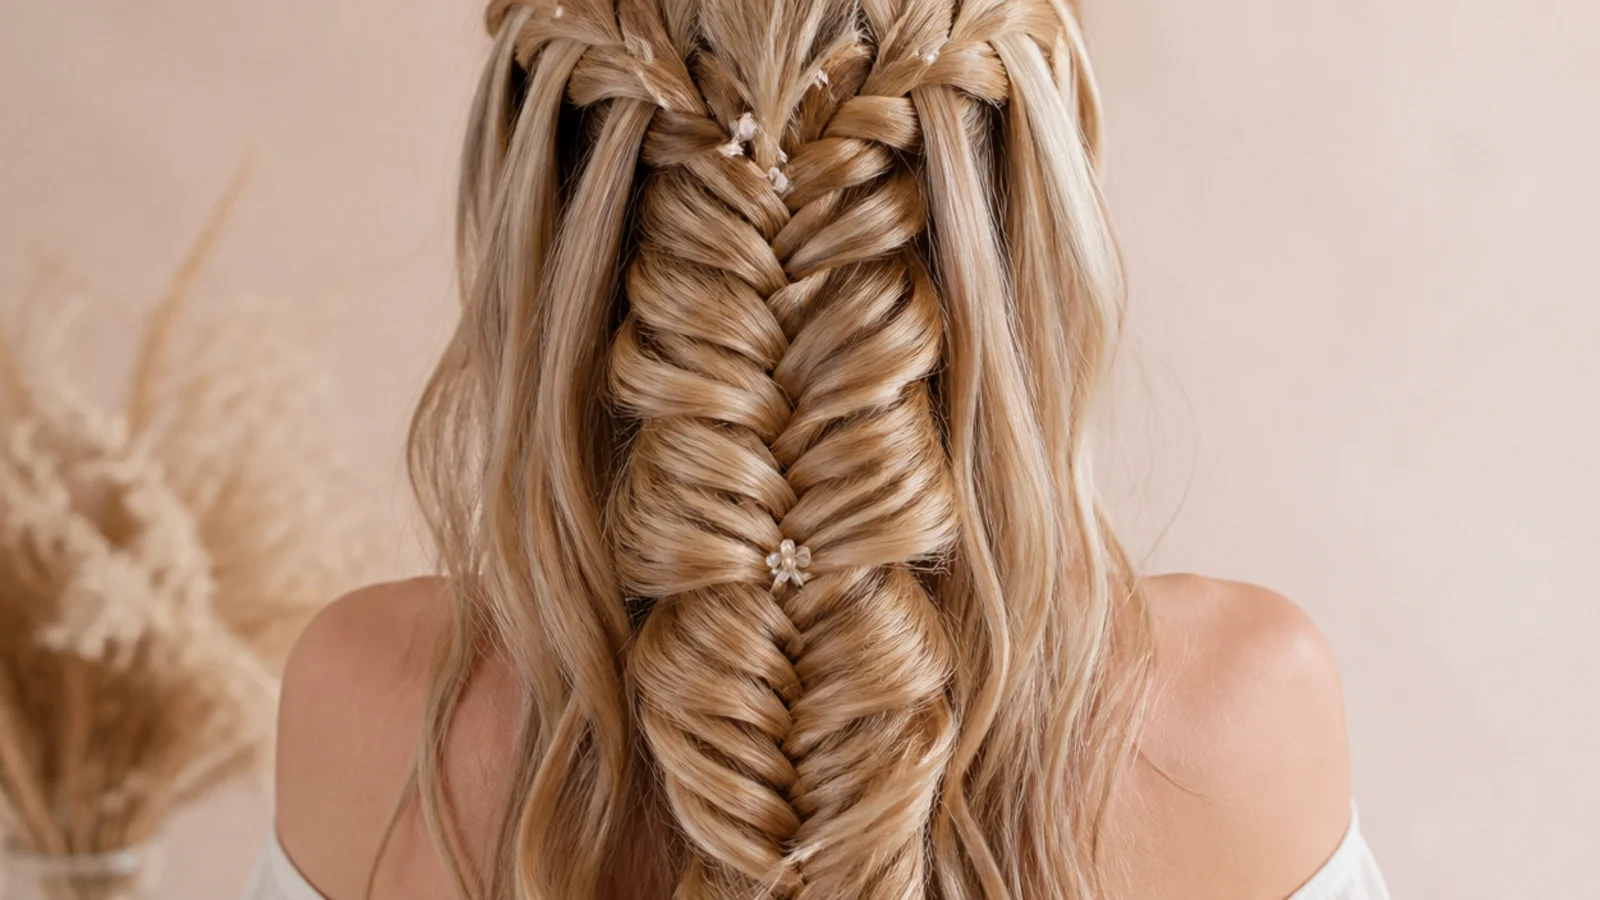
Two or three clip-in wefts sit below the waterfall row, so the braid section itself stays natural and only the mermaid fishtail gains length and weight. Clip the wefts in a horizontal line at ear level after the waterfall is pinned, never before, or the clips show through the lacy top row. The added weight also holds the pancaking open instead of letting it spring shut. Adds 5 minutes. More length strategy in long mermaid braids.
Who it suits: Shorter or thinner hair wanting a waist-length mermaid tail.
Tip: Match the weft color to your ends, not your roots, since the extensions only show in the tail.
16. Low Waterfall Mermaid Braid Into a Loose Bun
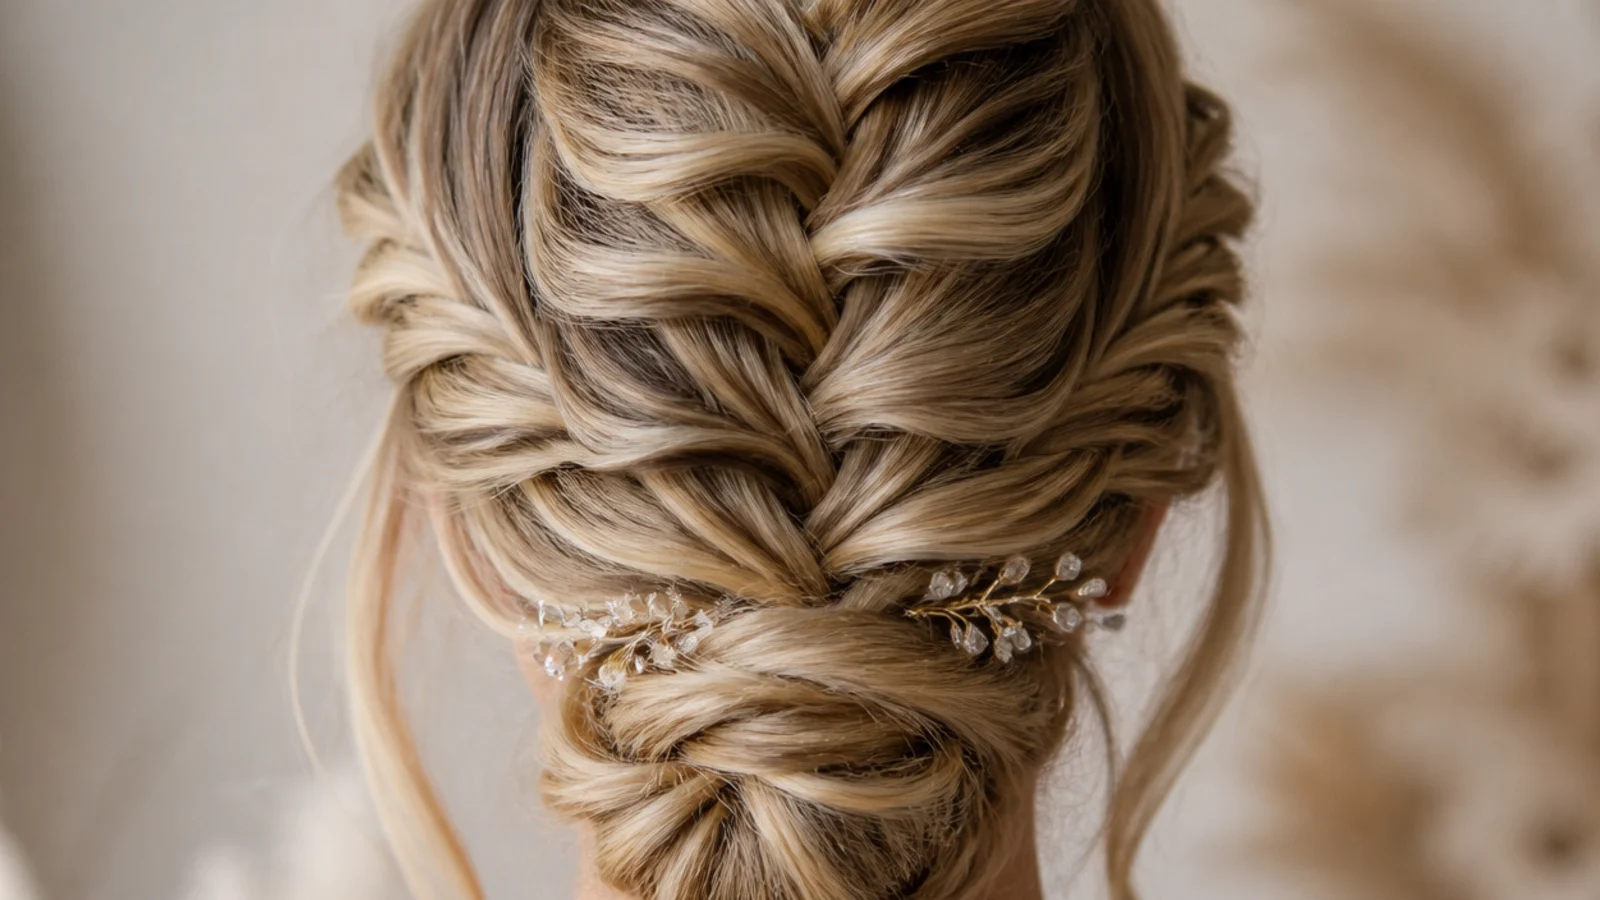
Run the waterfall, fishtail the collected hair for about 6 inches, pancake it wide, then coil that flattened braid into a loose bun at the nape and pin it. Because the braid is already fanned, the coil reads full and textured rather than tight, and the waterfall row above stays completely visible. It is the version to wear when the weather or a long day would wreck a hanging braid. About 20 minutes and 8 pins. See long hair updos that last.
Who it suits: Long days, wind, and anyone who wants hair off the neck.
Tip: Pin the coil at four points around the outside, not through the middle, so the fanned edges stay open.
17. Waterfall Mermaid Braid With a Deep Side Part
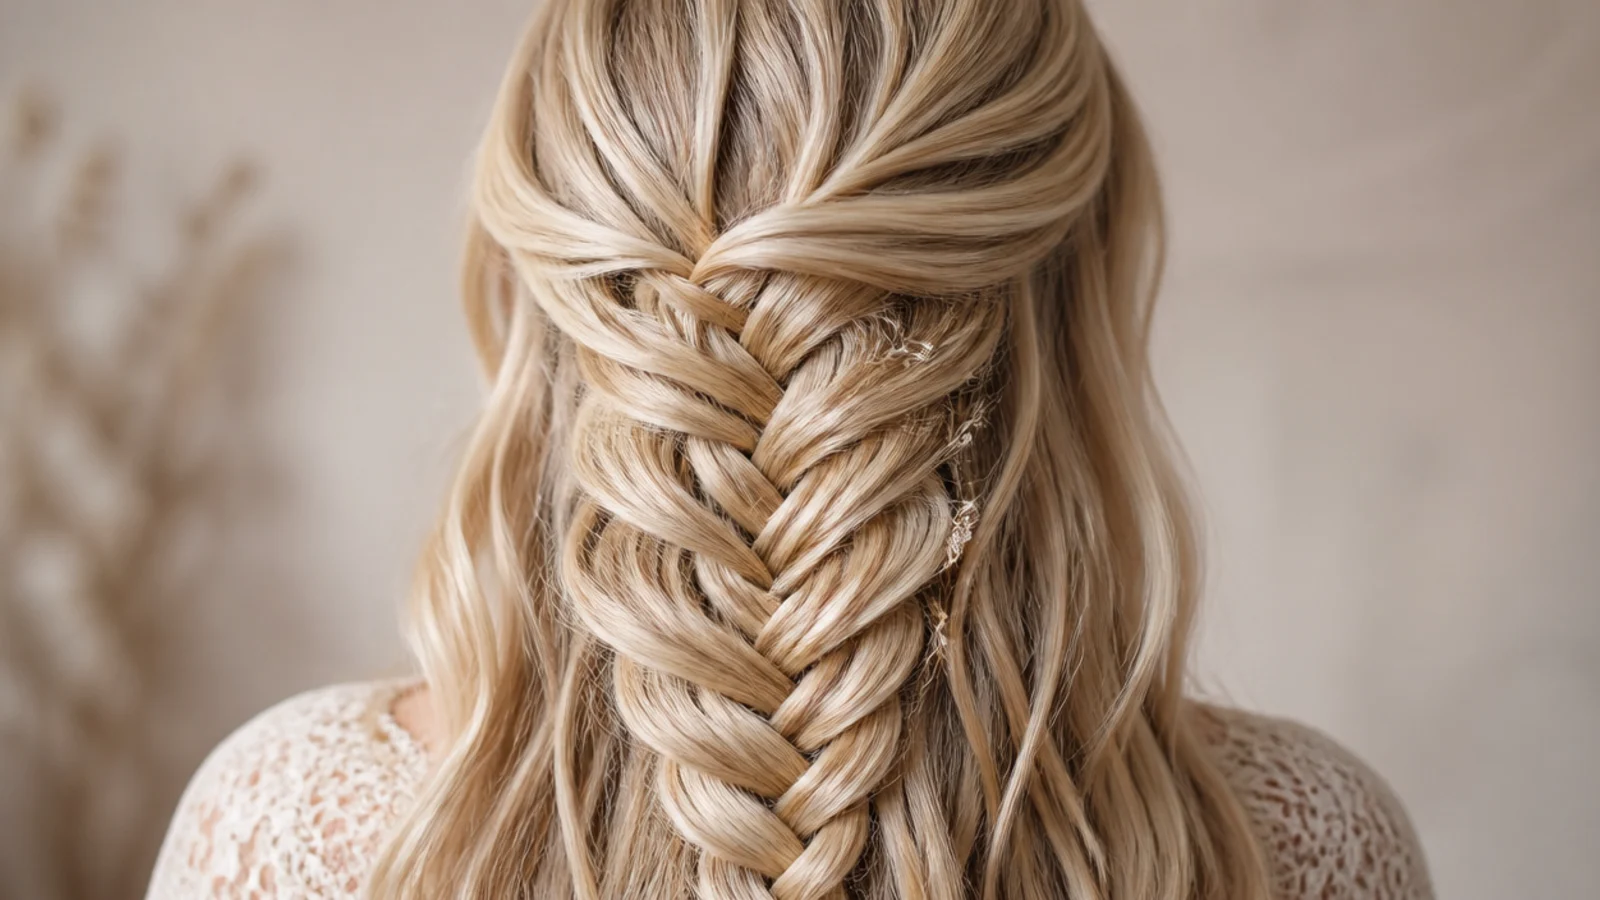
Part about 3 inches off center, above the arch of the heavier eyebrow, and start the waterfall from the thick side so the braid has volume to work with from the first pass. The deep part gives the front a swept, old-Hollywood weight that a center part cannot, and it hides a receding or uneven hairline on the light side. Ten minutes plus the braid. It is also the most forgiving part line for a face that is longer than it is wide.
Who it suits: Long or oval faces, thin hairlines and evening looks.
Tip: Set the deep part with a little pomade on a comb, or it will drift back to center by the afternoon.
18. Two-Tone Waterfall Mermaid Braid on Balayage Hair
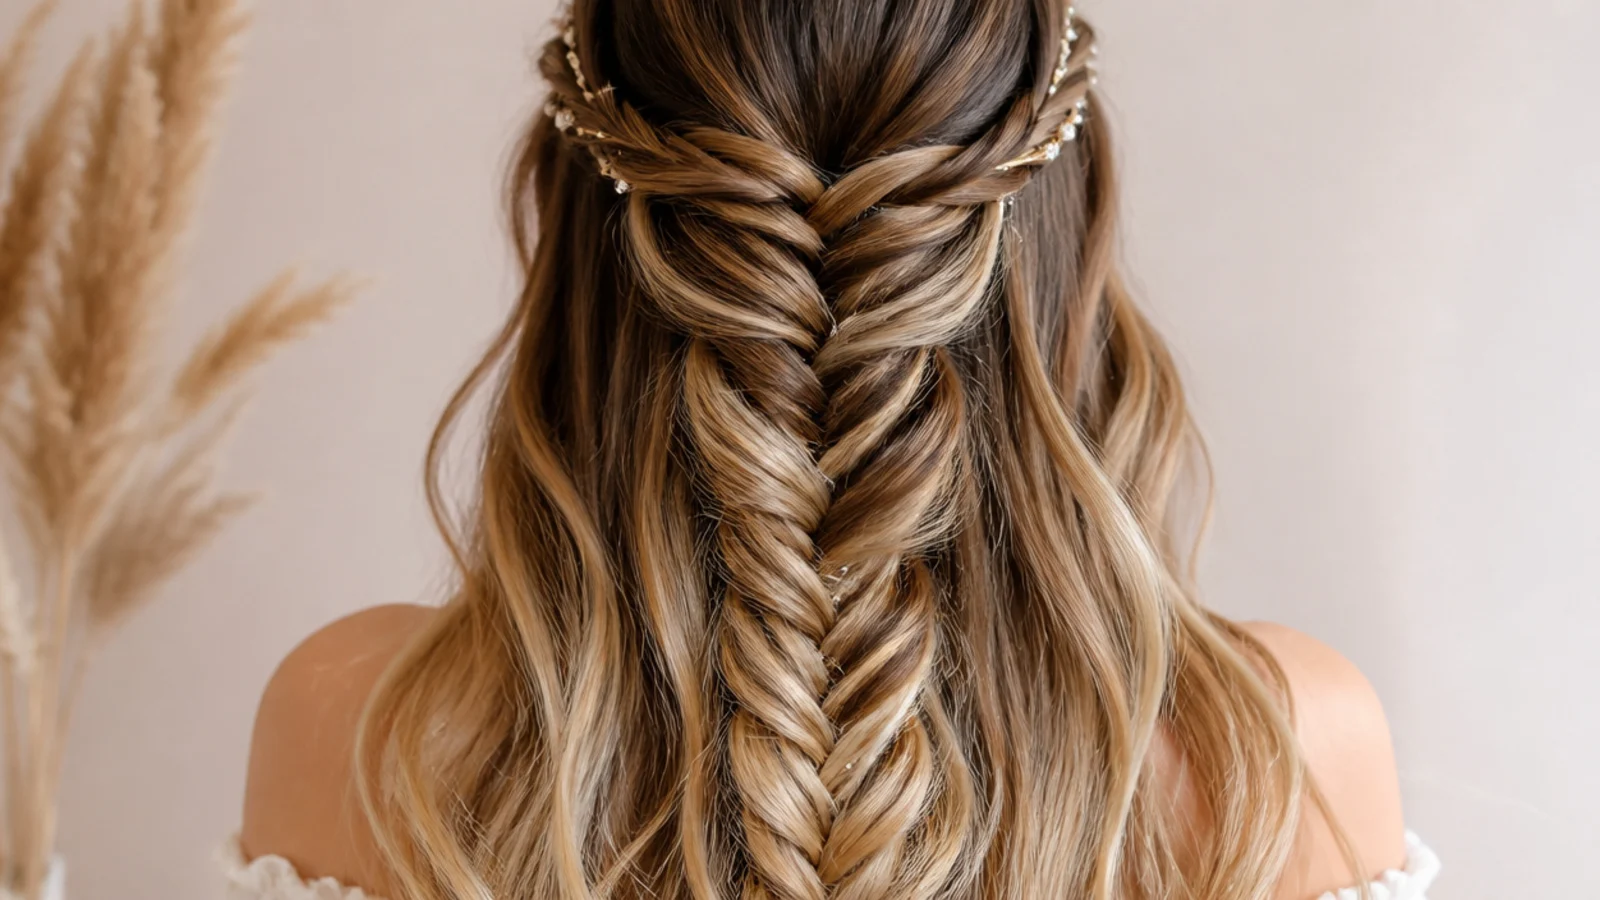
Balayage is the ideal color for a fishtail because the alternating crossovers separate light and dark strands into a visible ribbon pattern, and the waterfall drops carry the lighter mid-lengths down through the darker top row. Nothing extra to do: just braid, then pancake, and let the color do the work. It photographs best in daylight, where the contrast between the root shade and the ends actually reads. About 18 minutes.
Who it suits: Balayage, ombre and highlighted hair of any base color.
Tip: Start the fishtail with the two sections split by shade, lighter left and darker right, for sharper stripes.
19. Waterfall Mermaid Braid With Face-Framing Tendrils
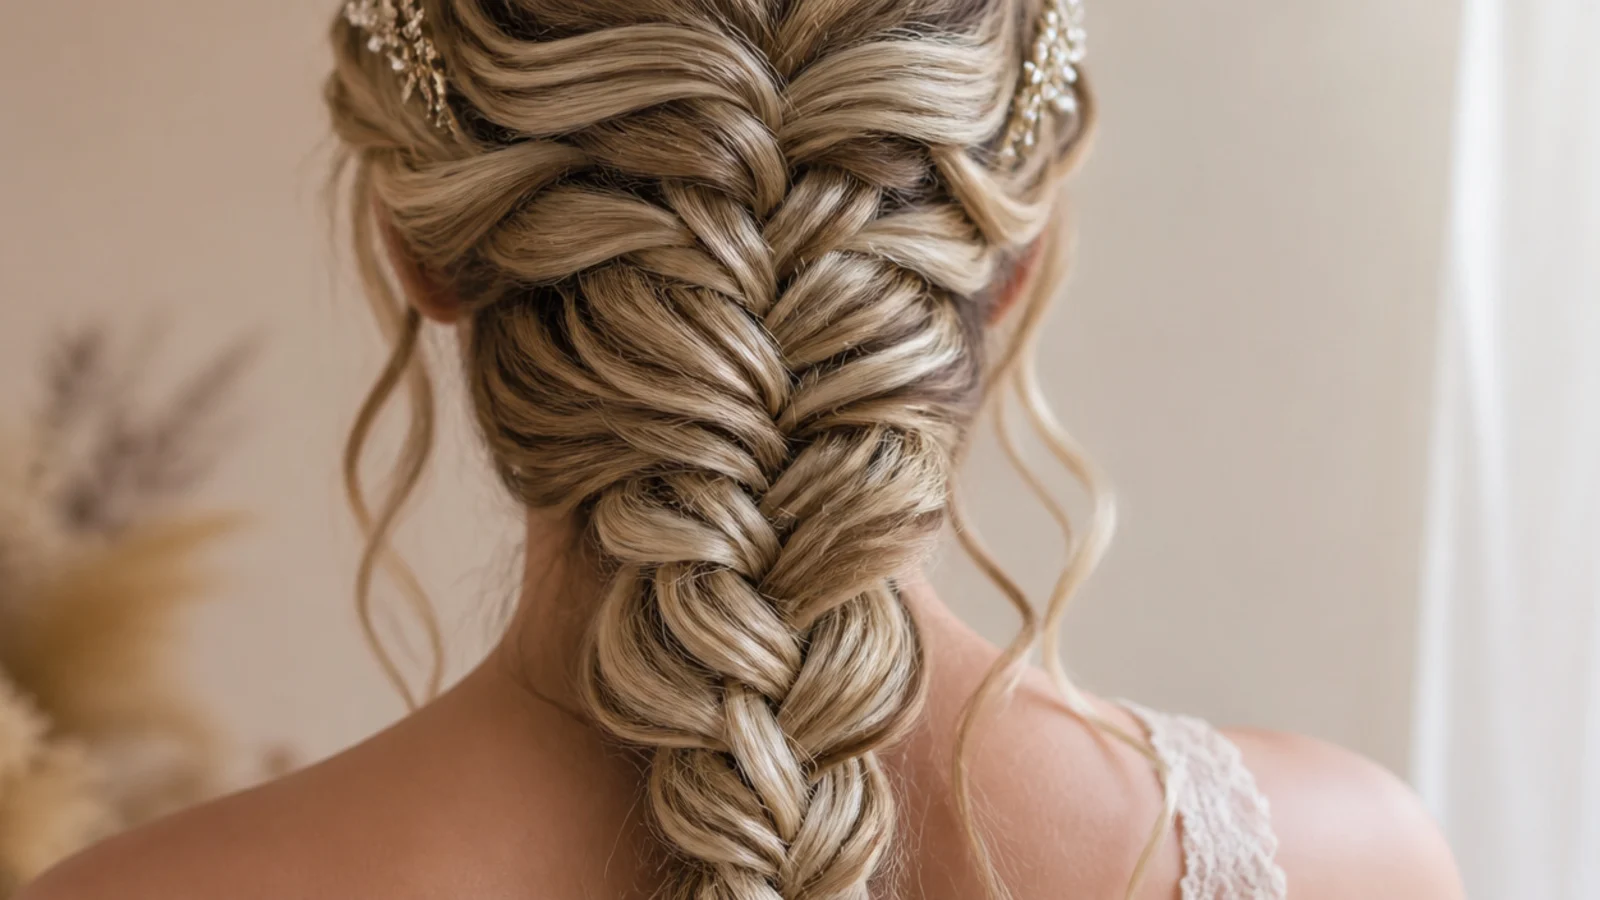
Pull two half-inch pieces free at the temples before you start braiding, so they stay soft instead of being yanked out of a finished braid, and curl them with a 1 inch iron at the end. Those two pieces are what stop a braided style from reading severe in photographs, and they cost 30 seconds. Anything wider than half an inch stops looking like a tendril and starts looking like you missed a section.
Who it suits: Softening strong jawlines and high foreheads.
Tip: Curl the tendrils away from the face so they frame instead of falling across the cheek.
20. Sleep-In Waterfall Mermaid Braid for Next-Day Waves
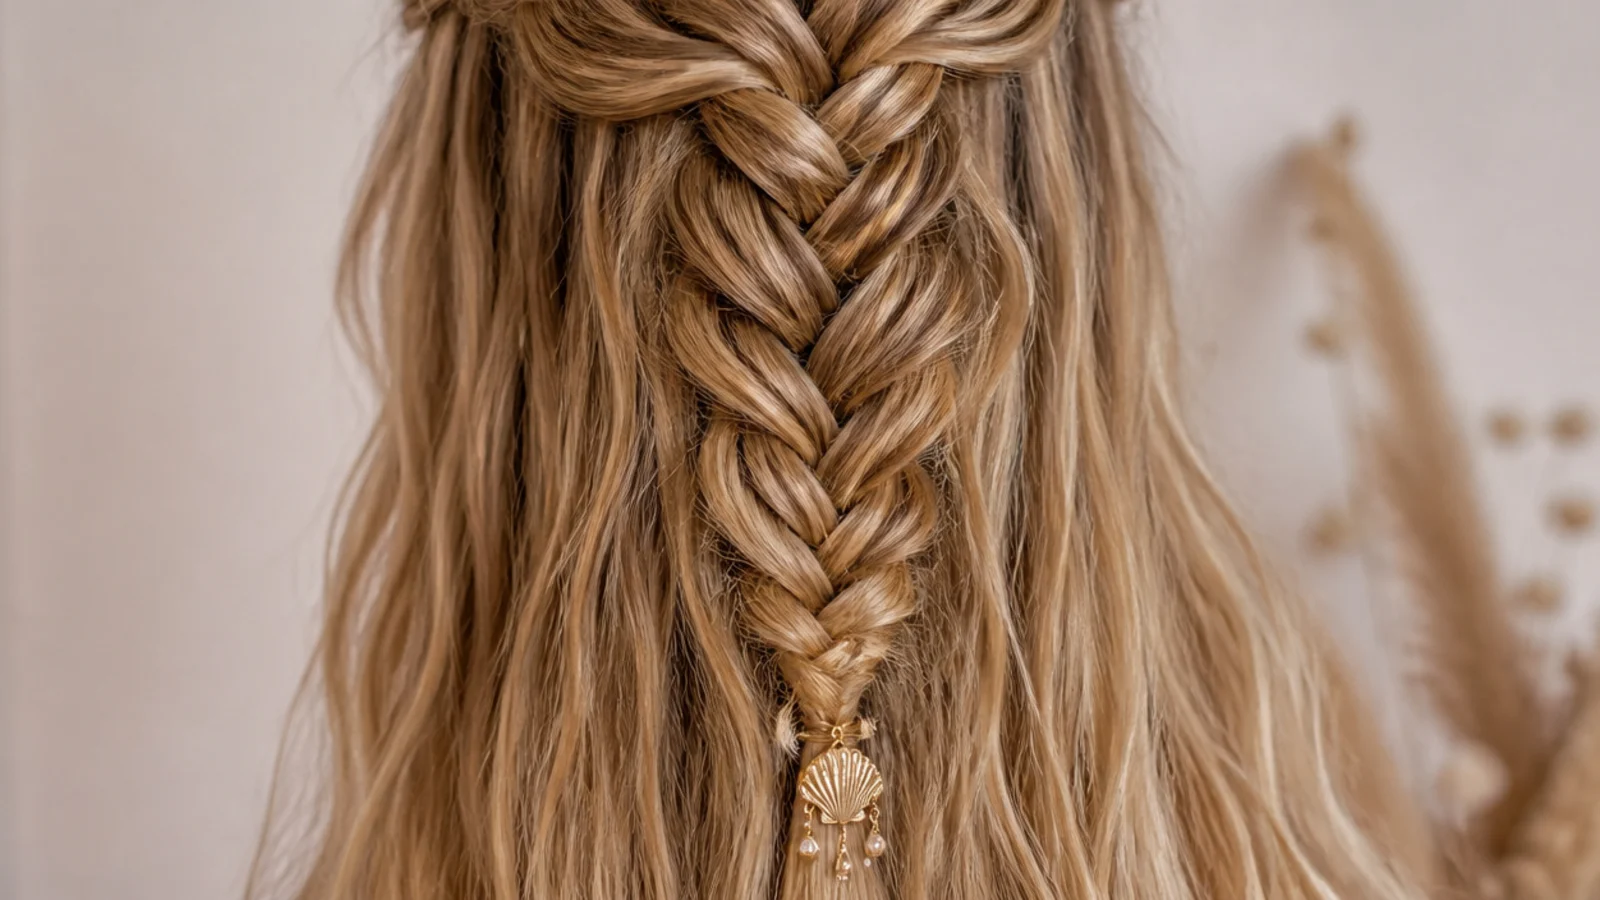
Braid the whole thing loosely on damp, not wet, hair before bed, skip the pancaking, and sleep on a satin pillowcase. In the morning the fishtail gives you fine crimped waves and the waterfall drops give looser bends through the top layers, which is the heatless version of mermaid hair. Take it out with fingers, never a brush. Five minutes at night, two in the morning. Compare heatless methods in heatless curl tools compared.
Who it suits: Anyone avoiding heat, and second-day hair rescue.
Tip: Damp, not soaking; hair that is still wet at 2am will still be damp and wave-free at 7am.
What Is a Waterfall Mermaid Braid?
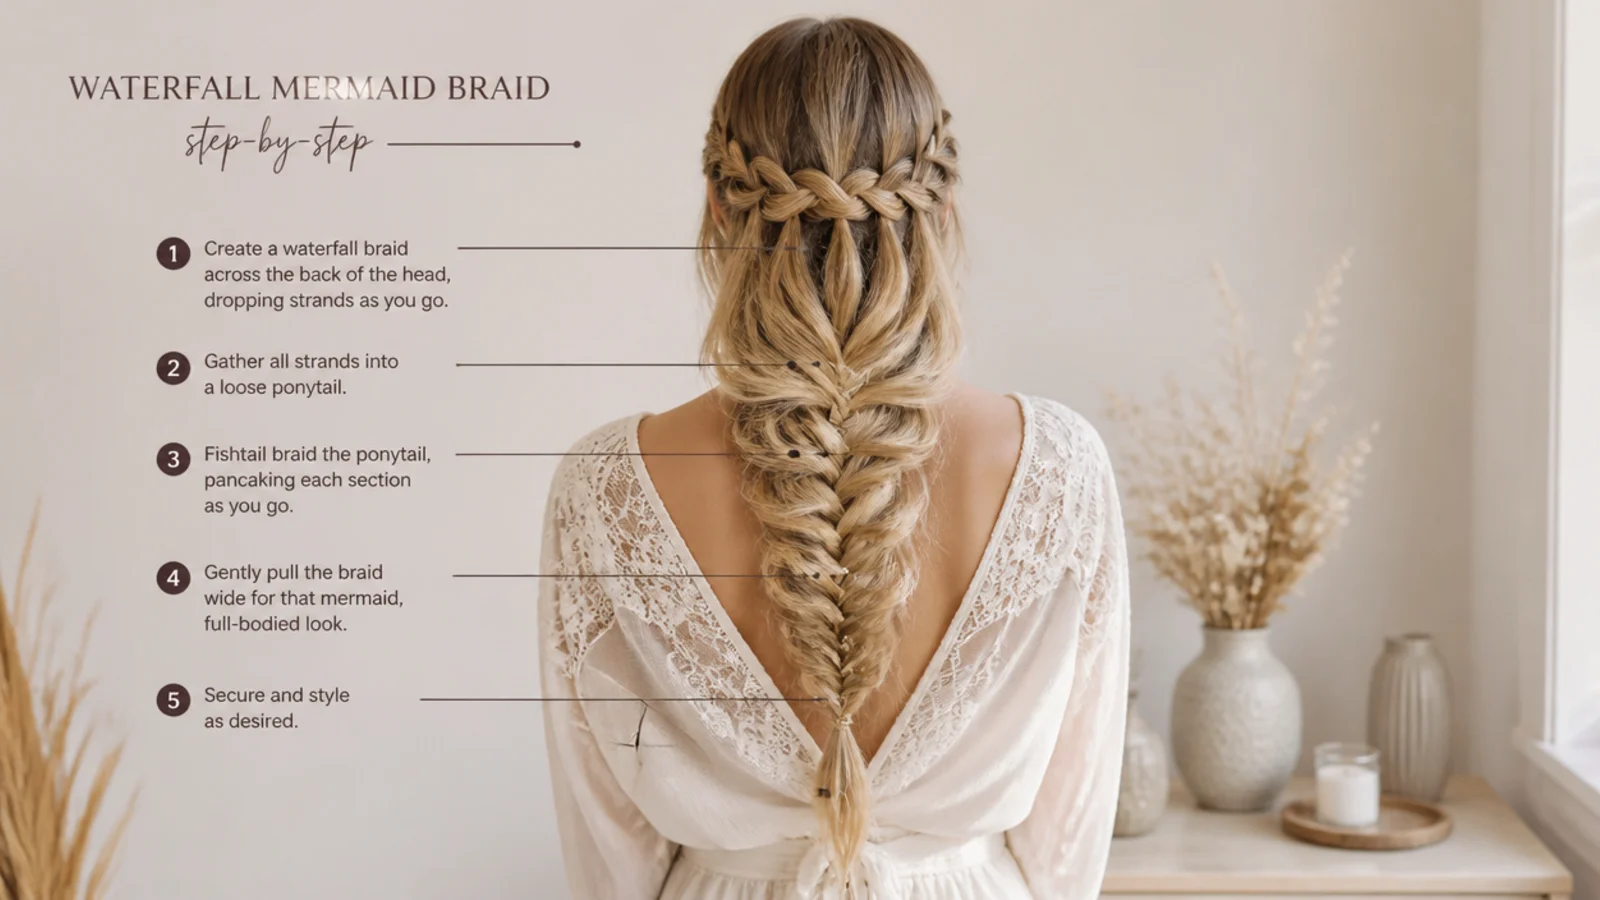
A waterfall mermaid braid is two separate braids joined in the middle of the head. The waterfall is the top half: a three-strand braid worked horizontally across the crown where, at every pass, you let the top strand fall out of the braid instead of carrying it along, and replace it with a fresh section picked up from above. Those fallen strands are the waterfall. The mermaid braid is the bottom half, and it is a fishtail that has been pancaked, meaning you tug the outer edge of each crossover outward so the braid fans wide like a tail instead of hanging as a narrow rope. The dropped strands from the waterfall get gathered up and braided into that fishtail, which is what visually connects the two halves. Nothing about it requires salon skill, but it does require sequencing: waterfall first, gather second, fishtail third, pancake last. Pancaking before you tie off simply undoes itself. The full family of related styles lives in the mermaid braids hub.
Waterfall Braid vs Waterfall Twist vs Criss-Cross: Which Mechanic to Use
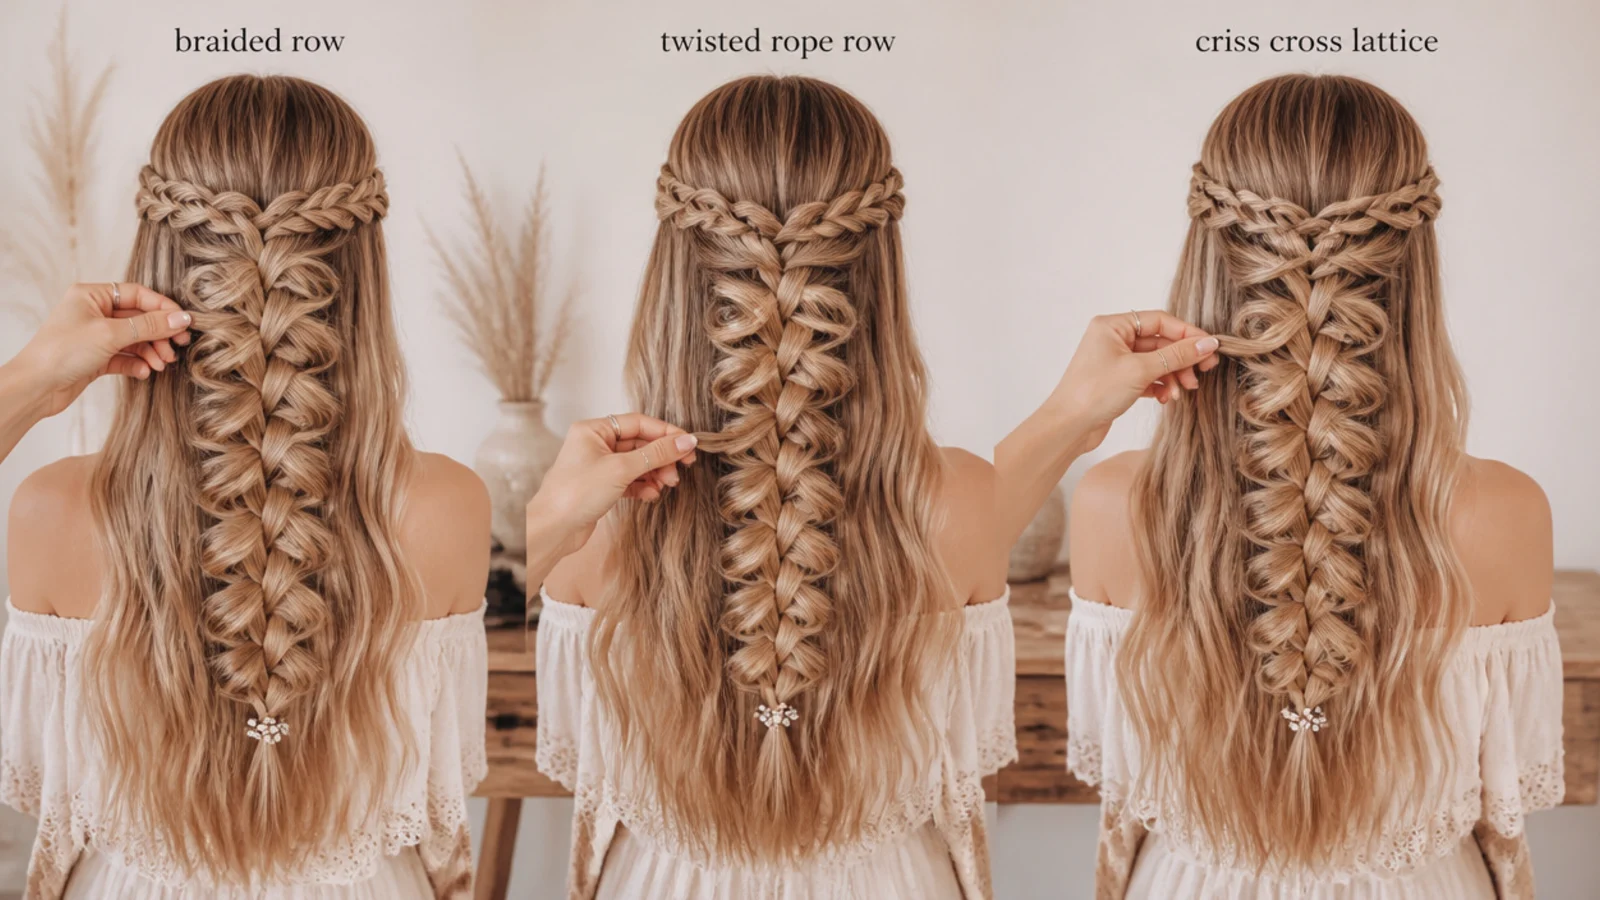
Almost every waterfall mermaid tutorial online is one of three different things wearing the same name, and nobody labels which. A waterfall braid drops strands out of a running three-strand plait, so the top row shows visible woven texture and grips fine hair well. A waterfall twist drops strands out of a two-section rope twist, which takes a quarter of the time and looks smoother, but slides loose unless you pin it every second twist. A criss-cross runs two waterfall rows from opposite directions so the drops from one row fall through the other, creating a lattice across the back that needs about 30 minutes and a second mirror. If you have never done any of them, start with the twist, because a single crossing point is far easier to control on your own head than three moving strands. Move to the braided version once the handoff into the fishtail feels automatic. Save the criss-cross for when someone else is doing your hair. The comparison table above lays the first two side by side.
How to Pancake a Waterfall Mermaid Braid So It Fans Out
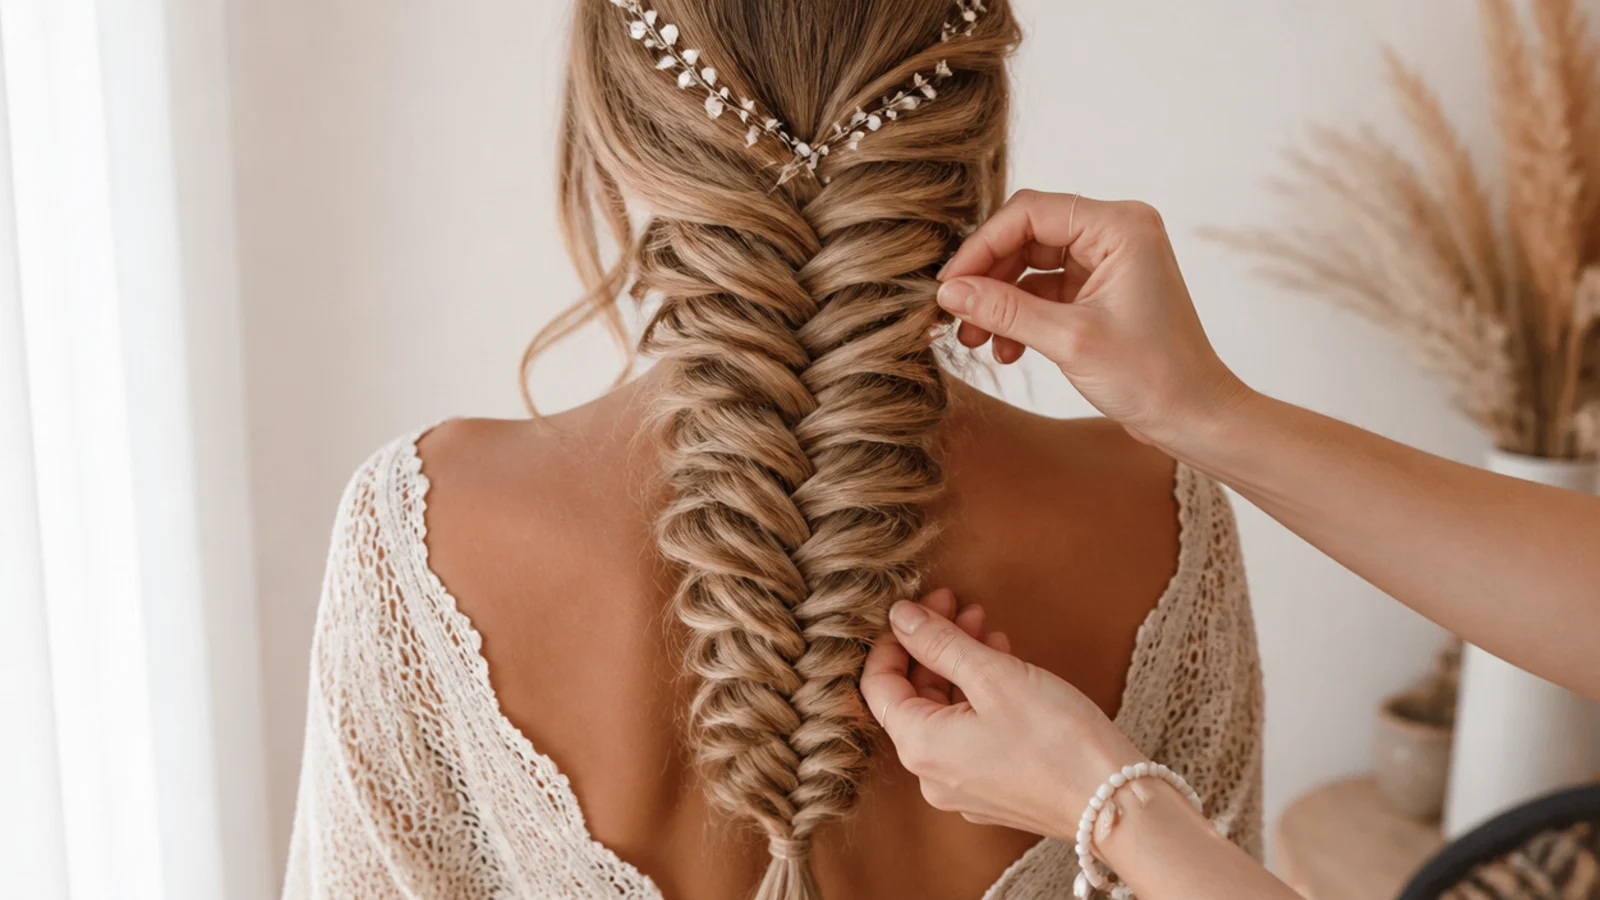
Pancaking is the single step that turns a fishtail into a mermaid braid, and it is where most attempts go wrong. Tie the braid off first with a clear elastic, then start at the very bottom, next to the elastic, and work upward. Pinch the outer edge of one crossover between your thumb and forefinger and pull it sideways a few millimeters, then move to the crossover above it and repeat. Do not grab a whole segment and yank, and do not pull from the near side of the braid only, or the whole plait rotates as it widens. Two full passes up the braid usually doubles the width. Braid tighter than feels comfortable in the first place, because a loose fishtail has no structure left to hold the fan open once you spread it, while a tight one holds its new shape. If the braid starts collapsing, mist it with a light hairspray at the halfway point and finish the second pass over the top. On curly hair, skip most of this: curls fan on their own and tugging creates frizz.
Waterfall Mermaid Braids on Fine or Slippery Hair
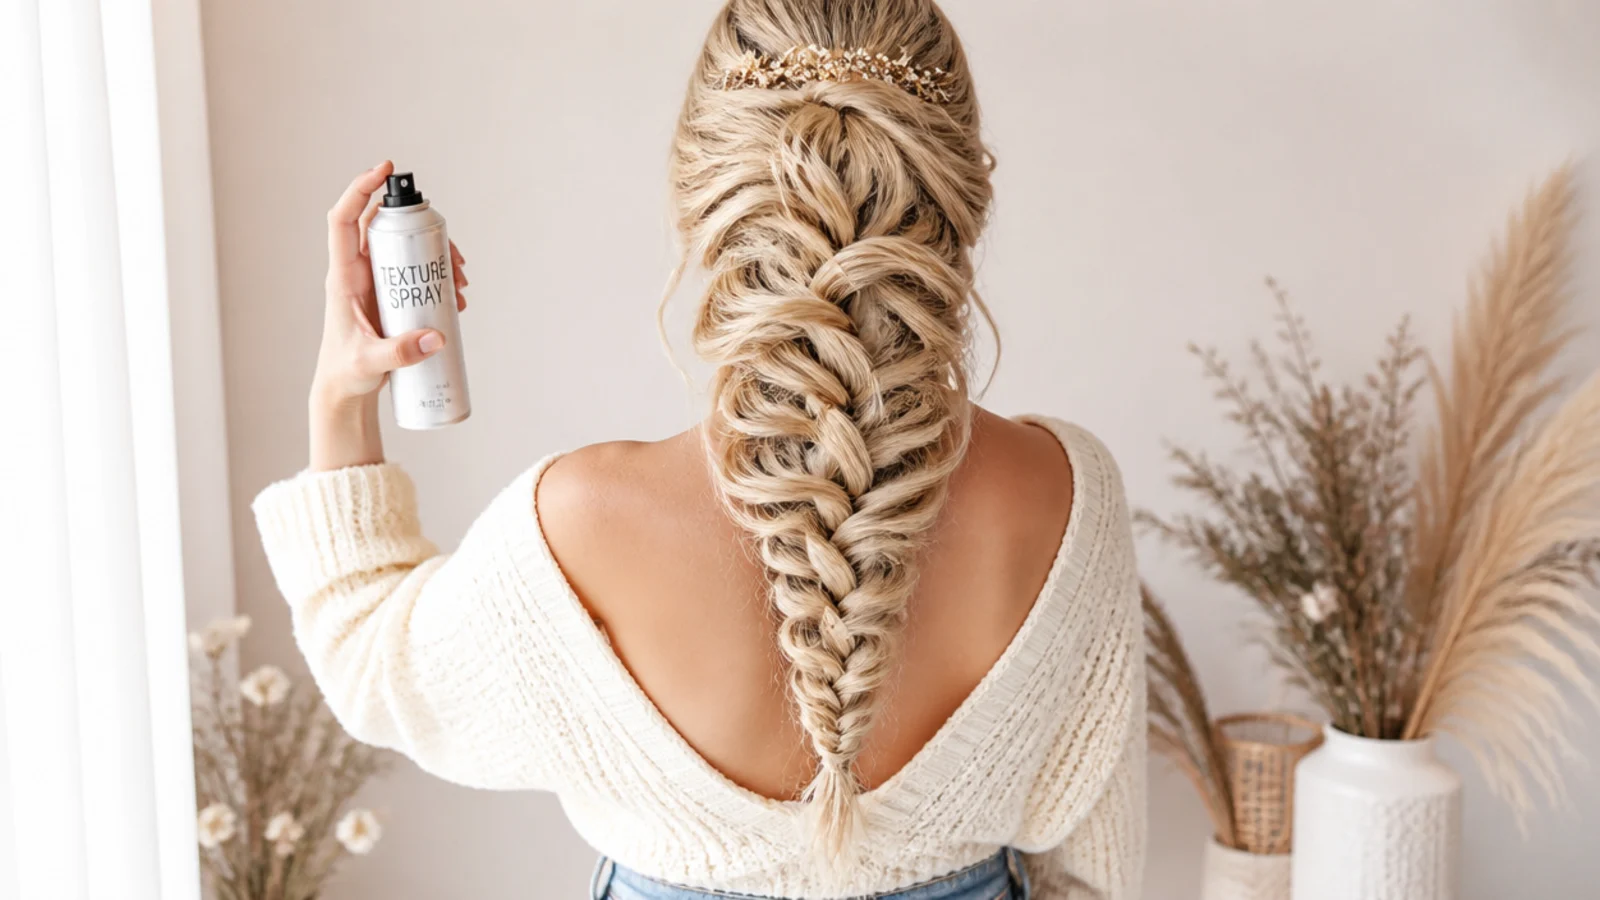
Fine or freshly washed hair slips, and the waterfall is the part that fails first, because every dropped strand is one less thing anchoring the row. Three fixes handle almost all of it. First, braid on day-two hair; the natural oil and the slight grit left from yesterday give the strands something to hold on to, and a braid that lasted two hours on clean hair will last most of a day on day-two hair. Second, if you have to work on clean hair, mist a texture or sea salt spray through the mid lengths and shake it in with your fingers before you part anything. Third, make your dropped sections narrower rather than wider, since a thin drop has proportionally more contact with the braid holding it. Then over-pancake the fishtail, because on fine hair the fanned width is the entire illusion of thickness. A little backcombing at the base of the fishtail keeps the top of the braid as wide as the bottom. Product-free routines for fine textures are in how to style short fine hair.
Waterfall Mermaid Braids by Hair Length and Thickness
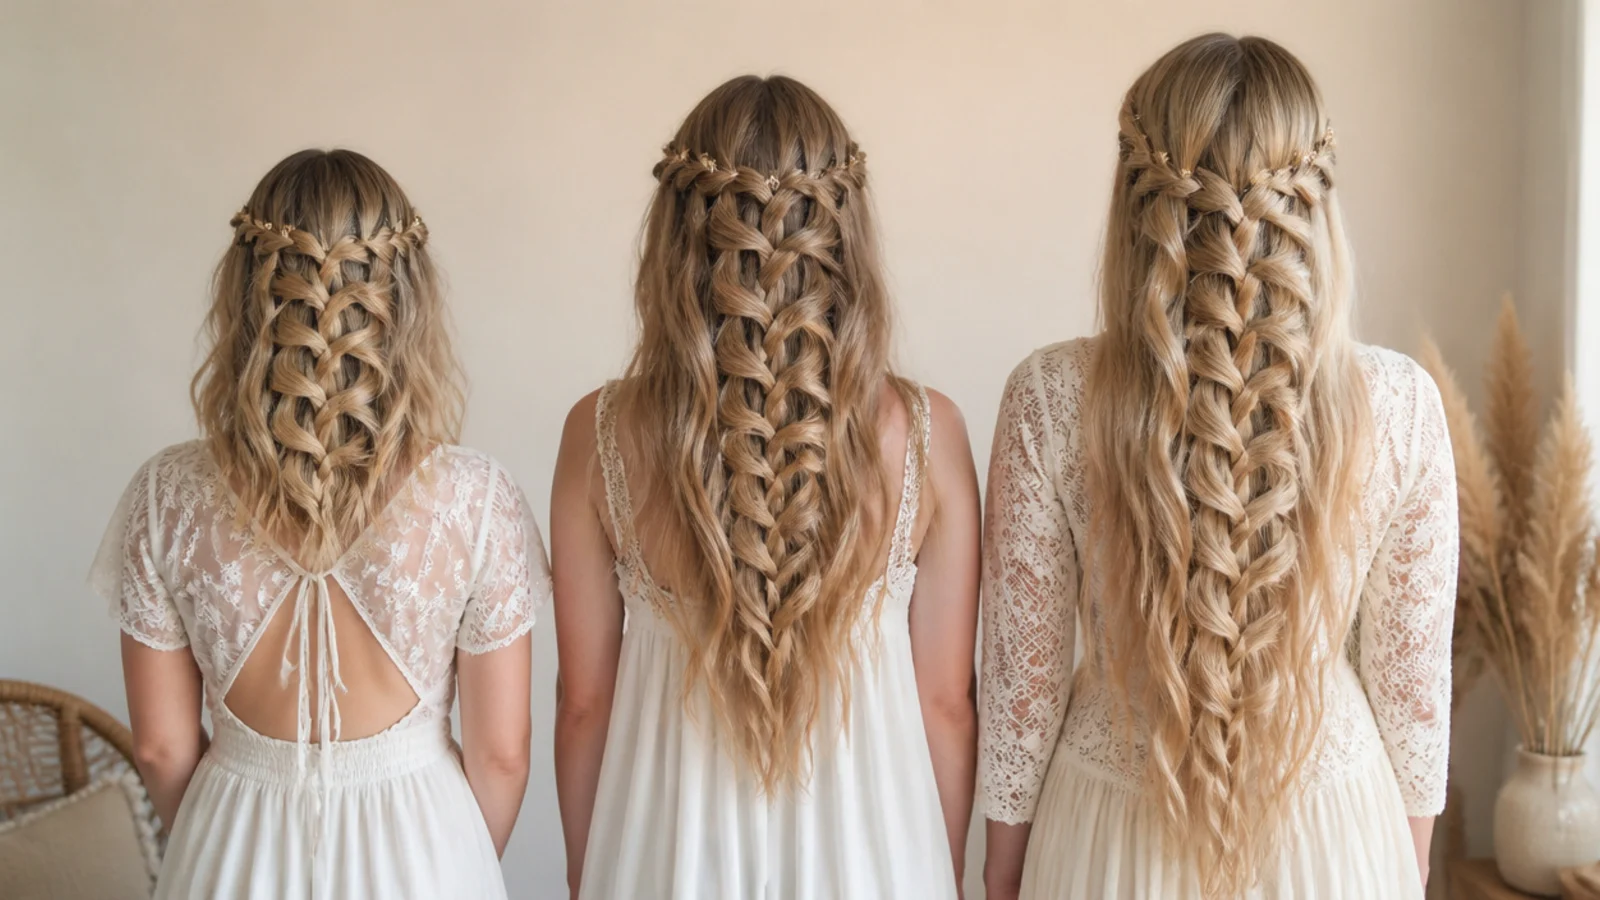
Length decides the shape of the style more than anything else. Below about 12 inches, run a short waterfall from one temple to behind the ear only and accept a stubby fishtail, pancaked hard so width does the work length cannot. At 14 to 18 inches, roughly collarbone to mid-back, everything works: full arcs, half-up versions, crowns, and a fishtail long enough to fan properly. Past 20 inches the braid gets heavy, so anchor the waterfall row with two bobby pins where it meets the fishtail, or the weight of the tail drags the drops out of the top row over a few hours. Thickness changes the drop size rather than the plan: thick hair takes drops around three quarters of an inch so the waterfall stays visible against a dense background, while fine hair needs half-inch drops for grip. Heavily layered hair is the one genuine problem, since short layers escape the drops as flyaways; braid it on day-two hair with a little cream through the top row. Length-specific detail is in long mermaid braids.
Making a Waterfall Mermaid Braid Last All Day and Overnight
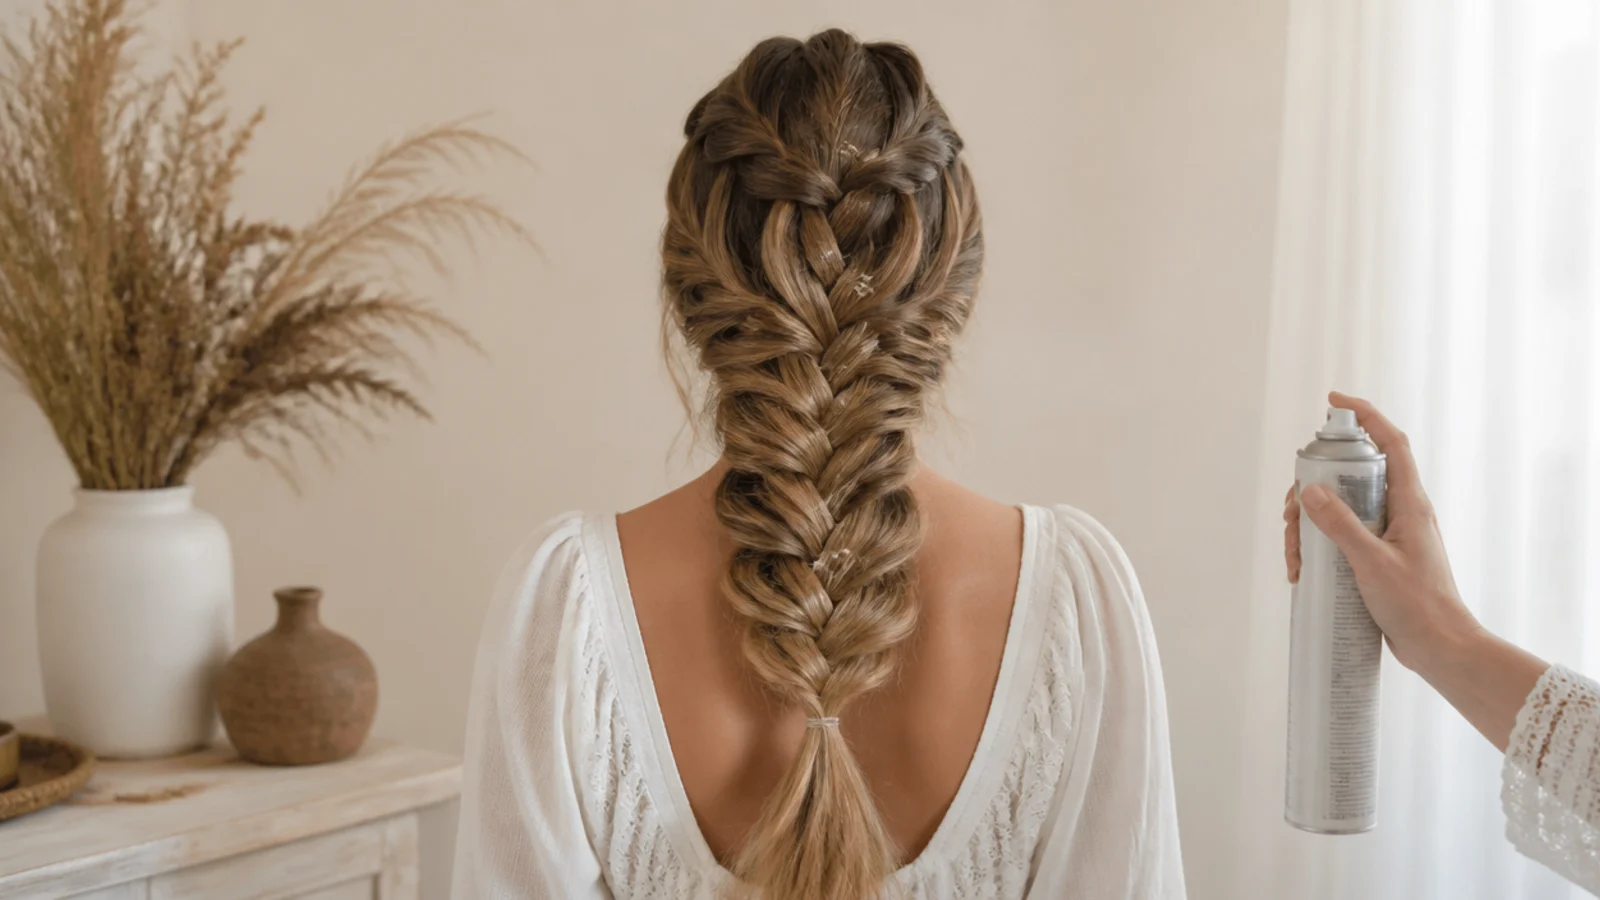
A well-built waterfall mermaid braid holds six to ten hours, and the failure points are predictable. Use a clear elastic rather than a colored one, because it disappears in photos and, more usefully, it is thin enough to sit inside a pancaked braid without creating a visible pinch. Anchor the point where the waterfall hands off to the fishtail with two crossed bobby pins; that junction carries all the weight and it is where the style unravels first. Finish with a flexible-hold spray held about 10 inches away, one light pass, since a stiff cast will crack and flake when the braid moves. For a second day, do not take it down at all: sleep in it loosely braided on a satin pillowcase and you wake up with fine crimped waves through the fishtail section and soft bends through the waterfall drops, which is the easiest heatless texture there is. Take it out with your fingers rather than a brush, since brushing separates the wave pattern into frizz. More all-day tactics in cute hairstyles that last all day.
Frequently Asked Questions
What is a waterfall mermaid braid?
It is a waterfall braid across the top of the head feeding into a mermaid braid at the back. In the waterfall, you drop one strand out of the braid at every pass and let it fall loose. Those dropped strands are then gathered and braided into a fishtail, which gets pancaked wide so it fans out like a mermaid tail.
How do you do a waterfall mermaid braid step by step?
Start a three-strand braid at one temple. Each time the top strand crosses to the middle, drop it and pick up a fresh section from above to replace it. Continue in an arc to the opposite side, about 8 to 10 drops. Gather everything including the dropped strands, fishtail it, secure with a clear elastic, then pancake from the bottom up.
What is the difference between a waterfall braid and a mermaid braid?
A waterfall braid is defined by what leaves it: strands are deliberately dropped so hair falls through the braid in gaps. A mermaid braid is defined by its width: it is a fishtail pancaked wide so it fans like a tail. A waterfall mermaid braid stacks the two, with the waterfall on top and the mermaid section below.
How long does a waterfall mermaid braid last?
Six to ten hours on day-two hair with a clear elastic and two bobby pins at the handoff point. On freshly washed hair without texture spray, expect the dropped strands to start pulling free within two or three hours. Sleeping in it loosely extends it into next-day waves rather than a next-day braid.
Do you need long hair for a waterfall mermaid braid?
Not as long as most tutorials assume. Around 12 inches, roughly collarbone length, is enough for a short waterfall row and a stubby pancaked fishtail. Mid-back hair at 16 to 18 inches is the sweet spot. Past 20 inches the tail gets heavy enough to drag the waterfall row loose unless you pin the junction.
How do you pancake a mermaid braid without it falling apart?
Braid tighter than feels comfortable, tie it off first, then tug the outer edge of each crossover a few millimeters at a time starting at the elastic and working upward. Never grab a whole segment and pull. If it loosens halfway, mist a light hairspray and do a second gentler pass over the top.
Can you do a waterfall mermaid braid on yourself?
Yes, though the back quarter is the hard part because you cannot see it. The easiest self-done version is waterfall twists into a mermaid braid, since a two-section twist has one crossing point to control instead of three strands. Working over one shoulder with a side-swept version also keeps everything in the mirror.
Why does my waterfall braid keep slipping out?
Usually because the hair is too clean, or the dropped sections are too thick. Freshly washed hair has nothing to grip, so use day-two hair or mist texture spray first. Then narrow the drops to about a half inch, since a thin drop has proportionally more contact with the braid holding it in place.
What should I use to secure a waterfall mermaid braid?
A clear elastic at the end, because it disappears in photos and is thin enough to sit inside a pancaked braid without pinching it. Add two crossed bobby pins where the waterfall meets the fishtail, since that junction carries the weight of the whole tail and is the first place the style comes undone.
Which mermaid braids look are you saving?
Every one of these 20 waterfall mermaid braids comes down to the same two decisions: how big you make the dropped sections, and how patiently you pancake the fishtail at the end. Keep the drops narrow, around a pencil width, so the waterfall stays lacy and the mermaid braid has enough hair to fan. Then tug the outer edge of each crossover a few millimeters at a time, working from the bottom up, until the braid reads twice as wide as it did when you tied it off. Spray texture on clean hair first, use a clear elastic so nothing shows in photos, and sleep in it loosely for waves the next morning. Start with the classic version in mermaid braids, or browse the rest of the mermaid braids hub.