Quick Comparison
| Short Hair Sketch | Long Hair Sketch | |
|---|---|---|
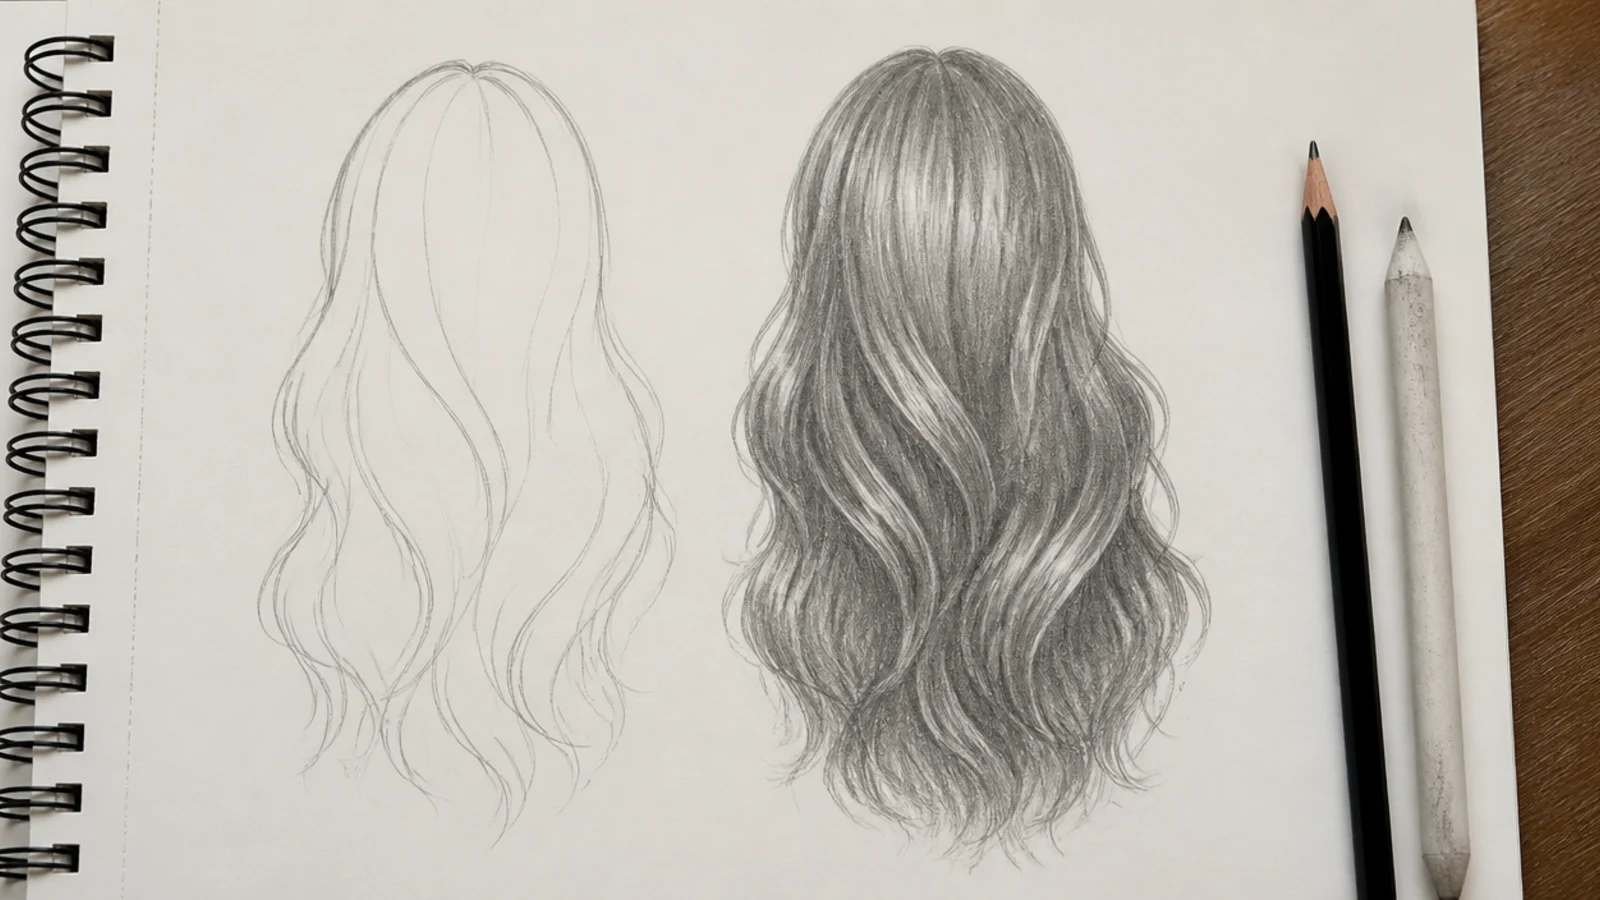
| Where the shape is decided | In the silhouette, in the first 30 seconds | In the flow lines, built up over several passes |
| Room for error | Almost none; the whole mass is visible | High; mistakes get buried under later strands |
| Main flow direction | Outward from the crown in every direction | Down and across, gravity dominated |
| Typical time per sketch | 8 to 20 minutes | 25 to 60 minutes |
| Pencil doing the most work | HB and 2B for tone, 6B only in small pockets | 4B and 6B across long shadow channels |
| Most common failure | Helmet effect from an unbroken outer edge | Spaghetti effect from parallel repeated lines |
| Number of strands to draw | 20 to 40 deliberate flicks, mostly at the edges | 60 plus, grouped into 5 or 6 major sections |
| Hardest angle | The back of the head and the nape taper | Hair in motion and wind-blown ends |
| Best first practice cut | Pixie at three-quarter view | Straight center-parted hair, front view |
1. Pixie Cut Short Hair Sketch, Three-Quarter View
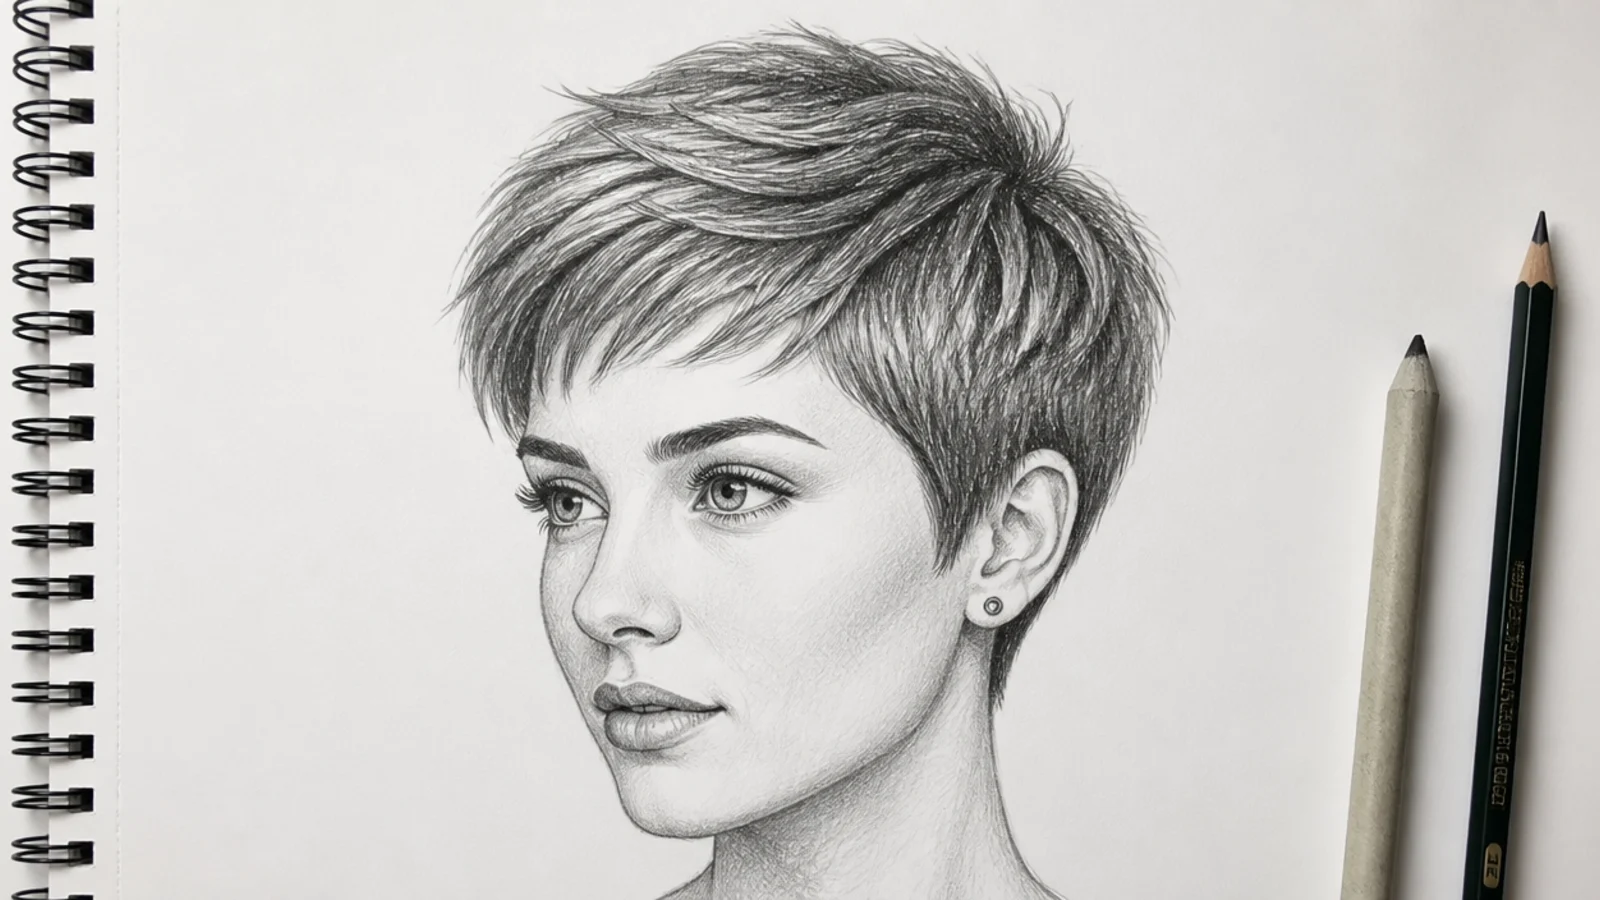
Block the pixie as a soft wedge that sits about 1 inch above the skull at the crown and shrinks to almost nothing at the nape. Draw the skull circle first in 2H so you can see how much air the hair adds, then commit the outer silhouette in HB. The flow runs forward and slightly down from the crown, which means the fringe strands point at the eyebrow, not straight down. Finish with 6 to 8 short flicks along the outer edge so the wedge stops looking carved. Roughly 10 minutes. The same blocking order opens every drill in easy hair sketch ideas.
Who it suits: Your first short cut if you have only ever drawn long hair.
Tip: Keep the sideburn strand pointed and thin; a blunt sideburn ages the whole sketch.
2. Blunt Bob Short Hair Sketch, Front View
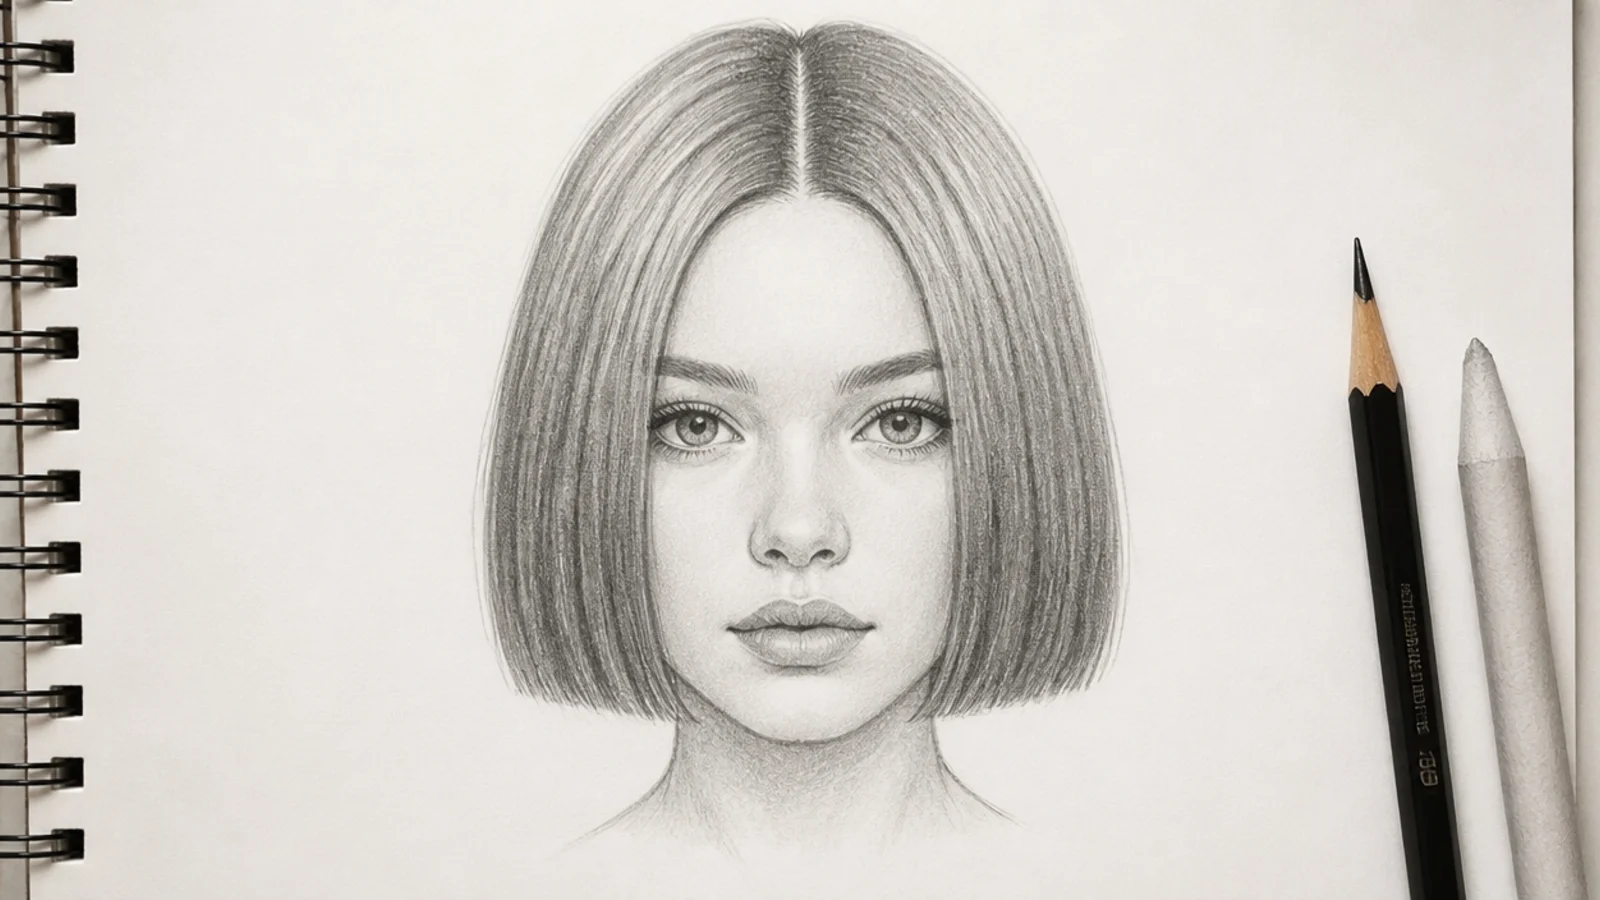
A jaw-length bob is two curved planes hanging off one crown, and the hardest part is the bottom edge. Draw it as a shallow arc, never a ruled straight line, because hair sitting on a curved head always dips slightly at the sides. Use 2H for the parting guide, then lay 2B mid tone down the inside of each panel and keep the outer third near white to suggest a shine band. The single mistake that flattens a bob is drawing both panels as identical mirror shapes. Offset one by about a quarter inch. Real bob references worth studying sit in short curtain bangs bob.
Who it suits: Portrait practice and clean line-art styles.
Tip: Cut a tiny notch out of the bottom edge every half inch so the blunt line still reads as hair.
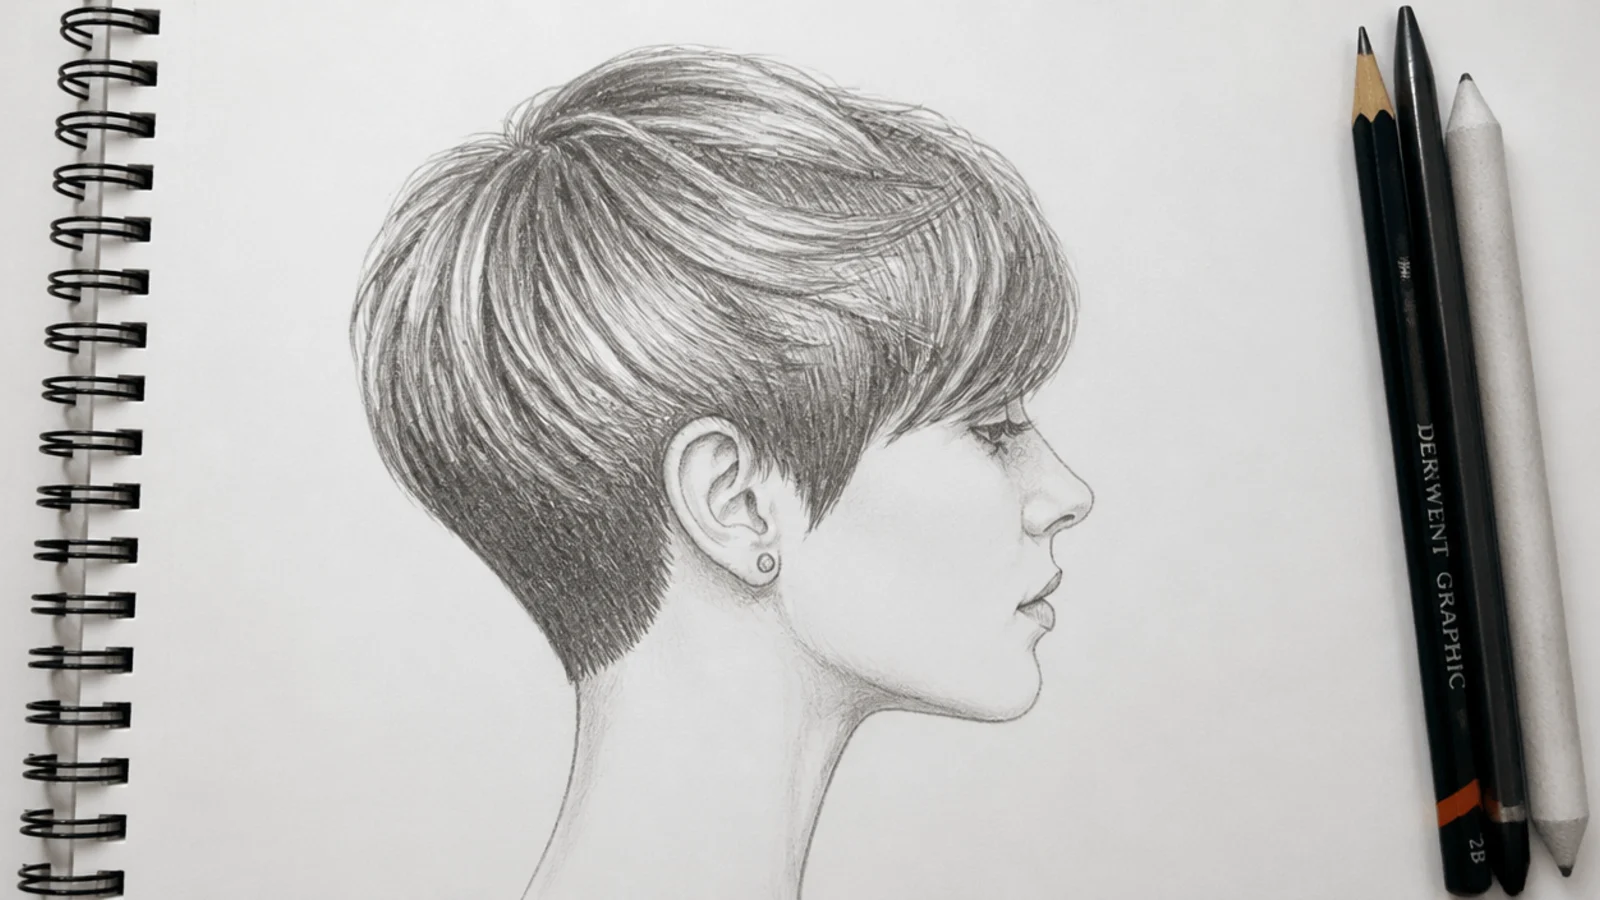
3. Side View Short Hair Sketch With a Nape Taper
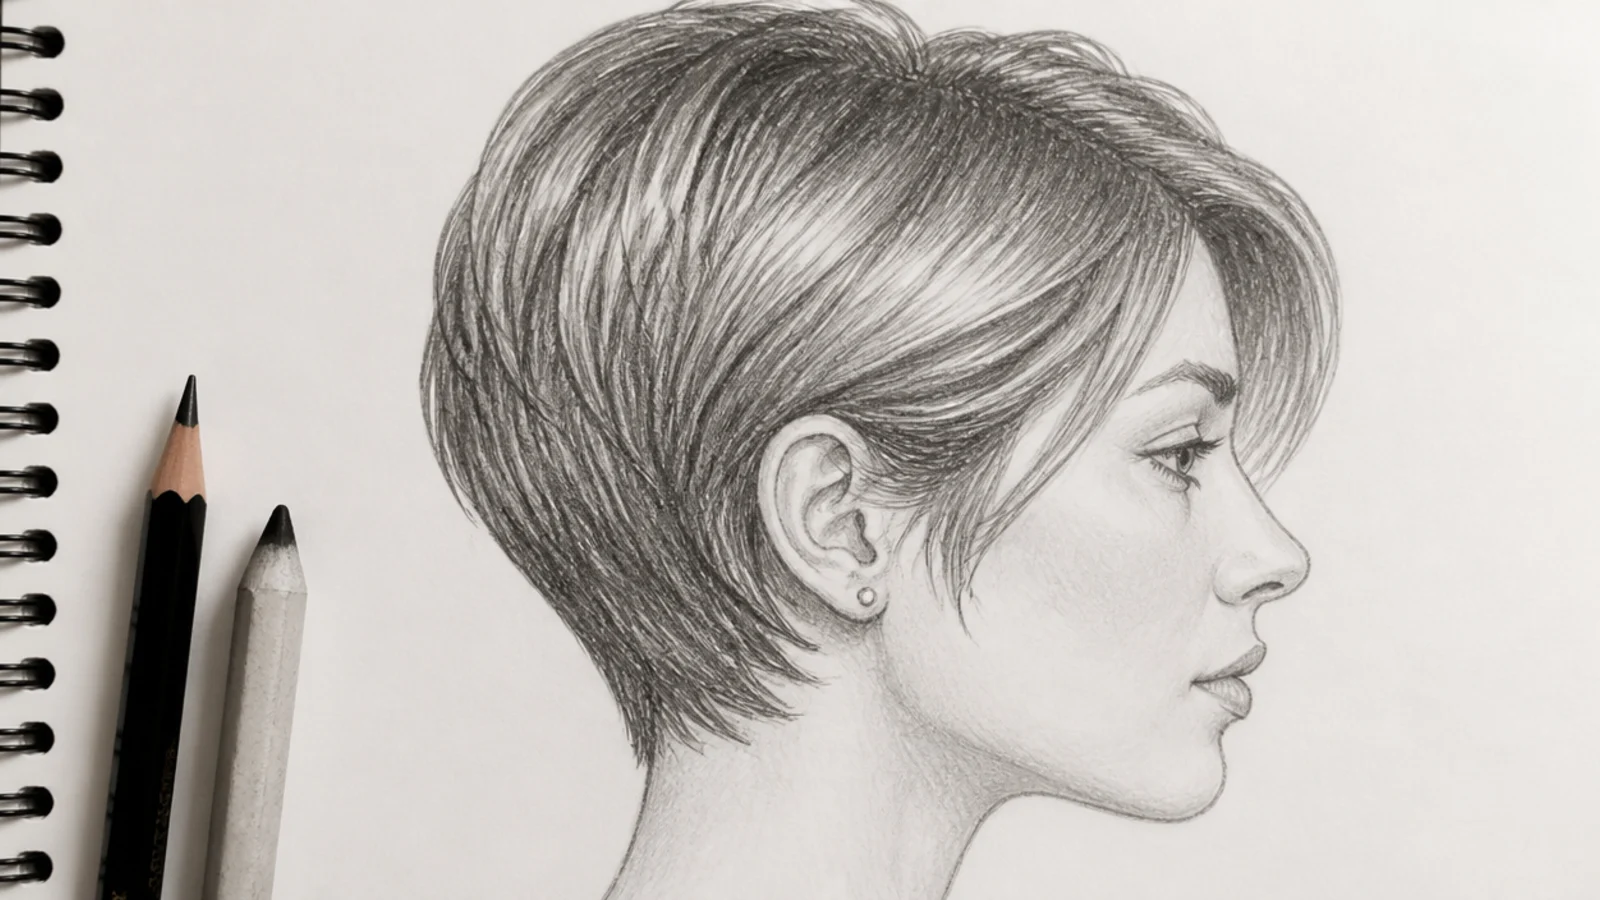
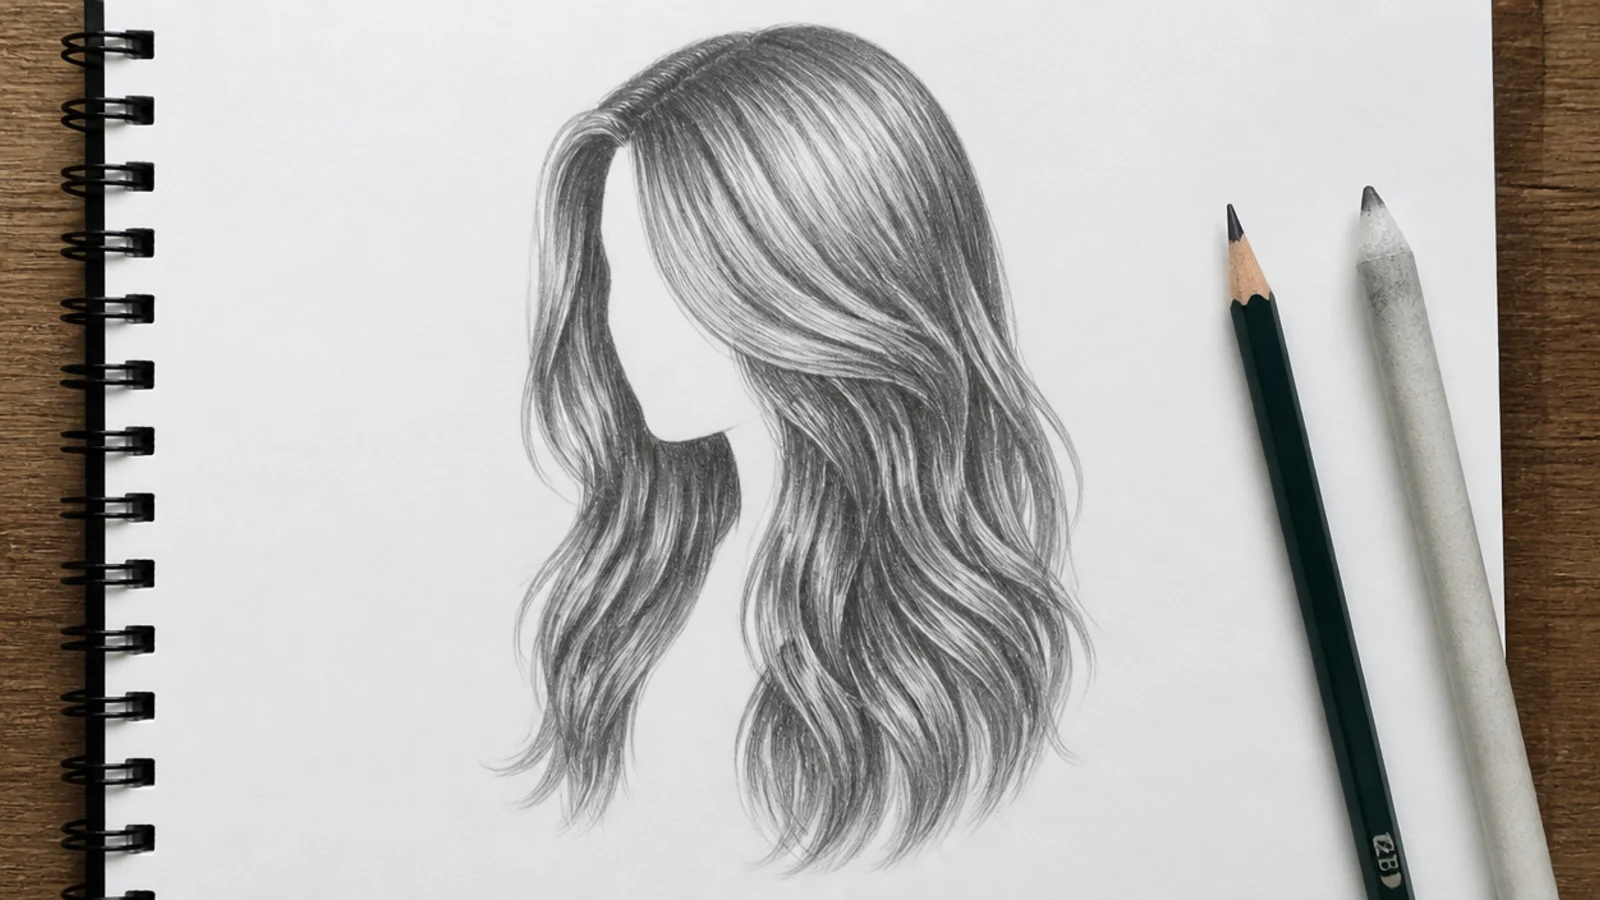
The side view is the angle most people search for and most people avoid. Draw the ear first, because the hair reads wrong the moment the ear floats. The hairline starts about half an inch in front of the ear, arcs over the skull, and the nape tapers to a thin point roughly at the base of the skull. Shade the mass behind the ear darkest with 4B, since that pocket never catches light, and keep the top plane lightest. Add strands last, always sweeping from crown to nape. The step sequence is drawn out in the hair sketch tutorial.
Who it suits: Anyone whose profiles look bald on top.
Tip: The crown sits behind the top of the ear, not above it; move it back if the head looks stretched.
4. Buzz Cut Short Hair Sketch With Stubble Texture
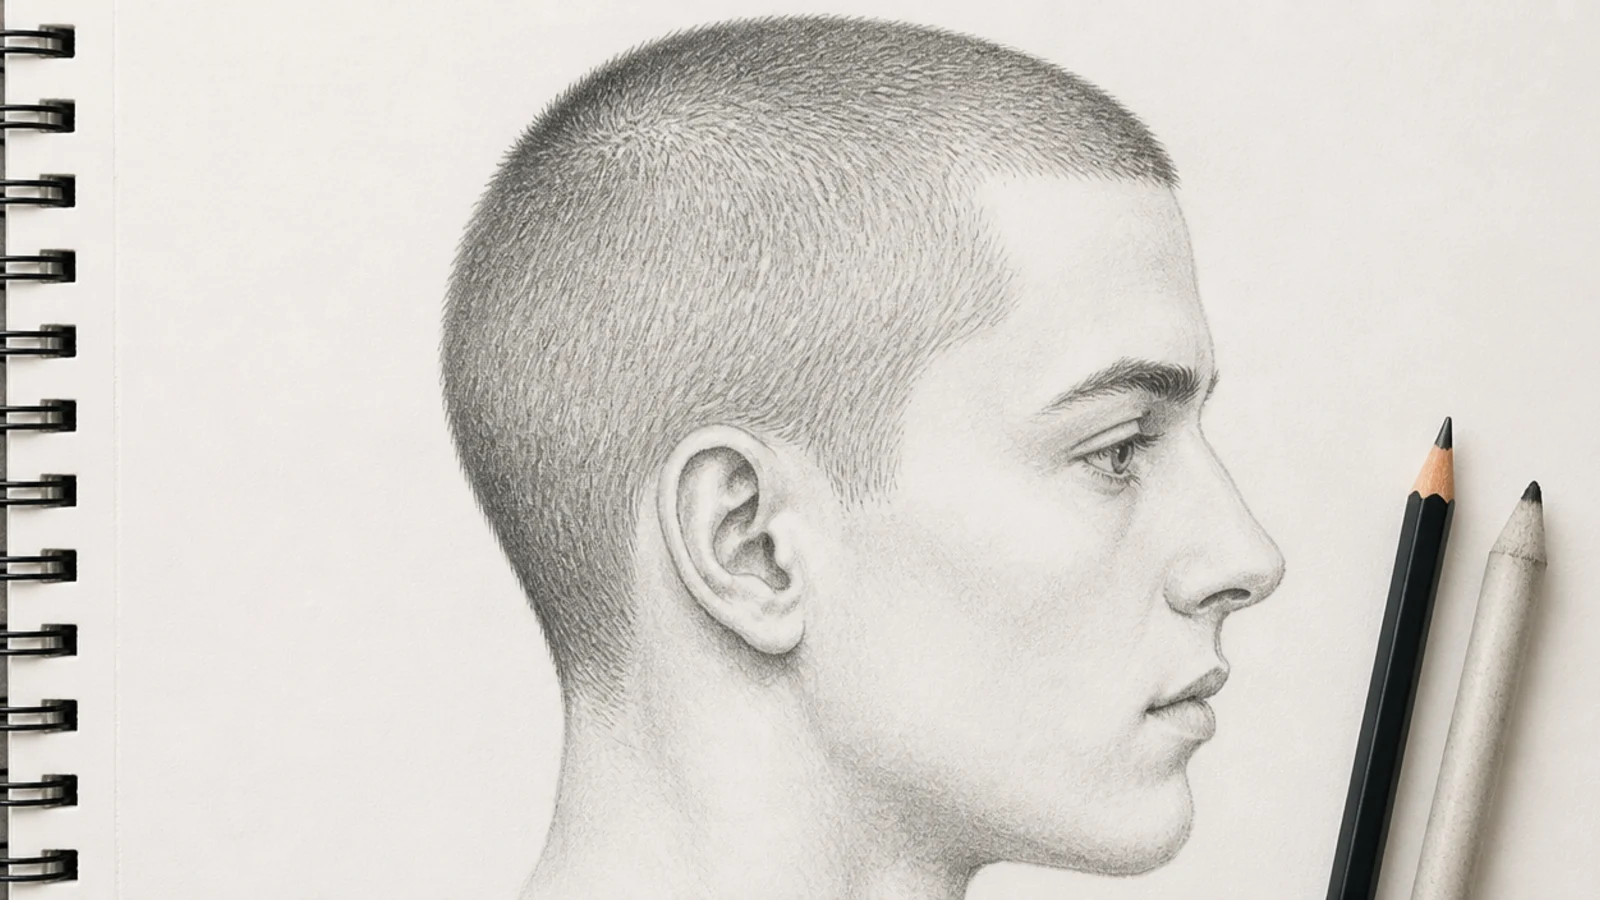
A buzz cut is not hair, it is a value on top of a skull, so the skull drawing has to be right first. Lay a flat HB tone over the whole hair area, then stipple with a sharp 2B in tiny dots that get denser at the temples and the crown swirl. Leave the top plane lighter where light lands. Never outline a buzz cut with a hard line; instead soften the silhouette by letting the stipple fade outward for about 2mm. Very short hair behaves like a carpet, rough and prickly, not like strands. More cropped male silhouettes are covered in boy hair sketch.
Who it suits: Character artists and anyone drawing male portraits.
Tip: Find the crown swirl and let the stipple spiral out from it, or the head looks shrink-wrapped.
5. Short Curly Bob Sketch With Ribbon Curls
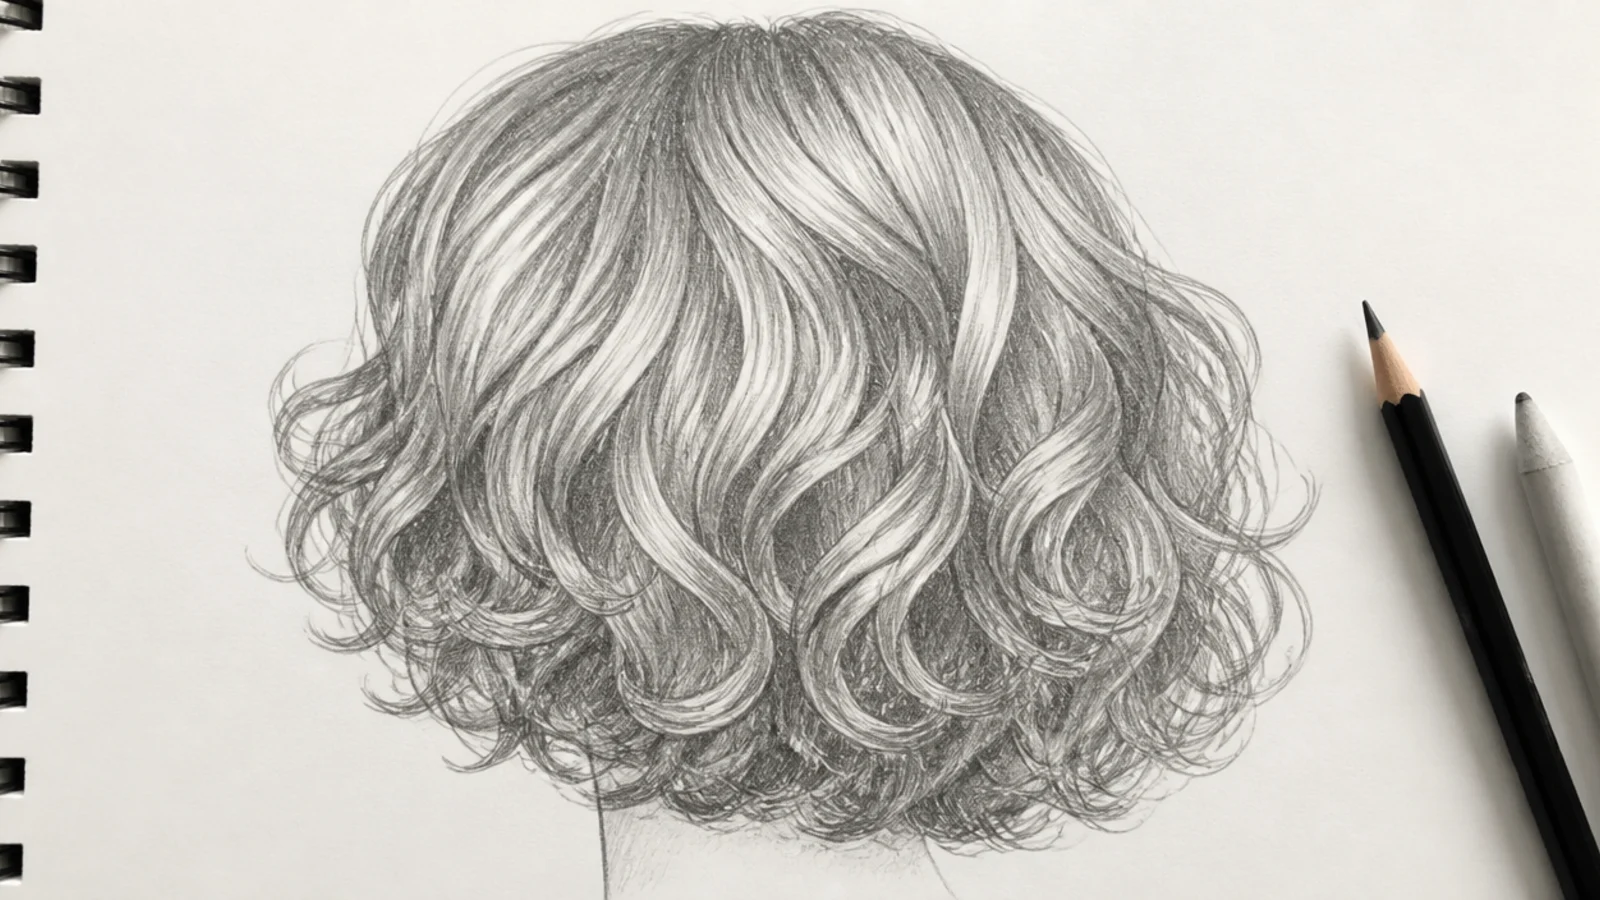
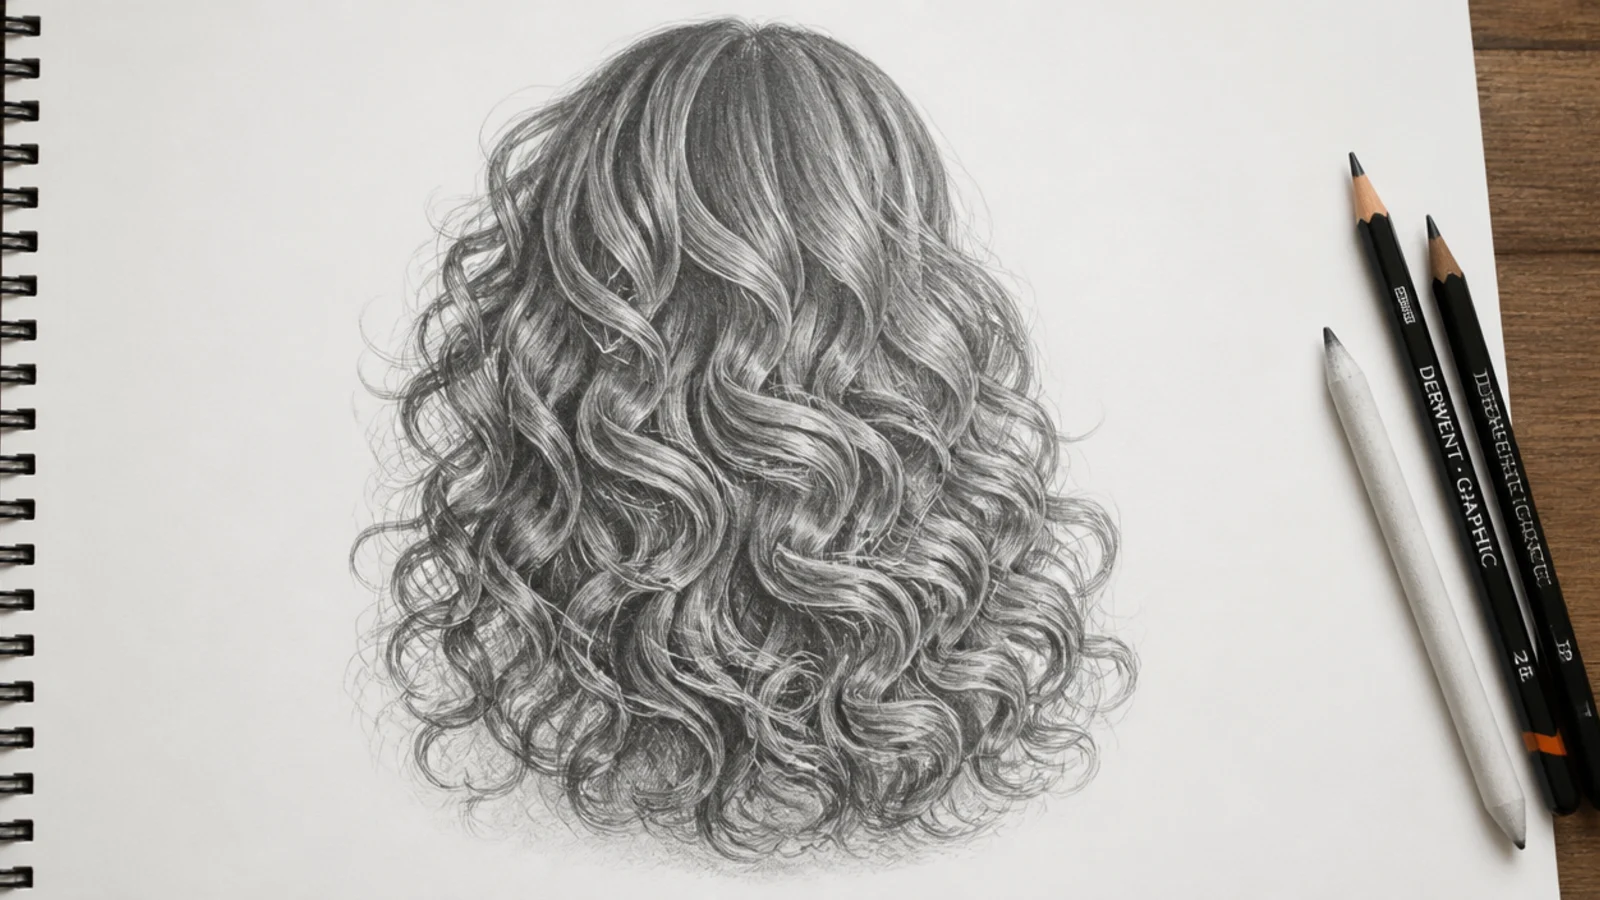
Draw each curl as a twisting ribbon, an S or a loose spiral, with light on one side of the twist and shadow on the other. Never outline a coil and fill it in, which is what makes drawn curls look like springs. Block the outer silhouette as a bumpy cloud about 2 inches wider than the skull, then place only 8 to 12 hero curls and let the rest stay as tone. 6B in the gaps between curls does most of the work. Full curl-type breakdowns live in curly hair sketch.
Who it suits: 2B to 3C curl patterns and lively character designs.
Tip: Vary curl size by at least half; identical curls read as a wig every time.
6. Tapered 4C Natural Short Hair Sketch
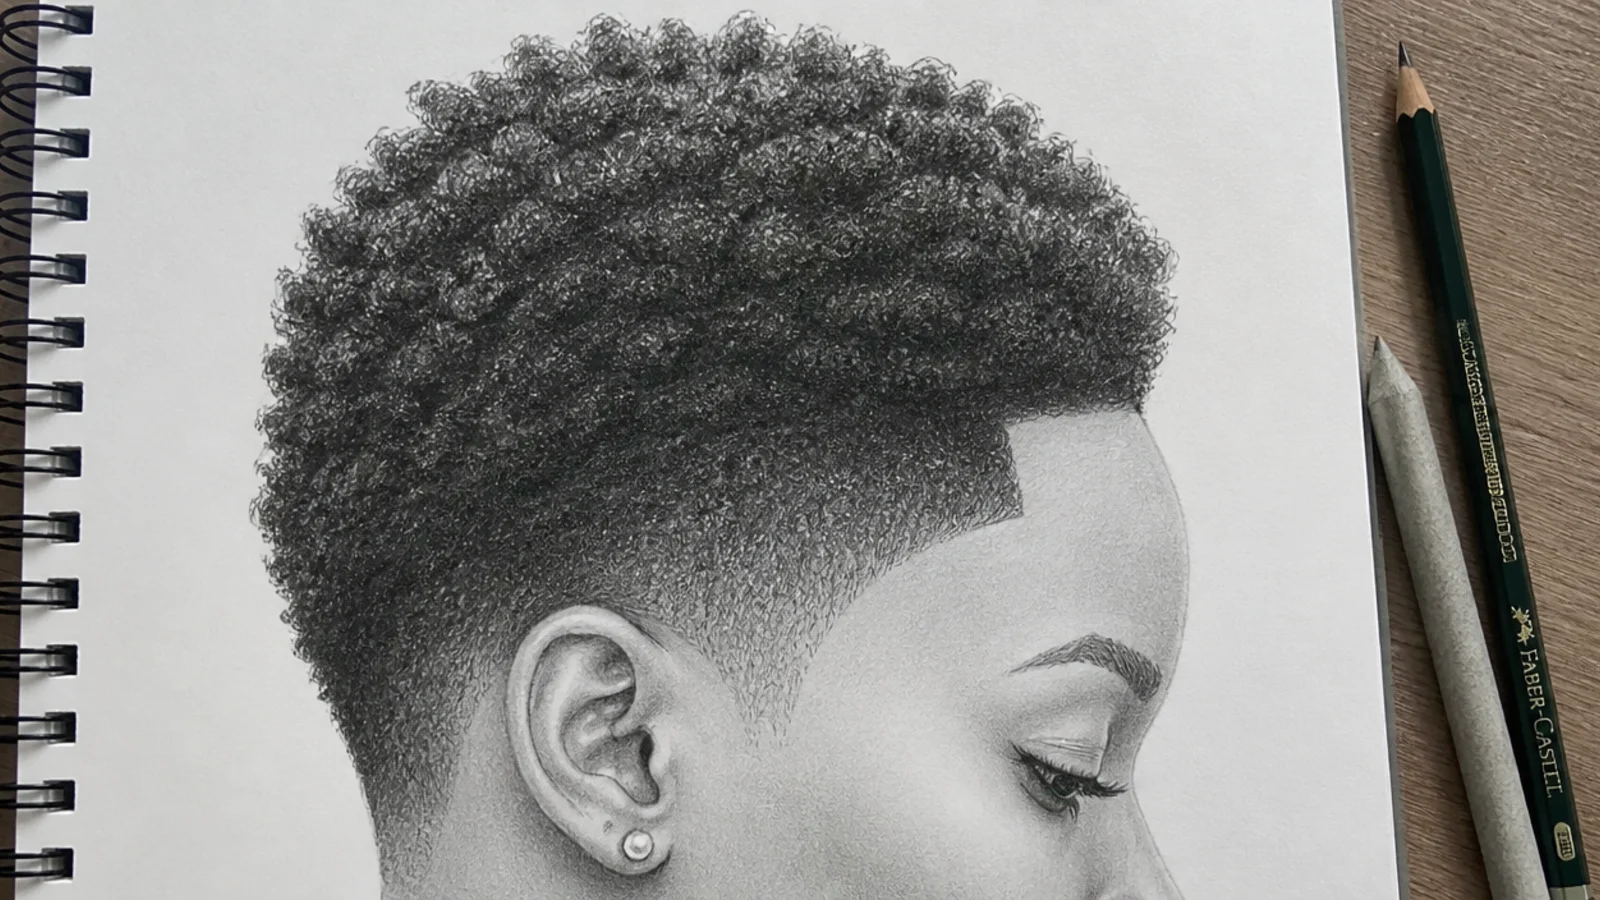
Coily hair is the most skipped texture in drawing tutorials and the easiest to fake badly. Treat it as a dense, matte volume, not as strands: block a rounded shape about 1.5 inches off the scalp, shade the whole mass with 4B, then lift a soft light band across the upper curve with a kneaded eraser. Texture comes from tiny hooked marks, not circles. The detail nobody teaches is the edge, which is crisp and shaped along the hairline and temple, so keep that line sharp while the outer silhouette stays soft. Coil-pattern notes carry over from curly hair sketch.
Who it suits: Portraits of textured and natural hair, front or three-quarter.
Tip: Do not draw individual coils across the whole mass; suggest them only where light hits.
7. Undercut Short Hair Sketch With Two-Value Contrast
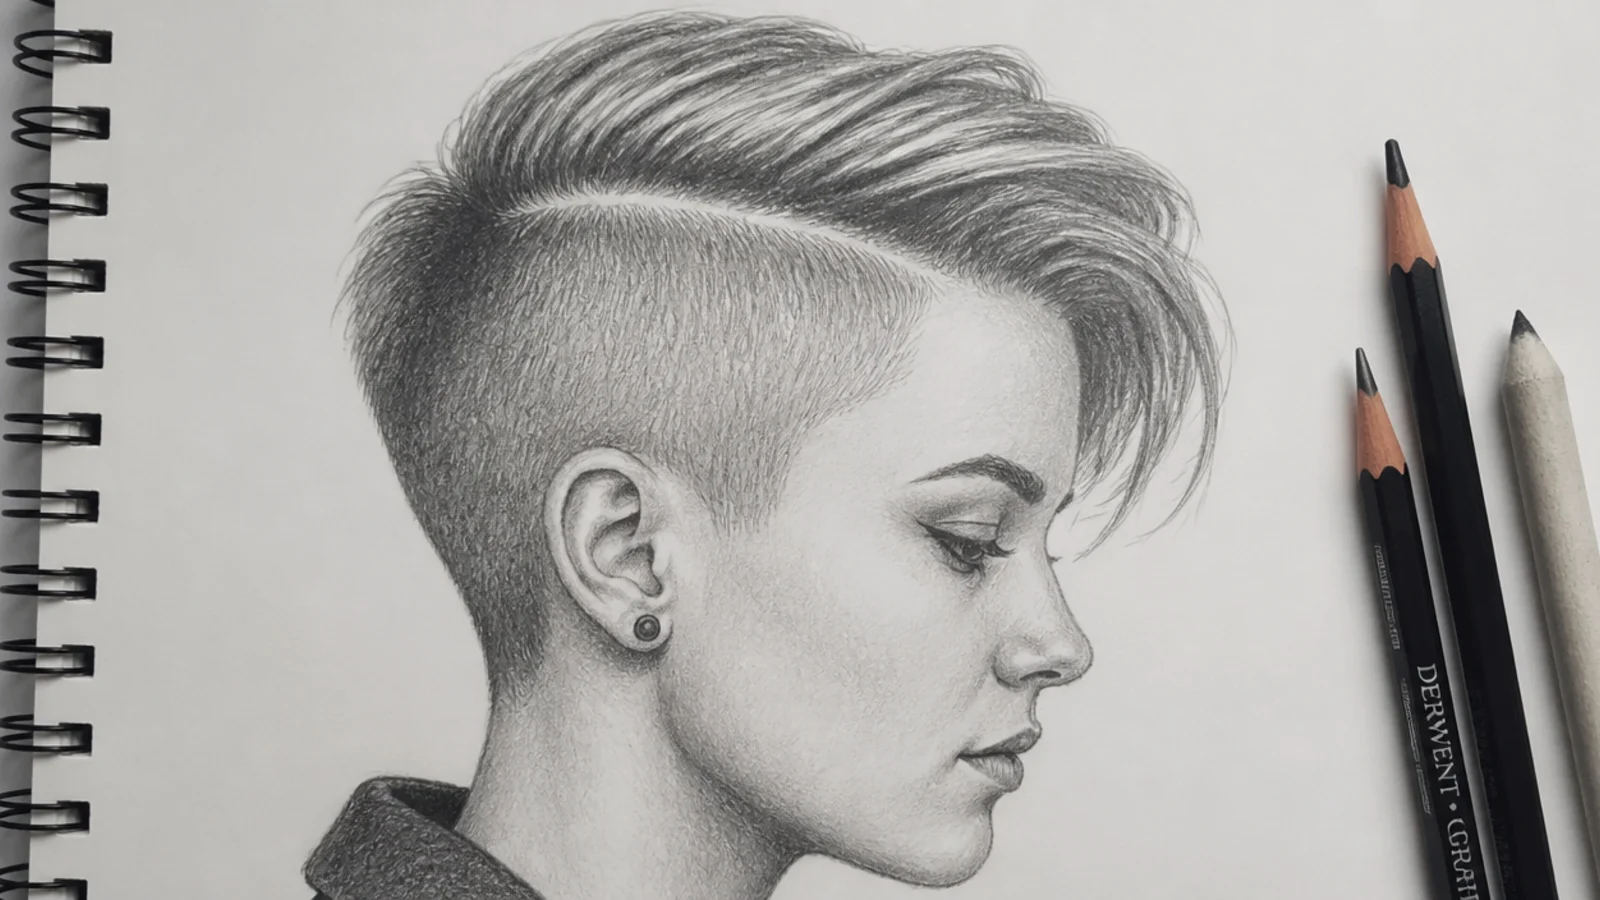
An undercut is a value puzzle: shaved sides at a flat light tone, a long top section at full dark. Draw the disconnect line first as a clean curve running from the temple to the back of the skull, then build the top as a leaning mass that overhangs that line by about a quarter inch. HB stipple below, 4B strands above, and a hard 6B shadow right where the top overhangs. That single shadow strip is what sells the depth. Skip it and the two sections look painted on.
Who it suits: Edgy character design and modern portrait work.
Tip: The disconnect line should not be perfectly parallel to the jaw; angle it up toward the crown.
8. French Crop Short Hair Sketch With a Forward Fringe
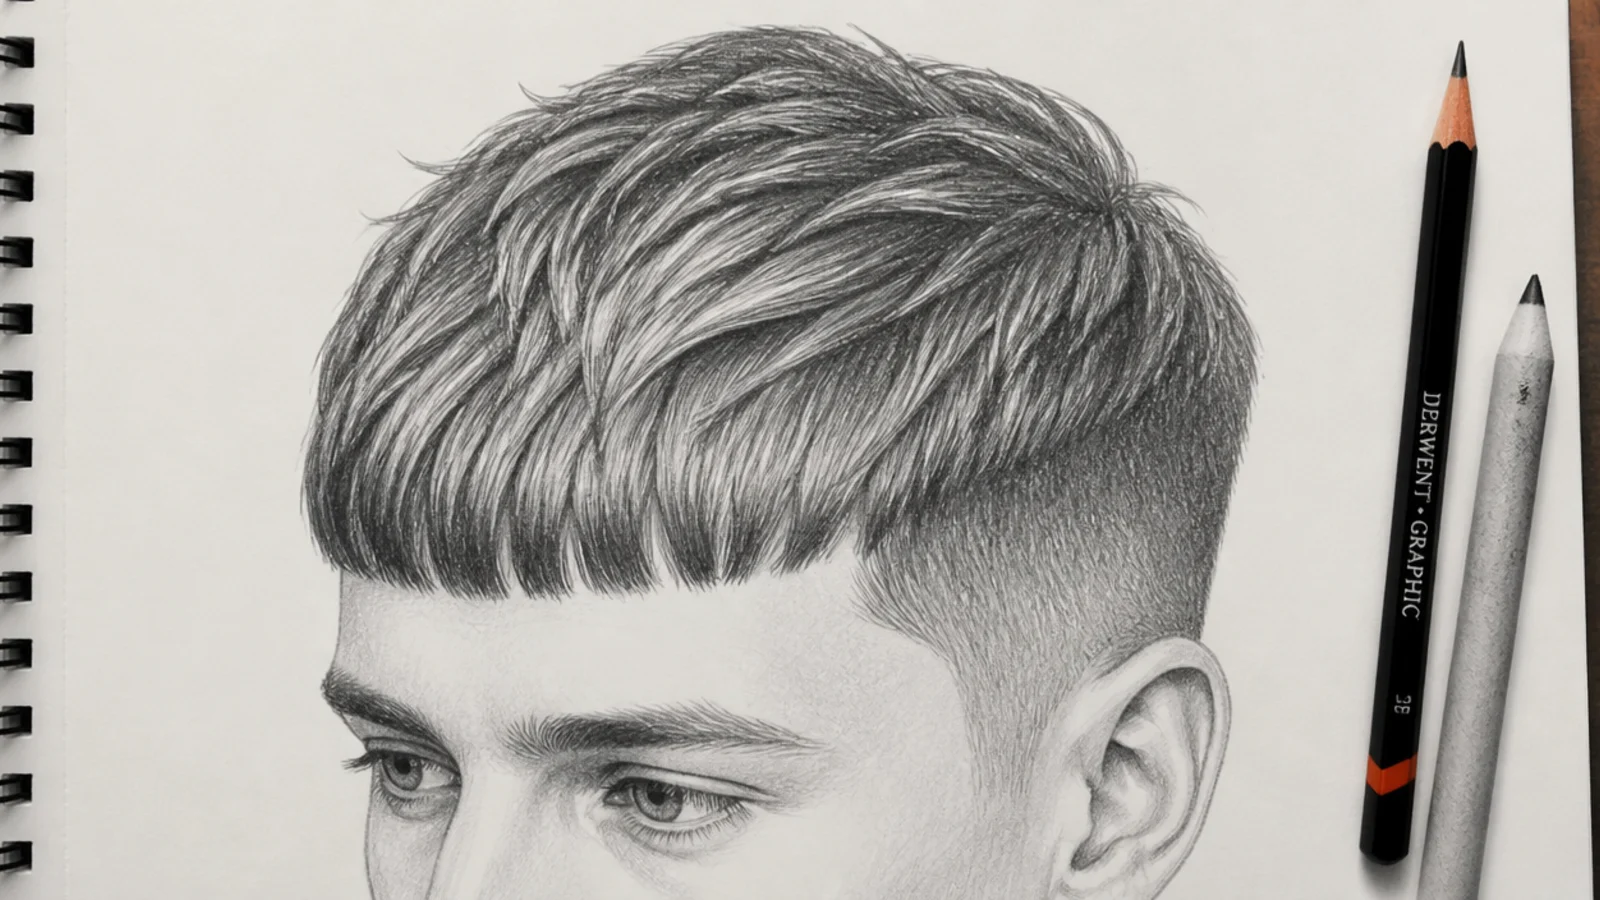
The French crop is a rectangle of hair pushed forward over the forehead with tight tapered sides. Draw the fringe as a shallow blunt band sitting about an inch above the eyebrows, then break its lower edge into 5 or 6 separated points so it reads textured rather than cut with scissors. Sides get HB stipple like a buzz. The inner bang line, a faint second line under the fringe edge, shows the underside of the hair and is the fastest way to give short fringes thickness.
Who it suits: Male character sketches and young faces.
Tip: Point the fringe strands slightly toward one temple so the crop does not look symmetrical and stiff.
9. Short Shag Hair Sketch With Choppy Layers
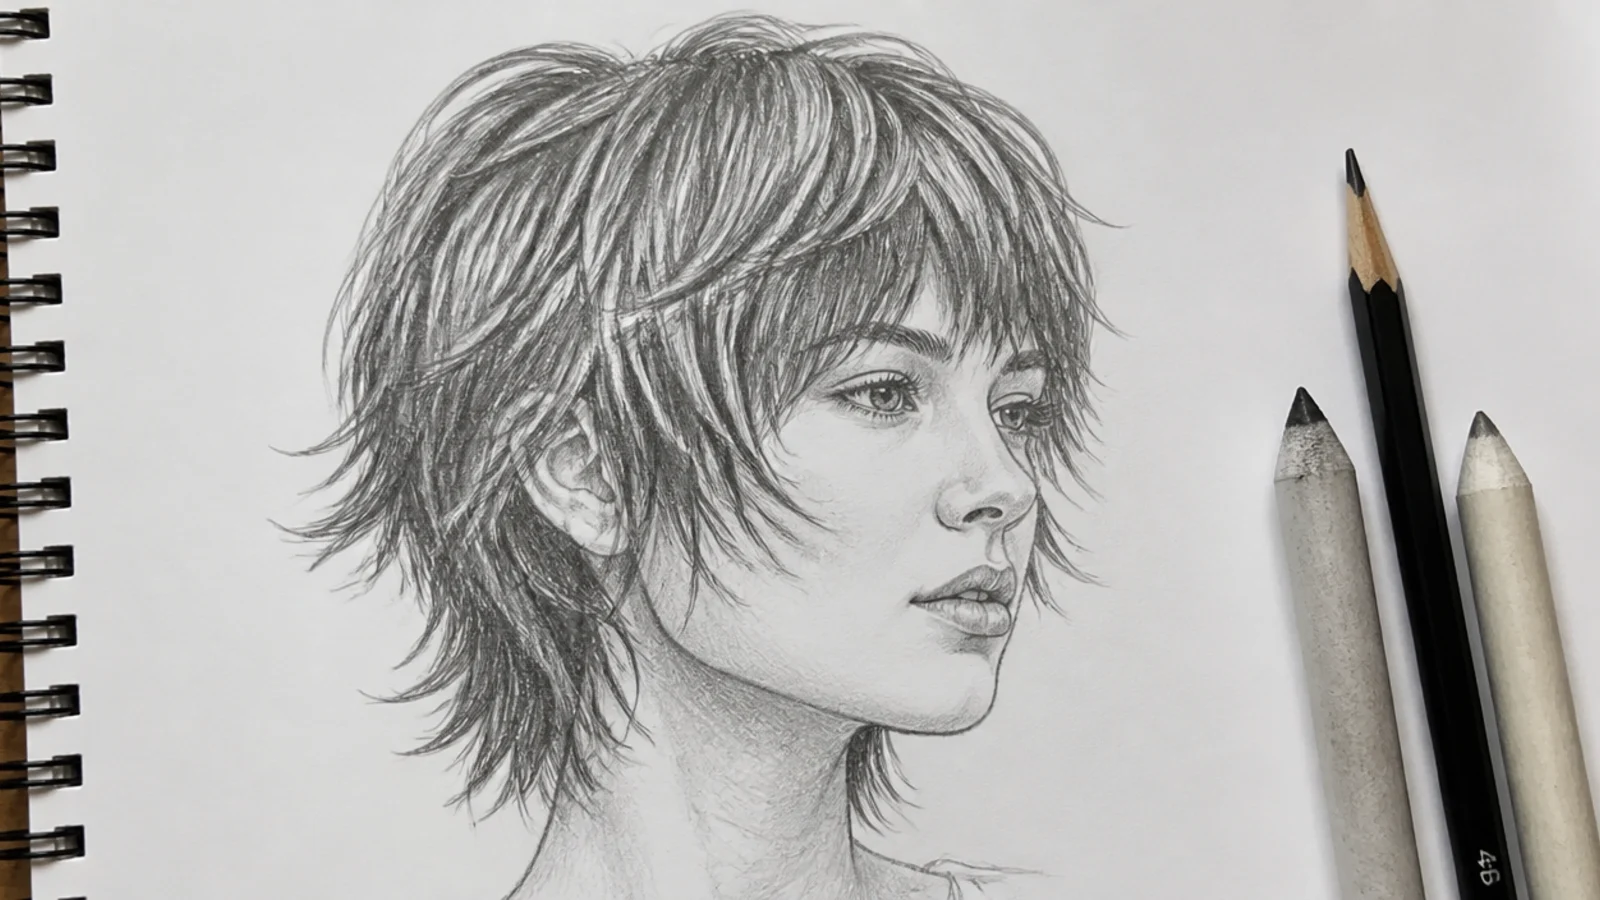
A shag is deliberately uneven, so this is the one short cut where messiness helps you. Block a rough triangle with the widest point at ear level, then carve into the silhouette with a kneaded eraser to create 8 or 10 separated pieces of different lengths. Each layer needs a dark gap beneath it, drawn in 4B, because layers are visible only through the shadows between them. Keep the crown light and airy. This is the cut where the dark spaces concept matters most on the whole page. For layered reference photos, the shaggy mid-length haircut gallery is useful.
Who it suits: Rock-style characters and anyone practicing layered volume.
Tip: Make no two piecey ends the same length; matching lengths kill the shag instantly.
10. Short Wolf Cut Sketch With Face-Framing Pieces
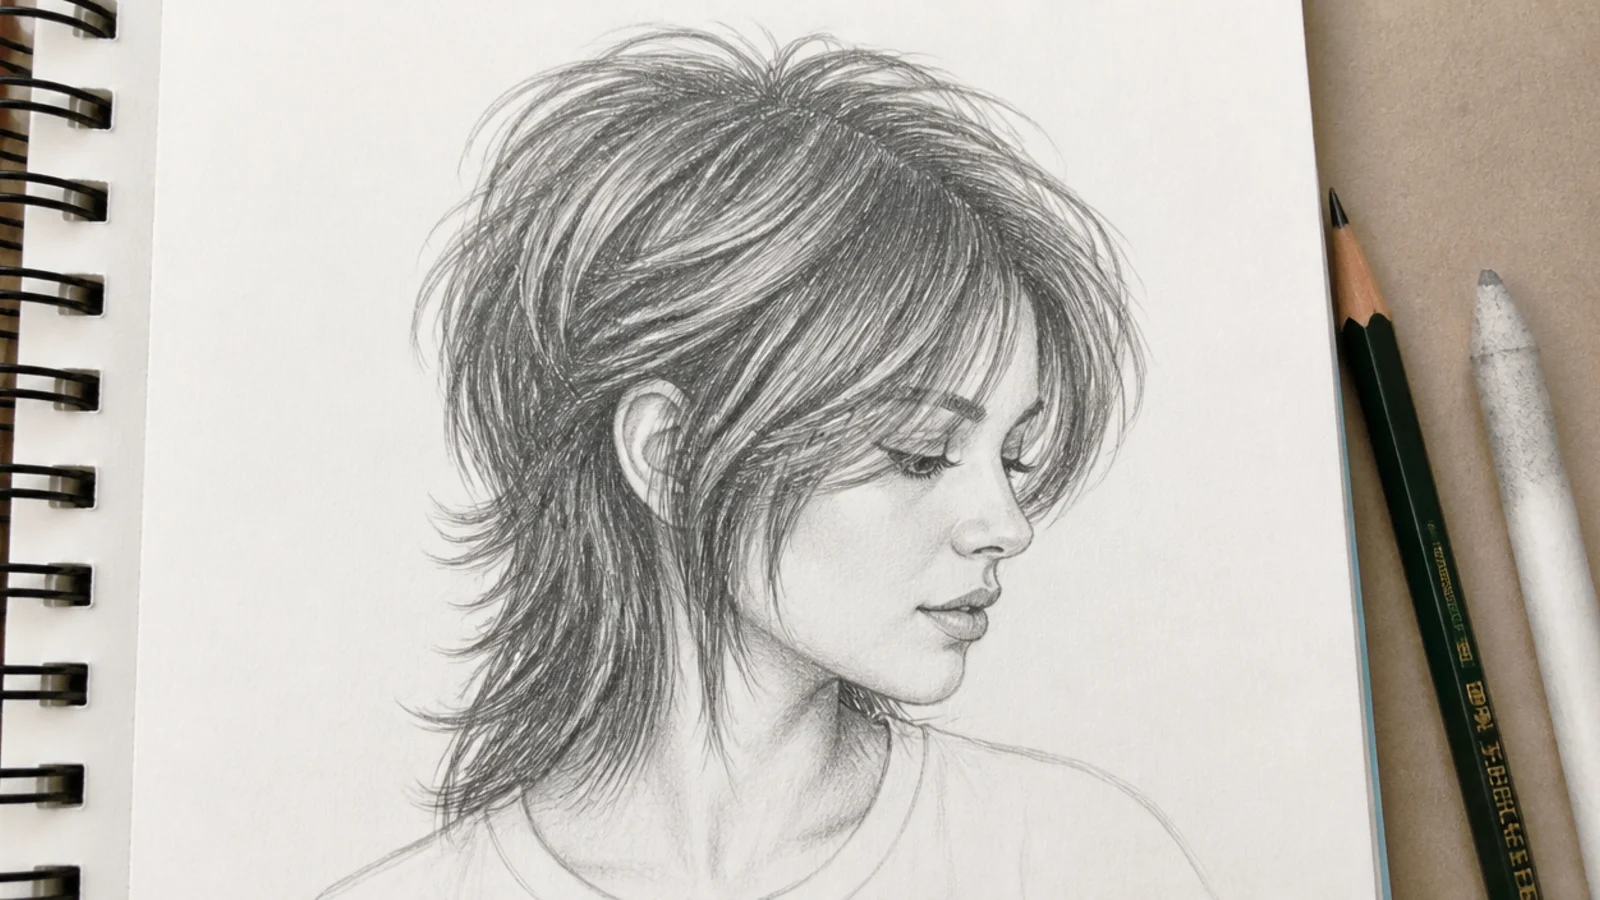
The wolf cut is top-heavy: big rounded volume at the crown, thin wispy ends near the jaw. Draw an oval mass sitting about 1.5 inches above the skull, then let only 6 to 8 thin strands escape downward past the cheekbone. Those escaping pieces should curve outward at the tips, never hang straight. Shade the crown mass with a 2B mid tone and reserve 6B for the tunnel of shadow behind the ear. Compare the long version in long hair sketch.
Who it suits: Trend-led character sketches and half-length portraits.
Tip: Keep the widest point of the silhouette above the ear; drop it lower and it becomes a shag.
11. Asymmetric Bob Short Hair Sketch With an Angled Line
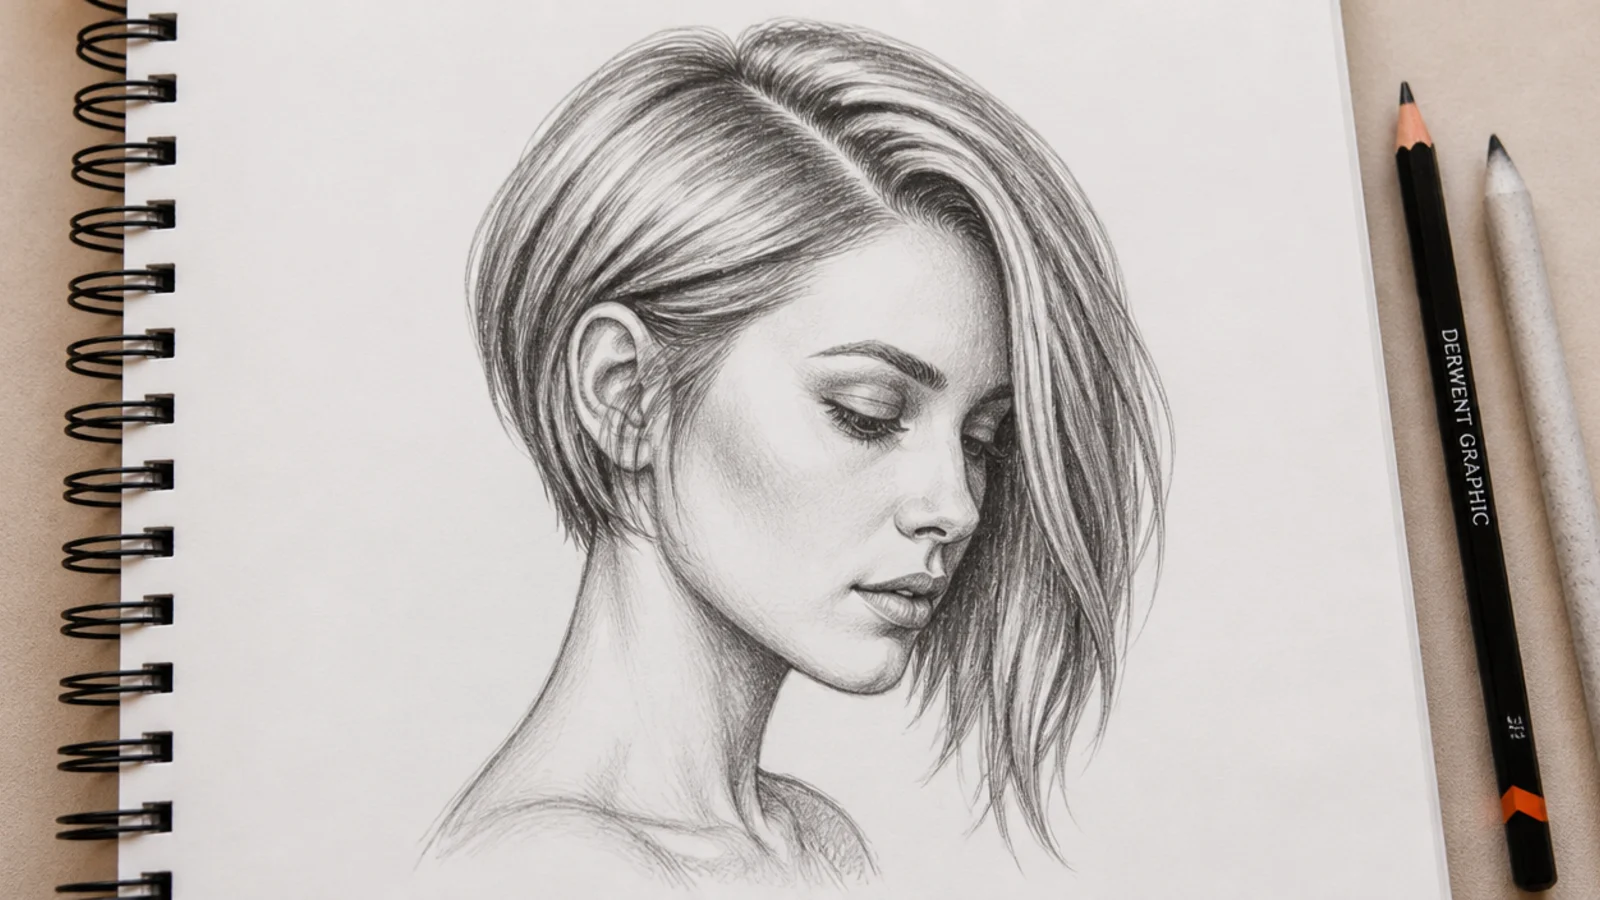
One side finishes at the jaw, the other at the collarbone, and the whole drawing depends on the angle between them. Rule a faint 2H guide from the short tip to the long tip before you commit any hair, so the diagonal stays consistent. The parting sits well off center, about a third of the way across the forehead, and the heavy side needs a broader mid tone because more hair sits in that plane. Keep both bottom edges slightly convex so the hair looks like it is falling, not hanging from a rail. Longer angled versions of this shape are worth studying in long hair sketch.
Who it suits: Fashion illustration and clean graphic styles.
Tip: Draw the short side first; it is easier to match a long side to it than the reverse.
12. Bowl Cut Short Hair Sketch With a Hard Shine Band
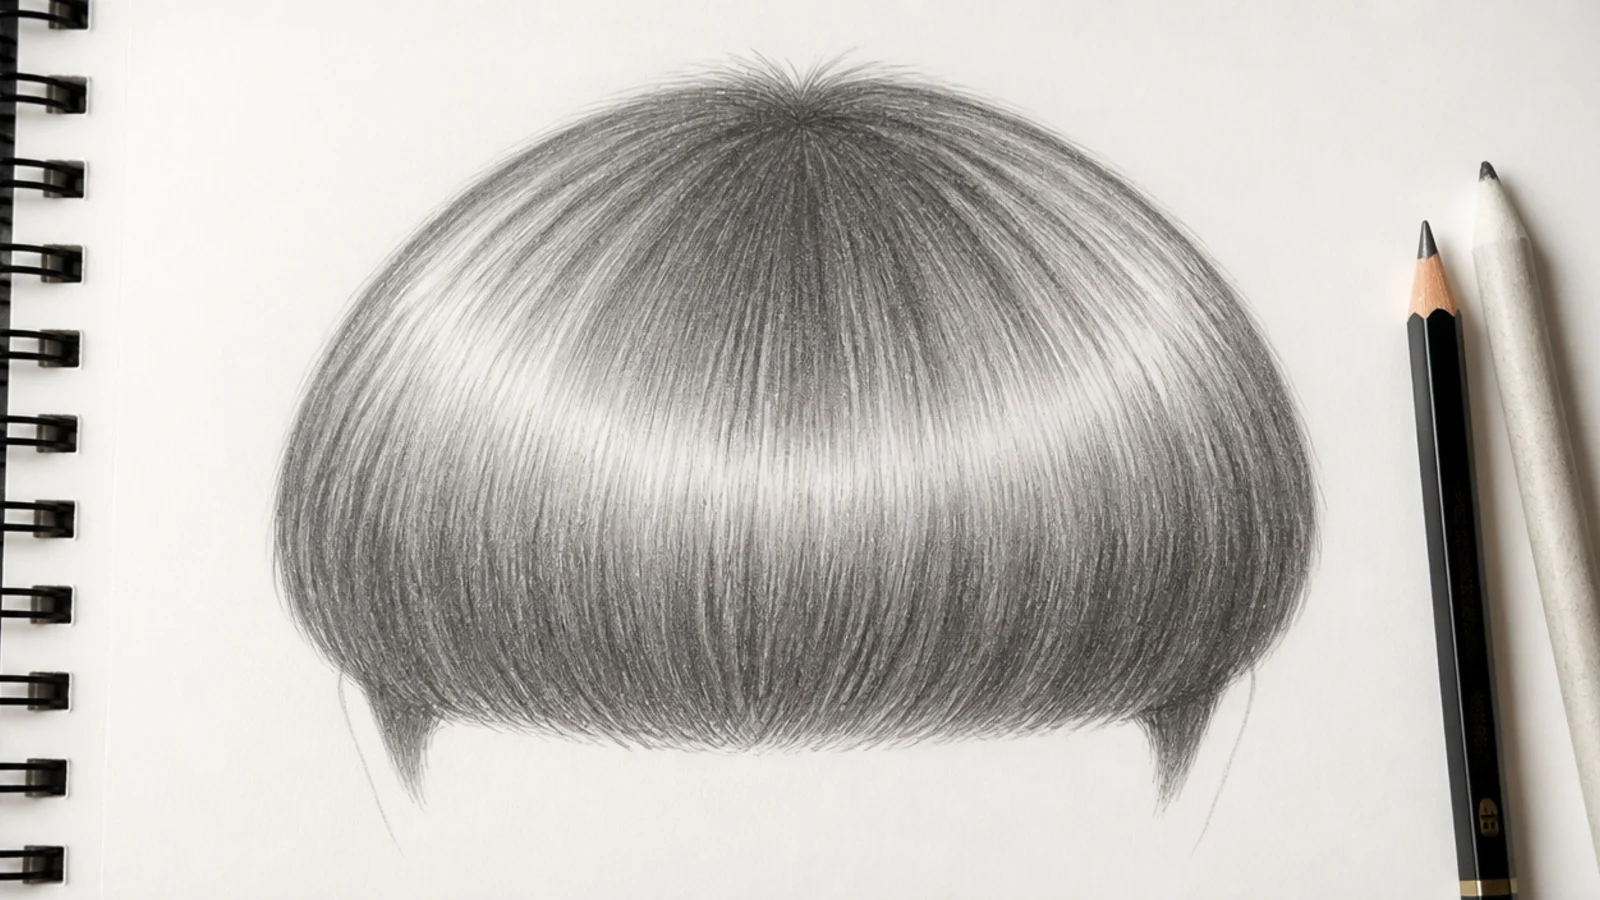
The bowl cut is the most helmet-prone shape on this list, so the shine band is doing all the rescuing. Block a smooth dome with a continuous curved edge running level around the head, then leave a white crescent about a quarter inch wide across the upper curve, following the skull rather than the fringe line. Shade beneath it with 2B and drop to 6B where the hair meets the forehead. Break the bottom edge with 10 or so fine flicks. Without them it really is a bowl. Browse the rest of the hair sketch board for related fringe shapes.
Who it suits: Retro and anime-adjacent character sketches.
Tip: Curve the shine band around the head, never straight across the page, or the skull flattens.
13. Short Mullet Sketch, Short at the Front and Long at the Back
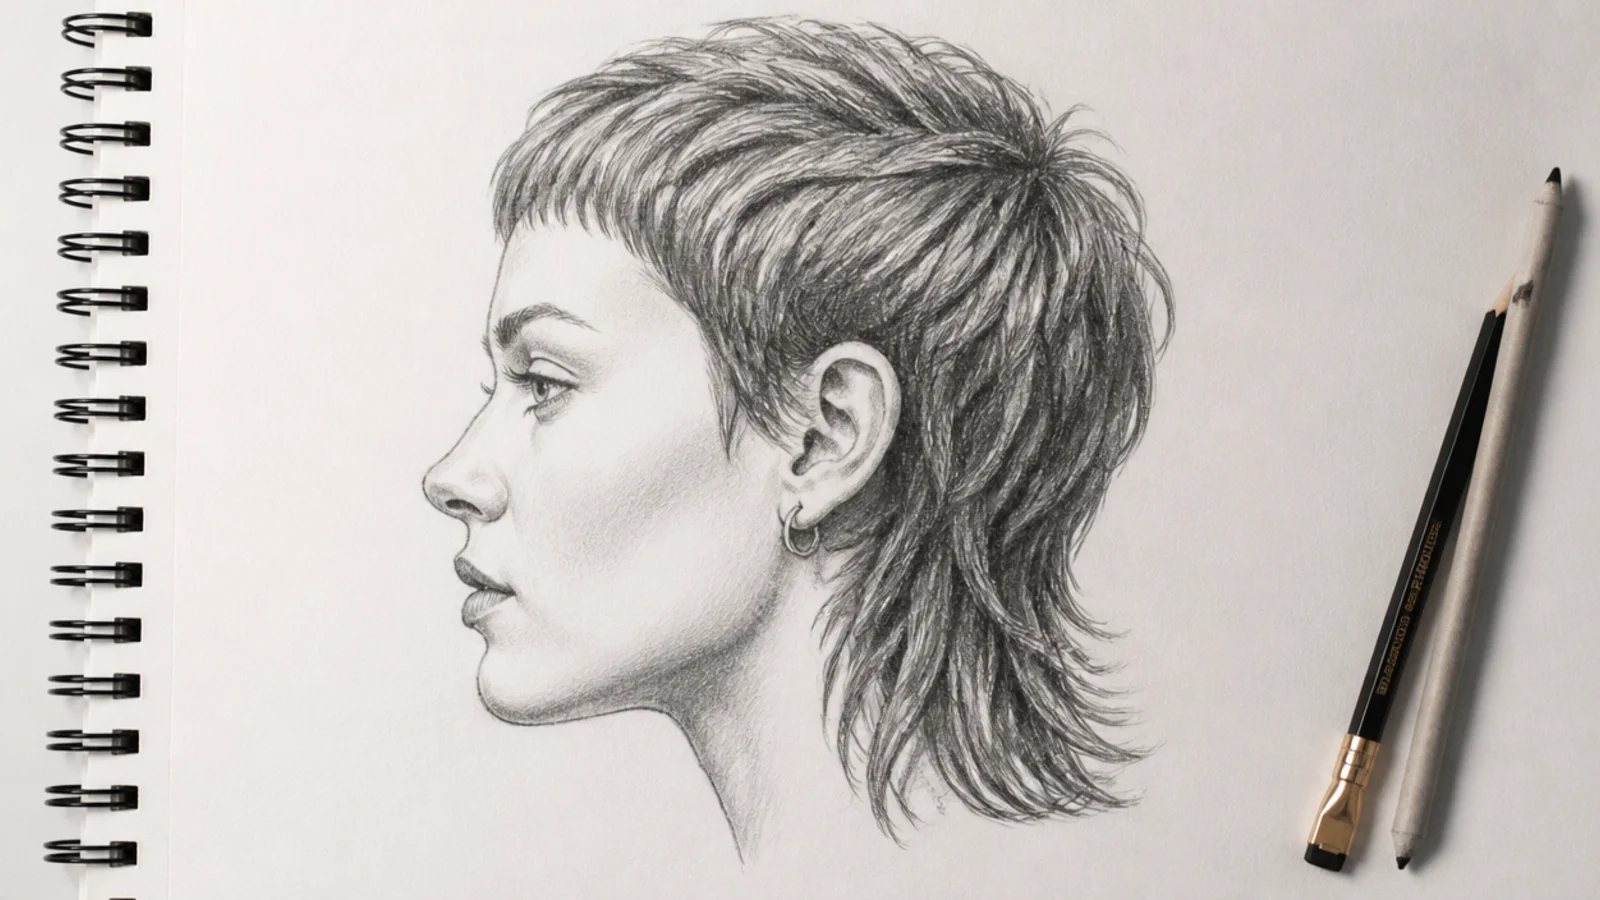
Draw this one in profile, because the whole joke of the cut lives at the transition. Crop the front and top tight to the skull with HB stipple, then let a separate mass drop from the occipital bone about 2 to 3 inches down the neck. The two zones must overlap, not butt together, so lay a 6B shadow where the top section falls over the back section. Nape strands taper to points and can flick outward. Boys' variations on short cuts sit in boy hair sketch.
Who it suits: Profile practice and stylized character work.
Tip: Make the back mass narrower than the head; a wide back mass reads as a wig, not a mullet.
14. Finger Wave Short Hair Sketch, Vintage Crop
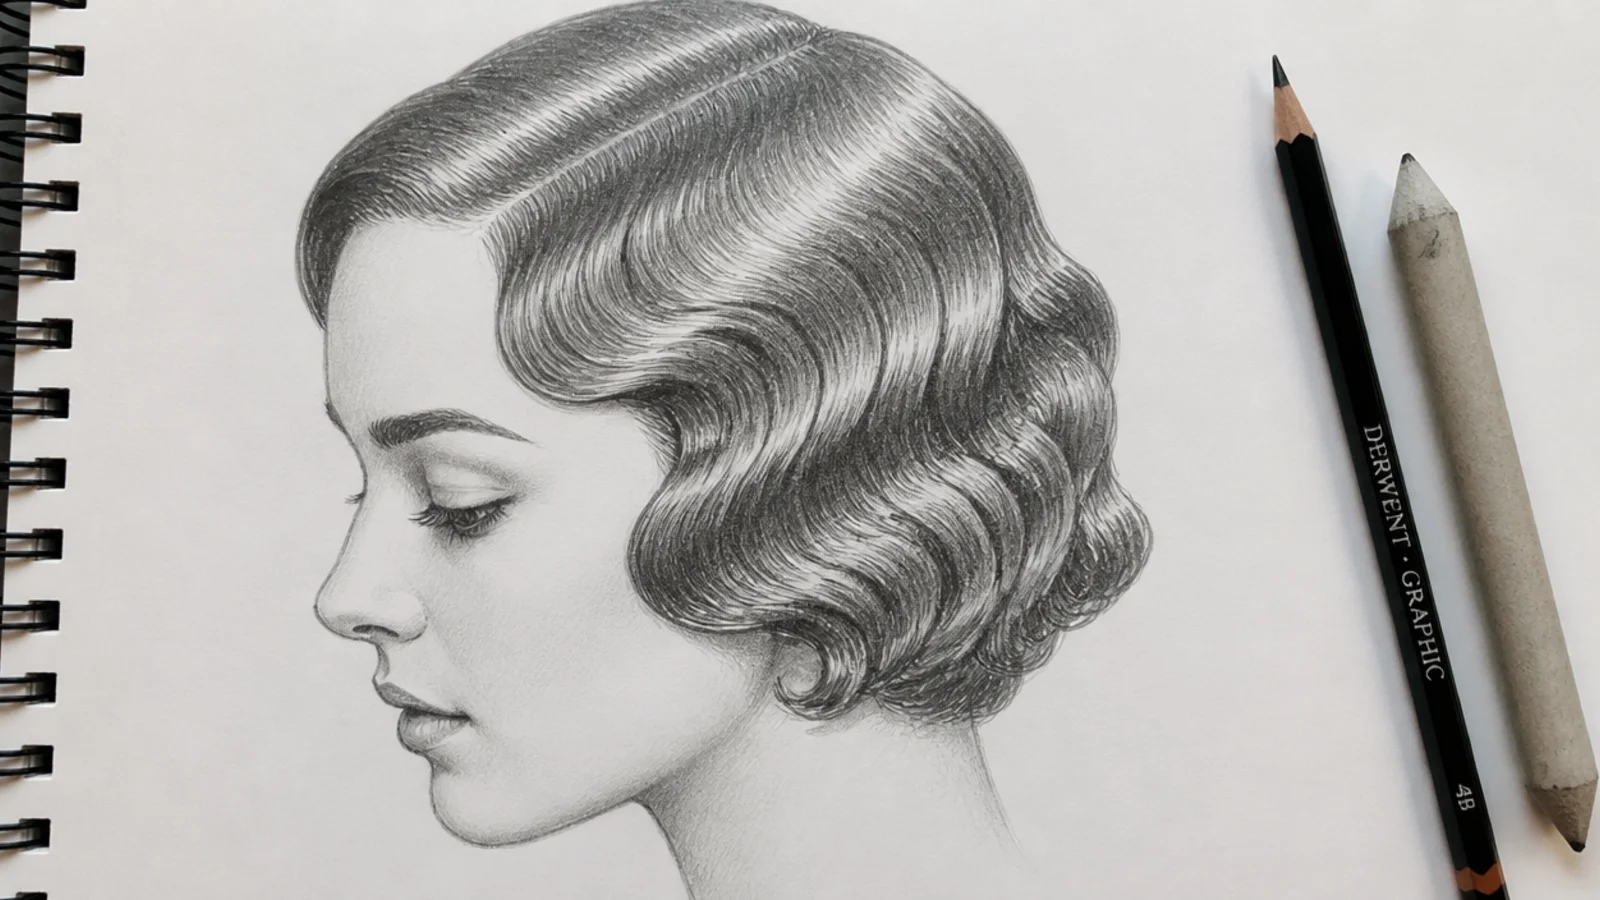
Finger waves are parallel S curves sculpted flat against the skull, and they are pure value work. Draw 4 or 5 long S-shaped ridges running from the parting down toward the ear, all following the same wave rhythm. Each ridge gets a bright highlight along its crest and a 6B shadow in the trough beside it. No stray strands at all, which is unusual for hair. Sharpen the pencil often, since a blunt tip turns crisp waves into mush. Around 20 minutes, the longest sketch here.
Who it suits: 1920s portraits, art deco illustration and shading practice.
Tip: Keep the trough shadows the same width all the way along, or the waves stop looking sculpted.
15. Cropped Hair Back View Short Hair Sketch
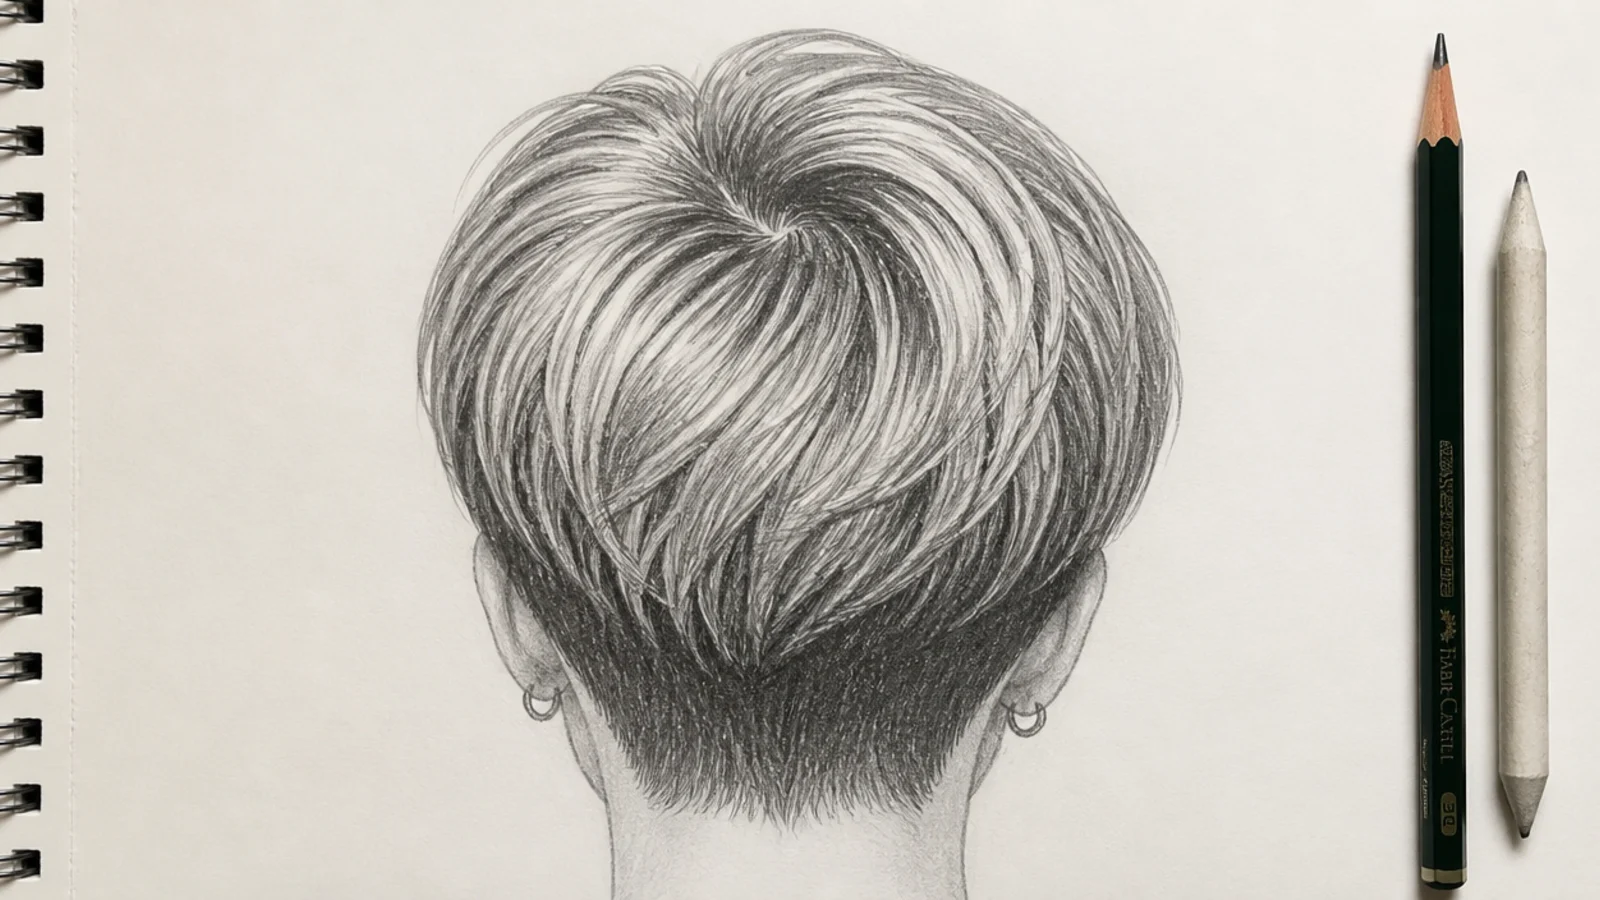
Almost no tutorial teaches the back of the head, which is why so many drawings collapse the moment a character turns. Start with the crown swirl placed slightly off center and slightly high, then radiate every strand outward from it like water from a drain. The nape hairline is a soft W or a gentle curve, never a straight line, and it fades rather than stops. Keep the two sides of the skull darker with 4B and the center lighter, which is what makes the head read round instead of flat.
Who it suits: Reference sheets and multi-angle character studies.
Tip: Place the crown swirl off center; a centered swirl makes the head look symmetrical and fake.
How to Start a Short Hair Sketch: Shape Before Strands
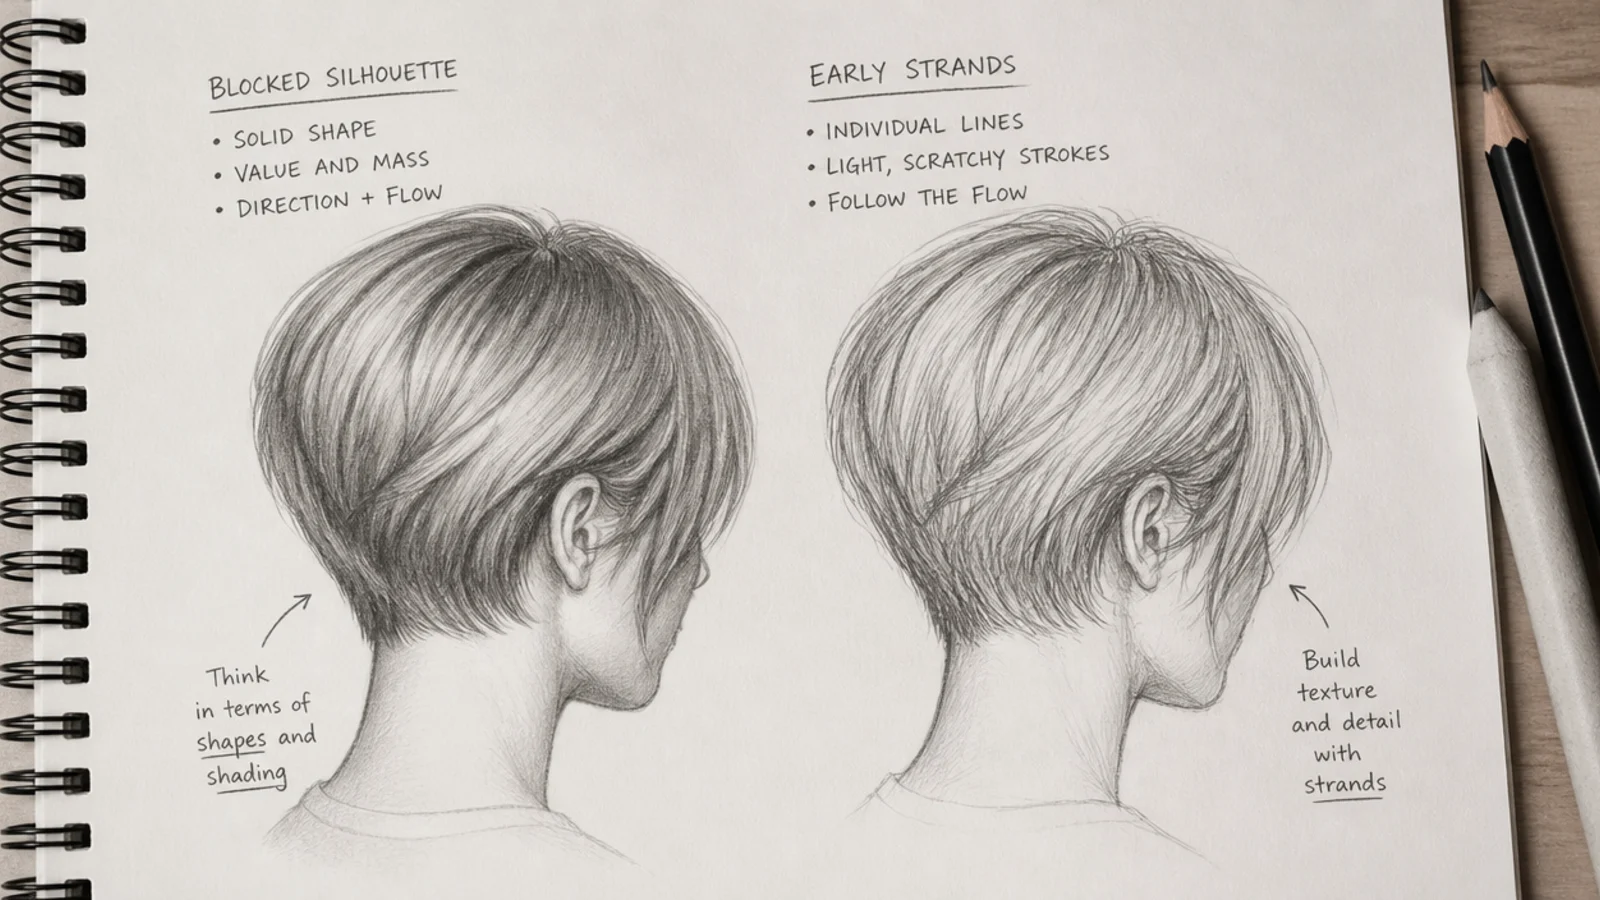
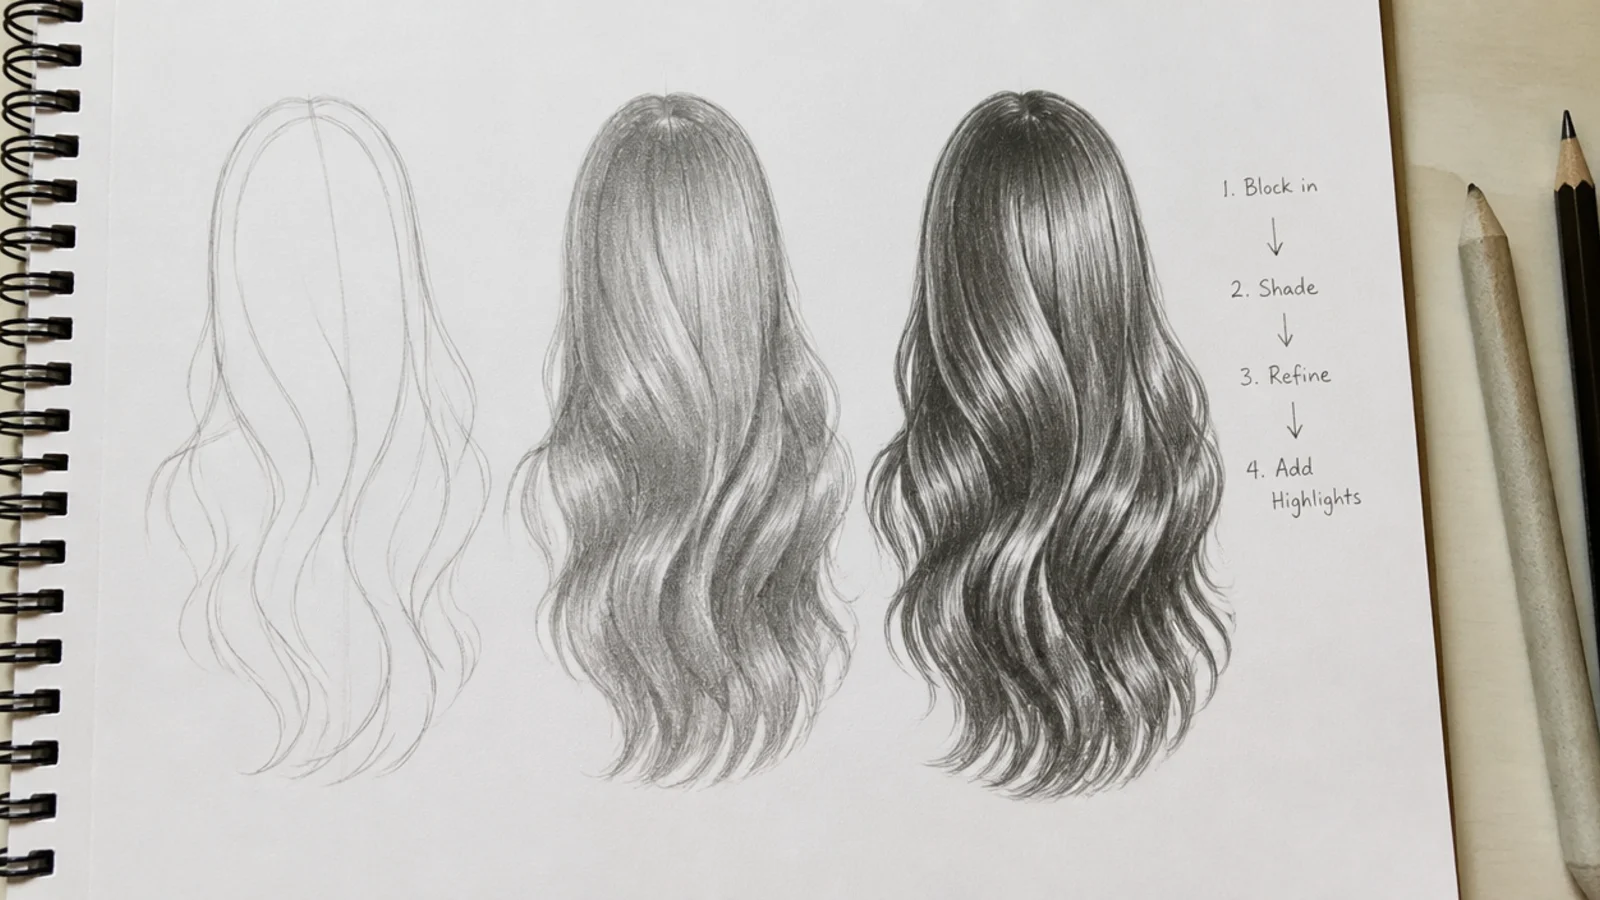
Drawing individual strands too early is the number one beginner mistake, and short hair exposes it faster than any other length. Start with a light 2H circle for the skull and a line for the jaw, then ask one question: how much air does this haircut add? A pixie adds about half an inch to an inch above the skull, a curly bob adds two, a buzz cut adds nothing at all. Draw that offset as a single closed silhouette in HB before a single strand exists. Next, mark the crown, the point the hair actually grows out from, and remember it sits behind the top of the ear rather than directly above it. Every later mark radiates from there. Only once the mass and the crown are settled do you break the outer edge with short flicks. If you find yourself drawing hair-shaped lines in the first two minutes, stop and go back to the blob. The step order used across the whole board is laid out in the hair sketch tutorial.
Shading Short Hair for Volume and Depth With Dark Spaces
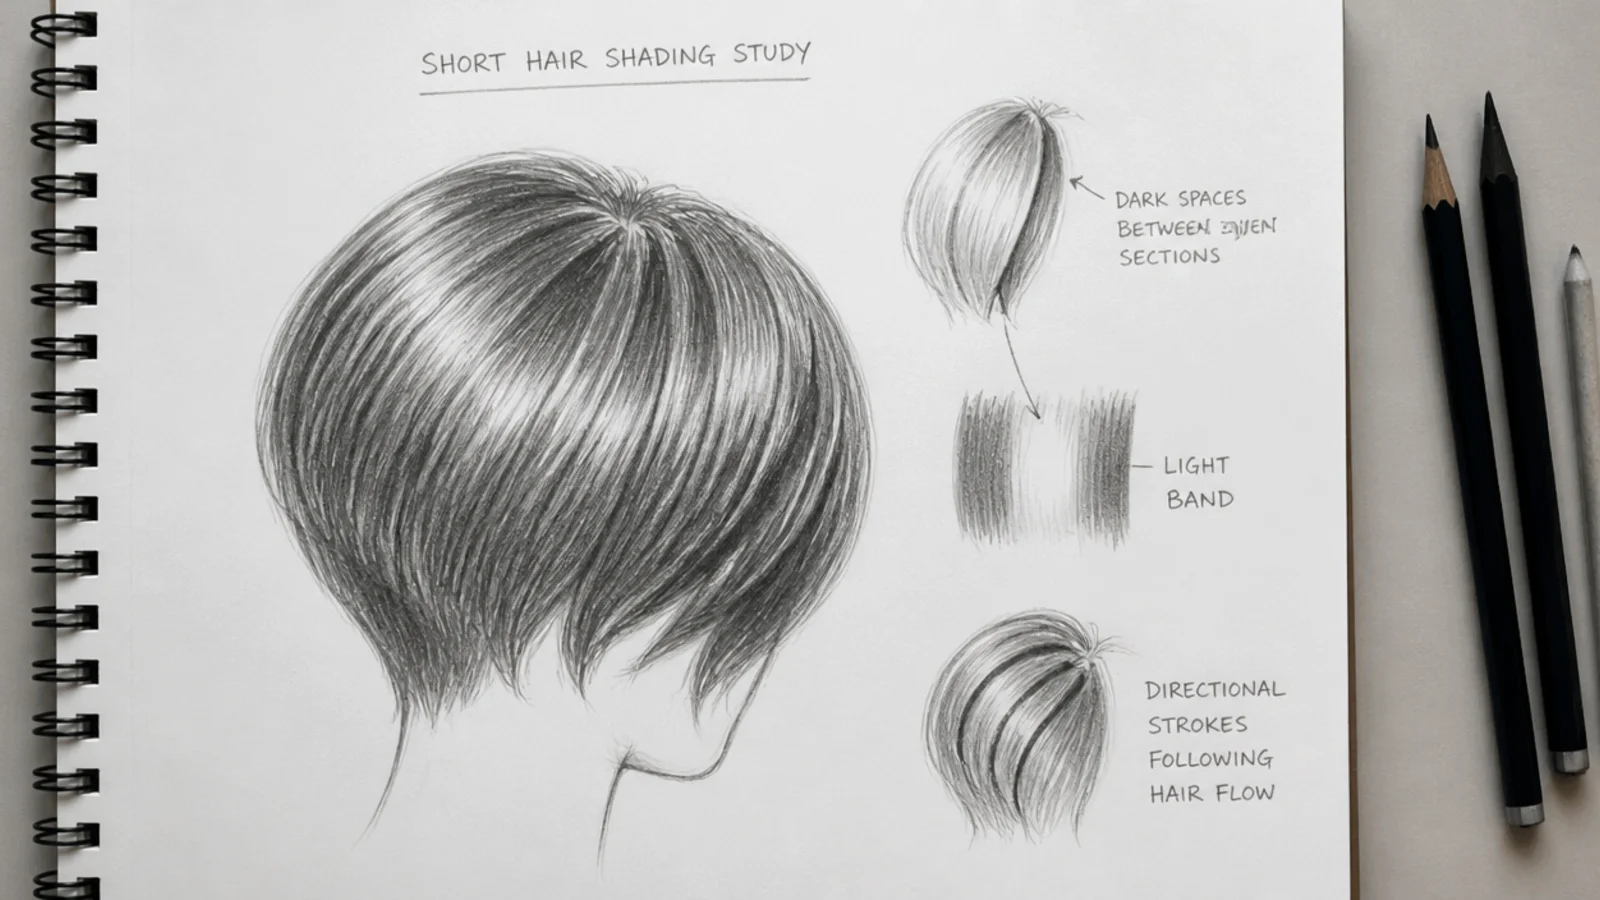
Volume in a short hair sketch comes from the gaps, not the strands. Find the places where hair layers overlap or tuck under, which on a short cut means behind the ear, under the fringe, beneath every layered piece and along the nape, then push those pockets to 6B until they are nearly black. Those dark spaces are what lift the sections above them off the skull. Around them, work light to dark: an HB base tone across the whole mass, 2B to 4B for mid shadows following the curve of the skull, and 6B reserved for the deep cores only. Highlights are the reverse move. Either leave the paper white in a crescent that wraps around the head, or lift the graphite back out with a kneaded eraser squeezed to a wedge. A blending stump softens the mid tone but should never touch a dark space, because a blurred core reads as dirt rather than depth. More shading drills sit in easy hair sketch ideas.
Drawing Straight, Wavy, Curly and Coily Short Hair
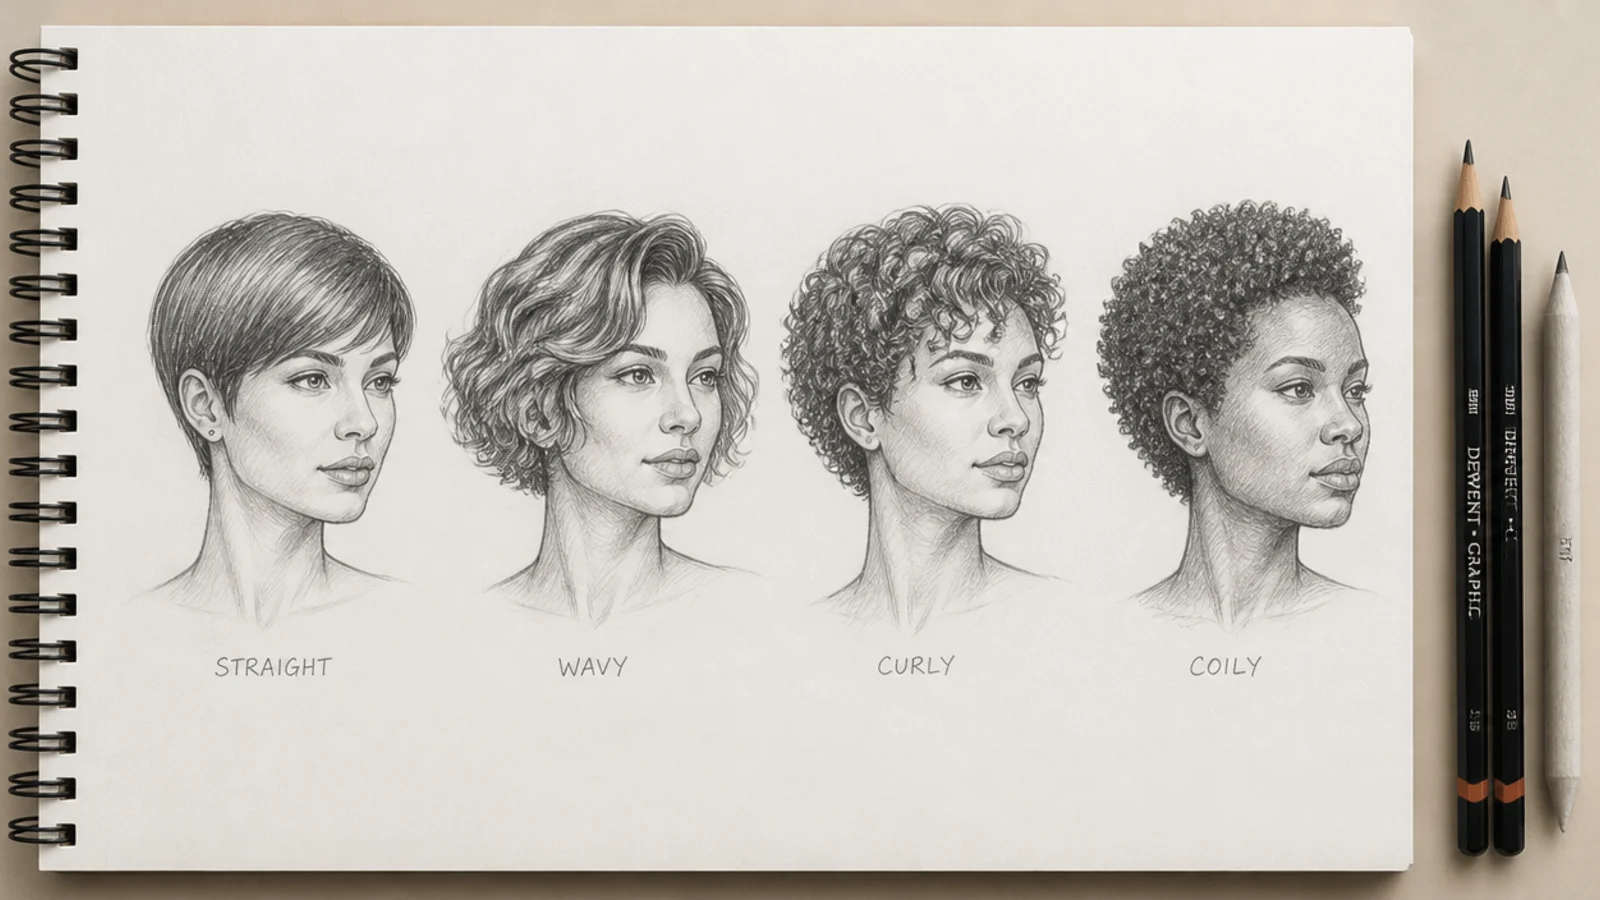
The same haircut changes completely with texture, and the change is in the silhouette long before it is in the strands. Straight short hair hugs the skull, so the outer edge sits close and the shine band is a single clean crescent. Wavy hair pushes the silhouette out about an inch and breaks the shine into two or three separate patches where the waves crest. Curly hair is drawn as ribbons, an S or a spiral with light on one side of the twist and shadow on the other, and the silhouette becomes a lumpy cloud with no straight sections anywhere. Coily hair reads as a dense matte volume with a crisp shaped hairline and a soft outer edge, textured with tiny hooked marks rather than drawn coils. A practical test: squint at your sketch. If you cannot tell the texture from six feet away, the problem is the outline, not the detail. Curl patterns get the full treatment in curly hair sketch.
Common Short Hair Drawing Mistakes and How to Fix Them
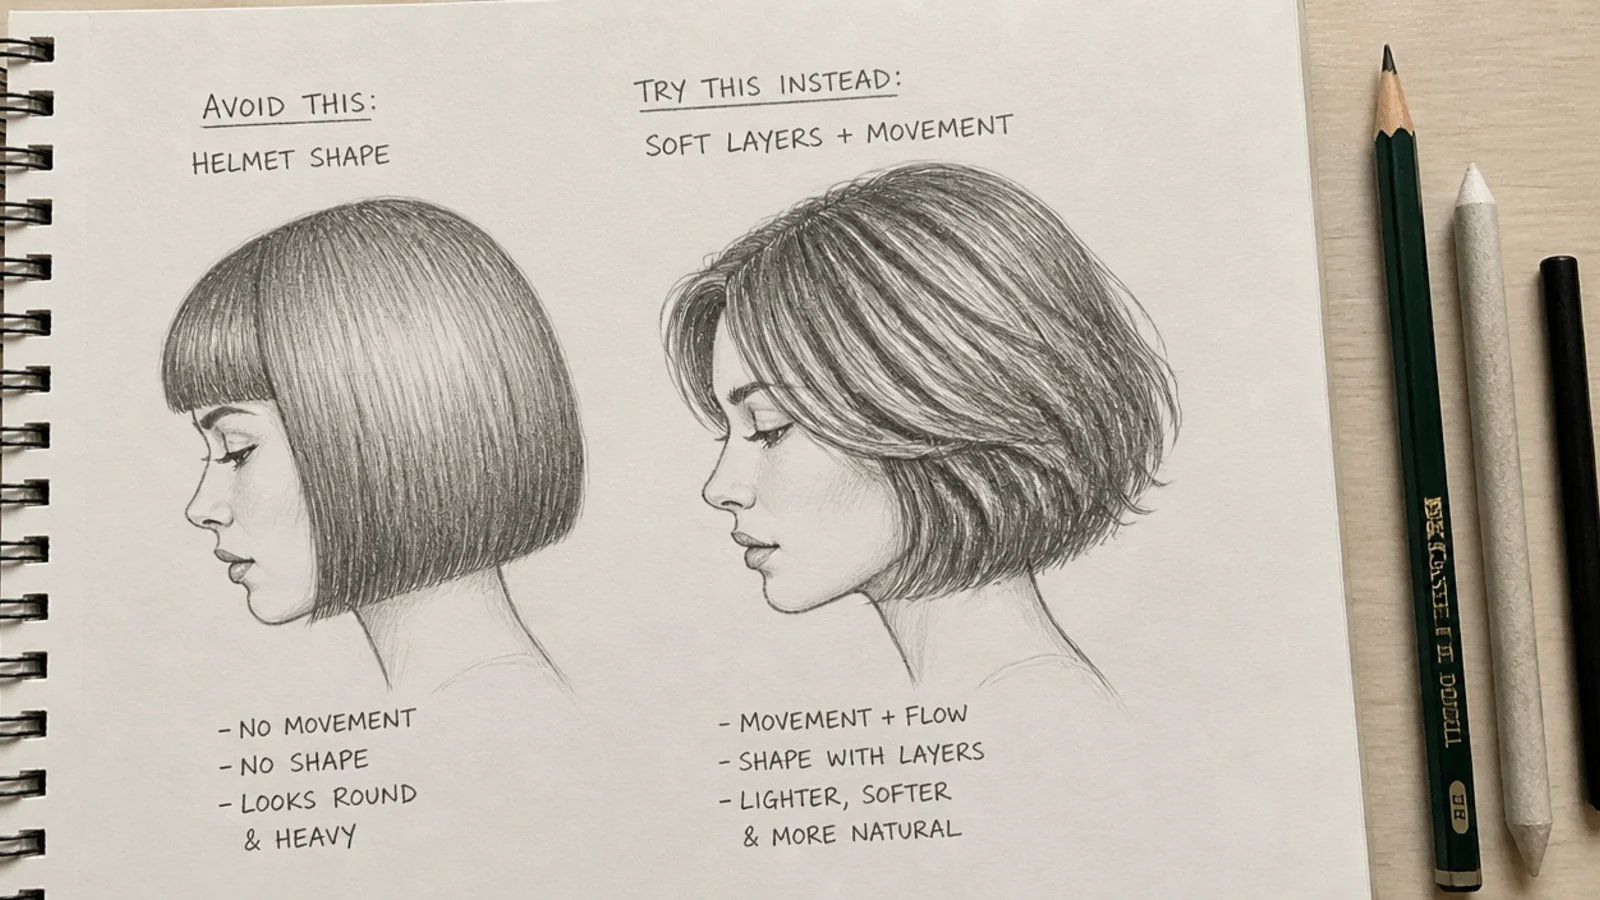
Five mistakes account for nearly every failed short hair sketch. The helmet, where the outer edge is one unbroken line, is fixed by adding short flicks at the ends and notching the silhouette. Parallel lines, where every strand runs at the same angle and spacing, are fixed by remembering that hair grows in sections from the crown and each section has its own direction. A floating hairline, drawn as a hard clean arc, is fixed by making it irregular and letting it fade at the temples. A flat skull, where the hair sits on top of a head with no top to it, is fixed by drawing the skull circle first every single time. And gray mush, where everything blended into one mid tone, is fixed by pushing the dark spaces to 6B and lifting real highlights back out. If a sketch has already gone wrong, do not rescue it stroke by stroke. Lift the whole thing back with a kneaded eraser to a ghost image and rebuild the silhouette.
Pencils, Paper and Blending Tools for Short Hair Sketches
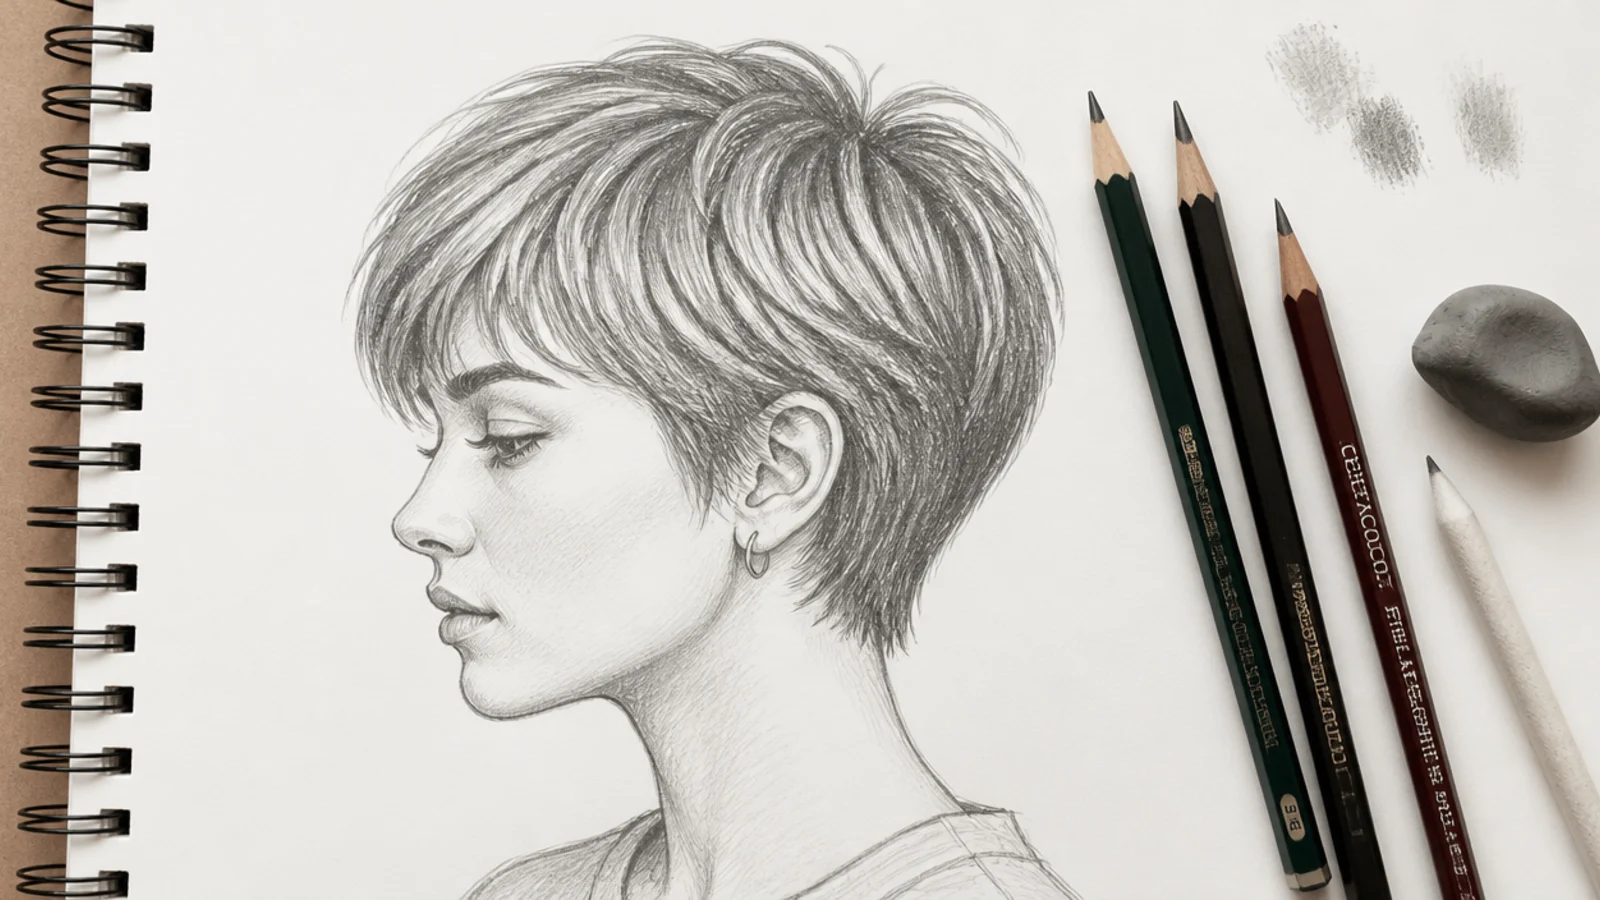
You need less kit than most supply lists suggest. Three pencils cover everything on this page: 2H for construction guides that erase cleanly, 2B to 4B for mid shadows, and 6B for the darkest cores. HB fills in as a base tone if you want a fourth. A kneaded eraser matters more than any pencil, because it lifts highlights out rather than scrubbing them, and it can be squeezed to a point for single strands. Add a hard vinyl eraser for cutting sharp edges back into a shag or a wolf cut. For paper, smooth cartridge around 120gsm holds graphite without the tooth fighting your fine strand work; heavily textured paper makes short hair look grainy at small sizes. A blending stump is optional and easy to overuse. If you are drawing digitally, a hard round brush at 60 to 80 percent opacity plus a soft eraser reproduces the same three-grade system, and the silhouette-first order does not change.
Using References for Short Hair Without Copying Them
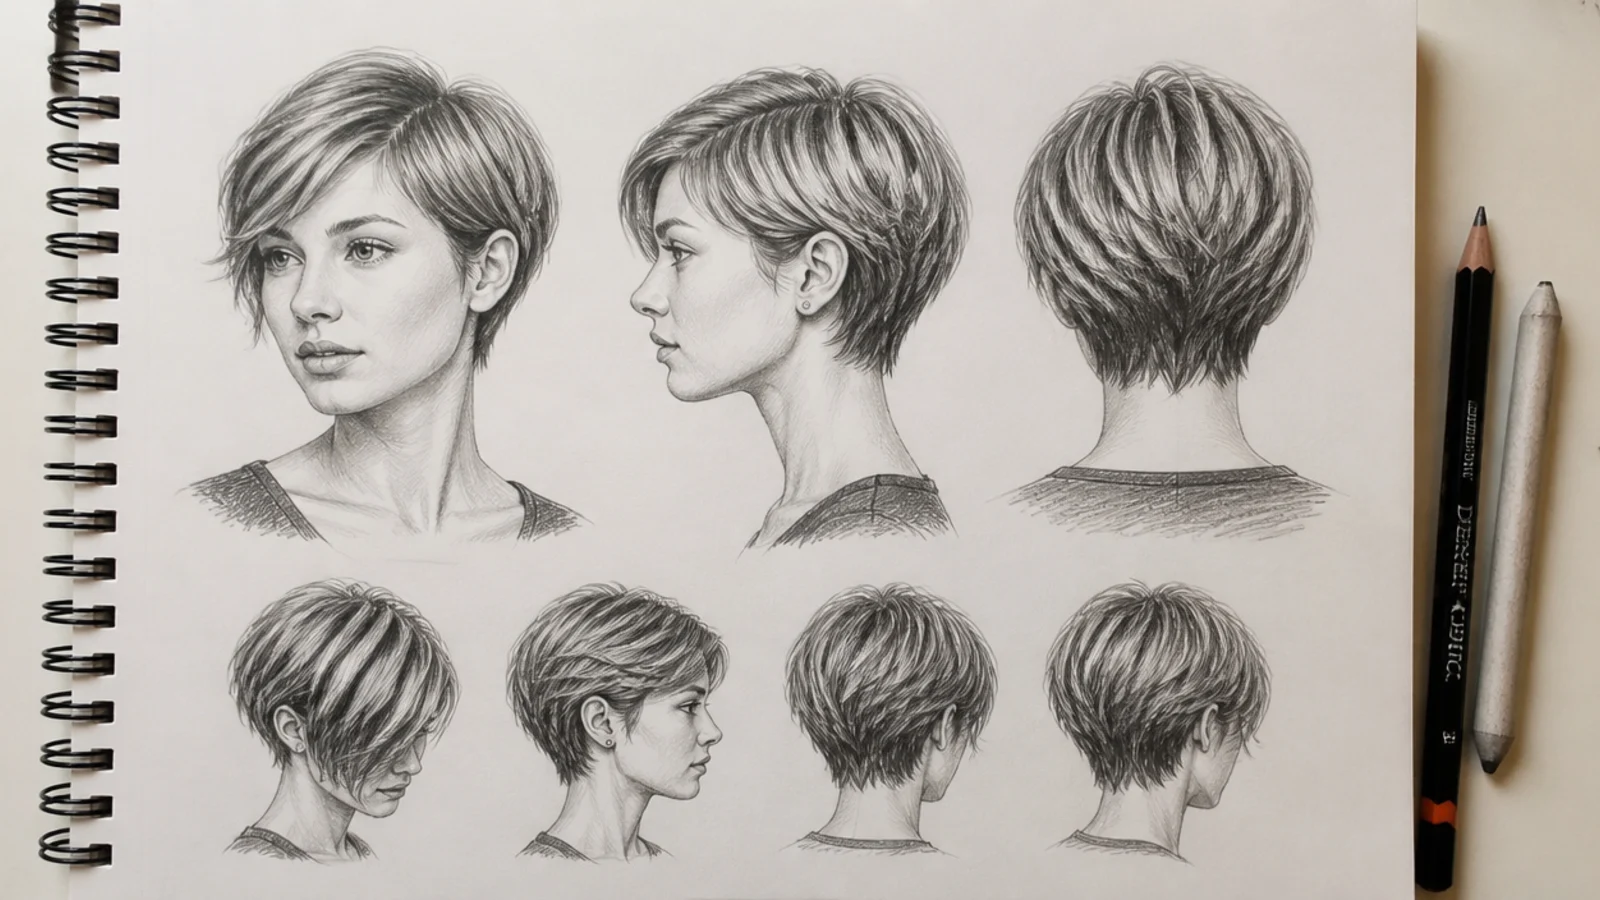
References fix short hair problems faster than any tutorial, because the errors are usually structural: the crown in the wrong place, the ear too high, the nape stopping too abruptly. The way to use one without copying is to extract information rather than trace appearance. Look at the reference and note three things only: where the crown sits, which way each section flows, and where the darkest pocket falls. Then close it and draw from those three notes. Better still, sketch the same cut from the front, the side and the back in one sitting, which is what turns a copied image into an understood shape. Ten-second silhouette studies are the highest-value drill here: fill a page with 20 short haircut outlines, no interior detail at all, and your instinct for mass improves more than it would from one careful drawing. Real haircut galleries such as short curtain bangs and the jellyfish haircut work well as source material.
Frequently Asked Questions
How do you draw short hair step by step?
Draw the skull circle and jaw first, then block the whole haircut as one silhouette that sits a set distance off the skull. Mark the crown behind the top of the ear and radiate flow lines from it. Lay an HB base tone, push the dark spaces to 6B, lift a shine band with a kneaded eraser, and add short flicks along the edges last.
How do you draw short hair from the side?
Place the ear first, because everything else is measured from it. The hairline begins about half an inch in front of the ear, arcs over the skull, and the nape tapers to a fine point near the base of the skull. Keep the crown behind the top of the ear, shade the pocket behind the ear darkest, and sweep strands from crown to nape.
Why does my short hair drawing look like a helmet?
Because the outer edge is one unbroken line and the interior is one flat tone. Break the silhouette with 6 to 10 short flicks at the ends, notch the bottom edge every half inch, and add a curved shine band that follows the skull rather than running straight across. Dark pockets behind the ear and under the fringe finish the fix.
How do you draw a pixie cut?
Block it as a soft wedge roughly an inch above the crown that shrinks to nothing at the nape. Point the fringe strands toward the eyebrow rather than straight down, since a pixie flows forward from the crown. Keep sideburn strands thin and pointed, and finish with short flicks along the outer edge so the wedge stops looking carved.
How do you draw a buzz cut or shaved hair?
Treat it as a value on a skull rather than as strands. Lay a flat HB tone over the hair area, then stipple with a sharp 2B, denser at the temples and around the crown swirl. Leave the top plane lighter where light falls, and never outline the shape with a hard line. Very short hair looks like a rough carpet, prickly and matte.
What pencils do you use for drawing short hair?
Three grades cover it. Use 2H for construction guides because it erases cleanly, 2B to 4B for mid shadows that follow the skull, and 6B for the darkest cores behind the ear and under layers. HB is useful as a base tone. A kneaded eraser to lift highlights matters as much as any pencil in the set.
Should I draw the head before adding the hair?
Yes, always. Draw the skull circle and jaw in 2H first, then block the hair as an offset mass around it. Beginners who start with hair flatten the top of the skull and leave no room for volume, which is why the drawing ends up looking like a cap. The head can be erased later once the hair is committed.
How do you make short hair look thick and not flat?
Thickness comes from dark spaces, not from more strands. Push the pockets where hair overlaps or tucks under to 6B, particularly behind the ear, under the fringe and beneath every layered piece. Then lift a clear highlight band back out with a kneaded eraser. The contrast between those two extremes is what reads as volume.
How do you draw the back of a short haircut?
Place the crown swirl slightly off center and slightly high, then radiate every strand outward from it. Draw the nape hairline as a soft W or a gentle curve that fades rather than stops. Keep the sides of the skull darker with 4B and the center lighter, which is what makes the back of the head read as round.
How long does a short hair sketch take?
Most of the ideas here take 8 to 20 minutes once the silhouette habit is in place. A pixie or a bob runs about 10 minutes, a buzz cut closer to 8, and finger waves around 20 because the value work is precise. Ten-second silhouette studies are faster still and improve your mass instinct fastest of all.
Which hair sketch look are you saving?
If you take one habit away from these 15 short hair sketch ideas, make it the order: silhouette, then flow, then dark spaces, then strands, and never the other way around. Short cuts punish the reverse order faster than any other hair length, because a scratchy first pass has no volume left to rescue it. Draw each cut twice, once from the front and once from the side, and keep the two on the same sketchbook page so you can see whether the crown sits in the same place in both. Ten minutes a cut for fifteen days is enough to make short hair automatic. When you are ready for length and movement, go on to the hair sketch tutorial or browse the whole hair sketch hub.