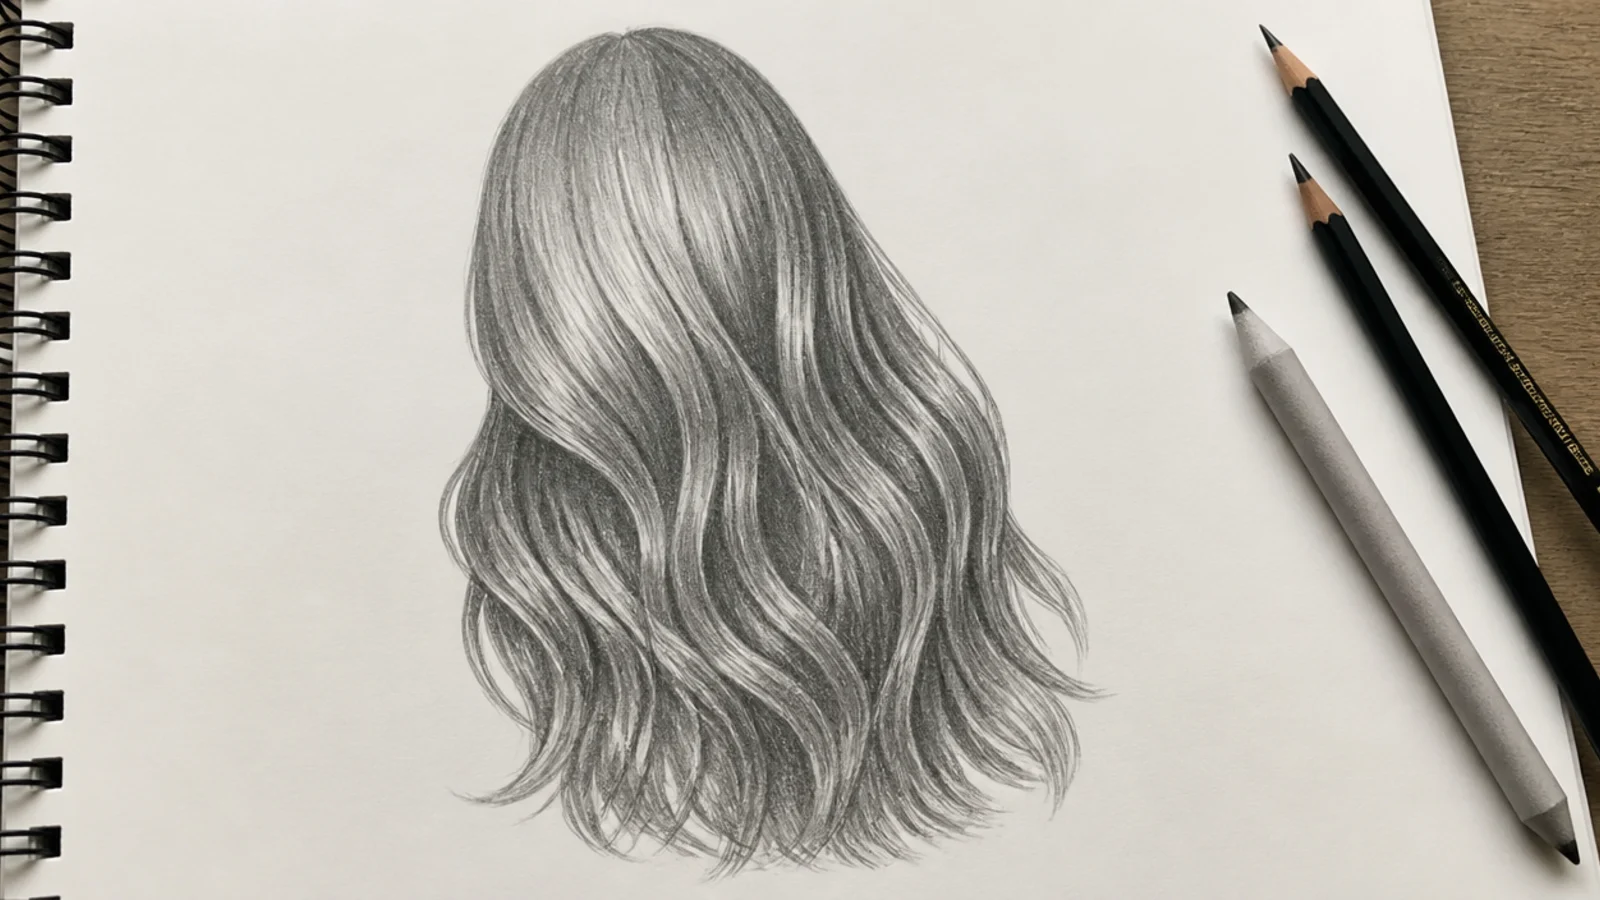
Quick Comparison
| Front View Female Hair Sketch | Back View Female Hair Sketch | |
|---|---|---|
| What has to be right first | Hairline shape and its height on the forehead | Crown swirl position, about two thirds up the skull |
| Flow line direction | Fans down and outward from a part | Spirals outward from the crown in all directions |
| Hardest part | Keeping both sides different without looking lopsided | Reading the skull as an egg with no facial landmarks |
| Where the 6B core goes | Behind the jaw and under the top layer | At the nape and just above any tie or knot |
| Highlight placement | A band across the upper curve, above the temples | A ring around the crown, broken by the swirl |
| Typical time to draw | 12 to 25 minutes including a face | 10 to 18 minutes, since no face is involved |
| Best styles to practice on | Center part, curtain fringe, hime cut, blunt bob | High ponytail, crown braid, low bun, waist-length locs |
| Most common failure | Hairline drawn as a hard clean arc, so hair looks glued on | Parallel vertical lines with no visible growth point |
| What it teaches you | How hair frames and reshapes a face | Where hair actually grows from, which fixes front views |
1. Long Straight Center-Part Hair, Front View
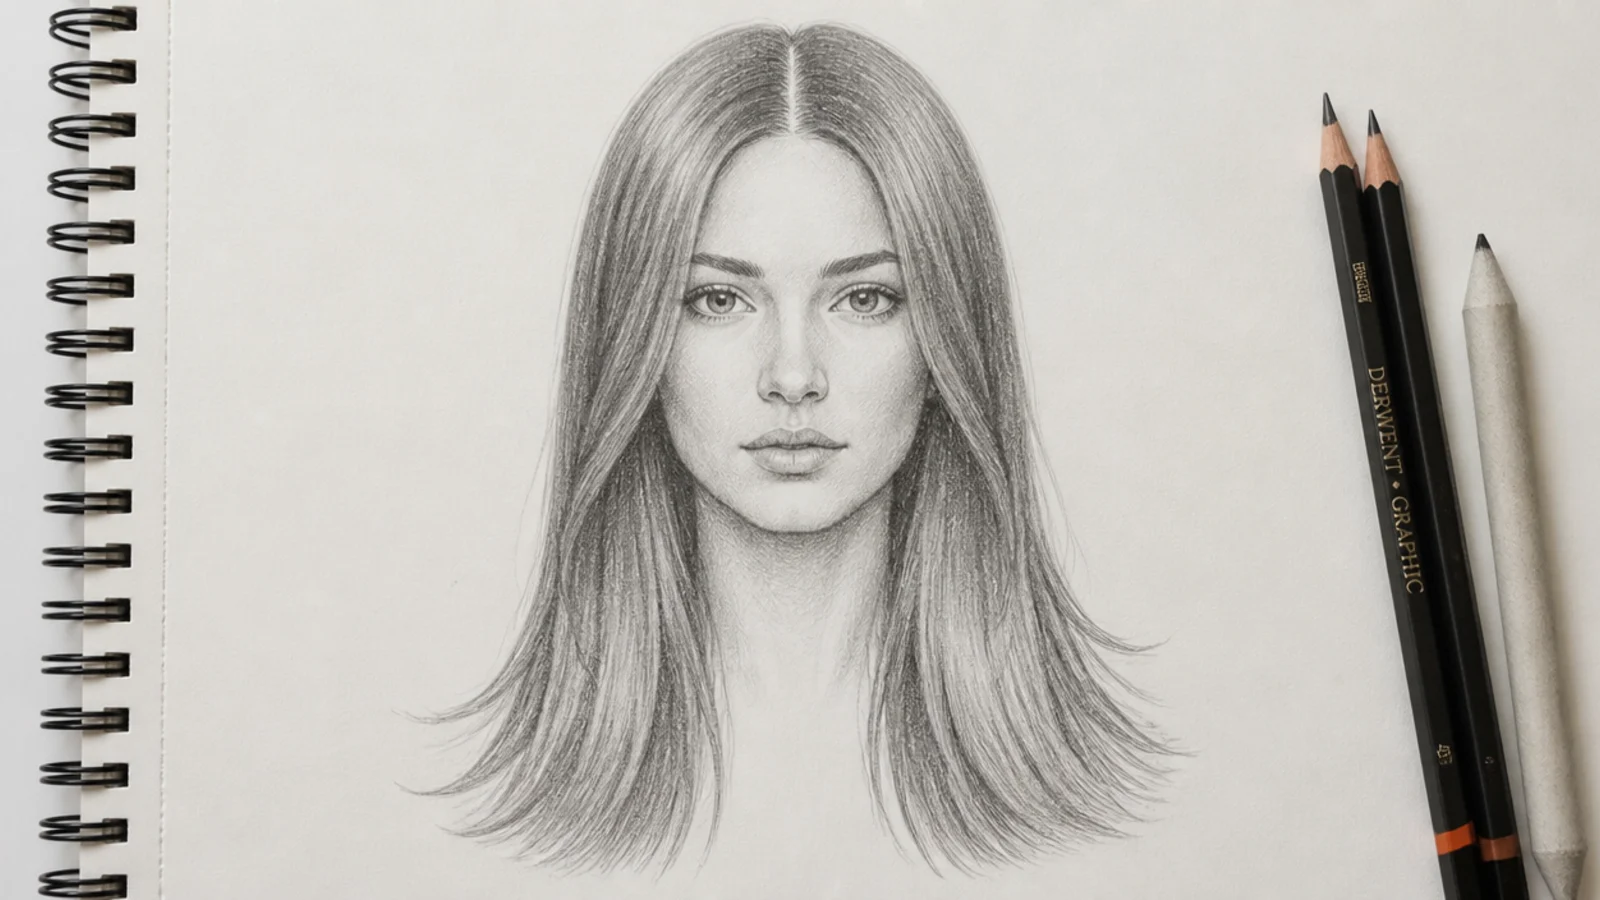
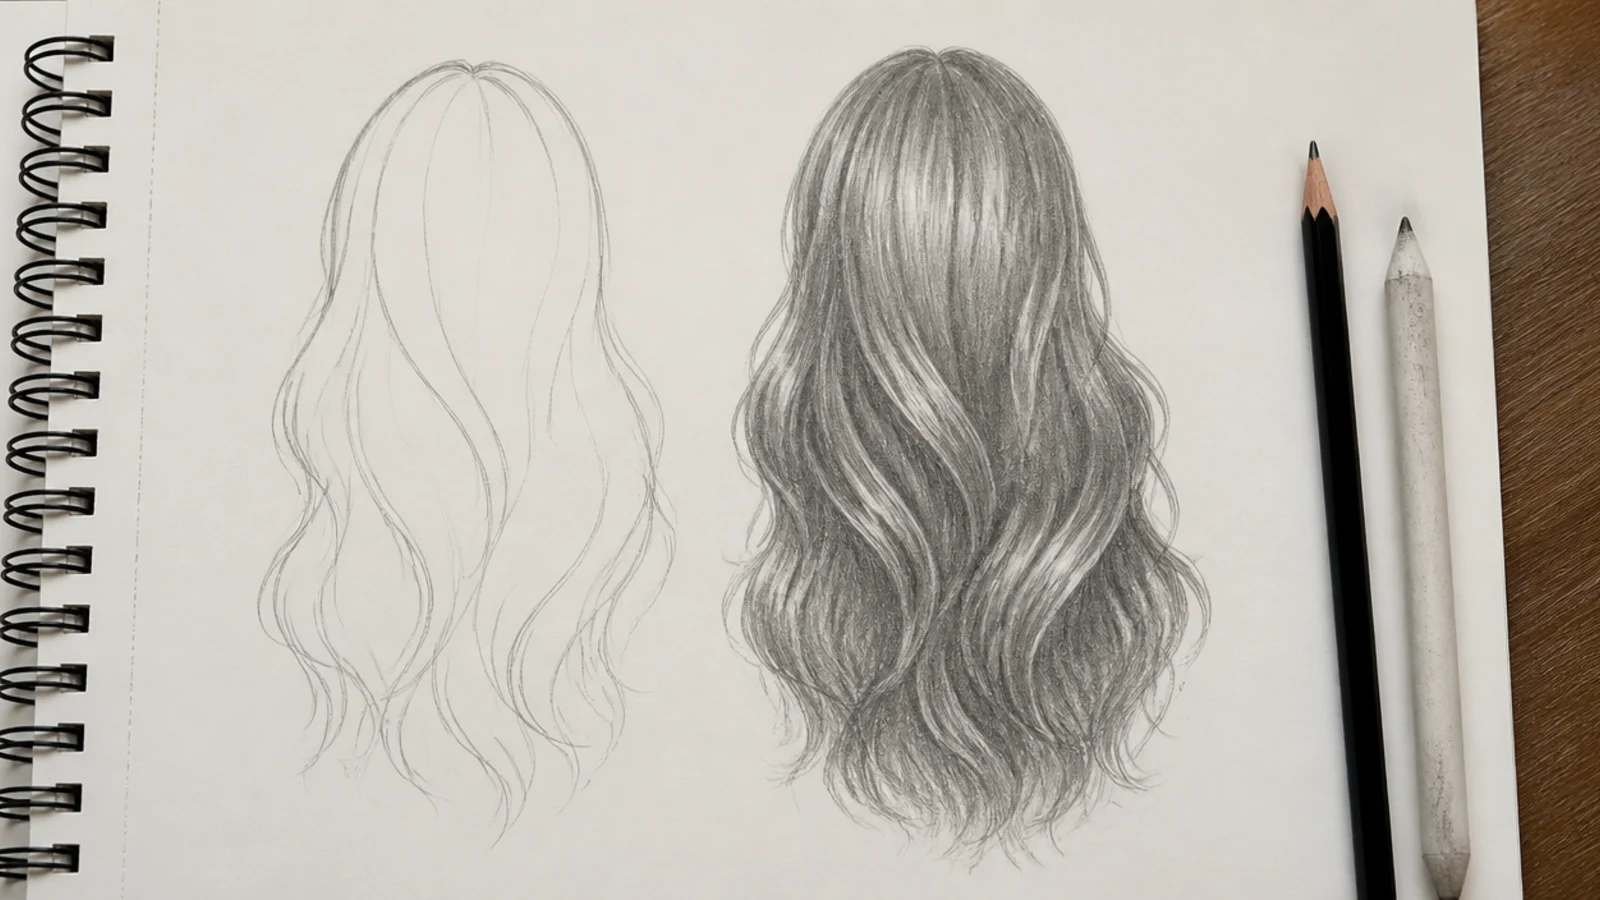
The cleanest place to begin. Draw the skull, mark a soft rounded hairline about a third down the forehead, then block the hair as one shape sitting 8 to 12mm outside the skull so it has volume. Set a center part, then pull six long 2H guide lines from the part down past the collarbone, wider at the shoulders than at the head. Fill between them with grouped HB strokes and a 4B shadow behind the jaw on each side. Around 12 minutes start to finish.
Who it suits: Total beginners, and anyone whose first female hair attempt came out helmet-shaped.
Tip: Break the bottom edge with 5 to 10mm flicks so the ends read as hair and not as a cut-out.
2. Loose Beach Waves Over One Shoulder
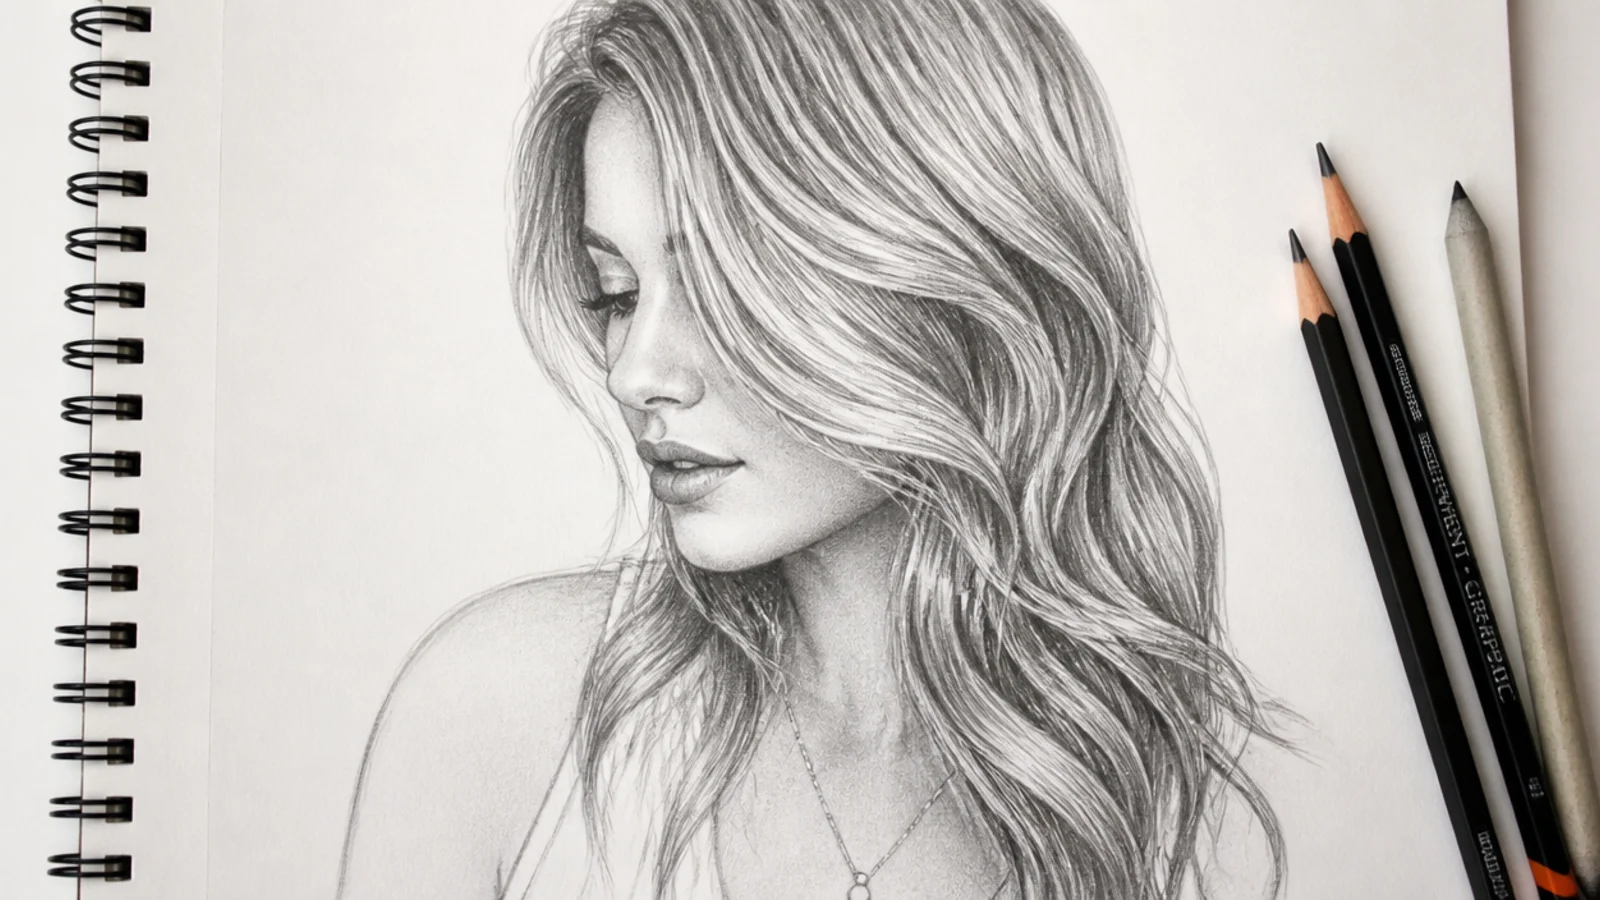
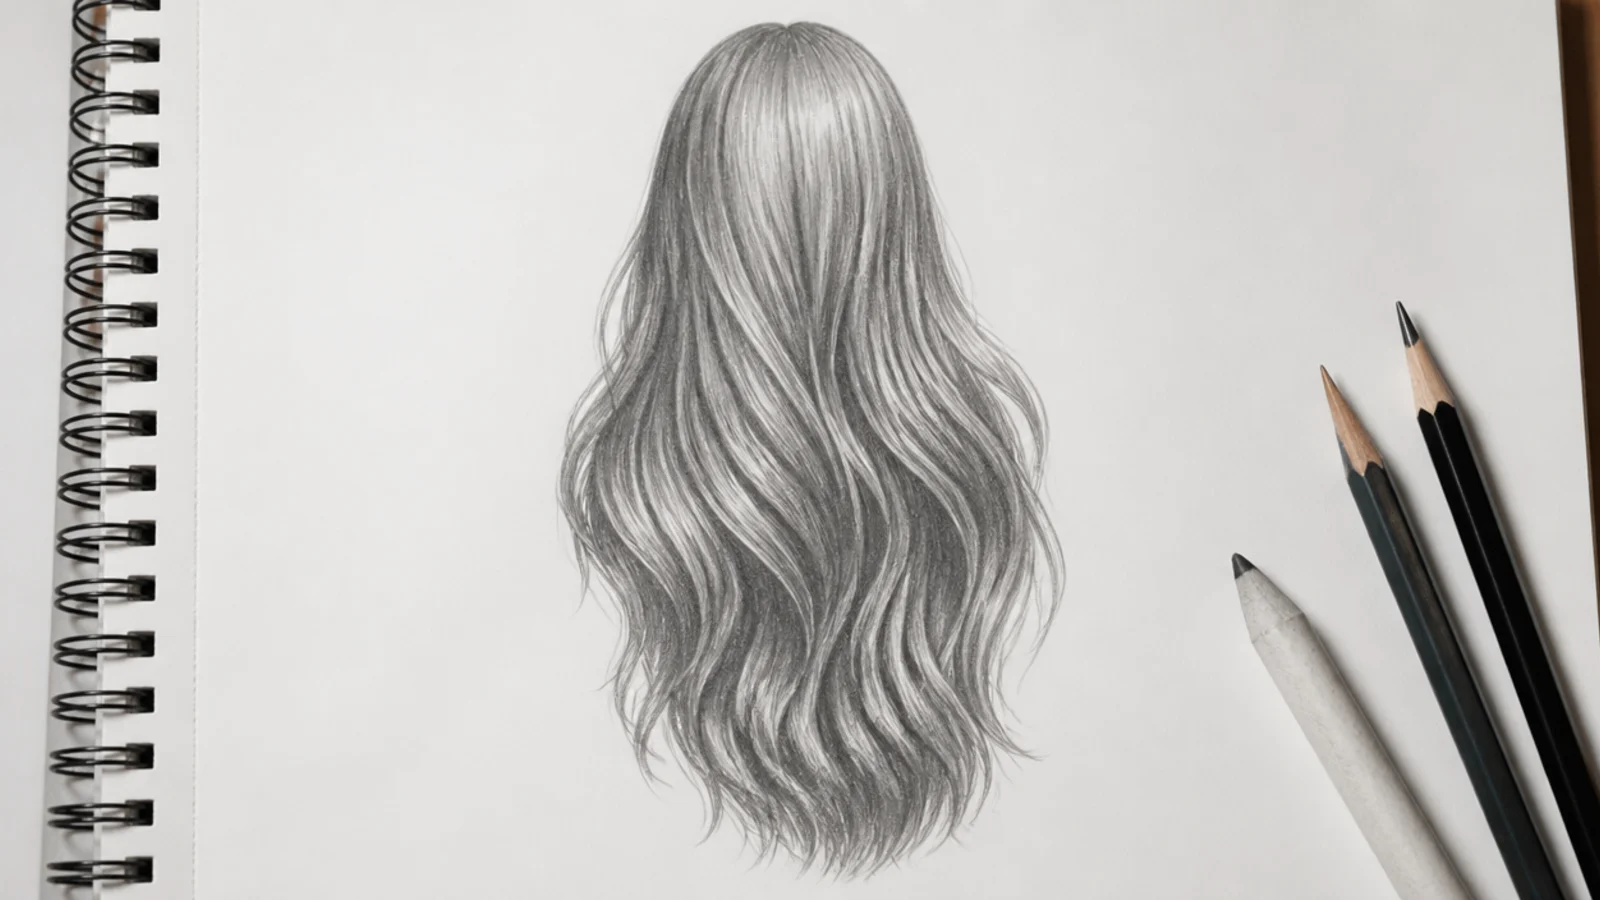
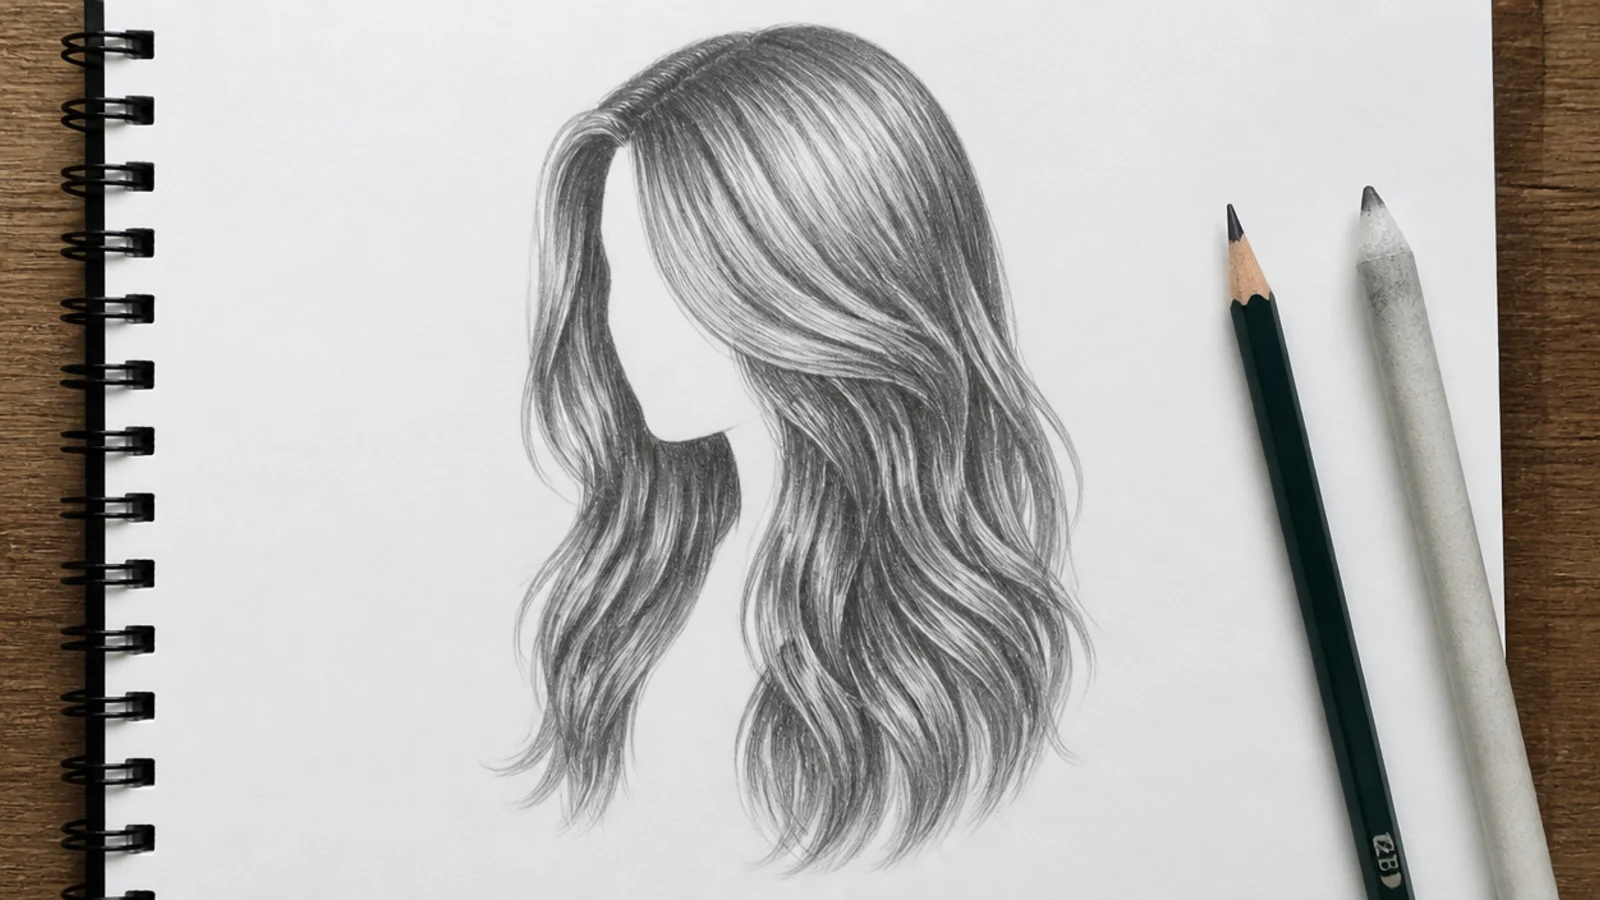
Wavy hair is straight hair with an S pushed into it. Draw the straight version in 2H first, then bend each guide into a lazy S roughly 25 to 35mm between peaks, loosening toward the ends. Sweeping the whole mass over one shoulder gives an asymmetric silhouette that instantly looks designed rather than symmetrical. Shade the inside of every S curve with 4B and leave the outside as bare paper, which is what creates the soft shine band women's hair is known for.
Who it suits: Anyone ready to move past flat straight hair without committing to real curls.
Tip: Keep the wave rhythm consistent; randomly sized S bends read as frizz rather than as waves.
3. Wavy Hair Blowing in the Wind, Three-Quarter View
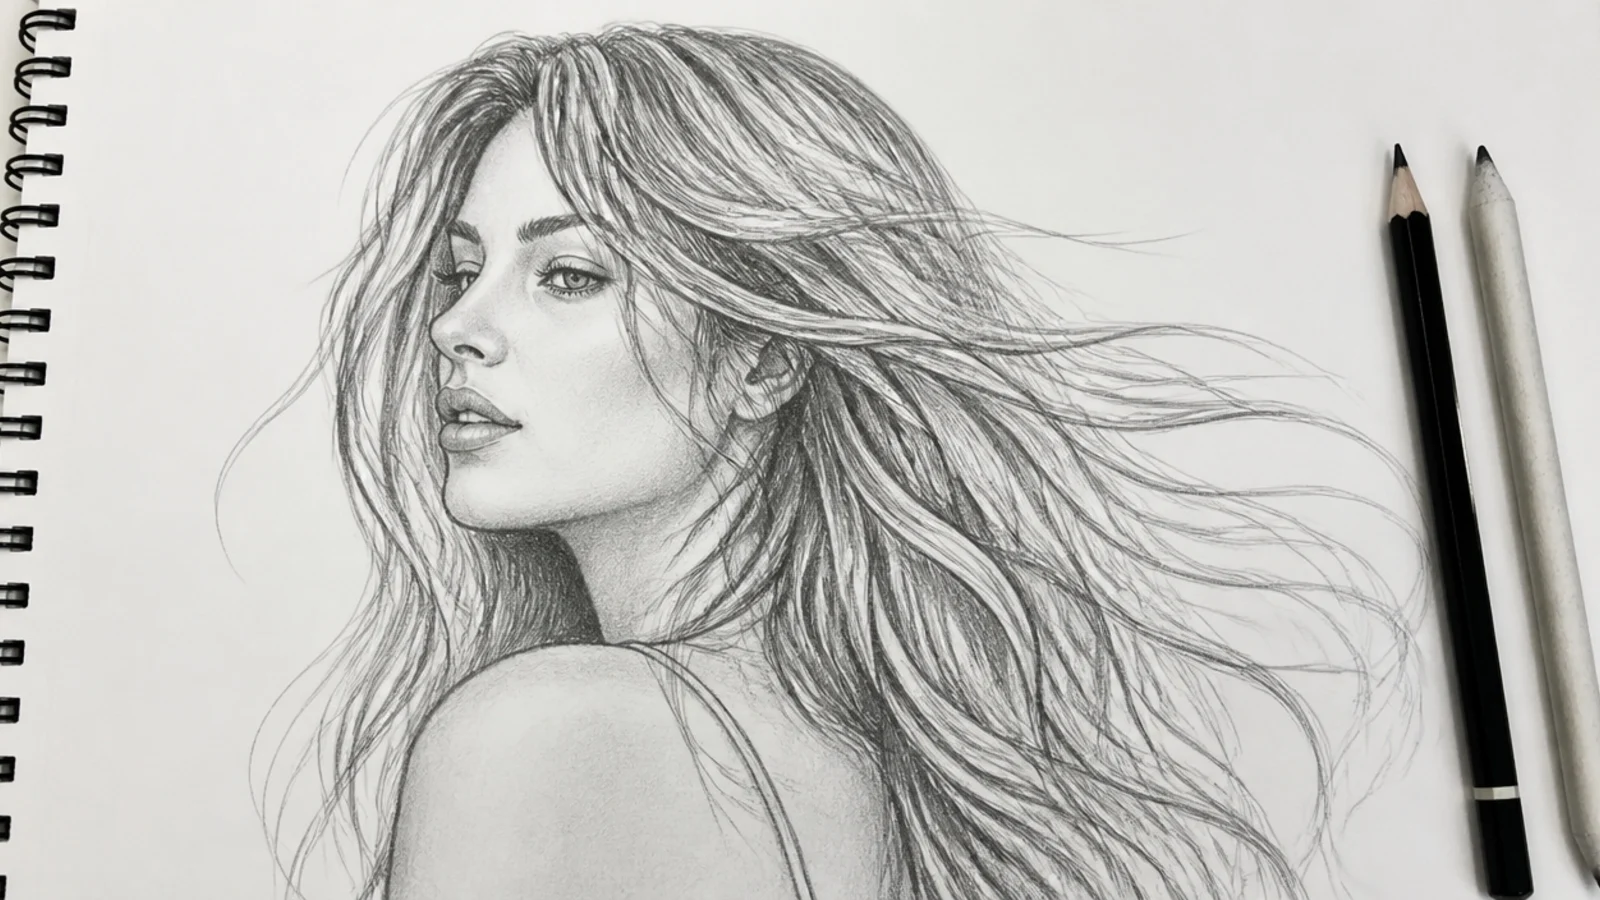
Hair in motion is the most saved female hair sketch on Pinterest and the least taught. Pick one wind direction and commit: every strand group leaves the crown, travels back over the skull and then lifts away on the same side. Two or three groups should separate from the mass entirely with clear gaps of white paper between them, since gaps are what sell movement. Keep the roots tight to the head and let the last third of each group whip. Give it 20 to 25 minutes, and see long hair sketch for more flow practice.
Who it suits: Character artists and anyone whose hair drawings always look static and posed.
Tip: Draw the negative shapes between the flying sections; if those read, the motion reads.
4. Low Messy Bun with Face-Framing Strands
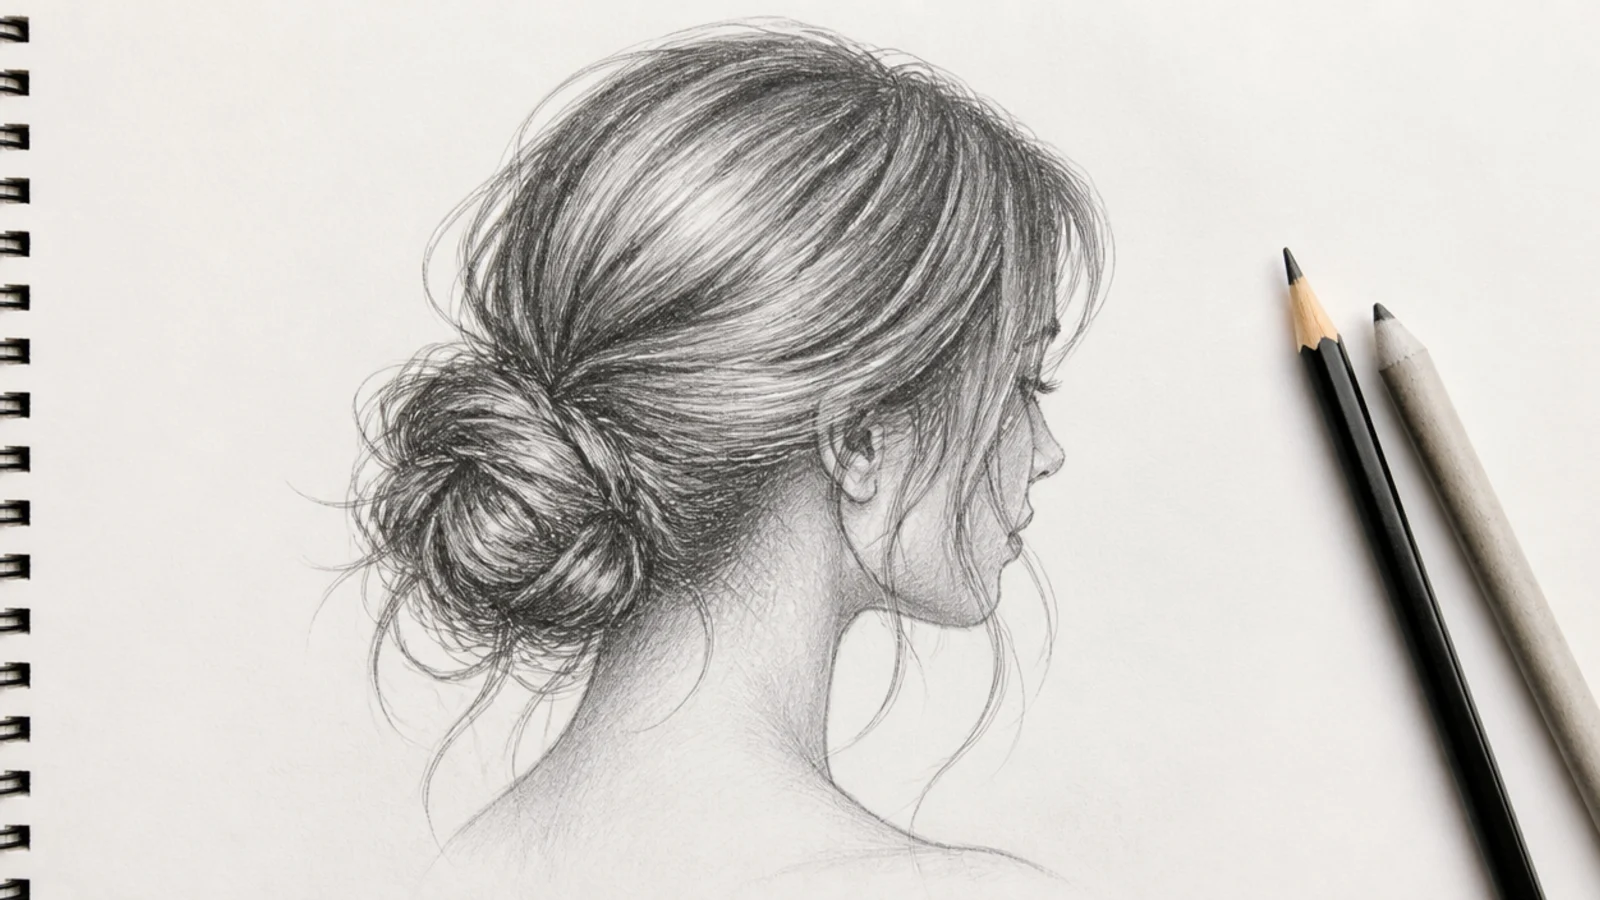
Two shapes only: a swept mass running from the hairline back to a knot at the nape, and a rough ball on that knot. Because the hair is under tension, every flow line converges on one point, which makes this a clean direction exercise. Push a 6B core where the mass meets the ball. The messiness is four or five loose strands added last, curving away with real arcs rather than scribble, plus two face-framing pieces falling in front of the ears. Real-world reference at low messy ponytail.
Who it suits: Portrait sketchers who want a soft, lived-in look instead of a sleek one.
Tip: Add the stray strands after shading, never before, or the blending stump smears them away.
5. High Ponytail Drawn from the Back
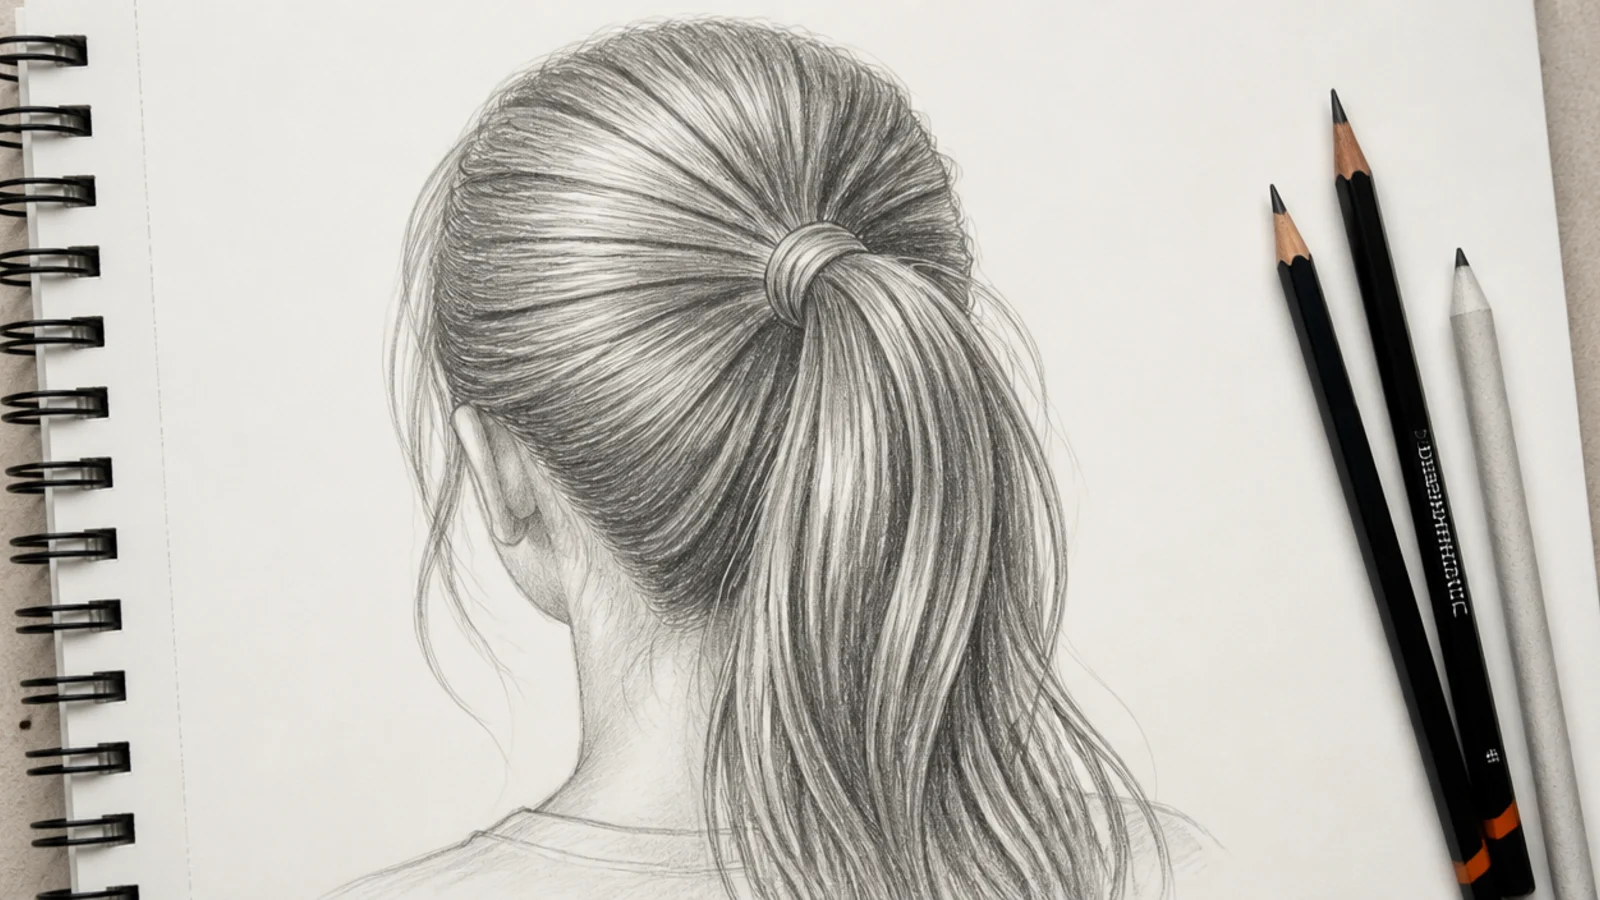
The angle almost nobody practices, and it is easier than the front because there is no face to get wrong. Draw the back of the skull as an egg, place the crown swirl about two thirds of the way up, then fan every line from that swirl to the gathering point. Below the tie the hair spreads back out into a tapered cone with a slight kink. This one sketch teaches you where hair actually originates, which quietly fixes your front views too. See how to messy ponytail for photo structure.
Who it suits: Anyone who has only ever drawn female hair from the front.
Tip: Put your darkest 6B value directly above the tie where the gathered hair compresses.
6. Chin-Length Blunt Bob, Side View
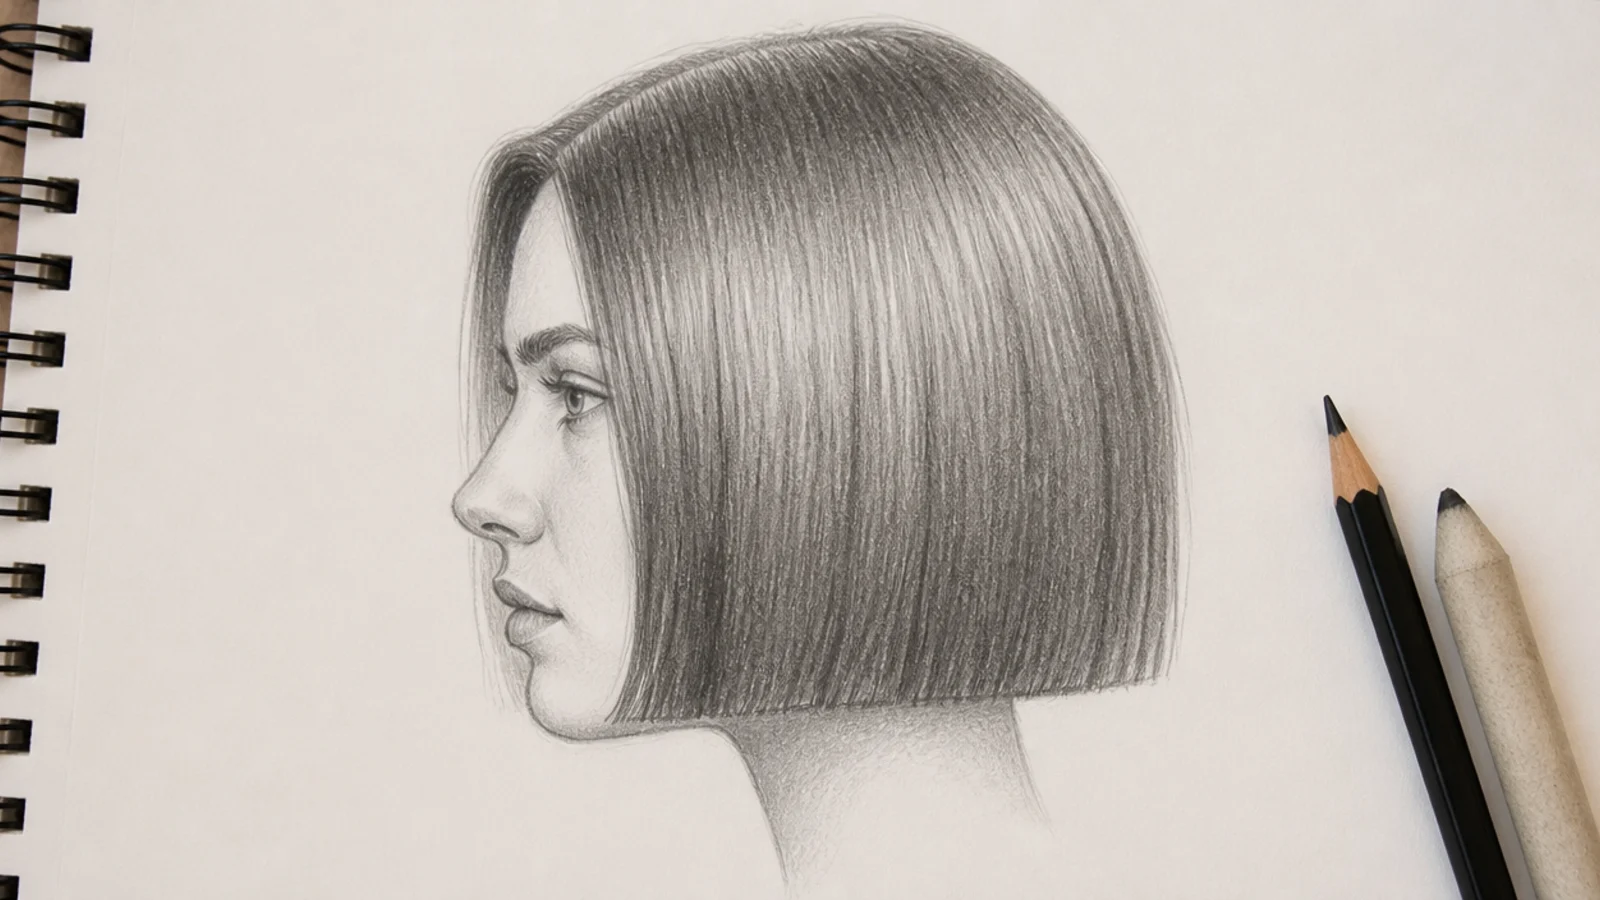
The one female hairstyle where a hard bottom edge is correct, which makes it forgiving. From the side, block a bell shape ending level with the chin, widest at jaw height rather than at the ear, with the nape edge tucking in slightly. Keep the interior nearly empty: three long HB strokes and one 2B shadow where the mass turns behind the cheekbone. Over-detailing the interior is what kills a bob, so stop earlier than feels finished. Roughly 10 minutes, and the hair sketch tutorial covers the same blocking order in steps.
Who it suits: Beginners who want a finished-looking female hair sketch fast.
Tip: Even a blunt cut needs 1 to 2mm of tiny breaks along the bottom line or it reads as plastic.
7. Pixie Cut with Side-Swept Fringe
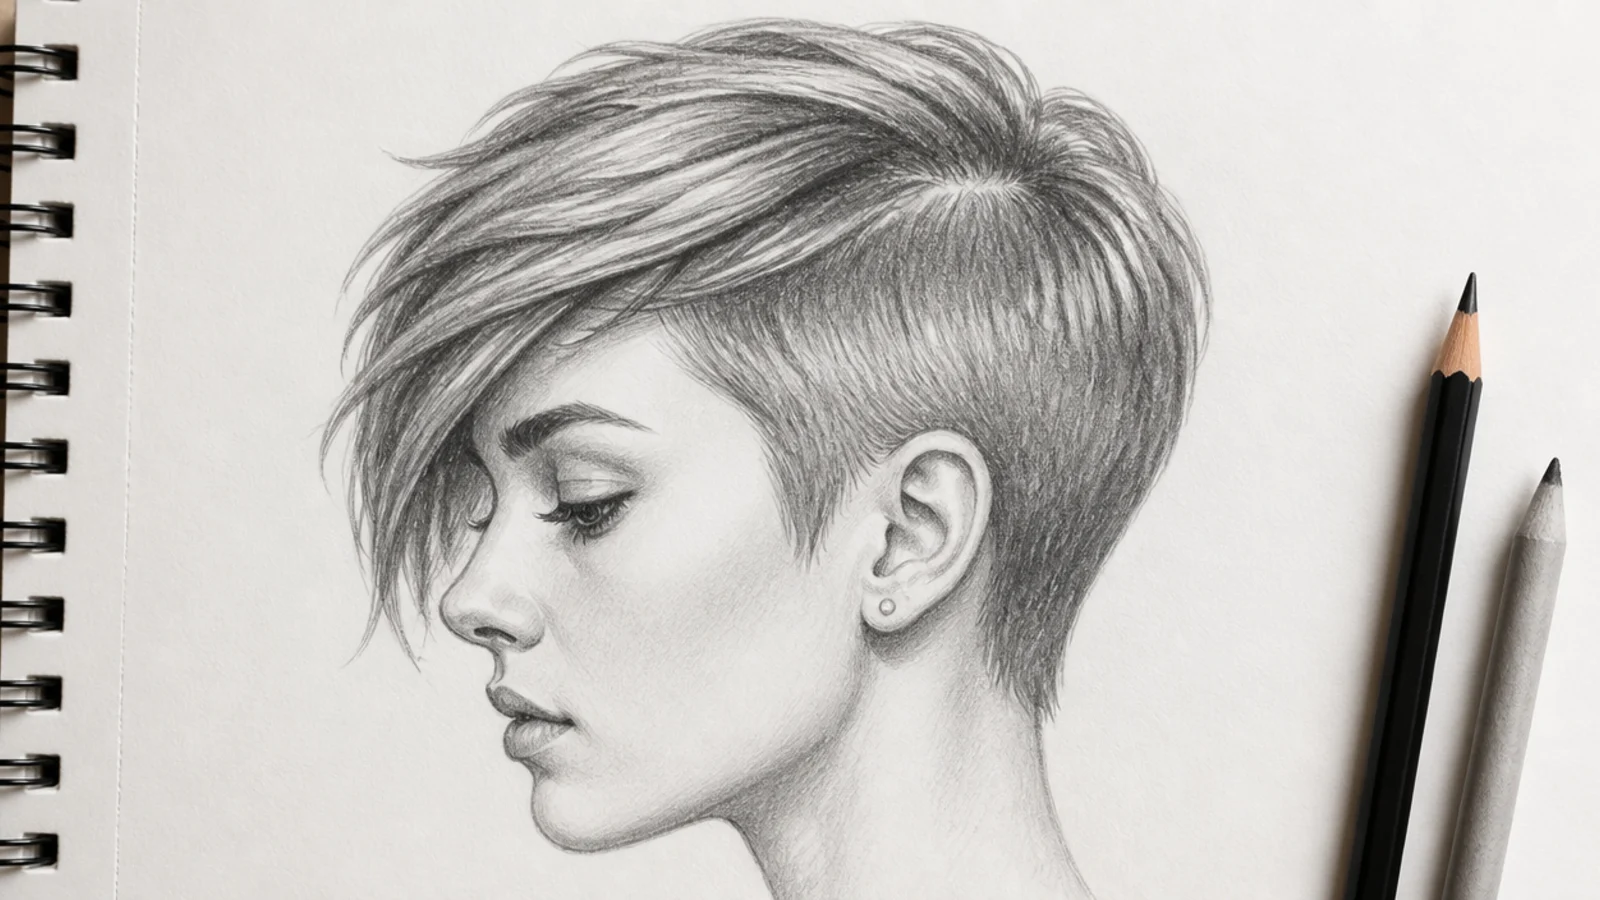
Short hair hides nothing, so this is a skull drawing exercise with a hairstyle on top. Lay the hair as a 5 to 8mm shell that thickens at the crown and thins to almost nothing at the nape. Strokes run 5 to 12mm, sweeping forward and up. The fringe is the feminine signal here: sweep it diagonally across the forehead so it lands at the outer corner of the far eyebrow. Leave a white highlight band across the top curve to prove the skull is round.
Who it suits: Artists who draw hair too thick and lose the head shape underneath it.
Tip: Let the nape hair fade into the neck rather than stopping at a hard drawn line.
8. Long Curly 3B Hair Drawn as Ribbons
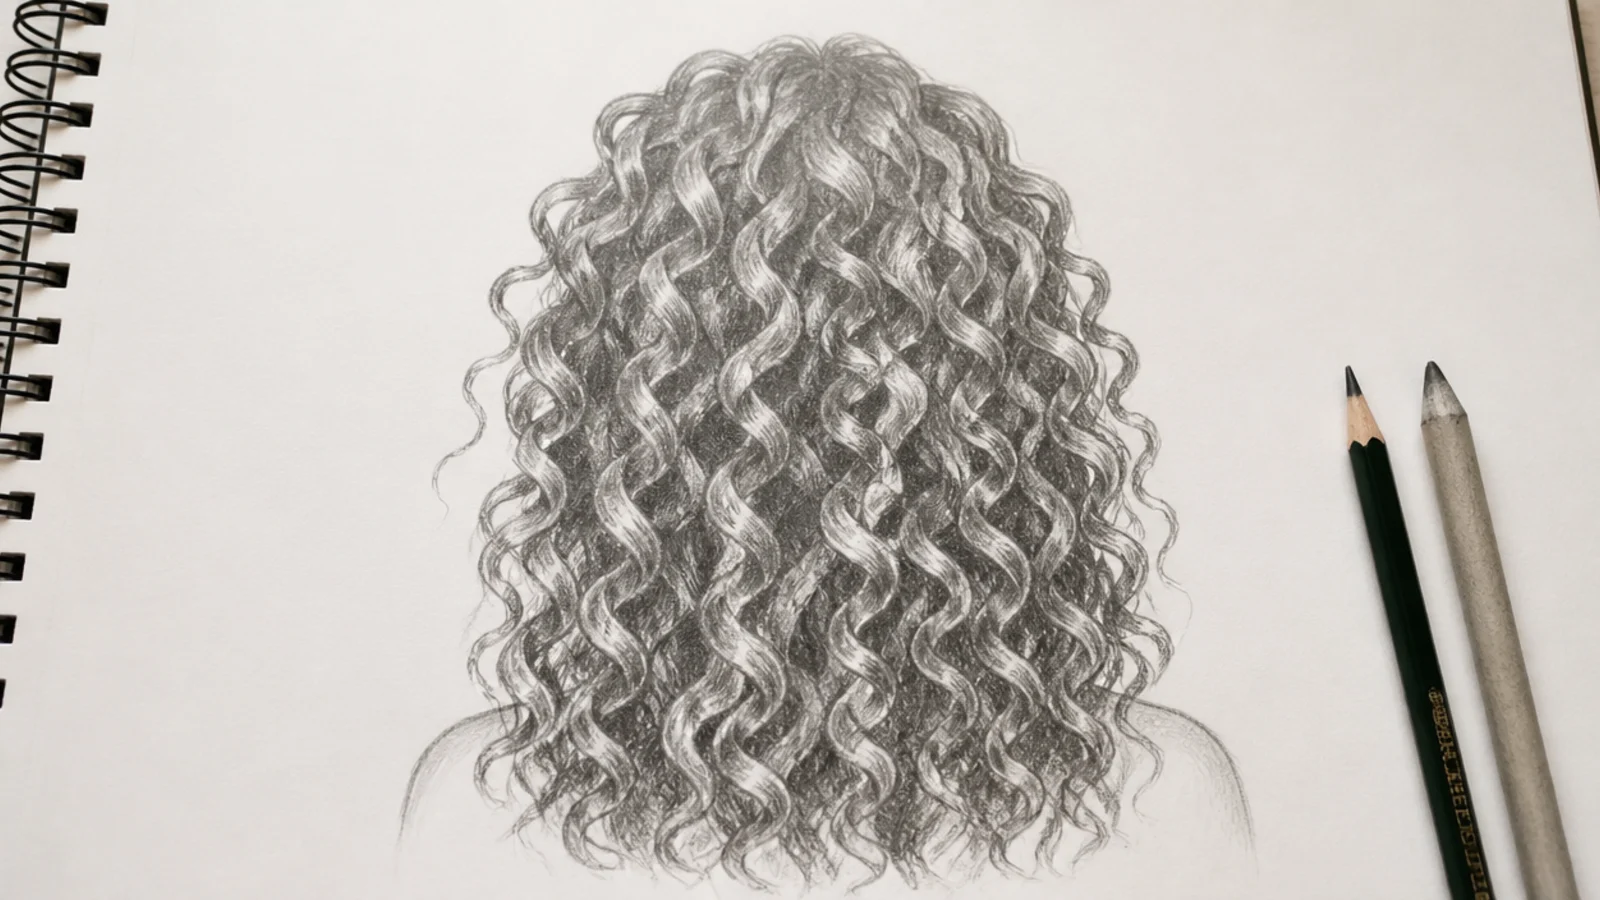
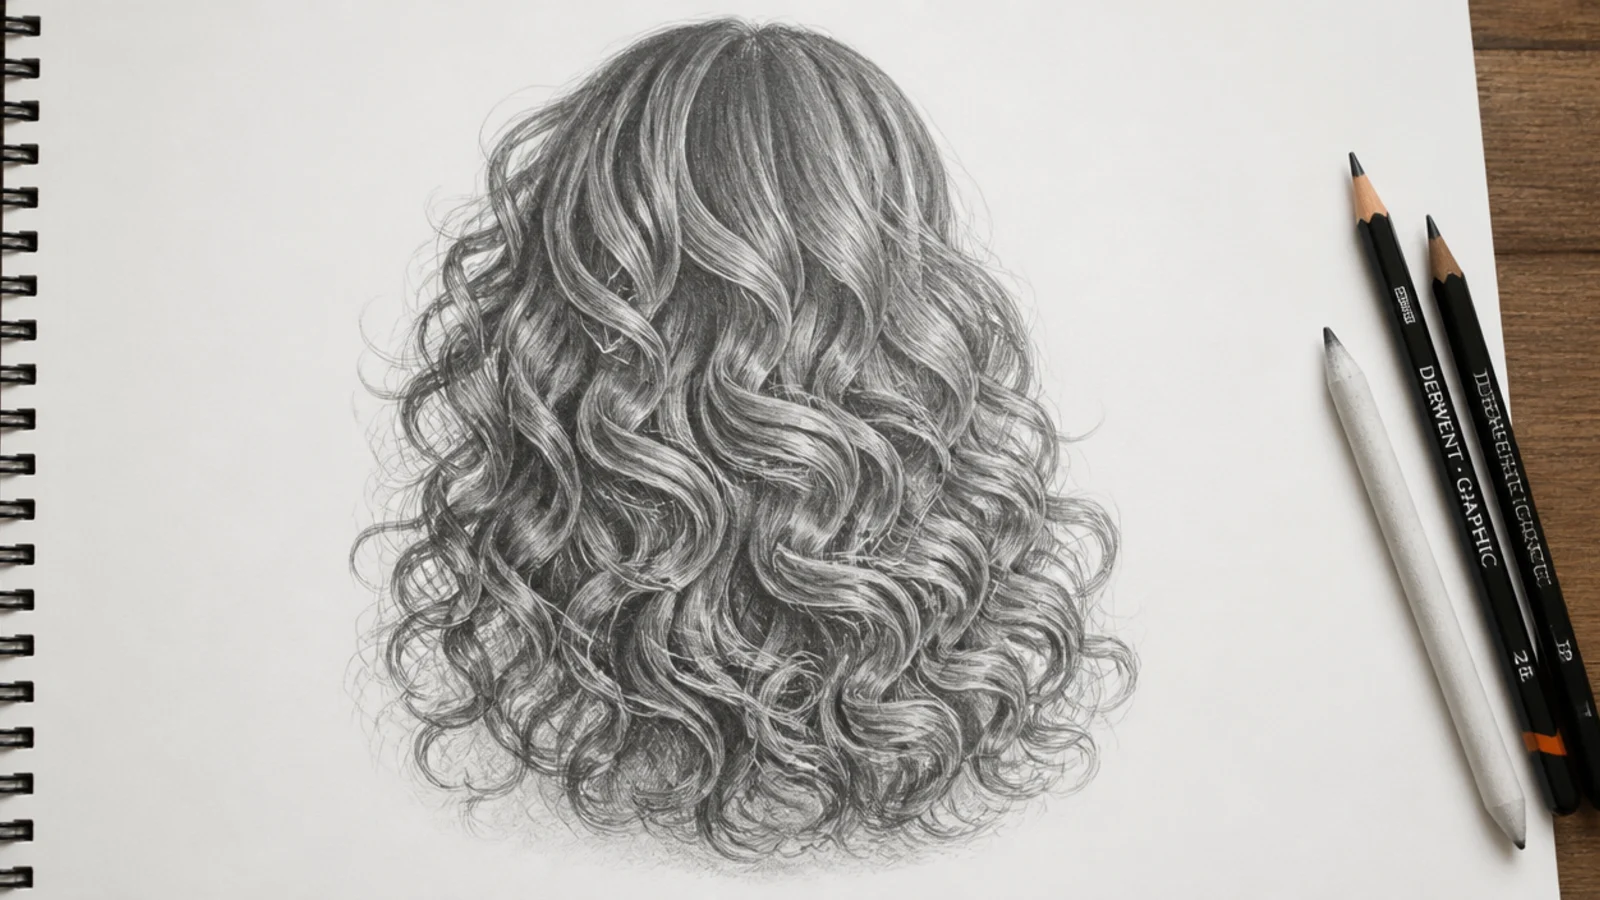
The single fix for beginner curls: stop outlining spirals and draw each curl as a twisting ribbon. A ribbon has a front face and a back face, so light hits one and the other goes 4B to 6B dark, and the curl reads as solid immediately. Vary ribbon width, wide near the crown and tighter at the ends, and only fully describe eight to twelve ribbons across the whole head. Suggest the rest with value. The full method is in curly hair sketch.
Who it suits: Anyone whose curls keep coming out looking like drawn springs or phone cords.
Tip: Never run a hard continuous outline around a curl; break it wherever light hits the ribbon.
9. Round Afro with a Soft Halo Edge
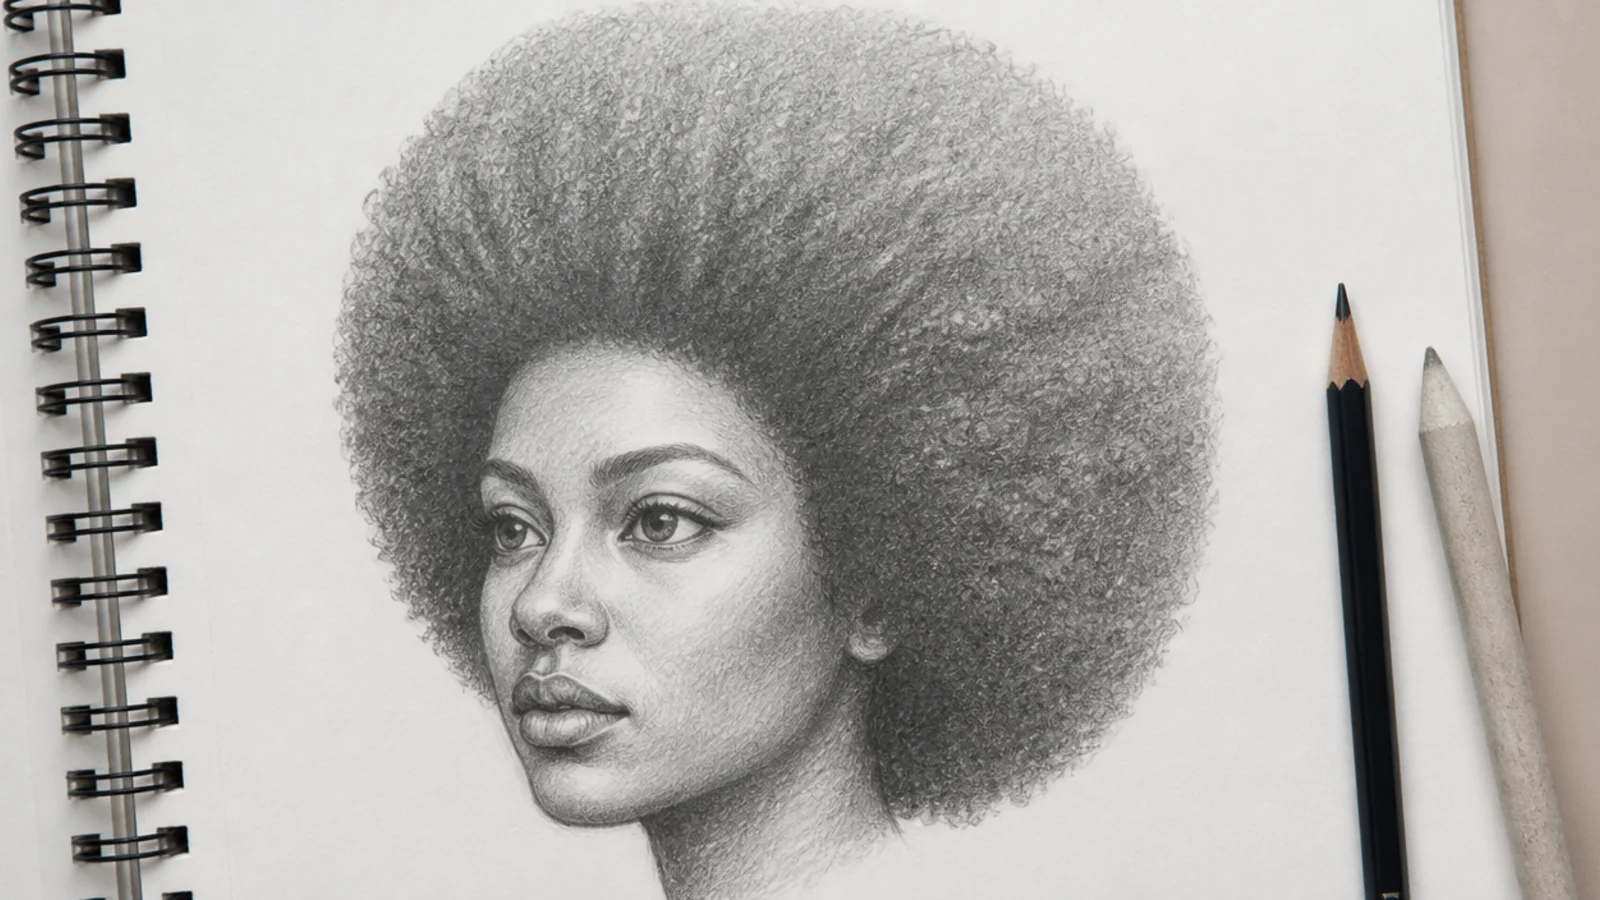
An afro is a sphere of texture wrapped around a head, sitting 30 to 50mm proud of the skull. Block that circle lightly and resist drawing a single coil. Break the outline with tiny overlapping loops so the edge reads as a soft halo rather than a smooth arc. Inside, work only in value: 6B in the deep zones near the scalp and behind the ears, 2B mid tones, and a lifted highlight band across the upper curve. Coils are suggested, never counted. The clump method carries over from curly hair sketch.
Who it suits: Character artists drawing textured hair, the most skipped texture in hair tutorials.
Tip: Keep the hairline slightly ragged and soft; a crisp edge instantly reads as a wig cap.
10. Waist-Length Locs with Gold Cuffs
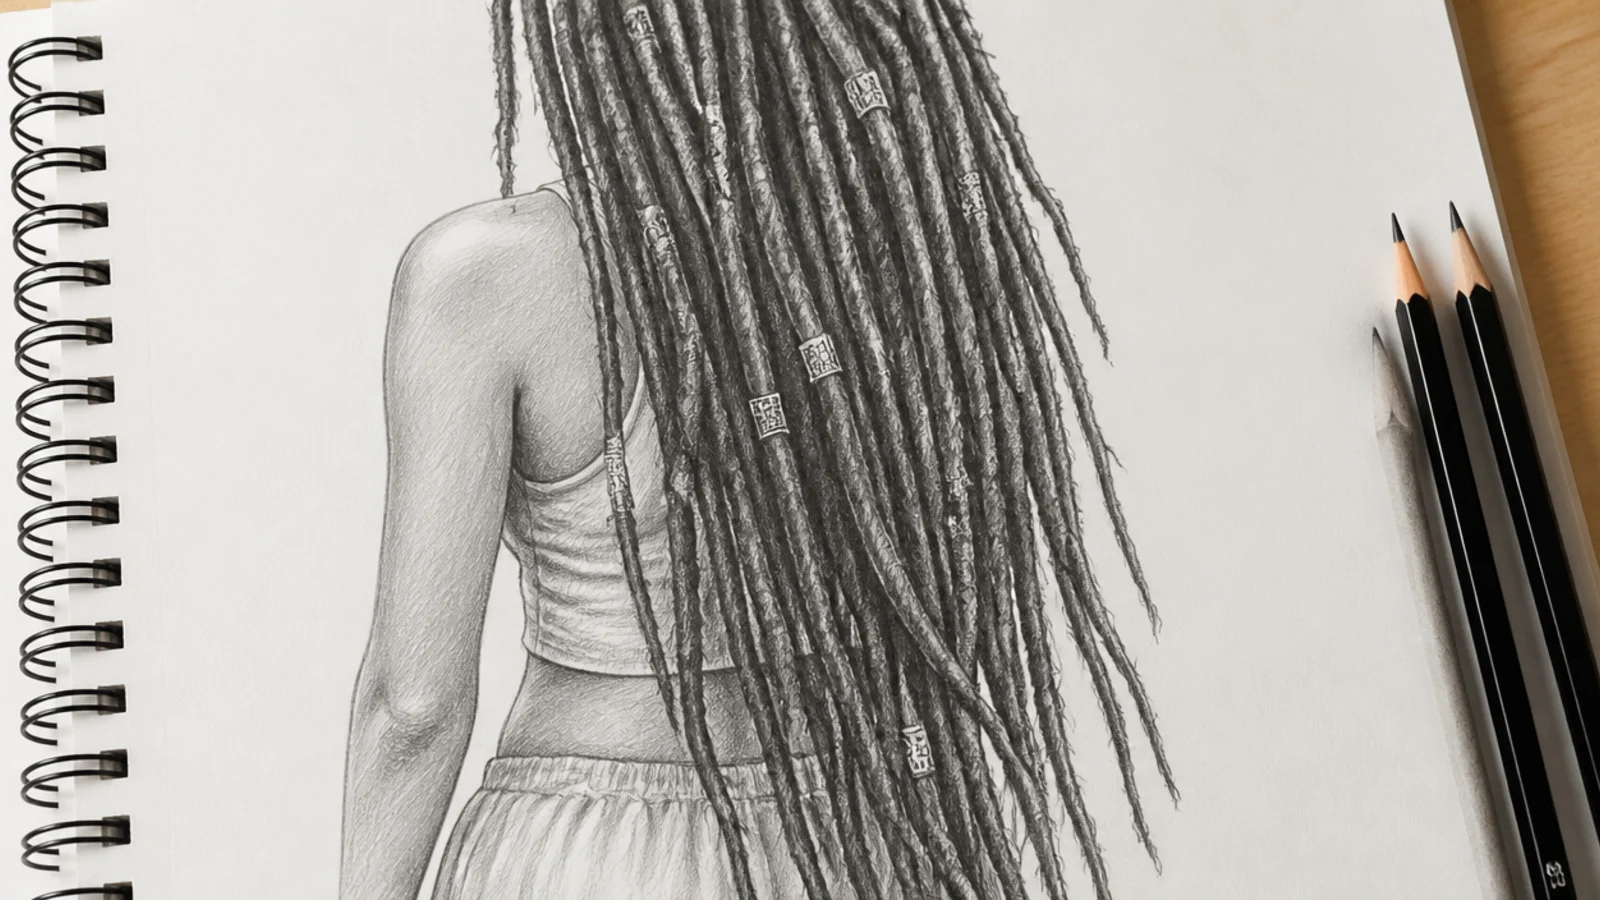
Locs are the friendliest textured style to draw because each loc is a cylinder, and cylinders shade predictably. Hang 18 to 24 slightly uneven tubes from a visible parting grid on the scalp, vary the thickness, and let several cross in front of others. Give every tube a 2B shaded side, a bare paper core highlight and a 6B contact shadow where it overlaps a neighbor. Two or three small cuffs, drawn as banded ellipses with a hard white glint, add the jewelry detail.
Who it suits: Anyone who struggles with mass texture but can already shade a cylinder.
Tip: Roughen each loc with short cross strokes or it will read as smooth wire instead of hair.
11. Fishtail Braid Over the Shoulder
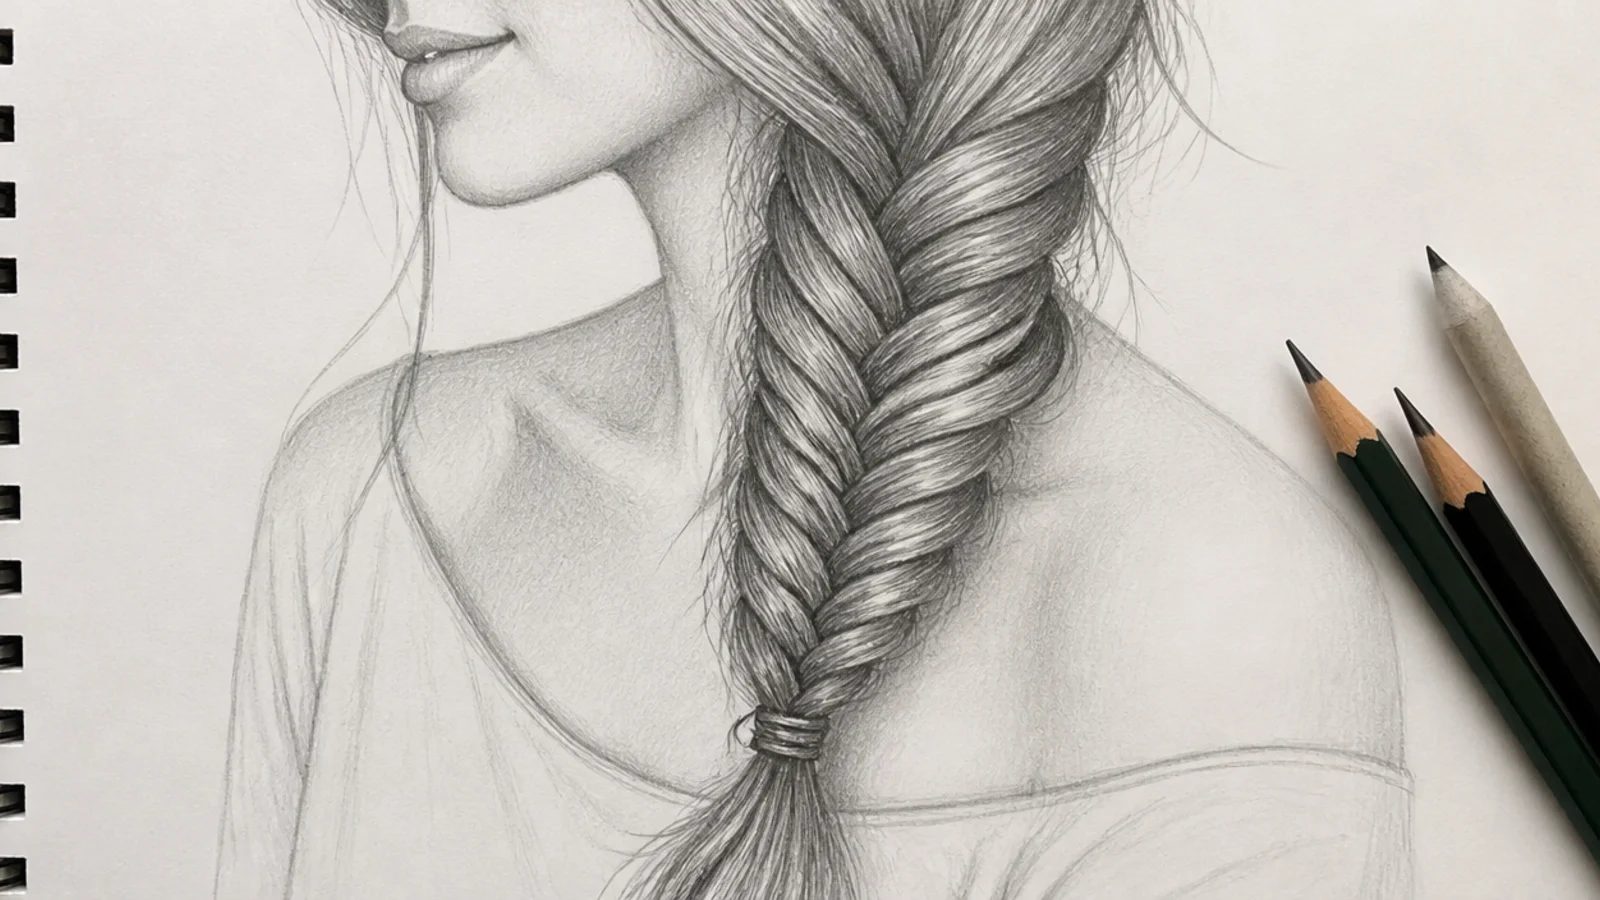
Do not track individual strands with your eye. A fishtail is a column of small chevrons alternating left and right down a gentle curve, each one tucking under the piece above it. Draw the column path first, divide it into 15 to 20 chevrons that shrink toward the tip, then put a 4B shadow at every tuck point. The braid reads immediately. Over the shoulder is the easiest angle because the whole column sits on one plane. Structure reference at mermaid braids.
Who it suits: Sketchers who want a braid that looks complex but follows one repeating rule.
Tip: Loosen the chevrons near the crown and tighten them near the tip so the braid tapers.
12. Crown Braid Wrapped Around the Head
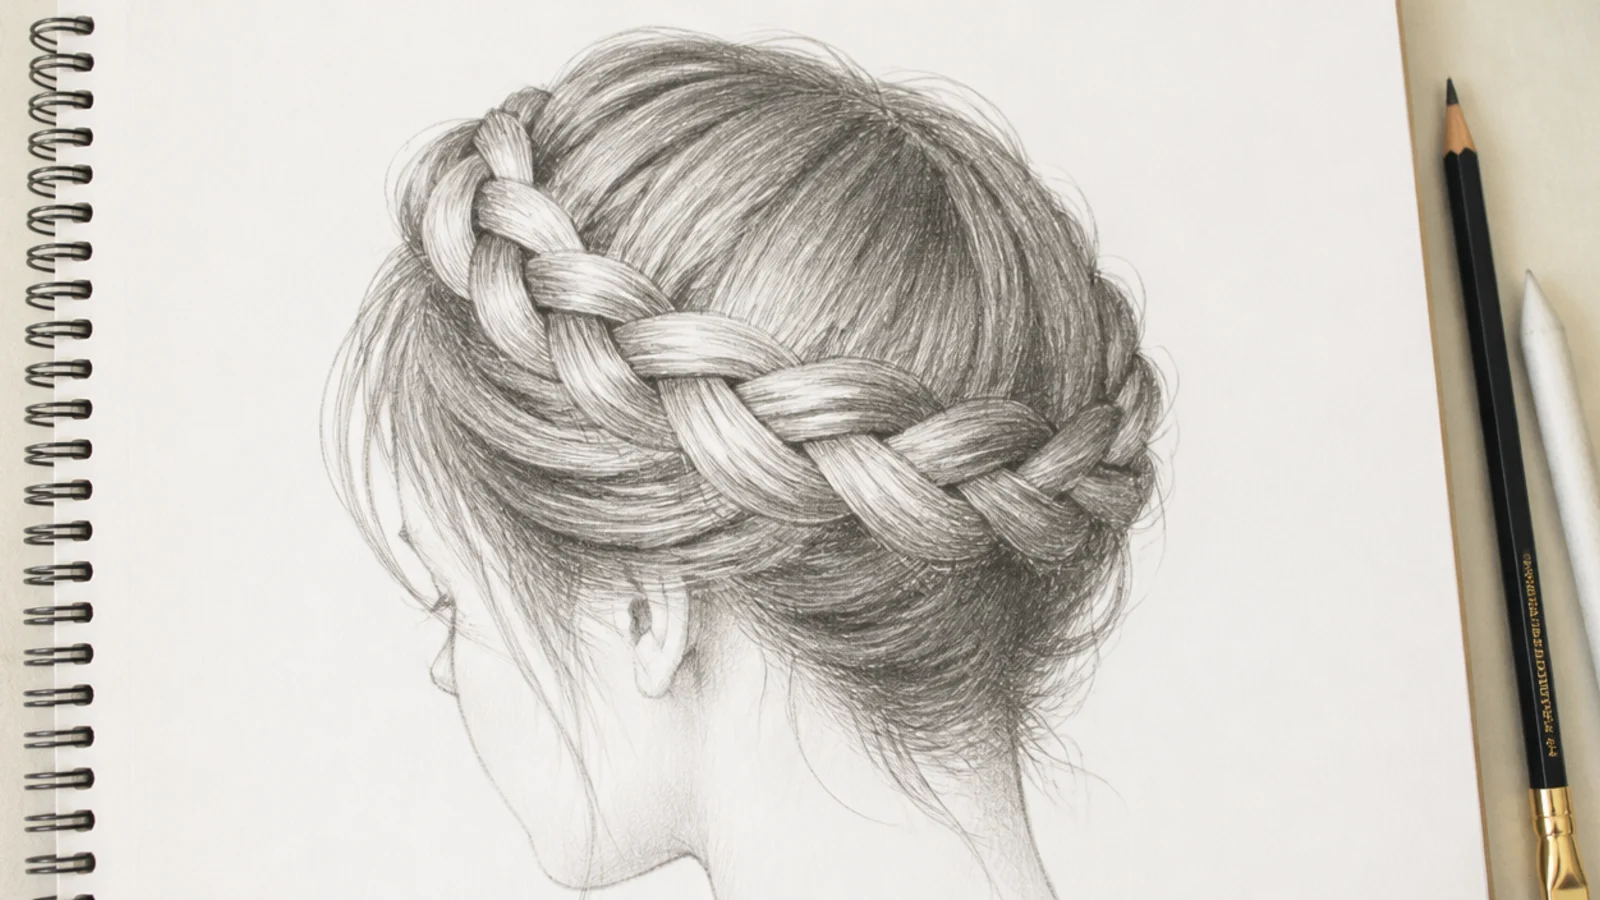
The same braid logic as a fishtail, but curving around a sphere, so it doubles as a perspective drill. Draw the path of the braid across the skull as one curved band before dividing it, then compress the sections as the band travels to the far side of the head. Because a crown braid sits on top of the surrounding hair, give the whole band a 4B cast shadow along its lower edge, and let feed strands sweep up into it from below rather than stopping at its border.
Who it suits: Anyone combining braid structure with foreshortening for the first time.
Tip: Sections on the far side should be less than half the width of the ones nearest the viewer.
13. Half-Up Half-Down with a Claw Clip
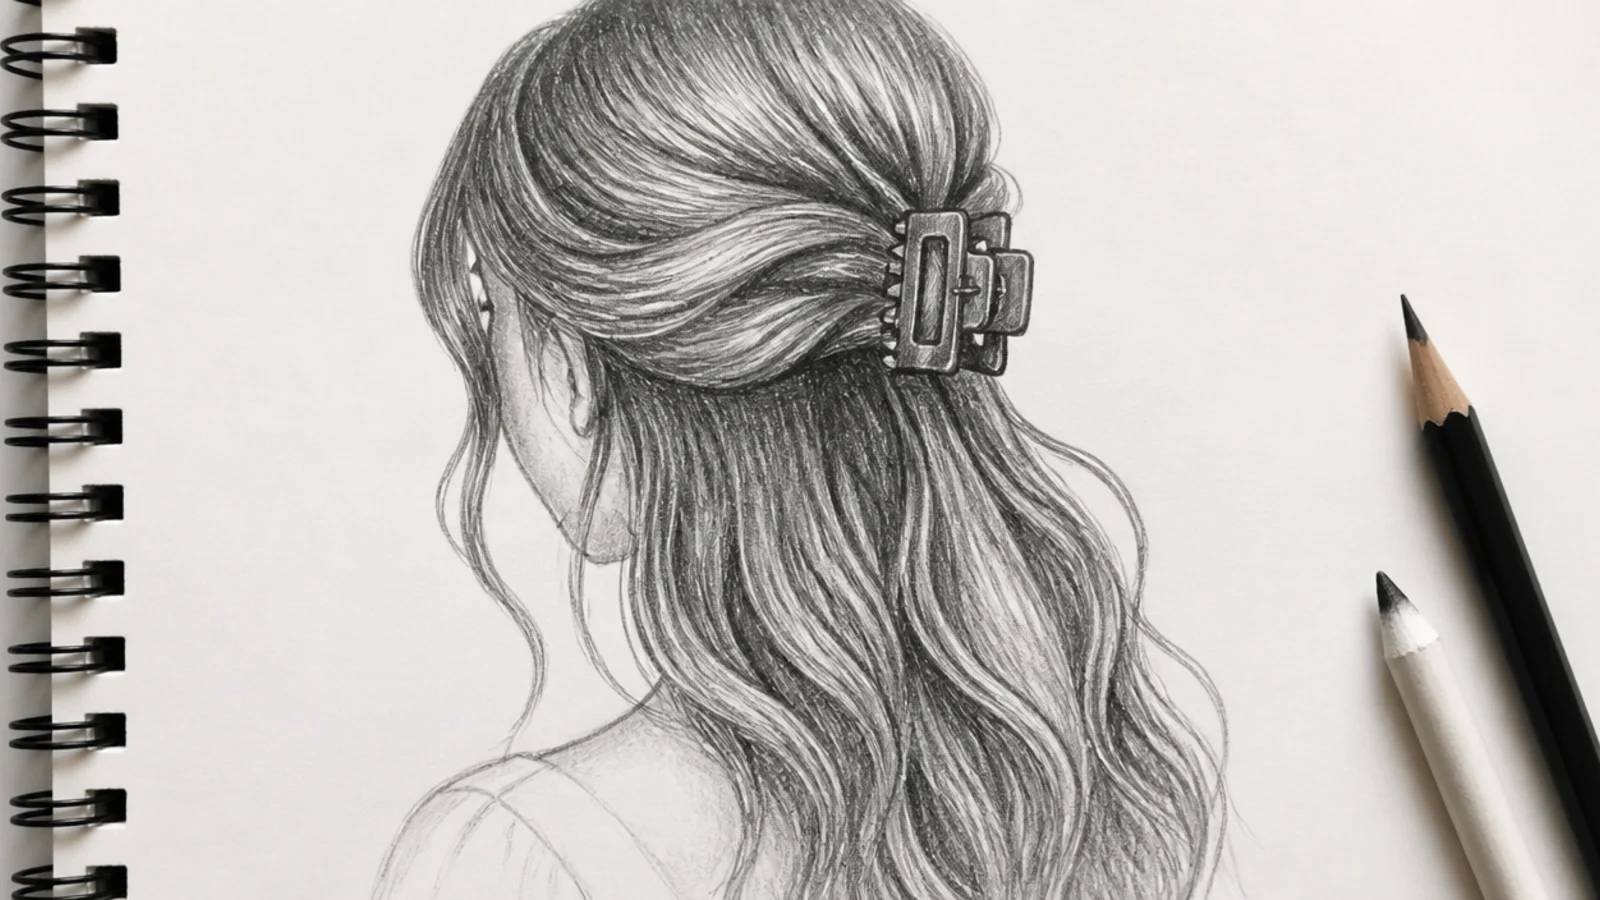
Two hair behaviors in one drawing, which is exactly why it is good practice. The top section is under tension, so its lines are smooth and converge on the clip. The bottom section is loose, so its lines fan and flick. Draw the clip as a simple wedge with two or three teeth showing, then run a 6B shadow directly under it where the gathered hair bunches. The visible boundary between tense and loose hair is what makes the style read at a glance, and half-up graduation hairstyles is a useful photo reference for the split.
Who it suits: Everyday hairstyle studies and slice-of-life character illustration.
Tip: Let three or four loose pieces escape the clip; a perfectly captured top section looks fake.
14. Wet Hair Slicked Back from a Center Part
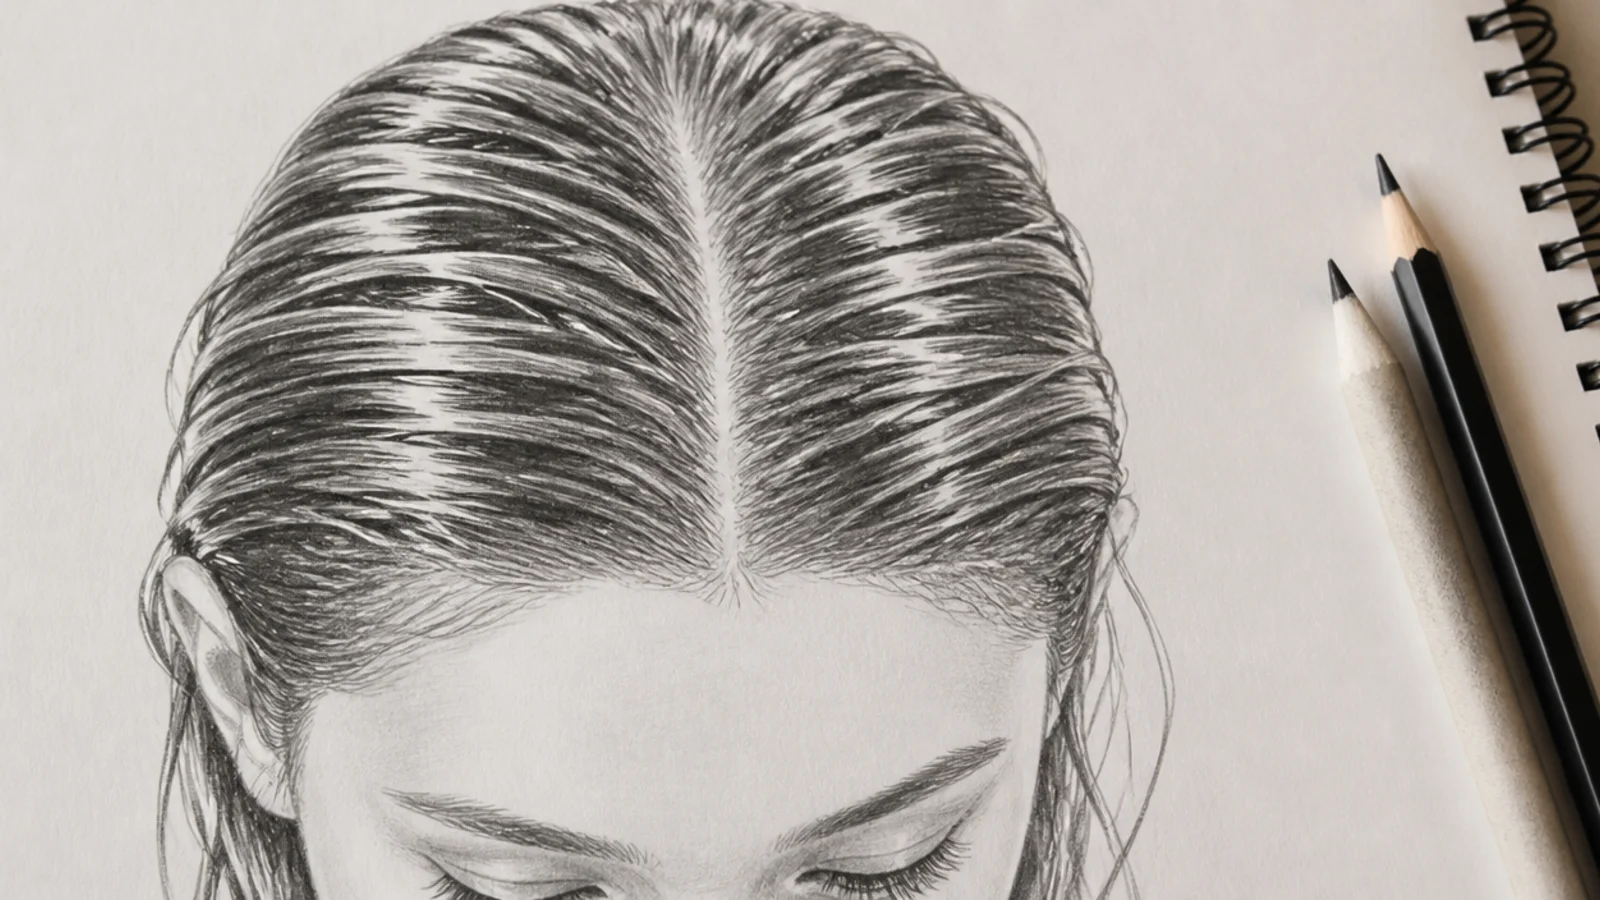
Wet hair inverts the usual value plan. The mass hugs the skull with almost no volume, strands clump into 6 to 10 thick ropes, and the highlights become hard-edged glints rather than soft bands. Push the contrast hard: 6B right down to bare paper within 3 or 4mm, with no gentle mid tone in between. Keep the silhouette tight and show a little scalp at the part. It is the fastest way to prove you understand value, and it takes about 15 minutes.
Who it suits: Intermediate sketchers who want a high-contrast, editorial-looking result.
Tip: Cut the highlight edges with a hard vinyl eraser rather than lifting them softly.
15. Hime Cut with Blunt Cheek-Length Side Panels
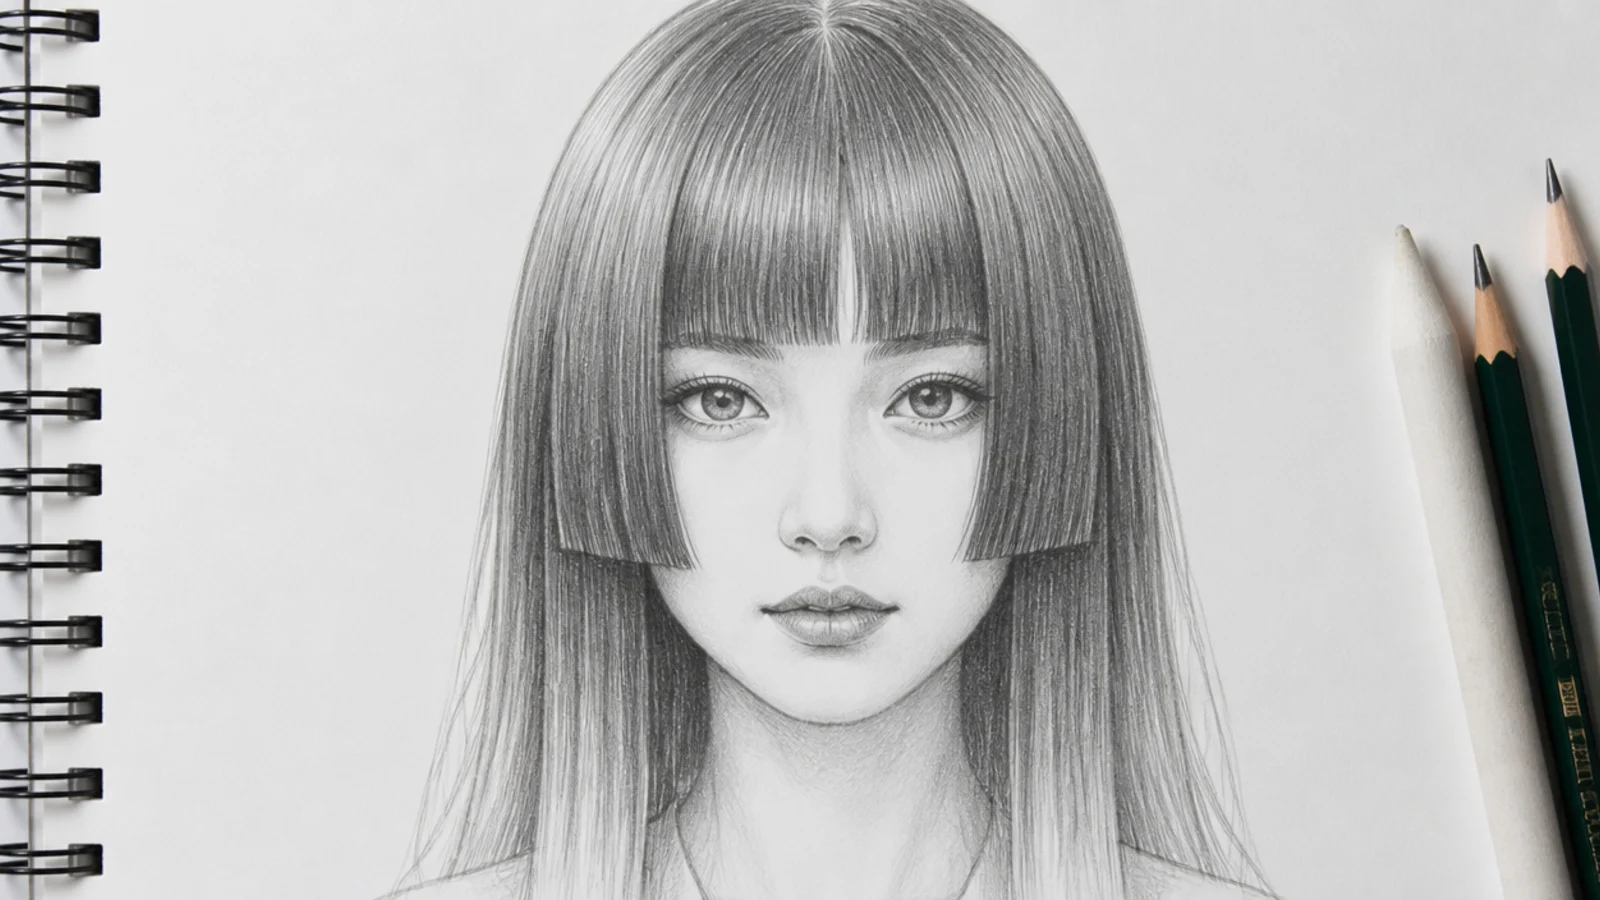
Three flat planes: a straight fringe cut level with the eyebrows, two side panels ending sharply at the cheekbone, and the long back length falling behind the shoulders. The whole style is built on hard horizontal edges, so it is a discipline exercise in restraint. Keep the interior almost bare, use 2B only where the side panels cast onto the cheek, and let the back length stay lighter so it reads as further away. The graphic look makes it a strong pin.
Who it suits: Anime and stylized artists, and anyone practicing clean edges over texture.
Tip: Vary the fringe by 1 to 2mm across its width; a perfectly ruled edge kills the drawing.
How to Start a Female Hair Sketch: Shape Before Strands
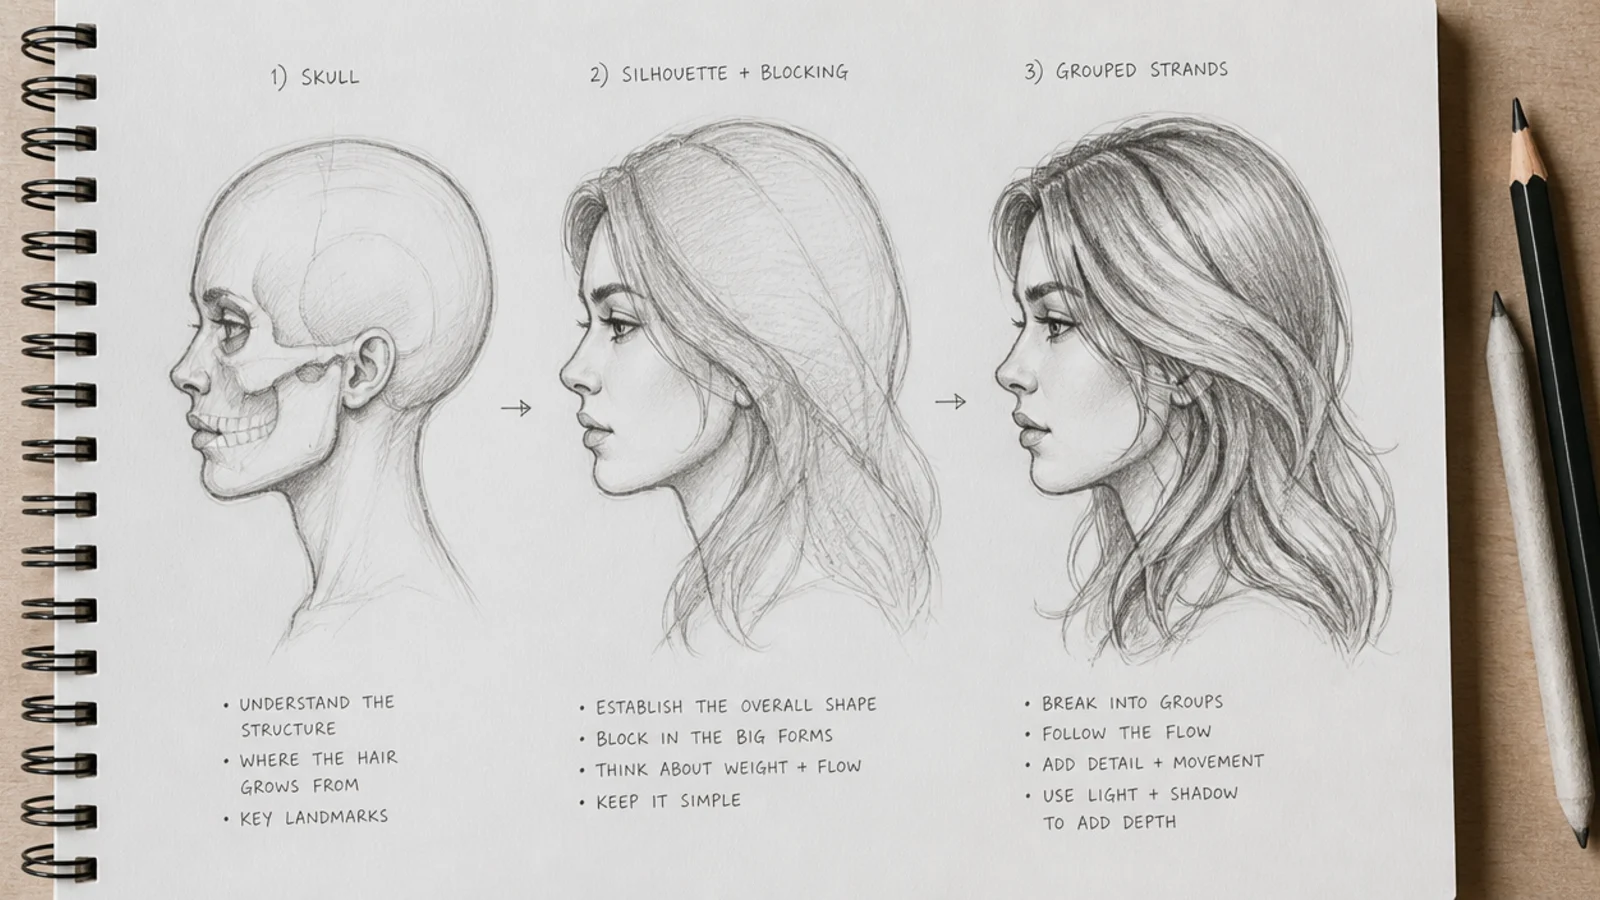
The number one beginner mistake in a female hair sketch is drawing individual strands too early. Hair is a solid mass with a silhouette, and until that silhouette exists there is nothing for strands to sit on. Work in four stages. Draw the skull first, including the upper cranium that beginners flatten, because hair needs somewhere to sit. Mark the hairline second, as a soft irregular line about a third of the way down the forehead. Third, block the entire hair mass in 2H as one shape sitting 8 to 20mm outside the skull depending on the volume you want, and further out again for textured hair. Fourth, and only fourth, break that mass into four to seven strand groups. Direction comes from the crown: hair grows in sections out of a swirl at the back of the head, so every line should fan from that point rather than run parallel down the page. Parallel lines are exactly why drawn hair looks like a wig. The hair sketch tutorial breaks this into numbered stages with progression images.
Drawing the Female Hairline: Lower, Rounder, Softer
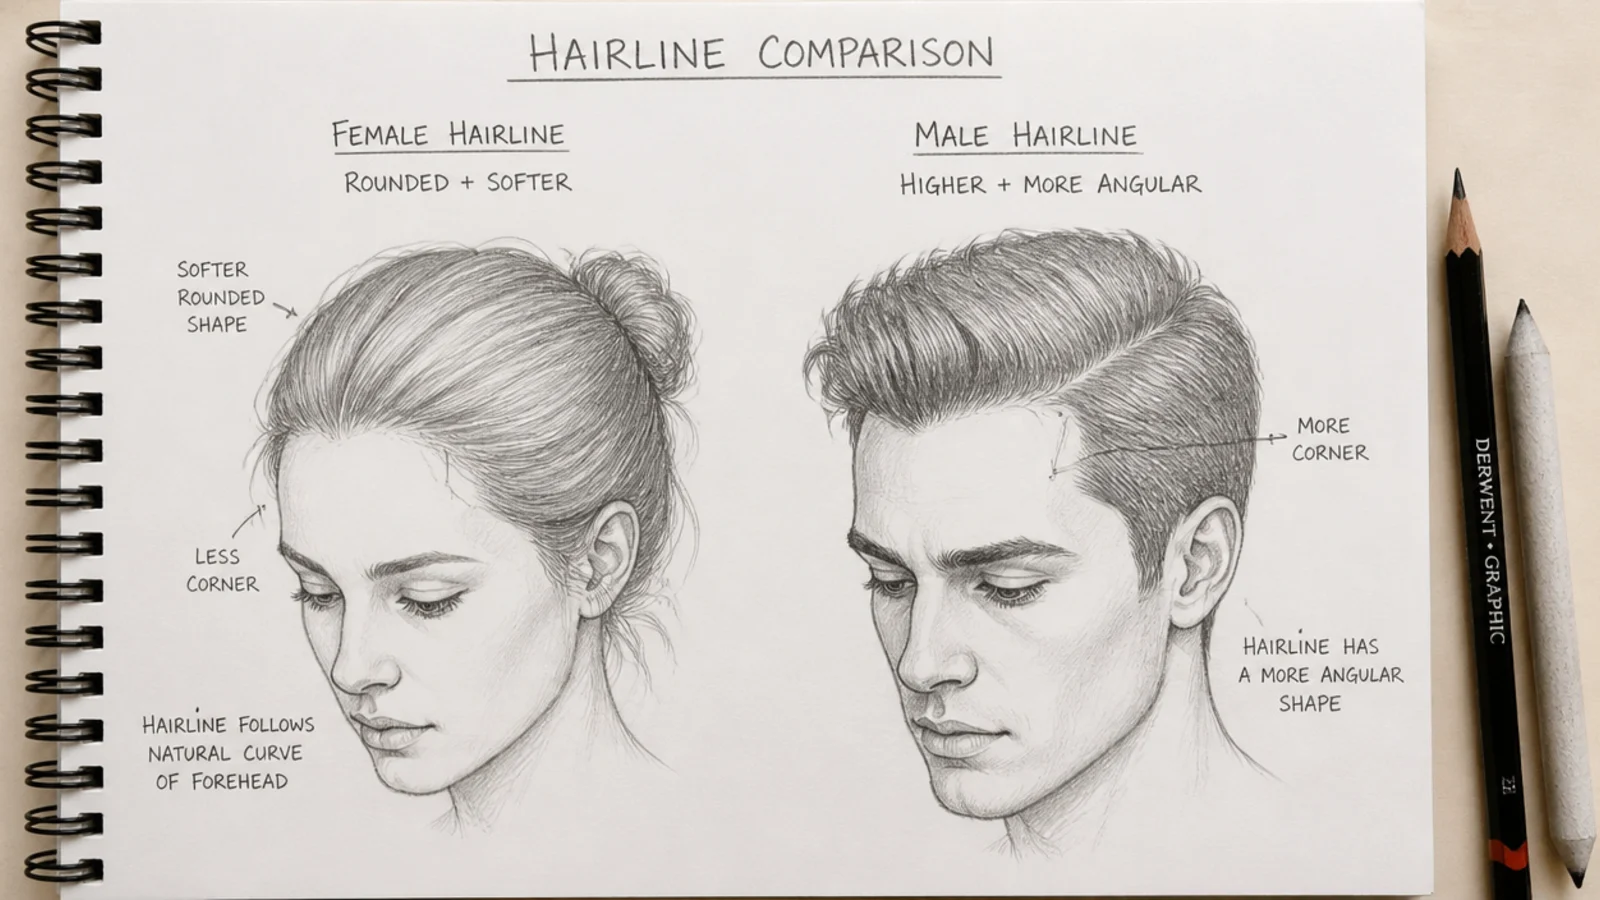
This is the detail that decides whether a hair sketch reads as female before any hairstyle is added. A female hairline generally sits lower on the forehead and curves in one continuous rounded arc, with soft, slightly denser edges and no sharp angle where the temple meets the brow. A male hairline sits higher and further back, squares off at the temples and often shows an M shape or a widow's peak, and the temple recession is the single strongest masculine cue in a portrait. If your drawn woman looks unintentionally masculine, check the temples before you check anything else. Two more soft cues help: keep baby hairs and a slightly fuzzy transition at the edge rather than a crisp drawn line, and let the hair mass sit a few millimeters further off the skull, since apparent density reads as feminine. None of this is a rule about real people, it is a set of visual conventions that make a sketch readable at a glance. For the opposite treatment, compare the boy hair sketch guide.
Shading Female Hair for Volume and Depth
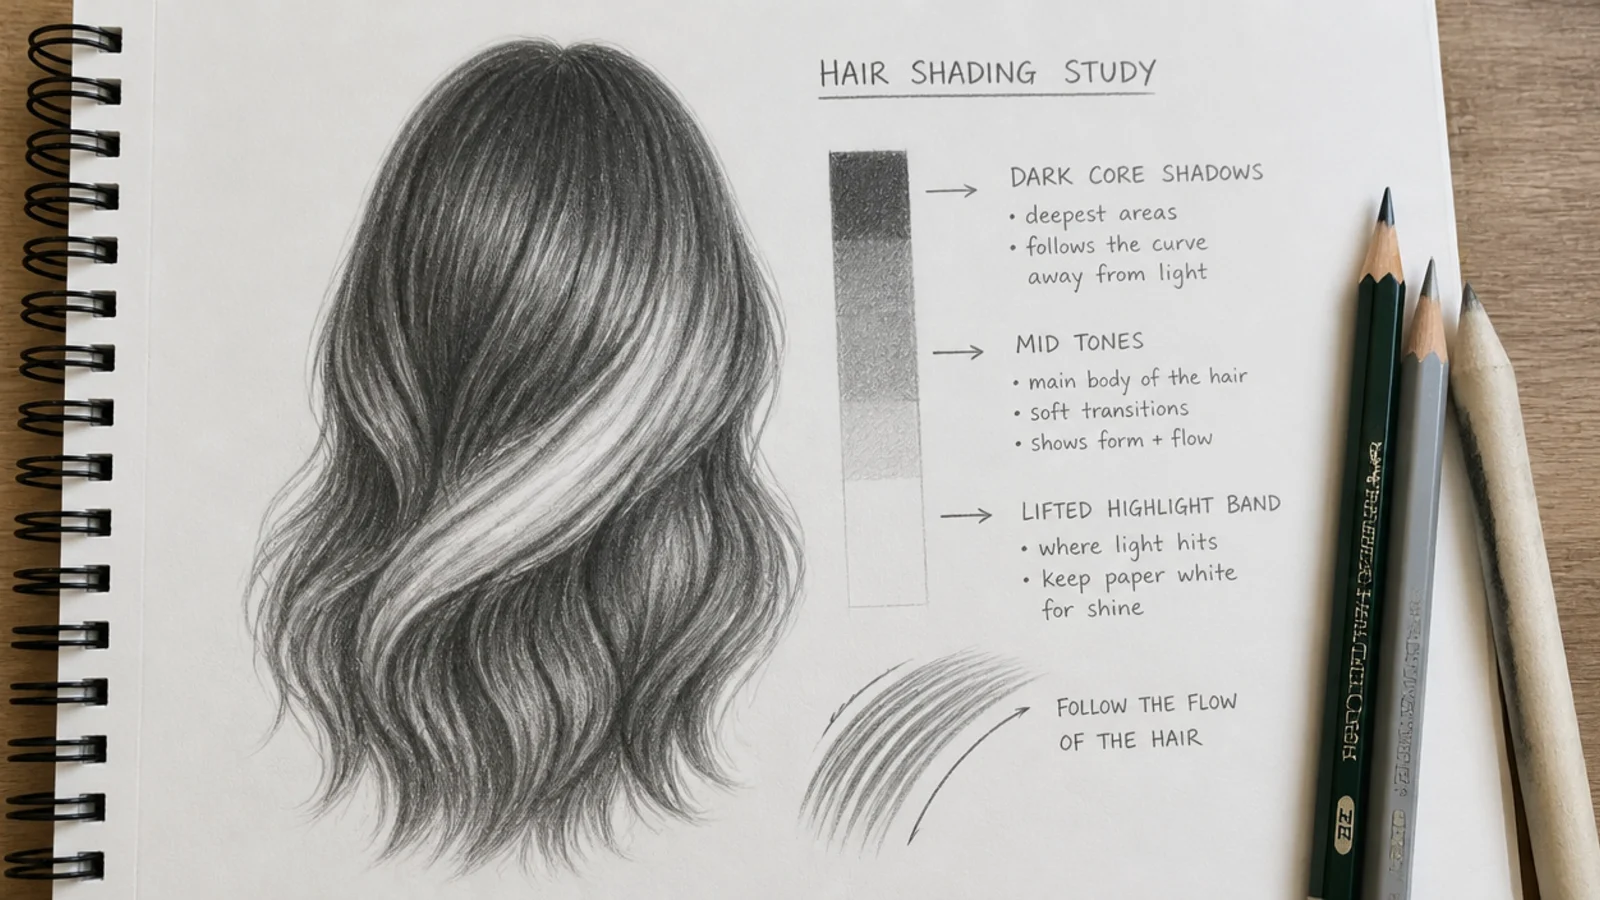
Flat hair is a value problem, not a detail problem. Choose your light source before a single shadow goes down, then put the darkest values where hair is physically deepest rather than where it looks busy: under the top layer, behind the ears, at the nape, inside every overlap and immediately below any tie or clip. Those dark cores are what push the surface layer forward. Build in three passes. Lay an even 2B mid tone across the whole mass, deepen the cores to 4B and then 6B, then leave or lift the highlight. A highlight is not a white line scribbled on top: it is a band that wraps the curve of the skull roughly two thirds of the way up, and the cleanest route is to leave the paper white from the start or press a pointed kneaded eraser into the graphite and pull it out. Keep the value range wide. Timid mid-gray hair from root to tip is precisely what reads as flat, while a 6B core sitting 3mm from bare paper reads as depth.
Straight, Wavy, Curly and Coily Female Hair, Drawn Differently
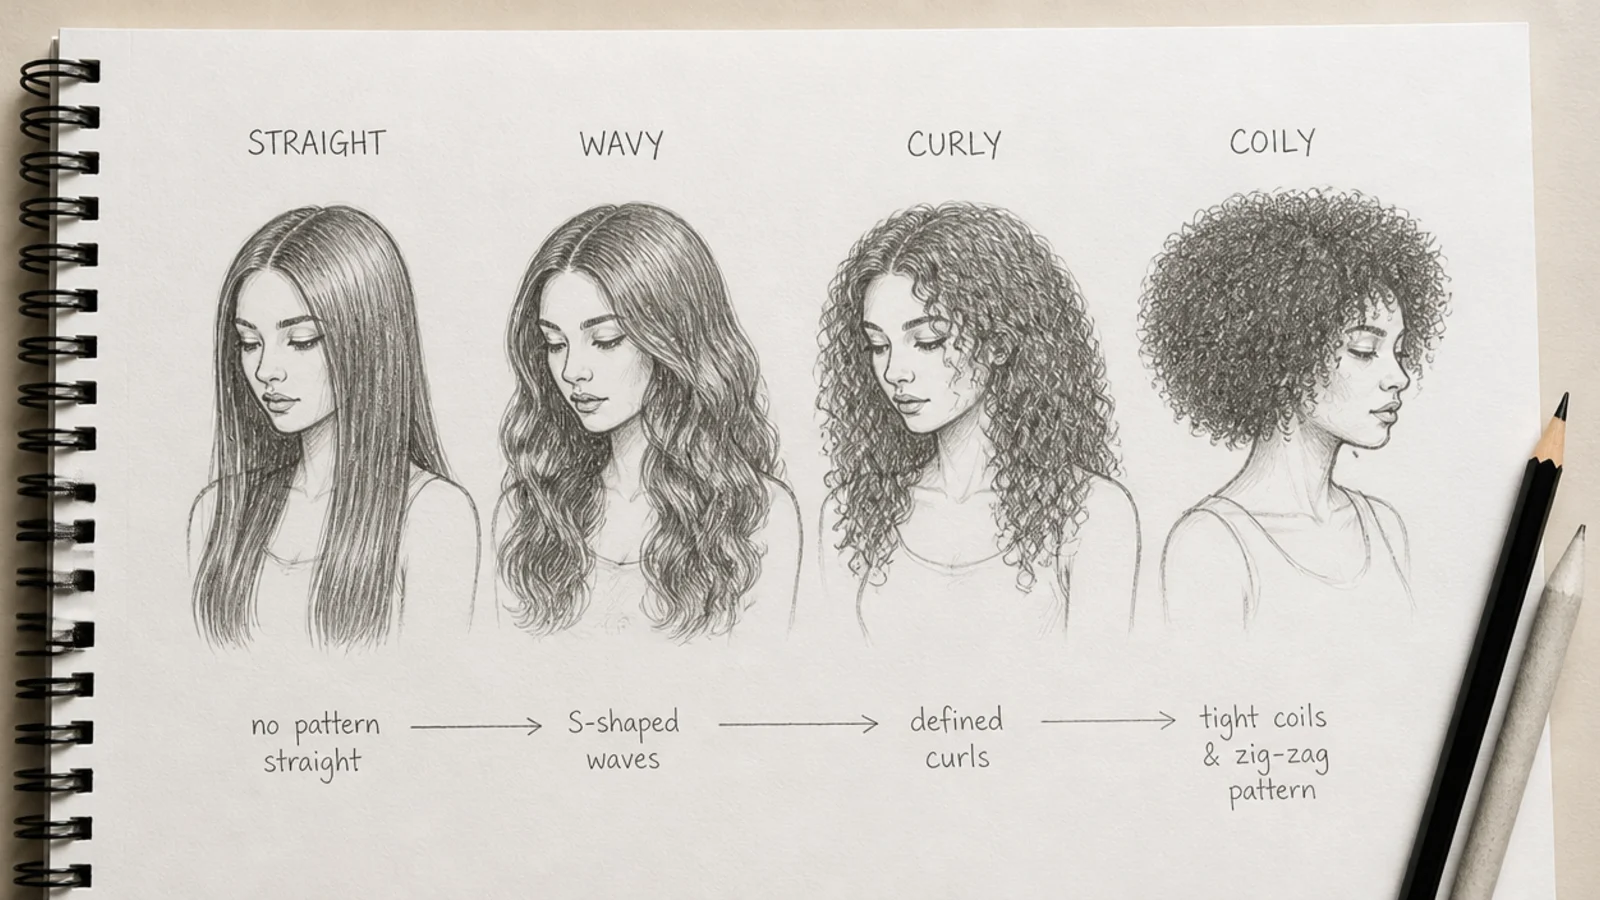
Each texture needs a different unit of drawing, and using the wrong unit is why a curly sketch ends up looking like noodles. Straight hair is built from long tapered strokes running the full length of the mass, with calm wide shapes and shine gathered in one broad band. Wavy hair is that same stroke with a repeating S pushed into it, shaded on the inside of every curve, left white on the outside, loosening toward the ends. Curly hair is not drawn in coils at all: each curl is a ribbon that twists, showing a lit face and a shadowed face, with the darkest value where the ribbon turns away. Coily and 4C hair is drawn as clusters rather than strands, close to the scalp, where the shadows between clusters carry the texture and individual coils are only implied. One rule covers all four: the tighter the texture, the more you draw negative space and the less you draw line. Practice all four on the same head in one sitting and the difference becomes obvious. For photo structure, the frizzy curly hair page shows real curl clumping clearly.
Common Female Hair Sketch Mistakes and How to Fix Them
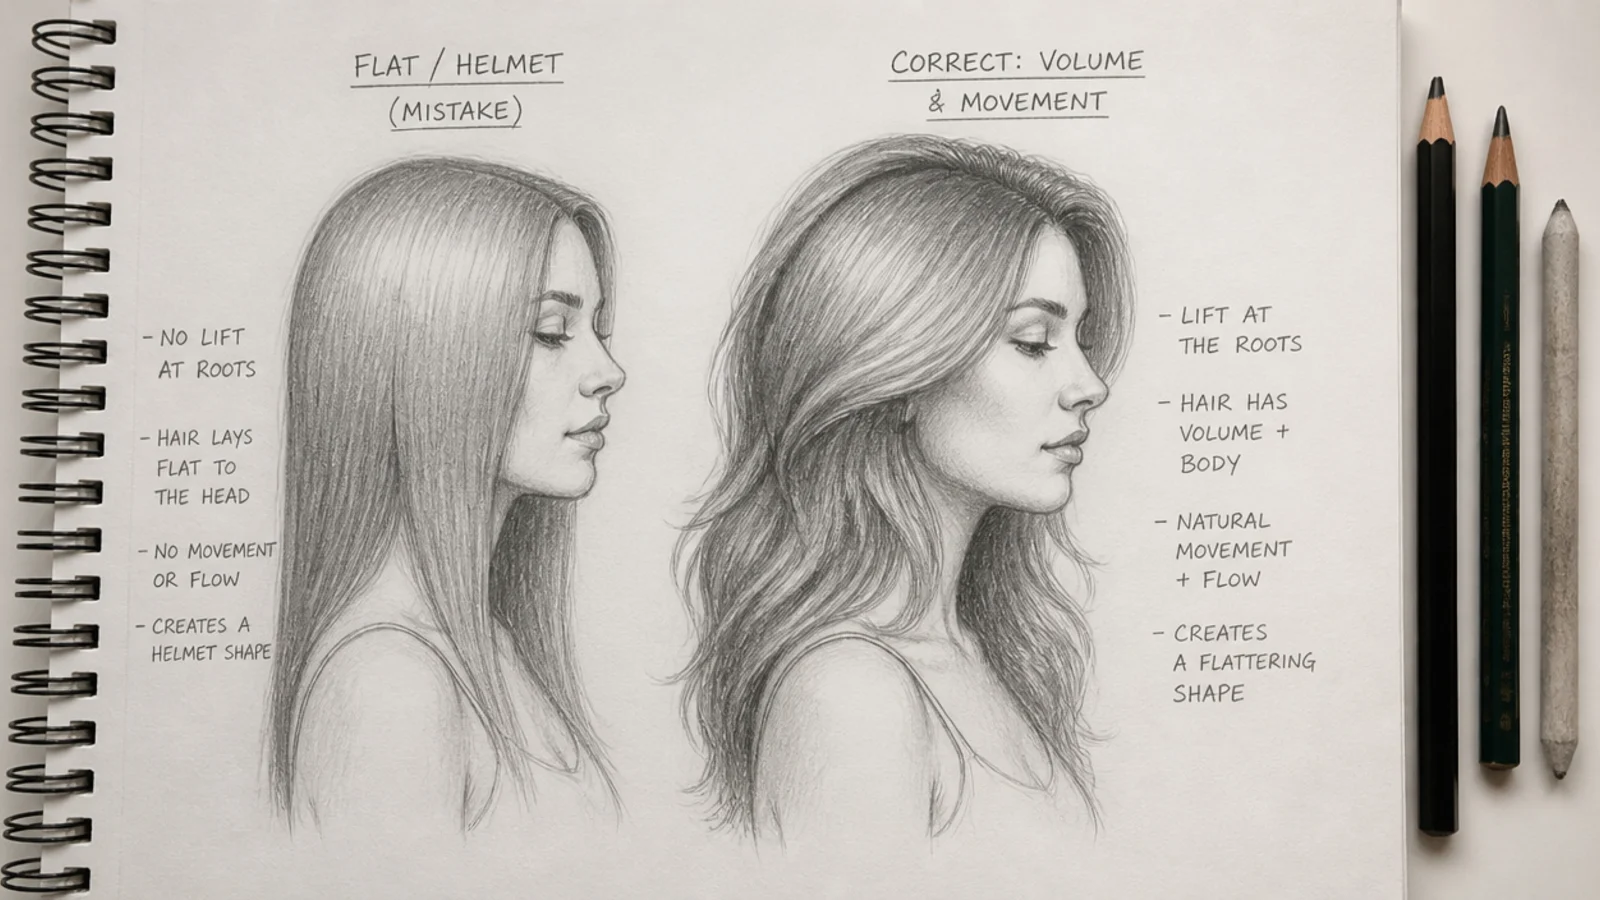
Six failures account for almost every disappointing female hair sketch. If it looks like a helmet, the outline is unbroken and the ends are blunt, so break the silhouette with short flicks and let two or three strands escape. If it looks like spaghetti, you drew single hairs instead of grouped sections, so erase back to four to seven groups and detail only inside them. If it looks flat, the value range is too narrow, so push the cores to 6B and lift a genuine white highlight. If the hair looks glued on, the hairline is a hard clean arc and the mass hugs the skull, so soften the hairline and lift the mass off the head. If the woman reads as masculine, the hairline is sitting too high or the temples are squared off. And if the head looks wrong once you finish, you flattened the cranium at the start, which left the hair no room. One quiet extra: perfectly matched left and right strand groups always read as artificial, so let one side carry more mass than the other.
Pencils, Paper and References for Female Hair Sketching
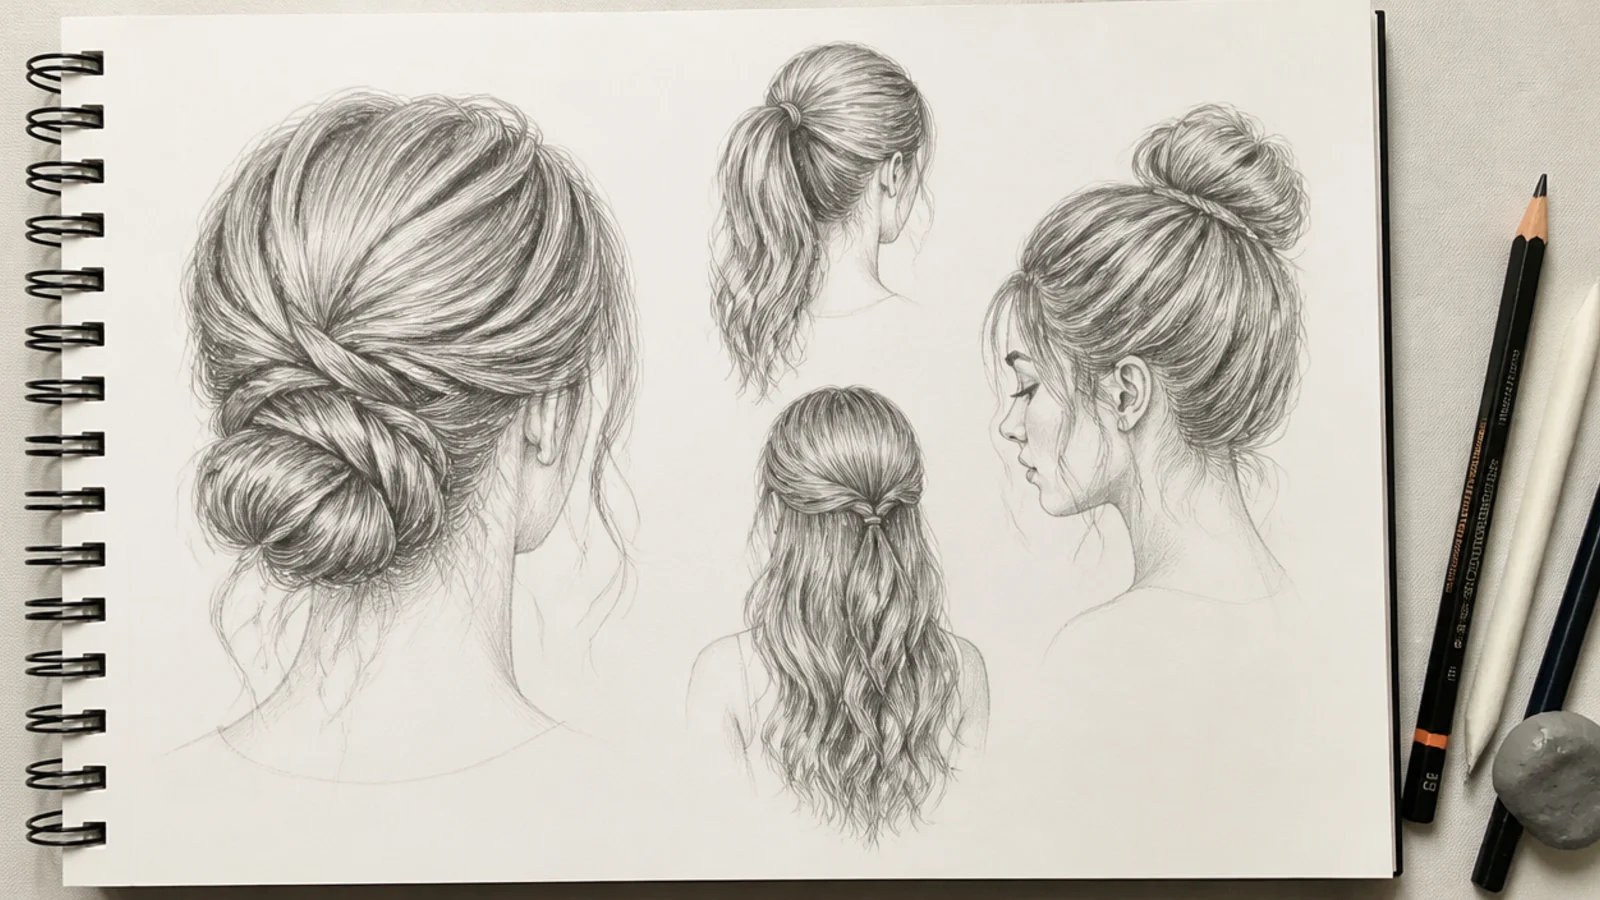
Five pencils cover this whole list. 2H handles guide lines and the first silhouette because it erases cleanly and will not scar the paper. HB carries the general line work. 2B and 4B do nearly all the mid shadows and strand grouping. 6B is reserved for the darkest cores and should occupy maybe five percent of the drawing. Match the grade to the hair color too: blonde and gray hair rarely passes 4B and lives in 2H and HB with the paper doing the work, while black hair needs 6B early and treats mid tones as the highlight. Smooth cartridge paper in the 90 to 120gsm range holds fine strand detail, whereas heavy textured paper fights every thin line. Keep a kneaded eraser shaped to a point for lifting highlight bands and a hard vinyl eraser for cutting clean edges. On references, look for structure rather than pixels: find the part, the widest point of the mass and the single darkest value, then thumbnail the silhouette in 30 seconds before committing. Browse the hair sketch ideas queue and the hair sketch list for more practice subjects, or study real styling photos like waterfall mermaid braids and wispy short curtain bangs.
Frequently Asked Questions
How do you draw a beautiful woman's hair step by step?
Draw the skull, mark a soft rounded hairline a third down the forehead, block the whole hair mass in 2H sitting 8 to 20mm outside the skull, then divide it into four to seven strand groups fanning from the crown. Shade mid tones in 2B, deepen cores to 6B, and add stray strands last.
How do you draw flowing hair that looks like it is moving?
Commit to one wind direction and keep every strand group obeying it. Hold the roots tight to the skull and let the last third of each group lift and separate, leaving clear white paper gaps between sections. Those negative shapes carry the motion, so draw the gaps as deliberately as you draw the hair.
What is the difference between a male and female hairline in a drawing?
A female hairline sits lower on the forehead and curves in one soft rounded arc with no sharp temple angles. A male hairline sits higher and further back, squares off at the temples and often shows an M shape or a widow's peak. Temple recession is the strongest masculine cue in a portrait sketch.
Why does my female hair drawing look flat?
Your value range is too narrow. Flat hair is almost always one mid gray from root to tip. Put 6B dark cores where hair is deepest, under the top layer, behind the ears, inside overlaps and below any tie, then leave or lift a clean white highlight band across the curve of the skull. Contrast makes volume, not detail.
What pencils do you use for drawing female hair?
Five grades: 2H for guides and the silhouette, HB for line work, 2B and 4B for mid shadows and strand grouping, and 6B for the darkest cores. Match the grade to the hair color as well, since blonde and gray hair rarely passes 4B while black hair needs 6B early and uses mid tones as the highlight.
Should I draw the head before adding the hair?
Yes, every time. Draw the full skull first, including the cranium above the hairline that beginners tend to flatten, then place the hair as a mass outside it. Skipping the skull is why drawn hair ends up too thin at the crown, glued flat to the head, or sitting on a head that looks wrong once you finish.
How do you draw curly female hair without it looking like springs?
Draw each curl as a twisting ribbon rather than an outlined coil. A ribbon has a lit face and a shadowed face, so put 4B and 6B where it turns away from the light and leave the facing side as bare paper. Fully describe only eight to twelve ribbons and suggest the rest with value and shadow gaps.
What is the easiest female hairstyle to sketch for a beginner?
A chin-length blunt bob. The hard bottom edge is correct for that cut, so it forgives an unsteady line, and the interior needs only three or four strokes plus one shadow. It finishes in about 10 minutes. A long straight center part is the next easiest once you can keep both sides balanced.
How do I use hair references without copying them?
Read structure, not pixels. Ask three questions of the reference: where is the part, where is the mass widest, and where is the single darkest value. Thumbnail the silhouette in 30 seconds and check it before adding detail. Studying another artist's drawing is fine practice, but publish work built from your own observation.
Which hair sketch look are you saving?
If you keep only two habits from these 15 female hair sketch ideas, keep these: draw the hairline as a soft rounded arc that sits low on the forehead, and put your darkest 6B value underneath the top layer rather than scribbled across it. The flicked ends, the ribbon curls and the lifted highlight band are all decoration sitting on those two decisions. Work through the list in order, give each sketch 15 to 25 minutes rather than an hour, and draw at least three of them from the back, which is where most artists finally understand the crown. For deeper single-texture practice, the curly hair sketch and long hair sketch guides go further, and the hair sketch board has the full step tutorials.